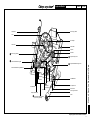
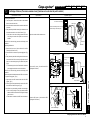
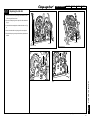
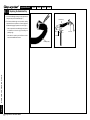
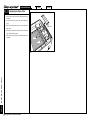
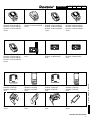
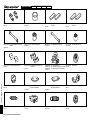
1
CATEYE ERGOCISER
AUTOMATIC TYPE
Applicable Models: EC-1200/EC-1600/EC-3600/EC-3700
SERVICE MANUAL
Applicable Models: EC-1200 EC-1600 EC-3600 EC-3700
INDEX
INTRODUCTION
Repair & Adjustment Methods
EC-1200
EC-1600
EC-3600
EC-3700
•
How to Use This Service Manual
ES-1:
Replacing the Wiring within the Frame ----------------------- 24
•
Name of Parts
ES-2:
Replacing the 5P Cable --------------------------------------- 25~26
1. Upright Type (w/o Flywheel) ---------------------------------------------------------- 4~5
ES-3:
Replacing the Power Supply Board ---------------------------- 27
Upright Type (with Flywheel) --------------------------------------------------------- 6~7
ES-4:
Correcting the Position of Solenoid Coil --------------------- 28
2. Recumbent Type (EC-3600 & EC-3700) ------------------------------------------- 8~9
ES-5:
Replacing the CDC Sensor --------------------------------------- 29
3. Belt Drive (EC-1200B, EC-1600B, EC-3600B & EC-3700B) ---------- ADD.1~2
-
-
ES-6:
Replacing the Panel Keyboard ---------------------------------- 30
Circuit Diagram ---------------------------------------------------------------------------------- 10
-
-
ES-7:
Replacing the Button Panel -------------------------------------- 31
-
-
ES-8:
Replacing the Printer ----------------------------------------------- 32
-
-
ES-9:
Adjusting the Printing Darkness -------------------------------- 33
•
Part A
Symptoms of Problems & Causes
T-1:
No Display on Control Unit after Power ON ----------------------------------- 11~12
-
-
ES-10:
Paper Jamming in Printer ----------------------------------------- 24
T-2:
No Display of Cadence -------------------------------------------------------------------- 13
-
-
MS-1:
Replacing the Workload Unit (w/o Flywheel) ---------- 35~37
T-3:
No Display of Pulse Rate ----------------------------------------------------------------- 14
G
MS-2:
Replacing the Workload Unit (w/ Flywheel) --------------- 38
T-4:
No Printer Operation ----------------------------------------------------------------------- 15
-
-
MS-3:
Adjusting the Flywheel --------------------------------------------- 39
T-5:
No Loading -------------------------------------------------------------------------------16~17
MS-4:
Replacing the Chain ------------------------------------------------- 40
T-6:
No Pedal Rotation (Locked) ------------------------------------------------------------- 18
MS-5:
Replacing the Free Wheel Set ----------------------------------- 41
T-7:
Unusual Noise
MS-6:
Replacing the Derailleur Set -------------------------------------- 42
1.
Continuous and Increasing. ------------------------------------------------------- 19
MS-7:
Replacing the Idler Set --------------------------------------------- 43
2.
Periodical. -------------------------------------------------------------------------------- 20
MS-8:
Replacing the Crank Set -------------------------------------- 44~45
3.
Noise occurs when the pedal is rotated with a large loading. --------- 21
MS-9:
Replacing the BB Set ----------------------------------------------- 46
-
-
MS-10:
Replacing the Post Spacer ---------------------------------------- 47
Part B
Removing the Frame Covers
-
-
MS-11:
Adjusting the Spacer Spring ------------------------------------- 48
Upright Type (EC-1200 & EC-1600) ---------------------------------------------------- 22
-
-
MS-12:
Replacing the Inner Pipe Spacer -------------------------------- 49
D-2:
Recumbent Type (EC-3600 & EC-3700) ---------------------------------------------- 23
-
-
MS-13:
Replacing the Vertical Pipe Spacer ---------------------------- 50
-
-
MS-14:
Replacing the Leg Cover ------------------------------------------ 51
-
-
MS-15:
Replacing the Caster/Level Adjuster -------------------------- 52
-
-
MS-16:
Replacing the Seat Post Knob ----------------------------------- 53
-
-
MS-17:
Replacing the Lock Pin -------------------------------------------- 54
MS-18:
Replacing the Crank Cover --------------------------------------- 55
-
-
MS-19:
Replacing the Center Cover of Upright Type --------------- 56
-
-
MS-20:
Replacing the Center Cover of Recumbent Type --------- 57
MS-21:
Replacing the Handlebar Grip ----------------------------------- 58
-
-
MS-22:
Replacing the Printer Cover -------------------------------------- 59
-
-
MS-23:
Replacing the Paper Cutter --------------------------------------- 60
INDEX
D-1:
PART C
List of Genuine Parts -------------------------------------------------------------------------------------------- 61~65
Cateye Ergociser Series 1000 Service Manual
2
Applicable Models: EC-1200 EC-1600 EC-3600 EC-3700
How to Use This Service Manual
The manual consists of Part A, Part B and Part C. Part A refers to trouble-shooting which allows you
to identify the cause and areas to be fixed depending on typical symptoms. Part B shows how to
repair and/or adjust specific defects. This part consists of repair methods for electrical parts [ES]
and those for mechanical parts [MS].
Part C lists up all genuine parts and corresponding part numbers that will be necessary for
replacement or stock
Whenever any problem has occurred on the main unit, take the following actions to repair or adjust it.
RESET
MODE
1. Check and identify the cause by referring to Part A.
ADV
2. Identify the parts name by referring to Name of Parts.
3. Perform repair or adjustment in accordance with the instructions in Part B.
EC-
16
00
ON
R
OF
F
EC
70
-3
How to Use This Service Manual
4. Replacement, if required, should be done by using genuine parts as specified in Part C.
0
Cateye Ergociser Series 1000 Service Manual
3
Applicable Models: EC-1200 EC-1600 EC-3600 EC-3700
Name of Parts for Upright Type (w/o Flywheel)
Crank
Crank Cap
Post Spacer
Lock Nut
Post Spacer
9
6 Spacer Spring
BB Set
Adjust Screw
Lock Nut
9
6
Frame
Adjust Screw
Spacer Spring
5P Cable
Cable Holder
Name of Parts for Upright Type (w/o Flywheel)
Seat Pipe
Large Gear
CDC Magnet
Timing Belt
Connector Cover
Inlet Metal Base
5P Cable Connector
Power Switch
CDC Sensor
Copper Plate
Idler
8 Idler Fixing Bolt [M6x16]
Frame
Idler Metal Base
Idler Spring
Wiring within Frame
Leg Cover
Leg Pipe
Leg Pipe Fixing Screw
Plastic Pulley
q SW Nut (M6)
Workload Unit
Caster
Levelling Knob
Power Supply Board
Levelling Knob
Cateye Ergociser Series 1000 Service Manual
4
Supply Board Fixing Screw
0 Power
[Tapping Screw(2) 4x12c]
Solenoid Coil Mounting Base
Solenoid Coil
Unit Mounting Base
4 Workload
[Screw Set (+) (M6x16)]
Applicable Models: EC-1200 EC-1600 EC-3600 EC-3700
Handlebar Post
Cable Holder
Seat Post
Center Cover
Frame Cover
Crank Cover
5
Tapping Screw (4x12) with Washer
Inlet Metal Base
AC Adapter Inlet
Chain
2
9 Crank Nut
Workload Unit Reinforcing Metal Base Nut
Power Supply Board
Workload Unit Reinforcing Metal Base
1 Hexagon Nut (M8-3)
Derailleur Spring
Leg Pipe Fixing Screw
Leg Pipe
Lever Cover
4 Workload Unit
Solenoid Coil
Fixing Bolt
4
Screw Set(+) (M6x16)
Derailleur Mounting Bolt
Levelling Knob
Free Wheel Set
Hexagon Head U Nut
3 Thrust Washer (9x15.5x0.25)
Derailleur
Cateye Ergociser Series 1000 Service Manual
5
Name of Parts for Upright Type (w/o Flywheel)
EC-1200
Applicable Models: EC-1200 EC-1600 EC-3600 EC-3700
Name of Parts for Upright Type (w/ Flywheel)
5P Cable Connector
5P Cable
Lock Nut
Post Spacer
Adjust Screw
Flywheel Mounting Metal Base
Post Spacer
BB Set
Crank Cap
9
6
Crank
Lock Nut
Adjust Screw [M8x10]
Spacer Spring
Seat Pipe
Cable Holder
Flywheel Metal
Name of Parts for Upright Type (w/ Flywheel)
q
Large Gear
4
Flywheel Fixing Screw [SW Nut(M6)]
Flywheel Metal Base Fixing Screw
[Screw Set (+) (M6x16)]
CDC Magnet
Inlet Metal Base
Power Switch
CDC Sensor
Copper Plate
Idler
4
Frame
Idler Mounting Bolt [M6x16]
Idler Metal Base
Idler Spring
Timing Belt
Wiring within Frame
Caster
Plastic Pulley
Leg Pipe Fixing Screw
Workload Unit
q SW Nut (M6)
Leg Pipe
0
Power Supply Board
Solenoid Coil Mounting Base
Unit Mounting Base
4 Workload
[Screw Set (+) (M6x16)]
Power Supply Board Fixing Screw
[Tapping Screw(2) 4x12c]
Solenoid Coil
Cateye Ergociser Series 1000 Service Manual
6
Leg Pipe
Levelling Knob
Applicable Models: EC-1200 EC-1600 EC-3600 EC-3700
Handlebar Post Cover
Seat Post
Center Cover
Flywheel Mounting Metal Base
Frame Cover
Crank Cover
CDC Magnet
Flywheel Fixing Screw
Power Supply Board
Flywheel Metal Base Fixing Screw
Flywheel Metal Base
5 Tapping Screw (4x12) with Washer
AC Adapter Inlet
Inlet Metal Base
Plain Belt
Chain
2 Workload Unit Reinforcing Nut
[Hexagon Nut (M6-3)]
Workload Unit Reinforcing Metal Base
1
7 Crank Nut (M10x1.25)
Hexagon Nut (M8-3)
Derailleur
Spring
Solenoid Coil
Workload Unit
Hexagon Head U Nut
4
Screw Set(+) (M6x16)
Derailleur Mounting Bolt
Unit Mounting
4 Workload
Bolt (M6x16)
Free Wheel Set
3 Thrust Washer (9x15.5x0.25)
Derailleur
Cateye Ergociser Series 1000 Service Manual
7
Name of Parts for Upright Type (w/ Flywheel)
Flywheel
Applicable Models: EC-1200 EC-1600 EC-3600 EC-3700
7 Crank Nut
Name of Parts for Recumbent Type (EC-3600 & EC3700)
5P Cable Connector
0 Power Supply Board Fixing Bolt
Crank
5P Cable Set
Power Supply Board
Cable Holder
Wiring within Frame
Frame
4 Flywheel Metal Base
BB Set
Fixing Screw
Flywheel
Copper Plate
Timing Belt
q Flywheel Fixing Screw
Idler
Flywheel Metal Base
8
Idler Spring
4
Solenoid Coil
Mounting Base
Frame Cover
Solenoid Coil
Workload Unit Mounting Base [Screw Set (+) (M6x16)]
Plastic Pulley
Workload Unit
Center Cover
Rear Support Pipe
Crank Cover
Leg Pipe Fixing Screw
R
Name of Parts for Recumbent Type
Plain Belt
Idler Metal Base
Idler Fixing Bolt
Inner Pipe
Seat Pipe
Cateye Ergociser Series 1000 Service Manual
8
Applicable Models: EC-1200 EC-1600 EC-3600 EC-3700
Cable Holder
Power Supply Board
Chain
CDC Magnet
CDC Sensor
Cable Holder
Flywheel
Plain Belt
4 Screw Set (+) [M6x16]
Flywheel Fixing Screw
4
Flywheel Metal Base Fixing Screw
Workload Unit Reinforcing Nut
Workload Unit Reinforcing Metal Base
ON
Workload Unit
Solenoid Coil
3
Derailleur
Mounting Bolt
Free Wheel Set
Derailleur
Inlet Metal Base
OFF
AC Adapter Inlet
Power Switch
Front Leg with Casters
Hexagon Head U Nut
Unit Mounting Base
4 Workload
[Screw Set (+) (M6x16)]
Caster
Cateye Ergociser Series 1000 Service Manual
9
Name of Parts for Recumbent Type
2
q
Applicable Models: EC-1200B
EC-1600B
Belt Drive
EC-1600B
EC-1200B
Teethed Timing Belt (P8M15-1192)
Pulley 1-A Set
Teethed Timing Belt (P8M15-1192)
Pulley Flange
Pulley Flange
Name of Parts for Belt Drive Type
Pulley 2-A Set
Pulley 2-A Set
Pulley 1-B
Idler A Set
Workload Unit
Cateye Ergociser Series 1000 Service Manual
ADD. 1
Idler Spring A
Pulley 1-A Set
Pulley 1-B
Idler A Set
Workload Unit
Idler Spring A
Applicable Models:
Belt Drive
EC-3600B/EC-3700B
Pulley 1-A Set
Pulley Flange
EC-3600B/EC-3700B
Name of Parts for Belt Drive Type
Teethed Timing Belt (P8M15-1080)
Pulley 2-A Set
Pulley 1-B
Idler A Set
Workload Unit
Idler Spring A
Cateye Ergociser Series 1000 Service Manual
ADD. 2
Applicable Models: EC-1200 EC-1600 EC-3600 EC-3700
Circuit Diagram for Automatic Type Cateye Ergociser
AC Adapter
Wiring within Frame
100V AC
CN4 (Connector 4)
Black Cable (-)
12V DC*
–
Switch
Red Cable (+)
DC Connector
AC Plug
+
AC Adapter Inlet
*Fluctuate depending on the electric load
About 16V when the load is zero.
DC Power Supply
CN4
Power Supply Board
(Connector 4)
+ –
CN3
Cadence Sensor
Magnet
C1–
+
–
+
C2
R2
CN2
5P Cable to Control Unit
R8
Common Line
Cadence Signal
REG
R3
R7
TR2
Control Unit Power Supply
VR1
Solenoid Coil Current Control Signal
IC1
TR1
Printer Power Supply (+5V)
R1
Solenoid Coil Current Control Circuit
Power Supply Control Circuit
for Printer
CN1
Circuit Diagram
D1
Metal Pulley
Timing Belt
Plastic Pulley
Cadence Sensor
Coil
Large Gear
Chain
Pedal
Electromagnet
Copper Disk Plate
Free Wheel
Magnet
Crank
Cateye Ergociser Series 1000 Service Manual
10
Applicable Models: EC-1200 EC-1600 EC-3600 EC-3700
T-1
No Display on Control Unit after Power ON. (1)
Check Method of Causes
Repair Method
Explanation Figures
Check the power is available at the wall socket before proceeding to
checking of causes.
Normal for 14V thru 19V
[1] Checking the AC Adapter
Red Cable
DC Connector
1. Detach the plug of AC adapter from the AC adapter inlet of the
main unit.
2. Connect the wall socket plug of the AC adapter to the wall
socket.
Cable Connector
3. Using a tester, measure the voltage at the plug which will be
connected to the main unit. (Fig. 1)
Black Cable
t The AC adapter will be working fine, if the voltage is minus
(-) at the inner area and plus (+) at the outer area of the
connector and also the meter reading is in the range of 14V
and 19V.
t When the measured voltage is 0V, or less than 14V, the
AC adapter will be defective.
Fig. 1
Fig. 2
Replace the AC adapter.
Normal for 14V thru 19V
Note: Never short-circuit the plug of AC adapter. This will
damage the AC adapter.
Black Cable
Red Cable
No Display on Control Unit after Power ON. (1)
[2] Checking the Wiring within the Frame
1. When the AC adapter is found to be correct, proceed to
checking of wiring within the frame. Loosen the four screws
on the handlebar stem to remove the control unit. (Fig. 2)
Terminal
3 (+)
2. Remove the 5P cable which is connected to the back of the
control unit. (Fig. 2)
3. Connect the AC adapter, and turn on the main unit.
5P Cable
4. Using a tester, measure the voltage across the terminals 1 (-)
and 3 (+) of the 5P cable. (Fig. 3)
t The main unit side will be working fine if the meter reading
Terminal 1 (-)
Replace the control unit.
Fig. 3
T-1
is in the range of 14V and 19V. This means the control unit
will be defective.
Cateye Ergociser Series 1000 Service Manual
11
Applicable Models: EC-1200 EC-1600 EC-3600 EC-3700
T-1
No Display on Control Unit after Power ON. (2)
Check Method of Causes
Repair Method
Explanation Figures
[3] When the meter reading at step 2. is 0V or less than 14V, check the
main unit in accordance with the following procedures:
Correct for 14V thru 19V
1. Remove the frame cover. (See sections D-1 and D-2
"Removing the Frame Covers.")
Power Supply Board
2. With the control unit removed, connect the AC adapter, and
turn on the power switch. Measure the voltage across the
electrolytic capacitor C1 on the power supply board (25V
1000µV). (Fig. 4)
Note: The layout of the power supply board may be different from
Black Cable
lot to lot. (Figs. 5 and 6)
t The wiring within the frame is correct when the measured
voltage is in the range of 14V and 19V. When the voltage
Replace the 5P cable. (See the Section ES-2
"Replacing the Frame.")
across the electrolytic capacitor on the power supply board
is correct, the 5P cable, which connects the power supply
Red Cable
board and the control unit, may be defective.
t When the measured voltage is 0V, the wiring within the
frame is defective.
Replace the Inlet Metal Base Set. (See the Section
ES-1 "Replacing the Wiring within the Frame."
Fig. 4
Power Supply Board B
No Display on Control Unit after Power ON. (2)
Power Supply Board A
t When the problem cannot be remedied even if the 5P cable
is replaced, the power supply board may be defective.
Replace the power supply board. (See the Section
ES-3 "Replacing the Power Supply Board. "Fig. 4
T-1
Fig. 5
Cateye Ergociser Series 1000 Service Manual
12
Fig. 6
Applicable Models: EC-1200 EC-1600 EC-3600 EC-3700
T-2
No Display of Cadence (The cadence remains at zero (0) and does not count when the pedal is rotated.)
Check Method of Causes
Repair Method
Explanation Figures
[1] Checking the Control Unit
1. Turn off the power. Loosen the four screws on the handlebar
The case of no short-circuiting
stem to remove the control unit.
2. Remove the cable connector which is connected to the back of
Black Cable
The case a short-circuiting is found. One zero (0)
is detected during one rotation of the pedal.
control unit.
3. Slowly rotate the pedal while measuring the resistance across
the connector terminals 1 and 2 of the 5P cable. (Fig. 1)
t When there is one short-circuiting (resistance becomes
1
2
3
4
5
Replace the control unit with a brand new one.
zero) during one rotation of the pedal, the control unit is
defective.
Terminal 2
When there is no short-circuiting, proceed to the following check
procedures.
[2] Checking the Main Unit
1. Remove the frame cover. (See the Section D-1 and D-2
"Removing the Frame Covers.")
5P Cable
Fig. 1
2. Remove the CN-3 connector on the power supply board. (Fig.
2)
Power Supply Board
3. Slowly rotate the pedal while checking shortcircuit across the
two terminals of the CN-3 connector by using a tester to see if
The case of no shortcircuiting
there is one short-circuiting during one rotation of the pedal.
(Fig. 3)
The case a short-circuiting is
found. One zero (0) is detected
during one rotation of the pedal.
Replace the 5P cable. (See the Section ES-2
Black Cable
"Replacing the 5P Cable.")
When there is no short-circuiting, proceed to the following check
procedures.
[3] Check the positional relation between the CDC sensor and the
magnet of the large gear. (Fig. 4)
Red Cable
1. Align the line on the CDC sensor with the center of the CDC
magnet. (Fig. 5)
2. Secure a gap of about 2mm between the surface of the CDC
sensor and that of the CDC magnet. (Fig. 5)
Fig. 3
Fig. 2
Gap of 2mm between CDC Sensor and CDC
Magnet
Check if there is any short-circuiting in the CN-3 connector again.
t When a short-circuiting is found, the positional relation
Line on CDC Sensor
between the CDC sensor and the CDC magnet of the large
gear is incorrect.
t When there is no shortcircuit, the CDC sensor is defective.
No Display of Cadence
CN-3 Connector
Line on CDC Sensor
Replace the CDC sensor. (See the Section ES-5
"Replacing the CDC Sensor".)
Center of CDC Magnet
Fig. 4
T-2
t If short-circuiting is found, the 5P cable which connects the
power supply board and the control unit is defective.
Terminal 1
Red Cable
Center of CDC Magnet
Fig. 5
Cateye Ergociser Series 1000 Service Manual
13
Applicable Models: EC-1200 EC-1600 EC-3600 EC-3700
T-3
No Display of Pulse Rate
Check Method of Causes
Repair Method
1. Turn on the power to display the in-training screen (any
exercise program).
2. Install a brand new pulse sensor, and check if pulse rate will be
displayed.
t When the pulse rate can be displayed, the pulse sensor is
Replace the pulse sensor with a brand new one.
defective.
t When the pulse rate cannot be displayed, the control unit is
T-3
No Display of Pulse Rate
defective.
Cateye Ergociser Series 1000 Service Manual
14
Replace the control unit with a brand new one.
Explanation Figures
Applicable Models: EC-1200 EC-1600 EC-3600 EC-3700
T-4
No Printer Operation
Check Method of Causes
Repair Method
Explanation Figures
In such cases as display of the LCD panel, etc. operate without
problem, but the printer does not operate, the following cases are
possible:
[1] Checking the Control Unit
RESET
1. Check that the printer symbol is displayed on the LCD panel
and the printer is in a working status. (Fig. 1)
In case the printer symbol is not indicated on the LCD
panel, press the printer button to have the symbol
2. Check if the setting of control unit is in the setting that the
indicated.
ON
Printer Symbol
10
1
10
1
1
2
3 4
OFF
TIME
MODE
printer is not used. (Check if the No.4 select switch on the
back of the control unit is in the "OFF" position.) (Fig. 2)
ADV
Select Switch
3 Check if the thermal paper is not jammed at the printer head.
Control Unit
t Remove the thermal paper if it is jammed. (Fig. 3)
Back of Control Unit
Fig. 1
4. When no other problems are found, replace the control unit
with a brand new one.
Fig. 2
Tweezer
5. With the new control unit installed, check the printer operation.
t When the printer works fine, the control unit is defective.
Replace the control unit with a brand new one.
Printer Cover
When the printer does not operate after the above-stated checks,
proceed to the following procedures:
[2] Checking the Main Unit
Cable Connector
1. Turn off the power, and loosen the four screws on the
Paper Cutter
handlebar stem to remove the control unit. (Fig. 4)
2. Remove the cable connector which is connected to the back of
the control unit. (Fig. 4)
Fig. 3
3. Remove the frame cover. (See the Section D1 & D2
"Removing the Frame Covers.")
Fig. 4
Power Supply Board
Normal when zero (0)
4. Remove the CN-2 connector on the power supply board. (Fig.
5)
No Printer Operation
5. Using a tester, check for any short-circuiting across Terminal
1s and Terminal 5s at both ends of the 5P cable which
connects the power supply board and the control unit. (Fig. 6)
t When there is no shortcircuit, the 5P cable is disconnected.
Replace the 5P cable. (See the Section ES-2
"Replacing the 5P Cable.")
Replace the power supply board. (See the Section
ES-3 "Replacing the Power Supply Board.")
Connector
Terminal 5
5P Cable
Fig. 5
Connector Terminal 5
Fig. 6
T-4
t When it is short-circuited, the power supply board is
defective.
Cateye Ergociser Series 1000 Service Manual
15
Applicable Models: EC-1200 EC-1600 EC-3600 EC-3700
T-5
No Loading (Check of mechanical systems)
Check Method of Causes
Repair Method
Explanation Figures
[1] Checking the Mechanical Systems
Chain
See the Section D1 & D2 "Removing the Frame Covers" to remove
the frame cover, and check the inside of frame.
1. Check if the chain has not been broken. (Fig. 1)
Replace the chain with a brand new one. (See the
Section MS-4 "Replacing the Chain.")
2. Rotate the crank and check if the belt of the workload unit will
Replace the free wheel with a brand new one. (See
rotate. (Fig. 2)
3. Check if the free wheel set is not idling. (Fig. 2)
the Section MS-5 "Replacing the Free Wheel Set.")
Spray CRC into the gap as shown in Fig. 2, and rotate
the pedal in forward and backward directions.
4. Check if the belt (timing belt) of the workload unit has not been
broken. (Fig. 2)
5. Check if the plastic pulley of the workload unit has not been
broken. (Fig. 2)
Replace the workload unit. (See the Sections MS-1 &
MS-2 "Replacing the Workload Unit.")
Replace the workload unit. (See the Sections MS-1 &
MS-2 "Replacing the Workload Unit.")
No Loading (Check of Mechanical Systems)
Free Wheel
Derailleur
Crank
Fig. 1
Gap
Timing Belt
Free Wheel
T-5
Plastic Pulley
Fig. 2
Cateye Ergociser Series 1000 Service Manual
16
Applicable Models: EC-1200 EC-1600 EC-3600 EC-3700
T-5
No Loading (Check of Electrical Systems)
Check Method of Causes
Repair Method
Explanation Figures
[2]Checking the Electrical Systems
Power Supply Board
1. Connect the AC adapter, and turn on the power of the main
unit.
2. Obtain the manual training program, set the pedal torque
setting to 4.0kg·m, and rotate the pedal at the rate of 50 rpm. If
you can rotate it quite easily, no load will be applied.
3. Replace the control unit with a brand new one.
4. Again, check the torque status under the manual training
program.
t When the pedal torque is loaded, the control unit is
Replace the control unit with a brand new one.
defective.
CN-2 Connector
When no torque loading is possible, proceed to the following
procedures.
1. Turn off the power, and loosen the four screws on the
handlebar stem to remove the control unit. (Fig. 1)
2. Remove the cable connector which is connected to the back of
the control unit. (Fig. 1)
3. Remove the frame cover. (See the Sections D1 & D2
"Removing the Frame Covers.")
4. Remove the CN-2 connector on the power supply board. (Fig.
2)
5. Using a tester, check for any short-circuiting across Terminal
1s and Terminal 4s at both ends of the 5P cable which
connects the power supply board and the control unit. (Fig. 3)
Replace the 5P cable with a brand new one. (See the
Connector
Terminal 4
No Loading (Check of Electrical Systems)
When it is short-circuited, proceed to the following procedures:
1. Remove the connector CN-1 from the power supply board,
and measure the resistance across Terminals 2 and 3 of the
connector. When the reading is in the range of 9Ω and 14Ω,
the connector is all right. (Figs. 4 & 5)
Normal when zero (0)
CN-1 Connector
Fig. 4
Section ES-2 " Replacing the 5P Cable.")
5P Cable
Connector Terminal 4
Fig. 3
Normal for 14V thru 19V
t When the meter reading is exceedingly large, the solenoid
coil is defective.
Replace the workload unit. (See the Sections MS-1 &
MS-2 "Replacing the Workload Unit.")
t When the meter reading is in the acceptable range, the
power supply board may be defective.
Replace the power supply board. (See the Section
ES-3 "Replacing the Power Supply Board.")
Connector
Terminal 2
To Solenoid Coil
Connector Terminal 3
CN-1 Connector
T-5
t When there is no shortcircuit, the 5P cable is disconnected.
Fig. 2
Fig. 1
Fig. 5
Cateye Ergociser Series 1000 Service Manual
17
Applicable Models: EC-1200 EC-1600 EC-3600 EC-3700
T-6
No Pedal Rotation (Locked)
Check Method of Causes
Repair Method
Explanation Figures
1. Remove the frame cover, and check the inside of frame. (See
the Sections D1 & D2 "Removing the Frame Covers.")
2. Check if the plain belt of the flywheel has not been detached.
(Fig. 1)
t No damage on the plain belt
Apply the plain belt correctly. (See the Section MS-2
"Replacing the Workload Unit (w/ Flywheel).")
t The plain belt is damaged.
Replace the workload unit and free wheel with brand
new ones. (See the Section MS-2 "Replacing the
Workload Unit (w/ Flywheel).")
Plain Belt
T-6
No Pedal Rotation (Locked)
Fig. 1
Cateye Ergociser Series 1000 Service Manual
18
Applicable Models: EC-1200 EC-1600 EC-3600 EC-3700
T-7-1
Unusual Noise (Continuous and Increasing)
Check Method of Causes
Repair Method
Explanation Figures
The noise generating source will be different depending on the
cases whether it is of continuous noise or periodical noise (several
Chain
times per rotation of pedal).
[1] Noise is continuous and increasing.
1. Remove the frame cover. (See the Sections D-1 & D-2
"Removing the Frame Covers.")
Apply grease to the following points. (Figs 1 & 2)
· Chain
· Inner surface of the timing belt (mating surface with the
plastic pulley)
2. Check if the derailleur has been worn out. (Fig. 1)
When it has been worn out, replace it with a brand
new derailleur set. (See the Section MS-6 "Replacing
the Derailleur Set.")
3. Check if the idler has been worn out. (Fig. 2)
When it has been worn out, replace it with a brand
new idler set. (See the Section MS-7 "Replacing the
Idler Set.")
flywheel set with new ones.
Derailleur
Fig. 1
Idler
Idler Set
Plain Belt
Unusual Noise
causing friction.
When the plain belt is shifted and is going to be
damaged, replace both the workload unit and the
Timing Belt
Plastic Pulley
Fig. 2
T-7-1
4. Check if the plain belt has been deviated in position, thus
Fig. 3
Cateye Ergociser Series 1000 Service Manual
19
Applicable Models: EC-1200 EC-1600 EC-3600 EC-3700
T-7-2
Unusual Noise (Periodical)
Check Method of Causes
Repair Method
Explanation Figures
[2] Noise is Periodical.
1. Noise occurs around once per rotation of the pedal.
t The pedal installation may not be perfect. (Fig. 1)
No.15 Wrench
Use a No.15 wrench and securely fasten the pedal to
the crank. (both sides)
2. Sliding noise occurs around 17 times per rotation of the pedal.
Remove the frame cover, and check the inside of frame. (See the
Crank
Sections D-1 & D-2 "Removing the Frame Covers.")
t The copper disc plate of the workload unit may touch the
solenoid coil. (Figs. 2 & 3)
See the Section ES-4 "Correcting the Position of
Pedal
Solenoid Coil," and correct the position of the copper
disc plate.
[If the plate is warped and the position of solenoid coil
cannot be corrected, replace the workload unit. (See
the Sections MS-1 & MS-2 "Replacing the Workload
Fig. 1
Unit.")]
Solenoid Coil
Fig. 2
Core Slit
Core Slit
Copper Disc Plate
Unusual Noise
Core
Core
Solenoid Coil
Solenoid Coil
Copper disc plate is in contact with the core.
T-7-2
Correct Position
Fig. 3
Cateye Ergociser Series 1000 Service Manual
20
Copper Disc Plate
Fig. 4
Applicable Models: EC-1200 EC-1600 EC-3600 EC-3700
T-7-3
Unusual Noise (Noise occurs when the pedal is rotated with a large torque.)
Check Method of Causes
Repair Method
Explanation Figures
[3] Noise occurs when the pedal is rotated with a large torque.
Idler
A large sound "bang" occurs when the pedal is abruptly rotated with
a large torque.
Pawl
Remove the frame cover, and check the inside of frame. (See the
Sections D-1 & D-2 "Removing the Frame Covers.")
2. Check if the idler mounting bolt is detached or loosened.
Securely fasten the idler mounting bolt.
Idler Mounting Bolt
Idler Spring
dler Metal Base
Fig. 1
Unusual Noise
Hook the idler spring on the pawl of the idler.
T-7-3
1. Check if the idler spring is detached.
Cateye Ergociser Series 1000 Service Manual
21
Applicable Models: EC-1200 EC-1600 EC-3600 EC-3700
D-1
Removing the Frame Covers
Upright Type (EC-1200 & EC-1600)
No. 15 Wrench
When any repair or adjustment of parts within the frame is required,
remove the frame covers in the following procedures.
REMOVAL
1. Remove the pedals at both the left and right sides. (The right
side pedal can be removed by turning it in the clockwise
direction, and the left side pedal can be removed in the
Crank
ON
Pedal
counter-clockwise direction.) (Fig. 1)
OF
F
2. Remove the crank cover fixing screws. The narrow-width area
of the crank cover should be positioned in between the frame
cover and the crank. (Fig. 2)
Crank Cover
3. Remove the leg pipe fixing screws. (Fig. 3)
* You do not have to remove the leg pipe itself.
Fig. 2
Fig. 1
* For the model EC-1600, remove the leg pipe cover.
Lift upward.
Leg Pipe Fixing Screw
4. Shift the rubber base at the seat post lock knob away from the
ON
center cover.
O FF
5. Loosen the center cover fixing screw a little, and lift the center
cover upward. (Do not remove it.) (Fig. 4)
6. Loosen the four screws on the inlet cover. (Fig. 5)
7. Remove the frame cover fixing screw with a screwdriver before
removing the frame cover. (Fig. 6)
Center Cover
Rear
Front
ASSEMBLING
Leg Pipe Fixing Screw
2. Fix the right and left frame covers with frame cover fixing
screws.
Center Cover Fixing Screw
Fig. 3
Fig. 4
Frame Cover
3. Mount the inlet cover with four screws. (Fig. 5)
4. Set the center cover to the frame cover correctly in position,
and fix it with the center cover fixing screws. (Fig. 4)
5. Pass the crank through the hole on the crank cover, and fix the
crank cover onto the frame cover with screws. (Fig. 2)
ON
O FF
6. Set the rubber base for the seat post lock knob, and then
Four (4)
Screws
mount the right and left pedals.
7. Fix the leg pipe with the leg pipe fixing screws. (For the model
EC-1600, mount the leg pipe cover.)
Inlet Cover
D-1
Removing the Frame Covers
1. Place the frame covers onto the frame at both right and left
sides, paying attention to the position of the crank.
Fig. 5
Cateye Ergociser Series 1000 Service Manual
22
Fig. 6
Applicable Models: EC-1200 EC-1600 EC-3600 EC-3700
D-2
Removing the Frame Covers
No. 15 Wrench
Recumbent Type (EC-3600 & EC-3700)
When any repair or adjustment of parts within the frame is required,
Leg Pipe
Fixing Screw
remove the frame covers in the following procedures.
àREMOVAL
Crank
1. Remove the pedals at both the left and right sides. (The right
side pedal can be removed by turning it in the clockwise
direction, and the left side pedal can be removed in the
Pedal
Front Leg with
Casters
Crank Cover
counter-clockwise direction.) (Fig. 1)
Fig. 3
2. Remove the crank cover fixing screws. The narrow-width area
of the crank cover should be positioned in between the frame
cover and the crank. (Fig. 2)
3. Remove the leg pipe fixing screws. (Fig. 3)
Fig. 1
Frame Cover
Center Cover
* You do not have to remove the leg pipe itself.
4. Remove the frame cover fixing screw with a screwdriver before
removing the frame cover. (Fig. 4)
Fig. 2
àASSEMBLING
R
1. Place the frame covers onto the frame at both right and left
sides, paying attention to the position of the crank. At the
Screw
same time, the center cover should be built in.
2. Fix the right and left frame covers with frame cover fixing
screws.
3. Pass the crank through the hole on the crank cover, and fix the
crank cover onto the frame cover with screws. (Fig. 2)
4. Fix the front leg with casters with the leg pipe fixing screws.
Removing the Frame Covers
5. Mount the pedals.
D-2
Fig. 4
Cateye Ergociser Series 1000 Service Manual
23
Applicable Models: EC-1200 EC-1600 EC-3600 EC-3700
ES-1
Replacing the Wiring within the Frame
Power Supply
Board
[A] Removing the Wiring Parts
1. Remove the frame cover. (See the Sections D-1 & D-2
"Removing the Frame Covers.")
2. Loosen the two screws on the inlet metal base to remove
them. (Fig. 1)
3. With the stopper being held with fingers, pull the CN-4
connector off the power supply board. (Fig. 2)
4. Cut the cable holder with a nipper. (Fig. 3)
[B] Mounting the Brand New Wiring Parts
1. Mount the brand new inlet metal base to the frame with two
screws.
ON
2. Pass the wiring cable from beneath the DC jack of the power
supply board along with the square pipe (21mm x 21mm) to
the left direction, and then pass it through the back of the inlet
metal base along with the square pipe toward the switch.
Inlet Metal Base
Inlet Metal Base
Power Supply Board
EC-3600 & EC-3700
EC-1200 & EC-1600
Inlet Metal Base (for Recumbent Type)
Inlet Metal Base (for Upright Type)
3. Connect the CN-4 connector to the power supply board.
4. Refer to the Section (2) "Checking the Wiring within the
5. Use the cable holder to fix the CDC sensor cable together with
the solenoid coil cable. (Fig. 3)
ON
Screws
DC Jack
ON
Screws
OFF
DC Jack
OFF
6. Provisionally connect the control unit, and check the unit works
fine after turning on the power. Then, completely assemble
the frame cover.
Fig. 1
Power Supply Board
Hold the stopper.
ES-1
Replacing the Wiring within the Frame
Frame" of T-1 "No Display on the Control Unit after Power ON"
(1) , measure the voltage across the electrolytic capacitor C-1
to check that it is in the correct range of 14V and 19V.
Cable Holders
Fig. 2
Cateye Ergociser Series 1000 Service Manual
24
Fig. 3
OFF
Applicable Models: EC-1200 EC-1600 EC-3600 EC-3700
ES-2
Replacing the 5P Cable (1)
Unit-Side Cable Connector
Power Supply Board
Procedures are different depending on the type of model as shown
below:
àUpright Type (EC-1200)
Screws
EC-1200
Fig. 1
To be continued on the next page.
Fig. 2
Fig. 3
Handlebar Pipe
Horizontal Frame
(2)
(3)
Inner Handlebar Post Cover
Cable
Connector
Unplug
Cable Holders
Screws
EC-1600
Fig. 5
àUpright Type (EC-1600)
T Removing the Existing Cable
5P Cable Handleber Post
1. Loosen the four screws which fix the control unit to remove the
control unit. Also, remove the cable connector. (Fig. 4) Slide
the inner handlebar post cover upward, and unplug the cable
connector. (Fig. 5)
2. Remove the screws of both the handlebar stem and the outer
handlebar post cover to remove the 5P cable. (Fig. 6)
5P Cable within the Frame
1. Remove the frame cover. (See the Section D-1 "Removing the
Frame Covers.")
2. Remove the CN-2 connector at the end of the 5P cable from
the power supply board.
3. Cut the cable holders which fix the 5P cable to the handlebar
pipe, and remove the 5P cable.
87cm
Fig. 6
(1)
Replacing the 5P Cable (1)
T Mounting the Brand New Cable
1. Mark the 5P cable at a point approx. 87cm from the unit-side
cable connector (Fig. 3), and connect the leading end of the
CN-2 connector to the power supply board.
2. (1)Using cable holders, fix the 5P cable at the bottom of the
handlaber pipe of the main unit frame.(2)Fix the cable at the
marked point of the cable to the handlebar pipe just beneath
the horizontal frame.(3)Pass the 5P cable along with the
handlebar pipe, and the sagging portion should be binded with
a cable holder. (Fig. 4)
3. Connect the cable connector to the control unit, and apply the
connector cover.Then, fix the control unit to the handlebar post
by using four screws. (Fig. 1)
4. Provisionally turn on the power, and check if the control unit
works fine.
5. Fix the 5P connector to the handlebar post with the cable
holder.
6. Mount the frame cover. (See the Section D-1 "Removing the
Frame Covers.")
Mark this point.
Cable
Connector
EC-1200
Fig. 4
5cm
Cable Connector
Handlebar Stem
Cover
Cable Holder
Screws
Fig. 7
ES-2
T Removing the Existing Cable
1. Loosen the four screws which fix the control unit to remove the
control unit. Also, remove the cable connector. (Fig. 1)
2. Remove the cable holder which fixes the 5P cable to the
handlebar post.
3. Remove the frame cover. (See the Section D-1 "Removing the
Frame Covers.")
4. Remove the CN-2 connector from the power supply board.
(Fig. 2)
5. Cut the cable holders which fix the 5P cable to the frame, and
remove the 5P cable.
Fig. 8
Cateye Ergociser Series 1000 Service Manual
25
Applicable Models: EC-1200 EC-1600 EC-3600 EC-3700
ES-2
Replacing the 5P Cable (2)
T Mounting the Brand New Cable
10cm
Control Unit
5P Cable within the Handlebar Post
1. Using cable holders, bind the 5P cable, leaving approx. 5cm
portion from the control unit side cable connector, to the
handlebar post. (Fig. 7) Assemble the handlebar post cover
and the handlebar stem cover. (Fig. 6)
2. Connect the cable connector to the control unit, and fix the unit
to the handlebar post by using four screws. (Fig. 5)
5P Cable
(1)
Screws
5P Cable within the Frame
1. Connect the CN-2 Connector at the end of the 5P cable to the
power supply board.
2. (1)Using cable holders, fix the 5P cable to the frame, leaving
the extra portion of 10cm from the top of the handlebar pipe.(2)
Fix the 5P cable at the bottom of the handlebar pipe.(3)
Pass the 5P cable along the handlebar pipe, and bind the
sagging portion to the point (3) by using cable holders. (Fig. 8)
3. Provisionally connect the intermediate cable connector, and
turn on the power. Then, check if the control unit works fine.
4. Mount the frame cover to restore the original shape. (See the
Section D-1 "Removing the Frame Covers.")
Cable Holders
(3)
Fig. 10
(2)
àRecumbent Type (EC-3600 and EC-3700)
T Removing the Existing Cable
1. Loosen the four screws which fix the control unit to remove the
control unit. Also, remove the cable connector. (Fig. 10)
2. Remove the frame cover. (See the Section D-2 "Removing the
Frame Covers.")
3. Remove the 5P connector from the power supply board. (Fig.
2)
4. Cut the cable holders which fix the cable to remove the 5P
cable.
EC-1600
Fig. 9
30cm
Power Supply Board
Cable Holders
1. Leaving approx. 30cm from the end of the frame, fix the 5P
cable to the frame by using cable holders.
2. Connect the 5P cable to the power supply board, and bind the
sagging portion to the point (2) of the frame. (Fig. 11)
3. Provisionally turn on the power, and check if the control unit
works fine.
4. Mount the frame cover. (See the Section D-2 "Removing the
Frame Covers.")
ES-2
Replacing the 5P Cable (2)
T Mounting the Brand New Cable
Fig. 11
Cateye Ergociser Series 1000 Service Manual
26
Applicable Models: EC-1200 EC-1600 EC-3600 EC-3700
ES-3
Replacing the Power Supply Board
Power Supply
Board
[1] Replacing the Power Supply Board
1. Remove the frame cover. (See the Sections D-1 & D-2
"Removing the Frame Covers.")
2. Remove all connectors CN-1, CN-2, CN-3 and CN-4 which are
connected to the power supply board.
3. Loosen the two screws which fix the power supply board to
remove the board. (Fig. 1)
4. Securely fix the brand new power supply board by using two
fixing screws.
Power Supply Board
EC-1200 & EC-1600
5. Connect three connectors, CN-2, CN-3 and CN-4.
EC-3600 & EC-3700
[2] Adjustment of Coil Current Value
1. Connect the cables for measuring coil current between the
female connector of the solenoid coil and the male connector
(CN-1) on the power supply board, and then connect the
cables to an ammeter. (Fig. 2)
2. Turn on the power switch of the main unit, set the control unit
to the manual mode, set the load display to 4.0kg m, and start
the system.
Fixing Screws
3. Adjust the potentiometer (as shown in Figs. 3 and 4) on the
solenoid coil. (A clockwise turn will increase the current, while
a counter-clockwise turn will reduce the current.)
Power Supply Board
Cable for Measuring
Coil Current
Fig. 1
value will be 630mA.
Fig. 2
4. Upon completion of the adjustment, detach the cable for
measuring coil current, and connect the CN-1 connector
directly to the power supply board.
Power Supply Board B
Power Supply Board A
Solenoid
Coil
I mA
COIL
LOT No.
K6020
Location of Coil Current Value Indication
Fig. 3
Fig. 4
ES-3
Example: When the indication is 630 as shown in Fig. 5,
adjust the potentiometer so that the coil current
Replacing the Power Supply Board
power supply board with a blade-head screwdriver so that the
coil current will be the value indicated on the workload unit
Fig. 5
Cateye Ergociser Series 1000 Service Manual
27
Applicable Models: EC-1200 EC-1600 EC-3600 EC-3700
ES-4
Correcting the Position of Solenoid Coil
Perform the positional correction of the core slit section after
detaching the frame cover and turning off the power. (See the
Workload Unit
Reinforcing Metal
Base
Sections D-1 & D-2 "Removing the Frame Covers.")
Workload Unit
Reinforcing
Metal Base
[1] Correction with Nuts of Workload Unit Reinforcing Metal Base
This correction is a minor correction method which allows
adjustment by the fastening force of the frame-side nuts of the
workload unit reinforcing metal base.
1. Check the contacting area by slowly rotating the copper disk
plate with your hands.
2. Adjust the two frame-side nuts of the workload unit reinforcing
metal base in the following procedures. (Fig. 1)
A. Loosen the nut on the workload unit side, and the nut on the
frame side (Fig. 1).
ON
Solenoid Coil
Solenoid Coil
OFF
EC-3600 & EC-3700
EC-1200 & EC-1600
B. If the right side of the copper disk plate contacts the core,
when the main unit is viewed from the direction as depicted
in Fig. 3, fasten the frame-side nut.
C. Then, fasten the frame-side nut on the other side until the
copper disk plate comes close to the center of the core slit
Workload Unit Reinforcing
Metal Base
Workload-UnitSide Nut
Core Slit
Core Slit
Copper Disk Plate
Copper Disk Plate
Core
Core
D. Fasten the nuts which had been tightened in the above step
A.
[2] In case correction is not possible by the method stated in [1].
Frame-Side Nut
Solenoid Coil
Fig. 1
Correct Position
Fig. 2
Cateye Ergociser Series 1000 Service Manual
28
I mA
I mA
Replace the whole workload unit. (See the Section MS-2 "Replacing
the Workload Unit (w/ Flywheel).")
ES-4
Correcting the Position of Solenoid Coil
(Fig. 2). [ Rotate the copper disk plate slowly, and check for
any contacts on the entire area of the plate.
Copper disk plate contacts the core.
Solenoid Coil
Fig. 3
Applicable Models: EC-1200 EC-1600 EC-3600 EC-3700
ES-5
Replacing the CDC Sensor
1. Remove the frame cover. (See the Sections D-1 & D-2
CDC Sensor
Power Supply
Board
"Removing the Frame Covers.")
2. Detach the CN-3 connector from the power supply board. (Fig.
1)
3. Cut the cable holders which fix the CDC sensor cable to the
frame.
CDC Sensor
4. Remove the defective CDC sensor set by loosening the
screws, and mount and fix the brandnew CDC sensor set.
(Fig. 2)
5. Perform the following adjustments. (Figs. 3 and 4)
T Align the line on the CDC sensor with the center of the line
on the CDC magnet. (Fig. 3)
T Adjust the gap between the surface of CDC sensor and the
surface of CDC magnet to be approx. 2mm. (Fig. 4)
ON
OFF
Power Supply Board
EC-3600 & EC-3700
EC-1200 & EC-1600
* If the gap is inadequate, bend the metal base to secure the
specified gap.
6. Securely connect the CN-3 connector to the power supply
Power Supply Board
board. (Fig. 1)
7. Rotate the crank, and check if the pedal cadence will be
displayed on the control unit.
8. Fix the CDC sensor cable to the frame by using cable holders.
(Fig. 5)
9. Assemble the frame cover. (See the Sections D-1 & D-2
"Removing the Frame Covers.")
Fig. 2
Fig. 1
Line on CDC Sensor
Approx. 2mm gap between CDC sensor and
CDC magnet
Cable Holders
Center of CDC
Magnet
Line on CDC Sensor
Fig. 3
ES-5
Center of CDC Magnet
Replacing the CDC Sensor
CDC Sensor
CN-3 Connector
Fig. 5
Fig. 4
Cateye Ergociser Series 1000 Service Manual
29
Applicable Models: EC-1200 EC-1600 EC-3600 EC-3700
ES-6
Replacing the Panel Keyboard
Control Unit
Substrate
Fixing Screw
Screw
Substrate
1. Remove the control unit by loosening four screws. Also
remove the cable connector from the control unit. (Fig. 1)
2. The control unit can be separated into upper and lower parts
when the eight screws on the bottom of the lower body of the
unit are removed (Fig. 2). Be careful to separate them slowly
since the upper and lower bodies are connected with a flat
Cable Connector
cable.
3. Remove the connector on the panel keyboard which is located
at the upper body side, loosen the nine screws on the
substrate, and remove them from the upper body. (Fig. 3)
4. Since the panel keyboard is fixed to the control unit with
silicon, cut the silicon with a sharp cutter (Fig. 4). Peel the
panel keyboard off the surface of upper body. (Fig. 5)
Fig. 2
Fig. 1
Fig. 3
Control Unit
5. If the silicon remains at the upper body, remove it thoroughly.
Panel Keyboard
6. Place the brandnew panel keyboard. The cable from the
keyboard should be pulled in through the hole on the upper
Upper Body
body. Press and adhere the panel keyboard in position.
7. Apply silicon at two depicted areas to prevent intrusion of
sweat. (Figs. 4 and 6)
8. Mount the substrate and fix it with nine screws, and insert the
connector of the panel keyboard. (Fig. 3)
9. Put the upper and lower body together, and fix them with eight
Silicon
screws.
Replacing the Panel Keyboard
10. Connect the cable connector to the control unit, and mount the
unit to the main unit.
Fig. 4
Silicon
ES-6
Fig. 6
Cateye Ergociser Series 1000 Service Manual
30
Connector
Control Unit
Fig. 5
Applicable Models: EC-1200 EC-1600 EC-3600 EC-3700
ES-7
Replacing the Button Panel
1. Insert a thin cutting knife, while paying cautions not to damage
the control unit, in between the button panel and the body, and
carefully peel off the button panel. (Fig. 1)
2. Clean the adhesive agent, if any, on the control unit before
placing a brandnew button panel.
Sufficiently press the button panel thus placed.
Control Unit
Button Panel
Replacing the Button Panel
Fig. 1
ES-7
*
Cateye Ergociser Series 1000 Service Manual
31
Applicable Models: EC-1200 EC-1600 EC-3600 EC-3700
ES-8
Replacing the Printer
Printer Unit
1. Open the control unit into upper and lower bodies by referring
to the Section ES-6 "Replacing the Panel Keyboard (1) & (2)."
CN-2 Connector
2. unit is fixed to the lower body with two screws. Remove these
two screws. (Fig. 1)
3. The printer unit can be removed after detaching cable
connectors CN-2 and CN-3 of the printer unit. To remove the
connector CN-3, just pull it, while to remove connector CN-2,
the use of tweezer will be recommended. (Fig. 2)
4. Connect the connector CN-2 of the brandnew printer unit.
Then, connect CN-3. For the connection, press it while moving
it to right and left side alternatively.
5. Fix the printer unit with two screws. (Fig. 1)
6. Put the upper and lower bodies together, and fix them with
eight screws.
7. Adjust the printing darkness by referring to the Section ES-9
"Adjusting the Printing Darkness."
ES-8
Replacing the Printer
8. Mount the control unit to the main unit.
Cateye Ergociser Series 1000 Service Manual
32
CN-3 Connector
Printer Fixing Screws
Fig. 1
Fig. 2
Applicable Models: EC-1200 EC-1600 EC-3600 EC-3700
ES-9
Adjusting the Printing Darkness
1. Remove the control unit from the main unit. (Fig. 1)
Upright Type
Recumbent Type
Control Unit
Control Unit
2. Loosen four screws on the bottom of the control unit, and
remove the cable connector from the unit. (Fig. 1)
3. Remove the black metal base on the bottom of the control unit.
(Fig. 2)
4. Provisionally connect the 5P connector on the bottom of the
control unit to the main unit.
Cable Connector
5. Turn on the power. Check if the printer symbol appears on the
LCD panel and the printer is in the operating condition.
Cable Connector
6. Check if the thermal paper is set in position.
7. Adjustment should be done with the control unit positioned
horizontally. Press the ADV button on the control panel twice
to perform a test printing. A counter-clockwise turn of the
potentiometer PR on the bottom of the control unit will
Fig. 1
Fig. 2
decrease the darkness, while a clockwise turn will increase it
(Fig. 2). Set it to an appropriate darkness level. (An extreme
clockwise turn of the potentiometer may distort the printed
characters.)
NOTE: Never touch the potentiometer DCV.
DCV
PR
Adjusting the Printing Darkness
Potentiometer PR
ES-9
Fig. 3
Cateye Ergociser Series 1000 Service Manual
33
Applicable Models: EC-1200 EC-1600 EC-3600 EC-3700
ES-10
Paper Jamming in Printer
1. Open the control unit into upper and lower bodies by referring
to the Section ES-6 "Replacing the Panel Keyboard (1) & (2)."
Pincette
2. Remove the jammed paper with a tweezer or the like. (Fig. 1)
3. Assemble the control unit by referring to the Section ES-6
"Replacing the Panel Keyboard (9) & (10)."
4. Set the printer paper. (See the Operation Manual.)
Printer Unit
ES-10
Paper Jamming in Printer
Fig. 1
Cateye Ergociser Series 1000 Service Manual
34
Applicable Models: EC-1200 EC-1600 EC-3600 EC-3700
MS-1
Replacing the Workload Unit (w/o Flywheel) (1)
àRemoving the Workload Unit
1. Remove the frame cover, by referring to the Sections D-1 & D2 "Removing the Frame Covers."
2. Detach the CN-1 connector on the power supply board.
3. Using a nipper or the like, cut the cable holder which fixes the
CN-1 connector, while paying attention not to damage the
cable. (Fig. 2)
Power Supply
Board
4. Remove the gear crank, by referring to the Section MS-8
"Replacing the Crank Set." Also, remove the chain together
with the gear crank.
Workload Unit
Power Supply Board
EC-1200
5. Using a wrench, loosen the nuts, which fix the workload unit
reinforcing metal base, on both the workload unit side and the
CN-1 Connector
Fig. 1
frame side, and remove the metal base. (Fig. 3)
6. Remove the hexagon head bolts which fix the workload unit
Wrench
(two bolts on either right and left sides). Lift the entire workload
unit upward until it comes off the workload unit fixing metal
touch the frame.
Replacing the Workload Unit (w/o Flywheel) (1)
base, and remove the unit by shifting it either in the right or left
side (Fig. 4). Be careful that the copper disk plate does not
Workload Unit
Reinforcing Metal Base
Cable Holder
Fig. 2
Fig. 3
Workload Unit
MS-1
Workload Unit Fixing Hexagon Head Bolt
Fig. 4
Cateye Ergociser Series 1000 Service Manual
35
Applicable Models: EC-1200 EC-1600 EC-3600 EC-3700
MS-1
Replacing the Workload Unit (w/o Flywheel) (2)
Wrench
Wrench
àMounting the Brandnew Workload Unit
Workload Unit
1. Assemble the brandnew workload unit so that it will engage
with the workload unit mounting metal base of the frame (Fig.
1). Be careful that the copper disk plate will not touch the
frame.
2. Tighten the crank nut by using a cotterless gear crank
removing/ fastening tool and a wrench (Figs. 2 and 3).
Tightening torque should be 350kg cm to 400kg·cm, and
tighten the nut until the end of the crank shaft can level with the
end surface of the nut. Then, put the crank cap with a coin or
Fig. 3
Fig. 2
Workload Unit Fixing Metal Base
the like. (Fig. 4)
3. Assemble the chain. Chain should first be set on the free
wheel before setting it to the upper part of the large gear.
Cotterless Gear Crank Removing/
Fastening Tool
Cotterless Gear Crank
Removing/Fastening Tool
Fig. 1
Upper Part of Large Gear
Coin
Then, a forward rotation of the crank will enable the complete
setting on the large gear. (Fig. 5)
Derailleur
Spring
Chain
4. Set the derailleur spring to the pawl of the derailleur to give
tension to the chain. (Fig. 6)
the chain at the workload unit can be adequate. Move the
workload unit back and forth so that the longer edge of the
derailleur fixing metal base can be positioned at a right angle
to the derailleur spring. (Fig. 6)
6. Tighten the workload unit fixing screw (two screws on either
right and left sides). (Fig. 7) The tightening torque is 90kg·cm
Derailleur
Crank Cap
Fig. 4
Fig. 6
Fig. 5
to 120kg·cm.
Workload Unit Reinforcing Metal
Base
7. Assemble the workload reinforcing metal base in between the
bolts at the workload side and the frame side, and tighten the
bolts with nuts. (Fig. 8)
* In case the nut is screwed in at the position where the
workload-unit-side workload unit metal base is supposed to be
mounted, remove the nut.
Workload-UnitSide Bolt
* The tightening torque at the workload unit side should be
90kg·cm to 120kg·cm, and the nut at the frame side should be
provisionally tightened.
Frame-Side Bolt
Workload Unit Fixing Screw
Fig. 7
Fig. 8
MS-1
Replacing the Workload Unit (w/o Flywheel) (2)
5. Adjust the position of the workload unit so that the tension of
Cateye Ergociser Series 1000 Service Manual
36
Applicable Models: EC-1200 EC-1600 EC-3600 EC-3700
MS-1
Replacing the Workload Unit (w/o Flywheel) (3)
Correct Position
Copper Disk Plate
à Checking the Positions of Copper Disk Plate and Solenoid Coil
Core Slit
Core Slit
Workload Unit
Reinforcing Metal Base
Core
T Regarding the workload unit, positions of copper disk plate
and solenoid coil core slit have been adjusted before
mounting the frame so that they will not touch each other
while the plate is rotating. However, due to positional
distortion caused by tightening the bolts while the frame is
being mounted, the copper disk plate may touch the core.
(Fig. 1)
T Rotate the copper disk plate slowly to check if it does not
touch the core. If it does, it is necessary to eliminate the
positional distortion caused by the tightening.
Frame-Side Nut
Workload-Unit-Side Nut
Fig. 1
Correction Method
Fig. 2
Power Supply Board
CN-1 Connector
Replacing the Workload Unit (w/o Flywheel) (3)
Correction can be made by tightening the frame-side nuts of the
workload reinforcing metal base. Tighten the metal base toward the
direction in which the positional correction of the copper disk plate
should be made, until the plate comes close to the center of the core
slit (Fig. 1). (See the Section ES-4 "Correcting the Position of
Solenoid Coil.")
1. After checking the correction direction, use a wrench to tighten
the frame-side nut of the workload unit reinforcing metal base.
Give the even tightening to both right and left sides.
2. As shown in Fig. 2, set a cable for measuring coil current in
between the CN-1 female connector and the CN-1 male
connector at the side of power supply board, and connect the
cable to an ammeter.
3. Turn on the power switch of the main unit, set the control unit
to the manual mode, select the torque at 4.0kg·m, and start the
system.
4. Using a blade-head screwdriver, adjust the potentiometer on
the power supply board so that the meter reading shows the
coil current which is specified on the solenoid coil of the
workload unit.
Example:As shown in Fig. 3, when 630 is indicated, adjust the
potentiometer so that the coil current will be 630mA.
5. After having adjusted the coil current, remove the measuring
cable, and connect the female connector of the CN-1 cable
directly to the male connector at the power supply board side.
6. Fix the cable onto the seat pipe with cable holders.
I mA
COIL
LOT No.
CN-1 Female
Connector
Cable for Measuring
Coil Current
K6020
Fig. 4
Fig. 3
àAdjusting the Flywheel
MS-1
1. Adjust the flywheel by referring to the Section MS-3 "Adjusting
the Flywheel."
Cateye Ergociser Series 1000 Service Manual
37
Applicable Models: EC-1200 EC-1600 EC-3600 EC-3700
MS-2
Replacing the Workload Unit (w/ Flywheel)
Flywheel
àRemoving the Workload Unit
1. Remove the gear crank and the chain by referring to Items 1
through 4 of the Section MS-1 "Replacing the Workload Unit
(w/o Flywheel) (1)."
2. Loosen the flywheel fixing nut which is fixed to the flywheel
metal base. (Fig. 1)
Flywheel
3. Remove the four bolts which fix the flywheel metal base, and
remove the plain belt. (Fig. 2)
4. Remove the workload unit by referring to Items 5 and 6 of the
Workload Unit
Section MS-1 "Replacing the Workload Unit (w/o flywheel)
(1)."
ON
Workload Unit
EC-1600
EC-3600 & EC-3700
àMounting the Brandnew Workload Unit
Flywheel Fixing Nut
1. Assemble the brandnew workload unit so that it will engage
with the workload unit mounting metal base of the frame (Fig.
Flywheel
1). [See the Item 1 of the Section MS-1 "Replacing the
Workload Unit (w/o flywheel) (2)."]
Flywheel Metal Base
Flywheel Fixing Nut
Plain Belt
2. Hang the plain belt on the flywheel, and fix it to the flywheel
Flywheel Fixing Metal Base
metal base with the flywheel fixing nut.
Metal Base Fixing
Screw
the flywheel fixing metal base and the frame respectively. (Fig.
2)
4. Mount the workload unit by referring to Items 2 to 6 of the
Section MS-1 "Replacing the Workload Unit (w/o flywheel)
(2)."
Fig. 1
àAdjusting the Flywheel
1. Adjust the flywheel by referring to the Section MS-3 "Adjusting
the Flywheel."
MS-2
Replacing the Workload Unit (w/ Flywheel)
3. Provisionally fasten the metal base fixing screw (4 pieces) to
Cateye Ergociser Series 1000 Service Manual
38
Fig. 2
Applicable Models: EC-1200 EC-1600 EC-3600 EC-3700
MS-3
Adjusting the Flywheel
Spring Scale
àAdjustment Method of Flywheel
Flywheel Metal Base
Since the plain belt which delivers the rotation of both the workload
unit and flywheel requires an adequate tension, a specified tension
should be given to the plain belt in the following adjustment
procedures. For this adjustment, use commercial tools, since no
purpose-designed tool is not prepared.
1. Set a commercial wire around the flywheel metal base as
depicted in Fig. 1, and tie up the both ends outside the frame.
Flywheel
2. Hang a commercial spring scale at the top of the wire thus tied
up, and lift the scale upward with a pulling force of 5 to 6 kg.
3. Keeping this status, fully tighten the four metal base fixing
Metal Base Fixing Screw
Wire
Metal Base Fixing Screws
Fig. 2
screws which had been fastened provisionally. (Fig. 2)
Flywheel Metal Base
MS-3
Adjusting the Flywheel
Fig. 1
Cateye Ergociser Series 1000 Service Manual
39
Applicable Models: EC-1200 EC-1600 EC-3600 EC-3700
MS-4
Replacing the Chain
1. Remove the frame cover by referring to the Sections D-1 & D2 "Removing the Frame Covers."
2. Use a screwdriver or the like to remove the derailleur spring
which is hung on the derailleur metal base, thus loosening the
Chain
Chain
chain.
3. First detach the chain at the upper part of the large gear, and
then rotate the crank forward to detach the entire chain. (Fig.
2)
4. The brandnew chain should be hung firstly on the free wheel,
and then hang it over the upper part of the large gear. A
forward rotation of the crank will allow complete setting of the
ON
OFF
entire chain. (Fig. 3)
5. Adjust the tension of chain. Hang the spring on the derailleur,
loosen the workload fixing screw, and adjust the tension while
sliding the workload unit back and forth. (Fig. 4)
EC-3600 & EC-3700
EC-1200 & EC-1600
* Be careful not to give excessive tension to the chain.
Crank
Large Gear
6. Assemble the frame cover by referring to the Sections D-1 &
D-2 "Removing the Frame Covers."
Derailleur Spring
Derailleur
Fig. 2
Fig. 1
Replacing the Chain
Large Gear
Crank
MS-4
Approx. 3 to 7mm of slack
Free Wheel
Fig. 3
Cateye Ergociser Series 1000 Service Manual
40
Fig. 4
Applicable Models: EC-1200 EC-1600 EC-3600 EC-3700
MS-5
Replacing the Free Wheel Set
1. Detach the chain. (See the Section MS-4 "Replacing the
Chain.")
2. Hold the D-cut section on the free wheel shaft with a No.13
wrench, and remove the hexagon U-nut. Then, pull off the free
wheel set by using a free wheel remover. (Figs. 1 & 2)
3. Mount the brandnew free wheel set, and firmly tighten the
hexagon nut. Tightening should be done while holding the Dcut section with a No.13 wrench. (Fig. 1)
4. Set the chain by referring to the Section MS-4 "Replacing the
Chain."
ON
Free Wheel Set
OFF
Free Wheel Set
EC-1200 & EC-1600
EC-3600 & EC-3700
Free Wheel
Idler
Replacing the Free Wheel Set
Timing Belt
Hexagon U-Nut
Free Wheel
D-Cut Section
Fig. 2
MS-5
Fig. 1
Cateye Ergociser Series 1000 Service Manual
41
Applicable Models: EC-1200 EC-1600 EC-3600 EC-3700
MS-6
Replacing the Derailleur Set
1. Detach the derailleur spring from the pawl of the derailleur
metal base. (Fig. 1)
2. Loosen the derailleur fixing bolt with a No.10 socket wrench,
and remove the derailleur set. (Fig. 2)
3. Mount the brandnew derailleur set with fixing screws.
4. Set the derailleur spring on the pawl of the metal base to give
tension to the chain.
Derailleur Set
Derailleur Set
EC-1200 & EC-1600
ON
EC-3600 & EC-3700
Replacing the Derailleur Set
Derailleur Spring
Derailleur Fixing Bolt
Derailleur
MS-6
Fig. 1
Cateye Ergociser Series 1000 Service Manual
42
Fig. 2
Derailleur
Applicable Models: EC-1200 EC-1600 EC-3600 EC-3700
MS-7
Replacing the Idler Set
1. Remove the frame cover by referring to the Sections D-1 & D2 "Removing the Frame Covers."
2. Remove the idler spring from the pawl of the idler metal base.
(Fig. 1)
3. Loosen the idler mounting bolts, and detach the idler set. (Fig.
2)
4. Mount a brandnew idler set by using an idler mounting bolt.
5. Hang the idler spring on the pawl of the idler to give tension to
the belt.
Idler Set
Idler Set
EC-1200 & EC-1600
EC-3600 & EC-3700
Idler
Idler
Idler Fixing
Bolt
Idler Spring
Replacing the Idler Set
Fig. 2
MS-7
Fig. 1
Cateye Ergociser Series 1000 Service Manual
43
Applicable Models: EC-1200 EC-1600 EC-3600 EC-3700
MS-8
Replacing the Crank Set (1)
Crank Set
àRemoving the Gear Crank (Crank)
Crank Set
1. Remove the frame cover by referring to the Sections D-1 & D2 "Removing the Frame Covers."
2. Detach the chain by referring to the Section MS-4 "Replacing
the Chain." (Fig. 1)
3. Detach the crank cap with a coin or the like. (Fig. 2)
4. Use a cotterless gear crank removing/fastening tool and a
wrench, rotate the crank nut to remove it. (Fig. 3)
5. Change the sides of a cotterless gear crank removing/
fastening tool, and rotate it clockwise to remove the gear crank
ON
(crank) from the crank shaft. (Fig. 4)
OFF
- to be continued to the next page -
EC-3600 & EC-3700
EC-1200 & EC-1600
Upper Part of Large Gear
Coin
Chain
Replacing the Crank Set (1)
Crank Cap
Fig. 1
Fig. 2
Wrench
Wrench
Cotterless Gear Crank
Removing/Fastening Tool
MS-8
Cotterless Gear Crank
Removing/Fastening Tool
Fig. 3
Cateye Ergociser Series 1000 Service Manual
44
Fig. 4
Applicable Models: EC-1200 EC-1600 EC-3600 EC-3700
MS-8
Replacing the Crank Set (2)
Right-Side
Crank
àAssembling the Gear Crank (Crank)
1. Mount the gear crank (crank) to the crank shaft.
2. Securely fasten the crank nut by using a socket wrench (or by
a cotterless gear crank removing/fastening tool and a wrench).
(Figs. 1 & 2)
* Respective cranks should be positioned each other to from
an angle of 180° against the gear.(Fig.3)
3. Fasten the crank cap by using a coin, etc. (Fig. 4)
Wrench
Wrench
Left-Side Crank
Cotterless Gear Crank Removing/Fastening Tool
Cotterless Gear Crank
Removing/Fastening Tool
Fig. 2
Fig. 1
Fig. 3
4. The chain should be first set on the free wheel, and then on the
upper part of the large gear. A forward rotation of the crank will
Upper Part of Large Gear
enable the complete setting of the gear. (Fig. 5)
5. Adjust the tension of chain. Loosen the workload fixing screw
Coin
[two screws at each right and left side (Fig. 6)], and adjust the
tension while sliding the workload unit. The tension of chain
should be adjusted as illustrated in Fig. 7.
* Be careful not to give excessive tensioning to the chain.
6. Adjust the clearance between the magnet mounted on the
large gear and the CDC sensor, and also adjust the positions
of the indication lines, by referring to Item (5) Section ES-5
"Replacing the CDC Sensor."
Crank Cap
Chain
7. Provisionally turn on the power, and check if the pedal
cadence is displayed on the control unit.
Fig. 4
Replacing the Crank Set (2)
Fig. 5
Approx. 3 to 7mm of Slack
Workload Unit Fixing Screw
Fig. 6
Fig. 7
MS-8
8. Assemble the frame cover by referring to the Sections D-1 & D2 "Removing the Frame Covers."
Cateye Ergociser Series 1000 Service Manual
45
Applicable Models: EC-1200 EC-1600 EC-3600 EC-3700
MS-9
Replacing the BB Set
BB Set
àREMOVAL
1. Remove the frame cover, by referring to the Sections D-1 & D2 "Removing the Frame Covers."
2. Remove the gear crank/crank from the crank shaft(BB axle),
by referring to the Section MS-8 "Replacing the Crank Set."
3. Remove the BB cup locking with a hanger rotating jig. (Fig. 1)
4. Remove the BB adjusting cup, by using a pin face wrench.
(Fig. 2)
5. Remove the crank shaft(BB axle).
6. Remove the BB fixing cup, by using the hanger rotating jig.
(Fig. 3) The CDC sensor metal base will be removed at the
same time.
àASSEMBLING
BB Set
EC-3600 & EC-3700
EC-1200 & EC-1600
1. Check if no retainer remains within the hanger, and mount the
BB fixing cup. Be sure that the CDC sensor metal base should
first be mounted before mounting the BB fixing cup.
Hanger Rotating
Jig
BB adjusting cup
2. Assemble the crank shaft(BB axle), retainer, BB fixing cup, BB
adjusting cup, BB cup locking and CDC sensor metal base as
depicted in Fig. 4.
3. Mount the gear crank/crank, by referring to Mounting Items (1)
Hanger Rotating
Jig
thru (5), Section-MS-8 "Replacing the Crank Set." Also, adjust
the tension of the chain.
Pin Face Wrench
BB fixing cup
4. Adjust the following:
1. Align the line on the CDC sensor with the center of the line
on the magnet. (Fig. 5)
2. Adjust the clearance between the CDC sensor surface and
Fig. 1
CDC Sensor Metal
Base
Fig. 3
Fig. 2
* When the specified clearance has not been established,
Retainer
bend the metal base to have the clearance.
5. Provisionally turn on the power, and check if the pedal
cadence is displayed on the control unit.
6. Assemble the frame cover, by referring to the Sections D-1 &
D-2 "Removing the Frame Covers."
Approx. 2mm Clearance between CDC
Sensor and Magnet
CDC Magnet
CDC Sensor Metal Base
Line
BB fixing cup
BB adjusting cup
Retainer
CDC
Magnet
CDC
Sensor
Hanger Pipe
BB cup locking
Line
Crank Shaft
(BB axle)
MS-9
Replacing the BB Set
the magnet surface to be approx. 2mm. (Fig. 6)
BB cup locking
Fig. 4
Cateye Ergociser Series 1000 Service Manual
46
Center
Fig. 5
CDC Sensor
Fig. 6
Center
Applicable Models: EC-1200 EC-1600 EC-3600 EC-3700
MS-10
Replacing the Post Spacer
Spacer Spring
àREMOVAL
Adjust Screw
1. Remove the center cover, by referring to the Section MS-19
"Replacing the Center Cover of Upright Type."
2. Remove the lock nut located at the side of the frame, and then
Post Spacer
remove the adjust screw. (Fig. 1)
Boss
3. Pull out the spacer spring. (Fig. 1)
4. The post spacer can be pulled out upward while the boss at
Lock Nut
the side of the post is being pressed in with a screwdriver (for
both right and left sides). (Fig. 2)
Press in.
àASSEMBLING
1. Insert a brandnew post spacer.
2. Insert the spacer spring, and slightly fasten the adjust screw.
Fig. 2
Fig. 1
(Fig. 3)
3. Insert the seat post (handleber post), and adjust the adjust
screw so that the post will drop slowly.
Lock Nut
4. Fasten the lock nut to lock the adjust screw.
Adjust Screw
5. Assemble the center cover, by referring to the Section MS-19
"Replacing the Center Cover of Upright Type."
MS-10
Replacing the Post Spacer
Fig. 3
Cateye Ergociser Series 1000 Service Manual
47
Applicable Models: EC-1200 EC-1600 EC-3600 EC-3700
MS-11
Adjusting the Spacer Spring
Lock Nut
1. Remove the center cover, by referring to the Section MS-19
"Replacing the Center Cover of Upright Type."
2. Slightly loosen the lock nut at the side of the frame. (Fig. 1)
3. Fasten the adjust screw so that the seat post (handleber post)
will drop slowly.
4. Fasten the lock nut to fix the adjust screw.
5. Assemble the center cover, by referring to the Section MS-19
"Replacing the Center Cover of Upright Type."
Adjust Screw
MS-11
Adjusting the Spacer Spring
Fig. 1
Cateye Ergociser Series 1000 Service Manual
48
Applicable Models: EC-1200 EC-1600 EC-3600 EC-3700
MS-12
Replacing the Inner Pipe Spacer
àREMOVAL
Stopper Screw
Inner Pipe Spacer A
1. Slide the seat pipe to the utmost back end, and set it at a posiInner Pipe
tion where the screw head can bee seen through the hole on
the top surface of the seat pipe.
Pull out.
Inner Pipe
2. Remove the stopper screw. (Fig. 1)
3. Pull out the seat pipe and the inner pipe spacer A, while
depressing the two bosses, located at the right and left sides of
Boss
the seat pipe, at the same time. (Fig. 2)
4. Remove the spacer B at the end of the inner pipe. (Fig. 3)
àASSEMBLING
Seat Pipe
Fig. 2
Fig. 1
1. Set a brandnew inner pipe spacer B into the seat pipe. (Fig. 4)
Inner Pipe Spacer A
2. Insert the inner pipe spacer A and B together into the seat pipe.
Inner Pipe Spacer B
Inner Pipe Spacer B
Insert.
Seat Pipe
Inner Pipe
Inner Pipe
Fig. 3
Replacing the Inner Pipe Spacer
Fig. 4
MS-12
3. Align the hole on the top surface of the seat pipe with the screw
hole, and apply the stopper screw. (Fig. 1)
Cateye Ergociser Series 1000 Service Manual
49
Applicable Models: EC-1200 EC-1600 EC-3600 EC-3700
MS-13
Replacing the Vertical Pipe Spacer
1. Remove the seat hite lock knob, and pull out the rear support
pipe.(Fig. 1)
Seat Hite Lock Knob
2. Remove the rear support pipe spacer at the rear support pipe
insertion area on the top surface of the seat pipe. The rear
Rear Support Pipe
support pipe spacer is fixed on the pipe with an adhesive tape.
3. Apply and set a brandnew rear support pipe spacer with an
adhesive tape.(Fig. 2)
4. Insert the rear support pipe, and fix it with the seat hite lock
knob.
Fig.1
Rear Support Pipe
Insertion Area
Rear Support Pipe Spacer
MS-13
Replacing the Vertical Pipe Spacer
Fig.2
Cateye Ergociser Series 1000 Service Manual
50
Applicable Models: EC-1200 EC-1600 EC-3600 EC-3700
MS-14
Replacing the Leg Cover
Leg Cover
àREMOVAL
1. Remove the leg pipe from the main body. Also, remove the
levelling knob. (Fig. 1)
Levelling Knob
2. Apply a screwdriver or the like to the damaged leg cover, and
knock the cover off, paying attention not to damage the caster.
Screwdriver
(Fig. 2)
àASSEMBLING
1. Set the legcover onto the leg, and hammer it in. The use of a
wood block is recommended as a buffer. (Fig. 2)
*
A direct hammering of the leg cover may damage the
legcover.
2. Mount the levelling knob and assemble it to the frame.
Fig. 2
Fig. 1
Replacing the Leg Cover
Leg Cover
MS-14
Fig. 3
Cateye Ergociser Series 1000 Service Manual
51
Applicable Models: EC-1200 EC-1600 EC-3600 EC-3700
MS-15 Replacing the Caster and Level Adjuster
1. Loosen the screw and remove the front leg with casters (rear
leg with level adjuster) from the main unit (leg).
Front Leg with Casters (Rear Leg
with Level Adjuster)
2. The caster (level adjuster) has been press-fitted into the front
leg with casters (rear leg with level adjuster). It can be
removed by hammering it through a wooden block. (Fig. 1)
3. Press fit a brandnew caster (level adjuster) with a hammer and
a wood block. (Fig. 2)
4. Mount the front leg with casters (rear leg with level adjuster) to
the main unit (leg).
Wood Block
Wood Block
Caster (Level Adjuster)
MS-15
Replacing the Caster and Level Adjuster
Fig. 1
Cateye Ergociser Series 1000 Service Manual
52
Front Leg with Casters (Rear Leg
with Level Adjuster)
Fig. 2
Applicable Models: EC-1200 EC-1600 EC-3600 EC-3700
MS-16
Replacing the Seat Post Knob
Knob Rubber Base
1. Pull out the seat post.
Seat Post Knob
2. Remove the seat post knob by rotating and loosening the
guide screw in the counter-clockwise direction.
3. Mount a brandnew seat post knob by securely tightening the
guide screw.
4. Insert the seat post.
Guide Screw
MS-16
Replacing the Seat Post Knob
Fig. 1
Cateye Ergociser Series 1000 Service Manual
53
Applicable Models: EC-1200 EC-1600 EC-3600 EC-3700
MS-17
Replacing the Lock Pin
1. Remove the lock pin by rotating and loosening the guide screw
in the counter-clockwise direction.
Lock Pin
2. Mount a brandnew lock pin by securely tightening the guide
screw.
Wrench
Guide Screw
MS-17
Replacing the Lock Pin
Fig. 1
Cateye Ergociser Series 1000 Service Manual
54
Applicable Models: EC-1200 EC-1600 EC-3600 EC-3700
MS-18
Replacing the Crank Cover
Upright Type
àREMOVAL
No.15 Wrench
1. Remove both right and left pedals. (Fig. 1)
2. Loosen and remove the fixing screw on the surface of the
crank cover. The narrow-width area of the crank cover should
position in between the frame cover and the crank. (Figs 2 & 3)
àASSEMBLING
Crank
1. Pass the crank through the hole on the crank cover, and fix the
crank cover onto the frame cover with screws. (Figs. 2 & 3)
ON
Pedal
OF
F
2. Set the right and left pedals.
Crank Cover
Fig. 1
Fig. 2
Recumbent Type
Replacing the Crank Cover
Crank Cover
MS-19
Fig. 3
Cateye Ergociser Series 1000 Service Manual
55
Applicable Models: EC-1200 EC-1600 EC-3600 EC-3700
MS-19
Replacing the Center Cover of Upright Type
1. Loosen the four screws on the bottom of the control unit,
remove the control unit, and then detach the cable connector.
Handlebar Post
(Fig. 1)
2. For EC-1600, slide the inner pipe of the handlebar post cover
upward, and detach the 5P cable connector (Fig. 2). For EC1200, remove the cable holder from the handlebar post.
Handlebar Post Cover
5P Cable
5P Cable
3. Loosen the handlebar post knob, and pull out the handlebar
post from the main unit. (Fig. 3)
4. Pull the seat post knob upward, and pull out the seat post from
the main unit. (Fig. 4)
5. Loosen and remove the guide screw of the seat post knob.
(Fig. 5)
6. Remove the rubber base of the seat post knob. (Fig. 6)
Handlebar Post Knob
Fig. 2
Fig. 1
7. Slightly loosen the center cover fixing screws (6 pieces), and
remove the center cover by pulling it upward. (Fig. 7)
Fig. 3
Seat Post Knob
8. The assembling of the center cover can be made in the
procedures opposite to the above.
Replacing the Center Cover of Upright Type
Seat Post
Seat Post Knob
Rubber Base
Guide Screw
Fig. 4
Center Cover
MS-19
Center Cover
Fixing Screws
Fig. 7
Cateye Ergociser Series 1000 Service Manual
56
Fig. 5
Fig. 6
Applicable Models: EC-1200 EC-1600 EC-3600 EC-3700
MS-20 Replacing the Center Cover of Recumbent Type
Control Unit
* Remove the pulse rate sensor, if it is connected, before
proceeding to the following procedures.
1. Remove the control unit fixing screws (4 pieces) from the main
unit. (Fig. 1)
Inner Pipe
2. Detach the cable connector from the control unit. (Fig. 2)
3. Loosen and remove the inner pipe from the joint metal base.
(Fig. 3)
4. Remove the frame cover fixing screws, and the frame cover
will be separated into right and left parts. (Fig. 4)
5. Remove the latch of the center cover from the frame cover,
and pull the center cover toward the joint metal base to remove
it. (Fig. 5)
Joint Metal Base
Control Unit Fixing Screw
5P Cable
6. Assembling of the center cover can be performed in reversed
procedure of the above.
Pull the 5P cable connector out of the center cover through
Fig. 2
Fig. 3
the hole on the cover, and tentatively hold it with an
adhesive tape so that it may not be retracted.
Replacing the Center Cover of Recumbent Type
Frame Cover
Fixing Screw
Center Cover
EC-3
600
Frame Cover
Joint
Fig. 4
Fig. 5
MS-20
*
Fig. 1
Cateye Ergociser Series 1000 Service Manual
57
Applicable Models: EC-1200 EC-1600 EC-3600 EC-3700
MS-21
Replacing the Handlebar Grip
1. In case the handlebar grip is damaged, cut the grip with a thin
cutting knife and peel it off the handlebar.(Fig. 1)
Brandnew Grip
2. Fit a brandnew handlebar grip onto the handlebar, utilizing
compressed air from a compressor, etc. Press the grip into the
handlebar while applying compressed air at one end.(Fig. 2)
*
When a compressor is not available, apply a soap water on
the handlebar, and insert the grip while twisting and
pressing the grip.
*
Air Gun,etc
When the above replacing work is difficult to achieve,
remove the handlebar before the work.
Handlebar
Existing Grip(Old)
MS-21
Replacing the Handlebar Grip
Fig.1
Cateye Ergociser Series 1000 Service Manual
58
Fig.2
Applicable Models: EC-1200 EC-1600 EC-3600 EC-3700
MS-22
Replacing the Printer Cover
Printer Cover
1. See the Items (1 &2), Section ES-6 "Replacing the Panel
Keyboard."
2. Detach the existing printer cover, and mount the brandnew
printer cover.
3. See the Item (8 & 9), Section ES-6 "Replacing the Panel
Keyboard."
Upper Body of Control Unit
MS-22
Replacing the Printer Cover
Fig.1
Cateye Ergociser Series 1000 Service Manual
59
Applicable Models: EC-1200 EC-1600 EC-3600 EC-3700
MS-23
Replacing the Paper Cutter
1. See the Items (1 &2), Section ES-6 "Replacing the Panel
Keyboard."
2. Loosen and remove four screws. Also, remove the spring.
(Fig. 1)
3. Remove the existing printer cutter, and mount a brandnew
Paper Cutter
paper cutter.
4. Set the spring so that it will fit into the groove of the paper
cutter, and fix it with four screws.
5. See the Item (8 & 9), Section ES-6 "Replacing the Panel
Keyboard."
Screws
Spring
MS-23
Replacing the Paper Cutter
Fig. 1
Cateye Ergociser Series 1000 Service Manual
60
Applicable Models EC-1200 EC-1600 EC-3600 EC-3700
EC-1200 Control Unit(E) Ivory
EC-1200 Control Unit(G) Ivory
EC-1200 Control Unit(E) Black
EC-1200 Control Unit(G) Black
PNR.780-6108
PNR.780-6109
unit: pieces
EC-1200 Control Unit Multi Ivory
EC-1200 Control Unit Multi Black
PNR.780-6501
PNR.780-6502
PNR.780-6506
PNR.780-6507
unit: pieces
EC-1600 Control Unit(E) Ivory
EC-1600 Control Unit(G) Ivory
EC-1600 Control Unit(E) Black
EC-1600 Control Unit(G) Black
PNR.781-5601
PNR.781-5602
PNR.781-5606
PNR.781-5607
unit: pieces
EC-3600 Control Unit(E) Ivory
EC-3600 Control Unit(G) Ivory
EC-3600 Control Unit(E) Black
EC-3600 Control Unit(G) Black
VALUE ADJUST
VALUE ADJUST
MODE
ADVANCE
MODE
PNR.781-5901
PNR.781-5902
PNR.781-5916
PNR.781-5917
unit: pieces
EC-3700 Control Unit(E) Ivory
EC-3700 Control Unit(G) Ivory
EC-3700 Control Unit(E) Black
EC-3700 Control Unit(G) Black
PNR.780-5160
unit: sets
EC-1600/3700 Panel Keybord
PNR.780-6120
PNR.780-6121
unit: sets
EC-1200 Button Panel(E)
EC-1200 Button Panel(G)
PNR.781-5611
PNR.781-5610
unit: sets
EC-1600
EC-1200 Decal(E)
EC-1200 Decal(G)
EC-1200 Decal(F)
EC-3600 Button Panel(E)
EC-3600 Button Panel(G)
EC-3700
EC-1200
EC-1200
PNR.000-0000
PNR.000-0000
PNR.000-0000
unit: sets
ADVANCE
SOUND ON/OFF
ADV
1
10
MODE
1
10
RESET
SOUND ON/OFF
PNR.000-0000
PNR.000-0000
PNR.000-0000
unit: sets
EC-1600 Decal(E)
EC-1600 Decal(G)
EC-1600 Decal(F)
PNR.000-0000
PNR.000-0000
PNR.000-0000
unit: sets
EC-3600 Decal(E)
EC-3600 Decal(G)
EC-3600 Decal(F)
PNR.000-0000
PNR.000-0000
PNR.000-0000
unit: sets
EC-3700 Decal(E)
EC-3700 Decal(G)
EC-3700 Decal(F)
PNR.736-6000
unit: sets
EC-1600/3700 Printer Unit
PNR.780-5111
unit: pieces
EC-1600/3700 Printer Cover
R
PNR.000-0000
unit: pieces
EC-3700 Unit Base
PNR.722-6502
unit: sets
Thermal Paper(E)
Cateye Ergociser Series 1000 Service Manual
61
List of Genuin Parts
PNR.780-6101
PNR.780-6102
PNR.780-6106
PNR.780-6107
unit: pieces
List of Genuin Parts
Applicable Models EC-1200 EC-1600 EC-3600 EC-3700
PNR.780-1031
unit: pieces
EC-1600/3700 Paper Cutter
PNR.780-1020
unit: pieces
Paper Case
PNR.780-1030
unit: pieces
Paper Roller
PNR.780-1100
PNR.780-1102
PNR.780-1101
unit: sets
EC-1200/1600 Pluse Sensor Set (1M)
EC-1200/1600 Pluse Sensor Set (1.5M)
EC-3600/3700 Pluse Sensor Set (2M)
PNR.780-1110
unit: sets
Pluse Sensor Cover Set
PNR.780-1200
unit: pieces
Sensor Clip
PNR.737-5500
PNR.737-5511
PNR.737-5520
PNR.737-5523
unit: sets
AC Adepter J (100V)
AC Adepter UL (120V)
AC Adepter EC (220V)
AC Adepter UK (240V)
PNR.781-9100
unitsets
Saddle (SMP1209)
PNR.703-3101
unit: sets
EC-3600/3700 Recumbent Seat
PNR.724-3410
PNR.780-6450
unit: pieces
EC-1200 Handlebar
EC-1600 Handlebar
PNR.781-9000
unit: pieces
Sporty Handlebar Set (HB-100)
PNR.781-5130
unit: pieces
EC-3600/3700 Handlebar
PNR.725-0000
PNR.780-6470
PNR.781-5060
unit: pieces
EC-1200 Handlebar Grip
EC-1600 Handlebar Grip
EC-3600/3700 Handlebar Grip
PNR.781-3200
unit: pieces
Handlebar Cap
PNR.781-0210
unit: pieces
EC-1200/1600 Hadlebar Post
PNR.780-6430
unit: sets
EC-1600 Hadlebar Post Cover Set
PNR.758-5000
unit: sets
EC-1200/1600 Hadlebar Lever Set
PNR.780-6170
unit: sets
EC-1200/1600 Hadlebar Stem
PNR.785-1416
unit: pieces
Adjusting Knob/Seat Hite Lock Knob
PNR.780-6190
unit: pieces
EC-1200/1600 Seat Post
Cateye Ergociser Series 1000 Service Manual
62
Applicable Models EC-1200 EC-1600 EC-3600 EC-3700
PNR.780-6050
unit: sets
EC-1200/1600 Post Spacer Set
PNR.780-9610
unit: pieces
EC-1200/1600 Seat Pillar
PNR.780-6260
unit: pieces
EC-1200 New Seat Pillar
PNR.781-5120
unit: pieces
EC-3600/3700 Lock Pin
PNR.780-6040
unit: pieces
EC-1200/1600 Rubber Base for Knob
PNR.780-6000
PNR.780-6001
unit: sets
EC-1200/1600 Frame Cover(L/R) Ivory PNR.781-5000
EC-1200/1600 Frame Cover(L/R) Black PNR.781-5001
unit: sets
PNR.785-1417
unit: pieces
EC-1200/1600 Seat Post Knob
EC-3600/3700 Frame Cover(L/R) Ivory
EC-3600/3700 Frame Cover(L/R) Black
00
16
EC-
00
16
EC-
EC-1
200
EC-1
200
R
R
EC-1200/1600 Center Cover
PNR.781-5500
unit: pieces
EC-3600/3700 Center Cover
PNR.780-6020
unit: sets
EC-1200 Crank Cover(L,R)Set
PNR.780-6420
unit: sets
EC-1600 Crank Cover(L,R)Set
R
EC
-3
70
0
70
-3
EC
EC
-3
6
-3
60
0
0
00
R
EC
PNR.780-6010
unit: pieces
R
PNR.781-5520
unit: sets
EC-3600 Crank Cover(L,R)Set
PNR.781-5810
unit: sets
EC-3700 Crank Cover(L,R)Set
PNR.781-5100
unit: sets
Pedal(L,R)
PNR.781-9300
unit: sets
Pedal Belt E-16 (L,R)
PNR.780-6160
unit: pieces
EC-1200/1600 Rear Leg with Level Adjuster PNR.780-6160
unit: pieces
EC-1200/1600 Mod. Rear Leg
PNR.780-0140
unit: sets
EC-1200/1600 Leveler Set
PNR.724-3950
unit: pieces
EC-1200/1600 Levelling Knob
Cateye Ergociser Series 1000 Service Manual
63
List of Genuin Parts
R
Applicable Models EC-1200 EC-1600 EC-3600 EC-3700
PNR.780-6180
unit: sets
EC-1200/1600 Caster Pipe Set
PNR.780-6550
unit: pieces
EC-1600 Vibration-proof Rubber
PNR.780-6445
EC-1200/EC-1600 Front Leg with
Cover Set
unit: sets
PNR.786-2409
PNR.780-6446
EC-1200/EC-1600 Rear Leg with
Cover Set
unit: sets
EC-3600/3700 Rear Leg with Level
Adjuster
PNR.781-0140
unit: pieces
EC-3600/3700 Leveler Set
PNR.787-2409
unit: pieces
EC-3600/3700 Caster Pipe Set
PNR.781-0150
unit: pieces
EC-3600/3700 Caster Set
EC-3600/3700 Pipe Spacer Set
PNR.781-5040
EC3600/3700 Rear Support Pipe
Spacer Set
PNR.780-2000
PNR.780-6310
PNR.781-5580
unit: pieces
PNR.780-2240
EC-1200 Workload Unit
EC-1600/1200G Workload Unit (w/Flywheel) unit: sets
EC-3600/3700 Workload Unit (w/Flywheel)
Freewheel Set
EC-1200/1600 Workload Unit
Reinforcing Metal Base
PNR.781-5580
EC-3600/3700 Workload Unit
Reinforcing Metal Base
PNR.780-2200
unit: set
Derailleur Set
Idler Spring
PNR.780-2240
unit: sets
unit: pieces
PNR.781-5030
unit: sets
List of Genuin Parts
unit: sets
PNR.724-4802
unit: sets
Crank Cap
PNR.718-0450
unit: pieces
PNR.720-1110
unit: set
Derailleur Spring
Cateye Ergociser Series 1000 Service Manual
64
PNR.780-2220
unit: sets
unit: pieces
Idler Set
PNR.720-1110
unit: pieces
Freewheel Set
Applicable Models EC-1200 EC-1600 EC-3600 EC-3700
PNR.780-6230
PNR.781-5570
unit: pieces
EC-1200/1600 Chain
EC-3600/3700 Chain
PNR.781-9200
unit: sets
Cartridge BB (YST-986A)
PNR.780-6250
unit: sets
Crank Set
PNR.780-6240
unit: sets
EC-1200/1600 Inlet Metal Base
PNR.780-6241
unit: sets
EC-3600/3700 Inlet Metal Base
PNR.780-6030
unit: sets
EC-1200/1600 Inlet Cover
PNR.780-6220
unit: sets
EC-1200 5PCable
PNR.780-6480
PNR.780-6481
unit: sets
EC-1600 5PCable (Upper)
EC-1600 5PCable (Lower)
PNR.781-5550
unit: sets
EC-3600/3700 5PCable
PNR.780-6241
unit: sets
CDC Sensor Set
PNR.780-6210
unit: sets
Power Supply Board
PNR.729-5010
unit: pieces
Cable Clip Small(CV200)
TR
AN
SM
ITTE
R
R
TM
-100
0
D
A
T
A
C
A
R
Cable Clip Large(CV250)
PNR.718-5140
unit: pieces
EC-1200 Cable Holder
PNR.722-4950
unit: sets
Date Card
PNR.701-6701
Wireless Heart Rate Senaor Kit (TM1000)
unit: sets
R
3
R
1
IS
-0
0R
P
ITTE
R TM
R2 1
Q
R
-10
31
0-
SM
F-2
00
D
C
AN
S
0R
50
-1
C
E
K
TR
00
DC
IN
5V
OU
T
IN
PNR.701-6801
unit: sets
Wireless Heart Rate Receiving Circuit
PNR.000-0000
unit: sets
Wireless Heart Rate Senaor
PNR.000-0000
unit: sets
HR Senaor Belt
PNR.701-5701
PNR.701-5703
unit: sets
RS232C Communication Kit
RS232C Communication Kit (220V)
Cateye Ergociser Series 1000 Service Manual
65
List of Genuin Parts
D
PNR.729-5025
unit: pieces
Applicable Models EC-1200B EC-1600B EC-3600B EC-3700B
Belt Drive
PNR.780-7050
PNR.781-5581
unit: pieces
EC-1600B/1200B Workload Unit
EC-3700B/3600B Workload Unit
PNR.780-7030
unit: sets
Idler A Set
PNR.780-7040
unit: pieces
Idler Spring A
PNR.780-7010
unit: pieces
Pulley 1-B
PNR.780-6990
unit: sets
Pulley 1-A Set
PNR.780-7020
unit: sets
Pulley 2-A Set
PNR.780-7000
unit: pieces
Pulley Flange
PNR.724-1021
EC-1600B/1200B Teethed Timing Belt
(P8M15-1192)
EC-3700B/3600B Teethed Timing Belt
(P8M15-1080)
PNR.724-1022
List of Genuin Parts (Belt Drive)
unit: pieces
Cateye Ergociser Series 1000 Service Manual
66
Applicable Models EC-1200 EC-1600 EC-3600 EC-3700
1
PNR.752-1085
unit: pieces
Hexagon Nut M8-3
4
PNR.750-9616
unit: pieces
PNR.752-1063
unit: pieces
Hexagon Nut M6-3
5
Screw Set(+) M6x16
PNR.756-1412
unit: pieces
Cross-recessed Head Hexagon Screw
M6x16
PNR.750-6810
unit: pieces
PNR.723-2080
unit: pieces
Thrust Washer 9x15.5x0.25
6
Tapping Screw 4x12 with Washer
9
8
PNR.750-8616
3
2
PNR.750-1390
unit: pieces
PNR.753-5410
unit: pieces
Screw Set M6x12
7
Spacer Spring
PNR.724-4803
unit: pieces
Crank Nut M10x1.25
Tapping Screw(2) 4x12C
PNR.751-5330
unit: pieces
Tapping Screw(2) 3x30
0
Seat Post Adjust Screw M8x10
PNR.753-6412
unit: pieces
unit: pieces
PNR.751-5208
unit: pieces
Tapping Screw(2) 2x8
PNR.751-5206
unit: pieces
Tapping Screw(2) 2x6
PNR.752-5600
unit: pieces
List of Genuin Parts
q
SW Nut M6
Cateye Ergociser Series 1000 Service Manual
67
Applicable Models EC-1200 EC-1600 EC-3600 EC-3700
PNR.780-6350
unit: sets
EC-1200/1600 Tool Kit
PNR.781-5180
unit: sets
EC-3600/3700 Tool Kit
PNR.758-1000
Cotterless Gear Crank Removing /
Fastening Tool
PNR.781-9210
unit: sets
Cartridge BB Removing Tool
PNR.737-7000
unit: sets
Tester
PNR.747-8000
unit: sets
Coil Current Measuring Cable
PNR.781-5701
PNR.781-5702
PNR.781-5703
unit: sets
EC-3600 Operating Instructions E
EC-3600 Operating Instructions G
EC-3600 Operating Instructions F
PNR.781-5991
PNR.781-5992
PNR.781-5993
unit: sets
EC-3700 Operating Instructions E
EC-3700 Operating Instructions G
EC-3700 Operating Instructions F
unit: sets
Freewheel Set Removing Tool
PNR.780-6111
PNR.780-6112
PNR.780-6113
unit: sets
EC-1200 Operating Instructions E
EC-1200 Operating Instructions G
EC-1200 Operating Instructions F
PNR.758-1080
unit: sets
Pin Face Wrench
PNR.780-6511
PNR.780-6512
PNR.780-6513
unit: sets
EC-1600 Operating Instructions E
EC-1600 Operating Instructions G
EC-1600 Operating Instructions F
R
R
PNR.758-1010
unit: sets
R
List of Genuin Parts
R
Cateye Ergociser Series 1000 Service Manual
68
CO.,LTD.
®
2-8-25, Kuwazu, Higashi Sumiyoshi-ku, OSAKA, 546-0041 JAPAN
TEL: 81-6-6719-2631
FAX: 81-6-6719-2363
Copyright © Feb. 1995 CAT EYE Co., Ltd.
ECSM1E-991007-PDF