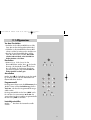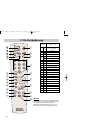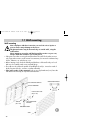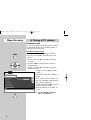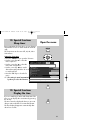
1
605 47 0024.A1 42TL92 D-GB 02.11.2005 15:59 Uhr Seite 1 Plasma-TV-Set 42“ PIP 42 TM92 Bedienungsanleitung 05/12/24 Operating Instructions 605 47 0024.A1 605 47 0024.A1 42TL92 D-GB 02.11.2005 15:59 Uhr Seite 2 Vielen Dank Sehr geehrte Kundin, Sehr geehrter Kunde, vielen Dank, dass Sie sich für ein Metz Produkt entschieden haben. Wir haben in diesem TV-Gerät eine Menüführung geschaffen, von der wir glauben, Ihnen eine leicht verständliche Bedieneroberfläche bereitzustellen. Vor der ersten Inbetriebnahme sollten Sie jedoch auf jeden Fall die Kapitel 1 bis 7 der Bedienungsanleitung studieren. Ihre METZ-WERKE Inhaltsverzeichnis 1. 1.1 1.2 1.3 1.4 1.5 2. 2.1 3. 4. 5. 5.1 6. 6.1 6.2 7. 8. 9. 10. 11. 12 13. Der Plasma-Bildschirm ist ein Produkt mit modernster Technologie. Gelegentlich können einige nicht aktive Pixel als ein fester blauer, 14. grüner oder roter Punkt auf dem 15. Bildschirm erscheinen. Bitte neh16. men Sie zur Kenntnis, dass dies nicht die Leistung Ihres Produktes beeinflusst. 2 Aufstellhinweise . . . . . . . . . . . . . . . . . . . .3 Wandmontage . . . . . . . . . . . . . . . . . . . . .4 Lautsprecher . . . . . . . . . . . . . . . . . . . . . . .5 Sonstiges . . . . . . . . . . . . . . . . . . . . . . . . .6 Bedienelemente Plasma-Bildschirm . . . . . . .6 Bedienelemente und Anschlüsse Tuner-Box . . .7 Sicherheitshinweise . . . . . . . . . . . . . . . . . .8 Allgemeines . . . . . . . . . . . . . . . . . . . . . . .9 Die Fernbedienung . . . . . . . . . . . . . . . . .10 Betrieb ohne Fernbedienung . . . . . . . . . .16 Land einstellen . . . . . . . . . . . . . . . . . . . .17 Sprache einstellen . . . . . . . . . . . . . . . . . .18 Sender einstellen . . . . . . . . . . . . . . . . . .19 Sender-Logo . . . . . . . . . . . . . . . . . . . . . .23 Sender sortieren . . . . . . . . . . . . . . . . . . .24 Programmwahl . . . . . . . . . . . . . . . . . . . .25 Bildeinstellungen . . . . . . . . . . . . . . . . . .26 Audio-/Toneinstellungen . . . . . . . . . . . . .27 Sonderfunktionen Bild im Bild (PIP) . . . . . . . . . . . . . . . . . . .28 Bildgröße . . . . . . . . . . . . . . . . . . . . . . . .29 Split Screen . . . . . . . . . . . . . . . . . . . . . .30 Standbild . . . . . . . . . . . . . . . . . . . . . . . .30 Sleep Timer . . . . . . . . . . . . . . . . . . . . . .31 Uhrzeit einblenden . . . . . . . . . . . . . . . . .31 Videotext . . . . . . . . . . . . . . . . . . . . . . . .32 Kopfhörer anschliessen . . . . . . . . . . . . . .33 AV Geräte . . . . . . . . . . . . . . . . . . . . . . .34 Auswahlmöglichkeiten . . . . . . . . . . . . . .35 Überspielen . . . . . . . . . . . . . . . . . . . . . .36 VCR-Funktion . . . . . . . . . . . . . . . . . . . . .37 PC anschliessen ( VGA / DVI ) . . . . . . . . .38 PC - Bildschirmmodi . . . . . . . . . . . . . . . .39 Reinigung des Gerätes . . . . . . . . . . . . . .40 Technische Daten . . . . . . . . . . . . . . . . . .41 Batterie-Entsorgung . . . . . . . . . . . . . . . .42 Störungen und Abhilfe . . . . . . . . . . . . . .43 Codeliste . . . . . . . . . . . . . . . . . . . . . . . .44 605 47 0024.A1 42TL92 D-GB 02.11.2005 15:59 Uhr Seite 3 1. Aufstellhinweise Das Plasma-TV-Set wird mit Plasma-Bildschirm, Standfuß, Wandhalterung, 2 Lautsprecher mit Fuß und Tuner-Box ausgeliefert. Montage Standfuß Der Standfuß ist mit zwei Blenden ausgestattet. Die hintere hohe Blende, mit dem Ausschnitt für die Kabeldurchführung, ist mit vier Schrauben am Standfuß befestigt. Diese Blende vor der Montage des Plasmabildschirms am Standfuß entfernen. Standfuß in die entsprechende Führung einschieben und mit vier Schrauben (M5 x 20 mm) vorsichtig festschrauben. Netzanschlusskabel und Verbindungskabel zur Tuner-Box einstecken, die Kabel durch den Ausschnitt führen und danach die Blende wieder anschrauben. Blende vorne, fest Kabeldurchführung Blende hoch, hinten, abgeschraubt Lautsprecher links Plasmabildschirm Lautsprecher rechts Standfuß 4 Schrauben M5 x 20mm Lautsprecherhalterung 4 Schrauben M5 x 12mm Montageschema 3 605 47 0024.A1 42TL92 D-GB 02.11.2005 15:59 Uhr Seite 4 1.1 Wandmontage Nichtbeachtung dieser Hinweise kann zu ernsthaften Verletzungen von Personen und/oder irreparablen Schäden am Gerät führen. Der Plasma-Bildschirm darf nur an senkrechten Wänden mit Hilfe der Wandmontageeinheit befestigt werden. Führen Sie die Montage der Wandhalterung und das Einhängen des Gerätes nicht ohne die Hilfe einer zweiten Person durch. • Gehen Sie bei der Befestigung der Wandhalterung sehr sorgfältig vor. Sie muss das TV-Gerät nicht nur dauerhaft halten, sondern dem Gerät auch bei Erschütterung, Stößen etc. sicheren Halt ermöglichen. • Vor der Montage ist die Beschaffenheit der Wand (Stabilität und Wandstärke) zu untersuchen. Fragen Sie im Eisenwaren-Fachhandel nach entsprechend geeigneten Metallschrauben und Dübeln. • Die Wand muss fest und statisch tragfähig sein (z.B. Mauerwerk aus Ziegel, Kalksandstein oder Beton). • Für abweichende Wandaufbauten wie z.B. Holz-, Hohlraumwände oder andere Materialien ist unbedingt ein erfahrener Fachmann mit der Montage der Wandhalterung zu betrauen. 4 605 47 0024.A1 42TL92 D-GB 02.11.2005 15:59 Uhr Seite 5 1.1 Wandmontage Wandmontage des Plasma-Bildschirm 1. Um den Plasmabildschirm an der Wand zu montieren, entfernen Sie zuerst den Standfuß (Abb. 1). Drehen Sie die vier Schrauben (M5 x 20) heraus, mit denen der Fuß am Bildschirm befestigt ist, und entfernen Sie den Standfuß. Das Plasma-Fernsehgerät kann mit oder ohne Lautsprecher an der Wand befestigt werden. 2. Montieren Sie den Wandträger mit vier Wanddübeln (Ø10 x 50) und vier Schrauben (Ø7 x 60) gemäß Abbildung 2 an der Wand. Wählen Sie zunächst den Platz aus, an dem der Bildschirm befestigt werden soll. Richten Sie den Wandträger waagerecht an der Wand aus, und markieren Sie die beiden Montagepunkte mit einem Bleistift. Bohren Sie die Löcher für die Kunststoffdübel, und befestigen Sie den Wandträger mit vier Schrauben (Ø7 x 60) an der Wand. 3. Heben Sie den Plasmabildschirm an, und hängen Sie ihn mit den beiden Aufhängeschrauben auf der Rückseite des Bildschirms in den Löchern am Wandträger ein. 1.2 Lautsprecher Montage der Lautsprecher (optional) Wenden Sie den Plasmabildschirm auf die Rückseite, und stellen Sie ihn auf eine feste Oberfläche, z.B. auf einen Tisch (Abb. 3). Stellen Sie die Lautsprecher rechts und links neben dem Bildschirm ab. Richten Sie die Lautsprecherhalterungen (je zwei am linken und zwei am rechten Lautsprecher) mit den Bohrungen am Plasmabildschirm aus, und befestigen Sie jede Halterung mit vier Schrauben (M5 x 12) an Lautsprecher und Bildschirm. Schließen Sie die Lautsprecher mit den Lautsprecherkabeln an der Plasmabox an. 5 605 47 0024.A1 42TL92 D-GB 02.11.2005 15:59 Uhr Seite 6 1.3 Sonstiges • Achten Sie darauf, daß kein helles Licht oder Sonnenschein direkt auf den Bildschirm fällt. Es können Spiegelungen entstehen, die die Brillanz des Bildes beeinträchtigen. • Der günstigste Betrachtungsabstand ist die 5–fache Bildschirmdiagonale, bei Geräten mit 107 cm Bildschirm also ca. 5,35 m. • Antennenanschlusskabel und sonstige Bauteile zwischen der fest eingebauten Antennen- / Breitbandsteckdose und dem Rundfunkempfänger (z. B. TV–Gerät, Videorecorder) müssen der Euro-Norm EN 60966-2-4 entsprechen. • In unmittelbarer Nähe des TV-Gerätes darf sich kein Magnetfeld befinden. • Das verwendete Antennenanschlusskabel sollte ein Schirmungsmaß von mindestens 75 dB besitzen. • Bei Verwendung nicht zugelassener Kabel und Bauteile erlischt die Betriebserlaubnis des Rundfunkempfängers. 1.4 Bedienelemente Plasma-Bildschirm Vorderansicht Rückansicht Netzkabel-Eingang 6 Verbindung PlasmaBildschirm mit der Tuner-Box (LVDS) 605 47 0024.A1 42TL92 D-GB 02.11.2005 15:59 Uhr Seite 7 1.5 Bedienelemente und Anschlüsse Tuner-Box Vorderansicht Ein- / Aus - Schalter Audioeingang Links/Rechts Videoeingang Kopfhörer S-VHS-Eingang Lautstärke einstellen Programmwahl P+ / P– Menü aufrufen AV-Taste / Signalauswahl Rückansicht A B C D E F G Subwoover - Ausgang Lautsprecher - Ausgang Links/Rechts Antenne Video Out Video In SCART 1 voll bestückt SCART 2 H I J K L M N SCART 3 SCART 4 LVDS (Ausgang, z. Plasmabildschirm) Audio In (vom PC kommend) DVI - Eingang (vom PC kommend) VGA - Eingang (vom PC kommend) Netzkabel-Eingang 7 605 47 0024.A1 42TL92 D-GB 02.11.2005 15:59 Uhr Seite 8 2. Sicherheitshinweise Bei Plasma-Displays besteht prinzipiell die Gefahr von Einbrenneffekten. Wird über einen längeren Zeitraum ein stehendes Bild dargestellt (z. B. Standbilder von TV, DVD, Videotext oder PC), so ergeben sich zwischen leuchtenden und nicht leuchtenden Bildpunkten Helligkeitsunterschiede, die sichtbar werden können, sobald eine andere Darstellung erfolgt. Um eine dauerhafte Schädigung auszuschließen, sollten Sie unbedingt darauf achten, dass stehende Bilder nicht dauerhaft dargestellt werden. Nutzen Sie nach Möglichkeit auch Bildschirm-Schutzfunktionen bei den angeschlossenen Geräten (z. B. PC, DVD, Videorecorder). • Ein kaltes Gerät darf in einem warmen Raum erst in Betrieb genommen werden, wenn ein eventuell vorhandener Feuchtigkeitsbeschlag verdunstet ist. • Ihr Gerät ist für den Betrieb in trockenen Räumen bestimmt. Sollten Sie ausnahmsweise das Gerät im Freien betreiben, so sorgen Sie bitte dafür, daß es vor Feuchtigkeit (Regen, Wasserspritzer, Betauung) geschützt ist. • Fernsehgeräte benötigen eine ausreichende Kühlung. Die Öffnungen in der Rückwand dürfen nicht durch Gardinen, Deckchen, Zeitungen o. ä. verdeckt werden. Die Lüftungsschlitze an der Geräteunterseite müssen frei zugänglich bleiben, denn darüber saugt das Gerät die Kühlluft an. • Sorgen Sie für einen ausreichenden Kühlluftstrom, wenn Sie Ihr Gerät in einen Einbauschrank stellen. • Stellen Sie Ihr Gerät nicht direkt neben einer Heizung auf; die Gerätekühlung könnte beeinträchtigt werden. • Auf oder über den Plasma-Bildschirm gehören keine 8 - brennenden Kerzen - Gefäße mit Flüssigkeit. Heißes Wachs und Flüssigkeiten, die ins Geräteinnere gelangen, zerstören die elektrischen Bauteile Ihres TV–Gerätes. Die elektrische Sicherheit des Gerätes ist in solchen Fällen nicht mehr gewährleistet. • Gewitter sind eine Gefahr für elektrische Geräte. Bei einem Blitzschlag in die Netzleitung oder die Antenne kann das Gerät beschädigt werden, auch dann, wenn es ausgeschaltet ist. Ziehen Sie bei Gewitter Netzstecker und Antennenstecker aus der Steckdose bzw. aus dem Fernsehgerät. • Öffnen des Gerätes und Durchführen von Reparaturen sind dem Fachmann vorbehalten. ACHTUNG ! LEBENSGEFAHR. Wenden Sie sich bitte bei erforderlicher Reparatur an Ihren Fachhändler. • Vor dem Reinigen das Gerät mit dem Netzschalter ausschalten ! • Fernbedienung nicht direkt vor die Augen halten und eine Taste drücken ! InfrarotLicht! • In das Batteriefach der Fernbedienung dürfen keine Akkus eingelegt werden. Es dürfen nur 2 Stück Batterien LR03/AM4/AAA 1,5V Micro verwendet werden. • Der Plasma-Bildschirm ist ausschließlich für den Empfang und die Wiedergabe von Bild- und Tonsignalen bestimmt. • Plasma-Bildschirm darf nur mit einer Netzspannung von 230 V ~ 50Hz Wechselstrom betrieben werden. • Netzkabel so verlegen, dass keine Gegenstände darauf stehen oder Personen darüber stolpern können! • Eingriffe dürfen nur durch Fachpersonal durchgeführt werden. 605 47 0024.A1 42TL92 D-GB 02.11.2005 15:59 Uhr Seite 9 2.1 Allgemeines Vor dem Einschalten • Verbinden Sie den Plasma-Bildschirm und die Tuner-Box mit dem beiliegenden LVDS-Kabel. • Schließen Sie die Netzkabel des Plasma-Bildschirms und der Tuner-Box an die Steckdose an. • Drücken Sie am Plasma-Bildschirm und der Tuner-Box den Ein/Aus-Schalter. Die Geräte schalten in Bereitschaft, wobei die LED’s an beiden Geräten rot leuchten. Einschalten • Warten Sie ca. 5 Sek. bevor Sie den Plasma-Bildschirm mit der Taste der Fernbedienung oder den P+/P– Tasten an der TunerBox einschalten. Es wird immer das zuletzt gesehene Programm eingestellt. Die LED’s an beiden Geräten leuchten grün. P+ P– P+ P– Ausschalten Mit der Taste der Fernbedienung in den Standby Zustand schalten oder den Netzschalter am Plasma-Bildschirm drücken. Programmwahl Die Programme können mit den Zifferntasten, den „P+/P–“ Tasten auf der Fernbedienung oder der Tuner-Box oder über die Programmtabelle ausgewählt werden. Die Programmtabelle mit der Taste „INFO“ aufrufen. Mit den Cursorsteuertasten den gewünschten Sender auswählen. Programmtabelle mit der Taste „INFO“ ausblenden. Lautstärke einstellen Mit der – + Taste kann die Lautstärke verstellt werden. 9 605 47 0024.A1 42TL92 D-GB 02.11.2005 15:59 Uhr Seite 10 3. Die Fernbedienung Mit der Metz Fernbedienung RL 18 können der Plasma-Bildschirm sowie zusätzlich Videorecorder VCR1 und VCR 2, DVD23 Player und HiFi–Geräte (z.B. Radio, Kassettendeck, CD-Player, Verstärker etc.) von 22 Metz oder verschiedenen anderen Herstellern in ihren Grundfunktionen ferngesteu21 ert werden. Die Fernbedienung übermittelt die Steuer befehle per Infrarotlicht zum TV–Gerät. Die Fernbedienung muss immer zum TV–Gerät gerichtet sein. Andere infrarotgesteuerte Geräte oder Systeme (z.B. Infrarot-Kopfhörer) im Wirkungsbereich können u.U. gestört werden. ☞ Direkte Sonneneinstrahlung auf das TV–Gerät kann u.U. zu Störungen führen, weil das TV–Gerät die Infrarotsignale der Fernbedienung nicht erkennt. Um das TV–Gerät mit der Fernbedienung steuern zu können, darf es nicht mit der Netztaste ausgeschaltet sein. Die Fernbedienung ist in den Bedienebenen werkseitig wie folgt vorprogrammiert: •TV Metz Plasma-Bildschirm •VCR1 Metz Videorecorder mit Fernbed. RH51 •VCR2 Metz Videorecorder mit Fernbed. RF52 •DVD Metz DVD-Player mit Fernbed. RG/RH37 •HiFi Metz HiFi CD-Receiver HE 11 mit Fernbed. F11 In das Batteriefach der Fernbedienung dürfen keine Akkus eingelegt werden. Es dürfen nur 2 Batterien vom Typ LR03/ AM4/AAA 1,5V Micro verwendet werden. 10 605 47 0024.A1 42TL92 D-GB 02.11.2005 15:59 Uhr Seite 11 3. Die Fernbedienung Die Tastenfunktionen im Überblick EIN auf den Programmplatz vor dem Ausschalten AUS (Stand-by Stellung) 21 zurück zum TV-Betrieb 22 Video Eingangssignal umschalten 23 Select Taste - Umschalten der Bedienebene auf AV-Geräte Bildformat auswählen zurück zum letzten Programm Zifferntasten (direkte Programmwahl) Cursorsteuertaste im Menü OK Bestätigungstaste / Standbild Lautstärke – + Tonstopp TV-Menü aufrufen Programm – Videotext aufrufen Programmtabelle ein- /ausblenden Programm + Bild im Bild (PIP) ein- /ausblenden PIP-Bildlage verändern Bildinhalte von PIP und Hauptbild vertauschen PIP-Bild in Größe verändern Split screen (2fach Bild ein- /ausblenden) Uhrzeit einblenden Umschaltung Mono - Stereo - Zweiton. 11 605 47 0024.A1 42TL92 D-GB 02.11.2005 15:59 Uhr Seite 12 3. Die Fernbedienung 1. Programmieren der Fernbedienung zum Steuern der einzelnen Geräte Damit Ihre UnterhaltungselektronikGeräte ferngesteuert werden können, muss die Fernbedienung in den einzelnen Bedienebenen mit einer 3stelligen Codenummer programmiert werden. • TV (Plasma-Bildschirm) Die TV-Bedienebene ist für den Metz 42“ Plasma-TV PIP programmiert. Eine andere Code-Belegung ist nicht möglich. • VCR 1 (Videorecorder 1) VCR 2 (Videorecorder 2) DVD-Player HiFi (z.B. Verstärker, Tuner, Tape etc.) Die Fernbedienung muss entsprechend der Codeliste mit einem Code programmiert werden. ☞ Beachten Sie die werkseitigen Einstellungen (S. 10) und die CodeListe am Ende der Bedienungsanleitung. 1.1 Code programmieren für VCR und DVD ☞ Nach Anwahl der Bedienschritte a) . . . c) bleibt ein Zeitfenster von ca. 15 sek. erhalten, danach wird automatisch auf die TV–Bedienebene zurückgeschaltet. Innerhalb dieses Zeitfensters muss die Eingabe erfolgen. a) Wählen Sie mit der Select Taste die gewünschte Bedienebene aus. Die farbige LED leuchtet entsprechend der getroffenen Auswahl. 12 b) Gleichzeitig die Tasten und l–ll der Fernbedienung so lange drücken, bis die LED zweimal blinkt. c) Mit den Zifferntasten den gewünschten Code (siehe Codetabelle) eingeben. Wird der Code angenommen, so blinkt die LED wieder zweimal. Ist der Code nicht vorhanden, leuchtet die LED einmal für ca. 2 sek. 1.2 Code programmieren für CD-Player, Tuner und Tape ☞ Nach Anwahl der Bedienschritte a) . . . c) bleibt ein Zeitfenster von ca. 15 sek. erhalten, danach wird automatisch auf die TV–Bedienebene zurückgeschaltet. Innerhalb dieses Zeitfensters muss die Eingabe erfolgen. a) Wählen Sie mit der Select Taste die Bedienebene HiFi aus. Die farbige HiFi LED leuchtet. b) Taste drücken, loslassen und anschliessend die Taste ... ...l–ll für CD-Player (CD-Spieler) ... für Tuner (Radio) ... für Tape (Cassetten-Bandgeräte) der Fernbedienung drücken, bis die LED einmal blinkt. c) Mit den Zifferntasten den gewünschten Code (siehe Codetabelle) eingeben. Wird der Code angenommen, so blinkt die LED wieder zweimal. Ist der Code nicht vorhanden, leuchtet die LED einmal für ca. 2 sek. Ȅ 605 47 0024.A1 42TL92 D-GB 02.11.2005 15:59 Uhr Seite 13 3. Die Fernbedienung 1.3 Code programmieren für HiFi–Verstärker (Amplifier) ☞ Nach Anwahl der Bedienschritte a) . .c) bleibt ein Zeitfenster von ca. 15 sek. erhalten, danach wird automatisch auf die TV–Bedienebene zurückgeschaltet. Innerhalb dieses Zeitfensters muss die Eingabe erfolgen. a) Wählen Sie mit der Select Taste die Bedienebene HiFi aus. Die farbige HiFi LED leuchtet. b) Taste drücken, loslassen und anschliessend die Taste drücken und gedrückt halten, bis die LED zweimal blinkt. c) Taste l–ll drücken. Die LED blinkt einmal d) Mit den Zifferntasten den gewünschten Code (siehe Codetabelle) eingeben. Wird der Code angenommen, so blinkt die LED wieder zweimal. Ist der Code nicht vorhanden, leuchtet die LED einmal für ca. 2 sek. 1.4 Suchlauf Nach Anleitung Code programmieren für ... VCR, DVD, CD, Tuner, Tape vorgehen bis zur Eingabe der Codenummer. Als 3stellige Codenummer "001" für Suchlauf eingeben. Die Eingabe wird mit 2 x LED-Blinken quittiert. Suchlauftaste (je nach Bedienebene, siehe Tabelle Seite 14 und 15) gedrückt halten bis externes Gerät stoppt bzw. abschaltet (alle 1,5 sec wird automatisch ein AUS bzw. STOP-Befehl gesendet). Suchlauftaste loslassen, mit Select-Taste bestätigen (gefundener Code wird gespeichert). Wenn der Suchlauf beendet ist bzw. alle Codenummern abgefragt wurden, blinkt die entsprechende LED 5 mal. 2. Feststellen eines bereits programmierten Codes (Auslesemodus) ☞ Nach Anwahl der Bedienschritte a) . . . e) bleibt ein Zeitfenster von ca. 5 sek. erhalten, danach wird der Auslesemodus verlassen. Innerhalb dieses Zeitfensters muss die Eingabe erfolgen. a) Um zu erfahren, welcher Code auf einer Bedienebene programmiert ist, verfahren Sie wie unter 1.1 a) bis b) beschrieben ist. b) Geben Sie mit den Zifferntasten ein. Die Eingabe wird mit zweimaligem Blinken quittiert. c) Zifferntaste (für die erste Ziffer der Codenummer) drücken. Die Anzahl der Blinkimpulse steht für die programmierte Zahl (z.B. LED blinkt 3 mal - Ziffer 3 ist programmiert). d) Zifferntaste (für die zweite Ziffer der Codenummer) drücken. Die Anzahl der Blinkimpulse steht für die programmierte Zahl (z.B. LED blinkt nicht - Ziffer 0 ist programmiert). e) Zifferntaste (für die dritte Ziffer der Codenummer) drücken. Die Anzahl der Blinkimpulse steht für die programmierte Zahl (z.B. LED blinkt 7 mal - Ziffer 7 ist programmiert). Der ausgelesene Code wäre somit Sollten Sie sich beim Auslesen verzählt haben, so beginnen Sie wieder mit Pkt. 2c). 13 605 47 0024.A1 42TL92 D-GB 02.11.2005 15:59 Uhr Seite 14 3. Die Fernbedienung Ta s t e 23 22 21 21 22 23 14 Ein VCR 1/ 2 Ein / Stand-by Aufnahme Zeitanzeige im Display 0...9 Zifferntasten: Programmwahl Programm +/– Vorlauf / Rücklauf OK OK Vol.+/– Lautstärke +/– TV Mute Stummschaltung TV Menu MENU P- Schaltspannung Ein/Aus Text Info Programmtabelle aufrufen P+ Pause rot STOP / Suchlauf grün PLAY weiß Zeitlupe gelb blau Ȅ I-II TV AV AV - Eingang Select Auswahl Bedienebene Hinweis: Die Zuordnung der Fernbedienungstasten zu den Gerätefunktionen gilt für die werkseitig eingestellten AV-Geräte. Bei Verwendung anderer AV–Geräte gemäß Code-Tabelle, können sich Abweichungen bzw. Einschränkungen ergeben. 605 47 0024.A1 42TL92 D-GB 02.11.2005 15:59 Uhr Seite 15 3. Die Fernbedienung Ta s t e Ein Ein / Stand-by C D ( I-II ) TUNER ( Ȅ ) TAPE ( ) EIN: Display Time/Track EIN: Radiotext ein/aus EIN & AV, EIN:ein/standby Ein & AV, Ein: ein/standby Return Angle 0...9 21 22 23 HiFi DVD Zifferntasten: Titelwahl Cursor auf/ab Cursor links/rechts OK OK / Enter Vol.+/– Lautstärke +/– TV Mute Stummschaltung TV Menu MENU P- Title Text Display I-II & EIN: CD I-II & EIN: CD Zifferntasten: Titelwahl Zifferntasten: Progr.wahl Titel +/– Programm +/– Frequenz +/– Lautstärke +/– AMP Lautstärke +/– AMP Lautstärke +/– AMP Info P+ Pause rot STOP / Suchlauf grün PLAY weiß EJECT Pause STOP / OPEN-CLOSE / Suchlauf Zifferntaste =Suchlauf gelb Skip + blau Skip – Audio Ȅ I-II Subtitle & EIN: Tape-Eingang & EIN: Tape-Eingang AUX Eingang AUX Eingang Ȅ Suchlauf PLAY Ȅ & EIN: Tuner & EIN: Tuner TV AV Repeat Select Auswahl Bedienebene AUX Eingang Auswahl Bedienebene Auswahl Bedienebene Auswahl Bedienebene Suchlauf: Nach Anleitung Code programmieren für ... VCR, DVD, CD, Tuner, Tape vorgehen bis zur Eingabe der Codenummer. Als 3stellige Codenummer "001" für Suchlauf eingeben. Die Eingabe wird mit 2 x LED-Blinken quittiert. Suchlauftaste (je nach Bedienebene, siehe Tabelle) gedrückt halten bis Gerät stoppt bzw. abschaltet (alle 1,5 sec wird automatisch ein AUS bzw. STOP-Befehl gesendet). Suchlauftaste loslassen, mit Select-Taste betätigen (gefundener Code wird gespeichert). Reset: Nach Anleitung Code programmiern für ... VCR, DVD, CD, Tuner, Tape und vorgehen bis zur Eingabe der Codenummer. Als 3-stellige Codenummer "000" für Reset eingeben. Die Eingabe wird mit 2 x LED-Blinken quittiert. Jetzt sind wieder alle werkseitig eingestellten Codes (Auslieferzustand) eingestellt. Reset wird für alle Bedienebenen gleichzeitig durchgeführt, unabhängig in welcher Bedienebene der Reset-Befehl ausgelöst wurde. 15 605 47 0024.A1 42TL92 D-GB 02.11.2005 15:59 Uhr Seite 16 4. Betrieb ohne Fernbedienung Diese Betriebsart ist nur als Notbedienung gedacht, wenn die Batterien Ihrer Fernbedienung leer sind oder die Fernbedienung nicht zur Hand sein sollte. ☞ Die Ortsbedienung finden Sie an der Vorderseite der Tuner-Box. Einschalten Netztaste der Tuner-Box drücken - der Standby Betrieb ist eingeschaltet. Schalten Sie auch den Plasma-Bildschirm mit der Netztaste ein. Die LED’s leuchten rot. Drücken Sie dann die „P+“ oder „P–“ Tasten zum Einschalten. Die LED’s leuchten grün. Lautstärke: z +“ oder „z z –“ Drücken Sie die Taste „z Programmwahl: Tasten „P+“ oder „P–“drücken. Menü: Drücken Sie die Taste „M“. Zur Menüsteuerung z +“ und „Volume –“ die Tasten „P+“ , „P–“ , „z verwenden. TV/AV: Die Taste „AV“ dient zum Umschalten von TV–Betrieb auf AV-Betrieb. 16 605 47 0024.A1 42TL92 D-GB 02.11.2005 15:59 Uhr Seite 17 5. Land einstellen Menü aufrufen Land einstellen Nach dem Aufstellen muss der Aufstellort bzw. das Land (z.B. Deutschland) eingegeben werden. Damit wird dem Gerät eine Grundeinstellung (z.B. Kanalraster etc.) zugewiesen. • TV-Menü mit der Taste „MENU“ aufrufen. • Mit der Cursorsteuertaste das Menü „Einstellungen“ anwählen. MENU • Mit der Cursorsteuertaste den Menüpunkt „TV-Tuner“ anwählen und mit Taste „OK“ öffnen. • Mit der Cursorsteuertaste das Untermenü „APS“ anwählen. OK • Mit der Cursorsteuertaste den Menüpunkt „Land“ anwählen. • Mit der Cursorsteuertaste das gewünschte Land, entsprechend der Auswahl, einstellen. • TV-Menü mit der Taste „TV“ ausblenden. ☞ APS Land Deutschland Die Einstellung wird mit dem Verlassen des TV-Menüs automatisch gespeichert. Mit <Rechts / Links> Land ändern TV 17 605 47 0024.A1 42TL92 D-GB 02.11.2005 15:59 Uhr Seite 18 Menü aufrufen 5.1 Sprache einstellen Sprachwahl im TV-Menü Dem TV-Menü kann eine Sprache entsprechend der angebotenen Auswahl zugeteilt werden. Alle Texte im Menü und in der Bedienhilfe (Information) werden in der gewählten Sprache angezeigt. MENU Sprache einstellen: • TV-Menü mit der Taste „MENU“ aufrufen. • Mit der Cursorsteuertaste das Menü „Optionen“ anwählen. OK • Mit der Cursorsteuertaste den Menüpunkt „Sprache“ anwählen. • Mit der Cursorsteuertaste die gewünschte Sprache, entsprechend der Auswahl, einstellen. • TV-Menü mit der Taste „TV“ ausblenden. ☞ Optionen deutsch Sprache Bildschirmanzeige Zeitli. Menühintergrund Scart 2-Ausgang Scart 4-Ausgang Sleeptimer verbleibende Zeit Mit <Rechts / Links> Sprache ändern TV 18 Die Einstellung wird mit dem Verlassen des TV-Menüs automatisch gespeichert. 605 47 0024.A1 42TL92 D-GB 02.11.2005 15:59 Uhr Seite 19 6. Sender einstellen Menü aufrufen Fernsehsender können auf drei verschiedene Arten eingestellt werden: a) Automatische Sendersuche (APS) Bei der Automatischen Sendersuche wird der gesamte Empfangsbereich automatisch durchsucht. Die gefundenen Sender werden in einer Sendertabelle abgelegt, die am Ende des Suchvorgangs präsentiert wird. Wenn Sie mit der Reihenfolge der gefundenen Sender nicht zufrieden sind, können die Sender noch verschoben oder gelöscht werden, siehe Kapitel „6.2. Sender sortieren“. Automatische Sendersuche durchführen • TV-Menü mit der Taste „MENU“ aufrufen. MENU • Mit der Cursorsteuertaste das Menü „Einstellungen“ anwählen. • Mit der Cursorsteuertaste den Menüpunkt „TV-Tuner“ anwählen. OK • Taste „OK“ drücken. • Mit der Cursorsteuertaste das Untermenü „APS“ öffnen. • Mit der Cursorsteuertaste den Menüpunkt „Auto. Einstellen“ anwählen. • Taste „OK“ drücken. Die Einblendbox fragt nun, ob Sie den Suchlauf wirklich starten möchten. APS Auto. Einstellungen Mit <OK> aktivieren • Nochmals Taste „OK“ drücken und den Suchlauf starten. • Eine Sendertabelle wird, entsprechend der gefundenen Sender, angezeigt. Mit <OK> APS starten • In der Sendertabelle können nicht gewünschte Sender mit der Cursorsteuertaste angesteuert und mit der roten Taste gelöscht werden. ☞ Die Einstellung wird mit dem Verlassen des TV-Menüs automatisch gespeichert. 19 605 47 0024.A1 42TL92 D-GB 02.11.2005 15:59 Uhr Seite 20 Menü aufrufen 6. Sender einstellen b) Manuelle Suche Mit dem manuellen Suchlauf können einzelne Sender mit unbekanntem Kanal bzw. unbekannter Frequenz gesucht werden. MENU Manuelle Suche durchführen • TV-Menü mit der Taste „MENU“ aufrufen. • Mit der Cursorsteuertaste das Menü „Einstellung“ anwählen. • Mit der Cursorsteuertaste den Menüpunkt „TV-Tuner“ anwählen. OK • Taste „OK“ drücken und Untermenü „Programmieren“ öffnen. • Mit der Cursorsteuertaste den Menüpunkt „Manuelle Suche“ anwählen. • Mit der Cursorsteuertaste den Suchlauf Starten. Programmieren • Wenn ein Sender gefunden wird, bleibt der Suchlauf stehen. • Wenn der gefundene Sender gespeichert werden soll, dann wählen Sie mit der Cursorsteuertaste den Menüpunkt „Programm speichern“. Manuelle Suche Mit <Rechts / Links> Kanalsuche starten TV • TV-Menü mit der Taste „TV“ ausblenden. ☞ 20 • Mit der Cursorsteuertaste das gefundene Programm speichern. Das Senderlogo kann geändert werden, siehe Kap. 6.1. 605 47 0024.A1 42TL92 D-GB 02.11.2005 15:59 Uhr Seite 21 6. Sender einstellen Menü aufrufen c) Direkte Kanaleingabe Die direkte Kanaleingabe bietet die Möglichkeit, einen Sender direkt zu programmieren. Bei dieser Art der Sendereinstellung muss die Kanalnummer des Senders bekannt sein. MENU Direkte Kanaleingabe durchführen • TV-Menü mit der Taste „MENU“ aufrufen. • Mit der Cursorsteuertaste das Menü „Einstellungen“ anwählen. OK • Mit der Cursorsteuertaste den Menüpunkt „TV-Tuner“ anwählen. • Taste „OK“ drücken und Untermenü „Programmieren“ öffnen. • Mit der Cursorsteuertaste den Menüpunkt „Kanaltyp“ anwählen. Programmieren • Mit der Cursorsteuertaste den gewünschten Kanaltyp (C = Normalkanal / S = Sonderkanal) einstellen. Kanal Kanaltyp • Mit der Cursorsteuertaste den Menüpunkt „Kanal“ anwählen und mit den Zifferntasten die Kanalnummer eingeben. C S <Rechts / Links> Kanal ändern • Wenn der gefundene Sender gespeichert werden soll, dann wählen Sie mit der Cursorsteuertaste den Menüpunkt „Programm speichern“. • Mit den Cursorsteuertasten das gefundene Programm speichern. • TV-Menü mit der Taste „TV“ ausblenden. ☞ TV Das Senderlogo kann geändert werden, siehe Kap. 6.1. 21 605 47 0024.A1 42TL92 D-GB 02.11.2005 15:59 Uhr Seite 22 Menü aufrufen 6. Sender einstellen Feinabstimmung (Frequenz) MENU OK Bei der Sendereinstellung werden die einzelnen Sender auf Kanalmitte abgestimmt. In der Regel reicht diese Abstimmung aus. Sollte diese Automatik zu keinem befriedigenden Ergebnis führen, kann eine Feinabstimmung durchgeführt werden. Feinabstimmung durchführen • Den Programmplatz einstellen, der abgestimmt werden soll. • TV-Menü mit der Taste „MENU“ aufrufen. • Mit der Cursorsteuertaste das Menü „Einstellungen“ anwählen. • Mit der Cursorsteuertaste den Menüpunkt „TV-Tuner“ anwählen. Programmieren Feinabstimmung • Taste „OK“ drücken und Untermenü „Programmieren“ öffnen. • Mit der Cursorsteuertaste den Menüpunkt „Feinabstimmung“ anwählen. <Rechts / Links> Feinabstimmung TV • Mit den Cursorsteuertasten eine Feinabstimmung vornehmen. • Wenn die Feinabstimmung gespeichert werden soll, dann wählen Sie mit der Cursorsteuertaste den Menüpunkt „Programm speichern“. • Mit den Cursorsteuertasten die Feinabstimmung speichern. • TV-Menü mit der Taste „TV“ ausblenden. 22 605 47 0024.A1 42TL92 D-GB 02.11.2005 15:59 Uhr Seite 23 6.1 Sender-Logo Menü aufrufen Jedem Sender wird über das VPS-Signal ein Senderlogo mit max. 4 Stellen automatisch zugewiesen. Wenn diese Automatik nicht funktioniert oder Sie ein anderes Logo möchten, kann es manuell geschrieben werden. Sender-Logo einstellen • Den gewünschten Programmplatz einstellen. • Taste „INFO“ drücken. • Gelbe Taste drücken und den Änderungsmode aufrufen. • Das Senderlogo kann mit der Taste „AV“ komplett gelöscht werden. • Mit den Cursorsteuertasten können Sie die einzelnen Stellen anwählen und mit den Cursorsteuertasten die Buchstaben bzw. Ziffern ändern. • TV-Menü mit der Taste „TV“ ausblenden. ☞ INFO OK Die Einstellung wird mit dem Verlassen des TV-Menüs automatisch gespeichert. 23 605 47 0024.A1 42TL92 D-GB 02.11.2005 15:59 Uhr Seite 24 Menü aufrufen 6.2 Sender sortieren In der Sendertabelle können einzelne Sender verschoben oder gelöscht werden. Sender verschieben, löschen • Mit der Taste „INFO“ die Programmtabelle aufrufen. INFO • Mit den Cursorsteuertasten den Sender ansteuern, der verschoben oder gelöscht werden soll. • Zum Löschen die rote Taste drücken und im Menü die Sicherheitsabfrage mit „OK“ bestätigen. OK • Zum Verschieben die grüne Taste drücken, das vorher rot umrahmte Senderlogo wird gelb umrahmt und quasi zum „ausschneiden“ bereitgestellt. Programmtabelle • Mit den Cursorsteuertasten das gelb umrahmte Senderlogo an den neuen Platz verschieben Löschen Einfügen TV 24 Name ☞ • Die grüne Taste drücken und der Sender wird am markierten Platz eingefügt. Alle anderen Programmplätze werden entsprechend verschoben ! • „Programmtabelle“ mit der Taste „TV“ ausblenden. 605 47 0024.A1 42TL92 D-GB 02.11.2005 15:59 Uhr Seite 25 7. Programmwahl Programmwahl u. Programmplatzverwaltung Der Plasma-Bildschirm kann max. 100 Programmplätze (0-99) in der Sendertabelle verwalten. Diese Programmplätze können Sie mit den Zifferntasten, den „P+/P–“ Tasten oder über die Programmtabelle anwählen. Nach dem Drücken einer Zifferntaste haben Sie ein Zeitfenster von 3 Sek. um weitere Zifferntasten zu drücken. Programmwahl über die Programmtabelle Im normalen Fernsehbetrieb kann die Programmtabelle mit der Taste „INFO“ aufgerufen werden. In der eingeblendeten Tabelle können die Programme mit den Cursorsteuertasten angesteuert werden. Das angesteuerte Programm wird eingeblendet. Zurück zum letzten Programm P+ P– INFO OK Mit der Taste kann zwischen den zwei zuletzt gewählten Programmplätzen hin- und hergeschalten werden. Beispiel: Sie sehen das Programm RTL. Während der Werbung schalten Sie mit den Zifferntasten auf das Programm ARD. Mit der Taste kann nun zwischen diesen beiden Programmen hin- und hergeschalten werden. 25 605 47 0024.A1 42TL92 D-GB 02.11.2005 15:59 Uhr Seite 26 Menü aufrufen 8. Bildeinstellungen Die Bildeinstellungen (Helligkeit, Kontrast, Schärfe etc.) können generell für alle Programme eingestellt werden. Bildeinstellungen aufrufen: • TV-Menü mit der Taste „MENU“ aufrufen. MENU • Mit der Cursorsteuertaste das Menü „Bild“ anwählen. • Mit der Cursorsteuertaste den gewünschten Menüpunkt „Helligkeit“, „Kontrast“, „Schärfe“ oder „Farbe“ anwählen. • Mit den Cursorsteuertasten können die einzelnen Bildeinstellungen verändert werden. OK • TV-Menü mit der Taste „TV“ ausblenden. ☞ Bild Helligkeit <Rechts / Links> Helligkeit einstellen TV 26 Die Einstellung wird mit dem Verlassen des TV-Menüs automatisch gespeichert. 605 47 0024.A1 42TL92 D-GB 02.11.2005 15:59 Uhr Seite 27 9. Audio / Toneinstellungen Menü aufrufen Die Toneinstellungen (Lautstärke, Kopfhörer-Lautstärke, Balance usw.) können im Menü „Audio“ eingestellt werden. Audioeinstellungen aufrufen: • TV-Menü mit der Taste „MENU“ aufrufen. • Mit der Cursorsteuertaste das Menü „Audio“ anwählen. • Mit der Cursorsteuertaste den gewünschten Menüpunkt „Lautstärke“, „Kopfhörer-Lautstärke“, „Kopfhörer-Tonmodus“, „Balance“, „Subwoofer“ oder „Equalizer“ anwählen. • Mit den Cursorsteuertasten können die einzelnen Audioeinstellungen verändert werden. • TV-Menü mit der Taste „MENU“ ausblenden. ☞ Die Einstellung wird mit dem Verlassen des TV-Menüs automatisch gespeichert. MENU OK Audio Subwoofer Subwoofer An der Rückseite der Tuner-Box können Sie einen aktiven Subwoofer zur <Abwärts> Optimierung der Basswiedergabe anschliesen. Schalten Sie nach Anschluss eines Subwoofers den Menüpunkt EIN. AUS für Audioeinstellungen Equalizer (Tonmodus) Einstellungen: Für den Equalizer gibt es die Standardeinstellungen „Normal“, „POP“, „Rock“, „Jazz“ und „Klassik“. Wenn Sie mit den Standardeinstellungen nicht zufrieden sind, können Sie unter „Benutzer“ Ihre persönliche Einstellung konfigurieren. 27 605 47 0024.A1 42TL92 D-GB 02.11.2005 15:59 Uhr Seite 28 10. Sonderfunktionen Bild im Bild (PIP) Menü aufrufen Das PIP-Bild kann für ein anderes TV-Programm oder die Einblendung eines AV-Gerätes genutzt werden. Bild im Bild (PIP) ein- / ausblenden: • Drücken Sie die rote Taste. Das PIP-Bild wird eingeblendet. OK • Mit den Cursorsteuertasten können die Bildinhalte selektiert werden. Der selektierte Bildinhalt ist mit einem grünen Rahmen gekennzeichnet. • Mit den Zifferntasten oder den „P+/P–“ Tasten kann im selektierten Bild ein anderer Programmplatz eingestellt werden. • Durch mehrmaliges Drücken der Taste „AV“ kann im selektierten Bild ein AV-Programm (z.B. Videorec. oder Camera usw.) eingestellt werden. • Das eingeblendete PIP-Bild kann in 8 Stufen gezoomt werden, dazu die gelbe Taste drücken und anschließend mit den Cursorsteuertasten das PIP-Bild vergrößern oder verkleinern. • Das eingeblendete PIP-Bild kann in seiner Position verändert werden, dazu die grüne Taste drücken und danach mit den Cursorsteuertasten das PIP-Bild verschieben. • Mit der weißen Taste können die Bildinhalte vertauscht werden. • Rote Taste drücken und das PIP-Bild wird ausgeblendet. ☞ 28 Die Einstellungen werden mit dem Ausblenden des PIP-Bildes automatisch gespeichert. 605 47 0024.A1 42TL92 D-GB 02.11.2005 15:59 Uhr Seite 29 10. Sonderfunktionen Bildgröße Funktion aufrufen Mit der Funktion „Bildgröße“ können Sendungen der verschiedenen Formate an das Breitbildformat des Bildschirms angepasst werden. Das Bild wird je nach Einstellung linear oder nicht linear gezoomt. Bildformat aufrufen: • Die Taste drücken, am unteren Bildschirmrand erscheint die Einblendung für das eingestellte Bildformat. OK • Mit den Cursorsteuertasten kann nun die Einstellung ausgewählt werden. oder über das Menü „Fenster“ Auswahlmöglichkeiten Bildformat: Normal: Die Sendungen werden im Standardformat 4:3 wiedergegeben. Auto: (bevorzugte Einstellung) Der Bildinhalt wird entsprechend des Eingangssignales (4:3 oder 16:9) formatrichtig wiedergegeben. Bei TV wird das WSS-Signal ausgewertet, wird vom Sender kein WSS-Signal gesendet wird das Bild wie in der Einstellung "Ausfüllen" dargestellt. Ausfüllen: Bildschirmfläche wird formatunabhängig immer horizontal ausgefüllt. 16:9 Bildsignale im 16:9 Format werden soweit vergrößert, dass der Bildschirm vertikal vollständig ausgeschrieben wird, an den Seiten bleiben dann nur noch schmale schwarze Streifen. Tipp: Sendungen im 4:3 Format können mit dieser Einstellung vergrößert dargestellt werden, es wird lediglich am oberen und unteren Bildrand ein geringer Teil des Bildinhaltes abgeschnitten. Letterbox: Wenn eine Sendung oben und unten einen schwarzen Streifen hat, können diese ausgeblendet werden. Untertitel: Das Bild wird gezoomt und nach oben geschoben, damit der Untertitel gut lesbar erscheint. ☞ Die Einstellung wird mit dem Verlassen des TV-Menüs automatisch gespeichert. 29 605 47 0024.A1 42TL92 D-GB 02.11.2005 15:59 Uhr Seite 30 10. Sonderfunktionen Split Screen Bei der „Split Screen“ Darstellung wird der Bildschirm in zwei gleichgroße Hälften geteilt. Der geteilte Bildschirm kann mit der Taste einund ausgeschaltet werden. Der Ton wird nach dem Aufrufen der Funktion prinzipiell von der Sendung auf der linken Seite wiedergegeben. Mit den Cursorsteuertasten können die Bilder selektiert werden. Ein selektiertes Bild wird kurzzeitig mit einem grünen Rahmen versehen. Nun kann das Programm mit den Zifferntasten, den „P+/P–“ Tasten oder der „AV“ Taste umgeschaltet werden. Ebenso können Sie Bildeinstellungen (siehe Kap. 8) vornehmen. Der Ton wird vom selektierten Bild wiedergegeben. Wird die Funktion mit der Taste ausgeschaltet, so schaltet der Plasma-Bildschirm immer auf die Sendung, die in der linken Bildhälfte dargestellt wird um. ☞ Die Einstellung wird mit dem Verlassen der Funktion automatisch gespeichert. 10. Sonderfunktionen Standbild OK 30 Nach Drücken der Taste „OK“ wird das Bild sofort eingefroren und am Bildschirm angezeigt. Die Sendung (oder Videofilm) läuft jedoch im Hintergrund weiter. Nach dem wiederholten Drücken der Taste wird wieder auf die laufende Sendung (oder Videofilm) umgeschaltet. 605 47 0024.A1 42TL92 D-GB 02.11.2005 15:59 Uhr Seite 31 10. Sonderfunktionen Sleep Timer Menü aufrufen Mit der Programmierung des Sleeptimers können Sie festlegen, wann der Plasma-Bildschirm automatisch ausschaltet. Der Sleeptimer kann auf Aus, 30, 60, 90 oder 120 Minuten eingestellt werden. MENU OK Sleeptimer einstellen: • TV-Menü mit der Taste „MENU“ aufrufen. • Mit der Cursorsteuertaste das Menü „Optionen“ anwählen. • Mit der Cursorsteuertaste den Menüpunkt „Sleeptimer“ anwählen. • Mit den Cursorsteuertasten die gewünschte Zeit einstellen, nach der das TV–Gerät automatisch ausgeschaltet wird. • TV-Menü mit der Taste „TV“ ausblenden. ☞ Optionen Sprache Bildschirmanzeige Zeitli. Menühintergrund Scart 2-Ausgang Scart 4-Ausgang Sleeptimer verbleibende Zeit Die Einstellung wird mit dem Verlassen des TV-Menüs automatisch gespeichert. Scart 3 FAV Schlafzeit einstellen 30 minuten Sleeptimer einstellen TV 10. Sonderfunktionen Uhrzeit einblenden Ȅ Die Uhrzeit kann mit der Taste eingeblendet werden, wenn Sie einen Sender eingestellt haben, der Videotext ausstrahlt. Auf Programmplätzen, die keinen Videotext ausstrahlen, kann keine Uhrzeit eingeblendet werden. Die Uhrzeit wird nach ca. 4 Sekunden automatisch ausgeblendet. Ȅ 31 605 47 0024.A1 42TL92 D-GB 02.11.2005 15:59 Uhr Seite 32 Menü aufrufen 11. Videotext Der Videotext ist ein zusätzlicher, kostenloser i Infoservice der Sendeanstalten. In dieser elektronischen Zeitung kann auf verschiedene Arten geblättert werden. TEXT Videotext aufrufen: • Taste „TEXT“ drücken. Am Bildschirm erscheint die Seite 100 (Inhaltsverzeichnis) des Videotextes. Videotext steuern bei angezeigten Seiten: • Mit der blauen Taste kann im Videotext die Themenauswahl durchgeblättert werden. • Mit der gelben Taste kann im Videotext die Kapitelauswahl durchgeblättert werden. • Mit der roten Taste können die Videotextseiten rückwärts geblättert werden. • Mit der grünen Taste können die Videotextseiten vorwärts geblättert werden. Wenn bestimmte Seiten angesteuert werden sollen, geben Sie die Seitennummer mit den Zifferntasten ein. Unterseiten werden automatisch weitergeblättert. Videotext ausblenden: • Taste „TV“ oder „TEXT“ drücken. 32 605 47 0024.A1 42TL92 D-GB 02.11.2005 15:59 Uhr Seite 33 12. Kopfhörer anschließen Der Kopfhöreranschluss befindet sich an der Vorderseite der Tuner-Box. Wir empfehlen Kopfhörer mit einer Impedanz von nicht weniger als 32 Ω. Bei Kopfhörer mit kleinerer Impedanz (ca. 8 Ω), verringert sich der Aussteuerbereich. Bei 2-Ton-Sendungen kann, unabhängig von den Gerätelautsprechern, Ton 1 oder Ton 2 über den Kopfhörer wiedergegeben werden. Kopfhörertoneinstellungen können im Audio-Menü (siehe Kap. 9 ) vorgenommen werden. Kopfhöreranschluss 33 605 47 0024.A1 42TL92 D-GB 02.11.2005 15:59 Uhr Seite 34 Menü aufrufen AV oder MENU OK 13. AV Geräte AV-Geräte (Audio/Video) sind Zusatzgeräte, die Bildoder/und Tonsignale ausgeben (z.B. Videorecorder, DVD-Player, Decoder, Videokamera etc.) und an ein TV–Gerät angeschlossen werden können. Videorecorder, DVD-Player usw. können an der Scart 1- oder Scart 2-Buchse angeschlossen werden. Decoder müssen an der Scart 1-Buchse angeschlossen werden. Wenn die AV-Geräte an den Scart-Buchsen auf Wiedergabe (FBAS-Signal) geschaltet werden, so schaltet der Plasma-Bildschirm automatisch in den AV–Modus, wenn das AV-Gerät eine Schaltspannung ausgibt. Wenn AV-Geräte an den Front-Buchsen angeschlossen sind, muss bei Wiedergabe im TV–Gerät manuell in den AV–Modus geschaltet werden. Einstellungen Quelle Auswahl Scart 1 Scart 1 RGB Scart 2 Scart 2 RGB Scart 3 Scart 4 BAV PC <OK> aktiviert Auswahl der Signalquelle AV-Modus manuell einstellen • Die Taste „AV“ mehrmals drücken und die AV-Programmplätze werden der Reihe nach durchgeschaltet - oder • TV-Menü mit der Taste „MENU“ aufrufen. • Mit der Cursorsteuertaste das Menü „Einstellungen“ anwählen. • Mit der Cursorsteuertaste den Menüpunkt „Quelle Auswahl“ anwählen. • Taste „OK“ drücken und Untermenü „Quelle Auswahl“ öffnen. • Mit den Cursorsteuertasten die Quelle bzw. Anschlussbuchse anwählen, die für das gewünschte AV-Gerät notwendig ist. • Mit der Cursorsteuertaste die Einstellung der Quelle bzw. Anschlussbuchse aktivieren. • AV-Gerät im entsprechenden Modus starten. 34 605 47 0024.A1 42TL92 D-GB 02.11.2005 15:59 Uhr Seite 35 13. AV Geräte Auswahlmöglichkeiten • Tuner Der vom Plasma-Bildschirm empfangene Sender wird am Bildschirm gezeigt. • Scart 1/2/3/4 Das Bild vom AV-Gerät, welches an der jeweiligen Scart–Buchse angeschlossen ist, wird im Format FBAS gezeigt. • Scart 1/2 RGB Das Bild vom AV-Gerät, welches an der jeweiligen Scart–Buchse angeschlossen ist, wird im Format RGB gezeigt. • PC und DVI Das Bild vom angeschlossenen PC wird angezeigt. Im Menü „Fenster“ können Bildgröße und Bildlage eingestellt werden. Im Menü „Bild“ können Helligkeit, Kontrast und Phase (Bildabgleich für die Bildschärfe, wird bei Anschluss an den PC automatisch vorgenommen) eingestellt werden. • BAV (Back-AV-Buchse, In/Out) an der Rückseite der Tuner-Box • FAV (Front-AV-Buchse) Das Bild vom AV-Gerät, welches an der Front–Buchse angeschlossen ist, wird im FBAS–Bildsignal gezeigt. Fenster Hinweis: Dieses Menü erscheint nur bei Anschluss über PC oder DVI. <Abwärts> Größeneinstellungen Bild Hinweis: Dieses Menü erscheint nur bei Anschluss über PC oder DVI. <Abwärts> Bildeinstellungen für aktuel. Fenster • S-Video Das Bild vom AV-Gerät, welches an der Front–Buchse angeschlossen ist, wird im S–Video–Bildsignal (YC) gezeigt. 35 605 47 0024.A1 42TL92 D-GB 02.11.2005 15:59 Uhr Seite 36 Menü aufrufen MENU OK 13. AV Geräte Überspielen Der Plasma-Bildschirm hat einen Überspiel- oder Kopiermodus, d.h., das an der Scart 2-Buchse angeschlossene Aufnahmegerät kann das Bild aufzeichnen, welches vom Abspielgerät an der „FAV“ (Front-AV-Buchse), von der Scart 1-Buchse oder dem Tuner geliefert wird. Scart 2-Ausgang einstellen: • TV-Menü mit der Taste „MENU“ aufrufen. • Mit der Cursorsteuertaste das Menü „Optionen“ anwählen. • Mit der Cursorsteuertaste den Menüpunkt „Scart 2-Ausgang“ anwählen. Optionen Sprache Bildschirmanzeige Zeitli. Menühintergrund Scart 2-Ausgang Scart 4-Ausgang Scart 3 FAV Sleeptimer <Rechts / Links> Scart 2-Ausgang auswählen TV 36 ☞ • Mit den Cursorsteuertasten die Buchse auswählen, an der das gewünschte Abspielgerät angeschlossen ist. • Am Aufnahmegerät eine Aufnahme starten und am Abspielgerät auf „Play“ drücken. • TV-Menü mit der Taste „TV“ ausblenden. Die Einstellung wird mit dem Verlassen des TV-Menüs automatisch gespeichert. 605 47 0024.A1 42TL92 D-GB 02.11.2005 15:59 Uhr Seite 37 13. AV Geräte Menü aufrufen Bildqualität bei Bildeinspielung von Bandgeräten MENU Die VCR-Funktion sorgt bei Bildeinspielungen von Bandgeräten z.B. Camcorder oder Videorecordern für eine optimale Bildqualität. ☞ Die VCR-Funktion im Menü „Optionen“ ist nur anwählbar, wenn z. B. der angeschlossene Videorecorder ein Signal liefert. VCR-Funktion einstellen • Wiedergabe am AV-Gerät starten. • TV-Menü mit der Taste „MENU“ aufrufen. • Mit der Cursorsteuertaste das Menü „Optionen“ anwählen. • Mit der Cursorsteuertaste den Menüpunkt „vcr“ anwählen • Mit den Cursorsteuertasten kann die Funktion ein- und ausgeschaltet werden. • TV-Menü mit der Taste „MENU“ ausblenden. ☞ OK Optionen Sprache vcr Bildschirmanzeige Zeitli. Menühintergrund Scart 2-Ausgang Scart 4-Ausgang Sleeptimer verbleibende Zeit EIN Scart 3 FAV 30 minuten Mit <Rechts / Links> VCR ein- und ausschalten Die Einstellung wird mit dem Verlassen des TV-Menüs automatisch gespeichert. 37 605 47 0024.A1 42TL92 D-GB 02.11.2005 15:59 Uhr Seite 38 13. AV Geräte - PC Anschluss des PC über den VGA-Eingang Schalten Sie Computer und TV-Gerät aus, bevor Sie die Anschlüsse vornehmen. Schließen Sie das VGA-Kabel an den VGA-Eingang Ihres TV-Geräts und an die 15-polige Buchse an der Rückseite Ihres Computers an. Ziehen Sie die Schrauben an den Steckern fest, bis die Anschlüsse fest verbunden sind. Wenn Sie ein Windows-Betriebssystem auf einem PC mit einer Microsoft Plug&Play-kompatiblen Grafikkarte verwenden, wählt Ihr System automatisch die beste Bildwiederholrate für Ihren Monitor aus. Anschluss des PC über den DVI-Eingang (Digital Video Interface) Um die bestmögliche Bildqualität zu erzielen, müssen Sie die DVI-Buchsen am TV-Gerät und an Ihrem PC verwenden. Dadurch kann der PC ein rein digitales Signal von der Grafikkarte direkt an das TFT-TV-Gerät senden. Da an dem TFT-TV-Gerät eine DVI-I-Buchse vorhanden ist, sollten Sie ein DVI-D- oder DVI-I-Kabel für den Anschluss verwenden. Es werden DDC (Display Data Channel) und EDID (Extended Display Identification Data), die für die Plug & Play-Kompatibilität verwendet werden, unterstützt. Hot-Plug-Detektion wird nicht unterstützt. Niedrige Bildwiederholraten wie 60Hz oder 72Hz sollten verwendet werden. Auch sollte die native Auflösung vorgezogen werden. Die DVI-Schnittstelle unterstützt kein HDCP (High Bandwidth Digital Content Protection), daher kann kein HDCP-tauglicher DVD-Player verwendet werden. 38 605 47 0024.A1 42TL92 D-GB 02.11.2005 15:59 Uhr Seite 39 13. AV Geräte - PC PC Eingang typische Bildschirmmodi Der Bildschirm hat eine maximale Auflösung von 1280 x 768, einen vertikalen sync. Frequenzbereich von 50-75Hz und einen horizontalen sync. Frequenzbereich von 30-69 KHz. Die folgende Tabelle beinhaltet einige typische Video Bildschirmmodi. Die Standardauflösung des TFT-LCD Bildschirm ist 1280 x 768. Deshalb ist es ratsam, als Modus 14 für die beste PC Eingang Bildschirmqualität zu wählen. 39 605 47 0024.A1 42TL92 D-GB 02.11.2005 15:59 Uhr Seite 40 14. Reinigung und Pflege ☞ Vor dem Reinigen ist das Gerät mit dem Netzschalter auszuschalten ! ☞ Unsachgemäße Behandlung und Reinigung können den Bildschirm irreparabel beschädigen. Beachten Sie daher die Vorschriften zur Behandlung und Pflege des Gerätes. Behandlung: Behandeln Sie die Bildschirmoberfläche sehr sorgsam und pfleglich. Vermeiden Sie jegliche mechanische Beanspruchung der Bildschirmoberfläche durch Schlag, Stoß, Druck, Kratzen, Schaben etc., da dies eine Beschädigung verursachen kann. Verhindern Sie den Kontakt mit spitzen, scharfkantigen oder harten Gegenständen. Die Bildschirmoberfläche ist vor Verschmutzung zu bewahren. Pflege und Reinigung: Vor dem Reinigen das Gerät abschalten und den Netzstecker ziehen. Die Reinigung der Bildschirmoberfläche muß mit einem trockenen, weichen Reinigungstuch (z.B. Microfasertuch) erfolgen. Sollten dennoch stärkere Verschmutzungen entstanden sein, kann die Reinigung der Bildschirmoberfläche mit einem nur leicht angefeuchteten, weichen Tuch erfolgen. Achten Sie darauf, dass niemals Wasser oder andere Flüssigkeiten in das Gerät eindringen, da diese eine Beschädigung des Gerätes verursachen. Ziehen Sie sofort den Netzstecker, falls Fremdkörper wie Wasser, sonstige Flüssigkeiten, Metallteile usw. in den Bildschirm gelangt sind. Versuchen Sie niemals mit irgendwelchen Gegenständen oder mit den Händen in das Gerät zu fassen. Es besteht die Gefahr eines elektrischen Schocks oder Unfalls. 40 605 47 0024.A1 42TL92 D-GB 02.11.2005 15:59 Uhr Seite 41 15. Technische Daten Netzspannung: 220 - 240 V ˜ 50 Hz Antenneneingang: 75 Ohm asymmetrisch DIN 45325 Empfangsbereich: Standardkanäle 2 - 12, 21 - 69 Plasma-Bildschirm und Tuner-Box ca. 355 W (Sinusleistung) DIN 45324 an 4 Ω bei 1 kHz Musikleistung nach TC 59 X) Leistungsaufnahme: (nach CENELEC / S1 - S20, S21 - S41, S42 ... S46 (Belgien Kanäle OIR) Leistungsaufnahme Sonderkanäle 2 x 14 W (2 x 8 W) Energieverbrauch pro Stunde (Wh): siehe Leistungsaufnahme in W x 1 Stunde Stand-by: Plasma-Bildschirm: ca. 3 Wh Tuner-Box: ca. 7 Wh Abmessungen: Plasma-Bildschirm mit Standfuß (H x T x B) 717 mm x 340 mm x 1049 mm Breite mit angebauten Lautsprechern: 1295 mm Technische Änderungen und Irrtümer vorbehalten ! 41 605 47 0024.A1 42TL92 D-GB 02.11.2005 15:59 Uhr Seite 42 16. Batterie-Entsorgung Batterien/Akkus gehören nicht in den Hausmüll! Bitte bedienen Sie sich bei der Rückgabe verbrauchter Batterien/Akkus eines vorhandenen Rücknahmesystems. Bitte geben Sie nur entladene Batterien/Akkus ab. Batterien/Akkus sind in der Regel dann entladen, wenn das damit betriebene Gerät - abschaltet und signalisiert „Batterien leer“ - nach längerem Gebrauch der Batterien nicht mehr einwandfrei funktioniert. Zur Kurzschlußsicherheit sollten die Batteriepole mit einem Klebestreifen überdeckt werden. Deutschland: Als Verbraucher sind Sie gesetzlich verpflichtet, gebrauchte Batterien zurückzugeben. Sie können Ihre alten Batterien überall dort unentgeltlich abgeben, wo die Batterien gekauft wurden. Ebenso bei den öffentlichen Sammelstellen in Ihrer Stadt oder Gemeinde. Diese Zeichen finden Sie auf schadstoffhaltigen Batterien: Pb = Batterie enthält Blei Cd = Batterie enthält Cadmium Hg = Batterie enthält Quecksilber Li = Batterie enthält Lithium 42 605 47 0024.A1 42TL92 D-GB 02.11.2005 15:59 Uhr Seite 43 Problem Plasma-Bildschirm reagiert nicht auf Fernbedienung Mögliche Ursache • Kein Sichtkontakt zwischen Fernbedienung und PlasmaBildschirm. • Direktes Sonnenlicht scheint auf des Infrarotfenster des Plasma-Bildschirmes. • Batterien der Fernbedienung leer. • Plasma-Bildschirm oder Tuner-Box sind mit der Netztaste ausgeschaltet. • Störung am Prozessor Abhilfe • Sichtkontakt herstellen. • Sonnenlichteinstrahlung vermeiden. • Batterien erneuern. • Plasma-Bildschirm und/ oder Tuner-Box mit der Netztaste einschalten. • Plasma-Bildschirm mit der Netztaste aus- und wieder einschalten. • LVDS-Kabel (Verbindung • Verbindung überprüfen. Plasma-Bildschirm - Tuner-Box) ist nicht korrekt angeschlossen Ihr Metz-Produkt wurde mit hochwertigen Materialien und Komponenten entworfen und hergestellt, die recycelbar sind und wieder verwendet werden können. Dieses Symbol bedeutet, dass elektrische und elektronische Geräte am Ende ihrer Nutzungsdauer vom Hausmüll getrennt entsorgt werden müssen. Bitte entsorgen Sie dieses Gerät bei Ihrer örtlichen kommunalen Sammelstelle oder im Recycling Centre. Bitte helfen Sie mit, die Umwelt in der wir leben, zu erhalten. 43 605 47 0024.A1 42TL92 D-GB 02.11.2005 15:59 Uhr Seite 44 Codeliste BLACK PANTHER BLAUPUNKT 616 491 508 607 614 BONDSTEC 466 BONDSTECBRANDT 505 BRANDT ELECTRONIQUE 503 574 BRAUN 570 BRIONVEGA 450 BROKSONIC 481 BRUNS 466 BUSH 588 Codes Video Metz VG61 532 VF21, VF44, VF46 VF61, VE21, VE43 VE44, VE45, VD21 VD43, VD44, VD45 VC21, VC43, VC44 VC62, 21VB11 42VB12, 21VA12 21VA13, 42VA11 64VA14, 9836,9837 9847, 9874, 9875 9876, 9877 Metz VF22, VF47 CALIN 568 VF48, 9843, 9844 9849 Metz VH22, VH47 573 VH48 ACTION ADMIRAL ADVANTZ ADVENTURA ADYSON AGHA AIWA AKAI AKIBA AKURA ALBA ALLORGAN ALLSTAR AMWAY ANITECH ART TECH ASA ASBERG ASTRA ASUKA ASUKA ASWO AUDIO DYNAMICS AUDIOSONIC AUDIOTON AUDIOVOX AVIS BAIRD BANG & OLUFSEN BASIC LINE BAUR BEAUMARK BELL & HOWELL BESTAR 44 468 481 481 468 487 547 481 477 481 505 575 487 487 466 547 529 529 487 575 478 575 481 481 527 528 505 575 466 481 487 505 503 487 513 607 547 468 466 481 487 547 481 547 505 562 572 482 508 609 483 546 612 484 554 505 588 593 490 529 481 528 CALIX CANDLE CARRERA CARVER CGE CIE CIMLINE CLARIVOX CLASSIC CLATRONIC COLORTYME COLT CONDOR CONTINENTAL EDISON CRAIG CROSLEY CROWN CROWN CRYSTAL CTC CURTIS MATHES CYBEREX DAEWOO DANSAI DAWA DAYTRON DE GRAAF DECCA DECCAVIDEO DENON DIGITAL DORIC DTS DUAL 547 487 616 DUEL DUMONT DYNATECH 547 ECONOMIC 583 547 609 616 565 612 599 EDISON ELBE ELCATECH ELECTROHOME ELECTROPHONIC ELIN ELTA EMERSON 481 481 481 547 527 505 487 487 606 481 466 547 487 466 503 481 481 487 490 575 466 505 547 466 487 575 466 529 528 528 527 477 601 547 503 530 505 468 487 510 487 616 487 481 481 547 487 481 496 527 609 621 487 502 530 610 507 532 612 504 505 524 575 487 590 490 593 481 487 547 616 504 487 507 505 547 527 547 575 616 547 468 553 481 505 504 505 527 481 487 527 547 616 616 605 47 0024.A1 42TL92 D-GB 02.11.2005 15:59 Uhr Seite 45 Codeliste EPC ESC ETZUKO EUROPHON EXPERT 505 466 487 586 604 586 510 FERGUSON 501 555 487 468 477 468 481 505 574 523 595 524 596 477 481 473 487 478 487 528 575 601 603 FIDELITY FINLUX FIRST LINE FISHER FUNAI GAB GBC GE GEC GELOSO GITEM GOLDHAND GOLDSTAR GOODMANS GRAETZ GRANADA GRANDIN GRUNDIG GRUNDIG GUTTRONIC HANSEATIC HANTAREX HARLEY DAVIDSON HARVARD HCM HEADQUARTER HINARI HINARIHITACHI HITACHI HYPSON IMPERIAL INGERSOL INNO HIT INNO HIT INTERBUY INTERDISCOUNT INTERFUNK INTERVIDEO INTERVISION IRRADIO ITT ITV 487 466 547 528 466 575 487 468 556 466 617 468 468 542 601 481 451 457 461 491 496 530 585 610 602 481 575 481 481 466 468 487 475 481 530 604 487 510 509 510 616 481 575 468 600 466 487 481 450 466 598 616 JENSEN JETPOINT JVC JVC_LCD 571 604 KAISER KAISUI KAPSCH KARCHER KENDO KENWOOD KLH KLIT KODAK KORPEL KUBA LEYCO 490 481 575 487 621 505 474 557 605 487 452 458 462 492 497 531 600 611 547 610 530 600 477 565 606 604 453 459 463 493 507 563 606 612 552 616 603 532 575 616 454 460 464 495 527 584 609 613 575 487 487 490 509 476 485 535 477 503 601 478 505 603 LG LIESENKOTTER LLOYD LLOYD’S LOEWE LOEWE OPTA LOGIK LUXOR LXI MAGNADYNE M ELECTRONICS MAGNASONIC MAGNAVOX MAGNIN MAGNUM MANESTH MARANTZ MARQUANT MARTA MATRIX MATSUI MATSUSHITA MEDIATOR MEMOREX MEMPHIS MGA MGN MINERVA MINOLTA MITSUBISHI 575 547 575 MULTITECH MURPHY 487 527 601 487 468 481 565 603 575 483 575 604 606 505 NAD NATIONAL NEC NECKERMANN 505 575 503 520 515 575 487 600 575 483 468 481 487 481 487 473 487 578 575 481 601 481 481 487 468 518 468 575 547 470 481 481 581 487 491 487 481 481 486 562 527 527 468 487 547 547 606 477 477 542 487 481 466 601 547 507 504 450 491 509 519 504 545 521 505 601 603 519 505 487 504 565 487 606 491 491 509 478 601 477 505 510 547 575 527 547 483 517 481 481 507 547 582 487 527 547 547 528 490 565 566 509 586 560 601 561 610 481 547 609 610 612 505 609 547 519 612 468 527 481 487 575 505 469 493 510 528 576 470 496 512 541 477 505 513 565 477 45 605 47 0024.A1 42TL92 D-GB 02.11.2005 15:59 Uhr Seite 46 Codeliste NEI NESCO NIKKAI NIKKO NOBLIKO NOKIA NOVATRONIC OCEANIC OKANO OLYMPIC OLYMPUS ORION OTTO VERSAND PAEL PALLADIUM PANASONIC PATHE MARCONI PAXSONIX PENNEY PENTAX PERSHIN PHILCO PHILIPS PHILIPS PHILIPS PHILIPS PHILIPS PHILIPS (F) PHONOLA PILOT PIONEER PRIMA PROFEX PROFILE PROSCAN PROTEC PULSAR PULSER PYE QTY1 QUARTER QUARTZ QUASAR QUELLE 46 575 575 487 466 481 606 450 488 505 518 554 601 500 515 602 575 483 487 466 507 481 537 560 527 508 544 609 616 606 481 507 533 623 503 547 477 477 606 481 481 529 550 568 624 491 527 481 477 505 487 547 477 487 481 468 565 592 468 481 507 450 470 610 611 616 QUELLE 468 489 510 547 557 603 503 521 470 503 516 551 567 604 504 524 483 504 517 553 600 QUESTAR 489 601 604 509 538 561 474 512 565 610 620 531 558 589 493 513 575 611 621 536 559 591 496 541 599 612 487 508 549 491 527 600 505 532 601 505 574 505 481 507 491 530 563 575 625 565 527 527 507 547 564 620 547 528 548 565 621 RADIOLA RADIONETTE RADIX RANDEX RANDIU RANK/BUSH/MURPHY RCA REALISTIC REDIFFUSION REX RICOH ROADSTAR ROYAL SABA SABA SABA SAISHO SALORA SALORA SAMBERS SAMEX SAMSUNG SANKY SANSUI SANWA SANYO SBR SCHAUB LORENZ SCHNEIDER 575 527 547 490 539 481 483 547 481 575 547 547 527 459 471 547 RADIALVA 575 529 461 474 547 464 477 SCOTT SEARS SEG SEI-SINUDYNE SELECO SENTRA SETRON SHARP SHINTOM SHIVAKI SHOGUN SHORAI SICE SIEMENS 478 496 505 512 529 599 610 616 466 484 497 508 513 541 604 611 621 487 503 509 519 565 606 612 481 527 601 497 481 481 601 477 468 601 503 481 481 466 487 575 604 527 481 481 483 547 547 487 487 547 617 503 521 601 509 468 517 504 524 603 575 470 505 540 483 547 575 575 505 575 469 577 470 586 471 468 478 527 564 575 604 483 481 529 569 578 505 487 530 571 581 477 490 528 504 481 510 547 505 545 462 470 481 493 464 472 486 494 499 515 574 486 467 516 606 547 510 597 487 487 509 468 551 527 450 477 510 563 573 582 481 468 487 509 503 466 466 468 487 481 547 509 609 459 468 479 491 491 504 510 528 575 609 614 505 487 544 575 612 461 469 480 492 605 47 0024.A1 42TL92 D-GB 02.11.2005 15:59 Uhr Seite 47 Codeliste SIEMENS SILMA SILVA SINGER SINUDYNE SOLAVOX SONOKO SONOLOR SONTEC SONY SR1000 STS SUNWOOD SYLVANIA SYMPHONIC TAISHO TALENT TANDBERG TANDY TASHIKO TATUNG TEAC TEC TECHLINE TECHNICS TECHNILAND TECHNISAT TEKNANT TEKNIKA TELEAVIA TELEAVIA TELEFUNKEN TELEORDER TELERENT TELESERVICE TELETECH TENOSAL TENSAI THOMAS THOMSON THORN THORN-FERGUSON TOKAI TOSHIBA TOTEVISION TOWADA TOWIKA 495 511 607 612 575 481 487 509 599 466 575 601 481 506 541 547 477 487 527 481 509 609 623 468 528 505 505 466 487 527 575 563 575 481 503 505 500 515 579 547 505 609 487 487 481 575 547 499 505 60 474 505 586 612 501 575 609 481 474 547 481 487 487 496 525 609 614 497 530 610 547 513 575 527 498 584 611 616 575 604 512 599 487 513 623 514 TRIAD TRIX TVA 575 481 466 UHER 466 505 450 565 606 547 560 481 530 606 604 ULTRAVOX UMA UMA UNITECH UNITED UNIVERSUM UNIVOX VICTOR 505 466 554 547 481 481 VIDEOMASTER VIDEOPLUS VIDEOSONIC VIEWMARK VIEWMAX 527 500 524 6226 482 542 604 503 574 503 601 612 487 481 547 490 527 575 621 545 547 YOKAN YOKO 487 487 466 510 481 547 ZENITH 481 505 574 509 491 571 612 487 565 487 490 Codes DVD-Player METZ AKAI BLUEsky 490 483 547 609 547 XR1000 YAMISHI 487 593 604 614 487 532 612 601 612 477 575 481 450 575 528 575 529 527 504 524 503 589 WEGAVOX WELTBLICK WHITE WESTINGHOUSE WINSTON WIZJA WORLDVIEW 503 521 594 481 543 562 WARDS 612 477 510 616 575 609 Boxford 204 254 256 CYBER HOME 223 247 504 594 DENON 216 243 248 501 565 606 503 575 609 EMERSON GAME 504 604 505 606 505 527 Cytron D-i-K DUAL 239 214 230 263 253 262 255 222 232 238 HARMAN/KARDON 206 205 210 260 261 JVC KENWOOD 212 246 231 263 GOLDSTAR GRAND PRIX GRUNDIG HITACHI KISS 208 270 47 605 47 0024.A1 42TL92 D-GB 02.11.2005 15:59 Uhr Seite 48 Codeliste DIORA DUAL 949 822 832 859 994 FISCHER 830 831 920 953 GOLDSTAR GOODMANNS GOODMANS GRUNDIG 885 872 888 908 911 912 913 HARMAN KARDON 905 853 931 934 935 INTERSOUND 960 937 JVC 844 903 848 904 849 992 902 233 237 KENWOOD 847 878 963 858 879 859 925 250 KRELL 820 877 948 908 LINN LUXMAN 908 924 964 946 METZ HE11 882 833 908 955 908 908 908 972 908 955 LABWAVE LG LINN LOEWE 200 263 215 219 201 MARANTZ MbyN MEDIENCOM MEDION MEGATON MUSTEK MYRYAD 218 271 241 221 240 256 269 219 272 NAD NONAME 207 228 ONKYO 209 266 225 226 PANASONIC 216 276 219 234 278 203 251 228 267 274 275 220 235 227 236 204 249 ORION PHILIPS PIONEER PROLINE SAMSUNG SCHAUB LORENZ SCHNEIDER SEG SHERWOOD SILVA SCHNEIDER SONY SUNKAI 210 255 244 201 224 243 211 242 TECHNICS TEVION THOMSON TOSHIBA UNITED YAMAHA 236 228 257 258 HITACHI ITT 273 268 248 263 263 229 264 216 228 213 202 217 259 277 245 246 252 255 266 216 278 234 265 Codes HIFI - CD AIWA AKAI AKKAI AMSTARD AMSTRAD ARCAM ASWO 815 856 856 957 929 908 909 BANG & OLUFSEN BRAUN BUSH 808 975 888 CAMBRIDGE 945 945 908 DAEWOO DENON 876 801 853 961 CAMBRIDGE AUDIO CARVER 48 816 857 817 872 884 921 940 942 956 MARANTZ MATSUI MEDION MERIDIAN MAGNAVOX MICROMEGA MINOWA MISSION MTC 812 899 962 803 807 OKANO 869 819 PALLADIUM PMG PROTON 810 834 833 965 824 862 923 906 908 QUAD 908 RADIOTONE 958 911 PIONEER 845 900 846 901 909 947 908 930 938 888 802 806 PANASONIC PHILIPS 976 908 NAD NAIM NAKAMICHI NOKIA NONAME NSM ONKYO RADMOR 967 804 805 871 827 861 881 851 915 908 866 918 909 870 825 863 826 864 850 922 965 911 605 47 0024.A1 42TL92 D-GB 02.11.2005 15:59 Uhr Seite 49 Codeliste REVOX REVOX/STUDER ROTEL 829 910 818 SABA 926 908 939 908 852 821 869 888 928 960 978 982 986 SAE SAMSUNG SANSUI SANYO SCHNEIDER DENON 860 840 870 892 929 972 979 983 987 919 841 873 911 955 973 980 984 988 799 936 833 872 876 886 891 892 892 842 896 990 888 908 800 943 867 873 880 887 969 813 944 868 874 883 889 970 T+A 882 T+A ELECTROAKUSTIK 882 TECHNICS 809 950 TENSAI 954 THOMSON 823 974 SUPERTECH SYLVANIA UHER 814 869 966 995 UNIVERSUM UNKNOWN YAMAHA 828 941 843 897 991 945 916 993 893 898 968 868 885 927 959 977 981 985 989 847 869 875 885 890 971 895 932 879 971 900 850 851 935 FISCHER 893 894 985 998 GOLDSTAR GOODMANNS GOODMANS GRUNDIG 964 833 867 976 979 980 HARMAN KARDON HITACHI 926 915 984 931 ITT 918 919 JVC 862 994 863 995 974 996 975 997 KENWOOD 848 957 917 958 935 990 936 993 LINN LUXMAN 888 876 889 877 884 989 METZ HE11 961 887 922 999 NAD NAKAMICHI NOKIA OKANO ONKYO 903 927 920 948 846 902 959 904 905 906 949 847 856 901 982 980 855 941 999 912 942 885 886 896 937 867 873 919 986 868 874 947 869 878 964 864 908 923 993 909 910 881 882 946 MARANTZ 917 918 ONKYO PALLADIUM 872 979 908 952 854 855 933 PANASONIC PHILIPS PIONEER 978 860 977 SAMSUNG 883 897 985 930 866 872 918 976 839 890 911 AMSTRAD ASWO 842 963 845 934 916 976 BANG & OLUFSEN BRAUN BUSH 836 870 835 SHARP SHERWOOD DAEWOO 907 SIEMENS AKAI 843 844 962 849 945 913 951 933 987 944 928 921 853 938 943 RADMOR REVOX REVOX/STUDER Codes HIFI - Tape AIWA 841 970 DIORA DUAL 966 SINOTEC SINOTEC (PEPSI-DOSE) SONY 840 892 908 951 SHARP SHERWOOD SIEMENS 834 891 972 899 837 936 SANY SANYO SCHNEIDER 880 960 929 976 854 939 988 861 49 605 47 0024.A1 42TL92 D-GB 02.11.2005 15:59 Uhr Seite 50 Codeliste 947 953 964 865 967 992 950 954 976 925 968 T+A T+A ELEKTROAKUSTIK TECHNICS THOMSON 871 961 838 852 961 UNIVERSUM 868 947 SONY YAMAHA 857 924 951 955 952 956 965 969 966 991 898 875 950 858 932 981 886 859 ASH ASWO 376 734 452 469 744 427 BANG & OLUFSEN BUSH 369 748 DAEWOO DENON 739 372 471 423 991 DIORA DUAL 458 371 445 461 370 381 994 FISCHER 434 449 GOLDSTAR GOODMANNS GOODMANS GRUNDIG 746 737 748 427 429 HARMAN KARDON HITACHI 418 453 730 991 ITT 412 JVC 414 448 425 KENWOOD 417 741 439 994 LINN LUXMAN 472 438 474 METZ HE11 MARANTZ MINOWA MISSION 743 450 409 426 NOKIA 410 AKAI AMSTRAD 50 459 419 748 OKANO 733 379 736 440 PALLADIUM 731 371 427 383 996 735 432 450 384 997 ONKYO 983 895 914 Codes HIFI - Tuner AIWA NAD NAKAMICHI NONAME 377 737 455 745 993 464 PANASONIC PHILIPS PIONEER 447 740 437 999 463 476 990 380 392 396 400 404 412 469 735 465 473 995 388 393 397 401 407 441 470 746 390 394 398 402 408 442 732 748 446 456 427 480 738 457 477 732 739 478 733 746 416 420 421 SUPERTECH 411 475 433 374 391 395 399 403 409 443 733 749 373 413 426 479 737 747 749 749 389 422 466 T+A T+A ELEKTROAKUSTIK TECHNICS TENSAI THOMSON 405 743 387 406 382 743 430 431 462 UHER 375 403 737 467 473 733 YAMAHA 385 992 415 435 454 986 766 829 831 SHARP SHERWOOD SIEMENS UNIVERSUM 446 436 998 SAMSUNG SINOTEC SINOTEC (PEPSI-DOSE) SONY 444 451 386 427 428 378 REVOX/STUDER RADMOR ROTEL 468 450 742 REVOX SANYO SCHNEIDER 424 460 Codes HIFI - Amp AIWA AKAI AMSTRAD ASH ASWO 777 753 785 840 776 793 985 754 813 605 47 0024.A1 42TL92 D-GB 02.11.2005 15:59 Uhr Seite 51 Codeliste BANG & OLUFSEN BRAUN BUSH DAEWOO DENON 996 960 748 SAMSUNG SANYO SCHNEIDER DIORA DUAL FISCHER 750 820 839 GRUNDIG 794 749 779 795 766 804 782 HARMAN KARDON 760 751 823 HITACHI ITT 827 JBL JVC 821 792 975 816 819 KENWOOD 755 771 818 LINN LUXMAN 794 810 795 845 954 METZ HE11 MARANTZ MEDION MERIDIAN MINOWA MISSION 774 794 785 795 978 799 795 798 NOKIA NAD NAKAMICHI NIAM NONAME 826 834 822 795 782 OKANO 763 772 765 982 PALLADIUM 783 991 PIONEER PRO-LOGIC 761 764 805 793 797 757 957 808 794 798 758 994 795 803 795 QUAD 795 RADIOTONE RADMOR REVOX REVOX/STUDER ROTEL 841 801 843 796 983 802 977 797 984 803 SABA 811 ONKYO PALLADIUM/OKANO PANASONIC PHILIPS 837 756 764 783 794 815 951 962 966 970 978 990 832 763 769 780 794 950 T+A 774 T+A ELEKTROAKUSTIK 774 TECHNICS 805 993 TENSAI 958 THOMSON 980 959 782 770 751 817 835 952 GOODMANNS GOLDSTAR 828 750 763 782 786 814 842 961 965 969 973 818 825 762 768 779 785 948 786 786 787 782 789 988 790 981 995 791 SHARP SHERWOOD SIEMENS SINOTEC SINOTEC (PEPSI-DOSE) SONY SUPERTECH 955 UHER UNIVERSUM 987 763 963 YAMAHA 752 844 846 768 784 812 827 953 963 967 971 779 785 813 840 956 964 968 972 833 766 770 781 800 767 775 784 947 974 991 806 836 976 766 838 844 809 979 824 830 788 796 992 798 51 605 47 0024.A1 42TL92 D-GB 02.11.2005 15:59 Uhr Seite 52 Geräte-Pass Bundesrepublik Deutschland Nur gültig, wenn ordnungsgemäß und vollständig ausgefüllt. Durch Änderungen verliert der Geräte-Pass seine Gültigkeit. Sorgfältig aufbewahren. Verlorene Urkunden werden nicht ersetzt. Typ: Verkaufsdatum: Gerätecode: Anschrift des Käufers: 1. Die nachfolgenden Bestimmungen haben nur für den privaten Gebrauch Gültigkeit. 2. Die Garantiezeit - 24 Monate - beginnt mit dem Abschluß des Kaufvertrages bzw. mit dem Tag der Auslieferung des Gerätes an den Käufer (Endverbraucher). 3. Garantieanspüche können nur unter Nachweis des Kaufdatums durch Vorlage der durch den Fachhändler vollständig ausgefüllten Garantieurkunde und des maschinell erstellten Kaufbeleges geltend gemacht werden. 4. Beanstandete Geräte bitten wir zusammen mit dieser Garantieurkunde und dem Kaufbeleg entweder über den Fachhändler oder direkt an die Firma Metz-Werke GmbH & Co KG - Zentralkundendienst - Ohmstrasse 55, 90513 Zirndorf, transportsicher verpackt unter genauer Schilderung der Beanstandung einzusenden. Sie können unter den gleichen Bedingungen auch an die autorisierten Kundendienststellen der Firma Metz-Werke GmbH & Co KG eingesandt werden. Hin- und Rücksendung erfolgen auf Gefahr des Käufers. 5. Die Garantie besteht darin, daß Geräte, die infolge eines anerkannten Fabrikations- oder Materialfehlers defekt geworden sind, kostenlos repariert oder, soweit eine Reparatur unverhältnismäßig ist, ausgetauscht werden. Eine weitergehende Haftung, insbesondere für Schäden, die nicht am Gerät selbst entstanden sind, ist ausgeschlossen. Dies gilt nicht, soweit im Falle des Vorsatzes oder der groben Fahrlässigkeit zwingend gehaftet wird. Garantieleistungen bewirken weder eine Verlängerung der Garantiezeit, noch wird für die ersetzten oder nachgebesserten Teile eine neue Garantiezeit begründet. 6. Unsachgemäße Behandlung und Eingriffe durch den Käufer oder Dritte schließen die Garantieverpflichtungen sowie alle weiteren Ansprüche aus. Ausgenommen von der Garantie sind ferner Schäden oder Fehler, die durch Nichtbeachtung der Gebrauchsanleitung, mechanische Beschädigung, ausgelaufene Batterien oder durch höhere Gewalt, Wasser, Blitz etc. entstanden sind. Ferner sind Verschleiß, Verbrauch sowie übermäßige Nutzung von der Garantie ausgenommen. 7. Der Garantieanspruch besteht nur in Deutschland und ist ab 01.01.2002 gültig. 8. Durch diese Garantieurkunde werden die Gewährleistungsansprüche des Käufers gegenüber dem Verkäufer nicht berührt. 190 90 0391 Flachbildschirm Stempel und Unterschrift des Fachhändlers 01/46/14 Unterschrift des Käufers 605 47 0024.A1 42TL92 D-GB 02.11.2005 15:59 Uhr Seite 53 Plasma TV Set 42“ PIP 42 TM92 Operating Instructions 605 47 0024.A1 42TL92 D-GB 02.11.2005 15:59 Uhr Seite 54 Thank you Contents Dear Customer, 1. thank you for selecting this Metz 1.1 product. 1.2 1.3 In this TV set, we have provided 1.4 a menu guidance system which, 1.5 2. we believe, will permit you to 2.1 operate the set easily. 3. However, before using the set for 4. the first time, you should at least 5. 5.1 read Sections 1 to 7 of these 6. Operating Instructions. 6.1 6.2 Your METZ-WERKE 7. 8. 9. 10. 11. 12. 13. The plasma monitor is a product which employs the latest technology. Occasionally, some inactive pixels may appear on the screen 14. as fixed blue, green or red dots. 15. Please note that these do not 16. affect the performance of the TV set. 54 Setting up . . . . . . . . . . . . . . . . . . . . . . .55 Wall mounting . . . . . . . . . . . . . . . . . . . .56 Loudspeaker . . . . . . . . . . . . . . . . . . . . .57 Installation . . . . . . . . . . . . . . . . . . . . . . .58 Controls on the plasma monitor . . . . . . . .58 Controls and connectors on the tuner box 59 Safety notes . . . . . . . . . . . . . . . . . . . . . .60 General information . . . . . . . . . . . . . . . .61 The remote control . . . . . . . . . . . . . . . . .62 Operation without the remote control . . . .68 Selecting your country . . . . . . . . . . . . . .69 Selecting a language . . . . . . . . . . . . . . .70 Tuning to TV stations . . . . . . . . . . . . . . . .71 Station logos . . . . . . . . . . . . . . . . . . . . .75 Sorting the stations . . . . . . . . . . . . . . . . .76 Selecting a station . . . . . . . . . . . . . . . . .77 Picture settings . . . . . . . . . . . . . . . . . . . .78 Sound settings . . . . . . . . . . . . . . . . . . . .79 Special functions Picture in picture (PIP) . . . . . . . . . . . . . . .80 Picture size . . . . . . . . . . . . . . . . . . . . . .81 Split screen . . . . . . . . . . . . . . . . . . . . . .82 Freeze frame . . . . . . . . . . . . . . . . . . . . .82 Sleep timer . . . . . . . . . . . . . . . . . . . . . .83 Displaying the time . . . . . . . . . . . . . . . . .83 Teletext . . . . . . . . . . . . . . . . . . . . . . . . .84 Connecting headphones . . . . . . . . . . . . .85 AV devices . . . . . . . . . . . . . . . . . . . . . . .86 Selecting AV devices . . . . . . . . . . . . . . . .87 Copying . . . . . . . . . . . . . . . . . . . . . . . .88 VCR function . . . . . . . . . . . . . . . . . . . . .89 Connecting the PC via VGA / DVI input . .90 PC input typical display modes . . . . . . . .91 Cleaning the set . . . . . . . . . . . . . . . . . . .92 Technical data . . . . . . . . . . . . . . . . . . . .93 Disposal of exhausted batteries . . . . . . . .94 Troubleshooting . . . . . . . . . . . . . . . . . . .95 Code list . . . . . . . . . . . . . . . . . . . . . . . .96 605 47 0024.A1 42TL92 D-GB 02.11.2005 15:59 Uhr Seite 55 1. Setting up The Plasma TV Set consists of the components: plasma monitor, stand, wall mounting bracket, two loudspeakers with bases and the tuner box. Fitting the base The stand has two vertical panels at the front and back. The (higher) rear panel, with a slot for the cables, is secured with four screws and must be removed before the plasma TV set is mounted on the stand. Slide the stand into the guides on the rear of the TV set and secure it carefully with four screws (M5 x 20 mm). Plug in the power cable and the cable to the tuner box, lay them through the slot in the rear panel and secure the panel to the rear of the stand. Front panel, fixed Cable slot Rear panel, removed Left loudspeaker Plasma monitor Right loudspeaker Stand 4 screws M5 x 20mm 4 screws M5 x 12mm Loudspeaker bracket 55 605 47 0024.A1 42TL92 D-GB 02.11.2005 15:59 Uhr Seite 56 1.1 Wall mounting Wall mounting Non-compliance with these instructions can result in serious injuries to persons and/or major damage to the TV set. The plasma monitor may be mounted only on vertical walls, using the wall bracket. Never attempt to mount the wall bracket and the monitor on your own; always obtain the assistance of a second person. • Take great care when securing the wall bracket to the wall. The bracket must not only support the monitor under normal circumstances, but must also withstand any shocks, vibration, etc. which may occur. • Before starting work, check the stability and thickness of the wall. Ask your local DIY store for suitable metal screws and wall plugs. • The wall must be solid and capable of handling the load (i.e. it must be made of bricks, limestone blocks, concrete or similar materials). • If the wall is made of other materials (such as wood, plasterboard, etc.) have the wall bracket mounted by an experienced tradesman. SUSPENSION SCREWS MOUNTING BRACKET PLASMA MONITOR PLASTIC WALL PLUG (M10 x 50) SCREW (M7 x 60) WALL MOUNTING BRACKET MOUNTING HOLE WALL 56 605 47 0024.A1 42TL92 D-GB 02.11.2005 15:59 Uhr Seite 57 1.1 Wall mounting Mounting the plasma monitor on a wall 1. To mount the plasma monitor on a wall, first remove the stand (Fig. 1) by unscrewing the four screws (M5 x 20) which hold it to the monitor and pulling the stand off. The plasma monitor can be mounted on a wall with or without the loudspeakers attached to it. 2. The wall mounting bracket is secured to the wall with four wall plugs (Ø10 x 50) and four screws (Ø7 x 60) as shown in Fig. 2. First select the position for the monitor. Hold the mounting bracket in a horizontal position against the wall and mark the positions of the four mounting holes on the wall. Drill four holes for the plastic wall plugs, insert the plugs and secure the mounting bracket to the wall with four screws (Ø7 x 60). 3. Lift the plasma monitor and engage the two suspension screws on the rear of the monitor with the matching holes in the wall mounting bracket. 1.2 Loudspeakers Mounting the loudspeakers on the monitor Place the plasma monitor face-down on a smooth, flat surface such as a table (Fig. 3). Place the loudspeakers on the left and right sides of the monitor. Align the loudspeaker brackets (two for each loudspeaker) with the holes in the plasma monitor and secure each bracket with four screws (M5 x 12) to the loudspeaker and the monitor. Connect the loudspeaker cables to the monitor. PLASMA MONITOR LOUDSPEAKER BRACKET RIGHT LOUDSPEAKER RED BLACK LOUDSPEAKER SOCKETS LEFT LOUDSPEAKER SCREW (M5 x 12) 57 605 47 0024.A1 42TL92 D-GB 02.11.2005 15:59 Uhr Seite 58 1.3 Installation • Take care that no bright lights (including sunshine) shine directly on the screen, since this can cause reflections and reduce the apparent brilliance of the picture. • The best viewing distance is about five times the diagonal dimension of the screen. For a TV set with a 107 cm screen, it is thus about 5.35 m. • All cables and components connected between the antenna/broadband socket in the wall and the TV set must comply with European Standard EN 60966-2-4. • There may be no magnetic fields in the immediate vicinity of the TV set. External loudspeakers should thus be positioned at a suitable distance from the set. • The antenna connection cable used for the set should have a screening attenuation of at least 75 dB. • The use of unapproved cables and components will invalidate the type approval of the TV set. 1.4 Controls on the plasma monitor Front view ON/OFF SWITCH PILOT LAMP Rear view 58 Socket for mains cable Connector for LVDS cable to tuner box 605 47 0024.A1 42TL92 D-GB 02.11.2005 15:59 Uhr Seite 59 1.5 Controls and connectors on the tuner box Front view On/off switch Audio input left/right Video input Headphone socket S-VHS input Volume control Programme selector P+ / P Menu key AV key/signal selection Rear view A B C D E F G Subwoofer output Loudspeaker output left/right Antenna Video Out Video In SCART 1 all pins connected SCART 2 H I J K L M N SCART 3 SCART 4 LVDS (output to plasma monitor) Audio In (from PC) DVI - input (from PC) VGA - input (from PC) Socket for mains cable 59 605 47 0024.A1 42TL92 D-GB 02.11.2005 15:59 Uhr Seite 60 2. Safety notes With plasma displays, there is always the risk that an image may be "burnt" into the screen if, for example, a static picture (such as a freezeframe display of a TV picture, a Teletext page, a PC image or a signal from a DVD player) is displayed for a long period. This results in differences in the brightness between illuminated and inactive pixels which can become visible as soon as a different picture is displayed. In order to prevent permanent damage to the display, you should thus always take care that static pictures are not displayed for long periods. Wherever possible, make use of any screen-saver functions offered by the connected devices (such as DVD player, video recorder or PC). - vases, etc. containing liquids on or above the TV set. Hot wax or other liquids which enter the set will destroy its electronic components. In such cases, safe operation of the set is no longer guaranteed. • Thunderstorms can damage electrical devices. Lightning hitting overhead power cables or the antenna can cause considerable damage to the set, even if it is switched off. If there is a risk of a thunderstorm, you should remove the power cable from the wall outlet and disconnect the antenna cable from the outlet or from the TV set. • Only suitably trained persons may open the set and/or carry out repairs. CAUTION: RISK OF ELECTRIC SHOCKS! If repairs should be necessary, please consult your local dealer. • Place the TV set on a solid surface which is capable of bearing the weight! • Always switch off the TV set with the mains switch before cleaning it! • If you bring a cold TV set into a warm room, wait until any condensation has evaporated before switching it on. • Do not point the remote control into your eyes and press any keys. The infrared radiation can damage your eyes! • The TV set is intended for use in dry rooms. If, in exceptional cases, you want to use it outdoors, take care that it is not exposed to moisture (rain, splashwater, dew). • Do not use rechargeable batteries in the remote control. Use only two dry batteries of the type LR03/AM4/AAA 1.5V Micro. • TV sets need sufficient cooling to prevent them from overheating. Ensure that the slots in the rear cover are not blocked by curtains, doily, newspapers, etc. Also keep the slots on the bottom of the set free so that cool air can enter the set. • The TV set may be operated only from a mains voltage of 220 – 240VAC ˜, 50Hz. • If you install the TV set in a wall cabinet, ensure that there is sufficient space around it to permit the circulation of cooling air. • Do not position the TV set in the immediate vicinity of a radiator or other heater, since this could cause it to overheat. • Do not place - burning candles 60 • The TV set is intended only for the reception and display of picture and sound signals. • Lay the mains cable so that no-one can trip over it and so that no objects (furniture, etc.) stand on it! • Repairs may be carried out only by suitably qualified persons. 605 47 0024.A1 42TL92 D-GB 02.11.2005 15:59 Uhr Seite 61 2.1 General information Before switching on • Connect the plasma monitor to the tuner box with the enclosed LVDS cable. • Connect the mains cables of the plasma monitor and the tuner box to a mains outlet socket. • Press the on/off switch on the plasma monitor and the tuner box to switch the two units to standby mode. The LEDs on both units light red. Switching on After connecting the cables, wait for about five seconds before switching on the plasma monitor with the key on the remote control or with the P+/P- keys on the tuner box. The LEDs on both units switch to green. The TV set is tuned to the last station you were watching before it was switched off. P+ P– P+ P– Switching off Press the key on the remote control to switch to standby mode or press the on/off switch on the plasma monitor. Selecting stations You can select the desired station with the numeric keys, with the P+/P- keys on the remote control or tuner box or with the aid of the station list. Open the station list by pressing the INFO key and use the cursor keys to select the desired station. Then close the station list by pressing the INFO key again. Adjusting the volume The volume can be adjusted with the – + key. 61 605 47 0024.A1 42TL92 D-GB 02.11.2005 15:59 Uhr Seite 62 3. The remote control 23 22 21 The Metz Remote Control RL 18 can be used to control the TV set and the basic functions of video recorders VCR1 and VCR 2, a DVD player and HiFi units (such as radio, cassette player, CD player, amplifier, etc.) made by Metz or various other manufacturers. The remote control sends the commands to the Tuner box with the aid of infrared radiation. Always point the remote control at the Tuner box when using it. The remote control may occasionally interfere with the operation of other infrared-controlled devices or systems (such as infrared headphones) within its range. ☞ Ensure that no sunlight falls directly on the TV set, since this may result in malfunctions because the set cannot detect the infrared signals from the remote control. Note that the TV set must be switched on with the mains switch before it can be controlled with the remote control. The various operating levels of the remote control are programmed as follows in the factory: •TV Metz TV sets •VCR1 Metz VCR with remote control RH51 •VCR2 Metz VCR with remote control RF52 •DVD Metz DVD player with remote control RG/RH37 •HiFi Metz HiFi CD receiver HE 11 with remote control F11 Do not use rechargeable batteries in the remote control. Use only two dry batteries of the type LR03/ AM4/AAA 1.5V Micro. 62 605 47 0024.A1 42TL92 D-GB 02.11.2005 15:59 Uhr Seite 63 3. The remote control Overview of the key functions 21 Back to TV mode ON at the programme position selected when the set was switched off OFF (standby) 22 Select video input signal 23 Select key – Switches to the operating level for AV devices Select aspect ratio (picture format) Back to previous programme position Numeric keys (direct programme selection) Cursor key for menus OK (confirm) / Freeze frame Volume - + Mute Open TV menu Programme Open Teletext Display/hide programme list Programme + Display/hide picture in picture (PIP) Change PIP position Exchange contents of PIP and main picture Change size of PIP picture Split screen (display/hide double picture) Display the time Select Mono - Stereo + Dual tone. 63 605 47 0024.A1 42TL92 D-GB 02.11.2005 15:59 Uhr Seite 64 3. The remote control 1. Programming the remote control for the individual devices 1.2 Entering the codes for CD player, tuner and tape In order to control your various devices with the remote control, you must first programme it with a three-digit number for each operating level. • TV (Plasma monitor) The TV operating level is programmed in the factory for the Metz 42“ Plasma monitor. You cannot enter any other code. • VCR 1 (video recorder 1) VCR 2 (video recorder 2) DVD player HiFi (e.g. amplifier, tuner, tape, etc.) The remote control must be programmed with suitable codes from the code list. ☞ ☞ Note the factory settings (page 6) and see the code list at the end of this manual. 1.1 Entering the codes for VCR and DVD ☞ After executing steps a) to c), you have about 15 seconds to make further entries. If you do not do so, the remote control returns automatically to the TV operating level. a) Use the Select key to select the desired operating level. The coloured LED for the selected level lights. b) Press and hold the keys and l–ll until the LED blinks twice. c) Enter the appropriate code (see the code list) with the numeric keys. If the code is accepted, the LED again blinks twice. If you enter a non-existent code, the LED lights once for about two seconds. 64 After executing steps a) to c), you have about 15 seconds to make further entries. If you do not do so, the remote control returns automatically to the TV operating level. a) Use the Select key to select the operating level HiFi. The coloured HiFi LED lights. b) Press the key, release it and then press the key: ...l–ll for CD player, ... Ȅ for tuner (radio) or ... for tape (cassette recorder) on the remote control until the LED blinks once. c) Enter the appropriate code (see the code list) with the numeric keys. If the code is accepted, the LED again blinks twice. If you enter a non-existent code, the LED lights once for about two seconds. 605 47 0024.A1 42TL92 D-GB 02.11.2005 15:59 Uhr Seite 65 3. The remote control 1.3 Entering the code for a HiFi amplifier 2. Reading out a programmed code ☞ ☞ After executing steps a) to d), you have about 15 seconds to make further entries. If you do not do so, the remote control returns automatically to the TV operating level. a) Use the Select key to select the operating level HiFi. The coloured HiFi LED lights. b) Press the key, release it and then press the key until the LED blinks twice. c) Press the l–ll key. The LED blinks once. d) Enter the appropriate code (see the code list) with the numeric keys. If the code is accepted, the LED again blinks twice. If you enter a non-existent code, the LED lights once for about two seconds. 1.4 Search function Proceed as described above for input of the code for VCR, DVD, CD, tuner or tape until you reach the step where the code number is entered. Now enter the code "001" to select the search function. The LED blinks twice. Then press the search key (the actual key depends on the operating level; see the table on pages 10 and 11) and hold it until the device stops or switches off (an Off or STOP command is transmitted automatically every 1.5 seconds). Now release the Search key and press the Select key to save the code which was found. At the end of the search, when all existing codes have been interrogated, the corresponding LED blinks five times. After executing steps a) to e), you have about 15 seconds to make further entries. If you do not do so, the remote control returns automatically to the TV operating level. a) In order to see which code is programmed for an operating level, first proceed as described in 1.1 a) to b). b) Use the numeric keys to enter . The LED blinks twice to acknowledge the input. c) Press numeric key to display the first digit of the code. The LED now blinks several times to show the value (e.g. the LED blinks three times: the digit 3 is programmed). d) Press numeric key to display the second digit of the code. The LED now blinks several times to show the value (e.g. the LED does not blink: the digit 0 is programmed). e) Press numeric key to display the third digit of the code. The LED now blinks several times to show the value (e.g. the LED blinks seven times: the digit 7 is programmed). In this example the programmed code is thus . If you lose track during this operation, simply start again at step 2c). 65 605 47 0024.A1 42TL92 D-GB 02.11.2005 15:59 Uhr Seite 66 3. The remote control Key 23 22 21 21 22 23 66 On VCR 1/ 2 On / Standby Record Time in display 0...9 Numeric keys: progr. selection Programme +/– Fast forward / Rewind OK OK Vol.+/– Lautstärke +/– TV Mute TV mute Menu MENU P- Switching voltage on/off Text Info Disp./hide programme list P+ Pause red STOP / Search green PLAY white Slow-motion yellow blue Ȅ I-II TV AV AV - Eingang Select Auswahl Bedienebene Note: The above key assignments are true for the AV devices programmed in the factory. If other AV devices shown in the code list are used, the assignments may be different and some may not be available. 605 47 0024.A1 42TL92 D-GB 02.11.2005 15:59 Uhr Seite 67 3. The remote control Key On On / Standby C D ( I-II ) TUNER ( Ȅ ) TAPE ( ) ON: Display time/track ON:Radio-text on/off ON&AV, ON:On/Standby ON&AV, ON: On/Standby Return Angle I-II & ON: CD I-II & ON: CD 0...9 Numeric keys: title selection Num.keys: title select. Num.keys: progr.select. Cursor up/down Cursor left/right OK OK / Enter Vol.+/– TV volume +/- Mute TV mute Menu MENU 21 22 23 HiFi DVD P- Title Text Display Title +/– Programme +/– Frequency +/– AMP volume +/- AMP volume +/- AMP volume +/- Info P+ Pause red STOP/Search green PLAY white EJECT yellow Skip + blue Skip – I-II Subtitle Ȅ Audio Pause STOP/OPEN-CLOSE/Search Num.key =Search Search PLAY Ȅ Ȅ & ON: Tuner & ON: Tape input & ON: Tuner & ON: Tape input TV AV Repeat AUX input AUX input AUX input Select Select operating level Select operating level Select operating level Select operating level Search: Proceed as described above for entering the codes for VCR, DVD, CD, tuner, tape as far as the step where the code number is entered. Then enter "001" for the search function. The LED blinks 2x to acknowledge the input. Then press and hold the search key (which depends on the operating level; see the table) until the device stops or switches off (a STOP or OFF command is automatically transmitted every 1.5 seconds). Then release the search key and press the Select key to save the code which was found. Reset: Proceed as described above for entering the codes for VCR, DVD, CD, tuner, tape as far as the step where the code number is entered. Then enter "000" for the reset function. The LED blinks 2x to acknowledge the input. All codes are now reset to the factory default settings. The reset is executed for all operating levels, regardless of the level from which it is initiated. 67 605 47 0024.A1 42TL92 D-GB 02.11.2005 15:59 Uhr Seite 68 4. Operation without the remote control This operating mode is provided only for situations where, for example, the batteries in your remote control are flat or you cannot find the remote control. ☞ The local controls are located on the front of the tuner box. Switching on Press the power switch on the tuner box to switch to standby mode. Switch on the plasma monitor with the power switch. The LEDs on both units light red. The press the "P+" or "P –" key to switch the TV set on. Both LEDs change to green. Adjusting the volume: z +“ or „z z –“. Press key , „z Selecting stations: Press key , "P+" or "P–". Opening the menu: Press key "M". Then use the keys "P+" , "P –" , z +“ and "Volume –" to navigate in the menu. „z TV/AV: The key "AV" is used to switch between TV mode and AV mode. 68 605 47 0024.A1 42TL92 D-GB 02.11.2005 15:59 Uhr Seite 69 5. Selecting your country Open the menu Once you have installed the TV set, you must specify the country in which it is located (e.g. UK) to assign certain basic settings (such as the TV channel frequencies). Selecting your country: • Press the "MENU" key to open the TV menu. • Use the cursor key to select the menu "Settings". • Use the cursor key to select the menu item "TV tuner" and press the "OK" key to open it. • Use the cursor key to select the sub-menu "APS". • Use the cursor key to select the menu item "Country". • Use the cursor key to select the desired country from the list. • Press the "TV" key to close the TV menu. ☞ The setting is saved automatically when you close the menu. MENU OK aps England countr y right / left to change country TV 69 605 47 0024.A1 42TL92 D-GB 02.11.2005 15:59 Uhr Seite 70 Open the menu 5.1 Selecting a language Language selection for the TV menu MENU OK You can select any of the available languages for the TV menu. All text in the menu and the help screens (Information) are displayed in the selected language. Selecting the language: • Press the "MENU" key to open the TV menu. • Use the cursor key to select the menu "Options". • Use the cursor key to select the menu item "Language". • Use the cursor key to select one of the languages from the list. • Press the "TV" key to close the TV menu. ☞ options english language osd timeout menu backround scart 2 out scart 4 out sleep timer sleep time remaining FAV Scart 3 <ok> to set sleep time right / left to change language TV 70 The setting is saved automatically when you close the TV menu. 605 47 0024.A1 42TL92 D-GB 02.11.2005 15:59 Uhr Seite 71 6. Tuning to TV stations Open the menu You can tune your TV set to TV stations in three different ways: a) Automatic Programme Search (APS) The automatic programme search searches the entire range of channels for TV stations. All stations which are found are placed in a station table which is displayed at the end of the search. If you do not like the order in which the stations appear in this table, you can move stations to other positions and/or delete unwanted stations. For further details, see Section 9, "Sorting the stations". Executing an automatic programme search • Press the "MENU" key to open the TV menu. • Use the cursor key to select the menu "Settings". • Use the cursor key to select the menu item "TV tuner". • Press the "OK" key and open the sub-menu "Programming". • Use the cursor key to open the sub-menu "APS". • Use the cursor key to select the aps menu item "Auto setting". • Press the "OK" key. You are then asked if you really want to start the autoset programme search. • Press the "OK" key again to start the search.. • A station table containing the results of the search is displayed. • You can delete any unwanted stations from the table by selecting them with the cursor key and pressing the red key. ☞ MENU OK <ok> to enable <ok> to start aps function The settings are saved automatically when you close the TV menu. 71 605 47 0024.A1 42TL92 D-GB 02.11.2005 15:59 Uhr Seite 72 Open the menu 6. Tuning to TV stations b) Manual search You can use the manual search function to search for individual stations whose channel number or frequency you do not know. MENU OK programming manual search right / left to search Executing a manual search • Press the "MENU" key to open the TV menu. • Use the cursor key to select the menu "Settings". • Use the cursor key to select the menu item "TV tuner". • Press the "OK" key and open the sub-menu "Programming". • Use the cursor key to select the menu item "Manual search". • Use the cursor key to start the search. • The search halts when a station is found. • If you wish to save this station, use the cursor key to select the menu item "Save programme". • Use the cursor key to save the station which was found. • Press the "TV" key to close the TV menu. ☞ TV 72 You can change the station logo: see Section 6.1. 605 47 0024.A1 42TL92 D-GB 02.11.2005 15:59 Uhr Seite 73 6. Tuning to TV stations Open the menu c) Direct channel input If you know the channel number of a station you want to save, you can enter this number directly. Executing direct channel input • Press the "MENU" key to open the TV menu. • Use the cursor key to select the menu "Settings". • Use the cursor key to select the menu item "TV tuner". • Press the "OK" key and open the sub-menu "Programming". • Use the cursor key to select the menu item "Channel type". • Use the cursor key to set the programming desired channel type (C = normal channel / S = special channel). • Use the cursor key to select the channel menu item "Channel" and enter the channel number with the channel type numeric keys. • Use the cursor key to select the menu item "Save programme". right / • Use the cursor key to save the entered station. • Press the "TV" key to close the TV menu. ☞ MENU OK C S left to change channel You can change the station logo: see Section 6.1. TV 73 605 47 0024.A1 42TL92 D-GB 02.11.2005 15:59 Uhr Seite 74 Open the menu 6. Tuning to TV stations Fine tuning MENU OK programming fine tune right / left to adjust fine TV 74 The TV set is normally tuned to the centre frequency of each of the TV channels. This is usually satisfactory. If you are not satisfied, you can carry out fine tuning of the frequency. Executing fine tuning • Switch to the programme position you wish to adjust. • Press the "MENU" key to open the TV menu. • Use the cursor key to select the menu item "Settings". • Use the cursor key to select the menu item "TV tuner". • Press the "OK" key and open the sub-menu "Programming". • Use the cursor key to select the menu item "Fine tuning". • Use the cursor key to carry out fine tuning. • If you want to save the fine-tuning setting, use the cursor key to tuning select the menu item "Store program". • Then press the cursor keys to save the setting. • Press the "TV" key to close the TV menu. 605 47 0024.A1 42TL92 D-GB 02.11.2005 15:59 Uhr Seite 75 6.1 Station logo Open the menu Each station which transmits VPS signals automatically receives a station logo with up to four characters. If this automatic assignment does not work, or if you want a different logo, you can enter the logo manually. Setting the station logo • Switch to the programme position for which you want to set the logo. • Press the "INFO" key. • Press the yellow key and switch to edit mode. • You can either delete the entire station logo with the "AV" key or use the cursor key to select the individual characters of the logo and then use the cursor key to change these characters. • Press the "TV" key to close the TV menu. ☞ INFO OK The setting is saved automatically when you close the TV menu. 75 605 47 0024.A1 42TL92 D-GB 02.11.2005 15:59 Uhr Seite 76 Open the menu 6.2 Sorting the stations In the station table, you can shift or delete individual stations. INFO OK program table Shifting and deleting stations • Press the "INFO" key to open the station table. • Use the cursor key to select the station you want to shift or delete. • To delete this station, press the red key and, in the menu, press the "OK" key to confirm that you want to delete it. • To move the selected station, press the green key. The frame around the selected station changes from red to yellow, indicating that it can be moved. • Use the cursor key to move the station logo in the yellow frame to the new position. • Press the green key to insert the station at this position. ☞ Delete Insert TV 76 Name All other programme positions are shifted as necessary to make space for the inserted station! • Press the "TV" key to close the station table. 605 47 0024.A1 42TL92 D-GB 02.11.2005 15:59 Uhr Seite 77 7. Programme selection Programme selection and programmeposition management Your TV set can manage a maximum of 100 programme positions (0-99) in the station table. You can select these programme positions with the numeric keys, the "P+/P-" keys or from the station table. When you press a numeric key, you have three seconds to enter any further digits. Programme selection from the station table P+ In normal TV mode, you can open the station table by pressing the "INFO" key. In the table which is then displayed, you can use the cursor key to select a programme. The selected programme is then displayed on the screen. P– INFO Back to the previous programme You can switch back and forth between the last two selected programme positions with the key. OK Example: You are currently watching ITV. During the commercials, you switch to BBC with the numeric keys. You can now switch back and forth between BBC and ITV with the key. 77 605 47 0024.A1 42TL92 D-GB 02.11.2005 15:59 Uhr Seite 78 Open the menu 8. Picture settings The picture settings (brightness, contrast, sharpness, etc.) can be set globally for all programme positions. MENU OK Adjusting the picture settings: • Press the "MENU" key to open the TV menu. • Use the cursor key to select the menu "Picture". • Use the cursor key to select the desired menu item "Brightness", "Contrast", "Sharpness" or "Colour". • Use the cursor key to adjust the selected picture setting. • Press the "TV" key to close the TV menu. ☞ picture brightness right / left to adjust brightness TV 78 The settings are saved automatically when you close the TV menu. 605 47 0024.A1 42TL92 D-GB 02.11.2005 15:59 Uhr Seite 79 9. Sound settings Open the menu The sound settings (volume, headphone volume, balance, etc.) can be adjusted in the menu "Audio". Adjusting the sound settings: • Press the "MENU" key to open the TV menu. • Use the cursor key to select the menu "Audio". • Use the cursor key to select the desired sound setting Volume, Headphone volume, Headphone sound mode, Balance, Equalizer or Subwoofer. • Use the cursor key to adjust the selected setting. • Press the "TV" key to close the TV menu. ☞ OK audio The settings are saved automatically when you close the TV menu. Subwoofer You can connect an active subwoofer to the socket on the rear of the tuner box for better bass reproduction. After connecting the subwoofer, set the corresponding menu item to "ON". MENU subwoofer down for audio adjustments Equalizer settings: The equalizer offers the standard settings "Normal", "Pop", "Rock", "Jazz" and "Classical". If you are not satisfied with these standard settings, you can configure your own personal setting under "User". 79 605 47 0024.A1 42TL92 D-GB 02.11.2005 15:59 Uhr Seite 80 Open the menu 10. Special functions Picture in Picture (PIP) The PIP picture can be used to display the programme of a second TV station or a signal from an AV device. OK Displaying/hiding PIP: • Press the red key to display the PIP picture. • You can use the cursor key to select the content of the picture + the selected part of the picture is surrounded by a green frame. • You can use the numeric keys or the "P+/P-" keys to switch to another programme position in the PIP picture. • You can display a signal from an AV device (such as video recorder or camera) in the PIP picture by pressing the "AV" key several times. • You can zoom the PIP picture in eight steps. To do this, press the yellow key and then use the cursor key to increase or decrease the size of the PIP picture. • You can move the PIP picture to a different position on the screen. To do this, press the green key and then use the cursor key to move the PIP picture. • You can exchange the contents of the PIP picture and the main picture by pressing the white key.. • To hide the PIP picture, press the red key again. ☞ 80 Any changes you have made to the PIP settings are saved automatically when you hide the PIP picture. 605 47 0024.A1 42TL92 D-GB 02.11.2005 15:59 Uhr Seite 81 10. Special functions Picture size Open the menu You can use the function "Picture size " to adjust programmes transmitted in various formats to match the wide-screen format of the TV screen. Adjusting the picture-size: • Press the key. The current aspect ratio is displayed at the bottom of the screen. • Use the cursor key to select the desired setting. The available options are: OK or use the menu "Window" Possible picture-size settings: Normal: Programmes are displayed in the standard format 4:3. Auto: (preferred setting) The picture is always displayed with the correct aspect ratio (4:3 or 16:9), depending on the input signal. In TV mode, the "Wide Screen Signal" (WSS) is evaluated: if the station does not transmit the WSS signal, the picture is displayed as if the option "Fill screen" were selected. Fill screen: Regardless of the transmitted aspect ratio, the picture always fills the full width of the screen. 16:9: Picture signals in the 16:9 aspect ratio are expanded to fill the full height of the screen, leaving only narrow black stripes at the sides. Tip: You can use this setting to magnify pictures received in the aspect ratio 4:3. Only a small part of the picture is lost at the top and bottom of the screen. Letterbox: This option can be used to expand the picture vertically so that programmes with a black stripe at the top and bottom fill the screen. Subtitles: The picture is zoomed and moved slightly upwards so that the subtitles are easier to read. ☞ The setting is saved automatically when you close the TV menu. 81 605 47 0024.A1 42TL92 D-GB 02.11.2005 15:59 Uhr Seite 82 10. Special functions Split screen In "split screen" mode, the screen is divided vertically into two halves. You can activate and deactivate this mode with the key. When this mode is activated, you hear the sound belonging to the picture on the left. You can use the cursor keys to select the pictures. The selected picture then has a green frame for a short time. You can now change the source of this picture with the numeric keys, with the "P+/P-" keys or the "AV" key. You can also perform picture settings (see Section 8). You then hear the sound of the selected picture. When you deactivate this mode with the key, the TV set is always switched to the station displayed on the left. ☞ The settings are saved automatically when you deactivate this function. 10. Special functions Freeze frame OK 82 Pressing the "OK" key immediately freezes the picture on the screen. The programme (or video film) continues to run in the background. Press the "OK" key again to switch back to the current programme (or video film). 605 47 0024.A1 42TL92 D-GB 02.11.2005 15:59 Uhr Seite 83 10. Special functions Sleep timer Open the menu By programming the sleep timer, you can determine when the TV set is to switch itself off automatically. The sleep timer can be set to Off, 30, 60, 90 or 120 minutes. MENU Setting the sleep timer: • Press the "MENU" key to open the TV menu. • Use the cursor key to select the menu "Options". • Use the cursor key to select the menu item "Sleep timer". language • Use the cursor key to set the osd timeout desired time after which the TV set is menu backround to switch itself off. scart 2 out scart 4 out • Press the "TV" key to close the TV sleeptimer menu. ☞ OK options sleep time remaining The setting is saved automatically when you close the TV menu. FAV Scart 3 <ok> to set sleep time 30 minutes adjust sleeptimer TV 10. Special functions Display the time If you are watching a station which transmits Teletext, you can display the current time by pressing the key. The time cannot be displayed when you are watching a station which does not transmit Teletext. The time display disappears automatically after about four seconds. Ȅ Ȅ 83 605 47 0024.A1 42TL92 D-GB 02.11.2005 15:59 Uhr Seite 84 Open the menu 11. Teletext Teletext is an additional, free information servii ce which is provided by many TV stations. You can scroll through the pages of this "electronic newspaper" in various ways. TEXT Displaying Teletext: • Press the "TEXT" key. Page 100 (Contents page) of the Teletext is displayed on the screen. Navigating through Teletext with pages displayed: • You can step through the subjects by pressing the blue key. • You can step through the sections of a subject by pressing the yellow key. • You can step backwards through the Teletext pages by pressing the red key. • You can step forwards through the Teletext pages by pressing the green key. To select a specific page, enter the page number with the numeric keys. Sub-pages are automatically scrolled. Hiding Teletext: • Press the "TV" key or the "TEXT" key. 84 605 47 0024.A1 42TL92 D-GB 02.11.2005 15:59 Uhr Seite 85 12. Connecting headphones The headphone socket is located on the front of the tuner box. We recommend that you use headphones with an impedance of at least 32 Ω. If you use headphones with a lower impedance (approx. 8 Ω), the dynamic range will be lower. In the case of dual-language programmes, you can listen to sound channel 1 or 2 on the headphones, regardless of which is selected for the internal loudspeakers. You can adjust the headphone sound settings in the "Audio" menu (see Section 9). Headphone socket 85 605 47 0024.A1 42TL92 D-GB 02.11.2005 15:59 Uhr Seite 86 Open the menu AV or MENU OK settings source select right to select source 86 13. AV devices AV (Audio/Video) devices are external devices (such as video recorders, DVD players, decoders, video cameras, etc.) which generate picture and/or sound signals and can be connected to a TV set. Video recorders, DVD players and similar devices can be connected to the Scart 1 or Scart 2 socket. Decoders must always be connected to the Scart 1 socket. If an AV device connected to one of the Scart sokkets generates a suitable switching voltage, the TV set automatically switches to AV mode when the device is switched to playback mode (compositevideo signal). For AV devices connected to the front sockets, you must switch the TV set to AV mode manually in order to display their signals. For AV devices connected to the front sockets, you must switch the TV set to AV mode manually in order to display their signals. tuner Scart 1 Scart 1 RGB Scart 2 Scart 2 RGB Scart 3 Scart 4 BAV PC Selecting AV mode manually • Press the "AV" key several times to step through the AV programme positions to the desired position - or Ļ • Press the "MENU" key to open the TV menu. • Use the cursor key to select the menu "Settings". • Use the cursor key to select the menu item "Select source". • Press the "OK" key and open the sub-menu "Select source". • Use the cursor key to select the source (the socket to which the desired AV device is connected). • Use the cursor key to activate this source. • Start the AV device in the desired mode. 605 47 0024.A1 42TL92 D-GB 02.11.2005 15:59 Uhr Seite 87 13. AV devices Possible selections • Tuner The signal from the TV station to which the TV set is tuned is displayed. • Scart 1/2/3/4 The composite-colour signal (FBAS) from the AV device connected to the corresponding Scart socket is displayed. • Scart 1/2 RGB The RGB signal from the AV device connected to the corresponding Scart socket is displayed. • PC und DVI The picture from the connected PC is displayed. The picture size and position can be adjusted in the menu "Window". The brightness, contrast and phase (adjustment for picture sharpness, executed automatically when a PC is connected) can be adjusted in the menu "Picture". • BAV (Back AV socket, in/out) on the rear of the tuner box. • FAV (front AV socket) down for The picture from the AV device connected to the front AV socket is displayed in the composite-colour picture signal. • S-Video The picture from the AV device connected to the front AV socket is displayed in the S-Video (YC) picture signal. window down for size setting picture picture settings for current window 87 605 47 0024.A1 42TL92 D-GB 02.11.2005 15:59 Uhr Seite 88 13. Copying AV recordings Open the menu Your TV set has a copy mode in which an AV device connected to the Scart 2 socket can record the picture and sound coming from an AV device connected to the "FAV" (Front AV socket) or to the Scart 1 socket. MENU OK options osd timeout menu backround scart 2 out scart 4 out sleep timer sleep time remaining Selecting the Scart 2 socket as the output: • Press the "MENU" key to open the TV menu. • Use the cursor key to select the menu "Options". • Use the cursor key to select the menu item "Scart 2 output". • Use the cursor key to select the socket to which the device being used for playback is connected. • Switch the recording device to record mode and then press "Play" on the playback device. • Press the "TV" key to close the TV menu. FAV Scart 3 <ok> to set sleep time right / left to select scart 2 out TV 88 ☞ The settings are saved automatically when you close the TV menu. 605 47 0024.A1 42TL92 D-GB 02.11.2005 15:59 Uhr Seite 89 13. AV devices Open the menu Picture quality when playing back pictures from tape MENU The VCR function ensures an optimal picture quality when playing back recordings from tape devices such as camcorders or video recorders. ☞ The VCR function in the menu "Options" can be selected only if, for example, the connected video recorder is delivering a signal. Activating the VCR function • Start the playback function on the AV device. • Press the "MENU" key to open the TV menu. • Use the cursor key to select the menu "Options". • Use the cursor key to select the menu item "vcr". • Use the cursor key to switch the function on or off. • Press the "TV" key to close the TV menu. ☞ OK options vcr on osd timeout menu backround scart 2 out scart 4 out sleep timer sleep time remaining FAV Scart 3 <ok> to set sleep time right / left to change vcr status The setting is saved automatically when you close the TV menu. 89 605 47 0024.A1 42TL92 D-GB 02.11.2005 15:59 Uhr Seite 90 13. AV devices - PC Connecting the PC via VGA input Power off both computer and TV before making any connections. Connect the VGA cable to the VGA input of your TV and to the 15-pin connector on the rear of your computer. Tighten the screws on the plugs until the connectors are fastened securely. If you are using Windows operating system running on a PC with a Microsoft Plug & Play compatible video card, your system will select the appropriate timing for your monitor. Connecting the PC via DVI (Digital Video Interface) input To get the best possible picture quality you’ll need to use the DVI sockets on both the TV and your PC. This allows the PC to send a pure digital signal straight from the graphics card to the TFT TV. As DVI-I type socket exists on the TFT TV, use a DVI-D or DVI-I cable for connection. DDC (Display Date Channel) and EDID (Extended Display Identification Data), which are used for Plug & Play compatibility, are supported. Hot Plug Detection is not supported. Low refresh rates like 60Hz and 72Hz should be used and native resolution should be preferred. The DVI interface does not support HDCP (High bandwidth Digital Content Protection), therefore a HDCP DVD player could not be used. 90 605 47 0024.A1 42TL92 D-GB 02.11.2005 15:59 Uhr Seite 91 13. AV devices - PC PC input typical display modes The display has a maximum resolution of 1280 x 768, vertical sync. frequency range of 50-75Hz and a horizontal sync. frequency range of 3069Hz. The following table is an illustration of some of the typical video display modes. The native resolution of the TFT-LCD Panel is 1280 x 768. Therefore using Mode 14’ is advised to get the best PC input display quality. 91 605 47 0024.A1 42TL92 D-GB 02.11.2005 15:59 Uhr Seite 92 14. Cleaning the set ☞ Before cleaning the set, always switch it off with the mains switch! ☞ Incorrect treatment and cleaning of the screen surface can cause irreparable damage to it. You should therefore always observe the following instructions for treatment and cleaning of the set. Treatment: Always treat the screen surface very carefully. Take care not to damage it mechanically by shocks, impact, scratching or scraping. Keep sharp, pointed and hard objects away from the surface of the screen. Keep the surface of the screen clean. For cleaning the case and the screen, use only a soft, dry cloth. For removing stubborn marks, you may moisten the cloth slightly. Cleaning and care: Always switch off the TV set and remove the mains plug from the wall outlet before cleaning. The surface of the screen may be cleaned only with a soft, dry cloth (such as a microfleece duster). If any marks cannot be removed with this dry cloth, you may moisten the cloth slightly. Take care that no water or other liquid can enter the TV set, since this can cause serious damage to the set. If any liquid or other foreign object (pieces of metal, etc.) enters the set, immediately disconnect the mains plug from the wall outlet. Never insert your hands or tools into the set, since this may result in electric shocks. 92 605 47 0024.A1 42TL92 D-GB 02.11.2005 15:59 Uhr Seite 93 15. Technical data Mains voltage: 220 - 240 V ˜ 50 Hz Antenna input: 75 Ohms asymmetrical DIN 45325 Tuning range: Standard channels 2 - 12, 21 - 69 Plasma monitor and tuner box ca. 355 W (sinus output power): to DIN 45324 into 4 Ohms at 1 kHz Music output power TC 59 X): Power consumption: (to CENELEC / S1 - S20, S21 - S41 S42 ... S46 (Belgium: channels OIR) Power consumption Special channels 2 x 14 W (2 x 8 W) Energy consumption per hour (Wh): See power consumption in W multiplied by 1 hour Standby Plasma monitor: approx. 3 Wh Tuner box: approx. 7 Wh Dimensions: Plasma monitor with stand (H x D x W) 717 mm x 340 mm x 1049 mm Width with loudspeakers attached: 1295 mm Errors excepted. Subject to changes ! 93 605 47 0024.A1 42TL92 D-GB 02.11.2005 15:59 Uhr Seite 94 16. Disposal of batteries Dry or rechargeable batteries should never be discarded as normal garbage! Please use the local facilities for the disposal of exhausted batteries. Make sure the batteries are fully discharged before disposal. The batteries are generally fully discharged when the unit in which they are used - switches itself off or indicates "Battery flat" or - no longer operates correctly when the batteries have been in use for a long time. In order to avoid short-circuits, the poles of the batteries should be covered with a piece of adhesive tape. Batteries which contain dangerous substances are marked as follows: Pb = battery contains lead Cd = battery contains cadmium Hg = battery contains mercury Li = battery contains lithium 94 605 47 0024.A1 42TL92 D-GB 02.11.2005 15:59 Uhr Seite 95 Symptom The plasma monitor does not react to commands from the remote control. Possible cause • There is an obstacle between the remote control and the plasma monitor. • Sunlight is shining directly on the infrared sensor in the plasma monitor. • The batteries in the remote control are flat. • The plasma monitor is not switched on with the main switch. • Fault in the internal processor. • The LVDS cable between the plasma monitor and the tuner box is not connected correctly. Remedies • Remove the obstacle. • Ensure that the sun does not shine on the set. • Install new batteries. • Switch on the plasma monitor set with the main switch. • Switch the plasma monitor set off with the main switch, wait a few seconds and then switch it on again. • Check the connection. Your Metz product was developed and manufactured with high-quality materials and components which can be recycled and/or re-used. This symbol indicates that electrical and electronic equipment must be disposed of separately from normal garbage at the end of its operational lifetime. Please dispose of this product by bringing it to your local collection point or recycling centre for such equipment. This will help to protect the environment in which we all live. 95 605 47 0024.A1 42TL92 D-GB 02.11.2005 15:59 Uhr Seite 96 Code list BLACK PANTHER BLAUPUNKT 616 491 508 607 614 BONDSTEC 466 BONDSTECBRANDT 505 BRANDT ELECTRONIQUE 503 574 BRAUN 570 BRIONVEGA 450 BROKSONIC 481 BRUNS 466 BUSH 588 Codes Video Metz VG61 532 VF21, VF44, VF46 VF61, VE21, VE43 VE44, VE45, VD21 VD43, VD44, VD45 VC21, VC43, VC44 VC62, 21VB11 42VB12, 21VA12 21VA13, 42VA11 64VA14, 9836,9837 9847, 9874, 9875 9876, 9877 Metz VF22, VF47 CALIN 568 VF48, 9843, 9844 9849 Metz VH22, VH47 573 VH48 ACTION ADMIRAL ADVANTZ ADVENTURA ADYSON AGHA AIWA AKAI AKIBA AKURA ALBA ALLORGAN ALLSTAR AMWAY ANITECH ART TECH ASA ASBERG ASTRA ASUKA ASUKA ASWO AUDIO DYNAMICS AUDIOSONIC AUDIOTON AUDIOVOX AVIS BAIRD BANG & OLUFSEN BASIC LINE BAUR BEAUMARK BELL & HOWELL BESTAR 96 468 481 481 468 487 547 481 477 481 505 575 487 487 466 547 529 529 487 575 478 575 481 481 527 528 505 575 466 481 487 505 503 487 513 607 547 468 466 481 487 547 481 547 505 562 572 482 508 609 483 546 612 484 554 505 588 593 490 529 481 528 CALIX CANDLE CARRERA CARVER CGE CIE CIMLINE CLARIVOX CLASSIC CLATRONIC COLORTYME COLT CONDOR CONTINENTAL EDISON CRAIG CROSLEY CROWN CROWN CRYSTAL CTC CURTIS MATHES CYBEREX DAEWOO DANSAI DAWA DAYTRON DE GRAAF DECCA DECCAVIDEO DENON DIGITAL DORIC DTS DUAL 547 487 616 DUEL DUMONT DYNATECH 547 ECONOMIC 583 547 609 616 565 612 599 EDISON ELBE ELCATECH ELECTROHOME ELECTROPHONIC ELIN ELTA EMERSON 481 481 481 547 527 505 487 487 606 481 466 547 487 466 503 481 481 487 490 575 466 505 547 466 487 575 466 529 528 528 527 477 601 547 503 530 505 468 487 510 487 616 487 481 481 547 487 481 496 527 609 621 487 502 530 610 507 532 612 504 505 524 575 487 590 490 593 481 487 547 616 504 487 507 505 547 527 547 575 616 547 468 553 481 505 504 505 527 481 487 527 547 616 616 605 47 0024.A1 42TL92 D-GB 02.11.2005 15:59 Uhr Seite 97 Code list EPC ESC ETZUKO EUROPHON EXPERT 505 466 487 586 604 586 510 FERGUSON 501 555 487 468 477 468 481 505 574 523 595 524 596 477 481 473 487 478 487 528 575 601 603 FIDELITY FINLUX FIRST LINE FISHER FUNAI GAB GBC GE GEC GELOSO GITEM GOLDHAND GOLDSTAR GOODMANS GRAETZ GRANADA GRANDIN GRUNDIG GRUNDIG GUTTRONIC HANSEATIC HANTAREX HARLEY DAVIDSON HARVARD HCM HEADQUARTER HINARI HINARIHITACHI HITACHI HYPSON IMPERIAL INGERSOL INNO HIT INNO HIT INTERBUY INTERDISCOUNT INTERFUNK INTERVIDEO INTERVISION IRRADIO ITT ITV 487 466 547 528 466 575 487 468 556 466 617 468 468 542 601 481 451 457 461 491 496 530 585 610 602 481 575 481 481 466 468 487 475 481 530 604 487 510 509 510 616 481 575 468 600 466 487 481 450 466 598 616 JENSEN JETPOINT JVC JVC_LCD 571 604 KAISER KAISUI KAPSCH KARCHER KENDO KENWOOD KLH KLIT KODAK KORPEL KUBA LEYCO 490 481 575 487 621 505 474 557 605 487 452 458 462 492 497 531 600 611 547 610 530 600 477 565 606 604 453 459 463 493 507 563 606 612 552 616 603 532 575 616 454 460 464 495 527 584 609 613 575 487 487 490 509 476 485 535 477 503 601 478 505 603 LG LIESENKOTTER LLOYD LLOYD’S LOEWE LOEWE OPTA LOGIK LUXOR LXI MAGNADYNE M ELECTRONICS MAGNASONIC MAGNAVOX MAGNIN MAGNUM MANESTH MARANTZ MARQUANT MARTA MATRIX MATSUI MATSUSHITA MEDIATOR MEMOREX MEMPHIS MGA MGN MINERVA MINOLTA MITSUBISHI 575 547 575 MULTITECH MURPHY 487 527 601 487 468 481 565 603 575 483 575 604 606 505 NAD NATIONAL NEC NECKERMANN 505 575 503 520 515 575 487 600 575 483 468 481 487 481 487 473 487 578 575 481 601 481 481 487 468 518 468 575 547 470 481 481 581 487 491 487 481 481 486 562 527 527 468 487 547 547 606 477 477 542 487 481 466 601 547 507 504 450 491 509 519 504 545 521 505 601 603 519 505 487 504 565 487 606 491 491 509 478 601 477 505 510 547 575 527 547 483 517 481 481 507 547 582 487 527 547 547 528 490 565 566 509 586 560 601 561 610 481 547 609 610 612 505 609 547 519 612 468 527 481 487 575 505 469 493 510 528 576 470 496 512 541 477 505 513 565 477 97 605 47 0024.A1 42TL92 D-GB 02.11.2005 15:59 Uhr Seite 98 Code list NEI NESCO NIKKAI NIKKO NOBLIKO NOKIA NOVATRONIC OCEANIC OKANO OLYMPIC OLYMPUS ORION OTTO VERSAND PAEL PALLADIUM PANASONIC PATHE MARCONI PAXSONIX PENNEY PENTAX PERSHIN PHILCO PHILIPS PHILIPS PHILIPS PHILIPS PHILIPS PHILIPS (F) PHONOLA PILOT PIONEER PRIMA PROFEX PROFILE PROSCAN PROTEC PULSAR PULSER PYE QTY1 QUARTER QUARTZ QUASAR QUELLE 98 575 575 487 466 481 606 450 488 505 518 554 601 500 515 602 575 483 487 466 507 481 537 560 527 508 544 609 616 606 481 507 533 623 503 547 477 477 606 481 481 529 550 568 624 491 527 481 477 505 487 547 477 487 481 468 565 592 468 481 507 450 470 610 611 616 QUELLE 468 489 510 547 557 603 503 521 470 503 516 551 567 604 504 524 483 504 517 553 600 QUESTAR 489 601 604 509 538 561 474 512 565 610 620 531 558 589 493 513 575 611 621 536 559 591 496 541 599 612 487 508 549 491 527 600 505 532 601 505 574 505 481 507 491 530 563 575 625 565 527 527 507 547 564 620 547 528 548 565 621 RADIOLA RADIONETTE RADIX RANDEX RANDIU RANK/BUSH/MURPHY RCA REALISTIC REDIFFUSION REX RICOH ROADSTAR ROYAL SABA SABA SABA SAISHO SALORA SALORA SAMBERS SAMEX SAMSUNG SANKY SANSUI SANWA SANYO SBR SCHAUB LORENZ SCHNEIDER 575 527 547 490 539 481 483 547 481 575 547 547 527 459 471 547 RADIALVA 575 529 461 474 547 464 477 SCOTT SEARS SEG SEI-SINUDYNE SELECO SENTRA SETRON SHARP SHINTOM SHIVAKI SHOGUN SHORAI SICE SIEMENS 478 496 505 512 529 599 610 616 466 484 497 508 513 541 604 611 621 487 503 509 519 565 606 612 481 527 601 497 481 481 601 477 468 601 503 481 481 466 487 575 604 527 481 481 483 547 547 487 487 547 617 503 521 601 509 468 517 504 524 603 575 470 505 540 483 547 575 575 505 575 469 577 470 586 471 468 478 527 564 575 604 483 481 529 569 578 505 487 530 571 581 477 490 528 504 481 510 547 505 545 462 470 481 493 464 472 486 494 499 515 574 486 467 516 606 547 510 597 487 487 509 468 551 527 450 477 510 563 573 582 481 468 487 509 503 466 466 468 487 481 547 509 609 459 468 479 491 491 504 510 528 575 609 614 505 487 544 575 612 461 469 480 492 605 47 0024.A1 42TL92 D-GB 02.11.2005 15:59 Uhr Seite 99 Code list SIEMENS SILMA SILVA SINGER SINUDYNE SOLAVOX SONOKO SONOLOR SONTEC SONY SR1000 STS SUNWOOD SYLVANIA SYMPHONIC TAISHO TALENT TANDBERG TANDY TASHIKO TATUNG TEAC TEC TECHLINE TECHNICS TECHNILAND TECHNISAT TEKNANT TEKNIKA TELEAVIA TELEAVIA TELEFUNKEN TELEORDER TELERENT TELESERVICE TELETECH TENOSAL TENSAI THOMAS THOMSON THORN THORN-FERGUSON TOKAI TOSHIBA TOTEVISION TOWADA TOWIKA 495 511 607 612 575 481 487 509 599 466 575 601 481 506 541 547 477 487 527 481 509 609 623 468 528 505 505 466 487 527 575 563 575 481 503 505 500 515 579 547 505 609 487 487 481 575 547 499 505 60 474 505 586 612 501 575 609 481 474 547 481 487 487 496 525 609 614 497 530 610 547 513 575 527 498 584 611 616 575 604 512 599 487 513 623 514 TRIAD TRIX TVA 575 481 466 UHER 466 505 450 565 606 547 560 481 530 606 604 ULTRAVOX UMA UMA UNITECH UNITED UNIVERSUM UNIVOX VICTOR 505 466 554 547 481 481 VIDEOMASTER VIDEOPLUS VIDEOSONIC VIEWMARK VIEWMAX 527 500 524 6226 482 542 604 503 574 503 601 612 487 481 547 490 527 575 621 545 547 YOKAN YOKO 487 487 466 510 481 547 ZENITH 481 505 574 509 491 571 612 487 565 487 490 Codes DVD-Player METZ AKAI BLUEsky 490 483 547 609 547 XR1000 YAMISHI 487 593 604 614 487 532 612 601 612 477 575 481 450 575 528 575 529 527 504 524 503 589 WEGAVOX WELTBLICK WHITE WESTINGHOUSE WINSTON WIZJA WORLDVIEW 503 521 594 481 543 562 WARDS 612 477 510 616 575 609 Boxford 204 254 256 CYBER HOME 223 247 504 594 DENON 216 243 248 501 565 606 503 575 609 EMERSON GAME 504 604 505 606 505 527 Cytron D-i-K DUAL 239 214 230 263 253 262 255 222 232 238 HARMAN/KARDON 206 205 210 260 261 JVC KENWOOD 212 246 231 263 GOLDSTAR GRAND PRIX GRUNDIG HITACHI KISS 208 270 99 605 47 0024.A1 42TL92 D-GB 02.11.2005 15:59 Uhr Seite 100 Code list DIORA DUAL 949 822 832 859 994 FISCHER 830 831 920 953 GOLDSTAR GOODMANNS GOODMANS GRUNDIG 885 872 888 908 911 912 913 HARMAN KARDON 905 853 931 934 935 INTERSOUND 960 937 JVC 844 903 848 904 849 992 902 233 237 KENWOOD 847 878 963 858 879 859 925 250 KRELL 820 877 948 908 LINN LUXMAN 908 924 964 946 METZ HE11 882 833 908 955 908 908 908 972 908 955 LABWAVE LG LINN LOEWE 200 263 215 219 201 MARANTZ MbyN MEDIENCOM MEDION MEGATON MUSTEK MYRYAD 218 271 241 221 240 256 269 219 272 NAD NONAME 207 228 ONKYO 209 266 225 226 PANASONIC 216 276 219 234 278 203 251 228 267 274 275 220 235 227 236 204 249 ORION PHILIPS PIONEER PROLINE SAMSUNG SCHAUB LORENZ SCHNEIDER SEG SHERWOOD SILVA SCHNEIDER SONY SUNKAI 210 255 244 201 224 243 211 242 TECHNICS TEVION THOMSON TOSHIBA UNITED YAMAHA 236 228 257 258 HITACHI ITT 273 268 248 263 263 229 264 216 228 213 202 217 259 277 245 246 252 255 266 216 278 234 265 Codes HIFI - CD AIWA AKAI AKKAI AMSTARD AMSTRAD ARCAM ASWO 815 856 856 957 929 908 909 BANG & OLUFSEN BRAUN BUSH 808 975 888 CAMBRIDGE 945 945 908 DAEWOO DENON 876 801 853 961 CAMBRIDGE AUDIO CARVER 100 816 857 817 872 884 921 940 942 956 MARANTZ MATSUI MEDION MERIDIAN MAGNAVOX MICROMEGA MINOWA MISSION MTC 812 899 962 803 807 OKANO 869 819 PALLADIUM PMG PROTON 810 834 833 965 824 862 923 906 908 QUAD 908 RADIOTONE 958 911 PIONEER 845 900 846 901 909 947 908 930 938 888 802 806 PANASONIC PHILIPS 976 908 NAD NAIM NAKAMICHI NOKIA NONAME NSM ONKYO RADMOR 967 804 805 871 827 861 881 851 915 908 866 918 909 870 825 863 826 864 850 922 965 911 605 47 0024.A1 42TL92 D-GB 02.11.2005 15:59 Uhr Seite 101 Code list REVOX REVOX/STUDER ROTEL 829 910 818 SABA 926 908 939 908 852 821 869 888 928 960 978 982 986 SAE SAMSUNG SANSUI SANYO SCHNEIDER DENON 860 840 870 892 929 972 979 983 987 919 841 873 911 955 973 980 984 988 799 936 833 872 876 886 891 892 892 842 896 990 888 908 800 943 867 873 880 887 969 813 944 868 874 883 889 970 T+A 882 T+A ELECTROAKUSTIK 882 TECHNICS 809 950 TENSAI 954 THOMSON 823 974 SUPERTECH SYLVANIA UHER 814 869 966 995 UNIVERSUM UNKNOWN YAMAHA 828 941 843 897 991 945 916 993 893 898 968 868 885 927 959 977 981 985 989 847 869 875 885 890 971 895 932 879 971 900 850 851 935 FISCHER 893 894 985 998 GOLDSTAR GOODMANNS GOODMANS GRUNDIG 964 833 867 976 979 980 HARMAN KARDON HITACHI 926 915 984 931 ITT 918 919 JVC 862 994 863 995 974 996 975 997 KENWOOD 848 957 917 958 935 990 936 993 LINN LUXMAN 888 876 889 877 884 989 METZ HE11 961 887 922 999 NAD NAKAMICHI NOKIA OKANO ONKYO 903 927 920 948 846 902 959 904 905 906 949 847 856 901 982 980 855 941 999 912 942 885 886 896 937 867 873 919 986 868 874 947 869 878 964 864 908 923 993 909 910 881 882 946 MARANTZ 917 918 ONKYO PALLADIUM 872 979 908 952 854 855 933 PANASONIC PHILIPS PIONEER 978 860 977 SAMSUNG 883 897 985 930 866 872 918 976 839 890 911 AMSTRAD ASWO 842 963 845 934 916 976 BANG & OLUFSEN BRAUN BUSH 836 870 835 SHARP SHERWOOD DAEWOO 907 SIEMENS AKAI 843 844 962 849 945 913 951 933 987 944 928 921 853 938 943 RADMOR REVOX REVOX/STUDER Codes HIFI - Tape AIWA 841 970 DIORA DUAL 966 SINOTEC SINOTEC (PEPSI-DOSE) SONY 840 892 908 951 SHARP SHERWOOD SIEMENS 834 891 972 899 837 936 SANY SANYO SCHNEIDER 880 960 929 976 854 939 988 861 101 605 47 0024.A1 42TL92 D-GB 02.11.2005 15:59 Uhr Seite 102 Code list 947 953 964 865 967 992 950 954 976 925 968 T+A T+A ELEKTROAKUSTIK TECHNICS THOMSON 871 961 838 852 961 UNIVERSUM 868 947 SONY YAMAHA 857 924 951 955 952 956 965 969 966 991 898 875 950 858 932 981 886 859 ASH ASWO 376 734 452 469 744 427 BANG & OLUFSEN BUSH 369 748 DAEWOO DENON 739 372 471 423 991 DIORA DUAL 458 371 445 461 370 381 994 FISCHER 434 449 GOLDSTAR GOODMANNS GOODMANS GRUNDIG 746 737 748 427 429 HARMAN KARDON HITACHI 418 453 730 991 ITT 412 JVC 414 448 425 KENWOOD 417 741 439 994 LINN LUXMAN 472 438 474 METZ HE11 MARANTZ MINOWA MISSION 743 450 409 426 NOKIA 410 AKAI AMSTRAD 102 459 419 748 OKANO 733 379 736 440 PALLADIUM 731 371 427 383 996 735 432 450 384 997 ONKYO 983 895 914 Codes HIFI - Tuner AIWA NAD NAKAMICHI NONAME 377 737 455 745 993 464 PANASONIC PHILIPS PIONEER 447 740 437 999 463 476 990 380 392 396 400 404 412 469 735 465 473 995 388 393 397 401 407 441 470 746 390 394 398 402 408 442 732 748 446 456 427 480 738 457 477 732 739 478 733 746 416 420 421 SUPERTECH 411 475 433 374 391 395 399 403 409 443 733 749 373 413 426 479 737 747 749 749 389 422 466 T+A T+A ELEKTROAKUSTIK TECHNICS TENSAI THOMSON 405 743 387 406 382 743 430 431 462 UHER 375 403 737 467 473 733 YAMAHA 385 992 415 435 454 986 766 829 831 SHARP SHERWOOD SIEMENS UNIVERSUM 446 436 998 SAMSUNG SINOTEC SINOTEC (PEPSI-DOSE) SONY 444 451 386 427 428 378 REVOX/STUDER RADMOR ROTEL 468 450 742 REVOX SANYO SCHNEIDER 424 460 Codes HIFI - Amp AIWA AKAI AMSTRAD ASH ASWO 777 753 785 840 776 793 985 754 813 605 47 0024.A1 42TL92 D-GB 02.11.2005 15:59 Uhr Seite 103 Code list BANG & OLUFSEN BRAUN BUSH DAEWOO DENON 996 960 748 SAMSUNG SANYO SCHNEIDER DIORA DUAL FISCHER 750 820 839 GRUNDIG 794 749 779 795 766 804 782 HARMAN KARDON 760 751 823 HITACHI ITT 827 JBL JVC 821 792 975 816 819 KENWOOD 755 771 818 LINN LUXMAN 794 810 795 845 954 METZ HE11 MARANTZ MEDION MERIDIAN MINOWA MISSION 774 794 785 795 978 799 795 798 NOKIA NAD NAKAMICHI NIAM NONAME 826 834 822 795 782 OKANO 763 772 765 982 PALLADIUM 783 991 PIONEER PRO-LOGIC 761 764 805 793 797 757 957 808 794 798 758 994 795 803 795 QUAD 795 RADIOTONE RADMOR REVOX REVOX/STUDER ROTEL 841 801 843 796 983 802 977 797 984 803 SABA 811 ONKYO PALLADIUM/OKANO PANASONIC PHILIPS 837 756 764 783 794 815 951 962 966 970 978 990 832 763 769 780 794 950 T+A 774 T+A ELEKTROAKUSTIK 774 TECHNICS 805 993 TENSAI 958 THOMSON 980 959 782 770 751 817 835 952 GOODMANNS GOLDSTAR 828 750 763 782 786 814 842 961 965 969 973 818 825 762 768 779 785 948 786 786 787 782 789 988 790 981 995 791 SHARP SHERWOOD SIEMENS SINOTEC SINOTEC (PEPSI-DOSE) SONY SUPERTECH 955 UHER UNIVERSUM 987 763 963 YAMAHA 752 844 846 768 784 812 827 953 963 967 971 779 785 813 840 956 964 968 972 833 766 770 781 800 767 775 784 947 974 991 806 836 976 766 838 844 809 979 824 830 788 796 992 798 103 605 47 0024.A1 42TL92 D-GB 02.11.2005 15:59 Uhr Seite 104 Service Center Trainings Center Verwaltung und Entwicklung Lager/Versand Mecablitz Produktion TV Produktion Kunststofftechnik Metz - Werke GmbH & Co. KG - Zirndorf bei Nürnberg Kernkompetenzen in den Bereichen Elektronik sowie Kunststofftechnik bilden den Ursprung für den ausgezeichneten Ruf der Metz-Werke. Er hat sich im Laufe vieler Jahrzehnte weltweit aufgebaut. Metz bietet Qualität Made in Germany: Consumer Electronics, Photo Electronics, Kunststofftechnik. Metz-Werke GmbH & Co. KG Postfach 1267, D-90506 Zirndorf Fon: +49 911 - 9706 0 Fax: +49 911 - 9706 340 www.metz.de [email protected] Technische Änderungen und Irrtümer vorbehalten. Errors excepted. Subject to changes. Ķķ Printed in Germany Metz - allways first class.