1
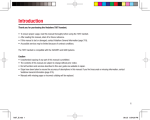
Introduction
Thank you for purchasing the Vodafone 902T phone.
•
•
•
•
To ensure proper usage, read this manual thoroughly before using the 902T phone.
After reading this manual, keep it in a safe place for later reference.
If this manual is lost or damaged, contact Vodafone General Information (page 307).
Accessible services may be limited because of contract conditions.
The 902T phone is compatible with the W-CDMA and GSM systems.
Caution
• Unauthorized copying of any part of this manual is prohibited.
• The contents of this manual are subject to change without prior notice.
• Steps have been taken to ensure the accuracy of descriptions in this manual. If you find inaccurate or missing information, contact
Vodafone General Information (page 307).
• Manuals with missing pages or incorrect collating will be replaced.
1
902T-e-manual-00.indd 1
05.6.9 4:51:26 PM
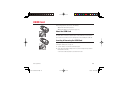
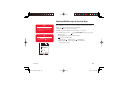
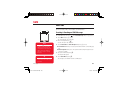
What's in the Box
• Phone
• Rapid Charger (TSCS01)
• Battery Pack (TSBS01)
• Desk Top Cradle (TSES01)
• Battery Cover (TSTS01/02/03)
• Stereo Handsfree Headset
• Video Output Cable (TSPS01) • USB Host Driver for 902T (CD-ROM)
• User Guide
• Quick Start Guide
• 3G Guide (Japanese only)
• In addition to the above items, optional items such as a cigarette lighter charger and USB cable are available. For details, contact your
nearest Vodafone Shop or Vodafone General Information (page 307).
• You can use an SD memory card (hereafter referred to as a memory card) with your phone. A memory card is not supplied with your
phone. Purchase a commercially available memory card to use the memory card functions.
Your phone supports memory cards with a storage capacity of up to 1GB (as of May 2005). There is no guarantee that all memory cards
will work with your phone.
2
902T-e-manual-00.indd 2
05.6.9 4:51:26 PM
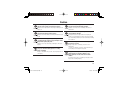
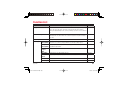
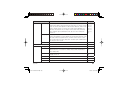
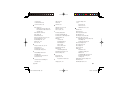
Contents
Introduction ...........................................1
What’s in the Box ...................................2
Contents ................................................3
About this Manual ..................................4
Symbols Used in This Manual..................5
Safety Precautions .................................6
General Notes for Handling ...................18
Trademarks and Patents .......................24
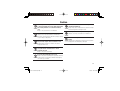
1 Basic Operations ...............................29
Parts & Functions .................................30
USIM Card ...........................................40
Battery Pack ........................................42
Memory Cards .....................................44
Turning Power On/Off ...........................45
System Mode Setting ...........................46
Language Setting .................................47
Date & Time Settings ............................48
Accessing Functions .............................51
Making a Call .......................................53
Answering a Call ..................................54
Engaged Call Operations.......................55
Call Log ...............................................57
Optional Services .................................61
Text Entry ............................................70
Contacts List ........................................75
2 Video Call ..........................................93
About Video Calls .................................94
Making a Video Call ..............................95
Answering a Video Call .........................96
Convenient Functions for Video Calls .....97
Video Call Settings .............................101
3 Camera/Video Camera ....................104
Camera .............................................105
4
5
6
7
Pictures .............................................109
Videos ...............................................121
Picture & Video Settings .....................125
Messaging .......................................134
Messaging Capabilities .......................135
MMS .................................................137
SMS ..................................................149
MMS/SMS Common Operations ..........154
Vodafone live! .................................160
Accessing Vodafone live! ....................161
Bookmarks ........................................163
Operations for Web Pages ..................165
Browser Settings ................................168
V-appli...............................................169
Media Player ......................................175
Data Folder ......................................182
Data Folder ........................................183
Using Files & Folders ..........................185
Displaying Files on a TV ......................188
Using vObjects ...................................190
Using a Memory Card .........................192
Using the USIM Card ..........................194
Settings ...........................................198
Display Settings .................................199
Phone Profiles ....................................206
Language Setting ...............................214
Shortcut Menu ...................................215
Shortcut Keys ....................................216
External Light Settings ........................218
Offline Mode Setting ...........................220
Answerphone .....................................221
Call Settings ......................................222
Caller ID Setting .................................226
Using International Call Service ...........227
Using the Stereo Handsfree Headset....229
Security Settings ................................231
Network & Internet .............................241
Location Settings ...............................247
8 Convenient Functions .....................248
USIM-appli .........................................249
Calendar ............................................250
Alarms...............................................254
Calculator ..........................................256
Converter...........................................257
Voice Recorder ...................................258
Countdown Timer ...............................260
Notepad.............................................261
Number Memo ...................................262
World Clock .......................................263
Multi Task ..........................................264
Barcode .............................................266
Flashlight ...........................................269
Sending Touch Tones ..........................270
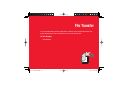
9 File Transfer ....................................272
File Transfer .......................................273
10 Appendix .........................................288
Function List ......................................289
Troubleshooting..................................295
Storage Capacity ................................297
Main Specifications ............................298
Glossary ............................................299
Index .................................................301
Warranty & After Sales Service ............305
Customer Service ...............................307
3
902T-e-manual-00.indd 3
05.6.9 4:51:27 PM
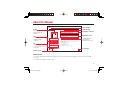
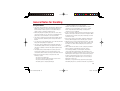
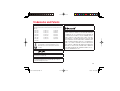
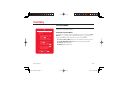
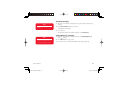
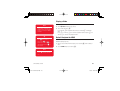
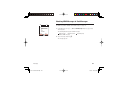
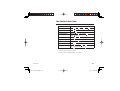
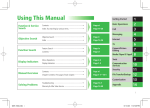
About this Manual
3CREEN
3HOWSTHESCREEN
DISPLAYEDDURINGTHE
OPERATION
,EVELHEADING
4E XT
( E L L O H O W A RE Y O U ,EVELHEADING
"!! %XPLANATIONOFFUNCTION
"
(") $&'((")
")$&'((")
.OTE
0ROVIDESIMPORTANT
INFORMATIONABOUTA
PROCEDURE
4IP
0ROVIDESADVICEAND
POINTSTOREMEMBERABOUT
APROCEDURE
%XPLANATIONOFSTEP
')((('$&&'(
/PTIONS
#L E A R
"
1(-)*++
'%/"#%
'&++!/#,"&-%,#)%
*++++,#+#'!+',,"
+'()*,#('#+'%% (*,"
*+++, ,*,"*++,(
/"#","&++!#+-**',%1
#'!+',
$)'#(($&'((
%*$$)'*&)%
')'(
") %' $&'((")
""%,(.%*)%(")&%$$*#''%#)%$))(" ()&
""%,(.%*)%$)'&%$$*#'*( $)!.&%*$
$)'*&)% )(
)&%$$*#'$&'((
0ROVIDESIMPORTANTOR
SUPPLEMENTARY
INFORMATIONONTHESTEP
& $)" ()&&'(
'1&++!,",(-%'(,
+',#++.,('+',++!+
)!
")$&'((
#(( (($)$)$(+)%$)(((
0AGENUMBER
2EFERENCEPAGE
About Screens
• The screens appearing in this manual are simplified for the purpose of explanation and may differ from the actual screens appearing on
the phone.
• Screens may be omitted for some procedures.
4
902T-e-manual-00.indd 4
05.6.9 4:51:28 PM
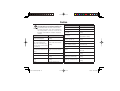
Symbols Used in This Manual
Using Soft Keys
Press soft keys to perform operations indicated at the bottom of the
main display.
• To perform the operation indicated
by
, press J.
• To perform the operation indicated
by
, press K.
Operation
(Notation Used
in This Manual)
Press up
A
Press down
B
Press left
D
Press right
C
Using the Navigation Key
Use the navigation key to move the cursor, access functions, display
the Main menu, confirm selected items and perform selected
operations.
Press centre
@
Function
Accesses the Shortcut menu
Moves the cursor up
Increases the volume
Accesses the Contacts list
Moves the cursor down
Decreases the volume
Access Dialled Numbers
Moves the cursor left
Decreases the volume
Access Received Calls
Moves the cursor right
Increases the volume
Accesses the Main menu
Confirms the selected item or performs the
selected operation
Acts as the shutter button for the camera
5
902T-e-manual-00.indd 5
05.6.9 4:51:29 PM
Safety Precautions
• To ensure proper usage, be sure to read the Safety Precautions
thoroughly before using your phone. Always keep this manual
available for future reference.
• Be sure to follow the safety information contained in the
instruction manuals and indicated on the product to prevent injury
to the user and other persons, as well as damage to property.
• When a child uses the phone, it is recommended that a parent or
guardian reads the instruction manuals thoroughly and provides
proper instructions to the child.
• The following describes the meaning of safety symbols and signal
words. Be sure to understand their meanings before proceeding to
read this manual.
Danger
Meaning
Indicates an imminently hazardous operation
that could result in death or serious injury1 of the
user.
Indicates a potentially hazardous operation that
Warning could result in death or serious injury1 of the
user.
Caution
Symbol Descriptions
Symbol
Pictograph Descriptions
Pictograph
1 Serious injury includes loss of sight, wounds, high temperature
burns, low temperature burns (burns causing reddish areas,
blistering and other damage to the skin as a result of heat
exceeding the body temperature contacting your skin for a
prolonged time), electric shock, fractures and poisoning requiring
hospitalization or long-term medical treatment.
2 Injury includes wounds, burns and electric shock not requiring
hospitalization or long-term medical treatment.
3 Damage to property includes extensive damage to homes and
household property, as well as livestock and pets.
Meaning
indicates a prohibited action. The prohibited
action is indicated graphically or described in
text in or near the symbol.
indicates a compulsory action that must be
carried out.
The compulsory action is indicated graphically or
described in text in or near the symbol.
Indicates a potentially hazardous operation that
could result in minor or moderate injury2 to the
user or damage to property3.
6
902T-e-manual-00.indd 6
05.6.9 4:51:30 PM
Limitation of Liability
・Vodafone and Toshiba accept no liability whatsoever for any
damages arising from natural disasters such as earthquakes,
lightning, storms and floods, as well as fires through no fault
of Vodafone and Toshiba, acts by third parties, other accidents,
improper use by the user, whether intentionally or negligently, or
use under other abnormal conditions.
・Vodafone and Toshiba accept no liability whatsoever for
incidental damages arising out of the use or inability to use the
product, including, but not limited to, corruption or loss of data,
lost business revenue or suspension of business operations.
・Vodafone and Toshiba accept no liability whatsoever for any
damages arising from improper use not conforming to the
instructions in the instruction manuals.
・Vodafone and Toshiba accept no liability whatsoever for
any damages arising from malfunctions caused by use in
combination with connection equipment or software that is not
authorized for use by Vodafone and Toshiba.
・Image data recorded with the camera, downloaded data and
other data may be corrupted or lost due to malfunction, repair
or other improper handling of the product. Vodafone and Toshiba
accept no liability whatsoever for the restoration of corrupted or
lost data, as well as any damages or lost revenue and profits.
・Vodafone and Toshiba accept no liability whatsoever for
corruption or loss of stored data resulting from failures or
malfunctions of the product, regardless of the cause. Be sure to
keep a separate memo of important data to limit damage caused
by data corruption or loss to a minimum.
Danger
Do not disassemble, modify or repair the phone,
battery pack or charger
Doing so may cause overheating, rupturing, fire, electric
shock, injury or malfunction. Modification of the phone
is prohibited by Japanese Radio Law. For repair, contact
your nearest Vodafone Shop or Vodafone Customer
Assistance (page 307).
Do not dispose of the phone or battery pack in a fire
or expose it to heat
If the phone or battery pack is exposed to water,
do not dry it artificially in heating equipment
(microwave oven, etc.)
Doing so may cause overheating, rupturing, fire or
malfunction.
Do not charge, use or leave the phone or battery
pack in hot places such as near a fire or heater
Doing so may cause overheating, rupturing, fire or
malfunction.
Do not expose the phone, charger or battery pack to
fluids such as water, perspiration or seawater
Doing so may cause overheating, rupturing, fire, electric
shock or malfunction. If the phone is dropped accidentally
in water or any other fluid, immediately turn off the phone
and contact your nearest Vodafone Shop or Vodafone
Customer Assistance (page 307).
7
902T-e-manual-00.indd 7
05.6.9 4:51:30 PM
Danger
Do not leave the phone, charger or battery pack
outdoors, in a bathroom or wherever water or any
other fluid is used
Do not place the phone, charger or battery pack
near cups, vases or other containers of fluids
Exposure to water or other fluids may cause electric shock,
overheating, rupturing or fire.
Do not use a charger other than one supplied with or
designated for the phone to charge the battery pack
Do not use the charger for any other phone
Doing so may cause overheating, rupturing, fire or
malfunction.
Do not use excessive force when inserting the
battery pack into the phone or connecting the phone
to the charger
Do not connect any cords with reverse polarity
Doing so may cause the battery pack to leak, rupture,
overheat or catch fire, as well as cause electric shock or
malfunction.
Do not touch the battery pack connectors (metal
parts) with any metal objects (necklace, hairpin,
etc.)
Doing so may cause the battery pack to overheat, rupture
or catch fire, as well as the metal object to overheat.
Do not use a battery pack other than one supplied
with or designated for the phone
Do not use the battery pack for any other phone
Doing so may cause overheating, rupturing, fire or
malfunction.
8
902T-e-manual-00.indd 8
05.6.9 4:51:31 PM
Warning
Do not charge the battery pack while it is wet or
damp
Doing so may cause overheating, rupturing, fire, electric
shock or short circuit. If the battery pack is exposed to
fluids such as water, unplug the rapid charger immediately.
Do not use the phone while driving
Do not make or receive a call and do not use other
functions (messaging, game, camera, video, mobile
light, etc.)
Doing so may cause a traffic accident. Use of the phone
while driving is prohibited by law. Before using the phone,
stop the vehicle in a safe area where parking or stopping is
permitted.
Do not use the phone wherever there is the risk of a
fire or explosion such as in a petrol station
Doing so may ignite the gases and start a fire or explosion.
Turn off the phone and do not charge it wherever gases
may be present (petrol station, etc.).
Do not swing the phone by its strap, video output
cable or stereo handsfree headset
Doing so may cause an injury, accident or damage.
Turn off the phone while you are near any precision
electronic equipment
Radio waves may adversely affect the operation of
electronic equipment. Examples of such equipment:
medical electronic equipment such as cardiac pacemakers
and hearing aids or fire alarms and automatic doors. If
you use medical electronic equipment, consult with the
equipment manufacturer or distributor about the influence
of radio waves.
Remove the power plug from the outlet if the rapid
charger is not to be used for a long period of time or
before cleaning
Failing to do so may cause an electric shock, fire or
malfunction.
Turn off the phone wherever its use is prohibited
such as on an aircraft
Turn off the phone after cancelling any settings
such as schedule and alarm settings that turn on the
phone automatically
Use of the phone on an aircraft is prohibited by law.
Check your surroundings to confirm that it is safe
to make/receive calls, send/receive messages, take
pictures or record videos
Failing to do so may cause you to trip over or cause a
traffic accident.
9
902T-e-manual-00.indd 9
05.6.9 4:51:31 PM
Warning
Do not use the phone with any power voltage other
than the specified voltage
Doing so may cause a fire. The power voltages are 100 to
240 V AC for the rapid charger and 12 or 24 V DC (for a
negative ground car only) for a cigarette lighter charger.
Wipe away any dust on the plug of the rapid charger
with a dry cloth after removing the plug from the
outlet
Dust on the plug or outlet may cause a fire.
Follow the instructions below when installing and
wiring in-vehicle devices
・Make sure that devices do not interfere with
driving and safety equipment such as airbags
・Make sure that wires are not caught in seatbelt
buckles, doors or other moving parts
Any wire caught around a foot, brake pedal, accelerator
pedal, etc. may interfere with driving and cause a traffic
accident. If any part of an in-vehicle device drops onto the
floor, it may startle you into abrupt braking or steering,
leading to a traffic accident.
If electrolyte fluid leaking from the battery pack
gets into your eyes, wash your eyes immediately
with clean water and have your eyes treated by an
ophthalmologist
Failing to receive treatment for your eyes may result in eye
injury.
When thunder is heard outside, stop using the phone
immediately
Turn off the phone and do not touch it
Failing to do so may attract lightning and cause electric
shock. When thunder is heard, stop using the phone and
move to a safe place such as inside a building.
If the battery pack fails to charge in the specified
time, stop charging immediately
Failing to do so may cause overheating, rupturing or fire.
Contact your nearest Vodafone Shop or Vodafone Customer
Assistance (page 307).
When inserting the rapid charger plug into an AC
household outlet, make sure that a metal strap or
any other metal object does not touch the plug
Failing to do so may cause electric shock, short circuit or
fire.
10
902T-e-manual-00.indd 10
05.6.9 4:51:32 PM
Warning
If something unusual happens to the phone, battery
pack or charger; for example, it emits smoke or an
unusual odour or is damaged, perform the following
steps immediately
1. If the battery pack is charging, unplug the rapid charger
from the AC household outlet or unplug the cigarette
lighter charger from the cigarette lighter socket.
2. Make sure that the phone is not hot, then turn it off and
remove the battery pack.
Failing to do so and continuing use (charging) may cause
the battery pack to overheat, rupture or catch fire or the
phone to overheat. If something unusual happens, contact
your nearest Vodafone Shop or Vodafone Customer
Assistance (page 307).
Do not drop the phone or battery pack or subject it
to excessive shock
Doing so may cause overheating, rupturing, fire or
malfunction.
Do not sit down with the phone in your trousers
pocket
Excess weight may damage the display, battery pack or
other parts resulting in overheating, fire or injury.
If the phone is used near an implanted cardiac
pacemaker, defibrillator or other electronic medical
equipment, radio waves may interfere with such
a device or equipment Observe the following
guidelines
1. If you have an implanted cardiac pacemaker or
defibrillator, carry and use the phone at a distance of at
least 22 centimetres away from the implanted device.
2. Turn off the phone in crowded places such as packed
trains because a person with an implanted cardiac
pacemaker or defibrillator may be nearby. Radio waves
can interfere with the operation of a cardiac pacemaker
or other medical device.
3. Follow the precautions below in medical institutions.
・Do not bring the phone into an operating room,
intensive care unit or coronary care unit.
・Turn off the phone in a hospital ward.
・Turn off the phone in a lobby or other location close
to medical equipment.
・Observe the instructions of individual medical
institutions and do not use the phone in or bring it
into prohibited areas.
・Turn off the phone after cancelling any settings such
as schedule and alarm settings that turn on the
phone automatically.
11
902T-e-manual-00.indd 11
05.6.9 4:51:32 PM
Warning
4. When using electronic medical devices other than an
implanted cardinal pacemaker or defibrillator outside
of medical institutions (such as at home), consult with
the individual medical device manufacturer about the
possible influence of radio waves.
The above information conforms to "The Guidelines on
Use of Mobile Phones and Other Devices to Prevent
Electromagnetic Wave Interference with Electronic Medical
Equipment" (Electromagnetic Compatibility Conference
Japan, April 1997), as well as refers to "The Investigative
Research Report on the Influence of Electromagnetic
Waves on Medical Equipment" (Association of Radio
Industries and Businesses, March 2001).
Do not use the rapid charger with any power supply
other than a 100 to 240 V AC household power
supply
Doing so may result in a fire, as well as cause the charger
to overheat, catch fire or malfunction.
12
902T-e-manual-00.indd 12
05.6.9 4:51:33 PM
Caution
Do not use or leave the phone or battery pack in
places where it will be exposed to direct sunlight or
in hot places such as inside a car in the sun
Doing so may cause overheating, fire or malfunction.
Keep the phone, battery pack and charger away
from infants and small children
Failing to do so may result in the battery pack or a memory
card being accidentally swallowed or cause an injury.
Make sure that the charger terminals (metal parts)
do not come into contact with wires or other metal
objects
Failing to do so may cause overheating or burns.
Do not pull the cord when unplugging the rapid
charger or cigarette lighter charger from an AC
household outlet or socket
Damage to the cord may cause electric shock, overheating
or fire.
Hold the plug when unplugging the rapid charger or
cigarette lighter charger.
Do not pull, bend with excessive force or twist the
cords of the rapid charger and cigarette lighter
charger
Do not damage or modify them
Do not place objects on them
Do not apply heat and keep them away from heaters
Damage to a cord may cause electric shock, overheating
or fire.
Do not plug or unplug the rapid charger with wet
hands
Doing so may cause electric shock or malfunction.
Keep magnetic cards away from the phone and
make sure that a magnetic card is not trapped when
closing the phone
Failing to do so may cause the magnetic data on a cash
card, credit card, telephone card or floppy disk to be lost.
Do not use the phone in a vehicle if it affects invehicle electronic devices
Use of the phone in some types of vehicles may, in
some rare cases, affect in-vehicle electronic devices and
interfere with safe driving.
13
902T-e-manual-00.indd 13
05.6.9 4:51:33 PM
Caution
Do not place the phone on an unstable or unlevel
surface
Doing so may result in the phone falling and causing injury
or malfunction. Be particularly careful when vibration is set.
Do not dispose of the used battery pack with
ordinary garbage
Insulate the connectors with tape and then dispose of the
used battery pack separately from ordinary garbage or take
it to your nearest Vodafone Shop. Be sure to observe local
regulations on the separate collection of used batteries,
wherever applicable.
If the fuse for the cigarette lighter charger blows,
replace it with a designated fuse
Replacing the fuse with other than a designated fuse may
cause overheating and fire.
For details on replacing the fuse, refer to the instruction
manual of the cigarette lighter charger.
If fluid leaking from the battery pack comes
into contact with skin or clothing, wash it away
immediately with clean water
Failing to do so may cause skin irritation.
Do not touch the phone with sweaty hands or place
it into a pocket of sweaty clothes
Sweat and humidity may erode the internal components of
the phone and cause overheating or malfunction.
Do not use the cigarette lighter charger when the
car engine is not running
Doing so may result in a flat battery.
14
902T-e-manual-00.indd 14
05.6.9 4:51:33 PM
Caution
If your skin becomes irritated, immediately stop
using the phone and consult with a dermatologist
The following materials and surface treatments have
been used for the phone. Some of these materials may
cause itching, irritation, eczema, etc. in some rare cases
depending on the individual's constitution and physical
condition.
Part
Outer housing (keypad)
Material (Surface Treatment)
PC resin (UV cured acrylic
coating)
Outer housing (main display
side, external display side,
PPE/PS resin (UV cured acrylic
hinge side covers, hinge caps,
coating)
external camera section, battery
compartment)
Part
External light LED lamp
Material (Surface Treatment)
Acrylic resin
Mobile light panel
PC resin
Round logo badge, rectangular
logo badge
Acrylic resin (UV cured acrylic
coating)
Camera grip
Polyester elastomer resin (UV
cured urethane coating)
Earphone microphone jack cap,
memory card slot cap
PC/ABS resin (UV cured acrylic
coating)
Cable connector cap
Polyester elastomer resin
Phone charging connector
Stainless steel (gold coating,
nickel undercoat)
Infrared port
Acrylic resin
Main display panel, internal
camera panel, external camera
panel
Acrylic resin (UV cured acrylic
ink)
Screws
Steel (nickel coating, copper
undercoat)
External display panel
Tempered glass (polyester film)
Screw covers (earpiece)
ABS resin (UV cured acrylic
coating)
Lower internal panel
ABS resin (UV cured acrylic
coating)
Screw covers (main display)
ABS resin (UV cured acrylic
coating)
Keys
PC resin (UV cured urethane
coating)
Screw caps (external camera)
ABS resin (UV cured acrylic
coating)
Stops
Polyester elastomer resin
15
902T-e-manual-00.indd 15
05.6.9 4:51:34 PM
Caution
Before using the phone, make sure that no metal
objects (such as pins) are stuck to the earpiece
Failing to do so may result in a metal object causing an ear
injury, etc.
Make sure things like paper, cloth or bedding are
not placed on the phone during charging
Failing to do so may cause overheating, fire, burns or
malfunction.
If you have a weak heart, be careful with the call
vibration and ringtone volume settings
Failing to do so may startle you and may be harmful to your
heart.
Do not turn the volume up too high while using the
stereo handsfree headset
Prolonged exposure to high sound levels may impair
hearing or sound leakage may annoy other people around
you. Surrounding sounds may not be heard clearly resulting
in an accident.
Be careful not to trap your fingers or objects when
closing the phone and not to trap your fingers in the
hinge when opening the phone
Failing to do so may cause injury or damage to the LCD
display.
Do not use the mobile light and flashlight for
purposes other than taking pictures, recording
videos or lighting
Doing so may dazzle the eyes and cause impaired vision or
other injury.
Do not insert objects other than a memory card into
the memory card slot
Doing so may cause overheating, electric shock or
malfunction.
Cover the slot with the cap at times other than when you
are inserting or removing a memory card.
Keep your face away from the memory card slot
when inserting or removing a memory card
Keep a memory card out of the reach of small
children
If a memory card is let go of suddenly, it may fly out and
hit your face resulting in injury.
16
902T-e-manual-00.indd 16
05.6.9 4:51:34 PM
Caution
Do not subject a memory card to vibration or shock
or remove it from the slot or turn off the phone while
data is being written to or read from the memory
card
Doing so may cause data loss or malfunction.
Use only a memory card supported by the phone
Failing to do so may cause data loss or malfunction.
The phone supports memory cards with a storage capacity
of up to 1GB (as of May 2005).
Do not let infants use the video output cable
Keep the video output cable out of infants' reach
An injury may be caused if, for instance, the cable is
wrapped around a neck.
Do not use excessive force when inserting or
removing the USIM card
Doing so may cause a malfunction. Be careful not to injure
a hand or finger when removing the card.
Use only a USIM card designated for the phone
Failing to do so may cause data loss or malfunction.
Do not remove the protective sheet from the external
display
Using the phone without the protective sheet may result in
an injury if the external display is damaged.
Do not point the infrared port towards eyes while
using the infrared communication or remote
controller functions
Doing so may cause eye damage.
Do not use the mobile light close to eyes
Doing so may cause eye damage. Be especially careful not
to take pictures or record videos with the mobile light too
close to the eyes of infants.
17
902T-e-manual-00.indd 17
05.6.9 4:51:34 PM
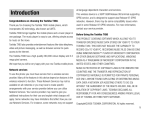
General Notes for Handling
Using Your Phone
• The phone employs radio waves. Signals may be disrupted even
within service areas if you are indoors, underground, inside a
tunnel or inside a vehicle. If you move to a location with poor
signal reception, a call may be suddenly cut off.
• When using the phone in public places, take care not to annoy
other people around you. Use of the phone is prohibited in some
public places such as in theatres or on buses and trains.
• The phone is a radio transceiver under Japanese Radio Law. You
may be requested to submit the phone for inspection based on
this law.
• Use of the phone near a landline phone, TV or radio may affect the
image and sound quality of the equipment.
• The phone employs a digital system to maintain a high level of
communication quality even at very low signal levels. However,
calls may be suddenly cut off when the signal strength becomes
too weak.
• The digital system provides a high level of privacy protection.
However, the possibility of someone eavesdropping on your
conversation cannot be ruled out as long as radio waves are used.
• Data stored on the phone may be corrupted or lost on the
following occasions.
・The phone is used improperly.
・The phone is exposed to static electricity or electric noise.
・The phone is turned off during operation.
・The battery pack is completely discharged.
•
•
•
•
・The phone malfunctions or is sent for repairs.
Vodafone and Toshiba accept no liability whatsoever for the
corruption or loss of stored data. Be sure to keep a separate
memo of important data to limit damage caused by data
corruption or loss to a minimum.
Be sure to charge the battery pack before using the phone for the
first time or if the phone has not been used for a long time. When
the battery pack is stored for a long time, it discharges over time
even if it is not used.
Before using a memory card, read the instruction manual of the
memory card thoroughly to ensure safe and proper operation.
When the phone is used for extended periods of time, especially
in high temperature conditions, the phone surface could become
hot. Please use caution when touching the phone under such
conditions.
When certain items are taken out of the country, documentation
may be required to certify that the export of the items is
not controlled, prohibited, or restricted by the Export Trade
Control Order and Foreign Exchange Order. Basically, no such
documentation is required if you take the phone out of the country
and bring it back for the purpose of personal use when going on
vacations or short business trips. In some cases, however, an
export permit may be required if the phone is to be used by or
transferred to anyone else.
Furthermore, a US government export permit may be required
when taking the phone to countries for which the US government
18
902T-e-manual-00.indd 18
05.6.9 4:51:35 PM
has imposed export restrictions (Cuba, Libya, North Korea, Iran,
Sudan, Syria).
For details on export laws, regulations and procedures, refer to
the Web page of the Security Export Control Policy Division of the
Ministry of Economy, Trade and Industry.
• If you have hearing aids, use of the phone may interfere with some
operations of the hearing aids. If there is any interference, consult
with the manufacturer or distributor of the hearing aids.
Inside Vehicles
• Do not use the phone while driving. Use of the phone while driving
is prohibited by law.
• Before using the phone, stop the vehicle in a safe area where
parking or stopping is permitted.
Aboard Aircraft
• Do not use the phone on an aircraft. Turn off the phone after
cancelling any settings such as schedule and alarm settings that
turn on the phone automatically. Do not turn the phone back on
while you are on the aircraft. Use of the phone on an aircraft is
prohibited by law.
Handling Basics
• Do not use the phone in extreme temperatures, direct sunlight and
humid or dusty places.
• Do not drop the phone or subject it to excessive shock.
• To clean the phone, wipe it with a dry soft cloth. Do not use
alcohol, thinner, benzene or other solvents. Doing so may cause
discoloration and remove the printed logo.
• Take care not to expose the phone to rain, snow or high humidity.
The phone, battery pack, charger, stereo handsfree headset and
other optional accessories are not waterproof.
• Do not remove the battery pack while the power is turned on.
Doing so may cause a malfunction.
• If the battery pack has been removed from the phone or the
phone has not been charged for a long time, stored data and
settings may be lost or altered. Vodafone and Toshiba accept no
liability whatsoever for any damage or loss resulting from such
negligence.
• The battery pack is a consumable item employing lithium ions.
Replace the battery pack with a new one if the operation time
becomes extremely short after it is fully charged. Buy a new
battery pack designated for the phone.
• When disposing of a used battery pack after battery
pack replacement or discontinued use of the phone,
insulate the connectors with tape or place the battery
pack into a plastic bag and then take it to your nearest
Vodafone Shop or battery pack recycling cooperative store. Be
sure to observe local regulations on the separate collection of
used batteries, wherever applicable.
• Some phone display pixels may be missing or remain lit. This
is not a defect or malfunction. If the display is left on for a long
period of time, pictures may be permanently burned into it.
• Make sure the stereo handsfree headset is securely plugged into
the earphone microphone jack. Failing to do so may generate
noise on the other party's phone during calls.
19
902T-e-manual-00.indd 19
05.6.9 4:51:35 PM
• Do not turn the volume up too high when using the stereo
handsfree headset. Prolonged exposure to high sound levels may
impair hearing or sound leakage may annoy other people around
you. Surrounding sounds may not be heard clearly while you are
doing something such as walking resulting in an accident.
• When not using the earphone microphone jack and external
connector, make sure they are covered with the caps. Otherwise,
dust and water may enter the phone, resulting in malfunction.
• Hold the plug and do not pull the cord when unplugging the video
output cable or stereo handsfree headset. Pulling the cord may
cause damage or malfunction.
• Do not close the phone with the strap, video output cable or stereo
handsfree headset inside. Doing so may cause malfunction or
damage.
• The antenna of the phone is built into the body and does not
protrude. Signal sensitivity may be reduced if you touch or cover
the portion of the body containing the internal antenna (page 32).
In particular, do not affix things like stickers onto this portion of the
body.
• When you replace the phone or send it for repair, messages and
other data stored in the phone cannot be transferred to another
phone.
• Do not drop the USIM card or subject it to excessive shock. Doing
so may cause a malfunction.
• Do not bend the USIM card or place a heavy object on it. Doing so
may cause a malfunction.
• Do not allow the USIM card to get wet or leave it in places of high
humidity. Doing so may cause a malfunction.
• Do not use or leave the USIM card in hot places such as near a
fire or heater. Doing so may cause a malfunction.
• Avoid storing the USIM card in direct sunlight or hot and humid
places. Failing to do so may cause a malfunction.
• Keep the USIM card out of infants' reach. Failing to do so may
result in the USIM card being accidentally swallowed or cause an
injury.
• Before using the USIM card, read the instruction manual of the
USIM card thoroughly to ensure safe and proper operation.
Mobile Camera
• Do not expose the camera lens to direct sunlight. Concentrated
sunlight through the lens may cause the phone to malfunction.
• Be sure to try taking and previewing pictures before using the
camera on important occasions like wedding ceremonies.
• Do not commercially use or transfer pictures taken with
the camera without the permission of the copyright holder
(photographer), except for personal use.
• Do not use the camera to record information in places like
bookstores where taking pictures is prohibited.
Mobile Light & External Light
• Do not use the mobile light in hot, cold or humid places. Doing so
may shorten its life.
• The mobile light and external light have a limited life. Repeated
use will decrease the light intensity.
20
902T-e-manual-00.indd 20
05.6.9 4:51:35 PM
Remote Controller
Right of Portrait
• A clear line of sight is required between the phone and the
receiving device. Make sure curtains, sliding doors or other objects
do not block the signal.
• The signal transmitted from the phone may be blocked if the
receiving port is exposed to sunlight or fluorescent light.
• Not all infrared compatible devices may work with the remote
control function.
• Portrait right is the right of an individual to refuse to be
photographed by others and protects from the unauthorized
publication or use of an individual's photograph by others. Right
of personality is a portrait right applicable to all citizens and
right of publicity is a portrait right (property right) designed to
protect celebrities' interests. Be careful when taking pictures with
the phone camera. Photographing, publicizing and distributing
photographs of citizens and celebrities without permission are
illegal.
Copyrights
• Copyrighted materials, such as music, images, computer programs
and databases, and their respective holders are protected by
copyright laws. Duplication of copyrighted materials is permitted
only for individual or home use. Making copies (including data
conversion), modifications, transfers or network distributions
of copies for purposes other than stated above without proper
authorization constitutes an infringement of copyrights and moral
rights, potentially resulting in claims for reparations or criminal
punishment. If you use the phone to make copies, observe the
copyright laws. Furthermore, recording materials using the camera
is also subject to the same laws.
21
902T-e-manual-00.indd 21
05.6.9 4:51:36 PM
TOSHIBA CORPORATION
IMPORTANT NOTE: PLEASE READ BEFORE USING YOUR
MOBILE PHONE
BY ATTEMPTING TO USE ANY SOFTWARE ON THE SUPPLIED
PHONE THIS CONSTITUTES YOUR ACCEPTANCE OF THESE
EULA TERMS. IF YOU REJECT OR DO NOT AGREE WITH ALL THE
TERMS OF THIS EULA, PLEASE DO NOT ATTEMPT TO ACCESS
OR USE THE SUPPLIED SOFTWARE.
End User License Agreement
This End User License Agreement ("EULA") is a legal agreement
between you (as the user) and TOSHIBA CORPORATION ("Toshiba")
with regard to the copyrighted software as installed in a Toshiba 3G
mobile phone supplied to you (the "Phone").
Use or disposal of any software installed in the Phone and related
documentations (the "Software") will constitute your acceptance of
these terms, unless separate terms are provided by the Software
supplier on the Phone, in which case certain additional or different
terms may apply. If you do not agree with the terms of this EULA, do
not use or dispose the Software.
1. License Grant. Toshiba grants to you a personal, nontransferable and non-exclusive right to use the Software as
set out in this EULA. Modifying, adapting, translating, renting,
copying, making available, transferring or assigning all or part
of the Software, or any rights granted hereunder, to any other
persons and removing any proprietary notices, labels or marks
from the Software is strictly prohibited, except as expressly
permitted in this EULA. Furthermore, you hereby agree not to
create derivative works based on the Software.
2. Copyright. The Software is licensed, not sold. You acknowledge
that no title to the intellectual property in the Software is or will
be transferred to you. You further acknowledge that title and
full ownership rights to the Software will remain the exclusive
property of Toshiba, Toshiba's affiliates, and/or their suppliers,
and you will not acquire any rights to the Software, except as
expressly set out in this EULA. You may keep a back-up copy
of the Software only so far as necessary for its lawful use.
All copies of the Software must contain the same proprietary
notices as contained in or on the Software and are subject to
the terms of this EULA. All rights not expressly granted under
this EULA are reserved to Toshiba, Toshiba's affiliates and/or
their suppliers.
3. Reverse Engineering. You agree that you will not attempt, and if
you are a business organisation, you will use your best efforts
to prevent your employees, servants and contractors from
attempting to reverse engineer, decompile, modify, translate
or disassemble the Software in whole or in part except to the
extent that such actions cannot be excluded by mandatory
applicable law and only if those actions are taken in accordance
with such applicable law. Any failure to comply with the above
or any other terms and conditions contained herein will result
in the automatic termination of this license and the reversion of
the rights granted hereunder to Toshiba.
4. DISCLAIMER OF WARRANTY. The Software is provided
"AS IS" without warranty of any kind. TOSHIBA, TOSHIBA'S
AFFILIATES, AND THEIR SUPPLIERS DISCLAIM ALL
22
902T-e-manual-00.indd 22
05.6.9 4:51:36 PM
WARRANTIES, CONDITIONS OR OTHER TERMS (WHETHER
EXPRESS OR IMPLIED), INCLUDING BUT NOT LIMITED
TO WARRANTIES, CONDITIONS AND TERMS OF
SATISFACTORY QUALITY, MERCHANTABILITY, FITNESS
FOR A PARTICULAR PURPOSE AND NON-INFRINGEMENT
OF THIRD-PARTY RIGHTS; AND THE ENTIRE RISK AS TO
THE QUALITY AND PERFORMANCE OF THE SOFTWARE
IS WITH YOU. YOU ACCEPT THAT SOFTWARE MAY NOT
MEET YOUR REQUIREMENTS AND NO WARRANTY CAN
BE GIVEN THAT OPERATION OF THE SOFTWARE WILL BE
UNINTERRUPTED OR ERROR-FREE.
5. LIMITATION OF LIABILITY. TO THE FULLEST EXTENT
LEGALLY PERMITTED, IN NO EVENT SHALL TOSHIBA,
TOSHIBA'S AFFILIATES OR THEIR SUPPLIERS BE LIABLE
TO YOU FOR ANY DAMAGES FOR (A) LOST BUSINESS OR
REVENUE, BUSINESS INTERRUPTION, LOSS OF BUSINESS
DATA; OR (B) CONSEQUENTIAL, SPECIAL, INCIDENTAL
OR INDIRECT DAMAGES OF ANY KIND (WHETHER UNDER
CONTRACT, TORT OR OTHERWISE) ARISING OUT OF:
(I) THE USE OR INABILITY TO USE THE SOFTWARE,
EVEN IF TOSHIBA, TOSHIBA'S AFFILIATES OR THEIR
SUPPLIER HAS BEEN ADVISED OF THE POSSIBILITY OF
SUCH DAMAGES; OR (II) ANY CLAIM BY A THIRD PARTY.
SAVE AS SET OUT IN THIS SECTION, TOSHIBA'S ENTIRE
LIABILITY UNDER THIS EULA SHALL NOT EXCEED THE
PRICE PAID FOR THE SOFTWARE, IF ANY.
PLEASE MAKE AND RETAIN A COPY OF ALL DATA YOU HAVE
INSERTED INTO YOUR PRODUCT, FOR EXAMPLE NAMES,
ADDRESSES, PHONE NUMBERS, PICTURES, RINGTONES ETC,
BEFORE SUBMITTING YOUR PRODUCT FOR A WARRANTY
SERVICE, AS SUCH DATA MAY BE DELETED OR ERASED AS
PART OF THE REPAIR OR SERVICE PROCESS.
6. Laws. This EULA will be governed by the laws of Japan.
All disputes arising out of this EULA shall be subject to the
exclusive jurisdiction of the Tokyo District Court.
7. Export Laws. Any use, duplication or disposal of the Software
involves products and/or technical data that may be controlled
under the export laws of applicable countries or region and
may be subject to the approval of the applicable governmental
authorities prior to export. Any export, directly or indirectly,
in contravention of the export laws of applicable countries or
region is prohibited.
8. Third Party Beneficiary. You agree that certain suppliers of the
Software to Toshiba have a right as a third party beneficiary to
enforce the terms of this EULA against you as a user.
23
902T-e-manual-00.indd 23
05.6.9 4:51:36 PM
Trademarks and Patents
Licensed by QUALCOMM Incorporated under one or more of the
following United States Patents and/or their counterparts in other
nations:
4,901,307 5,504,773 5,109,390
5,535,239 5,267,262 5,600,754
5,416,797 5,778,338 5,490,165
5,101,501 5,511,073 5,267,261
5,568,483 5,414,796 5,659,569
5,056,109 5,506,865 5,228,054
5,544,196 5,337,338 5,657,420
5,710,784
Java and all Java-based trademarks and logos
are trademarks or registered trademarks of Sun
Microsystems, Inc. in the United States and other
countries.
SD Logo
BluetoothTM is a trademark of Bluetooth SIG, Inc.USA.
THIS PRODUCT IS LICENSED UNDER THE MPEG-4 VISUAL
PATENT PORTFOLIO LICENSE FOR THE PERSONAL AND NONCOMMERCIAL USE OF A CONSUMER FOR (i) ENCODING VIDEO IN
COMPLIANCE WITH THE MPEG-4 VISUAL STANDARD (“MPEG-4
VIDEO”) AND/OR (ii) DECODING MPEG-4 VIDEO THAT WAS
ENCODED BY A CONSUMER ENGAGED IN A PERSONAL AND
NON-COMMERCIAL ACTIVITY AND/OR WAS OBTAINED FROM A
VIDEO PROVIDER LICENSED BY MPEG-LA TO PROVIDE MPEG-4
VIDEO. NO LICENSE IS GRANTED OR SHALL BE IMPLIED FOR
ANY OTHER USE. ADDITIONAL INFORMATION INCLUDING THAT
RELATING TO PROMOTIONAL, INTERNAL AND COMMERCIAL
USES AND LICENSING MAY BE OBTAINED FROM MPEG LA, LLC.
SEE HTTP://WWW.MPEGLA.COM.
is a trademark.
MPEG Layer-3 audio coding technology licensed from Fraunhofer
IIS and Thomson multimedia.
Powered by Mascot Capsule® / Micro3D EditionTM Mascot Capsule®
is a registered trademark of HI Corporation © 2002-2003 HI
Corporation. All Rights Reserved.
24
902T-e-manual-00.indd 24
05.6.9 4:51:36 PM
Copyright © 1998-2003 The OpenSSL Project. All rights
reserved.
Copyright © 1995-1998 Eric Young ([email protected]) All
rights reserved.
T9 Text Input is covered by Japan Pat.No. 特許 3532780,
3492981 and other patents pending.
THIS SOFTWARE IS PROVIDED BY THE OpenSSL PROJECT
AND/OR BY ERIC YOUNG "AS IS" AND ANY EXPRESSED OR
IMPLIED WARRANTIES, INCLUDING, BUT NOT LIMITED TO, THE
IMPLIED WARRANTIES OF MERCHANTABILITY AND FITNESS FOR
A PARTICULAR PURPOSE ARE DISCLAIMED. IN NO EVENT SHALL
THE OpenSSL PROJECT, ERIC YOUNG OR ITS CONTRIBUTORS
BE LIABLE FOR ANY DIRECT, INDIRECT, INCIDENTAL, SPECIAL,
EXEMPLARY, OR CONSEQUENTIAL DAMAGES (INCLUDING, BUT
NOT LIMITED TO, PROCUREMENT OF SUBSTITUTE GOODS OR
SERVICES; LOSS OF USE, DATA, OR PROFITS; OR BUSINESS
INTERRUPTION) HOWEVER CAUSED AND ON ANY THEORY OF
LIABILITY, WHETHER IN CONTRACT, STRICT LIABILITY, OR TORT
(INCLUDING NEGLIGENCE OR OTHERWISE) ARISING IN ANY WAY
OUT OF THE USE OF THIS SOFTWARE, EVEN IF ADVISED OF THE
POSSIBILITY OF SUCH DAMAGE.
25
902T-e-manual-00.indd 25
05.6.9 4:51:37 PM
FCC Notice
FCC RF Exposure Information
The handset may cause TV or radio interference if used in close
proximity to receiving equipment. The FCC can require you to stop
using the handset if such interference cannot be eliminated.
Your handset is a radio transmitter and receiver. It is designed and
manufactured not to exceed the emission limits for exposure to
radio frequency (RF) energy set by the Federal Communications
Commission of the U.S. Government.
The guidelines are based on standards that were developed by
independent scientific organisations through periodic and thorough
evaluation of scientific studies. The standards include a substantial
safety margin designed to assure the safety of all persons, regardless
of age and health.
The exposure standard for wireless handsets employs a unit of
measurement known as the Specific Absorption Rate, or SAR. The
SAR limit set by the FCC is 1.6W/kg.
The tests are performed in positions and locations (e.g., at the ear
and worn on the body) as required by the FCC for each model. The
highest SAR value for this model handset when tested for use at
the ear is 0.197W/kg and when worn on the body, as described in
this user guide, is 0.652W/kg. Body-worn Operation; This device
was tested for typical body-worn operations with the back of the
handset kept 1.5cm from the body. To maintain compliance with FCC
RF exposure requirements, use accessories that maintain a 1.5cm
separation distance between the user's body and the back of the
handset. The use of beltclips, holsters and similar accessories should
not contain metallic components in its assembly.
The use of accessories that do not satisfy these requirements may
not comply with FCC RF exposure requirements, and should be
avoided.
Information to User
This equipment has been tested and found to comply with the limits
of a Class B digital device, pursuant to Part 15 of the FCC Rules.
These limits are designed to provide reasonable protection against
harmful interference in a residential installation. This equipment
generates, uses and can radiate radio frequency energy and, if not
installed and used in accordance with the instructions, may cause
harmful interference to radio communications.
However, there is no guarantee that interference will not occur
in a particular installation; if this equipment does cause harmful
interference to radio or television reception, which can be determined
by turning the equipment off and on, the user is encouraged to try to
correct the interference by one or more of the following measures:
1. Reorient/relocate the receiving aerial.
2. Increase the separation between the equipment and receiver.
3. Connect the equipment into an outlet on a circuit different from
that to which the receiver is connected.
4. Consult the dealer or an experienced radio/TV technician for help.
Caution: Changes or modifications not expressly approved by the
manufacturer responsible for compliance could void the user's
authority to operate the equipment.
26
902T-e-manual-00.indd 26
05.6.9 4:51:37 PM
The FCC has granted an Equipment Authorisation for this model
handset with all reported SAR levels evaluated as in compliance
with the FCC RF emission guidelines. SAR information on this model
handset is on file with the FCC and can be found under the Display
Grant section of http://www.fcc.gov/oet/fccid after searching on FCC
ID SP2-CC4-E01.
Additional information on Specific Absorption Rates (SAR) can be
found on the Cellular Telecommunications & Internet Association
(CTIA) website at http://www.phonefacts.net.
European RF Exposure Information
Your handset has been designed, manufactured and tested so
as not to exceed the limits for exposure to electromagnetic fields
recommended by the Council of the European Union. These limits are
part of comprehensive guidelines developed by independent scientific
organisations. The guidelines include a substantial safety margin
designed to assure the safety of the handset user and others and to
take into account variations in age and health, individual sensitivities
and environmental conditions. European standards provide for the
amount of radio frequency electromagnetic energy absorbed by
the body when using a handset to be measured by reference to the
Specific Absorption Rate (SAR). The SAR limit for the general public is
currently 2W/kg averaged over 10g of body tissue. Your handset SAR
value is 0.419W/kg.
This has been tested to ensure that this limit is not exceeded even
when the handset is operating at its highest certified power. In use
however your handset may operate at less than full power because
it is designed to use only sufficient power to communicate with the
network.
27
902T-e-manual-00.indd 27
05.6.9 4:51:37 PM
28
902T-e-manual-00.indd 28
05.6.9 4:51:38 PM
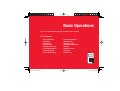
Basic Operations
This chapter explains the basic operations and functions of your phone.
In This Chapter
❍ Parts & Functions
❍ USIM Card
❍ Battery Pack
❍ Memory Cards
❍ Turning Power On/Off
❍ System Mode Setting
❍ Language Setting
❍ Date & Time Settings
902T-e-manual-01.indd 29
❍ Accessing Functions
❍ Making a Call
❍ Answering a Call
❍ Engaged Call Operations
❍ Call Log
❍ Optional Services
❍ Text Entry
❍ Contacts List
05.6.9 4:52:33 PM
Parts & Functions
Phone
!TTACHINGTHESTRAP
Basic Operations
902T-e-manual-01.indd 30
30
05.6.9 4:52:33 PM
1. Earpiece
2. Main Display
3. Left Soft Key: Allows you to select items and use the Options
menu. You can also use this key to access the Messaging menu
from standby mode.
4. Navigation Key: Moves the cursor up, down, left or right,
accesses functions assigned to the navigation key, etc.
Centre Key: Displays the Main menu from standby mode. You
can use this key to confirm selected items and perform selected
operations.
5. Video Call Key: Makes and answers video calls.
6. Send Key: Makes and answers calls.
7. Cable and Phone Charging Connections: Connect Rapid
Charger and other devices.
8. Internal Camera Lens: Used for video calls, etc.
9. External Light: Flashes for incoming calls, messages, etc.
10. Right Soft Key: Takes you back to the last operation, cancels
operations, etc. You can also use this key to access Vodafone
live! from standby mode.
11. Multi Task Key: Allows you to switch to another function
without ending the function currently in use.
12. Clear/Back Key: Deletes input characters and takes you
back to the last operation. You can also use this key to access
Answerphone from standby mode.
13. End/Power Key: Turns on/off the power, ends calls/operations
and takes you back to standby mode.
Basic Operations
902T-e-manual-01.indd 31
14. Keypad: Allows you to enter phone numbers, characters, etc.
To listen to the Voicemail service, press and hold 1 from
standby mode.
To enter "+" for making an international call, press and hold
0 from standby mode.
*, , Key: Allows you to change the input mode, etc. You
can also use this key to scroll to the previous page in a screen
displaying a list or turn the mobile light on or off during camera
use.
To set/cancel the key guard, press and hold * from standby
mode.
#, , 記号, Key: Allows you to enter symbols, etc. You can
also use this key to scroll to the next page in a screen displaying
a list.
To switch between Normal and Silent, press and hold # from
standby mode.
15. Microphone
16. Charging Indicator: Lights during charging and goes out when
charging is complete.
17. External Display: Notifies of incoming calls, received messages
and other information while your phone is closed.
18. External Camera Lens: Used for taking pictures and recording
videos.
19. Mobile Light: Used as a light when taking pictures or recording
videos at night time or while indoors.
20. Camera Grip
31
05.6.9 4:52:34 PM
21. Infrared Port: Used for exchanging data by infrared.
22. Internal Antenna: The antenna is built into your phone.
23. Camera/Video Indicator: Flashes when the camera or video is
activated.
24. Second Microphone: Sound is recorded via this microphone
when you record videos.
25. Stereo Speakers
26. Side Key P/Side Key Q: Used for moving cursor up and
down and adjusting the volume.
27. Side Key Z: Used as a shortcut key.
28. Side Key R: Activates the camera, etc. This key also acts as
the shutter button during camera use.
29. AV OUT/Earphone Microphone Jack: Connect a video output
cable or stereo handsfree headset.
30. Memory Card Slot: Allows you to insert a memory card.
31. Handstrap Hole
Basic Operations
902T-e-manual-01.indd 32
32
05.6.9 4:52:34 PM
Main Display
①②③④⑤⑥⑦⑧⑨⑩ ⑪
⑫ ⑬
⑭⑮⑯⑰⑱⑲
Basic Operations
902T-e-manual-01.indd 33
The following indicators appear on the main display.
①
Signal Strength
Strong
Weak
Moderate
Faint
Out of Range
Offline Mode On (page 220)
②
/ Voice/Video Call
Dial-up Connection (page 279, 282, 285)
Secret Mode On (page 240)
③
Streaming Playback (page 176, 177)
Exchanging Data
GPRS Network Data Communication Connection Established
GPRS Network Location Information Confirmation
④
/ 3G [UMTS] Network Connection/Roaming
/ GSM Network Connection/Roaming
/ GPRS Network Connection/Roaming
Service Area of Operator Other than Vodafone
⑤
Web SSL
Indicates a connection to an information page with security protection.
External Connection for Data Synchronisation
/ BluetoothTM Connection Established/Connection Standby (page 273)
Infrared Communication (page 280)
33
05.6.9 4:52:35 PM
⑥
/
V-appli Activated/Paused (page 172)
⑦
/
Memory Card Inserted/Write Protected (page 44)
⑧
Media File Playing
Silent (page 206)
Car (page 206)
Meeting (page 206)
⑨
Reception of High Priority MMS
Reception of Rights Object
Indicates the reception of a content key (page 142) during operation.
/ New MMS/SMS (page 142, 151)
WAP Push Message (page 152)
⑩
Battery Level
Sufficiently charged
Moderate
Low
Charging (page 43)
Very Low
Charge Immediately
⑪ Clock Display Indicator
Basic Operations
902T-e-manual-01.indd 34
⑫
Phone Lock Set (page 236)
Key Guard Set (page 239)
⑬
Alarm Set (page 254)
⑭
Silent and Vibration Set (page 207, 209)
Silent Set (page 207)
Vibration Set (page 209)
⑮
Information Prompt (page 38)
34
05.6.9 4:52:36 PM
Basic Operations
902T-e-manual-01.indd 35
⑯
New Voicemail Message (page 61)
Missed Call (page 57)
⑰
SMS maximum for Received Msgs.
Indicates Received Msgs. contains the maximum number of SMS messages.
⑱
Call Diverting without Ringer Set for Voice Call (page 63)
Call Diverting without Ringer Set for Video Call (page 63)
Call Diverting without Ringer Set for Voice and Video Calls (page 63)
⑲
/ / / Answerphone On and You Have a Message (page 54, 221)
/ / Answerphone Off and You Have a Message (page 54, 221)
35
05.6.9 4:52:37 PM
External Display
① ② ③ ④ ⑤ ⑥
⑦
⑧
⑨
⑬
/ 3 U N
12:30
The external display allows you to confirm information when your phone is closed.
⑫
⑪
⑩
①
Signal Strength
Strong
Weak
Moderate
Faint
Out of Range
Offline Mode On (page 220)
②
/
③
Voice Call
Dial-up Connection (page 279, 282, 285)
Secret Mode On (page 240)
Exchanging Data
GPRS Network Data Communication Connection Established
GPRS Network Location Information Confirmation
④
⑤
⑥
Basic Operations
902T-e-manual-01.indd 36
/
/
/
V-appli Activated/Paused (page 172)
3G [UMTS] Network Connection/Roaming
GSM Network Connection/Roaming
GPRS Network Connection/Roaming
Service Area of Operator Other than Vodafone
Battery Level
Sufficiently charged
Moderate
Low
Charging (page 43)
Very Low
Charge Immediately
36
05.6.9 4:52:38 PM
⑦
⑧
⑨
⑩
⑪
⑫
Phone Lock Set (page 236)
Key Guard Set (page 239)
/
Memory Card Inserted/Write Protected (page 44)
New Voicemail Message (page 61)
Missed Call (page 57)
Silent and Vibration Set (page 207, 209)
Silent Set (page 207)
Vibration Set (page 209)
Reception of High Priority MMS
Reception of Rights Object
Indicates the reception of a content key (page 142) during operation.
/ New MMS/SMS (page 142, 151)
WAP Push Message (page 152)
Media File Playing
Silent (page 206)
Car (page 206)
Meeting (page 206)
Web SSL
Indicates a connection to an information page with security protection.
External Connection for Data Synchronisation
/ BluetoothTM Connection Established/Connection Standby (page 273)
Infrared Communication (page 280)
/ / / Answerphone On and You Have a Message (page 54, 221)
/ / Answerphone Off and You Have a Message (page 54, 221)
⑬ Clock Display
Basic Operations
902T-e-manual-01.indd 37
37
05.6.9 4:52:39 PM
Information Prompt
Tip
To close the information prompt,
press k
K (Back) or o
O. To
redisplay the information prompt
later, press and hold a
@.
This feature notifies you of missed calls, unread messages or other unconfirmed
information. If you have unconfirmed information, the information prompt appears in
standby mode.
1. When the information prompt appears, select an item and press J (Select).
The information prompt contains the following items.
Missed Calls: Notifies of missed calls (page 57).
New SMS: Notifies of new SMS (page 151).
New MMS: Notifies of new MMS (page 142).
New Push: Notifies of new WAP Push message (page 152).
New Reports: Notifies of unread report messages (pages 147, 153).
Voicemail: Notifies of new messages at the Voicemail Centre (page 61).
Stop Snooze: Notifies of an activated alarm set to repeat (page 255).
Basic Operations
902T-e-manual-01.indd 38
38
05.6.9 4:52:39 PM
Opening & Closing Your Phone
In addition to open style, you can use your phone in turnover style and self-portrait style.
Note
• Do not rotate display
counterclockwise.
• Most descriptions in this
manual are described in the
open style.
• Do not carry your phone in
turnover style. The main display
may be damaged.
Tip
If you switch to turnover style
during a voice or video call, the
outgoing sound is muted.
/PENYOURPHONE
UNTILTHEDISPLAYIS
ATANANGLEOF
DEGREESTOTHE
KEYBOARD
2OTATETHEDISPLAY
DEGREES
CLOCKWISE
/PEN3TYLE
/PENYOURPHONE
UNTILITREACHESTHE
STOPPOSITION
Basic Operations
902T-e-manual-01.indd 39
4URNOVER3TYLE
#ONVENIENTFORTAKING
PICTURESANDRECORDING
VIDEOSATHIGH
RESOLUTIONS
3ELFPORTRAIT3TYLE
#ONVENIENTFOR
TAKINGPICTURESOF
YOURSELF
39
05.6.9 4:52:40 PM
USIM Card
Before using your phone, be sure to do the following.
◆ Insert the USIM card in your phone.
◆ Insert the battery pack in your phone (page 42).
About the USIM Card
The USIM card contains customer information such as your phone number. Only insert
the USIM card in a USIM card compatible phone. If the USIM card is not inserted, the
phone cannot be used. Do not touch or damage the IC when handling the USIM card.
Inserting & Removing the USIM Card
Before inserting or removing the USIM card, remove the battery pack. For details on
removing the battery pack, see page 42.
1. Open the battery cover and remove the battery pack.
2. Insert USIM card straight, making sure the IC portion is facing down (as shown in
the illustration to the left).
To remove the USIM card, slide it out as shown on the left.
Basic Operations
902T-e-manual-01.indd 40
40
05.6.9 4:52:40 PM
Personal Identification Number (PIN)
For security, the USIM card has two security codes: PIN 1 and PIN 2. Do not reveal them
to other people or forget them.
PIN1
This is a four to eight digit security code to prevent others from using your phone. The
default setting is “9999.”
PIN2
This is the four to eight digit security code required for operations such as resetting Call
Costs and setting Fixed Dialling Numbers. The default setting is “9999.”
PUK (Personal Unblocking Key) Codes
PUK codes are required to cancel PIN1 lock and PIN2 lock. PIN1/PIN2 lock is set when
an incorrect PIN1 or PIN2 is entered three times consecutively. To obtain the PUK1/
PUK2 code, contact Vodafone General Information (page 307). If the PUK1/PUK2 code
is incorrectly entered ten times in a row, the USIM card is locked. There is no way to
cancel the USIM card lock. Contact Vodafone General Information (page 307).
Basic Operations
902T-e-manual-01.indd 41
41
05.6.9 4:52:41 PM
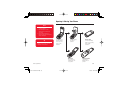
Battery Pack
Before using your phone for the first time, charge the battery.
Inserting & Removing the Battery Pack
1. Press (portion indicated by ①) and slide battery cover.
2. Lift up battery cover.
3. Insert battery pack. Make sure to align bottom of the battery pack with the connector
when inserting battery pack.
To remove the battery pack, insert a fingernail beneath the side or bottom tab and
lift out the battery pack.
4. Place the battery cover on your phone and slide it until it clicks into place.
Basic Operations
902T-e-manual-01.indd 42
42
05.6.9 4:52:41 PM
Charging the Battery Pack
The charging time is approximately 140 minutes.
1. Open the external connector cover of your phone and insert the connector of the AC
adapter.
2. Insert the AC adapter plug into an AC outlet. The charging indicator illuminates and
charging begins.
3. After the charging indicator goes out, remove the AC adapter plug from the outlet.
Press release buttons (on both sides of the connector) to remove the connector from
your phone.
Note
• The rapid charger supports a
power supply of 100 to 240 V
AC.
• The rapid charger plug is for
use in Japan. Purchase an
adapter plug for use overseas.
• To use the rapid charger in
another country, purchase and
use an appropriate adapter
plug for the country. Vodafone
accepts no liability whatsoever
for any problem resulting from
charging overseas.
Basic Operations
902T-e-manual-01.indd 43
43
05.6.9 4:52:41 PM
Memory Cards
About Memory Cards
You can save the pictures you take, videos you record and various downloaded files to a
memory card.
◆ This manual refers to an SD memory card as a “memory card.”
◆ For details on saving files to a memory card, see the corresponding explanation
for each function.
◆ Your phone supports memory cards with a storage capacity of up to 1G (as of May
2005). There is no guarantee that all memory cards will work with your phone
because an operation check has not been performed for all memory cards.
Inserting & Removing a Memory Card
1. Open the memory card slot cover.
2. Gently push a memory card into the slot until it clicks into position.
Gently push and release the memory card to eject it.
Note
3. Close the memory card slot cover.
• Do not use excessive force to
open the memory card slot
cover. Doing so may damage
the cover.
• The memory card may pop out
abruptly when removing it from
your phone. Be cautious when
ejecting the memory card.
Basic Operations
902T-e-manual-01.indd 44
44
05.6.9 4:52:41 PM
Turning Power On/Off
Turning Power On
Note
• A screen for setting the date
and time appears the first time
you turn on the power of your
phone. Set the date and time
while referring to “Date & Time
Settings” (page 48).
• The first time you turn on the
power, press a
@, j
J, K
k
or a
A in standby mode to
retrieve the network information
(page 246).
• Touching the internal antenna
part of your phone affects
signal strength. Avoid touching
this part of your phone during
use.
Basic Operations
902T-e-manual-01.indd 45
1. Press and hold O.
The standby screen appears on the main display.
If the PIN1 code setting (page 234) is set to On, enter your PIN1 code.
Turning Power Off
1. In standby mode, press and hold O.
The Power Off screen appears and the power is turned off.
45
05.6.9 4:52:41 PM
System Mode Setting
Your phone is UMTS (3G)/GSM dual mode compatible. Before using your phone, set the
system mode. For details on setting the system mode, see “Setting the System Mode”
(page 243).
Basic Operations
902T-e-manual-01.indd 46
46
05.6.9 4:52:41 PM
Language Setting
You can change the language displayed on your phone. For details on setting the
language, see page 214.
Basic Operations
902T-e-manual-01.indd 47
47
05.6.9 4:52:42 PM
Date & Time Settings
Setting the Date & Time
You can set the date and time displayed in standby mode.
Tip
• You can enter a date from 2/1/
2000 to 30/12/2099. Enter the
time in accordance with the
24-hour system.
• You can switch the clock
display between the 12-hour
and 24-hour system (page
202).
Basic Operations
902T-e-manual-01.indd 48
1. In standby mode, press @, select Settings and press J (Select).
2. Select Phone Settings and press J (Select).
3. Select Date&Time and press J (Select).
4. Select Set Date/Time and press J (Select).
5. Enter the year (two digits), month, day and time and press J (OK).
48
05.6.9 4:52:42 PM
World Clock Setting
In addition to the date and time displayed in standby mode, you can set the world clock.
For details on displaying the world clock, see page 263.
Setting the Home City/Alternate City
1. In standby mode, press @, select Settings and press J (Select).
2. Select Phone Settings and press J (Select).
3. Select Date&Time and press J (Select).
4. Select World Clock and press J (Select).
5. Select Set Home City or Set Alternate City and press J (Select).
6. Use F to select the city you want to set and press @.
A green circle indicates your home city on the map. A red circle indicates the
alternate city.
Basic Operations
902T-e-manual-01.indd 49
49
05.6.9 4:52:42 PM
Setting the GMT Offset
You can select a city by entering a GMT time difference.
1. After Step 5 of “Setting the Home City/Alternate City” (page 49), press J (Options).
2. Select GMT Offset and press J (Select).
If you press J(Options), you can select +/–.
3. Enter the time difference and press @ twice.
Setting the Daylight Saving Time (DST)
You can set the summer time.
Tip
If the DST setting is set to On, the
indicator appears on the display
when you set (page 49) or display
(page 263) the world clock. The
indicator or DST appears for the
time displayed in standby mode.
Basic Operations
902T-e-manual-01.indd 50
1. After Step 5 of “Setting the Home City/Alternate City” (page 49), press J (Options).
2. Select DST On/Off and press J (Select).
3. Select On or Off and press J (OK).
50
05.6.9 4:52:42 PM
Accessing Functions
Accessing a Function from the Main Menu
# A M E R A
iÕÊ >i
ÕÀÃÀ
3ELECT
"ACK
Main Menu Screen
Basic Operations
902T-e-manual-01.indd 51
1. In standby mode, press @ to display the Main menu.
2. Use E to select an icon and press J (Select).
V-appli: Download and run a variety of applications such as games and 3D
pictures (page 169).
Vodafone live!: Allows you to access the Vodafone live! menu and download
pictures, melodies and applications (page 161).
Media Player: Allows you to play audio and video files (page 175).
Messaging: Allows you to create MMS/SMS messages. You can also check
received and sent MMS/SMS messages (page 135).
Camera: Allows you to take pictures and record videos (page 105).
Data Folder: Allows you to check the pictures you took, videos you recorded
and other data stored in data folders (page 183).
Tools: Allows you to access preinstalled convenient functions (page 249).
Phonebook: Allows you to access and update the Contacts list (page 75).
Settings: Allows you to modify and confirm the settings of your phone (page
199).
51
05.6.9 4:52:42 PM
Codes
Your security code, centre access code and call barring service code are required for using your phone.
Security Code
Your security code is “9999” or the four-digit number you selected when you concluded
your contract. It is required to use functions and perform operations on your phone.
Centre Access Code
Your centre access code is the four-digit number you wrote on your application form
when you concluded your contract. It is required to perform optional service operations
from a fixed-line phone.
Call Barring Service Code
Your call barring service code is the four-digit number you selected when you concluded
your contract. It is required to set call barring (page 65).
Basic Operations
902T-e-manual-01.indd 52
52
05.6.9 4:52:47 PM
Making a Call
Tip
• You can perform the following
operations if you press J
j
(Options) after entering a phone
number in standby mode.
• Voice Call: Makes a voice call.
• Video Call: Makes a video
call (page 94).
• Save to Contacts: Saves
the phone number to the
Contacts list (page 76).
• Send Message: Allows
you to create an SMS/MMS
message (pages 137, 149).
• Manual Hyphen: Displays
a “-.”
• Pause: Allows you to use
the pause (P) for sending
touch tones (page 270).
• International Call: Allows you
to add the international code
and country code (page 227).
• Hide My ID: Hides your number
from the other party (page 226).
• Show My ID: Shows your
number to the other party
(page 226).
• You can also make a call from
the Contacts list (page 84) or
the call log (page 57).
Basic Operations
902T-e-manual-01.indd 53
1. Confirm that the power is on.
Confirm that the signal level is sufficient.
2. In standby mode, enter a phone number.
If you enter the wrong number, press K (Clear) or L to delete the last number
entered.
3. Press N.
4. Press O to end the call.
Making an International Call
1. In standby mode, press and hold 0.
+ appears.
2. Enter the country code, area code and other party's phone number.
If the other party’s phone number begins with 0, omit the 0.
3. Press N.
53
05.6.9 4:52:47 PM
Answering a Call
Tip
• To adjust the ringtone volume
while a call is being received,
use G
p
a or the side keys (P
and Q
q).
• If you miss a call, the
information prompt (page 38)
appears.
• You can also use Open to
Answer (page 225) or Any Key
Answer (page 225) to answer a
call.
When a call is received, the ringtone plays and the external light flashes. If the phone
number is in the Contacts list (page 75), the name and phone number of the caller
appear on the display.
1. Press N.
2. Press O to end the call.
Placing an Incoming Call on Hold
You can place an incoming call on hold when you are unable to answer it right away.
1. Press J (Hold) when a call is received.
2. Press J (Unhold) to answer the call.
3. Press O to end the call.
Recording a Message with the Answerphone
Tip
• To answer a call while the
answer message is playing or
a caller’s message is being
recorded, press J
j (Answer).
• For details on playing recording
files, see page 221.
You can record a caller’s message when you are unable to answer a voice call. The
Answerphone can save up to 3 messages and each message can be up to 15 seconds long.
1. Press and hold L when a call is received.
Rejecting a Call
You can manually reject an incoming call. To automatically reject calls from specific
phone numbers, add the phone numbers to the Rejection list (page 231).
1. A call is received.
2. Press O.
Basic Operations
902T-e-manual-01.indd 54
54
05.6.9 4:52:47 PM
Engaged Call Operations
Tip
You can send and receive
messages and access the Web
during a voice call. This function
is only available while you are in
an area with 3G coverage (UMTS
area). It is unavailable during a
video call even if you are in an
area with 3G coverage.
Basic Operations
902T-e-manual-01.indd 55
Options Available during a Call
You can perform the following operations if you press J (Options) during a call.
◆ Hold: Places the call on hold.
◆ Mute My Voice: Mutes the outgoing sound.
◆ Mute All: Mutes both the outgoing and incoming sound.
◆ Contacts List: Allows you to reference the Contacts list (page 84).
◆ Call Log: Allows you to access the call log (page 57).
◆ Voice Record: Records the other party’s voice (page 56).
◆ My Details: Displays the owner information (page 92).
◆ DTMF Off/On: Allows you to disable or enable the sending of DTMF tones.
55
05.6.9 4:52:47 PM
Earpiece Volume
You can use the navigation key or side keys to adjust the earpiece volume (level 1 - 5).
Tip
• To adjust the earpiece volume
in standby mode, press and
hold A
E
a and use a
a or B
to adjust the volume.
• For handsfree calling,
press K
k ( ) to switch sound
from earpiece to speaker.
1. Press G or a side key (P or Q) during a call.
The current setting appears.
2. Use E or a side key (P or Q) to adjust the earpiece volume.
Use A, C or a side key (P) to increase the earpiece volume and use B,
D or a side key (Q) to decrease the earpiece volume.
Recording Other Party's Voice
Note
Only the other party’s voice is
recorded. Your voice is not recorded.
Tip
Voice Record allows you to record the other party’s voice during a call. The maximum
length of one recording during a call is 60 seconds.
1. Press J (Options) during a call.
2. Select Voice Record and press J (Select).
After the maximum length of recording time elapses or the call ends, recording
stops and the recording data is saved to the Recordings folder automatically.
For details on playing Voice Record
recordings, see page 258.
Basic Operations
902T-e-manual-01.indd 56
56
05.6.9 4:52:47 PM
Call Log
Tip
• You can also view Dialled
Numbers if you press a
D in
standby mode.
• You can also view Received
Calls if you press a
C in
standby mode.
• You can perform the following
operations if you press j
J
(Options) while viewing dialled
numbers, missed calls or
received calls.
• View: Displays call details.
• Voice Call: Makes a voice
call.
• Video Call: Makes a video
call (page 94).
• Send Message: Allows
you to create an SMS/MMS
message (pages 137, 149).
• Save to Contacts: Saves
the phone number to the
Contacts list (page 76).
• To Rejection List: Saves
the phone number to the
Rejection list (page 231).
• Delete: Deletes the entry.
• International Call: Allows you
to add the international code
and country code (page 227).
Basic Operations
902T-e-manual-01.indd 57
Viewing Dialled Numbers/Missed Calls/Received Calls
You can view the last 20 dialled numbers, missed calls and received calls.
1. In standby mode, press @, select Phonebook and press J (Select).
2. Select Call Log and press J (Select).
The Call Log screen appears.
3. Select Dialled Numbers, Missed Calls or Received Calls and press @.
To switch from the Dialled Numbers screen to the Missed Calls screen or Received
Calls screen, use F.
57
05.6.9 4:52:48 PM
Tip
• Hide My ID: Hides your
number from the other party
(page 226).
• Show My ID: Shows your
number to the other party
(page 226).
Viewing Call Time
Viewing Last Call/All Calls
1. In standby mode, press @, select Phonebook and press J (Select).
2. Select Call Log and press J (Select).
3. Select Call Timers and press J (Select).
4. Select Last Call or All Calls and press J (Select).
To reset the call time, select Reset Timers.
Basic Operations
902T-e-manual-01.indd 58
58
05.6.9 4:52:48 PM
Viewing Call Costs
Note
The displayed call cost serves as a
guide only and may differ from the
actual call cost billed.
You can view the cost for the last call or the total costs for all calls. The data for the total
costs is saved to the USIM card.
Viewing Last Call/All Calls
1. In standby mode, press @, select Phonebook and press J (Select).
2. Select Call Log and press J (Select).
3. Select Call Costs and press J (Select).
The Call Costs list appears.
4. Select Last Call or All Calls and press J (Select).
To reset the call costs, select Reset Costs.
Setting the Currency
You can set the currency for call costs.
1. From the Call Costs list (above), select Cost Unit and press J (Select).
The currency and rate appear.
2. Press J (Change).
3. Enter your PIN2 code and press J (OK).
4. Enter the currency (three characters) you want to display and press @.
5. Enter the rate you want to set and press J (OK).
Basic Operations
902T-e-manual-01.indd 59
59
05.6.9 4:52:48 PM
Setting Call Cost Display
You can set whether to display the call cost after a call ends.
1. From the Call Costs list (page 59), select Call Cost Display and press J (Select).
2. Select On or Off and press J (Select).
Viewing Data Transfer Volume
You can view the packet communication data volume for the last session or all sessions.
Viewing Last Data/All Data
1. In standby mode, press @, select Phonebook and press J (Select).
2. Select Call Log and press J (Select).
3. Select Data Counter and press J (Select).
4. Select Last Data or All Data and press J (Select).
To reset the data transfer volume, select Reset Data Counts.
Basic Operations
902T-e-manual-01.indd 60
60
05.6.9 4:52:48 PM
Optional Services
For details on services, contact Vodafone General Information.
Voicemail
If you are unable to answer a call because, your phone is out of range or a call is in
progress, the call can be diverted to the Voicemail Centre. The indicator appears on
the standby screen when you have a new message.
Activating Voicemail
Tip
• To change the number for
diverting calls to the Voicemail
Centre or the number for
accessing the Voicemail Centre
to listen to voicemail, select
Voicemail Centre after Step 4.
However, do not change these
numbers unless Vodafone
informs you that they have
been changed.
• To confirm the status of
settings, select Status after
Step 4 and press J
j (Request).
Basic Operations
902T-e-manual-01.indd 61
1. In standby mode, press @, select Settings and press J (Select).
2. Select Call Settings and press J (Select).
3. Select Voicemail and press J (Select).
4. Select Voicemail Settings and press J (Select).
The Voicemail Settings screen appears.
5. Select Registration and press J (Select).
6. Select a diverting condition and press J (Request/Select).
◆ All Calls: All calls are diverted. The ringer does not sound before forwarding the
call.
◆ When Busy: Press K (Busy) to divert an incoming call.
◆ Not Reachable: Diverts a call when your phone is out of range or the power is off.
◆ No Answer: Diverts a call if you do not answer it within the set time. Set the
answer time.
◆ All Conditional: Diverts a call that meets all of the above conditions except All
Calls. Set the answer time.
After a network connection is established, the settings complete screen appears.
61
05.6.9 4:52:48 PM
Listening to Your Voicemail
Tip
To listen to your voicemail from
standby mode, press and hold
1.
/
1. In standby mode, press @, select Settings and press J (Select).
2. Select Call Settings and press J (Select).
3. Select Voicemail and press J (Select).
4. Select Call Voicemail and press J (call).
Follow the voice prompts of the Voicemail Centre.
Deactivating Voicemail
1. From the Voicemail Settings screen (page 61), select Deactivate and press J
(Request).
After a network connection is established, the settings complete screen appears.
Basic Operations
902T-e-manual-01.indd 62
62
05.6.9 4:52:48 PM
Call Diverting
This service allows you to divert calls to a preset phone number.
Tip
• To confirm the current setting
of all Call Divert types, select
Status after Step 3 and
press J
j (Request).
• To confirm the current setting of
a Call Divert type, select Status
after Step 4 and press j
J
(Request).
Activating Call Divert
1. In standby mode, press @, select Settings and press J (Select).
2. Select Call Settings and press J (Select).
3. Select Call Diverting and press J (Select).
4. Select the calls you want to divert and press J (Select).
◆ All Services: Allows you to set Call Divert for all call types.
◆ Voice Call: Allows you to set Call Divert for voice calls.
◆ Video Call: Allows you to set Call Divert for video calls.
◆ Fax: Allows you to set Call Divert for fax communication.
5. Select a diverting condition and press J (Select).
◆ All Calls/All Faxes: All calls are diverted to the preset number. The ringer does
not sound before forwarding the call.
◆ When Busy: Press K (Busy) to divert a call to the preset number.
◆ No Answer: Diverts a call if you do not answer it within the set time. Set the
answer time.
◆ Not Reachable: Diverts a call when your phone is out of range or the power is
off.
◆ All Conditional: Diverts a call that meets all of the above conditions except All
Calls. Set the answer time.
Basic Operations
902T-e-manual-01.indd 63
63
05.6.9 4:52:49 PM
6. Select an input method and press J (Select).
◆ From Phonebook: Allows you to select an entry from the Contacts list (page 84).
Afterwards, press @.
◆ Set Number: Allows you to directly enter a phone number. Afterwards, press J
(OK).
◆ From Call Log: Allows you to select a phone number from the call log (page 57).
Afterwards, press @.
7. Press J (Set/Request).
After a network connection is established, the settings complete screen appears.
Deactivating Call Divert
1. After Step 3 of “Activating Call Divert” (page 63), select Deactivate All and
pressJ (Request).
After a network connection is established, the settings complete screen appears and
all call divert services are deactivated.
To stop call divert services individually, select Deactivate after Step 4 of “Activating
Call Divert” (page 63) and press J (Request).
Basic Operations
902T-e-manual-01.indd 64
64
05.6.9 4:52:49 PM
Call Barring
This service allows you to restrict outgoing and incoming voice calls, video calls and
SMS messages.
Activating Call Barring
Tip
• You can still make calls to
110 (police), 119 (fire and
ambulance) and 118 (coast
guard) when the call barring
service is activated.
• To confirm the status of the
setting, select Status after Step
3 and press J
j (Request).
1. In standby mode, press @, select Settings and press J (Select).
2. Select Call Settings and press J (Select).
3. Select Call Barring and press J (Select).
The Call Barring settings screen appears.
4. Select Activate and press J (Select).
5. Select Outgoing Calls or Incoming Calls and press J (Select).
6. Select a barring condition and press J (Request).
◆ All Calls: Stops all outgoing and incoming calls.
◆ International Calls: Stops all outgoing and incoming international calls.
◆ Except Local/Home: Stops all outgoing international calls except to Japan.
7. Enter your call barring service code (page 52).
After a network connection is established, the settings complete screen appears.
Basic Operations
902T-e-manual-01.indd 65
65
05.6.9 4:52:49 PM
Deactivating Call Barring
1. From the Call Barring settings screen (page 65), select Deactivate and press J
(Select).
2. Select Outgoing Calls, Incoming Calls or All and press J (Request).
3. Enter your call barring service code (page 52).
After a network connection is established, the settings complete screen appears.
Changing Your Call Barring Service Code
1. From the Call Barring settings screen (page 65), select Change Password and
press J (Select).
2. Enter your current call barring service code (page 52).
3. Enter your new call barring service code and press J (OK).
4. Re-enter your new call barring service code for confirmation and press J (OK).
After a network connection is established, the settings complete screen appears.
Basic Operations
902T-e-manual-01.indd 66
66
05.6.9 4:52:49 PM
Call Waiting
When you receive a call during a call, you can place the current call on hold and answer
the incoming call. If the incoming call is from a caller whose phone number is in the
Contacts list (page 75), the caller’s name and phone number are displayed.
Activating Call Waiting
Tip
To confirm the current Call Waiting
setting, select Status after Step 3
and press J
j (Request).
1. In standby mode, press @, select Settings and press J (Select).
2. Select Call Settings and press J (Select).
3. Select Call Waiting and press J (Select).
The Call Waiting settings screen appears.
4. Select Activate and press J (Request).
After a network connection is established, the settings complete screen appears.
Basic Operations
902T-e-manual-01.indd 67
67
05.6.9 4:52:49 PM
Using Call Waiting
1. The call waiting tone is heard during a call. The name and phone number of the
caller appears on the display.
2. Press J (Options).
3. Select Answer and press J (Select) or N.
The original caller is placed on hold and a connection is established with the second
caller. Both names appear on the display.
4. Press N to switch between callers.
Deactivating Call Waiting
1. From the Call Waiting settings screen (page 67), select Deactivate and press J
(Request).
After a network connection is established, the settings complete screen appears.
Basic Operations
902T-e-manual-01.indd 68
68
05.6.9 4:52:49 PM
Multiparty Call
Note
The options that are available vary
depending on the call status.
This service allows you to call other parties during a call and switch between the parties
or talk to multiple parties simultaneously. Connect with up to 5 parties simultaneously.
The phone numbers of all the parties appear on the display during the call. However, this
service is unavailable for video calls.
1. Enter a phone number during a call and press N.
The original party is placed on hold and you can talk to another party.
2. Press J (Options) to perform one of the following operations.
◆ Swap: Allows you to change the party of a private call.
◆ Multiparty: Allows you to perform the following operations.
• Multiparty: Allows you to talk to all parties simultaneously.
• Private: Allows you to talk to the selected party only (private call).
• Hold: Places the selected party on hold.
• Hold All: Places all the parties on hold.
• End Call: Ends the call with the selected party.
• End All Calls: Ends the call with all the parties.
◆ Mute My Voice: Mutes the outgoing sound.
◆ Mute All: Mutes all the outgoing and incoming sound.
◆ Contacts List: Allows you to reference the Contacts list (page 84).
◆ Call Log: Allows you to access the call log (page 57).
◆ Voice Record: Records the other party's voice (page 56).
◆ My Details: Displays owner information (page 92).
◆ DTMF Off/On: Allows you to disable or enable the sending of DTMF tones.
Basic Operations
902T-e-manual-01.indd 69
69
05.6.9 4:52:50 PM
Text Entry
Text Entry Modes
Tip
• You can perform the following
operations in T9 mode or Multi
Tap mode.
• To switch between T9 mode
and Multi Tap mode, press
and hold *
/.
• To toggle between initial
caps, uppercase, lowercase
and numeric input mode,
press /
*.
• To display the symbols list to
enter a symbol, press #
/.
• To enter a space, press 0
/.
• To enter a number, press
and hold a digit key.
• To delete a character,
press K
l.
k (Clear) or L
Basic Operations
902T-e-manual-01.indd 70
Your phone has four text entry modes. Use these modes when saving new entries to the
Contacts list or creating text messages.
Switching Text Entry Modes
To switch the text entry mode in a text entry window, press J (Options), select Input
Method, press J (Select), select a text entry mode and press J (Select). The
selected text entry mode is indicated at the top of the text entry window.
◆ T9 abc/ T9 Abc/ T9 ABC: Allows you to enter characters in T9 mode (page 71).
◆ abc/Abc/ABC (Multi Tap mode): Enter roman letters using the keypad.
◆ Symbols: Symbol input mode.
◆ Numeric: Numeric input mode.
70
05.6.9 4:52:50 PM
T9 Mode
Tip
• To display a list of conversion
predictions, press B
a three
times in Step 2. Select a word
and press j
J (Select) to
confirm the word.
• If the word you want to enter
does not appear in the list of
conversion predictions, the
word will appear next time if
you add it to the T9 dictionary
(page 74).
• To enter a symbol, press /
1
and then press B
a.
In T9 mode, press a key once for each letter you want to enter. This feature displays
word predictions while you enter characters.
1. In a text entry window, switch to T9 mode (page 70).
2. Enter characters.
Example: To enter “dog,” press 364.
If the word you want to enter does not appear, press B to display the next
prediction.
3. Press @ to confirm your selection.
If you want to reconvert a word after it has been confirmed, press F, highlight the
word and press B.
Multi Tap Mode
In Multi Tap mode, each press of a key cycles through the letters and symbols assigned
to the key.
1. In a text entry window, switch to Multi Tap mode (page 70).
Tip
To enter a symbol, press /
1.
Basic Operations
902T-e-manual-01.indd 71
2. Enter characters.
Example: To enter “dog,” press 3 once, 6 three times and 4 once.
71
05.6.9 4:52:50 PM
Entering Symbols
1. In a text entry window, switch to Symbols mode (page 70).
A list of symbols appears.
2. Select a symbol and press @.
Using Numeric Mode
In Numeric mode, you can enter a number in a text entry window by simply pressing the
digit key to which the number is assigned.
Text Editing Functions
Copy/Cut
You can copy or cut a range of characters and store it in the clipboard. You can store up
to 20 data items (excluding pictures) in the clipboard.
1. In a text entry window, press J (Options), select Copy or Cut and press J
(Select).
2. Use E to move the cursor to the first character of the text range and press J
(Start).
3. Use E to move the cursor to the last character of the text range and press J
(End).
Basic Operations
902T-e-manual-01.indd 72
72
05.6.9 4:52:50 PM
Paste
In a text entry window, you can paste characters stored in the clipboard.
1. In a text entry window, use E to position the cursor.
2. Press J (Options), select Paste and press J (Select).
3. Select the item from the clipboard and press @.
Undo/Redo
During text input, you can undo and redo operations.
Note
Performing the Redo operation
after the Undo operation takes
you back to the state prior to
performing the Undo operation.
1. In a text entry window, enter characters.
2. Press J (Options), select Undo/Redo and press J (Select).
Insert
You can select information from notepad (page 261), Contacts list (page 84) or My
Details (page 92) and insert it during text entry. You can also insert a signature in an
MMS or SMS message.
1. In a text entry window, use E to position the cursor.
2. Press J (Options), select Insert and press J (Select).
Basic Operations
902T-e-manual-01.indd 73
73
05.6.9 4:52:50 PM
3. Select the item you want to insert and press J (Select).
◆ Notepad: Allows you to insert information saved to a notepad entry.
◆ Signature: Inserts MMS Signature (page 147) or SMS Signature (page 153).
◆ Contact Details: Allows you to insert information saved to a Contacts list entry.
◆ My Details: Allows you to insert information saved to My Details (page 92).
◆ URL history: Allows you to insert a recently entered URL.
◆ Phone number: Inserts your phone number.
Adding a Word to the T9 Dictionary
Tip
If J
j (Spell) appears for a word
during character input in T9
mode, the word is not in the T9
dictionary. To add the word to the
T9 dictionary, press j
J (Spell).
If a conversion doesn't appear in the conversion prediction list, add it to the T9
dictionary. The next time you enter text in T9 mode, the conversion will appear in the
prediction list.
1. In a text entry window in T9 mode, press J (Options), select Add to Dictionary
and press J (Select).
2. Enter the word and press J (OK).
When you enter a word, the mode switches automatically to Multi Tap.
Basic Operations
902T-e-manual-01.indd 74
74
05.6.9 4:52:50 PM
Contacts List
0HONEBOOK
$ISPLAYSALLYOURCONTACTS
FROMTHE3)-0HONEAND
# O N T A C T S , IST
# RE A T E # O N T A C T
# A LL , O G
-ANAGE#ATEGORY
- A N A G E 'RO U P
3 E N D - Y V# A RD
3 E LE C T
"ACK
Phonebook Menu Screen
Basic Operations
902T-e-manual-01.indd 75
You can save up to 500 Contacts list entries to your phone. You can also save Contacts
list entries to the USIM card and a memory card. The maximum number of entries
you can save depends on the size of entries and available space in the USIM card or
memory card.
◆ Contacts List: Displays the Contacts list.
◆ Create Contact: Allows you to add a new entry to the Contacts list.
◆ Call Log: Displays the Call Log screen (page 57).
◆ Manage Category: Displays the Category list for organising entries by category.
◆ Manage Group: Displays the Group list. Groups allow you to send the same
message simultaneously to multiple addresses.
◆ Send My vCard: Converts the owner information to vCard format and sends it to
an external device.
◆ My Details: Displays the owner information and allows you to edit the information.
◆ Settings: Allows you to add an entry to the Speed Calling list, set the storage
place of the Contacts list and set the scroll speed for the Contacts list screen.
◆ Memory Status: Displays the number of Contacts list entries in your phone,
USIM card and memory card.
75
05.6.9 4:52:51 PM
Adding an Entry to the Contacts List
Adding an Entry from the Main Menu
,AST.AME
[,AST.AME]
[&IRST.AME]
[2EADING,AST.AME]
[2EADING&IRST.AME]
[$IS PLAY . A M E]
[0HONE.UMBER ]
[%MAIL ]
/PTIONS
"ACK
Create Contact Screen of the Phone’s Contacts List
Note
• The entry cannot be saved
unless information is entered
in one of the following fields:
Last Name, First Name, Phone
Number or Email.
• Only a name, a phone number
and an email address can be
saved to each entry in the
Contacts list of the USIM card.
• Picture, Settings, Location and
Note cannot be set for the
Contacts list of a memory card.
Basic Operations
902T-e-manual-01.indd 76
Add new entries from the Create Contact screen. You can set just the required items
and modify items or set additional items later.
1. In standby mode, press @, select Phonebook and press J (Select).
2. Select Create Contact and press J (Select).
3. Select an item and press @.
The input screen for the selected item appears.
◆ Last Name
◆ First Name
◆ Reading (Last Name): Displays the reading of the last name automatically. You
can edit the reading.
◆ Reading (First Name): Displays the reading of the first name automatically. You
can edit the reading.
◆ Display Name: Displays the last name and first name you entered automatically.
You can also edit the display name.
◆ Phone Number: Allows you to enter up to three phone numbers. You can enter
up to 40 digits for each phone number.
◆ Email: Allows you to enter up to three email addresses.
◆ Postcode
◆ Country
◆ State
◆ City
◆ Street Address
76
05.6.9 4:52:51 PM
Tip
• You can preset the default
storage place for Contacts list
entries. For details, see “Setting
the Default Storage Place”
(page 90).
• To clear an item you entered,
select Clear Field after Step 5.
◆ Add Info.: Allows you to enter additional address information.
◆ Job Title: Allows you to enter a job title.
◆ Company: Allows you to enter a company name.
◆ Birthday
◆ URL: Allows you to enter a URL.
◆ Category: Allows you to set the category.
◆ Picture: Allows you to set a picture to appear on the display for an incoming call.
◆ Settings: Allows you to set the ringtone and other settings for incoming calls.
◆ Location: Displays location information.
◆ Note: Allows you to enter a reminder.
4. Enter the item and press @.
5. Press J (Options).
6. Select Save and press J (Select).
Adding an Entry from Standby Mode
1. In standby mode, enter a phone number and press @.
2. Select Add New Contact and press J (Select).
To add the phone number to an existing Contacts list entry, select Add to Existing.
3. Proceed from Step 3 of “Adding an Entry from the Main Menu” (page 76).
Basic Operations
902T-e-manual-01.indd 77
77
05.6.9 4:52:52 PM
Incoming Settings
Setting a Picture
Note
• Picture files without transfer
permission cannot be set.
• If a video file is set as the
ringtone, the video is displayed
for incoming calls and the
picture set as the incoming
picture is not displayed.
Tip
1. In Step 3 of “Adding an Entry from the Main Menu” (page 76), select Picture and
press J (Options).
2. Select Change Picture and press J (Select).
3. Select Take Picture or My Pictures and press J (Select).
◆ Take Picture: Activates the camera for you to take a picture. For details on taking
pictures, see page 109. After taking a picture, press @.
◆ My Pictures: Allows you to select a picture from Data Folder (page 183).
To select a file, press @.
4. Press J (Options).
5. Select Save and press J (Select).
To reset the picture setting, select
Remove Picture after Step 4.
Basic Operations
902T-e-manual-01.indd 78
78
05.6.9 4:52:52 PM
Setting the Ringtone & Other Settings
Note
• When the Mode Settings
(page 206) is set to Silent, the
ringtone does not play and your
phone does not vibrate.
• Video and sound files without
transfer permission cannot be
set.
Tip
If you select Same as Phone in
Step 3, the settings will be the
same as the corresponding settings
of “Phone Profiles” (page 206).
The external light setting will be
the same as corresponding setting
of “Setting the Incoming External
Light” (page 219).
You can set the incoming external light, ringtone volume, ringtone pattern, vibration and
secret setting individually for each Contacts list entry.
1. In Step 3 of “Adding an Entry from the Main Menu” (page 76), select Settings and
press J (Options).
2. Select Select and press J (Select).
3. Select an item and press J (Select).
◆ External Light: Allows you to set the External Light colour for incoming calls.
Select a colour and press J (Select).
◆ Ringtone Volume: Allows you to set the ringtone volume for incoming calls.
Select a ringtone type, select Set and set the volume.
◆ Ringtones: Allows you to set the ringtone pattern for incoming calls or the
ringtone duration for incoming messages. Proceed from Step 4 of “Personalising
the Ringtone” (page 208).
◆ Vibration: Allows you to set the vibration for incoming calls. Select a ringtone
type and select a vibration pattern.
◆ Secret Setting: Allows the Contacts list entry to be displayed only if Secret mode
(page 240) is set to On. Select either On or Off.
4. Press K (Back) once or twice to return to the Create Contact screen.
5. Press J (Options).
6. Select Save and press J (Select).
Basic Operations
902T-e-manual-01.indd 79
79
05.6.9 4:52:52 PM
Editing Categories
Your phone already has the following categories: Business Card, Private, Business,
VIP, Colleague and Favourites. In addition, you can set your own categories. You
can edit and set the options of categories. For each category, you can set the incoming
external light, ringtone volume, ringtone pattern and vibration.
Renaming a Category
Note
Preset categories cannot be
renamed.
1. In standby mode, press @, select Phonebook and press J (Select).
2. Select Manage Category and press J (Select).
3. Select a category and press @.
4. Press J (Options).
5. Select Edit and press J (Select).
6. Enter the category name and press @.
7. Select an icon and press J (Select).
8. Press J (Options).
9. Select Save and press J (Select).
Basic Operations
902T-e-manual-01.indd 80
80
05.6.9 4:52:53 PM
Resetting a Category
Note
Preset categories cannot be
deleted.
1. After Step 2 of “Renaming a Category” (page 80), select a category and press J
(Options).
2. Select Reset or Delete and press J (Select).
A confirmation screen appears.
3. Press J (Yes).
All Contacts list entries for the deleted category are set to No Category.
Setting Options for a Category
Note
The option settings for individual
entries (page 79) take priority over
the option settings for a category.
Basic Operations
902T-e-manual-01.indd 81
1. After Step 3 of “Renaming a Category” (page 80), select Category Options and
press J (Options).
2. Select Select and press J (Select).
3. Proceed from Step 3 of “Setting the Ringtone & Other Settings” (page 79).
81
05.6.9 4:52:53 PM
Setting Groups
You can set the groups to use for MMS addresses. There are five groups and you can
add up to ten members to each group. For details on using the Group list, see “Creating
& Sending an MMS Message” (page 137).
Adding a New Member to a Group
Note
The group cannot be saved unless
information is entered for both
Name and Send to fields.
1. In standby mode, press @, select Phonebook and press J (Select).
2. Select Manage Group and press J (Select).
3. Select a group and press @.
4. Select <Empty> and press J (Options).
5. Select Add and press J (Select).
6. Select Name and press @.
7. Enter a name and press @.
8. Select Send to and press @.
9. Enter a phone number or email address and press @.
10. Press J (Options).
11. Select Save and press J (Select).
Adding a New Group Member from the Contacts List
Note
Contact list entries with Secret
Setting (page 79) set to On cannot
be selected.
1. After Step 4 of “Adding a New Member to a Group” (above), select Get Contacts
and press J (Select).
2. Select a member and press @.
The details of the selected member appear.
3. Select a phone number or email address and press @.
Basic Operations
902T-e-manual-01.indd 82
82
05.6.9 4:52:53 PM
Editing Group Members
Tip
You can perform the following
operations after Step 1.
• View: Displays the details of
the member.
• Delete: Deletes the selected
member.
1. After Step 3 of “Adding a New Member to a Group” (page 82), select a member and
press J (Options).
2. Select Edit and press J (Select).
3. Select an item and press @.
4. Enter information and press @.
5. Press J (Options).
6. Select Save and press J (Select).
Renaming a Group
1. After Step 2 of “Adding a New Member to a Group” (page 82), select a group and
press J (Options).
2. Select Rename and press J (Select).
3. Enter the group name and press @.
Resetting a Group
1. After Step 2 of “Adding a New Member to a Group” (page 82), select a group and
press J (Options).
2. Select Reset and press J (Select).
A confirmation screen appears.
3. Press J (Yes).
The group name is reset and all members are deleted from the group.
Basic Operations
902T-e-manual-01.indd 83
83
05.6.9 4:52:53 PM
Using the Contacts List
Searching for an Entry in the Contacts List
+!
!
88888888 ! N D RE W - A C # A R T
! N T H O N Y " E N D E R S
! S H L E Y
% M I L Y
% M I E
/ S A M U
/PTIONS
"ACK
Contacts List Screen
Tip
To display the Contacts list from
standby mode, press a
B.
Basic Operations
902T-e-manual-01.indd 84
1. In standby mode, press @, select Phonebook and press J (Select).
2. Select Contacts List and press J (Select).
The Contacts list appears.
3. Press J (Options).
4. Select Search by and press J (Select).
5. Select a search method and press J (Select).
◆ 2-Touch: Convenient for searching Japanese names in Japanese language mode.
For details, refer to the Japanese user manual.
◆ Reading: Allows you to search an entry from the Reading field. Enter a letter to
search names beginning with that letter.
◆ Phone Number: Enter a number and press J (OK). A list of entries with phone
numbers containing the number you entered is displayed.
6. Select an entry and press N to make a call to the default phone number.
84
05.6.9 4:52:53 PM
Making a Call
Tip
To access the Web page, select
the URL in the details screen of
the entry, press J
j (Options) and
select Connect.
1. In standby mode, press @, select Phonebook and press J (Select).
2. Select Contacts List and press J (Select).
The Contacts list appears.
3. Select a Contacts list entry and press @.
The details screen of the entry appears.
4. Select a phone number and press N.
To make a video call, press H.
Sending a Message
Tip
If you selected an email address
in Step 1, press J
j (Options) and
select Send MMS.
1. After Step 3 of “Making a Call” (above), select a phone number and press J
(Options).
2. Select Send Message and press J (Select).
3. Select a message type and press J (Select).
◆ SMS: Allows you to create an SMS message (page 149).
◆ MMS: Allows you to create an MMS message (page 137).
Basic Operations
902T-e-manual-01.indd 85
85
05.6.9 4:52:54 PM
Using Speed Calling
Note
• Only Contacts list entries in
your phone can be added to the
Speed Calling list.
• Contact list entries with Secret
Setting (page 79) set to On
cannot be selected.
In standby mode, you can make calls quickly and easily to phone numbers in the Speed
Calling list. You can add up to nine phone numbers to the list.
Adding a Phone Number to the Speed Calling List
1. In standby mode, press @, select Phonebook and press J (Select).
2. Select Settings and press J (Select).
3. Select Speed Calling and press J (Select).
4. Select <Empty> and press J (Add).
Tip
To delete a phone number saved
to the Speed Calling list, select the
phone number after Step 3 and
press j
J (Delete).
The Contacts list appears.
5. Select a Contacts entry and press @.
Using Speed Calling to Make Calls
1. In standby mode, enter a speed calling number.
Tip
2. Press N.
• The speed calling number is
indicated beside the entry in
the Speed Calling list.
• If the Contacts list entry in the
Speed Calling list contains
more than one phone number,
a call is made to the default
phone number (page 88).
Basic Operations
902T-e-manual-01.indd 86
86
05.6.9 4:52:54 PM
Using Send My vCard
You can convert the owner information appearing in My Details to vObject format (page
190) and send it by infrared or BluetoothTM.
1. In standby mode, press @, select Phonebook and press J (Select).
2. Select Send My vCard and press J (Select).
3. Select a send method and press J (Select).
◆ Infrared: Sends the information by infrared (page 281).
◆ Bluetooth: Sends the information by BluetoothTM (page 277).
Basic Operations
902T-e-manual-01.indd 87
87
05.6.9 4:52:55 PM
Tip
• Alternatively, you can select an
entry after Step 2, press @
a
twice and press j
J (Edit).
• You can set the following
options after Step 7. The
available options vary
depending on the item selected.
• Edit: Allows you to re-edit
the currently selected item.
• Select: Allows you to select
the category, ringtone and
other options.
• Change Picture: Allows
you to change the picture.
• Change Type: Allows you to
change the phone number,
email address, postal
address and URL type.
• Set to Default: Sets the
selected phone number to
the default phone number.
• Remove Picture: Allows
you to delete the picture.
• Reset Settings: Allows you
to reset the ringtone and
other settings.
• Clear Field: Deletes the
selected item.
• Clear Category: Clears the
category setting.
Basic Operations
902T-e-manual-01.indd 88
Editing Contacts List Entries
You can edit and delete entries in the Contacts list.
1. In standby mode, press @, select Phonebook and press J (Select).
2. Select Contacts List and press J (Select).
The Contacts list appears.
3. Select a Contacts list entry and press J (Options).
4. Select Edit and press J (Select).
The edit screen appears.
5. Select an item and press @.
6. Edit the item and press @.
7. Press J (Options).
8. Select the save method and press J (Select).
◆ Save: Overwrites the original entry.
◆ Save as New: Saves the edited entry as a new entry.
88
05.6.9 4:52:55 PM
Options Available from the Contacts List
You can perform the following operations if you press J (Options) from the Contacts
list.
◆ View: Displays the details screen for selected entry.
◆ Search by: Allows you to search for an entry in the Contacts list (page 84).
◆ Edit: Displays the edit screen for selected entry.
◆ Delete: Deletes one or all Contacts list entries.
◆ Select Multi: Allows you to select multiple Contacts list entries to simultaneously
perform Delete, Copy, Move, Send vCard, View and Mark All operations on multiple
Contacts list entries.
◆ Send vCard: Send an entry in vCard format. You can select the send method.
◆ Memory Card: Displays a list of Contacts list entries in a memory card.
◆ Phone/USIM: Displays a list of Contacts list entries in the phone and USIM card.
◆ Sort by: Allows you to change the entry order by item. You can select a sort
option from Birthday or Reading.
◆ Category Filter: Displays the Contacts list entries of the selected category.
Basic Operations
902T-e-manual-01.indd 89
89
05.6.9 4:52:55 PM
Setting the Contacts List
Setting the Default Storage Place
You can preset the default storage place for new Contacts list entries.
An indicator ( / / ) at the top of the Contacts list screen (page 84) indicates the
storage place of the Contacts list entry.
1. In standby mode, press @, select Phonebook and press J (Select).
2. Select Settings and press J (Select).
3. Select Default Storage and press J (Select).
4. Select a default storage place and press J (Select).
◆ Always Ask: Asks you to select the storage place each time you save a new
entry.
◆ Phone Memory: Saves all new entries to the Contacts list of your phone.
◆ USIM: Saves all new entries to the Contacts list of the USIM card.
◆ Memory Card: Saves all new entries to the Contacts list of a memory card.
Setting the Scroll Speed
You can set the speed for scrolling up and down in the Contacts list.
1. In standby mode, press @, select Phonebook and press J (Select).
2. Select Settings and press J (Select).
3. Select Scroll Speed and press J (Select).
4. Select Fast or Slow and press J (Select).
Basic Operations
902T-e-manual-01.indd 90
90
05.6.9 4:52:55 PM
Prohibiting Use of the Contacts List
Note
If Phonebook Lock is set to On,
speed calling cannot be used to
make calls.
1. In standby mode, press @, select Phonebook and press J (Select).
2. Select Settings and press J (Select).
3. Select Phonebook Lock and press J (Select).
4. Select On and press J (Select).
5. Enter your security code (page 52).
Tip
If Phonebook Lock is set to On and
you want to use the Contacts list,
enter your security code (page 52)
to temporarily cancel the setting.
Basic Operations
902T-e-manual-01.indd 91
91
05.6.9 4:52:55 PM
Confirming the Memory Status
You can display the number of Contacts list entries in each of your phone, USIM card
and memory card.
1. In standby mode, press @, select Phonebook and press J (Select).
2. Select Memory Status and press J (Select).
Owner Information
Tip
You can also display owner
information if you press a
@
in standby mode and then
press /
0.
You can display and edit owner information such as the phone number and email
address of your phone.
1. In standby mode, press @, select Phonebook and press J (Select).
2. Select My Details and press J (Select).
The owner information appears.
3. Press J (Options).
4. Select Edit and press J (Select).
Perform Steps 3 and 4 of “Adding an Entry from the Main Menu” (page 76).
Basic Operations
902T-e-manual-01.indd 92
92
05.6.9 4:52:56 PM
Video Call
In This Chapter
❍ About Video Calls
❍ Making a Video Call
❍ Answering a Video Call
❍ Convenient Functions for Video Calls
❍ Video Call Settings
902T-e-manual-02.indd 93
05.6.9 4:54:14 PM
About Video Calls
A video call allows two parties with video call compatible phones to see each other’s
image during the call.
Note
• A video call is only possible
in areas with 3G-network
coverage.
• The video call function of
your phone complies with
the 3G-324M international
standard for 3G mobile
videophones.
6IDEO#ALL
/PTIONS
Video Call Screen
Video Call
902T-e-manual-02.indd 94
Indicators
The following indicators appear during video calls.
3G Area
Video Call
Mute
Mute My Voice
Mute All
Picture Quality
Motion Prioritised
Standard Mode
Macro Mode
Handsfree On
Handsfree
Handsfree (BluetoothTM connection)
Image Transfer Off
Sending Picture
Voice Connection Established
Video Connection Established
94
05.6.9 4:54:15 PM
Making a Video Call
Note
If a video call connection could
not be established, a message
appears and a warning tone plays.
To make a voice call instead,
press j
J (Yes).
Tip
1. In standby mode, confirm that the
3G-network coverage is displayed.
indicator for indicating you are in an area with
2. Enter a phone number and press H.
When a connection is established, both you and the other party see each other’s
image and can begin talking. The sound automatically switches from the earpiece to
the speaker.
When Appearance Check (page 103) is set to On, your image appears before the
call is made. After you have checked the image, press J (OK).
3. Press O to end the call.
You can also make a video call
from the Contacts list (page 84) or
call log (page 57).
Video Call
902T-e-manual-02.indd 95
95
05.6.9 4:54:16 PM
Answering a Video Call
Tip
• To perform the following
operations, use same
procedures used for voice
calls: Rejecting calls (page 54),
diverting calls (page 63), Any
Key Answer (page 225) and
Open to Answer (page 225).
• To place an incoming call on
hold, press @
a. To answer a
call placed on hold, press J
j
(Unhold).
When a video call is received, the ringtone plays, the external light flashes and “Video
Call” appears on the display.
1. A video call is received.
To check your image before beginning the call, press J (Options) when the call is
received, select Self-view and press J (Select).
2. Press H.
When a connection is established, both you and the other party see each other’s
image and can begin talking. The sound automatically switches from the earpiece
to the speaker. However, if the phone profile (page 206) is set to Silent when a video
call is received, the caller’s voice is heard from the earpiece. To switch the sound
from the earpiece to the speaker, press K ( ) during a call.
To answer the call as a voice call, press N during incoming video call. The
substitute picture set in the Outgoing Video settings (page 101) is sent to the other
party.
3. Press O to end the call.
Video Call
902T-e-manual-02.indd 96
96
05.6.9 4:54:16 PM
Convenient Functions for Video Calls
The following convenient functions are available during calls.
Placing a Call on Hold
You can place a call on hold. While on hold, voice guidance notifies the other party that
he/she has been placed on hold. The other party is also sent the picture preset for the
Hold Guidance setting (page 103).
1. Press J (Options) during a call.
2. Select Hold and press J (Select).
To resume a call placed on hold, press J (Unhold).
Adjusting the Speaker Volume
You can adjust the speaker volume during a call.
Tip
If you have switched the sound to
the earpiece (page 98), you can
use this procedure to adjust the
volume of the earpiece.
1. Press a side key (P or Q) during a call.
2. Use G or side keys (P and Q) to adjust the volume.
Press A or a side key (P) to increase the volume level and press B or a side
key (Q) to decrease the volume level.
Turning On/Off the Outgoing Voice
You can turn on/off the outgoing voice during a call. To turn off the outgoing voice, press
C during a call. To turn the outgoing voice back on, press C again.
Video Call
902T-e-manual-02.indd 97
97
05.6.9 4:54:16 PM
Setting Mute
You can mute the incoming voice and outgoing voice during a call.
Tip
• To cancel mute, press J
j
(Unmute).
• Switching to turnover style
during a handsfree call mutes
only the microphone. When
using the handsfree stereo
headset or a BluetoothTM device
as a microphone, mute is not
available.
1. Press J (Options) during a call.
2. Select Mute and press J (Select).
3. Select the item you want to set and press J (Select).
◆ Mute My Voice: Mutes the outgoing voice.
◆ Mute All: Mutes both the outgoing and incoming voice.
Switching between the Earpiece & Speaker
You can switch between the earpiece and speaker during a call. To switch between the
earpiece and speaker, press K ( ) or K ( ) during a call.
Switching Cameras
You can switch between the external camera and internal camera during a call.
Tip
When you switch from the internal
camera to the external camera, a
large outgoing image appears on
the display. When you switch from
the external camera to the internal
camera, a large incoming image
appears on the display.
Video Call
902T-e-manual-02.indd 98
1. Press J (Options) during a call.
2. Select External Camera or Internal Camera and press J (Select).
98
05.6.9 4:54:16 PM
Using the Zoom
Note
The zoom is disabled while
sending a picture (page 100) or
when image transfer is set to off.
You can enlarge the image to be sent to the other party during a call. To use the zoom,
press G during a call.
Switching Screen Display
You can select the screen display method during a call.
1. Press J (Options) during a call.
2. Select Screen Settings and press J (Select).
3. Select Switch Screens and press J (Select).
4. Select the display method you want to set and press J (Select).
◆ Priority Incoming: Displays a large incoming screen and a small outgoing
screen.
◆ Incoming Only: Displays only the incoming screen.
◆ Priority Outgoing: Displays a small incoming screen and a large outgoing
screen.
◆ Outgoing Only: Displays only the outgoing screen.
Turning On/Off the Outgoing Video
You can turn on/off the outgoing image of yourself during a call. To turn off the outgoing
video, press D during a call. To turn the outgoing video back on, press D again.
Video Call
902T-e-manual-02.indd 99
99
05.6.9 4:54:16 PM
Sending a Picture
You can send a picture in Data Folder during a call.
1. Press J (Options) during a call.
2. Select Screen Settings and press J (Select).
3. Select Sending Picture and press J (Select).
4. Select My Pictures and press J (Select).
5. Select the picture you want to send and press @.
6. Use E to trim the picture and press @.
7. Check the picture and press J (OK).
To cancel, press K (Stop).
Setting the Picture Quality
You can set the quality and motion speed of the incoming video.
1. Press J (Options) during a call.
2. Select Screen Settings and press J (Select).
3. Select Picture Quality and press J (Select).
4. Select the output format and press J (Select).
◆ Motion Prioritised: Gives priority to video motion.
◆ Standard Mode: Standard output format.
◆ Macro Mode: Gives priority to picture quality.
Video Call
902T-e-manual-02.indd 100
100
05.6.9 4:54:17 PM
Video Call Settings
You can set various video call settings.
Setting the Outgoing Image
You can preset the outgoing image to send during a video call.
1. In standby mode, press H, select Outgoing Video and press J (Select).
2. Select the item you want to set and press J (Select).
◆ Camera Monitored: Sends video images recorded during a call.
◆ My Pictures: Allows you to select a picture to send from the Picture folder of
Data Folder. Select a picture press @ and then press J (Set).
◆ No Picture: Sends a preinstalled picture in your phone.
Note
• The Auto Answer function for
incoming video calls is only
available while your phone is
open. Incoming video calls are
received as usual when your
phone is closed.
• If a video call is received
from a phone number in the
Auto Answer list while Auto
Answer is set to On, the Auto
Answer tone plays and the
call is answered automatically
regardless of the Phone Profile
(page 206) settings.
Video Call
902T-e-manual-02.indd 101
Setting Auto Answer for Video Calls
When the Auto Answer function for video calls is set, video calls received from phone
numbers in the Auto Answer list (page 102) are answered automatically without having
to press a key.
1. In standby mode, press H, select Auto Answer and press J (Select).
2. Select Mode Settings and press J (Select).
3. Select On or Off and press J (Select).
101
05.6.9 4:54:17 PM
Adding a Phone Number to the Auto Answer List for Video Calls
Tip
To check, edit or delete the phone
number, select the phone number
and press j
J (Options) after
Step 2.
You can add up to ten phone numbers to the Auto Answer list. When a video call is
received from a number saved in Auto Answer list, the call is automatically answered.
1. In standby mode, press H, select Auto Answer and press J (Select).
2. Select Auto Answer List and press J (Select).
3. Press J (Add).
4. Enter your security code (page 52).
5. Select a phone number input method and press J (Select).
◆ From Phonebook: Allows you to select a phone number from the Contacts list
(page 84).
◆ Set Number: Allows you to directly enter a phone number.
◆ From Call Log: Allows you to select a phone number from the call log (page 57).
To add a second or subsequent phone number, press J (Options) after Step 2.
Then, select Add and proceed from Step 4.
Setting the Backlight
You can set whether the backlight is lit during an appearance check or video call.
1. In standby mode, press H, select Backlight and press J (Select).
2. Select On or Off and press J (Select).
Video Call
902T-e-manual-02.indd 102
102
05.6.9 4:54:17 PM
Hold Guidance Settings
You can set the picture displayed to the other party when you place an incoming video
call or video call in progress on hold.
1. In standby mode, press H, select Hold Guidance and press J (Select).
2. Select the item you want to set and press J (Select).
◆ Hold Answer: Allows you to set the hold guidance for incoming calls.
◆ Hold during Call: Allows you to set the hold guidance for calls in progress.
3. Select the image type you want to set and press J (Select).
◆ Preset Picture: Allows you to set the default picture.
◆ My Pictures: Allows you to select a picture from the Pictures folder of Data
Folder. Select a picture press @ and then press J (Set).
Setting Appearance Check
This feature allows you to check your outgoing image before making a video call.
1. In standby mode, press H, select Appearance Check and press J (Select).
2. Select On or Off and press J (Select).
Video Call
902T-e-manual-02.indd 103
103
05.6.9 4:54:17 PM
Camera/Video Camera
You can take pictures and record videos and then save them, attach them to messages and
display them on a TV. You can also edit pictures.
In This Chapter
❍ Camera
❍ Pictures
❍ Videos
❍ Picture & Video Settings
902T-e-manual-03.indd 104
05.6.9 4:55:14 PM
Camera
You can use the camera to take pictures and record videos, as well as to scan QR codes
(page 267).
Modes
Change the orientation of the phone according to the mode.
Turnover Style
Display position for Digital Camera and Camcorder
Modes for Taking Pictures
◆ Digital Camera: Allows you to take high-quality pictures at W640×H480 or
higher resolution.
◆ Mobile Camera: Allows you to take pictures at W240×H320 size or smaller for
use as wallpaper, etc.
◆ Scanner: Allows you to scan QR codes. For details, see “Barcode” (page 266).
Modes for Recording Videos
Open Style
Display position for Mobile Camera, For MMS and Short Video
◆ Camcorder: Allows you to record videos up to 20 minutes long. The recording
time depends on the amount of available memory in the storage place.
◆ For MMS: Attach videos recorded in this mode to MMS messages.
◆ Short Video: Use this mode for sending video attachments to MPEG-4 compatible
Vodafone mobile phones (PDC).
Self-portrait Style
Display position for taking pictures and recording videos of yourself
Camera/Video Camera
902T-e-manual-03.indd 105
105
05.6.9 4:55:15 PM
Indicators
Camera Indicators
Note
Soft key indicators appear on the
monitor screen when:
• You take pictures in Mobile
Camera mode with the phone
in open style or self-portrait
style.
• You record videos in For MMS
or Short Video modes with the
phone in open style or selfportrait style.
②③④⑤⑥
0199
①
>ÝÕ
ÕLiÀÊv
*VÌÕÀiÃ
<Ê>À
Ý«ÃÕÀiÊ
ÌÀÊ>À
⑦
⑧
⑨
/PTIONS
① Camera Mode/Multi Shots:
Digital Camera, Mobile Camera, Scanner,
Internal Camera in Use, Multi Shots (High Speed),
(Low Speed)
(Normal Speed),
② Picture Size:
W1600 × H1200, W1280 × H1024,
W1024 × H768, W640 × H480,
W240 × H320, W144 × H176,
W120 × H160, W112 × H112,
W96 × H128
③ Picture Quality: Fine, Normal, Economy
⑥ Focus Mode: Auto, Macro, Infinity
⑫ Night Mode
⑬ Auto Bracket
"ACK
⑩⑪⑫⑬
Camera Monitor Screen
Camera/Video Camera
902T-e-manual-03.indd 106
106
05.6.9 4:55:15 PM
Video Camera Indicators
⑯⑰④⑤⑪⑱
⑲
⑮
<Ê>À
SS
⑦
⑧
/PTIONS
"ACK
Ý«ÃÕÀi
ÌÀÊ>À
,iVÀ`}
/i
,iVÀ`}
*À}ÀiÃÃÊ>À
⑮ Record Mode: Record Mode, Internal Camera in Use
⑯ Video Size: W320 × H240, W176 × H144, W128 × H96
⑰ Video Quality: Super Fine, Fine, Normal
⑱ Voice Record Off
⑲ Status:
Standby,
Forward,
⑨⑩
Recording,
Stopped,
Playing, Paused,
Rewind,
Frame Forward,
Frame Rewind
Video Monitor Screen
Camera & Video Camera Indicators
④ Exposure Control: ... ... -2.0 ... ±0 ...+2.0
⑤ Storage Place: Phone, Memory Card
⑦ Delay Timer: 5 sec., 10 sec., 20 sec.
Guide Display
⑧
⑨ White Balance:
Daylight,
⑩
⑪
Camera/Video Camera
902T-e-manual-03.indd 107
Shade,
Cloudy,
Fluorescent,
Tungsten
Self-view
Mobile Light
107
05.6.9 4:55:17 PM
Viewing Images on a Television
You can view pictures/videos on a TV. The TV systems supported by your phone are the
NTSC and PAL systems. The SECAM system is not supported. For details, see “Displaying
Files on a TV” (page 188).
Confirming the Memory Status
You can confirm the usage status of your phone and a memory card.
1. In standby mode, press @, select Camera and press J (Select).
2. Select Memory Status and press J (Select).
Camera/Video Camera
902T-e-manual-03.indd 108
108
05.6.9 4:55:19 PM
Pictures
Taking a Picture
Tip
• If the Preview setting (page
131) is set to On, you can
preview the image after it has
been saved.
• If the picture was taken in
Digital Camera, you can enlarge
or reduce the captured image.
• To capture another image,
press k
K (Back) or
a side key (Z
z).
• To end the camera, press o
O
or press and hold the side key
(Z
z).
• To set the Full Screen setting
after capturing image,
press J
j (Options) and select
Full Screen.
Camera/Video Camera
902T-e-manual-03.indd 109
There are two modes for taking pictures: Digital Camera and Mobile Camera (page 110).
You can also edit the pictures you take and set them for Contacts list entries.
1. In standby mode, press the side key (R).
2. Frame the subject in the main display and press @ or a side key (R).
The shutter clicks and the picture is saved automatically to the preset storage place
(page 128).
Deleting a Picture
You can delete the picture displayed after capturing image.
1. Press J (Options) after capturing image.
2. Select Delete and press J (Select).
3. Press J (Yes).
109
05.6.9 4:55:19 PM
Send Functions
Note
If the Preview setting (page 131)
is set to Off, the picture cannot be
sent.
1. Press @ after capturing image.
2. Select a send method and press J (Select).
◆ As MMS: Allows you to send the picture attached to an MMS message (page
137).
◆ Via Infrared: Allows you to send the picture by infrared (page 281).
Key Operations
You can adjust the exposure and zoom before capturing image. To adjust the exposure,
press D to make the picture darker and press C to make the picture lighter. To
adjust the zoom, press A or a side key (P) to zoom in and press B or a side key
(Q) to zoom out.
To adjust the exposure while in the turnover style, press a side key (Z), select
Advanced and press a side key (R). Then, select Exposure Control and press a side
key (R). Press a side key (Q) to make the picture darker and press a side key (P) to
make the picture lighter.
Picture Sizes
For details on setting the picture size, see “Changing the Picture Size” (page 125).
◆ Digital Camera: Allows you to select a picture size from W1600 × H1200,
W1280 × H1024, W1024 × H768 and W640 × H480.
◆ Mobile Camera: Allows you to select a picture size from W240 × H320,
W144 × H176, W120 × H160, W112 × H112 and W96 × H128.
Camera/Video Camera
902T-e-manual-03.indd 110
110
05.6.9 4:55:19 PM
Viewing a Picture
1. Press J (Options) before capturing image.
2. Select My Pictures and press J (Select).
3. Select a picture and press @.
Default Recipient for MMS
Note
If the Preview setting (page 131)
is set to Off, the picture cannot be
sent.
Capture a picture and send it to a pre-saved address. You can set one address as the
Default Recipient (page 148).
1. After you take a picture in turnover style, press a side key (R).
2. Select As MMS and press a side key (R).
If a picture taken in Digital Camera mode exceeds 300 KB, the picture size or file
size is reduced/compressed automatically.
Camera/Video Camera
902T-e-manual-03.indd 111
111
05.6.9 4:55:20 PM
Functions for Taking Pictures
Switching Camera Modes
For details on camera modes, see “Modes for Taking Pictures” (page 105).
Tip
For details on changing the picture
size in Digital Camera and Mobile
Camera, see page 125.
1. Press J (Options) before capturing image, select Camera Mode and press J
(Select).
2. Select Digital Camera, Mobile Camera or Scanner and press J (Select).
Focus Mode
Tip
To adjust the focus when Auto is
set, press H
h or half press a side
key (R
r) before capturing image.
After the focus is adjusted, the
complete sound is heard and the
focus is locked.
1. Press J (Options) before framing subject, select Focus Mode and press J
(Select).
2. Select an item and press J (Select).
◆ Auto: Adjusts the focus automatically.
◆ Macro: Suitable for taking a picture of a subject that is very close to you.
◆ Infinity: Suitable for taking a picture of a subject that is very far away from you.
Night Mode
You can use this mode for taking pictures at night, etc.
Note
• If night mode is set, Auto of
focus mode is unavailable.
• If multi shots or auto bracket is
set, night mode is unavailable.
Camera/Video Camera
902T-e-manual-03.indd 112
1. Press J (Options) before capturing image, select Night Mode and press J
(Select).
2. Select On or Off and press J (Select).
112
05.6.9 4:55:20 PM
Multi Shots
You can take up to nine pictures in succession.
Note
• Multi shots is unavailable
for taking pictures in Digital
Camera mode.
• If auto bracket is set, multi
shots is unavailable.
• If multi shots is set, the zoom
cannot be adjusted.
Tip
To delete a picture, select the picture
after Step 2 of “Deleting a Picture”
(page 109), press a
@ to add a
check mark, press J
j (Options)
and select Delete.
Note
1. Press J (Options) before capturing image, select Multi Shots and press J
(Select).
2. Select High Speed, Normal Speed, Low Speed or Off and press J (Select).
Frame Setting
You can select a frame before you take a picture. For details on setting a frame
afterwards, see page 116.
1. Press J (Options) before capturing image, select Add Frame and press J
(Select).
2. Select Preset Frames, My Pictures or Off and press J (Select).
A list of frames appears.
3. Select a frame from the list and press @.
The frame appears before capturing image.
Press D or * to display the previous frame and press C or # to display
the next frame.
4. Press J (OK).
When taking pictures in Digital
Camera mode or at the W96 × H128
size, a frame cannot be set.
Camera/Video Camera
902T-e-manual-03.indd 113
113
05.6.9 4:55:20 PM
Auto Bracket
Note
• When taking pictures in Digital
Camera, auto bracket cannot
be set.
• If multi shots is set, auto
bracket is unavailable.
• If auto bracket is set, the zoom
cannot be adjusted.
Tip
To delete a picture, select a picture
after Step 2 of “Deleting a Picture”
(page 109), press a
@ to add a
check mark, press j
J (Options)
and select Delete.
Camera/Video Camera
902T-e-manual-03.indd 114
You can take three pictures of the same subject at different exposure levels. By
comparing all three pictures, you can choose the optimal exposure level.
1. Press J (Options) before capturing image, select Advanced and press J
(Select).
2. Select Auto Bracket and press J (Select).
3. Select On or Off and press J (Select).
Additional Functions for Taking Pictures
◆ Self-view (page 128)
◆ Storage Place (page 128)
◆ Delay Timer (page 129)
◆ Mobile Light (page 129)
◆ White Balance (page 130)
◆ Exposure Control (page 130)
114
05.6.9 4:55:20 PM
Editing a Picture
You can edit the picture after capturing image using Mobile Camera or pictures saved to
Data Folder. You can edit any picture with 100,000 pixels or less saved in JPEG or PNG
format. Pictures taken in Digital Camera mode can only be saved as thumbnails.
Changing the Picture Size
You can change the sizes of the pictures you take.
Tip
You can perform the following
operations if you press J
j (Options)
after Step 3.
• Cut: Trims the image to fit the
selected picture size.
• Fit to Width: Resizes the
picture to fit the width of the
selected picture size.
• Fit to Length: Resizes the
picture to fit the height of the
selected picture size.
1. Press J (Options) after capturing image, select Edit Picture and press J
(Select).
2. Select Picture Size and press J (Select).
3. Select a picture size or Define and press J (Select).
A rectangle frame indicates the picture size.
If you selected Define, enter a picture size (W16 to 240 × H16 to 320) and press
J (OK).
4. Use E to adjust the position of the picture within the dotted line and press @.
5. Press J (OK) and @.
6. Select a save method and press (Select).
◆ Save: Overwrites the file of the original picture.
◆ Save as: Saves the picture as a new file. Enter a file name and press @.
Camera/Video Camera
902T-e-manual-03.indd 115
115
05.6.9 4:55:21 PM
Adding a Frame
You can add frames to the pictures you take. You can select a frame from preinstalled
frames or frames saved to Data Folder.
1. Press J (Options) after capturing image, select Edit Picture and press J
(Select).
2. Select Add Frame and press J (Select).
3. Select Preset Frames or My Pictures and press J (Select).
If you selected Preset Frames, select a frame size and press J (Select).
4. Select a frame and press @.
The framed picture appears.
If the frame size and picture size differ, you can use E to adjust the position of the
frame.
To switch to another frame, press * or #.
5. Press J (OK) and @.
6. Select a save method and press J (Select).
◆ Save: Overwrites the file of the original picture.
◆ Save as: Saves the picture as a new file. Enter a file name and press @.
Camera/Video Camera
902T-e-manual-03.indd 116
116
05.6.9 4:55:21 PM
Adding a Stamp
Tip
• To paste the same stamp again,
press J
j (Options) after Step
5 and select Continue.
• To undo the pasting of a stamp,
press j
J (Options) after Step
5 and select Undo All.
You can paste stamps on the pictures you take. You can select a stamp from preinstalled
stamps or stamps saved to Data Folder.
1. Press J (Options) after capturing image, select Edit Picture and press J
(Select).
2. Select Add Stamp and press J (Select).
3. Select Preset Stamps or My Pictures and press J (Select).
4. Select a stamp and press @.
5. Use E to adjust the paste position and press @.
6. Press @ twice.
7. Select a save method and press J (Select).
◆ Save: Overwrites the file of the original picture.
◆ Save as: Saves the picture as a new file. Enter a file name and press @.
Camera/Video Camera
902T-e-manual-03.indd 117
117
05.6.9 4:55:21 PM
Adding Text
You can add text to the pictures you take.
1. Press J (Options) after capturing image, select Edit Picture and press J
(Select).
2. Select Add Text and press J (Select).
3. Select Large Font, Standard Font or Small Font and press J (Select).
4. Select a font colour and press J (Select).
5. Enter text and press @.
You can enter up to 9 characters with the large font, 12 characters with the
standard font and 20 characters with the small font.
6. Use E to adjust the paste position and press J (Paste).
7. Press @.
8. Select a save method and press J (Select).
◆ Save: Overwrites the file of the original picture.
◆ Save as: Saves the picture as a new file. Enter a file name and press @.
Camera/Video Camera
902T-e-manual-03.indd 118
118
05.6.9 4:55:21 PM
Rotating a Picture
You can rotate and then save the pictures you take.
1. Press J (Options) after capturing image, select Edit Picture and press J
(Select).
2. Select Rotate Image and press J (Select).
3. Select an angle and press J (Select).
◆ 90 degrees: Rotates the picture 90 degrees clockwise.
◆ 180 degrees: Rotates the picture 180 degrees.
◆ 270 degrees: Rotates the picture 270 degrees clockwise (90 degrees
anticlockwise).
4. Press J (OK) and @.
5. Select a save method and press J (Select).
◆ Save: Overwrites the file of the original picture.
◆ Save as: Saves the picture as a new file. Enter a file name and press @.
Saving Thumbnails
Tip
Some pictures cannot be saved as
thumbnails.
Save pictures taken in Digital Camera mode as thumbnails. Pictures saved as
thumbnails can be attached to messages.
1. Press J (Options) while a picture is displayed.
2. Select Save Thumbnail and press J (Select).
The thumbnail is saved automatically to the Pictures folder of Data Folder.
Camera/Video Camera
902T-e-manual-03.indd 119
119
05.6.9 4:55:21 PM
Saving to a Contact Entry
You can register a picture taken in Mobile Camera mode at the W112 × H112 size
(page 125) to a Contacts list entry.
1. After you take a picture at the W112 × H112 size, press J (Options) after
capturing image, select Assign to Contact and press J (Select).
2. Select Add New Contact and press J (Select).
To add the picture to an existing Contacts list entry, select Add to Existing.
3. Proceed from Step 3 of “Adding an Entry from the Main Menu” (page 76).
Camera/Video Camera
902T-e-manual-03.indd 120
120
05.6.9 4:55:22 PM
Videos
Note
If the recording mode is set to For
MMS or Short Video, recording
cannot be paused.
Recording a Video
You can use the camera to record videos. There are three modes for recording videos:
Camcorder, For MMS and Short Video (page 124).
1. In standby mode, press and hold the side key (R).
2. Display the subject in the main display and press @ or a side key (R).
Tip
• If the Preview setting (page 131)
is set to On, the first frame of
the video appears after recording
a video.
• To record another video,
press K
k (Back) or a side key
(Z
z) after recording the first
video.
• To end the video camera,
press O
o or press and hold a
side key (Z
z).
• To set a video as the incoming
ringtone (page 79), press J
j
(Options) from the preview
screen after recording ends
and select Assign to Contact.
Only videos recorded in For
MMS and Short Video can be
set as an incoming image.
Camera/Video Camera
902T-e-manual-03.indd 121
The start sound is heard and recording begins.
To pause recording, press J or a side key (Z). To resume recording, press @
or a side key (R).
3. Press @ or a side key (R).
The end sound is heard and the video is saved automatically to the preset storage
place (page 128).
Deleting a Video
1. Press J (Options) after recording a video.
2. Select Delete and press J (Select).
3. Press J (Yes).
121
05.6.9 4:55:22 PM
Send Functions
Note
• Videos recorded in Camcorder
cannot be sent.
• If the Preview setting (page
131) is set to Off, the video
cannot be sent.
1. Press @ after recording a video.
2. Select a send method and press J (Select).
◆ As MMS: Allows you to send the video attached to an MMS message (page 137).
◆ Via Infrared: Allows you to send the video by infrared (page 281).
Key Operations
You can adjust the exposure and zoom before recording a video. To adjust the
exposure, press D to make the video darker and press C to make the video
lighter. To adjust the zoom, press A or a side key (P) to zoom in and press B
or a side key (Q) to zoom out.
To adjust the exposure while in the turnover style, press a side key (Z), select
Advanced and press a side key (R). Then, select Exposure Control and press a
side key (R). Press a side key (Q) to make the video darker and press a side key
(P) to make the video lighter.
Video Sizes
◆ Camcorder: Records at the W320 × H240 video size. You can save up to 20
minutes of video to your phone or a memory card. The recording time depends on
the amount of available memory in the storage place.
◆ For MMS: Records at the W176 × H144 video size. You can send videos attached
to MMS messages.
◆ Short Video: Records at the W128 × H96 video size. You can send videos
attached to MMS messages to MPEG-4 compatible Vodafone mobile phones (PDC).
Camera/Video Camera
902T-e-manual-03.indd 122
122
05.6.9 4:55:22 PM
Playing a Video
Note
The forward, rewind, frame
forward, frame rewind and slow
playback features are unavailable
for videos recorded in For MMS or
Short Video.
Tip
To pause a video during playback,
press a
@. When a video is
paused, press C
a for frame
forward, press and hold C
a for
slow playback and press a
D for
frame rewind.
1. Press J (Options) before recording a video.
2. Select My Videos and press J (Select).
3. Select a video and press @.
Press and hold C to forward the video and press and hold D to rewind the
video.
Press A or a side key (P) to increase the playback volume and press B or a
side key (Q) to decrease the playback volume.
Default Recipient for MMS
Record a video and send it to a pre-saved address. You can set one address as the
Default Recipient (page 148).
1. After you record a video in turnover style, press a side key (R) after recording a
video.
2. Select As MMS and press a side key (R).
Note
If the Preview setting (page 131)
is set to Off, the video cannot be
sent.
Camera/Video Camera
902T-e-manual-03.indd 123
123
05.6.9 4:55:22 PM
Functions for Recording Videos
Switching Record Modes
For details on record modes, see “Modes for Recording Videos” (page 105).
1. Press J (Options) before recording a video, select Record Mode and press J
(Select).
2. Select Camcorder, For MMS or Short Video and press J (Select).
Recording Sound
1. Press J (Options) before recording a video, select Voice Record and press J
(Select).
2. Select On or Off and press J (Select).
Additional Functions for Recording Videos
◆ Self-view (page 128)
◆ Storage Place (page 128)
◆ Delay Timer (page 129)
◆ Mobile Light (page 129)
◆ White Balance (page 130)
◆ Exposure Control (page 130)
Camera/Video Camera
902T-e-manual-03.indd 124
124
05.6.9 4:55:23 PM
Picture & Video Settings
Settings for Taking Pictures
Changing the Picture Quality
You can change the picture quality for camera modes.
1. In standby mode, press @, select Camera and press J (Select).
2. Select Settings and press J (Select).
3. Select Camera Settings and press J (Select).
4. Select Picture Settings and press J (Select).
5. Select Picture Quality and press J (Select).
6. Select Fine, Normal or Economy and press J (Select).
Changing the Picture Size
1. After Step 4 of “Changing the Picture Quality” (above), select Picture Size and
press J (Select).
2. Select Digital Camera or Mobile Camera and press J (Select).
3. Select a picture size and press J (Select).
For details on picture sizes, see page 110.
Camera/Video Camera
902T-e-manual-03.indd 125
125
05.6.9 4:55:23 PM
Date Stamp
You can add a date stamp to pictures.
Note
When taking pictures in Digital
Camera mode or at the W112 ×
H112 size, a date stamp cannot be
added.
1. After Step 4 of “Changing the Picture Quality” (page 125), select Date Stamp and
press J (Select).
2. Select On and press J (Select).
3. Select a date colour and press J (Select).
Displaying a Grid
You can display horizontal and vertical gridlines on the monitor screen to use as a
vertical and horizontal guide for taking pictures.
1. After Step 3 of “Changing the Picture Quality” (page 125), select Screen Settings
and press J (Select).
2. Select Grid and press J (Select).
3. Select On or Off and press J (Select).
Shutter Sound
You can set the shutter sound.
1. After Step 3 of “Changing the Picture Quality” (page 125), select Shutter Sound
and press J (Select).
2. Select Pattern 1 or Pattern 2 and press @.
Camera/Video Camera
902T-e-manual-03.indd 126
126
05.6.9 4:55:23 PM
Settings for Recording Videos
Changing the Video Quality
Note
The maximum recording time varies
depending on the video quality
setting.
1. In standby mode, press @, select Camera and press J (Select).
2. Select Settings and press J (Select).
3. Select Video Settings and press J (Select).
4. Select Movie Settings and press J (Select).
5. Select Video Quality and press J (Select).
6. Select Super Fine, Fine or Normal and press J (Select).
Switching Image to Full Display
You can use the full display to view images.
Tip
To set the Full Screen setting after
capturing image and recording a
video, press j
J (Options) and
select Full Screen.
1. After Step 3 of “Changing the Video Quality” (above), select Screen Settings and
press J (Select).
2. Select Screen Display and press J (Select).
3. Select Normal or Full Screen and press J (Select).
Display Indicators
You can set display indicators on or off.
1. After Step 3 of “Changing the Video Quality” (above), select Screen Settings and
press J (Select).
2. Select Controller Display and press J (Select).
3. Select On or Off and press J (Select).
Camera/Video Camera
902T-e-manual-03.indd 127
127
05.6.9 4:55:23 PM
Start & End Sounds
You can set the start and end sounds.
1. After Step 3 of “Changing the Video Quality” (page 127), select Start/End Sounds
and press J (Select).
2. Select Pattern 1 or Pattern 2 and press @.
Settings for Pictures & Videos
Self-view
This feature allows you to view your image on the display while you take pictures or
record videos. In self-portrait style, you can use the internal camera or external camera.
In turnover style and open style, you can use the internal camera. For details on styles,
see page 39.
1. Press J (Options) from the display, select Self-view and press J (Select).
2. Select Internal Camera, External Camera or Off and press J (Select).
Storage Place
You can set the storage places to which to automatically save pictures and videos.
Note
All pictures taken in Digital Camera
are saved to the Digital Camera
folder.
1. Press J (Options) from the display, select Save Image to or Save Video to and
press J (Select).
2. Select Phone Memory or Memory Card and press J (Select).
If more than one folder is available for selection as the storage place, select a folder
and press J (Select).
Camera/Video Camera
902T-e-manual-03.indd 128
128
05.6.9 4:55:23 PM
Delay Timer
This feature allows you to take a picture or start recording after a specified time elapses.
1. Press J (Options) from the display, select Advanced and press J (Select).
2. Select Delay Timer and press J (Select).
3. Select 5 sec, 10 sec, 20 sec or Off and press J (Select).
Mobile Light
You can turn on the mobile light while taking pictures or recording videos.
1. Press J (Options) from the display, select Advanced and press J (Select).
2. Select Mobile Light and press J (Select).
3. Select On or Off and press J (Select).
Camera/Video Camera
902T-e-manual-03.indd 129
129
05.6.9 4:55:23 PM
White Balance
Under some conditions, the colours in pictures and videos may differ from the actual
colours. If so, you can set the white balance so that the colours more closely resemble
the actual colours.
1. Press J (Options) from the display, select Advanced and press J (Select).
2. Select White Balance and press J (Select).
3. Select a mode and press J (Select).
◆ Auto: Adjusts the white balance automatically in order to obtain natural colours.
◆ Daylight: Suitable for outdoors under a clear sky.
◆ Shade: Suitable for in the shade.
◆ Cloudy: Suitable for outdoors under a cloudy sky.
◆ Fluorescent: Suitable for fluorescent lighting.
◆ Tungsten: Suitable for incandescent lighting.
Exposure Control
You can adjust the brightness for pictures and videos.
1. Press J (Options) from the display, select Advanced and press J (Select).
2. Select Exposure Control and press J (Select).
3. Use F to adjust the exposure.
Camera/Video Camera
902T-e-manual-03.indd 130
130
05.6.9 4:55:24 PM
Picture & Video Effects
You can change the colour adjustment setting for taking pictures and recording videos.
1. In standby mode, press @, select Camera and press J (Select).
2. Select Settings and press J (Select).
3. Select Camera Settings or Video Settings and press J (Select).
4. Select Picture Settings or Movie Settings and press J (Select).
5. Select Picture Effects or Effects and press J (Select).
6. Select a setting and press J (Select).
◆ Sepia: Sepia tone pictures and videos.
◆ Black & White: Monochrome pictures and videos.
◆ Negative: Reverses the tones of pictures and videos.
◆ Emboss: Emphasises the contours to give pictures and videos an embossed look.
◆ Off
Preview Setting
You can set whether to display the preview screen after you take a picture or record a
video.
1. After Step 4 of “Picture & Video Effects” (above), select Preview and press J
(Select).
2. Select On or Off and press J (Select).
Camera/Video Camera
902T-e-manual-03.indd 131
131
05.6.9 4:55:24 PM
Flicker Adjustment
When taking pictures and recording videos near fluorescent lighting, you can reduce
screen flicker by setting the frequency for the current area.
1. After Step 3 of “Picture & Video Effects” (page 131), select Screen Settings and
press J (Select).
2. Select Flicker Adjustment and press J (Select).
3. Select 50 Hz or 60 Hz and press J (Select).
Setting the File Name
You can preset the file name to use when saving pictures and videos to the date and
time or a name of your choice.
1. After Step 3 of “Picture & Video Effects” (page 131), select File Name and press
J (Select).
2. Select Date&Time or Define and press J (Select).
If you selected Define, enter a file name and press @.
Setting Keypad Shortcuts
You can set whether to use the keypad shortcuts for accessing functions while you are
using the camera.
1. After Step 3 of “Picture & Video Effects” (page 131), select Keypad Shortcut and
press J (Select).
2. Select On or Off and press J (Select).
Camera/Video Camera
902T-e-manual-03.indd 132
132
05.6.9 4:55:24 PM
The following keypad shortcuts are available while you are taking
pictures and recording videos.
Camera/Video Camera
902T-e-manual-03.indd 133
Taking Pictures
Recording Videos
1
Key Guide
Key Guide
2
Camera Mode
Record Mode
3
Delay Timer
Delay Timer
4
Picture Effects
Effects
5
Picture Quality
Video Quality
6
White Balance
White Balance
7
Focus Mode
Voice Record
8
Night Mode
-
9
Picture Size
-
0
-
Screen Display
*
Mobile Light
Mobile Light
#
Self-view
Self-view
133
05.6.9 4:55:24 PM
Messaging
Messaging allows you to send and receive text messages, pictures, sounds, vObjects and other
data via the Vodafone live! Service Centre.
In This Chapter
❍ Messaging Capabilities
❍ MMS
❍ SMS
❍ MMS/SMS Common Operations
902T-e-manual-04.indd 134
05.6.9 4:56:29 PM
Messaging Capabilities
Note
The network service is only available
while
or
appears on the
display.
Your phone is equipped with messaging functions for sending and receiving messages.
Via the Service Centre, you can exchange text messages, pictures, sounds, vObjects and
other data with other phones or PCs and other devices connected to the Internet. For
details on the messaging service, contact Vodafone General Information.
Changing Your Mail Address
Note
If ご希望のEメールアドレスは
既に登録されています。他の
アドレスを入力してください。
(The address has already been
registered. Enter another address.)
appears after Step 10, repeat from
Step 9.
If you use the email service, you can change the account name (part before @) of your
email address for exchanging email messages with PCs and other devices. Random
alphanumeric characters are set as the account name at the time of subscription.
1. In standby mode, press K (
).
2. Select My Vodafone and press @.
3. Select 各種変更手続き and press @.
4. Select オリジナルメール設定 and press @.
5. Select the centre access code input field and press @.
6. Enter your centre access code and press @.
7. Select OK and press @.
8. Select 1. メールアドレス編集 and press @.
9. Select the character input field and press @.
10. Enter an account name and press @.
11. Select OK and press @.
Messaging
902T-e-manual-04.indd 135
135
05.6.9 4:56:29 PM
Message Menu
Tip
Alternatively, you can press a
@
from standby mode and select
Messaging to access the Message
menu.
Messaging
902T-e-manual-04.indd 136
You can access the Message menu by pressing J (
) from standby mode.
◆ Create Message: Allows you to create and send an MMS or SMS message (pages
137, 149).
◆ Received Msgs.: Received messages are saved here (pages 142, 151).
◆ Drafts: Drafts are saved here (page 158).
◆ Sent Messages: Sent messages are saved here (pages 144, 152).
◆ Unsent Messages: Stores messages that could not be sent (page 159).
◆ Server Mail Box: Allows you to connect to the mail server and set various
settings (page 145).
◆ Templates: You can use the preinstalled templates to create messages (pages
140, 150).
◆ Settings: Allows you to set various MMS and SMS settings (pages 146, 153,
154).
136
05.6.9 4:56:29 PM
MMS
About MMS
The Multimedia Messaging Service (MMS) allows you to exchange multimedia messages
containing data such as text, pictures, sounds, animations and video clips. For details on
MMS, contact Vodafone General Information.
Creating & Sending an MMS Message
0AGE
+BYTES
[! D D 2 E C I P I E N T S ]
[! D D 3 U B J E C T]
[! D D 4E X T ]
[! D D 0 I C T U RE]
[! D D 3 O U N D ]
[! D D 6 I D E O]
[! D D / T H E R & I L E S]
/PTIONS
"ACK
Create MMS Message Screen
Note
Multiple files of the same type
cannot be attached to one page.
Also, some combinations of files
may not be able to be attached to
one page.
Messaging
902T-e-manual-04.indd 137
You can send a message up to 300 KB including the subject, body text and attachment
files.
1. In standby mode, press J (
), select Create Message and press J (Select).
2. Select MMS and press J (Select).
The Create MMS Message screen appears.
3. Select an item and press @.
◆ Add Subject: Allows you to enter a subject.
◆ Add Text: Allows you to enter a message. To set the text colour or font size, select
the text you entered, press J (Options) and select Text Options.
◆ Add Picture: Allows you to attach picture files. You can also activate the camera
and take a picture to attach.
◆ Add Sound: Allows you to attach sound files saved in Sounds&Ringtones.
◆ Add Video: Allows you to attach video files. You can also activate the camera and
record a video to attach.
◆ Add Other Files: Allows you to attach files such as vCard files in Other Files.
137
05.6.9 4:56:29 PM
Tip
• Any message that could not
be sent is saved to Unsent
Messages.
• To play, edit and perform/set
other options, from the Create
MMS Message screen, select
an item and press J
j (Options).
4. Select Add Recipients and press @.
5. Select From Contacts, Enter Recipient or From Group List and press J
(Select).
◆ From Contacts: Allows you to select an address from the Contacts list (page 84).
◆ Enter Recipient: Allows you to enter an address using the keypad. You can enter
up to 256 characters.
◆ From Group List: Allows you to specify a group as the address from the Group
list (page 82).
6. Set an address and press @.
7. Select Send MMS and press @.
The message is sent and then saved to Sent Messages.
Messaging
902T-e-manual-04.indd 138
138
05.6.9 4:56:30 PM
Recipient List Operations
+BYTES
$ONE
*OHN
/ P T IO N S
"ACK
Recipient List Screen
Note
Some items do not appear
depending on the position of the
cursor.
Messaging
902T-e-manual-04.indd 139
From the Create MMS Message screen, select the address field and press @ to
display the Recipient list.
You can perform the following operations if you press J (Options) from the Recipient list.
◆ Done: Confirms the address and displays the Create MMS Message screen.
◆ Edit Recipient: Allows you to edit addresses.
◆ Add Recipients: Allows you to add addresses. You can enter up to 30 addresses
for each of To, Cc and Bcc.
◆ Delete Recipient: Allows you to delete addresses.
◆ Save to Contacts: Allows you to save an address to the Contacts list.
◆ Set as To/Cc/Bcc: Allows you to switch To/Cc/Bcc for an address.
◆ Sending Options: Allows you to set the following sending options: Delivery
Report, Delivery Time, Expiry Time and MMS Priority. You can preset these
settings in “Sending Settings” (page 147) of the MMS settings.
139
05.6.9 4:56:30 PM
Using MMS Template
Tip
• Press J
j (Options) in Step 3,
to edit the template, etc.
• If preinstalled templates have
been deleted or edited, use
Clear Memory (page 240) to
re-install the templates.
You can use MMS templates that have preset pictures and sounds to create messages.
You can also edit MMS templates.
1. In standby mode, press J (
), select Templates and press J (Select).
2. Select MMS Templates and press J (Select).
3. Select a template and press @.
For details on the following procedure, see “Creating & Sending an MMS Message”
(page 137).
Adding/Deleting Pages
Tip
To set the page playback duration
or background colour of the page,
select Page Options in Step 2.
You can add, delete and replace pages. Using multiple pages enables you to create a
message that displays like a slide show. You can set up to 20 pages for each message.
1. From the Create MMS Message screen (page 137), press J (Options).
2. Select Add Page and press J (Select).
A page is added.
When there is more than one page, you can perform the following operations if you
select Page Control in Step 2.
◆ Add Page: Adds a page.
◆ Delete Page: Deletes a page.
◆ Previous Page/Next Page: Takes you to the previous or next page.
◆ Move Page: Moves a page to a specified position.
Messaging
902T-e-manual-04.indd 140
140
05.6.9 4:56:31 PM
Setting the File Playback Time
You can set the playback time for the text and attached files.
Note
A start time and display duration
that exceeds the page duration
(page 140) cannot be set.
1. From the Create MMS Message screen (page 137), select text or an attached file
and press J (Options).
2. Select Item Duration and press J (Select).
3. Select Start Time and press J (Select).
4. Enter the start time and press J (OK).
5. Select Duration and press J (Select).
6. Enter the display duration and press J (OK).
Previewing MMS Message
1. From the Create Message screen (page 137), select text or an attached file and
press J (Options).
2. Select Preview Message and press J (Select).
Messaging
902T-e-manual-04.indd 141
141
05.6.9 4:56:31 PM
Checking MMS Messages in Received Msgs.
Note
Some files cannot be displayed/
played unless the corresponding
content key (content usage right)
is downloaded.
When a message is received, animation plays while the ringtone is playing and your
phone is vibrating. If your phone is closed, the animation is displayed on the external
display. The indicator appears at the top of the display.
Received messages are saved to Received Msgs..
For details on operations available from Received Msgs., see page 155.
1. In standby mode, press J (
), select Received Msgs. and press J (Select).
The list appears.
The following indicators appear for MMS messages.
Tip
To open the Received Msgs. list,
select New MMS in the information
prompt and press j
J (Select).
appears for unread messages.
MMS message ( high priority level, low priority level)
MMS notification ( high priority level, low priority level)
Delivery report message
2 E C E IVE D - SG S
(ELLO
4HOMAS
3 O P H IE
% M ILY
-ATTHEW
88888888
/ P T IO N S
"ACK
List Screen
Messaging
902T-e-manual-04.indd 142
142
05.6.9 4:56:31 PM
0 A G E ( E LLO 9E ST E RD A Y ) WE N T T O
/ P T IO N S
"ACK
Message Screen
Messaging
902T-e-manual-04.indd 143
2. Select a message and press @.
The message appears.
If you receive an MMS message with multiple pages set, pictures, sounds and text
are presented in a slideshow-like format. Whether an attached file displays/plays
depends on the Auto-extract File setting of “Receiving Settings” (page 146). If there
is an attached video or other file, the file icon is displayed.
Receiving Complete MMS Messages
When Retrieve Mode of “Receiving Settings” (page 146) is set to Deferred or Always
Ask, messages are not received automatically. Notifications are received instead.
When a notification is received, the indicator appears at the top of the display. The
notification contains the first part of the message. The complete MMS message is stored
temporarily on the mail server (page 145).
In the notification message, select <Retrieve MMS> and press @.
143
05.6.9 4:56:32 PM
Checking MMS Messages in Sent Messages
3 E N T - E SSA G E S
(ELLO
4HOMAS
% M ILY
-ATTHEW
88888888
/ P T IO N S
Sent messages are saved to Sent Messages of the mailbox.
For details on operations available from Sent Messages, see page 157.
1. In standby mode, press J (
), select Sent Messages and press J (Select).
The list appears.
The following indicators appear for MMS messages.
"ACK
List Screen
MMS message ( high priority level,
Delivered MMS message
low priority level)
2. Select a message and press @.
The message appears.
Messaging
902T-e-manual-04.indd 144
144
05.6.9 4:56:33 PM
Using the Mail List
Incoming MMS messages with attached files or email messages from PCs or other
devices are stored on the mail server. You can use the mail list to retrieve MMS
messages and email messages.
1. In standby mode, press J (
), select Server Mail Box and press J (Select).
2. Press J (Options).
3. Select an item and press @.
◆ View: Allows you to check the contents of MMS notifications.
◆ Retrieve: Retrieves MMS messages.
◆ Update Mail List: Retrieves and updates the mail list.
◆ Delete: Allows you to delete a message stored on the mail server.
◆ Select Multi: Allows you to select multiple MMS notifications and delete or
retrieve the messages.
◆ Forward: Allows you to forward messages stored on the mail server.
◆ Server Mail Volume: Allows you to check the usage rate on the mail server.
◆ Sort by: Allows you to change the order of MMS notifications.
◆ Delete All: Deletes all messages stored on the mail server.
Messaging
902T-e-manual-04.indd 145
145
05.6.9 4:56:34 PM
MMS Settings
Receiving Settings
1. In standby mode, press J (
), select Settings and press J (Select).
2. Select MMS Settings and press J (Select).
3. Select Receiving Settings and press J (Select).
4. Select an item and press J (Select).
◆ Retrieve Mode: Allows you to set whether to automatically retrieve messages
received by the mail server. There are two settings: Home Network and
Roaming Network. For each of the settings, you can select Immediate,
Deferred or Always Ask.
◆ Auto-extract File: Allows you to set whether to automatically display/play picture
and sound files attached to messages.
◆ Reply for Delivery: Allows you to set whether to reply to requests for delivery
confirmation.
◆ Anonymous Msg.: Allows you to set whether to receive anonymous messages.
Messaging
902T-e-manual-04.indd 146
146
05.6.9 4:56:34 PM
Sending Settings
1. After Step 2 of “Receiving Settings” (page 146), select Sending Settings and press
J (Select).
2. Select an item and press J (Select).
◆ Delivery Report: Allows you to receive delivery reports to confirm whether sent
messages were delivered to recipients.
◆ Delivery Time: Allows you to specify a time up to seven days in the future for
delivering messages from the service centre to recipients.
◆ Expiry Time: Allows you to set the length of time a sent message is stored on the
mail server.
◆ MMS Signature: Allows you to save a signature and then set whether to display
the signature.
◆ MMS Priority: Allows you to set the message priority level to High, Normal or
Low.
Messaging
902T-e-manual-04.indd 147
147
05.6.9 4:56:34 PM
Setting the Default Recipient
Save an address in Default Recipient to capture and send an image from turnover style.
1. After Step 2 of “Receiving Settings” (page 146), select Default Recipient and press
J (Select).
2. Press @.
3. Select From Contacts or Enter Recipient and press J (Select).
◆ From Contacts: Allows you to select an address from the Contacts list (page 84).
◆ Enter Recipient: Allows you to enter an address using the keypad. You can enter
up to 256 characters.
4. Set an address and press @.
5. Press J (Options).
6. Select Save and press J (Select).
Messaging
902T-e-manual-04.indd 148
148
05.6.9 4:56:34 PM
SMS
About SMS
4E X T
( E LLO H O W A RE YO U The Short Message Service (SMS) allows you to exchange text message with other
phones. For details on SMS, contact Vodafone General Information.
Creating & Sending an SMS Message
1. In standby mode, press J (
), select Create Message and press J (Select).
2. Select SMS and press J (Select).
The Create Message screen appears.
/ P T IO N S
# LE A R
Note
If you press K
k (Cancel) while
an SMS message with multiple
addresses set is being sent, the
send operation is cancelled for the
address set after the address to
which the message is currently
being sent.
3. Enter a message and press @.
You can enter up to 160 characters.
4. Select From Contacts or Enter Recipient and press J (Select).
◆ From Contacts: Allows you to select a phone number from the Contacts list (page
84).
◆ Enter Recipient: Allows you to enter a phone number using the keypad. You can
enter up to 20 digits.
5. Set a phone number and press @.
The Recipient list appears.
Tip
Any message that could not be
sent is saved to Unsent Messages
(page 159).
Messaging
902T-e-manual-04.indd 149
6. Select Send SMS and press @.
The message is sent and then saved to Sent Messages.
149
05.6.9 4:56:34 PM
Recipient List Operations
Note
Some items do not appear
depending on the position of the
cursor.
You can perform the following operations if you press J (Options) from the Recipient
list.
◆ Send: Allows you to send the message.
◆ Edit Recipient: Allows you to edit the address.
◆ Delete Recipient: Allows you to delete the address.
◆ Add Recipient: Allows you to add an address. You can enter up to ten addresses.
◆ Edit Message: Allows you to edit the message.
◆ Save to Contacts: Allows you to save an address to the Contacts list.
◆ Save to Drafts: Saves the message as a draft message to Drafts.
◆ Sending Options: Allows you to set the following sending options: Delivery
Report and Expiry Time. You can preset these settings in “SMS Settings” (page
153).
Using SMS Template
Tip
To perform an operation such as
editing and deleting a template
(except for a preset SMS template),
press j
J (Options) in Step 3.
Templates allow you to enter messages easily. You can also save frequently used
messages as templates.
1. In standby mode, press J (
), select Templates and press J (Select).
2. Select SMS Templates and press J (Select).
3. Select a template and press @.
For details on the following procedure, see “Creating & Sending an SMS Message”
(page 149).
Messaging
902T-e-manual-04.indd 150
150
05.6.9 4:56:35 PM
Checking SMS Messages in Received Msgs.
Tip
To open the Received Msgs. list,
select New SMS in the information
prompt and press J
j (Select).
2 E C E IVE D - SG S
(ELLO
4 H O M A S
3 O P H IE
% M ILY
-ATTHEW
8 8 8 8 8 8 8 8
/ P T IO N S
1. In standby mode, press J (
), select Received Msgs. and press J (Select).
The list appears.
The following indicators appear for SMS messages.
appears for unread messages.
SMS Message
Delivery report message
"ACK
SMS message saved in the USIM card
WAP Push message
2. Select a message and press @.
The message appears.
List Screen
When a message is received, animation plays while the ringtone is playing and your
phone is vibrating. If your phone is closed, the animation is displayed on the external
display. The indicator appears at the top of the display.
Received messages are saved to Received Msgs..
For details on operations available from Received Msgs., see page 155.
# A LL M E
4EL88888888
ABCDE △△ COM
/ P T IO N S
"ACK
Message Screen
Messaging
902T-e-manual-04.indd 151
151
05.6.9 4:56:35 PM
Checking WAP Push Messages
WAP Push message is an information delivery service that allows you to receive
notifications in real time from the Web server. When you receive a message, the
indicator appears at the top of the display. If Auto Launch (page 168) of the browser
settings is set to On, your phone accesses the specified URL as soon as the message is
received. Some push messages are just saved to the Received Msgs..
Checking SMS Messages in Sent Messages
3 E N T - E SSA G E S
(ELLO
4HOMAS
3 O P H IE
% M ILY
-ATTHEW
88888888
/ P T IO N S
1. In standby mode, press J (
902T-e-manual-04.indd 152
), select Sent Messages and press J (Select).
The list appears.
The following indicators appear for SMS messages.
"ACK
List Screen
Messaging
Sent messages are saved to Sent Messages of the mailbox.
For details on operations available from Sent Messages, see page 157.
SMS message
SMS message saved in the USIM card
2. Select a message and press @.
The message appears.
152
05.6.9 4:56:36 PM
SMS Settings
Note
Do not change the centre number
for the Message Centre unless
Vodafone informs you that it has
been changed. Otherwise, you
will no longer be able to use the
service.
Messaging
902T-e-manual-04.indd 153
1. In standby mode, press J (
), select Settings and press J (Select).
2. Select SMS Settings and press J (Select).
3. Select an item and press @.
◆ Delivery Report: Allows you to receive delivery reports to confirm whether sent
messages were delivered to recipients.
◆ Expiry Time: Allows you to set an expiry time for messages.
◆ SMS Signature: Allows you to save a signature and then set whether to display
the signature.
◆ Message Centre: Allows you to change the centre number for SMS. The centre
number is saved to the USIM card.
◆ SMS Type: Allows you to set the SMS type for outgoing messages to Text, Email,
Fax Group 3, Fax Group 4 or Pager.
153
05.6.9 4:56:37 PM
MMS/SMS Common Operations
Common Settings
You can set various settings common to MMS and SMS.
1. In standby mode, press J (
), select Settings and press J (Select).
2. Select Common Settings and press J (Select).
3. Select an item and press J (Select).
◆ Reply Settings: Allows you to set whether to quote received messages when
replying to them.
◆ Display Font Size: Allows you to select a message font size from Large,
Standard and Small.
◆ Page Scroll: Allows you to select the scroll unit of the message display screen
from 1 Line, Half Screen and Full Screen.
Messaging
902T-e-manual-04.indd 154
154
05.6.9 4:56:37 PM
Received Msgs. Operations
Note
• Some items do not appear
depending on the message
type or screen.
• When Auto-delete is set to On
and memory becomes full, the
oldest MMS message is deleted
when a new MMS message is
received and the oldest SMS
message is deleted when a
new SMS message is received.
• When the memory for Drafts,
Unsent Messages and
Templates becomes full, a new
message cannot be created
regardless of the setting for
Auto-delete.
Messaging
902T-e-manual-04.indd 155
You can perform the following operations if you press J (Options) from the Received
Msgs. list or a message.
◆ View: Allows you to check the contents of the message.
◆ Retrieve: Downloads the body text and attachment files of the MMS message (only
for notification messages).
◆ Play: Plays the MMS message from the first page.
◆ Reply: Allows you to reply to the message.
◆ Delete: Deletes one message.
◆ Save Sender: Allows you to save the phone number of the sender to the Contacts
list.
◆ Select Multi: Allows you to specify multiple messages and then retrieve or delete
them. You can also switch between protected and unprotected or read and unread
messages and move messages to another folder.
◆ Forward: Allows you to forward the message.
◆ Call Sender: Makes a call to the sender of the message.
◆ Manage Folder: Allows you to set Auto-delete and create folders. If a message
in a folder is selected, you can delete or rename the folder and set automatic
sorting.
◆ Sort by: Changes the order that messages appear. You can select a sort option
from Date from Latest, Date from Oldest, Sender, Unread to Read and
Message Type.
◆ Delete All: Deletes all messages in Received Msgs..
◆ Extract: Allows you to use a phone number, email address, URL or file (MMS
message only) in the message.
155
05.6.9 4:56:37 PM
◆ View Item: Allows you to view all files attached to the MMS message. You can
also play, display and save files.
◆ Save as Template: Allows you to save the message as a template.
◆ Copy Text: Allows you specify a range of text in any part of the message and then
copy the text.
◆ Move to USIM/Phone: Allows you to move the SMS message to your USIM card
or phone.
◆ Details: Displays the message properties (time stamp, priority, address, size, etc.).
◆ Load: Starts the browser and displays the Web page (only for a WAP Push
message).
◆ View Original Msg.: Displays the message for which delivery was confirmed (only
for a delivery report).
Messaging
902T-e-manual-04.indd 156
156
05.6.9 4:56:37 PM
Sent Messages Operations
Note
• Some items do not appear
depending on the message
type or screen.
• When Auto Delete is set to Off
and memory becomes full,
a warning message appears
and new messages cannot be
created. Delete messages you
no longer require or set Auto
Delete to On. However, MMS
messages saved to a folder you
created are not deleted.
Messaging
902T-e-manual-04.indd 157
You can perform the following operations if you press J (Options) from the Sent
Messages list or a message.
◆ View: Allows you to check the contents of the message.
◆ Play: Plays the MMS message from the first page.
◆ Resend: Allows you to edit the message and then resend it.
◆ Delete: Deletes one message.
◆ Select Multi: Allows you to specify multiple messages and then delete them or
move them to another folder.
◆ Forward: Allows you to forward the message.
◆ Extract: Allows you to use a phone number, email address, URL or file (MMS
message only) in the message.
◆ Call Recipient: Makes a call to the recipient of the message.
◆ Manage Folder: Allows you to set Auto Delete and create folders. If a message in
a folder is selected, you can delete or rename the folder and set automatic sorting.
◆ Sort by: Changes the order that messages appear. You can select a sort option
from Date from Latest, Date from Oldest, Recipient and Message Type.
◆ Delete All: Deletes all messages in Sent Messages.
◆ View Item: Allows you to view all files attached to the MMS message. You can
also play, display and save files.
◆ Save as Template: Allows you to save the message as a template.
◆ Copy Text: Allows you specify a range of text in any part of the message and then
copy the text.
157
05.6.9 4:56:37 PM
◆ Move to USIM/Phone: Allows you to move the SMS message to your USIM card
or phone.
◆ Details: Displays the message properties (time stamp, priority, address, size, etc.).
Drafts
You can save the messages you create to Drafts.
1. In standby mode, press J (
), select Drafts and press J (Select).
2. Select a message and press J (Options).
3. Select an item and press J (Select).
◆ Edit: Allows you to edit the message.
◆ Delete: Allows you to select from One, All or Select Multi for deleting messages.
◆ Send: Allows you to send the message.
◆ Call Recipient: Makes a call to the recipient of the message.
◆ Sort by: Changes the order that messages appear. You can select a sort option
from Date from Latest, Date from Oldest, Recipient and Message Type.
Messaging
902T-e-manual-04.indd 158
158
05.6.9 4:56:38 PM
Unsent Messages
Messages that could not be sent are saved to Unsent Messages.
1. In standby mode, press J (
), select Unsent Messages and press J (Select).
2. Select a message and press J (Options).
3. Select an item and press J (Select).
◆ Edit: Allows you to edit the message.
◆ Send: Allows you to send the message.
◆ Delete: Deletes the message.
◆ Select Multi: Allows you to specify multiple messages and then send or delete
them.
◆ Call Recipient: Makes a call to the recipient of the message.
◆ Sort by: Changes the order that messages appear. You can select a sort option
from Date from Latest, Date from Oldest, Recipient and Message Type.
◆ Delete All: Deletes all messages.
Messaging
902T-e-manual-04.indd 159
159
05.6.9 4:56:38 PM
Vodafone live!
Vodafone live! is an online service that allows you to use the Internet to access various genres of
content. You can browse information or download pictures, melodies and applications.
In This Chapter
❍ Accessing Vodafone live!
❍ Bookmarks
❍ Operations for Web Pages
❍ Browser Settings
❍ V-appli
❍ Media Player
902T-e-manual-05.indd 160
05.6.9 4:57:26 PM
Accessing Vodafone live!
Note
The network service is only available
or
appears on the
while
display.
You can access Vodafone live! to search for and obtain information.
A separate subscription is required to use the Vodafone live! service. For details, contact
Vodafone General Information.
1. In standby mode, press @, select Vodafone live! and press J (Select).
The Vodafone live! menu appears.
Tip
To display the Vodafone live! home
page, press K
k ( ) from standby
mode.
2. Select an item and press J (Select).
The
indicator appears at the top of the display during communication.
3. Press O to end Vodafone live!.
Vodafone live! Menu
You can perform the following operations via the Vodafone live! menu.
◆ Vodafone live!: Displays the Vodafone live! home page.
◆ Enter URL: Allows you to access a Web page by directly entering the address.
◆ Bookmarks: Allows you to bookmark your favourite Web pages and access
bookmarked Web pages (page 163).
◆ History: Displays the addresses of accessed Web pages in the order of newest to
oldest.
◆ Browser Settings: Allows you to set various browser settings (page 168).
Vodafone live!
902T-e-manual-05.indd 161
161
05.6.9 4:57:27 PM
Key Assignments for Browsing the Web
The following shows the key assignments for browsing the Web.
In Open Style
J: Selects an item or displays the Option menu.
K: Takes you back to the previous screen.
@: Selects an item.
G: Scrolls up or down.
F: Scrolls left or right.
O: Ends communication. If your phone is not connected, takes you back to standby
mode.
1 to 9: Acts as a shortcut to a link with a number.
* and #: Acts as a shortcut to a link with * or #. You can also use these keys to
perform supported operations.
Side Key (P): Increases the volume level.
Side Key (Q): Decreases the volume level. To set the volume to mute, press and hold
the key.
In Turnover Style
Side Key (P), (Q): Scrolls up or down.
Side Key (Z): Takes you back to the previous screen.
Side Key (R): Selects an item.
Vodafone live!
902T-e-manual-05.indd 162
162
05.6.9 4:57:27 PM
Bookmarks
If you bookmark frequently accessed pages, you can access them quickly and easily.
Adding a Bookmark
1. Display the page you want to bookmark and press J (Options).
2. Select Bookmarks and press J (Select).
3. Select Add Bookmark and press J (Select).
4. Select the title field and press @.
5. Edit the title and press @.
6. Press J (OK).
7. Select Root Folder and press J (OK).
Vodafone live!
902T-e-manual-05.indd 163
163
05.6.9 4:57:27 PM
Using Bookmarks
1. In standby mode, press @ , select Vodafone live! and press J (Select).
2. Select Bookmarks and press J (Select).
3. Select the title of the page you want to access and press J (Options).
To access the page of the selected title, press @.
4. Select the item you want to use and press J (Select).
◆ Go to URL: Allows you to enter a URL and display the Web page for the URL.
◆ Send: Allows you to send the URL in an SMS or MMS message.
◆ New Entry: Allows you to enter a new URL to add as a bookmark.
◆ Delete: Deletes one or all bookmarks.
◆ Move: Moves a bookmark to another folder.
◆ Select Multi: Allows you to select multiple bookmarks and then delete or move
them.
◆ Edit: Allows you to edit a bookmark title or URL.
◆ Create Folder: Allows you to create a folder.
Vodafone live!
902T-e-manual-05.indd 164
164
05.6.9 4:57:27 PM
Operations for Web Pages
You can perform various operations while a Web page is displayed.
You can perform the following operations if you press J (Options) while a Web page is
displayed.
◆ Select: Selects the item at the cursor position.
◆ Bookmarks: Adds a bookmark for the displayed Web page or references existing
bookmarks. You can also create a folder.
◆ My Saved Pages: Saves the displayed page to My Saved Pages.
◆ Previous Page: Takes you back to the previous page.
◆ Next Page: Takes you to the next page (if one exists in cache).
◆ Go to URL: Allows you to enter a URL or select information to display from access
history.
◆ Send Page: Allows you to send the URL in an SMS or MMS message.
◆ Reload Page: Updates the information.
◆ Object Select Mode: Selects a file in the information.
◆ Page Details: Allows you to confirm details such as the title, file size and transfer
permission of the displayed information.
◆ Other Settings: Allows you to copy text and change the font size or encoding
of information. You can also clear the cache and display the details of server
certificates.
◆ Do Actions: Allows you to perform the action specified in the displayed Web
page.
Vodafone live!
902T-e-manual-05.indd 165
165
05.6.9 4:57:27 PM
Using Files in Web Pages
Note
• Copy restrictions may prevent
some files from being saved.
• Some downloaded files may not
be able to be displayed/played
properly.
You can perform various operations such as saving and displaying/playing picture and
animation files in Web pages.
1. Display a Web page containing a file and press J (Options).
2. Select Object Select Mode and press J (Select).
3. Select a file and press J (Options).
4. Select the item you want to use and press J (Select).
◆ Object Details: Allows you to confirm details such as the file name, file size, save
permission and transfer permission.
◆ Save Object: Saves the file to Data Folder.
◆ Play/View: Plays or displays the file data.
◆ Paging Mode: Takes you back to paging mode.
◆ Exit Browser: Ends the browser.
Vodafone live!
902T-e-manual-05.indd 166
166
05.6.9 4:57:27 PM
Downloading Files from Links
You can download files from links and other objects in some Web pages.
Note
• Copy restrictions may prevent
some files from being saved.
• Some downloaded files may not
be able to be displayed/played
properly.
1. Display a Web page, select a character string for which a link is set and press @.
2. Press J (Yes).
Downloading begins.
3. Select the item you want to use and press J (Select).
◆ Play: Plays the file.
◆ Save: Saves the file to Data Folder.
◆ Object Details: Allows you to confirm details such as the file name, file size and
file type.
Vodafone live!
902T-e-manual-05.indd 167
167
05.6.9 4:57:28 PM
Browser Settings
You can set various browser settings.
1. In standby mode, press @, select Vodafone live! and press J (Select).
2. Select Browser Settings and press J (Select).
3. Select an item and press J (Select).
◆ Text Settings: If you select Text Browser, you can set your phone to download
only text information even when the download information contains images
and melodies. If you select Font Size, you can change the font size of text in
information.
◆ Memory Manager: Clears the access history, Cookies, Web cache and DNS
(Domain Name Server) cache. You can also enable or disable the storing of
cookies.
◆ Manufacture No.: Allows you to set whether to send automatically the
International Mobile Equipment Identity (IMEI) of your phone as your User ID when
a request is received from the network.
◆ Certification: Allows you to confirm details on a certificate issued from a
certificate authority.
◆ Auto Launch: Allows you to set whether to start the browser automatically when
a WAP push message is received.
◆ Location Property: Allows you to set whether to send location information
automatically when a location request is received while downloading information.
Vodafone live!
902T-e-manual-05.indd 168
168
05.6.9 4:57:28 PM
V-appli
From Web pages, you can download a variety of JavaTM compatible applications such as
games.
Applications
Note
• When you use a network
application, a communication
fee is charged each time the
application connects to the
network. The communication
fee is the same as that for
using the Web.
• When offline mode is set (page
220), some network
applications may not run
properly.
Vodafone live!
902T-e-manual-05.indd 169
In addition to ordinary applications that run solely on your phone, some applications
need to connect to the network (Web). Network V-appli enable you to play a game online
or download information in real time.
169
05.6.9 4:57:28 PM
Games&More Menu
6 A P P LI
$ISPLAYSDOWNLOADED*AVA
APPLICATIONSANDPROVIDES
6 A P P LI , IB R A R Y
3 C RE E N SA VE R S
3 E T T IN G S
* A VA ) N F O R M A T IO N
3 E LE C T
Vodafone live!
902T-e-manual-05.indd 170
"ACK
1. In standby mode, press @, select V-appli and press J (Select).
2. Select the item you want to use and press J (Select).
◆ V-appli Library: Save applications downloaded from the Web and access
preinstalled applications.
◆ Screensavers: Stores standby mode applications downloaded from the Web.
You can also set which application runs in standby mode or switch the standby
setting on or off (page 172). To set the application start time or length of time the
application runs before pausing, select Set Time.
◆ Settings: Allows you to set various application settings (page 173).
◆ Java Information: Displays an explanation on the JavaTM licence.
170
05.6.9 4:57:28 PM
Downloading V-appli
Note
• If the battery level is low at
the start of downloading,
the application may not be
completely downloaded.
Charging the battery
beforehand is recommended.
• If you replace the USIM card,
downloaded applications will
no longer be available. This
does not apply to preinstalled
applications.
You can download applications. Before downloading an application, you can confirm
details such as the download size and storage size.
1. In standby mode, press @, select V-appli and press J (Select).
2. Select V-appli Library and press J (Select).
3. Select More V-appli and press @.
An application download site appears.
4. Select an application and press @.
The application details screen appears.
5. Press J (Downld.).
Downloading begins.
6. Press J (Yes).
The V-appli Library appears.
Vodafone live!
902T-e-manual-05.indd 171
171
05.6.9 4:57:29 PM
Starting V-appli
You can run one application in standby mode.
Tip
To pause or return to the
application, select Pause or
Resume after pressing O
o in
Step 4.
1. In standby mode, press @, select V-appli and press J (Select).
2. Select V-appli Library and press J (Select).
3. Select an application and press @.
The indicator appears at the top of the display and the application starts. If you
close your phone, the application stops.
4. Press O, select Quit in the confirmation screen that appears and press @ to
end the application.
Setting the Screensaver
1. In standby mode, press @, select V-appli and press J (Select).
2. Select Screensavers and press J (Select).
3. Select Screensavers and press J (Select).
To cancel the screensaver, select Off.
4. Select an application and press @.
5. Press J (Yes).
Vodafone live!
902T-e-manual-05.indd 172
172
05.6.9 4:57:29 PM
V-appli Settings
Tip
• You can also change the volume
level while an application is
running. Press a side key (P
p)
to increase the volume level
and press a side key (Q
q) to
decrease the volume level.
• If the memory is cleared, any
preinstalled applications that
were deleted are reinstalled and
returned to their initial state.
Vodafone live!
902T-e-manual-05.indd 173
1. In standby mode, press @, select V-appli and press J (Select).
2. Select Settings and press J (Select).
3. Select the item you want to set and press J (Select).
◆ Priority Settings: Allows you to set the priority for when there is an incoming
call, incoming message or alarm while an application is running. To give priority
to voice calls, video calls, messages or alarm and pause the application, select
Voice Calls, Video Calls, Messages or Alarms. To display a notification at the
top of the display without pausing the application, select Notification.
◆ Backlight: Use the Backlight setting to set the display lighting when an
application is running. Use the Blinking setting to set backlight blinking feature on
or off.
◆ Volume: Allows you to adjust the volume for when an application is running. You
can also set the volume to mute.
◆ Vibration: You can set the preset vibration of an application on or off.
◆ MemoryCard Sync.: Allows you to update the V-appli information in a memory
card.
◆ Reset Settings: If you select Master Reset, you can reset all V-appli function
settings. If you select Clear Memory, you can reset all V-appli function settings
and delete all downloaded applications.
173
05.6.9 4:57:29 PM
Managing V-appli
1. In standby mode, press @, select V-appli and press J (Select).
2. Select V-appli Library and press J (Select).
3. Select an application and press J (Options).
4. Select an item and press J (Select).
◆ Start: Runs the application.
◆ Delete: Deletes the application.
◆ Select Multi: Allows you to select multiple applications and then delete them or
move them to a memory card.
◆ Memory Card: Allows you to switch from the V-appli Library in your phone (Data
Folder) to the V-appli Library in a memory card.
◆ Details: Allows you to confirm details on the application.
◆ Security Settings: Allows you to set the display method for the confirmation
screen that appears when you attempt to use certain functions while an
application is activated.
Vodafone live!
902T-e-manual-05.indd 174
174
05.6.9 4:57:29 PM
Media Player
Media Player allows you to play video/audio files, stream files and save files to
Favourites. You can also play video and audio files downloaded from the Web or videos
recorded with the camera.
Media Player supports MPEG-4 file format.
Media Player Menu
1. In standby mode, press @, select Media Player and press J (Select).
2. Select an item and press J (Select).
◆ My Sounds: Displays a list of audio files in Data Folder.
◆ My Videos: Displays a list of video files in Data Folder.
◆ Playlist: Allows you to create a playlist and play files (page 178).
◆ Favourites: Allows you to add up to ten files and streaming URLs to Favourites.
◆ History: Displays the history for file and streaming playback.
◆ Enter URL: Allows you to enter a URL for streaming playback or starting the
browser.
◆ Settings: If you select Backlight, you can set the display lighting for playback to
Always On, Always Off or Same as Phone. If you select Visualisations, you
can set a graphic to appear for the playback of audio files. You can also select the
picture or animation file to display.
Vodafone live!
902T-e-manual-05.indd 175
175
05.6.9 4:57:29 PM
Playing Audio Files
①
②
③
④
⑤
⑥
0LAYLIST
4ITLE
6ODAFONE3ONG
!R TIST
6ODAFONE
2EPEAT
KBPSK(Z
/ P T IO N S
3TOP
⑦
⑧ ⑨
Tip
To start the browser and connect
to an audio file download site,
select More Sounds in Step 3.
Display Indications
① List name
② Title
③ Artist
④ Elapsed play time/total play time
⑤ Play mode
⑥ Bit rate
⑦ Progress bar
⑧ Play status (icon)
⑨ Volume level
Playback
You can play files attached to MMS messages and downloaded audio files, or connect to
a streaming server to stream audio files.
1. In standby mode, press @, select Media Player and press J (Select).
2. Select My Sounds and press J (Select).
3. Select the audio file you want to play and press @.
The playback screen of Media Player appears and playback begins.
To stop playback, press K (Stop).
Press A to increase the playback volume level and press B to decrease the
playback volume level.
Vodafone live!
902T-e-manual-05.indd 176
176
05.6.9 4:57:30 PM
Playing Video Files
①
4 IT LE
/
Display Indications
① Title and elapsed play time/total play time
② Video display
③ Subtitles area
②
④ Progress bar
⑤ Play status (icon)
⑥ Volume level
③
/ P T IO N S
3TOP
④
⑤ ⑥
Tip
To start the browser and connect
to a video file download site, select
More Videos in Step 3.
Vodafone live!
902T-e-manual-05.indd 177
Playback
You can play files attached to MMS messages, videos recorded with the camera and
downloaded video files, or connect to a streaming server to stream video files.
1. In standby mode, press @, select Media Player and press J (Select).
2. Select My Videos and press J (Select).
3. Select the video file you want to play and press @.
The playback screen of Media Player appears and playback begins.
To stop playback, press K (Stop).
Press A to increase the playback volume level and press B to decrease the
playback volume level.
177
05.6.9 4:57:30 PM
Creating a Playlist
0 LA YLIST
!DDSOUNDSANDVIDEOSTO
YOURPLAYLIST
# RE A T E 0 LA YLIST
0 LA YLIST 0 LA YLIST This feature allows you to create a list of files that you want to play as a set. You can
also change the playback order of files in a playlist.
1. In standby mode, press @, select Media Player and press J (Select).
2. Select Playlist and press J (Select).
3. Select Create Playlist and press J (Select).
3 E LE C T
"ACK
4. Enter the name of the playlist and press @.
5. Select My Sounds or My Videos and press J (Select).
Note
A combination of audio and video
files cannot be added to the same
playlist.
6. Press J (Options).
7. Select Select Multi and press J (Select).
8. Select a file you want to add to the list and press @.
To add another file, repeat Step 8.
9. Press J (Options).
10. Select Add Files and press J (Select).
Vodafone live!
902T-e-manual-05.indd 178
178
05.6.9 4:57:31 PM
Playing a Playlist
1. In standby mode, press @, select Media Player and press J (Select).
2. Select Playlist and press J (Select).
3. Select the playlist you want to play and press @.
Media Player Operations
Note
Some items do not appear
depending on the screen type.
Vodafone live!
902T-e-manual-05.indd 179
You can perform the following operations if you press J (Options) while a file list,
history, favourites or playlist is displayed or a file is playing.
◆ Pause/Play: Pauses or plays a file.
◆ View List: Displays a list of files in the playlist.
◆ Send: Allows you to send a file attached to an MMS message or send a file by
infrared.
◆ Delete: Deletes a file or playlist.
◆ Delete All: Deletes all files.
◆ Rename: Allows you to change the name of a file or playlist.
◆ Select Multi: Allows you to select multiple files and then delete or play them or
copy or move them to a memory card or your phone.
◆ Manage File: Allows you to add a file to a playlist or Favourites. You can also
confirm details.
179
05.6.9 4:57:31 PM
◆ Play Mode: Plays files repeatedly or in random order.
◆ Mute/Unmute: Allows you to set or cancel mute.
◆ Search Time: Allows you to specify a file playback start time.
◆ Full Screen/Normal Screen: Allows you to change the size of the playback
screen.
◆ Hide Controller/Show Controller: Hides or shows the controller.
◆ Memory Card/Phone Memory: Switches the file list display between your
phone and a memory card.
◆ Thumbnail View/List View: Switches between thumbnails view and list view.
◆ Sort by: Changes the order that files appear. You can select a sort option from
Filename, Size, Date from Latest and Date from Oldest.
◆ Add: Allows you to add a file to Favourites or a playlist.
◆ Add to Favourites: Allows you to add a file to Favourites.
◆ Change Order: Allows you to change the order of files in the playlist.
◆ Details: Displays file details.
Vodafone live!
902T-e-manual-05.indd 180
180
05.6.9 4:57:32 PM
Key Assignment while a File is Playing/Paused
@: Pauses/plays the file.
G: Increases/decreases the volume.
D: Rewinds frame-by-frame a paused file.
C: Forwards frame-by-frame a paused file. You can also slow forward a paused file by
pressing and holding the key.
*: Jumps to the next file.
#: Jumps to the previous file.
Streaming Playback of Audio/Video
Note
Packet communication fees
apply even if playback is paused
because phone continues network
communication.
Vodafone live!
902T-e-manual-05.indd 181
If you select a streaming URL from a Web page or body text of a message, Media Player
automatically starts and streams playback so as you can listen to the music or watch
the video. The indicator appears at the top of the display during streaming. For
details on the display indications that appear during playback, see pages 176 and 177.
181
05.6.9 4:57:32 PM
Data Folder
The data you save in your phone is stored in Data Folder. You can move the data stored in the
folders of Data Folder and edit it for use with other functions.
In This Chapter
❍ Data Folder
❍ Using Files & Folders
❍ Displaying Files on a TV
❍ Using vObjects
❍ Using a Memory Card
❍ Using the USIM Card
902T-e-manual-06.indd 182
05.6.9 4:58:56 PM
Data Folder
Data Folder of your phone contains ten preinstalled folders for storing files. In addition to
these, you can create your own folders (personal folders). Data Folder can store up to a
total of a combination of approximately 500 files and personal folders. You can also use
Data Folder of a memory card (page 44). The ability to store the maximum amount of
files will depend on available space in the memory card.
Structure of Data Folder
Note
There are no My Saved Pages and
Templates folders in Data Folder of
a memory card.
Tip
• To display the memory usage
status, select Memory Status.
• DCF format files comply with
the “Design Rule for Camera
File System.” This standard
was developed for the purpose
of facilitating the exchange of
digital camera pictures with
various devices.
Data Folder
902T-e-manual-06.indd 183
1. In standby mode, press @, select Data Folder and press J (Select).
The following folders are preinstalled in your phone.
◆ Pictures: Contains pictures and the Digital Camera folder. Pictures you take in
Digital Camera are saved in DCF format to the Digital Camera folder.
◆ Videos: Contains videos.
◆ Sounds&Ringtones: Contains sound files and the Recordings folder. Recordings
you record with the voice recorder are saved to the Recordings folder.
◆ V-appli: Contains applications.
◆ My Saved Pages: Contains URLs and Web pages.
◆ Templates: Contains the SMS Templates folder to store templates for use with
SMS messages and the MMS Templates folder to store templates for use with
MMS messages.
◆ Other Files: Contains vCard, vCalendar, SVG and text files, as well as files of
unknown types.
183
05.6.9 4:58:56 PM
Files Storable in Data Folder
Folder
File Format (Icon)
Pictures
JPEG (
), GIF (
Digital Camera
JPEG (
)1
), WBMP (
), PNG (
Videos
MPEG-42 (
Sounds&Ringtones
AMR/MPEG-42 ( ), SMF/SP-MIDI2 (
SMAF ( ), XMF ( )
Recordings
AMR (
)
V-appli
Java (
)
)
),
)
My Saved Pages
HTML/XHTML (
SMS/MMS Templates
Text (
Other Files
vCard ( ), vCalendar ( ), SVG ( )
Text ( ), Unknown File Types3 ( )
/
)
)
1 Files that do not comply with the DCF standard cannot be displayed.
2 Some files may not be able to be played.
3 These files cannot be displayed/played on your phone.
Data Folder
902T-e-manual-06.indd 184
184
05.6.9 4:58:56 PM
Using Files & Folders
Connecting to the Web from Folders
You can connect to the Web from within preinstalled folders in Data Folder.
◆ More Pictures: Allows you to download picture files.
◆ More Videos: Allows you to download video files.
◆ More Sounds: Allows you to download sound files.
◆ More V-appli: Allows you to download applications.
Note
• Some items do not appear
depending on the selected file
or folder.
• Some files may not be able to
be displayed, played or sent
depending on their file size,
contents and type.
• Some files saved to a memory
card from a PC or other device
may not be able to be displayed/
played.
Tip
To copy characters selected in a
displayed text file to the clipboard
(page 72), press j
J (Copy).
Data Folder
902T-e-manual-06.indd 185
Editing Files & Folders
You can perform the following operations if you press J (Options) while viewing files
or folders in Data Folder.
◆ View: Displays the selected file.
◆ Open: Opens the selected folder.
◆ Connect: Connects to the preset Web page.
◆ Play: Plays the selected file.
◆ Start: Runs an application.
◆ Send: Allows you to send the selected file as an MMS attachment, or transfer it
by infrared communication to an infrared compatible device.
◆ Delete: Allows you to delete just the selected file or all files within the folder.
Select One to delete the selected file and select All to delete all files. However,
if the folder contains a personal folder, the files within the personal folder are not
deleted even if you select All.
◆ Select Multi: Allows you to select multiple files and then simultaneously delete,
copy or move them.
185
05.6.9 4:58:57 PM
◆ Memory Card/Phone Memory: Switches the display between Data Folder in
your phone and Data Folder in a memory card.
◆ Details: Displays the properties of the selected file.
◆ Thumbnail View/List View: Switches the display of files and folders between
thumbnails view (icons and images) and list view (text and guide).
◆ Slideshow: Displays the pictures within the folder in sequence automatically.
◆ Manage Folder: Allows you to create a new folder or edit the selected folder.
You can select from Create Folder, Rename Folder, Delete Folder and Folder
Security.
◆ Sort by: Changes the order that files within the selected folder appear. You can
select a sort option from Filename, Size, Date from Latest and Date from
Oldest.
◆ Take Picture: Activates the camera for you to take a picture. The pictures you
take are saved to the Pictures folder.
◆ Record Video: Activates the camera for you to record a video. The videos you
record are saved to the Videos folder.
◆ Record Voice: Activates the voice recorder. The recordings you record are saved
to the Recordings folder.
◆ Create Folder: Allows you to create a new folder.
◆ Create Message: Displays the Create Message screen for MMS or SMS.
◆ Create Template: Allows you to create a new template.
◆ Edit Template: Allows you to edit the selected template.
◆ Rename: Allows you to change the name of the selected file.
◆ Mute/Unmute: Mutes the playback sound.
◆ Search Time: Allows you to specify a file playback start time and start playback.
◆ Full Screen/Normal Screen: Switches the screen display.
◆ Hide Controller/Show Controller: Hides or shows the controller.
Data Folder
902T-e-manual-06.indd 186
186
05.6.9 4:58:58 PM
◆ Zoom: Enlarges or reduces the selected picture.
◆ Advanced: Allows you to edit the selected picture.
◆ Expand/Reduce: Expands or reduces the image attached to the selected file.
◆ Save Thumbnail: Allows you to save a picture taken in Digital Camera mode as a
thumbnail for sending attached to a message.
◆ Save to Contacts/Save to Calendar: Allows you to save vObjects to the
Contacts list or Calendar.
◆ Rewind: Returns the play position of the video being played to the beginning.
◆ Reset: Returns a file to the state directly after it was read.
◆ Save: Allows you to save a file to your phone or a memory card.
◆ Show Guidance/Hide Guidance: Shows or hides the key guidance.
◆ Security Settings: Allows you to set the display method for the confirmation
screen that appears when you attempt to use certain functions while an
application is activated.
Data Folder
902T-e-manual-06.indd 187
187
05.6.9 4:58:58 PM
Displaying Files on a TV
Tip
The use of a TV as a display for
the camera is only possible while
you are using the external camera.
You can display the video recording screen (page 121), pictures and videos in Data
Folder and TV display compatible applications (page 169) on a TV.
Setting the TV System
The TV systems supported by your phone are the NTSC and PAL systems. The SECAM
system is not supported.
1. In standby mode, press @, select Settings and press J (Select).
2. Select Phone Settings and press J (Select).
3. Select AV Output and press J (Select).
4. Select NTSC or PAL and press J (Select).
Data Folder
902T-e-manual-06.indd 188
188
05.6.9 4:58:58 PM
TV Display
To use this feature, you need to connect your phone to the video input jacks of a TV with
the video output cable.
②
①
1. Follow the procedure below to connect your phone to a TV.
1) Open the AV OUT/earphone microphone jack cover of your phone.
2) Insert the plug of the video output cable into the AV OUT/earphone microphone
jack.
3) Connect the video output cable to the video input jacks of the TV.
③
2. In the main display, open the screen you want to display on the TV, then press and
hold H.
Note
• The screen display cannot be
switched while you are recording
a video or when the delay timer
is activated.
• Any of the following may
automatically end TV display.
• Closing your phone
• Pressing the shutter
• Ending recording of a video
• Displaying a submenu or
dialog box
• Displaying the Multi Task
screen (page 264)
• Receiving a voice/video call
• Receiving a message/Web
information or reaching an
alarm time up
Data Folder
902T-e-manual-06.indd 189
A confirmation screen appears.
3. Press J (Yes). The screen display switches from the main display to the TV.
To switch the screen display from the TV back to the main display, press and
hold H.
189
05.6.9 4:58:58 PM
Using vObjects
About vObjects
vObject is a collective name for file formats that enable your phone and other vObject
compatible phones, PCs and other devices to exchange and mutually use data such as
Contacts list entries and Calendar data.
You can send and receive vObjects as mail attachments (page 137) or transfer them by
BluetoothTM, infrared or via a USB cable. Received files can be used on your phone. If
you save vObjects to a memory card, you can use them directly from other memory card
compatible phones, PCs and other devices. Similarly, vObjects saved to a memory card
from other phones, PCs and other devices can be used on your phone.
◆ vObject compatible software is required to use the data of vObjects on a PC or
other device.
◆ Depending on the software used, vObjects may not be displayed properly.
◆ Depending on the contents of vObjects, the import of vObjects received from
another Vodafone mobile phone, PC or other device may not be possible.
◆ Depending on the contents of vObjects, the exchange of vObjects between a
vObject compatible phone and PC or other device may not be possible.
◆ When vObjects include many characters, all vObject may not be able to be sent or
received.
Data Folder
902T-e-manual-06.indd 190
190
05.6.9 4:58:59 PM
Creating a vObject
1. Display the data for which you want to create a vObject.
For details on displaying the Contacts list, see page 84.
For details on displaying Calendar, see page 250.
2. Press J (Options).
3. Select Send vCard or Send vCalendar and press J (Select).
4. Select a storage place and press J (Select).
◆ To Data Folder: Saves the data in vCard/vCalendar format to the Other Files
folder in Data Folder of your phone.
◆ To Memory Card: Saves the data in vCard/vCalendar format to the Other Files
folder in Data Folder of a memory card.
Importing a vObject into a Function
You can add data imported in vObject format from another phone or PC to the Contacts
list or Calendar of your phone.
1. In standby mode, press @, select Data Folder and press J (Select).
2. Select Other Files and press J (Select).
3. Select a vObject and press @.
4. Press J (Options).
5. Select Save to Contacts or Save to Calendar and press J (Select).
Data Folder
902T-e-manual-06.indd 191
191
05.6.9 4:58:59 PM
Using a Memory Card
You can check and edit pictures and other data saved to a memory card. You can also
save a backup of Data Folder, Contacts list and other data in your phone to a memory
card.
Formatting a Memory Card
You can use your phone to format a memory card.
◆ If a memory card is removed while reading or writing data, the data may be lost or
the memory card may be damaged.
◆ If a memory card is formatted by another device, it may not work properly with
your phone. Be sure to use your phone to format a memory card.
◆ Formatting a memory card deletes all data in the memory card.
1. Insert a memory card in the slot of your phone.
2. In standby mode, press @, select Settings and press J (Select).
3. Select Memory Settings and press J (Select).
4. Select Memory Card and press J (Select).
5. Select Format Card and press J (Select).
6. Enter your security code (page 52).
A confirmation screen appears.
7. Press J (Yes).
Data Folder
902T-e-manual-06.indd 192
192
05.6.9 4:58:59 PM
Confirming Memory Card Usage Status
You can confirm the volume label, total memory size, used memory size and available
memory size.
1. In standby mode, press @, select Settings and press J (Select).
2. Select Memory Settings and press J (Select).
3. Select Memory Card and press J (Select).
4. Select Card Details and press J (Select).
Data Folder
902T-e-manual-06.indd 193
193
05.6.9 4:58:59 PM
Using the USIM Card
You can move or copy Contacts list entries from your phone or a memory card to the
USIM card, as well as move SMS messages from your phone to the USIM card. An
indicator at the top of the Contacts list screen (page 84) indicates the storage place of
the Contacts list entry. The maximum number of entries you can save to the Contacts
list of the USIM card differs depending on the amount of available memory space in the
USIM card.
Moving Contacts List Entries
Moving Entries to the USIM Card
You can move the name and default phone number (page 88) of an entry.
Tip
To move Contacts list entries in a
memory card to the USIM card,
select Memory Card after Step
3. After the Contacts list in the
memory card appears, proceed
from Step 3.
1. In standby mode, press @, select Phonebook and press J (Select).
2. Select Contacts List and press J (Select).
3. Press J (Options).
4. Select Select Multi and press J (Select).
5. Select the Contacts list entry with
@.
you want to move from your phone and press
To select another Contacts list entry, repeat Step 5.
6. Press J (Options).
7. Select Move and press J (Select).
Data Folder
902T-e-manual-06.indd 194
194
05.6.9 4:58:59 PM
8. Select To USIM and press J (Select).
◆ To Phone: Moves Contacts list entries with a check mark to the Contacts list of
your phone.
◆ To Memory Card: Moves Contacts list entries with a check mark to the Contacts
list of a memory card.
Moving Entries from the USIM Card
1. After Step 4 of “Moving Entries to the USIM Card” (page 194), select the Contacts
list entries with you want to move from the USIM card and then perform the rest
of the Steps.
Data Folder
902T-e-manual-06.indd 195
195
05.6.9 4:58:59 PM
Copying Contacts List Entries
Copying Entries to the USIM Card
You can copy the name and default phone number (page 88) of an entry.
Tip
To copy Contacts list entries in a
memory card to the USIM card,
select Memory Card after Step
3. After the Contacts list in the
memory card appears, proceed
from Step 3.
1. In standby mode, press @, select Phonebook and press J (Select).
2. Select Contacts List and press J (Select).
3. Press J (Options).
4. Select Select Multi and press J (Select).
5. Select the Contacts list entry with
@.
you want to copy from your phone and press
To select another Contacts list entry, repeat Step 5.
6. Press J (Options).
7. Select Copy and press J (Select).
8. Select To USIM and press J (Select).
◆ To Phone: Copies Contacts list entries with a check mark to the Contacts list of
your phone.
◆ To Memory Card: Copies Contacts list entries with a check mark to the Contacts
list of a memory card.
Copying Entries from the USIM Card
1. After Step 4 of “Copying Entries to the USIM Card” (above), select the Contacts list
entries with you want to copy from the USIM card and then perform the rest of
the Steps.
Data Folder
902T-e-manual-06.indd 196
196
05.6.9 4:58:59 PM
Moving SMS Messages
You can move messages in Received Msgs. (page 151) and Sent Messages (page 152)
of your phone and messages in your USIM card. The maximum number of messages
you can save to the USIM card differs depending on the amount of available memory
space in the USIM card.
Moving Messages to the USIM Card
1. In Received Msgs. or Sent Messages, select the message you want to move from
your phone and press @.
2. Press J (Options).
3. Select Move to USIM and press J (Select).
◆ Move to Phone: Moves messages in the USIM card to your phone.
Moving Messages from the USIM Card
1. In Step 1 of “Moving Messages to the USIM Card” (above), select the messages with
you want to move from the USIM card and then perform the rest of the Steps.
Data Folder
902T-e-manual-06.indd 197
197
05.6.9 4:59:00 PM
Settings
You can make various settings to personalise your phone.
In This Chapter
❍ Display Settings
❍ Network & Internet
❍ Phone Profiles
❍ Location Settings
❍ Language Setting
❍ Shortcut Menu
❍ Shortcut Keys
❍ External Light Settings
❍ Offline Mode Setting
❍ Answerphone
❍ Call Settings
❍ Caller ID Setting
❍ Using International Call Service
❍ Using the Stereo Handsfree Headset
❍ Security Settings
902T-e-manual-07.indd 198
05.6.9 4:59:51 PM
Display Settings
Setting the Wallpaper
Tip
If the picture you want to set as the
wallpaper does not fit the screen,
press j
J (Options) after Step 6
and perform one of the following
operations.
• Cut: Allows you to trim the
picture to fit the screen.
• Zoom: Enlarges or reduces the
picture and then allows you to
position and trim the picture.
• Fit to Width: Reduces the
picture to fit the width of the
screen.
• Fit to Length: Reduces the
picture to fit the height of the
screen.
• Rotate Image: Rotates the
picture 90° anticlockwise and
then allows you to trim the
picture.
Settings
902T-e-manual-07.indd 199
You can set a picture preinstalled in your phone or taken with the camera as the
wallpaper for standby mode.
1. In standby mode, press @, select Settings and press J (Select).
2. Select Display Settings and press J (Select).
3. Select Main Display or External Display and press J (Select).
4. Select Wallpaper and press J (Select).
5. Select the type of picture you want to set and press J (Select).
◆ Wallpaper List: Allows you to select from pictures preinstalled in your phone.
◆ My Pictures: Allows you to select from pictures stored in the Pictures folder of
Data Folder.
◆ Off: Sets no picture.
6. Select the picture you want to set and press @.
7. Press J (Set/OK).
199
05.6.9 4:59:51 PM
Setting the Incoming Display
Tip
For details on the editing (changing
the size, etc.) of a picture saved to
Data Folder, see “Editing a Picture”
(page 115).
You can set a picture to appear on the main display for incoming calls. You can also set
whether the other party’s name and phone number appear on the external display for
incoming calls.
1. In standby mode, press @, select Settings and press J (Select).
2. Select Call Settings and press J (Select).
3. Select Voice Call or Video Call and press J (Select).
4. Select Caller Details and press J (Select).
5. Select the item you want to set and press J (Select).
◆ Incoming Picture: Allows you to set the incoming picture. Set Preset Picture
(default picture) or select the picture you want to set from My Pictures (pictures
saved to the Pictures folder in Data Folder).
◆ Caller Picture: Allows you to set the display of a face picture set for a caller in
the Contacts list when a call is received from that caller. Select On or Off and
press J (Select). If you want to also display the face picture on the external
display, set Caller Info to On.
◆ Caller Info: Allows you to set the display of the name and phone number set for a
caller in the Contacts list on the external display when a call is received from that
caller. Select On or Off and press J (Select).
Settings
902T-e-manual-07.indd 200
200
05.6.9 4:59:51 PM
Setting the Clock Display
You can select the clock display for the main display from six types. You can also set
whether to display the time on the external display.
Setting the Clock Display for the Main Display
1. In standby mode, press @, select Settings and press J (Select).
2. Select Display Settings and press J (Select).
3. Select Main Display and press J (Select).
4. Select Clock Type Display and press J (Select).
5. Select the type of display you want to set and press J (Select).
◆ 1-line Digital: Displays the time and date in one-line digital view.
◆ 2-line Digital: Displays the time and date in two-line digital view.
◆ Analog Clock: Displays an analog clock.
◆ Digital + Calendar: Displays the calendar and time in digital view.
◆ World Clock: Displays the city name and the time and date in one-line digital
view for both the home city and alternate city if the Alternate City setting is set for
the world clock (page 49).
◆ Off: Displays no time and date.
Settings
902T-e-manual-07.indd 201
201
05.6.9 4:59:51 PM
Setting the Clock Display for the External Display
1. In standby mode, press @, select Settings and press J (Select).
2. Select Display Settings and press J (Select).
3. Select External Display and press J (Select).
4. Select Time Display and press J (Select).
5. Select On or Off and press J (Select).
Switching between the 12-hour and 24-hour Clock
Note
You cannot switch the clock that
appears in the upper right of the
display to the 12-hour clock.
1. In standby mode, press @, select Settings and press J (Select).
2. Select Phone Settings and press J (Select).
3. Select Date&Time and press J (Select).
4. Select 12 hour/24 hour and press J (Select).
5. Select 12 hour or 24 hour and press J (Select).
Settings
902T-e-manual-07.indd 202
202
05.6.9 4:59:52 PM
Setting the Display Power Saving
You can save battery power by setting the phone to turn off the display after a specified
time of inactivity elapses. You can set the display time to 30 seconds, 1 minute or 3
minutes.
1. In standby mode, press @, select Settings and press J (Select).
2. Select Display Settings and press J (Select).
3. Select Main Display or External Display and press J (Select).
4. Select Power Saving and press J (Select).
5. Select a display time and press J (Select).
Setting the Backlights
You can adjust the brightness and lighting time of the display backlights.
1. In standby mode, press @, select Settings and press J (Select).
2. Select Display Settings and press J (Select).
3. Select Main Display or External Display and press J (Select).
4. Select Backlight Settings and press J (Select).
5. Select the item you want to set and press J (Select).
◆ Brightness: Allows you to set the brightness. Select Dark or Bright and press
J (Select).
◆ Lighting Time: Allows you to set the lighting time. Enter a time (0 to 60 seconds)
and press J (OK).
Settings
902T-e-manual-07.indd 203
203
05.6.9 4:59:52 PM
Setting Operator Name Display
You can set whether to display the operator name in standby mode.
1. In standby mode, press @, select Settings and press J (Select).
2. Select Display Settings and press J (Select).
3. Select Main Display and press J (Select).
4. Select Operator Name and press J (Select).
5. Select On or Off and press J (Select).
Setting the Display of Cell Information
You can set whether the cell information sent from a base station is displayed in standby
mode when you use your phone on a mobile phone network based on Micro Cellular
Network (MCN) technology.
1. In standby mode, press @, select Settings and press J (Select).
2. Select Display Settings and press J (Select).
3. Select Main Display and press J (Select).
4. Select Cell Information and press J (Select).
5. Select On or Off and press J (Select).
Settings
902T-e-manual-07.indd 204
204
05.6.9 4:59:52 PM
Adjusting the Contrast of the External Display
You can adjust the contrast of the external display to one of nine levels.
1. In standby mode, press @, select Settings and press J (Select).
2. Select Display Settings and press J (Select).
3. Select External Display and press J (Select).
4. Select Contrast and press J (Select).
5. Close your phone.
A screen for adjusting the contrast appears on the external display.
6. Use the side keys (P and Q) to adjust the contrast, open your phone and press
J (OK).
Settings
902T-e-manual-07.indd 205
205
05.6.9 4:59:52 PM
Phone Profiles
Note
When your phone is connected
to an in-car device or a wireless
headset via BluetoothTM, the
incoming ringtone for Bluetooth™
plays and your phone does not
vibrate for incoming calls regardless
of the phone profile settings.
This feature allows you to change the sound and vibration to match your surrounding
conditions. Your phone has four preset profiles. You can change the sound and vibration
settings of each profile.
Normal: Profile for ordinary use.
Silent: Profile for when you do not want your phone to emit any sound.
Car: Profile for using handsfree while you are driving.
Meeting: Profile for meetings, etc.
Switching Profiles
Tip
To switch the phone profile to
Silent, press and hold #
/ in
standby mode. To switch back
to previous profile, press and
hold /
# in standby mode.
Settings
902T-e-manual-07.indd 206
1. In standby mode, press @, select Settings and press J (Select).
2. Select Mode Settings and press J (Select).
3. Select the profile you want to set and press @.
If a profile other than Normal is set, the indicator (
appears at the top of the display.
/
/
) for the profile
206
05.6.9 4:59:52 PM
Personalising Profiles
Personalising the Ringtone Volume
For any profile except Silent, you can set the ringtone volume.
Tip
• You can also set Normal mode
if you press a
@ in standby
mode, select Settings and
then select Sound Settings.
• Only the vibration and alarm
settings can be changed for
Silent profile.
1. After Step 2 of “Switching Profiles” (page 206), select Normal, Car or Meeting and
press J (Options).
2. Select Personalise and press J (Select).
3. Select Ringtone Volume and press J (Select).
4. Select Voice Call, Video Call or Received Message and press J (Select).
5. Use E to adjust the volume and press J (OK).
Use A or C to increase the volume and use B or D to decrease the
volume.
Settings
902T-e-manual-07.indd 207
207
05.6.9 4:59:52 PM
Personalising the Ringtone
Note
• If a video file is set as the
ringtone, the video is displayed
for incoming calls and the
picture set as the incoming
picture (page 200) is not
displayed.
• A video file cannot be set
as the ringtone for incoming
messages.
For any profile except Silent, you can set a preinstalled sound in your phone or a sound
or video in Data Folder as the ringtone.
1. After Step 2 of “Switching Profiles” (page 206), select Normal, Car or Meeting and
press J (Options).
2. Select Personalise and press J (Select).
3. Select Assign Ringtone and press J (Select).
4. Select Voice Call, Video Call or Received Message and press J (Select/
Options).
If you selected Received Message, select Ringtone and press J (Select).
Tip
• You can also set Normal mode
if you press a
@ in standby
mode, select Settings and
then select Sound Settings.
• To set the ringtone duration for
incoming messages, select
Received Message in Step 4,
press J
j (Options) and select
Ringtone Duration.
Settings
902T-e-manual-07.indd 208
5. Select the type of tone you want to set and press J (Select).
◆ Preset Patterns: Allows you to select from patterns preinstalled in your phone.
◆ Preset Sounds: Allows you to select from melodies and sound effects
preinstalled in your phone.
◆ My Sounds: Allows you to select from sound and video files stored in Data Folder.
6. Select the tone you want to set and press @.
7. Press J (Assign).
208
05.6.9 4:59:53 PM
Personalising the Vibration
Tip
You can also set Normal mode if
you press a
@ in standby mode,
select Settings and then select
Sound Settings.
1. After Step 2 of “Switching Profiles” (page 206), select the profile you want to set
and press J (Options).
2. Select Personalise and press J (Select).
3. Select Vibration and press J (Select).
4. Select Voice Call, Video Call or Received Message and press J (Select).
If you selected Silent in Step 1, select On or Off and press J (Select).
5. Select the vibration pattern you want to set and press @.
Personalising the Keypad Tone Volume
For any profile except Silent, you can set the keypad tone volume.
Tip
You can also set Normal mode if
you press a
@ in standby mode,
select Settings and then select
Sound Settings.
1. After Step 2 of “Switching Profiles” (page 206), select Normal, Car or Meeting and
press J (Options).
2. Select Personalise and press J (Select).
3. Select Keypad Volume and press J (Select).
4. Use E to adjust the volume and press J (OK).
Use A or C to increase the volume and use B or D to decrease the
volume.
Settings
902T-e-manual-07.indd 209
209
05.6.9 4:59:53 PM
Personalising the Keypad Tone
For any profile except Silent, you can set the keypad tone.
Tip
You can also set Normal mode if
you press a
@ in standby mode,
select Settings and then select
Sound Settings.
1. After Step 2 of “Switching Profiles” (page 206), select Normal, Car or Meeting and
press J (Options).
2. Select Personalise and press J (Select).
3. Select Keypad Tones and press J (Select).
4. Select Original 1 or Original 2 and press J (Select).
Personalising the Sound Effects Volume
Tip
You can also set Normal mode if
you press a
@ in standby mode,
select Settings and then select
Sound Settings.
For any profile except Silent, you can set the volume level of each of the sound effects
for turning on/off the power, opening/closing your phone and errors.
1. After Step 2 of “Switching Profiles” (page 206), select Normal, Car or Meeting and
press J (Options).
2. Select Personalise and press J (Select).
3. Select Sound Effects Vol. and press J (Select).
4. Select the item you want to set and press J (Select).
5. Use E to adjust the volume and press J (OK).
Use A or C to increase the volume and use B or D to decrease the
volume.
Settings
902T-e-manual-07.indd 210
210
05.6.9 4:59:53 PM
Personalising the Sound Effects Tones
Tip
You can also set Normal mode if
you press a
@ in standby mode,
select Settings and then select
Sound Settings.
For any profile except Silent, you can set each of the sound effects for turning on/off the
power and opening/closing your phone.
1. After Step 2 of “Switching Profiles” (page 206), select Normal, Car or Meeting and
press J (Options).
2. Select Personalise and press J (Select).
3. Select Sound Effects and press J (Select).
4. Select the item you want to set and press J (Select).
5. Select the type of tone you want to set and press J (Select).
◆ Preset Patterns: Allows you to set the default sound effect.
◆ Preset Sounds: Allows you to select from melodies and sound effects
preinstalled in your phone. Select the sound you want to set, press @ and then
press J (Assign).
◆ My Sounds: Allows you to select from sound files stored in Data Folder. Select
the sound you want to set, press @ and then press J (Assign).
Settings
902T-e-manual-07.indd 211
211
05.6.9 4:59:53 PM
Personalising the Multimedia Volume
Tip
You can also set Normal mode if
you press a
@ in standby mode,
select Settings and then select
Sound Settings.
For any profile except Silent, you can set the volume level for games, messaging,
Vodafone live! and playing sound data in Data Folder.
1. After Step 2 of “Switching Profiles” (page 206), select Normal, Car or Meeting and
press J (Options).
2. Select Personalise and press J (Select).
3. Select Multimedia Volume and press J (Select).
4. Use E to adjust the volume and press J (OK).
Use A or C to increase the volume and use B or D to decrease the
volume.
Personalising the Battery Alarm Tone
Tip
You can also set Normal mode if
you press a
@ in standby mode,
select Settings and then select
Sound Settings.
When the battery level is very low and your phone is about to run out of power, the
battery alarm tone plays. For any profile except Silent, you can set whether to play the
battery alarm tone.
1. After Step 2 of “Switching Profiles” (page 206), select Normal, Car or Meeting and
press J (Options).
2. Select Personalise and press J (Select).
3. Select Battery Alarm and press J (Select).
4. Select On or Off and press J (Select).
Settings
902T-e-manual-07.indd 212
212
05.6.9 4:59:54 PM
Personalising the Alarm Tone
Note
Whether an alarm tone plays in
Normal profile and Car profile
depends on the alarm (page 254)
and Calendar (page 250) settings.
You can set whether the alarm tone plays for Silent profile and Meeting profile.
1. After Step 2 of “Switching Profiles” (page 206), select Silent or Meeting and press
J (Options).
2. Select Personalise and press J (Select).
3. Select Alarm and press J (Select).
4. Select On or Off and press J (Select).
Resetting Profiles
You can reset the settings of each profile.
1. After Step 2 of “Switching Profiles” (page 206), select the profile you want to reset
and press J (Options).
2. Select Set to Default and press J (Select).
3. Enter your security code (page 52).
A confirmation screen appears.
4. Press J (Yes).
Settings
902T-e-manual-07.indd 213
213
05.6.9 4:59:54 PM
Language Setting
Tip
If the language is set to Automatic,
the language is set automatically
in accordance with the language
priority setting of the USIM card. If
your phone does not support the
language set for the USIM card, the
default language of your phone is
selected.
Settings
902T-e-manual-07.indd 214
You can change the display language.
1. In standby mode, press @, select Settings and press J (Select).
2. Select Phone Settings and press J (Select).
3. Select 言語選択 and press J (Select).
4. Select the language you want to set or Automatic and press J (Select).
214
05.6.9 4:59:54 PM
Shortcut Menu
If you register frequently used functions in the Shortcut menu, you can access them
quickly and easily.
Setting the Shortcut Menu
You can set up to nine frequently used functions.
1. In standby mode, press A.
2. Select <Empty> and press @.
3. Press J (Yes).
4. Select the function you want to set and press J (Select).
If you selected Data Folder or Contacts List, you can set a shortcut for a file,
folder or Contacts list entry. Select the item you want to set.
Accessing a Function from the Shortcut Menu
Tip
To edit a name, cancel a setting
or switch the view (Thumbnail
View/ List View), select a function
in Step 2 and press j
J (Options).
Settings
902T-e-manual-07.indd 215
1. In standby mode, press A.
2. Select the function you want to access and press @.
215
05.6.9 4:59:54 PM
Shortcut Keys
This feature allows you to access a function from standby mode easily and quickly by
pressing a side key (Z) or navigation key. You can change the functions accessed.
Setting the Side Shortcut Key Function
You can change the function accessed if you simply press and hold a side key (Z)
from standby mode. The functions you can set are Main menu (page 51), Calendar (page
250), Profile switch (page 206) and Torch (page 269).
1. In standby mode, press @, select Settings and press J (Select).
2. Select Phone Settings and press J (Select).
3. Select Shortcuts and press J (Select).
4. Select Side Key and press J (Select).
5. Select the function you want to set and press J (Select).
Settings
902T-e-manual-07.indd 216
216
05.6.9 4:59:54 PM
Setting the Navigation Key Shortcuts
Tip
To reset which functions are assigned
to the navigation keys, select Set to
Default after Step 5.
You can change the functions accessed when you press the navigation keys A, B,
D and C from standby mode. The functions you can set are Shortcut menu (page
215), Phonebook (page 84), Dialled Numbers (page 57) and Received Calls (page 57).
1. In standby mode, press @, select Settings and press J (Select).
2. Select Phone Settings and press J (Select).
3. Select Shortcuts and press J (Select).
4. Select Navigation Keys and press J (Select).
5. Press J (Options).
6. Select Change and press J (Select).
7. Select the function you want to assign to A and press J (Select).
8. Select the function you want to assign to B and press J (Select).
9. Select the function you want to assign to D and press J (Select).
The remaining function is assigned automatically to C.
Settings
902T-e-manual-07.indd 217
217
05.6.9 4:59:54 PM
External Light Settings
Setting the Notification External Light
If you have unchecked information (missed calls, unread messages and Voice Mail), the
external light flashes when your phone is closed. You can select from three colours for
the flashing of the external light or set the external light not to flash.
1. In standby mode, press @, select Settings and press J (Select).
2. Select Phone Settings and press J (Select).
3. Select External Light and press J (Select).
4. Select Notification and press J (Select).
5. Select Missed Calls, Messages or Voice Mail and press J (Select).
6. Select the colour you want to set and press J (Select).
Settings
902T-e-manual-07.indd 218
218
05.6.9 4:59:55 PM
Setting the Incoming External Light
You can select from five colours for the external light that flashes when you have an
incoming voice call, video call or message. You can also set the external light not to
flash.
1. In standby mode, press @, select Settings and press J (Select).
2. Select Phone Settings and press J (Select).
3. Select External Light and press J (Select).
4. Select Incoming and press J (Select).
5. Select Voice Calls, Video Calls or Messaging and press J (Select).
6. Select the colour you want to set and press J (Select).
Settings
902T-e-manual-07.indd 219
219
05.6.9 4:59:55 PM
Offline Mode Setting
Note
You can still make calls to 110
(police), 119 (fire and ambulance)
and 118 (coast guard) when offline
mode is set.
You can use offline mode to block signal reception and transmission without turning off
the power. Offline mode disables the use of network services for making and receiving
calls, sending and receiving messages, etc.
1. In standby mode, press @, select Settings and press J (Select).
2. Select Phone Settings and press J (Select).
3. Select Offline Mode and press J (Select).
4. Select On and press J (Select).
The
Settings
902T-e-manual-07.indd 220
indicator appears at the top of the display.
220
05.6.9 4:59:55 PM
Answerphone
This feature can record a caller’s message when you are unable to answer a voice call.
Your phone can store up to 3 messages and each message can be up to 15 seconds
long.
Setting the Answerphone
Note
The answerphone is unavailable
for video calls and call waiting.
1. In standby mode, press @, select Settings and press J (Select).
2. Select Call Settings and press J (Select).
3. Select Answerphone and press J (Select).
4. Select Setting and press J (Select).
Tip
You can also set the answerphone
if you press and hold l
L in
standby mode.
5. Select On and press J (Select).
The
indicator appears on the standby screen.
Setting the Ringing Duration
1. After Step 3 of “Setting the Answerphone” (above), select Ringing Duration and
press J (Select).
2. Enter the ringing duration (0 to 60 seconds) and press J (OK).
Tip
• You can also display the
Answerphone list if you press
L in standby mode.
l
• To delete a message, press J
j
(Options) after Step 1.
Settings
902T-e-manual-07.indd 221
Playing a Message
1. After Step 3 of “Setting the Answerphone” (above), select Recordings and press
J (Select).
The Answerphone list appears.
2. Select the message you want to play and press @.
221
05.6.9 4:59:55 PM
Call Settings
Setting the Auto Answer
You can answer a call without having to press a key while the stereo handsfree headset
is connected. You can also change the length of time before a call is answered.
1. In standby mode, press @, select Settings and press J (Select).
2. Select Call Settings and press J (Select).
3. Select Voice Call and press J (Select).
4. Select Auto Answer and press J (Select).
5. Select On and press J (Select).
6. Enter the answer time (1 to 29 seconds) and press J (OK).
Settings
902T-e-manual-07.indd 222
222
05.6.9 4:59:55 PM
Setting Mute
You can mute the outgoing voice or both the outgoing voice and incoming voice for calls.
1. In standby mode, press @, select Settings and press J (Select).
2. Select Call Settings and press J (Select).
3. Select Voice Call or Video Call and press J (Select).
4. Select Mute and press J (Select).
5. Select Mute My Voice, Mute All or Off and press J (Select).
Enabling/Disabling Incoming Voice Calls during
Data Communication
You can set whether to receive incoming voice calls during data communication.
1. In standby mode, press @, select Settings and press J (Select).
2. Select Call Settings and press J (Select).
3. Select Voice Call and press J (Select).
4. Select Call Priority and press J (Select).
5. Select Enable or Disable and press J (Select).
Settings
902T-e-manual-07.indd 223
223
05.6.9 4:59:55 PM
Setting the Earpiece/Speaker Volume
You can set the earpiece/speaker volume for voice calls and video calls.
1. In standby mode, press @, select Settings and press J (Select).
2. Select Call Settings and press J (Select).
3. Select Common Settings and press J (Select).
4. Select the volume you want to set and press J (Select).
◆ Earpiece Volume: Allows you to set the volume for sound heard from the
earpiece.
◆ Speaker Volume: Allows you to set the volume for sound heard from the speaker.
5. Use E to adjust the volume and press J (OK).
Use A or C to increase the volume and use B or D to decrease the
volume.
While you are adjusting the volume, a confirmation tone is played to enable you to
hear the volume level.
Settings
902T-e-manual-07.indd 224
224
05.6.9 4:59:55 PM
Setting the Open to Answer
This feature allows you to answer an incoming call by simply opening your phone.
1. In standby mode, press @, select Settings and press J (Select).
2. Select Call Settings and press J (Select).
3. Select Common Settings and press J (Select).
4. Select Open to Answer and press J (Select).
5. Select On or Off and press J (Select).
Setting the Any Key Answer
This feature allows you to answer incoming calls with any key. If Any Key Answer is set
to On, you can answer an incoming call with any of N, 0 to 9, * and
#. If it is set to Off, you can only answer an incoming call with N.
1. In standby mode, press @, select Settings and press J (Select).
2. Select Call Settings and press J (Select).
3. Select Common Settings and press J (Select).
4. Select Any Key Answer and press J (Select).
5. Select On or Off and press J (Select).
Settings
902T-e-manual-07.indd 225
225
05.6.9 4:59:56 PM
Caller ID Setting
You can set whether to notify the other party of your phone number when you make a
call.
Automatically Hiding/Showing Caller ID
Tip
Even if Auto Prefix is not set, you
can press j
J (Options) while a
phone number is displayed, select
Hide My ID or Show My ID and
then make a call.
1. In standby mode, press @, select Settings and press J (Select).
2. Select Call Settings and press J (Select).
3. Select Voice Call and press J (Select).
4. Select Prefix Settings and press J (Select).
5. Select Auto Prefix and press J (Select).
6. Select Hide My ID, Show My ID or Off and press J (Select).
Hiding Caller ID when Calling from Missed Calls
You can set not to notify the other party of your phone number when you select and call
a phone number in Missed Calls (page 57) that is not stored in the Contacts list.
1. After Step 4 of “Automatically Hiding/Showing Caller ID” (above), select Hide to
Missed Call and press J (Select).
2. Select On and press J (Select).
Settings
902T-e-manual-07.indd 226
226
05.6.9 4:59:56 PM
Using International Call Service
When making an international call, you can simply add the international code (Vodafone
international access code, 0046 + 010) and then select a country code from a list after
entering the other party’s phone number. You can also change the international code
and add entries to the country code list.
Adding the International Code & Country Code
1. In standby mode, enter a phone number and press J (Options).
2. Select International Call and press J (Select).
3. Select the country of the other party and press @.
4. Select Japan or Abroad and press J (Select).
5. Press N.
Changing the International Code
1. In standby mode, press @, select Settings and press J (Select).
2. Select Call Settings and press J (Select).
3. Select Voice Call and press J (Select).
4. Select International Call and press J (Select).
5. Select International Code and press J (Select).
The current international code setting appears.
6. Enter the number you want to set and press J (OK).
To delete the international code, press and hold L.
Settings
902T-e-manual-07.indd 227
227
05.6.9 4:59:56 PM
Adding an Entry to the Country Code List
Note
You can edit or delete entries after
Step 2. However, only the entries
for the three additional country
codes can be deleted.
The country code list already includes the country codes of 17 countries. You can also
edit and add entries. The list can contain up to 20 entries.
1. After Step 4 of “Changing the International Code” (page 227), select Country List
and press J (Select).
2. Press J (Options).
3. Select Add and press J (Select).
4. Enter a country name and press @.
5. Enter a country code and press J (OK).
Settings
902T-e-manual-07.indd 228
228
05.6.9 4:59:56 PM
Using the Stereo Handsfree Headset
If you use the stereo handsfree headset with switch, simply pressing the switch of the
stereo handsfree headset allows you to dial a preset phone number or answer a call
without even opening your phone.
1. Open the earphone microphone jack cover.
②
①
2. Insert the plug of the stereo handsfree headset into the earphone microphone jack.
Setting the Phone Number
1. In standby mode, press @, select Settings and press J (Select).
2. Select Call Settings and press J (Select).
3. Select Voice Call and press J (Select).
4. Select Earphone Call and press J (Select).
5. Select On and press J (Select).
6. Select the input method for the phone number and press J (Select).
◆ Set Number: Allows you to directly enter a phone number.
◆ From Contacts: Allows you to select a phone number from the Contacts list
(page 84).
Settings
902T-e-manual-07.indd 229
229
05.6.9 4:59:56 PM
One-touch Calling
1. Press and hold the switch of the stereo handsfree headset.
Note
Making a call with the stereo
handsfree headset is only possible
from standby mode.
Short beeps are heard from the earphone and a call is made to the preset phone
number.
If you press and hold the switch again during dialling, a beep is heard and the call is
cancelled.
2. Press and hold the switch of the stereo handsfree headset to end the call.
A beep is heard from the earphone and the call ends.
Alternatively, you can press O to end the call.
One-touch Answering
1. A call is received.
2. Press and hold the switch of the stereo handsfree headset.
Short beeps are heard from the earphone and a connection is established.
If the caller made a video call, the video call begins.
3. Press and hold the switch of the stereo handsfree headset to end the call.
A beep is heard from the earphone and the call ends.
Alternatively, you can press O to end the call.
Settings
902T-e-manual-07.indd 230
230
05.6.9 4:59:57 PM
Security Settings
Rejecting Incoming Calls
Adding Phone Numbers to the Rejection List
Tip
To check details or edit/delete a
phone number, select a phone
number after Step 6 and press J
j
(Options).
You can save up to 20 phone numbers to the Rejection list to reject calls from those
phone numbers.
1. In standby mode, press @, select Settings and press J (Select).
2. Select Security Settings and press J (Select).
3. Select Reject Calls and press J (Select).
4. Select Select Contact and press J (Select).
5. Select On and press J (Select).
6. Enter your security code (page 52).
7. Press J (Add).
8. Select the input method for the phone number and press J (Select).
◆ From Phonebook: Allows you to select the phone number you want to add from
the Contacts list (page 84).
◆ Set Number: Allows you to directly enter a phone number.
◆ From Call Log: Allows you to select a phone number from the call log (page 57).
To add a second or subsequent phone number, press J (Options) after Step 6,
select Add and proceed from Step 8.
Settings
902T-e-manual-07.indd 231
231
05.6.9 4:59:57 PM
Rejecting Specific Incoming Calls
You can set your phone to reject calls with no Caller ID or calls from phone numbers not
in the Contacts list.
1. In standby mode, press @, select Settings and press J (Select).
2. Select Security Settings and press J (Select).
3. Select Reject Calls and press J (Select).
4. Select the type of call you want to reject and press J (Select).
◆ Hidden: Rejects calls with no Caller ID.
◆ Public Phone: Rejects calls from pay phones.
◆ Unavailable: Rejects calls for which the Caller ID cannot be displayed.
◆ Unknown: Rejects calls from phone numbers not in the Contacts list.
◆ Select Contact: Rejects calls from phone numbers in the Rejection list
(page 231).
5. Select On and press J (Select).
Settings
902T-e-manual-07.indd 232
232
05.6.9 4:59:57 PM
Reception Restriction
Adding an Email Address or Phone Number to the Rejection
List
Tip
To check details or edit/delete an
email address or phone number,
select the email address or phone
number after Step 5 and press J
j
(Options).
You can add up to 50 email addresses or phone numbers to the Rejection list to reject
the reception of messages from those email addresses and phone numbers
1. In standby mode, press @, select Settings and press J (Select).
2. Select Security Settings and press J (Select).
3. Select Reject Addresses and press J (Select).
4. Select On and press J (Select).
5. Enter your security code (page 52).
6. Press J (Add).
7. Select an input method for the email address or phone number and press
J (Select).
◆ From Contacts: Allows you to select the email address or phone number you
want to add from the Contacts list (page 84).
◆ Enter Addresses: Allows you to directly enter an email address or phone number.
To add a second or subsequent email address or phone number, press
J (Options) after Step 5, select Add and proceed from Step 7.
Settings
902T-e-manual-07.indd 233
233
05.6.9 4:59:57 PM
PIN Codes
You can set the PIN code (page 41) used for USIM card security.
Setting PIN1 Code Request
Note
This setting may not be available
for some types of USIM card.
You can set whether to request the entering of your PIN1 code to perform verification
each time a USIM card is inserted into the phone and the power is turned on.
1. In standby mode, press @, select Settings and press J (Select).
2. Select Security Settings and press J (Select).
3. Select PIN1 Code Request and press J (Select).
4. Select On and press J (Select).
5. Enter your PIN1 code and press J (OK).
Changing PIN Codes
You can change the PIN1 code and PIN2 code (page 41).
Note
Set PIN1 Code Request to On
before you change a PIN1 code
(above).
1. In standby mode, press @, select Settings and press J (Select).
2. Select Security Settings and press J (Select).
3. Select Change PIN1 or Change PIN2 and press J (Select).
4. Enter your current PIN1 code or PIN2 code and press J (OK).
5. Enter your new PIN1 code or PIN2 code and press J (OK).
6. Re-enter your new PIN1 code or PIN2 code for confirmation and press J (OK).
Settings
902T-e-manual-07.indd 234
234
05.6.9 4:59:57 PM
Cancelling the PIN Lock
Note
If the PUK1/PUK2 code is incorrectly
entered ten times in a row, the
USIM lock is set. If the USIM lock is
set, it cannot be cancelled. Contact
Vodafone General Information.
If the PIN1 code or PIN2 code is incorrectly entered three times in a row, the PIN1/PIN2
lock is set. You can cancel the PIN1/PIN2 lock by entering a personal unblocking key
code (PUK1/PUK2 code). For details on the personal unblocking key codes, contact
Vodafone General Information.
1. Enter the PUK1/PUK2 code in the PUK1/PUK2 code input screen.
2. Enter your new PIN1 code or PIN2 code and press J (OK).
3. Re-enter your new PIN1 code or PIN2 code for confirmation and press J (OK).
Changing the Security Code
You can change the security code (page 52) required to use some functions and modify
the settings of your phone. The initial security code is “9999” or the four-digit number
you selected when you concluded your contract.
1. In standby mode, press @, select Settings and press J (Select).
2. Select Security Settings and press J (Select).
3. Select Change Password and press J (Select).
4. Enter your current security code (page 52).
5. Enter your new security code.
6. Re-enter your new security code for confirmation.
Settings
902T-e-manual-07.indd 235
235
05.6.9 4:59:57 PM
Note
When the phone lock is set, the
information prompt (page 38) does
not appear.
Tip
When the phone lock is set, you can
still perform the following operations.
• Turn the power on and off.
• Cancel the phone lock
temporarily.
• Make calls to 110 (police), 119
(fire and ambulance) and 118
(coast guard).
• Answer voice calls and video
calls (but the Open to Answer
and Any Key Answer functions
are unavailable).
• Place calls on hold (page 54).
• Divert calls (page 63).
• Reject calls (page 54).
• Adjust the ringtone volume while
a call is being received (page 54).
• Stop the alarm.
• Pause the V-appli (page 169) set
to run in standby mode.
Settings
902T-e-manual-07.indd 236
Phone Lock
The phone lock allows you to lock the keys to prevent another person from using your
phone without entering your security code (page 52). When the phone lock is set,
“Phone Lock” appears in standby mode. Until you set the phone lock to Off, the keys are
locked each time the power is turned on.
Setting the Phone Lock
1. In standby mode, press @, select Settings and press J (Select).
2. Select Security Settings and press J (Select).
3. Select Phone Lock and press J (Select).
4. Enter your security code (page 52).
5. Select On and press J (Select).
The
indicator appears on the standby screen.
Cancelling the Phone Lock Temporarily
1. Enter your security code while the phone lock is set and press J (OK).
The indicator disappears.
To cancel the phone lock, cancel the lock temporarily and then set it to Off.
236
05.6.9 4:59:57 PM
Fixed Dialling Numbers
Note
The Fixed Dialling Numbers setting
is only available when you are
using a USIM card that supports
Fixed Dialling Numbers.
You can restrict the making of calls and sending of messages to only phone numbers in
the Fixed Dialling Number list of the USIM card.
Setting Fixed Dialling Numbers
1. In standby mode, press @, select Settings and press J (Select).
2. Select Security Settings and press J (Select).
Tip
You can still make calls to 110
(police), 119 (fire and ambulance)
and 118 (coast guard) when Fixed
Dialling Numbers is set to On.
Settings
902T-e-manual-07.indd 237
3. Select Fixed Dialling No. and press J (Select).
4. Select Setting and press J (Select).
5. Enter your PIN2 code and press J (OK).
6. Select On and press J (Select).
237
05.6.9 4:59:58 PM
Adding Phone Numbers to the Fixed Dialling Number List
Note
Before performing this operation, set
the Fixed Dialling Number setting to
On beforehand (page 237).
The maximum number of phone numbers you can add to the Fixed Dialling Numbers list
differs depending on the USIM card.
1. In standby mode, press @, select Settings and press J (Select).
2. Select Security Settings and press J (Select).
3. Select Fixed Dialling No. and press J (Select).
Tip
To display details, make a call,
create a message or delete/edit a
phone number, select a phone
number after Step 4 and press J
j
(Options).
4. Select Edit Dial List and press J (Select).
5. Select <Empty> and press J (Add).
6. Enter your PIN2 code and press J (OK).
7. Select Name or Dial Number and press J (Options).
8. Select Edit and press J (Select).
9. Enter a name or phone number and press @.
10. Press J (Options) after setting the items.
11. Select OK and press J (Select).
Settings
902T-e-manual-07.indd 238
238
05.6.9 4:59:58 PM
Note
When the key guard is set, the
information prompt (page 38) does
not appear.
Key Guard
The key guard allows you to disable the keys to prevent unintentional operations while
your phone is in your bag or pocket.
Setting the Key Guard
Tip
When the key guard is set, you can
still perform the following operations.
• Cancel the key guard.
• Make calls to 110 (police), 119
(fire and ambulance) and 118
(coast guard).
• Answer voice calls and video
calls (but the Open to Answer
and Any Key Answer functions
are unavailable).
• Record answerphone messages
(page 54).
• Place calls on hold (page 54).
• Divert calls (page 63).
• Reject calls (page 54).
• Adjust the ringtone volume while
a call is being received (page 54).
• Stop the alarm.
• Pause the V-appli (page 169) set
to run in standby mode.
• Use one-touch calling from a
stereo handsfree headset (page
230).
Settings
902T-e-manual-07.indd 239
1. In standby mode, press and hold *.
The
indicator appears on the standby screen.
Cancelling the Key Guard
1. Press and hold * while the key guard is set.
239
05.6.9 4:59:58 PM
Setting Secret Mode
You can set whether to show Contacts list entries saved as secret (page 79). Set secret
mode to On if you want to show secret entries and set secret mode to Off if you want to
hide secret entries.
1. In standby mode, press @, select Settings and press J (Select).
2. Select Security Settings and press J (Select).
3. Select Secret Mode and press J (Select).
4. Enter your security code (page 52).
5. Select On and press J (Select).
The
indicator appears at the top of the display.
Initialising Your Phone
Note
This operation does not reset the
data of the security code (page 52),
USIM card and memory card.
You can delete all saved data such as Contacts list entries, Data Folder files and
messages, as well as reset all function settings.
1. In standby mode, press @, select Settings and press J (Select).
2. Select Memory Settings and press J (Select).
3. Select Phone Memory and press J (Select).
Tip
To view an approximate indication
of the memory status for messages,
Data Folder, Contacts list and
Calendar, select Memory Status
after Step 3.
Settings
902T-e-manual-07.indd 240
4. Select Clear Memory and press J (Select).
5. Enter your security code (page 52).
A confirmation screen appears.
6. Press J (Yes).
Your phone is initialised and then automatically turned off and on.
240
05.6.9 4:59:58 PM
Network & Internet
Tip
Note that you may no longer be
able to connect to the home
network if the settings are set
incorrectly.
You can set the network (telecommunications carrier) and system mode to use. You can
also set the network connection information for using the Web and email.
Selecting the Network
You can set the network by selecting an available network in your current area
automatically or selecting a network manually from a list.
1. In standby mode, press @, select Settings and press J (Select).
2. Select Network Settings and press J (Select).
3. Select Select Network and press J (Select).
4. Select Select Network and press J (Select).
5. Select the item you want to set and press J (OK).
◆ Automatic: Selects an available network automatically.
◆ Manual: Allows you to select a network from the displayed list and connect to the
network. Available networks are indicated by the
or
indicator.
Settings
902T-e-manual-07.indd 241
241
05.6.9 4:59:58 PM
Adding a Network
You can add up to five new networks.
Tip
To delete an added network, select
the network you want to delete
after Step 1, press j
J (Options)
and select Delete.
1. After Step 3 of “Selecting the Network” (page 241), select Add New Network and
press J (Select).
2. Select <Empty> and press J (Options).
3. Select Edit and press J (Select).
4. Select the item you want to set and press @.
5. Enter the item and press @.
6. Press J (Options) after the settings the items.
7. Select Save and press J (Select).
Preferred Setting
In the Preferred Network list, you can set the priority order for selecting networks.
1. After Step 3 of “Selecting the Network” (page 241), select Set Preferred and press
J (Select).
2. Press J (Options).
3. Select an operation and press J (Select).
◆ Add: Allows you to select the network you want to add from the Network list and
add it to the bottom of the Preferred Network list.
◆ Insert: Allows you to select the network you want to add from the Network list
and insert it in a specified place in the Preferred Network list.
◆ Move: Allows you to select the network you want to move and change the order
by moving the network in the list.
◆ Delete: Deletes the selected network.
Settings
902T-e-manual-07.indd 242
242
05.6.9 4:59:59 PM
Setting the System Mode
Note
If you set the system mode to
UMTS Only or GSM Only, you
cannot make or receive any calls,
including emergency calls to
110 (police), 119 (fire) and 118
(coast guard), when the selected
network is unavailable. Functions
that use a network connection are
also unavailable. In such a case,
change the setting for the system
mode.
Settings
902T-e-manual-07.indd 243
You can set the phone to select the system mode from UMTS (3G) or GSM automatically
or set the system mode fixed to UMTS or GSM. Setting UMTS Only when using your
phone in Japan and Dual when using your phone overseas is recommended.
1. In standby mode, press @, select Settings and press J (Select).
2. Select Network Settings and press J (Select).
3. Select System Mode and press J (Select).
4. Select the item you want to set and press J (Select).
◆ Dual: Selects the available system mode automatically. If both system modes are
available, the phone selects your preferred mode. Select UMTS or GSM and press
J (Select). To change the GSM preferred area, press J (Yes), select Europe,
Asia, etc or America and press J (Select).
◆ UMTS Only: Sets the system mode to UMTS only.
◆ GSM Only: Sets the system mode to GSM only. To change the area, press
J (Yes), select Europe, Asia, etc or America and press J (Select).
243
05.6.9 4:59:59 PM
Application Settings
You can set and edit the network connection information for the browser, MMS and
other applications individually.
Setting the Network Connection Information
You can set all the network connection information (network access point, proxy, etc.) for
each application. You can set the information for up to six connections per application.
1. In standby mode, press @, select Settings and press J (Select).
2. Select Network Settings and press J (Select).
3. Select Settings and press J (Select).
4. Select the application you want to set and press J (Select).
5. Select <Empty> and press J (Options).
6. Select Edit and press J (Select).
7. Select the item you want to set and press @.
8. Enter/select information.
For each item, press @ or J (OK) and set the information.
9. Press J (Options) after the settings the items.
10. Select Save and press J (Select).
A confirmation screen appears.
11. Press J (Yes).
Settings
902T-e-manual-07.indd 244
244
05.6.9 4:59:59 PM
Modifying Application Settings
Tip
To display, edit, copy or delete
connection information, select
connection information after
Step 1 and press j
J (Options).
However, any profile indicated by
cannot be displayed, edited
or copied. Also, a preset factory
profile cannot be deleted.
1. After Step 3 of “Setting the Network Connection Information” (page 244), select the
application you want to set and press @.
2. Select the connection information you want to set and press @.
Internet Settings
You can edit the network access point (NAP) information used when modifying
application settings (above). You can register information for up to 20 NAP.
1. In standby mode, press @, select Settings and press J (Select).
2. Select Network Settings and press J (Select).
Tip
3. Select Internet and press J (Select).
To display, edit, copy or delete NAP
information, select information after
Step 3 and press j
J (Options).
However, any profile indicated by
cannot be displayed or copied.
Also, preset factory NAP cannot be
deleted.
4. Select <Empty> and press J (Add).
5. Select the item you want to set and press @.
6. Enter/select information.
For each item, press @ or J (OK) and set the information.
7. Press J (Options) after the settings the items.
8. Select Save and press J (Select).
A confirmation screen appears.
9. Press J (Yes).
Settings
902T-e-manual-07.indd 245
245
05.6.9 4:59:59 PM
Retrieving Network Information
Tip
The first time you turn on the
power after purchasing your phone,
a prompt for retrieving network
connection information appears if
you press a
k or a
@, j
J, K
A.
Before you can use Vodafone live!, you need to retrieve the network connection
information.
1. In standby mode, press @, select Settings and press J (Select).
2. Select Network Settings and press J (Select).
3. Select Retrieve NW Info. and press J (Select).
A confirmation screen appears.
4. Press J (Yes).
External Device Setting
You can set the access point name (APN) of the network information to write to your
phone in order to perform packet communication from an external device such as a PC.
1. In standby mode, press @, select Settings and press J (Select).
2. Select Network Settings and press J (Select).
3. Select External Device and press J (Select).
4. Select <Empty> and press J (Options).
5. Select Edit and press J (Select).
6. Enter the access point name and press J (Options).
7. Select OK and press J (Select).
A confirmation screen appears.
8. Press J (Yes).
Settings
902T-e-manual-07.indd 246
246
05.6.9 4:59:59 PM
Location Settings
You can configure the settings for retrieving location information.
Saving a Location Information URL
You can set a map provider for displaying maps from the Contacts list.
1. In standby mode, press @, select Settings and press J (Select).
2. Select Location Settings and press J (Select).
3. Select URL Settings and press J (Select).
4. Select <Empty> and press J (Edit).
5. Enter the URL for retrieving location information and press @.
Setting the Location Information URL
1. After Step 3 of “Saving a Location Information URL” (above), select the URL you want
to set and press @.
Location On/Off Setting
1. After Step 2 of “Saving a Location Information URL” (above), select Location On/Off
and press J (Select).
2. Enter your security code (page 52).
3. Select On or Off and press J (Select).
Settings
902T-e-manual-07.indd 247
247
05.6.9 5:00:00 PM
Convenient Functions
Your phone includes various convenient functions.
In This Chapter
❍ USIM-appli
❍ Calendar
❍ Alarms
❍ Calculator
❍ Converter
❍ Voice Recorder
❍ Countdown Timer
❍ Notepad
❍ Number Memo
❍ World Clock
❍ Multi Task
❍ Barcode
❍ Flashlight
902T-e-manual-08.indd 248
❍ Sending Touch Tones
05.6.9 5:00:35 PM
USIM-appli
Note
A name other than USIM-appli may
appear depending on the type of
USIM card.
If there are applications installed on the USIM card, you can run an application if you
follow the procedure below.
1. In standby mode, press @, select Tools and press J (Select).
2. Select USIM-appli and press J (Select).
A menu appears. Follow the on-screen instructions.
Convenient Functions
902T-e-manual-08.indd 249
249
05.6.9 5:00:36 PM
Calendar
Calendar allows you to save your appointments and use your phone as a scheduler.
-AY
-ON 4UE 7ED 4HU &RI 3AT 3UN
Adding a New Appointment
You can save up to 100 appointments.
1. In standby mode, press @, select Tools and press J (Select).
/ P T IO N S
"ACK
Month View Screen
Note
• If you change the Home City
setting (page 49) in the clock
settings, the start and end dates
and times of appointments
are automatically changed to
those in the time zone of the
city. Also, when DST (Daylight
Saving Time) is set to On, the
start and end dates and times
are automatically changed for
summer time.
• If the power is turned off at
the specified time, it turns on
automatically to start the alarm.
• When the mode settings (page
206) is set to Silent or Meeting
and the alarm is set to Off, the
alarm does not play.
Convenient Functions
902T-e-manual-08.indd 250
2. Select Calendar and press J (Select).
3. Press J (Options).
4. Select New Appointment and press J (Select).
5. Select the item you want to set and press @.
◆ Title: Allows you to enter the title (up to 16 characters) of the appointment.
◆ Start Date&Time: Allows you to set the start date and time for the appointment.
To set both the date and time, select Date&Time. To select only the date, select
Date only.
◆ End Date&Time: Allows you to set the end date and time for the appointment.
◆ No Repeat/Daily/Weekly/Monthly/Yearly/End of Month: Allows you to set a
repeat interval and period for the appointment. If you set Monthly for the 29th,
30th or 31st, the repeat is only set for months that include that date. If you set the
start date to the last day of the month, you can set the setting to End of Month.
◆ Memo: Allows you to enter the contents (up to 128 characters) of the appointment.
250
05.6.9 5:00:36 PM
◆ Alarm: Allows you to set the alarm. Select On and then set the alarm date and
time, alarm tone, alarm volume and vibration. After setting the items, press J
(Options) and select Save.
◆ Location: Allows you to enter the location information (up to 50 characters).
◆ None Category/Meeting/Date/Travel/Holiday/Anniversary/Miscellaneous:
Allows you set the category of the appointment.
6. Press J (Options) after setting the items.
7. Select Save and press J (Select).
Alarm Date & Time
Tip
If the time set for an alarm is
reached during an incoming/
outgoing voice call or video call,
while taking a picture or recording
a video or during infrared or other
data communication, the alarm
plays after the call, taking of a
picture, recording of a video or
communication ends.
Convenient Functions
902T-e-manual-08.indd 251
At the date and time set for an alarm, the alarm plays and “Appointment” appears in the
external display. To stop the alarm, press any key. After the alarm stops, press J (View)
to check the appointment details.
251
05.6.9 5:00:39 PM
Checking Appointments
Tip
To switch the view between month,
week, day and all appointments,
press j
J (Options) after Step 2
and select Calendar View.
1. In standby mode, press @, select Tools and press J (Select).
2. Select Calendar and press J (Select).
The month view screen appears.
Press * to switch to the previous month and press # to switch to the next
month.
3. Use E to select a date and press @.
A list of appointments for the selected date appears.
4. Select the appointment you want to check and press @.
The details of the appointment appear.
Convenient Functions
902T-e-manual-08.indd 252
252
05.6.9 5:00:39 PM
Managing Appointments
Tip
• The items displayed vary
depending on the Calendar view
(page 250).
• To save an edited appointment
as a new appointment without
overwriting the original
appointment, press J
j (Options)
and select Save as.
Convenient Functions
902T-e-manual-08.indd 253
You can perform the following operations if you select a date or appointment and press
J (Options) from the month, week, day or all appointments view.
◆ View: Displays the details of the selected appointment.
◆ Day View: Displays a list of appointments set for the selected date.
◆ Edit: Allows you to edit the appointment.
◆ Delete: Deletes the appointment.
◆ Go to Date: Allows you to enter a date and then display the appointments for that
date.
◆ Select Multi: Allows you to select multiple appointments in all appointments
view and then delete or export them. To select or unselect appointments, select
an appointment with the cursor and press @ or press J (Options) and select
Mark/Unmark or Mark all/Unmark all.
◆ Send vCalendar: Allows you to convert the appointment to vCalendar format and
then save it to Data Folder or a memory card or attach it to an MMS message (page
137). You can also send it via infrared communication (page 281) or BluetoothTM
communication (page 277).
◆ Lock Calendar: Locks the calendar. To cancel the lock, enter your security code
(page 52).
◆ Holiday Setting: Allows you to change the colour for displaying a specified date
or day of the week.
◆ Calendar View: Switches the view between month, week, day and all
appointments.
253
05.6.9 5:00:39 PM
Alarms
Note
• If the power is turned off at
the specified time, it turns on
automatically to start the alarm.
• When the mode settings (page
206) is set to Silent or Meeting
and the alarm is set to Off, the
alarm does not play.
You can set an alarm to play at a certain time.
1. In standby mode, press @, select Tools and press J (Select).
2. Select Alarm and press J (Select).
3. Select the alarm you want to set and press J (Select).
4. Select On and press J (Select).
The alarm settings screen appears.
5. Select the item you want to set and press @.
◆ Alarm Time: Allows you to enter an alarm time in accordance with the 24-hour
system. After you enter a time, press J (OK).
◆ Alarm Tone: Allows you to set the following items. Select an item and press J
(Select). After setting the items, press J (Options) and select Save.
• Alarm Tone: Allows you to set a sound preinstalled in your phone or a sound or
video saved to Data Folder as the alarm tone. For details on how to set a tone,
see from Step 5 of “Personalising the Ringtone” (page 208).
• Alarm Volume: Allows you to set the alarm volume.
• Vibration: Allows you to set the alarm vibration.
Convenient Functions
902T-e-manual-08.indd 254
254
05.6.9 5:00:39 PM
◆ Everyday (default): Allows you to set the alarm to repeat at a specified interval.
Select one of the following items and press @.
• Everyday: Starts the alarm everyday.
• Weekdays: Starts the alarm each day from Monday to Friday.
• Select Day: Allows you to specify which days to start the alarm. Press @ to
add a check mark, press J (Options) and select OK.
• Once: Starts the alarm once only on a specified day. To specify a day, press
F or G.
◆ Snooze: Allows you to set the snooze. If the snooze is set to On, the alarm plays
in five minute intervals up to five times.
6. Press J (Options) after setting the items.
7. Select Save and press J (Select).
The
indicator appears in standby mode and the alarm is set.
Alarm Time
Tip
If the time set for an alarm is
reached during an incoming/
outgoing voice call or video call,
while taking a picture or recording
a video or during infrared or other
data communication, the alarm
plays after the call, taking of a
picture, recording of a video or
communication ends.
Convenient Functions
902T-e-manual-08.indd 255
At a time set for an alarm, the alarm plays and the time-up screen appears. To stop the
alarm, press any key.
To stop the snooze function, press any key while the alarm is playing and then press
K (No).
255
05.6.9 5:00:39 PM
Calculator
You can use your phone as a calculator.
1. In standby mode, press @, select Tools and press J (Select).
2. Select Calculator and press J (Select).
Follow the onscreen instructions to enter digits.
Press * to enter a decimal point and use N to switch between + and -.
Calculator Operations
Tip
To calculate the tax rate from the
Calculator screen, press H
h. To
display the result of the tax rate
calculation in red, press h
H once.
To display the amount including
tax in green, press h
H again.
Convenient Functions
902T-e-manual-08.indd 256
You can perform the following operations if you press J (Options) from the Calculator
screen.
◆ =: Repeats the last arithmetic operation.
◆ Clear All: Deletes the input value and data stored in memory.
◆ MS: Saves the input value to memory.
◆ M+: Adds the input value to the value stored in memory.
◆ MR: Displays the value stored in memory.
◆ %: Calculates the percentage.
◆ 1/X: Calculates the reciprocal.
◆ SQRT: Calculates the square root.
◆ Set Tax Rate: Allows you to set the tax rate. To change the tax rate, enter a new
rate and press J (OK).
256
05.6.9 5:00:40 PM
Converter
You can set a currency exchange rate and then perform currency conversion calculations.
1. In standby mode, press @, select Tools and press J (Select).
2. Select Converter and press J (Select).
3. Select the Exchange rate input field and enter the exchange rate.
To enter a decimal point, press *.
4. Select the Amount input field and enter the amount you want to convert.
To enter a decimal point, press *.
5. Press J (Result).
The conversion result appears.
Convenient Functions
902T-e-manual-08.indd 257
257
05.6.9 5:00:40 PM
Voice Recorder
The voice recorder allows you to record sound and then save the recording data to
the Recordings folder in the Sounds&Ringtones folder of Data Folder. Although the
possible length of recording time depends on the amount of available memory space
in Data Folder, the maximum recording time is 90 minutes for each recording. Sound is
recorded via the main microphone (mouthpiece).
Recording Sound
Note
If a call is received during
recording, the call takes priority
and recording stops. All recording
data is saved automatically. To
prohibit the reception of calls
during recording, set offline mode
(page 220).
Tip
• To stop recording and save all
recording data automatically,
press @
a.
• If the phone is in turnover style,
use the side key (R
r) to start
recording or stop recording
and save the recording data
automatically. To cancel recording,
press the side key (Z
z) .
Convenient Functions
902T-e-manual-08.indd 258
1. In standby mode, press @, select Tools and press J (Select).
2. Select Voice Recorder and press J (Select).
3. Select Record and press J (Select).
The Recording screen appears.
4. Press J (Options).
The default storage place for recording data is your phone. To switch the storage
place to a memory card, select Save sound to and then select Memory Card.
5. Select Record and press J (Select).
Recording begins.
6. Press J (Pause) to pause recording.
To resume recording, press @.
To save the recording data, press J (Save).
258
05.6.9 5:00:40 PM
Playing Recordings
Tip
To play recording data saved to
a memory card, select Memory
Card after Step 4.
1. In standby mode, press @, select Tools and press J (Select).
2. Select Voice Recorder and press J (Select).
3. Select Recordings and press J (Select).
The contents of the Recordings folder in the Sounds&Ringtones folder of Data Folder
appear.
4. Select the recording data you want to play and press J (Options).
5. Select Play and press J (Select).
Convenient Functions
902T-e-manual-08.indd 259
259
05.6.9 5:00:40 PM
Countdown Timer
Note
The level of the alarm volume is that
set for the Multimedia Volume setting
(page 212) of the mode settings
currently set. If the mode settings is
set to Silent, no sound is emitted for
the alarm. Your phone vibrates only.
Tip
If the phone is in turnover style, use
the side key (R
r) to start, stop and
restart the timer or stop the alarm.
To reset the timer, press the side key
(Z
z) when the timer is stopped.
Convenient Functions
902T-e-manual-08.indd 260
You can set an alarm to notify you when a certain amount of time elapses. The alarm
plays for approximately one minute.
1. In standby mode, press @, select Tools and press J (Select).
2. Select Countdown Timer and press J (Select).
3. Enter a start time (10 seconds to 60 minutes) and press J (OK).
4. Press J (Start).
The timer starts.
To stop the timer, press J (Stop). To restart the timer, press J (Restart). To reset
the timer, press K (Reset) while the timer is stopped.
260
05.6.9 5:00:40 PM
Notepad
Note
To edit or delete a memo, select
the memo after Step 2 and press
J (Options).
j
You can use your phone as a notepad for storing text input. You can also access the
saved data during character input and editing. You can enter up 256 characters for each
memo and store up to 20 memos in the notepad.
1. In standby mode, press @, select Tools and press J (Select).
2. Select Notepad and press J (Select).
3. Select the position to which you want to save the memo and press @.
4. Enter the contents of the memo and press @.
Convenient Functions
902T-e-manual-08.indd 261
261
05.6.9 5:00:41 PM
Number Memo
You can use the keypad to take a memo of a phone number or other number during a
voice or video call. The number memo is saved automatically after the call ends, thus
allowing you to view the number and make a call later.
Taking a Memo of a Phone Number
1. Press keys on the keypad during a call.
Tip
• You can enter a total of up to
40 numbers and symbols (*, #,
- and P). To enter a pause (P),
press J
j (Options) and select
Pause.
• If there are already five number
memos, the oldest memo is
deleted each time a new memo
is saved.
Convenient Functions
902T-e-manual-08.indd 262
Viewing a Number Memo
1. In standby mode, press @, select Tools and press J (Select).
2. Select Number Memo and press J (Select).
The saved number memos appear. You can select a phone number in a number
memo and make a voice or video call or save the phone number to the Contacts list.
262
05.6.9 5:00:41 PM
World Clock
Tip
If you press J
j (DSTon) after Step
3, the time switches to Daylight
Saving Time (DST) and the
indicator appears on the display.
World Clock Viewer allows you to check the date and local time in major cities around
the world, as well as the time difference.
1. In standby mode, press @, select Tools and press J (Select).
2. Select World Clock and press J (Select).
World Clock Viewer appears.
3. Use F to select a city.
The date, local time and time difference for the selected city appear.
A green circle indicates your home city on the map. A red circle indicates the
alternate city.
For details on changing the Home City and Alternate City settings, see “World Clock
Setting” (page 49).
Convenient Functions
902T-e-manual-08.indd 263
263
05.6.9 5:00:41 PM
Multi Task
This feature allows you to run multiple functions (applications) simultaneously and
switch between them.
Starting a New Application
You can start another application without ending the application you are using.
Note
• Another application may not be
able to be started while some
applications are running.
• An application may not be able
to be switched to in the Multi
Task screen depending on how
the application was started.
1. Press I while an application is in use.
The Multi Task screen appears.
2. Select Tools and press J (Select).
3. Select the application you want to start and press J (Select).
The selected application starts.
Tip
The following applications can be
started from the Multi Task screen.
• USIM-appli
• Countdown Timer
• Calendar
• Notepad
• Alarm
• Number Memo
• Calculator
• World Clock
• Converter
• Backup
• Voice Recorder
Convenient Functions
902T-e-manual-08.indd 264
264
05.6.9 5:00:41 PM
Switching Applications
Note
A V-appli cannot be resumed while
another application is running. End
the application.
Convenient Functions
902T-e-manual-08.indd 265
1. Press I while an application is in use.
The Multi Task screen appears.
2. Select the application to which you want to switch and press @.
The application is switched to the selected application.
265
05.6.9 5:00:41 PM
Barcode
The external camera allows you to scan barcodes (QR codes). You can connect to a URL
included in the scanned information or create a message to send to an address included
in the scanned information. You can save up to ten scanned data items. However, this
number depends on the amount of available memory space. When a barcode has been
divided into data areas, you can scan up to 16 data areas consecutively.
QR Code
Note
• Some barcodes have save/
forward restrictions and some
barcodes cannot be scanned.
• The camera may not be able to
scan a barcode that is dirty or
in a shadow.
Convenient Functions
902T-e-manual-08.indd 266
266
05.6.9 5:00:41 PM
Scanning a Barcode
3CANNED$ATA
4 H E 1 2 C O D E WA S
SU C C E SSF U LLY
SC A N N E D " E SU RE T O M A K E
U SE O F T H E 1 2 C O D E
SC A N N IN G F U N C T IO N IN T H E F U T U RE / P T IO N S
"ACK
After Scanning Barcode
Tip
• If the scanned data begins
with MAILTO:, press a
@ after
Step 4 to create an SMS/MMS
message. If it begins with
MEMORY:, you can save it to
the Contacts list (page 75).
• If you select the text of a link
(indicated by a blue underline)
and press @
a, you can make
a call, create a message,
save data to the Contacts list,
connect to a URL, etc. If the
scanned data contains image
or sound data, you can display/
play the data, save the data to
Data Folder, etc.
Convenient Functions
902T-e-manual-08.indd 267
1. In standby mode, press @, select Camera and press J (Select).
2. Select Scan Data and press J (Select).
The Scan QR Code screen appears.
3. Align the barcode you want to scan in the guide of the main display.
To adjust the exposure, use F. Press D to make the barcode darker and
press C to make the barcode lighter.
4. Press @.
Scanning begins.
To perform auto focus, press H.
The scanned data appears in the display. If the barcode has been divided, scan the
other data areas.
To save the data, press J (Options) and select Save.
267
05.6.9 5:00:41 PM
Saved Barcodes
Tip
To rename or delete scanned data,
press j
J (Options) after Step 2.
1. After Step 2 of “Scanning a Barcode” (page 267), press J (Options).
2. Select Scanned Data List and press J (Select).
3. Select the scanned data you want to use and press @.
The barcode data appears.
For details on the operations you can perform while barcode data is displayed, see
“Scanning a Barcode” (page 267).
Convenient Functions
902T-e-manual-08.indd 268
268
05.6.9 5:00:42 PM
Flashlight
Note
• Do not turn on the mobile light
while it is close to anyone’s
eyes as doing so may damage
the person’s eyesight. Also,
check the direction with which
light will be emitted before
turning on the mobile light.
• If the side key (Z
z) is set to
another function (page 216),
this function is unavailable.
• While the phone lock is set (page
236), the key guard is set (page
239) or the countdown timer is
activated (page 260), the mobile
light cannot be turned on.
Convenient Functions
902T-e-manual-08.indd 269
When the Flashlight function has been assigned to a side key (Z) in the shortcut
settings (page 216), you can turn on the mobile light if you press and hold the side key
(Z).
1. Press and hold a side key (Z).
The mobile light turns on and remains lit while you hold the side key (Z).
269
05.6.9 5:00:42 PM
Sending Touch Tones
Send touch tones to use interactive voice response services and other types of touchtone services.
Sending Individual Touch Tones
1. Press any of the 0 to 9, * and # keys during a call.
Using the Pause (P) for Sending Touch Tones
The pause (P) allows you to send sequences of touch tones, each separated with a
pause (P). The Contacts list is useful for storing sequences of touch tones for remotely
operating your home answering machine and other devices. You can send up to 40
touch tones at one time.
Saving Touch Tones to the Contacts List
Example: Save the following three numbers.
Phone number: 03-123X-XXX3
Answering machine code: #7777
Answering machine playback code: #1
1. Save 03123XXXX3P#7777P#1 as the phone number of an entry.
To enter a pause (P), press J (Options) and select Pause.
Convenient Functions
902T-e-manual-08.indd 270
270
05.6.9 5:00:42 PM
Sending Touch Tones
1. Open the Contacts list entry containing the touch tones you want to send.
2. Press N.
A call is made to the phone number before the first “P.”
3. Press J (Tone).
The sequence of touch tones before the next “P” is sent.
Repeat this step until all the touch tones have been sent.
Convenient Functions
902T-e-manual-08.indd 271
271
05.6.9 5:00:42 PM
File Transfer
You can use Bluetooth™, infrared, a USB cable or a memory card to transfer data between your
phone and other phones, PCs and other devices. You can also back up data.
In This Chapter
❍ File Transfer
902T-e-manual-09.indd 272
05.6.9 5:01:26 PM
File Transfer
Using Bluetooth™ for Transferring Data
Note
• If a USB cable is connected to
your phone while you are using
BluetoothTM, the BluetoothTM
connection ends.
• When BluetoothTM is used to
send/receive data, offline mode
is set. The indicator appears
at the top of the display while
offline mode is set, except
when a dial-up connection was
established. When the sending/
receiving of data is complete,
offline mode is cancelled.
You can transfer the data of the Contacts list, Calendar and Data Folder between your
phone and Bluetooth™ compatible PCs and phones. BluetoothTM also allows you to
use a wireless headset or an in-car device for handsfree calls. We recommend using
Bluetooth™ while your phone and the other device are within 10 metres of each other.
For details on the operating procedures of the other device, refer to the instruction
manual for that device.
About BluetoothTM
BluetoothTM is a technology that facilitates wireless communication between PCs and
devices such as handsfree compatible devices.
Activating BluetoothTM
1. In standby mode, press @, select Settings and press J (Select).
2. Select Connectivity and press J (Select).
Tip
To transfer the data of Data Folder,
perform the transfer operation from
the other BluetoothTM compatible
device after Step 5 of “Activating
Bluetooth™”.
File Transfer
902T-e-manual-09.indd 273
3. Select Bluetooth and press J (Select).
4. Select Switch On/Off and press J (Select).
5. Select On and press J (Select).
The
indicator appears at the top of the display.
273
05.6.9 5:01:26 PM
Registering a BluetoothTM Compatible Device
Tip
If you enter the same PIN code (4
to 16 digits) on both your phone
and a BluetoothTM compatible
device, the Bluetooth™ compatible
device is registered.
Before establishing a BluetoothTM connection, you need to perform a search for the
Bluetooth™ compatible device to be connected. You can register up to 20 detected
Bluetooth™ compatible devices.
1. After Step 3 of “Activating BluetoothTM” (page 273), select Paired Devices and
press J (Select).
2. Select Search and press J (Select).
3. Select a BluetoothTM compatible device from the detected devices that appear and
press J (Select).
4. Enter your PIN code (4 to 16 digits) and press J (OK).
Setting a BluetoothTM Compatible Device as a Trusted Device
Tip
To cancel this setting for a device
you no longer want to trust, select
Off in Step 4.
If you set a registered BluetoothTM compatible device as a trusted device, a confirmation
screen is not displayed and a connection is established when a connection request is
received from that device.
1. After Step 3 of “Activating BluetoothTM” (page 273), select Paired Devices and
press J (Select).
2. Select a BluetoothTM compatible device and press J (Select).
3. Select Trust Device and press J (Select).
4. Select On and press J (Select).
File Transfer
902T-e-manual-09.indd 274
274
05.6.9 5:01:26 PM
Displaying Details of a Registered BluetoothTM Compatible
Device
You can display the device name, device address, device class and supported profiles of
a BluetoothTM compatible device.
1. After Step 3 of “Activating BluetoothTM” (page 273), select Paired Devices and
press J (Select).
2. Select the BluetoothTM compatible device for which you want to display the details
and press J (Select).
3. Select Details and press J (Select).
Changing the Name of a Registered BluetoothTM Compatible
Device
1. After Step 3 of “Activating BluetoothTM” (page 273), select Paired Devices and
press J (Select).
2. Select the BluetoothTM compatible device for which you want to change the name
and press J (Select).
3. Select Rename and press J (Select).
4. Enter your security code (page 52).
5. Change the name and press @.
Deleting a Registered BluetoothTM Compatible Device
1. After Step 3 of “Activating BluetoothTM” (page 273), select Paired Devices and
press J (Select).
2. Select a BluetoothTM compatible device and press J (Select).
3. Select Delete and press J (Select).
File Transfer
902T-e-manual-09.indd 275
275
05.6.9 5:01:27 PM
Response to Detection by Other BluetoothTM Compatible
Devices
Tip
You may still receive a connection
request even if Visibility is set to
Hide My Phone.
1. After Step 3 of “Activating BluetoothTM” (page 273), select My Phone ID and press
J (Select).
2. Select Visibility and press J (Select).
3. Select Show My Phone or Hide My Phone and press J (Select).
◆ Show My Phone: Allows your phone to be recognised when it is detected during
a search by a BluetoothTM compatible device in the vicinity.
◆ Hide My Phone: Prevents your phone from being recognised when it is detected
during a search by a BluetoothTM compatible device in the vicinity.
Displaying Details of Your Phone
You can display the device name, device address, device class and supported profiles of
your phone.
1. After Step 3 of “Activating BluetoothTM” (page 273), select My Phone ID and press
J (Select).
2. Select My Phone and press J (Select).
3. Select Details and press J (Select).
File Transfer
902T-e-manual-09.indd 276
276
05.6.9 5:01:27 PM
Changing the Name of Your Phone
You can change the name displayed on another BluetoothTM compatible device when
your phone is detected.
1. After Step 3 of “Activating BluetoothTM” (page 273), select My Phone ID and press
J (Select).
2. Select My Phone and press J (Select).
3. Select Rename and press J (Select).
4. Enter your security code (page 52).
5. Change the name and press @.
Using BluetoothTM for Sending Data
Note
The following files cannot be sent.
• Files in V-appli, My Saved Pages
and Templates of Data Folder
• Files without transfer permission
This feature allows you to convert Contacts list entries and Calendar data into vObjects
and then send them to a BluetoothTM compatible device.
1. Set up the other BluetoothTM compatible device to receive data.
2. Select Via Bluetooth from the Options menu of a function and press J (Select).
3. Press J (OK) to switch to offline mode.
4. Select the destination BluetoothTM compatible device and press J (Select).
Tip
To send the owner information of
the Contacts list, select Send
My vCard from the Phonebook
menu (page 75) and then select
Bluetooth.
File Transfer
902T-e-manual-09.indd 277
277
05.6.9 5:01:27 PM
Using BluetoothTM for Receiving Data
When BluetoothTM is enabled, you can receive data to the Contacts list and Calendar.
Tip
The received Contacts list and
Calendar data is saved to the
Contacts list and Calendar. When
importing a vObject that has a
picture to the Contacts list, the
picture cannot be saved to the
Contacts list if it exceeds W112 ×
H112.
1. Press J (Yes) when a confirmation screen appears after a connection request is
received from a BluetoothTM compatible device in the vicinity.
2. Press J (OK) to switch to offline mode.
3. Select Save and press J (Select).
If you select Reject, the connection ends if there is only one data item to receive.
However, if there are multiple data items to receive, the confirmation screen for the
next data item appears.
Connecting to a Handsfree Compatible Device
Tip
To perform handsfree
communication, the handsfree
compatible device needs to
be registered. For details, see
“Registering a BluetoothTM
Compatible Device” (page 274).
1. After Step 3 of “Activating BluetoothTM” (page 273), select Paired Devices and
press J (Select).
2. Select the handsfree compatible device and press J (Select).
3. Select Connect and press J (Select).
Performing Handsfree Communication
1. Press K (
The
) and switch to handsfree communication.
indicator appears on the display during handsfree communication.
Note
The other party’s voice cannot be
recorded during a handsfree call.
File Transfer
902T-e-manual-09.indd 278
278
05.6.9 5:01:27 PM
Setting Handsfree
You can set the mode for making and receiving calls while a handsfree compatible
device is connected.
1. After Step 3 of “Activating BluetoothTM” (page 273), select My Phone ID and press
J (Select).
2. Select Handsfree Setting and press J (Select).
3. Select a mode and press J (Select).
◆ Handsfree Mode: Allows you to make and receive handsfree calls from your
phone.
◆ Private Mode: Allows you to make and receive regular calls from your phone.
Using BluetoothTM for Dial-up Connections
When BluetoothTM is enabled, you can establish a dial-up connection.
1. Press J (Yes) when a confirmation screen appears after a connection request is
received from a BluetoothTM compatible device in the vicinity.
File Transfer
902T-e-manual-09.indd 279
279
05.6.9 5:01:28 PM
Using Infrared for Transferring Data
Note
• If a USB cable is connected
to your phone while you are
using infrared, the infrared
communication ends.
• When infrared is used to
send/receive data, offline mode
is set. The indicator appears
at the top of the display while
offline mode is set, except
when a dial-up connection was
established. When the sending
of data is complete, offline
mode is cancelled.
File Transfer
902T-e-manual-09.indd 280
You can use infrared to exchange the Calendar data of your phone, Contacts list entries
of your phone, memory card or USIM card, pictures/videos taken or recorded with the
camera and Data Folder data that can be forwarded with an infrared compatible phone,
PC or other device. You can also restore or backup of Data Folder data. The
indicator
appears at the top of the display during transfer. To transfer data between your phone
and a PC, the supplied PC management software My Mobile needs to be installed on
the PC. The infrared function of your phone complies with IrMC 1.1. As shown in the
illustration on the left, bring your phone and an infrared compatible device to within 30
centimetres of each other and point both infrared ports directly towards each other. Do
not place an object between them. For details on the operating procedures of the other
device, refer to the instruction manual for that device.
280
05.6.9 5:01:28 PM
Using Infrared for Sending Data
1. Set up the other infrared compatible device to receive data.
Note
The following files cannot be sent.
• Files in V-appli, My Saved Pages
and Templates of Data Folder
• Files without transfer permission
2. Select Via Infrared from the Options menu of a function and press J (Select).
Using Infrared for Receiving Data
1. In standby mode, press @, select Settings and press J (Select).
2. Select Connectivity and press J (Select).
Tip
The save locations of data are
determined by the extensions.
3. Select Infrared and press J (Select).
4. Select Incoming Data and press J (Select).
5. Enter your security code (page 52).
6. Press J (OK) to switch to offline mode.
7. Select Save and press J (Select).
If you select Reject, the connection ends if there is only one data item to receive.
However, if there are multiple data items to receive, the confirmation screen for the
next data item appears.
Using Infrared for Backing Up Data
You can back up files and folders in Pictures, Videos, Sounds&Ringtones and Other Files
of Data Folder to a PC. Files without transfer permission cannot be backed up.
1. After Step 6 of “Using Infrared for Receiving Data” (above), follow the instructions on
the PC to back up data from your phone to the PC.
File Transfer
902T-e-manual-09.indd 281
281
05.6.9 5:01:28 PM
Using Infrared for Restoring Data
You can restore Pictures, Videos, Sounds&Ringtones and Other Files of Data Folder
saved on a PC to your phone.
1. After Step 6 of “Using Infrared for Receiving Data” (page 281), follow the instructions
on the PC to restore data from the PC to your phone.
Using Infrared for Dial-up Connections
1. In standby mode, press @, select Settings and press J (Select).
2. Select Connectivity and press J (Select).
3. Select Infrared and press J (Select).
4. Select Dial-up Connection and press J (Select).
5. Select On and press J (Select).
Infrared Remote Controller Function
You can use your phone as a remote controller for TVs and other electric home
appliances.
◆ Before this function can be used, a separate application (page 169) compatible
with the infrared function needs to be downloaded.
◆ Bring the infrared port (page 280) of your phone to within approximately 5 metres
of the TV or other electric home appliance. Do not place an object between them.
◆ Your phone may not work properly as a remote controller in direct sunlight, directly
under fluorescent lighting or near other infrared devices.
◆ A dirty infrared port may cause an operation failure. Gently remove any dirt with a
soft cloth while making sure not to scratch the port.
File Transfer
902T-e-manual-09.indd 282
282
05.6.9 5:01:28 PM
Using a USB Cable for Transferring Data
As shown in the illustration on the left, you can use a USB cable to connect your phone
to a PC and then exchange Contacts list, Calendar and Data Folder data. Before you
connect the USB cable, the USB host driver and PC management software My Mobile
included on the CD-ROM supplied with your phone need to be installed on the PC. This
function supports USB 1.1 and USB 2.0. For details on the PC operating environment
required to use this function, refer to My Mobile.
Note
• When you send/receive data,
offline mode is set automatically.
The indicator appears at
the top of the display while
offline mode is set, except
when a dial-up connection was
established. When the sending/
receiving of data is complete,
offline mode is cancelled.
• When using a USB cable to
connect your phone to a PC, be
sure to directly insert the plug
of the USB cable into the USB
port of the PC.
• The following files cannot be
sent.
• Files in V-appli, My Saved
Pages and Templates of
Data Folder
• Files without transfer
permission
File Transfer
902T-e-manual-09.indd 283
Using a USB Cable for Sending Data
You can send the data of the Contacts list, Calendar and Data Folder.
1. Follow the procedure below to connect your phone and a PC with a USB cable.
1) Open the external connector cover of your phone.
2) Insert the plug of the USB cable into the external connector.
3) Connect the USB cable to the USB port of the PC.
2. In standby mode, press @, select Settings and press J (Select).
3. Select Connectivity and press J (Select).
4. Select USB and press J (Select).
5. Select Data Transfer and press J (Select).
6. Press J (OK) to switch to offline mode.
7. Follow the instructions on the PC to receive data from your phone to the PC.
283
05.6.9 5:01:28 PM
Using a USB Cable for Receiving Data
You can receive data to the Contacts list, Calendar and Data Folder.
Note
When you receive all vObjects
(page 190), any of the previous
vObjects in your phone that are the
same as the received vObjects are
deleted.
Note
Files that cannot be transferred
are not backed up.
1. After Step 6 of “Using a USB Cable for Sending Data” (page 283), follow the
instructions on the PC to send data from the PC to your phone.
Using a USB Cable for Backing Up Data
You can back up files and folders in Pictures, Videos, Sounds&Ringtones and Other Files
of Data Folder.
1. After Step 6 of “Using a USB Cable for Sending Data” (page 283), follow the
instructions on the PC to back up data from your phone to the PC.
2. Enter your security code (page 52).
Using a USB Cable for Restoring Data
Note
• All the data may not be able to be
restored from some backup files.
• All the data of the restore
destination is overwritten.
File Transfer
902T-e-manual-09.indd 284
You can restore Pictures, Videos, Sounds&Ringtones and Other Files of Data Folder
saved on a PC to your phone.
1. After Step 6 of “Using a USB Cable for Sending Data” (page 283), follow the
instructions on the PC to restore data from the PC to your phone.
2. Enter your security code (page 52).
284
05.6.9 5:01:29 PM
Using a USB Cable for Dial-up Connections
Note
• Charging is not possible while
your phone is turned off.
• Charging may not be possible
depending on the connection
settings of the PC.
You can use a USB cable to connect your phone to a PC and then access the Internet,
etc. For details on the configuration/operation of the PC modem, refer to the instruction
manual for the PC.
Using a USB Cable for Charging
1. After Step 4 of “Using a USB Cable for Sending Data” (page 283), select Battery
Charge and press J (Select).
2. Select On and press J (Select).
Using a Memory Card for Transferring Data
Note
When you back up/restore
data, offline mode is set. The
indicator appears at the top of the
display while offline mode is set.
When the backing up/restoring of
data is complete, offline mode is
cancelled.
File Transfer
902T-e-manual-09.indd 285
You can transfer Contacts list and Calendar data between your phone and a memory
card. We recommend using a memory card for backing up personal data. A memory
card needs to be formatted before it is used for the first time. For details on formatting,
see “Formatting a Memory Card” (page 192).
285
05.6.9 5:01:29 PM
Backing Up Data to a Memory Card
1. Insert a memory card in the slot of your phone.
Note
Do not use a PC or other device
to view or change a backup file in
a memory card. The file may be
damaged.
2. In standby mode, press @, select Tools and press J (Select).
3. Select Backup and press J (Select).
4. Select Backup and press J (Select).
5. Select a data and press @.
A check mark is added to the check box.
Tip
After Step 6, select Unmark to
remove the check mark from the
select data and select Unmark All
to remove all check marks.
◆ Contacts List: Backs up the Contacts list.
◆ Calendar: Backs up the Calendar.
6. Press J (Options).
7. Select Backup and press J (Select).
8. Enter your security code (page 52).
A confirmation screen appears.
9. Press J (Yes).
A confirmation screen appears.
10. Press J (Yes) or K (No) in accordance with the confirmation screen.
Press J (Yes) to include pictures or press K (No) to not include pictures when
backing up the Contacts list and press J (Yes) to include past appointments or
press K (No) to not include past appointments when backing up the Calendar.
11. Press J (OK) to switch to offline mode.
A backup file is created in the memory card.
File Transfer
902T-e-manual-09.indd 286
286
05.6.9 5:01:29 PM
Restoring Data from a Memory Card
1. Insert a memory card in the slot of your phone.
Tip
To delete one or all backup files,
press j
J (Options) after Step 5
and select Delete or Delete All.
2. In standby mode, press @, select Tools and press J (Select).
3. Select Backup and press J (Select).
4. Select Restore and press J (Select).
5. Select a data and press J (Select).
◆ Contacts List: Displays a list of Contacts list backup files.
◆ Calendar: Displays a list of Calendar backup files.
6. Select a backup file and press @.
7. Enter your security code (page 52).
A confirmation screen appears.
8. Press J (Yes).
A confirmation screen appears.
9. Press J (Yes) or K (No) in accordance with the confirmation screen.
Press J (Yes) to overwrite all the data in the restore destination and press
K(No) to add the data.
10. Press J (OK) to switch to offline mode.
File Transfer
902T-e-manual-09.indd 287
287
05.6.9 5:01:29 PM
Appendix
In This Chapter
❍ Function List
❍ Troubleshooting
❍ Storage Capacity
❍ Main Specifications
❍ Glossary
❍ Index
❍ Warranty & After Sales Service
❍ Customer Service
902T-e-manual-10.indd 288
05.6.9 5:01:52 PM
Function List
Function Name
Default Setting
Page
V-appli
Screensavers: Off, Set Time (Start Time: 3 sec, Duration: No Timeout), Priority Settings page 169
(Voice Calls: Voice Calls, Video Calls: Video Calls, Messages: Messages, Alarms:
Alarms), Backlight (Backlight: Same as Phone, Blinking: On), Volume: Level 3, Vibration:
On
Browser Settings
Text Browser (Image: Show, Sound: Unmute), Font Size: Standard, Cookie Settings: On, page 168
Manufacture No.: Off, Auto Launch: Off, Location Property: Ask every time, Encoding
Type: Auto
Media Player
Messaging
Backlight: Always On, Visualisations: Off
page 175
Receiving
Settings (MMS)
Retrieve Mode (Home Network: Deferred, Roaming Network: Deferred), Auto-extract
File (Picture: On, Sound: On), Reply for Delivery: On, Anonymous Msg.: Reject)
page 146
Sending
Settings (MMS)
Delivery Report: Off, Delivery Time: Immediate, Expiry Time: Off, MMS Signature: No
Text, MMS Priority: Normal
page 147
Default
Recipient
(MMS)
No recipient
page 148
SMS Settings
Delivery Report: Off, SMS Signature: No Text
page 153
Common
Settings
Reply Settings: Always Ask, Display Font Size: Standard, Page Scroll: 1 Line
page 154
Received Msgs. Auto-delete: Off
page 155
Sent Messages
page 157
Appendix
902T-e-manual-10.indd 289
Auto-delete: On
289
05.6.9 5:01:52 PM
Function Name
Camera
Video Settings
Scan Data
Data Folder
Tools
Default Setting
Picture Settings Picture Quality: Fine, Camera Mode: Mobile Camera, Picture Size (Digital Camera:
W1600×H1200, Mobile Camera: W240×H320), Picture Effects: Off, Preview: On, Date
Stamp: Off, Grid: Off, Flicker Adjustment: 50Hz, File Name: Date&Time, Shutter Sound:
Pattern 1, Keypad Shortcut: On, Self-view: Off, Focus Mode: Auto, Night Mode: Off,
Multi Shots: Off, Add Frame: Off, Save Image to: Pictures folder of the phone, Delay
Timer: Off, Mobile Light: Off, White Balance: Auto, Exposure Control: ±0.0EV, Auto
Bracket: Off
Page
page 112,
113, 114,
124, 125,
126, 127,
128, 129,
130, 131,
132
Video Quality: Fine, Record Mode: For MMS, Effects: Off, Preview: On, Screen Display:
Normal, Controller Display: On, Flicker Adjustment: 50Hz, File Name: Date&Time, Start/
End Sounds: Pattern 1, Keypad Shortcut: On, Self-view: Off, Voice Record: On, Save
Video to: Videos folder of the phone, Delay Timer: Off, Mobile Light: Off, White Balance:
Auto, Exposure Control: ±0.0EV
−
page 267
Thumbnail View (Pictures and Videos folders only)
page 185
USIM-appli
−
page 249
Calendar
Appointment: Unset, Alarm (Alarm: Off, Alarm Tone: Pattern 1, Alarm Volume: Level 3,
Vibration: Pattern 1), Lock Calendar: Off, Holiday Settings (Sunday: Red, Weekdays:
Black, Saturday: Blue)
page 250,
253
Alarm
Alarm: Off, Alarm Tone: Pattern 1, Alarm Volume: Level 3, Vibration: Pattern 1, Repeat:
Everyday, Snooze: Off
page 254,
255
Calculator
Set Tax Rate: 1%
page 256
Converter
Exchange rate: 0
page 257
Voice Recorder
Save sound to: Recordings of the Sounds&Ringtones folder of the phone
page 258
Appendix
902T-e-manual-10.indd 290
290
05.6.9 5:01:52 PM
Function Name
Tools
Countdown
Timer
Default Setting
−
Page
page 260
Notepad
−
page 261
Number Memo
−
page 262
World Clock
Viewer
DST on/off: DSToff
page 263
−
page 286
Phonebook
My Details: Owner phone number only, Default Storage: Phone Memory, Scroll Speed:
Fast, Phonebook Lock: Off
page 90, 91,
92
Mode Settings
Normal
page 206
Normal
Ringtone Volume: Level 3, Assign Ringtone: Pattern 1, Ringtone Duration: 5 sec,
Vibration: Off, Keypad Volume: Level 3, Keypad Tones: Original 1, Sound Effects Vol.
(Start Up: Level 2, Shut Down: Level 2, Phone Open: Silent, Phone Closed: Silent, Error:
Level 2), Sound Effects: Preset Pattern, Multimedia Volume: Level 3, Battery Alarm: On
page 207,
208, 209,
210, 211,
212, 213
Silent
Vibration: On, Alarm: Off
Car
Ringtone Volume: Level 5, Assign Ringtone: Pattern 1, Ringtone Duration: 5 sec,
Vibration: Off, Keypad Volume: Level 3, Keypad Tones: Original 1, Sound Effects Vol.
(Start Up: Level 3, Shut Down: Level 3, Phone Open: Silent, Phone Closed: Silent, Error:
Level 3), Sound Effects: Preset Pattern, Multimedia Volume: Level 5, Battery Alarm: On
Meeting
Ringtone Volume: Silent, Assign Ringtone: Pattern 1, Ringtone Duration: 5 sec,
Vibration: Off, Keypad Volume: Silent, Keypad Tones: Original 1, Sound Effects Vol.:
Silent, Sound Effects: Preset Pattern, Multimedia Volume: Silent, Battery Alarm: On,
Alarm: On
Backup
Sound
Settings
Appendix
902T-e-manual-10.indd 291
291
05.6.9 5:01:52 PM
Function Name
Display
Settings
Main Display
Default Setting
Wallpaper: Live, Clock Type Display: 1-line Digital, Backlight Settings (Brightness:
Bright, Lighting Time: 15 sec), Operator Name: On, Power Saving: 1min, Cell
Information: Off
Page
page 199,
201, 203,
204
External Display Wallpaper: Live, Time Display: On, Backlight Settings (Brightness: Bright, Lighting Time: page 199, 202,
15 sec), Power Saving: 1min, Contrast: Level 0
203, 205
Phone
Settings
Date & Time
12 hour/24 hour: 24 hour, World Clock (Set Home City: Tokyo, Set Alternate City: Unset, page 48, 49,
DST On/Off: Off)
50, 202
言語選択
Automatic
Shortcuts
Side Key: Profile Switch, Navigation Keys (A
a: Shortcut Menu, B
a: Phonebook, D: page 216,
Dialled Numbers, a
217
C: Received Calls)
External Light
Notification (Missed Calls: Red, Messages: Blue, Voice Mail: Green), Incoming (Voice
Call: Purple, Video Call: Purple, Messaging: Aqua)
page 218,
219
Offline Mode
Off
page 220
AV Output
NTSC
page 188
Setting: Off, Ringing Duration: 6 sec
page 221
Call Settings Answerphone
page 214
Voice Call
Caller Details (Incoming Picture: Preset Picture, Caller Picture: On, Caller Info: On),
page 222,
Auto Answer: Off, Mute: Off, Earphone Call: Off, Call Priority: Enable, International Call: 223, 226,
International Code: 0046010), Prefix Settings (Auto Prefix: Off, Hide to Missed Call:
227, 229
Off)
Video Call
Outgoing Video: Camera Monitored, Image Quality: Standard Mode, Caller Details
(Incoming Picture: Preset Picture, Caller Picture: On, Caller Info: On), Zoom: 1x, Auto
Answer: Off, Mute: Off, Loud Speaker: On, Backlight: On, Hold Guidance: Preset
Picture, Appearance Check: On
Appendix
902T-e-manual-10.indd 292
page 98, 99,
100, 101,
102, 103
292
05.6.9 5:01:53 PM
Function Name
Default Setting
Page
Common
Call Settings
Settings
Earpiece Volume: Level 3, Speaker Volume: Level 3, Open to Answer: Off, Any Key
Answer: Off
page 224, 225
Security
Settings
PIN1 Code
Request
Off
page 234
Change PIN1
−
Change PIN2
−
Change
Password
−
page 235
Phone Lock
Off
page 236
Reject Calls
Hidden: Off, Public Phone: Off, Unavailable: Off, Unknown: Off, Select Contact: Off
page 231, 232
Reject
Addresses
Off (Unset)
page 233
Secret Mode
Off
page 240
Fixed Dialling
No.
Off (Unset)
page 237
Phone Memory
−
page 240
Memory card
Memory
Settings
−
page 192, 193
Network Settings
Select Network: Automatic, System Mode: UMTS Only
page 241, 243
Connectivity Infrared
Dial-up Connection: Off
page 282
Bluetooth
Switch On/Off: Off, Paired Devices (Trust Devices: Off), My Phone ID (Visibility: Show
My Phone, Handsfree Setting: Handsfree Mode)
page 273, 274,
276, 279
USB
Battery Charge: On
page 285
Appendix
902T-e-manual-10.indd 293
293
05.6.9 5:01:53 PM
Function Name
Default Setting
Page
Location Settings
URL Settings: http: //mobile.its-mo.com/MapToLink/p2, Location On/Off: On
page 247
Optional
Services
−
page 63
Call Log
Call Diverting
Voicemail
−
page 61
Call Waiting
−
page 67
Multiparty Call
−
page 69
Call Barring
−
page 65
Dialled
Numbers
−
page 57
Missed Calls
−
Received Calls
−
Call Timers
Last Call Time: 000: 00: 00, All Calls Time: 000: 00: 00
page 58
Call Costs
Last Call: 0Yen, All Calls: 0Yen, Cost Unit: Yen, Call Cost Display: Off
page 59
Data Counter
Last Data: 0Kbytes, All Data: 0Kbytes
page 60
Text Entry
T9 Dictionary: Unset
page 70
Multi Task
−
page 264
Shortcut Menu
Unset
page 215
Press and
hold *
Key Guard
Unset
page 239
Press and
hold #
Silent
Unset
page 206
Appendix
902T-e-manual-10.indd 294
294
05.6.9 5:01:53 PM
Troubleshooting
Problem
Possible Causes and Remedies
Cannot turn the power on.
• Is the battery pack inserted properly (page 42)?
• Is the battery charged (page 34, 36, 43)?
Cannot charge the battery.
• Is there dust on the connections and contacts of the rapid charger, phone or battery pack?
Clean the connections and contacts with a dry cotton swab, etc.
Cannot operate the phone normally
after turning it on.
• Does the PIN1 Entry screen appear? PIN1 Code Request is set to On. Enter your PIN1
code.
• Does the indicator or “Phone Lock” appear on the display? The phone lock (page 236)
is set. Enter your security code.
• Does “Please insert valid USIM card.” appear on the display? The USIM was not read
properly. Turn the power off and make sure the USIM card is inserted properly.
Cannot establish a connection for voice • Does the indicator appear on the display? Are you out of the service area or in a
location where a signal cannot reach your phone? Move to a location where a signal can
and video calls or use mail and Web
reach your phone.
functions.
• Does the indicator appear on the display? Are you using the phone overseas? To use
the phone overseas, you need to change the Select Network and System Mode settings
(page 243).
• Is your hand or another object covering the internal antenna part (page 30, 32) of your
phone?
• Does the indicator or “Offline Mode” appear on the display? Cancel offline mode (page
220).
Cannot make voice and video calls.
Appendix
902T-e-manual-10.indd 295
• Did you dial the whole phone number starting from the area code?
• Is Fixed Dialling Numbers (page 237) set?
• Is Call Barring (page 65) set?
295
05.6.9 5:01:53 PM
Problem
Possible Causes and Remedies
Cannot receive voice and video calls.
• Is Reject Calls (page 231) set?
• Is Voicemail (page 61) or Call Diverting (page 63) set to All Calls?
• Is Call Barring (page 65) set?
Cannot send messages.
• Is Fixed Dialling Numbers (page 237) set?
Cannot receive messages.
• Is Reject Addresses (page 233) set?
Calls are interrupted or disconnected.
• Does the indicator appear on the display? Are you out of the service area or in a
location where a signal cannot reach your phone? Move to a location where a signal can
reach your phone.
• Is your hand or another object covering the internal antenna part (page 32) of your phone?
The phone does not respond to key
presses.
• Does the indicator appear on the display? The key guard is set (page 239). Press and
hold * to cancel the lock.
• Does the indicator or “Phone Lock” appear on the display? The phone lock (page 236)
is set. Enter your security code.
Appendix
902T-e-manual-10.indd 296
296
05.6.9 5:01:54 PM
Storage Capacity
Mail
Mailbox*
Up to approximately 3.6 MB
Received Msgs.
Up to 1,000 SMS messages
Up to 200 MMS messages
Sent Messages
Up to 500 SMS messages
Up to 60 MMS messages
Combination of Drafts, Unsent
Messages and Templates
Up to 100 SMS messages
Up to 40 MMS messages
* Received Msgs., Sent Messages, Drafts, Unsent Messages and Templates of Mailbox share the same memory.
Web
Cache
Up to approximately 600 KB
Bookmarks
Up to 200 bookmarks
History (URL)
Up to 300 URLs
V-appli
V-appli Library
Up to approximately 10 MB*
* The V-appli Library shares its memory with Data Folder.
Appendix
902T-e-manual-10.indd 297
297
05.6.9 5:01:54 PM
Main Specifications
902T
Frequency Range : 3G (UMTS) 2100 1920-2170 MHz
: GSM 900
880-960 MHz
: DCS 1800
1710-1880 MHz
: PCS 1900
1850-1990 MHz
Continuous Talk Time : Within 3G (UMTS) area Approx. 180 min.
: Video call
Approx. 100 min.
: Within GSM area
Approx. 320 min.
Continuous Standby Time : Within 3G (UMTS) area Approx. 360 hrs.
: Within GSM area
Approx. 270 hrs.
Charging Time : Approx. 140 min.
Dimensions (W×H×D) : Approx. 50×111×25 mm (when closed)
Maximum Output : 3G (UMTS) 2100 Class 3 0.25 W
: GSM 900
Class 4
2W
: DCS 1800
Class 1
1W
: PCS 1900
Class 1
1W
Weight : Approx. 148g (when the battery pack is attached)
• The values above were calculated with the battery pack attached.
• The continuous talk time refers to the average length of time a
signal can be received normally when the phone is in a stationary
state and a new fully charged battery pack is attached.
• The continuous standby time refers to the average length of time
a signal can be received normally when the phone is closed and
the external display is viewable, the phone is in a stationary state,
a new fully charged battery pack is attached and there are no
calls made/received or operations performed. If the phone is in a
location outside the service area or where it is difficult to receive a
Appendix
902T-e-manual-10.indd 298
•
•
•
•
signal (in a building, vehicle, bag, etc.), this time may be reduced
by up to half. This time may also be affected by other factors such
as the operating environment (battery state, temperature, etc.).
The value for continuous standby time is when the system mode
was set to 3G.
The operating time of the battery was calculated when a stable
signal was received constantly. However, this time is reduced by
up to half if the phone is used in a location where the signal is
weak or the phone is left in standby mode when it is outside the
service area.
Repeated charging and discharging a battery shortens the
operating time. If the operating time becomes too short, purchase
a new battery pack.
If the mobile light is used frequently for taking pictures and
recording videos or as a flashlight, the continuous talk time and
continuous standby time become shorter.
When a V-appli is activated, the continuous talk time and
continuous standby time become significantly shorter.
If the phone is used with the main display and external display
illuminated frequently (for Vodafone live! use, etc.), the continuous
talk time and continuous standby time become shorter.
Charger
Input Voltage : 100 to 240 V AC
: 50/60 Hz
Charging Temperature Range : 5 to 35°C
298
05.6.9 5:01:54 PM
Glossary
Term
Definition
3G (UMTS)
A third generation (3G) mobile communication system. UMTS is the 3G mobile communication system of Europe.
GSM
A wireless system for digital mobile phones. GSM is the predominant system in Europe and Asia, and is the world’s most
widely used system.
GPRS
A data transmission technique used for GSM mobile phone networks. It enables the high-speed transfer of data in the
form of packets.
USIM Card
Use the phone with this card inserted. The card stores subscriber information such as your phone number and phone
data. You can also save Contacts list entries and other data to the card. When you replace your phone, use of the same
USIM card in the new phone enables you to continue using the data stored on the card.
PIN
An abbreviation for Personal Identification Number. A number required for using the USIM card with your phone. This
number allows you to prevent others from using your phone in the event that your phone is lost or stolen.
MMS
A service that allows long text messages with picture, video and melody attachments to be exchanged.
SMS
A service that allows short text messages to be exchanged between mobile phones.
WAP Push
Message
The latest information sent automatically as a WAP Push message (server initiated rather than user requested) when you
have registered with an auto delivery service.
SSL
A communication method for transmitting data in an encrypted form over the Internet. It enables data such as
information related to privacy and credit card numbers to be sent and received safely and protects against dangers on
the Internet such as eavesdropping, tampering and spoofing. SSL communication uses server certificates.
Appendix
902T-e-manual-10.indd 299
299
05.6.9 5:01:55 PM
Term
Definition
Server
Certificate
A digital certificate for identifying that a site on a server is trustworthy. The server certificate includes information
necessary for SSL communication (encrypted communication), server information and a digital signature of a Certificate
Authority to verify that the server is authentic.
Cache
The location in the phone for temporarily storing the data of displayed Web pages, etc.
V-appli
Applications including games and 3D images that can be downloaded from the Web pages of V-appli providers. Some
applications connect to the network to obtain information in real time and some applications can be activated as
wallpaper.
Appendix
902T-e-manual-10.indd 300
300
05.6.9 5:01:55 PM
Index
Battery alarm tone 212
BluetoothTM 273
Transferring data 273
Bookmarks 163
Browser settings 168
Numbers
3G/UMTS 46, 243, 299
A
About this manual 4
Accessories 2
After sales service 306
Alarm tone 213
Alarms 254
Alternate city 49, 263
Answerphone 54, 221
Playing a message 221
Recording 54
Setting 221
Any key answer 225
Audio files 176
Auto answer 222
For video calls 101
Auto launch 168
B
Backing up data 281, 284, 286
Backlight 102, 203
Barcode 266
Battery 42
Alarm 212
Charging 43
Inserting & removing 42
Appendix
902T-e-manual-10.indd 301
C
Calculator 256
Calendar 250
Adding a new appointment 250
Managing appointments 253
Call
Answering a call 54
Answering a video call 96
Any key answer 225
Auto answer 222
Auto answering for video calls 101
Making a call 53
Making a video call 95
Making an international call 53
Open to answer 225
Call barring 65
Call costs 59
Call diverting 63
Call logs 57
Dialled numbers 57
Missed calls 57
Received calls 57
Call time 58
Call waiting 67
Caller ID setting 226
Camera 105
Car, phone profiles 206
Cell information display 204
Certification 168
Changing your mail address 135
Charging, battery 43
Using a USB cable 285
Clearing memory 240
Clock display 201
Codes 52
PIN1/PIN2 41, 234, 235
PUK1/PUK2 41, 235
Connecting
Using a USB cable 283
Via BluetoothTM 277
Via infrared port 280
Contacts 75
Adding an entry 76
Editing 88
Searching for an entry 84
Setting groups 82
Contrast 205
301
05.6.9 5:01:55 PM
GMT offset 50
GPRS 299
GSM 46, 299
Converter 257
Countdown timer 260
Customer service 307
D
Location settings 247
Locks
Key guard 239
Phone lock 236
PIN1/PIN2 lock 41, 235
H
Data folder 183
Display the memory status 183
Files storable in data folder 184
Structure 183
Data transfer volume 60
Date & time 48
Dialled numbers 57
Dial-up connection 279, 282, 285
Display language 47, 214
Downloading 167, 171
Drafts 136, 158
DST 50, 263
Handsfree 94, 229, 279
Headset call 230
Home city 49, 263
I
Incoming display 200
Incoming external light 219
Incoming voice calls during data
communication 223
Indicators
Camera 106
External display 36
Main display 33
Video call 94
Video camera 107
Information prompt 38
Infrared 280
Transferring data 280
International call service 227
Internet settings 245
E
Earpiece volume 56, 97, 224
Entry modes 70
External devices 246
External light settings 218
F
Fixed dialling number 237
Flashlight 269
Formatting a memory card 192
Function list 289
K
Key guard 239
Keypad tone 210
Keypad tone volume 209
G
General notes for handling 18
Glossary 299
Appendix
902T-e-manual-10.indd 302
L
Language 47, 214
M
Mail list 145
Main menu 51
Main Specifications 298
Media player 175
Meeting, phone profiles 206
Memory card 44, 192, 285
Displaying the memory status 193
Formatting 192
Inserting & removing 44
Memory manager 168
Message menu 136
Messaging 135
Missed calls 57
MMS 137
Attachment 137
Creating & sending 137
Mail list 145
Previewing MMS message 141
Receiving & checking 142
Settings 146
MMS/SMS common settings 154
Multi task 264
Multimedia volume 212
302
05.6.9 5:01:55 PM
Multiparty call 69
Muting 55, 98, 223
PIN1/PIN2 41, 234
Changing PIN codes 234
Setting PIN1 code request 234
Placing an incoming call on hold 54
Playlist 178
Power saving 203
PUK1/PUK2 41, 235
N
Navigation key 5, 217
Shortcut settings 217
Network 241
Application settings 244
Notepad 261
Notification external light 218
Number memo 262
Q
QR code 266
R
Received calls 57
Received msgs. 136, 142, 151, 155
Reception restriction 233
Recording videos 105, 121
Rejecting incoming calls 231
Rejection list 231, 233
Restoring data 282, 284, 287
Retrieving network information 246
Ringtone 79, 208
Ringtone volume 79, 207
O
Offline mode 220
One-touch calling 230
Open style 39
Open to answer 225
Operator name display 204
Owner information 92
P
Parts & functions 30
Password
Call barring service code 52, 65
Centre access code 52
Security code 52, 235
Phone lock 236
Phone Profiles 206
Personalising 207
Resetting 213
Phonebook 75
Phonebook lock 91
Appendix
902T-e-manual-10.indd 303
Navigation keys 5, 31, 217
Side shortcut keys 32, 216, 269
Shortcut menu 215
Silent, phone profiles 206
SMS 149
Creating & sending 149
Receiving & checking 151
Settings 153
Snooze (Alarm) 255
Soft key 5
Sound effect tones 211
Sound effect volume 210
Speaker volume 97, 224
Speed calling 86
Stereo handsfree headset 222, 229
One-touch calling 230
Storage capacity 297
Streaming 181
System mode 46, 243
S
Safety precautions 6
Screensaver 172
Secret mode 79, 240
Secret mode setting 240
Self-portrait style 39
Sent messages 136, 144, 152, 157
Server mail box 136, 145
Shortcut keys 32, 216
T
T9 dictionary 74
Taking pictures 105, 109
Templates 136, 140, 150
Text editing functions 72
Text entry modes 70
Multi tap mode 71
Numeric input mode 72
Symbol input mode 72
T9 mode 71
303
05.6.9 5:01:55 PM
Switching between the earpiece &
speaker 98
Switching cameras 98
Switching screen display 99
Zoom 99
Video camera 121
Video files 177
vObject 190
Vodafone live! 161
Accessing Vodafone live! 161
Vodafone live! Menu 161
Voice recorder 258
During a call 56
Recording 258
Voicemail 61
Touch tones 270
Trademarks and patents 24
Troubleshooting 295
Turning power on/off 45
Turnover style 39
TV display 108, 188, 189
U
UMTS 46, 243, 299
Unsent messages 136, 159
USB 283
Cable 190, 283
Transferring data 283
USIM card 40, 194
Inserting & removing 40
USIM-appli 249
V
W
V-appli 169
Downloading 171
Resetting settings 173
Settings 173
Vibration 79, 209
Video cable 189
Video call 94
Appearance check 95, 103
Auto answering 101
Hold guidance 103
Outgoing video 99, 101
Picture quality 100
Sending a picture 100
Appendix
902T-e-manual-10.indd 304
Wallpaper 199
WAP push message 152
Warranty 305
World clock 49, 201, 263
304
05.6.9 5:01:56 PM
Warranty & After Sales Service
Warranty
Note
A warranty card is included with the phone. Carefully read the card and check that the store
name and purchase date sections have been filled in correctly. Then, store it in a safe place.
Vodafone and Toshiba assumes
no responsibility for damages to
you or third parties as a result
of a failure, malfunction or faulty
operation of the product.
Appendix
902T-e-manual-10.indd 305
305
05.6.9 5:01:56 PM
After Sales Service
Note
• Data and settings may be lost
or altered as a result of failure
or repair of your phone. It is,
therefore, recommended that
you keep a backup copy of
important data such as Contacts
list data. Vodafone and Toshiba
assumes no responsibility for
any damages due to the loss
or alteration of phone data
(contents of the Contacts list,
Data Folder, etc.) and settings
as a result of failure or repair of
your phone.
• Disassembling or modifying the
phone is in violation of Radio
Law. Your phone will not be
accepted for repairs if it has
been modified.
Be sure to refer to “Troubleshooting” (page 295) before submitting your phone for repair.
If you are still having problems with your phone, contact your nearest Vodafone Shop or
Vodafone General Information (page 307).
Repair within warranty period
Repair is carried out in accordance with the conditions of the warranty.
Repair after warranty period
Repair is carried out if possible and the phone owner is responsible for any repair costs.
◆ During repair, parts may be replaced with used parts that meet our quality standards.
Tip
If you have any inquiries with
regards to the after sales service,
contact your nearest Vodafone
Shop or Vodafone General
Information (page 307).
Appendix
902T-e-manual-10.indd 306
306
05.6.9 5:01:56 PM
Customer Service
If you have any questions about a Vodafone mobile phone or service, please call General Information. For service or phone repairs, please call
Customer Assistance.
Vodafone Customer Centres
From a Vodafone mobile phone, dial toll free at 157 for General
Information or 113 for Customer Assistance.
Call These Numbers Toll Free from Fixed Line Phones
Subscription areas:
Hokkaido, Aomori, Akita, Iwate, Yamagata, Miyagi, Fukushima, Niigata, Tokyo, Kanagawa,
Chiba, Saitama, Ibaraki, Tochigi, Gunma, Yamanashi, Nagano, Toyama, Ishikawa, Fukui
Aichi, Gifu, Mie, Shizuoka
Osaka, Hyogo, Kyoto, Nara, Shiga, Wakayama
Hiroshima, Okayama, Yamaguchi, Tottori, Shimane
Tokushima, Kagawa, Ehime, Kochi
Fukuoka, Saga, Nagasaki, Oita, Kumamoto, Miyazaki, Kagoshima, Okinawa
Appendix
902T-e-manual-10.indd 307
General Information
0088-240-157
Customer Assistance
0088-240-113
General Information
0088-241-157
Customer Assistance
0088-241-113
General Information
0088-242-157
Customer Assistance
0088-242-113
General Information
0088-259-157
Customer Assistance
0088-259-113
General Information
0088-247-157
Customer Assistance
0088-247-113
General Information
0088-250-157
Customer Assistance
0088-250-113
307
05.6.9 5:01:56 PM