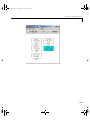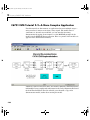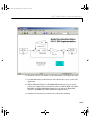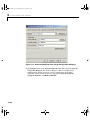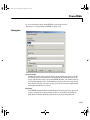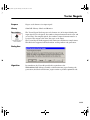
1
target_ti.book Page 1 Thursday, June 20, 2002 3:57 PM Embedded Target for the TI TMS320C6000™ DSP Platform For Use with Real-Time Workshop ® Modeling Simulation Implementation User’s Guide Version 1 target_ti.book Page 2 Thursday, June 20, 2002 3:57 PM How to Contact The MathWorks: www.mathworks.com comp.soft-sys.matlab Web Newsgroup [email protected] Technical support Product enhancement suggestions Bug reports Documentation error reports Order status, license renewals, passcodes Sales, pricing, and general information 508-647-7000 Phone 508-647-7001 Fax The MathWorks, Inc. 3 Apple Hill Drive Natick, MA 01760-2098 Mail [email protected] [email protected] [email protected] [email protected] [email protected] For contact information about worldwide offices, see the MathWorks Web site. Embedded Target for the TI TMS320C6000 DSP Platform User’s Guide COPYRIGHT 2002 by The MathWorks, Inc. The software described in this document is furnished under a license agreement. The software may be used or copied only under the terms of the license agreement. No part of this manual may be photocopied or reproduced in any form without prior written consent from The MathWorks, Inc. FEDERAL ACQUISITION: This provision applies to all acquisitions of the Program and Documentation by or for the federal government of the United States. By accepting delivery of the Program, the government hereby agrees that this software qualifies as "commercial" computer software within the meaning of FAR Part 12.212, DFARS Part 227.7202-1, DFARS Part 227.7202-3, DFARS Part 252.227-7013, and DFARS Part 252.227-7014. The terms and conditions of The MathWorks, Inc. Software License Agreement shall pertain to the government’s use and disclosure of the Program and Documentation, and shall supersede any conflicting contractual terms or conditions. If this license fails to meet the government’s minimum needs or is inconsistent in any respect with federal procurement law, the government agrees to return the Program and Documentation, unused, to MathWorks. MATLAB, Simulink, Stateflow, Handle Graphics, and Real-Time Workshop are registered trademarks, and TargetBox is a trademark of The MathWorks, Inc. Other product or brand names are trademarks or registered trademarks of their respective holders. Printing History: July 2002 Online only New for Version 1.0 (Release 13) target_ti.book Page i Thursday, June 20, 2002 3:57 PM Contents Preface About Embedded Target for C6000 DSP . . . . . . . . . . . . . . . . . viii Supported Hardware For Targets and Links . . . . . . . . . . . . . . . viii Related Products . . . . . . . . . . . . . . . . . . . . . . . . . . . . . . . . . . . . . . . x Using This Guide . . . . . . . . . . . . . . . . . . . . . . . . . . . . . . . . . . . . . . xi Expected Background . . . . . . . . . . . . . . . . . . . . . . . . . . . . . . . . . . xi Organization of the Document . . . . . . . . . . . . . . . . . . . . . . . . . . . xii Configuration Information . . . . . . . . . . . . . . . . . . . . . . . . . . . . xiv Typographical Conventions . . . . . . . . . . . . . . . . . . . . . . . . . . . . xvi About the Embedded Target for TI C6000 DSP 1 Introduction . . . . . . . . . . . . . . . . . . . . . . . . . . . . . . . . . . . . . . . . . 1-2 Suitable Applications . . . . . . . . . . . . . . . . . . . . . . . . . . . . . . . . . 1-3 Getting Started . . . . . . . . . . . . . . . . . . . . . . . . . . . . . . . . . . . . . . . 1-4 Platform Requirements—Hardware and Operating System . . 1-4 Using Command Line Help . . . . . . . . . . . . . . . . . . . . . . . . . . . . 1-7 Help for Embedded Target for TI C6000 DSP . . . . . . . . . . . . . . 1-7 i target_ti.book Page ii Thursday, June 20, 2002 3:57 PM Targeting C6000™ DSP Hardware 2 TI C6000 and Code Composer Studio IDE . . . . . . . . . . . . . . . . 2-4 Supported Boards and Simulators . . . . . . . . . . . . . . . . . . . . . . . 2-5 Typical Board Setup for Developing Models . . . . . . . . . . . . . . . . 2-6 Using the C6000lib Blockset . . . . . . . . . . . . . . . . . . . . . . . . . . . . 2-9 Configuring ADC Blocks . . . . . . . . . . . . . . . . . . . . . . . . . . . . . . 2-14 Configuring DAC Blocks . . . . . . . . . . . . . . . . . . . . . . . . . . . . . . 2-20 Configuring LED Blocks . . . . . . . . . . . . . . . . . . . . . . . . . . . . . . 2-22 Using the Overrun Indicator . . . . . . . . . . . . . . . . . . . . . . . . . . . 2-23 Configuring Reset Blocks . . . . . . . . . . . . . . . . . . . . . . . . . . . . . . 2-24 Creating DSP Application Models for Targeting . . . . . . . . . . . 2-25 Using Logging in Your DSP Applications . . . . . . . . . . . . . . . . . 2-25 Generating Code from Real-Time Models . . . . . . . . . . . . . . . . . 2-26 Setting Real-Time Workshop Build Options for C6000 Hardware . . . . . . . . . . . . . . . . . . . . . . . . . . . . . . . . . . . . . Real-Time Workshop Options for C6000 Hardware . . . . . . . . Target Configuration Options . . . . . . . . . . . . . . . . . . . . . . . . . . Target Language Compiler Debugging Options . . . . . . . . . . . . General Code Generation Category Options . . . . . . . . . . . . . . TI C6000 Target Selection . . . . . . . . . . . . . . . . . . . . . . . . . . . . . TI C6000 Code Generation Options . . . . . . . . . . . . . . . . . . . . . TI C6000 Compiler Options . . . . . . . . . . . . . . . . . . . . . . . . . . . . TI C6000 Linker Options . . . . . . . . . . . . . . . . . . . . . . . . . . . . . . TI C6000 Run-Time Options . . . . . . . . . . . . . . . . . . . . . . . . . . . Embedded Target for TI C6000 DSP Default Project Configuration—custom_MW . . . . . . . . . . . . . . Targeting Your C6701 EVM . . . . . . . . . . . . . . . . . . . . . . . . . . . Configuring Your C6701 EVM . . . . . . . . . . . . . . . . . . . . . . . . . Confirming Your C6701 EVM Installation . . . . . . . . . . . . . . . . Testing Your C6701 EVM . . . . . . . . . . . . . . . . . . . . . . . . . . . . . Creating Your Simulink Model for Targeting . . . . . . . . . . . . . 2-28 2-28 2-29 2-31 2-32 2-33 2-36 2-38 2-39 2-43 2-46 2-48 2-50 2-51 2-52 2-55 C6701 EVM Tutorial 2-1—Single Rate Application . . . . . . . 2-58 Configuring Simulation Parameters for Your Model . . . . . . . . 2-64 ii Contents target_ti.book Page iii Thursday, June 20, 2002 3:57 PM C6701 EVM Tutorial 2-2—A More Complex Application . . 2-68 Targeting Your C6711 DSK . . . . . . . . . . . . . . . . . . . . . . . . . . . . Configuring Your C6711 DSK . . . . . . . . . . . . . . . . . . . . . . . . . . Confirming Your C6711 DSK Installation . . . . . . . . . . . . . . . . Testing Your C6711 DSK . . . . . . . . . . . . . . . . . . . . . . . . . . . . . 2-82 2-82 2-82 2-83 C6711 DSK Tutorial 2-3—Single Rate Application . . . . . . . 2-88 Configuring Simulation Parameters for Your Model . . . . . . . . 2-94 Running Models on Your C6711 DSK . . . . . . . . . . . . . . . . . . . . 2-97 C6711 DSK Tutorial 2-4—A More Complex Application . . 2-100 Creating Code Composer Studio Projects Without Building . . . . . . . . . . . . . . . . . . . . . . . . . . . . . . . . . . . . 2-112 Targeting with DSP/BIOS™ Options 3 Introducing DSP/BIOS™ . . . . . . . . . . . . . . . . . . . . . . . . . . . . . . . 3-2 DSP/BIOS and Targeting Your C6000 DSP™ . . . . . . . . . . . . . DSP/BIOS Configuration File . . . . . . . . . . . . . . . . . . . . . . . . . . . Memory Mapping . . . . . . . . . . . . . . . . . . . . . . . . . . . . . . . . . . . . . Hardware Interrupt Vector Table . . . . . . . . . . . . . . . . . . . . . . . . Linker Command File . . . . . . . . . . . . . . . . . . . . . . . . . . . . . . . . . 3-4 3-5 3-5 3-6 3-6 Code Generation with DSP/BIOS . . . . . . . . . . . . . . . . . . . . . . . 3-7 Generated Code Without and with DSP/BIOS . . . . . . . . . . . . . . 3-7 Profiling Generated Code . . . . . . . . . . . . . . . . . . . . . . . . . . . . . 3-11 Reading Your Profile Report . . . . . . . . . . . . . . . . . . . . . . . . . . . 3-13 To Profile Your Generated Code . . . . . . . . . . . . . . . . . . . . . . . . 3-16 Using DSP/BIOS with Your Target Application . . . . . . . . . 3-20 iii target_ti.book Page iv Thursday, June 20, 2002 3:57 PM Using the C62x DSP Library 4 About the C62x DSP Library . . . . . . . . . . . . . . . . . . . . . . . . . . . 4-2 Common Characteristics . . . . . . . . . . . . . . . . . . . . . . . . . . . . . . . 4-2 Fixed-Point Numbers . . . . . . . . . . . . . . . . . . . . . . . . . . . . . . . . . . 4-3 Signed Fixed-Point Numbers . . . . . . . . . . . . . . . . . . . . . . . . . . . 4-3 Q Format Notation . . . . . . . . . . . . . . . . . . . . . . . . . . . . . . . . . . . . 4-4 Building Models . . . . . . . . . . . . . . . . . . . . . . . . . . . . . . . . . . . . . . Converting Data Types . . . . . . . . . . . . . . . . . . . . . . . . . . . . . . . . Using Sources and Sinks . . . . . . . . . . . . . . . . . . . . . . . . . . . . . . . Choosing Blocks to Optimize Code . . . . . . . . . . . . . . . . . . . . . . . 5 4-7 4-7 4-8 4-8 Using FDATool with the Embedded Target for TI C6000 DSP Guidelines on Exporting Filters from FDATool to CCS IDE Selecting the Export Mode . . . . . . . . . . . . . . . . . . . . . . . . . . . . . . Cautions Regarding Writing Directly to Memory . . . . . . . . . . . Variables and Memory Necessary for Filter Export . . . . . . . . . Selecting the Export Data Type . . . . . . . . . . . . . . . . . . . . . . . . . 5-3 5-4 5-4 5-5 5-7 Tutorial—Exporting Filters from FDATool to CCS IDE . . . 5-9 Task 1—Export Filter by Generating a C Header File . . . . . . . 5-9 Task 2—Export Filter by Writing Directly to Target Memory 5-15 Block Reference 6 Using the Embedded Target for C6000 iv Contents target_ti.book Page v Thursday, June 20, 2002 3:57 PM DSP Block Reference . . . . . . . . . . . . . . . . . . . . . . . . . . . . . . . . . . 6-2 Blocks—By Library . . . . . . . . . . . . . . . . . . . . . . . . . . . . . . . . . . . Embedded Target for C6000 DSP Blocks in Library c6701evmlib . . . . . . . . . . . . . . . . . . . . . . . . . . . . . . . . . . Embedded Target for C6000 DSP Blocks in Library c6711dsklib . . . . . . . . . . . . . . . . . . . . . . . . . . . . . . . . . . . Embedded Target for C6000 DSP Blocks in Library rtdxblocks Embedded Target for C6000 DSP in the C62x DSP Library . . . 6-3 6-3 6-3 6-4 6-4 Blocks—Alphabetical List . . . . . . . . . . . . . . . . . . . . . . . . . . . . . . 6-7 v target_ti.book Page vi Thursday, June 20, 2002 3:57 PM vi Contents target_ti.book Page vii Thursday, June 20, 2002 3:57 PM Preface About Embedded Target for C6000 DSP (p. viii) Presents an overview of the capabilities of the Embedded Target for TI C6000 DSP Related Products (p. x) Lists a few products that you might find can expand the way you use the Embedded Target for TI C6000 DSP Using This Guide (p. xi) Introduces the organization of the User’s Guide and provides summaries of each section Configuration Information (p. xiv) Describes how to determine if you have installed Embedded Target for TI C6000 DSP Typographical Conventions (p. xvi) Lists the conventions we use in this User’s Guide to distinguish between kinds of information, such as menu selections or MATLAB command line functions target_ti.book Page viii Thursday, June 20, 2002 3:57 PM Preface About Embedded Target for C6000 DSP Embedded Target for TI C6000 DSP lets you use Simulink® to model digital signal processing algorithms from blocks in the DSP Blockset, and then use Real-Time Workshop® to generate (or build) ANSI C code targeted to the Texas Instruments DSP development boards or Texas Instruments Code Composer Studio™ Integrated Development Environment (CCS IDE). The Embedded Target for TI C6000 DSP takes the generated C code and uses Texas Instruments (TI) tools to build specific machine code depending on the TI board you use. The build process downloads the targeted machine code to the selected hardware and runs the executable on the digital signal processor. After downloading the code to the board, your digital signal processing (DSP) application runs automatically on your target. Supported Hardware For Targets and Links Using the C6000 target in Real-Time Workshop, the Embedded Target for TI C6000 DSP supports the following boards produced by TI. Supported Board Designation Board Description TMS320C6701 EVM C6701 Evaluation Module. TMS320C6711 DSK C6711 DSP Starter Kit. C6xxx simulators in CCS Digital signal processor simulators in CCS. You cannot run models on your simulator because simulators do not simulate the codec on the board. You can generate code to the simulators and use CCS and RTDX links with them. To support code generation for your C6701 EVM, the Embedded Target for TI C6000 DSP offers an option for the C6000 target that provides a Real-Time Workshop (RTW) target you use to generate executable code that runs on the C6701 Evaluation Module, or to build a project in CCS IDE. You select this option when you set the simulation paremeters in Real-Time Workshop for your model. viii target_ti.book Page ix Thursday, June 20, 2002 3:57 PM About Embedded Target for C6000 DSP Within the same C6000 target in Real-Time Workshop, the C6711 option lets you generate code specifically for the C6711 DSK or to build a project in CCS. When you set the simulation paramters for your model in Real-Time Workshop, you can choose to generate C6711 specific executable code. Texas Instruments produces the TMS320C6701 Evaluation Module (C6701 EVM) and the TMS320C6711 DSK to help developers create digital signal processing applications for the Texas Instruments TMS320C6701 or C6711 processors (C6701 DSP and C6711 DSP). You can create, test, and deploy your processing software and algorithms or filters on the target processors without the difficulties inherent in starting with the digital signal processor itself and building the support hardware to test the application on the processor. Instead, the developement boards provide the input hardware, output hardware, timing circuitry, memory, and power for the digital signal processors. TI provides the software tools, such as the C compiler, linker, assembler, and integrated development environment, for PC users to develop, download, and test their algorithms and applications on the processors. ix target_ti.book Page x Thursday, June 20, 2002 3:57 PM Preface Related Products The MathWorks provides several products that are especially relevant to the kinds of tasks you can perform with the Embedded Target for TI C6000 DSP. For information about the products and hardware you need to run the Embedded Target for TI C6000 DSP, refer to “Getting Started” on page 1-4. For more information about any of these products, refer to either • The online documentation for that product, if it is installed or you are reading the documentation from the CD • The MathWorks Web site, at http://www.mathworks.com. Navigate to the Products area Note The toolboxes listed below include functions that extend MATLAB capabilities. The blocksets include blocks that extend Simulink capabilities. x Product Description Control System Toolbox Design and analyze feedback control systems Data Acquisition Toolbox Capture and send data from plug-in data acquisition boards DSP Blockset Design and simulate DSP systems Filter Design Toolbox Design and analyze advanced floating-point and fixed-point filters Image Processing Toolbox Perform image processing, analysis, and algorithm development target_ti.book Page xi Thursday, June 20, 2002 3:57 PM Using This Guide Using This Guide Expected Background This document introduces you to using Embedded Target for C6000 DSPs with Real-Time Workshop to develop digital signal processing applications for the Texas Instruments CC6000 family of DSP development hardware, such as the TI TMS320C6701 Evaluation Module (C6701 EVM). To get the most out of this manual, readers should be familiar with MATLAB and its associated programs, such as DSP Blockset and Simulink. We do not discuss details of digital signal processor operations and applications, except to introduce concepts related to using the C6701 EVM or C6711 DSK. For more information about digital signal processing, you may find one or more of the following books helpful: • McClellan, J. H., R. W. Schafer, and M. A. Yoder, “DSP First: A Multimedia Approach,” Prentice Hall, 1998. • Lapsley, P., J. Bier, A. Sholam, and E. A. Lee, “DSP Processor Fundamentals Architectures and Features,” IEEE Press, 1997. • Steiglitz, K, “A Digital Signal Processing Primer,” Addison-Wesley Publishing Company, 1996. For information about Code Composer Studio and Real-Time Data Exchange™ (RTDX™), refer to your Texas Instruments documentation for each product. Refer to the documentation for your TI boards for information about setting them up and using them. If You Are a New User New users should read Chapter 1, “About the Embedded Target for TI C6000 DSP.” This introduces the Embedded Target for TI C6000 DSP environment — the required software and hardware, installation requirements, and the board configuration settings that you need. You will find descriptions of the blocks associated with the targeting software, and an introduction to the range of digital signal processing applications that Embedded Target for C6000 DSPs supports. If You Are an Experienced User All users should read Chapter 2, “Targeting C6000™ DSP Hardware” for information and examples about using the new blocks and build software to xi target_ti.book Page xii Thursday, June 20, 2002 3:57 PM Preface target both your C6701 EVM or your C6711 DSK. Two example models introduce the targeting software and build files, and give you an idea of the range of applications supported by Embedded Target for C6000 DSPs. Visit “Confirming Your C6701 EVM Installation” on page 2-51, to confirm that you installed and configured your C6701 EVM board to meet the needs of Embedded Target for C6000 DSPs. For C6711 DSK users, refer to “Configuring Your C6711 DSK” on page 2-82 for more information about installing and using your C6711 DSK. Organization of the Document xii Chapter Description “About the Embedded Target for TI C6000 DSP” Introduces the Embedded Target for C6000 DSPs environment — the software and hardware you need, and the related products that may be of interest. “Targeting C6000™ DSP Hardware” Contains information about using the blocks and build software to create applications for the C6701 digital signal processor on the C6701 EVM and the C6711 DSK. Two example Simulink models introduce the targeting software for both targets, the target-specific blocks, and the build files, and give you a glimpse of the range of applications supported by the Embedded Target for TI C6000 DSP. “Targeting with DSP/BIOS™ Options” Describes how to use the TI DSP/BIOS™ real-time operating system in your CCS projects and the generated code for you hardware targets. “Using the C62x DSP Library” Provides details about fixed-point arithmetic and the fixed-point blocks in the C62x DSP Library. You use the fixed-point blocks to develop Simulink™ models and generate code targeted to the C62xx family of digital signal processors. target_ti.book Page xiii Thursday, June 20, 2002 3:57 PM Using This Guide Chapter Description “Using FDATool with the Embedded Target for TI C6000 DSP” Describes how to use FDATool to export filters to your target “Block Reference” Provides reference information for the blocks in the Embedded Target for TI C6000 DSP. All the blocks are included in the blockset c6000lib. xiii target_ti.book Page xiv Thursday, June 20, 2002 3:57 PM Preface Configuration Information To determine whether the Embedded Target for TI C6000 DSP is installed on your system, type this command at the MATLAB prompt. c6000lib When you enter this command, MATLAB displays the C6000 block library containing the following libraries that comprise the C6000 library: • C6701 EVM Board Support • C6711 DSK Board Support • C62s DSP Library • RTDX Instrumentation If you do not see the listed libraries, or MATLAB does not recognize the command, you need to install the Embedded Target for TI C6000 DSP. Without the software, you cannot use Simulink and Real-Time Workshop to develop applications targeted to the TI boards. Note For up-to-date information about system requirements, refer to the system requirements page, available in the products area at the MathWorks Web site (http://www.mathworks.com). To verify that CCS is installed on your machine, enter ccsboardinfo at the MATLAB command line. With CCS installed and configured, MATLAB returns information about the boards that CCS recognizes on your machine, in a form similar to the following listing. Board Board Proc Processor Processor Num Name Type --- ---------------------------------------------------------------1 C6xxx Simulator (Texas Instrum ... TMS320C6701 xiv Num Name --0 6701 target_ti.book Page xv Thursday, June 20, 2002 3:57 PM Configuration Information 0 C6x11 DSK (Texas Instruments) TMS320C6x1x 0 CPU If MATLAB does not return information about any boards, revisit your CCS installation and setup in your CCS documentation. As a final test, launch CCS to ensure that it starts up successfully. For the Embedded Target for TI C6000 DSP to operate with CCS, the CCS IDE must be able to run on its own. xv target_ti.book Page xvi Thursday, June 20, 2002 3:57 PM Preface Typographical Conventions This manual uses some or all of these conventions. Item Convention Example Example code Monospace font To assign the value 5 to A, enter A = 5 Function names, syntax, filenames, directory/folder names, and user input Monospace font The cos function finds the cosine of each array element. Syntax line example is MLGetVar ML_var_name Buttons and keys Boldface with book title caps Press the Enter key. Literal strings (in syntax descriptions in reference chapters) Monospace bold for literals f = freqspace(n,'whole') Italics for variables This vector represents the polynomial p = x2 + 2x + 3. Mathematical expressions MATLAB output Standard text font for functions, operators, and constants Monospace font MATLAB responds with A = 5 xvi Menu and dialog box titles Boldface with book title caps Choose the File Options menu. New terms and for emphasis Italics An array is an ordered collection of information. Omitted input arguments (...) ellipsis denotes all of the input/output arguments from preceding syntaxes. [c,ia,ib] = union(...) String variables (from a finite list) Monospace italics sysc = d2c(sysd,'method') target_ti.book Page 1 Thursday, June 20, 2002 3:57 PM 1 About the Embedded Target for TI C6000 DSP Introduction (p. 1-2) Introduces the Embedded Target for TI C6000 DSP, some of the features and supported hardware Getting Started (p. 1-4) Talks about the software and hardware required to use the Embedded Target for TI C6000 DSP, from both The MathWorks and from Texas Instruments Using Command Line Help (p. 1-7) Describes how you get help for functions in the Embedded Target for TI C6000 DSP target_ti.book Page 2 Thursday, June 20, 2002 3:57 PM 1 About the Embedded Target for TI C6000 DSP Introduction Embedded Target for the TI TMS320C6000 DSP Platformintegrates Simulink® and MATLAB® with Texas Instruments eXpressDSP™ tools. The software collection lets you develop and validate digital signal processing designs from concept through code. The Embedded Target for TI C6000 DSP consists of the TI C6000 target that automates rapid prototyping on your C6000 hardware targets. The target uses C code generated by Real-Time Workshop® and your TI development tools to build an executable file for your targeted processor. The Real-Time Workshop build process loads the targeted machine code to your board and runs the executable file on the digital signal processor. Using the Embedded Target for TI C6000 DSP and Real-Time Workshop, you can create executable code for the following boards: • C6701 Evaluation Module from Texas Instruments, revision 1 or later • C6711 DSP Starter Kit from Texas Instruments Additionally, one of the RTW build options builds a Code Composer Studio™ project from the C code generated by Real-Time Workshop. All the features provided by Code Composer Studio (CCS), such as tools for editing, building, debugging, code profiling, and project management, work to help you develop applications using MATLAB, Simulink, Real-Time Workshop, and your supported hardware. When you use this target, the build process creates a new project in Code Composer Studio and populates the project with the required files. As long as your TI hardware, whether built by TI or custom, supports communications over JTAG and RTDX, you can use the Embedded Target for TI C6000 DSP with your hardware, enabling you to maximize your development time and effort. This chapter provides sections that describe the following: • Some of the digital signal processing applications you can develop with Embedded Target for TI C6000 DSP, in the section “Suitable Applications” on page 1-3 • Prerequisites for using Embedded Target for TI C6000 DSP, in the section “Platform Requirements—Hardware and Operating System” on page 1-4 1-2 target_ti.book Page 3 Thursday, June 20, 2002 3:57 PM Introduction Suitable Applications The Embedded Target for TI C6000 DSP enables you to develop digital signal processing applications that have any of the following characteristics: • Single rate • Multirate • Multistage • Adaptive • Frame based Your supported boards, and the Embedded Target for TI C6000 DSP, cover a range of standard input sampling frequencies from 5.5 KHz to 48 KHz or more. The specific supported input range depends on the board you own. 1-3 target_ti.book Page 4 Thursday, June 20, 2002 3:57 PM 1 About the Embedded Target for TI C6000 DSP Getting Started This section describes the hardware and software you need to run the Embedded Target for TI C6000 DSP on your Microsoft Windows PC. Embedded Target for TI C6000 DSP runs on Microsoft Windows 98, Windows NT 4.0 Workstation and Server, and Windows 2000 platforms. Platform Requirements—Hardware and Operating System To run the Embedded Target for TI C6000 DSP, your host PC must meet the following hardware configuration: • Intel Pentium or Intel Pentium processor compatible PC • 64 MB RAM (128 MB recommended) • 20 MB hard disk space available after installing MATLAB • Color monitor • One full-length peripheral component interface (PCI) slot available to use the C6701 EVM internally in your PC • CD-ROM drive • Microsoft Windows 98, Windows NT 4.0 Server or Workstation, or Windows 2000 You may need additional hardware, such as signal sources and generators, microphones, oscilloscopes or signal display systems, and assorted audio cables to test and evaluate your digital signal processing application on your hardware. 1-4 target_ti.book Page 5 Thursday, June 20, 2002 3:57 PM Getting Started Refer to your documentation from The MathWorks for more information on installing the software required to support Embedded Target for TI C6000 DSP, as shown in Table 1-1. Table 1-1: Prerequisites for Using Embedded Target for TI C6000 DSP Software for Targeting Installed Product Additional Information MATLAB 6.1 Core software from The MathWorks MATLAB Link for Code Composer Studio™ Development Tools Software to enable communications between MATLAB and the Code Composer Studio development environment. Required for the Embedded Target for TI C6000 DSP to work in code generation and targeting. Real-Time Workshop 3.0 Software used to generate C code from Simulink models Simulink 3.0 Software package for modeling, simulating, and analyzing dynamic systems Signal Processing Toolbox 5.0 Software package for analyzing signals, processing signals, and developing algorithms DSP Blockset Block libraries used by Simulink For information about the software required to use the MATLAB Link for Code Composer Studio Development Tools, refer to the Products area of the MathWorks Web site—http://www.mathworks.com. Texas Instruments Software In addition to the required software from The MathWorks, Embedded Target for TI C6000 DSP requires that you install install the Texas Instruments 1-5 target_ti.book Page 6 Thursday, June 20, 2002 3:57 PM 1 About the Embedded Target for TI C6000 DSP development tools and software listed in Table 2-2. Installing Code Composer Studio IDE for the C6000 series installs the software shown in the table. Table 1-2: Required TI Software for Targeting Your TI C6000 Hardware Installed Product Additional Information Assembler Creates object code (.obj) for C6000 boards from assembly code. Compiler Compiles C code from the blocks in Simulink models into object code (.obj). As a by-product of the compile process, you get assembly code (.asm) as well. Linker Combines various input files, such as object files and libraries. Code Composer Studio 2.1 Texas Instruments integrated development environment (IDE) that provides code debugging and development tools. TI C6000 miscellaneous utilities Various tools for developing applications for the C6000 digital signal processor family. Code Composer Setup Utility Program you use to configure your CCS installation by selecting your target boards or simulator. In addition to the TI software, you need one or more of the following in any combination: • One or more Texas Instruments TMS320C6701 Evaluation Modules • One or more TMS320C6711 DSP Starter Kits For up-to-date information about the software from The MathWorks you need to use the Embedded Target for TI C6000 DSP, refer to the MathWorks Web site—http://www.mathworks.com. Check the Product area for the Embedded Target for the TI TMS320C6000 DSP Platform. 1-6 target_ti.book Page 7 Thursday, June 20, 2002 3:57 PM Using Command Line Help Using Command Line Help How you get command line help on a function depends on whether the function is overloaded. When a function name is used in multiple products, such as in the Embedded Target for TI C6000 DSP and MATLAB, it is said to be an overloaded function. Help for Embedded Target for TI C6000 DSP To get general help for using the Embedded Target for TI C6000 DSP, use the help feature in MATLAB. Type help tic6000 at the command prompt to get a list of the functions and block libraries included in the Embedded Target for TI C6000 DSP. Or select Help ->Full Product Family Help from the menu bar in the MATLAB desktop. When you see the Table of Contents in the Help navigator, select Embedded Target for TI C6000 DSP. 1-7 target_ti.book Page 8 Thursday, June 20, 2002 3:57 PM 1 About the Embedded Target for TI C6000 DSP 1-8 target_ti.book Page 1 Thursday, June 20, 2002 3:57 PM 2 Targeting C6000™ DSP Hardware TI C6000 and Code Composer Studio IDE (p. 2-4) Discusses the blocks provided by the Embedded Target for TI C6000 DSP for developing models for TI C6000 DSP platforms. Also lists the supported hardware Using the C6000lib Blockset (p. 2-9) Describes the contents of the C6000lib block set—what blocks are included and where Setting Real-Time Workshop Build Options for C6000 Hardware (p. 2-28) Provides the details on setting the Real-Time Workshop options when you generate code from your Simulink models to TI hardware Targeting Your C6701 EVM (p. 2-48) If you are targeting a C6701 EVM, this section details specific information about using the target C6701 EVM Tutorial 2-1—Single Rate Application (p. 2-58) Takes you through the process of creating and model in Simulink and generating code for the C6701 EVM C6701 EVM Tutorial 2-2—A More Complex Application (p. 2-68) Using a more complex model than the previous tutorial, this exercise walks you through code generation for a multistage model Targeting Your C6711 DSK (p. 2-82) If you are targeting a C6711 DSK, this section details specific information about using the target C6711 DSK Tutorial 2-3—Single Rate Application (p. 2-88) Takes you through the process of creating and model in Simulink and generating code for the C6711 DSK target_ti.book Page 2 Thursday, June 20, 2002 3:57 PM 2 Targeting C6000™ DSP Hardware 2-2 C6711 DSK Tutorial 2-4—A More Complex Application (p. 2-100) Using a more complex model than the previous tutorial, this exercise walks you through code generation for a multistage model Creating Code Composer Studio Projects Without Building (p. 2-112) You have the option of generating code into a Code Composer Studio project, rather than to hardware. This section introduces the Generate ccs project selection in the Real-Time Workshop build options. target_ti.book Page 3 Thursday, June 20, 2002 3:57 PM The Embedded Target for the TI TMS320C6000 DSP Platform lets you use Real-Time Workshop to generate a C language real-time implementation of your Simulink model. You can compile, link, download, and execute the generated code on the Texas Instruments (TI) C6701 Evaluation Module (C6701 EVM) and C6711 DSP Starter Kit (DSK). In combination with the supported boards, your Embedded Target for TI C6000 DSP software is the ideal resource for rapid prototyping and developing embedded systems applications for the TI C6701 and C6711 Digital Signal Processors. The Embedded Target for TI C6000 DSP software focuses on developing real-time digital signal processing (DSP) applications for C6000 hardware. This chapter describes how to use the Embedded Target for TI C6000 DSP to create and execute applications on Texas Instruments C6000 development boards. To use the targeting software, you should be familiar with using Simulink to create models and with the basic concepts of Real-time Workshop automatic code generation. To read more about Real-Time Workshop, refer to your Real-Time Workshop documentation. 2-3 target_ti.book Page 4 Thursday, June 20, 2002 3:57 PM 2 Targeting C6000™ DSP Hardware TI C6000 and Code Composer Studio IDE Texas Instruments (TI) markets a complete set of software tools to use when you develop applications for your C6000 hardware boards. This section provides a brief example of how the Embedded Target for TI C6000 DSP uses Code Composer Studio (CCS) Integrated Development Environment (IDE) with the Real-Time Workshop and the C6000lib blockset. Executing code generated from Real-Time Workshop on a particular target in real time requires that Real-Time Workshop generate target code that is tailored to the specific hardware target. Target-specific code includes I/O device drivers and an interrupt service routine (ISR). . Since these device drivers and ISRs are specific to particular hardware targets, you must ensure that the target-specific components are compatible with the target hardware. To allow you to build an executable, TI C6000 uses the MATLAB links to invoke the code building process from within CCS. Once you download your executable to your target and run it, the code runs wholly on the target; you can access the running process only from the CCS debugging tools or across a link for CCS or RTDX. Otherwise the running process is not accessible. Used in combination with your Embedded Target for TI C6000 DSP and Real-Time Workshop, TI products provide an integrated development environment that, once installed, needs no additional coding. 2-4 target_ti.book Page 5 Thursday, June 20, 2002 3:57 PM TI C6000 and Code Composer Studio IDE Supported Boards and Simulators Using the C6000 target provided by the Embedded Target for TI C6000 DSP you can generate code to run on the following boards. Table 2-1: Texas Instruments Boards Supported by the Embedded Target for TI C6000 DSP Board Designation Mode Description TMS320C6701 EVM Floating point Evaluation module for developing DSP applications for the C6701 digital signal processor. Supports code generation, model execution, and RTDX link use. TMS320C6711 DSK Floating point Starter kit for developing DSP applications for the C6711 digital signal processor. Supports code generation, model execution, and RTDX link use. C6xxx Simulator Floating point Simulator for the C6701 and C6711 digital signal processors. Supports code generation and RTDX link use. Supports model simulation and code operation through a software timer/scheduler. About Simulators CCS offers many simulators for the C6701 and C6711 digital signal processors, in the CCS Setup Utility. Much of your model and algorithm development efforts will work with the simulators, such as code generation. And, since the Embedded Target for TI C6000 DSP provides a software-based scheduler, your models and generated code run on the simulators just as they do on your hardware. You can use the real time data exchange (RTDX) links with the simulators as well. For more information about the simulators in CCS, refer to your CCS online help system. 2-5 target_ti.book Page 6 Thursday, June 20, 2002 3:57 PM 2 Targeting C6000™ DSP Hardware When you set up a simulator, you must match the processor on your target exactly to simulate your target hardware. If you plan to target C6701 EVM boards, your simulator must contain a C6701 processor, not just a C6xxx simulator. Simulators must match the target processor because the codecs on the board are not the same and the simulator needs to identify the correct codec. Correctly matching your simulator to your hardware ensures that the memory maps and registers match those of your intended target signal processor. Typical Board Setup for Developing Models Figure 2-1 presents a block diagram of the typical setup for the inputs and output for the C6701 EVM. For the C6711 DSK, the typical layout is similar except the board accepts only monaural input from a microphone. Figure 2-1: Block Diagram of Typical Inputs and Outputs to the C6701 EVM After you have installed one or more of the supported development boards shown in Table 2-1, Texas Instruments Boards Supported by the Embedded Target for TI C6000 DSP, launch MATLAB. At the MATLAB command prompt, type c6000lib. This opens a Simulink blockset named C6000lib that includes libraries that contain blocks predefined for C6000 input and output devices: • C6701 EVM Board Support blocks - C6701 EVM ADC—configures the analog to digital converter - C6701 EVM DAC—configures the digital to analog converter 2-6 target_ti.book Page 7 Thursday, June 20, 2002 3:57 PM TI C6000 and Code Composer Studio IDE - C6701 EVM DIP Switch—simulate or read the user-defined DIP switches on the C6701 EVM - C6701 EVM LED—controls the user status light emitting diodes (LED) on the C6701 EVM - C6701 EVM Reset—resets the current C6701 EVM • C6711 DSK Board Support blocks - C6711 DSK ADC—configures the analog to digital converter - C6711 DSK DAC—configures the digital to analog converter - C6711 DSK DIP Switch—simulate or read the user-defined DIP switches on the C6711 DSK - C6711 DSK LED—controls the three user status light emitting diodes (LED) on the C6711 DSK - C6711 DSK Reset—resets the current C6711 DSK • RTDX blocks for C6000 hardware - From RTDX—adds an RTDX input channel to the code generated from your model. When you run the model on your target, the block code imports data from your host over an RTDX channel to your running process. - To RTDX—adds an RTDX output channel to the code generated from your model.When you run the model on your target, the block code exports data to your host over an RTDX channel from your running process. • C62x DSPLIB blocks—provide fixed-point blocks for model that use fixed-point mathematics and algorithms. These I/O blocks are associated with your boards. As needed, add the devices to your model. If you choose not to include either an ADC or DAC block in your model, Embedded Target for TI C6000 DSP provides a timer that produces the interrupts required for timing and running your model, either on your hardware target or on a simulator. In addition to the blocks for specific boards, the C6000lib blockset includes the library rtdxBlocks that contains RTDX input and output blocks that apply to all C6000 development boards. With your model open, select Simulation Parameters from the Simulink option to open the Simulink Parameters dialog box. From this dialog, click Real-Time Workshop. You must specify the appropriate versions of the 2-7 target_ti.book Page 8 Thursday, June 20, 2002 3:57 PM 2 Targeting C6000™ DSP Hardware system target file and template makefile. For the C6701 EVM or the C6711 DSK, in the Real-Time Workshop pane of the dialog, specify ti_c6000.tlc to select the correct target file. Or click Browse and select ti_c6000.tlc from the list of targets. With this configuration, you can generate a real-time executable and download it to the TI development boards. You do this by clicking Build on the Real-Time Workshop pane. Real-Time Workshop automatically generates C code and inserts the I/O device drivers as specified by the ADC and DAC blocks in your block diagram, if any. These device drivers are inserted in the generated C code as inlined S-functions. Inlined S-functions offer speed advantages and simplify the generated code. For more information about inlining S-functions, refer to your target language compiler documentation. For a complete discussion of S-functions, refer to your documentation about writing S-functions. During the same build operation, the template makefile and block parameter dialog entries get combined to form the target makefile for your TI C6000 board. Your makefile invokes the TI cross-compiler to build an executable file. If you selected the Build and execute build action, the executable file is automatically downloaded via the peripheral component interface (PCI) bus to your C6701 evaluation module, or over the parallel port to your C6711 DSK. After downloading the executable file to the target, the build process runs the file on the board’s DSP. 2-8 target_ti.book Page 9 Thursday, June 20, 2002 3:57 PM Using the C6000lib Blockset Using the C6000lib Blockset The Embedded Target for TI C6000 DSP blockset C6000lib comprises four block libraries that contain blocks designed for targeting specific boards or using RTDX. The three libraries are: • C6701 EVM Board Support—blocks to configure the codec and LEDs on the C6701 EVM • C6711 DSK Board Support—blocks to configure the codec and LEDs on the C6711 DSK • RTDX Instrumentation—blocks for adding RTDX communications channels to Simulink models • TI C62x DSPLIB—fixed-point blocks for developing models for fixed-point targets Each block library appears in one of the next figures. The sections after the figures review the configuration options for blocks in the EVM and DSK block libraries. For more information about the RTDX blocks, refer to Constructing Link Objects in your MATLAB Link for Code Composer Studio documentation. Each board-based block library contains five blocks: • ADC block • DAC block • DIP Switch block (refer to the reference page for the DIP Switch block for your target, either C6701 EVM or C6711 DSK) • LED block • Reset block Similarities in the C6000 boards result in the ADC, DAC, DIP Switch, LED, and Reset blocks for the C6701 and C6711 being almost identical. Each section about a block, such as the ADC block, presents all possible options for the block, noting when an option applies only to a board-specific version of the ADC block. For example, the Codec data format option for ADC blocks applies only to the C6701 EVM ADC. 2-9 target_ti.book Page 10 Thursday, June 20, 2002 3:57 PM 2 Targeting C6000™ DSP Hardware 2-10 target_ti.book Page 11 Thursday, June 20, 2002 3:57 PM Using the C6000lib Blockset 2-11 target_ti.book Page 12 Thursday, June 20, 2002 3:57 PM 2 Targeting C6000™ DSP Hardware 2-12 target_ti.book Page 13 Thursday, June 20, 2002 3:57 PM Using the C6000lib Blockset 2-13 target_ti.book Page 14 Thursday, June 20, 2002 3:57 PM 2 Targeting C6000™ DSP Hardware Configuring ADC Blocks To drive and test your DSP application on a C6701 EVM or C6711 DSK, you use signals from external sources, such as signal generators, audio equipment, or microphones. In some cases, you may generate your input data in code using Simulink blocks in your model or from a source block, such as a signal generator; configuring the ADC block remains the same. The ADC and DAC blocks provide physical pathways from and to external sources and displays. They behave like source and sink blocks. They differ from sources and sinks in that they exchange data with external devices through analog input and output connectors, not the MATLAB workspace, and they work only for the C6000 boards. You add ADC blocks to a model in the same way that you add other DSP Blockset blocks, or Simulink blocks. You can add at most one ADC block to a model. When you add C6000 blocks to your Simulink model, you set parameters that determine how each block handles data. Adding the ADC block to your Simulink model enables the codec on the target to accept input from your external source. By connecting your source to the LINE IN connector on the board mounting bracket, you introduce signals to the board. Your ADC block defines the signal format the codec uses to sample, digitize, and send signals to the digital signal processor. When you build your Simulink model, the build process includes the software to implement the ADC-defined codec operation into the code downloaded to the board. Configuring an ADC block includes setting as many as nine parameters on the Block Parameters dialog. Choosing and setting these parameters are covered in the following sections. To help you select the settings, this section provides some guidelines for common DSP uses and applications for each parameter. While the examples are not exhaustive, the suggestions may help you select settings that work well for your application. Most of the configuration options for the block affect the codec. However, the Output data type, Samples per frame, and Scaling options relate to the model you are using in Simulink, the signal processor on the board, or direct 2-14 target_ti.book Page 15 Thursday, June 20, 2002 3:57 PM Using the C6000lib Blockset memory access (DMA) on the board. In the following table, you find each option listed with the target board hardware affected. Option Affected Hardware ADC Source Codec Codec data format (C6701 Codec EVM ADC only) Mic Codec Output data type TMS320C6xxx digital signal processor Sample rate (Hz) (C6701 EVM Codec ADC only) Samples per frame Direct memory access functions Scaling TMS320C6xxx digital signal processor Source gain (dB) Codec Stereo (C6701 EVM ADC only) Codec Selecting the ADC Source When you set up your target to accept input for your model, you tell the hardware where the input to the codec comes from. Selecting Line in and Mic in on the C6701 EVM corresponds to the two different input connectors on the board, with different input signal levels expected. On the DSK, the Line in and Mic in options use the same connector, but generate different signal levels to the codec. Both boards include the Loopback option that feeds the output from the DAC back to the ADC input. Choosing the Sample Rate (C6701 EVM ADC Block Only) To open the Block Parameters dialog, right-click the C6701 EVM ADC block in your Simulink model and select Block Parameters from the context menu. You see the dialog presented in Figure 2-2, Block Parameters for C6701 EVM ADC Dialog. 2-15 target_ti.book Page 16 Thursday, June 20, 2002 3:57 PM 2 Targeting C6000™ DSP Hardware Figure 2-2: Block Parameters for C6701 EVM ADC Dialog Select your sample rate from the list. 5521 Hz is the lowest rate and 48000 Hz is the highest. You cannot set a sample rate that is not on the list. The available rates are derived from the clocks on the codec and cannot be changed. The C6711 DSK uses a fixed sample rate of 8 KHz. For many applications, your sample rate should reflect the standards for the industry. For example, if you are developing a professional audio application, working with digital audio tape (DAT) processes, or developing applications for high fidelity audio use, consider using 48000 Hz sampling rate in your model. In addition, choose double-precision, fixed-point arithmetic format when you select the Codec data format. 2-16 target_ti.book Page 17 Thursday, June 20, 2002 3:57 PM Using the C6000lib Blockset For applications used by CD players and sound cards in personal computers, the standard sampling rate is 44.1 KHz, and some of the lower rates such as 22.05 or 16 KHz. Moving Picture Expert Group (MPEG) audio applications often select a 32 KHz sampling rate. When you are developing an application for speech, telephony, or “toll quality” speech processing, the 8 KHz sampling rate, paired with one of the 8-bit data formats that use a compressed format such as A-law, best matches current standards. Choosing the Codec Data Format (C6701 EVM ADC Only) When the codec performs A/D conversion, the output data format is partly determined by the setting for Codec data format in the Block Parameters dialog. Codec data format offers five choices: • 16-bit linear—the standard method of representing 16-bit digital audio. Provides 96 dB theoretical dynamic range and best fits the standard for compact disk audio players. -32768 represents the maximum negative analog amplitude and 32767 represents the maximum positive analog amplitude. • 8-bit linear—commonly used in the PC industry. Provides 48 dB theoretical dynamic range. 00 represents the maximum negative analog amplitude and 255 represents the maximum positive analog amplitude. • 8-bit A law—used in the telephone industry most frequently. A-law is the European standard; µ-law is the standard in Japan and the United States. Uses a nonlinear companding transfer function to digitize analog input to provide 64 dB or 72 dB maximum dynamic range. • 8-bit µ law—used in the telephone industry most frequently. µ-law is the standard in Japan and the United States; A-law is the European standard. Uses a nonlinear companding transfer function to digitize analog input to provide 64 or 72 dB maximum dynamic range. • 4-bit IMA ADPCM—voice digitization scheme that uses a lower bit rate than Pulse Code Modulation (PCM). ADPCM records only the difference between samples, and adjusts the coding scale dynamically to accommodate large and small differences. This scheme is simple to implement, but can introduce significant noise. The G.721 method uses 32Kbps per voice channel, as compared to standard telephony's 64Kbps using PCM. Using ADPCM 2-17 target_ti.book Page 18 Thursday, June 20, 2002 3:57 PM 2 Targeting C6000™ DSP Hardware instead of PCM is imperceptible to humans—but it can significantly reduce the throughput required by higher-speed modems and fax transmissions. You will probably use 16-bit linear codec data format when you begin developing your model. If you do not care about, or do not expect, negative data values, as would be the case where you are measuring a voltage that varies from 0 volts to 5 volts, you could use 8-bit unsigned math. If appropriate for your application, choose one of the compression data formats for your model. Selecting the Data Type You must select the data type when you include the ADC block in your DSP simulation. The data type you use in the simulation is likely not to be the one you use when you build and download the application to the target. Your choice of data type depends on a number of factors related to how the application runs on the target DSP and what limitations apply. Four factors can influence your choice: • Processing time—how long does each iteration of your process take? Can the DSP process the data quickly enough to meet your needs? • Power used—how much power does the application require? Doing lots of multiply and divide operations uses more power and generates more heat than add operations. • Memory required—how does your application use memory and how much does it need? • Does accuracy matter—do you need the accuracy provided by double-precision arithmetic or is fixed-point or integer acceptable? When you have developed and tested your signal processing application in Simulink, you are ready to use the Real-Time Workshop and your Embedded Target for TI C6000 DSP to build and download your model to the C6701 EVM or C6711 DSK. Your Simulink model should represent a general purpose implementation of your application, without specific features that depend on the target DSP. For instance, use floating-point arithmetic and single- or double-precision format to develop your simulation. Select DSP target-specific data and format requirements when you prepare your model for the board. 2-18 target_ti.book Page 19 Thursday, June 20, 2002 3:57 PM Using the C6000lib Blockset Note If you use fixed-point arithmetic in your processing algorithm or application on the C6701 EVM or C6711 DSK, verify that the blocks in your Simulink model will work with the processor in integer mode. Blocks in the C62 DSPLIB are designed specifically for fixed-point models. To ease model development on the target, start by selecting floating-point data format when you build and download your application to the board. You could choose either single-precision or double-precision at this time to ensure that your model runs on the target processor. Often, normalized floating-point arithmetic is the best choice during development. As you tune your model for the processor, consider whether such features as calculation time and memory use are important in your application environment. If time is a critical parameter, use either less precise math, such as single-precision instead of double, or switch from floating-point to fixed-point or integer. These changes both speed up your process and reduce the memory and power the processor consumes to complete its calculations. For accuracy without regards to time, use floating-point arithmetic. Note Most blocks in the DSP Blockset support only double-precision data. If you use the DSP Blockset blocks in your model, verify either that double-precision math is acceptable, or the blocks support other data types. Selecting the Scaling Both the single-precision and double-precision data types are available as floating point or normalized values. During development, it is a good idea to start with normalized values to relieve you from worrying about overflows and underflows in the calculations performed in the algorithm. When you are happy that the process is under control, change the data type to the one you need for the deployed executable code. Selecting a floating-point data type can reduce your algorithm processing overhead slightly. 2-19 target_ti.book Page 20 Thursday, June 20, 2002 3:57 PM 2 Targeting C6000™ DSP Hardware Configuring DAC Blocks In most cases, DAC blocks inherit attributes from the ADC block in the model, or from the previous nonvirtual block. You must select Codec data format, Scaling, and Overflow mode when you use a C6701 EVM DAC block in your model. In addition, you can choose to use the overrun indicator function provided in the Embedded Target for TI C6000 DSP. Two of the configuration options for the block affect the codec. The remaining options relate to the model you are using in Simulink and the signal processor on the board. In the following table, you find each option listed with the hardware affected. Option Affected Hardware Codec data format Codec (C6701 EVM DAC only) DAC attenuation Codec Overflow mode Digital Signal Processor Scaling Digital Signal Processor When you double-click the C6701 EVM DAC block, you see the dialog shown here. 2-20 target_ti.book Page 21 Thursday, June 20, 2002 3:57 PM Using the C6000lib Blockset Choosing the Codec Data Format (C6701 EVM DAC Block Only) The Codec data format for the C6701 EVM DAC block must be the same as the Codec data format for the C6701 EVM ADC block, if you use one in your model. C6711 DSK codec blocks do not offer the Codec Data Format option. Selecting the Scaling Select the scaling that best suits your model and your output device. For most applications, choose the scaling to match the setting of the ADC block if your model uses it. Scaling defines the range of the input values from the codec. Independent of your setting for Scaling, signal values are stored as floating-point data. In Normalize mode, the signal ranges from -1 to 1 at the output of the ADC block. When you select Integer value for the scaling, the signal ranges between the minimum and maximum values representable by the number of bits specified by Codec data format. Selecting the Overflow Mode Models running on the target can encounter situations where calculations exceed the range represented by the data type. The Overflow mode option on 2-21 target_ti.book Page 22 Thursday, June 20, 2002 3:57 PM 2 Targeting C6000™ DSP Hardware the DAC dialog lets you select how the block responds to overflow conditions. Select one of the following settings: • Saturate—arithmetic results that fall outside the representable range of the selected data type are limited to the largest or smallest values. Saturated values are set to the nearest value that the data type can represent, either the largest representable value in the case of arithmetic overflow or the smallest representable value in the case of arithmetic underflow. Before input data reaches the codec, the Embedded Target for TI C6000 DSP uses an efficient linear assembly algorithm to determine whether the input values exceed the representable range of your selected data type. When input values exceed the range of the data type, the saturation algorithm clips the input to the nearest representable value and passes the clipped, or saturated, value to the codec. • Wrap—arithmetic results that fall outside the numeric range of the selected data type are wrapped into the range of the data type. The wrapping algorithm uses modular arithmetic relative to the largest or smallest representable number to determine the value of the result after wrapping. Configuring LED Blocks You use the LEDs on the evaluation module as indicators for your process. For example, you might use an LED to indicate that your algorithm has completed a specified calculation or reached a particular point in the processing. To use an LED as an indicator, add an LED block to your model, and send a nonzero signal to the block to light the specified LED—either internal or external. Any nonzero scalar sent to the LED block lights the LED and keeps it lit until the block receives a scalar with zero value. The zero value scalar turns off the selected LED. Since the C6701 EVM provides two LEDs, you can use two C6701 EVM LED blocks—one for each user status LED on the board. Although the C6711 DSK offers three user defined LEDs, the C6711 DSK LED block treats all three as one LED, enabling them as a group. For this reason you can include only one C6711 DSK LED block in a model. Select the Target LED (C6701 EVM LED Block Only) Double-clicking the C6701 EVM LED block opens the dialog shown here. 2-22 target_ti.book Page 23 Thursday, June 20, 2002 3:57 PM Using the C6000lib Blockset When you add an C6701 EVM LED block to your model, you select which LED the block controls—internal or external. Select External to have the C6701 EVM LED block trigger the LED located on the C6701 EVM mounting bracket at the back of your PC. To trigger the internal LED located on the C6701 EVM board internally, select Internal for the LED option. Using the Overrun Indicator When your digital signal process application cannot complete the calculations and data manipulations required to yield a result before the available clock cycles expire, your model can generate unreliable data. Failing to complete an algorithm is called overrunning, and is one of the most important errors to identify and eliminate in digital signal processing design and implementation. The Embedded Target for TI C6000 DSP provides an overrun indicator that you use to notify you when your process is running out of processing time before it completes its tasks. To signal that the algorithm has overrun its limits, the Embedded Target for TI C6000 DSP turns on the external LED on the C6701 EVM and leaves it on until you reset the evaluation module. Limitations on the Overrun Indicator In two cases, the overrun indicator does not work: • In multirate sustems where the rate in the process is not the same as the base clock rate for your model. When this is the case, the timer/scheduler in the Embedded Target for TI C6000 DSP provides the interrupts for setting the model rate and cannot use the LED overrun indication. 2-23 target_ti.book Page 24 Thursday, June 20, 2002 3:57 PM 2 Targeting C6000™ DSP Hardware • In models that do not include ADC or DAC blocks, the timer/scheduler provides the software interrupts that drive model processing. Again, when the timer/scheduler runs the model, the overrun indicator does not work. To detect overrun conditions, the generated C code sets and checks a persistent flag during each iteration of the direct memory access (DMA) interrupt service routine. To indicate an overrun condition on the C6711 DSK, the software turns on all three user-defined LEDs on the board. Note Using an LED block to trigger the external LED on the C6701 EVM or the user-defined LEDs on the C6711 DSK, and selecting the Overrun Action option can be confusing when an overrun condition triggers the specified LEDs. The Overrun Action option uses the external LED or user-defined LEDs to signal model conditions. If you are using the overrun indicator, consider not using the LED block to trigger the external LED on the C6701 EVM, or the user LEDs on the C6711 DSK until you stop monitoring your process for overrun conditions. To enable the overrun indicator, choose one of three ways for the indicator to respond to an overrun condition in your model: • None—your model does not respond to overrun conditions during processing. • Continue—when your model runs out of clock cycles before completing enough of the processing algorithm, the overrun indicator turns on the external or user defined LEDs. The model continues to run without pause. • Halt—when your algorithm runs out of clock cycles before completing the required calculations and manipulations, the model stops executing and turns on the selected LED on the target. Configuring Reset Blocks Each target library offers a block that performs a software reset of the appropriate board. Although Reset blocks are blocks, they do not require input; 2-24 target_ti.book Page 25 Thursday, June 20, 2002 3:57 PM Using the C6000lib Blockset they do not provide output; and they do not need to be connected to any other block. When you add a reset block to a model window, it provides single-click access to resetting your board. Click on the block in your model and your target processor returns to its original state, with the memory locations, registers, and other peripherals reset to their default values before you loaded or ran a program. Creating DSP Application Models for Targeting Create your real-time model for your application the way you create any other Simulink model—by using standard blocks and C-MEX S-functions. Select blocks to build your model from any of the following sources: • Use the ADC, DAC, and LED blocks from libraries in the C6000lib block library to handle input and output functions for your target hardware • Use blocks from the TI C62x DSP Library in the C6000lib block library to build fixed-point models • Use blocks provided with the Real-Time Workshop • Use blocks from the DSP Blockset • Use discrete time blocks from Simulink • Use blocks from any other blockset that meet your needs and operate in the discrete time domain Using Logging in Your DSP Applications Simulink offers various data logging capabilities in the Simulation Parameters dialog for your model. Found on the Workspace I/O pane of the Simulation Prameters dialog, the implicit logging options let you specify how and when Simulink logs model operations and gets data from your workspace. When your model is running on the target, it cannot communicate directly with MATLAB. Configuration options that tell your model to send or retrieve data from your MATLAB workspace do not work and use processing time to no benefit. To avoid these effects, do not enable options on the Workspace I/O pane in the Simulation Parameters dialog in your model. 2-25 target_ti.book Page 26 Thursday, June 20, 2002 3:57 PM 2 Targeting C6000™ DSP Hardware To Turn Off Logging in Your Model Follow this procedure to disable the logging options in your existing Simulink model. 1 Select Simulation->Simulation Parameters... from the menu bar in your model. 2 Click Workspace I/O to open the Workspace I/O pane. 3 Clear the options in the Load from workspace and Save to workspace fields. - Input - Initial state - Time - States - Output - Final states Instead of using the Workspace I/O options in Real-Time Workshop to eliminate logging during code generation and operation, run dspstartup from your MATLAB command prompt before you create new Simulink models. Running dspstartup disables the Workspace I/O options in the Simulation Parameters dialog for your new models. Generating Code from Real-Time Models This section summarizes how to generate code from your real-time model. For details about generating code from models in Real-Time Workshop, refer to your Real-Time Workshop documentation. You start the automatic code generation process from the Simulink model window by clicking Build in the Real-Time Workshop pane of the Simulation Parameters dialog. The code building process consists of these tasks: 1 Real-Time Workshop invokes the function make_rtw to start the Real-Time Workshop build procedure for a block diagram. make_rtw invokes the Target Language Compiler to generate the code and then invokes the language specific make procedure. 2-26 target_ti.book Page 27 Thursday, June 20, 2002 3:57 PM Using the C6000lib Blockset 2 gmake builds file modelname.out. Depending on the build options you select in the Simulation Parameters dialog, gmake can download and execute the model on your TI target board. 2-27 target_ti.book Page 28 Thursday, June 20, 2002 3:57 PM 2 Targeting C6000™ DSP Hardware Setting Real-Time Workshop Build Options for C6000 Hardware Before you generate code with the Real-Time Workshop, set the fixed-step solver step size and specify an appropriate fixed-step solver if the model contains any continuous-time states. At this time, you should also select an appropriate sample rate for your system. Refer to your Real-Time Workshop documentation for additional information. Real-Time Workshop Options for C6000 Hardware The Real-Time Workshop pane of the Simulation Parameters dialog lets you set several options for the real-time model. To open the Simulation Parameters dialog, select Simulation -> Simulation Parameters from the menubar in your model. The following figure shows the Real-Time Workshop categories when you are using the Embedded Target for TI C6000 DSP. 2-28 target_ti.book Page 29 Thursday, June 20, 2002 3:57 PM Setting Real-Time Workshop Build Options for C6000 Hardware On the Real-Time Workshop pane, the Category list provides access to the options you use to control how Real-Time Workshop builds and runs your model. Nine sets of options for configuring Real-Time Workshop target builds make up the categories—the first four apply to all RTW targets and always appear on the list. The last four categories in the list shown are specific to the Embedded Target for TI C6000 DSP target ti_C6000.tlc and appear when you select the TI C6000 target: • Target configuration—Real-Time Workshop general options • TLC debugging—Real-Time Workshop general options • General code generation options—Real-Time Workshop general options • General code generation options (cont.)—Real-Time Workshop general options • TI C6000 target selection—target specific options • TI C6000 code generation—target specific code generation options • TI C6000 compiler—target specific options • TI C6000 linker—target specific options • TI C6000 runtime—target specific options When you select your target in Target Configuration, the options change in the list. For the Embedded Target for TI C6000 DSP, the target to select is ti_c6000.tlc. When you make the change, the options that apply just to TI hardware get added to the list as shown. The following sections present each Real-Time Workshop category and the options available in each. Target Configuration Options Use the selections in this category to determine your target, either C6000 or some other target if you are not using the Embedded Target for TI C6000 DSP. When you select the C6000 target in the Target configuration, you enable the automatic mode for the target board and processor in TI C6000 Target selection category for the model. After that, opening the Simulation Parameters dialog for the model triggers the automatic board and processor selection tool defined in the TI C6000 Target selection category. 2-29 target_ti.book Page 30 Thursday, June 20, 2002 3:57 PM 2 Targeting C6000™ DSP Hardware System target file. Clicking Browse opens the Target File Browser where you select ti_c6000.tlc as your System target file for the Embedded Target for TI C6000 DSP on the Target configuration pane of the Real-Time Workshop pane. When you select your target configuration, Real-Time Workshop chooses the appropriate system target file, template makefile, and make command. You can also enter the target configuration filename and Real-Time Workshop will fill in the Template makefile and Make command selections. Template makefile. Real-Time Workshop uses template makefiles to generate the makefile for building the executable file. During the automatic build process, the make_rtw command is issued. make_rtw extracts information from the template makefile ti_c6000.tmf and creates the actual makefile c6000.mk. When Real-Time Workshop compiles the model, it uses the actual makefile to generate the compiled code for the target. Set the Template makefile option to ti_c6000.tmf when you build your application for the C6000 target. If the template makefile shown in the option is not ti_c6000.tmf, click Browse to open the list of available system target 2-30 target_ti.book Page 31 Thursday, June 20, 2002 3:57 PM Setting Real-Time Workshop Build Options for C6000 Hardware files and select the correct file from the list. Real-Time Workshop then selects the appropriate template makefile. Make command. When you generate code from your digital signal processing application, use the standard command make_rtw as the Make command. On the Real-Time Workshop pane of the Simulation Parameters dialog, under Configuration in the Target configuration category, enter make_rtw for the Make command option. Parameters you set in this dialog belong to the model you are building. They are saved with the model and stored in the model file. Generate code only. This option does not apply to the Embedded Target for TI C6000 DSP targeting. To configure your Embedded Target for TI C6000 DSP to generate source code without building and executing the code on the target and without requiring Code Composer Studio, select Generate code only for the Build action under the TI C6000 runtime options. Target Language Compiler Debugging Options Real-Time Workshop uses the Target Language Compiler (TLC) to generate C code from the model.rtw file. The TLC debugger helps you identify programming errors in your TLC code. Using the debugger, you can: • View the TLC call stack. • Execute TLC code line-by-line and analyze and/or change variables in a specified block scope. When you select TLC debugging from the Category list, you see the pane in the figure. Within this dialog you set options that are specific to TLC debugging. 2-31 target_ti.book Page 32 Thursday, June 20, 2002 3:57 PM 2 Targeting C6000™ DSP Hardware For details about using the options in TLC debugging, refer to the section “About TLC Debugger” in your Real-Time Workshop documentation. General Code Generation Category Options From the Real-Time Workshop pane of the Simulation Parameters dialog, you set options for the code that Real-Time Workshop generates during the build process. You use these options to tailor the generated code to your needs. To open the Code Generation Options pane, select General code generation options from the Category list on the Real-Time Workshop pane. The figure shows the General code generation options pane when you select the system target file ti_C6000.tlc under Target configuration. 2-32 target_ti.book Page 33 Thursday, June 20, 2002 3:57 PM Setting Real-Time Workshop Build Options for C6000 Hardware These are the options typically included for Real-Time Workshop: • Show eliminated statements • Loop rolling threshold • Verbose builds • Inline invariant signals • Local block outputs • Force generation of parameter comments For more information about using these options and the General code generation options (cont.) options, refer to your Real-Time Workshop documentation. TI C6000 Target Selection From this Real-Time Workshop category you select your specific C6000 family target using the Code generation target type option: • C6701 EVM for the C6701 Evaluation Module • C6711 DSK for the C6711 DSP Starter Kit 2-33 target_ti.book Page 34 Thursday, June 20, 2002 3:57 PM 2 Targeting C6000™ DSP Hardware One feature of this pane lets you direct the Embedded Target for TI C6000 DSP to determine your target for you. When you choose Automatic for the Board and processor selection method, the Embedded Target for TI C6000 DSP runs ccsboardinfo when you open the Simulation Parameters dialog. ccsboardinfo determines what boards you have set up in CCS. If you have a board of the type you selected in Code generation target type, the Embedded Target for TI C6000 DSP identifies the board, reports the board name and processor number in this dialog, and uses that board as your target. With the Automatic method selected for a Simulink model, each time you launch the Simulation Parameters dialog from the model, the board selection process searches for a board of the type you selected in Code generation target type. You can prevent this search by switching to Manual for the selection method. Selecting Manual enables the Board name and Processor number options in the pane. Select your board and processor manually when these options are available. If you are not sure about which boards and processors you have, run ccsboardinfo at the MATLAB prompt to see which boards are installed and 2-34 target_ti.book Page 35 Thursday, June 20, 2002 3:57 PM Setting Real-Time Workshop Build Options for C6000 Hardware recognized in CCS. When you have more than one board of a type, such as two C6701 EVM boards, you may need to use the manual selection option to target the correct board. In the Automatic selection mode, the Embedded Target for TI C6000 DSP targets the first instance of the selected target type. Simulators do not work in the Automatic mode. If you use simulators, the target search does not work and returns an error like the following. To avoid this error, set the Board and processor selection method for the model to Manual when you do not have actual boards as targets. Export CCS Handle to MATLAB Base Workspace When you use Real-Time Workshop to build a model to a C6000 target, Embedded Target for TI C6000 DSP makes a link between MATLAB and CCS. If you have used the link portion of the Embedded Target for TI C6000 DSP, you are familiar with function ccsdsp, which creates links between the IDE and MATLAB. This option refers to the same link, called cc in the function reference pages. Although MATLAB to CCS is a link, what it really is is a handle to an object that contains information about the object, such as the target board and processor it accesses. In this pane, the Export handle to MATLAB base workspace checkbox lets you instruct the Embedded Target for TI C6000 DSP to export the link to your MATLAB work space, giving it the name you assign in CCS handle name. After you build your model with the Export handle to MATLAB base workspace option selected, you see the CCS object in your MATLAB workspace browser with the name you provided and class type ccsdsp. 2-35 target_ti.book Page 36 Thursday, June 20, 2002 3:57 PM 2 Targeting C6000™ DSP Hardware TI C6000 Code Generation Options From this category, you choose from four options that define the way your code gets generated: • Incorporate DSP/BIOS • Profile performance at atomic subsystem boundaries • Inline DSP Blockset functions • Use target specific optimization for speed (allow LSB differences) Incorporate DSP/BIOS determines whether the build process incorporates DSP/BIOS features in your generated code. When you select Incorporate DSP/BIOS, the build process inserts the DSP/BIOS options and files (the .cmd file that contains DSP/BIOS configuration information) in the generated code. The resulting code include instrumentation based on DSP/BIOS objects. “Introducing DSP/BIOS™” provides details about the changes that occur to your generated code when you opt to include DSP/BIOS. For profiling your generated code, the code generation options include the Profile performance at atomic subsystem boundaries option. When your model includes atomic subsystems, you can select this option to have Embedded Target for TI C6000 DSP generate a run-time report about the way your generated code performs when you run the code on your target. For more information about using code profiling, refer to “Profiling Generated Code”. To allow you to specify whether the functions generated from blocks in you model are used inline, or by pointers, Inline DSP Blockset functions tells the compiler to inline DSP blockset function. Inlining functions can make your code run more efficiently (better optimized) at the expense of using more memory. As shown, the default setting uses inlining to optimize your generated code. 2-36 target_ti.book Page 37 Thursday, June 20, 2002 3:57 PM Setting Real-Time Workshop Build Options for C6000 Hardware When you inline a block function, the compiler replaces each call to a block function with the equivalent function code from the static run-time library. If your model use the same block four times, your generated code contains four copies of the function. While this redundancy uses more memory, inline functions run more quickly than calls to the functions outside the generated code. The final option in this category is Use target specific optimization for speed (allow LSB differences), which determines whether Embedded Target for TI C6000 DSP attempts to optimize the code generated from your model to make it run more quickly on your selected target. This option may not make any difference in some models. Notice that selecting target specific optimization allows your generated code to differ from your simulation results in the least significant bit (LSB) for the outputs of optimized blocks. You should review the results of the optimized and simulation-true code to see that they are sufficiently close for your needs. For many models, the LSB differences do not matter. Clearing this option results in generated code whose results match your model simulation results. 2-37 target_ti.book Page 38 Thursday, June 20, 2002 3:57 PM 2 Targeting C6000™ DSP Hardware The preferred way to use Use target… is to create your model, generate code from the model, and run the code on your target with profiling enabled. After you have your model and code running the way it should (generating the correct answers), try selecting Use target specific optimization for speed (allow LSB differences) and regenerating your code. Again, run the new code with profiling and compare the profile reports to see whether optimization improved the performance. TI C6000 Compiler Options Options in this pane determine how the TI C6000 compiler generates compiled code for the assembler and linker to use. If you change the settings in this dialog, your changes become part of the build configuration options for your project in CCS. You can edit these settings in CCS to change them later. In the dialog, as presented in the figure, five options under Options let you configure compiler operations. Optimization level. To let you determine the degree of optimization provided by the TI optimizing compiler, you select the optimization level to apply to files 2-38 target_ti.book Page 39 Thursday, June 20, 2002 3:57 PM Setting Real-Time Workshop Build Options for C6000 Hardware in your project. For details about the compiler options, refer to your CCS documentation. When you create new projects, the Embedded Target for TI C6000 DSP sets the optimization to Function(-o2). Byte order. The supported boards provide the ability of the digital signal processors to run in little-endian or big-endian mode. While your choice of Big-endian or Little-endian operation does not directly affect your algorithm processing, it does determine the ability of the processor to communicate with other processors. When you choose which byte ordering to use, select the option that matches other processors your board might need to communicate with. For example, most RISC-based processors and Motorola processors use the big-endian approach. Intel processors are little-endian machines. By default, the compiler generates code in little-endian format. Compiler verbosity. You can choose how much information the compiler returns while it runs. Select from: • Verbose—returns all compiler messages • Quiet—suppresses compiler progress messages • Super Quiet—suppresses all compiler messages Symbolic debugging. Selecting this option generates symbolic debugging directives that the C source-level debugger uses and enables assembly source debugging. By default this option is selected—symbolic debugging is provided. Retain .asm files. Select this option to direct Real-Time Workshop and the Embedded Target for TI C6000 DSP to save your assembly language (.asm) files after creation. The Embedded Target for TI C6000 DSP does not retain .asm files by default. If you choose to keep the .asm files, Real-Time Workshop saves the files to your current directory. When you create new projects, the Embedded Target for TI C6000 DSP does not save your .asm files unless you select this option. TI C6000 Linker Options As shown in the figure, you can configure the TI C6000 linker to perform certain operations and use specified files. Note that the linker, not the compiler, defines the memory map used and allocated code and data into memory on the target. Refer to Texas Instruments TMS320C000 Optimizing C Compiler User’s Guide and to the online help in CCS for more details about using memory maps and models on the target processor. 2-39 target_ti.book Page 40 Thursday, June 20, 2002 3:57 PM 2 Targeting C6000™ DSP Hardware Retain .obj files. The linker uses object (.obj extension) files to generate a single executable common object file format (COFF) file that you run on the C6701 EVM or C6711 DSK. Select this option to direct Real-Time Workshop and the Embedded Target for TI C6000 DSP to save your object (.obj) files after creation. Real-Time Workshop saves the files to your current directory. Saving your .obj files can speed up the compile process by not having to compile files that you have not changed since you most recently compiled your project. Retaining the .obj files is the default setting for new projects. Create .map file. You can direct the linker to produce a map of the input and output sections, including null areas, and place the listing in a file in your current directory with the name modelname.map. When you clear this check box, the linker does not produce the listing. New projects do not create the .map file. Linker command file. Specifies the linker command file to use when the linker runs. Linker command files contain linker or hex conversion utility options and the names of input files to the linker or hex conversion utility. You select one of the file options from the list: 2-40 target_ti.book Page 41 Thursday, June 20, 2002 3:57 PM Setting Real-Time Workshop Build Options for C6000 Hardware • User_defined—lets you use your own linker command file. Developing a custom .cmd file lets you set linker options that can be more appropriate for your needs. When you select this option, you enable the User linker command file option where you enter the name of your linker command file with the .cmd file extension. If you enter your command filename with a full path description, the Embedded Target for TI C6000 DSP locates your file immediately when you build your model in Real-Time Workshop. If you supply a filename without the full path, the Embedded Target for TI C6000 DSP searches your MATLAB working directory for the file when you build your model. If it does not find your file in your working directory, the Embedded Target for TI C6000 DSP searches your MATLAB path for the file and takes the first instance it finds of the specified file. Refer to TMS320C6000 Assembly Language Tools User’s Guide and TMS320C6000 Optimizing C Compiler User’s Guide, both from Texas Instruments, for more information. • Full_memory_map—invokes the linker command file that uses the large memory model on the target. The large memory model does not restrict the size of the uninitialized code sections. Your global and static data can use unlimited storage space up to the limits of the board. • Internal_memory_map—invokes a linker command file that directs the linker to use the small memory model of the target. Using the small memory model requires that the uninitialized sections of the code fit in the 32KB memory space. The total space for the global and static data in the program must be less than 32KB. This setting offers the optimum use of memory on your target by using only near calls and data exclusively. Notes about Using The Linker Command File Options Which option you select for the linker command file options affects how the Embedded Target for TI C6000 DSP handles near and far data and calls. By default, the Embedded Target for TI C6000 DSP, and the TI compiler, generate small memory models that use near calls and data exclusively. Near calls require only one operation; far calls require more operations. As a consequence, programs and code that use far calls run more slowly. You should refer to your CCS documentation for details about near and far data objects and the near and far functions calls. When you select the Internal_memory_map option, the Embedded Target for TI C6000 DSP specifies that only near calls get used to access static and global 2-41 target_ti.book Page 42 Thursday, June 20, 2002 3:57 PM 2 Targeting C6000™ DSP Hardware data objects. Internal_memory_map represents the most efficient memory use. In CCS, the equivalent setting is choosing Near Calls & Data for the Memory Models option in the build configuration. If you select Internal_memory_map, but your data or program requires far calls, the TI compiler returns an error message like the following in the CCS IDE error: can’t allocate '.far' or error: can’t allocate '.text' indicating that your data does not fit in internal memory or your code or program do not fit in internal memory. To eliminate these errors, select Full_memory_map. Use the Full_memory_map selection when either or both of the following conditions are true: • Your static and external data do not fit within a 15-bit scaled offset from the beginning of the .bss section of memory, or • You have calls in which the called function is more than ± 1 M word away from the call site In the above instances, the TI linker issues the error message shown earlier if you select the Internal_memory_map setting when your program meets the conditions specified. When you declare an object or data as far, its address is loaded into a register and the compiler does an indirect load of that register (the -mln option in the Memory Models in the project build configuration). For more information on the -mln option, refer to your CCS documentation. You can avoid the error by selecting Full_memory_map for the Linker Command File option. This prevents the compiler from using near calls, offering you the ability to use all the available memory on your target. But note that your program may run more slowly than if you use the internal map option and your data and program fit into memory without needing far calls for access. User linker command file. When you select the User defined option for Linker command file, enter the name of your command file in this box. If the file is not in your current directory, provide the full pathname for the file. 2-42 target_ti.book Page 43 Thursday, June 20, 2002 3:57 PM Setting Real-Time Workshop Build Options for C6000 Hardware TI C6000 Run-Time Options Before you run your model as an executable on either the C6701 EVM or the C6711 DSK, you must configure the run-time options for the model on the board. When you select TI C6000 runtime from the Category list, you see the pane shown in this figure. By selecting values for the options available, you configure the operation of your target. Build action. To specify to Real-Time Workshop what to do when you click Build, select one of the following options. The actions are cumulative—each listed action adds features to the previous action on the list and includes all the previous features: • Generate_code_only—directs Real-Time Workshop to generate C code only from the model. It does not use the TI software tools, such as the compiler 2-43 target_ti.book Page 44 Thursday, June 20, 2002 3:57 PM 2 Targeting C6000™ DSP Hardware and linker, and you do not need to have CCS installed. Also, MATLAB does not create the handle to CCS that results from the other options. This option creates a file named model.bat—an MS-DOS batch file that contains the TI C6000 compiler command line (cl6x) you use to compile and link your generated code. In this file you find information you need, such as the include paths, library locations, and default compiler options, to compile the code and that are not stored in any other file generated by the Generate_code_only build action. Learn more about the batch file by reading the comments included in the file. The build process for a model also generates the files modelname.c, modelname.cmd, modelname.bld, and many others. It puts the files in a build directory named modelname_c6000_rtw in your MATLAB working directory. This file set contains many of the same files that Real-Time Workshop generates to populate a CCS project when you choose Create_CCS_Project for the build action. • Create_CCS_Project—directs Real-Time Workshop to launch CCS and populate a new project with the files from the build process. Selecting this setting enables the CCS board number option so you can select which installed board to target. This option offers a convenient way to build projects in CCS. • Build—builds the executable COFF file, but does not download the file to the target. • Build_and_execute—directs Real-Time Workshop to download and run your generated code as an executable on your target. Your selection for Build action determines what happens when you click Build or press CTRL+B. Your selection tells RTW when to stop the code generation and build process. To run your model on the target, select Build_and_execute. This is the default build action; Real-Time Workshop automatically downloads and runs the model on your target board. 2-44 target_ti.book Page 45 Thursday, June 20, 2002 3:57 PM Setting Real-Time Workshop Build Options for C6000 Hardware Note When you build and execute a model on your target, the Real-Time Workshop build process resets the target automatically. You do not need to reset the board before building models. Current C6701 EVM CPU clock rate. When you generate code for C6000 targets from Simulink models, you may encounter the software timer. If your model does not include ADC or DAC blocks, or when the processing rates in your model change (the model is multirate), you automatically invoke the timer to handle and create interrupts to drive your model. Correctly generating interrupts for your model depends on the clock rate of the CPU on your target, either the C6701 EVM or the C6711 DSK. While the default clock rate is 100 MHz on the C6701 EVM, you can change the rate with the DIP switches on the board or from one of the software utilities provided by TI. C6711 DSK hardware uses a fixed clock rate of 150 MHz; you can not change the clock rate. While this option appears on the dialog, it is grayed out and does not apply to the C6711 DSK. For the timer software to calculate the interrupts correctly, Embedded Target for TI C6000 DSP needs to know the actual clock rate of your C6701 EVM as you configured it. This option lets you report the current clock rate—one of 25, 33.25, 100 or 133 MHz. Select the appropriate rate from the list. You are not changing the clock rate with this option. You are telling the software timer what rate to use to match the C6701 EVM clock rate. The timer uses the CPU clock rate you select in Current C6701 EVM CPU clock rate to calculate the time for each interrupt. For example, if your model includes a sine wave generator block running at 1 KHz feeding a signal into an FIR filter block, the timer needs to create interrupts to genrate the sine wave samples at the proper rate. Using the clock rate you choose, perhaps 100 MHz, the timer calculates the sine generator interrupt period as follows for the sine block: Sine block rate = 1 KHz, or 0.001 secs/sample CPU clock rate = 100 MHz, or 0.000000001 secs/sample To create sine block interrupts at 0.001 sec/sample requires 100000000/1000 = 1 Sine block interrupt per 1000000 clock ticks 2-45 target_ti.book Page 46 Thursday, June 20, 2002 3:57 PM 2 Targeting C6000™ DSP Hardware You see you must report the correct clock rate or the interrupts come at the wrong times and the results are incorrect. Overrun Action. To enable the overrun indicator, choose one of three ways for the target processor to respond to an overrun condition in your model: • None—ignores overruns encountered while running the model. • Continue—when the DSP encounters an overrun condition, it turns on the external LED and continues running the executable. If you use an C6701 EVM LED block in your model, you cannot determine whether the C6701 EVM LED block enabled the external LED or if an overrun condition caused the LED to light. • Halt—respond to overrun conditions by stopping program execution and turning on the external LED. If you use an LED block in your model, you cannot determine whether the LED block enabled the external LED or user defined LEDs, or if an overrun condition caused the LEDs to light. Overrun Indicator and Software-based Timer Embedded Target for TI C6000 DSP includes software that generates interrupts in models that do not have ADC or DAC blocks, or use multiple clock rates. In two cases, the overrun indicator does not work: • In multirate sustems where the rate in the model is not the same as the base clock rate for your model. When this is the case, the timer in the Embedded Target for TI C6000 DSP provides the interrupts for setting the model rate and cannot use the LED overrun indication. • In models that do not include ADC or DAC blocks, the timer provides the software interrupts that drive model processing. Again, when the timer runs the model, the overrun indicator does not work. Embedded Target for TI C6000 DSP Default Project Configuration—custom_MW Although CCS offers two standard project configurations—Release and Debug, models you build with the Embedded Target for TI C6000 DSP use a custom configuration that provides a third combination of build and optimization settings—custom_MW. Project configurations define sets of project build options. When you specify the build options at the project level, the options apply to all files in your project. 2-46 target_ti.book Page 47 Thursday, June 20, 2002 3:57 PM Setting Real-Time Workshop Build Options for C6000 Hardware In the tables and figures in the next section, you can find the build options that the Embedded Target for TI C6000 DSP presets in custom_MW and the default setting for each option. For more information about the build options, refer to your TI documentation. The default settings for custom_MW are the same as the Release project configuration in CCS, except for the compiler options shown in the next section. custom_MW uses different compiler optimization levels to preserve important features of the generated code. Default Build Options in custom_MW When you create a new project or build a model to your TI C6000 hardware, your project and model inherit the build configuration settings from the configuration custom_MW. custom_MW differs from the settings in the Release configuration in CCS in its compiler settings. For the compiler options, custom_MW uses the Function(-o2) compiler setting. The CCS default Release configuration uses File(-o3), a slightly more aggressive optimization regime. For memory configuration, where Release uses the default memory model that specifies near calls and data, custom_MW specifies far calls and data—the -m/3 memory model— to accommodate large models. Your CCS documentation provides complete details on the compiler build options. You can change the individual settings or the build configuration within CCS. Build configuration options that do not appear on these panes default to the settings for the Release build configuration in CCS. 2-47 target_ti.book Page 48 Thursday, June 20, 2002 3:57 PM 2 Targeting C6000™ DSP Hardware Targeting Your C6701 EVM Texas Instruments markets a complete set of tools for use with the C6701 EVM. These tools are primarily intended for rapid prototyping of control systems and hardware-in-the-loop applications. This section provides a brief example of how to use TI development tools with Real-Time Workshop and the C6701 EVM block library. Executing code generated from the Real-Time Workshop on a particular target in real-time requires target-specific code. Target-specific code includes I/O device drivers and an interrupt service routine. Other components, such as a communication link with Simulink, are required if you need the ability to download parameters on-the-fly to your target hardware. Since these components are specific to particular hardware targets (in this case, the C6701 EVM), you must ensure that the target-specific components are compatible with the target hardware. To allow you to build an executable, the Embedded Target for TI C6000 DSP provides a target makefile specific to the evaluation module. This target makefile invokes the optimizing compiler, provided as part of TI Code Composer Studio. Used in combination with the Real-Time Workshop, TI products provide an integrated development environment that, once installed, needs no additional coding. After you install the C6701 EVM development board and supporting TI products on your PC, launch MATLAB. At the MATLAB command prompt, type c6701evmlib. This opens a Simulink block library, c6701evmlib, that includes a set of blocks for C6701 EVM I/O devices • C6701 EVM ADC (configure the analog to digital converter) • C6701 EVM DAC (configure the digital to analog converter) • C6701 EVM LED (control the user status light emitting diodes (LED) on the C6701 EVM) • C6701 EVM Reset (reset the processor on the C6701 EVM) These blocks are associated with your C6701 EVM board. As needed, add the devices to your model. . With your model open, select Simulation -> Simulation Parameters. From this dialog, click the Real-Time Workshop tab. You must specify the 2-48 target_ti.book Page 49 Thursday, June 20, 2002 3:57 PM Targeting Your C6701 EVM appropriate versions of the system target file and template makefile. For the C6701 EVM, in the Real-Time Workshop pane, specify: • System target file—ti_c6000.tlc • Template makefile—ti_c6ooo.tmf With this configuration, you can generate a real-time executable and download it to the TI C6701 evaluation board. Do this by clicking Build on the Real-Time Workshop pane. The Real-Time Workshop automatically generates C code and inserts the I/O device drivers as specified in your block diagram. These device drivers are inserted in the generated C code as inline S-functions. Inlined S-functions offer speed advantages and simplify the generated code. For more information about inlining S-functions, refer to Target Language Compiler Reference Guide. For a complete discussion of S-functions, refer to Writing S-Functions. During the same build operation, the template makefile and block parameter dialog entries are combined to form the target makefile for your TI evaluation module. This makefile invokes the TI compiler to build an executable file. When you select the Build_and_execute option, Real-Time Workshop automatically downloads the executable via the peripheral component interface (PCI) bus to the TI evaluation board. After downloading the executable file to the C6701 EVM, the build process runs the file on the processor. Starting and Stopping DSP Applications on the C6701 EVM When you create, build, and download a Simulink model to the C6701 EVM, you are not running a simulation of your DSP application. You are running actual machine code corresponding to the block diagram you built in Simulink. To start running your DSP application on the evaluation module, you must open your Simulink model and rebuild the machine executable by clicking Build on the Real-Time Workshop pane. To start the application on the C6701 EVM, you use Real-Time Workshop to rebuild the executable from the Simulink model and download the code to the board. Your model runs until it encounters one of the following actions: • You select Debug -> Halt in CCS. • You shut down the host PC. 2-49 target_ti.book Page 50 Thursday, June 20, 2002 3:57 PM 2 Targeting C6000™ DSP Hardware • The running application encounters an error condition that stops the process. If you included a C6701 EVM Reset block in your model, clicking the C6701 EVM Reset block stops the running application and restores the digital signal processor to its initial state. Note When you build and execute a model on the C6701 EVM, the Real-Time Workshop build process resets the evaluation module automatically. You do not need to reset the board before building models. Use Reset C6701 EVM to stop processes that are running on the evaluation module, or to return the board to a known state for any reason. Configuring Your C6701 EVM When you install the C6701 EVM, set the dual inline pin (DIP) switches as shown in Table 2-2, Setting C6701 EVM User Option DIP Switches for the Embedded Target for TI C6000 DSP. If you have installed the board with different settings, reconfigure the board. Refer to your TMS320C6201/6701 Evaluation Module User’s Guide for details. Table 2-2: Setting C6701 EVM User Option DIP Switches for the Embedded Target for TI C6000 DSP 2-50 DIP Switch Name Setting Effect SW2-1 BOOTMODE4 On Boot mode setting SW2-2 BOOTMODE3 On Boot mode setting SW2-3 BOOTMODE2 Off Sets memory map = 1 when SW2-5 is off SW2-4 BOOTMODE1 On Boot mode setting SW2-5 BOOTMODE0 Off Sets memory map =1 when SW2-3 is off SW2-6 CLKMODE On Sets multiply-by-4 mode SW2-7 CLKSEL On Selects oscillator A SW2-8 ENDIAN On Selects little endian mode target_ti.book Page 51 Thursday, June 20, 2002 3:57 PM Targeting Your C6701 EVM Table 2-2: Setting C6701 EVM User Option DIP Switches for the Embedded Target for TI C6000 DSP DIP Switch Name Setting Effect SW2-9 JTAGSEL Off Selects internal Test Bus Controller (TBC) SW2-10 USER2 On User defined option SW2-11 USER1 On User defined option SW2-12 USER0 On User defined option Confirming Your C6701 EVM Installation Texas Instruments supplies a test utility to verify the operation of the board and its associated software. For complete information about running the test utility and interpreting the results, refer to your TMS320C6201/6701 Evaluation Module User’s Guide. To run the C6701 EVM verification test, complete the following steps after you install your board: 1 Launch CCS. 2 Select Start -> Programs -> Code Composer Studio -> EVM Confidence Test. As the test runs, the results appear on your display. By default, the test utility does not create a log file to store the test results. To specify the name and location of a log file to contain the results of the confidence test, use the command line options in CCS to run the confidence test utility. For further information about running the verification test from a DOS window and using the command line options, refer to TMS320C6201/6701 Evaluation Module User’s Guide. 3 Review the test results to verify that everything works. Check that the options settings match the settings listed in “Setting C6701 EVM User Option DIP Switches for the Embedded Target for TI C6000 DSP”. If your options settings do not match the listed configuration, reconfigure your C6701 EVM. After you change your board configuration, rerun the verification utility to check your new settings. 2-51 target_ti.book Page 52 Thursday, June 20, 2002 3:57 PM 2 Targeting C6000™ DSP Hardware Testing Your C6701 EVM The Embedded Target for TI C6000 DSP includes a Simulink demonstration model called c6701evmtest. You can use this model to verify that you installed your C6701 EVM hardware and your Embedded Target for TI C6000 DSP software correctly and the board settings are suitable for targeting. The demonstration model presets the Real-Time Workshop settings to build and run the model on your board. To run the model you need a signal generator, an oscilloscope, and audio cables to connect the signal generator and scope to your C6701 EVM. Refer to the Texas Instruments TMS320C6201/6701 Evaluation Module User’s Guide for more information on connecting sources and scopes to your C6701 EVM. In addition, connect your signal generator to the oscilloscope input so you can display the source and output signals together. To Confirm the Operation of Your C6701 EVM As an initial test to determine that your Embedded Target for TI C6000 DSP software and C6701 EVM are installed and operating correctly, open and build the Simulink model c6701evmtest. Test model c6701evmtest appears in the figure below. Line In C6701 EVM ADC Line Out C6701 EVM DAC Modulator Reset C6701 EVM Mod Source Type Ctrl+B to build and execute model on C6701 EVM 1 Enter c6701evmtest at the MATLAB command prompt. Test model c6701evmtest opens in Simulink. 2 Select Simulation Parameters from the Simulation menu. Figure 2-3, Using c6701evmtest to Test Your Embedded Target for TI C6000 DSP Installation, shows the model c6701evmtest with the Simulation parameters option selected. 2-52 target_ti.book Page 53 Thursday, June 20, 2002 3:57 PM Targeting Your C6701 EVM Figure 2-3: Using c6701evmtest to Test Your Embedded Target for TI C6000 DSP Installation 3 On the Simulation Parameters dialog, click Real-Time Workshop to view the Real-Time Workshop pane. 4 Click Build to run the model. Building the model provides a comprehensive test of the build, download, and run processes in the Embedded Target for TI C6000 DSP. A lengthy series of messages appears in the MATLAB command window, starting with ### Starting RTW build procedure for model: c6701evmtest.mdl ### Invoking Target Language Compiler on c6701evmtest.rtw If c6701evmtest.mdl builds, compiles, and downloads to your C6701 EVM successfully, the following message strings appear at the end of the build process messages. C6x EVM Command Line COFF Loader Utility, Version 1.20a Copyright (c) 1998 by DNA Enterprises, Inc. Found board type:EVM6x Revision:0 Using DSP memory map 1. ### Downloaded:c6701evmtest.out 2-53 target_ti.book Page 54 Thursday, June 20, 2002 3:57 PM 2 Targeting C6000™ DSP Hardware ### Successful completion of Real-Time Workshop build procedure for model:c6701evmtest When you receive this message, your model is running on the C6701 EVM. You should be able to see the input and output on your oscilloscope. When you change the input, the output should change as well. Try increasing the frequency you send to your C6701 EVM and watch to see that the output amplitude modulation changes to match. Error Message While Building C6701 EVMtest If you receive an error message from the build and compile process, it that your board or the software may not be configured correctly. Reinstall the board and review the configurations listed in section “Configuring Your C6701 EVM” on page 2-50. You need to resolve errors that appear in this build before you start to develop and build your own models. Note that after you build and download the model to the board, the build process runs the downloaded code on your C6701 EVM immediately. Verifying That C6701 EVMtest Is Running To see that the model is running, turn on your signal generator and set the output to produce a sine wave at 8000 Hz. Set your oscilloscope to display both the input signal from the signal generator and the output from your C6701 EVM. On the oscilloscope display, you should see the sine wave input from the signal generator, and the amplitude-modulated sine wave output from your C6701 EVM. If you change the frequency of the sine wave input, you should see the change in the input and output traces on the oscilloscope. Starting and Stopping C6701 EVMtest.mdl on the C6701 EVM When you build and download the model c6701evmtest.mdl to your C6701 EVM, you are not running a simulation of the model. You are running the actual machine code, in real time, corresponding to the block diagram in c6701evmtest.mdl. To run c6701evmtest.mdl on the evaluation module, open the Simulink model and click Build on the Real-Time Workshop pane. Clicking Build rebuilds the machine executable and downloads the new executable to your board. Building and downloading the new executable starts the process running on your C6701 EVM. The Embedded Target for TI C6000 DSP offers a function, run, that restarts your loaded program on your target. 2-54 target_ti.book Page 55 Thursday, June 20, 2002 3:57 PM Targeting Your C6701 EVM Once your application is running on your target, stop the process by one of the following methods: • Using the Debug -> Halt function in CCS. • Using halt from the MATLAB command prompt. • Clicking the C6701 EVM Reset block in your model (if you added one) or in the C6701 EVM board support library. Creating Your Simulink Model for Targeting You create real-time digital signal processing models the same way you create other Simulink models—by combining standard DSP blocks and C-MEX S-functions. You add blocks to your model in several ways: • Use blocks from the DSP Blockset • Use blocks from the fixed-point blocks library TI C62x DSPLIB • Use other Simulink discrete-time blocks • Use the blocks provided in the C6000 blockset: ADC, DAC, LED and Reset blocks for specific supported target hardware • Use blocks that provide the functions you need from any blockset installed on your computer • Create and use custom blocks Once you have designed and built your model, you generate C code and build the real-time executable by clicking Build on the Real-Time Workshop pane of the Simulation Parameters dialog. The automatic build process creates the file modelname.out containing a real-time model image in COFF file format that can run on your target. The file modelname.out is an executable whose format is target specific. You can load the file to your target and execute it in real time. Refer to your Real-Time Workshop documentation for more information about the build process. Notes About Selecting Blocks For Your Models Many blocks in the blocksets communicate with your MATLAB workspace. Using these blocks can slow your model when you them on your target because they do nothing on the target except use time. All the blocks will generate code, 2-55 target_ti.book Page 56 Thursday, June 20, 2002 3:57 PM 2 Targeting C6000™ DSP Hardware but they do not work as they do on your desktop—they waste time waiting to send or receive data from your workspace, slowing your signal processing application without adding instrumentation value. In general, using blocks to instrument your application is a valuable tool. In most cases, blocks that you add to display results or create plots, such as Histogram blocks, add to your generated code without affecting your running application. However, the blocks in Table 2-3, Blocks to Avoid in Models for Embedded Target for TI C6000 DSP Targets, generate code and perform operations that do not add value to your running application. To send data to or receive data from your target, use the To Rtdx and From Rtdx blocks to accomplish the data transfer. For this reason, we recommend that you avoid using certain blocks, such as the Scope block and some source and sink blocks, in Simulink models that you use on Embedded Target for TI C6000 DSP targets. In the next table, we present the blocks you should not use in your target models. Table 2-3: Blocks to Avoid in Models for Embedded Target for TI C6000 DSP Targets 2-56 Block Name/Category Library Description Scope Simulink, DSP Blockset Provides oscilloscope view of your output. Do not use the Save data to workspace option on the Data history pane in the ‘Scope’ parameters dialog. To Workspace Simulink Return data to your MATLAB workspace. From Workspace Simulink Send data to your model from your MATLAB workspace. Spectrum Scope DSP Blockset Compute and display the short-time FFT of a signal. It has internal buffering that can slow your process without adding value. target_ti.book Page 57 Thursday, June 20, 2002 3:57 PM Targeting Your C6701 EVM Table 2-3: Blocks to Avoid in Models for Embedded Target for TI C6000 DSP Targets Block Name/Category Library Description To File Simulink Send data to a file on your host machine. From File Simulink Get data from a file on your host machine. Triggered to Workspace DSP Blockset Send data to your MATLAB workspace. Signal To Workspace DSP Blockset Send a signal to your MATLAB workspace. Signal From Workspace DSP Blockset Get a signal from your MATLAB workspace. Triggered Signal From Workspace DSP Blockset Get a signal from your MATLAB workspace. To Wave device DSP Blockset Send data to a .wav device. From Wave device DSP Blockset Get data from a .wav device. To Wave file DSP Blockset Send data to a .wav file. From Wave file DSP Blockset Get data from a .wav file. 2-57 target_ti.book Page 58 Thursday, June 20, 2002 3:57 PM 2 Targeting C6000™ DSP Hardware C6701 EVM Tutorial 2-1—Single Rate Application In this tutorial you create and build a model that simulates audio reverberation applied to an input signal. Reverberation is similar to the echo effect you can hear when you shout across an open valley or canyon, or in a large empty room. You can choose to create the Simulink model for this exercise from blocks in DSP Blockset and Simulink block libraries, or you can find the model in the Embedded Target for TI C6000 DSP demos. For this example, we show the model as it appears in the demonstration program. The demonstration model name is c6701evmafxr.mdl as shown in the next figure. Open this model by typing c6701evmafxr at the MATLAB prompt. To exercise this model you need a microphone connected to the Mic In connector on your C6701 EVM and speakers and an oscilloscope connected to the Line Out connector on your C6701 EVM. To test the model, speak into the microphone and listen to the output from the speakers. You can observe the output on the oscilloscope as well. 2-58 target_ti.book Page 59 Thursday, June 20, 2002 3:57 PM C6701 EVM Tutorial 2-1—Single Rate Application To download and run your model on your C6701 EVM, you complete the following tasks: 1 Use Simulink blocks and blocks from other blocksets to create your model application. 2 Add the Embedded Target for TI C6000 DSP blocks that let your signal sources and output devices communicate with your C6701 EVM—the C6701 EVM ADC and C6701 EVM DAC blocks that you find in the Embedded Target for TI C6000 DSP c6000lib blockset. 2-59 target_ti.book Page 60 Thursday, June 20, 2002 3:57 PM 2 Targeting C6000™ DSP Hardware 3 Configure the simulation parameters for your model, including: - Simulation parameters such as simulation start and stop time and solver options - Real-Time Workshop options such as target configuration and target compiler selection 4 Build your model to the selected target. 5 Test your model running on the target by changing the input to the target and observing the output from the target. Your target for this tutorial is your C6701 EVM installed on your PC. Be sure to configure and test your board as directed in “Configuring Your C6701 EVM” on page 2-50 in this guide before continuing this tutorial. Building the Audio Reverberation Model To build the model for audio reverberation, follow these steps. 1 Open Simulink: 2 Create a new model by selecting File -> New -> Model from the Simulink menu bar. 3 Use Simulink blocks to create the following model. 0.8 Feedback Gain −1 z Integer Delay 0.9 Gain Look for the Integer Delay block in the Signal Operations library of the DSP Blockset. You do not need to add the input and output signal lines at this 2-60 target_ti.book Page 61 Thursday, June 20, 2002 3:57 PM C6701 EVM Tutorial 2-1—Single Rate Application time. When you add the C6701 EVM blocks in the next section, you add the input and output to the sum blocks. 4 Save your model with a suitable name before continuing. Adding C6701 EVM Blocks to Your Model So that you can send signals to your C6701 EVM and get signals back from the board, the Embedded Target for TI C6000 DSP includes a block library containing five blocks designed to work with the codec on your C6701 EVM: • Input block (C6701 EVM ADC) • Output block (C6701 EVM DAC) • Light emitting diode block (C6701 EVM LED) • Software reset block (Reset C6701 EVM) • DIP Switch block (C6701 EVM DIP Switch) Typing C6701 EVMlib at the MATLAB prompt brings up this window showing the library blocks. 2-61 target_ti.book Page 62 Thursday, June 20, 2002 3:57 PM 2 Targeting C6000™ DSP Hardware Figure 2-4: Embedded Target for TI C6000 DSP Target for C6701 EVM Block Library C6701 EVMlib These blocks are included in the Embedded Target for TI C6000 DSP c6000lib blockset in the Simulink Library browser. The C6701 EVM ADC and C6701 EVM DAC blocks let you configure the codec on your C6701 EVM to accept input signals from the input connectors on the board, and send the model output to the output connector on the board. Essentially, the C6701 EVM ADC and C6701 EVM DAC blocks add driver software that controls the behavior of the codec for your model. To add C6701 EVM target blocks to your model, follow these steps: 1 Double-click Embedded Target for TI C6000 DSP in the Simulink Library browser to open the c6000lib blockset. 2 Click the library EVM Blocks to see the available blocks for your C6701 EVM. 2-62 target_ti.book Page 63 Thursday, June 20, 2002 3:57 PM C6701 EVM Tutorial 2-1—Single Rate Application 3 Drag and drop C6701 EVM ADC and C6701 EVM DAC blocks to your model as shown in the figure. 4 Connect new signal lines as shown in the figure. Configuring the Embedded Target for TI C6000 DSP Blocks To configure the Embedded Target for TI C6000 DSP blocks in your model, follow these steps: 1 Click the C6701 EVM ADC block to select it. 2 Select Block Parameters from the Simulink Edit menu. 3 Set the following parameters for the block: - Clear the Stereo check box - Select the +20 dB mic gain boost check box 2-63 target_ti.book Page 64 Thursday, June 20, 2002 3:57 PM 2 Targeting C6000™ DSP Hardware - From the list, set Sample rate to 8000 - Set Codec data format to 16-bit linear - For Output data type, select Double from the list - Set Scaling to Normalize - Set Source gain to 0.0 - Enter 64 for Samples per frame Include a signal path directly from the input to the output so you can display both the input signal and the modified output signal on the oscilloscope for comparison. 4 For C6701 EVM ADC source, select Mic In. 5 Click OK to close the C6701 EVM ADC dialog. 6 Now set the options for the C6701 EVM DAC block. - Set Codec data format to 16-bit linear - Set Scaling to Normalize - For DAC attenuation, enter 0.0 - Set Overflow mode to Saturate. 7 Click OK to close the dialog. You have completed the model. Now you configure the Real-Time Workshop options to build and download your new model to your C6701 EVM. Configuring Simulation Parameters for Your Model The following sections describe how to build and run real-time digital signal processing models on your C6701 EVM. Running a model on the target starts with configuring and building your model from the Simulation Parameters dialog in Simulink. Setting Simulink Simulation Parameters After you have designed and implemented your digital signal processing model in Simulink, complete the following steps to set the simulation parameters for the model: 2-64 target_ti.book Page 65 Thursday, June 20, 2002 3:57 PM C6701 EVM Tutorial 2-1—Single Rate Application 1 Open the Simulation Parameters dialog and set the appropriate options on the Solver pane for your model and for the Embedded Target for TI C6000 DSP. - Set Start time to 0.0 and Stop time to inf (model runs without stopping) - Under Solver options, select the fixed-step and discrete settings from the lists - Set the Fixed step size to Auto and the Mode to Single Tasking 2 Ignore the Workspace I/O, Diagnostics, and Advanced panes in the Simulation Parameters dialog. The default settings are correct for your new model. Setting Real-Time Workshop Target Build Options To configure Real-Time Workshop to use the correct target files and to compile and run your model executable file, you set the options on the Real-Time Workshop pane of the Simulation Parameters dialog. Follow these steps to set the Real-Time Workshop options to target your C6701 EVM: 1 Click the Real-Time Workshop tab. 2 For Category, select Target configuration. 3 Under Configuration, click Browse to select the system target file for C6000 targets. 4 On the System Target File Browser, select the system target file ti_c6000.tlc and click OK to close the browser. Real-Time Workshop updates the Template makefile and Make command options with the appropriate files based on your system target file selection. 5 To choose your C6000 target, change Category to TI C6000 target. 6 From the Code generation target type list, choose C6701_EVM. 7 For Category, select TI C6000 code generation to specify code generation options that apply to the C6701 EVM target. 8 Select the Inline DSP Blockset functions option. 2-65 target_ti.book Page 66 Thursday, June 20, 2002 3:57 PM 2 Targeting C6000™ DSP Hardware 9 For Category, select TI C6000 compiler to set the Real-Time Workshop compile options. 10 Set the following options in the dialog: - Byte order should be Little endian - Set Compiler verbosity to Quiet 11 Change the Category to TI C6000 linker. 12 Set the linker operation options. - Select the Retain .obj files check box - For the Linker command file, select Full memory map 13 Change the Category to TI C6000 runtime. 14 Set the following Real-Time Workshop run-time options: - CPU clock: 133MHz - Overrun action: Halt - Build action: Build_and_execute You have configured the Real-Time Workshop options that let you target your C6701 EVM. You may have noticed that you did not configure three Real-Time Workshop options on the Category list: TLC debugging, General code generation options, and General code generation options (cont.). For your new model, the default values for the options in these categories are correct. For other models you develop, you may want to set the options in these categories to provide information during the build and to launch TLC debugging when you generate code. Building and Executing Your Model on Your C6701 EVM After you set the simulation parameters and configure Real-Time Workshop to create the files you need, you direct Real-Time Workshop to build, download, and run your model executable on your target: 2-66 target_ti.book Page 67 Thursday, June 20, 2002 3:57 PM C6701 EVM Tutorial 2-1—Single Rate Application 1 Click Build to generate and build an executable file targeted to your C6701 EVM. When you click Build with Build_and_execute selected for Build action, the automatic build process creates an executable file that can be run by the C6701 DSP on your C6701 EVM, and then downloads the executable file to the target and runs the file. 2 To stop model execution, click the Reset C6701 EVM block or use the Halt option in CCS. You could type halt from the MATLAB command prompt as well. Testing Your Audio Reverb Model With your model running on your C6701 EVM, speak into the microphone you connected to the board. The model should generate a reverberation effect out of the speakers, delaying and echoing the words you speak into the mike. If you built the model yourself, rather than using the supplied model c6701evmafxr, try running the demonstration model to compare the results. 2-67 target_ti.book Page 68 Thursday, June 20, 2002 3:57 PM 2 Targeting C6000™ DSP Hardware C6701 EVM Tutorial 2-2—A More Complex Application For this tutorial, we demonstrate an application that uses multiple stages— using wavelets to remove noise from a noisy signal. The model name is evm67xdnoisf. As with any model file, you can run this de-noising demonstration by typing c6701evmdnoisf at the MATLAB prompt. Or the model is in the MATLAB demos collection. Here is a picture of the model as it appears in the demonstration library. Unlike the audio reverberation demo, this model is difficult to build from blocks in Simulink. It uses complicated subsystems for the Delay Alignment block and the Soft Threshold block. For this tutorial you work with a copy of the demonstration model, rather than creating the model. 2-68 target_ti.book Page 69 Thursday, June 20, 2002 3:57 PM C6701 EVM Tutorial 2-2—A More Complex Application This tutorial takes you through generating C code and building an executable program from the demonstration model. The resulting program runs on your C6701 EVM as an executable COFF file. Working and Build Directories It is convenient to work with a local copy of the c6701evmwdnoisf model, stored in its own directory, which you name (something like c6701dnoisfex). This discussion assumes that the c6701dnoisfex directory resides on drive d:. Use a different drive letter if necessary for your machine. Set up your working directory as follows: 1 Create the new model directory from the MATLAB command line by typing !mkdir d:\c6701dnoisfex (on PC) 2 Make c6701dnoisfex your working directory in MATLAB. cd d:/c6701dnoisfex 3 Open the c6701evmwdnoisf model. c6701evmwdnoisf The model appears in the Simulink window. 4 From the File menu, choose Save As. Save a copy of the c6701evmwdnoisf model as d:/c6701dnoisfex/dnoisfrtw.mdl. During code generation, Real-Time Workshop creates a build directory within your working directory. The build directory name is model_target_rtw, derived from the name of your source model and your chosen target. In the build directory, Real-Time Workshop stores generated source code and other files created during the build process. You examine the contents of the build directory at the end of this tutorial. Setting Simulation Program Parameters To generate code correctly from the dnoisfrtw model, you must change some of the simulation parameters. In particular, Real-Time Workshop uses a fixed-step solver. To set the parameters, use the Simulation Parameters dialog as follows: 2-69 target_ti.book Page 70 Thursday, June 20, 2002 3:57 PM 2 Targeting C6000™ DSP Hardware 1 From the Simulation menu, choose Simulation parameters. The Simulation Parameters dialog opens. 2 Click Solver and enter the following parameter values on the Solver pane. Start Time: 0.0 Stop Time: inf Solver options: set Type to Fixed-step. Select the discrete solver algorithm. Fixed step size: auto Mode: Auto 3 Click Apply. Then click OK to close the dialog. 4 Save the model. Simulation parameters persist with the model, for use in future sessions. Figure 2-5 shows the Solver pane with the correct parameter settings. 2-70 target_ti.book Page 71 Thursday, June 20, 2002 3:57 PM C6701 EVM Tutorial 2-2—A More Complex Application Figure 2-5: Solver Pane of Simulation Parameters Dialog Selecting the Target Configuration To specify the desired target configuration, you choose a system target file, a template makefile, and a make command. In these tutorials, you do not need to specify these parameters individually. Instead, you use the ready-to-run ti_c6000.tlc target configuration. To target your C6701 EVM: 1 From the Simulation menu, choose Simulation Parameters. The Simulation Parameters dialog opens. 2 Click Real-Time Workshop on the Simulation Parameters dialog. The Real-Time Workshop pane activates. 3 The Real-Time Workshop pane has several pages, which you select via the Category option. Select Target configuration from the Category. 2-71 target_ti.book Page 72 Thursday, June 20, 2002 3:57 PM 2 Targeting C6000™ DSP Hardware Figure 2-6: Real-Time Workshop Pane (Target Configuration Category) 4 Click Browse next to the System target file field. This opens the System Target File Browser. The browser displays a list of available target configurations. When you select a target configuration, Real-Time Workshop automatically chooses the appropriate system target file, template makefile, and make command. 2-72 target_ti.book Page 73 Thursday, June 20, 2002 3:57 PM C6701 EVM Tutorial 2-2—A More Complex Application Figure 2-7: The System Target File Browser 5 From the list of available configurations, select ti_c6000.tlc (as in Figure 2-7) and click OK. 6 The Real-Time Workshop pane now displays the correct System target file (ti_c6000.tlc), Template makefile (ti_c6000.tmf), and Make command (make_rtw), as shown in Figure 2-6. 7 To choose your specific C6000 hardware target, change Category to TI C6000 target selection. 2-73 target_ti.book Page 74 Thursday, June 20, 2002 3:57 PM 2 Targeting C6000™ DSP Hardware 8 From the Code generation target type, choose C6701 EVM. 9 To export the handle that CCS creates when you generate code from your model, select Export CCS handle to MATLAB workspace and enter a name for the handle in CCS handle name. 10 Select General code generation options from Category. The options displayed here are common to all target configurations. Check to make sure that all options are set to their defaults, as below. 2-74 target_ti.book Page 75 Thursday, June 20, 2002 3:57 PM C6701 EVM Tutorial 2-2—A More Complex Application 11 Select TLC debugging from Category. Clear all the check boxes in this category. 12 For Category, select TI C6000 code generation to specify code generation options that apply to the C6701 EVM target. 13 Select the Inline DSP Blockset functions option, as shown. 2-75 target_ti.book Page 76 Thursday, June 20, 2002 3:57 PM 2 Targeting C6000™ DSP Hardware 14 Select TI C6000 compiler from Category. The options displayed here are specific to the C6000 target. Check to make sure that the options are set as shown below. 2-76 target_ti.book Page 77 Thursday, June 20, 2002 3:57 PM C6701 EVM Tutorial 2-2—A More Complex Application . 15 Select TI C6000 linker from Category. Set the linker options as shown. 2-77 target_ti.book Page 78 Thursday, June 20, 2002 3:57 PM 2 Targeting C6000™ DSP Hardware 16 Select TI C6000 runtime from Category. Set the runtime options as shown. 2-78 target_ti.book Page 79 Thursday, June 20, 2002 3:57 PM C6701 EVM Tutorial 2-2—A More Complex Application 17 Click OK to close the Simulation Parameters dialog. Save the model to retain your new build settings. Building and Running the Program The Real-Time Workshop build process generates C code from the model, and then compiles and links the generated program. To build and run the program: 1 Access the Simulation Parameters dialog for your model. 2 Click Build in the Simulation Parameters dialog to start the build process. 3 A number of messages concerning code generation and compilation appear in the MATLAB command window. The initial messages are ### Starting Real-Time Workshop build procedure for model: dnoisfrtw 2-79 target_ti.book Page 80 Thursday, June 20, 2002 3:57 PM 2 Targeting C6000™ DSP Hardware ### Generating code into build directory: .\dnoisfrtw_c6000_rtw The content of the succeeding messages depends on your compiler and operating system.The final message is ### Successful completion of Real-Time Workshop build procedure for model: dnoisfrtw 4 The working directory now contains an executable, dnoisfrtw.exe. In addition, Real-Time Workshop created a build directory, dnoisfrtw_c6000_rtw. To review the contents of the working directory after the build, type the dir command from the MATLAB command window. dir . .. dnoisfrtw.exe dnoisfrtw.mdl dnoisfrtw_c6000_rtw 5 To run the executable from the MATLAB command window, type !dnoisfrtw The “!” character passes the command that follows it to the operating system, which runs the stand-alone dnoisfrtw program. The program produces one line of output. **starting the model** 2-80 target_ti.book Page 81 Thursday, June 20, 2002 3:57 PM C6701 EVM Tutorial 2-2—A More Complex Application 6 To see the contents of the build directory, type dir dnoisfrtw_c6701_rtw Contents of the Build Directory The build process creates a build directory and names it model_target_rtw, concatenating the name of your source model and your chosen target. In this example, your build directory is named dnoisfrtw_c6701_rtw. dnoisfrtw_c6701_rtw contains these generated source code files: • dnoisfrtw.c—the stand-alone C code that implements the model. • dnoisfrtw.h—an include header file containing information about the state variables • dnoisfrtw_export.h—an include header file containing information about exported signals and parameters The build directory also contains other files used in the build process, such as the object (.obj) files and the generated makefile (dnoisfrtw.mk). 2-81 target_ti.book Page 82 Thursday, June 20, 2002 3:57 PM 2 Targeting C6000™ DSP Hardware Targeting Your C6711 DSK The Embedded Target for TI C6000 DSP for Texas Instruments DSP lets you use Real-Time Workshop to generate, target, and execute Simulink models on the Texas Instruments (TI) C6711 DSP Starter Kit (C6711 DSK). In combination with the C6711 DSK, your Embedded Target for TI C6000 DSP software is the ideal resource for rapidly prototyping and developing embedded systems applications for the TI C6711 Digital Signal Processor. The Embedded Target for TI C6000 DSP software focuses on developing real-time digital signal processing (DSP) applications for the C6711 DSK. This chapter describes how to use the Embedded Target for TI C6000 DSP to create and execute applications on the C6711 DSK. To use the targeting software, you should be familiar with using Simulink to create models and with the basic concepts of Real-time Workshop automatic code generation. To read more about Real-Time Workshop, refer to your Real-Time Workshop documentation. In this chapter, you will find sections that detail how to use your Embedded Target for TI C6000 DSP to build and download DSP applications in Simulink to your C6711 DSK and to Texas Instruments Code Composer Studio: • Configuring your Embedded Target for TI C6000 DSP software, in the section “Real-Time Workshop Options for C6000 Hardware” on page 2-28 • Configuring your Texas Instruments TMS320C6711 DSP Starter Kit, in “Configuring Your C6711 DSK” on page 2-82 • Testing your hardware and software installation to be sure everything works, in the sections “Confirming Your C6711 DSK Installation” on page 2-82 and “Testing Your C6711 DSK” on page 2-83 Configuring Your C6711 DSK After you install and configure your C6711 DSK according to the instructions in the online help for Code Composer Studio, you do not need to configure further your C6711 DSK. Confirming Your C6711 DSK Installation Texas Instruments supplies a test utility to verify operation of the board and its associated software. For complete information about running the test utility and interpreting the results, refer to your TMS320CDSK Help under 2-82 target_ti.book Page 83 Thursday, June 20, 2002 3:57 PM Targeting Your C6711 DSK TMS320C6000 Code Composer Studio Help in the Code Composer Studio 2.0 online help system. To run the C6711 DSK confidence test, complete the following steps after you install and configure your board. 1 Open a DOS command window. 2 Access the directory \..\ti\c6000\dsk6x11\conftest CCS creates this directory when you install your software. It contains the files to run the C6711 confidence test. 3 Start the confidence test by typing dsk6xtst at the DOS prompt. By default, the test utility creates a log file named dsk6xtst.log where it stores the test results. To specify the name and location of a log file to contain the results of the confidence test, use the CCS command line options to run the confidence utility. For further information about running the confidence test from a DOS window and using the command line options, refer to the DSK Confidence Test topic in the online help for CCS. 4 Review the test results to verify that everything works. If your confidence test fails, reconfigure your C6711 DSK. After you change your board configuration, rerun the confidence utility to check your new settings. Testing Your C6711 DSK The Embedded Target for TI C6000 DSP includes a Simulink demonstration model called c6711dsktest. You can use this model to verify that you installed your C6711 DSK hardware and your Embedded Target for TI C6000 DSP software correctly and the board settings are suitable for targeting. The demonstration model presets the Real-Time Workshop settings to build and run the model on your board. To run the model you need a signal generator, an oscilloscope, and audio cables to connect the signal generator and scope to your C6711 DSK. Refer to your CCS documentation for more information on connecting sources and scopes to your C6711 DSK. In addition, you should connect your signal generator to the oscilloscope input so you can display the source and output signals together. 2-83 target_ti.book Page 84 Thursday, June 20, 2002 3:57 PM 2 Targeting C6000™ DSP Hardware To Test the Operation of Your C6711 DSK As a test to verify that your Embedded Target for TI C6000 DSP software and C6711 DSK are installed and operating correctly, open and build the Simulink model c6711dsktest. Test model c6711dsktest appears in the figure below. Line In C6711 DSK ADC Line Out C6711 DSK DAC Modulator DSP Sine Wave Type Ctrl+B to build and execute model on C6711 DSK Reset C6711 DSK 1 Enter c6711dsktest at the MATLAB command prompt. Test model c6711dsktest opens in Simulink. 2 Select Simulation -> Simulation parameters from the menu bar. Figure 2-8, Using c6711dsktest to Test Your Embedded Target for TI C6000 DSP Installation, shows the model c6711dsktest with Simulation Parameters selected. 2-84 target_ti.book Page 85 Thursday, June 20, 2002 3:57 PM Targeting Your C6711 DSK Figure 2-8: Using c6711dsktest to Test Your Embedded Target for TI C6000 DSP Installation 3 Click Real-Time Workshop in the Simulation Parameters dialog to view the Real-Time Workshop dialog. 4 Click Build to run the model. Building the model provides a comprehensive test of the build, download, and run processes in the Embedded Target for TI C6000 DSP. MATLAB returns a lengthy series of messages in the command window, starting with ### Starting RTW build procedure for model: c6711dsktest.mdl 2-85 target_ti.book Page 86 Thursday, June 20, 2002 3:57 PM 2 Targeting C6000™ DSP Hardware ### Invoking Target Language Compiler on c6711dsktest.rtw If c6711dsktest.mdl builds, compiles, and downloads to the C6711 DSK successfully, the following message strings appear at the end of the build process messages. C6x DSK Command Line COFF Loader Utility, Version 1.20a Copyright (c) 1998 by DNA Enterprises, Inc. Found board type:DSK6x Revision:0 Using DSP memory map 1. ### Downloaded:c6711dsktest.out ### Successful completion of Real-Time Workshop build procedure for model:c6711dsktest When you receive this message, your model is running on the C6711 DSK. You should be able to see the input and output on your oscilloscope. When you change the input the output should change as well. Try increasing the frequency you send to the C6711 DSK and watching to see that the output changes to match by changing the amplitude modulation. Error Message While Building c6711dsktest If you receive an error message from the build and compile process, your board or the software may not be configured correctly. Reinstall the board and review the configurations listed in section “Configuring Your C6711 DSK” on page 2-82. You need to resolve errors that appear in this build before you start to develop and build your own models. Note that after you build and download the model to the board, the build process runs the downloaded code on the C6711 DSK immediately. Verifying That c6711dsktest Is Running To see that the model is running, turn on your signal generator and set the output to produce a sine wave at 8000 Hz. Set your oscilloscope to display both the input signal from the signal generator and the output from the C6711 DSK. On the oscilloscope display, you should see the sine wave input from the signal generator, and the amplitude-modulated sine wave output from the C6711 DSK. If you change the frequency of the sine wave input, you should see the change on the oscilloscope, in the input and output traces. 2-86 target_ti.book Page 87 Thursday, June 20, 2002 3:57 PM Targeting Your C6711 DSK Starting and Stopping c6711dsktest.mdl on the C6711 DSK When you build and download the model c6711dsktest.mdl to your C6711 DSK, you are not running a simulation of the model. You are running the actual machine code, in real time, corresponding to the block diagram in c6711dsktest.mdl. To run c6711dsktest.mdl on the starter kit, you open the Simulink model and click Build on the Real-Time Workshop pane to rebuild the machine executable and download the new executable to the board. Building and downloading the new executable starts the process running on the C6711 DSK. Once your application is running on your target, stop the process by one of the following methods: • Using the Debug -> Halt option in CCS • Using halt from the MATLAB command prompt • Clicking the C6711 DSK Reset block in your model (if you added one) or in the C6711 DSK Board Support library 2-87 target_ti.book Page 88 Thursday, June 20, 2002 3:57 PM 2 Targeting C6000™ DSP Hardware C6711 DSK Tutorial 2-3—Single Rate Application In this tutorial you create and build a model that simulates audio reverberation applied to an input signal. Reverberation is similar to the echo effect you can hear when you shout across an open valley or canyon, or in a large empty room. You can choose to create the Simulink model for this exercise from blocks in the DSP Blockset and Simulink block libraries, or you can find the model in the Embedded Target for TI C6000 DSP demos. For this example, we show the model as it appears in the demonstration program. The demonstration model name is c6711dskafxr.mdl as shown in the next figure. Open this model by typing c6711dskafxr at the MATLAB prompt. To exercise this model you need a microphone connected to the Mic In connector on your C6711 DSK and speakers and an oscilloscope connected to the Line Out connector on your C6711 DSK. To test the model, speak into the microphone and listen to the output from the speakers. You can observe the output on the oscilloscope as well. 2-88 target_ti.book Page 89 Thursday, June 20, 2002 3:57 PM C6711 DSK Tutorial 2-3—Single Rate Application To download and run your model to your C6711 DSK, you complete five tasks: 1 Use Simulink blocks and blocks from other blocksets to create your model application. 2 Add the Embedded Target for TI C6000 DSP blocks that let your signal sources and output devices communicate with your C6711 DSK—the C6711 DSK ADC and C6711 DSK DAC blocks that you find in the Embedded Target for TI C6000 DSP C6711 DSK Board Support library. 3 Configure the simulation parameters for your model, including: 2-89 target_ti.book Page 90 Thursday, June 20, 2002 3:57 PM 2 Targeting C6000™ DSP Hardware - Simulation parameters such as simulation start and stop time and solver options. - Real-Time Workshop options such as target configuration and target compiler selection. 4 Build your model to the selected target. 5 Test your model running on the target by changing the input to the target and observing the output from the target. Your target for this tutorial is your C6711 DSK installed on your PC. Be sure to configure and test your board as directed in “Configuring Your C6711 DSK” on page 2-82. Building the Audio Reverberation Model To build the model for audio reverberation, follow these steps: 1 Open Simulink. 2 Create a new model by selecting File -> New -> Model from the Simulink menu bar. 3 Use Simulink blocks to create the following model. 2-90 target_ti.book Page 91 Thursday, June 20, 2002 3:57 PM C6711 DSK Tutorial 2-3—Single Rate Application Look for the Integer Delay block in the Signal Operations library of DSP Blockset. You do not need to add the input and output signal lines at this time. When you add the C6711 DSK blocks in the next section, you add the input and output to the sum blocks. 4 Save your model with a suitable name before continuing. Adding C6711 DSK Blocks to Your Model So that you can send signals to your C6711 DSK and get signals back, TI C6000 includes a block library that contains five blocks designed to work with the codec and LEDs on your C6711 DSK: • Input block (C6711 DSK ADC) • Output block (C6711 DSK DAC) • Light emitting diode block (C6711 DSK LED) 2-91 target_ti.book Page 92 Thursday, June 20, 2002 3:57 PM 2 Targeting C6000™ DSP Hardware • DIP switch block (C6711 DIP Switch) • Reset block (Reset C6711 DSK) Type c6711dsklib at the MATLAB prompt to bring up this window showing the library contents. Figure 2-9: Embedded Target for TI C6000 DSP Block Library c6711dsklib These blocks are included in the Embedded Target for TI C6000 DSP c6000lib blockset in the Simulink Library browser. The C6711 DSK ADC and C6711 DSK DAC blocks let you configure the codec on the C6711 DSK to accept input signals from the input connectors on the board, and send the model output to the output connector on the board. Essentially, the C6711 DSK ADC and C6711 DSK DAC blocks add driver software that controls the behavior of the codec for your model. To add an input to the your model without using a C6711 DSK ADC block, add a DSP source block, such as a signal generator, that creates the discrete time signal you need and use that signal as the input to your model. 2-92 target_ti.book Page 93 Thursday, June 20, 2002 3:57 PM C6711 DSK Tutorial 2-3—Single Rate Application To add C6711 DSK target blocks to your model, follow these steps: 1 Double-click Embedded Target for TI C6000 DSP in the Simulink Library browser to display the C6000lib blockset. 2 Double-click DSK Blocks to view the C6711 DSK blocks. 3 Drag and drop C6711 DSK ADC and C6711 DSK DAC blocks to your model as shown in the figure. 4 Connect new signal lines as shown in the figure. Configuring the Embedded Target for TI C6000 DSP Blocks To configure the Embedded Target for TI C6000 DSP blocks in your model, follow these steps: 1 Click the C6711 DSK ADC block to select it. 2-93 target_ti.book Page 94 Thursday, June 20, 2002 3:57 PM 2 Targeting C6000™ DSP Hardware 2 Select Block Parameters from the Simulink Edit menu. 3 Set the following parameters for the block: - Select the +20 dB mic gain boost check box - For Output data type, select Double from the list - Set Scaling to Normalize - Set Source gain to 0.0 - Enter 64 for Samples per frame Include a signal path running from the input to the output in your model so you can display both the input signal and the modified output signal on the oscilloscope for comparison. 4 For ADC source, select Mic In. 5 Click OK to close the Block Parameters: ADC dialog. 6 Now set the options for the C6711 DSK DAC block. - Set Scaling to Normalize - For DAC attenuation, enter 0.0 - Set Overflow mode to Saturate. 7 Click OK to close the dialog. You have completed the model. Now configure the Real-Time Workshop simulation options to build and download your new model to your C6711 DSK. Configuring Simulation Parameters for Your Model The following sections describe how to build and run your real-time digital signal processing model on your C6711 DSK. Running the model on the target starts with configuring and building your model from the Simulation Parameters dialog in Simulink. Setting Simulink Simulation Parameters After you have designed and implemented your digital signal processing model in Simulink, complete the following steps to set the simulation parameters for the model: 2-94 target_ti.book Page 95 Thursday, June 20, 2002 3:57 PM C6711 DSK Tutorial 2-3—Single Rate Application 1 Open the Simulation Parameters dialog and set the appropriate options on the Solver pane for your model and for the Embedded Target for TI C6000 DSP. - Set Start time to 0.0 and Stop time to inf (model runs without stopping) - Under Solver options, select the fixed-step and discrete settings from the lists - Set the Fixed step size to auto and select Single Tasking for the Mode 2 Ignore the Workspace I/O, Diagnostics, and Advanced panes in the Simulation Parameters dialog. The default settings are correct for your new model. Setting Real-Time Workshop Target Build Options To configure Real-Time Workshop to use the correct target files and to compile and run the model executable, you set the options on the Real-Time Workshop pane of the Simulation Parameters dialog. Follow these steps to set the Real-Time Workshop options to target your C6711 DSK for running your model: 1 Click the Real-Time Workshop tab. 2 For Category, select Target configuration. 3 Under Configuration, click Browse to select the system target file for the C6000 hardware targets. 4 On the System Target File Browser, select the system target file ti_c6000.tlc and click OK to close the browser. Real-Time Workshop fills the Template makefile and Make command options with the appropriate files based on your system target file selection. 5 To choose your C6000 target, change Category to TI C6000 target selection. 6 From the Code generation target type list, choose C6711_DSK. 7 For Category, select TI C6000 compiler to set the Real-Time Workshop compile options. 2-95 target_ti.book Page 96 Thursday, June 20, 2002 3:57 PM 2 Targeting C6000™ DSP Hardware 8 Set the following options in the dialog: - Byte order should be Little endian - Set Compiler verbosity to Quiet 9 Change the Category to TI C6000 linker. 10 Set the linker operation options. - Select the Retain .obj files check box - For the Linker command file, select Full memory map from the list 11 Change the Category to TI C6000 runtime. 12 Select the following Real-Time Workshop runtime options: - CPU clock: 133MHz - Overrun action: Halt - Build action: Build_and_execute You have configured the Real-Time Workshop options that let you target your C6711 DSK. Notice that you did not configure three Real-Time Workshop options on the Category list: • TLC debugging • General code generation options • General code generation options (cont.) For your model in this tutorial, the default values for options in these categories are correct. For other models you develop, you may want to set the options in these categories to provide information during the build and to launch target languange compiler (TLC) debugging when you generate code. Building and Executing Your Model on Your C6711 DSK After you set the simulation parameters and configured Real-Time Workshop to create the files you need, you direct Real-Time Workshop to build, download, and run your model executable on your target. 1 Click Build to generate and build an executable targeted to the C6711 DSK. When you click Build with the Build_and_execute option selected, the automatic build process creates the executable file that can be run by the 2-96 target_ti.book Page 97 Thursday, June 20, 2002 3:57 PM C6711 DSK Tutorial 2-3—Single Rate Application C6711 DSP on the C6711 DSK, and then downloads and runs the executable file on your target. 2 Stop model execution by one of the following methods: - Using the Halt function in CCS - Entering halt from the MATLAB command prompt - Clicking the C6711 DSK Reset block in your model (if you added one) or in the DSK Block library Testing Your Audio Reverb Model With your model running on your C6711 DSK, speak into the microphone you connected to the board. The model should generate a reverberation effect out of the speakers, delaying and echoing the words you speak into the mike. If you built the model yourself, rather than using the supplied model c6711dskafxr, try running the demonstration model to compare the results. Running Models on Your C6711 DSK Texas Instruments markets a complete set of tools for use with the C6711 DSK. These tools are primarily intended for rapid prototyping of control systems and hardware-in-the-loop applications. This section provides a brief example of how the TI development tools work with Real-Time Workshop, the Embedded Target for TI C6000 DSP, and the DSK block library. Executing code generated from Real-Time Workshop on a particular target in real-time requires target-specific code. Target-specific code includes I/O device drivers and an interrupt service routine. Other components, such as a communication link with Simulink, are required if you need the ability to download parameters on-the-fly to your target hardware. Since these components are specific to particular hardware targets (in this case, the C6711 DSK), you must ensure that the target-specific components are compatible with the target hardware. To allow you to build an executable, the Embedded Target for TI C6000 DSP provides a target makefile specific to C6000 hardware targets. This target makefile invokes the optimizing compiler provided as part of CCS. Used in combination with the Embedded Target for TI C6000 DSP and Real-Time Workshop, TI products provide an integrated development environment that, once installed, needs no additional coding. 2-97 target_ti.book Page 98 Thursday, June 20, 2002 3:57 PM 2 Targeting C6000™ DSP Hardware After you have installed the C6711 DSK development board and supporting TI products on your PC, launch MATLAB. At the MATLAB command prompt, type c6711dsklib. This opens a Simulink block library, c6711dsklib, that includes a set of blocks for C6711 DSK I/O devices: • C6711 DSK ADC—configures the analog to digital converter • C6711 DSK DAC—configures the digital to analog converter • C6711 DSK LED—controls the user defined light emitting diodes (LED) on the C6711 DSK • C6711 DSK DIP Switch—lets you set the dual inline pin switches on the C6711 DSK • C6711 EVM Reset—resets the processor on the C6711 DSK These devices are associated with your C6711 DSK board. With your model open, select Simulation -> Simulation parameters from the menu bar to open the Simulation Parameters dialog. From this dialog, click the Real-Time Workshop tab. You must specify the appropriate versions of the system target file and template makefile. For the C6711 DSK, in the Real-Time Workshop pane of the dialog, specify: • System target file—ti_c6000.tlc • Template makefile—ti_c6000.tmf With this configuration, you can generate and download a real-time executable to your TI C6711 DSP starter kit. Start the Real-Time Workshop build process by clicking Build on the Real-Time Workshop property pane. Real-Time Workshop automatically generates C code and inserts the I/O device drivers as specified by the ADC and DAC blocks in your block model. These device drivers are inserted in the generated C code as inline S-functions. Inlined S-functions offer speed advantages and simplify the generated code. For more information about inlining S-functions, refer to Target Language Compiler Reference Guide. For a complete discussion of S-functions, refer to Writing S-Functions. During the same build operation, the template makefile and block parameter dialog entries are combined to form the target makefile for your TI evaluation module. This makefile invokes the TI compiler to build an executable file. If you select the Build_and_execute option, the executable file is automatically downloaded via the peripheral component interface (PCI) bus to the TI 2-98 target_ti.book Page 99 Thursday, June 20, 2002 3:57 PM C6711 DSK Tutorial 2-3—Single Rate Application evaluation board. After downloading the executable file to the C6711 DSK, the build process runs the file on the digital signal processor. Starting and Stopping DSP Applications on the C6711 DSK When you create, build, and download a Simulink model to the C6701 EVM, you are not running a simulation of your DSP application. You are running the actual machine code corresponding to the block diagram you built in Simulink. To start running your DSP application on the evaluation module, you must open your Simulink model and rebuild the machine executable by clicking Build on the Real-Time Workshop pane. Each time you want to start the application on the C6711 DSK, you use Real-Time Workshop to rebuild the executable from the Simulink model and download the code to the board. Your model runs until the model encounters one of the following actions: • You use the Halt function in CCS • You use halt from the MATLAB command prompt • You click the C6711 DSK Reset block in your model (if you added one) or in the DSK block library Clicking the Reset block stops the running application and restores the digital signal processor to its initial state. Note When you build and execute a model on your C6711 DSK, the Real-Time Workshop build process resets the DSK automatically. You do not need to reset the board before building models. Use the Reset C6711 DSK block to stop processes that are running on your starter kit, or to return your board to a known state for any reason. 2-99 target_ti.book Page 100 Thursday, June 20, 2002 3:57 PM 2 Targeting C6000™ DSP Hardware C6711 DSK Tutorial 2-4—A More Complex Application For this tutorial, we demonstrate an application that uses multiple stages— using wavelets to remove noise from a noisy signal. The model name is c6711dskwdnoisf. As with any model file, you can run this denoising demonstration by typing c6711dskwdnoisf at the MATLAB prompt. The model also appears in the MATLAB demos collection. Here is a picture of the model as it appears in the demonstration library. Unlike the audio reverberation tutorial model (“C6711 DSK Tutorial 2-3— Single Rate Application”), this model is difficult to build from blocks in Simulink. It uses complicated subsystems for the Delay Alignment block and the Soft Threshold block. For this tutorial you work with a copy of the demonstration model, rather than creating the model. 2-100 target_ti.book Page 101 Thursday, June 20, 2002 3:57 PM C6711 DSK Tutorial 2-4—A More Complex Application This tutorial takes you through generating C code and building an executable program from the demonstration model. The resulting program runs on your C6711 DSK as an executable COFF file. Working and Build Directories It is convenient to work with a local copy of the c6711dskwdnoisf model, stored in its own directory, that you name (something like c6711dskwdnoisfex). This discussion assumes that the c6711dskwdnoisf directory resides on drive d:. Use a different drive letter if necessary for your machine. Set up your working directory as follows: 1 Create your new model directory from the MATLAB command line by typing !mkdir d:\c6711dskwdnoisfex (on PC) 2 Make c6711dskwdnoisfex your working directory in MATLAB. cd d:/c6711dskwdnoisfex 3 Open the c6711dskwdnoisf model. c6711dskwdnoisf The model appears in the Simulink window. 4 From the File menu, choose Save As. Save a copy of the c6711dskwdnoisf model as d:/c6711dskwdnoisfex/dnoisfrtw.mdl. During code generation, Real-Time Workshop creates a build directory within your working directory. The ‘ build directory name is model_target_rtw, derived from the name of your source model and your chosen target. In the build directory, Real-Time Workshop stores generated source code and other files created during the build process. You examine the contents of the build directory at the end of this tutorial. Setting Simulink Simulation Parameters To generate code correctly from the dnoisfrtw model, you must change some of the simulation parameters. In particular, Real-Time Workshop uses a fixed-step solver. To set the parameters, use the Simulation Parameters dialog as follows: 2-101 target_ti.book Page 102 Thursday, June 20, 2002 3:57 PM 2 Targeting C6000™ DSP Hardware 1 From the Simulation menu, choose Simulation Parameters. The Simulation Parameters dialog opens. 2 Click Solver and enter the following parameter values on the Solver pane. Start Time: 0.0 Stop Time: inf Solver options: set Type to Fixed-step. Select the discrete solver algorithm. Fixed step size: auto Mode: Auto 3 Click Apply. Then click OK to close the dialog. 4 Save the model. Simulation parameters persist with your model, for you to use in future sessions. Figure 2-10 shows the Solver pane with the correct parameter settings. 2-102 target_ti.book Page 103 Thursday, June 20, 2002 3:57 PM C6711 DSK Tutorial 2-4—A More Complex Application Figure 2-10: Solver Pane of Simulation Parameters Dialog Selecting the Target Configuration To specify the desired target configuration, you choose a system target file, which specifies the appropriate template makefile, and make command. In these tutorials, you do not need to specify these parameters individually. Instead, you use the ready-to-run ti_c6000.tlc target configuration. To select the C6000 target: 1 From the Simulation menu, choose Simulation parameters. The Simulation Parameters dialog opens. 2 Click Real-Time Workshop on the Simulation Parameters dialog. The Real-Time Workshop pane activates. 3 The Real-Time Workshop pane has several pages, which you select from Category. Select Target configuration from Category. 2-103 target_ti.book Page 104 Thursday, June 20, 2002 3:57 PM 2 Targeting C6000™ DSP Hardware Figure 2-11: Real-Time Workshop Pane (Target Configuration Category) 4 Click Browse next to the System target file field. This opens the System Target File Browser. The browser displays a list of available target configurations. When you select a target configuration, Real-Time Workshop automatically chooses the appropriate System target file, Template makefile, and Make command. 2-104 target_ti.book Page 105 Thursday, June 20, 2002 3:57 PM C6711 DSK Tutorial 2-4—A More Complex Application Figure 2-12: Selecting Your Target in the System Target File Browser 5 From the list of available configurations, select ti_c6000.tlc (as in Figure 2-12) and click OK. The Real-time Workshop pane now displays the correct System target file (ti_c6000.tlc), Template makefile (ti_c6000.tmf), and Make command (make_rtw), as shown in Figure 2-11. 6 Select General code generation options from the Category list. The options displayed here are common to all target configurations. Check to make sure that all options are set to their defaults, as below. 2-105 target_ti.book Page 106 Thursday, June 20, 2002 3:57 PM 2 Targeting C6000™ DSP Hardware 7 Select TLC debugging from Category. Clear all the check boxes in this category. 8 Select TI C6000 compiler from Category. The options displayed here are specific to the C6711 DSK target. Check to make sure that the options are set as shown below. 2-106 target_ti.book Page 107 Thursday, June 20, 2002 3:57 PM C6711 DSK Tutorial 2-4—A More Complex Application . 9 Select TI C6000 linker from Category. Set the linker options as shown. 2-107 target_ti.book Page 108 Thursday, June 20, 2002 3:57 PM 2 Targeting C6000™ DSP Hardware 10 Select TI C6000 runtime from Category. Set the run-time options as shown. 2-108 target_ti.book Page 109 Thursday, June 20, 2002 3:57 PM C6711 DSK Tutorial 2-4—A More Complex Application 11 Click OK to close the Simulation Parameters dialog. Save the model to retain your new build settings. Building and Running Your Model The Real-Time Workshop build process generates C code from the model, and then compiles and links the generated program. To build and run the program: 1 Access the simulation parameters for your model. 2 Click Build in the Simulation Parameters dialog to start the build process. 3 A number of messages concerning code generation and compilation appear in the MATLAB command window. The initial messages are ### Starting Real-Time Workshop build procedure for model: dnoisfrtw 2-109 target_ti.book Page 110 Thursday, June 20, 2002 3:57 PM 2 Targeting C6000™ DSP Hardware ### Generating code into build directory: .\dnoisfrtw_c6000_rtw The content of the succeeding messages depends on your compiler and operating system.The final message is ### Successful completion of Real-Time Workshop build procedure for model: dnoisfrtw 4 The working directory now contains an executable, dnoisfrtw.exe. In addition, Real-Time Workshop created a build directory, dnoisfrtw_c6000_rtw. To review the contents of the working directory after the build, type dir at the MATLAB command prompt. dir . .. dnoisfrtw.exe dnoisfrtw.mdl dnoisfrtw_c6000_rtw 5 To run the executable from the MATLAB command window, type !dnoisfrtw The “!” character passes the command that follows it to the operating system, which runs the stand-alone dnoisfrtw program. The program produces one line of output. **starting the model** 2-110 target_ti.book Page 111 Thursday, June 20, 2002 3:57 PM C6711 DSK Tutorial 2-4—A More Complex Application 6 To see the contents of the build directory, type dir dnoisfrtw_c6000_rtw Contents of the Build Directory The build process creates a build directory and names it modelname_target_rtw, concatenating the name of your source model and your chosen target. In this example, your build directory is named dnoisfrtw_c6000_rtw. dnoisfrtw_c6000_rtw contains these generated source code files: • dnoisfrtw.c—the stand-alone C code that implements the model. • dnoisfrtw.h—an include header file containing information about the state variables • dnoisfrtw_export.h—an include header file containing information about exported signals and parameters The build directory also contains other files used or generated in the build process, such as the object (.obj) files, the command file (.cmd), and the generated makefile (dnoisfrtw.mk). 2-111 target_ti.book Page 112 Thursday, June 20, 2002 3:57 PM 2 Targeting C6000™ DSP Hardware Creating Code Composer Studio Projects Without Building Rather than targeting your C6000 board when you build your signal processing application, you can create Texas Instruments Code Composer Studio (CCS) projects. Creating projects for CCS lets you use the tools provided by the CCS software suite to debug your real-time process. If you build and download your Simulink model to CCS, the Embedded Target for TI C6000 DSP opens Code Composer, creates a new CCS project named for your model, and populates the new project with all the files it creates during the build process—the object code files, the assembly language files, the map files, and any other necessary files. As a result, you can immediately use CCS to debug your model using the features provided by CCS. Creating a project in CCS is the same as targeting C6000 hardware. You configure your target options, select your build action to create a CCS project, and then build the project in CCS by clicking Make Project. To Create Projects in CCS Without Loading Files to Your Target From the Real-Time Workshop pane in the Simulation Parameters dialog, select TI C6000 runtime in Category. Select Create_CCS_Project for the Build Action, as shown in the figure. Note that the Build and Build_and_execute options create CCS projects as well. The Generate_code_only option does not create a CCS project. 2-112 target_ti.book Page 113 Thursday, June 20, 2002 3:57 PM Creating Code Composer Studio Projects Without Building After you select Create_CCS_Project, set the options for the CCS compiler and CCS linker categories on the Real-Time Workshop pane. Click Make Project to build your new CCS project. Real-Time Workshop and the Embedded Target for TI C6000 DSP generate all the files for your project in CCS and create a new project in the IDE. Your new project is named for the model you built, with a custom project build configuration custom_MW, not Release or Debug. In CCS you see your project with the files in place in the directory tree. 2-113 target_ti.book Page 114 Thursday, June 20, 2002 3:57 PM 2 Targeting C6000™ DSP Hardware 2-114 target_ti.book Page 1 Thursday, June 20, 2002 3:57 PM 3 Targeting with DSP/BIOS™ Options Introducing DSP/BIOS™ (p. 3-2) Introduces DSP/BIOS from Texas Instruments. DSP/BIOS and Targeting Your C6000 DSP™ (p. 3-4) Discusses the concepts and files used by Embedded Target for TI C6000 DSP in DSP/BIOS projects. “Using DSP/BIOS with Your Target Application” Shows you how to add DSP/ BIOS to your on page 3-20 projects when you generate code. Profiling Generated Code (p. 3-11) Demonstrates how to set up and use profiling in your generated code. target_ti.book Page 2 Thursday, June 20, 2002 3:57 PM 3 Targeting with DSP/BIOS™ Options Introducing DSP/BIOS™ The Embedded Target for TI C6000 DSP supports DSP/BIOS™ features as options when you generate code for your target. In the sections that follow, you can read more about what DSP/ BIOS is, how the Embedded Target for TI C6000 DSP incorporates the DSP/BIOS features into your generated code, and some ways you might use the real-time operating system (RTOS) features of DSP/BIOS in your application. Follow these links for more information on specific areas that interest you, or read on for more details. • “DSP/BIOS and Targeting Your C6000 DSP™” on page 3-4 • “Code Generation with DSP/BIOS” on page 3-7 • “Profiling Generated Code” on page 3-11 • “Using DSP/BIOS with Your Target Application” on page 3-20 As a part of the Texas Instruments eXpressDSP™ technology, TI designed DSP/BIOS to include three components: • DSP/BIOS Real-Time Analysis Tools—use these tools and windows within Code Composer Studio to view your program as it executes on the target in real-time. • DSP/BIOS Configuration Tool—enables you to add and configure any and all DSP/BIOS objects that you use to instrument your application. Use this tool to configure interrupt schedules and handlers, set thread priorities, and configure the memory layout on your DSP. • DSP/BIOS Application Programming Interface (API)—lets you use C or assembly language functions to access and configure DSP/BIOS functions by calling any of over 150 API functions. The Embedded Target for TI C6000 DSP uses the API to let you access DSP/BIOS from MATLAB. You link these components into your application, directly or indirectly referencing only functions you need for your application to run efficiently and optimally. Only functions that you specifically reference become part of you code base. Others are not included to avoid adding unused code to your project. In addition, after you add one or more functions from DSP/BIOS, the configuration tool help you disable feature you do not need later, letting you optimize your program for speed and size. 3-2 target_ti.book Page 3 Thursday, June 20, 2002 3:57 PM Introducing DSP/BIOS™ For details about DSP/BIOS and what it can do for your applications, refer to your Code Composer Studio™ and DSP/BIOS documentation from Texas Instruments. 3-3 target_ti.book Page 4 Thursday, June 20, 2002 3:57 PM 3 Targeting with DSP/BIOS™ Options DSP/BIOS and Targeting Your C6000 DSP™ When you use Real-Time Workshop to generate code from the Simulink model of your digital signal processing application, you can choose to include the DSP/BIOS features provided by the Embedded Target for TI C6000 DSP in your generated code. By electing to include DSP/BIOS in your generated project, the Embedded Target for TI C6000 DSP adds a DSP/BIOS configuration file (with the filename modelname.cdb) to your project, and adds the the following files as well: • modelnamecfg.s62—contains the DSP/BIOS objects required by your application and the vector table for the hardware interrupts. • modelnamecfg.h62—the header file for modelnamecfg.s62. • modelnamecfg.h—model configuration header file. • modelnamecfg_c.c—source code for the model. • modelnamecfg.cmd—the linker command file for the project; adds the required DSP/BIOS libraries and the library RTS6201.lib, or the run-time support library for your target. Thus the executable code and source code you generate when you use the DSP/BIOS option is not the same as the code generated without DSP/BIOS included. Rather than having you incorporate the DSP/BIOS files manually when you create your application, as you would if you used Code Composer Studio alone, or another text editor, the Embedded Target for TI C6000 DSP starts from your Simulink model and adds the DSP/BIOS files automatically. As it adds the files it: • Configures the DSP/BIOS configuration file for your model needs • Sets up the objects you need to analyse your program while it runs on your target • Handles memory mapping to optimize your code based on the blocks in your model 3-4 target_ti.book Page 5 Thursday, June 20, 2002 3:57 PM DSP/BIOS and Targeting Your C6000 DSP™ DSP/BIOS Configuration File DSP/BIOS projects all have a file with the extension .cdb. The file contains the DSP/BIOS configuration information for your project, in the form of objects for instrumenting and scheduling tasks in the program code. Included in any DSP/BIOS project might be: • Log (LOG) objects for logging events and messages (replace the *printf statements, for instance) • Statistics (STS) objects for tracking the performance of your code • A clock (CLK) object for configuring the clock on your target, and various memory functions • Hardware and software interrupt (HWI, SWI) objects that control program execution • Other objects you use to meet your needs. Your TI DSP/BIOS documentation can provide all the details about the objects and how to use them. In addition, your installed software from TI includes tutorials to introduce you to using DSP/BIOS in projects. Not all of the DSP/BIOS objects get used by the code you generate from the Embedded Target for TI C6000 DSP. In the next sections, you learn about which objects the Embedded Target uses and how. Of course, you can still add more objects to your code through Code Composer Studio. Note, however, that if you add additional DSP/BIOS objects beyond those provided by the Embedded Target for TI C6000 DSP, you lose the additions when you regenerate your code from your Simulink model. Memory Mapping Memory mapping that takes place in the linker command file now appears in the MEM object in the DSP/BIOS configuration file. Your memory sections, such as the DATA_MEM assignments and definitions, move to the MEM object, as do the memory segments. After completing this conversion, the memory assignment portions of your non-DSP/BIOS linker command file are not necessary in the linker command file. 3-5 target_ti.book Page 6 Thursday, June 20, 2002 3:57 PM 3 Targeting with DSP/BIOS™ Options Hardware Interrupt Vector Table In non-DSP/BIOS project, the vector.asm file in your project defines the hardware interrupt vector table. An assembly language file, vector.asm, defines which interrupts your project uses and what each one does. When you choose to use DSP/BIOS capabilities, the interrupts defined in the vector table move to the Hardware Interrupt Service Routine Manager in the CCS Configuration Tool. With all of your interrupts now defined as Hardware Interrupts (HWI) in the Configuration Tool, your project does not need vector.asm so the file does not appear in your DSP/BIOS enabled projects. Linker Command File After migrating your memory sections and segment, and your hardware interrupt vector table to the configuration file, building with hte DSP/BIOS option creates a compound linker command file. Since DSP/BIOS only allows one command file per project, and your linker file may comprise command options that did not move the the DSP/BIOS configuration, Embedded Target for TI C6000 DSP uses compound command files. Compound command files work to let your project use more than one command file. By starting your original linker command file with the statement “-lmodelnamecfg.cmd” added as the first line in the file, your DSP/BIOS enabled project uses both your original linker command file and the DSP/BIOS command file. You get the features provide by DSP/BIOS as well as the custom command directives you need. 3-6 target_ti.book Page 7 Thursday, June 20, 2002 3:57 PM Code Generation with DSP/BIOS Code Generation with DSP/BIOS While generating code that include the DSP/BIOS options is straightforward using the Incorporate DSP/BIOS option in the TIC6000 code generation options, you should know what changes between code that does not include DSP/BIOS and code that does. Two things change when you generate code with DSP/BIOS—files are added and removed from the project in CCS, and DSP/BIOS objects become part of your generated code. With these in place, you can use the DSP/BIOS features in CCS to debug your project, as well as use the profiling option in Embedded Target for TI C6000 DSP to check the performance of your application running on your target. Generated Code Without and with DSP/BIOS The next two figures show the results of generating code without and with the DSP/BIOS option enabled in the Simulation Parameters dialog. Example—c6711dskwdnoisf.pjt code generated without DSP/BIOS When you create your project in Code Composer Studio, the directory structure looks like this. 3-7 target_ti.book Page 8 Thursday, June 20, 2002 3:57 PM 3 Targeting with DSP/BIOS™ Options Example—c6711dskwdnoisf.pjt code including DSP/BIOS If you now create a new project that includes DSP/BIOS, the directory structure for your project changes to look like the following figure. 3-8 target_ti.book Page 9 Thursday, June 20, 2002 3:57 PM Code Generation with DSP/BIOS Notice that the new directory includes some new files, shown in the next table. Added File Description modelname.cdb Contains the DSP/BIOS objects required by your application, and the vector table for the hardware interrupts modelnamecfg.s62 Shows all the included files in your project, the variables, the DSP/BIOS objects, and more in this file generated from the .cdb file. 3-9 target_ti.book Page 10 Thursday, June 20, 2002 3:57 PM 3 Targeting with DSP/BIOS™ Options Added File Description modelnamecfg.h62 The header file for modelnamecfg.s62 modelnamecfg.h Model configuration header file modelnamecfg_c.c Source code for the model modelnamecfg.cmd The linker command file for the project; adds the required DSP/BIOS libraries and the library RTS6201.lib or the run-time support library for your target With DSP/BIOS functions enabled for your project, the following files no longer appear in your project. Filename Description vectors.asm Defines the hardware interrupts (HWI) used by interrupt service routines on the processor. This file is removed after all hardware interrupts appear in the HWI section of the Configuration Tool. Original linker command file— Assigns memory sections on the processor. Removed if SECTION directive is empty because all section assignments moved to the configuration file. Otherwise, include call to the DSP/BIOS command file modelname.cmd Some *.lib files Provide access to libraries for the processor, and peripherals. Removed if their contents have been incorporated in the new compound linker command file. When you investigate your generated code, notice that the function “main” portion of modelname_main.c includes different code when you generate DSP/BIOS-enabled source code, and modelname_main.c incorporates one or more new functions. 3-10 target_ti.book Page 11 Thursday, June 20, 2002 3:57 PM Profiling Generated Code Profiling Generated Code When you use the Embedded Target for TI C6000 DSP to generate code that incorporates the DSP/BIOS options, you can easily profile your generated code to gauge performance and find bottlenecks. By selecting the Profile performance at atomic subsystem boundaries option in the Real-Time Workshop options, you direct Real-Time Workshop to insert statistics (STS) object instrumentation at the beginning and end of the code for each atomic subsystem in your model. (For more about statistics objects, refer to your DSP/BIOS documentation from Texas Instruments.) After your code has been running for a few moments on your target, you can retrieve the profiling results from your target back to MATLAB and display the information in a custom HTML report. For directions that explain how to use the profiling feature, refer to “To Profile Your Generated Code”. To enable the profile feature for your Simulink model, choose Tools-> Real-Time Workshop -> Options from the model menu bar. Navigate to the TI C6000 code generation category, and select the Profile performance at atomic subsystem boundaries option. Before you build your model in the Real-Time Workshop, you must convert the segments of your model to profile into subsystems using Create subsystem. Code profiling works only on atomic subsystems in your model. By designating one or more subsystems in your model as atomic, you force the subsystem to be executed all at once, that is only at a time step when all of its inputs are available. Waiting for all the subsystem inputs to be available before running the subsystem allows the subsystem code to be profiled as a contiguous segment. Notice the STS objects that are placed into the generated code and the generated DSP/BIOS configuration in the configuration file. The Embedded Target for TI C6000 DSP inserts and configures these objects specifically for profiling your code. You do not have to make changes to the STS objects. Simply download the generated application to your board, turn on the DSP/BIOS Statistics View in Code Composer Studio, and run the board for a few seconds. You see the statistics being accumulated. To help you to measure subsystem performance, Embedded Target for TI C6000 DSP provides a custom HTML report that analyzes and displays the profile statistics. The HTML page shows you the amount of time spent computing each subsystem, including both Outputs and Update code segments, 3-11 target_ti.book Page 12 Thursday, June 20, 2002 3:57 PM 3 Targeting with DSP/BIOS™ Options and provides links to click that open the corresponding subsystem in the Simulink model. To view the profiling report, use profile(cc,'report') at the MATLAB prompt, where cc is the handle to your target and Code Composer Studio and report is one of the input options for profile. When you generate the report, Embedded Target for TI C6000 DSP stores the report in your MATLAB temporary directory, with the name profileReport.html. To locate your temporary directory, type tempdir at the MATLAB prompt. MATLAB returns the path to your temporary directory. Note Each time you run the profiling process, Embedded Target for TI C6000 DSP replaces your existing report with a newer version. To save earlier reports, rename the report before you generate a new one, or change your destination temporary directory in MATLAB. You must invoke profile after your Real-Time Workshop build, without clearing MATLAB memory between operations, so that stored information about the model is still available to the report generator. If you clear your MATLAB memory, information required for the profile report gets deleted and the report does not work properly. If you have a Code Composer Studio project that was previously created with Real-Time Workshop, you must repeat the Real-Time Workshop build to see the subsystem-based profile analysis in the report. Trace each subsystem presented in the profile report back to its corresponding subsystem in your Simulink model by clicking a link in the report. The mapping from Simulink subsystems to generated system code is complex and thus not detailed here. Inspect the generated code, particularly modelname.c, to determine where and how Simulink and Real-Time Workshop implemented particular subsystems. In some cases, Real-Time Workshop may have pruned unused data paths, causing related performance measurements to become meaningless. Reusable system code, or code reuse, where a single function is 3-12 target_ti.book Page 13 Thursday, June 20, 2002 3:57 PM Profiling Generated Code called from multiple places in the generated code, can exhibit extra measurements in the profile statistics, while the duplicate subsystem may not show valid measurements. Although there are STS objects which measure the execution time of the entire mdlOutputs and mdlUpdate functions, those measurements can be misleading because they do not include other segments of code that execute at each interrupt. Statistics for the SWI are used when calculating the critical headroom, which does not include the small overhead required for each interrupt. To measure most accurately the overall application CPU usage, consider the DSP/BIOS IDL statistics, which measure time spent not doing application work. The interrupt rate for a DSP/BIOS application created by the Embedded Target for TI C6000 is the fastest block execution rate in the model. The interrupt rate is usually, but not always, the same as the codec frame rate. When there is an upsampling operation or other rate-increasing operation in your model, interrupts are triggered by a timer (PRD) object at the faster rate. You can determine the effective interrupt rate of the model by inverting the interrupt interval reported by the profiler. Nested subsystems are profiled inclusively—the execution time reported for the parent subsystem includes the time spent in any profiled child subsystems. For models with multiple sample times, the profiling feature can be used only in single-tasking mode, because code segments must execute contiguously for the timing measurements to be correct. Reading Your Profile Report After you have the report from your generated code, you need to interpret the results. This section provides a link to sample report from a model and explains each entry in the report. Sample of a Profile Report When you click Sample Profile Report, the sample report opens in a new Help browser window. We open a new window so you can read the report and the descriptions of the report contents at the same time. Running the model c6711dskwdnoisf with DSP/BIOS included generated the sample report shown accessed by the link. The next sections explain the headings in the report— whatthey mean and how they are measured (where that applies). 3-13 target_ti.book Page 14 Thursday, June 20, 2002 3:57 PM 3 Targeting with DSP/BIOS™ Options Report Heading Information At the beginning of the report, profiling includes the name of the model you profiled, the target you used, and the date of the report. Since the report changes each time you run it, the date can be an important means of tracking model development. Note Each time you run the profiling process, Embedded Target for TI C6000 DSP replaces your existing report with a newer version. To save earlier reports, rename the report before you generate a new one, or change your destination temporary directory in MATLAB, since MATLAB stores the report in your MATLAB temporary directory. Report Subsections and Contents Within the body of your profile report, sections report the overall performance of your generated code and the performance of each atomic subsystem. 3-14 Report Heading Description Overall CPU Statistics Show you how your code ran from when you started program execution to when you stopped execution to gather the statistics. Summary of Subsystem Profiling Lists the name of each subsystem and the performance of the code in the subsystem. Profiled Simulink Subsystems Presents the statistics for each profiled subsystem separately, by subsystem. Each listing include the STS object name or names that instrument the subsystem. STS Objects Lists every STS object in the generated code and the statistics for each. In particular, notice the IDL_busyObj entry. DSP/BIOS uses this to determine the CPU load statistics. For more information about this object, refer to your DSP/BIOS documentation from TI. target_ti.book Page 15 Thursday, June 20, 2002 3:57 PM Profiling Generated Code STS timing objects that are associated with subsystem profiling are configured for host operation at 4*x, reflecting the numerical relationshop between CPU clock cycles and high-resolution timer clicks. STS Average, Max, and Total measurements return counts in instructions or CPU clock cycles. Critical Headroom The measured amount of time the CPU spent in idle during the worst-case interrupt cycle, when all rates in the code coincide and the code exhibits the maximum measured number of clock cycles spent in idle mode (time spent waiting to process information). When Critical headroom approaches zero, your code is at risk for overrunning. Interpret Critical headroom as a portion of the time between interrupts. Time Between Interrupts Time in microseconds between interrupts, where the interrupt is generated either by the ADC block or by a PRD timer. Number of Interrupts Counted The number of interrupts that occurred between start model execution and the moment the statistics were obtained. CPU Clock Speed The instruction cycle speed of your digital signal processor. On the C6701 EVM, you can adjust this speed externally to MATLAB. If you change the speed to something other than the default setting of 100 MHz, you must specify the new speed in the Real-Time Workshop options using the Current C6701EVM CPU clock rate option on the TIC6000 runtime pane. Set at a fixed 150 MHz, the CPU clock rate on the C6711 DSK cannot be changed. You do not need to report the setting in the Real-Time Workshop options. CPU Load The average CPU usage computed by CCS. Note that the actual load in any particular interrupt cycle may vary greatly from this average, especially in multirate applications. 3-15 target_ti.book Page 16 Thursday, June 20, 2002 3:57 PM 3 Targeting with DSP/BIOS™ Options Maximum Time Spent in This Subsystem per Interrupt (Max Time) The amount of time spent in the code segment corresponding to the indicated subsystem in the worst case. Over all the iterations measured, the maximum time that occurs is reported here. Since the profiler only supports single-tasking solver mode, no calculation can be preempted by a new interrupt. All calculations for all subsystems must complete within one interrupt cycle, even for subsystems that execute less often than the fastest rate. Maximum Percent of Interrupt Interval (Max %) The worst-case execution time of the indicated subsystem, reported as a percentage of the time between interrupts. STS Objects Profiling uses STS objects to measure the execution time of each atomic subsystem. STS objects are a feature of the DSP/BIOS Run-time Analysis tools, and one STS object can be used to profile exactly one segment of code. Depending on how Real-Time Workshop generates code for each subsystem, there may be one or two segments of code for the subsystem; the computation of outputs and the updating of states can be combined or separate. Each subsystem is assigned a unique index, i. The correspondence between subsystem and STS object can be determined from the names of the objects. Each STS object has a name of the form stsSysi_segment where i is the subsystem index and segment is one of Output, Update, or OutputUpdate. To Profile Your Generated Code Before profiling your generated code, you configure your model and the Real-Time Workshop to support the profiling features in Embedded Target for TI C6000 DSP. Seven tasks compose the process of profiling the code you generate. 1 Enable DSP/BIOS for your generated code. 2 Enable Profiling in the Real-Time Workshop. 3-16 target_ti.book Page 17 Thursday, June 20, 2002 3:57 PM Profiling Generated Code 3 Create atomic subsystems to profile in your model. 4 Build your model. 5 Download your generated code to your target. 6 Run your code on the target. 7 In MATLAB, use profile to view the profile report. To demonstrate profiling generated code, this procedure uses the wavelet denoising model c6711dskwdnoisf.mdl that is included with the Embedded Target for TI C6000 DSP demo programs. If you are using the C6701 EVM as your target, use the model C6710evmwdnoisf instead throughout this procedure. Simulators work as well, just choose the appropriate model for your simulator. Begin by loading the model, entering c6711dskwdnoisf at the MATLAB prompt. The model opens on your desktop. Enabling Profiling for Your Generated Code 1 To enable the profile feature for your Simulink model, select Tools -> Real-Time Workshop -> Options… from the model menu bar. The Simulation Parameters dialog opens for you to set the code generation options for your model. 2 Click Real-Time Workshop to display the configuration panes for setting your code generation options. 3 From the Category list, select TI C6000 code generation. Your display changes to show the options you can set to control code generation for TI C6000 targets, as shown here. 3-17 target_ti.book Page 18 Thursday, June 20, 2002 3:57 PM 3 Targeting with DSP/BIOS™ Options 4 Select the Profile performance at atomic subsystem boundaries option. Selecting this option enables profiling in your generated code. However, you still need to configure your model to support the profiling process. Creating Atomic Subsystems for Profiling Profiling your generated code depends on two features—DSP/BIOS being enabled and your model having one or more subsystems defined as atomic subsystems. To learn more about subsystems and atomic subsystems, refer to your Simulink documentation in the Help browser. In this tutorial, you create two atomic subsystems—one from the Analysis Filter Bank block and a second from the Soft Threshold block. 1 Select the Analysis Filter Bank block. Select Edit -> Create subsystem from the model menu bar. Note that the name of the block changes to subsystem. Repeat for the Soft Threshold block. 2 To convert your new subsystems to atomic subsystems, right-click on each subsystem and choose Subsystem parameters… from the context menu. 3 In the Block Parameters: Subsystem dialog for each subsystem, select the Treat as atomic unit option. Click OK to close the dialog. If you look closely you see that the subsystems now have heavier borders to distinguish them from the other blocks in your model. Building and Profiling Your Generated Code You have enabled profiling in your model and configured two atomic subsystems in the model as well. Now, use the profiling feature in Embedded Target for TI C6000 DSP to see how your code runs and check the performance for bottlenecks and slowdowns as the code runs on your target. 1 Select Tools -> Real-Time Workshop -> Build Model. If compiling, linking, downloading, and executing are not automated according to RTW Options, then perform these tasks in CCS IDE. Allow the application to run for a few seconds or as long as necessary to execute the model segments of interest a few times. Then stop the program. 3-18 target_ti.book Page 19 Thursday, June 20, 2002 3:57 PM Profiling Generated Code 2 Create a link to CCS by entering cc = ccsdsp; at the MATLAB prompt. 3 Enter profile(cc,'report') at the prompt to generate the profile report of your code executing on your target. The profile report appears in the Help browser. It should look very much like the report sample shown here; your results may differ based on your target and your settings in the model. 3-19 target_ti.book Page 20 Thursday, June 20, 2002 3:57 PM 3 Targeting with DSP/BIOS™ Options Using DSP/BIOS with Your Target Application The Embedded Target for TI C6000 DSP lets you build projects and generate code with or without DSP/BIOS included. To Enable DSP/BIOS When You Generate Code For any code you generate using Real-Time Workshop and the Embedded Target for TI C6000 DSP, you have the option of including DSP/BIOS features automatically when you generate the code. Incorporating the features requires you to select one option in the TI C6000 code generation settings— Incorporate DSP/BIOS. 1 Open the model to use to generate code. 2 From your model menu bar, select Simulation -> Simulation parameters… to launch the Simulation Parameters dialog. 3 From the Category list, select TI C6000 code generation. To provide access to the options, the display changes to show the following options. 3-20 target_ti.book Page 21 Thursday, June 20, 2002 3:57 PM Using DSP/BIOS with Your Target Application 4 As shown in the figure, select Incorporate DSP/BIOS. 5 Using the other entries on the Category list, set other options as you need. 6 From the Category list, select TI C6000 runtime. 7 For the Build action, select one of the following choices. Each option generates code that includes the DSP/BIOS instrumentation. - Create_CCS_project - Build - Build_and_execute Notice that the Generate_code_only option is not on the preceding list. Using the Generate_code_only option does not generate DSP/BIOS enabled code. 8 Click Make Project, Build, or Build & Execute to generate code. 3-21 target_ti.book Page 22 Thursday, June 20, 2002 3:57 PM 3 Targeting with DSP/BIOS™ Options 3-22 target_ti.book Page 1 Thursday, June 20, 2002 3:57 PM 4 Using the C62x DSP Library About the C62x DSP Library (p. 4-2) Introduces the C62x DSP Library Fixed-Point Numbers (p. 4-3) Discusses the representation of fixed-point numbers in the C62x DSP Library Building Models (p. 4-7) Issues to consider when you build models with the C62x DSP Library target_ti.book Page 2 Thursday, June 20, 2002 3:57 PM 4 Using the C62x DSP Library About the C62x DSP Library The blocks in the C62x DSP Library correspond to functions in the Texas Instruments TMS320C62x DSP Library assembly-code library, which target the TI C62x family of digital signal processors. You can use these blocks to run simulations by building models in Simulink before generating code. Once you develop your model, you can invoke Real-Time Workshop to generate code that is optimized to run on the C6711 DSK or C6701 EVM. During code generation, each C62x DSP Library block in your model is mapped to its corresponding TMS320C62x DSP Library assembly-code routine to create target-optimized code. The C62x DSP Library blocks generally input and output fixed-point data types. The reference pages in Chapter 6, “Block Reference” discuss the data types accepted and produced by each block in the library. “Fixed-Point Numbers” on page 4-3 gives a brief overview of using fixed-point data types in Simulink. For a more in-depth discussion of this topic, including issues with scaling and precision when performing fixed-point operations, refer to your Fixed-Point Blockset documentation. You can use C62x DSP Library blocks with certain core Simulink blocks, as well as with certain blocks from the DSP Blockset and Fixed-Point Blockset. To learn more about creating models that include both C62x DSP Library blocks and blocks from other blocksets, refer to “Building Models” on page 4-7. Common Characteristics The following characteristics are common to all C62x DSP Library blocks: • Sample times are inherited from driving blocks. • Blocks are single rate. • Parameters are not tunable, except for filter weights and coefficients, and not in real-time. • All blocks support discrete sample times. Individual reference pages indicate blocks that also support continuous sample times. To learn more about characteristics particular to each block in the library, refer to Chapter 6, “Block Reference.” 4-2 target_ti.book Page 3 Thursday, June 20, 2002 3:57 PM Fixed-Point Numbers Fixed-Point Numbers In digital hardware, numbers are stored in binary words. A binary word is a fixed-length sequence of binary digits (1s and 0s). How hardware components or software functions interpret this sequence of 1s and 0s is defined by the data type. Binary numbers are represented as either fixed-point or floating-point data types. A fixed-point data type is characterized by the word size in bits, the binary point, and whether it is signed or unsigned. The position of the binary point is the means by which fixed-point values are scaled and interpreted. For example, a binary representation of a fractional fixed-point number (either signed or unsigned) is shown below. b ws – 1 b ws – 2 … b5 b4 • b3 b2 b1 b0 LSB MSB binary point where • b i is the ith binary digit. • ws is the word size in bits. • b ws – 1 is the location of the most significant (highest) bit (MSB). • b 0 is the location of the least significant (lowest) bit (LSB). • The binary point is shown four places to the left of the LSB. In this example, therefore, the number is said to have four fractional bits, or a fraction length of four. Signed Fixed-Point Numbers Signed binary fixed-point numbers are typically represented in one of three ways: • Sign/magnitude • One’s complement • Two’s complement 4-3 target_ti.book Page 4 Thursday, June 20, 2002 3:57 PM 4 Using the C62x DSP Library Two’s complement is the most common representation of signed fixed-point numbers and is used by TI digital signal processors. Negation using signed two’s complement representation consists of a bit inversion (translation into one’s complement) followed by the binary addition of a one. For example, the two’s complement of 000101 is 111011, as follows: 000101 ->111010 (bit inversion) ->111011 (binary addition of a 1 to the LSB) Q Format Notation The position of the binary point in a fixed-point number determines how you interpret the scaling of the number. When it performs basic arithmetic such as addition or subtraction, hardware uses the same logic circuits regardless of the value of the scale factor. In essence, the logic circuits have no knowledge of a binary point. They perform signed or unsigned integer arithmetic—as if the binary point is to the right of b0. Therefore, you, the programmer, determine the binary point. In the the C62x DSP Library, the position of the binary point in the signed, fixed-point data types is expressed in and designated by Q format notation. This fixed-point notation takes the form Qm.n where • Q designates that the number is in Q format notation—the Texas Instruments representation for signed fixed-point numbers. • m is the number of bits used to designate the two’s complement integer portion of the number. • n is the number of bits used to designate the two’s complement fractional portion of the number, or the number of bits to the right of the binary point. In Q format, the most significant bit is always designated as the sign bit. Representing a signed fixed-point data type in Q format always requires m+n+1 bits to account for the sign. Example—Q.15 For example, a signed 16-bit number with n = 15 bits to the right of the binary point is expressed as 4-4 target_ti.book Page 5 Thursday, June 20, 2002 3:57 PM Fixed-Point Numbers Q0.15 in this notation. This is (1 sign bit) + (m = 0 integer bits) + (n = 15 fractional bits) = 16 bits total in the data type. In Q format notation the m = 0 is often implied, as in Q.15 In the Fixed-Point Blockset, this data type is expressed as sfrac16 or sfix16_En15 In the Filter Design Toolbox, this data type is expressed as [16 15] Example—Q1.30 Multiplying two Q.15 numbers yields a product that is a signed 32-bit data type with n = 30 bits to the right of the binary point. One bit is the designated sign bit, thereby forcing m to be 1: m+n+1 = 1+30+1 = 32 bits total Therefore this number is expressed as Q1.30 In the Fixed-Point Blockset, this data type is expressed as sfix32_En30 In the Filter Design Toolbox, this data type is expressed as [32 30] Example—Q-2.17 Consider a signed 16-bit number with a scaling of 2(-17). This requires n = 17 bits to the right of the binary point, meaning that the most significant bit is a sign-extended bit. Sign extension fills additional bits with the value of the MSB. For example, consider a 4-bit two’s complement number 1011. When this number is extended 4-5 target_ti.book Page 6 Thursday, June 20, 2002 3:57 PM 4 Using the C62x DSP Library to 7 bits with sign extension, the number becomes 1111101 and the value of the number remains the same. One bit is the designated sign bit, forcing m to be -2: m+n+1 = -2+17+1 = 16 bits total Therefore this number is expressed as Q-2.17 In the Fixed-Point Blockset, this data type is expressed as sfix16_En17 In the Filter Design Toolbox, this data type is expressed as [16 17] Example—Q17.-2 Consider a signed 16-bit number with a scaling of 2^(2) or 4. This means that the binary point is implied to be 2 bits to the right of the 16 bits, or that there are n = -2 bits to the right of the binary point. One bit must be the sign bit, thereby forcing m to be 17: m+n+1 = 17+(-2)+1 = 16 Therefore this number is expressed as Q17.-2 In the Fixed-Point Blockset, this data type is expressed as sfix16_E2 In the Filter Design Toolbox, this data type is expressed as [16 -2] 4-6 target_ti.book Page 7 Thursday, June 20, 2002 3:57 PM Building Models Building Models You can use C62x DSP Library blocks in models along with certain core Simulink, DSP Blockset, and Fixed-Point Blockset blocks. This section discusses issues you should consider when building a model with blocks from these different libraries. Converting Data Types As always, it is vital to make sure that any blocks you connect in a model have compatible input and output data types. In most cases, C62x DSP Library blocks handle only a limited number of specific data types. You can refer to any block reference page in Chapter 6, “Block Reference” for a discussion of the data types that the block accepts and produces. When you connect C62x DSP Library blocks and Fixed-Point Blockset blocks, you will often need to set the data type and scaling in the block parameters of the Fixed-Point Blockset block to match the data type of the C62x DSP Library block. Many Fixed-Point Blockset blocks allow you to set their data type and scaling through inheritance from the driving block, or through backpropagation from the next block. This can be a good way to set the data type of a Fixed-Point Blockset block to match a connected C62x DSP Library block. Some DSP Blockset blocks and core Simulink blocks also accept fixed-point data types. Make the appropriate settings in these blocks’ parameters when you connect them to a C62x DSP Library block. However, to use DSP Blockset or core Simulink blocks that do not handle fixed-point data types in your model with C62x DSP Library blocks, you must use an appropriate data type conversion block: • To connect fixed-point and nonfixed-point blocks, use the Gateway In and Gateway Out blocks in the Data Type library of the Fixed-Point Blockset. • To serve as an interface to nonfixed-point blocks, use the Convert Floating-Point to Q.15 and Convert Q.15 to Floating-Point blocks in the C62x DSP Library. • To connect blocks of varying nonfixed-point data types in your model, use the Data Type Conversion block in the Signals and Systems Simulink library 4-7 target_ti.book Page 8 Thursday, June 20, 2002 3:57 PM 4 Using the C62x DSP Library • To connect blocks of varying fixed-point data types in your model, use the Conversion and Conversion Inherited blocks in the Data Type library of the Fixed-Point Blockset. See the reference pages of these blocks or invoke the Help from their dialogs for more information. Using Sources and Sinks The C62x DSP Library does not include source or sink blocks. Use source or sink blocks from the core Simulink library or DSP Blockset in your models with C62x DSP Library blocks. See “Converting Data Types” on page 4-7 for more information on incorporating blocks from other libraries into your models. Choosing Blocks to Optimize Code In some cases, blocks that perform similar functions appear in more than one blockset. For example, both the C62x DSP Library and the DSP Blockset have an Autocorrelation block. How do you choose which to include in your model? If you are building a model to run on the C6711 DSK or C6701 EVM, choosing the block from the C62x DSP Library will always yield better optimized code. You can use a similar block from another library if it gives you functionality that the C62x DSP Library block does not support, but you will generate less well optimized code. 4-8 target_ti.book Page 1 Thursday, June 20, 2002 3:57 PM 5 Using FDATool with the Embedded Target for TI C6000 DSP Guidelines on Exporting Filters from FDATool to CCS IDE (p. 5-3) Things to think about when you export filters to Code Composer Studio™ Tutorial—Exporting Filters from FDATool to CCS IDE (p. 5-9) Takes you through the process of exporting a filter from FDATool to Code Composer Studio target_ti.book Page 2 Thursday, June 20, 2002 3:57 PM 5 Using FDATool with the Embedded Target for TI C6000 DSP The Filter Design and Analysis Tool (FDATool) in the Signal Processing Toolbox is a powerful user interface used for designing and analyzing filters. FDATool enables you to quickly design digital FIR or IIR filters by setting filter performance specifications, by importing filters from your MATLAB workspace, or by directly specifying filter coefficients. FDATool also provides tools for analyzing filters, such as magnitude and phase response plots and pole-zero plots. Once you have designed a filter in FDATool, you can export it to Code Composer Studio™ Integrated Development Environment (CCS IDE) to test the filter on an actual target digital signal processor (DSP). Using FDATool with CCS IDE takes filter design to the next level by enabling you to quickly test your filter on a target DSP, tune and optimize the filter in FDATool, and test your redesigned filter on the target. 5-2 target_ti.book Page 3 Thursday, June 20, 2002 3:57 PM Guidelines on Exporting Filters from FDATool to CCS IDE Guidelines on Exporting Filters from FDATool to CCS IDE You can export filters from FDATool to CCS IDE by generating a C header file, or by writing the filter coefficients directly to target memory. To export a filter from FDATool to CCS IDE, use the Export to Code Composer Studio (tm) IDE dialog (shortened to Export to CCS IDE dialog in this section). Open the dialog from the FDATool Targets menu. For guidelines on exporting filters using the Export to CCS IDE dialog, see the following sections: • “Selecting the Export Mode” on page 5-4 • “Cautions Regarding Writing Directly to Memory” on page 5-4 • “Variables and Memory Necessary for Filter Export” on page 5-5 • “Selecting the Export Data Type” on page 5-7 For instructions on using the Export to CCS IDE dialog, see “Tutorial— Exporting Filters from FDATool to CCS IDE” on page 5-9. 5-3 target_ti.book Page 4 Thursday, June 20, 2002 3:57 PM 5 Using FDATool with the Embedded Target for TI C6000 DSP Selecting the Export Mode You can export a filter by generating a C header file, or by writing the filter coefficients directly to target memory. The following table summarizes when and how to use the two export modes. Export Mode When to Use Suggested Use Generate C header file You have not yet allocated memory in your target DSP for the filter coefficients to export. Create a program file from the generated C header file. Loading this program file into your target allocates static memory locations in the target, and exports your filter coefficients to these memory locations. You may want to edit the header file so that the program file allocates extra target memory, providing you more freedom to change your filter. See “Allocating Sufficient or Extra Memory for Filter Coefficients” in the next section. (For a sample generated header file, see “Contents of the C Header File Generated in Task 1” on page 5-14.) Write directly to memory You have already allocated memory in your target DSP for the filter coefficients to export. Tune your filter coefficients in FDATool, and write the updated filter coefficients directly to the allocated target memory. See the next section, “Cautions Regarding Writing Directly to Memory”. Cautions Regarding Writing Directly to Memory When you write filter coefficients directly to target memory, you need to allocate sufficient memory for the coefficients, and proceed with caution when you update your filter coefficients in target memory. Allocating Sufficient or Extra Memory for Filter Coefficients When you export filter coefficients directly to target memory, the filter coefficients overwrite as many memory locations as they need. The export process does not check whether you allocated sufficient memory for your filter coefficients. You must allocate enough memory for your filter coefficients or you 5-4 target_ti.book Page 5 Thursday, June 20, 2002 3:57 PM Guidelines on Exporting Filters from FDATool to CCS IDE may get unexpected results. To ensure you allocate enough target memory for your filter, export the filter by generating a C header file, as described in “Tutorial—Exporting Filters from FDATool to CCS IDE” on page 5-9. You can allocate extra memory by editing the generated C header file, and then loading the associated program file into your target as described in the tutorial in “Step 8—Export the Filter by Generating a Program File” on page 5-13. Allocating extra memory provides more freedom for changing a filter and overwriting its previous version stored in target memory. Even after you allocate extra memory, you should still proceed with caution when overwriting old filter coefficients with updated coefficients as discussed in the next section. Overwriting Old Filter Coefficients with Updated Coefficients When you tune a filter to overwrite its previous version in target memory, carefully consider changes that increase the memory required to store the filter coefficients, or that alter the export data type. Do Not Tune a Filter’s Export Data Type. Never tune a filter by changing its data type, because the allocated memory expects the data type of the first version of the filter that you exported. Overwriting a filter with a filter that has a different data type usually yields unexpected results. Be Wary of Filter Changes that Increase Memory Required to Store Filter Coefficients. If you do not allocate extra memory when exporting the first version of your filter, do not tune the filter in ways that increase the memory required to store its coefficients. For instance, you should not increase the order of the filter. When you overwrite your original filter with one of a higher order, the updated filter may overwrite data in memory locations that you did not intend for storing filter coefficients. Even if you do allocate extra memory for your filter coefficients, be cautious about making changes that increase the memory required to store the coefficients. Examples of such changes include • Changing an FIR filter to an IIR filter • Increasing the filter order • Increasing the number of filter sections Variables and Memory Necessary for Filter Export When you export a filter by generating a C header file, the header file stores the filter coefficients in filter coefficient variables. You must name these 5-5 target_ti.book Page 6 Thursday, June 20, 2002 3:57 PM 5 Using FDATool with the Embedded Target for TI C6000 DSP variables in the Export to CCS IDE dialog. Variable names cannot be reserved words of the C programming language, such as if. By generating a program file from the C header file and loading the program file into your target, the filter coefficient variables in the header file appear in the target application symbol table. When you export a filter by writing directly to target memory, the target stores the filter coefficients in memory locations. These memory locations correspond to filter coefficient variables in the target application symbol table. To export directly to target memory, you specify these variables in the Export to CCS IDE dialog. The necessary filter coefficient variables depend on the structure of your filter. The Export to CCS IDE dialog provides you with the following parameters to specify or name the necessary filter coefficient variables. The dialog activates only the parameters you need to set; the others become invisible or inactive. Parameters for Specifying Filter Coefficient Variables Description Numerator Numerator filter coefficients Numerator length Number of numerator filter coefficients Denominator Denominator filter coefficients Denominator length Number of denominator filter coefficients Lattice coeffs Lattice coefficients Lattice coeffs length Number of lattice coefficients Ladder coeffs Ladder coefficients Ladder coeffs length Number of ladder coefficients Number of sections Number of filter sections (parameter is inactive if your filter has only one section) In the following table, x marks indicate the parameters you need to set for each filter structure. 5-6 target_ti.book Page 7 Thursday, June 20, 2002 3:57 PM Guidelines on Exporting Filters from FDATool to CCS IDE (Inactive for filters with one section.) Filter Coefficient Variables Necessary for Exporting Filters with Various Structures Selecting the Export Data Type When you export a filter, the export process suggests the export data type that best preserves the performance of your filter. Use the suggested export data type by selecting Export suggested in the Export to CCS IDE dialog. The supported export data types are • Signed integer (8-, 16-, or 32-bit) • Unsigned integer (8-, 16-, or 32-bit) 5-7 target_ti.book Page 8 Thursday, June 20, 2002 3:57 PM 5 Using FDATool with the Embedded Target for TI C6000 DSP • Double-precision floating point • Single-precision floating point Recommended Procedure for Selecting Export Data Type By adhering to the following procedure when you set the export data type of your filter, the exported filter coefficients closely match the coefficients of the filter you designed in FDATool. Step 1—Set the Numerical Precision of Your Filter in FDATool. Set the numerical precision of your filter in FDATool by using the Quantized Filter pane, available when you install the Filter Design Toolbox. If you do not have the Filter Design Toolbox, your filters in FDATool have the default precision— double-precision floating point. Step 2—Select an Export Data Type in the Export to CCS IDE Dialog. Use the export data type indicated by the Export suggested parameter in the Export to CCS IDE dialog. See the following note. Though Step 2 insists you use the Export suggested parameter, you may find it useful to select the Export as option and select an export data type other than the one suggested. However, if you deviate from the suggested data type, the exported filter coefficients can be very different from the coefficients of the filter you designed in FDATool. Note When you design your filter using an unsupported data type, the Export to CCS IDE dialog rounds the word length up to the next supported data type, and maintains the specified difference between the word length and fraction length. For example, for a filter with 14-bit word length and an 11-bit fraction length, the Export suggested parameter sets the export data type to a signed 16-bit integer with a 13-bit fraction length. 5-8 target_ti.book Page 9 Thursday, June 20, 2002 3:57 PM Tutorial—Exporting Filters from FDATool to CCS IDE Tutorial—Exporting Filters from FDATool to CCS IDE This tutorial shows you how to export filters from FDATool to CCS IDE with the Export to CCS IDE dialog. The tutorial covers exporting filters by generating C header files, and by writing filter coefficients directly to the target memory. Also see the previous section, “Guidelines on Exporting Filters from FDATool to CCS IDE” on page 5-3. Descriptions of the Two Tutorial Tasks “Task 1—Export Filter by Generating a C Header File” — You should complete this task before starting Task 2. Exporting a filter by generating a C header file not only exports your filter; it also ensures that you allocate enough target memory for the exported filter coefficients. “Task 2—Export Filter by Writing Directly to Target Memory” — You should complete Task 1 before starting this task to ensure you allocate enough target memory for the filter coefficients to export. Exporting directly to target memory is useful when you want to repeatedly tune your filter in FDATool, and then export the updated filter coefficients directly to the allocated target memory. Setting Up for the Tutorial To complete this tutorial, you must install both the Signal Processing Toolbox and the Embedded Target for the TI TMS320C6000 DSP Platform (shortened to Embedded Target for TI C6000 DSP in this section). You do not need to open CCS IDE before starting the tutorial. Task 1—Export Filter by Generating a C Header File In Task 1, you export a filter by generating a C header file. The generated C header file defines global arrays of filter coefficients that correspond to static memory locations in the final target program. By generating a program file from the C header file and loading the program file into your target, not only do you export your filter, but you ensure that you allocated enough memory for the exported filter coefficients. In Task 2, you write filter coefficients directly to the memory allocated in Task 1. You should complete Task 1 before starting Task 2. Step 1—Open FDATool Open FDATool by typing fdatool in the MATLAB command window. 5-9 target_ti.book Page 10 Thursday, June 20, 2002 3:57 PM 5 Using FDATool with the Embedded Target for TI C6000 DSP fdatool % Open FDATool FDATool opens with a default lowpass equiripple FIR filter that you export in this tutorial (you do not need to design a filter for this tutorial). 5-10 target_ti.book Page 11 Thursday, June 20, 2002 3:57 PM Tutorial—Exporting Filters from FDATool to CCS IDE Step 2—Open the Export to Code Composer Studio (tm) IDE Dialog Open the Export to CCS IDE dialog by selecting Targets -> Export to Code Composer Studio (tm) IDE from the FDATool menu bar. Step 3—Set the Export Mode Set Export mode to Generate C header file. 5-11 target_ti.book Page 12 Thursday, June 20, 2002 3:57 PM 5 Using FDATool with the Embedded Target for TI C6000 DSP Step 4—Name the Filter Coefficient Variables You must name the variables that store the filter coefficients in the generated C header file by setting the Numerator, Denominator, Numerator length, and Denominator length parameters. (These correspond to the four variables for the numerator filter coefficients, denominator filter coefficients, number of numerator coefficients, and number of denominator coefficients.) For this tutorial, use the default variable names, NUM, DEN, NL, and DL. The generated C header file will define global arrays, NUM, DEN, NL, and DL, that correspond to static memory locations containing the filter coefficients in the final target program. Step 5—Select a Data Type Use the suggested data type to export your filter coefficients by selecting the Export suggested parameter. Step 6—Select a Target If you know the board number and processor number of your target DSP, select your target by setting the DSP Board # and DSP Processor # values. 5-12 target_ti.book Page 13 Thursday, June 20, 2002 3:57 PM Tutorial—Exporting Filters from FDATool to CCS IDE Alternatively, click Select target..., which opens the Selection Utility: Link for Code Composer(tm) dialog. Select the board name and processor name of the DSP target and click Done. This automatically sets the DSP Board # and DSP Processor # values in the Export to CCS IDE dialog. Step 7—Generate the C Header File Click Apply to generate the C header file. This opens the generated C header file in CCS IDE. (CCS IDE will be opened for you if you did not have it open.) Step 8—Export the Filter by Generating a Program File Add the generated C header file to an appropriate project, generate a program file, and load the program file into your target DSP. The program file allocates static memory locations in the target, and writes the filter coefficients to these locations. See the following note. By completing steps 1 through 8, you allocated target memory for the filter coefficients and exported the coefficients to these memory locations. Now you 5-13 target_ti.book Page 14 Thursday, June 20, 2002 3:57 PM 5 Using FDATool with the Embedded Target for TI C6000 DSP can tune the filter in FDATool, then export the updated filter coefficients directly to the allocated memory locations as described in Task 2 of this tutorial. Note You may want to edit the generated C header file so the associated program file allocates extra target memory. This allows you to change your filter and export the new filter coefficients directly to the allocated memory without having to worry about whether there is enough memory. For example, in the following header file, you could modify const real64_T NUM[47] = {...} to real64_T NUM[256] = {...} to allow NUM to store up to 256 numerator filter coefficients rather than 47. Contents of the C Header File Generated in Task 1 /* * Filter Design and Analysis Tool - Generated Filter Coefficients - C Source * Generated by MATLAB - Signal Processing Toolbox */ /* General type conversion for MATLAB generated C-code */ #include "tmwtypes.h" /* * Expected path to tmwtypes.h * D:\v5\extern\include\tmwtypes.h */ const int NL = 47; const real64_T NUM[47] = { -0.001384463093657,-0.004518981980449,-0.004897044657617, 0.003407148842561, 0.01572838996192, 0.01654194333933, 0.00164298284835,-0.008806408558624, 0.002021262464639, 0.01578576956127, 0.004464610692757, -0.01727452424144, -0.008835593007042, 0.02164594139449, 0.0179008188858, -0.02459850261385, -0.03066089435881, 0.02764920456168, 0.05260956118871, -0.02977511581716, 5-14 target_ti.book Page 15 Thursday, June 20, 2002 3:57 PM Tutorial—Exporting Filters from FDATool to CCS IDE -0.09918534387346, 0.03121885582524, 0.3159846926607, 0.4683345369683, 0.3159846926607, 0.03121885582524, -0.09918534387346, -0.02977511581716, 0.05260956118871, 0.02764920456168, -0.03066089435881, -0.02459850261385, 0.0179008188858, 0.02164594139449,-0.008835593007042, -0.01727452424144, 0.004464610692757, 0.01578576956127, 0.002021262464639,-0.008806408558624, 0.00164298284835, 0.01654194333933, 0.01572838996192, 0.003407148842561, -0.004897044657617,-0.004518981980449,-0.001384463093657 }; const int DL = 1; const real64_T DEN[1] = { 1 }; Task 2—Export Filter by Writing Directly to Target Memory In Task 2 you export a filter by writing the filter coefficients directly to target memory. Before starting this task, you must allocate enough target memory for the filter coefficients by completing “Task 1—Export Filter by Generating a C Header File”. Once you have allocated enough target memory, you can tune your filter in FDATool and export the updated filter coefficients directly to the allocated target memory by following the steps in this task. For important guidelines on writing directly to target memory, see “Cautions Regarding Writing Directly to Memory” on page 5-4. Step 9—Tune Your Filter in FDATool Tune your filter coefficients in FDATool to improve its performance. Set the numerical precision of your filter by using the Quantized Filter pane in FDATool, available when you install the Filter Design Toolbox. If you do not have the Filter Design Toolbox, your filters in FDATool have the default precision, double-precision floating point. If you have the Export to CCS IDE dialog open from Task 1, the dialog automatically updates itself as you tune the filter in FDATool. If you closed the 5-15 target_ti.book Page 16 Thursday, June 20, 2002 3:57 PM 5 Using FDATool with the Embedded Target for TI C6000 DSP dialog, reopen it as described in “Step 2—Open the Export to Code Composer Studio (tm) IDE Dialog” on page 5-11. Note If you allocated exactly enough memory for the filter coefficients in Task 1, you should not tune your filter such that it requires more memory than did the original filter (by increasing the filter order, for example). If you need more memory for your updated filter, allocate extra memory by editing the generated C header file from Task 1 (as described in the previous note), generating a program file, and loading the program file into your target. Step 10—Set the Export Mode Set Export mode to Write directly to memory. Leave the parameter Disable memory transfer warnings unchecked so that you get a warning if your target does not support the export data type. Step 11—Input Filter Variable Names To write to the memory allocated in Task 1, enter the names of the variables in the target symbol table corresponding to the allocated memory. These names are the same as the names of the filter coefficient variables in the C header file from Task 1: NUM, DEN, NL, and DL. You do not need to type these names in, since they are the default setting of the Numerator, Denominator, Numerator length, and Denominator length parameters. (These parameters correspond to the memory locations that store the numerator filter coefficients, denominator filter coefficients, number of numerator coefficients, and number of denominator coefficients.) 5-16 target_ti.book Page 17 Thursday, June 20, 2002 3:57 PM Tutorial—Exporting Filters from FDATool to CCS IDE Step 12—Set All Other Parameters for Export as in Task 1 Select an export data type and indicate your target DSP as in Steps 5 and 6 of Task 1. Step 13—Load the Program File Load the program file associated with your target into CCS IDE to activate the target symbol table. The program file must contain the global variables you entered in Step 11. Step 14—Export by Writing Directly to Target Memory Click Apply to export your filter. Before the filter export begins, a warning dialog appears if your target does not support the export data type. You can choose to continue to export the filter, or to cancel the export. To prevent this warning dialog from appearing, you can select the parameter Disable memory transfer warnings in Step 10. Step 15 — Continue Optimizing Filter Performance Continue to optimize filter performance by retuning your filter in FDATool and exporting the updated filter coefficients directly to target memory. Since you already set up the export process to write to specific memory locations, you can click Apply to export updated coefficients to these same memory locations. When the Export to CCS IDE dialog is open, it automatically updates as you tune your filter in FDATool, and preserves the parameter settings from Steps 10 through 13. The dialog stays open as long as you do not click Cancel or OK. Keep the dialog open when exporting multiple times to the same memory locations so you do not have to repeat Steps 10 through 13, and can just click Apply. 5-17 target_ti.book Page 18 Thursday, June 20, 2002 3:57 PM 5 Using FDATool with the Embedded Target for TI C6000 DSP Where to Find More Information For more information on exporting filters from FDATool to CCS IDE, see “Guidelines on Exporting Filters from FDATool to CCS IDE” on page 5-3, which contains the following sections: • “Selecting the Export Mode” • “Cautions Regarding Writing Directly to Memory” • “Variables and Memory Necessary for Filter Export” • “Selecting the Export Data Type” To learn how to use FDATool, see the Filter Design and Analysis Tool section in the Signal Processing Toolbox documentation. Also see the reference pages of the following Embedded Target for TI C6000 DSP functions: • address • ccsdsp • write 5-18 target_ti.book Page 1 Thursday, June 20, 2002 3:57 PM 6 Block Reference Using the Embedded Target for C6000 DSP Block Reference (p. 6-2) Introduces the format for the block reference pages Blocks—By Library (p. 6-3) Provides tables that list each block in the Embedded Target for C6000 DSP by category, such as C6701 EVM or RTDX™ Blocks—Alphabetical List (p. 6-7) Lists each block in the Embedded Target for C6000 DSP in alphabetical order target_ti.book Page 2 Thursday, June 20, 2002 3:57 PM 6 Block Reference Using the Embedded Target for C6000 DSP Block Reference These sections provide complete information on each block in the Embedded Target for C6000 DSP c6000lib block library, in a structured form. Refer to these pages when you need details about a specific block. Click Help on the Block Parameters dialog for the block, or access the block reference page through Help. Block reference pages are listed in alphabetical order by the block name. Each entry contains the following information: • Purpose—describes why you use the block or function. • Library—identifies the block library where you find the block. • Description—describes what the block does. • Dialog Box—shows the block parameters dialog and describes the parameters and options contained in the dialog. Each parameter or option appears with the appropriate choices and effects. • Algorithm—optional section that describes the algorithm applied by the block. • Examples—optional section that provides demonstration models to highlight block features. • See Also—lists related blocks and functions. In addition, block reference pages provides pictures of the Simulink model icon for the blocks. 6-2 target_ti.book Page 3 Thursday, June 20, 2002 3:57 PM Blocks—By Library Blocks—By Library The following reference pages list the blocks included in the Embedded Target for C6000 DSP. Each block page includes Purpose, Library, Description, and Dialog Box sections; Algorithm and Examples sections appear when needed. Where appropriate, a See Also section includes cross references to related blocks and functions. Embedded Target for C6000 DSP Blocks in Library c6701evmlib Block Description C6701 EVM ADC Configure digitized signal output from the codec to the processor C6701 EVM DAC Use and configure the codec to convert digital input to analog output C6701 EVM DIP Switch Simulate or read the three user-defined DIP switches on the C6701 EVM C6701 EVM LED Control the light emitting diodes on the C6701 EVM C6701 EVM RESET Reset the C6701 Evaluation Module to initial conditions Embedded Target for C6000 DSP Blocks in Library c6711dsklib Block Description C6711 DSK ADC Configure digitized signal output from the codec to the processor C6711 DSK DAC Use and configure the codec to convert digital input to analog output C6711 DSK DIP Switch Simulate or read the three user-defined DIP switches on the C6711 DSK 6-3 target_ti.book Page 4 Thursday, June 20, 2002 3:57 PM 6 Block Reference Embedded Target for C6000 DSP Blocks in Library c6711dsklib Block Description C6711 DSK LED Control the user-configurable light emitting diodes on the C6711 DSK C6711 DSK RESET Reset the C6711 DSP Stater Kit to initial conditions Embedded Target for C6000 DSP Blocks in Library rtdxblocks Block Description From Rtdx Add an RTDX communication channel to your model to send data from MATLAB to the model running on your target To Rtdx Add an RTDX communication channel to your model to send data from the model running on your target to MATLAB Embedded Target for C6000 DSP in the C62x DSP Library Block Description Conversions Convert Floating-Point to Q.15 Convert a floating-point signal to a Q.15 fixed-point signal Convert Q.15 to Floating-Point Convert a Q.15 fixed-point signal to a single-precision floating-point signal Filters Complex FIR 6-4 Filter a complex input signal using a complex FIR filter target_ti.book Page 5 Thursday, June 20, 2002 3:57 PM Blocks—By Library Embedded Target for C6000 DSP in the C62x DSP Library Block Description General Real FIR Filter a real input signal using a real FIR filter LMS Adaptive FIR Perform least-mean-square adaptive FIR filtering Radix-4 Real FIR Filter a real input signal using a real FIR filter Radix-8 Real FIR Filter a real input signal using a real FIR filter Real Forward Lattice All-Pole IIR Filter a real input signal using an auto-regressive forward lattice filter Real IIR Filter a real input signal using a real auto-regressive moving-average IIR filter Symmetric Real FIR Filter a real input signal using a symmetric real FIR filter Math and Matrices Autocorrelation Compute the autocorrelation of an input vector or frame-based matrix Block Exponent Return the minimum exponent (number of extra sign bits) found in each channel of an input Matrix Multiply Perform matrix multiplication on two input signals Matrix Transpose Compute the matrix transpose of an input signal Reciprocal Compute the fractional and exponential portions of the reciprocal of a real input signal Vector Dot Product Compute the vector dot product of two real input signals 6-5 target_ti.book Page 6 Thursday, June 20, 2002 3:57 PM 6 Block Reference Embedded Target for C6000 DSP in the C62x DSP Library Block Description Vector Maximum Index Compute the zero-based index of the maximum value element in each channel of an input signal Vector Maximum Value Compute the maximum value for each channel of an input signal Vector Minimum Value Compute the minimum value for each channel of an input signal Vector Multiply Perform element-wise multiplication on two inputs Vector Negate Negate each element of an input signal Vector Sum of Squares Compute the sum of squares over each channel of a real input Weighted Vector Sum Find the weighted sum of two input vectors Transforms 6-6 Bit Reverse Bit-reverse the positions of the elements of each channel of a complex input signal FFT Compute the decimation-in-frequency forward FFT of a complex input vector Radix-2 FFT Compute the radix-2 decimation-in-frequency forward FFT of a complex input vector Radix-2 IFFT Compute the radix-2 inverse FFT of a complex input vector target_ti.book Page 7 Thursday, June 20, 2002 3:57 PM Blocks—Alphabetical List Blocks—Alphabetical List 6 Autocorrelation . . . . . . . . . . . . . . . . . . . . . . . . . . . . . . . . . . . . . . . . . . . . . . . 6-9 Bit Reverse . . . . . . . . . . . . . . . . . . . . . . . . . . . . . . . . . . . . . . . . . . . . . . . . . . 6-11 Block Exponent . . . . . . . . . . . . . . . . . . . . . . . . . . . . . . . . . . . . . . . . . . . . . . 6-13 C6701 EVM ADC . . . . . . . . . . . . . . . . . . . . . . . . . . . . . . . . . . . . . . . . . . . . . 6-14 C6701 EVM DAC . . . . . . . . . . . . . . . . . . . . . . . . . . . . . . . . . . . . . . . . . . . . . 6-20 C6701 EVM DIP Switch . . . . . . . . . . . . . . . . . . . . . . . . . . . . . . . . . . . . . . . 6-25 C6701 EVM LED . . . . . . . . . . . . . . . . . . . . . . . . . . . . . . . . . . . . . . . . . . . . . 6-29 C6701 EVM RESET . . . . . . . . . . . . . . . . . . . . . . . . . . . . . . . . . . . . . . . . . . . 6-31 C6711 DSK ADC . . . . . . . . . . . . . . . . . . . . . . . . . . . . . . . . . . . . . . . . . . . . 6-32 C6711 DSK DAC . . . . . . . . . . . . . . . . . . . . . . . . . . . . . . . . . . . . . . . . . . . . 6-36 C6711 DSK DIP Switch . . . . . . . . . . . . . . . . . . . . . . . . . . . . . . . . . . . . . . . 6-38 C6711 DSK LED . . . . . . . . . . . . . . . . . . . . . . . . . . . . . . . . . . . . . . . . . . . . . 6-42 C6711 DSK RESET . . . . . . . . . . . . . . . . . . . . . . . . . . . . . . . . . . . . . . . . . . 6-43 Complex FIR . . . . . . . . . . . . . . . . . . . . . . . . . . . . . . . . . . . . . . . . . . . . . . . . 6-44 Convert Floating-Point to Q.15 . . . . . . . . . . . . . . . . . . . . . . . . . . . . . . . . . . 6-46 Convert Q.15 to Floating-Point . . . . . . . . . . . . . . . . . . . . . . . . . . . . . . . . . . 6-47 FFT . . . . . . . . . . . . . . . . . . . . . . . . . . . . . . . . . . . . . . . . . . . . . . . . . . . . . . . . 6-48 From Rtdx . . . . . . . . . . . . . . . . . . . . . . . . . . . . . . . . . . . . . . . . . . . . . . . . . . 6-50 General Real FIR . . . . . . . . . . . . . . . . . . . . . . . . . . . . . . . . . . . . . . . . . . . . . 6-54 LMS Adaptive FIR . . . . . . . . . . . . . . . . . . . . . . . . . . . . . . . . . . . . . . . . . . . . 6-57 Matrix Multiply . . . . . . . . . . . . . . . . . . . . . . . . . . . . . . . . . . . . . . . . . . . . . . 6-60 Matrix Transpose . . . . . . . . . . . . . . . . . . . . . . . . . . . . . . . . . . . . . . . . . . . . . 6-63 Radix-2 FFT . . . . . . . . . . . . . . . . . . . . . . . . . . . . . . . . . . . . . . . . . . . . . . . . . 6-64 Radix-2 IFFT . . . . . . . . . . . . . . . . . . . . . . . . . . . . . . . . . . . . . . . . . . . . . . . . 6-66 Radix-4 Real FIR . . . . . . . . . . . . . . . . . . . . . . . . . . . . . . . . . . . . . . . . . . . . . 6-68 Radix-8 Real FIR . . . . . . . . . . . . . . . . . . . . . . . . . . . . . . . . . . . . . . . . . . . . . 6-70 Real Forward Lattice All-Pole IIR . . . . . . . . . . . . . . . . . . . . . . . . . . . . . . . 6-72 Real IIR . . . . . . . . . . . . . . . . . . . . . . . . . . . . . . . . . . . . . . . . . . . . . . . . . . . . 6-74 Reciprocal . . . . . . . . . . . . . . . . . . . . . . . . . . . . . . . . . . . . . . . . . . . . . . . . . . . 6-77 Symmetric Real FIR . . . . . . . . . . . . . . . . . . . . . . . . . . . . . . . . . . . . . . . . . . 6-78 To Rtdx . . . . . . . . . . . . . . . . . . . . . . . . . . . . . . . . . . . . . . . . . . . . . . . . . . . . . 6-82 Vector Dot Product . . . . . . . . . . . . . . . . . . . . . . . . . . . . . . . . . . . . . . . . . . . 6-84 Vector Maximum Index . . . . . . . . . . . . . . . . . . . . . . . . . . . . . . . . . . . . . . . . 6-85 Vector Maximum Value . . . . . . . . . . . . . . . . . . . . . . . . . . . . . . . . . . . . . . . . 6-86 Vector Minimum Value . . . . . . . . . . . . . . . . . . . . . . . . . . . . . . . . . . . . . . . . 6-87 6-7 target_ti.book Page 8 Thursday, June 20, 2002 3:57 PM 6 Vector Multiply . . . . . . . . . . . . . . . . . . . . . . . . . . . . . . . . . . . . . . . . . . . . . . Vector Negate . . . . . . . . . . . . . . . . . . . . . . . . . . . . . . . . . . . . . . . . . . . . . . . Vector Sum of Squares . . . . . . . . . . . . . . . . . . . . . . . . . . . . . . . . . . . . . . . . Weighted Vector Sum . . . . . . . . . . . . . . . . . . . . . . . . . . . . . . . . . . . . . . . . . 6-8 6-88 6-89 6-90 6-91 target_ti.book Page 9 Thursday, June 20, 2002 3:57 PM Autocorrelation Purpose 6Autocorrelation Library C62x DSP Library—Math and Matrices Description The Autocorrelation block computes the autocorrelation of an input vector or frame-based matrix. For frame-based inputs, the autocorrelation is computed along each of the input’s columns. The number of samples in the input channels must be an integer multiple of eight. Input and output signals are real and Q.15. Compute the autocorrelation of an input vector or frame-based matrix Autocorrelation blocks support discrete sample times and little-endian code generation only. Dialog Box Compute all non-negative lags When you select this parameter, the autocorrelation is performed using all nonnegative lags, where the number of lags is one less than the length of the input. The lags produced are therefore in the range [0, length(input)-1]. When this parameter is not selected, you specify the lags used in Maximum non-negative lag (less than input length). 6-9 target_ti.book Page 10 Thursday, June 20, 2002 3:57 PM Autocorrelation Maximum non-negative lag (less than input length) Specify the maximum lag (maxLag) the block should use in performing the autocorrelation. The lags used are in the range [0, maxLag]. The maximum lag must be odd. This parameter is enabled when you clear the Compute all non-negative lags parameter. Algorithm 6-10 In simulation, the Autocorrelation block is equivalent to the TMS320C62x DSP Library assembly code function DSP_autocor. During code generation, this block calls the DSP_autocor routine to produce optimized code. target_ti.book Page 11 Thursday, June 20, 2002 3:57 PM Bit Reverse Purpose 6Bit Reverse Library C62x DSP Library—Transforms Description The Bit Reverse block bit-reverses the elements of each channel of a complex input signal, X. The Bit Reverse block is primarily used to provide correctly-ordered inputs and outputs to or from blocks that perform FFTs. Inputs to this block must be 16-bit fixed-point data types. Bit-reverse the positions of the elements of each channel of a complex input signal The Bit Reverse block supports discrete sample times and little-endian code generation only. Dialog Box Algorithm In simulation, the Bit Reverse block is equivalent to the TMS320C62x DSP Library assembly code function DSP_bitrev_cplx. During code generation, this block calls the DSP_bitrev_cplx routine to produce optimized code. Examples The Bit Reverse block reorders the output of the Radix-2 FFT in the model below to natural order. The following code calculates the same FFT in the workspace. The output from this calculation, y2, is displayed side-by-side with the output from the model, c. 6-11 target_ti.book Page 12 Thursday, June 20, 2002 3:57 PM Bit Reverse The outputs match, showing that the Bit Reverse block reorders the Radix-2 FFT output to natural order: k = 4; n = 2^k; xr = zeros(n, 1); xr(2) = 0.5; xi = zeros(n, 1); x2 = complex(xr, xi); y2 = fft(x2); [y2, c] 0.5000 0.4619 0.3536 0.1913 0 -0.1913 -0.3536 -0.4619 -0.5000 -0.4619 -0.3536 -0.1913 0 0.1913 0.3536 0.4619 See Also 6-12 - 0.1913i 0.3536i 0.4619i 0.5000i 0.4619i 0.3536i 0.1913i + + + + + + + 0.1913i 0.3536i 0.4619i 0.5000i 0.4619i 0.3536i 0.1913i Radix-2 FFT, Radix-2 IFFT 0.5000 0.4619 0.3535 0.1913 0 -0.1913 -0.3535 -0.4619 -0.5000 -0.4619 -0.3535 -0.1913 0 0.1913 0.3535 0.4619 - 0.1913i 0.3535i 0.4619i 0.5000i 0.4619i 0.3535i 0.1913i + + + + + + + 0.1913i 0.3535i 0.4619i 0.5000i 0.4619i 0.3535i 0.1913i target_ti.book Page 13 Thursday, June 20, 2002 3:57 PM Block Exponent Purpose 6Block Exponent Library C62x DSP Library—Math and Matrices Description The Block Exponent block first computes the number of extra sign bits of all values in each channel of an input signal, and then returns the minimum number of sign bits found in each channel. The number of elements in each input channel must be even and at least six. All input elements must be 32-bit signed fixed-point data types. The output is a vector of 16-bit integers—one integer for each channel of the input signal. Return the minimum exponent (number of extra sign bits) found in each channel of an input This block is useful for determining whether every sample in a channel is using extra sign bits. If so, you can scale your signal by the minimum number of extra sign bits to eliminate the common extra bits. This increases the representable precision and decreases the representable range of the signal. The Block Exponent block supports both continuous and discrete sample times. This block also supports both little-endian and big-endian code generation. Dialog Box Algorithm In simulation, the Block Exponent block is equivalent to the TMS320C62x DSP Library assembly code function DSP_bexp. During code generation, this block calls the DSP_bexp routine given to produce optimized code. 6-13 target_ti.book Page 14 Thursday, June 20, 2002 3:57 PM C6701 EVM ADC Purpose 6C6701 EVM ADC Library c6701evmlib in Embedded Target for TI C6000 DSP for TI DSP Description Use the C6701 EVM ADC (analog-to-digital converter) block to capture and digitize analog signals from external sources, such as signal generators, frequency generators or audio devices. Placing an C6701 EVM C6701 EVM ADC block in your Simulink block diagram lets you use the multimedia audio coder-decoder module (codec) on the C6701 EVM to convert an analog input signal to a digital signal for the digital signal processor. Configure digitized signal output from the codec to the processor Most of the configuration options in the block affect the codec. However, the Output data type, Samples per frame and Scaling options are related to the model you are using in Simulink, the signal processor on the board, or direct memory access (DMA) on the board. In the following table, you find each option listed with the C6701 EVM hardware affected. Option Affected Hardware ADC Source Codec Codec Data format Codec Mic Codec Output data type TMS320C6701 digital signal processor Sample rate (Hz) Codec Samples per frame Direct memory access functions Scaling TMS320C6701 digital signal processor Source gain (dB) Codec Stereo Codec You can select one of three input sources from the ADC source list: • Line In — the codec accepts input from the line in connector (LINE IN) on the board’s mounting bracket. 6-14 target_ti.book Page 15 Thursday, June 20, 2002 3:57 PM C6701 EVM ADC • Mic — the codec accepts input from the microphone connector (MIC IN) on the board mounting bracket. • Loopback — routes the analog signal from the codec output back to the codec input. Can be useful in some feedback applications. Use the Stereo check box to indicate whether the audio input is monaural or stereo. Clear the check box to choose monaural audio input. Select the check box to enable stereo audio input. Monaural (mono) input is left channel only, but the output sends left channel content to both the left and right output channels; stereo uses the left and right channels. Table 6-1, Audio Word Byte Order for Mono and Stereo Inputs, shows how the codec stores monaural and stereo digitized signals in 32-bit words on the C6701 EVM.In the table, L means left channel, R means right channel, and O means that the 4-byte nibble does not contain data. Table 6-1: Audio Word Byte Order for Mono and Stereo Inputs Format Left and Mono Channel Right and Stereo Channel (first 16 bits of data word) (last 16 bits of data word) 16-bit mono 0xLLLL 0x0000 16-bit stereo 0xLLLL 0xRRRR 8-bit mono 0xLL00 0x0000 8-bit stereo 0xLL00 0xRR00 4-bit mono 0xL000 0x0000 4-bit stereo 0xL000 0xR000 When you select Mic for ADC source, you can select the +20 dB Mic gain boost check box to add 20 dB to the microphone input signal before the codec digitizes the signal. Selecting Loopback for ADC source configures the C6701 EVM to capture the output from the codec as the input to the C6701 EVM ADC. When you select Loopback, your model must include both the C6701 EVM ADC and C6701 EVM DAC blocks. 6-15 target_ti.book Page 16 Thursday, June 20, 2002 3:57 PM C6701 EVM ADC You must set the sample rate for the block. From Sample rate (Hz), select the sample rate for your model. Sample rate (Hz) specifies the number of times each second that the codec samples the input signal. Sample rates range from 5500 Hz to 48000 Hz, in preset rates. You must select from the list; you cannot enter a sample rate that is not on the list. Source gain (dB) lets you add gain to the input signal before the A/D conversion. When you select Loopback as the ADC source, your specified source gain is not added to the input signal. Select the appropriate gain from the list. To enable the block and codec to generate data that your Simulink model can use, select the digitized data format. Three parameters — Codec data format, Codec data type and Scaling — control the format and range of the digital data generated by the block. Entries in Table 6-2 define the output ranges based on your selections for the Data type, Scaling, and Codec data format parameters in the Block Parameters dialog. Table 6-2: Data Type and Codec Data Format Parameters Choices Determine the Range Codec Data Format Data Type Parameter Integer Single- or Double Precision, Normalized Single- or Double Precision, Floating-Point Integer 8-bit Unsigned 0-255 -1.0 to 1.0 0.0 to 255.0 16-bit Linear -32768 to 32767 -1.0 to 1.0 -32768.0 to 32767.0 A-law Unsigned 8-bit (0-255) -1.0 to 1.0 0.0 to 255.0 µ-law Unsigned 8-bit (0-255) -1.0 to 1.0 0.0 to 255.0 ADPCM Unsigned 8-bit (0-255) N/A 0.0 to 255.0 For example, when you select 16-bit linear data format, normalized scaling, and the Double data type, the C6701 EVM ADC block outputs a digitized signal composed of 16 bit samples ranging linearly from -1.0 to about 1.0. 6-16 target_ti.book Page 17 Thursday, June 20, 2002 3:57 PM C6701 EVM ADC Tables 4-2 and 4-3 list the five codec data formats you can select for the block. For reference purposes, the data types are described briefly in the following list: • 8-bit unsigned — linear encoding that uses 8-bit words and constant steps between adjacent quantization levels. Compare to A-law or ADPCM encoding. • 16-Bit Linear — linear encoding that uses 16-bit words and constant steps between adjacent quantization levels. Compare to A-law or ADPCM encoding. • A-law — a variation on the basic pulse code modulation (PCM) encoding method. The quantization levels are distributed according to the logarithmic A-law. It has linear characteristics near zero and logarithmic character for higher amplitudes. Used in Europe as the telephony standard. • µ-law — the American/Japanese equivalent of the European standard A-law encoding. For details, refer to the Consultative Committee for International Telegraphy and Telephony (CCITT) G.711 specification. • IMA ADPCM — a modified differential pulse code modulation (PCM) encoding scheme. The step size for the difference quantization is adapted to the momentary rate of change of the input signal. For details, refer to the specification from the Interactive Multimedia Association (IMA) for their ADPCM implementation. 6-17 target_ti.book Page 18 Thursday, June 20, 2002 3:57 PM C6701 EVM ADC Dialog Box ADC source The input source to the codec. Line In is the default. Stereo The number of channels input to the A/D converter. Clearing this option selects the left channel; selecting this option selects both left and right input channels. To configure the C6701 EVM board for monaural operation, clear the Stereo check box. When you first open the dialog, Stereo is cleared. The default is monaural operation. +20 dB Mic gain boost Boosts the input signal by +20dB when ADC source is Mic. Gain is applied before analog-to-digital conversion. 6-18 target_ti.book Page 19 Thursday, June 20, 2002 3:57 PM C6701 EVM ADC Sample rate (Hz) Sampling rate of the A/D converter. Available sample rates are set by the two clocks in the codec. Default rate is 8000 Hz. Codec data format Configures the format for output from the codec. Used in combination with the Scaling and Data type parameters to define the digital data leaving the block. Your C6701 EVM ADC block format must match the codec data format for the C6701 EVM DAC block, if you use one in your model. The default setting is 16-bit linear. Output data type Selects the word length and shape of the data from the codec. By default, double is selected. Scaling Selects whether the codec data is unmodified, or normalized to the output range to ±1.0, based on the codec data format. Normalize is the default setting. Source gain (dB) Specifies the amount to boost the input before conversion. Applied to input signal when ADC source is Line In or Mic In. Samples per frame Creates frame-based outputs from sample-based inputs. This parameter specifies the number of samples of the signal buffered internally by the block before it sends the digitized signals, as a frame vector, to the next block in the model. 64 samples per frame is the default setting. Notice that the frame rate depends on the sample rate and frame size. For example, if your input is 32 samples per second, and you select 64 samples per frame, the frame rate is one frame every two seconds. The throughput remains the same at 32 samples per second. See Also C6701 EVM DAC 6-19 target_ti.book Page 20 Thursday, June 20, 2002 3:57 PM C6701 EVM DAC Purpose 6C6701 EVM DAC Library c6701evmlib in Embedded Target for TI C6000 DSP Description Adding the C6701 EVM DAC (digital-to-analog converter) block to your Simulink model provides the means to output an analog signal to the LINE OUT connection on the C6701 EVM mounting bracket. When you add the C6701 EVM DAC block, the digital signal received by the codec is converted to an analog signal. After converting the digital signal to analog form (digital-to-analog (D/A) conversion), the codec sends the signal to the output audio jack. Use and configure the codec to convert digital input to analog output Two of the configuration options in the block affect the codec. The remaining options relate to the model you are using in Simulink and the signal processor on the board. In the following table, you find each option listed with the C6701 EVM hardware affected. Option Affected Hardware Codec data format Codec DAC attenuation Codec Overflow mode TMS320C6701 Digital Signal Processor Scaling TMS320C6701 Digital Signal Processor To attenuate the output signal after the D/A conversion, select an attenuation from the DAC attenuation list. Available attenuation values range from 0.0 to 94.5 dB in 1.5 dB increments. You must select from the list; you cannot enter a value for the attenuation. For the block to accept data from your Simulink model, you must configure the data format. The parameters Codec data format and Scaling inform the block of the format of the digital data being received. Entries in Table 6-3, Expected Data Range for Data Type and Codec Data Format Parameter Combinations, define the D/A input format based on the data type inherited from the 6-20 target_ti.book Page 21 Thursday, June 20, 2002 3:57 PM C6701 EVM DAC preceding block and your selection for the Codec data format parameter in the Block Parameters dialog box. Table 6-3: Expected Data Range for Data Type and Codec Data Format Parameter Combinations Codec Data Format Inherited Data Type Parameter Integer Single- or DoublePrecision, Normalized Single- or DoublePrecision, Floating Point Integer 8-bit Unsigned 0-255 -1.0 to 1.0 0.0 to 255.0 16-bit Linear -32768 to 32767 -1.0 to 1.0 -32768.0 to 32767.0 A-law Unsigned 8-bit (0-255) -1.0 to 1.0 0.0 to 255.0 µ-law Unsigned 8-bit (0-255) -1.0 to 1.0 0.0 to 255.0 ADPCM Unsigned 8-bit (0-255) N/A 0.0 to 255.0 For example, when you select 16-bit linear codec data format, with normalized scaling, and the block inherits the Double data type, the C6701 EVM DAC block expects to receive a digitized signal with each sample 16 bits long and ranging from -1.0 to 1.0. Signals that do not meet these criteria result in an error. Tables 4-4 and 4-5 list the codec data formats you can select for the block. The following list provides brief descriptions of the available data formats: • 8-bit unsigned — linear encoding using 8-bit words and constant steps between adjacent quantization levels. Compare to A-law or ADPCM encoding. • 16-Bit Linear — linear encoding using 16-bit words and constant steps between adjacent quantization levels. Compare to A-law or ADPCM encoding. • A-law — a variation on the basic pulse code modulation (PCM) encoding method. The quantization levels are distributed according to the logarithmic A-law. It has linear characteristics near zero and logarithmic character for higher amplitudes. Used in Europe as the telephony standard. 6-21 target_ti.book Page 22 Thursday, June 20, 2002 3:57 PM C6701 EVM DAC • µ-law — the American/Japanese equivalent of the European standard A-law encoding. For details, refer to the Consultative Committee for International Telegraph and Telephony (CCITT) G.711 specification. • IMA ADPCM — a modified differential pulse code modulation (PCM) encoding scheme. The step size for the difference quantization is adapted to the momentary rate of change of the input signal. For details, refer to the specification from the Interactive Multimedia Association (IMA) for their ADPCM implementation. While converting the digital signal to an analog signal, the codec rounds floating point data to the nearest integer, thus rounding 0.51 up to 1.0 or 4.49 down to 4.0. In addition, data that exceeds the range for a selected codec data format and data type is clipped or wrapped depending on the Overflow mode setting. Clipping is equivalent to saturating. To choose how the board handles data that falls outside the range that can be represented by the chosen data format, select an appropriate setting from Overflow mode. Saturate is the default setting. Selecting Saturate instructs the codec to clip output values to the maximum or minimum allowed value when output data exceeds the range of the data format. When you select Wrapping, the codec takes data that exceeds the acceptable output range and wraps the data back into the acceptable range using modular arithmetic relative to the smallest representable number. Selecting wrapping for the Overflow Mode can increase the performance of your application, but risks generating output values that exceed the codec data format limits and are wrapped back into the range of acceptable values. 6-22 target_ti.book Page 23 Thursday, June 20, 2002 3:57 PM C6701 EVM DAC Dialog Box Codec data format Tells the codec the format of data coming into it. Used in combination with the Scaling and Data type parameters to define the digital data entering the block. The block converts the input digital signal to an analog output signal based on how it interprets the input data stream. Codec data format tells the block how to interpret the input values. The C6701 EVM DAC block Codec data format must match the Codec data format for the C6701 EVM ADC block in your model, if any. Scaling Selects whether the input to the codec represents unmodified data, or data that has been normalized to the range ±1.0. Matching the setting for the C6701 EVM ADC block is usually appropriate here. Overflow mode Determines how the codec responds to data that is outside the range specified by the Codec data format and Scaling parameters. DAC attenuation Specifies the amount to attenuate the block output after D/A conversion. 6-23 target_ti.book Page 24 Thursday, June 20, 2002 3:57 PM C6701 EVM DAC See Also 6-24 C6701 EVM ADC target_ti.book Page 25 Thursday, June 20, 2002 3:57 PM C6701 EVM DIP Switch Purpose 6C6701 EVM DIP Switch Library c6701evmlib in Embedded Target for TI C6000 DSP Description Added to your model, this block behaves differently in simulation than in code generation and targeting. Simulate or read the user-defined DIP switches on the C6701 EVM In simulation—the options USER0, USER1, and USER2 generate output to simulate the settings of the user-defined dual inline pin (DIP) switches on your C6701 EVM. Each option turns the associated DIP switch on when you select it. The switches are independent of one another. By defining the switches to represent actions on your target, DIP switches let you modify the operation of your simulated process by reconfiguring the switch settings. Use the Data type to specify whether the DIP switch options output an integer or a logical string of bits to represent the status of the switches. The table that follows presents all the option setting combinations with the result of your Data type selection. Table 6-4: Option Settings to Simulate the User DIP Switches on the C6701 EVM USER0 (LSB) USER1 USER2 (MSB) Boolean Output Integer Output Cleared Cleared Cleared 000 0 Selected Cleared Cleared 001 1 Cleared Selected Cleared 010 2 Selected Selected Cleared 011 3 Cleared Cleared Selected 100 4 Selected Cleared Selected 101 5 Cleared Selected Selected 110 6 Selected Selected Selected 111 7 6-25 target_ti.book Page 26 Thursday, June 20, 2002 3:57 PM C6701 EVM DIP Switch Selecting the Integer data type results in the switch settings generating an integer in the range from 0 to 7 (uint8), corresponding to converting the string of individual switch settings to a decimal value. In the Boolean data type, the output string presents the separate switch setting for each switch, with the status of USER0 represented by the least significant bit (LSB) and the USER2 status represented by the most significant bit (MSB). In code generation and targeting—the code generated by the block reads the physical switch settings of the user switches on the board and reports them as shown in Table 6-5. Your process uses the result in the same way whether simulating a process or generating code. In code generation and when running your application, the block code ignores the settings for USER0, USER1, and USER2 in favor of the hardware switch settings. When the block reads the switch settings, it reports the status as shown in Table 6-5, Output Values From the User DIP Switches on the C6701 EVM. Table 6-5: Output Values From the User DIP Switches on the C6701 EVM 6-26 USER0 (LSB) USER1 USER2 (MSB) Boolean Output Integer Output Off Off Off 000 0 On Off Off 001 1 Off On Off 010 2 On On Off 011 3 Off Off On 100 4 On Off On 101 5 Off On On 110 6 On On On 111 7 target_ti.book Page 27 Thursday, June 20, 2002 3:57 PM C6701 EVM DIP Switch Dialog Box a USER0 Simulate the status of the user-defined DIP switch on the board. USER1 Simulate the status of the user-defined DIP switch on the board. USER2 Simulate the status of the user-defined DIP switch on the board. Data type Determines how the block reports the status of the user-defined DIP switches. Boolean is the default, indicating that the output is a logical string of three bits. Each bit represents the status of one DIP switch; the LSB is switch USER0 and the MSB is switch USER2. The other data type, Integer, converts the 6-27 target_ti.book Page 28 Thursday, June 20, 2002 3:57 PM C6701 EVM DIP Switch logical string to an equivalent unsigned 8-bit (uint8) decimal value. For example, if the logical string is 101, the decimal conversion yields 5. Sample time Specifies the time between samples of the signal. The default is 1 second between samples, for a sample rate of one sample per second (1/Sample time). For further information about the user-defined DIP switches on the board, refer to your Texas Instruments TMS320C6201/6701 Evaluation Module Technical Reference. 6-28 target_ti.book Page 29 Thursday, June 20, 2002 3:57 PM C6701 EVM LED Purpose 6C6701 EVM LED Library c6701evmlib in Embedded Target for TI C6000 DSP Description Adding an C6701 EVM LED block to your Simulink block diagram lets you trigger one of the red light emitting diodes (LED) on the C6701 EVM. To use the block, select an LED from the LED list — internal(1) or external(0) and send a nonzero real scalar to the block. The C6701 EVM LED block triggers the external status LED (User Status LED0) located on the C6701 EVM mounting bracket when you select external. When you select internal, the C6701 EVM LED block triggers the internal status LED (User Status LED1) located at the top of the C6701 EVM board. Control the light emitting diodes on the C6701 EVM When you add this block to a model, and send a real scalar to the block input, the block sets the LED state based on the input value it receives: • When the block receives an input value equal to 0, the specified LED is turned off (disabled) • When the block receives a non-zero input value, the specified LED is turned on (enabled) To activate the block, send it a scalar of any real data type. Vectors do not work to activate LEDs; nor do complex numbers as scalars or vectors. Both LEDs maintain their state until their controlling C6701 EVM LED blocks receive an input value that changes the state. An enabled LED stays on until its block receives an input value equal to zero and turns the LED off; a disabled LED stays off until turned on. Resetting the C6701 EVM turns both LEDs off. Note Target for C6701 EVM uses the external LED to signal overrun conditions during processing on the C6701 EVM, when you set the Overrun option on the Real-Time Workshop dialog to Halt or Continue. Using the external LED as a status indicator through a C6701 EVM LED block can conflict with overrun indications. When you are trying to determine why the external LED is on, recall this point. 6-29 target_ti.book Page 30 Thursday, June 20, 2002 3:57 PM C6701 EVM LED Dialog Box LED Selects which light emitting diode the block activates on the C6701 EVM. The default setting is external(0). 6-30 target_ti.book Page 31 Thursday, June 20, 2002 3:57 PM C6701 EVM RESET Purpose 6C6701 EVM RESET Library c6701evmlib in Embedded Target for TI C6000 DSP Description Double-clicking this block in a Simulink model window resets the C6701 EVM that is running the executable code built from the model. When you double-click the RESET block, the block runs the software reset function provided by CCS that resets the processor on your C6701 EVM. Applications running on the board stop and the signal processor returns to the initial conditions you defined. Reset the C6701 Evaluation Module to initial conditions Before you build and download your model, add the block to the model as a stand-alone block. You do not need to connect the block to any block in the model. When you double-click this block in the block library it resets your C6701 EVM. In other words, anytime you double-click a C6701 EVM RESET block you reset your C6701 EVM. Dialog Box This block does not have settable options and does not provide a user interface dialog. 6-31 target_ti.book Page 32 Thursday, June 20, 2002 3:57 PM C6711 DSK ADC Purpose 6C6711 DSK ADC Library c6711dsklib in Embedded Target for TI C6000 DSP Description Use the C6711 DSK ADC (analog-to-digital converter) block to capture and digitize analog signals from external sources, such as signal generators, frequency generators or audio devices. Placing an C6711 DSK ADC block in your Simulink block diagram lets you use the audio coder-decoder module (codec) on the C6711 DSK to convert an analog input signal to a digital signal for the digital signal processor. Configure digitized signal output from the codec to the processor Most of the configuration options in the block affect the codec. However, the Output data type, Samples per frame and Scaling options are related to the model you are using in Simulink, the signal processor on the board, or direct memory access (DMA) on the board. In the following table, you find each option listed with the C6711 DSK hardware affected. Option Affected Hardware ADC Source Codec Mic Codec Output data type TMS320C6701 digital signal processor Samples per frame Direct memory access functions Scaling TMS320C6701 digital signal processor Source gain (dB) Codec You can select one of three input sources from the ADC source list: • Line In — the codec accepts input from the line in connector (LINE IN) on the board’s mounting bracket. • Mic — the codec accepts input from the microphone connector (MIC IN) on the board mounting bracket. • Loopback — routes the analog signal from the codec output back to the codec input. Can be useful in some feedback applications. 6-32 target_ti.book Page 33 Thursday, June 20, 2002 3:57 PM C6711 DSK ADC Use the Stereo check box to indicate whether the audio input is monaural or stereo. Clear the check box to choose monaural audio input. Select the check box to enable stereo audio input. Monaural (mono) input is left channel only, but the output sends left channel content to both the left and right output channels; stereo uses the left and right channels. Table 6-1, Audio Word Byte Order for Mono and Stereo Inputs, shows how the codec stores monaural and stereo digitized signals in 32-bit words on the C6711 DSK. In the table, L means left channel, R means right channel, and O means that the 4-byte nibble does not contain data. Table 6-6: Audio Word Byte Order for Mono and Stereo Inputs Format Left and Mono Channel Right and Stereo Channel (first 16 bits of data word) (last 16 bits of data word) 16-bit mono 0xLLLL 0x0000 16-bit stereo 0xLLLL 0xRRRR 8-bit mono 0xLL00 0x0000 8-bit stereo 0xLL00 0xRR00 4-bit mono 0xL000 0x0000 4-bit stereo 0xL000 0xR000 When you select Mic for ADC source, you can select the +20 dB Mic gain boost check box to add 20 dB to the microphone input signal before the codec digitizes the signal. Selecting Loopback for ADC source configures the C6711 DSK to capture the output from the codec as the input to the C6701 EVM ADC. When you select Loopback, your model must include both the C6701 EVM ADC and C6701 EVM DAC blocks. Source gain (dB) lets you add gain to the input signal before the A/D conversion. When you select Loopback as the ADC source, your specified source gain is not added to the input signal. Select the appropriate gain from the list. 6-33 target_ti.book Page 34 Thursday, June 20, 2002 3:57 PM C6711 DSK ADC Dialog Box ADC source The input source to the codec. Line In is the default. +20 dB Mic gain boost Boosts the input signal by +20dB when ADC source is Mic. Gain is applied before analog-to-digital conversion. Output data type Selects the word length and shape of the data from the codec. By default, double is selected. Options are Double, Single, and Integer Scaling Selects whether the codec data is unmodified, or normalized to the output range to ±1.0, based on the codec data format. Select either Normalize or Integer Value. Normalize is the default setting. Source gain (dB) 6-34 target_ti.book Page 35 Thursday, June 20, 2002 3:57 PM C6711 DSK ADC Specifies the amount to boost the input before conversion. Select from the range 0.0 to 12.0 dB in 1.5 dB increments. Applies to the input signal when ADC source is Line In or Mic In. Samples per frame Creates frame-based outputs from sample-based inputs. This parameter specifies the number of samples of the signal the block buffers internally before it sends the digitized signals, as a frame vector, to the next block in the model. 64 samples per frame is the default setting. Notice that the frame rate depends on the sample rate and frame size. For example, if your input is 32 samples per second, and you select 64 samples per frame, the frame rate is one frame every two seconds. The throughput remains the same at 32 samples per second. See Also C6711 DSK DAC 6-35 target_ti.book Page 36 Thursday, June 20, 2002 3:57 PM C6711 DSK DAC Purpose 6C6711 DSK DAC Library c6711dsklib in Embedded Target for TI C6000 DSP Description Adding the C6711 DSK DAC (digital-to-analog converter) block to your Simulink model provides the means to output an analog signal to the LINE OUT connection on the C6711 DSK mounting bracket. When you add the C6711 DSK DAC block, the digital signal received by the codec is converted to an analog signal. After converting the digital signal to analog form (digital-to-analog (D/A) conversion), the codec sends the signal to the output audio jack. Use and configure the codec to convert digital input to analog output One of the configuration options in the block affects the codec. The remaining options relate to the model you are using in Simulink and the signal processor on the board. In the following table, you find each option listed with the C6711 DSK hardware affected by your selection. Option Affected Hardware DAC attenuation Codec Overflow mode TMS320C6711 Digital Signal Processor Scaling TMS320C6711 Digital Signal Processor To attenuate the output signal after the D/A conversion, select an attenuation from the DAC attenuation list. Available attenuation values range from 0.0 to 36.0 dB in 1.5 dB increments. You must select from the list; you cannot enter a value for the attenuation. 6-36 target_ti.book Page 37 Thursday, June 20, 2002 3:57 PM C6711 DSK DAC Dialog Box Scaling Selects whether the input to the codec represents unmodified data, or data that has been normalized to the range ±1.0. Matching the setting for the C6711 DSK ADC block is usually appropriate here. DAC attenuation Specifies the amount to attenuate the block output after D/A conversion. Overflow mode Determines how the codec responds to data that is outside the range specified by the Scaling parameter. See Also C6711 DSK ADC 6-37 target_ti.book Page 38 Thursday, June 20, 2002 3:57 PM C6711 DSK DIP Switch Purpose 6C6711 DSK DIP Switch Library c6711dsklib in Embedded Target for TI C6000 DSP Description Added to your model, this block behaves differently in simulation than in code generation and targeting. Simulate or read the user-defined DIP switches on the C6711 DSK Simulation—the options USER_SW1, USER_SW2, and USER_SW3 generate output to simulate the settings of the user-defined dual inline pin (DIP) switches on your C6711 DSK. Each option turns the associated DIP switch on when you select it. The switches are independent of one another. By defining the switches to represent actions on your target, DIP switches let you modify the operation of your process by reconfiguring the switch settings. Use the Data type to specify whether the DIP switch options output an integer or a logical string of bits to represent the status of the switches. The table that follows presents all the option setting combinations with the result of your Data type selection. Table 6-7: Option Settings to Simulate the User DIP Switches on the C6711 DSK 6-38 USER_SW1 (LSB) USER_SW2 USER_SW3 (MSB) Boolean Output Integer Output Cleared Cleared Cleared 000 0 Selected Cleared Cleared 001 1 Cleared Selected Cleared 010 2 Selected Selected Cleared 011 3 Cleared Cleared Selected 100 4 Selected Cleared Selected 101 5 Cleared Selected Selected 110 6 Selected Selected Selected 111 7 target_ti.book Page 39 Thursday, June 20, 2002 3:57 PM C6711 DSK DIP Switch Selecting the Integer data type results in the switch settings generating integers in the range from 0 to 7 (uint8), corresponding to converting the string of individual switch settings to a decimal value. In the Boolean data type, the output string presents the separate switch setting for each switch, with the USER_SW1 status represented by the least significant bit (LSB) and the status of USER_SW3 represented by the most significant bit (MSB). Code generation and targeting—the code generated by the block reads the physical switch settings of the user switches on the board and reports them as shown in Table 6-8. Your process uses the result in the same way whether in simulation or in code generation. In code generation and when running your application, the block code ignores the settings for USER_SW1, USER_SW2, and USER_SW3 in favor of reading the hardware switch settings. When the block reads the DIP switches, it reports the results as either a Boolean string or an integer value as Table 6-8, Output Values From The User DIP Switches on the C6711 DSK shows Table 6-8: Output Values From The User DIP Switches on the C6711 DSK USER_SW1 (LSB) USER_SW2 USER_SW3 (MSB) Boolean Output Integer Output Off Off Off 000 0 On Off Off 001 1 Off On Off 010 2 On On Off 011 3 Off Off On 100 4 On Off On 101 5 Off On On 110 6 On On On 111 7 6-39 target_ti.book Page 40 Thursday, June 20, 2002 3:57 PM C6711 DSK DIP Switch Dialog Box USER_SW1 Simulate the status of the user-defined DIP switch on the board. USER_SW2 Simulate the status of the user-defined DIP switch on the board. USER_SW3 Simulate the status of the user-defined DIP switch on the board. Data type Determines how the block reports the status of the user-defined DIP switches. Boolean is the default, indicating that the output is a logical string of three bits. Each bit represents the status of one DIP switch; the LSB is switch USER_SW1 and the MSB is switch USER_SW3. The other data type, Integer, converts the logical string to an equivalent unsigned 8-bit (uint8) 6-40 target_ti.book Page 41 Thursday, June 20, 2002 3:57 PM C6711 DSK DIP Switch decimal value. For example, if the logical string is 101, the decimal conversion yields 5. Sample time Specifies the time between samples of the signal. The default is 1 second between samples, for a sample rate of one sample per second (1/Sample time). 6-41 target_ti.book Page 42 Thursday, June 20, 2002 3:57 PM C6711 DSK LED Purpose 6C6711 DSK LED Library c6711dsklib in Embedded Target for TI C6000 DSP Description Adding the C6711 DSK LED block to your Simulink block diagram lets you trigger all three of the user red light emitting diodes (LED) on the C6711 DSK. To use the block, send a nonzero real scalar to the block. The C6711 DSK LED block triggers all three user LEDs located on the C6711 DSK. Control the user-defined light emitting diodes on the C6711 DSK When you add this block to a model, and send a real scalar to the block input, the block sets the LED state based on the input value it receives: • When the block receives an input value equal to 0, the specified LEDs are turned off (disabled) • When the block receives a non-zero input value, the specified LEDs are turned on (enabled) To activate the block, send it a scalar of any real data type. Vectors do not work to activate LEDs; nor do complex numbers as scalars or vectors. All LEDs maintain their state until their controlling C6711 DSK LED block receives an input value that changes the state. Enabled LEDs stay on until the block receives an input value equal to zero and turns the LEDs off; disabled LEDs stays off until turned on. Resetting the C6711 DSK turns off all user LEDs. Dialog Box This dialog does not have any user selectable options. 6-42 target_ti.book Page 43 Thursday, June 20, 2002 3:57 PM C6711 DSK RESET Purpose 6C6711 DSK RESET Library c6711dsklib in Embedded Target for TI C6000 DSP Description Double-clicking this block in a Simulink model window resets the C6711 DSK that is running the executable code built from the model. When you double-click the RESET block, the block runs the software reset function provided by CCS that resets the processor on your C6711 DSK. Applications running on the board stop and the signal processor returns to the initial conditions you defined. Reset the C6711 DSK to initial conditions Before you build and download your model, add the block to the model as a stand-alone block. You do not need to connect the block to any block in the model. When you double-click this block in the block library it resets your C6711 DSK. In other words, anytime you double-click a C6711 DSK RESET block you reset your C6711 DSK. Dialog Box This block does not have settable options and does not provide a user interface dialog. 6-43 target_ti.book Page 44 Thursday, June 20, 2002 3:57 PM Complex FIR Purpose 6Complex FIR Library C62x DSP Library—Filtering Description The Complex FIR block filters a complex input signal X using a complex FIR filter. This filter is implemented using a direct form structure. Filter a complex input signal using a complex FIR filter The number of FIR filter coefficients, which are given as elements of the input vector H, must be even. The product of the number of elements of X and the number of elements of H must be at least four. Inputs, coefficients, and outputs are all Q.15 data types. The Complex FIR block supports discrete sample times and little-endian code generation only. Dialog Box Coefficient source Specify the source of the filter coefficients: •Specify via dialog—Enter the coefficients in the Coefficients (H) parameter in the dialog 6-44 target_ti.book Page 45 Thursday, June 20, 2002 3:57 PM Complex FIR •Input port—Accept the coefficients from port H. This port must have the same rate as the input data port X. Coefficients (H) Designate the filter coefficients in vector format. There must be an even number of coefficients. This parameter is only visible when Specify via dialog is selected for the Coefficient source parameter. This parameter is tunable in simulation. Initial conditions If the initial conditions are •All the same, you need only enter a scalar. •Different within channels but the same across channels, enter a vector containing the initial conditions for one channel. The length of this vector must be one less than the number of coefficients. •Different across channels, enter a matrix containing all initial conditions. The number of rows of this matrix must be one less than the number of coefficients, and the number of columns of this matrix must be equal to the number of channels. You may enter real-valued initial conditions. Zero-valued imaginary parts will be assumed. Algorithm In simulation, the Complex FIR block is equivalent to the TMS320C62x DSP Library assembly code function DSP_fir_cplx. During code generation, this block calls the DSP_fir_cplx routine to produce optimized code. See Also General Real FIR, Radix-4 Real FIR, Radix-8 Real FIR, Symmetric Real FIR 6-45 target_ti.book Page 46 Thursday, June 20, 2002 3:57 PM Convert Floating-Point to Q.15 Purpose 6Convert Floating-Point to Q.15 Library C62x DSP Library—Conversions Description The Convert Floating-Point to Q.15 block converts a single-precision floating-point input signal to a Q.15 output signal. Input can be real or complex. For real inputs, the number of input samples must be even. Convert an input signal to a Q.15 fixed-point signal The Convert Floating-Point to Q.15 block supports both continuous and discrete sample times. This block also supports both little-endian and big-endian code generation. Dialog Box Algorithm In simulation, the Convert Floating-Point to Q.15 block is equivalent to the TMS320C62x DSP Library assembly code function DSP_fltoq15. During code generation, this block calls the DSP_fltoq15 routine to produce optimized code. See Also Convert Q.15 to Floating Point 6-46 target_ti.book Page 47 Thursday, June 20, 2002 3:57 PM Convert Q.15 to Floating-Point Purpose 6Convert Q.15 to Floating-Point Library C62x DSP Library—Conversions Description The Convert Q.15 to Floating-Point block converts a Q.15 input signal to a single-precision floating-point output signal. Input can be real or complex. For real inputs, the number of input samples must be even. Convert a Q.15 fixed-point signal to a single-precision floating-point signal The Convert Q.15 to Floating-Point block supports both continuous and discrete sample times. This block also supports both little-endian and big-endian code generation. Dialog Box Algorithm In simulation, the Convert Q.15 to Floating-Point block is equivalent to the TMS320C62x DSP Library assembly code function DSP_q15tofl. During code generation, this block calls the DSP_q15tofl routine to produce optimized code. See Also Convert Floating-Point to Q.15 6-47 target_ti.book Page 48 Thursday, June 20, 2002 3:57 PM FFT Purpose 6FFT Library C62x DSP Library—Transforms Description The FFT block computes the decimation-in-frequency forward FFT, with interstage scaling, of each channel of a complex input signal. The input length of each channel must be both a power of two and in the range 8 to 16,384, inclusive. The input must also be in natural (linear) order. The output of this block is a complex signal in natural order. Inputs and outputs are all signed 16-bit fixed-point data types. Compute the decimation-in-frequency forward FFT of a complex input vector The fft16x16r routine used by this block employs butterfly stages to perform the FFT. The number of butterfly stages used, S, depends on the input length L = 2^k. If k is even, then S = k/2. If k is odd, then S = (k+1)/2. If k is even, then L is a power of two as well as a power of four, and this block performs all S stages with radix-4 butterflies to compute the output. If k is odd, then L is a power of two but not a power of four. In that case this block performs the first (S-1) stages with radix-4 butterflies, followed by a final stage using radix-2 butterflies. To minimize noise, the FFT block also implements a divide-by-two scaling on the output of each stage except for the last. Therefore, in order to ensure that the gain of the block matches that of the theoretical FFT, the FFT block offsets the location of the binary point of the output data type by (S-1) bits to the right relative to the location of the binary point of the input data type. That is, the number of fractional bits of the output data type equals the number of fractional bits of the input data type minus (S-1). OutputFractionalBits = InputFractionalBits – ( S – 1 ) The FFT block supports both continuous and discrete sample times. This block supports little-endian code generation. 6-48 target_ti.book Page 49 Thursday, June 20, 2002 3:57 PM FFT Dialog Box Algorithm In simulation, the FFT block is equivalent to the TMS320C62x DSP Library assembly code function DSP_fft16x16r. During code generation, this block calls the DSP_fft16x16r routine to produce optimized code. See Also Radix-2 FFT, Radix-2 IFFT 6-49 target_ti.book Page 50 Thursday, June 20, 2002 3:57 PM From Rtdx Purpose 6From Rtdx Library rtdxBlocks in Embedded Target for TI C6000 DSP for TI DSP Description When you generate code from your Simulink model in Real-Time Workshop with this block in place, code generation inserts the C commands to create an RTDX input channel on the target. The inserted code opens and enables the channel with the name you specify in Channel name in the block parameters. You can open, close, disable, and enable the channel from the host side afterwords, overriding the target side status. Add a named RTDX input channel to Simulink models In the generated code, you see a command like the following RTDX_enableInput(&channelname) where channelname is the name you enter in Channel name. In simulations this block does not perform any operations with the exception that the block will generate an output matching your specified initial conditions. From Rtdx blocks work only in code generation and when your model runs on your target. The initial conditions you set in the block parameters determine the output from the block to the target for the first read attempt. Specify the initial conditions in one of the following ways: • Scalar value—the block generates one output sample with the value of the scalar. For a value of 0, the block outputs a zero to the processor. When Output dimension specifies an array, every element in the array has the same scalar value. • Null array ([ ])—same output as a scalar with the value zero for every sample. Using RTDX in your model involves: • Adding one or more To Rtdx or From Rtdx blocks to your model to prepare your target • Downloading and running your model on your target • Enabling the RTDX channels from MATLAB • Using the readmsg and writemsg functions in MATLAB to send and retrieve data from the target over RTDX 6-50 target_ti.book Page 51 Thursday, June 20, 2002 3:57 PM From Rtdx To see more details about using RTDX in your model, refer to “Tutorial 3-2—Using Links for RTDX” on page 3-39. Dialog Box Channel name Defines the name of the input channel to be created by the generated code. Recall that input channels refer to transferring data from the host to the target (input to the target). To use this RTDX channel, you enable and open the channel with the name, and send data from the host to the target across this channel. Specify any name as long as it meets C syntax requirements for length and character content. Blocking Puts RTDX communications into blocking mode where the target processor waits to continue processing until new data is available from the From Rtdx block. Selecting blocking mode slows your processing while the 6-51 target_ti.book Page 52 Thursday, June 20, 2002 3:57 PM From Rtdx processor waits—if your new data is not available when the processor needs it, your process stops. In nonblocking mode, the processor uses old data from the block when new data is not available. Nonblocking operation is the default and recommended for most operations. Selecting the Blocking option disables the Initial conditions option. Initial conditions Specifies what data the processor reads from RTDX for the first read. This can be 0, null ([ ]), or a scalar. You must have an entry for this option. Leaving the option blank causes an error in Real-Time Workshop. Sample time Specifies the time between samples of the signal. The default is 1 second between samples, for a sample rate of one sample per second (1/Sample time). Output dimensions Defines a matrix for the output signal from the block, where the first value is the number of rows and the second is the number of columns in the output matrix. For example, the default setting [1 64] represents a 1-by-64 matrix of output values. Enter a 1-by-2 vector of doubles for the dimensions. Frame-based Sets a flag at the block output that directs downstream blocks to use frame-based processing on the data from this block. In frame-based processing, the samples in a frame are processed simultaneously. In sample-based processing, samples are processed one at a time. Frame-based processing can greatly increase the speed of your application running on your target. Note that throughput remains the same in samples per second processed. Frame-based operation is the default. Data type Sets the type for the data coming from the block. Select one of the following types: • Double—double-precision floating point values. This is the default setting. Values range from -1 to 1. • Single—single-precision floating point values ranging from -1 to 1. • Uint8—8-bit unsigned integers. Output values range from 0 to 255. 6-52 target_ti.book Page 53 Thursday, June 20, 2002 3:57 PM From Rtdx • Int16—16-bit signed integers. With the sign, the values range from -32768 to 32767. • Int32—32-bit signed integers. Values range from -231 to (231-1). See Also ccsdsp, readmsg, To RTDX, writemsg 6-53 target_ti.book Page 54 Thursday, June 20, 2002 3:57 PM General Real FIR Purpose 6General Real FIR Library C62x DSP Library—Filtering Description The General Real FIR block filters a real input signal X using a real FIR filter. This filter is implemented using a direct form structure. Filter a real input signal using a real FIR filter The filter coefficients are specified by a real vector H, which must contain at least five elements. The coefficients must be in reversed order. All inputs, coefficients, and outputs are Q.15 signals. The General Real FIR block supports discrete sample times and both little-endian and big-endian code generation. Dialog Box Coefficient source Specify the source of the filter coefficients: •Specify via dialog—Enter the coefficients in the Coefficients (H) parameter in the dialog 6-54 target_ti.book Page 55 Thursday, June 20, 2002 3:57 PM General Real FIR •Input port—Accept the coefficients from port H. This port must have the same rate as the input data port X 6-55 target_ti.book Page 56 Thursday, June 20, 2002 3:57 PM General Real FIR Coefficients (H) Designate the filter coefficients in vector format. This parameter is only visible when Specify via dialog is selected for the Coefficient source parameter. This parameter is tunable in simulation. Initial conditions If the initial conditions are •All the same, you need only enter a scalar. •Different within channels but the same across channels, enter a vector containing the initial conditions for one channel. The length of this vector must be one less than the number of coefficients. •Different across channels, enter a matrix containing all initial conditions. The number of rows of this matrix must be one less than the number of coefficients, and the number of columns of this matrix must be equal to the number of channels. The initial conditions must be real. Algorithm In simulation, the General Real FIR block is equivalent to the TMS320C62x DSP Library assembly code function DSP_fir_gen. During code generation, this block calls the DSP_fir_gen routine to produce optimized code. See Also Complex FIR, Radix-4 Real FIR, Radix-8 Real FIR, Symmetric Real FIR 6-56 target_ti.book Page 57 Thursday, June 20, 2002 3:57 PM LMS Adaptive FIR Purpose 6LMS Adaptive FIR Library C62x DSP Library—Filtering Description The LMS Adaptive FIR block performs least-mean-square (LMS) adaptive filtering. This filter is implemented using a direct form structure. Filter a scalar input using least-mean-square adaptive filtering The following constraints apply to the inputs and outputs of this block: • The scalar input X must be a Q.15 data type. • The scalar input B must be a Q.15 data type. • The scalar output R is a Q1.30 data type. • The output H has length equal to the number of filter taps and is a Q.15 data type. The number of filter taps must be a positive, even integer. This block performs LMS adaptive filtering according to the equations e( n + 1) = d( n + 1 ) – [ H( n) ⋅ X( n + 1) ] and H ( n + 1 ) = H ( n ) + [ µe ( n + 1 ) ⋅ X ( n + 1 ) ] where • n designates the time step. • X is a vector composed of the current and last nH – 1 scalar inputs. • d is the desired signal. The output R converges to d as the filter converges. • H is a vector composed of the current set of filter taps. • e is the error, or d – [ H ( n ) ⋅ X ( n + 1 ) ] . • µ is the step size. For this block, the input B and the output R are defined by B = µe ( n + 1 ) R = H( n ) ⋅ X( n + 1) which combined with the first two equations, result in the following equations that this block follows: 6-57 target_ti.book Page 58 Thursday, June 20, 2002 3:57 PM LMS Adaptive FIR e(n + 1) = d(n + 1 ) – R H( n + 1 ) = H( n ) + [B ⋅ X (n + 1 ) ] d and B must be produced externally to the LMS Adaptive FIR block. See “Examples” below for a sample model where this is done. The LMS Adaptive FIR block supports discrete sample times and both little-endian and big-endian code generation. Dialog Box Number of FIR filter taps Designate the number of filter taps. The number of taps must be a positive, even integer. Initial value of filter taps Enter the initial value of the filter taps. Output filter coefficients H? If selected, the filter taps are produced as output H. If not selected, H is suppressed. 6-58 target_ti.book Page 59 Thursday, June 20, 2002 3:57 PM LMS Adaptive FIR Algorithm In simulation, the LMS Adaptive FIR block is equivalent to the TMS320C62x DSP Library assembly code function DSP_firlms2. During code generation, this block calls the DSP_firlms2 routine to produce optimized code. Examples The following model uses the LMS Adaptive FIR block. X d e B The portion of the model enclosed by the dashed line produces the signal B and feeds it back into the LMS Adaptive FIR block. The inputs to this region are X and the desired signal d, and the output of this region is the vector of filter taps H . Thus this region of the model acts as a canonical LMS adaptive filter. For example, compare this region to the adaptlms function in the Filter Design Toolbox. adaptlms performs canonical LMS adaptive filtering and has the same inputs and output as the outlined section of this model. To use the LMS Adaptive FIR block you must create the input B in some way similar to the one shown here. You must also provide the signals X and d . This model simulates the desired signal d by feeding X into a digital filter block. You can simulate your desired signal in a similar way, or you may bring d in from the workspace with a From Workspace or codec block. 6-59 target_ti.book Page 60 Thursday, June 20, 2002 3:57 PM Matrix Multiply Purpose 6Matrix Multiply Library C62x DSP Library—Math and Matrices Description The Matrix Multiply block multiplies two input matrices A and B. Inputs and outputs are real, 16-bit, signed fixed-point data types. This block wraps overflows when they occur. Perform matrix multiplication on two input signals The product of the two 16-bit inputs results in a 32-bit accumulator value. The Matrix Multiply block, however, only outputs 16 bits. You can choose to output the highest or second-highest 16 bits of the accumulator value. Alternatively, you can choose to output 16 bits according to how many fractional bits you want in the output. The number of fractional bits in the accumulator value is the sum of the fractional bits of the two inputs. Input A Input B Accumulator Value Total Bits 16 16 32 Fractional Bits R S R+S Therefore R+S is the location of the binary point in the accumulator value. You can select 16 bits in relation to this fixed position of the accumulator binary point to give the desired number of fractional bits in the output (see “Examples” below). You can either require the output to have the same number of fractional bits as one of the two inputs, or you can specify the number of output fractional bits in the Number of fractional bits in output parameter. The Matrix Multiply block supports both continuous and discrete sample times. This block also supports both little-endian and big-endian code generation. 6-60 target_ti.book Page 61 Thursday, June 20, 2002 3:57 PM Matrix Multiply Dialog Box Set fractional bits in output to Only 16 bits of the 32 accumulator bits are output from the block. Choose which 16 bits to output from the list: •Match input A—Output the 16 bits of the accumulator value that cause the number of fractional bits in the output to match the number of fractional bits in input A (or R in the discussion above). •Match input B—Output the 16 bits of the accumulator value that cause the number of fractional bits in the output to match the number of fractional bits in input B (or S in the discussion above). •Match high bits of acc. (b31:b16)—Output the highest 16 bits of the accumulator value. •Match high bits of prod. (b30:b15)—Output the second-highest 16 bits of the accumulator value. •User-defined—Output the 16 bits of the accumulator value that cause the number of fractional bits of the output to match the value specified in the Number of fractional bits in output parameter. Number of fractional bits in output Specify the number of bits to the right of the binary point in the output. This parameter is enabled only when you select User-defined for Set fractional bits in output to. 6-61 target_ti.book Page 62 Thursday, June 20, 2002 3:57 PM Matrix Multiply Algorithm In simulation, the Matrix Multiply block is equivalent to the TMS320C62x DSP Library assembly code function DSP_mat_mul. During code generation, this block calls the DSP_mat_mul routine to produce optimized code. Examples Example 1 Suppose A and B are both Q.15. The data type of the resulting accumulator value is therefore the 32-bit data type Q1.30 (R + S = 30). In the accumulator, bits 31:30 are the sign and integer bits, and bits 29:0 are the fractional bits. The following table shows the resulting data type and accumulator bits used for the output signal for different settings of the Set fractional bits in output to parameter. Set fractional bits in output to Data Type Accumulator Bits Match input A Q.15 b30:b15 Match input B Q.15 b30:b15 Match high bits of acc. Q1.14 b31:b16 Match high bits of prod. Q.15 b30:b15 Example 2 Suppose A is Q12.3 and B is Q10.5. The data type of the resulting accumulator value is therefore Q23.8 (R + S = 8). In the accumulator, bits 31:8 are the sign and integer bits, and bits 7:0 are the fractional bits. The following table shows the resulting data type and accumulator bits used for the output signal for different settings of the Set fractional bits in output to parameter. See Also 6-62 Set fractional bits in output to Data Type Accumulator Bits Match input A Q12.3 b20:b5 Match input B Q10.5 b18:b3 Match high bits of acc. Q23.-8 b31:b16 Match high bits of prod. Q22.-7 b30:b15 Vector Multiply target_ti.book Page 63 Thursday, June 20, 2002 3:57 PM Matrix Transpose Purpose 6Matrix Transpose Library C62x DSP Library—Math and Matrices Description The Matrix Transpose block transposes an input matrix or vector. A 1-D input is treated as a column vector and is transposed to a row vector. Input and output signals are any real, 16-bit, signed fixed-point data type. Compute the matrix transpose of an input signal The Matrix Transpose block supports both continuous and discrete sample times. This block also supports both little-endian and big-endian code generation. Dialog Box Algorithm In simulation, the Matrix Transpose block is equivalent to the TMS320C62x DSP Library assembly code function DSP_mat_trans. During code generation, this block calls the DSP_mat_trans routine to produce optimized code. 6-63 target_ti.book Page 64 Thursday, June 20, 2002 3:57 PM Radix-2 FFT Purpose 6Radix-2 FFT Library C62x DSP Library—Transforms Description The Radix-2 FFT block computes the radix-2 decimation-in-frequency forward FFT of each channel of a complex input signal. The input length of each channel must be both a power of two and in the range 16 to 32,768, inclusive. The input must also be in natural (linear) order. The output of this block is a complex signal in bit-reversed order. Inputs and outputs are signed 16-bit fixed-point data types, and the output data type matches the input data type. Compute the radix-2 decimation-in-frequency forward FFT of a complex input vector You can use the Bit Reverse block to reorder the output of the Radix-2 FFT block to natural order. The Radix-2 FFT block supports both continuous and discrete sample times. This block supports little-endian code generation. Dialog Box Algorithm 6-64 In simulation, the Radix-2 FFT block is equivalent to the TMS320C62x DSP Library assembly code function DSP_radix2. During code generation, this block calls the DSP_radix2 routine to produce optimized code. target_ti.book Page 65 Thursday, June 20, 2002 3:57 PM Radix-2 FFT Examples The output of the Radix-2 FFT block is bit-reversed. This example shows you how to use the Bit Reverse block to reorder the output of the Radix-2 FFT block to natural order. The following code calculates the same FFT as the above model in the workspace. The output from this calculation, y2, is then displayed side-by-side with the output from the model, c. The outputs match, showing that the Bit Reverse block does reorder the Radix-2 FFT block output to natural order: k = 4; n = 2^k; xr = zeros(n, 1); xr(2) = 0.5; xi = zeros(n, 1); x2 = complex(xr, xi); y2 = fft(x2); [y2, c] 0.5000 0.4619 0.3536 0.1913 0 -0.1913 -0.3536 -0.4619 -0.5000 -0.4619 -0.3536 -0.1913 0 0.1913 0.3536 0.4619 + See Also - 0.1913i 0.3536i 0.4619i 0.5000i 0.4619i 0.3536i 0.1913i + 0.1913i + 0.3536i + 0.4619i + 0.5000i + 0.4619i + 0.3536i 0.1913i 0.5000 0.4619 0.3535 0.1913 0 -0.1913 -0.3535 -0.4619 -0.5000 -0.4619 -0.3535 -0.1913 0 0.1913 0.3535 0.4619 + - 0.1913i 0.3535i 0.4619i 0.5000i 0.4619i 0.3535i 0.1913i + 0.1913i + 0.3535i + 0.4619i + 0.5000i + 0.4619i + 0.3535i 0.1913i Bit Reverse, FFT, Radix-2 IFFT 6-65 target_ti.book Page 66 Thursday, June 20, 2002 3:57 PM Radix-2 IFFT Purpose 6Radix-2 IFFT Library C62x DSP Library—Transforms Description The Radix-2 IFFT block computes the radix-2 inverse FFT of each channel of a complex input signal. This block uses a decimation-in-frequency forward FFT algorithm with butterfly weights modified to compute an inverse FFT. The input length of each channel must be both a power of two and in the range 16 to 32,768, inclusive. The input must also be in natural (linear) order. The output of this block is a complex signal in bit-reversed order. Inputs and outputs are signed 16-bit fixed-point data types. Compute the radix-2 inverse FFT of a complex input vector The radix2 routine used by this block employs a radix-2 FFT of length L=2^k. In order to ensure that the gain of the block matches that of the theoretical IFFT, the Radix-2 IFFT block offsets the location of the binary point of the output data type by k bits to the left relative to the location of the binary point of the input data type. That is, the number of fractional bits of the output data type equals the number of fractional bits of the input data type plus k. OutputFractionalBits = InputFractionalBits + ( k ) You can use the Bit Reverse block to reorder the output of the Radix-2 IFFT block to natural order. The Radix-2 IFFT block supports both continuous and discrete sample times. This block supports little-endian code generation. Dialog Box 6-66 target_ti.book Page 67 Thursday, June 20, 2002 3:57 PM Radix-2 IFFT Algorithm In simulation, the Radix-2 IFFT block is equivalent to the TMS320C62x DSP Library assembly code function DSP_radix2. During code generation, this block calls the DSP_radix2 routine to produce optimized code. See Also Bit Reverse, FFT, Radix-2 FFT 6-67 target_ti.book Page 68 Thursday, June 20, 2002 3:57 PM Radix-4 Real FIR Purpose 6Radix-4 Real FIR Library C62x DSP Library—Filtering Description The Radix-4 Real FIR block filters a real input signal X using a real FIR filter. This filter is implemented using a direct form structure. Filter a real input signal using a real FIR filter The number of input samples per channel must be even. The filter coefficients are specified by a real vector, H. The number of filter coefficients must be a multiple of four and must be at least eight. The coefficients must also be in reversed order. All inputs, coefficients, and outputs are Q.15 signals. The Radix-4 Real FIR block supports discrete sample times and both little-endian and big-endian code generation. Dialog Box Coefficient source Specify the source of the filter coefficients: •Specify via dialog—Enter the coefficients in the Coefficients parameter in the dialog 6-68 target_ti.book Page 69 Thursday, June 20, 2002 3:57 PM Radix-4 Real FIR •Input port—Accept the coefficients from port H. This port must have the same rate as the input data port X Coefficients (H) Designate the filter coefficients in vector format. This parameter is only visible when Specify via dialog is selected for the Coefficient source parameter. This parameter is tunable in simulation. Initial conditions If the initial conditions are •All the same, enter a scalar. •Different within channels but the same across channels, enter a vector containing the initial conditions for one channel. The length of this vector must be one less than the number of coefficients. •Different across channels, enter a matrix containing all initial conditions. The number of rows of this matrix must be one less than the number of coefficients, and the number of columns of this matrix must be equal to the number of channels. Initial conditions must be real. Algorithm In simulation, the Radix-4 Real FIR block is equivalent to the TMS320C62x DSP Library assembly code function DSP_fir_r4. During code generation, this block calls the DSP_fir_r4 routine to produce optimized code. See Also Complex FIR, General Real FIR, Radix-8 Real FIR, Symmetric Real FIR 6-69 target_ti.book Page 70 Thursday, June 20, 2002 3:57 PM Radix-8 Real FIR Purpose 6Radix-8 Real FIR Library C62x DSP Library—Filtering Description The Radix-8 Real FIR block filters a real input signal X using a real FIR filter. This filter is implemented using a direct form structure. Filter a real input signal using a real FIR filter The number of input samples per channel must be even. The filter coefficients are specified by a real vector, H. The number of coefficients must be an integer multiple of eight. The coefficients must be in reversed order. All inputs, coefficients, and outputs are Q.15 signals. The Radix-8 Real FIR block supports discrete sample times and little-endian code generation only. Dialog Box Coefficient source Specify the source of the filter coefficients: •Specify via dialog—Enter the coefficients in the Coefficients parameter in the dialog 6-70 target_ti.book Page 71 Thursday, June 20, 2002 3:57 PM Radix-8 Real FIR •Input port—Accept the coefficients from port H. This port must have the same rate as the input data port X Coefficients (H) Designate the filter coefficients in vector format. This parameter is only visible when Specify via dialog is selected for the Coefficient source parameter. This parameter is tunable in simulation. Initial conditions If the initial conditions are •All the same, you need only enter a scalar. •Different within channels but the same across channels, enter a vector containing the initial conditions for one channel. The length of this vector must be one less than the number of coefficients. •Different across channels, enter a matrix containing all initial conditions. The number of rows of this matrix must be one less than the number of coefficients, and the number of columns of this matrix must be equal to the number of channels. Initial conditions must be real. Algorithm In simulation, the Radix-8 Real FIR block is equivalent to the TMS320C62x DSP Library assembly code function DSP_fir_r8. During code generation, this block calls the DSP_fir_r8 routine to produce optimized code. See Also Complex FIR, General Real FIR, Radix-4 Real FIR, Symmetric Real FIR 6-71 target_ti.book Page 72 Thursday, June 20, 2002 3:57 PM Real Forward Lattice All-Pole IIR Purpose 6Real Forward Lattice All-Pole IIR Library C62x DSP Library—Filtering Description The Real Forward Lattice All-Pole IIR block filters a real input signal using an autoregressive forward lattice filter. The input and output signals must be the same 16-bit signed fixed-point data type. The reflection coefficients must be real and Q.15. The number of reflection coefficients must be greater than or equal to four, and they must be in reversed order. Use an even number of reflection coefficients to maximize the speed of your generated code. Filter a real input signal using an autoregressive forward lattice filter The Real Forward Lattice All-Pole IIR block supports discrete sample times and both little-endian and big-endian code generation. Dialog Box Coefficient source Specify the source of the filter coefficients: •Specify via dialog—Enter the coefficients in the Reflection coefficients parameter in the dialog 6-72 target_ti.book Page 73 Thursday, June 20, 2002 3:57 PM Real Forward Lattice All-Pole IIR •Input port—Accept the coefficients from port K Reflection coefficients Designate the reflection coefficients of the filter in vector format. The number of coefficients must be greater than or equal to four, and they must be in reverse order. Use an even number of reflection coefficients to maximize the speed of your generated code. This parameter is only visible when Specify via dialog is selected for the Coefficient source parameter. This parameter is tunable in simulation. Initial conditions If the initial conditions are •All the same, you need only enter a scalar. •Different within channels but the same across channels, enter a vector containing the initial conditions for one channel. The length of this vector must be one less than the number of coefficients. •Different across channels, enter a matrix containing all initial conditions. The number of rows of this matrix must be one less than the number of coefficients, and the number of columns of this matrix must be equal to the number of channels. Algorithm In simulation, the Real Forward Lattice All-Pole IIR block is equivalent to the TMS320C62x DSP Library assembly code function DSP_iirlat. During code generation, this block calls the DSP_iirlat routine to produce optimized code. See Also Real IIR 6-73 target_ti.book Page 74 Thursday, June 20, 2002 3:57 PM Real IIR Purpose 6Real IIR Library C62x DSP Library—Filtering Description The Real IIR block filters a real input signal X using a real autoregressive moving-average (ARMA) IIR Filter. This filter is implemented using a direct form I structure. Filter a real input signal using a real autoregressive moving-average IIR filter There must be five AR coefficients and five MA coefficients. The first AR coefficient is always assumed to be one. Inputs, coefficients, and output are Q.15 data types. The Real IIR block supports discrete sample times and both little-endian and big-endian code generation. Dialog Box 6-74 target_ti.book Page 75 Thursday, June 20, 2002 3:57 PM Real IIR Coefficient sources Specify the source of the filter coefficients: •Specify via dialog—Enter the coefficients in the MA (numerator) coefficients and AR (denominator) coefficients parameters in the dialog •Input ports—Accept the coefficients from ports MA and AR MA (numerator) coefficients Designate the moving-average coefficients of the filter in vector format. There must be five MA coefficients. This parameter is only visible when Specify via dialog is selected for the Coefficient sources parameter. This parameter is tunable in simulation. AR (denominator) coefficients Designate the autoregressive coefficients of the filter in vector format. There must be five AR coefficients, however the first AR coefficient is assumed to be equal to one. This parameter is only visible when Specify via dialog is selected for the Coefficient sources parameter. This parameter is tunable in simulation. Input state initial conditions If the input state initial conditions are •All the same, you need only enter a scalar. •Different within channels but the same across channels, enter a vector containing the input state initial conditions for one channel. The length of this vector must be four. •Different across channels, enter a matrix containing all input state initial conditions. This matrix must have four rows. Output state initial conditions If the output state initial conditions are •All the same, you need only enter a scalar. •Different within channels but the same across channels, enter a vector containing the output state initial conditions for one channel. The length of this vector must be four. 6-75 target_ti.book Page 76 Thursday, June 20, 2002 3:57 PM Real IIR •Different across channels, enter a matrix containing all output state initial conditions. This matrix must have four rows. Algorithm In simulation, the Real IIR block is equivalent to the TMS320C62x DSP Library assembly code function DSP_iir. During code generation, this block calls the DSP_iir routine to produce optimized code. See Also Real Forward Lattice All-Pole IIR 6-76 target_ti.book Page 77 Thursday, June 20, 2002 3:57 PM Reciprocal Purpose 6Reciprocal Library C62x DSP Library—Math and Matrices Description The Reciprocal block computes the fractional (F) and exponential (E) portions of the reciprocal of a real Q.15 input, such that the reciprocal of the input is F*(2E). The fraction is Q.15 and the exponent is a 16-bit signed integer. Compute the fractional and exponential portions of the reciprocal of a real input signal The Reciprocal block supports both continuous and discrete sample times. This block also supports both little-endian and big-endian code generation. Dialog Box Algorithm In simulation, the Reciprocal block is equivalent to the TMS320C62x DSP Library assembly code function DSP_recip16. During code generation, this block calls the DSP_recip16 routine to produce optimized code. 6-77 target_ti.book Page 78 Thursday, June 20, 2002 3:57 PM Symmetric Real FIR Purpose 6Symmetric Real FIR Library C62x DSP Library—Filtering Description The Symmetric Real FIR block filters a real input signal using a symmetric real FIR filter. This filter is implemented using a direct form structure. Filter a real input signal using a symmetric real FIR filter The number of input samples per channel must be even. The filter coefficients are specified by a real vector H, which must be symmetric about its middle element. The number of coefficients must be of the form 16k + 1, where k is a positive integer. This block wraps overflows that occur. The input, coefficients, and output are 16-bit signed fixed-point data types. Intermediate multiplys and accumulates performed by this filter result in a 32-bit accumulator value. However, the Symmetric Real FIR block only outputs 16 bits. You can choose to output 16 bits of the accumulator value in one of the following ways. Match input x Output 16 bits of the accumulator value such that the output has the same number of fractional bits as the input Match coefficients h Output 16 bits of the accumulator value such that the output has the same number of fractional bits as the coefficients Match high 16 bits of acc. Output bits 31 - 16 of the accumulator value Match high 16 bits of prod. Output bits 30 - 15 of the accumulator value User-defined Output 16 bits of the accumulator value such that the output has the number of fractional bits specified in the Number of fractional bits in output parameter The Symmetric Real FIR block supports discrete sample times and only little-endian code generation. 6-78 target_ti.book Page 79 Thursday, June 20, 2002 3:57 PM Symmetric Real FIR Dialog Box Coefficient source Specify the source of the filter coefficients: •Specify via dialog—Enter the coefficients in the Coefficients parameter in the dialog •Input port—Accept the coefficients from port H 6-79 target_ti.book Page 80 Thursday, June 20, 2002 3:57 PM Symmetric Real FIR Coefficients Enter the coefficients in vector format. This parameter is visible only when Specify via dialog is specified for the Coefficient source parameter. This parameter is tunable in simulation. Set fractional bits in coefficients to Specify the number of fractional bits in the filter coefficients: •Match input X—Sets the coefficients to have the same number of fractional bits as the input •Best precision—Sets the number of fractional bits of the coefficients such that the coefficients are represented to the best precision possible •User-defined—Sets the number of fractional bits in the coefficients with the Number of fractional bits in coefficients parameter This parameter is visible only when Specify via dialog is specified for the Coefficient source parameter. Number of fractional bits in coefficients Specify the number of bits to the right of the binary point in the filter coefficients. This parameter is visible only when Specify via dialog is specified for the Coefficient source parameter, and is only enabled if User-defined is specified for the Set fractional bits in coefficients to parameter. Set fractional bits in output to Only 16 bits of the 32 accumulator bits are output from the block. Select which 16 bits to output: •Match input X—Output the 16 bits of the accumulator value that cause the number of fractional bits in the output to match the number of fractional bits in input X •Match coefficients H—Output the 16 bits of the accumulator value that cause the number of fractional bits in the output to match the number of fractional bits in coefficients H •Match high bits of acc. (b31:b16)—Output the highest 16 bits of the accumulator value •Match high bits of prod. (b30:b15)—Output the second-highest 16 bits of the accumulator value 6-80 target_ti.book Page 81 Thursday, June 20, 2002 3:57 PM Symmetric Real FIR •User-defined—Output the 16 bits of the accumulator value that cause the number of fractional bits of the output to match the value specified in the Number of fractional bits in output parameter See Matrix Multiply “Examples” on page 6-62 for demonstrations of these selections. Number of fractional bits in output Specify the number of bits to the right of the binary point in the output. This parameter is only enabled if User-defined is selected for the Set fractional bits in output to parameter. Initial conditions If the initial conditions are •All the same, you need only enter a scalar. •Different within channels but the same across channels, enter a vector containing the initial conditions for one channel. The length of this vector must be one less than the number of coefficients. •Different across channels, enter a matrix containing all initial conditions. The number of rows of this matrix must be one less than the number of coefficients, and the number of columns of this matrix must be equal to the number of channels. Algorithm In simulation, the Symmetric Real FIR block is equivalent to the TMS320C62x DSP Library assembly code function DSP_fir_sym. During code generation, this block calls the DSP_fir_sym routine to produce optimized code. See Also Complex FIR, General Real FIR, Radix-4 Real FIR, Radix-8 Real FIR 6-81 target_ti.book Page 82 Thursday, June 20, 2002 3:57 PM To Rtdx Purpose 6To Rtdx Library rtdxBlocks in Embedded Target for TI C6000 DSP for TI DSP Description When your Simulink model with this block is in place, Real-Time Workshop code generation inserts the C commands to create an RTDX output channel on the target. The inserted code opens and enables the channel with the name you specify in Channel name. You can open, close, disable, and enable the channel from the host side afterwords, overriding the target side status. Add a named RTDX output channel to Simulink models In the generated code from models with this block, you see a command like RTDX_enableOutput(&channelname) where channelname is the name you enter in Channel name. In simulations this block does not perform any operations. To Rtdx blocks work only in code generation and when your model runs on your target. Using RTDX in your model involves: • Adding one or more RTDX blocks to your model to prepare your target • Downloading and running your model on your target • Enabling the RTDX channels from MATLAB • Using the readmsg and writemsg functions in MATLAB to send and retrieve data from the target over RTDX To see more details about using RTDX in your model, refer to “Tutorial 3-2—Using Links for RTDX” on page 3-39. Dialog Box 6-82 target_ti.book Page 83 Thursday, June 20, 2002 3:57 PM To Rtdx Channel name Defines the name of the output channel on the target DSP. Recall that output channels refer to transferring data from the target to the host (output from the target). To use this RTDX channel, you enable and open the channel with the name, and send data from the target to the host across this channel. Specify any name as long as it meets C syntax requirements for length and character content. See Also ccsdsp, From RTDX, readmsg, writemsg 6-83 target_ti.book Page 84 Thursday, June 20, 2002 3:57 PM Vector Dot Product Purpose 6Vector Dot Product Library C62x DSP Library—Math and Matrices Description The Vector Dot Product block computes the vector dot product of two real input vectors, X and Y. The input vectors must have the same dimensions and must be signed 16-bit fixed-point data types. The number of samples per channel of the inputs must be even and greater than or equal to four. The output is a signed 32-bit fixed-point scalar on each channel, and the number of fractional bits of the output is equal to the sum of the number of fractional bits of the inputs. Compute the vector dot product of two real input signals The Vector Dot Product block supports both continuous and discrete sample times. This block also supports both little-endian and big-endian code generation. Dialog Box Algorithm 6-84 In simulation, the Vector Dot Product block is equivalent to the TMS320C62x DSP Library assembly code function DSP_dotprod. During code generation, this block calls the DSP_dotprod routine to produce optimized code. target_ti.book Page 85 Thursday, June 20, 2002 3:57 PM Vector Maximum Index Purpose 6Vector Maximum Index Library C62x DSP Library—Math and Matrices Description The Vector Maximum Index block computes the zero-based index of the maximum value element in each channel (vector) of the input signal. The input may be any real, 16-bit, signed fixed-point data type, and the number of samples per input channel must be an integer multiple of three. The output data type is a 32-bit signed integer. Compute the index of the maximum value element in each channel of an input signal The Vector Maximum Index block supports both continuous and discrete sample times. This block also supports both little-endian and big-endian code generation. Dialog Box Algorithm In simulation, the Vector Maximum Index block is equivalent to the TMS320C62x DSP Library assembly code function DSP_maxidx. During code generation, this block calls the DSP_maxidx routine to produce optimized code. 6-85 target_ti.book Page 86 Thursday, June 20, 2002 3:57 PM Vector Maximum Value Purpose 6Vector Maximum Value Library C62x DSP Library—Math and Matrices Description The Vector Maximum Value block returns the maximum value in each channel (vector) of the input signal. The input can be any real, 16-bit, signed fixed-point data type. The number of samples on each input channel must be an integer multiple of four and must be at least 16. The output data type matches the input data type. Compute the maximum value for each channel of an input signal The Vector Maximum Value block supports both continuous and discrete sample times. This block also supports both little-endian and big-endian code generation. Dialog Box Algorithm In simulation, the Vector Maximum Value block is equivalent to the TMS320C62x DSP Library assembly code function DSP_maxval. During code generation, this block calls the DSP_maxval routine to produce optimized code. See Also Vector Minimum Value 6-86 target_ti.book Page 87 Thursday, June 20, 2002 3:57 PM Vector Minimum Value Purpose 6Vector Minimum Value Library C62x DSP Library—Math and Matrices Description The Vector Minimum Value block returns the minimum value in each channel of the input signal. The input may be any real, 16-bit, signed fixed-point data type. The number of samples on each input channel must be an integer multiple of four and must be at least 16. The output data type matches the input data type. Compute the minimum value for each channel of an input signal The Vector Minimum Value block supports both continuous and discrete sample times. This block also supports both little-endian and big-endian code generation. Dialog Box Algorithm In simulation, the Vector Minimum Value block is equivalent to the TMS320C62x DSP Library assembly code function DSP_minval. During code generation, this block calls the DSP_minval routine to produce optimized code. See Also Vector Maximum Value 6-87 target_ti.book Page 88 Thursday, June 20, 2002 3:57 PM Vector Multiply Purpose 6Vector Multiply Library C62x DSP Library—Math and Matrices Description The Vector Multiply block performs element-wise 32-bit multiplication of two inputs X and Y. The total number of elements in each input must be even and at least eight, and the inputs must have matching dimensions. The upper 32 bits of the 64-bit accumulator result are returned. All input and output elements are 32-bit signed fixed-point data types. Perform element-wise multiplication on two inputs The Vector Multiply block supports both continuous and discrete sample times. This block also supports both little-endian and big-endian code generation. Dialog Box Algorithm In simulation, the Vector Multiply block is equivalent to the TMS320C62x DSP Library assembly code function DSP_mul32. During code generation, this block calls the DSP_mul32 routine to produce optimized code. See Also Matrix Multiply 6-88 target_ti.book Page 89 Thursday, June 20, 2002 3:57 PM Vector Negate Purpose 6Vector Negate Library C62x DSP Library—Math and Matrices Description The Vector Negate block negates each element of a 32-bit signed fixed-point input signal. For real signals, the number of input elements must be even and at least four. For complex signals, the number of input elements must be at least two. The output is the same data type as the input. Negate each element of an input signal The Vector Negate block supports both continuous and discrete sample times. This block also supports both little-endian and big-endian code generation. Dialog Box Algorithm In simulation, the Vector Negate block is equivalent to the TMS320C62x DSP Library assembly code function DSP_neg32. During code generation, this block calls the DSP_neg32 routine to produce optimized code. 6-89 target_ti.book Page 90 Thursday, June 20, 2002 3:57 PM Vector Sum of Squares Purpose 6Vector Sum of Squares Library C62x DSP Library—Math and Matrices Description The Vector Sum of Squares block computes the sum of squares over each channel of a real input. The number of samples per input channel must be even and at least eight, and the input must be a 16-bit signed fixed-point data type. The output is a 32-bit signed fixed-point scalar on each channel. The number of fractional bits of the output is twice the number of fractional bits of the input. Compute the sum of squares over each channel of a real input The Vector Sum of Squares block supports both continuous and discrete sample times. This block also supports both little-endian and big-endian code generation. Dialog Box Algorithm 6-90 In simulation, the Vector Sum of Squares block is equivalent to the TMS320C62x DSP Library assembly code function DSP_vecsumsq. During code generation, this block calls the DSP_vecsumsq routine to produce optimized code. target_ti.book Page 91 Thursday, June 20, 2002 3:57 PM Weighted Vector Sum Purpose 6Weighted Vector Sum Library C62x DSP Library—Math and Matrices Description The Weighted Vector Sum block computes the weighted sum of two inputs, X and Y, according to (W*X)+Y. Inputs may be vectors or frame-based matrices. The number of samples per channel must be a multiple of four. Inputs, weights, and output are Q.15 data types, and weights must be in the range -1 < W < 1. Find the weighted sum of two input vectors The Weighted Vector Sum block supports both continuous and discrete sample times. This block also supports both little-endian and big-endian code generation. Dialog Box Weight source Specify the source of the weights: •Specify via dialog—Enter the weights in the Weights (W) parameter in the dialog •Input port—Accept the weights from port W 6-91 target_ti.book Page 92 Thursday, June 20, 2002 3:57 PM Weighted Vector Sum Weights (W) This parameter is visible only when Specify via dialog is specified for the Weight source parameter. This parameter is tunable in simulation. When the weights are •All the same, you need only enter a scalar. •Different within channels but the same across channels, enter a vector containing the initial conditions for one channel. The length of this vector must be a multiple of four. •Different across channels, enter a matrix containing all initial conditions. The number of rows of this matrix must be a multiple of four, and the number of columns of this matrix must be equal to the number of channels. Weights must be in the range -1 < W < 1. Algorithm 6-92 In simulation, the Weighted Vector Sum block is equivalent to the TMS320C62x DSP Library assembly code function DSP_w_vec. During code generation, this block calls the DSP_w_vec routine to produce optimized code. target_ti.book Page 1 Thursday, June 20, 2002 3:57 PM Index Numerics 4-bit IMA ADPCM 2-17 A adding DSP/BIOS to generated code 2-36 applications logging 2-25 Autocorrelation block 6-9 automatic board selection 2-34 B Bit Reverse block 6-13 Block Exponent block 6-13 block recommendations 2-55 blocks use in target models 2-55 Board and processor selection 2-34 build configuration default 2-46 MW_custom 2-46 build directory contents of 2-81, 2-111 naming convention 2-69 building models use C62x DSP Library blocks 4-7 C C6000 Target code generation options 2-36 compiler options 2-38 MATLAB to CCS link 2-35 runtime options 2-43 target selection 2-33 targeting Code Composer Studio 2-112 TI C6000 linker options 2-39 C62x DSP Library blocks building models 4-7 choose blocks to optimize code 4-8 common characteristics 4-2 Q format notation 4-4 use source and sink blocks 4-8 C6701 EVM confirming proper configuration 2-51 DIP switch configuration for targeting C6701 EVM 2-50 general code generation options 2-32 start/stop models 2-49 target options 2-29 TLC debugging options 2-31 tutorial about multirate applications 2-68 C6701 EVM ADC block 6-14 C6701 EVM blocks tutorial 2-68 C6701 EVM directories build 2-69 working 2-101 C6701EVM ADC choose the codec data format 2-17 choose the sample rate 2-15 select the data type 2-18 select the scaling 2-19 use fixed-point arithmetic 2-19 C6701EVM ADC block 2-14 C6701EVM ADC dialog 2-16 C6701EVM DAC block 2-20, 6-20 choose the codec data format 2-21 choose the scaling 2-21 overflow mode 2-21 C6701EVM DAC dialog 2-20 C6701EVM DIP Switch block 6-25 I-1 target_ti.book Page 2 Thursday, June 20, 2002 3:57 PM Index C6701EVM LED block 6-29 configure the block 2-22 select the target LED 2-22 the overrun indicator 2-23 C6701EVM RESET block 6-31 c6701evmtest.mdl 2-52 errors while running 2-86 use 2-52 verifying that the model is running 2-54 C6711 DSK configure 2-82 fixed sample rate 2-16 start/stop models 2-99 tutorial about multirate applications 2-100 C6711 DSK blocks tutorial 2-100 C6711 DSK directories build 2-101 working 2-69 C6711DSK ADC block 6-32 C6711DSK DAC block 6-36 C6711DSK DIP Switch block 6-38 C6711DSK LED block 6-42 C6711DSK RESET block 6-43 c6711dsktest.mdl 2-84 errors while running 2-54 verifying that the model is running 2-86 calls near and far 2-41 CCS IDE create projects for the IDE 2-112 Code Composer Studio 2-112 codec data format 2-17 command line help 1-7 Complex FIR block 6-44 configure the software timer 2-45 I-2 configure your C6711 DSK for Embedded Target for TI C6000 DSP 2-82 confirm your C6701 EVM configuration 2-51 convert data types 4-7 Convert Floating-Point to Q.15 block 6-46 Convert Q.15 to Floating-Point block 6-47 current C6701 EVM CPU clock rate 2-45 D data format, 16-bit linear 2-17 data format, 8-bit A law 2-17 data format, 8-bit mu law 2-17 data format, codec 2-17 data type, select 2-18 default build configuration 2-46 disabling logging 2-26 DSP/BIOS added files 3-9 adding to generated code 2-36 files removed from project 3-10 E Embedded Target for TI C6000 DSP viii about viii, 1-2 configure C6701EVM ADC blocks 2-14 configure C6701EVM LED blocks 2-22 configure C6711DSK LED blocks 2-22 configure the C6701EVM DAC block 2-20 create Simulink model for targeting 2-55 errors while running test model c6701evmtest 2-54 errors while running test model c6711dsktest 2-86 expected background for use xi general help 1-7 target_ti.book Page 3 Thursday, June 20, 2002 3:57 PM Index hardware and OS requirements 1-4 information for new users xi peripheral hardware for testing C6701 EVM operation 2-52 peripheral hardware for testing C6711 DSK operation 2-83 procedure for testing the operation 2-52 requirements for TI software 1-5 requirements for use x select the target LED 2-22 starting/stopping test model c6701evmtest 2-54 starting/stopping test model c6711dsktest 2-87 suitable applications 1-3 test installation and operation of the C6701 EVM 2-52 test installation and operation of the C6711 DSK 2-83 use C6701 EVM blocks 2-9 error select board automatically 2-34 errors running c6701evmtest.mdl 2-54 errors running c6711dsktest.mdl 2-86 export filters to CCS IDE from FDATool 5-2 select the export data type 5-7 set the Export mode option 5-4 set the Target selection options 5-12 set Variable names in C header file 5-5 set Variable names in target symbol table 5-5 exporting filters to CCS IDE from FDATool tutorial 5-9 external LED 2-23 F far calls 2-41 FDATool See export filters to CCS IDE from FDATool FFT block 6-48 files added to DSP/BIOS project 3-9 files removed from DSP/BIOS projects 3-10 fixed-point numbers 4-3 signed 4-3 From Rtdx block 6-50 G General Real FIR block 6-54 generate optimized code 2-36 generate_code_only option 2-43 H halting a running process 2-54 hardware requirements for Embedded Target for TI C6000 DSP 1-4 headroom meter 2-23 help command line 1-7 I Incorporate DSP/BIOS option 2-36 indicator, overrun 2-23 inline DSP Blockset functions option 2-36 internal LED 2-23 L LED block 2-22 LED target 2-23 linker error 2-41 LMS Adaptive Filter block 6-57 logging I-3 target_ti.book Page 4 Thursday, June 20, 2002 3:57 PM Index about 2-26 logging in models 2-25 logging options in Simulink Parameters dialog 2-26 logging, disabling 2-26 profile report about 3-11 reading 3-13 sample 3-13 projects, create for CCS 2-112 M Q manual board selection 2-34 Matrix Multiplication block 6-60 Matrix Transpose block 6-63 models logging 2-25 multiple boards, select a target 2-34 MW_custom build configuration 2-46 Q format notation 4-4 N near calls 2-41 O optimization,target specific 2-36 optimize code 4-8 OS requirements for Embedded Target for TI C6000 DSP 1-4 overflow mode 2-21 overflow mode, about 2-21 overrun indicator 2-23 P prerequisites for using Embedded Target for TI C6000 DSP x procedure for testing Embedded Target for TI C6000 DSP 2-52 profile generated code 3-11 I-4 R Radix-2 FFT block 6-64 Radix-2 IFFT block 6-66 Radix-4 Real FIR block 6-68 Radix-8 Real FIR block 6-70 Real IIR block 6-74 Reciprocal block 6-77 RTDX links. See links. RTW build options generate_code_only 2-43 run the EVM confidence test 2-51 S sample rate for C6711 DSK 2-16 saturate 2-22 select blocks for models 2-55 select data type 2-18 set C6701 EVM DIP switches for Embedded Target for TI C6000 DSP 2-50 signed fixed-point numbers 4-3 simulators and board selection, board selection, simulators 2-35 simulators, about 2-5 source and sink blocks 4-8 stopping running models 2-54 target_ti.book Page 5 Thursday, June 20, 2002 3:57 PM Index suitable applications for Embedded Target for TI C6000 DSP 1-3 Symmetric Real FIR block 6-78 T table of blocks to avoid in models 2-55 target Code Composer Studio 2-112 target configuration options build action 2-43 byte order 2-39 compiler verbosity 2-39 create .map files 2-40 generate code only 2-31 linker command file 2-40 make command 2-31 overrun action 2-46 retain .asm files 2-39 retain .obj files 2-40 symbolic debugging 2-39 system target file 2-30 template makefile 2-30 user linker command file 2-42 target LED 2-23 target specific optimization 2-36 test your Embedded Target for TI C6000 DSP installation C6701 EVM 2-52 C6711 DSK 2-83 timer, configure 2-45 To Rtdx block 6-82 tutorial for C6701 EVM blocks 2-68 tutorial for C6711 DSK blocks 2-100 typographical conventions (table) xvi U use blocks for the C6701 EVM 2-68 use blocks for the C6711 DSK 2-100 use C62x DSP Library blocks 4-1 use C6701 EVM blocks 2-68 use c6701evmtest.mdl 2-52 use C6711 DSK blocks 2-100 use logging in models 2-25 use simulators for development 2-5 user LED 2-23 V Vector Dot Product block 6-84 Vector Maximum Index block 6-85 Vector Maximum Value block 6-86 Vector Minimum Value block 6-87 Vector Multiply block 6-88 Vector Negate block 6-89 Vector Sum of Squares block 6-90 verify that c6701evmtest.mdl is running 2-54, 2-86 W Weighted Vector Sum block 6-91 working directory 2-69 wrap 2-22 I-5