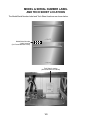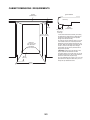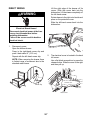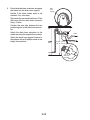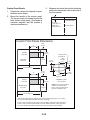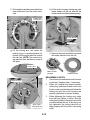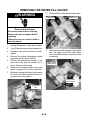
1
KAD-9 TECHNICAL EDUCATION DRAWER DISHWASHER JOB AID 4317364 FORWARD This KitchenAid Job Aid, “Drawer Dishwasher,” (Part No. 4317364), provides the technician with information on the installation, operation, and service of the Drawer Dishwasher. It is to be used as a training Job Aid and Service Manual. For specific information on the model being serviced, refer to the “Use and Care Guide,” or “Tech Sheet” provided with the dishwasher. The Wiring Diagram used in this Job Aid is typical and should be used for training purposes only. Always use the Wiring Diagram supplied with the product when servicing the unit. GOALS AND OBJECTIVES The goal of this Job Aid is to provide detailed information that will enable the service technician to properly diagnose malfunctions and repair the KitchenAid Drawer Dishwasher. The objectives of this Job Aid are to: • Understand and follow proper safety precautions. • Successfully troubleshoot and diagnose malfunctions. • Successfully perform necessary repairs. • Successfully return the dishwasher to its proper operational status. WHIRLPOOL CORPORATION assumes no responsibility for any repairs made on our products by anyone other than Authorized Service Technicians. Copyright © 2004, Whirlpool Corporation, Benton Harbor, MI 49022 - ii - TABLE OF CONTENTS Page GENERAL ............................................................................................................................... 1-1 Safety First ......................................................................................................................... 1-1 Model & Serial Number Designations ................................................................................ 1-2 Model & Serial Number Label And Tech Sheet Locations................................................. 1-3 Specifications ..................................................................................................................... 1-4 KitchenAid Dishwasher Warranty ...................................................................................... 1-5 INSTALLATION INFORMATION ........................................................................................... 2-1 General .............................................................................................................................. 2-1 Installing The Dishwasher .................................................................................................. 2-5 PRODUCT OPERATION ........................................................................................................ 3-1 System Overview ............................................................................................................... 3-1 Parts And Features ............................................................................................................ 3-3 Dishwasher Systems ......................................................................................................... 3-4 Using The Dishwasher ....................................................................................................... 3-6 Wash Programs ............................................................................................................... 3-10 COMPONENT ACCESS ......................................................................................................... 4-1 Component Locations ........................................................................................................ 4-1 Removing The Spray Arm And Impeller ............................................................................ 4-2 Removing The Isolator, Badge, & Door Handle................................................................. 4-3 Removing The Drying Fan And Rinse Aid LED ................................................................. 4-5 Removing The Controller ................................................................................................... 4-7 Removing The Rinse Aid And Detergent Dispenser .......................................................... 4-8 Removing The Upper Or Lower Drawer ............................................................................ 4-9 Removing The Hall Sensor, The Wash And Drain Motor, And The Heater Element Assembly .............................................................................. 4-10 Removing The Lid ............................................................................................................ 4-13 Removing The Lid Motors ................................................................................................ 4-14 Removing The Chassis Module And Power Cord ........................................................... 4-15 Removing The Water Fill Valves ..................................................................................... 4-16 COMPONENT TESTING ........................................................................................................ 5-1 Drying Fan ......................................................................................................................... 5-1 Rinse Aid And Detergent Dispenser .................................................................................. 5-2 Wash & Drain Motor .......................................................................................................... 5-2 Lid Motor ............................................................................................................................ 5-3 Power Resistor & Heater ................................................................................................... 5-3 Temperature Sensor .......................................................................................................... 5-4 Water Fill Valves ................................................................................................................ 5-4 - iii - Page DIAGNOSTICS & TROUBLESHOOTING .............................................................................. 6-1 Diagnostics ........................................................................................................................ 6-1 The Error Code Display Mode ....................................................................................... 6-1 Error Codes ................................................................................................................... 6-2 Diagnostic Modes .......................................................................................................... 6-5 Troubleshooting Chart ....................................................................................................... 6-6 WIRING DIAGRAM ................................................................................................................. 7-1 - iv - GENERAL SAFETY FIRST Your safety and the safety of others is very important. We have provided many important safety messages in this Job Aid and on the appliance. Always read and obey all safety messages. This is the safety alert symbol. This symbol alerts you to hazards that can kill or hurt you and others. All safety messages will follow the safety alert symbol and either the word “DANGER” or “WARNING.” These words mean: DANGER You can be killed or seriously injured if you don’t immediately follow instructions. WARNING You can be killed or seriously injured if you don’t follow instructions. All safety messages will tell you what the potential hazard is, tell you how to reduce the chance of injury, and tell you what can happen if the instructions are not followed. 1-1 MODEL & SERIAL NUMBER DESIGNATIONS MODEL NUMBER K U D D 01 D P PA 0 MODEL NUMBER PRODUCT GROUP K = KITCHENAID BRAND PRODUCT IDENTIFICATION UD = UNDERCOUNTER DISHWASHER FEATURE LEVEL P = DERIVATIVE S = SUPERIOR D = DRAWER SERIES 01 = 01 SERIES 01 SERIES—CONSOLE DESIGN T = 6″ TRADITIONAL CONSOLE D = SPLIT CONTROL CONSOLE F = FULLY INTEGRATED I = 4″ INTEGRATED CONSOLE V = VBL PRO LINE SERIES YEAR OF INTRODUCTION P = 2004 COLOR CODE AL = ALMOND ON ALMOND BL = BLACK ON BLACK BT = BISCUIT BS = BLACK CONSOLE W / STAINLESS STEEL PANELS MT = METEORITE PA = PANEL READY SP = STAINLESS CONSOLE & PANEL READY DOOR SS = STAINLESS STEEL SW = STAINLESS ON WHITE WH = WHITE ON WHITE ENGINEERING CHANGE (NUMERIC) SERIAL NUMBER SERIAL NUMBER FP R 10 11181 MANUFACTURING SITE FP = FINDLAY/FISHER & PAYKEL YEAR OF PRODUCTION R = 2004 WEEK OF PRODUCTION 10 = 10th WEEK PRODUCT SEQUENCE NUMBER 1-2 MODEL & SERIAL NUMBER LABEL AND TECH SHEET LOCATIONS The Model/Serial Number Label and Tech Sheet locations are shown below. Model/Serial Number Label Location (On Frame Between Doors) Tech Sheet Location (On Inside Rear Of Cabinet) 1-3 SPECIFICATIONS Electrical: Electrical Supply ................................................................................ 110 - 120 VAC, 60 Hz Dual Dishwasher Motor Load .................................................................................................... 3.1 amperes Total Load ..................................................................................................... 9.2 amperes General: Wash / Drain Pump Motor ....................................................................................... 60 Watts Water Level In Tank ........................................................................................................ 1/2″ Heater Element ..................................................................................................... 650 Watts Supply Water Flow Rate To Fill ......................................... .65 gallons (2.5 liters) per minute Supply Water Pressure ...................................... 4.3 - 145 psi (30 kPa min - 1000 kPa max) Supply Water Temperature ........................................................................... 120°F (48.8°C) Dish Rack ..................................................................................................................... Nylon Dimensions: Dual Dishwasher Height .................................................................. 32-1/4″ to 34-1/4″ (819.4 to 869.4 mm) Width ................................................................................................... 23-7/16″ (595 mm) Depth ................................................................................................... 22-7/16″ (570 mm) Minimum Front Panel (2) Height ........................................................ 28-1/4″ (717.5 mm) Weight ...................................................................................................................124 lbs. Cavity Height .................................................................................................. 32-5/16″ (820 mm) Width ..................................................................................................... 23-5/8″ (600 mm) Depth ..................................................................................................... 22-7/8″ (580 mm) 1-4 KITCHENAID DISHWASHER WARRANTY TWO-YEAR FULL WARRANTY For two years from the date of purchase, when this dishwasher is operated and maintained according to instructions attached to or furnished with the product, KitchenAid will pay for replacement parts and repair labor costs to correct defects in materials or workmanship. Service must be provided by a KitchenAid designated service company. THIRD THROUGH FIFTH YEAR LIMITED WARRANTY ON NYLON COATED DISHRACKS, NYLON CUPSHELVES, SILVERWARE BASKETS In the third through fifth years from the date of purchase, when this dishwasher is operated and maintained according to instructions attached to or furnished with the product, KitchenAid will pay for replacement parts for the following components if defective in materials or workmanship: the upper and lower drawer nylon dishracks, the nylon cupshelves, the silverware baskets. KitchenAid will not pay for: 1. Service calls to correct the installation of your dishwasher, to instruct you how to use your dishwasher, to replace house fuses or correct house wiring or plumbing. 2. Repairs when your dishwasher is used in other than normal, single-family household use. 3. Damage resulting from accident, alteration, misuse, abuse, fire, floods, acts of God, improper installation, or installation not in accordance with local electrical and plumbing codes, or the use of products not approved by KitchenAid or KitchenAid Canada. 4. Any labor costs during the limited warranty period. 5. 6. 7. 8. Replacement parts or repair labor costs for units operated outside the United States or Canada. Pickup and delivery. This product is designed to be repaired in the home. Repairs to parts or systems resulting from unauthorized modifications made to the appliance. In Canada, travel or transportation expenses for customers who reside in remote areas. KITCHENAID AND KITCHENAID CANADA SHALL NOT BE LIABLE FOR INCIDENTAL OR CONSEQUENTIAL DAMAGES. Some states or provinces do not allow the exclusion or limitation of incidental or consequential damages, so this exclusion or limitation may not apply to you. This warranty gives you specific legal rights and you may also have other rights which may vary from state to state or province to province. Outside the 50 United States and Canada, this warranty does not apply. Contact your authorized KitchenAid dealer to determine if another warranty applies. If you need service, first see “Troubleshooting” in the “Use and Care Guide.” Additional help can be found by checking “Assistance or Service” in the “Use and Care Guide,” or by calling our Customer Interaction Center at 1-800-422-1230, from anywhere in the U.S.A. or write: KitchenAid Brand Home Appliances, Customer Interaction Center, 553 Benson Road, Benton Harbor, MI 49022-2692. In Canada, call KitchenAid Canada at 1-800-807-6777. 1-5 — NOTES — 1-6 INSTALLATION INFORMATION GENERAL IMPORTANT: Observe all governing codes and ordinances. Failure to meet codes and ordinances could lead to fire or electrical shock. Proper installation is your responsibility: • Contact a qualified installer to insure that the dishwasher is installed to meet all electrical and plumbing national and local codes and ordinances. • Install the dishwasher as specified in these instructions. • Have everything you need to properly install dishwasher. • Protect dishwasher and water lines leading to dishwasher against freezing. Damage from freezing is not covered by the warranty. • This dishwasher is manufactured for inside use only. • Install and level dishwasher on floor that will hold the weight, and in an area suitable for its size and use. • • • • • • • • • • • • pencil sandpaper level wood cutting board adjustable wrench that opens to 1-1/8″ (29 mm) 7 mm socket wrench 5 mm socket wrench 5 mm open end or box end wrench electric or hand drill 1-1/2″ hole saw valve (sized to fit hot water supply line) with 3/8″ male compression fitting protective floor covering PARTS SUPPLIED Located in bottom drawer: • 2 flexible extrusions (for sides) • 1 flexible extrusion (for top) • edge protection • hose clamp, hose-type • washer • 2 installation brackets (top) • drain hose support • drain hose connector • 2 hose clamps, wire-type • 24 #8 phillips wood screws • toe kick • custom toe kick mounting bracket • moisture protection tape TOOLS AND MATERIAL REQUIRED Assemble the required tools and parts before starting installation. Read and follow the instructions provided with any tools listed here. • utility (carton) knife • pliers • tape measure • flat-bladed screwdriver • #2 phillips screwdriver • side cutting pliers 2-1 PRODUCT DIMENSIONS 23-7/16" (59.5 cm) 22-7/16" * (57 cm) raised tabs for optional top attaching brackets 32-3/16" - 34-1/2" (81.8 cm - 87.8 cm) 30" *** (76.2 cm) side attaching tabs 20-15/32" (52 cm) drawer open 2" - 4-3/8" ** (5 cm - 11 cm) 2-2 * If custom wood panels are to be used, the product depth is specified with an 11/16" (18 mm) door panel thickness. ** Toe kick depth: Factory supplied – 2 - 4-3/8" (5-11 cm); Custom wood – 5" (12.7 cm) less the toe kick panel thickness for integrated. Minimum panel thickness using the supplied screws is 3/8" (9 mm). *** Door front height: Factory supplied – 30" (76.2 cm); Custom wood – 28-1/4" (71.8 cm) minimum. NOTE: Product shown with front panels for dimension purposes. CABINET DIMENSIONS / REQUIREMENTS moisture protection tape typical installation counter top 4" (10 cm) 32-5/16" - 34-5/8" (82.0 cm - 88.0 cm) tape 1/2" (12.7 mm) from front of counter top moisture protection tape It is recommended that wood cabinetry surrounding the dishwasher be sealed with an oil based paint or moisture-proof polyurethane to prevent possible damage from heat and humidity. The utility hole must be located as shown. If the hole is not located as shown, the hoses will prevent the dishwasher from being pushed back all the way into the cavity. Make sure the edges of the utility hole are smooth or covered. If the utility hole is through a metal cabinet, the hole must be protected with the edge protector provided. Utility hole: 1-1/2" (3.8 cm) dia. hole, either side – immediately adjacent to corner *IMPORTANT: Custom wood door panels, if used, may be wider than the dishwasher to match surrounding cabinets. The 23-5/8" (60.0 cm) must be increased so that there is a 1/4" (6.4 mm) clearance between the cabinet side and panel edge. 22-7/8" (58.0 cm) For corner installation, there must be a 1/2" (12.7 mm) space between the adjacent cabinet doors (i.e. door knobs) and open dishwasher drawer. 23-5/8" * (60.0 cm) 2-3 Power cord must plug into a mating 3 prong, grounded outlet located in the cabinet next to the dishwasher opening. Outlet must meet all local codes and ordinances. The 3 prong grounded outlet must be installed within 6″ (15.2 cm) to 18″ (45.7 cm) of the cabinet side wall. NOTE: The power outlet must be accessible after installation. ELECTRICAL REQUIREMENTS WARNING Electrical Shock Hazard Plug into a grounded 3 prong outlet. Do not remove ground prong. Do not use an adapter. Do not use an extension cord. Failure to follow these instructions can result in death, fire, or electrical shock. GROUNDING INSTRUCTIONS For a grounded, cord-connected dishwasher: The dishwasher must be grounded. In the event of a malfunction or breakdown, grounding will reduce the risk of electric shock by providing a path of least resistance for electric current. The dishwasher is equipped with a cord having an equipment-ground conductor and a grounding plug. The plug must be plugged into an appropriate outlet that is installed and grounded in accordance with all local codes and ordinances. WARNING: Improper connection of the equipment-grounding conductor can result in a risk of electric shock. Check with a qualified electrician or service representative if you are in doubt whether the dishwasher is properly grounded. Do not modify the plug provided with the dishwasher; if it will not fit the outlet, have a proper outlet installed by a qualified electrician. For a permanently connected dishwasher: The dishwasher must be connected to a grounded metal, permanent wiring system, or an equipment-grounding conductor must be run with the circuit conductors and connected to the equipment-grounding terminal or lead on the dishwasher. If codes permit and a separate ground wire is used, it is recommended that a qualified electrician determine that the ground path is adequate. Do not ground to a gas pipe. Check with a qualified electrician if you are not sure the dishwasher is properly grounded. A 120-volt, 60-Hz, AC-only, 15-ampere fused electrical supply is required. (Time-delay fuse or circuit breaker is recommended.) It is recommended that a separate circuit serving only this appliance be provided. Garbage Disposer: If you plan to install a garbage disposer, an additional separate 120-volt, 60-Hz, AC-only, 15 or 20 amp fused electrical supply is required. Recommended Ground Method For your personal safety, this appliance must be grounded. This appliance is equipped with a power supply cord having a 3 prong ground plug. To minimize possible shock hazard, the cord must be plugged into a mating 3 prong ground-type outlet, grounded in accordance with local codes and ordinances. If a mating outlet is not available, it is the personal responsibility and obligation of the customer to have a properly grounded 3 prong outlet installed by a qualified electrician. WATER REQUIREMENTS For dishwasher: • Hot water line with 4.3 - 145 psi (30 -1000 kPa) water pressure. • 120°F (48.8°C) water at dishwasher. • An easily accessible valve with 3/8″ compression fitting must be installed in the hot water supply line. 2-4 INSTALLING THE DISHWASHER Slide the brackets under the raised tabs. Using the flat side of the side cutting pliers, lightly tap the brackets into place. Make sure the locking tabs on the brackets have passed completely through the raised tabs on the dishwasher. WARNING Excessive Weight Hazard Use two or more people to move and install dishwasher. Failure to do so can result in back or other injury. 1. 2. mounting bracket raised tab Check that the cabinet opening measurements, electrical requirements and water requirements are met. Prepare the cabinet opening by applying self-adhesive moisture protection tape to the dry dust-free underside of the countertop. 7. typical installation counter top tape 1/2" (12.7 mm) from front of counter top 3. 4. 5. 6. locking tab If you are using the factory-installed power cable and plug, proceed to the “Power Supply Cord” section. If you are direct wiring the dishwasher, proceed to the “Direct Wiring” section. POWER SUPPLY CORD WARNING moisture protection tape Turn water supply off. Place cardboard, or other protective covering, on the floor in front of cabinet opening. Place the dishwasher on the covering. Decide which attaching tabs to use to secure the dishwasher. The four side attaching tabs are recommended. If the countertop material permits, and the optional top attaching brackets will be used, install them now. Tip Over Hazard Do not open dishwasher drawer until inside cabinet opening. Doing so can cause serious injury. 2-5 1. Route the hoses and power supply cord through the utility hole. IMPORTANT: Push against the outside edges of drawers as shown. Do not push against the middle of the drawers. 2. WARNING Excessive Weight Hazard Use two or more people to move and install dishwasher. Failure to do so can result in back or other injury. Push the dishwasher partway into the opening. As the dishwasher is being pushed into the opening, carefully pull the inlet hose, drain hose and power supply cord through the utility hole. Remove the strap from upper drawer. If the cabinet opening is 24″ wide x 34-12″ high (61.0 cm x 87.6 cm) flexible extrusions can be attached along the top and sides of the dishwasher. The top and side extrusions are different lengths. - Open the drawers to expose the chassis trim. - Center the extrusions. - If using the optional top attaching brackets, place the extrusion under the attaching brackets. - Remove extrusion backing paper to expose the adhesive. - Carefully place the extrusion on the trim and press. side extrusion chassis trim edge lip side extrusion top extrusion open drawer side extrusion chassis trim edge - Finish pushing the dishwasher into the opening. Proceed to “Mounting The Dishwasher” on page 2-10. 2-6 DIRECT WIRING Lift the right edge of the drawer off its runner. Slide the runner back into the dishwasher. Lift the drawer completely off the left-hand runner. Rotate drawer to the right onto its side and place on the protective cover. Slide the left-hand runner back into the dishwasher. WARNING Electrical Shock Hazard Disconnect electrical power at the fuse box or circuit breaker box before installing dishwasher. Failure to do so can result in death or electrical shock. 1. Disconnect power. Open the bottom drawer. Press in the right-hand runner clip and push it back about 6″ (15.2 cm). Repeat with the left-hand runner clip. 2. NOTE: When removing the drawer there is limited range of movement due to the attached water hoses. The electrical cover is located in the back left corner. Use a flat blade screwdriver to press the release button. Slide the cover to the right and then pull up. electrical cover runner clip press release button 2-7 3. Remove factory-installed power cord. Disconnect the black and white wires of the electrical cord from the EMI filter. Use a 7 mm socket wrench to remove the ground screw. Remove the green ground wire. Use a phillips screwdriver to remove the strain relief screw. Open the strain relief clamp. Pull the power supply cord through the back of the dishwasher. Close the strain relief clamp and replace screw so it does not interfere with the terminal block cover. 5. 6. 7. 8. Run the house wiring through the cable clamp and into the dishwasher. Install a cable clamp (not supplied) in the knockout opening. From the house wiring, strip 1/2″ (13 mm) of insulation off of each wire. Attach the supply cable to the EMI filter. Connect the black wires together using a wire nut. Connect the white wires together using a wire nut. Place the ground wire under the ground screw. Use a 7 mm socket wrench to securely tighten the ground screw. . cable clamp strain relief ground screw ground screw 4. EMI filter 9. EMI filter wire nuts Tighten the cable clamp and replace the electrical cover. 10. Pull the bottom drawer runners all the way out. Make sure the latches on the back of each drawer runner are facing forward. Remove the house wiring knockout. drawer runner knockout latch bracket 2-8 latch If the bottom drawer was rotated, rotate the drawer to unwind the hoses and then place the drawer on the runners, making sure the hoses are looping upward. Close the bottom drawer. WARNING Excessive Weight Hazard Use two or more people to move and install dishwasher. Failure to do so can result in back or other injury. Push the dishwasher partway into the opening. As the dishwasher is being pushed into the opening, carefully pull the inlet hose and drain hose through the utility hole. Allow the house wiring to gather behind the dishwasher. Remove the strap from upper drawer. 11. Use the side cutting pliers to carefully cut the two cable ties securing the hoses and power supply cord to the back of the dishwasher. Completely remove the power supply cord and save it in case a power cord installation is needed in the future. WARNING 13. If the cabinet opening is 24″ wide x 34-12″ high (61.0 cm x 87.6 cm), flexible extrusions can be attached along the top and sides of the dishwasher. The top and side extrusions are different lengths. Tip Over Hazard Do not open dishwasher drawer until inside cabinet opening. Doing so can cause serious injury. side extrusion chassis trim edge 12. Route the hoses through the utility hole. IMPORTANT: Push against the outside edges of the drawers as shown. Do not push against the middle of the drawers. lip side extrusion top extrusion open drawer 2-9 side extrusion chassis trim edge - Open the drawers to expose the chassis trim. - Center the extrusions. - If using the optional top attaching brackets, place the extrusion under the attaching brackets. - Remove extrusion backing paper to expose the adhesive. - Carefully place the extrusion on the trim and press. - Finish pushing dishwasher into opening. 2. Reach inside the dishwasher to adjust the feet using a 5 mm open end, box end, or socket (if space permits) wrench. Adjust for cabinet height and level. Place a level on the drawer runners. Level the dishwasher to within 3/32″ (2.4 mm) from front to back. Place a level across the drawer runners. Level the dishwasher to within 3/32″ (2.4 mm) from side to side. 3/32" (2.4 mm) minimum clearance to underside of counter MOUNTING THE DISHWASHER 1. Leave the protective cover on the floor. Open the bottom drawer. Press in the right-hand runner clip and push it back about 6″ (15.2 cm). Repeat with the left-hand runner clip. 3. runner clip NOTE: When removing the drawer, there is limited range of movement due to the attached water hoses. Lift the right edge of the drawer off its runner. Slide that runner back into the dishwasher. Lift the drawer completely off the left-hand runner. Rotate drawer to the right onto its side and place on the protective cover. Slide the left-hand runner back into the dishwasher. 2-10 The dishwasher side attaching tabs are accessed through holes in the sound insulation. IMPORTANT: All four attaching tabs are the recommended mounting locations. Secure the attaching tabs to the cabinet using #8 phillips screws. side mounting bracket 4. Pull the bottom drawer runners all the way out. Make sure the latches on the back of each drawer runner are facing forward. drawer runner If the bottom drawer was rotated, rotate the drawer to unwind the hoses and then place the drawer on the runners, making sure the hoses are looping upward. Make sure both runner clips have snapped into place. If not, pull the runner clips forward until they do. Close the bottom drawer. latch latch bracket 5. Optional: If the top attaching brackets are used, slightly open the top drawer. Screw the top attaching brackets to the underside of the counter with two #8 phillips screws. The top attaching brackets can accommodate a maximum 3/4″ (19 mm) vertical gap. Close the top drawer. top attaching bracket 2-11 6. Route the drain hose, as shown, and press the hoses into the drain hose support. Decide if the drain hoses need to be trimmed. If so, trim them. Slip a wire clip over each drain hose. Push the hoses into the drain hose connector firmly, 5 clicks. Position the wire clips between the two positioning ribs on the drain hose connector. Attach the drain hose connector to the waste tee using the supplied hose clamp. Attach the drain hose support bracket to the cabinet with a #8 phillips screw at the height shown below. drain hose support waste 27-1/2" – 32-1/4" (70 cm – 82 cm) water supply wire clip drain hose connector waste tee 2-12 Other Plumbing Options 27-1/2" – 32-1/4" (70 cm – 82 cm) NOTE: The drain hose connector must not support the weight of excess hose length. Keep the hoses as fully extended as possible. For standpipe installations: IMPORTANT: To prevent siphoning, the hoses should not extend further than 4-3/4″ (12.1 cm) down the standpipe. waste valve water supply waste 8" (20.3 cm) min. bend radius from valve Option 1 1-1/2" (3.8 cm) Standpipe With Air Gap 4-3/4" (12.1 cm) diameter of standpipe must be large enough to create air gap 7. Install the flat seal washer on the end of the inlet hose. Connect the inlet hose to the water supply valve. Tighten securely. Turn the water valve on and check for leaks. 27-1/2" – 32-1/4" (70 cm – 82 cm) 6" (15.2 cm) minimum garbage disposal valve waste water supply 8" (20.3 cm) min. bend radius from valve Option 2 Garbage Disposal air break valve flat seal washer drain hose connector inlet hose waste valve 8. Open the top drawer. Remove the packing tape from the front and rear of the dish rack. Close the drawer. Open the bottom drawer. Remove the packing tape from the front and rear of the dish rack. Close the drawer. 2-13 water supply 8" (20.3 cm) min. bend radius from valve Option 3 Air Break With Drain Hose Connector FRONT PANELS & TOE KICK If you are using the standard front panels and toe kick, continue with “Standard Front Panels.” If you are using custom wood panels and custom toe kick, proceed to “Custom Front Panels.” Standard Front Panels 1. Remove the front panels from the box and discard all shipping material. 2. On the shorter front panel, (lower drawer), remove the tape securing the connector and wires. Discard the tape. 3. Connect the front panel connector to the lower drawer connector. 6. 7. 8. Push the front panel down to lock in place. Repeat Steps 3 through 6 for the top drawer panel. When installed properly, top panel should be even with top of dishwasher with a 3/8″ (9.5 mm) gap between the top and bottom panel. Standard Toe Kick 1. Partially open the bottom drawer. Turn the toe kick upside down and hold vertically against the bottom edge of the tub side (not the front). On the toe kick, mark where the tub’s bottom edge is. metal plate wire opening lower front panel 4. 5. Gently feed the wires and connectors into the metal plate wire opening. Line up the front panel tabs to slots in metal plate. Do not pull the connector from wire opening. metal plate slots bottom edge of tub side front panel tabs 2-14 2. Place the toe kick on a wooden cutting board, and pick the closest groove to the mark. If the mark is between two grooves, choose the groove that makes the toe kick the shortest. At the selected groove, use a utility (carton) knife and cut the vertical rib the length of the toe kick. Continue cutting from rear of toe kick until piece is removed. Snap off the toe kick tabs. Remove any rough edges by sanding smooth. Close the drawer. Check that there is 1/2″ (12.7 mm) minimum clearance between the bottom edge of the toe kick and the floor. 1/2" (12.7 mm) floor rear of toe kick 4. 3. Partially open bottom drawer. Position toe kick behind door and slide on the underside of tub. toe kick mounting rail 5. clamping screw 2-15 If not, remove the toe kick, and shorten using the utility (carton) knife. Remove any rough edges. NOTE: Rugs placed in front of dishwasher could interfere with toe kick. Clearance between the floor and toe kick may need to include the rug thickness. Slide the toe kick back onto mounting rails. Adjust the toe kick so that it is even with the cabinet toe kicks on both sides when the drawer is closed. With a phillips screwdriver, tighten the toe kick clamping screws on both sides. Plug in the dishwasher or reconnect power. Custom Front Panels 1. Prepare the custom front panels to specifications shown below. 2. Mount the handle to the custom panel. The screws must not extend beyond the back surface of the panel. (The handle is customer supplied, and the location is customer preference.) 3. Measure and mark the vertical centerline and horizontal position line on the back of the front panels. mark horizontal line Top Panel 1-7/16" (36.5 mm) Bottom panel 1-3/16" (30.2 mm) mark centerline Custom Front Panels Dimensions 9" (22.9 cm) 2-5/16" (5.9 cm) 15-5/8" (39.7 cm) medallion cutout area 5" (12.7 cm) Top panel (front view) end may be round or squared off 1-7/32" (30.8 mm) 1-9/32" (32.6 mm) max. 1/4" (6.4 mm) 23-7/16" (59.5 cm) 9" (22.9 cm) medallion cutout area Bottom panel (front view) 2-1/8" (5.4 cm) 1-13/64" (30.6 mm) 2-13/32" (60.8 mm) 14" (35.6 cm) 5" (12.7 cm) Medallion cutout (front of panel) NOTE: Do not cut beyond outline of medallion cutout shown above. Rout a 1/4" (6 mm) radius around back side of medallion cutout. 23-7/16" (59.5 cm) Upper and lower panel minimum thickness is 5/8" (16 mm). Panel thickness above 11/16" (18 mm) can be accommodated but product depth will increase accordingly. Custom front panel material must be suitable for damp conditions or adequately sealed to withstand moisture. Using a moisture resistant material can provide additional protection. Taping edges alone may not provide adequate sealing. For painted panel, paint all rear edges to improve sealing. 2-16 4. 5. 6. Feed the wires of the medallion through the front of the custom front panel and push the medallion into the prepared medallion hole. Lay the custom front panel face down on a protective covering. Remove the pin on both sides of the dishwasher drawer with a pair of needlenose pliers. Pull the pin straight out. 10. Align the centerline marked on the custom panel with the diamond shape and notch in the metal plate to center the metal plate horizontally. Align the horizontal line with the top of the metal plate. horizontal line top of plate centerline pin 7. Gently pull the bottom of the metal plate away from the dishwasher, and then pull down. 11. Fasten the metal plate with the three inner holes on the outside of the bracket on each side to the front panel with screws provided. three inner holes 8. 9. Lay the custom front panel face down. Feed the medallion wires through the wire opening in the metal plate. Lay the metal plate on the back of the custom front panel. wire opening 12. Connect the medallion connector to the dishwasher connector. 13. Fit the metal plate tabs to the notches and slots on the dishwasher and gently pull up to lock in place. metal plate front panel 2-17 14. Line up the holes through the pinhole and replace each pin so that the pin line is vertical. 4. 5. pin Custom Toe Kick 1. Prepare the custom toe kick to the specifications shown below. 2. 3. Lay the custom toe kick face down. Fasten the black plastic toe kick on the back of the custom toe kick with the screws provided with the dishwasher. Partially open the bottom drawer. Position the custom toe kick behind the door, and slide on the underside of the tub. Close the drawer and slide the toe kick back onto mounting rails. Adjust the toe kick so that it is even with the cabinet toe kicks on both sides when the drawer is closed. Use a phillips screwdriver, and tighten the toe kick clamping screws on both sides. NOTE: Rugs placed in front of dishwasher could interfere with toe kick. Clearance between floor and toe kick may need to include the rug thickness. toe kick mounting rail clamping screw plastic toe kic k custom toe kick 6. Plug in the dishwasher or reconnect power. Custom Toe Kick Dimensions 2-5/32" (55 mm) 23-1/2" (59.7 cm) 17" (43.2 cm) 1/2" (12.7 mm) radius 5" (127 mm) max. (varies) The black prefinished toe kick can also have a custom front panel with a thickness from 3/8" to 3/4" (9-19 mm) attached to it. Determine the height of the toe kick custom panel: The minimum height is 2-3/4" (70.5 mm). Measure from the top of the adjacent cabinet door front to the floor. Subtract 28-15/32" (72.3 cm) for needed toe kick height. 2-18 PRODUCT OPERATION SYSTEM OVERVIEW ELECTRONICS AMOUNT OF WATER The functions of controlling the motor and the user interface console are combined into a single 16-bit micro controller on the main circuit board. The micro controller also controls a transformerless 85 watt switchmode power supply. The power supply uses a large dropping resistor on the heater plate and phase control of the line voltage to produce a variable voltage supply. The micro controller can supply 5 - 85 volts to the various components. The user interface has a circuit board for front controls and a touch switch panel for internal controls. The tub fills with 0.8 gallons of water, approximately level with the base of the spray arm. Once this level is reached, the wash is primed to pump water through the spray arm, which will then rotate. The load on the wash pump is constantly monitored throughout the wash cycle and the water level adjusted if necessary. TUB HOME SENSOR Using an infrared transmitter and receiver mounted on the controller circuit board, the tub home sensor detects when the tub is closed and ready to start a cycle. The transmitter sends infrared light through an optical light pipe to the side of the tub. Another optical light pipe leads from the infrared receiver to the side of the tub. When the tub is closed, the two light pipes are optically connected via a prism mounted in the side of the chassis. MOTOR & HALL SENSOR The electronically controlled 80V, 60w, 3 phase, 4-pole, brushless DC motor runs at 2300-2850 rpm during wash cycles, and approximately 4200 rpm during drain. The hall sensor is mounted on a small circuit board clipped to the motor case, and monitors motor speed and rotation. DETERGENT/RINSE AID DISPENSER HEATER PLATE The detergent/rinse aid dispenser door is opened manually to load detergent, and then manually closed to transport the detergent to the tub by the inlet water. An electronicallycontrolled inlet water diverter valve enables each detergent chamber to be dispensed separately. A positive displacement pump and storage tank is incorporated within the dispenser to supply rinse agent. The electronic controller regulates the amount of rinse agent dispensed. A red light on the tank filler cap indicates an empty rinse agent tank. The heater plate is a porcelain enameled steel plate that supports the motor at the base of the tub and is clamped in place by a lock ring nut. A thick film resistive circuit for the heater element and the power supply dropping resistor are printed on the dry side of the heater plate. The heater element is only activated during wash cycles. It is not used for drying. Temperature is maintained by the thermistor. Overheat protection is provided by a thermal fuse located on the heater plate. 3-1 DRAIN CYCLE LID SYSTEM The self-priming centrifugal drain pump operates when the motor is rotating in a counterclockwise direction. A non-return flap valve on the outlet pipe prevents soiled water from returning to the tub. The lid is a single piece of injection-molded polymer plastic with an integral static seal. Each side of the lid is clipped into a yoke, which is attached to a worm drive gearbox assembly containing a small brush-type 24V DC motor. At the beginning of each wash cycle, both motors are powered up for approximately 10 seconds to pull the lid down onto the tub. The lid remains down for the duration of the cycle and is only lifted when the dishwasher beeps to signal the end of the cycle, or if the customer pauses it to gain access to the tub. If power to the dishwasher fails while the lid is down, the tub can be forced open manually. It is very difficult to close the tub again without lifting the lid. The lid can be wound up manually with the tub fully removed. FILTER PLATE The drain filter can be emptied with the dish rack in place by removing the cutlery basket and opening the plastic section of the dish rack. The filter plate is removable for cleaning by removing the dish rack and spray arm and unlocking the lock ring nut counterclockwise. DRYING CYCLE The fan moves air through the tub to draw water from the dish load. The moisture-laden air is then mixed with a large quantity of ambient air to minimize the amount of vapor visible exiting from the drawer front. The fan runs continuously during the drying cycle and will restart if the tub is opened and closed again. After the drying cycle is complete, the fan continues to run for 30 minutes, but will not restart if the tub is opened. FLOOD SENSOR A flood sensor, located at the edge of the electronic control board in the dishwasher lower compartment, will sense the presence of moisture. In the event that moisture is detected, the sensor will signal the electronic control, which in turn, will de-energize the fill valves, and start both drain pumps. 3-2 PARTS AND FEATURES The features on your dishwasher may vary from those shown below. A B H C D E I J F K SE DEL NO VY HEA RM AL FA ST IC AT E RIN L M N O G P A. SURE-HOLD medium rack insert B. SURE-HOLD large rack insert C. SURE-HOLD base rack D. SURE-HOLD light item clips E. Control Panel (on drawer front) F. WHISPER QUIET sound system G. Model & Serial Number Label (left front edge between drawers) H. FLEXI-BASKET silverware basket I. Fold-Down Cup Shelves J. Spray Arm K. Control Panel (top edge of drawer) L. Filter Plate M. Drain Filter N. Powdered Detergent Dispenser (inside front drawer) O. Rinse Aid Dispenser (inside front drawer) P. Water Inlet (inside front drawer) CONTROL PANELS HEAVY NORMAL QUICK CLEAN 3-3 LIGHT/ CHINA RINSE HI TEMP DISHWASHER SYSTEMS Cleaning The Spray Arm, Drain Filter, And Filter Plate THE WASH SYSTEM The wash system provides excellent cleaning results. Two levels of filtration filter the wash water and prevent food particles from redepositing on the clean dishes. • A filter plate prevents bones, pits, and other large objects from entering the pump system. • Items small enough to pass through the filter plate are caught in the drain filter. • The wash water continuously flows through the drain filter, trapping food particles. IMPORTANT: Before each wash load, check the drain filter for evidence of food particles and clean. (A small amount of water will remain in the drain filter area.) The filter plate is designed to be self-cleaning, but food scraps may accumulate. The spray arm and filter plate may need cleaning about once a month in normal use or more often, should the need arise. To Clean The Spray Arm 1. Carefully remove the base rack. Lift from the back end first so that you do not bump the detergent and rinse aid dispenser. 2. Lift the spray arm and shake out any foreign material. 3. Rinse the spray arm under running water and wipe it with a damp cloth. 4. Place the spray arm back onto the impeller. A B C D E F G A. Spray arm B. Drain filter C. Outer ring 3-4 D. Filter plate E. Center ring F. Impeller G.. Heater plate To Clean The Drain Filter 1. If the base rack is in place, lift the drain filter access panel. 2. Lift and remove the drain filter from the drawer. 3. Empty the drain filter, and rinse it with clean running water, then place the filter back into the drain space. Make sure that the drain filter is flush with the filter plate. 3. 4. 5. 6. To Clean The Filter Plate NOTE: Make sure that the dishwasher is cool before you start cleaning the filter plate. 1. 2. Remove the spray arm and drain filter, as described in the previous sections. In the center of the filter plate, there are two rings: an outer ring and a center ring. Hold the center ring still, and turn the outer ring counterclockwise about 1/8-turn so that the tabs and notches in both rings are aligned. This will release the filter plate. Lift the filter plate and remove it from the unit. Use hot, soapy water, and remove any soil that is present. Rinse the filter plate thoroughly in clean water. Wipe the heater plate that is located in the drawer with a damp cloth. Replace the filter plate so that it lies flat in the base of the drawer. Align the outer ring tabs with the notches in the center ring. Hold the center ring steady, and turn the outer ring clockwise until the lines that are on the two rings align. NOTE: When properly installed, you should not be able to move the filter plate. IMPORTANT: The drawer must be used with the filter plate, drain filter, and spray arm correctly in place. THE SOUND SYSTEM B The WHISPER QUIET sound insulation system helps to maintain a quiet home environment during dishwasher operation. NOTE: If you do not load dishes properly, the quiet operation of the dishwasher could be affected. C THE DRYING SYSTEM A A. Impeller At the end of the selected wash program, the drying fan will continue to run for a set time, or until the drawer is opened. The fan assists with drying, and uses a small amount of energy. B. Center ring C. Outer ring 3-5 USING THE DISHWASHER DETERGENT USE IMPORTANT: • Use powdered, automatic dishwashing detergent only. Other detergents can produce excessive suds that can overflow out of the dishwasher and reduce washing performance. • Add detergent just before starting a cycle. • Store tightly closed detergent in a cool, dry place. Using fresh, automatic dishwasher detergent results in better cleaning. NOTE: Do not use detergent with a Rinse program. The detergent and rinse aid dispenser is located on the front inside wall of the drawer. The detergent dispenser has two sections: 1) Pre Wash and, 2) Main Wash. The Pre Wash and Main Wash sections each have inside fill line markings. The Pre Wash section has one marking, which represents 1 tsp (5 mL). When it is full, the Pre Wash section holds 2 tsp (10 mL). The Main Wash section has two markings. The lowest mark indicates 2 tsp (10 mL), and the middle mark 4 tsp (20 mL). When the Main Wash section is full, it contains 6 tsp (30 mL). NOTE: The detergent dispenser is designed for use with powdered detergent. Liquid and tablet detergents are not suitable to be used in the dispenser. (Dispenser posts are a reminder not to use detergent tablets.) A B C Filling The Powdered Detergent Dispenser 1. Press the latch down and the door will open. 2. Pour in detergent. No detergent is needed for the Rinse program. 3. After filling the dispenser, close the door until it clicks shut. The detergent will automatically be released into the drawer during the Wash program. D E F G A. Pre Wash section B. Main Wash section C. Posts D. Detergent dispenser latch E. Rinse aid dispenser plug F. Rinse aid indicator light G. Water inlet opening 3-6 How Much Detergent To Use • The detergent quantities suggested in the chart are for individual drawer use. • The amount of detergent to use depends on the hardness of the water, and the type of detergent. Too little detergent, and the dishes will not be clean. Too much detergent in soft water, and glassware will etch. • Water hardness can change over a period of time. Find out what the water’s hardness is by asking your local water department, water softener company, or county extension agent. Water Type • You can order a water hardness test strip at no charge. In the U.S.A., call the Customer Interaction Center, and ask for Part Number 4171690. (See “Assistance or Service” in the Use and Care Guide.) • Different brands of dishwasher detergent have different amounts of phosphorus for softening water. If the water is hard and a detergent with a phosphorous content of less than 8.7% is used, more detergent may be necessary, or use a detergent with a phosphorous content higher than 8.7%. Wash Program Detergent Quantities Pre Wash Main Wash Hard (13 grains per U.S. gallon or above) All** 2 tsp* (10 mL) 6 tsp* (30 mL) Medium (7-12 grains per U.S. gallon) All** 2 tsp* (10 mL) 4 tsp* (20 mL) Heavy 1 tsp* (5 mL) 3 tsp* (15 mL) Normal 1 tsp* (5 mL) 2 tsp* (10 mL) Soft (0-6 grains per U.S. gallon) Quick Clean 1 tsp* (5 mL) Light/China 1 tsp* (5 mL) * tsp = teaspoon. 1 tsp = 5 mL. ** No detergent is required in prewash section for the Quick Clean. 3-7 RINSE AID DISPENSER Filling The Dispenser The rinse aid dispenser holds 1.7 oz. (50.28 mL) of rinse aid. Under normal conditions, this will last for about 1 to 2 months. Try to keep it full, but do not overfill it. To fill the dispenser: 1. Turn the plug counterclockwise and remove it. 2. Pour the rinse aid into the circular opening. NOTE: Be careful not to spill any rinse aid into the drawer. Clean any spillage to prevent excess foaming. Failure to clean rinse aid spillages may result in a service call, which will not be covered by warranty. The regular use of liquid rinse aid gives the best drying results. Rinse aids prevent water from forming droplets on surfaces that can dry as spots, or streaks, and keep metal from tarnishing. They also improve drying by allowing water to drain off the dishes during the final rinse. The dishwasher is designed to use a liquid rinse aid. Do not use a solid, or bar-type. The rinse aid dispenser is located on the front inside of the drawer underneath the detergent dispenser. A B C A. Rinse aid plug B. Rinse aid indicator light C. Rinse aid dispenser 3. How Much Rinse Aid To Use The regulator may need adjusting to suit the water conditions. The lowest setting is “1” and the highest is “5.” For hard water situations, the rinse aid should be set to its highest setting (5). NOTE: If there is excessive foam at the end of the wash, reduce the setting. If dishes are wet or streaky after drying, increase the setting. Install the plug back into the original position. Rinse Aid Indicator If the rinse aid indicator light is red, refill the dispenser. If the rinse aid indicator light is not lit, there is enough rinse aid for the wash. You do not have to wait until the dispenser is empty to refill it. 3-8 PERFORMANCE TIPS • To save water, energy, and time, do not rinse the dishes before placing them into the dishwasher. • Choose the cycle that describes the most difficult soil on your dishload. • Do not worry about mixed loads. Any item that is dishwasher safe can be washed using any cycle. • Use a delay feature to run your dishwasher during off-peak hours. Local utilities recommend avoiding heavy usage of energy at certain times of day. • Use a rinse aid to improve drying. • Use cycles or options that add extra heat to the wash or rinse portion of the cycle for better performance. • Operate the dishwasher with full loads. Run a rinse cycle after meals until the dishwasher is full. • If the home is equipped with a water softener, try to avoid starting the dishwasher during the regeneration of the softener, since this may contribute to poor wash performance. Hot water dissolves and activates the dishwashing detergent. Hot water also dissolves grease on dishes, and helps glasses to dry spot-free. For best dishwashing results, water temperature should be 120°F (49°C) as it enters the dishwasher. Loads may not wash as well if the water temperature is too low. Water that is too hot can make some soils harder to remove, and cause certain detergent ingredients not to function. If the water heater is located far from the dishwasher, it may be necessary to run the hot water at the faucet closest to the dishwasher to minimize the amount of cold water in the water line. 1. 2. 3. Run hot water at the faucet closest to the dishwasher for at least 1 minute. Place a candy or meat thermometer in a glass measuring cup. Check the temperature on the thermometer while the water is running into the cup. 3-9 WASH PROGRAMS Select the wash program and cycle desired. The indicator will be lit above the selected cycle. Press the Start/Pause button. This model meets the ENERGY STAR® guidelines for energy efficiency. NOTE: Please refer to “Detergent Use” for the recommended detergent dispenser sections and powdered detergent amounts to use. PROGRAM CHARTS program description Standard Program - when to use (These cycles use less energy and time.) Heavy Normal Quick Clean Light China Rinse Use this cycle for heavily soiled, everyday dishes. Use this cycle for normally soiled dishes for optimum energy use. Use this cycle for a quick wash and light dry to cleanup cookware prior to entertaining. This cycle uses a shortened dry time. Towel drying may be needed. Use this cycle for china and crystal. This cycle uses a gentle light wash and gentle dry. Use this rinse cycle for rinsing dishes, glasses, and silverware that will not be washed right away. Pre Wash 1 Pre Wash 2 Main Wash 149°F (65°C) Rinse 1 Rinse 2 Final Rinse 149°F (65°C) Dry Pre Wash Pre Wash Pre Wash program description HI TEMP Main Wash 131°F (55°C) Rinse Main Wash 113°F (45°C) Rinse Main Wash 113°F (45°C) Rinse Final Rinse 131°F (55°C) Dry Final Rinse 113°F (45°C) Final Rinse 122°F (50°C) Dry Hi Temp Wash Program - when to use (The red indicator is lit when this program is selected.) Heavy Normal Quick Clean Light China Rinse Use this cycle for heavily soiled, everyday dishes and hard-to- clean cookware. Use this cycle for normally soiled dishes for optimum wash and dry performance. Use this cycle for a quick wash and light dry for lightly soiled dishes. Towel drying may be needed. Use this cycle for lightly soiled china and crystal. This cycle uses a gentle light wash and gentle dry. Use this rinse cycle for rinsing dishes, glasses, and silverware that will not be washed right away. Pre Wash 1 Pre Wash 2 Pre Wash 3 Main Wash 149°F (65°C) Rinse 1 Rinse 2 Final Rinse 163°F (73°C) Dry Pre Wash 1 Pre Wash 2 Pre Wash Pre Wash Pre Wash Main Wash 144°F (62°C) Rinse Main Wash 131°F (55°C) Rinse Main Wash 122°F (50°C) Rinse Final Rinse 140°F (60°C) Dry Final Rinse 122°F (50°C) Final Rinse 131°F (55°C) Dry NOTE: Wash times can vary depending on the incoming water temperature, type of dishload, and whether the drawer has been opened during the wash. 3-10 CANCELING A WASH CYCLE ADDING ITEMS DURING A CYCLE To end a wash program in mid-cycle, press the Power button. Any water in the drawer will be pumped out. You can add an item anytime before the main wash starts. Press START/PAUSE and wait for 3 beeps before opening the drawer. Open the drawer and check the detergent amount. If the detergent is still visible, you can add items. To add items: 1. Press START/PAUSE and wait for 3 beeps before opening the drawer. PAUSING A CYCLE To pause the drawer during its wash cycle, press START/PAUSE and wait for 3 beeps before opening. Restart by pressing START/ PAUSE. IMPORTANT: Forcing the drawer open in midcycle may cause damage to the dishwasher. NOTE: If the drawer is operating and a power failure occurs, it will stop. The drawer may not be opened during this time. When the power supply resumes, the drawer will restart in the same part of the wash program. 2. 3. 4. If the detergent is still visible in the detergent dispenser, you may add the item. Close the drawer firmly. Restart by pressing START/PAUSE. IMPORTANT: Forcing the drawer open in midcycle may cause damage to the dishwasher. OPTION SELECTIONS & ADJUSTMENTS CHANGING A CYCLE OR SETTING 1. Press the Power button to end the current cycle. Wait for the drawer to drain. 2. 3. When the draining stops, open the drawer. Press the desired wash program button to select the desired wash cycle. The lighted indicators will progress until the desired cycle is selected. OR 4. 5. 6. HI TEMP Check the detergent dispensers. They must be filled properly for the new cycle. Close the drawer. Press START/PAUSE. After using the dishwasher, you may want to use or adjust some of the preset options that are available. You can select the Lock button, Control lock, Keylock, or Delay Start mode. You can also adjust the settings for Rinse Aid, Auto Power, and End of Wash Program beeps. NOTE: The indicator light colors vary depending on the model dishwasher. The optional setting buttons are as follows: Lock Button The Lock button activates or deactivates the Control lock or the Keylock functions. Use the Lock button to prevent unintended use of the dishwasher. You can also use either of the lock options to prevent unintended cycle or option changes during a program. 3-11 Control Lock The Control lock feature disables all of the buttons on the dishwasher. To activate the Control Lock: 1. Press and hold the Lock button until you hear 1 beep (about 3 seconds). 2. To cancel, press and hold the Lock button until the indicator light turns off. Keylock The Keylock feature locks the drawer closed and disables the dishwasher and all the buttons. To activate the Keylock: 1. Press and hold the Lock button until you hear the 2nd beep (about 5 seconds). 2. To cancel, press and hold the Lock button until the indicator light turns off. Delay Start Mode The start of the selected wash program can be delayed from 1 to 12 hours. To activate the Delay Start: 1. Press and hold the Start/Pause button until the indicator light turns orange or lavender, depending on the model. 2. 3. 4. The dishwasher will beep as you hold down the button. Each “beep” represents an hour delay, so for each beep while the button is pressed an additional hour delay will be programmed until the desired delay time is reached. Make sure the drawer is closed. The dishwasher will start after the set delay time has elapsed. To cancel the Delay Start: 1. Press the Power button, or hold the Start/ Pause button until the indicator light turns green or blue, depending on the model. OR Power Button Start / Pause Button To enter the Option Adjustment Mode 1. Press the Power button to turn the dishwasher to the Normal operating mode. 2. Simultaneously press and hold the HI TEMP and Lock buttons for 5 seconds. One long beep will sound, and the Start/ Pause indicator light will be red. 3. Release the HI TEMP and Lock buttons. 4. Use the appropriate buttons on the control panel to make the necessary adjustments. These are explained below. 5. Once the changes have been made, press the Power button to return to the Normal operating mode. NOTE: The dishwasher automatically saves the changes. To adjust the Rinse Aid setting 1. Enter the Option Adjustment Mode as explained above. The indicator light above the Start/Pause button will be red to indicate that this setting has been chosen. 2. The current Rinse Aid setting is shown on the wash program display panel. If 4 red lights are lit on the panel, then the Rinse Aid setting is at 4. 3-12 HEAVY NORMAL QUICK CLEAN LIGHT/ CHINA RINSE 3. 4. Press the Lock button to increase or decrease the Rinse Aid setting. The red indicator lights will scroll up to 5, and then start from 1 again. Once you have selected the desired Rinse Aid setting, press the Power button to return to the Normal operating mode. To disable the Auto Power The dishwasher is factory-set to automatically power up whenever the drawer is opened, even if the Power pad has not been pressed. The dishwasher will not start washing until the drawer is closed, and the Start/Pause button has been pressed. If you do not want the dishwasher to automatically power up, this feature can be turned off. 1. Enter the Option Adjustment Mode as explained on the previous page. 2. Press the Start/Pause button until its indicator light is orange or lavender, depending on the model, and the indicator light for the HI TEMP button is red. If the indicator lights are not on, press the Power button to return to Normal operating mode, and start again. 3. Press the Lock button to turn the Auto Power feature on or off. If all the red lights on the wash program panel are off, the Auto Power feature has been turned off. 4. Press the Power button to return to the Normal operating mode. Auto Power On Auto Power Off HEAVY NORMAL QUICK CLEAN LIGHT/ CHINA RINSE HEAVY NORMAL QUICK CLEAN LIGHT/ CHINA RINSE To disable the “End of Wash” Program beeps The dishwasher is factory-set to beep 6 times at the end of the selected wash program. This feature can be disabled. 1. Enter the Option Adjustment Mode as explained on the previous page. 2. Press the Start/Pause button until the indicator light is green or blue, depending on the model, and the HI TEMP indicator light is red. If the indicator lights are not on, press the Power button to return to Normal operating mode, and start again. 3. Press the Lock button to turn the “End of Wash” Program beeps on or off. If the “End of Wash” program beeps have been turned off, all the red indicator lights on the wash program panel will be off. 4. Press the Power button to return to the Normal operating mode. 3-13 Beeps On Beeps Off HEAVY NORMAL QUICK CLEAN LIGHT/ CHINA RINSE HEAVY NORMAL QUICK CLEAN LIGHT/ CHINA RINSE — NOTES — 3-14 COMPONENT ACCESS This section instructs you on how to service each component inside the Drawer Dishwasher. The components and their locations are shown below. COMPONENT LOCATIONS In-Tub Components Spray Arm Impeller Coarse Filter Hall Sensor Wash & Drain Motor Heater Element Rinse Aid LED Drying Fan Rinse Aid & Detergent Dispenser Pumps Controller Tub-Mounted Components Water Fill Valve Lid Motor (1 of 4) Power Cord Chassis Module Cabinet-Mounted Components 4-1 REMOVING THE SPRAY ARM AND IMPELLER 5. WARNING To Remove: Turn Outer Ring CCW Electrical Shock Hazard Disconnect power before servicing. Replace all parts and panels before operating. Failure to do so can result in death or electrical shock. 1. 2. 3. Rotate the outer ring on the filter plate counterclockwise (CCW) until the slots and tabs in the outer and inner rings align, then lift the filter plate, and remove it from the tub. Outer Ring Slot Inner Ring Tab Alignment Marks Unplug dishwasher or disconnect power. Turn off the water going to the dishwasher. Remove the dishracks and silverware basket from the tub. 6. Rotate the outer ring on the impeller counterclockwise (CCW) as far as it will go, then lift the impeller, and remove it from the tub. To Remove: Turn Impeller Ring CCW 4. Lift the spray arm off the impeller. Impeller Spray Arm Impeller 4-2 REMOVING THE ISOLATOR, BADGE, & DOOR HANDLE 5. WARNING To remove the isolator: a) Disconnect the two green ground wires from the inner door panel, and the badge connector from the isolator connector. b) Remove the isolator from the front of the dishwasher. Electrical Shock Hazard Disconnect power before servicing. Replace all parts and panels before operating. Failure to do so can result in death or electrical shock. 1. 2. 3. Ground Wires Badge & Isolator Connectors Unplug dishwasher or disconnect power. Open the dishwasher drawer. Using a pair of longnosed pliers, pull out and remove the left and right pins from the tub. NOTE: Keep the pin web in the vertical position when you reinstall the pin in the tub. Isolator c) Disconnect the two wire connectors from the isolator. Isolator Side Of Tub Pin Connector (Blue Wires) 4. Pull the drawer front down so it is free of the handle and the top locating slots and remove the front. Connector (White Wires) Continued on the next page. 4-3 6. Pry up on the inner door panel, slide the panel down, and remove it from the door. 7. 8. Inner Door Panel To remove the badge from the door, push it out of the door opening. To remove the door handle, remove the two hex-head screws. Slide Down & Lift Badge Pry Inner Door Panel Up Door Handle Screws 4-4 REMOVING THE DRYING FAN AND RINSE AID LED 6. WARNING 7. Electrical Shock Hazard Disconnect power before servicing. Replace all parts and panels before operating. Failure to do so can result in death or electrical shock. 1. 2. 3. 4. 5. Pull out on the drying fan air chute and slide the chute off the drawer. NOTE: The top of the chute has two small slots that fit into tabs, so you may have to push up on the top while you pull out to clear the tabs. Pull the fan/LED connector off the controller board marked FAN. Fan/LED Connector Unplug dishwasher or disconnect power. Turn off the water going to the dishwasher. Disconnect the drain line from the dishwasher. Remove the door panel from the drawer (see page 4-4 for the procedure). Remove the dishwasher drawer and turn it over (see page 4-9 for the procedure). Air Chute 8. Using a straight-blade screwdriver, pry the three locking tabs holding the drying fan away from the fan, and remove it from the drawer holder. Locking Tabs Rinse Aid LED Drying Fan NOTE: The drying fan and rinse aid LED are replaced as an assembly. Continued on the next page. 4-5 9. On the rinse aid & detergent dispenser pump housing, unsnap the two locking tabs of the LED cover, and raise the cover. 10. Slide the rinse aid LED out of its holder. Unsnap Tabs LED & Holder LED Cover Rinse Aid & Detergent Dispenser Pump Housing 4-6 REMOVING THE CONTROLLER 5. WARNING 6. Electrical Shock Hazard Disconnect power before servicing. Replace all parts and panels before operating. Failure to do so can result in death or electrical shock. Pull the five connectors from the edges of the controller board. Press in on the locking tab of the controller and remove the controller from the drawer. 6-Wire BADGE 4-Wire DISPENSER 4-Wire FAN CONTROLLER 1. 2. 3. 4. Unplug dishwasher or disconnect power. Turn off the water going to the dishwasher. Disconnect the drain line from the dishwasher. Remove the door panel from the drawer (see page 4-4 for the procedure). Locking Tab Controller 6-Wire MOTOR 14-Wire CHASSIS 4-7 REMOVING THE RINSE AID AND DETERGENT DISPENSER 8. Disconnect the wire connectors from the rinse aid and detergent dispenser. Press out on the locking tab of each connector to release the connectors. 9. Remove the three T10 torx screws from the left and right housing mounting brackets, and remove the brackets. 10. Lower the rinse aid and detergent dispenser housing assembly into the tub and remove it. WARNING Electrical Shock Hazard Disconnect power before servicing. Replace all parts and panels before operating. Failure to do so can result in death or electrical shock. Left Bracket & Screws 1. 2. 3. 4. 5. Unplug dishwasher or disconnect power. Turn off the water going to the dishwasher. Disconnect the drain line from the dishwasher. Remove the door panel from the drawer (see page 4-4 for the procedure). Remove the dishwasher drawer and turn it over (see page 4-9 for the procedure). Dispenser Hose Clamp Wire Connector Rinse Aid & Detergent Dispenser 6. 7. Remove the rinse aid LED from the rinse aid and detergent dispenser housing (see page 4-5). Loosen the clamp on the dispenser hose, and slide the clamp off the dispenser fitting, (see the photo in step 10), then pull the dispenser hose off the fitting. Locking Tab 11. Check the seal around the dispenser to make sure that it is not damaged or worn. Seal 4-8 REMOVING THE UPPER OR LOWER DRAWER WARNING 7. Lift the drawer from the rails, and push the rails back into the cabinet. 8. Turn the drawer over so the bottom side is facing up. Electrical Shock Hazard Disconnect power before servicing. Replace all parts and panels before operating. Failure to do so can result in death or electrical shock. 1. 2. 3. Unplug dishwasher or disconnect power. Turn off the water going to the dishwasher. Disconnect the drain line from the dishwasher. NOTE: The components that are mounted to the bottom of the upper and lower drawers are identical, and are mounted in the same manner. The lower drawer components will be shown. 4. Open the lower dishwasher drawer. 5. Remove the door panel from the drawer (see page 4-4 for the procedure). 6. Press in on the tub clips on the left and right rails, and push the rails back about 1″. Push Door Rail Back Press In On Clip 4-9 REMOVING THE HALL SENSOR, THE WASH AND DRAIN MOTOR, AND THE HEATER ELEMENT ASSEMBLY 6. WARNING 7. Use a screwdriver and unsnap the underside of the wiring cover arms, and remove the cover from the bottom of the drawer. Wedge a screwdriver blade into the three top slots of the wiring cover and unsnap the cover from the motor housing. Slot Electrical Shock Hazard Disconnect power before servicing. Replace all parts and panels before operating. Failure to do so can result in death or electrical shock. 1. 2. 3. 4. 5. Slot Slot Wiring Cover Unplug dishwasher or disconnect power. Turn off the water going to the dishwasher. Disconnect the drain line from the dishwasher. Remove the dishwasher drawer and turn it over (see page 4-9 for the procedure). Unclip the locking tab from the air cover, slide it forward off the rails, and remove the cover. Rail Unsnap Arm Hall Sensor Rail Air Cover Tab Unsnap Arm Wash & Drain Motor Heater Element Assembly 4-10 8. To remove the hall sensor: a) Disconnect the wire connector at P701. b) Unclip the locking tab from the hall sensor board and lift the board up and off the motor/heater housing. Ground Wire Drain & Fill Hoses Locking Tab Hall Sensor P701 Wire Connector Electrical Wires Heater Element Connector Locking Ring e) Unclip the two locking arms on the motor housing from the end of the drain hose, and pull the hose out of the housing. Drain Hose Lift Sensor 9. To remove the wash and drain motor and heater element assembly: a) Remove the hall sensor (see step 8). b) Disconnect the green wire from the ground terminal (see the photo at the top of the right column). c) Remove the drain and fill hoses, and the electrical wires from the locking ring clips. d) Disconnect the heater element wiring connector. 4-11 Motor Housing W / Locking Arms Continued on the next page. f) Pull straight up and disconnect the three wire connectors from the motor terminals. h) Lift the motor housing, locking ring, and heater element off the tub, and pull the suction nozzle out of the tub drain opening. 3 Motor Wire Connectors Suction Nozzle Drain Opening g) Lift the locking arm, and rotate the locking ring in a counterclockwise direction until the outer tabs line up with the tub slots. NOTE: The motor housing tabs and slots will also be loose at this point. i) Remove the wash and drain motor and the heater element from the tub. Locking Arm Motor W/Seal Installed Motor Housing Align These Tabs and Slots Heater Element REASSEMBLY NOTES: 1. Check the motor and heater seals for wear or damage. Replace them, if necessary. 2. When you reinstall the heater element, locking ring, and wash & drain motor onto the tub, make sure that the seals below the locking ring and the motor housing are properly positioned to prevent leaking. 3. When tightening the locking ring, make sure that you tighten it fully so that the locking arm (shown in the photo to the left) is locked behind the tub. If the ring is not fully tightened, the locking tabs will not align properly with the slots in the wiring cover. 4-12 REMOVING THE LID 6. WARNING 7. 8. Insert a regular screwdriver blade into the slot of one of the front locking arms. Pry down on the screwdriver far enough to fully depress the locking arm. Pull down on the lid so it just clears the arm. Electrical Shock Hazard Disconnect power before servicing. Replace all parts and panels before operating. Failure to do so can result in death or electrical shock. Lid Lower Lid To Here Unplug dishwasher or disconnect power. Turn off the water going to the dishwasher. Disconnect the drain line from the dishwasher. 4. Remove dishwasher drawer for the lid you wish to service (see page 4-9 for the procedure). 5. Position the dishwasher drawer to the side, out of the way. Be careful not to stress the hoses and wiring. NOTE: There are four locking arms inside the cabinet, (two on each side, as shown below), holding the lid in place. You will need to release these four arms to remove the lid. Pull Down 1. 2. 3. Locking Arm Slot 9. Repeat the previous steps for the remaining front, and then two rear locking arms. 10. Position the lid so it is in the two indents in the sides of the cabinet, and remove the lid from the unit. Cabinet Indent Lid Front Locking Arm NOTE: Check the rubber seals on the top of the lid for wear. Replace the lid, if necessary. Rear Locking Arm Rubber Seal 4-13 REMOVING THE LID MOTORS WARNING Yoke Unsnap Tabs Drawer Rail Electrical Shock Hazard Disconnect power before servicing. Replace all parts and panels before operating. Failure to do so can result in death or electrical shock. 1. 2. 3. 4. 5. 6. 8. Unplug dishwasher or disconnect power. Turn off the water going to the dishwasher. Disconnect the drain line from the dishwasher. Remove the bottom dishwasher drawer (see page 4-9 for the procedure). Position the dishwasher drawer to the side, out of the way. Be careful not to stress the hoses and wiring. Use a flat-blade screwdriver and press the release button. Slide the chassis module cover to the right, and then pull it up to remove it. Lower the lid motor and remove the wires from the motor housing clip and from the chassis module clip. Wire Clips 9. Chassis Module Cover Disconnect the lid motor connector from the chassis module at the appropriate following connectors. P406 (Upper Left) P404 (Upper Right) P403 (Lower Left) P405 (Lower Right) Chassis Module P404 P406 P403 P405 Press Release Button 7. Unsnap the top arm of the lid motor from the yoke by squeezing the two tabs together (see the photo at the top of the right column). NOTE: The lid will drop down at this time. Support it on the drawer rail. 10. Pull the lid motor out from behind the drawer rail and remove the motor and linkage. 4-14 Linkage REMOVING THE CHASSIS MODULE AND POWER CORD WARNING Screw Locking Tab Electrical Shock Hazard Disconnect power before servicing. Replace all parts and panels before operating. Failure to do so can result in death or electrical shock. 1. 2. 3. 4. 5. 6. Chassis Module c) Disconnect the eight wire connectors from the module. P401 Unplug dishwasher or disconnect power. Turn off the water going to the dishwasher. Disconnect the drain line from the dishwasher. Remove the bottom dishwasher drawer (see page 4-9 for the procedure). Position the dishwasher drawer to the side, out of the way. Be careful not to stress the hoses and wiring. Use a flat-blade screwdriver and press the release button. Slide the chassis module cover to the right, and then pull it up to remove it. P402 P408 P409 P404 P406 8. Chassis Module Cover P403 P405 To remove the power cord: a) Disconnect connectors P408 (white) and P409 (black) from the terminal strip. b) Remove the 7 mm hex-head screw from the green ground wire and remove the wire. c) Remove the screw from the clamp, open the clamp, and remove the power cord from the unit. Power Cord Clamp Screw P408 Press Release Button 7. To remove the chassis module: a) Remove the screw from the chassis module (see the photo at the top of the right column). b) Unhook the locking tab from the module and lift the module out of its holder. 4-15 P409 Ground Wire REMOVING THE WATER FILL VALVES 8. WARNING Disconnect the outlet lines from the valves. Lower Outlet Upper Outlet Electrical Shock Hazard Disconnect power before servicing. Replace all parts and panels before operating. Failure to do so can result in death or electrical shock. 1. 2. 3. 4. 5. 6. 7. Unplug dishwasher or disconnect power. Turn off the water going to the dishwasher. Disconnect the drain line from the dishwasher. Remove the bottom dishwasher drawer (see page 4-9 for the procedure). Position the dishwasher drawer to the side, out of the way. Be careful not to stress the hoses and wiring. Remove the chassis module cover (see step 6 on page 4-15- for the procedure). Remove the water inlet line from the water fill valves, then lift the valves off the housing and remove the valves. 9. Disconnect the wire connector locking tabs from the upper and lower outlet water valve solenoid terminals, and remove the connectors. Upper Outlet (White Wires) Lower Outlet (Black Wires) Lift Water Inlet Line 4-16 COMPONENT TESTING Before testing any of the components, perform the following checks: • Control failure can be the result of corrosion on connectors. Therefore, disconnecting and reconnecting wires will be necessary throughout test procedures. • All tests/checks should be made with a VOM or DVM having a sensitivity of 20,000 ohmsper-volt DC, or greater. • Check all connections before replacing components, looking for broken or loose wires, failed terminals, or wires not pressed into connectors far enough. • Resistance checks must be made with power cord unplugged from outlet, and with wiring harness or connectors disconnected. WARNING Electrical Shock Hazard Disconnect power before servicing. Replace all parts and panels before operating. Failure to do so can result in death or electrical shock. DRYING FAN Refer to page 4-5 for the procedure for servicing the drying fan. 1. Unplug dishwasher or disconnect power. 2. Disconnect the wire connector from the FAN terminals on the controller. 3. Set the ohmmeter to the R x 1 scale. 4. Touch the ohmmeter test leads to drying fan terminals 1 (red) and 2 (black). The meter should indicate approximately 3400 Ω. 1 5-1 WARNING Electrical Shock Hazard Disconnect power before servicing. Replace all parts and panels before operating. Failure to do so can result in death or electrical shock. WASH & DRAIN MOTOR RINSE AID AND DETERGENT DISPENSER Refer to page 4-10 for the procedure for servicing the wash & drain motor. 1. Unplug dishwasher or disconnect power. Refer to page 4-8 for the procedure for servicing the rinse aid and detergent dispenser. 1. Unplug dishwasher or disconnect power. 2. Disconnect the wire connector from the DISPENSER terminals on the controller. Disconnect the wire connector from the MOTOR terminals on the controller. 3. Set the ohmmeter to the R x 1 scale. 3. Set the ohmmeter to the R x 1 scale. 4. 4. Touch the ohmmeter test leads to rinse aid terminals 1 and 2. The meter should indicate between 65 and 75 Ω. Touch the ohmmeter test leads to the following terminals. The meter should indicate between 7.5 and 8.5 Ω per coil. 2. 5. Coil 1 = terminals 1 and 2 Coil 2 = terminals 1 and 3 Coil 3 = terminals 2 and 3 Touch the ohmmeter test leads to detergent dispenser terminals 3 and 4. The meter should indicate between 65 and 75 Ω. 1 1 5-2 WARNING Electrical Shock Hazard Disconnect power before servicing. Replace all parts and panels before operating. Failure to do so can result in death or electrical shock. LID MOTOR POWER RESISTOR & HEATER Refer to page 4-14 for the procedure for servicing the lid motors. 1. Unplug dishwasher or disconnect power. Refer to page 4-10 for the procedure for servicing the heater element assembly. NOTE: The power resistor is part of the heater element assembly. 1. Unplug dishwasher or disconnect power. 2. Disconnect the lid motor connector from the chassis module at the appropriate following connectors. P406 (Upper Left) P403 (Lower Left) 2. Disconnect the wire connector from the CHASSIS HARNESS terminals on the controller. P404 (Upper Right) P405 (Lower Right) 3. Set the ohmmeter to the R x 1 scale. 3. Set the ohmmeter to the R x 1 scale. 4. Touch the ohmmeter test leads to the lid motor connector terminals. The meter should indicate between 55 and 200 Ω. 4. To test the power resistor, touch the ohmmeter test leads to heater terminals 4 and 9. The meter should indicate between 25 and 35 Ω. 5. To test the heater, touch the ohmmeter test leads to heater terminals 6 and 9. The meter should indicate between 23 and 29 Ω. 1 Connector 5-3 4 6 9 WARNING Electrical Shock Hazard Disconnect power before servicing. Replace all parts and panels before operating. Failure to do so can result in death or electrical shock. TEMPERATURE SENSOR WATER FILL VALVES Refer to page 4-10 for the procedure for servicing the heater element assembly. NOTE: The temperature sensor is part of the heater element assembly. 1. Unplug dishwasher or disconnect power. Refer to page 4-16 for the procedure for servicing the water fill valves. 1. Unplug dishwasher or disconnect power. 2. Disconnect the wire connectors from the water fill valve solenoid terminals. 2. 3. Set the ohmmeter to the R x 1 scale. 4. Touch the ohmmeter test leads to the upper and lower water fill valve solenoid terminals. The meter should indicate between 65 and 75 Ω. Disconnect the wire connector from the CHASSIS HARNESS terminals on the controller. 3. Set the ohmmeter to the R x 1 scale. 4. Touch the ohmmeter test leads to heater terminals 1 and 2. The meter should indicate as follows: 962 Ω @ 68°F (20°C) 1000 Ω @ 86°F (30°C) 1200 Ω @ 140°F (60°C) 1 2 Upper Solenoid Terminals Lower 5-4 DIAGNOSTICS & TROUBLESHOOTING DIAGNOSTICS THE ERROR CODE DISPLAY MODE 3. Press Start/Pause. The current error code is displayed on the drawer control panel LEDs, followed by the previous error code. 4. Press the Keylock button to clear the current error code. Press Keylock again to clear the previous error code. 5. Press the Power button to exit the Error Code Display mode. To enter the error code display mode: 1. Press the Power button for the Power On mode. 2. Press the Keylock button, and then the Start/Pause button. Hold both buttons for 5 seconds. The Start/Pause LED is on. 6-1 ERROR CODES WILL NOT RUN ON POWER UP MOTOR FAILURE NO LED DISPLAY No Power To Unit Check fuses, circuit breakers and junction box connections. Motor Jammed Free jammed rotor, check for damage to rotor and rotor housing. Power To One Tub Only 1. Unplug dishwasher or disconnect power. 2. Check connections to chassis PC board, controller and element. 3. Check resistance of power resistor; replace if necessary. 4. Replace controller if necessary. Stator Wiring Damaged 1. Unplug dishwasher or disconnect power. 2. Check stator winding resistances, replace stator if necessary. Hall Sensor Out Of Position 1. Unplug dishwasher or disconnect power. 2. Ensure sensor is clipped into the stator housing properly. Loose Connections 1. Unplug dishwasher or disconnect power. 2. Check connections to machine and chassis PC board. Hall Sensor Connection Bad 1. Unplug dishwasher or disconnect power. 2. Check sensor connection at the electronic controller. Faulty EMI Filter 1. Unplug dishwasher or disconnect power. 2. Check resistance of the EMI filter (<1 Ω); replace if necessary. Hall Sensor Failed 1. Unplug dishwasher or disconnect power. 2. Replace sensor. Faulty Chassis PCB 1. Unplug dishwasher or disconnect power. 2. Check connections on chassis PCB; replace if necessary. 6-2 FAILED TEMP SENSOR OR ELEMENT FLOOD SWITCH ACTIVATED Failed Heater Element 1. Unplug dishwasher or disconnect power. 2. Check resistance of element; replace heater plate if necessary. Lid Not Sealing Correctly 1. Unplug dishwasher or disconnect power. 2. Remove lid and repair or replace lid or motor assembly. Temperature Sensor Failed 1. Unplug dishwasher or disconnect power. 2. Check resistance of temperature sensor; replace heater plate if necessary. Water Valve Leaking 1. Unplug dishwasher or disconnect power. 2. Tighten connections or replace valve as necessary. Bad Wiring Or Connections 1. Unplug dishwasher or disconnect power. 2. Check element edge connector, wiring and electronic controller connection. Spray Arm Is Split Replace spray arm. Spray Arm Not Turning Freely Clear any obstructions to spray arm. Electronic Controller Failed 1. Unplug dishwasher or disconnect power. 2. Replace electronic controller if necessary. Split Inlet Hose Replace inlet hose. Split Drain Hose Replace drain hose. Blocked Drain Hose Clear hose blockage. Heater Plate O-Ring Leaks 1. Unplug dishwasher or disconnect power. 2. Replace o-rings on heater plate. Moisture / Foreign Matter On Chassis Board Flood Switch PCB 1. Unplug dishwasher or disconnect power. 2. Clean chassis PC board and flood switch area. Power Failure To Lower Tub Causes Flood Error Code On Top Tub 1. Unplug dishwasher or disconnect power. 2. Replace chassis PC board. 6-3 FILL FAILURE ELECTRONICS FAILURE (EEPROM Access Error) Water Supply Valve Turned Off Turn on water supply valve. Dishwasher Will Not Operate 1. Unplug dishwasher or disconnect power for 10 seconds. 2. Plug in dishwasher or reconnect power. Error code should clear. 3. If error code remains, replace electronic controller. Inlet Valve Failed 1. Unplug dishwasher or disconnect power. 2. Check resistance of inlet valve coil, replace if necessary. Low Water Pressure Water pressure must be above 4.3 psi. WATER TEMPERATURE SENSED GREATER THAN 185°F (85°C) Spray Arm Not In Place Put spray arm back in proper location. Obstructed Inlet Hose Or Inlet Valve Clear obstructions. Inlet Water Above 185°F (85°C) Adjust water heater setting. Bad Wiring Or Connections 1. Unplug dishwasher or disconnect power. 2. Check wiring and connectors to controller. Heater Element On Continuously 1. Unplug dishwasher or disconnect power. 2. Replace electronic controller. Machine Is Siphoning Check drain hose installation. Moisture Around Temperature Sensor 1. Unplug dishwasher or disconnect power. 2. Repair any water leaks from tub. Impeller Is Slipping On Rotor Replace rotor and impeller assembly. Wiring Or Connections Bad 1. Unplug dishwasher or disconnect power. 2. Check all wiring and connections from electronic controller to element. Temperature Sensor Failed 1. Unplug dishwasher or disconnect power. 2. Check resistance of temperature sensor; replace heater plate, if necessary. 6-4 DIAGNOSTIC MODES Tub Home Sensor Test During the Hardware Output test mode, the Keylock LED indicates the tub position: • Keylock LED on = Tub closed • Keylock LED off = Tub open Diagnostics can only be entered from the Power Off mode (both medallion indicator lights are off). No error codes are displayed in diagnostic modes. Fast Test Cycle The Fast Test Cycle takes approximately 7 minutes to run. 1. Press the Power button for Power Off mode. Both medallion LEDs are off. 2. Press the Keylock button, and then the Start/Pause button. Hold both buttons for 5 seconds. The Start/Pause LED is on. 3. Press the Power button twice. The Heavy, Normal, Light/China, and Rinse LEDs are on. 4. Press Start/Pause twice. The Fast Test Cycle will start. 5. Press the Power button to exit the test cycle. Continuous Test Cycle 1. Press the Power button for Power Off mode. Both medallion LEDs are off. 2. Press the Keylock button, and then the Start/Pause button. Hold both buttons for 5 seconds. The Start/Pause LED is on. 3. Press the Power button three times. The Heavy, Normal, and Rinse LEDs are on. 4. Press Start/Pause. The last test cycle selected prior to entering the Diagnostics mode will run continuously. 5. Press the Power button to exit the cycle. IMPORTANT: Do not turn on heater element in diagnostic modes without water in the tub. Otherwise, heater plate failure may occur. Hardware Output Test 1. Press the Power button for Power Off mode. Both medallion LEDs are off. 2. Press the Keylock button, and then the Start/Pause button. Hold both buttons for 5 seconds. The Start/Pause LED is on. 3. Press the Power button once. Heavy, Normal, Quick Clean, Light/China, and Rinse LEDs are on. 4. Press Start/Pause. Advance through the outputs by repeatedly pressing the Start/ Pause button. Turn outputs on and off with the Keylock button. 5. Press the Power button to exit the test. LED DISPLAY HARDWARE OUTPUT Backlight (not used) Heater Element Relay (3 to 4 seconds) Lid Motors (will run for 10 seconds) Detergent Diverter Valve Fill Water Valve Motor Wash Direction (2300 to 2850 rpm)* Motor Drain Direction (4200 rpm) Rinse Aid Dispenser (dispenses current setting) Drying Fan Rinse Aid LED Not Used Not Used Not Used Water Temperature Display (not used) Controller Voltage Supply Display (not used) * Drawer must be closed 6-5 Resistance Checks NOTE: Perform component resistance checks, shown in the chart, with the wiring harness disconnected. CONNECTOR ON CONTROLLER PINS Rinse Aid Dispenser Dispenser 1-2 65-75 Ω Detergent Dispenser Dispenser 3-4 65-75 Ω Fan 1-2 Motor 1-2 1-3 2-3 7.5-8.5 Ω per coil Fill Valve Chassis/Harness 18-19 65-75 Ω per coil Heater Element Chassis/Harness 6-9 23-29 Ω Power Resistor Chassis/Harness 4-9 25-35 Ω Temperature Sensor Chassis/Harness 1-2 962 Ω at 68° F (20 ° C) 1000 Ω at 86°F (30 °C) 1202 Ω at 140 °F (60 °C) EMI Filter At Line Input N-N L1-L1 < 1Ω Lid Motor Chassis/Harness 1-2 COMPONENT Drying Fan Motor RESISTANCE 3.4 k Ω 55-200 Ω TROUBLESHOOTING CHART PROBLEM Poor wash performance POSSIBLE CAUSE AND RECOMMENDED PROCEDURES SPRAY ARM HAS STOPPED ROTATING • One of the items has fallen through the basket and jammed the spray arm. • Filter plate, drain filter, or drain filter access panel is not installed correctly, causing the spray arm to jam. RACKS OVERLOADED/INCORRECTLY LOADED • Advise customer of correct loading. WRONG WASH CYCLE SELECTION • Advise customer about lower water temperatures in Normal and Quick Clean cycles. Use High Temp option. Coffee/tea stains left in cups NOT ENOUGH DETERGENT BEING USED • Fill detergent cup to the top; also fill prewash cup. • Run on Normal or Heavy cycle with High Temp option. UPPER RACKS OVERLOADED • Water cannot reach upper racks. Advise customer of correct loading. Water spots deposited on dishware NOT ENOUGH/NO RINSE AID BEING USED • Use rinse aid; increase rinse agent setting (4 or 5 indicator lights). • Run on Normal or Heavy cycle with High Temp option. White film deposited on dishware* NOT ENOUGH DETERGENT BEING USED • Fill detergent cup to the top; also fill pre-wash cup. • Run on Normal cycle with High Temp option. MINERAL BUILDUP FROM HARD WATER • Use a detergent additive designed for use in hard water areas or fit a water softener to the incoming water supply. * Once this film has formed on dishware it cannot be removed by normal washing. Remove film by soaking dishware in a solution of white vinegar and water. Follow procedures above to prevent reoccurrence. 6-6 WIRING DIAGRAM N GND L1 Heater Plate Isolator 5 Badge Motor 4 Fan 6 Rinse Aid Pump Chassis Harness 4 Dispenser Rinse Aid LED Heater Element Relay Temperature Sensor Thermal Fuse 6 Power Supply Resistor Electronic Controller 6 Detergent Dispenser Heater Element Badge 19 11 Drying Fan M + Hall Sensor EMI Filter Lid Motors M M Wash/Drain Motor 10 10 N Chassis PCB Flood Fill Valve 3 Bottom Lid 7-1 3 2 2 Top Lid L1 — NOTES — 7-2 PRODUCT SPECIFICATIONS AND WARRANTY INFORMATION SOURCES IN THE UNITED STATES: FOR PRODUCT SPECIFICATIONS AND WARRANTY INFORMATION CALL: FOR WHIRLPOOL PRODUCTS: 1-800-253-1301 FOR KITCHENAID PRODUCTS: 1-800-422-1230 FOR ROPER PRODUCTS: 1-800-447-6737 FOR TECHNICAL ASSISTANCE WHILE AT THE CUSTOMER’S HOME CALL: THE TECHNICAL ASSISTANCE LINE: 1-800-253-2870 HAVE YOUR STORE NUMBER READY TO IDENTIFY YOU AS AN AUTHORIZED SERVICER FOR LITERATURE ORDERS: PHONE: 1-800-851-4605 FOR TECHNICAL INFORMATION AND SERVICE POINTERS: www.servicematters.com IN CANADA: FOR PRODUCT SPECIFICATIONS AND WARRANTY INFORMATION CALL: 1-800-461-5681 FOR TECHNICAL ASSISTANCE WHILE AT THE CUSTOMER’S HOME CALL: THE TECHNICAL ASSISTANCE LINE: 1-800-488-4791 HAVE YOUR STORE NUMBER READY TO IDENTIFY YOU AS AN AUTHORIZED SERVICER