1
CA eHealth
BT Studio Administration Guide
r6.1
This documentation and any related computer software help programs (hereinafter referred to as the
“Documentation”) is for the end user’s informational purposes only and is subject to change or withdrawal by CA at
any time.
This Documentation may not be copied, transferred, reproduced, disclosed, modified or duplicated, in whole or in
part, without the prior written consent of CA. This Documentation is confidential and proprietary information of CA
and protected by the copyright laws of the United States and international treaties.
Notwithstanding the foregoing, licensed users may print a reasonable number of copies of the documentation for
their own internal use, and may make one copy of the related software as reasonably required for back-up and
disaster recovery purposes, provided that all CA copyright notices and legends are affixed to each reproduced copy.
Only authorized employees, consultants, or agents of the user who are bound by the provisions of the license for
the product are permitted to have access to such copies.
The right to print copies of the documentation and to make a copy of the related software is limited to the period
during which the applicable license for the Product remains in full force and effect. Should the license terminate for
any reason, it shall be the user’s responsibility to certify in writing to CA that all copies and partial copies of the
Documentation have been returned to CA or destroyed.
EXCEPT AS OTHERWISE STATED IN THE APPLICABLE LICENSE AGREEMENT, TO THE EXTENT PERMITTED BY
APPLICABLE LAW, CA PROVIDES THIS DOCUMENTATION “AS IS” WITHOUT WARRANTY OF ANY KIND, INCLUDING
WITHOUT LIMITATION, ANY IMPLIED WARRANTIES OF MERCHANTABILITY, FITNESS FOR A PARTICULAR PURPOSE
OR NONINFRINGEMENT. IN NO EVENT WILL CA BE LIABLE TO THE END USER OR ANY THIRD PARTY FOR ANY
LOSS OR DAMAGE, DIRECT OR INDIRECT, FROM THE USE OF THIS DOCUMENTATION, INCLUDING WITHOUT
LIMITATION, LOST PROFITS, BUSINESS INTERRUPTION, GOODWILL, OR LOST DATA, EVEN IF CA IS EXPRESSLY
ADVISED OF SUCH LOSS OR DAMAGE.
The use of any product referenced in the Documentation is governed by the end user’s applicable license
agreement.
The manufacturer of this Documentation is CA.
Provided with “Restricted Rights.” Use, duplication or disclosure by the United States Government is subject to the
restrictions set forth in FAR Sections 12.212, 52.227-14, and 52.227-19(c)(1) - (2) and DFARS Section 252.2277014(b)(3), as applicable, or their successors.
All trademarks, trade names, service marks, and logos referenced herein belong to their respective companies.
Copyright © 2008 CA. All rights reserved.
Contact Technical Support
For online technical assistance and a complete list of locations, primary service
hours, and telephone numbers, contact Technical Support at
http://ca.com/support.
Contents
Chapter 1: The BT Studio Tool Set
13
BT Studio .................................................................................... 13
Application Response ......................................................................... 14
BT Marker .................................................................................... 14
Applications .................................................................................. 15
Default Applications and Servers............................................................... 15
Recording Agent .............................................................................. 16
Events and Transactions ...................................................................... 16
About Rules and Rule Sets .................................................................... 17
Module Sets and the Application Hierarchy ..................................................... 18
About Servers ................................................................................ 19
About Alternate Rule Sets ..................................................................... 19
Default Servers ............................................................................... 20
About Response Paths ........................................................................ 20
About the Event Log File ...................................................................... 21
Measure Response Time ...................................................................... 22
Rule Development Process .................................................................... 23
Determine the Transactions to Monitor ......................................................... 24
Monitor Multiple Application Versions........................................................... 25
Upgrade Monitored Applications ............................................................... 26
Update Application Rule Sets .................................................................. 26
Chapter 2: Install BT Studio and BT Marker
29
Installation Requirements ..................................................................... 29
Installation Instructions ....................................................................... 30
Install BT Studio on a Terminal Server ......................................................... 31
Licensing Instructions ......................................................................... 32
Chapter 3: Generate an Event Log File
35
Helpful Hints for Recording Events ............................................................. 35
Record Events and Annotate the Log ........................................................... 36
Transfer the Event Log File .................................................................... 38
Open an Event Log ........................................................................... 39
Contents 5
Chapter 4: Set Up the Recording Agent
41
Enable Recording for the AR Agent ............................................................. 41
Requirements for the BT Recording Agent ...................................................... 42
Install the BT Recording Agent ................................................................ 43
Record Terminal Server Applications ........................................................... 44
Define EventLogSetting for the BT Recording Agent ......................................... 45
Define EventLogSetting for the AR Agent ................................................... 45
EventLogSetting Values ................................................................... 46
Stop Event Recording ......................................................................... 46
Stop Recording for the AR Agent ........................................................... 47
Stop the BT Recording Agent .............................................................. 47
Remove the BT Recording Agent ............................................................... 49
Chapter 5: Develop Rule Sets
51
Start BT Studio ............................................................................... 52
Download a Rule Set .......................................................................... 52
Enable an Application ......................................................................... 53
Open an Event Log ........................................................................... 53
Filter Events.................................................................................. 54
Customize the Events and Results Pane ........................................................ 56
Search the Event Log File ..................................................................... 58
Define Rules for an Application ................................................................ 59
Copy Event Values into Rules .................................................................. 60
Insert Comments in Rules ..................................................................... 61
Create Event Specifications Automatically ...................................................... 61
Use Templates to Define Rules ................................................................ 62
Print a Rule Set............................................................................... 62
Check Syntax ................................................................................ 63
Test the Defined Rules ........................................................................ 63
Use Breakpoints When Testing Rules ........................................................... 64
Recognize Events as Parts of Transactions...................................................... 65
Transactions with Constraints ................................................................. 66
Save Changes to Rule Sets .................................................................... 67
Chapter 6: Configure Applications and Servers
69
Download AR Configuration into BT Studio ..................................................... 70
Use the Connection Manager .................................................................. 71
Start the Connection Manager ............................................................. 72
The Connection Manager and Applications .................................................. 73
The Connection Manager and Servers ...................................................... 73
6 BTStudio Administration Guide
Add an Executable to a New Application .................................................... 74
Add an Executable to an Application........................................................ 75
Add a Hostname and Port to a New Server ................................................. 76
Add a Hostname and Port to a Server ...................................................... 77
Edit an Application Definition .............................................................. 78
Edit a Server Definition.................................................................... 78
Combine Connection Manager Symbols ..................................................... 79
Use Default Applications and Servers .......................................................... 81
Configuration Files ............................................................................ 82
Configuration Menu ........................................................................... 83
Alternative Configuration Methods ............................................................. 83
Import AR Configuration from eHealth...................................................... 84
Create Servers Based on Event Log Data ................................................... 85
Define Applications Manually............................................................... 86
Define Servers Manually ................................................................... 87
Chapter 7: Update Rules in Application Response
89
Upload Rules to eHealth ....................................................................... 89
Import Rule Sets into Application Response .................................................... 90
Update Configuration for Application Response ................................................. 91
Chapter 8: Monitor Transactions Based on Keystrokes
93
Enable the AR Agent to Monitor Individual Keystrokes ........................................... 94
Develop Transaction Rules Based on Keystrokes ................................................ 95
Define Resources to Monitor Transactions Based on Keystrokes .................................. 96
Example: Develop a Text-Based Transaction Rule ............................................... 97
Chapter 9: Monitor Transactions in Java Applications
101
Enable the AR Agent to Monitor Java Applications .............................................. 102
Enable the AR Agent to Monitor Java Applets .................................................. 104
Define Rules for a Java Application or Java Applet ............................................. 106
Example: Develop Java Transaction Rules ..................................................... 107
Track Failed Transactions .................................................................... 109
Invoke the Application Response Java Hook as an Applet ....................................... 111
Chapter 10: BT Language Reference
113
Syntax for Resource Definitions............................................................... 114
Names for Transactions, Modules, and Failures ............................................ 115
Special Characters in String Parameters ................................................... 116
Contents 7
Regular Expressions ..................................................................... 116
Parameter Substitutions .................................................................. 117
Case Insensitivity ........................................................................ 119
Comments .............................................................................. 119
Transaction Definitions ....................................................................... 120
Event Specifications ......................................................................... 122
Event Types ................................................................................. 123
AppEvent Event Type .................................................................... 123
Connection Event Type ................................................................... 125
DNS Event Type ......................................................................... 126
Java Event Type ......................................................................... 127
Outlook Event Type ...................................................................... 128
Process Event Type ...................................................................... 131
Session Event Type ...................................................................... 132
Web Event Type ......................................................................... 132
Windows Event Type ..................................................................... 133
Event Actions ............................................................................... 135
AppEvent Start Action .................................................................... 137
AppEvent Stop Action .................................................................... 137
DNS FailedLookup Event Action ........................................................... 138
DNS Start Event Action................................................................... 138
DNS Stop Event Action ................................................................... 139
DNS SuccessfulLookup Event Action ....................................................... 139
Java JAddComponent Event Action ........................................................ 139
Java JInvokeApp Event Action ............................................................ 140
Java JKeyPress Event Action .............................................................. 140
Java JMouseClick Event Action ............................................................ 140
Java JMouseRelease Event Action ......................................................... 141
Java JRemoveComponent Event Action .................................................... 141
Java JSetLabel Event Action .............................................................. 142
Java JSetText Event Action ............................................................... 142
Java Start Event Action .................................................................. 143
Java Stop Event Action ................................................................... 143
Outlook ChangeFocus Event Action ........................................................ 143
Outlook CheckNames Event Action ........................................................ 143
Outlook CheckNamesComplete Event Action ............................................... 144
Outlook ComposeForwardMessage Event Action ............................................ 144
Outlook ComposeNewMessage Event Action ............................................... 144
Outlook ComposeReplyAllMessage Event Action ............................................ 145
Outlook ComposeReplyMessage Event Action .............................................. 145
Outlook DeleteMessage Event Action ...................................................... 145
Outlook MessageDelivery Event Action .................................................... 146
8 BTStudio Administration Guide
Outlook Read Message Event Action ....................................................... 147
Outlook SelectionChange Event Action .................................................... 147
Outlook Start Event Action ............................................................... 148
Outlook Stop Event Action ................................................................ 148
Outlook SubmitMessage Event Action ..................................................... 149
Outlook SubmitMessageComplete Event Action ............................................ 149
Outlook WriteMessage Event Action ....................................................... 150
Outlook WriteMessageComplete Event Action .............................................. 150
Process Start Event Action................................................................ 150
Process Stop Event Action ................................................................ 151
Web BeginLoad Event Action ............................................................. 152
Web EndLoad Event Action ............................................................... 153
Web FailedLoad Event Action ............................................................. 154
Web Start Event Action................................................................... 155
Web Stop Event Action ................................................................... 155
Windows ButtonPress Event Action ........................................................ 156
Windows Create Event Action ............................................................. 157
Windows Destroy Event Action ............................................................ 157
Windows KeyPress Event Action .......................................................... 158
Windows LoseFocus Event Action ......................................................... 158
Windows MenuCommand Event Action .................................................... 159
Windows MouseClick Event Action......................................................... 160
Windows SetFocus Event Action........................................................... 160
Windows SetTitle Event Action ............................................................ 161
Windows Start Event Action .............................................................. 161
Windows StatusMessage Event Action ..................................................... 162
Windows Stop Event Action ............................................................... 162
Parameter List............................................................................... 163
Sequence Statement ......................................................................... 165
Choice Statement............................................................................ 166
Last Statement .............................................................................. 168
Except Statement ........................................................................... 169
Failure Statement ........................................................................... 172
Failure Codes ................................................................................ 175
Alternate Rulesets ........................................................................... 176
IgnoreEvents Clause ......................................................................... 178
Resource Types ............................................................................. 181
AppEvent Resource Type ................................................................. 181
Connection Resource Type................................................................ 182
DNS Resource Type ...................................................................... 183
Java Resource Type ...................................................................... 185
Outlook Resource Type ................................................................... 185
Contents 9
Process Resource Type ................................................................... 186
Session Resource Type ................................................................... 187
Web Resource Type ...................................................................... 188
Windows Resource Type .................................................................. 188
Resource Definitions ......................................................................... 189
Resource Definition for a Web Browser .................................................... 190
Resource Definition for Network Response ................................................. 190
Resource Definition for a Java Application or Applet ........................................ 191
Resource Definition for a GUI Application .................................................. 192
Defining Required Resources ............................................................. 192
User-Definable Resources ................................................................ 194
The Selection-Kind Qualifier: Defining and Application Instance ............................. 195
Using No Resource Parameters ........................................................... 197
Defining Additional Resources ............................................................ 198
Additional Resources without Parameters .................................................. 200
Additional Resources with Parameters ..................................................... 200
Connection: Tracking Server and Network Time ............................................ 202
Examples of Resource Definitions ......................................................... 202
How Transaction Limits Work ................................................................. 204
Eliminating Transactions with No Server Activity ........................................... 204
Using Transaction Time Limits ............................................................ 206
Default Elapsed and Reported Time ....................................................... 206
Application-Specific Elapsed and Reported Time ............................................ 207
Transaction-Specific Elapsed and Reported Time ........................................... 208
Eliminating Transactions with No Server Activity ........................................... 210
Other Transaction Limits and Constraints .................................................. 211
Syntax for Transaction Limits and Constraints ............................................. 214
Tracking Timed-Out Transactions ............................................................. 215
Application Event Source ..................................................................... 217
Function Descriptions .................................................................... 217
C Interface Example ..................................................................... 222
C# Interface Example........................................................................ 223
Screen Descriptions.......................................................................... 223
Applications ............................................................................. 224
New Application ......................................................................... 224
Application Types ........................................................................ 224
Application Properties > General .......................................................... 225
Servers ................................................................................. 226
New Server .............................................................................. 226
Server Types ............................................................................ 227
Server Properties General Tab ............................................................ 228
Server Properties: Hostnames, Ports ...................................................... 229
10 BTStudio Administration Guide
Server Properties: URL Substrings ........................................................ 229
Server Properties: Details ................................................................ 231
eHealth System Connection Parameters ................................................... 231
Select an Application to Download ........................................................ 232
Select Application ........................................................................ 232
Select Server ............................................................................ 233
Customize Columns ...................................................................... 233
Edit Column Filter ........................................................................ 234
Events Pane ............................................................................. 234
Rules Pane .............................................................................. 235
Results Pane ............................................................................ 235
Syntax Tab .............................................................................. 235
Transactions Tab......................................................................... 236
Recognized Events Tab ................................................................... 236
Module Statement ........................................................................... 236
Basic Rule Set Syntax ........................................................................ 238
Chapter 11: Troubleshooting
241
BT Marker Errors ............................................................................ 241
BT Studio Errors ............................................................................. 241
Transactions Not Recognized ................................................................. 242
Inaccurate Response Time Measurements ..................................................... 243
Glossary
247
A ....................................................................................... 247
B ....................................................................................... 249
C ....................................................................................... 250
D ....................................................................................... 252
E ....................................................................................... 253
F ....................................................................................... 254
G ....................................................................................... 255
H ....................................................................................... 255
I ........................................................................................ 256
L ....................................................................................... 256
M ....................................................................................... 256
N ....................................................................................... 257
P ....................................................................................... 257
R ....................................................................................... 258
S ....................................................................................... 261
T ....................................................................................... 262
Contents 11
U ....................................................................................... 263
W ....................................................................................... 263
Index
12 BTStudio Administration Guide
265
Chapter 1: The BT Studio Tool Set
Application Response allows you to measure actual, observed response time
from the end user’s point of view. In reports, it can show an average response
time for a monitored application, with total response time divided into client
time, network time, and server time. This allows you to determine whether
performance problems originate from the client, the network, or the server.
However, you might want more detailed information than an average response
time for the entire application. You might want response time for specific
transactions that are important to the success of your enterprise. You can use
the BT Studio tool set to specify the transactions to monitor. (BT is an
abbreviation for Business Transaction.) Application Response can then track
performance data for those transactions, in addition to the performance of the
application as a whole.
This section contains the following topics:
BT Studio (see page 13)
Application Response (see page 14)
BT Marker (see page 14)
Applications (see page 15)
Default Applications and Servers (see page 15)
Recording Agent (see page 16)
Events and Transactions (see page 16)
About Rules and Rule Sets (see page 17)
Module Sets and the Application Hierarchy (see page 18)
About Servers (see page 19)
About Alternate Rule Sets (see page 19)
Default Servers (see page 20)
About Response Paths (see page 20)
About the Event Log File (see page 21)
Measure Response Time (see page 22)
Rule Development Process (see page 23)
Determine the Transactions to Monitor (see page 24)
Monitor Multiple Application Versions (see page 25)
Upgrade Monitored Applications (see page 26)
Update Application Rule Sets (see page 26)
BT Studio
BT Studio is a tool that you use to develop the rule sets that Application
Response (AR) uses to recognize transactions to monitor for performance. You
use BT Studio to view the event log generated by the recording agent, write
rules using the Business Transaction (BT) language, check syntax, and test the
The BT Studio Tool Set 13
Application Response
rule set. You can also use functions of BT Studio to download AR configuration
and to upload new rules to eHealth.
The BT Studio tool set consists of the following components:
Recording Agent
BT Marker
BT Studio
Application Response
Application Response is a software solution that focuses on measuring actual,
observed response time from the end user's point of view. With Application
Response, you can do the following:
Understand how applications are currently performing by measuring
average response time for each application (including terminal server and
Citrix applications).
Learn which user groups are experiencing slow application performance
and understand why.
Proactively manage service levels and perform capacity planning.
You manage Application Response and AR agents using the Application
Response functions of the eHealth Web interface. For more information about
Application Response, see the eHealth Response Administration Guide.
BT Marker
BT Marker is a tool that you use to annotate the event log while a user
performs transactions. Later, when using BT Studio to develop rules, you can
view these comments in the event log within the overall context of the activity
in which they occurred. This can help you determine start and end points for
transactions within the overall sequence of events recorded for the application.
For example, before a user creates a purchase order, you can use BT Marker
to insert a comment in the event log that states “Creating purchase order Start.” After the application displays the status message "Purchase order
created," you can insert another comment such as “Creating purchase order End."
14 BTStudio Administration Guide
Applications
Applications
An application is a software product that you use for a specific purpose or to
perform a set of related tasks. For example, you might use an e-mail
application to send and receive electronic mail, or a Web application to search
a database. You can use Application Response to monitor average response
time for an application, or to monitor the response times for specific
transactions performed using an application.
Application Response provides default application definitions that monitor
specific applications (such as Microsoft Outlook or Lotus Notes) and measure
average response time. In general, the default applications are useful for
demonstrating the capabilities of Application Response. When you are ready to
monitor your applications, you may want to define new applications. However,
you can continue to use the default applications and servers to monitor
application response time if they suit your needs.
To monitor an application for which no default definition is available, you must
define the application to Application Response using the eHealth Web
interface. For default or custom application definitions, you can use BT Studio
to define the specific transactions that you want to monitor, or to refine the
rules that determine what Application Response measures.
Default Applications and Servers
Application Response provides default application definitions that monitor
specific applications (such as Microsoft Outlook or Lotus Notes) and measure
average response time. To monitor an application for which no default
definition is available, you must define the application to Application Response
using the eHealth Web interface. For default or custom application definitions,
you can use BT Studio to define the specific transactions that you want to
monitor, or to refine the rules that determine what Application Response
measures.
When you enable a default application definition in eHealth, Application
Response monitors the default application executable using a default server
definition to collect response time data. In reports, Application Response
displays a response path similar to the following:
Client
Module
name
name
An application
path
yellow- Outlook- Read-Default-Exchange- AP
Application
Server name
The BT Studio Tool Set 15
Recording Agent
If you are using the default servers, the default server name appears at the
end of the response path name. In the example, the server name is "DefaultExchange". (If you disable default constraints and an application does not
have associated server activity, "No-Server" appears instead of a server
name.)
If you want a more specific server name to appear in the path on reports
(such as "Exchange1" instead of "Default-Exchange"), or if an application uses
multiple servers and you want to be able to track response time for each
server individually, then you must define servers using the Connection
Manager or another configuration method.
Similarly, Application Response provides a default server definition for a Citrix
server (or any terminal server). If you are using Application Response to
monitor the performance of a terminal server application, Application
Response uses the Citrix server definition to obtain network times between the
client system and the Citrix server. Another default server definition helps to
capture network times between the Citrix server and the application server.
You do not need to define and attach servers to a Citrix application definition
unless you want to name the specific servers involved, so that those server
names appear in reports.
Recording Agent
The recording agent resides on a computer where an end user uses an
application to perform transactions. The agent records information about all
application activity in an event log file for later processing by BT Studio.
As a user performs transactions, the recording agent creates a separate record
for each of the most significant application events in the event log file. (The
event log file is a file that records information about activity related to each
transaction performed using applications on the local computer.) An event is
any individual step that occurs during a transaction. Events can include a
window receiving focus, a button being pressed, a status message appearing,
a menu command being selected, a process being created, and so on.
Events and Transactions
By default, Application Response monitors all transactions performed by
application users and computes an average application response time. While
this capability can provide very useful information, you may want more indepth information about the performance of your applications. To meet this
need, Application Response can monitor and report on the performance of
individual transactions or groups of transactions.
16 BTStudio Administration Guide
About Rules and Rule Sets
A transaction can consist of one or more events. An event is the basic unit of
transaction activity recognized by Application Response. The following are
examples of events:
The creation or termination (start or stop) of a process, terminal server
session, Web browser, or Transmission Control Protocol (TCP) connection
The creation or closing of an application window, or a window receiving or
losing focus
Within an application window, a change in window title, the press of a
button or key, a mouse click, the selection of a menu command, or the
display of a status message
A request to or response from a server through a TCP connection
The loading of a browser page
The reading or sending of a Microsoft Exchange message
A Domain Name System (DNS) lookup
You may be interested in the response time required to complete a singleevent transaction, such as a DNS lookup. Or you may want to monitor
response time for an entire sequence of events, starting when the user opens
the New Purchase Order window, through the user completing the form and
clicking OK to submit the purchase order, and ending when the application
responds with the status message “Purchase Order Created.”
Use BT Studio to define how Application Response recognizes a specific
transaction: as one event or a series of events. If you define a transaction
consisting of multiple events, Application Response looks for the specified
sequence of events. Other unspecified events may occur within that sequence.
As long as the sequence of specified events occurs in the application,
Application Response recognizes the transaction and measures its response
time.
About Rules and Rule Sets
To specify the transactions that Application Response will monitor, you define
rules using a proprietary Business Transaction (BT) language.
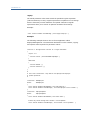
The following is a sample rule that defines a transaction that begins when the
user chooses the New, Record menu command of the application and ends
when the application displays the status message “New employee record
created.”
transaction "New_Employee"
module "New_Employee"
{
event "1-of-2" Windows MenuCommand
The BT Studio Tool Set 17
Module Sets and the Application Hierarchy
{ Text="New ->Record..." }
event "2-of-2" Windows StatusMessage
{ Text="New employee record created." }
}
A rule set is a group of rules used to monitor a particular application. Use BT
Studio to develop a rule set for each application for which you want to monitor
transaction response time.
Module Sets and the Application Hierarchy
In addition to monitoring average application response time and individual
transaction response time, you can configure Application Response to monitor
response time for a group of related transactions, called a module set. In
reports, Application Response can summarize response times by application or
by individual transaction (module). Some reports (such as the Service
Summary report) also allow you to summarize response times by module set.
For example, suppose that you use SAP for sales, purchasing, and shipping,
and different groups of people perform each set of functions. In addition to
reporting on the response times of individual transactions, you also want to be
able to report on the response times of sales transactions, purchasing
transactions, and shipping transactions. With the use of module sets, you can
create a 3-tier hierarchy for reporting (an application hierarchy), similar to the
following:
Application Hierarchy
Sample Application
application1
moduleSetA
moduleU
moduleV
SAP
SAP-Purchasing
SAP-CreatePO
SAP-UpdatePO
SAP-Sales
SAP-Invoice
SAP-Quote
SAP-Shipping
moduleSetB
moduleW
moduleX
moduleSetC
moduleY
moduleZ
application2
SAP- Labels
SAP- Pack
Web
When you run Service Level reports, you can see this application hierarchy and
specify the level at which you want to report. To create module sets and define
the application hierarchy, use the nhAddAppType and nhModifyAppType
18 BTStudio Administration Guide
About Servers
commands. (Do this after defining transactions and modules in application rule
sets and after discovering response paths in eHealth.) For details, refer to the
command usage descriptions, or enter the following in the address field of
your Web browser, where ehealth is the eHealth Web server name:
http://ehealth/help/files/reports/general/crtAndMngAppHier.html
About Servers
When installed, Application Response defines default servers and uses them to
track network and server time for default and custom applications. The server
name appears in the response path in reports. When a default server is used,
that default server name appears in the response path.
If you want a more specific server name to appear in the path on reports
(such as "Exchange1" instead of "Default-Exchange"), or if an application uses
multiple servers and you want to be able to track response time for each
server individually, then you must define servers. To define servers in BT
Studio, use the Connection Manager or another configuration method. To
define servers in Application Response, use Server Discovery or define them
manually using the eHealth Web interface.
Citrix Servers
Application Response provides a default server definition for a Citrix server (or
a terminal server). If you are using Application Response to monitor the
performance of a Citrix- published application, Application Response uses the
Citrix server definition to obtain network times between the client system and
the Citrix server. Another default server definition helps to capture network
times between the Citrix server and the application server. You do not need to
define and attach Citrix servers to an application definition for a Citrixpublished application. (You can, however, define the application servers to
obtain server-specific response time information.)
About Alternate Rule Sets
Sometimes you may want to monitor an application using two different rule
sets simultaneously. For example, Application Response can monitor average
application response time and at the same time monitor the response times of
specific, mission- critical transactions. Application Response uses the response
times of all transactions to calculate an average application response time; it
also monitors the mission-critical transactions to calculate transaction-specific
response times.
You can use BT Studio to define a primary rule set and an alternate rule set.
Application Response analyzes all application activity against both rule sets,
The BT Studio Tool Set 19
Default Servers
but some activity will satisfy only the primary rule set or the alternate rule set,
and some activity will satisfy both rule sets. In reports, Application Response
shows response data gathered using both rule sets, allowing you to analyze
application response time from different points of view.
For example, you may want to monitor an application for a set of transactions
related to New Employee activity and a set of transactions related to Employee
Update activity (the primary rule set), while simultaneously recording a
measurement of all activity that occurs within the application (the alternate
rule set).
Default Servers
Default servers enable Application Response to monitor certain applications
out-of-the- box (that is, with little setup or configuration required). By using
these default server definitions, Application Response can collect the server
response time component of a transaction's response time.
When you select View, Servers in BT Studio, the server list that appears
includes default servers. These servers have names that begin with "Default-"
and check marks in the Default column. If Application Response observes a
monitored application communicating with a server for which no server
definition exists but that matches one of these default servers, Application
Response uses the default server definition to collect network and server time
related to the application activity.
More specifically, the default servers enable Application Response to track
response time for all traffic of a certain type for which no specific server has
been defined. For example, the default Mail application uses the Default-MailPOP3 and Default-Mail-SMTP servers so that Application Response can monitor
all POP and SMTP traffic.
In general, the out-of-the-box application and server definitions are useful for
demonstrating the capabilities of Application Response. When you are ready to
monitor your applications, you may want to define new applications. You can
continue to use the out-of-the-box applications and servers to monitor
application response time if they suit your needs.
About Response Paths
In reports, Application Response displays a response path, which indicates the
client, application, module (transaction), and server involved in the measured
response time. The following shows a sample response path name:
20 BTStudio Administration Guide
About the Event Log File
Client
Module
name
name
An application
path
yellow- Outlook- Read-Default-Exchange- AP
Application
Server name
name
The maximum length of a response path name is 64 characters. If a path
name exceeds 64 characters, eHealth generates an error and does not include
that response time data in reports. When creating names for applications,
modules, and servers, choose names that are 15 characters or less. Shorter
names help to avoid errors and ensure that response paths are easy to read.
Note: Although the recommended length of names for applications, modules,
and servers is 15 characters, you can define names that use up to 32
characters. This permits flexibility, but you must remember that the maximum
length for a response path name is 64 characters. For example, if you use a
server name of 25 characters, you may want to balance this with a shorter
application name of five characters.
About the Event Log File
You use information in the event log file when developing rules for
transactions to monitor. The event log file stores details about application
activity (events) that the recording agent observes on the client computer.
When you use BT Marker to annotate events, those annotations are also
stored in the event log file. The recording agent continues to store information
in the event log file until you stop recording.
When you use BT Studio to develop application rules, you open an event log
file in the events pane of the BT Studio window. The events pane displays each
event on a separate line. You can filter events to hide irrelevant or
uninteresting events from view. This helps you focus on important events
while you create transaction definitions in the rule set. After you develop a rule
set, you can test the rules against the event log file. This helps you to debug
the rule set and make sure that it recognizes transactions correctly.
Name and Location of the Event Log File
The default file name for the event log is events.btl, and by default it resides
in the same directory as the recording agent. (The default location for the
recording agent and the event log file is C:\eHealth\agent\response.) You can
specify a different name (and location) for the file by defining the value of the
The BT Studio Tool Set 21
Measure Response Time
EventLogFile registry setting. To change EventLogFile for the AR agent, use
the Configure Agent function of the eHealth Web interface. To change
EventLogFile for the BT Recording agent, use regedit to navigate to
HKEY_LOCAL_MACHINE\SOFTWARE\Firstsense\Firstsense and change its
value.
Important! Be careful when using regedit to change registry settings. If you
are not familiar with regedit, contact Technical Support before attempting it.
Size of the Event Log File
By default, the event log file has a maximum file size of 3 MB to prevent it
from consuming too much disk space. When the file reaches this size, the
recording agent creates a new event log and saves the old file with the suffix
.old (for example, events.btl.old). The old file also consumes a maximum of 3
MB, so you need to have at least 6 MB of file space for the event log file. When
the second event log file fills, the agent overwrites the existing .old file with a
new version of the .old file, and starts a new .btl file.
To change the default maximum file size, change the MaxEventLogSize
registry setting to specify the maximum size in bytes. If you are using the AR
agent with recording enabled, use the Configure Agent function of the eHealth
Web interface to change the value of this setting. If you are using the BT
Recording agent, use regedit to change it.
Changing Agent Settings for the Event Log File
When you change one of these agent settings, you do not need to restart the
agent. The new settings take effect almost immediately (within one or two
minutes).
Measure Response Time
A transaction definition in a rule set identifies the key application events that
characterize the operation. In addition to these key events, a transaction is
likely to include other events. These other events may be relatively
insignificant (such as key presses and button presses) or more significant but
not critical to identifying the transaction (such as request/response exchanges
with an application server). In any case, all application events that occur
between the first and last key events of a transaction (as identified by the
transaction definition) and that originate from the required and additional
resources identified in the application's resource definitions are included in the
response time calculation for the transaction. Key events have no special
significance in the computation of a transaction's response time.
Note that some events (such as GUI events) are instantaneous, while other
events (such as a request/response pair) are not. The combined durations of
22 BTStudio Administration Guide
Rule Development Process
the individual events do not generally add up to the overall elapsed time for a
transaction. To account for the entire duration of a transaction, you must
provide for the inter-event gaps when computing a transaction's response time
breakdown.
In general, every event has a duration that contains the same five components
as a transaction:
Client Processing Time. Elapsed time spent processing at the application
client. For Terminal Services, this refers to processing time on the terminal
server system itself, not the end-user client system.
Client Think Time. Elapsed time waiting for user input.
Network Time. Transmission time exchanging data with the application
server.
Server Processing Time. Elapsed time waiting for a response from the
application server.
Terminal Server Latency. Elapsed time transmitting application
input/output between the end-user client system and the terminal server
system.
To compute the response time breakdown for a transaction, the transaction is
divided into intervals based on the starting and ending time of all application
events that occur during the transaction. Application Response computes a
separate response time breakdown for each interval, and the sum of
components for all intervals determines the overall response time breakdown
for the transaction. Although a transaction's response time contains five
components, the response times that appear in reports typically do not include
the Client Think Time component. This component is subtracted to provide
focus on other causes of performance issues (client, network, or server).
Rule Development Process
To use the BT Studio tool set to develop rules that recognize transactions,
follow this general process:
Determine which transactions you want to monitor for performance.
Install BT Studio.
Generate an event log file.
Develop rule sets using the event log file as input to BT Studio.
Update Application Response with new rules.
The BT Studio Tool Set 23
Determine the Transactions to Monitor
Determine the Transactions to Monitor
Before using the BT Studio tool set to develop application rule sets, do the
following:
1.
Gather information on which transactions to monitor.
2.
Consult with application managers (or the people who will be using reports
to monitor transaction response times) to determine which transactions
they want to monitor and any other reporting requirements they may
have.
3.
Then consult with application users to determine the following:
4.
Which transactions are most important to their work?
5.
Which transactions do they perform routinely (daily, weekly, monthly,
quarterly)?
6.
Which transactions are too slow and interfere with their productivity?
7.
Which versions of the application do they use?
8.
Which versions of the operating system do they use?
9.
As you plan the correct set of transactions to monitor, you may need to
meet with both groups to reconcile any differences in information from the
application managers and users.
10. List the transactions to monitor.
11. Make a list of the transactions you want to track for response time. Also
make a list of the application versions and operating systems that you
need to support.
12. Find the boundaries of each transaction.
Application Response can distinguish individual steps (events) within a
transaction, including mouse clicks, button presses, window transitions, and
more. It is important to think about the entire transaction, from start to finish.
Consider these questions:
How does the user start the transaction?
What steps does the user take through the middle of the transaction?
How does the user end the transaction?
How does the user know that the transaction is complete?
Can the user perform the same task in more than one way?
Note: If you support multiple versions of the application, answer these
questions for each application version. Some tasks may differ slightly from one
version to the next, and it is important to understand these differences.
24 BTStudio Administration Guide
Monitor Multiple Application Versions
Monitor Multiple Application Versions
When you develop rules for an application, you specify the particular events
that characterize each transaction. If your users use different versions of an
application and/or different versions of an operating system, the specific
events of a transaction may differ. For example, screen titles or button titles
may change from one version to the next, or the workflow to perform a
particular task may change. If you plan to monitor transactions for two or
more versions of an application simultaneously, you must write the rules to
reflect these differences.
To monitor multiple versions of an application
1.
Generate an event log file for each combination of application version and
operating system version.
For example, suppose that you want to monitor a custom Windows
application called EmpMgt, and your users are currently using two versions
of the software. In addition, some users use Windows NT and others use
Windows 2000. To ensure that you capture all relevant events that may
need to be included in the transaction rules, you must generate four event
log files: EmpMgt Version 1 on Windows NT, EmpMgt Version 2 on
Windows NT, EmpMgt Version 1 on Windows 2000, and EmpMgt Version 2
on Windows 2000.
2.
Develop rule sets that define the transactions you want to monitor.
3.
Test the rules against all of the event log files that you generated to
ensure that BT Studio can recognize the transactions for each version of
the application and/or operating system.
4.
If the rules fail to recognize certain transactions when played against a
particular event log file, do the following:
5.
Examine the log file to determine which events may be different for that
application version.
6.
Refine the rules to ensure that all versions of the application and/or
operating system are supported. For example, you may want to use the
choice statement to indicate that an event may occur in two different
ways, or define two separate transactions: one for the first application
version, and another for the second application version.
7.
Test the rules again to ensure that they work for all versions.
8.
Save changes to the rule set and upload them to Application Response.
9.
Whenever you upgrade the application or operating system, use it to
generate a new event log file for the monitored transactions and test the
existing rules against it. If BT Studio cannot recognize the transactions,
refine the rules to accommodate the changes, test them, save the
changes, and upload them.
The BT Studio Tool Set 25
Upgrade Monitored Applications
Upgrade Monitored Applications
Whenever you upgrade a monitored application or its operating system, you
need to make sure that the existing application rules will correctly recognize
transactions for the new version. If you write transaction rules that include
object IDs, it is likely that the transaction rules will not work for an application
upgrade. If relevant windows or dialog boxes have changed, their object IDs
have also probably changed, and you must update the transaction rules to
reflect these changes.
To test application rules for a new application version
1.
Use the upgraded version of the application (or operating system) to
generate a new event log file for the monitored transactions.
2.
Use BT Studio to test the existing rules against event log file.
3.
If BT Studio cannot recognize the transactions, do the following:
a.
Refine the rules to accommodate the changes.
b.
Test the rules, save the changes, and upload them.
If you plan to monitor two or more versions of an application, you can write
transaction rules using choice statements or another technique to ensure that
transactions are recognized properly, regardless of which application version is
in use.
Update Application Rule Sets
Suppose you have already defined transaction rules for an application and
uploaded the rule set to Application Response. Now you want to monitor an
additional transaction, or you need to refine the transaction rules to monitor
transactions more accurately. To update an application rule set, use the
following process.
To update an application rule set
1.
Make sure that the application and its servers are properly defined in
Application Response, and back up the current configuration files.
2.
Generate an event log file that includes application activity for the
transactions whose rules you want to add or modify.
3.
Download the AR Configuration into BT Studio. By downloading the entire
configuration file, you ensure that BT Studio has the same application and
server configuration information as Application Response, as well as copies
of the latest rule sets.
4.
In the events pane of BT Studio, do the following:
a.
Open the event log file.
26 BTStudio Administration Guide
Update Application Rule Sets
5.
b.
Filter events to hide those in which you are uninterested.
c.
Customize columns as desired.
In the rules pane, do the following:
a.
Display the rule set that you want to modify, and make sure that the
application is enabled.
b.
Check the application's resource definitions, and update them if
needed.
c.
Add or update transaction definitions as needed to recognize new or
existing transactions.
6.
Check the syntax of the updated rules.
7.
Test the rules to make sure that they recognize transactions properly.
8.
Repeat steps 5, 6, and 7 to refine the rule set until the updated rules
provide the desired results.
9.
When you are satisfied with the updated rules, do the following:
a.
Save the changes.
b.
Upload the modified rules to eHealth.
During the next agent heartbeat, Application Response will update each
agent's application rules with the updated version, and each agent will then
begin to monitor transactions using the updated rules.
The BT Studio Tool Set 27
Chapter 2: Install BT Studio and BT
Marker
The BT Studio installation program installs BT Studio, BT Marker, and related
files. Run the installation program on a Windows system where you plan to
develop rule sets for applications. This system is referred to as the BT Studio
system.
To install BT Studio and BT Marker
1.
Check installation requirements.
2.
Install the software on a Windows system, or install it on a terminal
server.
3.
License the software.
This section contains the following topics:
Installation Requirements (see page 29)
Installation Instructions (see page 30)
Install BT Studio on a Terminal Server (see page 31)
Licensing Instructions (see page 32)
Installation Requirements
Before installing BT Studio, make sure that the BT Studio system meets the
requirements listed in the following table.
BT Marker has no additional requirements; it uses minimal disk space and
memory.
Components
Requirements
CPU
Pentium II 400 MHz or higher
(recommended) on an Intel-based, PCcompatible system
Install BT Studio and BT Marker 29
Installation Instructions
Components
Requirements
Operating System
Any of the following:
Microsoft Windows NT 4.0 Workstation or
Windows NT 4.0 Server with Service Pack 5
or Service Pack 6
Microsoft Windows 2000 Professional
Workstation or Windows 2000 Advanced
Server Workstation with Service Pack 1
(English only)
Microsoft Windows 2000 Advanced Server
for Servers or Windows 2000 DataCenter
Server with Service Pack 1 (English only)
Microsoft Windows 2003
Microsoft Windows XP Professional
Disk Space
At least 4 MB
Memory
Physical memory: On computers sufficiently
sized to run distributed applications (at
least 32 MB), BT Studio will have minimal
impact.
Virtual memory: At least 10 MB
Permissions
No special permissions are required for
installation.
Browser
Microsoft Internet Explorer Version 5.5
through 6 or
Netscape Communicator Version 6.2
through 7
(to support online help)
Installation Instructions
After checking installation requirements, use the following procedure to install
BT Studio on the target system. The installation program also copies BT
Marker (btmarker.exe) and the BT Recording agent (RecAgent.exe) to the
target system. In general, it is easier to use BT Marker on the client system
where the recording agent resides. After installing BT Marker on the BT Studio
system, you can copy or move btmarker.exe to the client system. (To install
BT Studio on a terminal server, use a different procedure.)
30 BTStudio Administration Guide
Install BT Studio on a Terminal Server
If you are upgrading BT Studio from a previous version, you must use the BT
Studio installation program to remove the old version before installing the new
version. (Instructions are included in the following procedure.)
To install BT Studio and BT Marker
1.
Download the BT Studio installation package:
2.
Log in to the eHealth Web interface.
3.
On the Systems & Apps page, click Application Response in the left pane.
4.
Click Download.
5.
Click the link to download BT Studio, using the Open or Save options. By
default, BTStudio.install.exe is placed in the C:\ehealth\BTStudio directory.
If you select Open, BTStudio.install.exe is copied to your system and
automatically unpacked; this process copies the BT Studio files and
begins the BT Studio installation in one step.
If you select Save, BTStudio.install.exe is copied to your system.
Navigate to the location of the downloaded file and double-click
BTStudio.install.exe to begin the installation process.
6.
Follow the program instructions to install BT Studio.
7.
If you currently have an older version of BT Studio, remove it before
installing the new version, as follows:
8.
On the Welcome screen of the BT Studio installation program, click Next.
9.
On the Program Maintenance screen, select Remove and click Next.
10. On the Remove the Program screen, click Remove.
11. When the operation is complete, click Finish.
12. Navigate to the directory where the new BT Studio files were unpacked.
13. Double-click the Setup.exe file to install the new version of BT Studio.
14. (Optional) After installation, copy btmarker.exe from the BTStudio
directory to the client system where you plan to use the recording agent to
record application activity. (You can run BT Marker from any system that
has network access to the client system, but it is easier to run it from the
client system.) By default, the BTStudio directory is located in
C:\eHealth\BTStudio.
Install BT Studio on a Terminal Server
If you need to install BT Studio on a terminal server (such as a Citrix server),
use the Windows Add/Remove Programs utility. This method avoids problems
with security and registry settings on terminal servers. (Do not install BT
Install BT Studio and BT Marker 31
Licensing Instructions
Studio on terminal servers by executing the BT Studio installation program
directly.)
To install BT Studio on a terminal server
1.
Download the BT Studio installation package:
2.
From the terminal server system, log in to the eHealth Web interface.
3.
On the Systems & Apps page, click Application Response in the left pane.
4.
Click Download.
5.
Click the link to download BT Studio.
6.
In the File Download dialog box, click Save. Place BTStudio.install.exe in
the directory where you want BT Studio to reside (typically
C:\ehealth\BTStudio).
7.
Install BT Studio using the Windows Add/Remove Programs utility, as
follows:
8.
a.
From the Windows desktop, select Start, Settings, Control Panel.
b.
Double-click Add/Remove Programs.
c.
Click Add New Programs.
d.
Click CD or Floppy.
e.
In the Insert Program from Floppy Disk or CD-ROM dialog box, click
Next.
f.
In the Run Installation Program dialog box, click Browse and navigate
to the location of the BT Studio installation program, Setup.exe
(typically in C:\ehealth\BTStudio).
g.
Click Finish.
h.
In the BT Studio Setup Complete dialog box, click OK.
(Optional) After installation, copy btmarker.exe from the BTStudio
directory to the client system where you plan to use the recording agent to
record application activity. (You can run BT Marker from any system that
has network access to the client system, but it is easier to run it from the
client system.) By default, the BTStudio directory is located in
C:\eHealth\BTStudio.
Licensing Instructions
To run BT Studio, you need a license key. Use the following procedure to
obtain a license key.
Note: If you remove an old version of BT Studio to install a new version of
the software, you do not need to obtain a new license key. The removal
32 BTStudio Administration Guide
Licensing Instructions
program retains BTStudio.lic in the BTStudio directory, so that it is still
available for the new version of BT Studio.
To obtain a license key for BT Studio:
1.
Start BT Studio by double-clicking the BT Studio desktop icon or selecting
Start, Programs, BT Studio. A BT Studio License Error window should
appear to alert you that the application cannot be run without a valid
license.
2.
Press Ctrl+C to copy the contents of the field and click OK.
3.
Open a text editor (such as WordPad) and press Ctrl+V to paste the BT
Studio license information into the editor.
4.
Save the license information in an ASCII text file. For example, you can
save the file with the name BTstudioLicenseInfo.txt in the BTStudio
directory.
5.
In a Web browser, go to http://license.concord.com/license.
6.
In the Permanent Licensing area, click Create eHealth – System License. If
Create eHealth – System License does not appear, click Create
SystemEDGE/AdvantEDGE License instead.
7.
Enter your support contract ID or username and password in the fields
provided, and click Login.
8.
This information was e-mailed to you or to your reseller by CA when your
order for Application Response was processed. You can copy and paste the
username and password from the e-mail message into the fields.
9.
On the Product Licensing page, complete the Contact Information fields as
appropriate for your organization.
10. In the Software Information area, select BT Studio from the Product list.
11. Use the information provided by BT Studio to complete the remaining
Software Information fields. (To avoid typing errors, you can copy and
paste information from the file you created into the fields.)
12. Click Create License.
13. CA generates your license key and immediately sends it to you in an email message from [email protected].
14. In the e-mail message, the text string that appears below the line starting
with #btstudio is your license key.
15. Copy and paste that text string (the license key) into a new file in a text
editor.
16. Save the file as an ASCII text file with the name BTStudio.lic in the
BTStudio directory. Do not save BTStudio.lic in rich text format. Save it as
plain ASCII text.
17. As long as the BTStudio.lic file exists in the BTStudio directory, you can
start BT Studio.
Install BT Studio and BT Marker 33
Licensing Instructions
34 BTStudio Administration Guide
Chapter 3: Generate an Event Log File
After you install BT Studio, you are ready to generate an event log file. To do
this, you use the target application (the application whose performance you
want to monitor) to perform transactions. The recording agent stores
information about all application activity in the event log file. You will later use
the event log file when using BT Studio to develop rules to recognize the
desired transactions.
This section contains the following topics:
Helpful Hints for Recording Events (see page 35)
Record Events and Annotate the Log (see page 36)
Transfer the Event Log File (see page 38)
Open an Event Log (see page 39)
Helpful Hints for Recording Events
Before you begin to record events, follow these suggestions to simplify the
rules development process:
Clear the cache. Before starting the recording agent, clear the cache as
follows: From the Internet Explorer browser window, select Tools, Internet
Options. On the General tab, in the Temporary Internet Files area, click
Delete Files and then click OK in the confirmation box. This procedure
prevents timing issues in the resulting event log file.
Use BT Marker. Before performing a significant step of a transaction (such
as a starting step or an ending step), use BT Marker to annotate the event
log. This helps to clarify the boundaries (start and end points) of a
transaction, which can be useful when defining rules with BT Studio. It
also helps you to identify the events in which you are interested. The
event log file contains lots of detail and, without BT Marker annotations,
you may have difficulty locating the desired events.
Pause between steps. As you perform a transaction, pause after each
action required to perform the transaction. This pause allows the
application to complete any processing required for that action before
starting the next action. These pauses, along with the BT Marker
annotations, can make it easier for you to identify and locate significant
events of a transaction.
Pause after the final step. Pause at least 30 seconds after performing the
final step of a transaction. After you think the application has finished
processing, use BT Marker to make a notation indicating the end of the
transaction.
Generate an Event Log File 35
Record Events and Annotate the Log
Perform the transaction in different ways. Be sure to perform the
transaction using all methods that users are likely to use. (For example,
add a record using menu commands, and add a record by importing data
from a file.) This will help you to identify important events relating to the
transaction, regardless of the method used. It may also help you decide
whether to monitor each method of performing the transaction
individually, or to monitor all methods of performing the transaction
together within one transaction rule. Be sure to annotate the fact that it is
the same transaction performed in a different way.
Create separate directories and event logs for different applications. If you
will be developing rules for several applications, create a separate working
directory for each one (for example, directories named OutlookEvents and
SAPevents), use the recording agent to create a separate event log file for
each application, and store the event logs in the appropriate directories.
Also, you can rename the event log file using the file name format
events.version.btl, where version is a meaningful indicator of a particular
version of the event log. This allows you to store multiple btl files in the
same directory.
Create one event log file for each application version and operating system
version. This will allow you to develop transaction rules that can monitor
multiple application versions.
To generate an event log file for use with BT Studio
1.
Set up the recording agent.
2.
Record events in the event log file.
3.
Stop the recording of events.
4.
Transfer the event log file to the BT Studio system.
Record Events and Annotate the Log
After reading Helpful Hints for Recording Events, follow this procedure to
record application activity in the event log file.
To record events
1.
If the target application (to monitor) is already running on the client
system, close it. This ensures that the recording agent is able to record all
aspects of application activity in the event log file, including the
application’s startup activities.
2.
If any other applications are currently running on the client system, close
them. This ensures that the event log file contains information only about
the target application. Extraneous data about other applications can make
it difficult to find the needed information in the event log.
3.
Start BT Marker, using either of the following methods:
36 BTStudio Administration Guide
Record Events and Annotate the Log
Double-click btmarker.exe in the BTStudio directory on the BT Studio
system or in the directory to which you copied it on the client system.
If the application to monitor resides on the BT Studio system, start BT
Studio and select Tools > Run BT Marker from the menu bar.
The BT Marker dialog box appears.
4.
If BT Marker is not installed on the client system, use the Switch Agent
function to connect to the recording agent:
5.
In the BT Marker dialog box, click Switch Agent. BT Marker displays the
Switch Agent dialog box.
6.
Specify the name of the client system.
7.
Click Connect.
8.
A field in the middle of the BT Marker dialog box indicates the agent to
which you are connected. If you receive the error "Unable to send
message to the remote agent," verify that the remote agent is running.
(Use Control Panel, Services to make sure that the Application Response
Agent Proxy is started on that system.)
9.
On the client system, start the application to monitor.
10. Now BT Marker and the target application are running simultaneously. You
can move between them to make annotations and perform transactions.
11. Perform the desired transactions, using BT Marker to annotate significant
steps within each transaction.
12. For example, before selecting File, New to create a new document in the
application, in the Annotation field of BT Marker, you might enter text such
as the following: Create document: File, New.
13. Then click Annotate, and use the application to perform the action.
14. In the event log, this text appears just before the event information about
that part of the transaction. When you later look at the event log in BT
Studio, the annotations appear in a column of the events pane.
15. Before saving the new document, you might use BT Marker again to add
this note:
Create document: File > Save.
16. Pause for about 30 seconds after performing each step of the transaction
to allow the application to complete processing.
17. When you have finished performing the desired transactions, exit the
application and BT Marker.
Generate an Event Log File 37
Transfer the Event Log File
Transfer the Event Log File
After generating an event log file and stopping the recording of events, you
must transfer the event log file from its current location to a directory on the
BT Studio system (the system where BT Studio resides).
Hint: If you will be developing rules for several applications or different
versions of one application, create a separate working directory for each one
(for example, directories named OutlookEvents and SAPevents, or EmpMgtV1
and EmpMgtV2). Use the recording agent to create a separate event log file for
each application or version, and store the event logs in the appropriate
directories.
You can transfer the event log file to BT Studio in two ways:
Copy the event log file. Use this method if you have access to the client
system where you generated the event log using the BT recording agent or
the AR agent.
Export the event log file. Use this method if you generated the event log
using the AR agent and you do not have access to the client system where
the event log file is located, or other administrative issues prevent you
from copying the event log file.
To copy the event log
1.
On the BT Studio system, create a working directory where you will store
the event log file and other related files.
2.
Use Windows Explorer to navigate to the location of the event log file
(events.btl). It resides in the same directory as the recording agent.
3.
Copy the event log file to the target directory on the BT Studio system.
You may want to rename the event log to reflect the application whose
activity it records (for example, eventsOutlook.btl). If you create separate
event logs for different applications or different versions of one application,
this prevents one log file from overwriting another, and reminds you of the
contents of each log file.
To export the event log
1.
On the BT Studio system, create a working directory where you will store
the event log file and other related files.
2.
Access the eHealth Agent Properties page, as follows:
a.
Log in to the eHealth Web interface using the admin user account.
b.
On the Systems & Apps page, click Application Response in the left
frame.
c.
Click Agents.
d.
In the agent list, click the name of the agent that recorded events.
38 BTStudio Administration Guide
Open an Event Log
3.
e.
On the Agent Properties page, click Configure Agent.
f.
Click Export Agent Files.
g.
On the Export Agent Files dialog box, do the following:
h.
Specify a target directory.
i.
Select the Export check box for Recording File.
j.
Click OK.
Copy the event log file to the target directory on the BT Studio system.
You may want to rename the event log to reflect the application whose
activity it records (for example, eventsOutlook.btl). If you create separate
event logs for different applications or different versions of one application,
this prevents one log file from overwriting another, and reminds you of the
contents of each log file.
Open an Event Log
The default event log file is named events.btl. After recording events, you
transferred this or another event log to a directory on the BT Studio system.
To use the information recorded in the event log file to develop rule sets, you
must open the event log in BT Studio.
To open an event log
1.
Start BT Studio.
2.
Select File, Open or click Open Event Recording.
3.
In the Open dialog box, use the Look In field to navigate to the directory
containing the desired event log file.
4.
Select the file name or type it in the File name field.
5.
Click Open.
6.
Events recorded in the log file appear in the events pane of the BT Studio
window. Use the divider bar between the events pane and the rules pane
to expand the events pane.
7.
Take a few moments to examine the information displayed in the events
pane. Each event is described on one line. For each event, BT Studio
shows a line number, the event type (such as Windows, Process, or
Connection), the event action (such as ButtonPress or MouseClick), and
more information about that event. Annotations created using BT Marker
appear on separate lines in the Engine State column. You will use this
information when developing rules.
Hint: When you first open an event log, test it against the default application
rules to make sure that BT Studio can recognize default transactions and that
you have the correct application rules enabled and displayed.
Generate an Event Log File 39
Open an Event Log
40 BTStudio Administration Guide
Chapter 4: Set Up the Recording Agent
Before using BT Studio to define rule sets, you must record the application
activity occurring on a client system (the computer where the application client
software resides). You record this activity using a recording agent.
As soon as you set up the recording agent on the client system, it immediately
begins to record all application activity in the event log file. To ensure that the
event log contains useful information, close all applications now, before setting
up the recording agent.
The recording agent can be either of the following:
The AR agent with recording enabled. If you already have installed
Application Response (AR) agents, enable recording for an AR agent that
resides on a client system where you can perform the transactions to
monitor. AR agents require software licenses, and you can use the eHealth
Web interface to manage them.
The BT Recording agent. If AR agents have not yet been installed, you can
install the BT Recording agent to record transactions on a client system.
BT Recording agents do not require software licenses, and you cannot use
the eHealth Web interface to manage them.
You can install either the BT Recording agent or the AR agent on a system;
you cannot install both agents on the same system.
Note: To reduce the size of the event log file and to reduce any undesired
information in BT Studio, you should enable recording for only short periods
while the application is used to perform the transactions to monitor. Stop
recording as soon as you have collected the desired data.
This section contains the following topics:
Enable Recording for the AR Agent (see page 41)
Requirements for the BT Recording Agent (see page 42)
Install the BT Recording Agent (see page 43)
Record Terminal Server Applications (see page 44)
Stop Event Recording (see page 46)
Remove the BT Recording Agent (see page 49)
Enable Recording for the AR Agent
If you have already installed the Application Response (AR) agent on a client
system, enable recording for the AR agent as follows. Once enabled, the agent
continues to record events until you disable recording.
Set Up the Recording Agent 41
Requirements for the BT Recording Agent
To enable recording for the AR agent
1.
Access the Agent Properties page:
a.
Log in to the eHealth Web interface using the admin user account.
b.
On the Systems & Apps page, click Application Response in the left
frame.
c.
Click Agents.
d.
In the agent list, click the agent name.
2.
If you will be recording events for a terminal server application (such as
one managed using Citrix), define EventLogSetting to filter the application
activity that is recorded.
3.
On the Agent Properties page, click Start Event Recording.
4.
The AR agent immediately begins to collect information about all
application activity performed on the client system and stores it in the
event log file. By default, this file is named events.btl and it is located in
the same directory as the AR agent.
Note: To reduce the size of the event log file and to avoid collecting undesired
information, enable recording for only short periods while the application is
used to perform the transactions to monitor. Stop recording as soon as you
have collected the desired data.
Requirements for the BT Recording Agent
Before installing the BT Recording agent, make sure that the target system
meets the following requirements. The BT Recording agent does not require a
software license.
Note: Do not run the BT Recording agent on the eHealth system.
Component
Requirements
CPU
Pentium II 400 MHz or higher (recommended)
on an Intel-based, PC-compatible system
42 BTStudio Administration Guide
Install the BT Recording Agent
Component
Requirements
Operating system
Any of the following:
Microsoft Windows 95, OEM1, OEM 2
Microsoft Windows 98
Microsoft Windows NT 4.0 Workstation or
Windows NT 4.0 Server with Service Pack 5 or
Service Pack 6
Microsoft Windows 2000 Professional
Workstation or Windows 2000 Advanced Server
Workstation with Service Pack 1 (English only)
Microsoft Windows 2000 Advanced Server for
Servers or Windows 2000 DataCenter Server
with Service Pack 1 (English only)
Microsoft Windows 2003
Microsoft Windows XP Professional
Disk Space
At least 4 MB for the BT Recording agent
An additional 6 MB for the event log file (based
on its default size)
Memory
On systems sufficiently sized to run distributed
applications (at least 16 MB), the BT Recording
agent will have minimal impact.
Permissions
Local administrator privileges are required to
install the BT Recording agent on Windows NT,
2000, 2003, and XP systems.
Install the BT Recording Agent
You can install the BT Recording agent on a Windows system where you (or an
application user) will use the application to perform transactions. The BT
Recording agent is a stand-alone version of the AR agent that you can use to
collect event recordings on systems where you have not installed the AR
agent. The BT Recording agent does not require a software license. Before
installing the BT Recording agent, be sure that the target system meets the
system requirements.
Note: Do not run the BT Recording agent on the eHealth system.
Set Up the Recording Agent 43
Record Terminal Server Applications
If you have already installed the AR agent, you do not need to install the BT
Recording agent. Instead, enable recording for the AR agent.
To install the BT Recording agent
1.
On the system where you installed BT Studio, navigate to the root BT
Studio directory (such as C:\ehealth\BTStudio) and locate the
RecAgent.exe file.
2.
Copy RecAgent.exe to the target system.
3.
If you are installing the BT Recording agent on a Windows NT, 2000, 2003,
or XP system, log on to the target system using the administrator account
or a user account with local administrative privileges.
4.
If you will be recording events for a terminal server application (such as
one managed using Citrix), define EventLogSetting to limit the application
activity that is recorded.
5.
Double-click RecAgent.exe to start the installation program for the BT
Recording agent.
6.
Follow the program instructions to install the BT Recording agent. You may
need to restart the system after installing the BT Recording agent; the
installation program informs you if this is required.
7.
When the installation is complete, the BT Recording agent immediately
begins to record application activity in the event log file. By default, this
file is named events.btl, and it is located in the same directory as the BT
Recording agent. The agent continues to record application activity until
you stop it.
Note: To reduce the size of the event log file and to avoid collecting undesired
information, enable recording for only short periods while the application is
used to perform the transactions to monitor. Stop recording as soon as you
have collected the desired data.
Record Terminal Server Applications
You can use BT Studio to develop rule sets for terminal server applications,
such as applications that are managed using Citrix® Metaframe™. In general,
the process is the same as that described for client/server applications.
For terminal server applications, however, the recording agent must reside on
the terminal server (the Citrix server). Because that system may service many
users, the event log will (by default) contain information for all users or
sessions. To narrow the scope of the event log to events generated by one or
a few users or sessions, you must specify a filter for the recording agent
before recording events. You specify a filter by changing the value of
EventLogSetting. The method for defining EventLogSetting depends on which
44 BTStudio Administration Guide
Record Terminal Server Applications
type of recording agent you are using: the AR agent with recording enabled, or
the BT Recording agent.
Define EventLogSetting for the BT Recording Agent
Use the following procedure when you want the BT Recording agent to record
activity for terminal server applications that originate only from specified users
or systems, or to otherwise limit the data recorded in the event log.
Caution: Be careful when using regedit to change registry settings. If you are
not familiar with regedit, contact Technical Support for assistance.
To define EventLogSetting for the BT Recording agent
1.
On the system where the BT Recording agent resides, start regedit and
navigate to HKEY_LOCAL_MACHINE\SOFTWARE\Firstsense\Firstsense.
2.
Edit the value of EventLogSetting. To monitor a terminal server
application, replace the existing value with session: followed by a commaseparated list of user names or system names, indicating the users or
systems for which you want to record application activity. For example, to
indicate that you want to monitor application activity for users green,
brown, and yellow, specify the following value:
session:green,brown,yellow
3.
Click OK.
If the agent is currently running, it may take one or two minutes for this
setting to take effect.
Define EventLogSetting for the AR Agent
Use the following procedure to specify a filter for the AR agent before starting
event recording for a terminal server application, or to otherwise limit the data
recorded in the event log.
To define EventLogSetting for the AR agent
1.
Access the Agent Properties page of the eHealth Web interface.
2.
Click Configure Agent.
3.
In the Standard Settings list, locate EventLogSetting.
4.
Edit the value of EventLogSetting.
To monitor a terminal server application, replace the existing value with
session: followed by a comma-separated list of user names or system
names, indicating the users or systems for which you want to record
application activity.
Set Up the Recording Agent 45
Stop Event Recording
For example, to indicate that you want to monitor application activity for
users green, brown, and yellow, specify the following value:
session:green,brown,yellow
5.
Click OK.
When you start event recording, the AR agent records activity generated
only by the specified users or systems.
EventLogSetting Values
You can control the amount of information stored in the event log file by
specifying a filter for the recording agent. To specify a filter, define
EventLogSetting using a value listed in the following table. You can define
EventLogSetting when enabling recording for the AR agent or when specifying
a filter for the BT Recording agent.
app:app1,app2,... - Specifies the applications (app1,app2,...) for which
you want to record events. Use the application names as defined to
Application Response and BT Studio. The recording agent will not record
events for other applications. For example: app:outlook,notes
exe:exe1,exe2,... - Specifies the executable programs (exe1,exe2,...) for
which you want to record events. Use the executable names as listed in
the Windows Task Manager Processes tab, without the .exe file extension.
The recording agent will not record events for other executables. For
example: exe:notes,nlnotes
exhaustive - Indicates that you want to record all events performed on the
client system, regardless of which applications, executable programs, or
users are involved. This is the default value. For example; exhaustive.
session:user1,user2,...or session:sys1,sys2,... - Indicates the users
(user1,user2,...) or systems (sys1,sys2,...) for which you want to record
application activity. Use this value to record activity for terminal server
applications (such as those managed using Citrix Metaframe). For
example: session:green,brown
Stop Event Recording
When you finish using the recording agent to record application activity,
disable recording. The procedure differs depending on whether you are using
the AR agent with recording enabled, or the BT Recording agent.
Stop Recording for the AR Agent
Stop the BT Recording Agent
46 BTStudio Administration Guide
Stop Event Recording
Stop Recording for the AR Agent
Use this procedure to stop the recording of events by the AR agent.
Note: After performing the final task of your last transaction, wait about one
minute before you stop recording for the AR agent. This ensures that the AR
agent finishes recording all events related to the transaction.
To stop recording
1.
Log in to the eHealth Web interface using the admin user account.
2.
On the Systems & Apps page, click Application Response in the left frame.
3.
Click Agents.
4.
In the agent list, click the name of the agent that is currently recording.
5.
On the Agent Properties page, click Stop Event Recording.
6.
Click Apply.
The AR agent stops recording events almost immediately.
Stop the BT Recording Agent
To stop the BT Recording agent, you can either uninstall it using Add/Remove
Programs, or stop the Application Response Agent Proxy service. The
recommended method of stopping the service differs based on the operating
system. Click a link below for the instructions to stop the BT Recording agent
for your operating system.
Note: After performing the final task of your last transaction, wait about one
minute before you stop the BT Recording agent. This ensures that the agent
finishes recording all events related to the transaction.
Stop the Agent on Windows XP
To stop the BT Recording agent on a Windows XP system, you can use
Add/Remove Programs to uninstall it, or use the following procedure. When
you stop the agent, it no longer records application activity on the target
system.
To stop the BT Recording agent on Windows XP
1.
From the desktop of the client system, select Start, Control Panel.
2.
Click Performance and Maintenance.
3.
Double-click Administrative Tools.
4.
Double-click Services.
Set Up the Recording Agent 47
Stop Event Recording
5.
Double-click Application Response Agent Proxy. The Application Response
Agent Proxy Properties dialog appears, displaying the General page.
6.
For Service status, click Stop.
7.
For Startup type, select Disabled.
8.
Click OK.
Stop the Agent on Windows 2003
To stop the BT Recording agent on a Windows 2003 system, you can use
Add/Remove Programs to uninstall it, or use the following procedure. When
you stop the agent, it no longer records application activity on the target
system.
To stop the BT Recording agent on Windows 2003
1.
From the desktop of the client system, select Start, Control Panel,
Administrative Tools, Services.
2.
Double-click Application Response Agent Proxy. The Application Response
Agent Proxy Properties dialog appears, displaying the General page.
3.
For Service status, click Stop.
4.
For Startup type, select Disabled.
5.
Click OK.
Stop the Agent on Windows 2000
To stop the BT Recording agent on a Windows 2000 system, you can use
Add/Remove Programs to uninstall it, or use the following procedure. When
you stop the agent, it no longer records application activity on the target
system.
To stop the BT Recording agent on Windows 2000
1.
From the desktop of the client system, select Start, Settings, Control
Panel.
2.
Double-click Administrative Tools.
3.
Double-click Services.
4.
Double-click Application Response Agent Proxy. The Application Response
Agent Proxy Properties dialog box appears, displaying the General page.
5.
For Service status, click Stop.
6.
For Startup type, select Disabled.
7.
Click OK.
48 BTStudio Administration Guide
Remove the BT Recording Agent
Stop the Agent on Windows NT
To stop the BT Recording agent on a Windows NT system, you can use
Add/Remove Programs to uninstall it, or use the following procedure. When
you stop the agent, it no longer records application activity on the target
system.
To stop the BT Recording agent on Windows NT
1.
From the desktop of the client system, select Start, Settings, Control
Panel.
2.
Double-click Services.
3.
Click Application Response Agent Proxy.
4.
Click Stop.
5.
Click Startup.
6.
For Startup Type, select Disabled.
7.
Click OK.
Stop the Agent on Windows 95/98/Me
Use Add/Remove Programs to stop the BT Recording agent on Windows 95 or
98 systems. When you remove the agent, it no longer records application
activity on the client system.
To stop the BT Recording agent on Windows 95/98
1.
From the desktop of the client system, select Start, Settings, Control
Panel.
2.
Double-click Add/Remove Programs.
3.
Select Application Response Agent.
4.
Click Remove.
Remove the BT Recording Agent
If you installed the BT Recording agent on a system and now want to install
the AR agent, you must first remove the BT Recording agent. This ensures
that existing registry settings are also removed, so they do not interfere with
the proper functioning of the AR agent.
To remove the BT Recording agent
1.
Download the AR Agent Publisher, as follows:
Set Up the Recording Agent 49
Remove the BT Recording Agent
2.
3.
a.
Log in to the eHealth Web interface.
b.
On the Systems & Apps tab, click Application Response.
c.
Click Download.
d.
Download the Application Response (AR) Agent Publisher.
Generate an uninstall program for the BT Recording agent, as follows:
a.
Double-click ARAgentPublisher.exe to start it.
b.
In the Welcome window, select Generate an Uninstall program for
existing AR Agents and click Next.
c.
In the Warning dialog box, click OK.
d.
In the Software License Agreement window, read the agreement and
click Yes.
e.
In the Choose Destination Location and Program Name window,
specify a file name for the uninstall program (the default is
ARUninstall.exe), specify a file location, and click Next.
f.
In the Edit Agent Host Names window, click Next.
g.
In the Start Generating Program window, click Finish.
Run the uninstall program on the target system by double-clicking
ARUninstall.exe.
The uninstall program removes the BT Recording agent. Now you can
install the AR agent on the system as instructed in the Application
Response documentation.
50 BTStudio Administration Guide
Chapter 5: Develop Rule Sets
BT Studio provides a work environment to help you develop a set of rules that
Application Response uses to recognize the transactions to monitor. Some of
the rule definition steps are iterative: you must perform some steps repeatedly
until finished with that task, before proceeding to the next step.
To define a rule set for an application, follow these steps:
1.
Start BT Studio.
2.
Open the event log file.
3.
Configure applications and servers.
4.
Filter events (if desired).
5.
Define rules.
6.
Check rule syntax.
7.
Test defined rules.
8.
Modify rules as required to recognize desired transactions.
9.
Save changes to rules.
10. When you finish developing one or more rule sets, you must update
Application Response with the new rules.
This section contains the following topics:
Start BT Studio (see page 52)
Download a Rule Set (see page 52)
Enable an Application (see page 53)
Open an Event Log (see page 53)
Filter Events (see page 54)
Customize the Events and Results Pane (see page 56)
Search the Event Log File (see page 58)
Define Rules for an Application (see page 59)
Copy Event Values into Rules (see page 60)
Insert Comments in Rules (see page 61)
Create Event Specifications Automatically (see page 61)
Use Templates to Define Rules (see page 62)
Print a Rule Set (see page 62)
Check Syntax (see page 63)
Test the Defined Rules (see page 63)
Use Breakpoints When Testing Rules (see page 64)
Recognize Events as Parts of Transactions (see page 65)
Transactions with Constraints (see page 66)
Save Changes to Rule Sets (see page 67)
Develop Rule Sets 51
Start BT Studio
Start BT Studio
To start BT Studio, select Start, Programs, BT Studio or double-click the BT
Studio desktop icon.
The main BT Studio window appears. The window has three panes:
The top pane is the events pane, where you view events recorded in an
event log file.
The middle pane is the rules pane, where you view and edit application
rule sets.
The bottom pane is the results pane, where you see the results of testing
rule sets.
Note: If you receive the following error, you need a license for BT Studio;
read the licensing instructions.
Fatal error. The file 'BTStudio.lic' could not be read.
From the BT Studio window, you can do the following:
Open an event log file.
Filter events.
Customize the events pane.
Configure applications and servers.
Define rules for an application.
Check rule syntax.
Test defined rules.
Save changes to rules.
Download a Rule Set
As an alternative to downloading the entire configuration set from Application
Response, you can download a rule set for a single application from Application
Response to BT Studio. Then you can use BT Studio to develop the rules for
that application. Use this procedure when you already have the application
servers and definitions defined for BT Studio, and you only need to download
application rule sets.
To download a rule set
1.
Start BT Studio.
2.
From the menu bar, select Tools, Download Rules.
52 BTStudio Administration Guide
Enable an Application
3.
Complete the eHealth System Connection Parameters dialog and click
Connect.
BT Studio displays a list of applications defined in Application Response
(through the eHealth Web interface).
4.
Select the application whose rules you want to download, and click OK.
If the application already exists in BT Studio, BT Studio downloads the
rules for that application. The application rules from eHealth replace
the application rules in BT Studio.
If the application does not exist in BT Studio, BT Studio defines the
application in its configuration and then downloads the rules for the
application from eHealth.
Now you can begin to develop transaction rules for the application.
Enable an Application
To be able to modify the rule set for an application (or, more specifically, to be
able to test its rules), you must first enable the application in BT Studio. You
must do this for default applications and for defined (custom) applications that
are currently disabled. BT Studio indicates applications that are disabled with a
red X next to their names.
To enable an application
1.
In the BT Studio toolbar, select the application to enable from the pulldown list.
BT Studio displays the application's rule set in the rules pane.
2.
Click Enable/Disable Application.
BT Studio removes the red X from the application's name. Now you can
modify and test the rule set, if desired.
Open an Event Log
The default event log file is named events.btl. After recording events, you
transferred this or another event log to a directory on the BT Studio system.
To use the information recorded in the event log file to develop rule sets, you
must open the event log in BT Studio.
To open an event log
1.
Start BT Studio.
2.
Select File, Open or click Open Event Recording.
Develop Rule Sets 53
Filter Events
3.
In the Open dialog box, use the Look In field to navigate to the directory
containing the desired event log file.
4.
Select the file name or type it in the File name field.
5.
Click Open.
6.
Events recorded in the log file appear in the events pane of the BT Studio
window. Use the divider bar between the events pane and the rules pane
to expand the events pane.
7.
Take a few moments to examine the information displayed in the events
pane. Each event is described on one line. For each event, BT Studio
shows a line number, the event type (such as Windows, Process, or
Connection), the event action (such as ButtonPress or MouseClick), and
more information about that event. Annotations created using BT Marker
appear on separate lines in the Engine State column. You will use this
information when developing rules.
Hint: When you first open an event log, test it against the default application
rules to make sure that BT Studio can recognize default transactions and that
you have the correct application rules enabled and displayed.
Filter Events
By default, the recording agent stores information about all activity performed
on the client system. As a result, the event log file may contain large amounts
of information, much of which may not interest you. BT Studio allows you to
filter the contents of the events pane to display, for example, only the events
for a specific application, or all events except those of a certain action type.
Filtering is powerful. It helps to reduce unwanted data from the event log file
or to focus your attention on the important or significant events. This can help
to streamline the process of defining rule sets.
Before filtering events, think carefully about the transactions you want to
define. Which application is involved? You can filter out all others. Which event
types or actions are important for rules development? Filter out those that do
not interest you. You should filter out any executables that are not listed in the
resource definition for the application. Hiding those executables will make it
easier to identify significant events for transaction rules.
You can filter the events displayed in the events pane based on the values of
any of the columns listed at the top. Filtering does not actually delete any
information from the event log file. Rather, it hides information from the
events pane, removing unwanted data from view while you define rules.
Note: The event filter only affects which events are displayed in the events
pane. It does not affect the processing of events in the event log file. When
you test rules, they run against all events in the log file, including events that
are not displayed in the events pane due to filtering.
54 BTStudio Administration Guide
Filter Events
To specify the events to display in the events pane, you can do the following:
Filter events.
Filter out a value.
Remove a column filter.
Remove a single filter for a column.
Remove all filters.
Note: Currently, BT Studio does not provide a way to save or preserve your
filter criteria. If you exit BT Studio and restart it, you must reset your filter
criteria.
To filter events
1.
Open an event log file in BT Studio.
2.
In the events pane, right-click a column title.
3.
From the shortcut menu, select Edit Column Filter.
4.
BT Studio displays the Edit Column Filter dialog box, which lists all values
for the column that are currently contained in the event log.
5.
Deselect the check boxes of any values to filter out of the events pane.
Use Clear All and Select All as appropriate to set the check boxes as
needed.
6.
Click OK.
BT Studio refreshes the events pane, displaying only those events that
match your filter criteria. If desired, you can repeat this procedure for
other columns, filtering events based on specific values. As an alternative,
you can filter out events based on a specific value.
To filter out a value
1.
To filter out events based on a specific value, go to an event where the
undesired value appears in the events pane, right-click the cell containing
the value.
2.
From the shortcut menu, select Filter Out.
3.
Optionally, do one of the following:
Eliminate a filter to restore those events to the events pane. This is
especially helpful when you want to focus on developing a rule for a
specific transaction now, and later you want to develop a rule for
another transaction.
Turn filters on and off to display events that are relevant to the
transaction definition on which you are currently working.
Develop Rule Sets 55
Customize the Events and Results Pane
To remove a column filter
1.
In the events pane, right-click the column where the filter is applied.
2.
Select Remove Column Filter from the shortcut menu.
BT Studio removes all filters defined for that column. For example, if you
had filtered out Start and Stop events from the Action column and you
select Remove Column Filter, BT Studio restores both Start events and
Stop events to the events pane.
To remove a single filter for that column
1.
In the events pane, right-click the column where the filter is applied.
2.
Select Edit Column Filter from the shortcut menu.
3.
Select the check box for the value to display.
4.
Click OK.
You can also use a single command to eliminate all defined filters for all
columns. When you do this, BT Studio displays all events recorded in the
event log file.
To remove all filters
1.
Right-click in any column of the events pane.
2.
From the shortcut menu, select Remove All Column Filters.
Customize the Events and Results Pane
You can modify the events pane and the results pane in the following ways:
Hide or display columns.
Change the order of columns.
Size columns to fit the screen.
For example, you may decide that, while developing rules, you do not need to
see the Client and User columns in the events pane., or you may want the
Window Title column to directly follow the Server column. You can customize
the columns of the events and results panes before or after opening an event
log file. You customize the columns in each pane separately. When you exit BT
Studio, the software remembers your column customizations and restores
them when you restart BT Studio.
To hide a column
1.
In the events or results pane, right-click the column to hide.
2.
Select Hide Column from the shortcut menu.
56 BTStudio Administration Guide
Customize the Events and Results Pane
To change columns
1.
Right-click anywhere in the events pane or the results pane and select
Customize Columns from the shortcut menu (o select Tools, Customize
Columns).
2.
The Visible column of the Customize Columns dialog box indicates which
columns are displayed in the appropriate pane. The dialog box lists the
columns in the order in which they appear.
3.
Change the columns as desired.
To hide a column, deselect it.
To display a column, select it.
To change the location of a column, select the column name and click
Move Up or Move Down until it appears in the appropriate place in the
list.
4.
Click OK.
5.
BT Studio updates the pane as specified.
To size columns to fit
1.
In the events or results pane, right-click to display the shortcut menu.
2.
Select Size to Fit All Columns.
BT Studio adjusts the sizes of all columns so that you can view their full values
or their column headings, whichever is longer.
Columns in the Events Pane
You can use the Customize Columns function to hide or show the following
information in the events pane:
Action
Bytes Received
Bytes Sent
Client
Date
Duration
Event Type
Executable
Object ID
Round Trips
Server
Develop Rule Sets 57
Search the Event Log File
Text
Time
URL
User
Window Class
Window Title
Columns in the Results Pane
You can use the Customize Columns function to hide or show the following
information in the Transaction tab of the results pane:
Application
Bytes Received
Bytes Sent
Client (time in seconds)
Constraint
Elapsed (time in seconds)
Failure
Module
Network (time in seconds)
Reported (time in seconds)
Round Trips
Server (time in seconds)
Think (time in seconds)
Transaction
Time (time in seconds, for the first matching event in the transaction)
Search the Event Log File
You can use Find and other functions to search the event log file for a specific
value.
To search for a value
1.
Open an event log file.
2.
Right-click in the column of the events pane that you want to search.
3.
From the shortcut menu, select Find in Column.
58 BTStudio Administration Guide
Define Rules for an Application
4.
5.
Specify the value to search for in the chosen column. (By default, BT
Studio displays the current value of the selected column and row.) You can
also specify the following:
Match whole word only
Match case
Direction: Up or Down
Column (to change the column to search)
Click Find Next to locate the next occurrence of that value in the event log
file.
To search for event types
1.
Scroll or use Find in Column to locate an event type.
2.
To locate the next occurrence of that event type:
3.
a.
Right-click the row and column containing the event type.
b.
From the shortcut menu select Next of This Type (or press F8).
To locate the previous occurrence of an event type:
a.
Right-click the row and column containing the event type.
b.
From the shortcut menu select Previous of This Type (or press
Shift+F8).
To search for event actions
1.
Scroll or use Find in Column to locate an event action.
2.
To locate the next occurrence of that event action:
3.
a.
Right-click the row and column containing the event action.
b.
From the shortcut menu select Next of This Action (or press Ctrl+F8).
To locate the previous occurrence of an event action:
a.
Right-click the row and column containing the event action.
b.
From the shortcut menu select Previous of This Action (or press
Ctrl+Shift+F8).
Define Rules for an Application
After you open an event log file and filter it to show interesting events, you are
ready to begin defining rules. You define rules by entering text in the rules
pane of the BT Studio window.
Develop Rule Sets 59
Copy Event Values into Rules
To display and enable a rule set
1.
At the top of the BT Studio window, click the arrow to display the list of
defined applications. This list displays only defined applications. To define
rules for a new application, you must first define the application, and then
repeat this procedure.
2.
Select the desired application from the list.
3.
Check the title of the BT Studio window. It should reflect the name of the
application rule set that you want to modify and test. For example, if you
are monitoring the Outlook rules, the window title includes "Outlook.rul".
4.
Click Enable/Disable Application to enable the application for rule
development and testing.
BT Studio displays that application’s rule set in the rules pane, where you
can do the following:
5.
Use a template to write a rule.
6.
Create event specifications automatically.
7.
Copy values from the event log into the rules pane for transaction
definitions.
8.
Define resources by specifying resource types and parameters.
9.
Define transactions by specifying event types and event actions.
10. Insert comments.
11. Print the rule set.
Hint: After you open an event log and display a rule set, test the rules against
the event log to make sure that BT Studio can recognize default transactions
and that you have the correct application rules enabled and displayed.
Copy Event Values into Rules
When developing a rule set, you may want to use values from the event log as
parameters for rules. BT Studio allows you to copy and paste event values into
the rules pane. This feature speeds the rule definition process and reduces
typing errors. The ability to copy and paste event values is especially useful for
the Executable, Window Title, Window Class, Object ID, and Text columns.
These values can otherwise be difficult to determine. BT Studio, however,
clearly identifies them for each event and allows you to copy and paste the
values into the rule definition to avoid retyping.
To copy an event value
In the events pane, locate an event that includes the value to copy.
1.
Right-click the value.
60 BTStudio Administration Guide
Insert Comments in Rules
2.
Select Copy from the shortcut menu.
3.
In the rules pane, right-click at the point within a rule where you want to
insert the value.
4.
From the shortcut menu, select Paste.
5.
The events pane and the rules pane support the use of basic editing
commands, such as Ctrl+C to copy, Ctrl+V to paste, Ctrl+Z to undo, and
Ctrl+X to cut. You can also use the Cut, Copy, and Paste buttons of the BT
Studio toolbar.
Insert Comments in Rules
You can use the pound sign (#) to include comments in rule sets. On each
line, BT Studio (and Application Response) ignores any text that follows the
pound sign. When editing rules in the rules pane, you can use the Comment
Out command to indicate that one or more selected lines are comments. This
command inserts a pound sign at the start of each fully selected line, making
the entire line a comment. The Comment Out command can be useful when
you want to temporarily remove an event specification or transaction definition
from a rule set; use the corresponding Comment In command when you are
ready to restore that part of the rule set.
To insert comments in rules
1.
In the rules pane, select the line (or lines) of text that you want to be a
comment.
2.
Right-click and select Comment Out from the shortcut menu.
3.
If Comment Out does not appear in the menu, you have not selected the
entire line. Move the cursor to the far left side of the rules pane until the
cursor changes into an arrow, then click to select the entire line and try
again.
4.
BT Studio inserts the pound sign at the beginning of the selected lines. If
you later decide that you no longer want these lines to be commented out,
you can either delete the pound sign from the beginning of the lines, or
select the lines again and select Comment In from the shortcut menu.
Create Event Specifications Automatically
To simplify the process of creating event specifications, you can select an
event in the events pane and use the Create Event command. BT Studio
automatically inserts an event specification in the rules pane, based on the
characteristics of the selected event. Use this feature when you identify a
significant event that you want to define as part of a transaction.
Develop Rule Sets 61
Use Templates to Define Rules
To create an event specification based on an event
1.
In the rules pane, place the cursor where you want the new event
specification to appear in the rule set.
2.
In the events pane, select the event that you want to use as a basis for
the new event specification.
3.
Right-click the event and select Create Event from the shortcut menu.
In the rules pane, BT Studio adds an event specification based on
information from the selected event, similar to the following:
Event "<EventName>" Process Start { ExecutableName="winlogon" }
4.
In the rules pane, edit the event specification to replace <EventName>
with an event name that you assign. For example:
Event "WindowsLogin" Process Start { ExecutableName="winlogon" }
5.
Continue defining other event specifications and transaction definitions, as
appropriate.
6.
Before exiting BT Studio, be sure to test the rules and save your changes.
Use Templates to Define Rules
You can use templates to help define the following parts of a rule set:
Transaction definition
Event specification
Alternate rule set
To use a template to define rules
1.
In the rules pane of BT Studio, place the cursor at the point where you
want to add a rule.
2.
Right-click and from the shortcut menu select Insert Template, then select
the appropriate option:
Transaction to insert a transaction definition template.
Event to insert an event specification template.
Alternate Ruleset to insert a template for an alternate rule set.
BT Studio inserts text into the rules pane for the selected template.
Keywords appear in blue text; text that you must replace appears
enclosed within square brackets [ ].
3.
Replace the text in square brackets with the indicated information.
Print a Rule Set
62 BTStudio Administration Guide
Check Syntax
While working on a rule set, you may want to print a hardcopy to analyze the
rules or find logical errors.
To print a rule set
1.
Display the rule set in the rules pane.
2.
Select File, Print or click Print.
3.
In the Print dialog box that appears, enter the appropriate values and click
OK.
Check Syntax
After you have defined a rule set, check its syntax for accuracy.
To check the syntax of a rule set
1.
In the results pane, click the Syntax tab.
2.
Select Tools, Check Syntax or click Check Syntax.
BT Studio displays the results of the syntax check on the Syntax tab. If it
finds a syntax error, it highlights the line where the error occurs in the rule
set and may offer a suggestion for correcting the error.
3.
Correct the error and perform another syntax check. Continue correcting
errors and checking syntax until BT Studio finds no more errors.
After you have finished correcting all syntax errors, you are ready to test the
defined rules.
Test the Defined Rules
When you test defined rules, BT Studio runs the events recorded in the event
log file against the current rule set. Test the rules to ensure that they correctly
identify the transactions that you want to monitor.
Before testing a rule set, be sure that you do the following:
Check syntax and correct any syntax errors.
Ensure that the application is enabled.
Note: The event filter only affects which events are displayed in the events
pane. It does not affect the processing of events in the event log file. When
you test rules, they run against all events in the log file, including events that
are not displayed in the events pane due to filtering.
Develop Rule Sets 63
Use Breakpoints When Testing Rules
To test defined rules against events
1.
If you have not already done so, open the event log file and display the
rule set to test.
2.
In BT Studio, select Tools, Start or click Start. At any time, you can click
Pause to temporarily pause the testing (and click Start to restart it), or
click Stop to stop testing.
3.
BT Studio analyzes all events in the event log file and attempts to
recognize transactions as defined by the rule set. It displays the results on
the Transactions tab of the results pane.
4.
To locate the starting event of a transaction listed in the results pane,
double-click that transaction.
5.
In the events pane, BT Studio jumps to the starting event for that
transaction. Scroll down the events pane to find intermediate events and
the ending event. Use this feature to ensure that the rule set uses the
correct start and stop points to recognize the transaction.
6.
If you receive an error indicating that at least one event for this
transaction has been filtered out, do the following:
7.
a.
Click OK to dismiss the error.
b.
Right- click any column of the events pane.
c.
Select Remove All Column Filters from the shortcut menu.
d.
Double-click a transaction on the Transactions tab again.
(Optional) Right-click any transaction listed on the Transactions tab and
select Track from the shortcut menu.
Note: While the Track feature is enabled, whenever you click a transaction on
the Transactions tab, BT Studio automatically displays the starting event for
that transaction in the events pane and the related transaction definition in the
rules pane.
You can also select Tools, Restart to run events against defined rules from the
beginning of the event log file to the end or to the first encountered
breakpoint.
Use Breakpoints When Testing Rules
A breakpoint is a line of the event log file where you want BT Studio to start or
stop analyzing events against the defined rule set. The use of breakpoints
allows you to focus your attention on a certain subset of events. BT Studio
indicates a breakpoint with a red dot in the status column of an event in the
events pane.
64 BTStudio Administration Guide
Recognize Events as Parts of Transactions
While you are developing the rule set and testing it against events, you may
want to use breakpoints to do the following:
Test the rule set against part of the event log.
Check the state of transaction recognition at intermediate points in the
event sequence.
You may want to define several breakpoints in the events pane. You can then
test the rule set against events from the beginning of the event log to a break
point, or from one breakpoint to the next. BT Studio indicates the current
starting point (for testing rules against the event log) with a yellow arrow in
the status column.
To add or remove a breakpoint
1.
Select the desired event in the events pane.
2.
Select Tools, Add/Remove Breakpoint or press F9.
To test rules against a set of events
1.
If you have not already done so, open the event log file, add one or more
breakpoints, and display the rule set to test.
2.
Select Tools, Start or click Start.
3.
At any time, you can click Pause to temporarily pause the testing (and
click Start to restart it), or click Stop to stop testing.
4.
BT Studio runs the events against the defined rule set from the beginning
of the event log to the end of the log if no breakpoints are defined. If you
define breakpoints, it stops testing at the first breakpoint; click Start to
resume testing to the next breakpoint, or use the Step command. BT
Studio displays the results on the Transactions tab.
Recognize Events as Parts of Transactions
When debugging a set of rules, you may want to play the events against the
rules one step at a time to determine which events match the rules. BT Studio
allows you to do this by viewing the Recognized Events tab as you use the
Step command. On the Recognized Events tab, BT Studio displays information
about events that it recognizes based on defined rules. As you step through
events displayed in the events pane (by pressing F10), BT Studio displays a
blue dot in the status column of the events pane for each successive event
that it recognizes based on an event specification. In addition, these
recognized events appear listed on the Recognized Events tab, where BT
Studio displays the name of the transaction for which the event was
recognized.
When BT Studio recognizes the ending event of a transaction, that transaction
appears on the Transactions tab, and all related events are removed from the
Develop Rule Sets 65
Transactions with Constraints
Recognized Events tab. In this way, you can use the Transactions tab to see a
list of complete transactions that have been recognized, and the Recognized
Events tab to see events recognized for incomplete transactions. This
capability can be useful when debugging rules.
To see events as they are recognized
1.
If you have not already done so, open the event log file and display the
rule set to test.
2.
In the results pane, click the Recognized Events tab.
3.
In the events pane, add a breakpoint just before the events that you want
to test.
4.
Click Start to move the yellow arrow to that point.
5.
Press F10 (or select Tools, Step) repeatedly until you reach the desired
end point.
6.
As you step through events, whenever BT Studio recognizes an event
identified by a transaction definition in the current rule set, it lists the
event on the Recognized Events tab. It also indicates the engine state for
that event in the Engine State column of the events pane.
7.
If desired, double-click an event on the Recognized Events tab to jump to
the corresponding line in the events pane.
When BT Studio recognizes an ending event for a transaction, all related
events are removed from the Recognized Events tab, and the transaction
appears on the Transactions tab. If you defined alternate rule sets, some
events may remain on the Recognized Events tab until BT Studio
encounters ending events for a transaction defined by an alternate rule
set.
Transactions with Constraints
When you test rules against the events log file, in the results pane you may
see a transaction with an icon next to it. The icon indicates that the
transaction matches a rule, but the transaction data will not be included in
reports because the rule set defines a constraint that excludes the transaction.
BT Studio indicates which constraint applies to the transaction in the
Constraint column of the results pane.
For example, the results pane at the bottom of the window could indicate that
BT Studio recognizes Events 158 and 999. (That is, the events in the
transaction match the defined rules.) However, the constraint icons could
indicate that response data for these transactions will not appear in reports
due to a constraint. The Constraint column in the results pane indicates the
reason: these transactions exceed the ServerTime limit that is defined in the
rules. You can report on these timed-out transactions by running an eHealth
Trend report on the Transaction Timeouts variable.
66 BTStudio Administration Guide
Save Changes to Rule Sets
Save Changes to Rule Sets
After making changes to a rule set, save your changes.
To save changes to rules
1.
Click anywhere in the rules pane.
2.
Select Configuration, Save or click Save.
BT Studio saves changes to the rule set (for the selected application) in
the name.Rules.ard file.
3.
When you have finished updating application rules, update Application
Response with the new data.
Develop Rule Sets 67
Chapter 6: Configure Applications
and Servers
BT Studio provides a work environment to help you develop a
set of rules that Application Response (AR) uses to recognize
the transactions to monitor. To use BT Studio to develop rule
sets, you must define the applications and servers for the
monitored applications. The definition of these applications and
servers is called configuration. When the AR configuration is
properly defined, BT Studio can calculate client, network, and
server time for transactions recorded in an event log file, just
as they would be reported by Application Response.
Back Up AR Configuration Data
As a precaution, back up your Application Response (AR)
configuration data before using BT Studio to modify rule sets
and make other configuration changes. This will enable you to
return to your previous configuration if you encounter
problems with a new configuration. The AR configuration data
is stored in the %NH_HOME%\data\response directory on a
Windows eHealth system, and in the
$NH_HOME/data/response directory on a UNIX eHealth
system. Before making configuration changes, copy the
contents of the entire directory to another directory, such as
NH_HOME\data\response_backup.
Choose a Configuration Method
BT Studio offers several ways to define applications and
servers. Choose the method that is appropriate for your
situation:
If you have defined applications and servers for Application
Response and the BT Studio system has network access to
the eHealth Web server, download configuration
information. This is the most common configuration
method.
Configure Applications and Servers 69
Download AR Configuration into BT Studio
If you have not yet defined applications and servers for
Application Response, you can use the Connection
Manager to define them based on information in an event
log file.
If you have not yet defined applications and servers for
Application Response and you want to use the default
application rule sets as a starting point, you can use
default applications and servers.
If these methods do not suit your needs, BT Studio also
provides alternative configuration methods.
This section contains the following topics:
Download AR Configuration into BT Studio (see page 70)
Use the Connection Manager (see page 71)
Use Default Applications and Servers (see page 81)
Configuration Files (see page 82)
Configuration Menu (see page 83)
Alternative Configuration Methods (see page 83)
Download AR Configuration into BT Studio
Use the following procedure to download AR configuration
information from eHealth to BT Studio if both of the following
are true:
You have defined applications and servers for Application
Response using the eHealth Web interface.
The BT Studio system has network access to the eHealth
Web server. (If the BT Studio system does not have
network access to eHealth, import configuration
information.)
To download AR configuration into BT Studio
1.
Start BT Studio.
2.
From the menu bar, select Tools, Download Configuration.
BT Studio displays the eHealth System Connection
Parameters dialog box.
70 BTStudio Administration Guide
Use the Connection Manager
Hint: Use Download Configuration when you want to
download application and server definitions and application
rule sets. Use Download Rules when you already have the
application servers and definitions defined for BT Studio,
and you only need to download application rule sets.
3.
In the eHealth System Hostname field, enter the hostname
or IP address of the eHealth Web server.
4.
The AR Controller Port field shows the default port of
10182 used for communications between Application
Response and eHealth. Leave the default value as is, or
change it if Application Response uses another port.
Note: You cannot edit the eHealth Administrator field; it
contains admin, the name of the eHealth Web admin user
account.
5.
In the Password field, specify the password of the eHealth
Web admin user account.
6.
Click Connect.
BT Studio downloads the AR configuration files into
memory. The status bar at the bottom of the BT Studio
window indicates when BT Studio completes the download.
7.
From the BT Studio menu bar, select Configuration, Save
As.
BT Studio displays the Save As dialog box. By default, it
points to the BTStudio directory and shows a default file
name of New.Config.ard.
8.
Navigate to the desired location and specify a file name.
Use the format name.Config.ard. (The file name must use
the file type extension .Config.ard.)
9.
Click Save.
Use the Connection Manager
Use the BT Studio Connection Manager to define applications
and servers in the following cases:
Configure Applications and Servers 71
Use the Connection Manager
The default application definitions do not meet your needs;
you need to define an application for monitoring.
You want to add an application executable name to an
existing application definition.
You want a specific server name to appear in the response
path name on reports (instead of the default server name).
An application uses multiple servers and you want to track
the performance of each server individually.
The Connection Manager identifies the specific executable
names, hostnames, and ports used when application activity
occurs, based on information in the current event log file. It
also streamlines the process of creating applications and
servers, adding executable names to applications, and adding
hostnames and ports to servers.
Start the Connection Manager
Use the Connection Manager to simplify the process of defining
applications, servers, and resources used by applications.
To start the Connection Manager
1.
Start BT Studio.
2.
Open an event log file.
3.
Select Tools, Connection Manager or click Connection
Manager.
4.
BT Studio displays a list of the following:
All connections made by application executables to
hostnames and ports during event recording
All executable names for defined applications
All hostnames and ports for defined servers
Sample Connection Manager
72 BTStudio Administration Guide
Use the Connection Manager
The Connection Manager and Applications
Sometimes it is difficult to determine the name of the
executable program (or programs) used by an application. The
Connection Manager identifies application executable names
for you.
You can use the Connection Manager to do the following:
Add an executable program to the resource definition of a
defined application.
Create a new application and include the identified
executable program in its resource definition.
Edit an application definition.
BT Studio modifies the require section of the application’s
resource definition to include the selected executable name.
The Connection Manager and Servers
It can be difficult to determine the hostname and port of an
application server. The Connection Manager simplifies this by
clearly identifying the hostname and port that an application
executable uses, based on information recorded in the event
log file. Use the Connection Manager to streamline the process
of creating servers and adding hostnames and ports to
servers.
Note: Any server definitions that you create in BT Studio
cannot be directly imported into Application Response.
Instead, you must recreate them later using functions of the
eHealth Web interface.
You can use the Connection Manager to do the following:
Create a new server and add a hostname and port to it.
Add a hostname and port to a server.
Edit a server definition.
Configure Applications and Servers 73
Use the Connection Manager
Add an Executable to a New Application
When you use the Connection Manager to add an executable
name to a new application, BT Studio automatically creates a
default rule set for the application and adds the selected
executable to the require section of the application's resource
definitions.
Note: This assumes that the require section of the
application's resource definition includes a parameterized
resource, using the form resource Process {
ExecutableName=$(Application Executable) }. The selected
executable is applied to the first instance of
ExecutableName=$ that occurs in the rule set. If the first
instance appears in an event specification, for example, that is
where the selected executable name is used.
To add an executable name to a new application
1.
In the Connection Manager, right-click the name of an
application executable that is not connected to an
application.
This row of the Connection Manager shows a connection
symbol and possibly a server symbol , but not an
application symbol . (If the row shows both a connection
symbol and an application symbol, the executable is
already associated with a defined application.)
2.
From the shortcut menu, select Application, Create New.
3.
In the New Application dialog, select the appropriate
application type from the list and click OK.
BT Studio displays the Application Properties window.
4.
On the General tab, enter a name (15 characters or less)
and description for the new application.
5.
Click Submit and Close.
BT Studio defines the application, adding the selected
executable name to the require section of that application’s
resource definition. In the Connection Manager, the
application symbol and application name appear on the
same line as the executable name.
74 BTStudio Administration Guide
Use the Connection Manager
Add an Executable to an Application
When you use the Connection Manager to add an executable
name to a defined application, BT Studio automatically adds
the selected executable to the require section of the
application's resource definitions. This assumes that the
require section of the application's resource definition includes
a parameterized resource, using the form resource Process {
ExecutableName=$(Application Executable) }. Application
Response applies the selected executable to the first instance
of ExecutableName=$ that occurs in the rule set. If the first
instance appears in an event specification, for example, that is
where Application Response uses the selected executable
name.
To add an executable name to a defined application:
1.
In the Connection Manager, select (highlight) the name of
an application executable that is not connected to an
application.
This row of the Connection Manager shows a connection
symbol and possibly a server symbol , but not an
application symbol. (If the row shows both a connection
symbol and an application symbol, the executable is
already associated with a defined application.)
2.
Click Add Executable to Application. BT Studio displays a
list of defined executable-based applications.
3.
Select the application to which you want to add the
executable.
4.
Click OK.
BT Studio adds that executable name to the require section of
that application’s resource definition. In the Connection
Manager, the application symbol and application name appear
on the same line as the executable name. This ensures that
Application Response can monitor the application when it
observes that the executable program is running. If the
application does not have a defined server assigned to it,
Application Response uses a default server definition to
monitor network and server response times for the application.
Configure Applications and Servers 75
Use the Connection Manager
Add a Hostname and Port to a New Server
You can use the Connection Manager to identify the hostname
and port that a particular server uses, and use a function of
the Connection Manager to create a new server and associate
that hostname and port with it.
To add a hostname and port to a new server
1.
In the Connection Manager, right-click the name of a
hostname or port that is not connected to a server.
This row of the Connection Manager shows a connection
symbol and possibly an application symbol , but not a
server symbol . (If the row shows both a connection
symbol and a server symbol, the hostname and port are
already associated with a defined server.)
2.
From the shortcut menu, select Server, Create New.
3.
In the New Server dialog box, select the appropriate server
type from the list and click OK. BT Studio displays the
Server Properties window.
4.
On the General tab, specify a unique name (15 characters
or less) for the new server and a description of the server,
if desired.
5.
Check the remaining tabs of the Server Properties window
and make changes, as appropriate.
On the Details tab, click Uses Port Redirection if the
server is enabled for redirection, allowing the server to
redirect the client to use another port if the original
port is in use.
On the Hostnames, Ports tab, BT Studio lists the
hostname and port for the server that you selected. If
the server system has multiple hostnames (for
example, because it has two or more network interface
cards), click to add more hostnames or ports for this
server.
On the URL Substrings tab (for Web servers only),
specify one or more URL substrings to monitor for Web
traffic. If you want to combine the traffic for various
URL substrings, you can specify them here. For
76 BTStudio Administration Guide
Use the Connection Manager
example, you can specify myWeb1 and myWeb2 to
combine the traffic for all URLs that include those
strings.
6.
Click Submit and Close.
BT Studio defines the server, adding the selected
hostname and port to the server definition. In the
Connection Manager, the server symbol and server name
appear on the same line as the hostname and port.
Add a Hostname and Port to a Server
You can use the Connection Manager to identify the hostname
and port that a particular server uses, and use a function of
the Connection Manager to associate that hostname and port
with the server.
To add a hostname and port to a defined server
1.
In the Connection Manager, select the name of a hostname
or port that is not connected to a server.
This row of the Connection Manager shows a connection
symbol and possibly an application symbol , but not a
server symbol . (If the row shows both a connection
symbol and a server symbol, the hostname and port are
already associated with a defined server.)
2.
Click Add Hostname and Port to Server.
BT Studio displays the Select Server dialog box, which lists
defined servers. (It does not list default servers.)
3.
Select the server to which you want to add the hostname
and port, and click OK. If the Select Server dialog box does
not list any servers, click New to create one, and provide
the information requested.
BT Studio adds that hostname and port to the selected
server definition. (Go to Server Properties to see the
hostname and port listed for the server.) In the Connection
Manager, the server symbol and server name appear on
the same line as the hostname and port.
Configure Applications and Servers 77
Use the Connection Manager
This ensures that Application Response monitors
connections to the specified server, and so can calculate
network time and server time, in addition to client time.
On reports, the server name appears in the response path
name.
Edit an Application Definition
While you are working in the Connection Manager, you can use
a function to change an application's name or description or to
enable or disable it.
To edit an application definition
1.
In the Connection Manager, right-click an application
name.
2.
From the shortcut menu, select Application, Edit.
3.
BT Studio displays the Application Properties window.
4.
From this window do any of the following:
5.
Change the application name and description.
Enable or disable the application for monitoring and
testing.
Make the desired changes.
Click Submit and Close.
Edit a Server Definition
While you are working in the Connection Manager, you can use
a function to change a server's name or description, add
hostnames and ports, or modify other properties.
To edit a server definition:
1.
In the Connection Manager, right-click a server name.
2.
From the shortcut menu, select Server, Edit.
BT Studio displays the Server Properties window.
78 BTStudio Administration Guide
Use the Connection Manager
3.
4.
From this window, do any of the following:
Change the server name and description.
Set port redirection for the server.
Add hostnames and ports to the server definition.
Specify URL substrings for a Web server.
Click Submit and Close.
Combine Connection Manager Symbols
The symbols in the first three columns of the Connection
Manager are significant; use them to determine whether you
have all of the pieces in place to properly monitor an
application.
The application symbol indicates a defined application.
The connection symbol indicates a connection between an
application executable and a hostname/port.
The server symbol indicates a defined server.
To ensure that Application Response can monitor an
application’s response time, you must have one of the
following symbol combinations in the Connection Manager:
The application and connection symbols together indicate
that Application Response can monitor the application
executable using the defined application. It will monitor
network and response times using a default server
definition for the hostname and port.
All three symbols together indicate that Application
Response can monitor the application executable using the
defined application, and it will monitor network and
response times using the defined server.
The connection and server symbols together indicate that
Application Response can monitor a connection-based
application, such as DNS. This combination will not
successfully monitor an executable-based application.
Configure Applications and Servers 79
Use the Connection Manager
Use the Connection Manager to achieve any of these symbol
combinations, as appropriate. Any other symbol combination
indicates that Application Response does not yet have all
information required to monitor a specific application
executable.
The Application Symbol
The application symbol (on a line of the Connection Manager)
indicates that the specified executable is assigned to a defined
application. The lack of the connection symbol indicates that
this event log contains no activity concerning this executable.
(You would not see an application symbol and a server symbol
with no connection symbol.) To create and test transaction
definitions for this application executable, you must generate
another event log file that includes activity for the executable.
The Connection Symbol
The connection symbol (on a line of the Connection Manager)
indicates that the event log shows a connection between the
application executable and the hostname and port. The lack of
the application symbol indicates that the executable has not
yet been assigned to a defined application. The lack of the
server symbol indicates that the hostname and port have not
yet been assigned to a defined server. To enable Application
Response to monitor activity for this executable, add it to a
new or defined application.
The Server Symbol
The server symbol (on a line of the Connection Manager)
indicates that the specified hostname and port are assigned to
a defined server with the specified server name and type. The
lack of a connection symbol indicates that the event log does
not show connections to any of the hostnames/ports listed for
the defined server. If appropriate, you can assign an identified
connection (hostname and port) to the defined server.
80 BTStudio Administration Guide
Use Default Applications and Servers
The Application and Connection Symbols
The application and connection symbols together (on a line of
the Connection Manager) indicate that the event log contains
activity for the specified executable, and that executable is
assigned to the defined application. The lack of the server
symbol indicates that the specified hostname and port are not
assigned to a defined server, so a default server definition will
be used to track network and server response time. As a
result, Application Response can monitor client, network, and
server time for this application using the default server
information. If you want Application Response to track network
and server time for this application using a specific server
name, define the server.
The Connection and Server Symbols
The connection and server symbols together (on a line of the
Connection Manager) indicate that the specified executable
made a connection to the specified hostname and port, which
are assigned to a defined server. This can indicate successful
monitoring for a connection-based application, such as DNS. In
the case of an executable-based application, however, the lack
of the application symbol indicates that the specified
executable is not assigned to a defined application. As a result,
Application Response cannot monitor activity for this
executable. To enable Application Response to monitor activity
for this executable, add it to a new or defined application.
The Application, Connection, and Server Symbols
When all three symbols appear together on a line of the
Connection Manager, the specified executable is assigned to a
defined application, and the hostname and port that it
connected to are assigned to a defined server. As a result,
Application Response can monitor client, network, and server
time for this application.
Use Default Applications and Servers
Configure Applications and Servers 81
Configuration Files
Application Response provides a set of default applications and
servers (defined in the configuration files) that allow you to
monitor average response time almost immediately. To
monitor an application, you use a function of the eHealth Web
interface to enable the desired application. You do not need to
define servers; Application Response uses the default server
definitions for that application.
BT Studio provides the same set of default applications and
servers as Application Response. If you have not yet defined
applications and servers in Application Response, you can do
the following:
Use the default applications provided by BT Studio as a
starting point for rule sets. To start with a default
application rule set, simply enable the application. Then
edit the rule set to add transaction definitions that will
monitor transaction-specific response times.
Use the default servers provided by BT Studio. The default
servers enable you to track server times for transactions
but not to track the response times of individual servers.
To use the default servers, do nothing. BT Studio and
Application Response use them automatically when specific
servers are not defined.
Configuration Files
When you install eHealth, it uses the following default files to
define default applications, servers, and rule sets:
Config.ard – contains information about application and
server definitions
Rules.ard – contains application rule sets
DefRules.ard – contains template (default) application rule
sets, which BT Studio uses as a starting point when you
define a new application
On the eHealth system, these files are stored in the
ehealth/data/response directory, where ehealth is the eHealth
installation directory. When you download configuration
82 BTStudio Administration Guide
Configuration Menu
information into BT Studio, BT Studio downloads those files
into memory. If desired, you can use the Configuration menu
commands to save configuration files with different names,
using the format name.Config.ard, name.Rules.ard, and
name.DefRules.ard. All three files must use the same value for
name, and they must use the appropriate file type extensions:
.Config.ard, .Rules.ard, and .DefRules.ard.
Configuration Menu
The Configuration menu allows you to manage multiple
configuration files, for example, if you are developing two or
more configurations or sets of application rules simultaneously.
Use the Configuration menu commands as follows:
Use Configuration, Open to open a configuration file
(name.Config.ard).
Note: In addition to name.Config.ard, the directory must
contain the files name.Rules.ard and name.DefRules.ard.
Use Configuration, Save to save changes to the current
configuration.
Use Configuration, Save As to save changes to the current
configuration under a new name. The new file name must
use the file type extension .Config.ard.
Use Configuration, Close to close the current configuration
file (for example, to work with another configuration file).
Use Configuration, New to create a new set of
applications, servers, and application rule sets.
Alternative Configuration Methods
In most cases, you will want to use the recommended methods
of configuring applications and servers. If those methods do
not suit your needs, however, you can use the following
alternative methods of configuration:
Configure Applications and Servers 83
Alternative Configuration Methods
If you have defined applications and servers in Application
Response but you do not have network access to the
eHealth Web server from the BT Studio system, import AR
configuration from eHealth.
When you cannot import or download Application Response
configuration information or when you want to define
additional servers to monitor, create servers based on
event log data.
When all other methods are not feasible, you can define
applications and servers manually.
Import AR Configuration from eHealth
You can import Application Response (AR) configuration
information (applications, servers, and rule sets) from eHealth
into BT Studio if both of the following are true:
You have defined applications and servers using the
Application Response area of the eHealth Web interface.
The BT Studio system does not have network access to the
eHealth Web server. (If you do have network access to
eHealth, use the Download Configuration function.)
If you do not meet these criteria, use one of the other
configuration methods.
To import AR configuration information from eHealth
into BT Studio
1.
Export AR configuration data from eHealth, as follows:
a.
On the BT Studio system, do one of the following:
Determine the name of the working directory that you
created when transferring the event log file.
Create a working directory where you will store the AR
configuration files and other related files.
b.
Copy the three AR configuration files from the
ehealth/data/response directory on the eHealth system
to the target directory on the BT Studio system. If
84 BTStudio Administration Guide
Alternative Configuration Methods
necessary, copy the files to a diskette and transfer
them to the BT Studio system.
Config.ard
DefRules.ard
Rules.ard
2.
Import the configuration data into BT Studio, as follows:
a.
Start BT Studio.
b.
Select Configuration, Open.
c.
Specify the Config.ard file in the directory in which the
AR configuration files reside.
Note: In addition to Config.ard, the directory must
contain the remaining configuration files: Rules.ard
and DefRules.ard files.
d.
Click OK.
BT Studio imports the application rule sets and
configuration information (application and server
definitions) from that directory. BT Studio reflects the
name of the configuration file (Config.ard) in the title
bar of the main window.
Create Servers Based on Event Log Data
BT Studio provides an easy way to create server definitions
based on information in the event log file. Use this function
when you cannot import or download Application Response
configuration information or when you want to define
additional servers to monitor. This is an alternative to using
the Connection Manager.
Note: Any server definitions that you create in BT Studio
cannot be directly imported into Application Response.
Instead, you must recreate them later using functions of the
eHealth Web interface.
To create servers based on event log data
1.
Start BT Studio.
2.
Open the desired event log file.
Configure Applications and Servers 85
Alternative Configuration Methods
3.
In the events pane, locate a value in the Server column
that is a resource of the application to monitor and for
which a server definition does not already exist.
4.
Right-click the server value and select Create Server from
the shortcut menu.
5.
In the New Server dialog, select the appropriate server
type and click OK.
6.
On the General tab, specify a unique name for the new
server (15 characters or less) and a description of the
server, if desired.
7.
Check the remaining tabs of the Server Properties window
and make changes, as appropriate.
8.
On the Details tab, click Uses Port Redirection if the server
is enabled for redirection, allowing the server to redirect
the client to use another port if the original port is in use.
9.
On the Hostnames, Ports tab, BT Studio lists the hostname
and port for the server that you selected. If the server
system has multiple hostnames (for example, because it
has two or more network interface cards), click to add
more hostnames or ports for this server.
10. On the URL Substrings tab (for Web servers only), specify
one or more URL substrings to monitor for Web traffic. If
you want to combine the traffic for various URL substrings,
you can specify them here. For example, you can specify
myWeb1 and myWeb2 to combine the traffic for all URLs
that include those strings.
11. Click Submit and Close.
12. Repeat steps 3 through 11 for each server that you want
to define.
Define Applications Manually
BT Studio provides a function to define applications manually.
This is an alternative to defining applications using the
Connection Manager or another configuration method. To
determine which applications are already defined to BT Studio,
from the menu bar select View, Applications. BT Studio
86 BTStudio Administration Guide
Alternative Configuration Methods
displays a list of currently defined applications. If the
application for which you want to develop rules (the target
application) is not listed here, you must define it.
To define an application manually
1.
From the BT Studio main window, select View,
Applications.
2.
In the Applications window, click New.
3.
In the New Application dialog box, select the appropriate
application type from the list and click OK. BT Studio
displays the Application Properties window.
4.
On the General tab, enter a name (15 characters or less)
and description for the new application.
5.
Click Submit and Close.
Define Servers Manually
BT Studio provides a function to define servers manually. This
is an alternative to defining servers using the Connection
Manager or another configuration method. To determine which
servers are already defined to BT Studio, from the menu bar
select View, Servers. BT Studio displays a list of currently
defined servers. If the desired server is not listed here, you
must define it.
To define a server manually
1.
From the BT Studio main window, select View, Servers.
2.
In the Servers window, click New.
3.
In the New Server dialog box, select the appropriate server
type from the list and click OK. BT Studio displays the
Server Properties window.
4.
On the General tab, specify a unique name for the new
server (15 characters or less) and a description of the
server, if desired.
5.
Check the remaining tabs of the Server Properties window
and make changes, as appropriate.
Configure Applications and Servers 87
Alternative Configuration Methods
6.
On the Details tab, click Uses Port Redirection if the server
is enabled for redirection, allowing the server to redirect
the client to use another port if the original port is in use.
7.
On the Hostnames, Ports tab, enter the hostname and port
for the server. If the server system has multiple
hostnames (for example, because it has two or more
network interface cards), click to add more hostnames or
ports for this server.
8.
On the URL Substrings tab (for Web servers only), specify
one or more URL substrings to monitor for Web traffic. If
you want to combine the traffic for various URL substrings,
you can specify them here. For example, you can specify
myWeb1 and myWeb2 to combine the traffic for all URLs
that include those strings.
9.
Click Submit and Close.
88 BTStudio Administration Guide
Chapter 7: Update Rules in Application
Response
After you define new rule sets and test them, you must update Application
Response with the new rules. You can do this in two ways:
From BT Studio, upload the new rules into eHealth. Use this method to
update a single rule set or when you are currently working in the BT
Studio environment.
From the eHealth Web interface, import rules from BT Studio. Use this
method to update several application rule sets, or when you are currently
working in the eHealth Web interface.
If you defined servers in BT Studio, you may also need to use the eHealth Web
interface to define the same servers for Application Response.
Caution: As a precaution, back up AR configuration data before updating
Application Response with new configuration information.
This section contains the following topics:
Upload Rules to eHealth (see page 89)
Import Rule Sets into Application Response (see page 90)
Update Configuration for Application Response (see page 91)
Upload Rules to eHealth
BT Studio allows you to copy a modified rule set directly into Application
Response without leaving the BT Studio development environment. This
prevents the need to start the eHealth Web interface to import a new rule set,
and it simplifies the process if eHealth resides on a UNIX system.
When you upload a rule set from BT Studio, it is incorporated into Application
Response. The new rule set for the application overwrites the existing rule set.
If you upload a rule set for an application that has not yet been defined in
eHealth, Application Response creates a simple application definition for it
automatically, using the uploaded application name, type, and rule set.
Before using the following procedure to upload a rule set from BT Studio to
Application Response, do the following:
Make the desired changes to the rule set.
Test the rule set to make sure it recognizes transactions appropriately.
Save changes to the rule set.
Update Rules in Application Response 89
Import Rule Sets into Application Response
Caution: As a precaution, back up AR configuration data before updating
Application Response with new rules or other configuration information.
To upload rules from BT Studio
1.
In the rules pane of the BT Studio main window, display the rule set to
upload.
2.
From the menu bar, select Tools, Upload Rules.
BT Studio displays the eHealth System Connection Parameters dialog
3.
In the eHealth System Hostname field, enter the hostname of the eHealth
Web server.
4.
The AR Controller Port field shows the default port of 10182 used for
communications between Application Response and eHealth. Leave the
default value as is, or change it if Application Response uses another port.
Note: You cannot edit the eHealth Administrator field; it contains admin,
the name of the eHealth Web admin user account.
5.
In the Password field, specify the password of the eHealth Web admin user
account.
6.
Click Connect.
BT Studio uploads the current application rule set to Application Response,
overwriting an existing rule set with the new one, or adding a rule set for a
new application.
Import Rule Sets into Application Response
When you import a new rule set from BT Studio to eHealth, it is incorporated
into Application Response. The new rule set for that application overwrites the
existing rule set. Although the rules file (such as eHealth.Rules.ard) contains
rule sets for all applications, you can use an Application Response function to
import rule sets for all applications or for selected applications only.
Caution: As a precaution, back up AR configuration data before updating
Application Response with new rules or other configuration information.
To import new rules into Application Response
1.
If you are not able to access the directory on the BT Studio system where
the rules file (such as eHealth.Rules.ard) resides over the network, copy
that file to a temporary directory on the eHealth system.
2.
Log in to the eHealth Web interface using the admin user account.
3.
On the Systems & Apps page, click Application Response.
4.
Click Applications.
5.
Click Import Application Rulesets.
90 BTStudio Administration Guide
Update Configuration for Application Response
6.
Specify the directory where the new version of the rules file resides and
click OK. Application Response displays a list of applications whose rule
sets are defined in the new version of the rules file.
7.
If the rule set to import is not yet defined in Application Response
(indicated by New in the Import column), add it as follows:
8.
In the Import Application Rulesets window, click New next to the new
application name.
9.
Specify a name and application type for the application and click Next.
10. Click OK.
11. The Import Application Rulesets window reappears, with an Import check
box next to the new application’s name.
12. Select one or more applications to import into Application Response.
13. Click OK.
Application Response overwrites existing rule sets for the chosen
applications with new rule sets, or adds rule sets for new applications. AR
agents begin to monitor clients for the newly defined transactions almost
immediately.
Update Configuration for Application Response
If servers related to the new application rule sets are already defined in the
Application Response area of the eHealth Web interface and you do not need
to update those definitions, you do not need to update the AR configuration.
If, when updating Application Response with new data from BT Studio, you
upload a rule set for an application that has not yet been defined in eHealth,
Application Response creates a simple application definition for it
automatically, using the uploaded application name, type, and rule set.
If you do not create servers for the new application, Application Response uses
the appropriate default server definition. If you had defined server definitions
for the application in BT Studio, that server information is lost to Application
Response. You must recreate the server definitions using the Application
Response area of the eHealth Web interface. If any servers related to the new
rule sets are not defined in eHealth, or if you modified application or server
definitions in BT Studio (making them different from the way they are defined
to Application Response), you must update Application Response accordingly.
You can do this before or after updating Application Response with the new
rule sets.
Caution: As a precaution, back up AR configuration data before updating
Application Response with new configuration information.
Update Rules in Application Response 91
Update Configuration for Application Response
To update AR configuration data in eHealth
1.
Log in to the eHealth Web interface using the admin user account.
2.
On the Systems & Apps page, click Application Response.
3.
Use Application Response functions to do the following:
Add or update application definitions.
Add or update server definitions.
Enable or disable applications for monitoring.
When you are satisfied that the application and server definitions for
Application Response reflect those defined in BT Studio, you can update
the rule sets.
92 BTStudio Administration Guide
Chapter 8: Monitor Transactions Based
on Keystrokes
Application Response is designed to use windowing activity and other types of
typical application activity to recognize transactions and measure their
response times. For example, Application Response can detect when a user
presses a key on the keyboard, and it can identify non-printing characters,
such as Enter and Ctrl. (In the application rule, you define these events using
the Windows KeyPress event action.) To maintain security, however,
Application Response does not indicate specifically which printable keys
(letters, numbers, and punctuation) are pressed.
For some applications, however, you may want to be able to determine the
specific keys that users press (the printable text that they type) to help
recognize transactions. Consider the following examples:
A transaction may involve a user entering a particular text string in a textentry field of a form. For example, you want to make sure that all
customer support representatives are able to log into Remedy quickly.
(Their login response time threshold is shorter than the login threshold for
other types of users.) All support representatives' login names begin with
CS. So you define a transaction that involves the user typing the letters
"CS" (and other letters) in the Login User Name field, followed by clicking
OK.
An application requires the user to enter text commands in an entry field.
To monitor the response times of these text commands, Application
Response needs to be able to recognize the text commands as they are
typed. For example, suppose that, whenever a user enters a formula in a
Microsoft Excel spreadsheet, you want to monitor the response time
required to complete the calculation. To do this, you define a transaction
that begins when the user performs a mouse click or types Tab or Enter,
then types the equal sign (=) in a cell (along with other text defining the
formula), and then presses Enter.
In these cases, to be able to recognize transactions to monitor, Application
Response must be able to determine the keys that users press. To allow
Application Response to monitor these applications: you must enable the
AR agent to monitor individual keystrokes. Then you can write rules that
recognize transactions based on the specific keys that users press.
Warning: This technique may introduce a security hole in your infrastructure.
By examining an event log file and reconstructing the keystrokes entered by a
user, unauthorized users may be able to learn passwords and other text-based
security mechanisms, thereby compromising system security. This security
issue exists only when you use the recording agent to generate an event log
file or when you enable transaction logging to view transaction details through
Monitor Transactions Based on Keystrokes 93
Enable the AR Agent to Monitor Individual Keystrokes
the Agent Transaction Viewer (ATV). Take appropriate steps to ensure that
these functions are available only to authorized users.
The keystroke version of the AR agent cannot be used to monitor applications
with command line interfaces, applications that run within a command prompt
window, Windows Explorer, or Telnet. (You may, however, use the keystroke
version of the AR agent to monitor the version of Telnet that is available with
Windows NT 4.0; that version of Telnet runs in its own application window, not
in a command prompt window as do more recent versions of Telnet.)
To monitor a text-based application
1.
Enable the AR agent to monitor individual keystrokes.
2.
Develop rules that define transactions based on keystrokes.
This section contains the following topics:
Enable the AR Agent to Monitor Individual Keystrokes (see page 94)
Develop Transaction Rules Based on Keystrokes (see page 95)
Define Resources to Monitor Transactions Based on Keystrokes (see page 96)
Example: Develop a Text-Based Transaction Rule (see page 97)
Enable the AR Agent to Monitor Individual Keystrokes
To enable Application Response to monitor transactions based on keystrokes,
you must first generate an AR agent installation program that supports this
functionality. When the agent is installed on client systems where the
application is used, Application Response will be able to measure transaction
response times based on special rules.
Note: You must use a licensed AR agent to monitor keystrokes. You cannot
use the BT recording agent to collect information for this feature.
To enable the AR agent to monitor individual keystrokes
1.
2.
Download the AR Agent Publisher:
a.
Log in to the eHealth Web interface.
b.
Go to the Systems & Apps page.
c.
Click Application Response.
d.
Click Download.
e.
Click the link to download the AR Agent Publisher.
Use the AR Agent Publisher to generate an AR agent installation program:
a.
Double-click ARAgentPublisher.exe to start it.
b.
On the Welcome screen, select Generate an AR Agent Installation
Program and click Next.
94 BTStudio Administration Guide
Develop Transaction Rules Based on Keystrokes
c.
At the warning message, click OK.
d.
On the Software License Agreement screen, read the agreement and
click Yes.
e.
On the Edit Controller Information screen, complete the fields and click
Next. (Click Help for assistance.)
f.
On the Options for Agent Install screen, complete the fields and click
Next. (Click Help for assistance.)
g.
On the Agent Extensions screen, select Monitor All Keystrokes and
click Next.
h.
Complete the remainder of the AR Agent Publisher screens, as
described in its online help, and generate the AR agent installation
program.
3.
Install the AR agent by running the AR agent installation program on each
client system where users will use the target application.
4.
Confirm that the client systems have the correct version of the AR agent:
a.
Use Windows Explorer to navigate to the directory where the AR agent
is located (typically C:\ehealth\agent\response).
b.
Right-click on arwinhk.dll and select Properties from the shortcut
menu.
c.
Click on the Version tab and, in the Comments field, look for the
following text: Keystroke Version.
Note: If the Comments field displays "Non-Keystroke Version," the AR
agent will not be able to monitor transactions based on keystrokes.
Develop Transaction Rules Based on Keystrokes
To monitor transactions based on keystrokes, you must install the keystroke
version of the AR agent on each target client system and then define a rule set
that will recognize transactions based on specific keystrokes. The process that
you use to develop these rules is basically the same as for other types of
applications; however, you must generate the event log file on a client system
where the keystroke version of the AR agent resides.
To develop transaction rules based on keystrokes
1.
Determine the transactions to monitor.
2.
Install BT Studio and BT Marker, if needed.
3.
Install the keystroke version of the AR agent on a client system and
enable recording.
4.
Record events in the event log file using the client system with the
enabled AR agent to perform transactions for the target application.
Monitor Transactions Based on Keystrokes 95
Define Resources to Monitor Transactions Based on Keystrokes
5.
Stop the recording of events.
6.
Transfer the event log file to the BT Studio system.
7.
Develop rule sets for the target application.
8.
The resource definitions will be similar to those for GUI applications.
The transaction definitions will use Windows KeyPress events,
Connection Request and Response events, and possibly other events
to identify transactions.
Update Application Response with the new rule set.
Define Resources to Monitor Transactions Based on
Keystrokes
When developing an application rule set that monitors transactions based on
keystrokes, define the resources as you would for a Windows-based
application.
In the require section, specify the processes that are required to indicate
that an instance of the application is running.
In the additional section, specify Windows (so that you can recognize
keystrokes) and Connection (to include network and server time in
response time measurements for transactions). You can also specify other
resource types as appropriate for the application.
Example
The following rule set for Remedy (whose executable name is aruser) shows
the resources required to track transaction response times when customer
service representatives log in.
[
BytesSent > 0
ServerName != "No-Server"
]
resources
{
require one
{
resource Process { ExecutableName=$(Application Executable) }
resource Process { ExecutableName="aruser"
}
additional
{
resource Windows { }
resource Connection { }
96 BTStudio Administration Guide
Example: Develop a Text-Based Transaction Rule
}
}
transaction "CS_Login"
module "CS_Login"
{
# Remedy (aruser) starts and creates the login window
#
Event "StartAruserProcess" Process Start { ExecutableName="aruser" }
Event "StartAruserWindow" Windows Start { ExecutableName="aruser" }
Event "CreateLoginWindow" Windows Create { Title="Login" }
Event "SetTitleLogin" Windows SetTitle { Title="Login - Remedy User" }
#
# All customer service login names begin with CS_
# so check for the user typing CS_
# after the login window is created
#
# For login name, type uppercase C or lowercase c
#
Choice
{
Event "Type_C" Windows KeyPress { Key=67 } # uppercase C
Event "Type_c" Windows KeyPress { Key=99 } # lowercase c
}
# For login name, type uppercase S or lowercase s
#
Choice
{
Event "Type_S" Windows KeyPress { Key=83 } # uppercase S
Event "Type_s" Windows KeyPress { Key=115 } # lowercase s
}
# Type an underscore
#
Event "Type_underscore" Windows KeyPress { Key=95 }
#
# User clicks the OK button on the Login window
#
Event "ClickOK" Windows MouseClick { Title="OK" }
#
# Login window is destroyed
#
Event "DestroyLoginWindow" Windows Destroy { Title="Login Status" }
}
Example: Develop a Text-Based Transaction Rule
To monitor transactions based on keystrokes, you need to define a rule set
whose transaction definitions specify the keystrokes to watch for. For example,
suppose that you want to monitor how long it takes customer support
Monitor Transactions Based on Keystrokes 97
Example: Develop a Text-Based Transaction Rule
representatives to log into Remedy. (Because the customer service
representatives interface with the customer, any delays for them translate into
longer support calls for the customer. You have decided that you do not need
to monitor the login times for other users.) All support representatives' login
names begin with CS_. So you define a transaction that involves the user
typing "CS_" (and other letters) in the Login User Name field, followed by
clicking OK.
Based on information collected in an event log file, the transaction definition
for CS_Login begins as follows:
transaction "CS_Login"
module "CS_Login"
{
# Remedy (aruser.exe) starts and creates the login window
#
Event "StartAruserProcess" Process Start { ExecutableName="aruser" }
Event "StartAruserWindow" Windows Start { ExecutableName="aruser" }
Event "CreateLoginWindow" Windows Create { Title="Login" }
Event "SetTitleLogin" Windows SetTitle { Title="Login - Remedy User" }
#
Now you need to add event specifications that recognize when users type
"CS_" or "cs_" in the Username field of the Login window, indicating that they
are customer service representatives. Because users may be typing in
uppercase or lowercase, you need to use choice statements to cover both
cases.
#
# All customer service login names begin with CS_
# so check for the user typing CS_
# after the login window is created
#
# For login name, type uppercase C or lowercase c
#
Choice
{
Event "Type_C" Windows KeyPress { Key=67 } # uppercase C
Event "Type_c" Windows KeyPress { Key=99 } # lowercase c
}
# For login name, type uppercase S or lowercase s
#
Choice
{
Event "Type_S" Windows KeyPress { Key=83 } # uppercase S
Event "Type_s" Windows KeyPress { Key=115 } # lowercase s
}
# Type an underscore
98 BTStudio Administration Guide
Example: Develop a Text-Based Transaction Rule
#
Event "Type_underscore" Windows KeyPress { Key=95 }
#
Note: For a list of decimal ASCII codes for printing and non-printing
characters, refer to www.asciitable.com.
The final part of the transaction definition recognizes when users click OK on
the login window, and the login window is destroyed.
#
# User clicks the OK button on the Login window
#
Event "ClickOK" Windows MouseClick { Title="OK" }
#
# Login window is destroyed
#
Event "DestroyLoginWindow" Windows Destroy { Title="Login Status" }
}
So the entire transaction definition for CS_Login is as follows:
transaction "CS_Login"
module "CS_Login"
{
# Remedy (aruser) starts and creates the login window
#
Event "StartAruserProcess" Process Start { ExecutableName="aruser" }
Event "StartAruserWindow" Windows Start { ExecutableName="aruser" }
Event "CreateLoginWindow" Windows Create { Title="Login" }
Event "SetTitleLogin" Windows SetTitle { Title="Login - Remedy User" }
#
# All customer service login names begin with CS_
# so check for the user typing CS_
# after the login window is created
#
# For login name, type uppercase C or lowercase c
#
Choice
{
Event "Type_C" Windows KeyPress { Key=67 } # uppercase C
Event "Type_c" Windows KeyPress { Key=99 } # lowercase c
}
# For login name, type uppercase S or lowercase s
#
Choice
{
Monitor Transactions Based on Keystrokes 99
Example: Develop a Text-Based Transaction Rule
Event "Type_S" Windows KeyPress { Key=83 } # uppercase S
Event "Type_s" Windows KeyPress { Key=115 } # lowercase s
}
# Type an underscore
#
Event "Type_underscore" Windows KeyPress { Key=95 }
#
# User clicks the OK button on the Login window
#
Event "ClickOK" Windows MouseClick { Title="OK" }
#
# Login window is destroyed
#
Event "DestroyLoginWindow" Windows Destroy { Title="Login Status" }
}
100 BTStudio Administration Guide
Chapter 9: Monitor Transactions in Java
Applications
If your Java applications or applets were developed using Java 2 Platform,
Standard Edition (J2SE) 1.2 and later or Oracle's JInitiator 1.2 and later,
Application Response captures more than just object IDs and Windows
classes; it captures parameters that are specific to Java such as invocation of
a Java application, text titles in a Java window, and the addition or removal of
a Java component to or from a container. To allow Application Response to
monitor these applications: you must publish AR agents that are enabled to
monitor Java. Then you can write rules that recognize transactions based on
Java-specific events.
Java Application Example
A customer service organization wants to track the speed with which customer
service representatives can open a customer account summary using the Java
application that is the interface to the customer database. To monitor the
response times of opening account summaries, Application Response needs to
be able to recognize when the status message changes from "Update in
progress..." to "Done." To do this, you define a transaction that begins when
the label on a Java component is "Update in progress..." and ends when the
label on the same Java component is no longer "Update in progress...".
With the AR agent and AR Java hook installed on the system, the customer
service representative starts the AR agent. Then the representative starts the
Java application. If configured correctly, the AR Java hook and the Java
application start and use the same Java runtime environment. The AR Java
hook starts the JNI API through which Java events are sent to the AR agent.
Java Applet Example
A major insurance company spent several years developing a home-grown
Java applet that allows salespeople in the field to perform quotes and collect
premiums. The company wants to track the time to login response time
because their threshold is shorter than the login threshold for other types of
users. With the AR agent installed and running on the system, a salesperson
opens a browser window and launches the Web page that will download the AR
Java hook. The browser asks for permission to download and run the AR Java
hook applet.
If the salesperson grants permission, the browser starts a Java virtual machine
process in which the AR Java hook applet runs. The AR Java hook applet starts
a JNI API through which Java events are sent to the AR agent. The
salesperson then starts the home-grown sales applet. Because the AR Java
Monitor Transactions in Java Applications 101
Enable the AR Agent to Monitor Java Applications
hook applet runs within the same Java virtual machine as the sales applet, it
can measure transaction times and report them to the AR agent.
The procedure for setting up Application Response for monitoring of Java
applets is different from the setup of monitoring Java applications.
To setup Application Response to monitor a Java application
1.
Enable the AR agent to monitor Java applications
2.
Define rules for a Java application
To setup Application Response to monitor a Java applet
1.
Enable the AR agent to monitor Java applets
2.
Define rules for a Java applet.
This section contains the following topics:
Enable the AR Agent to Monitor Java Applications (see page 102)
Enable the AR Agent to Monitor Java Applets (see page 104)
Define Rules for a Java Application or Java Applet (see page 106)
Example: Develop Java Transaction Rules (see page 107)
Track Failed Transactions (see page 109)
Invoke the Application Response Java Hook as an Applet (see page 111)
Enable the AR Agent to Monitor Java Applications
To enable Application Response to monitor transactions in Java applications,
you must first generate an AR agent installation program that supports this
functionality. When the agent is installed on client systems where a Java
application is used, Application Response will be able to measure transaction
response times based on special rules. This functionality supports applications
developed using Java 2 Platform, Standard Edition (J2SE) 1.2 and later.
Note: You must use a licensed AR agent to monitor Java applications. You
cannot use the BT recording agent to collect information for this feature.
To enable the AR agent to recognize events in Java applications
1.
Download the AR Agent Publisher:
a.
Log in to the eHealth Web interface.
b.
Go to the Systems & Apps page.
c.
Click Application Response.
d.
Click Download.
e.
Click the link to download the AR Agent Publisher to a Windows
system.
102 BTStudio Administration Guide
Enable the AR Agent to Monitor Java Applications
2.
Use the AR Agent Publisher to generate an AR agent installation program:
a.
Double-click ARAgentPublisher.exe to start it.
b.
On the Welcome screen, select Generate an AR Agent Installation
Program and click Next.
c.
At the warning message, click OK.
d.
On the Software License Agreement screen, read the agreement and
click Yes.
e.
On the Edit Controller Information screen, complete the fields and click
Next. (Click Help for assistance.)
f.
On the Options for Agent Install screen, complete the fields and click
Next. (Click Help for assistance.)
g.
On the Agent Extensions screen, select Install Application Event API
and Monitor Java Applications. This is necessary for extending your
Java runtime environment (JRE) installation with the AR Java hook.
h.
In the Application Class Path field, enter one location in which the AR
Java hook should be installed and click Add. (The maximum path
length is 128 characters.) The recommended location is the
$JAVA_HOME\jre\lib\ext subdirectory. For example, if you want to
monitor Live Health and you normally install Live Health in
c:\LiveHealth, the application class path would be
c:\LiveHealth\client\jre\lib\ext. You can specify additional paths by
entering them one at a time or you can separate them using a semicolon (;).
i.
Complete the remainder of the AR Agent Publisher screens, as
described in its online help, and generate the AR agent installation
program.
3.
Install the AR agent by running the AR agent installation program on each
client system where users will use the target application.
4.
Optionally, on each client system, use Windows Explorer to confirm the
following:
5.
a.
The file that contains the JavaHook classes, ARJavaHook.jar, should be
in the directory that you specified to the AR Agent Publisher, typically
the jre\lib\ext subdirectory of the JRE installation.
b.
The ARAppEvent.dll file should be in the %system root%\SYSTEM32
directory, typically C:\WINNT\SYSTEM32.
Because the AR Java Hook classes need to be initialized before the Java
application you want to monitor starts, you need to modify one or more of
the following for each client installation:
the application icon properties
the .bat file for the application
Monitor Transactions in Java Applications 103
Enable the AR Agent to Monitor Java Applets
For Java applications like Live Exceptions that have an icon that does not call
the .bat file, you must modify both the icon and the .bat file. If you currently
invoke the Java application using the following command:
$JAVA_HOME/bin/java com.acme.MainClass -arg1 -arg2
then the invocation with the AR Java hook would be as follows:
$JAVA_HOME/bin/java com.concord.apps.ARJavaHook.ARJavaHook com.acme.MainClass
-arg1 -arg2
For example, you can start the Live Exceptions application using the
application icon or through the command line.
To modify the Live Exceptions icon, right-click on the icon and select
Properties. If the Shortcut tab is not selected, select it. In the Target field,
insert the AR Java hook class,
com.concord.apps.ARJavaHook.ARJavaHook, before the Live Exceptions
main class.
To modify the nhLiveExceptions.bat file, find the line that reads, @start
"Live Exceptions". Insert the text,
com.concord.apps.ARJavaHook.ARJavaHook, before the Live Exceptions
main class.
Note: You may want to create a backup of any .bat file that you modify.
When you reinstall the Live Health clients, the installation overwrites the
existing .bat files.
Enable the AR Agent to Monitor Java Applets
To enable Application Response to monitor transactions in client-side Java
applets, you must first generate an AR agent installation program that has the
Application Event API extension. You must also add specific HTML code and the
ARJavaHook.jar file to your Web server so that the Application Response
JavaHook classes and the applet that you want to monitor are available for
download by the client browser and then run within the same Java virtual
machine.
Communication Path of Application Response Monitoring a Java Applet
When the agent is installed on client systems where a Java applet is used,
Application Response will be able to measure transaction response times based
on special rules. This functionality supports applets developed using Java 2
104 BTStudio Administration Guide
Enable the AR Agent to Monitor Java Applets
Platform, Standard Edition (J2SE) 1.2 and later or Oracle's JInitiator 1.2 and
later.
Note: You must use a licensed AR agent to monitor Java applications. You
cannot use the BT recording agent to collect information for this feature.
To enable the AR agent to recognize events in Java applets
1.
2.
Download the AR Agent Publisher:
a.
Log in to the eHealth Web interface.
b.
Go to the Systems & Apps page.
c.
Click Application Response.
d.
Click Download.
e.
Click the link to download the AR Agent Publisher to a Windows
system.
Use the AR Agent Publisher to generate an AR agent installation program:
a.
Double-click ARAgentPublisher.exe to start it.
b.
On the Welcome screen, select Generate an AR Agent Installation
Program and click Next.
c.
At the warning message, click OK.
d.
On the Software License Agreement screen, read the agreement and
click Yes.
e.
On the Edit Controller Information screen, complete the fields and click
Next. (Click Help for assistance.)
f.
On the Options for Agent Install screen, complete the fields and click
Next. (Click Help for assistance.)
g.
On the Agent Extensions screen, select Install Application Event API.
h.
Complete the remainder of the AR Agent Publisher screens, as
described in its online help, and generate the AR agent installation
program.
3.
Install the AR agent by running the AR agent installation program on each
client system where users will use the Java applet.
4.
Optionally, on each client system, use Windows Explorer to confirm that
the ARAppEvent.dll file is in the system root\SYSTEM32 directory, typically
C:\WINNT\SYSTEM32.
5.
In the Web page from which users run the Java applet, add HTML code to
start the Application Response Java hook. The HTML code depends on the
Web browser and the type of Java plug-in that is being used. The Java
applet that you want to observe must launch in the same Web browser
window as the Application Response Java hook; if the applet launches in a
new Web page, Application Response cannot collect response time data.
Monitor Transactions in Java Applications 105
Define Rules for a Java Application or Java Applet
6.
Download the Java Application Monitor:
a.
Log in to the eHealth Web interface.
b.
Go to the Systems & Apps page.
c.
Click Application Response.
d.
Click Download.
e.
Click the link to download the Java Application Monitor
(ARJavaHook.jar file).
7. Copy the ARJavaHook.jar file to the same location on your Web server as
the Web page that you modified.
Define Rules for a Java Application or Java Applet
After you install the Java monitoring version of the AR agent on each target
client system, you can define a rule set that will recognize transactions based
on specific Java event actions. The process that you use to develop these rules
is basically the same as for other types of applications; however, you must
generate the event log file on a client system where the Java monitoring
version of the AR agent resides.
To develop transaction rules based on Java event actions
1.
Determine the transactions to monitor.
2.
Install BT Studio and BT Marker, if needed.
3.
Enable recording.
4.
Record events in the event log file using the client system with the
enabled AR agent to perform transactions for the target application.
5.
Stop the recording of events.
6.
Transfer the event log file to the BT Studio system.
7.
Develop rule sets for the Java application or applet.
8.
Define the resources (or use the resource definition template for Java):
9.
In the require section, specify that the javaw process is one of the
required processes to indicate that an instance of the Java application or
applet is running.
10. In the additional section, specify Windows (so that AR can calculate client
time and think time) and Connection (to include network and server time
in response time measurements for transactions). Specify the Java
resource type so that the agent recognizes Java event actions.
106 BTStudio Administration Guide
Example: Develop Java Transaction Rules
11. Define the transactions as described in the example of developing a Java
transaction rule. The transaction definitions will use Java-specific events
such as JKeyPress, JSetLabel and JAddComponent.
12. Update Application Response with the new rule set.
Example: Develop Java Transaction Rules
To monitor response times for transactions in Java application or applets, you
need to define a rule set with transaction definitions that specify Java event
actions. Study the following examples to learn how to create transaction
definitions to monitor various transactions in the Live Exceptions Java
application.
Login Transaction
transaction "LELogin"
module "LELogin"
{
event "LEStarted" Java JInvokeApp { Class="com.concord.apps.liveExceptions.LeApp"
Args != contains:"-status" }
choice
{
event "LoginStartedClick" Java JMouseRelease { Title="Login"
Class="javax.swing.JButton" Text="OK" }
event "LoginStartedKey" Java JKeyPress { Title="Login" Key=10 }
}
event "LoginFinished" Windows SetTitle { Title=contains:"eHealth Live Exceptions"
}
}
except
{
event "BadPassword" Windows SetTitle { Title="Login incorrect" }
}
failure1 "Exception"
{
event "LEStarted" Java JInvokeApp {
Class="com.concord.apps.liveExceptions.LeApp"}
event "Exception" Windows SetFocus { Title="LiveHealth Internal Error Messages" }
}
Open Subjects to Monitor Transaction
Monitor Transactions in Java Applications 107
Example: Develop Java Transaction Rules
transaction "OpenSubjects"
module "OpenSubjects"
{
event "OpenSubjects" Java JMouseRelease { Text="Subjects to Monitor..." }
last
{
event "OpenSubjectsTitle" Windows SetTitle { Title="Setup Subjects"}
event "OpenSubjReq" Connection Request { }
event "OpenSubjResp" Connection Response { }
}
}
failure1 "Exception"
{
event "OpenSubjects" Java JMouseRelease { Text="Subjects to Monitor..." }
event "Exception" Windows SetFocus { Title="LiveHealth Internal Error Messages" }
Save Subjects to Monitor Transaction
}
transaction "SaveSubjects"
module "SaveSubjects"
{
event "SaveSubjects" Java JMouseRelease { Title="Setup Subjects" Text="OK" }
event "SaveSubjectsDone" Windows SetTitle { Title="Information" }
}
failure1 "Exception"
{
event "SaveSubjects" Java JMouseRelease { Title="Setup Subjects" Text="OK" }
event "Exception" Windows SetFocus { Title="LiveHealth Internal Error Messages" }
}
Update Live Exceptions Server Transaction
transaction "LEUpdate"
module "LEUpdate"
{
event "UpdateStarted" Java JSetLabel { Title=contains:"eHealth Live Exceptions"
Text="Update in progress ..." }
event "UpdateDone" Java JSetLabel { Title=contains:"eHealth Live Exceptions"
OldText="Update in progress ..." }
}
failure1 "Exception"
{
event "UpdateStarted" Java JSetLabel { Title=contains:"eHealth Live Exceptions"
Text="Update in progress ..." }
event "Exception" Windows SetFocus { Title="LiveHealth Internal Error Messages" }
}
108 BTStudio Administration Guide
Track Failed Transactions
Open Top Ten Alarms Transaction
transaction "TopTen"
module "TopTen"
{
event "TopTenStarted" Java JMouseRelease { Title=contains:"eHealth Live
Exceptions" Text="Top Ten Alarms" }
event "TopTenWindow" Windows SetTitle { Title="Top 10 Alarms" }
last
{
event "TopTenDone" Java JSetLabel { Title="Top 10 Alarms" }
}
}
failure1 "Exception"
{
event "TopTenStarted" Java JMouseRelease { Title=contains:"eHealth Live
Exceptions" Text="Top Ten Alarms" }
event "Exception" Windows SetFocus { Title="LiveHealth Internal Error Messages" }
}
Track Failed Transactions
To understand the end-user experience, you must measure the following
facets of application performance:
Availability: Is the application available when users need it? Measure
application availability using SystemEDGE with the Service Availability
module.
Response time: When users use an application, does it response quickly?
Use Application Response to measure actual, observed response times
experienced by end users.
Failures: Are users able to successfully complete transactions? Transaction
failures occur when the application is available to users, but something is
preventing the transactions from finishing. These failures can significantly
degrade user productivity. Use Application Response to monitor the rate of
failed transactions. When the failure rate increases, you can use
Application Response to determine the most frequent cause of the failures
and then take steps to eliminate the cause and so restore user productivity
to normal levels.
Application Response tracks the total count of failures for each monitored
application and transaction. You can use Live Health to send alerts when the
failure rate suddenly increases dramatically, indicating an application problem
that needs to be resolved. You can also use the following eHealth reports to
monitor transaction failures:
Monitor Transactions in Java Applications 109
Track Failed Transactions
At-a-Glance reports for response paths, client sets, and end points
Trend reports for individual response paths and groups of response paths
Top N reports for response paths, client sets, and end points
For each of these reports, you can monitor the rate of failed transactions and
compare it to the rate of successful transactions. (Use the Failed Transactions
variables when generating Trend and Top N reports.)
How It Works
To track transaction failures, you use BT Studio to modify the application rule
set to define one to five failure cases for each transaction. Application
Response tracks the total count of failures for each transaction. eHealth
reports show this information as the rate of transaction failures per minute.
Application Response does not, however, provide a breakdown of failures by
case. That is, if you define four failure cases for the Login transaction (such as
Invalid Password, Invalid Server, Server Not Available, and Cancel Login),
Application Response maintains a single count of all failures for the Login
transaction. The reports do not show a breakdown of Login failures based on
their causes.
If Live Health or eHealth reports reveal a sudden increase in transaction
failures, you can use the Agent Transaction Viewer (ATV) to troubleshoot the
cause of the failures. In the ATV, the transaction details indicate the reason
that each transaction failed, based on the defined failure cases.
To track transaction failures
1.
Define failure cases:
a.
Use BT Studio to define up to five failure cases for each transaction in
an application rule set. Defining failure cases requires that you
understand the causes of failed transactions and the events that
characterize them. If you have more than five failure cases for a
transaction, you can use the choice statement to combine multiple
failures under one failure case.
b.
Test the updated rules against an event log file that contains
application activity for the failure cases.
c.
Upload the updated application rule set to Application Response.
2.
If you use Live Health, define a profile that raises an alarm when the
failure rate exceeds a threshold. (For instructions, refer to the online help
in the eHealth Web interface.)
3.
Use eHealth reports and Live Health to monitor the number of transaction
failures.
4.
If you notice a sudden increase in transaction failures, use the ATV to view
the details. The ATV shows the name of the failure case that applies to an
individual transaction. Use this information to determine which failure
110 BTStudio Administration Guide
Invoke the Application Response Java Hook as an Applet
cases are occurring most frequently. Then take steps to eliminate the
cause or source of the transaction failures.
Invoke the Application Response Java Hook as an Applet
The HTML code that you add to the Web page where the Java applets are
launched depends on the type of Web browser and Java plug-in for your
environment. The following examples are for use with Microsoft Internet
Explorer. You should consult other sources for information about invoking Java
applets in Web browsers such as Netscape Navigator.
Invoke the applet using the browser's default Java plug-in
Invoke the applet using Sun's Java plug-in
Invoke the applet within the same virtual machine as Oracle's JInitiator
Code Example: Invoke the Applet Using the Default Java Plug-In
The following HTML file is an example of using the <APPLET> tag to invoke the
AR Java hook applet using the default Java plug-in that is installed in the Web
browser.
Content-type: text/html
<html>
<title>AR Java Hook Example</title>
<h1>AR Java Hook Example</h1>
<hr>
Java Hook Applet for AR started using APPLET html tag
<p>
<APPLET CODE = com.concord.apps.ARJavaHook.ARJavaHook.class
ARCHIVE = "ARJavaHook.jar" WIDTH = 200 HEIGHT = 200 >
</APPLET>
This applet is a signed applet.
</center>
<hr>
</html>
Code Example: Invoke the Applet Using Sun's Java Plug-in
The following HTML file is an example of using the login info tag to invoke the
AR Java hook applet using Sun's Java plug-in. This will get you a version later
than 1.3 or return an error.
Content-type: text/html
<html>
<title>AR Java Hook Example</title>
<h1>AR Java Hook Example</h1>
<hr>
Monitor Transactions in Java Applications 111
Invoke the Application Response Java Hook as an Applet
Java Hook Applet for AR started using OBJECT html tag
<p>
<OBJECT classid="clsid:8AD9C840-044E-11D1-B3E9-00805F499D93"
width="200" height="200" align="baseline"
codebase="http://java.sun.com/products/plugin/1.3/jinstall-13win32.cab#Version=1,3,0,0">
<PARAM NAME="code" VALUE="com.concord.apps.ARJavaHook.ARJavaHook.class">
<PARAM NAME="codebase" VALUE="html/">
<PARAM NAME="type" VALUE="application/x-java-applet;version=1.3">
<PARAM NAME="archive" VALUE="ARJavaHook.jar">
</OBJECT>
This applet is a signed applet.
</center>
<hr>
</html>
Code Example: Invoke the Java Applet Within Oracle's JInitiator
The following HTML file is an example of using the login info tag with Oracle
Jinitiator. You specify Oracle's Jinitiator class ID so that the AR Java hook and
the custom applet are running in the same Java Virtual Machine.
Content-type: text/html
<html>
<title>AR Java Hook Example</title>
<h1>AR Java Hook Example</h1>
<hr>
Java Hook Applet for AR started with JInitiator
<p>
<OBJECT classid="clsid:CAFECAFE-0013-0001-0009- ABCDEFABCDEF"
width="200" height="200" align="baseline"
codebase="http://www.acme.com/jinit1319.exe#Version=1.3.1.9">
<PARAM NAME="code" VALUE="com.concord.apps.ARJavaHook.ARJavaHook.class">
<PARAM NAME="type" VALUE="application/x-jinit- applet;version=1.3.1.9">
<PARAM NAME="archive" VALUE="ARJavaHook.jar">
</OBJECT>
This applet is a signed applet.
</center>
<hr>
</html>
112 BTStudio Administration Guide
Chapter 10: BT Language Reference
You can use the Business Transaction (BT) language to define rule sets that
Application Response uses to recognize transactions to monitor. You compose
the BT language rules in the rules pane of the main BT Studio window.
An application’s rule set definition has three parts:
Constraints configure Application Response to ignore any transactions that
exceed defined limits or constraints.
Resource definitions configure Application Response to recognize a running
instance of the application and indicate the resources that the monitored
transactions use.
Transaction definitions configure Application Response to recognize the
transactions to monitor.
This section contains the following topics:
Syntax for Resource Definitions (see page 114)
Transaction Definitions (see page 120)
Event Specifications (see page 122)
Event Types (see page 123)
Event Actions (see page 135)
Parameter List (see page 163)
Sequence Statement (see page 165)
Choice Statement (see page 166)
Last Statement (see page 168)
Except Statement (see page 169)
Failure Statement (see page 172)
Failure Codes (see page 175)
Alternate Rulesets (see page 176)
IgnoreEvents Clause (see page 178)
Resource Types (see page 181)
Resource Definitions (see page 189)
How Transaction Limits Work (see page 204)
Tracking Timed-Out Transactions (see page 215)
Application Event Source (see page 217)
C# Interface Example (see page 223)
Screen Descriptions (see page 223)
Module Statement (see page 236)
Basic Rule Set Syntax (see page 238)
BT Language Reference 113
Syntax for Resource Definitions
Syntax for Resource Definitions
The resource definition for an application goes at the top of the rule set after
any application-specific constraints, but before any transaction definitions.
When calculating response time for a transaction, Application Response
includes the response time of all events that occur from the start of the
transaction to its ending event that originate from the resources listed
(required and additional).
When creating a resource definition, use the following syntax:
resources
{
require selection-kind
{
resource resource-type { parameter-list }
resource resource-type { parameter-list }
.
.
.
}
additional
{
resource resource-type { parameter-list }
resource resource-type { parameter-list }
.
.
.
}
}
Read the following guidelines for basic information about the parts of a
resource definition, or follow the links for more details.
resource
The resources keyword is followed by exactly one require statement and one
additional statement.
require
The require keyword is followed by a list of one or more resources that must
exist for Application Response to recognize that the application is running.
selection-kind
114 BTStudio Administration Guide
Syntax for Resource Definitions
Use the selection-kind qualifier to specify how many of the specified resources
must exist before Application Response recognizes that the application is
running. Valid values are as follows:
one – Each resource matching one of the resource specifications should be
considered a separate running instance of the application (for example, an
application with multiple GUI executables).
any – Any resource matching one of the resource specifications should be
considered part of a single instance of the application, although perhaps
resources matching all of the specifications may not be active at the same
time (for example, an application with multiple processes that come into
and go out of existence).
all – Resources matching all of the resource specifications must exist
simultaneously for Application Response to recognize that the application
is running (for example, an application with separate GUI and networking
executables).
resource
Use the resource keyword to identify the type of resource that must exist for
the application to be considered to be running and any resource-specific
parameters that further qualify the resource.
additional
Use the additional keyword to tell Application Response what types of activity
to monitor for the application.
Names for Transactions, Modules, and Failures
When creating names for transactions, modules, and failures in transaction
definitions, note the following restrictions:
Do not include spaces.
Do not include the following characters:
& * " \ ~ ` ! @ # $ % ^ , ( ) + = [ ] { } | ; ' < > ?
Use module names that are 15 characters or less, so that response path
names in reports are easy to read and do not get truncated. (Transaction and
failure names do not have this restriction, since they are not used in response
path names.)
BT Language Reference 115
Syntax for Resource Definitions
Special Characters in String Parameters
When using special characters such as quotation marks (") or backslashes ( \ )
in a string parameter to qualify an event, preceded the special characters with
a backslash ( \ ).
The following example shows how to specify a string parameter to match a
window title containing quotation marks.
{ Title="\"OK\"" }
Regular Expressions
Regular expressions are patterns in text strings that are formed by normal
characters and special characters (also known as meta-characters). Regular
expressions allow you to search for patterns instead of fixed strings. For
example, the regular expression [akm] matches either an a, k, or m. The
brackets around the characters are special characters.
Period ( . )
The period ( . ) matches any character except the newline control character.
The regular expression .ide matches hide, side, wide, and so on.
Square Brackets [ ]
A set of characters enclosed in square brackets [ ] is a one-character regular
expression that matches any of the characters in the set. The regular
expression [abcde] matches either an a, b, c, d, or e.
Within square brackets, you can indicate a range of characters with a dash (-).
For example, [a-z] matches any lowercase letter.
When used as the first character of a set, the caret defines a regular
expression matching any character except those in the set. For example, [^ae] matches any character except a, b, c, d, or e.
Plus Sign (+)
A one-character regular expression followed by a plus sign (+) matches one or
more occurrences of the regular expression. For example, [a- z]+ matches one
or more lowercase characters.
Asterisk (*)
A one-character regular expression followed by an asterisk (*) matches zero
or more occurrences of the regular expression. For example, [a- z]* matches
zero or more lowercase characters.
116 BTStudio Administration Guide
Syntax for Resource Definitions
Question Mark (?)
The question mark (?) indicates that the preceding character is an optional
character. For example, xy?z matches either xyz or xz.
Caret (^)
A caret (^) at the beginning of a regular expression matches the string at the
beginning of a line.
Dollar Sign ($)
A dollar sign ($) at the end of a regular expression matches the string at the
end of a line.
Using Multiple Regular Expressions
You can use several regular expressions together to match multiple strings.
For example, to search for purchase order numbers (occurring at the
beginning of a line) that begin with the letters PO and end in one or more
numbers, specify ^PO[0-9]+.
Parameter Substitutions
To monitor a class of applications using generic rule sets, you can specify
placeholders for user-specified parameter values in a rule set. You can later
use a function of the eHealth Web interface to specify the parameter values
(for example, application executable names and URLs to monitor). You can use
parameter substitutions in resource definitions and transaction definitions.
Syntax
Dollar Sign ($) - A dollar sign ($) indicates that Application Response should
expect a string value from the user.
Percent Sign (%) - A percent sign (%) indicates that Application Response
should expect a numeric value from the user.
Text (Text) - Text enclosed in parentheses immediately following a dollar sign
or percent sign is the text that eHealth displays to prompt the user for
parameter values on the Application Properties page of the eHealth Web
interface..
Resource Definition Example
The following example shows substitutable parameter values specified in a
resource definition.
BT Language Reference 117
Syntax for Resource Definitions
resources
{
require one
{
resource Process { ExecutableName=$(Application Executable) }
}
additional
{
resource Windows { }
resource Connection { }
}
}
When you define an application whose rule set contains this definition, you can
use a function of the eHealth Web interface to specify one or more "Application
Executable" values. If you specify the values CERNER and CERNADV,
Application Response expands the resource definition as follows:
resources
{
require one
{
resource Process { ExecutableName=$(Application Executable) }
resource Process { ExecutableName="CERNER" }
resource Process { ExecutableName="CERNADV" }
}
additional
{
resource Windows { }
resource Connection { }
}
}
Transaction Definition Example
The following example shows substitutable parameter values specified in a
transaction definition.
transaction "WebActivity"
module "WebActivity"
{
# Begin page download.
choice
{
event "BeginDownload" Web BeginLoad { Level="top" URL=contains:$(URLs) }
}
# End page download.
118 BTStudio Administration Guide
Syntax for Resource Definitions
event
"EndDownload" Web EndLoad { Level="top" }
}
When you define an application whose rule set contains this transaction
definition, you can use the Application Properties page of the eHealth Web
interface to specify one or more URLs to monitor. If you supply the values
www.concord.com and www.irs.treas.gov, Application Response expands the
transaction definition in the following way. (The choice statement is necessary
so that Application Response recognizes the BrowseAnywhere transaction if
any one of the URLs listed is accessed for a Web BeginLoad event.)
transaction "WebActivity"
module "WebActivity"
{
# Begin page download.
choice
{
event "BeginDownload" Web BeginLoad
{ Level="top" URL=contains:$(URLs) }
event "BeginDownload" Web BeginLoad
{ Level="top" URL=contains:"www.concord.com" }
event "BeginDownload" Web BeginLoad
{ Level="top" URL=contains:"www.irs.ustreas.gov" }
}
# End page download.
event
"EndDownload" Web EndLoad { Level="top" }
}
Case Insensitivity
BT Studio and Application Response make text comparisons regardless of
whether the letters are uppercase or lowercase. For example, the following
event specifications are equivalent.
event "Event1" Windows StatusMessage { Text="Change Purchase Order" }
event "Event1" Windows StatusMessage { Text="change purchase order" }
Comments
When writing rule sets, include comments to document the purpose of each
section. You can include comments within resource and transaction definitions
by preceding comments with a pound sign (#). On each line, Application
Response and BT Studio ignore any text that follows a pound sign. When
editing rules in the BT Studio rules pane, you can use the Comment Out
command to indicate that one or more selected lines are comments. This
BT Language Reference 119
Transaction Definitions
command inserts a pound sign at the start of each fully selected line, making
the entire line a comment.
Example
In the following transaction definition, text following a pound sign (#) is a
comment (shown in bold in this example). Application Response and BT Studio
ignore these comments when evaluating the rule set.
transaction "UpdateEmpInfo"
module "UpdateEmpInfo"
{
choice
{
sequence # Manually enter employee information
{
event "Event1" Windows SetFocus { Title="Enter Employee Info" }
event "Event2" Windows MenuCommand { Text="Record->Save" }
event "Event3" Windows StatusMessage {Text="Record Saved" }
}
sequence # Import employee information from a file
{
event "Import1" Windows SetFocus { Title="Import Employee Record" }
event "Import2" Windows MenuCommand { Text="Record->Save" }
event "Import3" Windows StatusMessage { Text="Record Imported" }
}
}
}
Transaction Definitions
A transaction definition specifies the sequence of key events that characterize
the transaction to monitor.
Syntax
transaction
"transaction- name"
module
"module-name"
[
transaction- specific_constraints
]
{
event-specification
event-specification
event-specification
120 BTStudio Administration Guide
Transaction Definitions
.
.
.
}
except
{
except-event- specifications
}
failure1 "failure-name1"
{
failure-event- specifications
}
failureN "failure-nameN"
{
failure-event- specifications
}
transaction
Required. The transaction keyword is followed by a unique transaction
name.
Note: Do not include spaces in the transaction name. Other naming
restrictions exist.
module
Required. The module keyword is followed by a module name. The module
name can be identical to the transaction name.
Note: No spaces are allowed in the module name. Other naming restrictions
exist.
transaction-specific_constraints
Optional. If desired, specify transaction-specific limits and constraints to
specify circumstances when Application Response should not monitor this
transaction.
event-specifications
Generally, each event specification describes a single event and has the
following form.
event event-name event-type event- action
{ parameter- list }
BT Language Reference 121
Event Specifications
Within the transaction definition, you can create more complicated constructs
using the choice, sequence, and last statements. (You cannot use choice,
sequence, or last within the event specifications for the except and failure
statements.)
Application Response looks for the specified event sequence interspersed
among all of the events occurring within the application. When searching an
application’s event sequence for a specified transaction, Application Response
examines only those events that occur from defined resources of the
application. As such, each transaction rule should only reference events from
the application’s defined resources. (Event types listed in transaction
definitions must match resource types listed in the application’s resource
definitions.)
except
Optional. Use the except statement to specify one or more events that indicate
that the transaction should not be monitored.
failure1 - failure5
Optional. Use the failure statement to define failure cases for the transaction.
Example
The following transaction definition applies to a PeopleSoft application for
updating employee data. The rule body consists of a simple sequence of
events. When Application Response observes that these five events have
occurred in the specified order for the specified application, it recognizes the
transaction and measures its response time.
transaction
"Update"
module
"Update"
{
event "Event1" Windows SetFocus { Title="Correction – Personal Data" }
event "Event2" Windows ButtonPress { Text="OK" }
event "Event3" Windows SetFocus
{ Title="Administer Workforce (U.S.) – Use – Personal Data" }
event "Event4" Windows MenuCommand { Text="File->Save" }
event "Event5" Windows StatusMessage { Text="Record Saved" }
}
Event Specifications
In the BT language, each event specification describes a single application
event. Event specifications are a core component of the transaction definition,
122 BTStudio Administration Guide
Event Types
identifying the key events that must be matched for Application Response to
recognize and monitor a transaction.
Syntax
event event-name event-type event-action { parameter-list }
event-name
Required. The event name is a non-unique name that you assign and use to
identify the event in the events pane of the main BT Studio window. It is
useful when debugging rule sets. The event name can consist of any character
string and has no impact on the recognition of transactions. You must enclose
the event name in quotation marks.
event-type
Required. The event type identifies the resource from which the event
originates. Possible values include: AppEvent, Connection, DNS, Java, Outlook,
Process, Session, Windows, and Web. Event types specified in transaction
definitions must correspond to resource types specified in the resource
definition.
event-action
Required. The event action specifies the kind of action to observe. The set of
possible values depends on the event type.
parameter-list
Optional. A parameter list is a comparison expression used to match an event
with greater precision. For more information, refer to Parameter List.
Event Types
In the BT language, each event specification describes a single application
event. The event type identifies the resource from which the event originates.
Possible values include: AppEvent, Connection, DNS, Java, Outlook, Process,
Session, Windows, and Web. Event types specified in transaction definitions
must correspond to resource types specified in the resource definition.
AppEvent Event Type
Use the AppEvent event type to define events sent by the user of the
Application Event API.
BT Language Reference 123
Event Types
When used in a transaction definition, an AppEvent event type supports the
following event actions:
Start
Stop
BT Studio also recognizes all other event actions based on those defined in the
Application Event API. For example, if the API defines an action called
SalesQuery, the supported parameter is exactly what is displayed in the Text
column of the events pane.
The following example shows a resource definition and transaction definitions
for events sent by the application.
resources
{
require all
{
resource Process { ExecutableName=$(Application Executable) }
resource Process { ExecutableName="TASKEXEC" }
resource Process { ExecutableName="IEXPLORE" }
}
additional
{
resource Web { }
resource Windows { }
resource Connection { }
resource AppEvent { }
}
}
transaction "WebAppSession"
124 BTStudio Administration Guide
Event Types
module "WebAppSession"
{
event "Begin" AppEvent Start {}
event "End" AppEvent Stop {}
}
transaction "SalesQuery"
module "SalesQuery"
{
event "AppEventQuery" AppEvent SalesQuery {Flag=contains:"Begin"}
event "AppEventQuery" AppEvent SalesQuery {Flag=contains:"End"}
}
Connection Event Type
Use the Connection event type when defining an event that involves a network
connection.
The Connection event type supports the following event actions:
Request. Indicates that data was sent to the server.
Response. Indicates that data was received from the server.
Start. Indicates that the associated connection has been established.
Stop. Indicates that the associated connection has terminated.
These event actions can take the same parameters as the Connection
resource.
Example
The following example of a Telnet rule set uses the Request and Response
events to measure latency between the client and the Telnet server.
resources
{
require one
{
BT Language Reference 125
Event Types
resource Process { ExecutableName="TELNET" }
}
additional
{
resource Connection { }
}
}
transaction "Command"
module "Command"
{
event "Request" Connection Request { }
event "Response" Connection Response { }
}
DNS Event Type
Use the DNS event type when defining an event that involves requests to a
DNS server.
When used in a transaction definition, a DNS event type supports the following
event actions:
FailedLookup
Start
Stop
SuccessfulLookup
Example
The following example shows a resource definition and transaction definitions
for DNS activity.
resources
{
require one
{
resource Process { ExecutableName=$(Application Executable) }
}
additional
{
resource DNS { }
}
}
transaction "FailedLookup"
module "FailedLookup"
{
126 BTStudio Administration Guide
Event Types
event "Fail" DNS FailedLookup { }
}
transaction "SuccessfulLookup"
module "SuccessfulLookup"
{
event "Success" DNS SuccessfulLookup { }
Java Event Type
Use the Java event type when defining an event that involves actions in a Java
application or applet.
When used in a transaction definition, a Java event type supports the following
event actions:
JInvokeApp (not applicable to Java applets)
JMouseClick
JMouseRelease
JKeyPress
JSetLabel
JSetText
JAddComponent
JRemoveComponent
Start
Stop
Example
The following example shows a resource definition and transaction definitions
for Java activity.
resources
{
require any
{
resource Process { ExecutableName=$(Application Executable) }
resource Process { ExecutableName="javaw" }
}
additional
{
BT Language Reference 127
Event Types
resource Windows { }
resource Java { }
resource Connection { }
}
}
transaction "LSLogin"
module "LSLogin"
{
event "LEStarted" Java JInvokeApp { Class="com.concord.apps.liveExceptions.LeApp"
Args = contains:"-status"}
choice
{
event "LoginStartedClick" Java JMouseRelease { Title="Login"
Class="javax.swing.JButton" Text="OK" }
event "LoginStartedKey" Java JKeyPress { Title="Login" Key=10 }
}
event "LoginFinished" Windows SetTitle { Title=contains:"eHealth Live Status" }
}
except
{
event "BadPassword" Windows SetTitle { Title="Login incorrect" }
}
failure1 "Exception"
{
event "LEStarted" Java JInvokeApp { Class="com.concord.apps.liveExceptions.LeApp"
Text=contains:"-status"}
event "Exception" Windows SetFocus { Title="LiveHealth Internal Error Messages" }
}
Outlook Event Type
Use the Outlook event type to define events that are specific to Microsoft
Outlook.
ChangeFocus
CheckNames
CheckNamesComplete
ComposeForwardMessage
ComposeNewMessage
ComposeReplyAllMessage
ComposeReplyMessage
DeleteMessage
MessageDelivery
128 BTStudio Administration Guide
Event Types
ReadMessage
ReadMessageComplete
SelectionChange
Start
Stop
SubmitMessage
SubmitMessageComplete
WriteMessage
WriteMessageComplete
Example
The following is a sample rule set for Microsoft Outlook. It defines events using
several of the supported Outlook event actions. The alternate rule set enables
Application Response to report on Read and CheckName transaction times
separately from other transactions, even though Read and CheckNames
transactions may also be reported as parts of other monitored transactions.
resources
{
require one
{
resource Process { ExecutableName=$(Application Executable) }
resource Process { ExecutableName="OUTLOOK" }
}
additional
{
resource Windows { }
resource Outlook { }
resource Connection { }
}
}
transaction "Send"
Module "Send"
{
event "SubmitMsgBegin" Outlook SubmitMessage {}
event "SubmitMsgComplete" Outlook SubmitMessageComplete {}
event "DestroyWndw" Windows Destroy {}
}
transaction "DeleteMessage"
module "Delete"
{
#Deleting a message
choice
BT Language Reference 129
Event Types
{
sequence
{
#This is when a user presses the delete key
event "DeleteKey" Windows KeyPress {Key = 46}
event "DeleteMenu" Windows MenuCommand { }
}
sequence
{
#This is when a user presses CTRL and then "D"
event "DeleteKey" Windows KeyPress {Key = 17}
event "DeleteKey" Windows KeyPress {Key = 68}
}
#The user clicked one of the many delete buttons
event "DeleteMouse" Windows MouseClick { }
}
#Now Outlook is starting the actual delete
event "Delete" Outlook DeleteMessage { }
choice
{
#Window is destroyed when message is in its own window
event "Destroy" Windows Destroy { }
sequence
{
#There will be 2 of these when you delete from the message list
event "SelectionChange" Outlook SelectionChange { }
event "SelectionChange" Outlook SelectionChange { }
}
}
}
alternate ruleset
{
transaction "Read"
module "Read"
{
# Reading a message
event "Selection" Outlook ReadMessage { }
event "ReadComplete" Outlook ReadMessageComplete { }
}
transaction "CheckNames"
module "CheckNames"
{
event "msclick" Windows MouseClick {}
event "chcknm" Outlook CheckNames { }
event "chckCmplt" Outlook CheckNamesComplete { }
}
}
130 BTStudio Administration Guide
Event Types
Process Event Type
Use the Process event source to define an event that involves the start or stop
of a process.
Start
Stop
Example
The following example of a PeopleSoft rule set matches the first choice
statement if either of the additional processes has started, and matches the
second choice statement if either of the additional processes has stopped.
resources
{
require one
{
resource Process { ExecutableName="PSTOOLS" }
resource Process { ExecutableName="PSIDE" }
resource Process { ExecutableName="PSTORES" }
resource Process { ExecutableName="PSQED" }
}
additional
{
resource Connection { }
resource Process { ExecutableName="SQRW" }
resource Process { ExecutableName="PSCRRUN" }
}
}
transaction "Report"
module "Report"
{
event "Begin" Windows SetTitle { Title=contains:"CONCORD\\" }
choice
{
event "StartA" Process Start { ExecutableName="SQRW" }
event "StartB" Process Start { ExecutableName="PSCRRUN }
}
choice
{
event "StopA" Process Stop { ExecutableName="SQRW" }
event "StopB" Process Stop { ExecutableName="PSCRRUN }
}
}
BT Language Reference 131
Event Types
Session Event Type
Use the Session event type to define an event that involves the start or stop of
a terminal server session. Normal (non-terminal-server-based) desktop
computers have a single session.
When used in a transaction definition, the Session event source supports the
following event actions:
Start. Indicates that the associated terminal services session has been
created.
Stop. Indicates that the associated terminal services session has
terminated.
Example
resources
{
require one
{
resource Session { }
}
additional
{
}
}
transaction "Sessions"
module "Sessions"
{
event "Begin" Session Start { }
event "End" Session Stop { }
}
Web Event Type
Use the Web event type to define events that involve Web browser activity
(using Microsoft Internet Explorer or Netscape Navigator only).
Note: For a list of the versions of Internet Explorer and Netscape Navigator
that the AR agent can monitor, refer to the BT Studio readme file, which
resides in the BT Studio installation directory.
BeginLoad
EndLoad
FailedLoad
132 BTStudio Administration Guide
Event Types
Start
Stop
Example
The following is a sample Web rule set. Using this rule set, Application
Response monitors the time required to load Web pages in the browser.
resources
{
require one
{
resource Process { ExecutableName="IEXPLORE" }
resource Process { ExecutableName="NETSCAPE" }
resource Process { ExecutableName="NETSCP" }
}
additional
{
resource Web { }
resource Windows { }
resource Connection { }
}
}
transaction "LoadPage"
module "LoadPage"
{
choice
{
event "WindowCreate" Windows Create { }
event "MouseClick" Windows MouseClick { }
event "KeyPress Windows KeyPress { }
}
event "BeginLoad" Web BeginLoad { Level="top" }
event "EndLoad" Web EndLoad { Level="top" }
}
Windows Event Type
Use the Windows event type to define events based on windowing activities.
ButtonPress
Create
Destroy
KeyPress
LoseFocus
MenuCommand
BT Language Reference 133
Event Types
MouseClick
SetFocus
SetTitle
Start
StatusMessage
Stop
Example
resources
{
require any
{
resource Process {ExecutableName=$(Application Executable) }
resource Process {ExecutableName="NOTES"}
resource Process {ExecutableName="nlnotes"}
resource Process {ExecutableName="naldaemn" }
resource Process {Executablename="collector"}
resource Process {Executablename="navapw32"}
resource Process {Executablename="nwrdaemn"}
}
additional
{
resource Windows {ExecutableName="NOTES"}
resource Windows {ExecutableName="nlnotes"}
resource Connection { }
}
}
transaction "Logon"
module "Logon"
{
event "LogonOKBtn" Windows ButtonPress {ParentTitle="Enter Password" text="OK"}
event "DstryLogin" Windows Destroy {Title="Enter Password"}
last
{
event "A" Connection Request { }
event "B" Connection Response { }
}
}
transaction "NewMemo"
module "NewMemo"
{
event "1" Windows MouseClick {title="New Memo" }
event "2" Windows Losefocus {title=contains:"New Memo"}
last
{
event "3a" connection request { }
event "3b" connection response { }
134 BTStudio Administration Guide
Event Actions
}
}
transaction "Reply"
module "Reply"
{
event "1" Windows MouseClick {Title="Reply"}
event "2" Windows LoseFocus {Title=contains:"New Memo"}
last
{
event "3a" connection request { }
event "3b" connection response { }
}
}
alternate ruleset
{
transaction "Read"
module "Read"
{
event "1" Windows MouseClick {count=2 objectid="NLNOTES-381- 459033237"}
last
{
event "2a" connection request { }
event "2b" connection response { }
}
}
}
Event Actions
An event action (or, more simply, an event) is the basic unit of transaction
activity recognized by Application Response. Each event type can support
different actions, as follows:
Event Type
Supported Event Actions
Connection
Request
Response
Start
Stop
DNS
FailedLookup
Start
Stop
SuccessfulLookup
BT Language Reference 135
Event Actions
Event Type
Supported Event Actions
Java
JAddComponent
JInvokeApp
JKeyPress
JMouseClick
JMouseRelease
JRemoveComponent
JSetLabel
JSetText
Start
Stop
Outlook
ChangeFocus
CheckNames
CheckNamesComplete
ComposeForwardMessage
ComposeNewMessage
ComposeReplyAllMessage
ComposeReplyMessage
DeleteMessage
MessageDelivery
ReadMessage
ReadMessageComplete
SelectionChange
Start
Stop
SubmitMessage
SubmitMessageComplete
WriteMessage
WriteMessageComplete
Process
Start
Stop
Session
Start
Stop
136 BTStudio Administration Guide
Event Actions
Event Type
Supported Event Actions
Web
BeginLoad
EndLoad
FailedLoad
Start
Stop
Windows
ButtonPress
Create
Destroy
KeyPress
LoseFocus
MenuCommand
MouseClick
SetFocus
SetTitle
Start
StatusMessage
Stop
AppEvent Start Action
The AppEvent Start event indicates that the associated application process
initialized.
Note: You cannot use the IgnoreEvents clause for an AppEvent Start event.
Example
transaction "AppEventstart"
module "AppEventstart"
{
event "Start" AppEvent Start { }
}
AppEvent Stop Action
The AppEvent Stop event indicates that the associated application process
ended.
Note: You cannot use the IgnoreEvents clause for an AppEvent Stop event.
BT Language Reference 137
Event Actions
Example
transaction "AppEventstop"
module "AppEventstop"
{
event "Stop" AppEvent Stop { }
}
DNS FailedLookup Event Action
A Domain Name System (DNS) resource exists for each process that makes
requests to a DNS server. The FailedLookup event action indicates a failed
DNS lookup. At times, it may appear that Application Response is reporting
more DNS failed lookups than actually occur. In fact, the DNS failures do
occur, but the Windows Internet Naming Service (WINS), which is layered
beneath DNS, successfully fills the request for an IP address after DNS fails.
When monitoring DNS failures, be aware that WINS often fulfills these failed
DNS requests successfully.
Example
The following example shows a rule for monitoring failed DNS lookups.
transaction "FailedLookup"
module "FailedLookup"
{
event "Failed" DNS FailedLookup { }
}
DNS Start Event Action
A Domain Name System (DNS) resource exists for each process that makes
requests to a DNS server. The Start event indicates that the process has
begun making DNS requests to the server.
Note: You cannot use the IgnoreEvents clause for a DNS Start event.
Example
transaction "DNSstart"
module "DNSstart"
{
event "Start" DNS Start { }
}
138 BTStudio Administration Guide
Event Actions
DNS Stop Event Action
A Domain Name System (DNS) resource exists for each process that makes
requests to a DNS server. The Stop event indicates that the process has
terminated.
Note: You cannot use the IgnoreEvents clause for a DNS Stop event.
Example
transaction "DNSstop"
module "DNSstop"
{
event "Stop" DNS Stop { }
}
DNS SuccessfulLookup Event Action
A Domain Name System (DNS) resource exists for each process that makes
requests to a DNS server. The SuccessfulLookup event action indicates a
successful DNS lookup.
Example
The following example shows a rule for monitoring successful DNS lookups.
transaction "DNSlookup"
module "DNSlookup"
{
event "Success" DNS SuccessfulLookup { }
}
Java JAddComponent Event Action
The Java JAddComponent event action indicates that a component was added
to a container. This event supports the following parameter:
Child. The class name of the child component that was added.
Example
transaction "AddComponent"
module "AddComponent"
{
event "AddComponent" Java JAddComponent { }
event "AddComponent" Java JAddComponent { }
}
BT Language Reference 139
Event Actions
Java JInvokeApp Event Action
The Java JInvokeApp event action indicates that the Java application
initialized. The JInvokeApp event supports the following parameters:
Args. The arguments passed to the application class.
Class. The name of the application class.
Title. The title of the application.
Example
transaction "LTLogin"
module "LTLogin"
{
event "LTStarted" Java JInvokeApp { Class="com.concord.apps.liveTrend.LtApp"}
}
Java JKeyPress Event Action
The Java JKeyPress event action indicates a keystroke event on a Java
component. This event supports the following parameters:
Title. The title of the application window.
Key. The number that identifies the key that was pressed.
Example
transaction "LTLogin"
module "LTLogin"
{
event "LTStarted" Java JInvokeApp { Class="com.concord.apps.liveTrend.LtApp"}
choice
{
event "LoginStartedClick" Java JMouseReleased { Title="Login"
Class="javax.swing.JButton" Text="OK" }
event "LoginStartedKey" Java JKeyPress { Title="Login" Key=10 }
}
event "LoginFinished" Windows SetTitle { Title=contains:"eHealth Live Trend" }
}
Java JMouseClick Event Action
The Java JMouseClick event action indicates that the user clicked on a Java
component using the mouse. This event supports the following parameters:
Text. The text on the component activated by the mouse, if any.
140 BTStudio Administration Guide
Event Actions
Class. The name of the application class.
Title. The title of the window that was activated by the mouse.
Example
transaction "MouseClick"
module "MouseClick"
{
event "MouseClick" Java JMouseClick {}
}
Java JMouseRelease Event Action
The Java JMouseRelease event action indicates that the user released the
mouse after clicking on a Java component. This event supports the following
parameters:
Text. The text on the component activated by the mouse, if any.
Class. The name of the application class.
Title. The title of the window that was activated by the mouse.
Example
transaction "LSLogin"
module "LSLogin"
{
event "LEStarted" Java JInvokeApp { Class="com.concord.apps.liveExceptions.LeApp"
Args = contains:"-status"}
choice
{
event "LoginStartedClick" Java JMouseRelease { Title="Login"
Class="javax.swing.JButton" Text="OK" }
event "LoginStartedKey" Java JKeyPress { Title="Login" Key=10 }
}
event "LoginFinished" Windows SetTitle { Title=contains:"eHealth Live Status" }
}
Java JRemoveComponent Event Action
The Java JRemoveComponent event action indicates that a component was
removed from a container. This event supports the following parameter:
Child. The class name of the child component that was removed.
Example
transaction "RemoveComponent"
module "RemoveComponent"
BT Language Reference 141
Event Actions
{
event "RemoveComponent" Java JRemoveComponent { }
event "RemoveComponent" Java JRemoveComponent { }
}
Java JSetLabel Event Action
The Java JSetLabel event action indicates that a label changed on a JLabel
component. This event supports the following parameters:
Title. The title of the Java component.
Text. The new value for the SetLabel event.
OldText. The former value for the SetLabel event.
Example
transaction "LEUpdate"
module "LEUpdate"
{
event "UpdateStarted" Java JSetLabel { Title=contains:"eHealth Live Exceptions"
Text="Update in progress ..." }
event "UpdateDone" Java JSetLabel { Title=contains:"eHealth Live Exceptions"
OldText="Update in progress ..." }
}
Java JSetText Event Action
The Java JSetText event action indicates that text changed on an AWT
TextEvent component. This event supports the following parameters:
Title. The title of the AWT TextEvent component.
Text. The new value for the SetText event.
OldText. The former value for the SetText event.
Example
transaction "JavaChangeText"
module "JavaChangeText"
{
event "JavaChangeText" Java JSetText{ }
}
142 BTStudio Administration Guide
Event Actions
Java Start Event Action
The Java Start event action indicates that the associated Java process
initialized.
Example
transaction "JavaStart"
module "JavaStart"
{
event "JavaStarted" Java Start { }
}
Java Stop Event Action
The Java Stop event action indicates that the associated Java process
terminated.
Example
transaction "JavaStop"
module "JavaStop"
{
event "JavaStopped" Java Stop {}
}
Outlook ChangeFocus Event Action
The Outlook ChangeFocus event action indicates that the user has made a
selection in the left pane. This action supports the following parameter:
ExecutableName. The name of the process
Outlook CheckNames Event Action
The Outlook CheckNames event action indicates that Outlook is checking the
names that the user entered against the address book. This action supports
the following parameter:
ExecutableName. The name of the process
Example
transaction "CheckNames"
module "CheckNames"
{
event "msclick" Windows MouseClick { }
event "chcknm" Outlook CheckNames { }
BT Language Reference 143
Event Actions
event "chckCmplt" Outlook CheckNamesComplete { }
}
Outlook CheckNamesComplete Event Action
The Outlook CheckNamesComplete event action indicates that the previous
operation, CheckNames, has completed. This action supports the following
parameter:
ExecutableName. The name of the process
Example
transaction "CheckNames"
module "CheckNames"
{
event "msclick" Windows MouseClick { }
event "chcknm" Outlook CheckNames { }
event "chckCmplt" Outlook CheckNamesComplete { }
}
Outlook ComposeForwardMessage Event Action
The Outlook ComposeForwardMessage event action indicates that the user
composed a forwarded message. This action supports the following parameter:
ExecutableName. The name of the process
Example
transaction "ForwardMessage"
module "ForwardMessage"
{
event "Event1" Outlook ComposeForwardMessage { }
event "Event2" Outlook SubmitMessageComplete { }
}
Outlook ComposeNewMessage Event Action
The Outlook ComposeNewMessage event action indicates that the user
composed a new message. This action supports the following parameter:
ExecutableName. The name of the process
Example
transaction "SendNew"
module "SendNew"
{
144 BTStudio Administration Guide
Event Actions
# Sending a message
event "msclick" Windows MouseClick { }
event "New" Outlook ComposeNewMessage { }
event "SubmitComplete" Outlook SubmitMessageComplete { }
}
Outlook ComposeReplyAllMessage Event Action
The Outlook ComposeReplyAllMessage event action indicates that the user has
composed a reply to the sender and all other recipients. This action supports
the following parameter:
ExecutableName. The name of the process
Example
transaction "SendReplyAll"
module "SendReplyAll"
{
# Sending a message
event "msclick" Windows MouseClick { }
event "ReplyAll" Outlook ComposeReplyAllMessage { }
event "SubmitComplete" Outlook SubmitMessageComplete { }
}
Outlook ComposeReplyMessage Event Action
The Outlook ComposeReplyMessage event action indicates that the user
composed a reply to the sender of a message. This action supports the
following parameter:
ExecutableName. The name of the process
Example
transaction "SendReply"
module "SendReply"
{
# Sending a message
event "Reply" Outlook ComposeReplyMessage { }
event "SubmitComplete" Outlook SubmitMessageComplete { }
}
Outlook DeleteMessage Event Action
The Outlook DeleteMessage event action indicates that a message is deleted.
This action supports the following parameter:
BT Language Reference 145
Event Actions
ExecutableName. The name of the process
Example
transaction "Delete"
module "Delete"
{
#Deleting a message
choice
{
sequence
{
#This is when a user presses the delete key
event "DeleteKey" Windows KeyPress {Key = 46}
event "DeleteMenu" Windows MenuCommand { }
}
sequence
{
#This is when a user presses CTRL and then "D"
event "DeleteKey" Windows KeyPress {Key = 17}
event "DeleteKey" Windows KeyPress {Key = 68}
}
#The user clicked one of the many delete buttons
event "DeleteMouse" Windows MouseClick { }
}
#Now Outlook is starting the actual delete
event "Delete" Outlook DeleteMessage { }
choice
{
#Window is destroyed when message is in its own window
event "Destroy" Windows Destroy { }
sequence
{
#There will be 2 of these when you delete from the message list
event "SelectionChange" Outlook SelectionChange { }
event "SelectionChange" Outlook SelectionChange { }
}
}
}
Outlook MessageDelivery Event Action
The Outlook MessageDelivery event action indicates that a message has been
delivered. This action supports the following parameter:
ExecutableName. The name of the process
Example
transaction "Incoming"
146 BTStudio Administration Guide
Event Actions
module "Incoming"
{
event "Event1" Connection Request { }
event "Event2" Connection Response { }
event "Event3" Outlook MessageDelivery { }
}
Outlook Read Message Event Action
The Outlook ReadMessage event action indicates that the user has opened a
message. This action supports the following parameter:
ExecutableName. The name of the process
Example
transaction "Read"
module "Read"
{
event "Read" Outlook ReadMessage { }
event "ReadComplete" Outlook ReadMessageComplete { }
}
Outlook SelectionChange Event Action
The Outlook SelectionChange event action indicates that the selection has
changed either within the current pane or between panes. This action supports
the following parameter:
ExecutableName. The name of the process
Example
transaction "Delete"
module "Delete"
{
#Deleting a message
choice
{
sequence
{
#This is when a user presses the delete key
event "DeleteKey" Windows KeyPress {Key = 46}
event "DeleteMenu" Windows MenuCommand { }
}
sequence
{
#This is when a user presses CTRL and then "D"
event "DeleteKey" Windows KeyPress {Key = 17}
BT Language Reference 147
Event Actions
event "DeleteKey" Windows KeyPress {Key = 68}
}
#The user clicked one of the many delete buttons
event "DeleteMouse" Windows MouseClick { }
}
#Now Outlook is starting the actual delete
event "Delete" Outlook DeleteMessage { }
choice
{
#Window is destroyed when message is in its own window
event "Destroy" Windows Destroy { }
sequence
{
#There will be 2 of these when you delete from the message list
event "SelectionChange" Outlook SelectionChange { }
event "SelectionChange" Outlook SelectionChange { }
}
}
}
Outlook Start Event Action
The Outlook Start event action indicates that a process has started. This action
supports the following parameter:
ExecutableName. The name of the process
Note: You cannot use the IgnoreEvents clause for an Outlook Start event.
Example
transaction "OutlookStart"
module "OutlookStart"
{
event "Start1" Process Start {ExecutableName="OUTLOOK" }
event "Start2" Windows Start {ExecutableName="OUTLOOK" }
event "Start3" Outlook Start {ExecutableName="OUTLOOK" }
event "Start4" Windows Create {ExecutableName="OUTLOOK" }
}
Outlook Stop Event Action
The Outlook Stop event action indicates that a process has stopped. This
action supports the following parameter:
ExecutableName. The name of the process
Note: You cannot use the IgnoreEvents clause for an Outlook Stop event.
148 BTStudio Administration Guide
Event Actions
Example
transaction "OutlookStop"
module "OutlookStop"
{
event "Stop1" Windows Destroy { ExecutableName="OUTLOOK" }
event "Stop2" Windows SetTitle { Title="Microsoft Outlook Shutting Down" }
event "Stop3" Process Stop { ExecutableName="OUTLOOK" }
event "Stop4" Windows Stop { ExecutableName="OUTLOOK" }
event "Stop5" Outlook Stop { ExecutableName="OUTLOOK" }
event "Stop6" Windows Destroy { ExecutableName="MAPISP32" }
event "Stop7" Process Stop { ExecutableName="MAPISP32" }
event "Stop8" Windows Stop { ExecutableName="MAPISP32" }
}
Outlook SubmitMessage Event Action
The Outlook SubmitMessage event action indicates that a message has been
submitted. This action supports the following parameter:
ExecutableName. The name of the process
Example
transaction "Send"
Module "Send"
{
event "SubmitMsgBegin" Outlook SubmitMessage {}
event "SubmitMsgComplete" Outlook SubmitMessageComplete {}
event "DestroyWndw" Windows Destroy {}
}
Outlook SubmitMessageComplete Event Action
The Outlook SubmitMessageComplete event action indicates that the previous
operation (ComposeNewMessage, ComposeReplyMessage,
ComposeReplyAllMessage, or ComposeForwardMessage) has completed.
This action supports the following parameter:
ExecutableName. The name of the process
Example
transaction "Send"
BT Language Reference 149
Event Actions
Module "Send"
{
event "SubmitMsgBegin" Outlook SubmitMessage {}
event "SubmitMsgComplete" Outlook SubmitMessageComplete {}
event "DestroyWndw" Windows Destroy {}
}
Outlook WriteMessage Event Action
The Outlook WriteMessage event action indicates that Outlook saved the
properties of a message. This action supports the following parameter:
ExecutableName. The name of the process
Example
transaction "Write"
module "Write"
{
event "Event1" Outlook WriteMessage { }
event "Event2" Outlook WriteMessageComplete { }
}
Outlook WriteMessageComplete Event Action
The Outlook WriteMessageComplete event action indicates that the previous
operation, WriteMessage, has completed. This action supports the following
parameter:
ExecutableName. The name of the process
Example
transaction "Write"
module "Write"
{
event "Event1" Outlook WriteMessage { }
event "Event2" Outlook WriteMessageComplete { }
}
Process Start Event Action
The Process Start event action indicates that the specified process has started.
This action supports the following parameter:
ExecutableName. The name of the process
Note: You cannot use the IgnoreEvents clause for a Process Start event.
150 BTStudio Administration Guide
Event Actions
Example
The following example shows a sample rule set for an SAP application.
resources
{
require all
{
resource Process { ExecutableName="FRONT" }
resource Process { ExecutableName="SAPGUI" }
}
additional
{
resource Windows { }
resource Connection { }
}
}
transaction "Login"
module
"Login"
{
event "Start" Process Start { ExecutableName="SAPGUI" }
event "Login" Windows SetTitle { Title="Enter Username" }
event "Logout" Windows SetTitle { Title="SAP R/3 System" }
event "Stop" Process Stop { ExecutableName="SAPGUI" }
}
Process Stop Event Action
The Process Stop event action indicates that the specified process has been
terminated. This action supports the following parameter:
ExecutableName. The name of the process
Note: You cannot use the IgnoreEvents clause for a Process Stop event.
Example
The following example shows a sample rule set for an SAP application.
resources
{
require all
{
resource Process { ExecutableName="FRONT" }
resource Process { ExecutableName="SAPGUI" }
}
additional
{
BT Language Reference 151
Event Actions
resource Windows { }
resource Connection { }
}
}
transaction "Login"
module
"Login"
{
event "Start" Process Start { ExecutableName="SAPGUI" }
event "Login" Windows SetTitle { Title="Enter Username" }
event "Logout" Windows SetTitle { Title="SAP R/3 System" }
event "Stop" Process Stop { ExecutableName="SAPGUI" }
}
Web BeginLoad Event Action
The Web BeginLoad event action indicates that the browser is loading a
document. This event supports the following parameters:
ExecutableName. The name of the Web browser executable
URL. The universal resource locator (URL) of the Web page being loaded
Level. The level of the Web page being loaded, using one of the following
values:
top. indicates a top-level page.
sublink. indicates a sub-link of another page.
Note: For a list of the versions of Internet Explorer and Netscape Navigator
that the AR agent can monitor, refer to the BT Studio readme file, which
resides in the BT Studio installation directory.
Example
The following example shows a parameterized event specification using the
URL parameter. In this case, the use of the choice statement is significant; it
ensures that, if the user specifies multiple URL values, a Browse transaction is
recognized if the browser downloads any one of the specified URLs. The Level
parameter causes the agent to report transactions for top-level Web pages
matching the parameterized URL. As a result, if one of the URLs is accessed as
part of a sub-link on another page, the agent does not report it as a
transaction.
transaction "Browse"
module "Browse"
{
choice
{
event "WindowCreate" Windows Create {}
event "MouseClick"
152 BTStudio Administration Guide
Windows MouseClick {}
Event Actions
event "KeyPress"
Windows KeyPress {}
}
choice
{
event "Begin" Web BeginLoad { Level="top" URL=contains:$(URLs) }
}
event "End" Web EndLoad { Level="top" }
}
When you create or modify an application definition that uses this rule set,
Application Response prompts you for one or more values for the URL
parameter. If you specify "www.concord.com" and "www.irs.ustreas.gov" as
values, the transaction definition expands as follows:
transaction "Browse"
module "Browse"
{
choice
{
event "WindowCreate" Windows Create {}
event "MouseClick"
Windows MouseClick {}
event "KeyPress"
Windows KeyPress {}
}
choice
{
event "Begin" Web BeginLoad { Level="top" URL=contains:$(URLs) }
event "Begin" Web BeginLoad
{ Level="top" URL=contains:"www.concord.com" }
event "Begin" Web BeginLoad
{ Level="top" URL=contains:"www.irs.treas.gov" }
}
event "End" Web EndLoad { Level="top" }
}
Web EndLoad Event Action
The Web EndLoad event action indicates that the browser has loaded a
document. This event supports the following parameters:
ExecutableName. The name of the Web browser executable
URL. The universal resource locator (URL) of the Web page being loaded
Title. The title of the HTML document (If the document does not have a
title, no title appears.)
Level. The level of the Web page being loaded, using one of the following
values:
BT Language Reference 153
Event Actions
top indicates a top-level page.
sublink indicates a sub-link of another page.
Note: For a list of the versions of Internet Explorer and Netscape Navigator
that the AR agent can monitor, refer to the BT Studio readme file, which
resides in the BT Studio installation directory.
Example
transaction "LoadPage"
module
"LoadPage"
{
event "Event1" Web BeginLoad
{ Level="top" URL=contains:"www.concord.com/cust/techsup.htm" }
event "Event2" Web EndLoad { Level="top" }
}
Web FailedLoad Event Action
The Web FailedLoad event action indicates that Internet Explorer (IE) has
failed when trying to load a document. (You cannot use Web FailedLoad to
monitor Netscape transactions.) Use this event to track different types of IE
Web failures.
This event supports the following parameter:
FailureCode. The failure code returned by the Web browser.
Example:
event "404" Web FailedLoad {FailureCode=404}
Note: Some versions of Internet Explorer do not properly report 404 failures
or other types of browser failures.
Example
The following example defines the LoadIntranet transaction, which begins
when the user creates a window, clicks the mouse, or presses a key, resulting
in the loading of the intranet page. If a 404 failure occurs, however, the
transaction fails.
transaction "LoadIntranet"
module "LoadIntranet"
{
choice # create a window, click the mouse, or press a button
{
event "CreateWindow" Windows Create {}
event "MouseClick" Windows MouseClick {}
event "ButtonPress" Windows ButtonPress {}
}
154 BTStudio Administration Guide
Event Actions
# begin loading the intranet page
event "Begin" Web BeginLoad { Level="top" URL=contains:"abc.com" }
#
# finish loading the intranet page
event "End" Web EndLoad { Level="top" }
}
failure1 "404_not-found"
{
choice # create a window, click the mouse, or press a button
{
event "CreateWindow" Windows Create {}
event "MouseClick" Windows MouseClick {}
event "ButtonPress" Windows ButtonPress {}
}
# begin loading the intranet page
event "Begin" Web BeginLoad { Level="top" URL=contains:"abc.com" }
#
# load fails due to 404 error: Not Found
event "404" Web FailedLoad {FailureCode=404}
}
Web Start Event Action
The Web Start event action indicates that the browser has initialized. This
action supports the following parameter:
ExecutableName. The name of the process
Note: You cannot use the IgnoreEvents clause for a Web Start event.
Example
transaction "IEstart"
module "IEstart"
{
event "Start1" Windows Start { ExecutableName="IEXPLORE" }
event "Start2" Web Start { ExecutableName="IEXPLORE" }
event "Start3" Web BeginLoad { ExecutableName="IEXPLORE" }
event "Start4" Windows SetTitle { }
event "Start5" Web EndLoad { ExecutableName="IEXPLORE" }
}
Web Stop Event Action
The Web Stop event action indicates that the browser has terminated. This
action supports the following parameter:
ExecutableName. The name of the process
BT Language Reference 155
Event Actions
Note: You cannot use the IgnoreEvents clause for a Web Stop event.
Example
transaction "IEstop"
module "IEstop"
{
event "Stop1" Windows SetFocus { ExecutableName="IEXPLORE" }
event "Stop2" Windows Destroy
{ ExecutableName="IEXPLORE" }
event "Stop3" Process Stop
{ ExecutableName="IEXPLORE" }
event "Stop4" Windows Stop
{ ExecutableName="IEXPLORE" }
event "Stop5" Web Stop { ExecutableName="IEXPLORE" }
}
Windows ButtonPress Event Action
The Windows ButtonPress event action indicates that the user clicked a button
in an application dialog.
ButtonPress events support the following parameters:
(BT Studio displays these values in the events pane.)
ExecutableName. The name of the process
ParentClass. The class of the button’s parent window
ParentTitle. The title of the button’s parent window
ParentObjectID. Application-wide unique identifier of the button’s parent
window
Text. The label of the button
Item. The internal item ID of the button (numeric)
ObjectID. Application- wide unique identifier of the button
Example
transaction "Logon"
module "Logon"
{
event "LogonOKBtn" Windows ButtonPress {ParentTitle="Enter Password" Text="OK"}
event "DstryLogin" Windows Destroy {Title="Enter Password"}
last
{
event "A" Connection Request { }
event "B" Connection Response { }
}
}
156 BTStudio Administration Guide
Event Actions
Windows Create Event Action
The Windows Create event action indicates that a new application window was
created.
Create events support the following parameters:
(BT Studio displays these values in the events pane.)
ExecutableName. The name of the process
Class.
Title. The title of the new window
ObjectID. Application- wide unique identifier of the new window
The class of the new window
Example
transaction
module
"LoadRecord"
"LoadRecord"
{
event "1" Windows MenuCommand { Text="Load Customer Record..." }
event "2" Windows Create { Title=contains:"Customer Summary" }
}
Windows Destroy Event Action
The Windows Destroy event action indicates that an application window was
closed (destroyed).
Destroy events support the following parameters:
(BT Studio displays these values in the events pane.)
ExecutableName. The name of the process
Class. The class of the destroyed window
Title. The title of the destroyed window
ObjectID. Application- wide unique identifier of the window
Example
transaction "Send"
Module "Send"
{
event "SubmitMsgBegin" Outlook SubmitMessage {}
event "SubmitMsgComplete" Outlook SubmitMessageComplete {}
event "DestroyWindow" Windows Destroy {}
}
BT Language Reference 157
Event Actions
Windows KeyPress Event Action
The Windows KeyPress event action indicates that the user pressed a key (of
the keyboard) within the context of an application window.
KeyPress events support the following parameters:
(BT Studio displays these values in the events pane.)
ExecutableName. The name of the process
Class. The class of the affected window
Title. The title of the affected window
ObjectID. Application-wide unique identifier of the affected window
Key. The decimal ASCII numeric value representing the key that was
pressed.
For letter, number, and punctuation keys, the reported key value is 0 (zero),
indicating that a KeyPress event occurred but not giving the specific key value
(for security reasons). You can, however, specify key values for other control
characters, such as Ctrl, Alt, Tab, Enter, Delete, F1, Alt+4, and so on. For a
list of decimal ASCII codes for non-printing characters, refer to
www.asciitable.com.
Note: Due to limitations of the Windows operating system, BT Studio and
Application Response cannot recognize the key sequences Ctrl+Alt+Delete and
Ctrl+C. To be able to recognize individual keystrokes (generally used to
monitor text-based applications), you must install the keystroke version of the
AR agent.
Example
transaction "F1help"
module "F1help"
{
# User presses "F1" key for help in Outlook
#
event "Help1" Windows KeyPress { ExecutableName="OUTLOOK" Key=112 }
event "Help2" Process Start { ExecutableName="msohelp" }
event "Help3" Windows Start { ExecutableName="msohelp" }
event "Help4" Windows MenuCommand { ExecutableName="OUTLOOK" Item="21858"}
event "Help5" Windows Create { ExecutableName="msohelp" }
}
Windows LoseFocus Event Action
The Windows LoseFocus event action indicates that an application window lost
focus. A window can lose focus when a pop-up window appears or when the
user selects another window.
158 BTStudio Administration Guide
Event Actions
LoseFocus events support the following parameters.
(BT Studio displays these values in the events pane.)
ExecutableName. The name of the process
Class. The class of the affected window
Title. The title of the affected window
ObjectID. Application- wide unique identifier of the affected window
Example
transaction "Reply"
module "Reply"
{
event "1" Windows MouseClick {Title="Reply"}
event "2" Windows LoseFocus {Title=contains:"New Memo"}
last
{
event "3a" connection request { }
event "3b" connection response { }
}
}
Windows MenuCommand Event Action
The Windows MenuCommand event action indicates that the user selected a
menu command in the application. MenuCommand events support the
following parameters.
(BT Studio displays these values in the events pane.)
ExecutableName. The name of the process
ParentClass. The class of the menu’s parent window
ParentTitle. The title of the menu’s parent window
ParentObjectID. Application-wide unique identifier of menu’s parent
window
Text. The name of the menu item selected
Item. The internal ID of the menu item (numeric)
Example
transaction
module
"ChangePO"
"ChangePO"
{
event "Event1" Windows SetFocus { Title=contains:"Purchase Order" }
event "Event2" Windows MenuCommand { Text="Purchase order- >Change" }
event "Event3" Windows StatusMessage { Title="Purchase Order Updated" }
}
BT Language Reference 159
Event Actions
Windows MouseClick Event Action
The Windows MouseClick event action indicates that the user clicked a mouse
button within the context of an application window.
MouseClick events support the following parameters.
(BT Studio displays these values in the events pane.)
ExecutableName. The name of the process
Class.
Title. The title of the affected window
ObjectID. Application- wide unique identifier of the affected window
Count. (numeric) 1 = single click, 2 = double click
The class of the affected window
Example
transaction "Read"
module "Read"
{
event "1" Windows MouseClick {count=2 objectid="NLNOTES-381- 459033237"}
last
{
event "2a" connection request { }
event "2b" connection response { }
}
}
Windows SetFocus Event Action
The Windows SetFocus event action indicates that an application window
received focus. A window can receive focus when it pops up or when a user
selects it.
SetFocus events support the following parameters.
(BT Studio displays these values in the events pane.)
ExecutableName. The name of the process
Class. The class of the affected window
Title. The title of the affected window
ObjectID. Application-wide unique identifier of the affected window
Example
transaction
module
"ChangePO"
"ChangePO"
160 BTStudio Administration Guide
Event Actions
{
event "Event1" Windows SetFocus { Title=contains:"Purchase Order" }
event "Event2" Windows MenuCommand { Text="Purchase order- >Change" }
event "Event3" Windows StatusMessage { Title="Purchase Order Updated" }
}
Windows SetTitle Event Action
The Windows SetTitle event action indicates that the title of an application
window changed.
SetTitle events support the following parameters.
(BT Studio displays these values in the events pane.)
ExecutableName. The name of the process
Class. The class of the affected window
Title. The new title of the affected window
ObjectID. Application- wide unique identifier of the affected window
Example
transaction
module
"RecordOrder"
"RecordOrder"
{
event "RO1" Windows SetTitle { Title="Confirm Changes" }
event "RO2" Windows ButtonPress { Text="OK" }
event "RO3" Windows StatusMessage { Text="Order Updated" }
}
Windows Start Event Action
The Windows Start event action indicates that the associated windowing
process initialized. The Start event supports the following parameter:
ExecutableName. The name of the process
Note: You cannot use the IgnoreEvents clause for a Windows Start event.
Example
transaction "IEstart"
module "IEstart"
{
event "Start1" Windows Start { ExecutableName="IEXPLORE" }
event "Start2" Web Start { ExecutableName="IEXPLORE" }
event "Start3" Web BeginLoad { ExecutableName="IEXPLORE" }
event "Start4" Windows SetTitle { }
BT Language Reference 161
Event Actions
event "Start5" Web EndLoad { ExecutableName="IEXPLORE" }
}
Windows StatusMessage Event Action
The Windows StatusMessage event action indicates that the application
displayed a status message. StatusMessage events support the following
parameters.
(BT Studio displays these values in the events pane.)
ExecutableName. The name of the process
Class. The class of the affected window
Title. The title of the affected window
ObjectID. Application- wide unique identifier of the affected window
Text. The status message displayed by the application
Example
transaction
module
"ChangePO"
"ChangePO"
{
event "Event1" Windows SetFocus { Title=contains:"Purchase Order" }
event "Event2" Windows MenuCommand { Text="Purchase order- >Change" }
event "Event3" Windows StatusMessage { Text="Purchase Order Updated" }
}
Windows Stop Event Action
The Windows Stop event action indicates that the associated windowing
process terminated. The Stop event supports the following parameter:
ExecutableName. The name of the process
Note: You cannot use the IgnoreEvents clause for a Windows Stop event.
Example
transaction "IEstop"
module "IEstop"
{
event "Stop1" Windows SetFocus { ExecutableName="IEXPLORE" }
event "Stop2" Windows Destroy
{ ExecutableName="IEXPLORE" }
event "Stop3" Process Stop
{ ExecutableName="IEXPLORE" }
event "Stop4" Windows Stop
{ ExecutableName="IEXPLORE" }
event "Stop5" Web Stop { ExecutableName="IEXPLORE" }
}
162 BTStudio Administration Guide
Parameter List
Parameter List
A parameter is a name with an associated value that qualifies an instance of a
resource or an application event. For example, Application Response
recognizes a Process resource by an executable name. In a parameter-list,
each parameter entry is usually comprised of a simple name and value (string
or numeric) separated by an equality operator (‘=’). If the associated value
can vary (such as a window title that includes an employee ID number), use a
comparison-qualifier (contains or regexp) to qualify the instance.
Syntax
parameter-name = parameter-value
or
parameter-name = comparison-qualifier : parameter-value
When specifying a parameter-value, you must enclose string values (for
example, text and numerals) in quotation marks. The comparison- qualifier
can be any of the values listed below. If you do not include a qualifier in a
parameter specification, BT Studio assumes the exact qualifier.
Note: Use a backslash ( \ ) to escape embedded quotes and backslashes in
the parameter value.
exact
Default qualifier. The actual parameter value from the resource or event must
exactly match the specified value (without sensitivity to case).
Example:
event "Event2" Windows StatusMessage { Text="New employee record created." }
or
event "Event2" Windows StatusMessage { Text=exact:"New employee record
created." }
contains
The actual parameter value must contain (as a sub-string) the specified value
(without sensitivity to case).
Example:
event "Event4" Windows StatusMessage { Text=contains:"record updated."
}
BT Language Reference 163
Parameter List
regexp
The actual parameter value must match the specified regular expression
(without sensitivity to case). Regular expressions are patterns in text strings
that are formed by normal characters and special characters. Regular
expressions allow you to search on patterns instead of fixed strings.
Example:
event "Event5" Windows StatusMessage { Text=regexp:"ID[0-9]+" }
Example
The following example shows a rule set for an application called
EmployeeManagement. The transaction definitions use the contains, regexp,
and implicit exact keywords for parameter values.
resources #
The application consists of a single executable.
{
require
all
{
resource Process { ExecutableName="EmplMgmt" }
}
additional
{
resource Windows { }
resource Connection { }
}
}
#
#
User-level transactions. Only monitor new employee and employee
#
update operations.
#
transaction
"NewEmployee"
module
"NewEmployee"
{
event "Event1" Windows MenuCommand { Text="New->Record…" }
event "Event2" Windows StatusMessage { Text="New employee record created." }
}
transaction
"EmployeeUpdate"
module
"EmployeeUpdate"
{
event "Event3" Windows MenuCommand { Text="Edit->Save" }
# Match any status message that contains "record updated."
event "Event4" Windows StatusMessage { Text=contains:"record updated."
164 BTStudio Administration Guide
}
Sequence Statement
# Match any status message that begins with an identification number
event "Event5" Windows StatusMessage { Text=regexp:"ID[0-9]+" }
Sequence Statement
Sometimes a transaction is valid only if a number of steps occur in a specific
order. The sequence statement allows you to specify an ordered series of
events for a transaction. Application Response considers a sequence statement
to be satisfied if it observes all of the event specifications to occur in order
within the application (although other events may be interspersed).
Syntax
sequence
{
event-specification
event-specification
event-specification
.
.
.
}
event-specification
A sequence statement is matched if all of the specified event specifications are
observed to occur in order within the application (although other events may
be interspersed). Each event specification can itself be a single event
specification, choice statement, last statement, or sequence statement.
Application Response always interprets the main rule body of a transaction
definition as an implicit sequence statement.
Example
In the example below, an application user can create a new employee record
by either manually entering the employee’s data into a screen, or importing it
from a file.
transaction
"AddNewEmployee"
module
"AddNewEmployee"
{
choice
{
BT Language Reference 165
Choice Statement
sequence
# Manually enter employee data
{
event "EventA1" Windows SetFocus { Title="Enter Employee Data" }
event "EventA2" Windows MenuCommand { Text="Record->Save" }
event "EventA3" Windows StatusMessage { Text="Record Saved" }
}
sequence
# Import employee data from a file
{
event "EventB1" Windows SetFocus { Title="Import Employee Record" }
event "EventB2" Windows MenuCommand { Text="Record->Save" }
event "EventB3" Windows StatusMessage { Text="Record Imported" }
}
}
}
Choice Statement
Sometimes a user can perform a transaction in many ways. Use the choice
statement to specify multiple, valid event sequences for a transaction.
Application Response considers a choice statement to be satisfied if it observes
any one of the event specifications.
Syntax
choice
{
event-specification
event-specification
event-specification
.
.
.
}
event-specification
A choice statement is matched if any one of its event specifications is satisfied.
Each event specification can itself be a single event specification, choice
statement, sequence statement, or last statement.
Examples
In the following example, a user of the application can create a new employee
record by either manually entering the employee’s data into a window, or by
importing it from a file.
166 BTStudio Administration Guide
Choice Statement
transaction
"AddEmployee"
module
"AddEmployee"
{
choice
{
sequence
# Manually enter employee data
{
event "Event A1" Windows SetFocus { Title="Enter Employee Data" }
event "Event A2" Windows MenuCommand { Text="Record->Save" }
event "Event A3" Windows StatusMessage { Text="Record Saved" }
}
sequence
# Import employee data from a file
{
event "Event B1" Windows SetFocus { Title="Import Employee Record" }
event "Event B2" Windows MenuCommand { Text="Record->Save" }
event "Event B3" Windows StatusMessage { Text="Record Imported" }
}
}
}
In the following example of a PeopleSoft rule set, the first choice statement is
matched if either of the PeopleSoft processes have started, and the second
choice statement is matched if either of the PeopleSoft processes have
stopped.
resources
{
require one
{
resource Process { ExecutableName="pstools" }
resource Process { ExecutableName="pside" }
resource Process { ExecutableName="pstores" }
resource Process { ExecutableName="PSQED" }
}
additional
{
resource Windows { }
resource Connection { }
resource Process { ExecutableName="SQRW" }
resource Process { ExecutableName="PSCRRUN" }
}
}
transaction "Report"
module "Report"
{
event "Begin" Windows SetTitle { Title=contains:"CONCORD\\" }
BT Language Reference 167
Last Statement
choice
{
event "StartA" Process Start { ExecutableName="SQRW" }
event "StartB" Process Start { ExecutableName="PSCRRUN }
}
choice
{
event "StopA" Process Stop { ExecutableName="SQRW" }
event "StopB" Process Stop { ExecutableName="PSCRRUN }
}
}
Last Statement
In some cases, you may have difficulty identifying the end of a transaction,
particularly if the transaction does not end with any windowing activity, but
instead with a flurry of network activity. Use the last statement to instruct
Application Response to identify the end of a transaction by looking for the last
in a series of similar events.
The last statement allows you to specify an iterative series of events (of
indeterminate number) for a transaction. A last statement starts with the last
keyword and is followed by any number of event specifications. You can only
use event specifications within a last statement. You cannot use nested choice,
sequence, or last statements within a last construct. Application Response
considers the last statement to be satisfied if it observes an uninterrupted
series of events (each of which matches an event specification in the list).
More specifically, the final matching event is considered to satisfy the last
construct.
Syntax
A last statement uses the following syntax:
last
{
event-specification
event-specification
.
.
.
}
168 BTStudio Administration Guide
Except Statement
Example
Suppose you want to monitor the performance of Lotus Notes. Scheduling a
meeting involves some user actions followed by a flurry of exchanges with the
database server. The following transaction definition configures Application
Response to recognize such a transaction.
transaction ”ScheduleMeeting”
module ”ScheduleMeeting”
{
event "1" Windows MouseClick { Title="Schedule a Meeting" }
event "2" Windows MouseClick { Title="Save and Send Invitations" }
event "3" Windows ButtonPress { Text="Yes" }
event "4" Windows SetTitle { ObjectID="NLNOTES-23-3207281309" }
last
{
event "5" Connection Response { }
}
}
In this example, the last statement helps Application Response to identify the
flurry of network activity occurring at the end of the transaction. This example
requires the last statement because the number of Request/Response events
may vary with each appointment scheduled. When Application Response
observes an event other than a network response, it uses the final response to
mark the end of the transaction.
Except Statement
The except statement instructs Application Response to ignore a transaction if
a particular event (or any one of several events) occurs. When an except
statement is satisfied, Application Response discards any response time data
collected (for that particular transaction) up to that point. It then begins to
evaluate succeeding events to see if they match a defined transaction. Use the
except statement to distinguish between two or more transactions that are the
same except for one intervening event.
The except statement instructs Application Response not to measure response
time for transactions that contain a particular event. You can use the except
statement at the transaction level (that is, define it within a transaction
definition). Compare this to the IgnoreEvents clause, which continues to
measure response time for transactions but omits the response time of
specified events from the transactions. Ignored events are defined applicationwide; you specify them in the additional resources section of an application
rule set.
BT Language Reference 169
Except Statement
Note: If you are defining exceptions and failures for a transaction, the except
statement must follow the transaction definition (event specifications) but
precede the failure statement.
Syntax
transaction "transaction- name"
module "module-name"
[
transaction- specific_constraints
]
{
event-specification
event-specification
event-specification
.
.
.
}
except
{
except-event-specification
except-event-specification
except-event-specification
.
.
.
}
except-event-specification
An except statement is satisfied if any one of its event specifications occurs
before an event in the preceding transaction definition occurs. You cannot use
a choice statement, sequence statement, or last statement within an except
statement.
Examples
Example 1: The following transaction definition specifies three events that
constitute the AddEmployee transaction: EnterData, Record-Save, and StatusSaved. It also defines one exception event: Record- Update.
transaction "AddEmployee"
170 BTStudio Administration Guide
Except Statement
module
"AddEmployee"
{
event "EnterData" Windows SetFocus { Title="Enter Employee Data" }
event "Record-Save" Windows MenuCommand { Text="Record->Save" }
event "Status-Saved" Windows StatusMessage { Text="Record Saved" }
}
except # Unless the Update command is used
{
event "Record-Update" Windows MenuCommand { Text="Record- >Update" }
}
When an EnterData event occurs, Application Response begins to watch for
other events that match the remaining events of the transaction. If a RecordUpdate event occurs before the remaining events of the AddEmployee
transaction occur, Application Response discards any response time
measurements collected so far (for this transaction) and begins to watch for a
new EnterData event to mark the start of a new AddEmployee transaction.
Example 2:
The following Update transaction definition specifies five events for the
transaction and three exception events. When a Title-Correction event occurs,
Application Response begins to watch for other events that match the
remaining events of the transaction. If any one of the three exception events
(Press-Cancel, File-SaveAs, or File-Close) occurs before the remaining events
of the Update transaction are matched, Application Response discards any
response time measurements collected so far for the transaction. It then
begins to watch for a new Title- Correction event to mark the start of a new
Update transaction.
transaction
"Update"
module
"Update"
{
event "Title-Correction" Windows SetFocus { Title="Correction – Personal Data"
}
event "Press-OK" Windows ButtonPress { Text="OK" }
event "Title-Data" Windows SetFocus
{ Title="Administer Workforce (U.S.) – Use – Personal Data" }
event "File-Save" Windows MenuCommand { Text="File->Save" }
event "Status-Saved" Windows StatusMessage { Text="Record Saved" }
}
except # Unless any one of these events occurs
{
event "Press-Cancel" Windows ButtonPress { Text="Cancel" }
event "File-SaveAs" Windows MenuCommand { Text="File->Save As" }
event "File-Close" Windows MenuCommand { Text="File->Close" }
}
BT Language Reference 171
Failure Statement
Failure Statement
The failure statement defines events that, when they occur, indicate that the
transaction has failed in some way. You can define up to five failures for each
transaction. Application Response tracks this data and can report on the rate
of failures per transaction, or failure rates per client set or response endpoint.
Transaction failure data can appear in Trend, Top N, and At-a-Glance reports.
You can also view transaction failure details using the Agent Transaction
Viewer (ATV) from the eHealth Web interface. Failure statements must occur
at the end of a transaction definition, following the event specifications and
any except statements for the transaction.
Note: Some versions of Internet Explorer do not properly report 404 failures
or other types of browser failures. In these cases, Application Response cannot
report failed transactions.
Syntax
transaction "transaction- name"
module "module-name"
[
transaction- specific_constraints
]
{
event-specifications
}
except
{
except-event-specifications
}
failure1 "failure-name"
{
failure-event-specifications
}
failure2 "failure-name"
{
failure-event-specifications
}
failure3 "failure-name"
{
failure-event-specifications
}
failure4 "failure-name"
{
failure-event-specifications
}
172 BTStudio Administration Guide
Failure Statement
failure5 "failure-name"
{
failure-event-specifications
}
Parameters
failure1, failure2, failure3, failure4, failure5
Required to define failures for transactions. You can define up to five failures
per module. Each failure statement begins with the failure keyword, which is
appended with a number 1 through 5.
If you need to define more than five failures, use a choice statement to group
several failure methods into a single failure case.
failure-name
A descriptive name for the failure case. These failure names do not appear in
Application Response reports, but they can appear in BT Studio and in the
Agent Transaction Viewer (ATV) of the eHealth Web interface. Use the same
guidelines as for transaction names and module names.
failure-event-specifications
Event specifications for the events that lead up to a particular failure. This
might be one event or a complex sequence of events. Each failure case must
begin with (repeat) the starting event for the transaction. This can be followed
by any number of event specifications that define the failure, including nested
choice and sequence statements. However, you cannot use a last statement or
other failure clauses within a failure statement.
When monitoring Internet Explorer transactions, you can use the Web
FailedLoad event to identify the failure messages displayed by Internet
Explorer.
Example 1: The following Login transaction definition consists of two events:
the event begins when the window title is "Login" and it ends when the
window title is "Login Succeeded". If these two events occur, Application
Response measures and records the total response time. The transaction
definition also defines a failure: the Login transaction has failed if the Login
window is followed by a window whose title contains "Login Failed". If these
two events occur, Application Response does not measure response time for
the Login transaction; however, it adds to the count of failed Login
transactions. The number of failed Login transactions can appear in various
eHealth reports.
BT Language Reference 173
Failure Statement
transaction "Login"
module "Login"
{
event "Begin" Windows SetTitle {Title="Login"}
event "Success" Windows SetTitle {Title="Login Succeeded"}
}
failure1 "FailedLogin"
{
event "Begin" Windows SetTitle {Title="Login"}
event "Failed" Windows SetTitle {Title=contains:"Login Failed"}
}
Example 2: To expand on Example 1, the following Login transaction
definition includes four failure statements, which help to identify reasons for
the login failure: invalid password, invalid server, server not available, or
cancelled login. This level of detail is available in the ATV. Notice that each
failure case begins with the same Begin event that starts the transaction.
transaction "Login"
module "Login"
{
event "Begin" Windows SetTitle {Title="Login"}
event "Success" Windows SetTitle {Title="Login Succeeded"}
}
failure1 "InvalidPassword"
{
event "Begin" Windows SetTitle {Title="Login"}
event "Failed1" Windows SetTitle {Title="Login Failed - Invalid Password"}
}
failure2 "InvalidServer"
{
event "Begin" Windows SetTitle {Title="Login"}
event "Failed2" Windows SetTitle {Title="Login Failed - Invalid Server"}
}
failure3 "ServerNotAvailable"
{
event "Begin" Windows SetTitle {Title="Login"}
event "Failed3" Windows SetTitle {Title="Login Failed - Server Not Available"}
}
failure4 "CancelLogin"
{
event "Begin" Windows SetTitle {Title="Login"}
event "FailedLogin" Windows SetTitle {Title="Warning"}
event "Cancel" Windows ButtonPress {Text="Cancel"}
}
174 BTStudio Administration Guide
Failure Codes
Example 3: The following transaction definition demonstrates the use of a
choice statement within a failure statement to define multiple paths for a
failure case. It also demonstrates use of the Web FailedLoad event action.
transaction "WebLogin"
module "WebLogin"
{
event "Begin" Windows SetTitle {Title="Login"}
event "Success" Windows SetTitle {Title="Login Succeeded"}
}
failure1 "CancelLogin"
{
event "Begin" Windows SetTitle {Title="Login"}
choice
{
event "404-NotFound" Web FailedLoad {FailureCode=404}
event "Stop" Windows ButtonPress {Text="Stop"}
}
}
Failure Codes
The FailureCode parameter for the Web FailedLoad event action supports the
following failure codes.
Note: Some versions of Internet Explorer do not properly report 404 failures
or other types of browser failures.
Failure Code
Code Message
400
HTTP_STATUS_BAD_REQUEST
401
HTTP_STATUS_DENIED
402
HTTP_STATUS_PAYMENT_REQ
403
HTTP_STATUS_FORBIDDEN
404
HTTP_STATUS_NOT_FOUND
405
HTTP_STATUS_BAD_METHOD
406
HTTP_STATUS_NONE_ACCEPTABLE
407
HTTP_STATUS_PROXY_AUTH_REQ
408
HTTP_STATUS_REQUEST_TIMEOUT
409
HTTP_STATUS_CONFLICT
BT Language Reference 175
Alternate Rulesets
Failure Code
Code Message
410
HTTP_STATUS_GONE
411
HTTP_STATUS_LENGTH_REQUIRED
412
HTTP_STATUS_PRECOND_FAILED
413
HTTP_STATUS_REQUEST_TOO_LARGE
414
HTTP_STATUS_URL_TOO_LONG
415
HTTP_STATUS_UNSUPPORTED_MEDIA
500
HTTP_STATUS_RETRY_WITH
501
HTTP_STATUS_NOT_SUPPORTED
502
HTTP_STATUS_BAD_GATEWAY
503
HTTP_STATUS_SERVICE_UNAVAIL
504
HTTP_STATUS_GATEWAY_TIMEOUT
505
HTTP_STATUS_VERSION_NOT_SUP
Alternate Rulesets
Alternate rule sets allow you to monitor an application using two or more
different rule sets (a primary rule set and one or more alternate rule sets)
simultaneously. The primary rule set provides the transaction definitions to
monitor application response time from one point of view, and the alternate
rule sets provide transaction definitions to monitor response time from other
perspectives.
Application Response independently analyzes an application’s activity for
transactions using each alternate rule set defined. However, the transactions
recognized under each alternate definition (and their corresponding response
information) are recorded under the same overall application definition. In
effect, this allows you to "double-count" activity, including response time for a
particular transaction in multiple response time calculations.
Note: You cannot nest alternate ruleset constructs. All transaction definitions
that occur outside the scope of an alternate ruleset construct belong to the
primary rule set.
Syntax
alternate
ruleset
{
transaction transaction- name1
176 BTStudio Administration Guide
Alternate Rulesets
module module-name1
{
rule-body1
}
transaction transaction- name2
module module-name2
{
rule-body2
}
.
.
.
}
Example
The following example shows how to monitor events at a detailed transaction
level and at a general response time level using an alternate rule set.
Application Response will monitor the application (the EmplMgmt executable)
looking for occurrences of “NewEmployee” and “EmployeeUpdate”
transactions, while simultaneously recording a transaction for each window
transition that occurs within the application (“WindowTrans”).
resources # The application consists of a single executable.
{
require all
{
resource Process { ExecutableName="EmplMgmt" }
}
additional
{
resource Windows { }
resource Connection { }
}
}
#
#
Detailed transactions.
#
update operations.
Only monitor new employee and employee
#
transaction
"NewEmployee"
module
"NewEmployee"
{
event "Wnd1" Windows MenuCommand { Text="New->Record…" }
event "Wnd2" Windows StatusMessage { Text="New employee record created." }
}
transaction "EmployeeUpdate"
module
"EmployeeUpdate"
{
BT Language Reference 177
IgnoreEvents Clause
event "Wnd3" Windows MenuCommand { Text="Edit->Save" }
event "Wnd4" Windows StatusMessage { Text="Employee record updated." }
}
#
#
AR-level transactions.
Monitor every window transition.
#
alternate
ruleset
{
transaction
"WindowTrans"
module
"WindowTrans"
{
event "Wnd5" Windows
SetFocus
{ }
event "Wnd6" Windows
SetFocus
{ }
}
}
IgnoreEvents Clause
Use the IgnoreEvents clause as a filter to disregard events that might
incorrectly affect the response time measurements of monitored transactions.
When Application Response monitors a transaction, it omits any response time
data for ignored events from the transaction's total response time. Add the
IgnoreEvents clause to the additional resource definition. Ignored events apply
to all monitored transactions for an application; you cannot specify events to
ignore for a particular transaction (that is, within a transaction definition).
Note: To prevent Application Response from measuring any part of a
transaction's response time if a particular event occurs, use the Except
statement.
Syntax
You can use either (or both) of the following types of IgnoreEvents syntax in
the additional resources section of an application rule set.
additional
{
resource resource-type { IgnoreEvents="ignore-events- list" }
resource resource-type { ExecutableName="executable- name"
"IgnoreEvents="ignore-events- list" }
}
Parameters
executable-name
178 BTStudio Administration Guide
IgnoreEvents Clause
The name of the application executable whose events you want to ignore. If
you specify an executable name, Application Response ignores the specified
events only for that executable. If an event is performed by another
executable of the same resource type, Application Response does not ignore it
but includes its data in the response time measurements for a monitored
transaction. (See Examples.) If you want Application Response to ignore an
event for all executables, omit the ExecutableName="executable-name"
clause.
Note: If you include the ExecutableName="executable-name" clause in an
additional resource statement, you must include a second resource statement
for that resource type that does not include the ExecutableName clause. The
second resource statement ensures that Application Response measures
events that are not specified as ignored for a particular executable.
ignore-events-list
A list of one or more events that Application Response is to ignore when
measuring the response time of a monitored transaction. Separate events with
commas; enclose the list of events within quotation marks ( " ).
You cannot ignore Start or Stop events for any type of resource.
resource-type
The resource type whose events you want to ignore.
Examples
Example 1: The following resource definition for a custom Windows
application includes two IgnoreEvents. As a result of this rule set, Application
Response monitors the response time of any Windows and Connection events
that are generated by the EMPMGT1 and EMPMGT2 processes as part of
monitored transactions. When monitoring transactions, however, Application
Response does not include response time for the Destroy event (from either
EMPMGT 1 or EMPMGT2), if it occurs. It also does not include response time
for the ButtonPress event when it is generated by the EMPMGT1 process.
(ButtonPress events generated by EMPMGT2 are included in a transaction's
total response time, however.)
resources
{
require all
{
resource Process { ExecutableName="EMPMGT1" }
resource Process { ExecutableName="EMPMGT2" }
}
additional
BT Language Reference 179
IgnoreEvents Clause
{
resource Windows {ExecutableName="EMPMGT1" IgnoreEvents="ButtonPress"}
resource Windows {IgnoreEvents="Destroy"}
resource Connection {}
}
}
In the above example, the resource Windows {IgnoreEvents="Destroy"}
statement ensures that Application Response measures the response times of
all Windows events related to the monitored transactions, in addition to
ignoring all Destroy events. Because the first additional resource statement
(resource Windows {ExecutableName="EMPMGT1"
IgnoreEvents="ButtonPress"}) specifies an executable name, it does not
address Windows events from other executables.
Example 2: The following example demonstrates that, if you specify an
executable name for IgnoreEvents, you must include a second resource
statement that does not specify the executable name.
resources
{
require all
{
resource Process { ExecutableName="EMPMGT1" }
resource Process { ExecutableName="EMPMGT2" }
}
additional
{
resource Windows {ExectuableName="EMPMGT1" IgnoreEvents="ButtonPress"}
resource Windows {}
resource Connection {}
}
}
Example 3: The following resource definition instructs Application Response
to omit from a transaction's total response time any response time that is
related to network requests and responses.
resources
{
require all
{
resource Process { ExecutableName="ACCOUNT" }
}
additional
{
resource Windows {}
180 BTStudio Administration Guide
Resource Types
resource Connection {IgnoreEvents = "Request,Response"}
}
}
Resource Types
Resource types indicate the sources of application events that the AR agent
uses to recognize transactions and measure their response times. Resources
provide application events to the transaction recognition engine. For example,
when you specify the Web resource in a resource definition, Application
Response observes events about the URLs navigated to and the Web frames
that appear in Web browsers.
Supported Resource Types
AppEvent Resource Type
Connection Resource Type
DNS Resource Type
Java Resource Type
Outlook Resource Type
Process Resource Type
Session Resource Type
Web Resource Type
Windows Resource Type
AppEvent Resource Type
Use the AppEvent resource in a resource definition to monitor events from C
and any language supporting COM.
Parameters
The AppEvent resource type does not support any parameters in a resource
definition. This syntax allows you to define transactions using any events that
the AppEvent.dll sends. At a minimum, BT Studio recognizes Start and Stop
events as AppEvent actions.
Note: You cannot use the IgnoreEvents clause for Start or Stop events.
The following example shows a rule set for monitoring a Web-based
application.
BT Language Reference 181
Resource Types
resources
{
require all
{
resource Process { ExecutableName=$(Application Executable) }
resource Process { ExecutableName="TASKEXEC" }
resource Process { ExecutableName="IEXPLORE" }
}
additional
{
resource Web { }
resource Windows { }
resource Connection { }
resource AppEvent { }
}
}
Alternate Ruleset
{
Transaction "AppEvent-WebLoad"
Module "AppEvent-WebLoad"
{
Event "ARAppEvent" AppEvent WebLoad {Flag=contains:"Begin"}
Event "ARAppEvent" AppEvent WebLoad
{Flag=contains:"End"}
}
Connection Resource Type
If you want the response time breakdown for transactions to include network
and server components, you need to specify Connection or DNS resources.
You must specify this type of resource even if it is not referenced in the
transaction definitions.
When you define an application, BT Studio (or Application Response) includes
the following in the application's resource definition:
additional
{
resource Connection { }
}
This syntax allows Application Response to capture network and server time
(in addition to client response time) for the specified required resources. You
should not specify (hard- code) the hostname and port for an application's
resources in the additional section, because a valid server definition is still
required, and specifying the hostname and port could lead to inconsistency
between the rule set and the server definition.
182 BTStudio Administration Guide
Resource Types
Parameters
When used in a resource definition, a Connection resource supports the
following parameters:
ExecutableName. The name of the process
Hostname. The name of the server to which the connection was made
Port. The server port to which the connection was made (numeric)
URL. The original uniform resource locator (URL) accessed on the connection
(for Web connections only)
In general, however, you do not need to specify parameters for the Connection
resource. When you omit Connection parameters, Application Response
monitors network connections for all executables, hostnames, ports, and URLs.
Note: You cannot use the IgnoreEvents clause for Connection Start or Stop
events.
Example
The following example defines resources for SAP.
resources
{
require all
{
resource Process { ExecutableName=$(Application Executable) }
resource Process { ExecutableName="FRONT" }
resource Process { ExecutableName="SAPGUI" }
}
additional
{
resource Windows { }
resource Connection { }
}
}
DNS Resource Type
A Domain Name System (DNS) resource exists for each combination of a
process that makes a DNS request and the DNS server contacted. As a result,
each resource represents a process/server pair. For subsequent DNS activity
from the same process to the same DNS server, the same resource is re-used.
BT Language Reference 183
Resource Types
As long as the process exists, this resource is maintained. When the process
terminates, the DNS resource is considered to have terminated.
Parameters
When used in a resource definition, a DNS resource supports the following
parameters:
ExecutableName. The name of the process
Hostname. The hostname of the server system to which the request was
sent
Port. The numeric value representing the port on the server system to
which the request was sent
In general, you do not need to specify parameters for the DNS resource. When
you omit DNS parameters, Application Response monitors DNS activity for all
executables, hostnames, and ports.
Note: You cannot use the IgnoreEvents clause for DNS Start or Stop events.
Example
The following example shows a resource definition and transaction definitions
for DNS activity.
resources
{
require one
{
resource Process { ExecutableName=$(Application Executable) }
}
additional
{
resource DNS { }
}
}
transaction "FailedLookup"
module "FailedLookup"
{
event "Fail" DNS FailedLookup { }
}
transaction "SuccessfulLookup"
module "SuccessfulLookup"
{
event "Success" DNS SuccessfulLookup { }
}
184 BTStudio Administration Guide
Resource Types
Java Resource Type
If you want to capture events for Java applications and applets, you must
include the Java resource type in the additional section of your resource
definition. This enables Application Response to monitor Java-specific activity.
You do not need to specify parameters for the Java resource. This syntax
allows you to define transactions using any Java events.
Example
The following example shows a resource definition for monitoring Java activity.
For more information, refer to the template for Java resource definitions.
resources
{
require any
{
resource Process { ExecutableName=$(Application Executable) }
resource Process { ExecutableName="javaw" }
}
additional
{
resource Windows { }
resource Java { }
resource Connection { }
}
}
Outlook Resource Type
A separate Outlook resource represents each instance of Microsoft Outlook.
Use the Outlook resource when defining a resource for a Microsoft Outlook
application.
Parameter
When used in a resource definition, an Outlook resource supports the following
parameter:
ExecutableName. The name of the process
Note: You cannot use the IgnoreEvents clause for Outlook Start or Stop
events.
Example
The following example shows a sample resource definition for Outlook. The
Process resource is required because it is the base resource on which the
additional resources depend. The additional resource definitions permit
BT Language Reference 185
Resource Types
Application Response to monitor transactions that use Windows, Outlook, and
Connection events (related to the required OUTLOOK process).
resources
{
require one
{
resource Process { ExecutableName=$(Application Executable) }
resource Process { ExecutableName="OUTLOOK" }
}
additional
{
resource Windows { }
resource Outlook { }
resource Connection { }
}
}
Process Resource Type
A separate resource represents each process on the monitored system. Use
the Process resource to specify a process that must exist when the application
is running.
Parameter
When used in a resource definition, a Process resource supports the following
parameter:
ExecutableName. The name of the process
Note: You cannot use the IgnoreEvents clause for Process Start or Stop
events.
Example
The following example shows a rule set for SAP.
resources
{
require all
{
resource Process { ExecutableName=$(Application Executable) }
resource Process { ExecutableName="FRONT" }
resource Process { ExecutableName="SAPGUI" }
}
additional
{
186 BTStudio Administration Guide
Resource Types
resource Windows { }
resource Connection { }
}
}
transaction "WindowTransition"
module "WindowTransition"
{
# Start with any window.
event "Wnd1" Windows SetTitle { }
# Ends with any other window
event "Wnd2" Windows SetTitle { }
}
Session Resource Type
Use the Session resource in a resource definition to monitor terminal server
sessions.
Parameters
The Session resource type does not support any parameters in a resource
definition.
Note: You cannot use the IgnoreEvents clause for Session Start or Stop
events.
Example
The following example shows a rule set for monitoring the duration of terminal
server sessions.
resources
{
require one
{
resource Session { }
}
additional
{
}
}
transaction "UserSession"
module "UserSession"
{
event "Event1" Session Start { }
event "Event2" Session Stop { }
}
BT Language Reference 187
Resource Types
Web Resource Type
Use the Web resource in a resource definition to monitor Web activity involving
Microsoft Internet Explorer or Netscape Navigator. (You cannot use Application
Response to monitor Web activity for other Web browsers.)
Note: For a list of the versions of Internet Explorer and Netscape Navigator
that the AR agent can monitor, refer to the BT Studio readme file.
Parameter
When used in a resource definition, a Web resource supports the following
parameter:
ExecutableName. The name of the browser process
Note: You cannot use the IgnoreEvents clause for Web Start or Stop events.
Example
The following example shows a resource definition for Internet Explorer. This
rule set monitors Web activity for the executable IEXPLORE. The additional
Connection resource allows Application Response to monitor windowing activity
and network and server time (in addition to client time) for the required
IEXPLORE process.
resources
{
require one
{
resource Process {ExecutableName="IEXPLORE"}
}
additional
{
resource Web { }
resource Windows { }
resource Connection { }
}
}
Windows Resource Type
Use the Windows resource in a resource definition to enable Application
Response to include Windows activity in response time calculations when
monitoring transactions.
188 BTStudio Administration Guide
Resource Definitions
Parameter
When used in resource definitions, a Windows resource supports the following
parameter.
ExecutableName. The name of the process
Note: You cannot use the IgnoreEvents clause for Windows Start or Stop
events.
Example
The following example shows a sample rule set for PeopleSoft. The Windows
resource definition in the additional section allows Application Response to
observe windowing activity (related to the required processes) when
monitoring PeopleSoft transactions.
resources
{
require one
{
resource Process
{ ExecutableName=$(Application Executable) }
resource Process { ExecutableName="PSTOOLS" }
resource Process { ExecutableName="PSIDE" }
resource Process { ExecutableName="PSTORES" }
resource Process { ExecutableName="PSQED" }
}
additional
{
resource Windows { }
resource Connection { }
}
}
transaction "WindowTransition"
module "WindowTransition"
{
# Start with any window.
event "Wnd1" Windows SetTitle { }
# Ends with any other window
event "Wnd2" Windows SetTitle { }
}
Resource Definitions
Application Response does not begin to monitor transactions until it has
recognized an application instance. Resource definitions tell Application
Response how to recognize a running instance of an application, and which
BT Language Reference 189
Resource Definitions
resources an application uses for monitored transactions. (A resource is an
entity that generates activity that can be monitored by the Application
Response agent, such as a process or a network connection.)
Resource Definition for a Web Browser
Use the following resource definition to monitor response times for a Web
browser (Internet Explorer or Netscape Navigator):
resources
{
require one
{
resource Process { ExecutableName="IEXPLORE" }
resource Process { ExecutableName="NETSCAPE" }
resource Process { ExecutableName="NETSCP" }
}
additional
{
resource Web {}
resource Windows {}
resource Connection {}
}
}
This resource definition indicates that when a Web browser starts, Application
Response begins to monitor Web activity. Because some Web activity is
initiated with windowing activity (such as mouse clicks, key presses, and
window title changes), it also looks for Windows resources. The additional
Connection resource configures Application Response to monitor networking
activity associated with the Web activity. When calculating response time for a
transaction, Application Response includes the response time of all events that
occur from the start of the transaction to its ending event that match the
resources listed (required and additional).
Resource Definition for Network Response
Use the following resource definition to monitor basic network response times
for an executable program:
resources
{
require one
{
resource Process
190 BTStudio Administration Guide
Resource Definitions
{ ExecutableName=$(Application Executable) }
resource Process { ExecutableName="process_name"}
}
additional
{
resource Connection { }
}
}
Replace process_name with the name of the executable program whose
network activity you want to monitor.
Note: Applications such as DNS and Telnet do not have windowing activity,
and so they should use resource definitions like this one.
Resource Definition for a Java Application or Applet
You can copy the following resource definition, paste it into the Rules pane of
BT Studio, and then upload the rules to monitor response times for a Java
application or Java applet.
resources
{
require any
{
resource Process { ExecutableName=$(Application Executable) }
resource Process { ExecutableName="javaw" }
}
additional
{
resource Windows { }
resource Java { }
resource Connection { }
}
}
This resource definition indicates that when a javaw process starts, Application
Response begins to monitor it. When the javaw process terminates, the Java
resource is considered to have terminated.
The additional Java resource enables Application Response to monitor Javaspecific process activity such as mouse releases and key presses. The
additional Windows and Connection resources configure Application Response
to monitor windowing activity (such as mouse clicks, button presses, key
presses, window title changes, and so on) and networking activity related to
the specified process. When calculating response time for a transaction,
BT Language Reference 191
Resource Definitions
Application Response includes the response time of all events that occur from
the start of the transaction to its ending event that match the resources listed
(required and additional).
Resource Definition for a GUI Application
To create a resource definition for a Windows-based graphical user interface
(GUI) application, use the following format:
resources
{
require one
{
resource Process
{ ExecutableName=$(Application Executable) }
resource Process {ExecutableName="process_name"}
}
additional
{
resource Windows { }
resource Connection { }
}
}
Replace process_name with the name of the executable program for the GUI
application.
This resource definition indicates that when a process (process_name) starts,
Application Response begins to monitor it. The additional Windows and
Connection resources configure Application Response to monitor windowing
activity (such as mouse clicks, button presses, key presses, window title
changes, and so on) and networking activity related to the specified process.
When calculating response time for a transaction, Application Response
includes the response time of all events that occur from the start of the
transaction to its ending event that match the resources listed (required and
additional).
Defining Required Resources
In an application's resource definition, the require keyword configures
Application Response to recognize a running instance of an application. It
identifies the resources that must exist in order for the application to be
running. Application Response will not begin to monitor transactions until the
resource definitions listed in the require section are satisfied.
192 BTStudio Administration Guide
Resource Definitions
Syntax
Use the following syntax for the require section of an application's resource
definition:
resources
{
require selection-kind
{
resource resource- type { parameter- list }
resource resource- type { parameter- list }
.
.
.
}
The require keyword must be followed by the selection-kind qualifier. Valid
values are one, all, or any.
When defining a required resource, you can specify user-definable resources
or use no resource parameters.
Example
The following example shows part of the resource definition for the Microsoft
Outlook application:
resources
{
require one
{
resource Process { ExecutableName="OUTLOOK" }
}
This resource definition indicates that the Microsoft Outlook application is
running when Application Response observes a process with the executable
name OUTLOOK. Application Response does not begin to monitor Outlook
transactions until it observes this process running.
In the example, Process is the resource type, and
{ExecutableName="OUTLOOK"} is a parameter that qualifies the resource. For
each resource in a resource definition, you must specify its resource type, and
you can specify any number of parameters that further qualify the desired
resource.
Not recommended: Consider the following example of a required resource
definition:
BT Language Reference 193
Resource Definitions
resources
{
require one
{
resource Process { }
}
The syntax Process { } indicates that Application Response is to monitor
processes with any executable name (effectively acting as a wildcard). As a
result, Application Response monitors all processes and, assuming it can
match transactions based on the transaction definitions, aggregates response
time for all of the processes under this one application definition. This would
result in useless performance information.
User-Definable Resources
The BT language provides a syntax that permits you to add or remove specific
resources in an application rule set using the Application Response area of the
eHealth Web interface. This avoids the need to use BT Studio to make this
simple change after uploading an application rule set to eHealth. For example,
suppose that you use BT Studio to define an application rule set and upload it
to eHealth. Later you upgrade the monitored application and learn that the
application uses a new executable, which is not currently listed in the require
section of the application’s resource definition. You want to add the executable
name to the list of required resources for an application rule set. This BT
language syntax permits you to easily add the new resource to the application
rule set without using BT Studio.
Consider the following example, which shows the require section of a resource
definition for the Mail application.
resources
{
require one
{
resource Process { ExecutableName=$(Application Executable) }
resource Process { ExecutableName="MAPISP32" }
}
The syntax $(Application Executable) indicates that the label “Application
Executable” is to appear on the Application Properties page in the Application
Response area of the eHealth Web interface, and that authorized users
(administrators) can add or remove executable names in the application’s
resource definition.
194 BTStudio Administration Guide
Resource Definitions
Many of the default application rule sets provide this functionality; they include
syntax that allows authorized users to add or remove required resource
definitions from the eHealth Web interface. If you remove this syntax from the
application’s rule set, you will not be able to change an application’s required
resources from the eHealth Web interface. Leave this syntax in place unless
you need to remove it for a specific reason.
The Selection-Kind Qualifier: Defining and Application Instance
Typically, the required resource consists of the application’s GUI process. In
general, though, you can specify any number of resources. In the require
section of a resource definition, use the selection-kind qualifier to identify how
many of the specified resources must exist in order for Application Response to
recognize a running instance of the application.
Syntax
Use the following syntax for the selection-kind qualifier:
resources
{
require selection-kind
{
resource resource- type { parameter- list }
resource resource- type { parameter- list }
.
.
.
}
Valid values for selection-kind are one, all, and any.\
ALL: An Application That Uses Several Resources
Use the all keyword for the selection-kind qualifier if a running instance of an
application consists of more than one resource. For example, you would use
this keyword for an application with separate GUI and networking executables,
such as SAP.
Application Response recognizes one running instance of the application when
all of the required resources are running at the same time. Only then does
Application Response monitor transactions for that application, using the
combined activity of all of the defined resources.
Example
The following example lists required resources for the SAP application.
BT Language Reference 195
Resource Definitions
resources
{
require all
{
resource Process { ExecutableName="FRONT" }
resource Process { ExecutableName="SAPGUI" }
}
Based on this resource definition, Application Response monitors transactions
only when both the FRONT networking executable and the SAPGUI executable
are running. Application Response uses the combined network and GUI activity
to monitor and measure transactions. If either process does not exist,
Application Response does not monitor transactions for that application.
ANY: An Application That May Use Multiple Resources
If an application may use more than one resource (per running instance), use
the any keyword for the selection-kind qualifier. The any keyword indicates
that any resource matching one of the resource specifications should be
considered part of a single instance of the application, although perhaps
resources matching all of the specifications may not be active at the same
time. For example, you would use this keyword for an application with multiple
processes that start and stop. You might also use the any keyword for an
application whose executable name changes during upgrades; in this case, you
would list both executable names in the resource definition until you have
upgraded the application for all users. With the any keyword, if any one or
more of the resources exists, Application Response recognizes one running
instance of the application and monitors its transactions.
Example
The following example uses the any keyword in the require section of a
resource definition for an Employee Management application.
resources
{
require any
{
resource Process { ExecutableName="EmpMgt2" }
resource Process { ExecutableName="EmpMgt3" }
}
In this case, if EmpMgt2 is running, Application Response recognizes one
running instance of the application, and it begins to monitor transactions. If
EmpMgt2 and EmpMgt3 are both running, Application Response still recognizes
just one running instance and monitors transactions of both executables as
part of the same application using their combined activity.
196 BTStudio Administration Guide
Resource Definitions
ONE: An Application That Uses One Resource
Use the one keyword for the selection-kind qualifier if a running instance of an
application consists of one resource, such as a GUI executable. You can list
several resources with the one keyword, in which case Application Response
recognizes one running instance of the application for each resource that it
observes.
Example
The following example lists required resources for a PeopleSoft application.
resources
{
require one
{
resource Process { ExecutableName="PSTOOLS" }
resource Process { ExecutableName="PSIDE" }
resource Process { ExecutableName="PSTORES" }
resource Process { ExecutableName="PSQED" }
}
Based on this resource definition, Application Response recognizes PSTOOLS
as one running instance of PeopleSoft, PSIDE as a second running instance,
and so on. For each running instance of the application, Application Response
monitors transactions separately.
Using No Resource Parameters
In most cases, you will create resource definitions that use parameters to
specify which executables (or other resources) Application Response is to use
to recognize a running instance of an application. For example, the following
resource definition tells Application Response to monitor network activity for
port 1234 on host Yellow:
resources
{
require one
{
resource Connection { Port="1234" Hostname="yellow" }
}
If you want to monitor network activity for port 1234 on any system (not just
on host Yellow), simply omit the Hostname parameter:
BT Language Reference 197
Resource Definitions
resources
{
require one
{
resource Connection { Port="1234" }
}
To monitor activity of a particular type from any source, simply omit all
parameters for the resource, as follows:
resources
{
require one
{
resource Connection { }
}
This resource definition configures Application Response to monitor network
activity on any port and any system.
Example
The following example shows the require section of the resource definition for
DNS.
resources
{
require one
{
resource DNS { }
}
This resource definition tells Application Response to monitor each DNS path
independently, regardless of its source. (A DNS path is a unique combination
of a process and the DNS server that it contacted.)
Defining Additional Resources
While the require section of a resource definition defines how Application
Response identifies a running instance of an application, the additional section
defines the other types of activity that Application Response can monitor.
When calculating response time for a transaction, Application Response
includes the response time of all events that occur from the start of the
transaction to its ending event that originate from the resources listed
(required and additional). Implicit in the definition of additional resources is
198 BTStudio Administration Guide
Resource Definitions
that they are from the same processes identified in the require section. As
such, there is usually no need to further qualify them.
Additional resources may be in use while the application is running, but they
are not required in order for Application Response to monitor response time.
Instead, if Application Response observes any of these additional resources
while it is monitoring a transaction, it includes response time related to the
additional resources (and required resources) in the response time calculation
for the transaction. One exception to this is the Connection resource: in order
for Application Response to be able to monitor network and server time, a
network connection must exist. However, any connection is valid; it does not
have to be a specific connection (unless connection parameters are specified).
Consider the following example, which is a sample resource definition for
Microsoft Outlook:
resources
{
require one
{
resource Process
{ ExecutableName=$(Application Executable) }
resource Process {ExecutableName="OUTLOOK"}
}
additional
{
resource Windows { }
resource Outlook { }
resource Connection { }
}
}
Based on this resource definition, Application Response does the following:
Monitors this application only if the OUTLOOK process is running (defined
in the require section).
Monitors its process activity (defined in the require section) and the
windowing, Outlook- specific, and network activity (defined in the
additional section) related to the required process.
When defining transactions for an application, use events with event types
that match the resource types specified in the resource definitions. The
resources specified in the resource definition are the only sources of events
that Application Response monitors for transactions. If you define transaction
definitions that use event types that do not match the resource types specified
in the resource definition, Application Response will not be able to monitor
those transactions. When calculating response time for a transaction,
Application Response includes the response time of all events that occur from
BT Language Reference 199
Resource Definitions
the start of the transaction to its ending event and that originate from the
resources listed (required and additional).
If you find that BT Studio is not recognizing defined transactions, check your
resource definitions. Does the transaction definition refer to an event type that
does not match a resource type in the resource definition? If so, you must
define the appropriate type of resource.
You can define additional resources with parameters and without parameters.
Be sure to specify the Connection resource so that you can track server and
network time. You can also use the IgnoreEvents clause to omit the response
time of specified events from a transaction's reported response time.
Additional Resources without Parameters
The resource definitions in the additional section for Microsoft Outlook (and
other default rule sets) do not specify parameters, as follows:
additional
{
resource Windows { }
resource Outlook { }
resource Connection { }
}
This syntax allows you to define transactions using any Windows events, any
Outlook events, and any Connection events. Implicit in the definition of
additional resources is that they are from the same processes identified in the
require section. As such, there is usually no need to further qualify them.
When calculating response time for a transaction, Application Response
includes the response time of all events that occur from the start of the
transaction to its ending event and that originate from the resources listed
(required and additional).
Additional Resources with Parameters
When creating a resource definition for an application, if you specify
parameters for additional resources, then Application Response can monitor
transactions that use only the specified resources. You can also use
parameters with the IgnoreEvents clause to specify events to ignore.
Specifying additional resources without parameters acts as a wildcard to
monitor response time for all events that originate from a particular resource.
Consider the following example of a PeopleSoft rule set that uses additional
resources with parameters to help define transactions. In this case, the
200 BTStudio Administration Guide
Resource Definitions
additional section lists the processes SQRW and PSCRRUN. These resources
are then referenced in transaction events.
resources
{
require one
{
resource Process { ExecutableName="PSTOOLS" }
resource Process { ExecutableName="PSIDE" }
resource Process { ExecutableName="PSTORES" }
resource Process { ExecutableName="PSQED" }
}
additional
{
resource Windows { }
resource Connection { }
resource Process { ExecutableName="SQRW" }
resource Process { ExecutableName="PSCRRUN" }
}
}
transaction "Report"
module "Report"
{
event "Begin" Windows SetTitle { Title=contains:"CONCORD\\" }
choice
{
event "StartA" Process Start { ExecutableName="SQRW" }
event "StartB" Process Start { ExecutableName="PSCRRUN }
}
choice
{
event "StopA" Process Stop { ExecutableName="SQRW" }
event "StopB" Process Stop { ExecutableName="PSCRRUN }
}
}
When calculating response time for the Report transaction, Application
Response measures the response time of all activity generated by the required
processes, as well as any windowing activity and network connections that
occur from the start of the Report transaction (when SQRW or PSCRRUN
begin) to the end of the transaction. To ensure that Application Response also
measures the response time involved with the SQRW and PSCRRUN processes
for the transaction, these processes are listed in the additional section.
SQRW and PSCRRUN are not listed in the require section because these
processes are not used to identify a running instance of PeopleSoft. However,
they are used to identify the start and end of a transaction, and their response
BT Language Reference 201
Resource Definitions
times need to be included in the total response time calculation. Therefore,
these processes must be specified in the additional section.
Connection: Tracking Server and Network Time
Many of the default application rule sets include the following line in the
additional section of their resource definitions:
additional
{
resource Connection { }
}
Even when Connection events are not used to define transactions, this
definition is important because it enables Application Response to monitor
server time and network time, in addition to client time, for transactions.
Because no parameters are specified, Application Response monitors network
connections for all required executable names, hostnames, ports, and URLs.
This is the recommended practice.
If you want to monitor server time and network time (in addition to client
time) you must specify the Connection resource even if it is not referenced in
the transaction definitions.
If you remove the Connection resource definition, Application Response cannot
monitor server time and network time for transactions. In addition, the client
time statistics that Application Response calculates may be inaccurate,
because Application Response cannot determine the application’s network
activity periods.
Examples of Resource Definitions
Study the following examples to learn how to create resource definitions for
applications.
Example 1
The following example shows a sample resource definition for Lotus Notes.
resources
{
require one
{
resource Process
{ ExecutableName=$(Application Executable) }
202 BTStudio Administration Guide
Resource Definitions
resource Process { ExecutableName="NOTES" }
resource Process { ExecutableName="NLNOTES" }
}
additional
{
resource Windows { }
resource Connection { }
}
}
In this resource definition, the require section uses the one keyword,
indicating that Application Response will recognize any one of the listed
processes (NOTES or NLNOTES) as a separate running instance of the
application, and will monitor each separately. The
ExecutableName=$(Application Executable) syntax allows administrators to
add or remove executable names in the application’s list of required resources
using the eHealth Web interface.
In the additional section, the resource definitions for Windows and Connection
indicate that Application Response will monitor these types of activity for the
required Notes processes and that transaction definitions can use these event
types, in addition to the Process event type listed in the require section.
Furthermore, the Connection resource permits Application Response to
measure network and server response times for the application’s transactions.
Example 2
The following is a slightly more complicated sample resource definition for
SAP.
resources
{
require all
{
resource Process { ExecutableName=$(Application Executable) }
resource Process { ExecutableName="FRONT" }
resource Process { ExecutableName="SAPGUI" }
}
additional
{
resource Windows { }
resource Connection { }
}
}
In this resource definition, the require section uses the all keyword to indicate
that both processes, FRONT and SAPGUI, must be running before Application
Response recognizes a running instance of the SAP application. When both
BT Language Reference 203
How Transaction Limits Work
processes exist, then Application Response begins to monitor SAP
transactions. As soon as either process terminates, Application Response will
cease to monitor the application.
In the additional section, the resource definitions for Windows and Connection
indicate that Application Response will monitor these types of activity for the
required SAP processes and that transaction definitions can use these event
types, in addition to the Process event type listed in the require section.
Furthermore, the Connection resource permits Application Response to
measure network and server response times for the application’s transactions.
How Transaction Limits Work
Sometimes a particular transaction may take so long to complete that its total
response time skews the average response time for that transaction. Or some
other aspect of the transaction may be so unusual that its response time data
is not helpful in understanding your IT environment. These anomalies can
result in inaccurate interpretations of overall transaction response time trends.
For example, suppose that one transaction is performed 10 times. Most of the
time, the transaction takes one second to complete, but occasionally
something happens to make the transaction take 10 minutes (600 seconds) to
complete. Normally, the average response time is one second, but the
abnormally long transaction response time skews the average, giving the
impression that the overall average response time for the transaction is more
than one minute. To avoid such occurrences, you can set transaction time
limits or other constraints. When it observes a transaction whose response
time exceeds an upper limit, Application Response counts the transaction as
"timed-out" and stores this data for reporting purposes. If a transaction does
not meet some other constraint, Application Response ignores the transaction
and discards its response time data. In this way, the spurious transactions do
not skew the average response time to produce misleading results. You can
define these limits at the application level or the transaction level. You can
define multiple limits for each application and transaction.
Eliminating Transactions with No Server Activity
A typical transaction involves an action performed at the client, which sends a
request over the network to an application server. If Application Response
does not observe any network activity, it assumes that the application is local
to the client, and so the transaction has no server activity to measure. Many
Application Response customers prefer to omit such information from their
reports, choosing to focus instead on the response time of applications and
transactions that involve measurable amounts of server and network time.
204 BTStudio Administration Guide
How Transaction Limits Work
To eliminate these no-server transactions from reports, each default
application rule set begins with the following constraints. In addition, when
you define a new application, these constraints appear at the top of the rule
set.
[
BytesSent > 0
ServerName != "No-Server"
]
The BytesSent constraint instructs Application Response to ignore any
transaction for which no data is sent over the network. In effect, this
eliminates response time information for all transactions that do not involve
significant server time. The ServerName constraint instructs Application
Response to ignore any transaction where the server cannot be identified
(resulting in the server name of No-Server). This constraint ensures that all
No-Server transactions are omitted from eHealth reports.
Including Transactions with No Server Activity
If you want to include information about these transactions (that do not
involve sending data over the network) in eHealth reports, change the
constraints to the following:
[
BytesSent >= 0
# ServerName != "No-Server"
]
This will ensure that Application Response includes response time information
about transactions in eHealth reports, regardless of whether they involve
sending data over the network.
If a Rule Set Does Not Define BytesSent
If an application rule set does not include the [ BytesSent > 0 ] constraint or
any other constraints, Application Response still applies the constraints and
ignores any transaction for which no data is sent over the network. For
example, any application defined prior to eHealth Release 5.6.5 does not
include this constraint.
If you want to include information about these transactions (that do not
involve sending data over the network) in eHealth reports, do either of the
following:
Define any transaction limit for the application rule set.
Edit the default constraints as follows:
[
BytesSent >= 0
BT Language Reference 205
How Transaction Limits Work
# ServerName != "No-Server"
]
When an application rule set includes any transaction limit or constraint,
Application Response ignores the default constraints and applies the defined
limit or constraint when monitoring transactions. If the application does not
have associated server activity, the response path name on reports shows
"No-Server" instead of a server name, similar to the following:
Client
Module
name
An application
name
path
yellow- Outlook- Read-No-Server- AP
Application
No server
name
activity
Using Transaction Time Limits
Application Response provides several ways to set transaction time limits:
Default elapsed and reported time
Application-specific elapsed and reported time
Transaction-specific elapsed and reported time
Elapsed time refers to the amount of time that elapses during the entire
transaction, from the moment the transaction begins to the moment it ends.
This includes client time, network time, server time, and client think time (also
called idle time). Reported time includes client time, network time, and server
time, but it does not include client think time. Application Response reports
show reported time.
An application-specific limit overrides a default limit, and a transaction-specific
limit overrides an application-specific limit. In addition to limits on elapsed and
reported time, you can also set other types of transaction limits and
constraints.
Default Elapsed and Reported Time
Application Response has two default settings: MaxElapsedTime and
MaxReportedTime. These settings are each defined as 60 minutes (one hour).
They are purposely very high so that you can detect and troubleshoot
transactions that take longer to complete than they should. Application
Response applies these time limits when monitoring all transactions for all
applications on all client systems (where AR agents reside). If a transaction
exceeds the MaxElapsedTime or the MaxReportedTime, Application Response
206 BTStudio Administration Guide
How Transaction Limits Work
discards its response time information. The data is not included in any reports,
nor is it stored in the eHealth database. However, the transaction is included
in the count of timed-out transactions for reporting purposes (available
through the Transaction Timeouts variable).
If you want to change the MaxElapsedTime or MaxReportedTime settings, edit
each application rule set to define the ElapsedTime or ReportedTime
constraints (or both) at the application level or the transaction level. These
constraints override the MaxElapsedTime and MaxReportedTime settings. If
you do not define these constraints for some applications or transactions, the
MaxElapsedTime and MaxReportedTime settings still apply to them.
Application-Specific Elapsed and Reported Time
You can set different transaction time limits for each monitored application. An
application-specific time limit overrides the default time limits. To define an
application-specific transaction time limit, use BT Studio to edit the application
rule set. Before the resource definition, add the following syntax:
[
ReportedTime < milliseconds
]
or
[
ElapsedTime < milliseconds
]
Replace milliseconds with the maximum number of milliseconds. Time limits
are optional; you can set one, both, or neither time limit for an application.
When it observes a transaction whose response time exceeds an upper limit,
Application Response counts the transaction as "timed-out." If you define a
lower limit (such as ElapsedTime > 1000) and a transaction does not reach
this limit, Application Response discards its response time data.
Example of Application-Specific Transaction Time Limits
In this example, the rule set defines both ReportedTime and ElapsedTime to
be 15 minutes (900,000 milliseconds). Application Response counts as timedout transactions any monitored transactions (for this application) that exceed
15 minutes.
[
ReportedTime < 900000
ElapsedTime < 900000
]
BT Language Reference 207
How Transaction Limits Work
resources
{
require any
{
resource Process {ExecutableName="IEXPLORE"}
}
additional
{
resource Web { }
resource Windows { }
resource Connection { }
}
}
transaction "LoadPage"
module "LoadPage"
{
choice
{
event "WindowCreate" Windows Create { }
event "MouseClick" Windows MouseClick { }
event "KeyPress Windows KeyPress { }
}
event "BeginLoad" Web BeginLoad { Level="top" }
event "EndLoad" Web EndLoad { Level="top" }
}
Transaction-Specific Elapsed and Reported Time
You can set different time limits for each monitored transaction. To do this,
use BT Studio to edit the application rule set. Within the transaction definition,
use the same syntax as for an application-specific elapsed time or reported
time. Time limits are optional; you can set one, both, or neither time limit for
a transaction. A transaction-specific time limit overrides an application-specific
time limit.
Example of Transaction-Specific Time Limits
In this example, the Outlook rule set defines ReportedTime and ElapsedTime
for the application to be 15 minutes (900,000 milliseconds). These time limits
apply to the ForwardMessage and ReadMessage transactions, for which
transaction-specific time limits are not defined. The NewMessage transaction
definition specifies a ReportedTime maximum of 600,000 milliseconds; in this
case the application-specific ElapsedTime applies. The ReplyMessage
transaction specifies an ElapsedTime maximum of 300,000 milliseconds; in
this case the application-specific ReportedTime applies. The ReplyAllMessage
transaction specifies ElapsedTime and ReportedTime maximums of 100,000
milliseconds, which overrule both application-specific transaction limits.
208 BTStudio Administration Guide
How Transaction Limits Work
[
ReportedTime < 900000
ElapsedTime < 900000
]
resources
{
require one
{
resource Process { ExecutableName=$(Application Executable) }
resource Process { ExecutableName="OUTLOOK" }
}
additional
{
resource Windows { }
resource Outlook { }
resource Connection { }
}
}
transaction "New"
module "New"
[
ReportedTime < 600000
]
{
# Sending a message
event "New" Outlook ComposeNewMessage { }
event "SubmitComplete" Outlook SubmitMessageComplete { }
}
transaction "Reply"
module "Reply"
[
ElapsedTime < 300000
]
{
# Sending a message
event "Reply" Outlook ComposeReplyMessage { }
event "SubmitComplete" Outlook SubmitMessageComplete { }
}
transaction "ReplyAll"
module "ReplyAll"
[
ReportedTime < 100000
ElapsedTime < 100000
]
{
# Sending a message
event "ReplyAll" Outlook ComposeReplyAllMessage { }
event "SubmitComplete" Outlook SubmitMessageComplete { }
}
BT Language Reference 209
How Transaction Limits Work
transaction "Forward"
module "Forward"
{
# Sending a message
event "ComposeForward" Outlook ComposeForwardMessage { }
event "SubmitComplete" Outlook SubmitMessageComplete { }
}
transaction "Read"
module "Read"
{
# Reading a message
event "Selection" Outlook ReadMessage { }
event "ReadComplete" Outlook ReadMessageComplete { }
}
Eliminating Transactions with No Server Activity
A typical transaction involves an action performed at the client, which sends a
request over the network to an application server. If Application Response
does not observe any network activity, it assumes that the application is local
to the client, and so the transaction has no server activity to measure. Many
Application Response customers prefer to omit such information from their
reports, choosing to focus instead on the response time of applications and
transactions that involve measurable amounts of server and network time.
To eliminate these no-server transactions from reports, each default
application rule set begins with the following constraints. In addition, when
you define a new application, these constraints appear at the top of the rule
set.
[
BytesSent > 0
ServerName != "No-Server"
]
The BytesSent constraint instructs Application Response to ignore any
transaction for which no data is sent over the network. In effect, this
eliminates response time information for all transactions that do not involve
significant server time. The ServerName constraint instructs Application
Response to ignore any transaction where the server cannot be identified
(resulting in the server name of No-Server). This constraint ensures that all
No-Server transactions are omitted from eHealth reports.
Including Transactions with No Server Activity
If you want to include information about these transactions (that do not
involve sending data over the network) in eHealth reports, change the
constraints to the following:
210 BTStudio Administration Guide
How Transaction Limits Work
[
BytesSent >= 0
# ServerName != "No-Server"
]
This will ensure that Application Response includes response time information
about transactions in eHealth reports, regardless of whether they involve
sending data over the network.
If a Rule Set Does Not Define BytesSent
If an application rule set does not include the [ BytesSent > 0 ] constraint or
any other constraints, Application Response still applies the constraints and
ignores any transaction for which no data is sent over the network. For
example, any application defined prior to eHealth Release 5.6.5 does not
include this constraint.
If you want to include information about these transactions (that do not
involve sending data over the network) in eHealth reports, do either of the
following:
Define any transaction limit for the application rule set.
Edit the default constraints as follows:
[
BytesSent >= 0
# ServerName != "No-Server"
]
When an application rule set includes any transaction limit or constraint,
Application Response ignores the default constraints and applies the defined
limit or constraint when monitoring transactions. If the application does not
have associated server activity, the response path name on reports shows
"No-Server" instead of a server name, similar to the following:
Client
Module
name
An application
name
path
yellow- Outlook- Read-No-Server- AP
Application
No server
name
activity
Other Transaction Limits and Constraints
In addition to ElapsedTime and ReportedTime limits for applications and
transactions, you can set other types of limits. Use these constraints in the
same manner as ElapsedTime and ReportTime limits. Constraints defined for
BT Language Reference 211
How Transaction Limits Work
transactions override constraints defined for applications. Use the same
syntax.
Constraint
BytesReceived
Description
The limit for the number
of bytes received during
a transaction
Example: BytesReceived >= 100000
BytesSent
The limit for the number
of bytes sent during a
transaction
Example: BytesSent = 0
ClientTime
The limit for the number
of milliseconds of client
time for a transaction
Example: ClientTime <= 900000
ElapsedTime
The limit for the number
of milliseconds of
elapsed time for a
transaction (client time +
network time + server
time + think time)
Example: ElapsedTime < 600000
NetworkTime
The limit for the number
of milliseconds of
network time for a
transaction
Example: NetworkTime <= 900000
N1NetworkTime
For a terminal server
application, the limit for
the number of
milliseconds of N1
network time for a
transaction, where N1 is
the latency introduced by
the connection between
the client and the
terminal server
Example: N1NetworkTime < 900000
212 BTStudio Administration Guide
How Transaction Limits Work
Constraint
N2NetworkTime
Description
For a terminal server
application, the limit for
the number of
milliseconds of N2
network time for a
transaction, where N2 is
the latency introduced by
the connection between
the terminal server and
the application server
Example: N2NetworkTime < 600000
ReportedTime
The limit for the number
of milliseconds of
reported time for a
transaction (client time +
network time + server
time)
Example: ReportedTime < 600000
RoundTrips
The limit for the number
of round trips for a
transaction, where a
round trip is one request
from the client to the
server followed by a
response from the server
to the client
Example: RoundTrips > 200
ServerName
For restricted use to
eliminate No- Server
transactions only. It can
only be used as follows:
ServerName != "No-Server"
ServerTime
The limit for the number
of milliseconds of server
time for a transaction
Example: ServerTime <= 500000
BT Language Reference 213
How Transaction Limits Work
Constraint
Description
ThinkTime
The limit for the number
of milliseconds of think
time for a transaction
Example: ThinkTime <= 8000000
Syntax for Transaction Limits and Constraints
When defining an application-specific or transaction-specific transaction limit
or constraint, use the following syntax:
[
transaction_limit_name operator value
]
In the application rule set, place this syntax as follows:
To define an application-specific limit, add the syntax above the
application's resource definition.
To define a transaction-specific limit, add the syntax to the transaction
definition for the transaction to which it applies. Place it after the
transaction and module statements but before the transaction's first event
specification.
You can define multiple constraints for each application and each transaction.
Transaction_limit_name
For transaction_limit_name, specify the name of the transaction limit or
constraint that you want to define.
Operator
For operator, use one of the following operators.
Operator
Description
Valid Values
Example
<
Less than
Integer
ElapsedTime <
600000
<=
Less than or
equal to
Integer
NetworkTime <=
900000
Integer
RoundTrips > 200
>
214 BTStudio Administration Guide
Greater than
Tracking Timed-Out Transactions
Operator
Description
Valid Values
Example
BytesSent >= 0
>=
Greater than or
equal to
Integer
!=
Not equal to (for
use with
ServerName only)
String enclosed in quotes ServerName !=
"No- Server"
=
Equal to
Integer
BytesSent = 0
When Application Response observes a transaction that exceeds an upper time
limit (such as [ ElapsedTime < 900000 ]), it adds that transaction to the
Transaction Timeouts counter and excludes the response data from other
eHealth reports.
When Application Response observes a transaction that falls below a lower
time limit (such as [ ReportedTime > 1000 ]) or that does not meet some
other limit (such as [ BytesSent >= 0 ]), it discards the transactions' data. The
transaction is not included in the Transaction Timeouts counter, and its data is
not included in any eHealth reports.
Value
For value, specify the desired limit or constraint. Enclose string values in
double quotes (").
Tracking Timed-Out Transactions
When you define upper time limits for transactions, Application Response can
track the number of transactions that time-out (exceed the upper limit), so
that you can report on them. This information can help you to understand how
many transactions take too long. And by setting upper time limits, you ensure
that these too-long transactions do not skew average response times.
For example, suppose that you add the following ReportedTime constraint to
the default constraints for the Lotus Notes application.
[
BytesSent > 0
ServerName != "No-Server"
ReportedTime < 600000
]
The ReportedTime constraint indicates that Application Response is to track
response time for transactions whose total reported time (client time +
network time + server time) is less than 10 minutes (600,000 milliseconds). If
BT Language Reference 215
Tracking Timed-Out Transactions
reported time for a Notes transaction exceeds 10 minutes, Application
Response counts it as a timed-out transaction and does not include its
response time data in average response time calculations. To report on the
rate of timed-out transactions, you can run a Trend report on selected
response paths for the Transaction Timeouts variable.
Application Response will track timed-out transactions when you set upper
limits (using the less than sign < ) for any of the following time-based
constraints: ClientTime, ElapsedTime, NetworkTime, N1NetworkTime,
N2NetworkTime, ReportedTime, ServerTime, ThinkTime. You can define these
limits at the application level or the transaction level, and you can define
multiple limits for each application and transaction. For examples, refer to
Transaction-Specific Elapsed and Reported Time.
Defining Lower Time Limits
If you define a lower time limit for an application or transaction (using the
greater than sign > ) and a transaction falls below the limit, Application
Response ignores the transaction and discards its response time data. In this
way, the spurious transactions do not skew the average response time to
produce misleading results. However, Application Response does not track
these discarded transactions as timed-out transactions, and you cannot report
on them.
For example, suppose that you add the following ElapsedTime constraint to the
default constraints for the Lotus Notes application.
[
BytesSent > 0
ServerName != "No-Server"
ElapsedTime > 1000
]
The ElapsedTime constraint indicates that Application Response is to track
response time for transactions whose total elapsed time (client time + network
time + server time + think time) is greater than one second. If elapsed time
for a Notes transaction is less than one second, Application Response is to
discard the transaction and not include its response time data in average
response time calculations. You cannot report on transactions that do not
reach a lower limit.
Observing Timed-Out Transactions in BT Studio
When you test application rules in BT Studio, the Transactions tab of the
results pane lists all transactions (from the open event log file) that match the
defined rules. If a transaction's response time will not be reported by
Application Response due a constraint or time limit, the Transactions tab
216 BTStudio Administration Guide
Application Event Source
indicates this with an icon and the name of the applicable constraint, as shown
in Transactions with Constraints.
Application Event Source
The AR Application Event API allows you to define unique start and end events
that allow the AR agent to explicitly bound a transaction. It supports events
from C and any language supporting COM. It does not support events sent
from remote systems.
API Lifecycle
The API has a well-defined lifecycle of three parts: connection, sending of
events, and disconnection. The lifecycle begins when the application calls one
of the connect functions: ARAppEvent_Connect or IARAppEvent::Connect.
Then the instrumented application calls one of the send event functions
(ARAppEvent_SendEvent or IARAppEvent::SendEvent) one or more times to
notify the AR agent of transaction events. When the application shuts down, it
calls either ARAppEvent_Disconnect or IARAppEvent::Disconnect.
Usage Guidelines
Review the following guidelines before you instrument your application:
Call the Connect function once per application startup because the AR
agent stores state information upon connection.
Call the SendEvent function as many times as necessary but remember
that excessive calls may flood the AR agent. In addition, timing is
disturbed as the number of sent events increase. To prevent the flooding
of the AR agent, send a unique start event and a unique end event per
transaction.
To ensure that AR calculates transaction times accurately, call the
SendEvent function before the application starts the transaction.
Also to ensure that AR calculates transaction times accurately, you should
call the Disconnect function as close to the end of the application
transaction as possible.
Function Descriptions
For supported applications, the Application Event API relies upon three
functions: Connect, SendEvent, and Disconnect. Use the Connect function to
start a session. Use the SendEvent function to send events to the AR agent.
Your application must call the Disconnect function to end a session.
BT Language Reference 217
Application Event Source
C Interface
BOOL _cdecl ARAppEvent_Connect()
BOOL _cdecl ARAppEvent_SendEvent(const TCHAR* pszEventName, const
TCHAR* pszEventArguments)
VOID _cdecl ARAppEvent_Disconnect()
COM Interface
IARAppEventSink:
HRESULT Connect()
HRESULT SendEvent(BSTR eventName, BSTR eventArgs)
HRESULT Disconnect()
Examples
C
C#
ARAppEvent_Connect
The ARAppEvent_Connect function connects the ARAppEvent.dll to the AR
agent.
BOOL _cdecl ARAppEvent_Connect();
Parameters
None.
Return Values
Returns TRUE if connected, FALSE if connection fails.
Remarks
A process should only call this function once at startup. The result of calling
the function multiple times is undefined. If ARAppEvent_Connect is called, a
process must call ARAppEvent_Disconnect.
218 BTStudio Administration Guide
Application Event Source
ARAppEvent_SendEvent
ARAppEvent_SendEvent causes events to be sent to the AR agent.
BOOL _cdecl ARAppEvent_SendEvent(const TCHAR* pszEventName, const TCHAR*
pszEventArguments)
Parameters
pszEventName – [in] Pointer to a NULL terminated string, either UNICODE or
ANSI based on the version of the operating system. Win9x variants use ANSI,
while WinNT variants use UNICODE.
pszEventArguments – [in] Pointer to a NULL terminated string, either
UNICODE or ANSI based on the version of the operating system. Win9x
variants use ANSI, while WinNT variants use UNICODE. Multiple arguments
are allowed, using spaces as delimiters. A maximum of 2048 bytes is allowed.
Return Values
Returns TRUE if the event was sent to the AR agent; otherwise it returns
FALSE.
Remarks
The pszEventArguments parameter holds a list of parameter pairs. The pairs
are delimited with spaces and are of the form:
EventParameter=EventParameterValue
Foo=Bar
Foo=1234
To list multiple parameter pairs, delimit them with a space:
EventParameter=EventParameterValue EventParameter=EventParameterValue
EventParameter may not contain spaces, or any other characters disallowed by
eHealth. EventParameterValue may contain spaces. If it does, you must
double quote the value:
Foo=”Bar Bar Bar”
BT Language Reference 219
Application Event Source
An EventParameterValue that starts with the digits 0-9 is treated as an
integer, unless it is double quoted:
Integer Example
Foo=1234
String Example
Foo=”1234”
ARAppEvent_Disconnect
The ARAppEvent_Disconnect function tells the AR agent to clean up the
instance-based bookkeeping which is used to receive application events from
the ARAppEvent.dll.
VOID _cdecl ARAppEvent_Disconnect()
Parameters
None.
Return Values
None.
Remarks
A process must call this function if it calls ARAppEvent_Connect.
HRESULT Connect
The HRESULT_Connect function connects the ARAppEvent.dll to the AR agent.
HRESULT IARAppEventSink::Connect();
Parameters
None.
Return Values
Returns S_OK if connected, S_FALSE if connection fails.
Remarks
A process should only call this function once at startup. The result of calling
the function multiple times is undefined. If this function is called, a process
must also call HRESULT_Disconnect.
220 BTStudio Administration Guide
Application Event Source
HRESULT_SendEvent
HRESULT_SendEvent causes events to be sent to the AR agent.
HRESULT IARAppEventSink::SendEvent(BSTR eventName, BSTR eventArgs)
Parameters
BSTR eventName – [in] Pointer to a NULL terminated string in UNICODE
format.
BSTR eventArgs – [in] Pointer to a NULL terminated string in UNICODE format.
Multiple arguments are allowed, using spaces as delimiters. A maximum of
2048 bytes is allowed.
Return Values
Returns TRUE if the event was sent to the AR agent; otherwise it returns
FALSE.
Remarks
The BSTR eventArgs parameter holds a list of parameter pairs. The pairs are
delimited with spaces and are of the form:
EventParameter=EventParameterValue
Foo=Bar
Foo=1234
To list multiple parameter pairs, delimit them with a space:
EventParameter=EventParameterValue EventParameter=EventParameterValue
EventParameter may not contain spaces, or any other characters disallowed by
eHealth. EventParameterValue may contain spaces. If it does, you must
double quote the value:
Foo=”Bar Bar Bar”
An EventParameterValue that starts with the digits 0-9 is treated as an
integer, unless it is double quoted:
Integer Example
Foo=1234
String Example
BT Language Reference 221
Application Event Source
Foo=”1234”
HRESULT_Disconnect
The HRESULT_Disconnect function tells the AR agent to clean up the instancebased bookkeeping which is used to receive application events from the
ARAppEvent.dll.
HRESULT_IARAppEventSink::Disconnect()
Parameters
None.
Return Values
None.
Remarks
A process must call this function if it calls HRESULT_Connect.
C Interface Example
#include <TChar.h>
#include “CInterface.h”
int main(int argc, char** argv)
{
if(ARAppEvent_Connect() != TRUE)
{
return -1;
}
if(ARAppEvent_SendEvent(_T(“TestEvent”), _T(“First=1”))
{
return -2;
222 BTStudio Administration Guide
C# Interface Example
}
ARAppEvent_Disconnect();
}
C# Interface Example
For information related to the use of the ARAppEvent.dll in C#, refer to
"Importing a Type Library as an Assembly" in the MSDN library at
http://msdn.microsoft.com.
#using ARAppEvent
static void Main()
{
Thread.CurrentThread.ApartmentState = ApartmentState.STA;
ARAppEventSink appEvent = new ARAppEventSink();
if(appEvent == null){
return;
}
appEvent.Connect();
string eventName = "LoadWindow";
string eventArgs = "Title=FirstWindow";
appEvent.SendEvent(eventName, eventArgs);
appEvent.Disconnect();
}
Screen Descriptions
This section contains help topics for windows and dialog boxes of BT Studio.
These help topics appear when you click Help or press F1 within a dialog box.
BT Language Reference 223
Screen Descriptions
Applications
The Applications window displays a list of applications defined to BT Studio,
according to the name.Config.ard configuration file.
You can access the Applications window in either of the following ways:
From the BT Studio menu, select View, Applications.
Click the Applications button on the BT Studio tool bar.
From the Applications window, you can perform the following tasks:
To define rules for an application that is not listed in the Applications
window, you must define the application first. To do so, click New and
provide the information requested, or use the Connection Manager.
To view or modify the properties of an existing application, select the
application in the list and click Edit.
To delete an application definition, select the application in the list and
click Delete.
To exit the Applications window, click OK.
New Application
The New Application dialog appears when you click New on the Applications
window, or if you choose to create a new application from the Connection
Manager. Click the drop-down arrow and select an appropriate application
type. If the application does not match any of the more specific application
types, select Other. Click OK. The Application Properties window appears,
where you specify information about the new application.
Application Types
When adding an application, you must specify the application type in the New
Application dialog box. Choose an application type as follows.
Application Type
When to Use This Application Type
AvgWebResponse
To define a Web-based application
224 BTStudio Administration Guide
Screen Descriptions
Application Type
When to Use This Application Type
AvgWinResponse
To define a Windows-based application that does
not have a more specific application type, such as
Clarify, Scopus, or SalesLogix (The default rule
measures the response time of a transaction
initiated by a user, but you can add and modify
rules as needed.)
DNS
To define an application that monitors Domain
Name System (DNS) traffic
Mail
To define an application that monitors Simple Mail
Transfer Protocol (SMTP) or Post Office Protocol
(POP3) electronic mail
Notes
To define a Lotus Notes application
Oracle-Apps- Suite
To define an application for Oracle NCA or Oracle
SmartClient
Outlook
To define a Microsoft Outlook application
PeopleSoft
To define a PeopleSoft application
SAP
To define an application for SAP R/3
SQL DBMS
To define an application for a SQL-based database
management system (such as Sybase, Microsoft
SQL Server, or Oracle DBMS)
Telnet
To define an application that monitors Telnet
activity
Web
To define a Web-based application that uses
Internet Explorer or Netscape as the browser
Windows
To define a Windows-based application that does
not have a more specific application type, such as
Clarify, Scopus, or SalesLogix (The default rule
measures the response time of window transitions,
but you can add and modify rules as needed.)
Application Properties > General
The General tab of the Application Properties window displays general
information about the application. To access this tab, select View >
Applications, double-click the application in the list, and click the General tab.
Use the General tab to view or define the following information for an
application.
BT Language Reference 225
Screen Descriptions
Name
Assigns a name to the application. Application names are case-sensitive and
should be 15 characters or less. An application name cannot include spaces or
any of the following characters:
~`!@#$%^&*()+=[]{}|;'\",<>?
Type
Indicates the application type. After you define an application, you cannot
change its type; instead, you must delete the application and define a new
one.
Disable this application
When the application is disabled, BT Studio does not look for transactions
generated by this application to monitor. Deselect this option to enable the
application, so that you can modify its rules and test the rule set against an
event log file.
Description
(Optional) Provides a description of this application definition. This description
is for your use only. It is not used elsewhere in BT Studio.
Servers
The Servers window displays a list of servers defined to BT Studio, according
to the name.Config.ard configuration file. This list includes default system
servers.
You can access the Servers window in either of the following ways:
From the BT Studio menu, select View > Servers.
Click the Servers button on the BT Studio tool bar.
From the Servers window, you can perform the following tasks:
To define a new server, click New and provide the information requested,
or use the Connection Manager.
To view or modify the properties of an existing server, select the server in
the list and click Edit.
To delete an server definition, select the server in the list and click Delete.
To exit the Servers window, click OK.
New Server
226 BTStudio Administration Guide
Screen Descriptions
The New Server dialog appears when you define a new server. Click the dropdown arrow and select an appropriate server type. If the server does not
match any of the more specific server types, select Other. Click OK. The
Server Properties window appears, where you specify information about the
new server.
Server Types
When defining a server, you must specify the server type in the New Server
dialog. Choose a server type as follows.
Server Type
When to Use This Server Type
DNS
To define a Domain Name System (DNS) server. The
default DNS port is 53.
Exchange
To define a server for a Microsoft Outlook application. The
default port number is zero (0), indicating that Application
Response uses automatic protocol recognition to identify
the port used by the server.
Mail (POP3)
To perform low-level monitoring of mail traffic. Use a Mail
(POP3) server with an application of type Other or
Outlook. The default port number for a Mail (POP3) server
is 110.
Mail (SMTP)
To perform low-level monitoring of mail traffic. Use a Mail
(SMTP) server with an application of type Other or
Outlook, where appropriate. The default port number for a
Mail (SMTP) server is 25.
Microsoft DBMS
To define a server for an application of type Windows or
SQL DBMS. The default port number is zero (0), indicating
that Application Response uses automatic protocol
recognition to identify the port used by the server.
Notes
To define a server for Lotus Notes. The default port
number is 1352.
Oracle DBMS
To define an Oracle DBMS server for an application of type
Windows or SQL DBMS. The default port number is zero
(0), indicating that Application Response uses automatic
protocol recognition to identify the port used by the
server.
Oracle Forms
To define a server for Oracle NCA or another Oracle
application (an application of type Oracle-Apps-Suite). The
default port number is zero (0), indicating that Application
Response uses automatic protocol recognition to identify
the port used by the server.
BT Language Reference 227
Screen Descriptions
Server Type
When to Use This Server Type
Other
To define a server that does not fit any other server type.
The default port number is zero (0), indicating that
Application Response uses automatic protocol recognition
to identify the port used by the server. You may need to
provide a port number so that Application Response can
monitor activity on this server.
PeopleSoft App
Server
To define a server for a PeopleSoft application. The default
port number is zero (0), indicating that Application
Response uses automatic protocol recognition to identify
the port used by the server. If the PeopleSoft application is
managed using Citrix, you can also define one or more
Citrix servers for the application.
SAP App Server
To define a server for an SAP application. The default port
number is zero (0), indicating that Application Response
uses automatic protocol recognition to identify the port
used by the server. If the SAP application is managed
using Citrix, you can also define one or more Citrix servers
for the application.
Sybase DBMS
To define a server for an application of type Windows or
SQL DBMS. The default port number is zero (0), indicating
that Application Response uses automatic protocol
recognition to identify the port used by the server.
Telnet
To perform low-level monitoring of Telnet network traffic.
Use a Telnet server with an application of type Telnet. The
default port number for a Telnet server is 23.
Web
To define a server for a Web-based application. The
default port number is 80. (For Web applications, you can
create a Web server with a hostname and port, or you can
specify URL substrings to monitor.)
Server Properties General Tab
The General tab of the Server Properties window displays general information
about the server (an application server process). To access this tab, select
View, Servers, double- click the server, and click the General tab. Use the
General tab to view or define the following information for a server.
Name
Assigns a name to the server. Server names should be 15 characters or less. A
server name cannot include spaces or any of the following characters:
~`!@#$%^&*()+=[]{}|;'\",<>?
228 BTStudio Administration Guide
Screen Descriptions
Type
Indicates the server type. After you define a server, you cannot change its
type; instead, you must delete the server and define a new one.
Description
(Optional) Provides a description of this server. This description is for your use
only. It is not used elsewhere in BT Studio.
Server Properties: Hostnames, Ports
The Hostnames, Ports tab of the Server Properties window specifies one or
more hostnames and related ports for the server. For Web servers, you can
either specify hostnames and ports or URL substrings to monitor. For all other
server types, specify one or more hostnames and ports.
To access this tab, select View, Servers, double- click the server in the list,
and click the Hostnames, Ports tab.
To add a hostname to the list, click <Click here to add a new hostname>.
Enter the hostname and press Enter.
BT Studio displays the default port number for this type of server. If your
site uses a different port number for that hostname, click the port number
to change it. If the application uses multiple ports for client-server
communications, you can specify 0 (zero) to indicate that Application
Response should monitor application activity to this host on any port.
NOTE: If you specify multiple hostnames for a server, the hostnames
must reside on the same system (for example, because it has two or more
network interface cards). You cannot specify multiple systems for one
server.
To modify a hostname in the list, click the hostname, modify it, and click
Apply.
To delete a hostname from the list, click the hostname and click Delete.
Server Properties: URL Substrings
For a Web server, you can specify either a hostname and port to monitor for
application activity or URL substrings. (A URL substring is part of a universal
resource locator.) For Web traffic, the initial Web server may redirect the
traffic to another Web server. For this reason, it may be more useful (and
easier) to use URL substrings than hostnames/ports for Web servers. The URL
Substrings tab of the Server Properties window specifies one or more URL
substrings for servers of type Web. Application Response then monitors all
Web traffic whose URL contains a match to the URL substrings specified here.
BT Language Reference 229
Screen Descriptions
This enables Application Response to monitor Web traffic that is redirected
from a primary Web server to other Web servers.
Using the URL Substrings Tab
To access this tab, select View, Servers, double- click the server in the list,
and click the URL Substrings tab. (This tab appears only for servers of type
Web.)
To add a URL substring to the list, click <Click here to add a new URL
substring>, type the desired substring, press Enter, and click Apply.
To modify a URL substring in the list, select the substring, modify it, and
click Apply.
To delete a URL substring from the list, select the substring and click
Delete.
Specifying URL Substrings
List the minimum substring (the lowest common denominator) of any URLs
that Application Response is to match when monitoring the response time of
Web transactions.
URL Substring
Substring Matches These URLs
green
www.green.com, www.green1.com, www.green23.com,
www.darkgreen.com
www.green
www.green1.com, www.green23.com, but not
www.green.com or www.darkgreen.com
com
Web traffic to all .com sites
Server URLs and Application URLs
When monitoring specific transactions for response time, Application Response
recognizes transactions based solely on the URLs specified in an application
definition (if any). For example, if you include the following transaction
definition in an application's rule set, Application Response recognizes a
CustomerSupport transaction when Web traffic includes the URL
www.concord.com/cust/techsup.htm:
transaction "CustomerSupport"
module
"LoadPage"
{
event "Event1" Web BeginLoad
{ Level="top" URL=contains:"www.concord.com/cust/techsup.htm" }
event "Event2" Web EndLoad { Level="top" }
}
230 BTStudio Administration Guide
Screen Descriptions
The URL substrings specified for a Web application server (on the URL
Substrings tab) control the monitoring of network time for the application only.
If Application Response recognizes a transaction based on the application rule
set, but there is no match in the Web server definition, it reports a network
time of 0 (zero).
Server Properties: Details
Use the Details tab of the Server Properties window to provide more
information about a server. To access this tab, select View > Servers, doubleclick the server in the list, and click the Details tab.
On the Details tab, you can specify the following:
Uses Port Redirection - If the server is enabled for port redirection, select
this option. Some application servers accept an initial request on a wellknown port and then redirect the client to communicate on a different
port. For the AR agent to monitor activity on these ports, the server must
have the "Uses Port Redirection" option enabled. (This is the default
setting.) If you are not sure whether an application server uses port
redirection, leave this option enabled.
Oracle SID - This field appears only for servers of type Oracle DBMS.
Specify the system identifier (SID) for the Oracle system that this server
uses.
eHealth System Connection Parameters
The eHealth System Connection Parameters dialog box appears when BT
Studio needs to connect with the AR controller, such as when downloading
configuration data or uploading rules.
Provide the following information so that BT Studio can connect with the AR
controller, which is located on the eHealth system.
eHealth System Hostname: Specify the hostname of the eHealth system.
AR Controller Port: This field shows the default port of 10182 used for
communications between Application Response and eHealth. Change this
value only if Application Response uses another port.
eHealth Administrator: You cannot edit the value of this field; BT Studio
must communicate with the AR controller using the eHealth admin user
account.
Password: Specify the password of the eHealth Web admin user account.
After completing the fields, click Connect.
BT Language Reference 231
Screen Descriptions
Select an Application to Download
The Select an Application to Download dialog box appears when you select
Tools, Download Rules from the BT Studio main window, and after you connect
to the eHealth system by completing the eHealth System Connection
Parameters dialog. The Download Rules function allows you to download the
rule set for one application from Application Response. The Select an
Application to Download dialog displays a list of applications currently defined
in Application Response (using the eHealth Web interface). Select the
application whose rules you want to download, and click OK.
BT Studio downloads the rule set for the selected application, displays a
confirmation message, and loads that rule set into the rules pane, so you can
begin to develop transaction rules for the application.
Select Application
The Select Application dialog box appears when you are using the Connection
Manager to add an executable to an application. Do one of the following:
To add the selected executable to an existing application, select the
desired application in the list and click OK.
BT Studio adds the executable name to the require section1 of that
application’s resource definition. In the Connection Manager, the
application symbol and application name appear on the same line as the
executable name. This ensures that Application Response can begin
monitoring the application when it observes that the executable program is
running. If a specific server is not defined for the application, Application
Response uses a default server definition to monitor network and server
response times for the application.
To add the selected executable to a new application, click New, select an
application type, and complete the Application Properties window.
BT Studio defines the application, adding the selected executable name to
the require section1 of that application’s resource definition. In the
Connection Manager, the application symbol and application name
appears on the same line as that executable name.
Note: This assumes that the require section of the application’s resource
definition includes a parameterized resource, using the form resource Process
{ ExecutableName=$(Application Executable) }. The selected executable is
applied to the first instance of ExecutableName=$ that occurs in the rule set.
If the first instance appears in an event specification, for example, that is
where the selected executable name is used.
232 BTStudio Administration Guide
Screen Descriptions
Select Server
The Select Server dialog box appears when you are using the Connection
Manager to add a hostname or port to a server. Do one of the following:
To add the selected hostname or port to an existing server, select the
desired server in the list and click OK.
BT Studio adds that hostname and port to the selected server definition.
(Go to Server Properties to see the hostname and port listed for the
server.) In the Connection Manager, the server symbol and server name
appear on the same line as the hostname and port. This ensures that
Application Response monitors connections to the specified server, and so
can calculate network time and server time, in addition to client time. On
reports, the server name appears in the response path name.
To add the selected hostname or port to a new server, click New, select a
server type, and complete the Server Properties window.
BT Studio defines the server, adding the selected hostname and port to
the server definition. In the Connection Manager, the server symbol and
server name appear on the same line as the hostname and port.
Customize Columns
To change the columns displayed in the events pane of the BT Studio window,
select Tools, Customize Columns or right-click anywhere in the events pane
and select Customize Columns from the shortcut menu. To customize columns
in the results pane, right-click anywhere in the Transactions tab of the results
pane and select Customize Columns from the shortcut menu.
From the Customize Columns dialog, you can hide and show columns, or
change the order in which columns appear.
To hide a column:
In the Customize Columns dialog, deselect the column to hide and click
OK.
To show a hidden column:
In the Customize Columns dialog, select the desired column and click OK.
To change the order of columns:
1.
Select a column name.
2.
Click Move Up or Move Down until the column is in the appropriate place in
the list.
3.
Click OK.
BT Language Reference 233
Screen Descriptions
Edit Column Filter
Use the Edit Column Filter function to filter the events that appear in the
events pane of the BT Studio window, based on values for the current column
of the events pane. To access this function, right-click the desired column of
the events pane and select Edit Column Filter.
On the Edit Column Filter dialog, a check mark appears in the Visible column
for each value that is currently visible in the events pane.
Use this dialog as follows:
To hide events with a certain value from the events pane, deselect that
value.
To show events for a certain value in the events pane, select that value.
To deselect all check boxes, click Clear All. Then you can select those
values that you want to show.
To select all check boxes, click Select All. Then you can deselect values
that you want to hide.
When you have selected and deselected the desired events, click OK.
Events Pane
The events pane appears in the top third of the BT Studio window. After you
open an event log file, this area displays details about the events recorded on
a client system. You can refer to information shown in the events pane when
developing rules for an application.
To change the size of the events pane, move the divider bar between the
events pane and the rules pane.
In the events pane, you can do the following:
Customize the events pane to show or hide columns or to change their
order
Filter events to limit the information shown
Search the event log file for specific values
Copy event values into rules for transactions
Create event specifications automatically based on a selected event
234 BTStudio Administration Guide
Screen Descriptions
See the events that are matched by transaction rules during testing
Define breakpoints to use when troubleshooting and refining rules
Rules Pane
The rules pane is the middle pane of the BT Studio window. In this pane you
can edit an application's rule set to define the resources and transactions to
monitor. Before you can edit the rule set, you must choose the application. BT
Studio displays the application's rule set in the rules pane, and you can edit
and enter text as needed to define rules for the application:
To define resources, you must specify resource types.
To define transactions, you must specify event types and event actions.
In the rules pane you can do the following:
Copy event values into rules.
Create event specifications automatically based on selected events.
Use templates to define rules.
Check the syntax of rules.
Test defined rules.
Save changes to rule sets.
Results Pane
The results pane appears at the bottom of the BT Studio window. It displays
the results of various operations, and it contains three tabs:
Syntax tab
Transactions tab
Recognized Events tab
Syntax Tab
After you have developed a rule set, check its syntax for accuracy by selecting
Tools, Check Syntax. BT Studio does the following:
Displays the results of the syntax check on the Syntax tab, which appears
in the results pane at the bottom of the BT Studio window.
If it finds a syntax error, BT Studio highlights the first error found in the
rules pane.
BT Language Reference 235
Module Statement
After correcting any syntax errors, perform another syntax check to
ensure that you find and correct all errors.
Transactions Tab
After checking the syntax of a rule set, you can test the rule set by running
the events recorded in the event log against the defined rules. BT Studio
displays recognized transactions on the Transactions tab of the results pane,
which appears at the bottom of the BT Studio window. It also indicates
transactions that will be ignored due to constraints.
To locate the starting event of a recognized transaction, double-click that
transaction on the Transactions tab. In the events pane, BT Studio jumps to
the starting event for that transaction. Scroll down the events pane to find
intermediate and ending events for the transaction. Use this feature to ensure
that the rule set identifies the correct events to recognize a transaction.
Recognized Events Tab
When debugging an application rule set, you may want to run the events
against rules one step at a time and see which events match rules during the
process. BT Studio allows you to do this by viewing the Recognized Events tab
as you use the Step command. The Recognized Events tab appears in the
results pane, which is at the bottom of the BT Studio window.
On the Recognized Events tab, BT Studio displays information about events
that it recognizes based on defined rules. As you step through events
displayed in the events pane (by pressing F10), each successive event that it
recognizes based on a transaction definition appears listed on the Recognized
Events tab. BT Studio displays the name of the transaction for which the event
was recognized.
When BT Studio recognizes the ending event of a transaction, that transaction
appears on the Transactions tab, and all related events are removed from the
Recognized Events tab. In this way, you can use the Transactions tab to see a
list of complete transactions that have been recognized, and the Recognized
Events tab to see events recognized for incomplete transactions. This
capability is useful for debugging rules.
Module Statement
All transaction definitions must include a module- name, which appears in
response paths and in reports. The module name can be identical to the
transaction name. You can organize modules into module sets for reporting
purposes.
236 BTStudio Administration Guide
Module Statement
Note: Naming restrictions apply to module names.
Syntax
module "module-name"
Example
The following transaction definitions are from an application rule set for Lotus
Notes.
transaction "Logon"
module "Logon"
{
event "LogonOKBtn" Windows ButtonPress {ParentTitle="Enter Password" text="OK"}
event "DstryLogin" Windows Destroy {Title="Enter Password"}
last
{
event "A" Connection Request { }
event "B" Connection Response { }
}
}
transaction "NewMemo"
module "NewMemo"
{
event "1" Windows MouseClick {title="New Memo" }
event "2" Windows Losefocus {title=contains:"New Memo"}
last
{
event "3a" connection request { }
event "3b" connection response { }
}
}
transaction "Reply"
module "Reply"
{
event "1" Windows MouseClick {Title="Reply"}
event "2" Windows LoseFocus {Title=contains:"New Memo"}
last
{
event "3a" connection request { }
event "3b" connection response { }
}
}
BT Language Reference 237
Basic Rule Set Syntax
Basic Rule Set Syntax
The basic structure of an application's rule set definition is as follows:
[
limits_and_constraints
]
resources
{
resource_definitions
}
transaction "transaction-name- 1"
module "module-name-1"
{
transaction_definitions_1
}
.
.
.
transaction "transaction-name- n"
module "module-name-n"
{
transaction_definitions_n
}
alternate ruleset
{
alternate_transaction_rules
}
Example
A sample rule set for SAP follows. It defines resources and four transactions:
Login, ChangePO, NavFromMain, and LogOff.
[
BytesSent > 0
ServerName != "No-Server"
]
resources
{
require all
{
resource Process { ExecutableName=$(Application Executable) }
resource Process { ExecutableName="FRONT" }
resource Process { ExecutableName="SAPGUI" }
}
238 BTStudio Administration Guide
Basic Rule Set Syntax
additional
{
resource Windows {}
resource Connection {}
}
}
transaction "Login"
module "Login"
{
# Start with the SAP R/3 window
event "StartWindow" Windows SetTitle { Title="SAP R/3" }
# End with SAP R/3 System window
event "SAP-RS_System" Windows SetTitle { Title-"SAP R/3 System" }
}
transaction "ChangePO"
module "ChangePO"
{
# Start with the Change Purchase Order window
event "Change-PO" Windows SetTitle { Title=contains:"Change Purchase Order" }
# Next event is status message
event "Status-Changed" Windows StatusMessage { Text=contains:"changed" }
# End with the Purchasing window
event "Purchasing" Windows SetTitle { Title="Purchasing" }
}
transaction "NavFromMain"
module "NavFromMain"
{
# Start with SAP R/3 System window
event "SAP-RS_System" Windows SetTitle { Title-"SAP R/3 System" }
# End with any other window
event "AnyWindow" Windows SetTitle {}
}
transaction "LogOff"
module "LogOff"
{
# Start with menu command to log off
event "Log-Off" Windows MenuCommand { Text="System->Log off" }
# End when executable stops
event "Stop-Front" Windows Stop { ExecutableName="FRONT" }
}
BT Language Reference 239
Chapter 11: Troubleshooting
Use the following information to troubleshoot problems with BT Studio or the
rule development process.
This section contains the following topics:
BT Marker Errors (see page 241)
BT Studio Errors (see page 241)
Transactions Not Recognized (see page 242)
Inaccurate Response Time Measurements (see page 243)
BT Marker Errors
This error message appears when you try to connect BT Marker to a remote
agent, but the agent on the remote system is not started. To correct the error,
verify that the remote agent is running. (Use Control Panel, Services to make
sure that the Application Response Agent Proxy is started on that system.)
BT Studio Errors
The following error message appears when you try to start BT Studio, but a
valid BTStudio.lic file does not reside in the BT Studio directory. Also make
sure that the BT Studio license file, BTStudio.lic, is a plain (ASCII) text file
with no formatting, and that the 20-character hexadecimal value is followed by
a blank line.
At least one event for this transaction has been filtered out.
This error message appears when you use BT Studio to test rules against an
event log file and you double-click a transaction in the results pane to see its
starting event in the events pane. When you filter events in the events pane,
BT Studio still uses them for testing but does not display them in the events
pane. The selected transaction includes one of these filtered, invisible events.
To display all events in the events pane
1.
Right-click any column of the events pane.
2.
Select Remove All Column Filters from the shortcut menu.
Troubleshooting 241
Transactions Not Recognized
3.
Double-click the transaction in the results pane again to see all of its
matching events.
Warning: Module "xxxx" has more than one transaction defined--this
feature is being deprecated.
4.
This warning appears on the eHealth console and in arcontrol.log. BT
Studio issues this warning when you add transaction definitions to an
application rule set, and more than one transaction is assigned to the
same module.
5.
In prior versions of BT Studio, you could use modules as a way to group
several transactions together for reporting purposes. In eHealth 5.7 and
later, this is still permitted, but the warning informs you that CA plans to
deprecate this feature. In a future release of eHealth, you will not be able
to assign multiple transactions to one module name.
6.
Instead of using modules to group together transactions for reporting, you
can now use module sets.
Transactions Not Recognized
If you test transaction rules against an event log and find that BT Studio is not
recognizing defined transactions, do the following:
Make sure that the application is enabled. BT Studio cannot recognize
transactions for a disabled application rule set.
Make sure that you modified the correct rule set. In addition to enabling
the application, you must display the correct rule set in the rules pane
before editing it.
Make sure that the event log file includes application activity for the
startup of the application. If BT Studio does not observe the application
starting, it does not begin to monitor the application's transactions. To
record the startup of the application in the event log file, exit the
application, start event recording, and then start the application and
perform the transactions to be monitored. Test the rules against the new
version of the event log file.
Check the resource definitions for the application rule set.
The require section must list the processes that indicate a running instance
of the monitored application. Without properly defined required resources,
Application Response cannot recognize a running instance of the
application and so cannot monitor the application’s transactions.
The additional section must list the resource types that match the event
types used in the event specifications. For example, if a transaction rule
uses the Web BeginLoad and Endload events and the Windows MouseClick
and ButtonPress events, the additional section must include the Web and
Windows resources.
242 BTStudio Administration Guide
Inaccurate Response Time Measurements
Check the Recognized Events tab in the results pane. If it lists one or more
events for a transaction, BT Studio was able to begin to recognize a
transaction but was not able to recognize all of its events. Double-click the
first event. In the events pane, BT Studio jumps to the starting event for
the transaction. Scroll down the events in the events pane to find the
subsequent events that you expected BT Studio to recognize. Compare the
characteristics of these events with the event specifications in the
transaction rule. Update the event specifications to accurately reflect the
events to be recognized. Test your rules again using breakpoints and F10
to step through events to learn where the rules fail. Continue refining the
event definitions and transaction rules until BT Studio recognizes the
desired transactions properly.
Inaccurate Response Time Measurements
BT Studio (or Application Response) may calculate unexpected or seemingly
inaccurate response times for several reasons. In BT Studio, response time
measurements appear in columns of the Transactions tab on the results pane.
In Application Response, response time measurements appear in the Agent
Transaction Viewer and in reports.
No network or server time reported for transactions
If BT Studio does not report network time or server time for recognized
transactions, check to make sure that the additional section of the
application's resource definitions includes the connection resource, similar to
the following:
resources
{
require one
{
resource Process
{ ExecutableName=$(Application Executable) }
resource Process {ExecutableName="process_name"}
}
additional
{
resource Windows { }
resource Connection { }
}
}
You also may not see network and server time for a recognized transaction
because the transaction is local to the client system and does not include
server time. To ensure that BT Studio (and Application Response) can report
client, network, and server time for these transactions, temporarily define the
Bytes constraint as follows:
Troubleshooting 243
Inaccurate Response Time Measurements
[
BytesSent < 100
]
When you have finished testing, reset the Bytes constraint to its default
setting or another appropriate setting.
No network time reported for Web transactions
When testing Web application rules against an event log, BT Studio may report
zero network time. This problem occurs when the URL substrings defined for
the Web server do not apply to the URLs of the monitored transaction.
When monitoring Web transactions, BT Studio recognizes transactions based
on the URLs specified in an application rule set (if any). For example, if you
include the following transaction definition in an application's rule set, BT
Studio recognizes a CustomerSupport transaction when Web traffic includes
the URL www.concord.com/cust/techsup.htm:
transaction "LoadPage"
module
"LoadPage"
{
event "Begin" Web BeginLoad
{ Level="top" URL=contains:"www.concord.com/cust/techsup.htm" }
event "End" Web EndLoad { Level="top" }
}
The URL substrings specified for a Web server (on the URL Substrings tab)
control the monitoring of network time for the application. If BT Studio
recognizes a transaction based on the application rule set, but there is no
match in the Web server definition, it reports a network time of 0 (zero).
So, for example, if the Web server for this application includes the URL
substring www.google.com, google.com does not match the transaction's URL,
www.concord.com/cust/techsup.htm. As a result, BT Studio monitors the
transaction but is not able to calculate its network time.
If the Web server for the application includes the URL substring concord.com,
the substring provides a match for www.concord.com/cust/techsup.htm, and
so BT Studio is able to monitor the transaction's response time, including its
network time.
To ensure that BT Studio can report network time for Web transactions, check
the URL substrings specified for the application's Web server and correct them
if necessary. You must also change the URL substrings for the Web server
defined in Application Response.
244 BTStudio Administration Guide
Inaccurate Response Time Measurements
Response times are inaccurate
If a transaction's reported time is greater than expected, consider how you are
bounding the transaction rule. Have you specified appropriate starting and
ending events? Make sure that the final event specification correctly identifies
the end of the transaction. When calculating response time for a transaction,
BT Studio (or Application Response) includes the response time of all events
that occur from the start of the transaction to its ending event and that match
the resources listed (required and additional). In some cases, however,
application activity may match listed resources but may not be part of a
particular transaction, or you may not want to include the activity's response
time in the transaction's response time. For example, while a user is
performing a transaction, the application may also be performing some
background tasks. Because these tasks use the same resources as the
transaction and they occur during the time interval of the transaction, BT
Studio (or Application Response) includes the response time for the
background tasks as part of the total response time for the user's transaction.
To remedy this situation, use the IgnoreEvents clause as a filter to disregard
events (such as these background tasks) that might incorrectly affect the
response time measurements of monitored transactions. When Application
Response monitors a transaction, it omits any response time data for ignored
events from the transaction's total response time. Add the IgnoreEvents clause
to the additional resource definition for the application. Ignored events apply
to all monitored transactions for an application; you cannot specify events to
ignore for a particular transaction (that is, within a transaction definition).
Troubleshooting 245
Glossary
A
additional resource
A resource, specified in the additional section of an
application's resource definition, that Application Response
uses to identify the type of activity to monitor. If you define
transaction definitions that use event types that do not match
resource types listed in the resource definition, Application
Response cannot monitor those transactions.
agent
See AR agent.
Agent Transaction Viewer (ATV)
A tool that you access from the Application Response area of
the eHealth Web interface to troubleshoot problems with AR
agents. The ATV displays details about each transaction that
Application Response recognizes based on the current
application rule set.
alternate rule set
A set of transaction rules that Application Response uses to
monitor response time from a different point of view than the
primary rule set. Application Response independently analyzes
application activity for transactions using each alternate rule
set defined. However, Application Response records the
transactions (and the corresponding response data) using each
alternate definition under the same overall application
definition.
Troubleshooting 247
Inaccurate Response Time Measurements
application
A software product that you use for a specific purpose or to
perform a set of related tasks. For example, you might use an
e-mail application to send and receive electronic mail, or a
Web application to search a database.
application definition
In Application Response and BT Studio, a record that defines
an application to monitor for response time.
application executable
The executable program for an application. Also referred to as
an executable.
application instance
A single implementation of a distributed application using
common server processes and client systems. Also referred to
as an application.
Application Response
An eHealth software module that allows you to measure the
actual, observed response time of mission-critical applications
from the end user's point of view.
AR agent
The agent (a program) that you install on a client system to
monitor the performance of applications. You can manage
these agents from the eHealth Web interface. The response
data received from these agents allows eHealth to generate
historical reports and end-to-end performance alerts relating
to application response time.
AR controller
The eHealth component that sends the information that you
configure through Application Response to the AR agents. The
248 BTStudio Administration Guide
Inaccurate Response Time Measurements
AR controller also receives data from the agents and sends it
to eHealth. The AR controller resides on the eHealth system.
ASCII
The American Standard Code for Information Interchange. The
most common format for character representation in
computers and the Internet. Characters fit into a single byte. It
was developed by the American National Standards Institute
(ANSI).
ATV
See Agent Transaction Viewer.
B
breakpoint
In BT Studio, a line of an event log file that causes BT Studio
to stop analyzing events against the defined rule set. While
you are developing a rule set and testing it against events, you
may want to use breakpoints to test the rule set against part
of the event log, or to check the state of transaction
recognition at intermediate points in the event sequence.
BT language
The Business Transaction (BT) language, CA's proprietary
programming language for use with BT Studio. You use the BT
language to define application rule sets, specifying resources
used by an application and defining the transactions to
monitor.
BT Marker
A component of the BT Studio tool set that you use to
annotate the event log file while recording application activity.
Troubleshooting 249
Inaccurate Response Time Measurements
BT Recording agent
A version of the AR agent that you can use to record
application activity in an event log file if licensed AR agents are
not yet installed or available on the client system. The BT
Recording agent does not require a software license.
BT Studio
A software program that provides a work environment to help
you develop an application rule set, which Application
Response uses to recognize the applications and transactions
to monitor.
BT Studio system
A computer system on which BT Studio is installed.
BT Studio tool set
A set of software tools that help you to define the applications
and specific transactions that Application Response is to
monitor. The BT Studio tool set consists of the recording
agent, BT Marker, and BT Studio.
C
Citrix® Metaframe®
Application server software by Citrix Systems, Inc., that
delivers business-critical applications to users across the
extended enterprise. A client system communicates with a
Citrix server, which, in turn, communicates with an application
server.
client
A computer system, usually a desk computer or a lap , that
presents data directly to a user and accepts input. Clients drive
the computing process, supporting local processing and
250 BTStudio Administration Guide
Inaccurate Response Time Measurements
accessing remote servers as needed for data access and
analysis.
client process
The client-side part of a distributed application.
client think time
The time that is neither client processing time, network time,
nor server time for a transaction. It is calculated by
subtracting client processing time and remote time from the
total response time. For example, client think time may reflect
the time it takes the user to type text or pause between tasks.
Also referred to as think time or idle time.
client time
The time that a client system spends processing a transaction.
Also referred to as client processing time.
configuration
The definition of applications, servers, and rule sets that
Application Response requires to understand which
applications and transactions to monitor.
configuration files
Files that define the applications, servers, and rule sets
involved in monitoring the performance of applications. The
eHealth.Config.ard file defines applications and servers, the
eHealth.Rules.ard file defines application rule sets, and the
eHealth.DefRules.ard file defines default application rule sets.
Connection Manager
A BT Studio utility that identifies the specific application
executable names, hostnames, and ports used when
transactions are performed, based on information recorded in
an event log file. You can access the Connection Manager from
the BT Studio main window.
Troubleshooting 251
Inaccurate Response Time Measurements
connection-based application
An application for which the require section of the resource
definition refers to a DNS or Connection resource. When
monitoring a connection-based application, Application
Response monitors response times for network connections.
D
DBMS
Database management system. A program such as Oracle,
Microsoft SQL Server, or Sybase for creating and providing
access to one or more databases.
DNS
Domain Name System. The system that locates and translates
Internet domain names such as concord.com into Internet
Protocol (IP) addresses. A DNS server is typically a device that
translates domain names to IP addresses within your network.
DNS path
A unique combination of a process and the DNS server that it
contacted. Application Response can monitor each DNS path
independently, regardless of its source.
download
A method of copying programs or information from one
computer to another computer. For example, you can use a
function of BT Studio to download configuration information
from Application Response.
252 BTStudio Administration Guide
Inaccurate Response Time Measurements
E
eHealth Web administrator
A person who is responsible for managing and administering
the eHealth Web server and the eHealth Web interface.
eHealth Web interface
A Web-based user interface that allows users to run and view
reports and manage certain components of eHealth.
elapsed time
The amount of time that elapses during an entire transaction,
from the moment the transaction begins to the moment it
ends. Elapsed time includes client time, network time, server
time, and client think time.
event
The basic unit of application activity that is recognized by
Application Response. Examples of events include: the creation
or termination of a process, a change in window title, a mouse
click or button press, a DNS lookup, and more. When defining
a transaction to monitor, you specify the events that make the
transaction unique.
event action
A specific type of application activity used when defining a
transaction to Application Response. Each event type supports
different event actions. Sample keywords for event actions
include Start, S , ButtonPress, MouseClick, SetTitle, LoseFocus,
and others.
event log file
A text file (created by a recording agent) that stores
information about application activity. You use the event log
file in BT Studio to develop and test application rule sets for
use with Application Response. By default, the event log file is
Troubleshooting 253
Inaccurate Response Time Measurements
named events.btl, and it resides in the same directory as the
recording agent. Also referred to as the event log.
event type
A category of events used when defining a transaction to
Application Response. Event types include Connection, DNS,
Outlook, Process, Session, Web, and Windows. Each event
type supports different event actions. For each event type that
you use in an application's transaction definitions, you must
specify a corresponding resource type in its resource
definitions.
events pane
The upper part of the BT Studio window that displays
application events recorded in an event log file.
Exchange
The Microsoft Corporation groupware application that enables
communication and collaborative work. At its core is an
electronic mail routing, distribution, and storage facility.
executable
See application executable.
executable-based application
An application for which the names of one or more executable
programs are listed in the require section of the application's
resource definition.
F
FTP
File Transfer Protocol. A means for uploading and downloading
files on the Internet. You can use an FTP client application to
request files from or transfer files to an FTP server.
254 BTStudio Administration Guide
Inaccurate Response Time Measurements
filter
In BT Studio, a method of hiding irrelevant information
displayed in the events pane of the BT Studio main window.
You can filter the events displayed in the events pane based on
the values of any of the columns listed at the of the events
pane. Filtering does not actually delete any information from
the event log file. Rather, it hides information from the event
pane, removing unwanted data from view to simplify the rule
development process.
G
GUI
Graphical user interface. The use of pictures rather than just
words to represent the input and output of a program. A
program with a GUI runs under a windowing system, such as
Microsoft Windows. Compare a GUI with a command line
interface, in which the user communicates with the program
using text commands.
H
hostname
The name for an individual IP (Internet Protocol) address on a
computer. While many computers have only one hostname,
some systems, such as network servers, have multiple
hostnames.
HTTP
Hypertext Transfer Protocol. An application protocol that
defines the set of rules for exchanging files (text, graphics,
multimedia, and other files) on the World Wide Web.
Troubleshooting 255
Inaccurate Response Time Measurements
I
idle time
See client think time.
import
A method of copying information from one computer to
another computer. For example, you can use a function of
eHealth to import updated application rule sets from BT Studio
to Application Response.
IP
Internet Protocol. The method (or protocol) by which packets
of information are sent across the Internet.
L
latency
A measure of delay, often network delay.
M
MB
Megabytes.
module
A name for a transaction that is defined in an application rule
set. The module name appears in eHealth reports. You can
define module sets to group modules (transactions) together
for reporting purposes.
module set
256 BTStudio Administration Guide
Inaccurate Response Time Measurements
A group of related modules (transactions). Certain eHealth
reports summarize response time information for all
transactions or modules that belong to a module set.
N
network time
The time spent establishing network connections to complete a
transaction. For terminal server applications, Application
Response can track N1 network time, which is the latency
introduced by the connection between the client and the
terminal server, and N2 network time, which is the latency
introduced by the connection between the terminal server and
the application server.
P
port
The physical (hardware) connection on a device that connects
the device to a network.
process
Typically, an instance of a program or application that is
running on a server. Applications can have one or more
associated processes.
protocol
The set of rules by which the endpoints in a telecommunication
connection communicate. The protocol defines the packet
format of the transmitted information. On the Internet,
common protocols are TCP, IP, HTTP, and FTP.
Troubleshooting 257
Inaccurate Response Time Measurements
R
recognized event
An event that Application Response and BT Studio recognize as
part of a transaction definition. When testing rules in BT
Studio, you can see a list of recognized events on the
Recognized Events tab of the results pane.
recording agent
An agent (installed on a client system) that records
information about all application activity in an event log file for
later processing by BT Studio. You can use either of two types
of recording agent: the AR agent or the BT Recording agent.
regular expression
Patterns in text strings that are formed by normal characters
and special characters (also known as meta-characters).
Regular expressions allow you to search for patterns instead of
fixed strings. For example, the regular expression [akm]
matches an a, k, or m. The brackets around the characters are
special characters.
remote time
The portion of total response time that includes server time
and network time (network transmission plus latency time).
reported time
Response time calculated by Application Response to measure
the performance of applications and transactions. This includes
client time, network time, and server time, but not client think
time. Application Response reports show reported time.
required resource
A resource that must be running before Application Response
can recognize a running instance of the application. Application
Response does not monitor transactions until the resource
258 BTStudio Administration Guide
Inaccurate Response Time Measurements
definitions listed in the require section of an application rule
set are satisfied.
resource
A entity that generates activity that can be monitored by the
AR agent, such as a process or a network connection.
resource definition
The section of an application rule set that defines required
resources and additional resources for the application.
Resource definitions configure Application Response to
recognize a running instance of an application and indicate
which resources an application uses for monitored
transactions.
resource type
A specific category of resource that Application Response uses
to identify an application instance or to monitor application
activity. You specify resource types in an application's resource
definition. Resource types include: Connection, DNS, Outlook,
Process, Session, Web, and Windows. Each event type used in
an application's transaction definitions must have a
corresponding resource type defined in the application's
resource definitions.
response destination
A response path endpoint that processes a transaction, such as
an application server.
response endpoint
A response source (such as a client system) or a response
destination (such as an application server).
Troubleshooting 259
Inaccurate Response Time Measurements
response path
The connection between a response source (typically a client
system) and a response destination (typically an application
server) over which transactions travel.
response source
A response path endpoint from which users perform
transactions, such as a client system.
response time
The elapsed time between a user request and the system
response. In Application Response reports, response time
calculations include client time, network time, and server time,
but not client think time.
results pane
The bottom part of the BT Studio main window, where BT
Studio displays the results of various operations. The results
pane includes the Syntax tab, the Transactions tab, and the
Recognized Events tab.
round trip
In Application Response, one request from the client to the
server, followed by a response from the server to the client.
rule
A transaction definition that specifies the events that uniquely
identify a transaction, or a resource definition that specifies
the resources used by an application. You use BT Studio and
the BT language to define a set of rules for each application.
rule set
A set of rules that Application Response uses to recognize an
application and monitor its transactions.
260 BTStudio Administration Guide
Inaccurate Response Time Measurements
rules file
A text file used by Application Response to identify an
application and its transactions. The rules file is named
eHealth.Rules.ard, and the file containing default rule sets is
eHealth.DefRules.ard.
rules pane
The middle pane of the BT Studio main window, where you use
the BT language to develop rule sets for applications.
S
server
A program that provides services to other programs on the
same and other computers. Also, a computer that performs file
storage and application hosting, as well as provides computing
services to other devices and users on the network. A server
typically has one or more CPUs, disks, interfaces, and storage
partitions.
server definition
A record that defines a server connected to a monitored
application. The server definition includes a server name, type,
list of hostnames and ports, and other details. Server
definitions ensure that Application Response can track network
time and server time as part of the calculated response time
for monitored transactions.
server process
The server-side part of a distributed application.
server time
The amount of time that a server requires to process a
transaction. It is calculated by determining network time and
subtracting it from remote time.
Troubleshooting 261
Inaccurate Response Time Measurements
T
TCP
Transmission Control Protocol. A connection-based protocol
used along with the Internet Protocol (IP) to send data in the
form of message units between computers over the Internet.
template
BT language text that provides the syntax for creating a
transaction definition, event specification, or alternate rule set.
When you select a template from a list, BT Studio inserts the
text into the rule set. You then modify certain parts of the text
as appropriate.
terminal server application
An application that is serviced by Citrix Metaframe or similar
application server software.
think time
See client think time.
total response time
The entire elapsed time required to complete a transaction,
from start to completion. Measured using wall clock time, it
includes client time, network time, server time, and client
think time. Also referred to as elapsed time.
transaction
An application-specific task that may encompass several
intermediary steps or events.
transaction definition
The set of rules that enable Application Response to recognize
a transaction and measure its response time.
262 BTStudio Administration Guide
Inaccurate Response Time Measurements
transaction limit
A threshold for a transaction parameter. You can set
transaction limits for elapsed time, reported time, bytes sent
or received, and other parameters. If a transaction exceeds
the limit, its response time data is omitted from reports. This
prevents spurious transactions from skewing overall response
time statistics, giving misleading results. You define
transaction limits in the application rule set.
U
URL
Uniform resource locator. A standard way of specifying the
location of an object, typically a web page, on the Internet.
URLs are the form of address used on the World Wide Web.
upload
A method of copying information from one computer to
another computer. For example, you can upload application
rule sets from BT Studio to Application Response.
W
Web
World Wide Web. All of the resources on the Internet that use
HTTP. Users of the Web access information through Web
browser software.
Troubleshooting 263
Index
A
P
alternate rule sets • 19
application event source • 217
Application Response • 14
parameter list • 163
B
recording agents • 16
resource definitions, syntax • 114
resource types • 181
response paths • 20
rule management • 89
rule set development • 51
rules and rule sets - BT Studio • 17
BT
BT
BT
BT
BT
language • 113
language reference • 113
Marker • 14
recording • 43
Studio • 13, 15, 18, 19, 62, 241
R
C
S
choice statement • 166
configuration, application and servers • 69
Connection Manager - BT Studio • 71
sequence statement • 165
syntax, resource definitions • 114
D
Default Servers • 20
E
event actions • 135
Event Log File • 21
event types • 123
events and transactions • 16
except statement • 169
T
timed-out transactions • 215
transaction definitions • 122
transactions - BT Studio • 24
transactions, based on keystrokes • 93
transactions, in Java applications • 101
F
failure code • 175
failure statement • 172
I
ignoreEvents clause • 178
installation • 29
J
Java - BT Studio rules • 106
L
last statement • 168
licensing • 32
Index 265