1
Adaptive Server® Enterprise
Document Version: 16.0 - 2014-09-19
Installation Guide for Linux
Table of Contents
1
Installation Guide for Linux. . . . . . . . . . . . . . . . . . . . . . . . . . . . . . . . . . . . . . . . . . . . . . . . . . . . . . . 5
2
Conventions. . . . . . . . . . . . . . . . . . . . . . . . . . . . . . . . . . . . . . . . . . . . . . . . . . . . . . . . . . . . . . . . . . 6
3
Installation Task Overview. . . . . . . . . . . . . . . . . . . . . . . . . . . . . . . . . . . . . . . . . . . . . . . . . . . . . . . .7
3.1
Installation Workflows. . . . . . . . . . . . . . . . . . . . . . . . . . . . . . . . . . . . . . . . . . . . . . . . . . . . . . . . . . . . 7
4
SAP ASE Components. . . . . . . . . . . . . . . . . . . . . . . . . . . . . . . . . . . . . . . . . . . . . . . . . . . . . . . . . . . 9
4.1
SAP ASE Editions. . . . . . . . . . . . . . . . . . . . . . . . . . . . . . . . . . . . . . . . . . . . . . . . . . . . . . . . . . . . . . . 9
4.1.1
Determining the Edition You Have. . . . . . . . . . . . . . . . . . . . . . . . . . . . . . . . . . . . . . . . . . . . . 9
4.2
SAP ASE Options. . . . . . . . . . . . . . . . . . . . . . . . . . . . . . . . . . . . . . . . . . . . . . . . . . . . . . . . . . . . . . . 10
4.3
Managing SAP ASE with SAP Control Center. . . . . . . . . . . . . . . . . . . . . . . . . . . . . . . . . . . . . . . . . . . 10
4.4
Client Components and Utilities. . . . . . . . . . . . . . . . . . . . . . . . . . . . . . . . . . . . . . . . . . . . . . . . . . . . 12
5
System Requirements. . . . . . . . . . . . . . . . . . . . . . . . . . . . . . . . . . . . . . . . . . . . . . . . . . . . . . . . . . 14
5.1
Memory Requirements. . . . . . . . . . . . . . . . . . . . . . . . . . . . . . . . . . . . . . . . . . . . . . . . . . . . . . . . . . . 16
5.2
System Requirements for Clients. . . . . . . . . . . . . . . . . . . . . . . . . . . . . . . . . . . . . . . . . . . . . . . . . . . 16
6
Planning Your SAP ASE Installation. . . . . . . . . . . . . . . . . . . . . . . . . . . . . . . . . . . . . . . . . . . . . . . . 17
6.1
SAP ASE Release Bulletin. . . . . . . . . . . . . . . . . . . . . . . . . . . . . . . . . . . . . . . . . . . . . . . . . . . . . . . . . 17
6.2
Obtaining a License. . . . . . . . . . . . . . . . . . . . . . . . . . . . . . . . . . . . . . . . . . . . . . . . . . . . . . . . . . . . . 17
6.2.1
Comparing License Deployment Models. . . . . . . . . . . . . . . . . . . . . . . . . . . . . . . . . . . . . . . 19
6.2.2
SySAM License Server. . . . . . . . . . . . . . . . . . . . . . . . . . . . . . . . . . . . . . . . . . . . . . . . . . . .20
6.2.3
Determining Host IDs. . . . . . . . . . . . . . . . . . . . . . . . . . . . . . . . . . . . . . . . . . . . . . . . . . . . .20
6.2.4
Generating Licenses. . . . . . . . . . . . . . . . . . . . . . . . . . . . . . . . . . . . . . . . . . . . . . . . . . . . . 22
6.2.5
Knowing the Product License Type. . . . . . . . . . . . . . . . . . . . . . . . . . . . . . . . . . . . . . . . . . . 23
6.3
Installation Directory Contents and Layout. . . . . . . . . . . . . . . . . . . . . . . . . . . . . . . . . . . . . . . . . . . . 26
6.4
Creating the Sybase User Account. . . . . . . . . . . . . . . . . . . . . . . . . . . . . . . . . . . . . . . . . . . . . . . . . . 28
6.5
Preparing to Install SAP ASE. . . . . . . . . . . . . . . . . . . . . . . . . . . . . . . . . . . . . . . . . . . . . . . . . . . . . . .28
6.5.1
Adjusting the Operating System Shared Memory Parameters. . . . . . . . . . . . . . . . . . . . . . . . 30
6.5.2
Managing Java in the Database During Installations and Upgrades. . . . . . . . . . . . . . . . . . . . . 31
6.5.3
Multipathing. . . . . . . . . . . . . . . . . . . . . . . . . . . . . . . . . . . . . . . . . . . . . . . . . . . . . . . . . . . 32
7
Installing SAP ASE. . . . . . . . . . . . . . . . . . . . . . . . . . . . . . . . . . . . . . . . . . . . . . . . . . . . . . . . . . . . 35
7.1
Installing SAP ASE in GUI Mode. . . . . . . . . . . . . . . . . . . . . . . . . . . . . . . . . . . . . . . . . . . . . . . . . . . . .35
7.2
Installing SAP ASE in Console Mode. . . . . . . . . . . . . . . . . . . . . . . . . . . . . . . . . . . . . . . . . . . . . . . . . 39
7.3
Minimally Configuring an SAP ASE Server. . . . . . . . . . . . . . . . . . . . . . . . . . . . . . . . . . . . . . . . . . . . . 40
7.4
Installing SAP ASE Using a Response File. . . . . . . . . . . . . . . . . . . . . . . . . . . . . . . . . . . . . . . . . . . . . .45
2
7.4.1
Creating a Response File. . . . . . . . . . . . . . . . . . . . . . . . . . . . . . . . . . . . . . . . . . . . . . . . . . 45
7.4.2
Installing in Silent Mode. . . . . . . . . . . . . . . . . . . . . . . . . . . . . . . . . . . . . . . . . . . . . . . . . . . 47
7.4.3
Command Line Options. . . . . . . . . . . . . . . . . . . . . . . . . . . . . . . . . . . . . . . . . . . . . . . . . . . 48
© 2014 SAP SE or an SAP affiliate company. All rights reserved.
Installation Guide for Linux
Table of Contents
7.5
Uninstalling SAP ASE. . . . . . . . . . . . . . . . . . . . . . . . . . . . . . . . . . . . . . . . . . . . . . . . . . . . . . . . . . . . 48
7.5.1
Removing an Existing SAP ASE Server. . . . . . . . . . . . . . . . . . . . . . . . . . . . . . . . . . . . . . . . .49
8
Starting and Stopping SAP Control Center. . . . . . . . . . . . . . . . . . . . . . . . . . . . . . . . . . . . . . . . . . 50
9
Postinstallation Tasks. . . . . . . . . . . . . . . . . . . . . . . . . . . . . . . . . . . . . . . . . . . . . . . . . . . . . . . . . . 52
9.1
Verifying That Servers are Running. . . . . . . . . . . . . . . . . . . . . . . . . . . . . . . . . . . . . . . . . . . . . . . . . . 52
9.2
Verifying Your Connection to the Servers. . . . . . . . . . . . . . . . . . . . . . . . . . . . . . . . . . . . . . . . . . . . . .53
9.3
Test the Installation and Network Connections. . . . . . . . . . . . . . . . . . . . . . . . . . . . . . . . . . . . . . . . . . 53
9.3.1
Configuring libtcl.cfg for LDAP. . . . . . . . . . . . . . . . . . . . . . . . . . . . . . . . . . . . . . . . . . . . . . 54
9.3.2
Adding a Server to the Directory Service. . . . . . . . . . . . . . . . . . . . . . . . . . . . . . . . . . . . . . . 55
9.4
The System Administrator Password. . . . . . . . . . . . . . . . . . . . . . . . . . . . . . . . . . . . . . . . . . . . . . . . 56
9.5
Installing Sample Databases. . . . . . . . . . . . . . . . . . . . . . . . . . . . . . . . . . . . . . . . . . . . . . . . . . . . . . .56
9.6
9.5.1
Default Devices for Sample Databases. . . . . . . . . . . . . . . . . . . . . . . . . . . . . . . . . . . . . . . . .57
9.5.2
Running the Database Scripts. . . . . . . . . . . . . . . . . . . . . . . . . . . . . . . . . . . . . . . . . . . . . . . 57
9.5.3
Installing the interpubs Database. . . . . . . . . . . . . . . . . . . . . . . . . . . . . . . . . . . . . . . . . . . . 58
9.5.4
Installing the jpubs Database. . . . . . . . . . . . . . . . . . . . . . . . . . . . . . . . . . . . . . . . . . . . . . . 58
9.5.5
Maintaining Sample Databases. . . . . . . . . . . . . . . . . . . . . . . . . . . . . . . . . . . . . . . . . . . . . . 59
Raw Partitions on Linux. . . . . . . . . . . . . . . . . . . . . . . . . . . . . . . . . . . . . . . . . . . . . . . . . . . . . . . . . . 60
9.6.1
Choosing a Raw Partition. . . . . . . . . . . . . . . . . . . . . . . . . . . . . . . . . . . . . . . . . . . . . . . . . . 60
9.6.2
Examples for Creating Raw Partitions. . . . . . . . . . . . . . . . . . . . . . . . . . . . . . . . . . . . . . . . . 61
9.6.3
Administering Raw Devices. . . . . . . . . . . . . . . . . . . . . . . . . . . . . . . . . . . . . . . . . . . . . . . . 62
9.6.4
Accessing Raw Devices from the Server. . . . . . . . . . . . . . . . . . . . . . . . . . . . . . . . . . . . . . . 64
10
SAP ASE Upgrades. . . . . . . . . . . . . . . . . . . . . . . . . . . . . . . . . . . . . . . . . . . . . . . . . . . . . . . . . . . . 65
10.1
Considerations When Upgrading from SAP ASE 15.0.x or Earlier. . . . . . . . . . . . . . . . . . . . . . . . . . . . . 65
10.2
Considerations for Component Integration Services. . . . . . . . . . . . . . . . . . . . . . . . . . . . . . . . . . . . . . 67
10.3
Preparing to Upgrade. . . . . . . . . . . . . . . . . . . . . . . . . . . . . . . . . . . . . . . . . . . . . . . . . . . . . . . . . . . .67
10.4
Changes in SAP ASE Directories. . . . . . . . . . . . . . . . . . . . . . . . . . . . . . . . . . . . . . . . . . . . . . . . . . . . 68
10.5
Preupgrade Tasks. . . . . . . . . . . . . . . . . . . . . . . . . . . . . . . . . . . . . . . . . . . . . . . . . . . . . . . . . . . . . . 69
10.6
10.7
10.5.1
Upgrade Stored Procedures. . . . . . . . . . . . . . . . . . . . . . . . . . . . . . . . . . . . . . . . . . . . . . . . 71
10.5.2
Reserved Words. . . . . . . . . . . . . . . . . . . . . . . . . . . . . . . . . . . . . . . . . . . . . . . . . . . . . . . . .71
10.5.3
Preparing the Database and Devices. . . . . . . . . . . . . . . . . . . . . . . . . . . . . . . . . . . . . . . . . . 73
10.5.4
The sybprocsdev device. . . . . . . . . . . . . . . . . . . . . . . . . . . . . . . . . . . . . . . . . . . . . . . . . . . 75
Upgrade to SAP ASE 16.0. . . . . . . . . . . . . . . . . . . . . . . . . . . . . . . . . . . . . . . . . . . . . . . . . . . . . . . . . 79
10.6.1
Upgrading Interactively Using sqlupgrade. . . . . . . . . . . . . . . . . . . . . . . . . . . . . . . . . . . . . 79
10.6.2
Upgrading Noninteractively Using sqlupgraderes. . . . . . . . . . . . . . . . . . . . . . . . . . . . . . . 81
10.6.3
Manually Upgrading SAP ASE. . . . . . . . . . . . . . . . . . . . . . . . . . . . . . . . . . . . . . . . . . . . . . . 82
Postupgrade Tasks. . . . . . . . . . . . . . . . . . . . . . . . . . . . . . . . . . . . . . . . . . . . . . . . . . . . . . . . . . . . . 83
10.7.1
Restoring Functionality in SAP ASE After Upgrading. . . . . . . . . . . . . . . . . . . . . . . . . . . . . . . 84
10.7.2
Reenabling Auditing. . . . . . . . . . . . . . . . . . . . . . . . . . . . . . . . . . . . . . . . . . . . . . . . . . . . . .85
10.7.3
Restoring Permissions. . . . . . . . . . . . . . . . . . . . . . . . . . . . . . . . . . . . . . . . . . . . . . . . . . . . 86
Installation Guide for Linux
Table of Contents
© 2014 SAP SE or an SAP affiliate company. All rights reserved.
3
10.7.4
10.8
10.9
Reenabling Replication Server After the Dataserver Upgrade. . . . . . . . . . . . . . . . . . . . . . . . .86
Migrate. . . . . . . . . . . . . . . . . . . . . . . . . . . . . . . . . . . . . . . . . . . . . . . . . . . . . . . . . . . . . . . . . . . . . .89
10.8.1
Migrating Data Using a Dump-and-Load Method. . . . . . . . . . . . . . . . . . . . . . . . . . . . . . . . . 89
10.8.2
Using bcp to Migrate Data. . . . . . . . . . . . . . . . . . . . . . . . . . . . . . . . . . . . . . . . . . . . . . . . . 90
10.8.3
Migrating Data by Replacing the Binary. . . . . . . . . . . . . . . . . . . . . . . . . . . . . . . . . . . . . . . . 90
SAP ASE Components and Related Products. . . . . . . . . . . . . . . . . . . . . . . . . . . . . . . . . . . . . . . . . . . 91
10.9.1
Upgrading Job Scheduler. . . . . . . . . . . . . . . . . . . . . . . . . . . . . . . . . . . . . . . . . . . . . . . . . . 91
10.9.2
Upgrading High Availability and Cluster Support. . . . . . . . . . . . . . . . . . . . . . . . . . . . . . . . . .95
10.9.3
Upgrading Java in the Database. . . . . . . . . . . . . . . . . . . . . . . . . . . . . . . . . . . . . . . . . . . . . 97
10.9.4
Upgrading Backup Server. . . . . . . . . . . . . . . . . . . . . . . . . . . . . . . . . . . . . . . . . . . . . . . . . 98
10.9.5
Upgrading Databases Using Dump and Load. . . . . . . . . . . . . . . . . . . . . . . . . . . . . . . . . . . . 98
10.9.6
How Compiled Objects Are Handled When Upgrading SAP ASE. . . . . . . . . . . . . . . . . . . . . . . 99
11
Downgrading SAP ASE. . . . . . . . . . . . . . . . . . . . . . . . . . . . . . . . . . . . . . . . . . . . . . . . . . . . . . . . .103
12
Troubleshoot the Server. . . . . . . . . . . . . . . . . . . . . . . . . . . . . . . . . . . . . . . . . . . . . . . . . . . . . . . 104
12.1
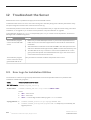
Error Logs for Installation Utilities. . . . . . . . . . . . . . . . . . . . . . . . . . . . . . . . . . . . . . . . . . . . . . . . . . 104
12.2
Error Logs for SAP ASE Servers. . . . . . . . . . . . . . . . . . . . . . . . . . . . . . . . . . . . . . . . . . . . . . . . . . . 105
12.3
Troubleshooting Common Installation Problems. . . . . . . . . . . . . . . . . . . . . . . . . . . . . . . . . . . . . . . .105
12.3.1
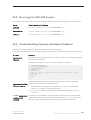
If the Installation Quits While You Are Configuring an SAP ASE Server. . . . . . . . . . . . . . . . . .107
12.4
Stopping a SAP ASE Server After a Failure. . . . . . . . . . . . . . . . . . . . . . . . . . . . . . . . . . . . . . . . . . . . 107
12.5
If SAP ASE Fails the Preupgrade Eligibility Test. . . . . . . . . . . . . . . . . . . . . . . . . . . . . . . . . . . . . . . . . 108
12.6
When an Upgrade Fails. . . . . . . . . . . . . . . . . . . . . . . . . . . . . . . . . . . . . . . . . . . . . . . . . . . . . . . . . . 108
13
4
12.6.1
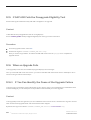
If You Can Identify the Cause of the Upgrade Failure. . . . . . . . . . . . . . . . . . . . . . . . . . . . . . 108
12.6.2
Restoring Databases After a Failed Upgrade. . . . . . . . . . . . . . . . . . . . . . . . . . . . . . . . . . . . 109
12.6.3
Recovering from a Failed Upgrade. . . . . . . . . . . . . . . . . . . . . . . . . . . . . . . . . . . . . . . . . . . 109
12.6.4
If You Cannot Identify the Cause of an Upgrade Failure. . . . . . . . . . . . . . . . . . . . . . . . . . . . . 111
[conref] ASE Installation Guide. . . . . . . . . . . . . . . . . . . . . . . . . . . . . . . . . . . . . . . . . . . . . . . . . . 112
© 2014 SAP SE or an SAP affiliate company. All rights reserved.
Installation Guide for Linux
Table of Contents
1
Installation Guide for Linux
®
®
SAP Adaptive Server Enterprise is a high-performance relational database management system for missioncritical, data-intensive environments. It ensures highest operational efficiency and throughput on a broad range of
platforms.
®
This installation guide includes information on system requirements, planning the installation, installing SAP ASE,
post-installation tasks, upgrades, and downgrades.
Installation Guide for Linux
Installation Guide for Linux
© 2014 SAP SE or an SAP affiliate company. All rights reserved.
5
2
Conventions
®
®
®
These style and syntax conventions are used in SAP Adaptive Server Enterprise (SAP ASE) documentation.
●
In a sample window display, commands to be entered exactly as shown appear in:
this font
●
In a sample window display, words that you should replace with the appropriate value for your installation are
shown in:
<this font>
●
In the regular text of this document, the names of files and directories appear in this font: /usr/u/home_dir.
●
The names of programs, utilities, procedures, and commands appear in this font: sqlupgrade.
●
Commands for both the C shell and the Bourne shell are provided, when they differ. The initialization file for
the C shell is called .cshrc. The initialization file for the Bourne shell is called .profile. If you are using a
different shell, such as the Korn shell, refer to your shell-specific documentation for the correct command
syntax.
Table 1: SQL Syntax Conventions
Key
Definition
command
Command names, command option names, utility names, utility flags, and other key
words are in a bold san-serif font.
<variable >
Variables, or words that stand for values that you fill in, are in italic.
{ }
Curly braces indicate that you choose at least one of the enclosed options. Do not include
braces in your option.
[ ]
Brackets mean choosing one or more of the enclosed options is optional. Do not include
brackets in your option.
( )
|
,
6
() are to be typed as part of the command.
The vertical bar means you can select only one of the options shown.
The comma means you can choose as many of the options shown as you like, separating
your choices with commas, which are typed as part of the command.
© 2014 SAP SE or an SAP affiliate company. All rights reserved.
Installation Guide for Linux
Conventions
3
Installation Task Overview
To successfully install and configure SAP ASE, use the configuration guide along with this installation guide.
The SAP ASE installation guide explains how to unload the SAP ASE software from the distribution media to your
hard disk, and perform the minimal set of additional tasks so that you can start SAP ASE on your machine.
The configuration guide provides instructions for:
●
Reconfiguring certain attributes of your existing SAP ASE, Backup Server™, and XP Server™ to meet your
specific needs.
●
Creating network connections.
●
Configuring optional functionality.
●
Performing operating system administrative tasks.
●
Working with system administration issues that are relevant to SAP ASE running on UNIX platforms. This
manual supplements the System Administration Guide and the Performance and Tuning Series.
3.1
Installation Workflows
Workflows define a complete path for planning, installing, and upgrading.
Whether you plan to install or upgrade SAP ASE, identify the components and options to install or upgrade, and
obtain a license.
Installing SAP ASE for the First Time
1.
Plan your installation and review system requirements.
2.
Install SAP ASE.
3.
Perform postinstallation tasks.
Upgrading to a New Version of SAP ASE
1.
Determine your upgrade eligibility, plan your installation, and review system requirements.
2.
Run the preupgrade utility to prepare SAP ASE for upgrading.
3.
Upgrade SAP ASE.
4.
Perform postinstallation (postupgrade) tasks.
Installation Guide for Linux
Installation Task Overview
© 2014 SAP SE or an SAP affiliate company. All rights reserved.
7
Uninstalling SAP ASE
See Uninstalling SAP ASE.
8
© 2014 SAP SE or an SAP affiliate company. All rights reserved.
Installation Guide for Linux
Installation Task Overview
4
SAP ASE Components
SAP ASE is based on a client/server model, communicating with its clients over the network via the Tabular Data
Stream™ (TDS) protocol. Each client process may execute on one machine and communicate with a database
server on the same or a different machine.
SAP ASE runs as an application on top of an operating system. The hardware that the operating system runs on is
completely transparent to SAP ASE, which sees only the operating system's user interfaces. To enhance
performance on multiprocessor systems, configure multiple processes (engines).
SAP ASE is divided into a DBMS component and a kernel component. The kernel component uses the operating
system services for process creation and manipulation, device and file processing, and interprocess
communication. The DBMS component manages SQL statement processing, accesses data in a database, and
manages different types of server resources.
4.1
SAP ASE Editions
Analyze your system and scalability requirements to determine which edition of SAP ASE is appropriate for your
enterprise.
●
Enterprise edition – has no limit on scalability and supports all of the options that can be purchased or
licensed separately.
●
Small business edition – has limited scalability, and supports a limited set of the options that are purchased
or licensed separately.
●
Developer edition – has limited scalability and includes many of the options that are included in the enterprise
edition.
See the SySAM Users Guide for information about unlocking editions and optional features.
The SAP ASE installer automatically installs a SySAM license server if you choose the full installation option or
enter a served license when prompted for the SySAM license key. You can also install the license server using the
installer's custom installation option. See the SySAM Users Guide to generate licenses.
4.1.1
Determining the Edition You Have
If you already use SAP ASE, use the sp_lmconfig system procedure to identify the version.
Procedure
Enter:
sp_lmconfig 'edition'
Installation Guide for Linux
SAP ASE Components
© 2014 SAP SE or an SAP affiliate company. All rights reserved.
9
SAP ASE returns a value of EE, SE, or DE based on the edition that is currently running. See the Reference
Manual for more information about sp_lmconfig.
4.2
SAP ASE Options
SAP offers various optional features for SAP ASE, such as data compression, partitions, and encrypted columns.
Option
Description
Data compression
Enables compression for regular and large object data, which uses less storage space
for the same amount of data, reduces cache memory consumption, and improves
performance due to lower I/O demands.
Security and directory
services
Provides lightweight directory services and network-based authentication and
encryption using SSL and Kerberos.
Partitions
Enables semantic partitioning for table row data.
Encrypted columns
Increases security parameters and allows for addition of datatypes.
Tivoli storage manager
Enables the database to back up and restore operations to IBM Tivoli Storage
Manager.
In-memory database
Provides zero-disk-footprint in-memory database support that is fully integrated with
SAP ASE for high-performance transactional applications. Provides performance
enhancements to disk-resident databases with relaxed durability properties.
SAP ASE editions and optional features are unlocked by SySAM licenses. See the SySAM Users Guide.
To install any of these optional features to an existing SAP ASE installation, use the same steps as you used to
install SAP ASE.
4.3
Managing SAP ASE with SAP Control Center
®
SAP Control Center (SCC) provides a single, comprehensive, Web-administration console for real-time
performance, status, and availability monitoring of large-scale SAP enterprise servers.
SAP Control Center combines a modular architecture, a rich-client administrative console, agents, common
services, and tools for managing and controlling SAP products. It includes historical monitoring, threshold-based
alerts and notifications, alert-based script execution, and intelligent tools for identifying performance and usage
trends.
The SAP ASE installer installs these SAP Control Center components:
●
Remote Command and Control Agent for SAP ASE – a remote command and control agent that runs on a
managed server, and which is required to manage SAP ASE tasks within SCC.
●
SNMP support for SAP ASE – Simple Network Management Protocol is a standard protocol used for network
management. SNMP allows managers and agents to communicate: managers send requests to agents, and
agents respond to queries from managers.
10
© 2014 SAP SE or an SAP affiliate company. All rights reserved.
Installation Guide for Linux
SAP ASE Components
In addition, you must also install the SCC Management User Interface for SAP ASE in the custom installation
option by selecting the SAP Control Center Management User Interface for SAP ASE feature. This feature provides
the GUI that allows you to manage and monitor activities in SAP ASE using a Web browser.
In some cases, you may want to use a central SCC server to manage multiple SAP ASE servers and other
products rather than using the SCC server that is installed with each SAP ASE server. Deployment considerations
include:
●
Minimizing network latency – you see better performance if you install SCC near the monitored servers and
near the workstations on which SCC Web clients are running.
●
Unified SCC environment – installing SCC in a central location lets you manage and monitor your servers
from a single SCC installation, which is especially useful in a replication environment.
●
Administration and security – you can exercise differing levels of control in different parts of your enterprise,
for example, by protecting the data in some servers more strictly than in others.
See Preinstallation Tasks in SAP Control Center Installation Guide for details on installation and deployment
considerations.
In a production environment, we recommend that you install the SCC server on a machine other than the one you
plan to run SAP ASE on.
See the following for detailed SCC information:
●
SAP Control Center Release Bulletin – provides last-minute installation and upgrade information, as well as
known problems.
●
SAP Control Center Installation Guide – provides complete installation, configuration, and troubleshooting
procedures.
●
SAP Control Center for Adaptive Server Enterprise – includes SAP ASE configuration procedures, user
assistance, and troubleshooting information.
Related Information
Starting and Stopping SAP Control Center [page 50]
Installing SAP ASE in GUI Mode [page 35]
Minimally Configuring an SAP ASE Server [page 40]
Installation Guide for Linux
SAP ASE Components
© 2014 SAP SE or an SAP affiliate company. All rights reserved.
11
4.4
Client Components and Utilities
There are several components that you can install onto a PC client to support the SAP ASE server, which are
downloaded from the SAP Service Marketplace (SMP). The previous PC-Client installer is replaced in ASE 16.0 by
separately downloadable installers that provide many of the same components.
SDK for SAP ASE
®
The SAP Service Marketplace provides both 32-bit and 64-bit SDK for SAP ASE images. Download the software
development kit (SDK) that matches your version of Windows (32- or 64-bit).
Use either method to obtain the SDK from
SAP Service Marketplace
SAP Software Download Center :
●
Select
●
In the search field at Support Packages and Patches, enter SDK for SAP ASE.
Support Packages and Patches
A-Z Index
S
SDK for SAP ASE
Included in the SDK are:
Product
Open Client™
Description
In addition to Open Client (Client Library, dblib), the following, which are all installed into
the OCS-16_0 directory:
DataAccess
●
ESQL/C
●
ESQL/COBOL
●
XA
●
SAP ASE extension module for Python
●
SAP ASE database driver for Perl
●
SAP ASE extension module for PHP
Installed into the DataAccess64 directories:
●
ODBC – a driver used that connects to SAP ASE from ODBC-based applications.
●
ADO.NET – a provider used that connects to SAP ASE from .NET-based applications.
Java Runtime
Environment (JRE)
Installed into the shared directory, JRE is a runtime Java virtual machine used to execute
Language Modules
Installed into the locales directory. Provides system messages and date/time formats.
Character Sets
Installed into the charsets directory. Provides character sets that are available for use
Java-based programs, such as Interactive SQL, and which is shared by several other
components.
with SAP ASE.
jConnect
Installed into the jConnect-16_0 directory, jConnect provides a Java Database
Connectivity (JDBC) driver for SAP ASE.
Interactive SQL
Installed into the DBISQL-16_0 directory, Interactive SQL is a GUI tool that allows you to
execute SQL statements, build scripts, and display data from SAP ASE.
12
© 2014 SAP SE or an SAP affiliate company. All rights reserved.
Installation Guide for Linux
SAP ASE Components
Product
Description
jutils-3_0
A collection of SAP ASE utility programs that includes ribo, a tool to trace TDS traffic
utilities
between a client program and SAP ASE.
See the SDK Installation Guide at the SAP Service Marketplace for installation instructions.
PowerDesigner Physical Modeler
The modeler is available in the ASE SAP 16.0 section of the SAP Service Marketplace, and is installed from its own
image.
To install the modeler, download and extract the file, then run setup.exe in your root directory.
SySAM Utilities
Access these utilities by searching for sysam 2.3 in the SAP Service Marketplace.
Follow the installation instructions in the Info tab for SySAM 2.3 in the SAP Service Marketplace.
QP-Tune
Run this components from the SAP ASE server image directly.
Installation Guide for Linux
SAP ASE Components
© 2014 SAP SE or an SAP affiliate company. All rights reserved.
13
5
System Requirements
Before installing SAP ASE version 16.0, ensure that your system is updated with the latest patches and system
requirements. Do not use a patch that is earlier than the version suggested for your operating system. Use the
patch recommended by the operating system vendor, even if it supersedes the patch listed.
To list all currently installed patches and display the operating system version level, enter:
rpm -q -a
SAP ASE supports Pentium and higher chip sets.
Table 2: Operating System Requirements for Linux
Hardware
Operating System
Recommended
RAM
x86_64 processor (Intel Xeon with
EM64T)
Red Hat Enterprise Linux Server release 6.1 (San
tiago)
1GB
●
kernel-2.6.32-71.el6.x86_64
●
glibc-2.12-1.7.el6.x86_64
●
compat-glibc-2.5-46.2.x86_64
x86_64 processor (AMD Opteron or SuSE Linux Enterprise Server 11 (x86_64); version
Intel Xeon with EM64T)
11 patch level 0:
●
kernel-2.6.27.19-5.1
●
glibc-2.9-13.2
1GB
Linux requires these additional files:
Required Files
Description
Required libraries for Linux
●
openmotif-2.3.1-2.el5
●
libXp-1.0.0-8.1.el5
●
libXt-1.0.2-3.1.fc6
●
libXtst-1.0.1-3.1
●
libXi-1.6.1-1
●
libXmu-1.0.2-5
●
libXext-1.0.1-2.1
●
libSM-1.0.1-3.1
●
libICE-1.0.1-2.1
●
libX11-1.0.3-9.el5
●
libXtst-devel
●
libXi-devel
●
openmotif-devel
●
libXmu-devel
●
libXt-devel
●
libXext-devel
Required X/Motif-related RPM package manager files
14
© 2014 SAP SE or an SAP affiliate company. All rights reserved.
Installation Guide for Linux
System Requirements
Required Files
Description
●
libXp-devel
●
libX11-devel
●
libSM-devel
●
libICE-devel
These files should be compatible with RHEL5.3 or later.
There is a known OS kernel bug in scheduling threads in RHEL 6.0 that has been fixed in RHEL 6.1; for this reason,
you use 6.1.
Linux system memory requirements are:
●
Minimum RAM required for SAP ASE, with default stack size, packet size, and user log cache size – 127 MB
●
Minimum RAM per additional user – approximately 324KB
●
Default user stack size – 128KB
Table 3: Linux Disk Space Requirements
Product
Linux X64 Requirements
Linux X64 PSeries Require
ments
SAP ASE typical installation
921MB
1092MB
Default databases created during installa
tion
306MB
164MB
Total
1071MB
1256MB
Before you can install a 64-bit SAP ASE version 16.0 to a Red Hat Enterprise Linux 6.x x86_64, install the 32-bit
GNU C Libraries package (glibc-2.xx-x.xx.el6.i686.rpm).
To run the installer in Chinese, Japanese, or Korean, install the appropriate RPM package:
Operating System
Language
RPM Package
RedHat 5.x
Chinese
fonts-chinese
Japanese
fonts-japanese
Korean
fonts-korean
Traditional Chinese
ttf-founder-traditional
Japanese
sazanami-fonts
Korean
baekmuk-ttf
SuSE 10.x
Ensure that you have the required operating system patches for the SAP Java Runtime Environment (JRE) version
7.1. See SAP Note 1367498 (https://service.sap.com/sap/support/notes/1367498
Log in with your SAP support account to view the SAP note.
Installation Guide for Linux
System Requirements
) for the JRE requirements.
© 2014 SAP SE or an SAP affiliate company. All rights reserved.
15
5.1
Memory Requirements
Each operating system has a default maximum shared-memory segment. Configure your operating system to
allow the allocation of a shared-memory segment at least as large as the maximum memory value.
The amount of memory SAP ASE can use on a Linux system is chip-dependent.
The amount of memory SAP ASE can use is:
●
On Sun Solaris 10 (SPARC) – 16EB
●
On Sun Solaris 10 on AMD (x86) – chip-dependent
5.2
System Requirements for Clients
Check the system requirements for the machine on which you plan to install the client applications and utilities.
Type
Requirement
Product
Programs and utilities installed onto the PC client
Hardware
X86 or X64 system running Xeon or AMD 1.5 GHz or faster
Operating system
Windows Server 2012, Windows 2008 R2 SP1, Windows 2008 x86, Windows 8,
Windows 7 SP1
Suggested minimum RAM 512MB
Note
If you are using ODBC or ADO.NET drivers, make sure that Microsoft .NET Framework 2.0 Service Pack 1 is
installed on your Windows machine. To confirm that it is installed, select
Programs
16
Control Panel
Add or Remove
and verify that .NET Framework appears in the list of currently installed programs.
© 2014 SAP SE or an SAP affiliate company. All rights reserved.
Installation Guide for Linux
System Requirements
6
Planning Your SAP ASE Installation
Before you install or upgrade, prepare your environment.
Procedure
●
Identify the components and options to install or upgrade.
●
Obtain a license.
Note
If you are using a served license, you must install the SySAM license server version 2.1 or later.
●
Make sure your system meets all requirements for your installation scenario and planned use.
6.1
SAP ASE Release Bulletin
The release bulletin contains last-minute information about installing and upgrading SAP ASE software.
The latest release bulletins are available at the Product Documentation Web page at http://sybase.com/support/
manuals
6.2
.
Obtaining a License
Before installing your product, choose a SySAM license model, and obtain license files from the SAP Service
Marketplace (SMP) at http://service.sap.com/licensekeys
Context
Note
If you purchased your product from Sybase® or an authorized Sybase reseller and have not been migrated to
SAP Service Marketplace (SMP), go to the Sybase Product Download Center (SPDC) at https://
sybase.subscribenet.com
Installation Guide for Linux
Planning Your SAP ASE Installation
to generate license keys.
© 2014 SAP SE or an SAP affiliate company. All rights reserved.
17
Procedure
1.
Choose a SySAM license model.
License Model
Description
Unserved license model Licenses are obtained directly from the license file. If you are using an unserved license, save
the license file to the machine on which you install the product.
Served license model
A license server manages the allocation of licenses among multiple machines.
Note
The SAP ASE installer automatically installs a SySAM license server if you choose the full installation option
or enter a served license when prompted for the SySAM license key. You can also install the license server
using the installer's custom installation option. See the SySAM Users Guide to generate licenses.
2.
For the served license model, decide whether to use an existing or new license server.
The license server and your product installation need not share the same machine, operating system, or
architecture.
Note
There can be only one instance of a SySAM license server running on a given machine. To set up a SySAM
2 license server on a machine that is already running a SySAM 1.0 license server, follow the migration
instructions in the SySAM Users Guide. A migrated license server can serve licenses for both SySAM 1.0
and SySAM 2-enabled products.
3.
Get your host IDs.
When you generate licenses, you must specify the host ID of the machine where the licenses will be deployed.
4.
○
For unserved licenses – the host ID of the machine where the product will run. If you are running a
product with per-CPU or per-chip licensing that supports SySAM sub-capacity and want to run the
product in a virtualized environment, see SySAM Sub-capacity Licensing in the SySAM Users Guide.
○
For served licenses – the host ID of the machine where the license server will run.
Before installing your product, obtain license files from SMP or from SPDC using the access information in
your welcome e-mail message.
Note
If you purchased your software from a reseller, rather than an e-mail message you may receive a Web key
certificate that contains the location of the SPDC Web key login page at https://sybase.subscribenet.com/
webkey
and the activation key to use for the login name.
If you plan to use sub-capacity licensing, see the SySAM Users Guide for information on how to configure
using the sysamcap utility.
Use sp_lmconfig to configure and show license management-related information in SAP ASE. See
sp_lmconfig in Reference Manual: Procedures.
18
© 2014 SAP SE or an SAP affiliate company. All rights reserved.
Installation Guide for Linux
Planning Your SAP ASE Installation
6.2.1
Comparing License Deployment Models
Learn about license deployment models.
Unserved Licenses
Served Licenses
Licenses can be used only on the machine for which
the license was generated.
Licenses can be distributed from a network license
server to products running on any network machine.
Generate licenses at SMP or SPDC for each machine
that will run the product:
Generate licenses at SMP or SPDC for products run
ning on multiple machines:
1.
2.
Specify the host ID of the machine where the prod 1.
uct will run.
2.
Generate a license for that machine.
3.
3.
Save the license to the specified machine.
4.
Repeat steps 1 – 3 for each machine where the
product will run.
Specify the host ID of the license server.
Specify the number of required licenses.
Save the licenses to the license server host ma
chine.
No license administration is required. However, when
new licenses are required for product updates, you
must update and deploy each license for each machine
where the product update will run.
The license server requires administration. When new
licenses are required for product updates, SMP or
SPDC lets you update all licenses for a specific license
server in a single step.
No license reporting or asset management capabilities
are available.
Allows license monitoring and reporting of license use,
capacity planning, and asset management.
Installed locally and always available.
Requires a functioning license server and network. If
the license server or network fails, you must fix the
problem or install an alternate license server before the
product grace period expires.
If a machine where the product is running fails, you
must regenerate all of its licenses and deploy those li
censes to the replacement machines.
If a machine where the product is running fails, you can
move the product to a new machine, and it will acquire
licenses from the running license server.
If the license server host machine fails, use the Manage
License Hosts functionality at SMP or SPDC to move
its licenses to a new network license server host.
License files are distributed across each machine run
ning a product, and therefore they are difficult to man
age and control.
License files are centrally located and managed.
Unserved Standalone Seat (SS) licenses do not allow
product use via Remote Desktop Connection or other
terminal services clients.
Products can be used via Remote Desktop Connection
or other Terminal Services clients, irrespective of the
type of license in use.
Installation Guide for Linux
Planning Your SAP ASE Installation
© 2014 SAP SE or an SAP affiliate company. All rights reserved.
19
6.2.2
SySAM License Server
If you choose to use the served licensed model, make sure you have installed the required SySAM license server
version.
The license server is a lightweight application that serves licenses to products running on any operating system.
A license server can run on a low-end machine or a machine with spare cycles. For example, a license server
running on a Solaris UltraSparc-60 serving 100 different licenses to 200 product instances, used 50MB of
memory, 5 minutes of CPU time per week, and 100MB of disk space per year.
SAP ASE 16.0 requires SySAM 2.3 or later. To determine the current license server version, use the sysam
version command.
Note
This command is not available in SySAM version 2.0 and earlier.
Download the latest SySAM version from http://service.sap.com/patches
.
SAP ASE 16.0 and SySAM 2.3 use FlexNet Publisher version 11.11.
To check the version of FlexNet Publisher used by your license server, examine the license server log or execute
the lmgrd -v command.
The license server installer is available in the <ASE_installer>/sysam_setup directory.
Note
You cannot start the license server until there is at least one served license saved to the licenses directory on
the license server host machine.
6.2.3
Determining Host IDs
When you generate licenses at SMP, you must specify the host ID of the machine where the licenses will be
deployed.
Context
●
For unserved licenses, specify the host ID of the machine where the product will run. If you are running a
product with per-CPU or per-CHIP licensing that supports SySAM sub-capacity, and you want to run the
product in a virtualized environment, see SySAM Sub-capacity Licensing in the SySAM Users Guide for
information about determining the host ID for unserved licenses.
●
For served licenses, specify the host ID of the machine where the license server will run.
SMP remembers the host information so that you can select the same license server when generating additional
licenses.
20
© 2014 SAP SE or an SAP affiliate company. All rights reserved.
Installation Guide for Linux
Planning Your SAP ASE Installation
To determine the host ID of the machine, run the lmutil utility from a terminal window or the Windows command
prompt. For example:
lmutil lmhostid
Note
You can download the lmutil utility from either:
●
The SAP ASE installer image, under the sysam_utilities directory; or,
●
The Flexera Software Web site at http://www.globes.com/support/fnp_utilities_download.htm
.
You can also determine the host ID using native operating system commands. See the Frequently Asked
Questions topic "What is my Host ID?" at https://websmp208.sap-ag.de/~sapidb/
011000358700001006652011E
(requires login)
.
6.2.3.1
Determining Host IDs for Machines with Multiple
Network Adapters
On some platforms, the host ID is derived from the network adapter address.
Context
If the machine where your product is installed or where the license server is hosted has multiple network
adapters, running lmutil lmhostid returns one host ID for each network adapter, and returns output similar to
this:
The FLEXlm host ID of this machine
is ""0013023c8251 0015c507ea90""
Only use ONE from the list of hostids.
It is important that you:
●
Choose only one host ID to enter during license generation.
●
Use the value associated with the primary wired Ethernet adapter.
●
Do not use values associated with internal loopback or virtual adapters.
If you cannot determine the host ID using the lmutil lmhostid output, use the native operating system
commands to get additional details.
Installation Guide for Linux
Planning Your SAP ASE Installation
© 2014 SAP SE or an SAP affiliate company. All rights reserved.
21
6.2.3.2
Using Alternate Host IDs on Windows
If your Windows machine does not have a network adapter, SySAM allows you to use an alternate host ID based
on the hard disk serial number.
Procedure
1.
At a Windows command prompt on the machine where you will deploy your license, enter:
lmutil lmhostid -vsn
This returns output similar to:
The FLEXlm host ID of this machine is "DISK_SERIAL_NUM=70ba7a9d"
2.
Use the complete output (DISK_SERIAL_NUM=70ba7a9d) for the host ID value requested during license
generation.
6.2.4
Generating Licenses
Before you generate licenses, gather the necessary information and complete these tasks.
Table 4: Information Needed Before License Generation
Required Information or
Action
License deployment model
License Model
Served
Unserved
X
X
Description
Decide whether to use a served or unserved license
deployment model.
Typically, this is a company-wide decision that is made
only once. Therefore, this is one of the most important
things to determine before license generation.
Product machine host ID
X
Determine the host ID of the machine, or machine par
tition where the product will run.
License server – download
and install
X
Download and install the SySAM license server before
you generate the product’s licenses, and before you
install the product.
License server host ID
X
Determine the host ID of the machine where the li
cense server will run.
License server host name
X
Determine the host name of the machine where the li
cense server will run.
22
© 2014 SAP SE or an SAP affiliate company. All rights reserved.
Installation Guide for Linux
Planning Your SAP ASE Installation
Required Information or
Action
License Model
Served
License server TCP/IP port
numbers
6.2.4.1
Description
Unserved
X
Determine the two port numbers on which the license
server will listen for license requests.
Generating License Keys at SMP
Use SMP to generate license keys.
Procedure
1.
Go to the SAP Marketplace main page at http://service.sap.com/licensekeys
2.
Log in using your SMP credentials.
3.
Select SAP Support Portal.
4.
Select
5.
Follow the instructions in the "How to generate license keys for SAP Sybase products" presentation available
under the "Documentation and Helpful Resources" quick access link.
6.2.5
Keys & Requests
.
License Keys .
Knowing the Product License Type
SAP sells products under different license types, which entitle the customer to different rights of use. For
example, whether a product is entitled to be used in production, or standby, or development and test
environments.
The license type determines the quantity of licenses required; dictating, for example, whether a license is required
for each machine; or for each CPU, or CPU chip; or per terabyte of storage.
For example, a product purchased under the CPU License (CP) type requires one license per CPU on the machine,
partition, or resource set where it will run. The same product purchased under the Server License (SR) type
requires a single license for the machine, partition, or resource set.
Your account can have the same product licensed under multiple license types. Make sure you select the correct
license type when you generate your SySAM license file.
When you generate licenses, each license type is presented on the License Information screen in bold font. For
example:
License Type: CPU License (CP)
Installation Guide for Linux
Planning Your SAP ASE Installation
© 2014 SAP SE or an SAP affiliate company. All rights reserved.
23
6.2.5.1
Optional Feature Licenses
Some SAP ASE applications are offered as base products with optional features that require a separate license.
Customers can mix license types. For example, customers can order SAP ASE under the Server License (SR)
license type and order an optional feature (for example, High Availability or Enhanced Full Text Search) under the
CPU License (CP) type.
Optional features are licensed only with the base product of the same product edition. For example, if you order
SAP ASE, you cannot use a Small Business Edition optional feature license with the Enterprise Edition base
product. In addition, the entitled use of the license types must be compatible; for example, both types should
allow use in a production environment.
6.2.5.2
SySAM Licensing Checkout
If SAP ASE is licensed using a per-processor license type, it checks out a license quantity equal to the number of
processors, or, if insufficiet licenses are available, allows a 30-day grace period.
If the number of processors is dynamically increased while running and the software cannot check out additional
licenses, the software permits a 30-day grace period. If sufficient licenses are not made available within the grace
period, the software shuts down. Decreasing the number of processors that the software can use while it is
running does not reduce the required license quantity. You must restart the SAP ASE server on the correct
number of processors.
See the SySAM Users Guide.
6.2.5.3
Sub-capacity Licensing
Sub-capacity licensing allows you to license a subset of the CPUs available on a physical machine using the
SySAM sub-capacity license functionality.
Platform support
Table 5: SySAM Virtualization Sub-Capacity Compatibility
Vendor
Product
Platform Support
Virtualization Type
HP
nPar
HP IA 11.31
Physical partition
24
vPar
Virtual partition
Integrity Virtual Machines with
Resource Manager
Virtual machine
© 2014 SAP SE or an SAP affiliate company. All rights reserved.
Installation Guide for Linux
Planning Your SAP ASE Installation
Vendor
Product
Platform Support
Secure Resource Partitions
IBM
LPAR
OS containers
AIX 6.1, AIX 7
dLPAR
Sun
Dynamic System Domains
Intel, AMD
Virtualization Type
Virtual partition
Virtual partition
Solaris 10
Physical partition
Solaris Containers/Zones with
Solaris Resource Manager
Virtual partition
Sun Logical Domain (LDOM)
Virtual partition
VMWare ESX Server Guest O/S:
Windows
VMWare ESX 3.5, ESX 4.0
and ESX 4.1, ESXi4.1, ESXi
5.0, Guest OS: Windows
2008 R2, Windows 7
Virtual machine
VMWare ESX Server Guest OS:
Linux, Sun Solaris x64
VMWare ESX 3.5, ESX 4.0
and ESX 4.1, ESXi4.1, ESXi
5.0, Guest OS: RH 5.5,
SuSE 11, Sun Solaris x64
Virtual machine
Xen, KVM, DomainU: Windows
Windows 2008 R2, Win
dows 7
Virtual machine
Xen, KVM, DomainU: Linux
RH 5.5, SuSe 11
Virtual machine
Hyper-V
Windows 2008 R2
Virtual machine
Note
VMWare ESX Server excludes
VMWare Workstation, and
VMWare Server.
Note
Xen excludes Sun Solaris x64.
Enabling Sybase Sub-Capacity Licensing
If you purchased your product from Sybase or an authorized reseller, you must have a sub-capacity licensing
agreement with SAP or Sybase before you can enable sub-capacity licensing.
Note
Keep your license server up-to-date.
Installation Guide for Linux
Planning Your SAP ASE Installation
© 2014 SAP SE or an SAP affiliate company. All rights reserved.
25
Although the installation media includes a copy of the most recent SySAM license server, we recommend that
you periodically check for updates at http://service.sap.com/patches
.
When using SySAM sub-capacity licensing, set the SYBASE_SAM_CAPACITY environment variable before
installing, or copy in the license key after installation.
6.3
Installation Directory Contents and Layout
SAP ASE includes server components that are installed into specific directories.
Product
Description
SAP ASE
Installed into the ASE-16_0 directory.
Connectivity
●
SAP ASE – the database server.
●
Backup Server – an application based on SAP Open Server™ that manages all database
backup (dump) and restore (load) operations.
●
XP Server – an Open Server application that manages and executes extended stored
procedures (ESPs) from within SAP ASE.
●
Job Scheduler – provides a job scheduler for SAP ASE. Job Scheduler components are
located in ASE-16_0/jobscheduler/.
®
Installed into the OCS-16_0 directory:
●
Open Client™ (<Client Library>, <dblib>)
●
ESQL/C
●
ESQL/COBOL
●
XA
Installed into the DataAccess and DataAccess64 directories:
Shared Directory
●
ODBC (Windows, Solaris SPARC, Solaris x64, Linux Power, HP-UX Itanium, IBM AIX) – a
driver used to connect to SAP ASE from ODBC-based applications.
●
ADO.NET (Windows only) – a provider used to connect to SAP ASE from .NET based
applications.
The shared directory contains components and libraries that are shared by several other
components. In earlier versions, this directory was named shared-1_0.
●
SAP Control
Center
Java Runtime Environment (JRE) – is a runtime Java virtual machine used to execute
Java-based programs, such as SAP Control Center. SAP ASE includes the JRE. In typical
installations, by default, the JRE is fully installed. In custom installations, if you select a
component for installation that requires the JRE, the JRE is also automatically selected.
It is located in the shared/SAPJRE-7_1 * directory.
SAP Control Center logs and utilities – files related to the Web-based tool for monitoring the
status and availability of SAP ASE servers. They are installed into the $SYBASE/SCC-3_3
directory.
26
© 2014 SAP SE or an SAP affiliate company. All rights reserved.
Installation Guide for Linux
Planning Your SAP ASE Installation
Product
Description
Note
The SAP ASE typical installation option installs only the SCC Remote Command and
Control (RCC) agent. To use a GUI-based connection to the SCC server using a Web
browser, you must use the custom installation option to install the SCC Management
User Interface for SAP ASE.
Language
Modules
Installed into the locales directory. Provides system messages and date/time formats.
Character Sets
Installed into the charsets directory. Provides character sets that are available for use with
SAP ASE.
Collation
Sequences
Installed into the collate directory. Provides the collation sequences that are available for
Sybase Software
Asset
Management
(SySAM)
Installed into the SYSAM-2_0 directory. Provides asset management of SAP ASE servers
Web Services
Installed into the WS-16_0 directory. An optional product that provides access to SAP ASE
use with SAP ASE.
and optional features.
using HTTP/SOAP and WSDL.
Interactive SQL
Interactive SQL is a GUI tool that allows you to execute SQL statements, build scripts, and
display data from SAP ASE. It is installed into the DBISQL-16_0 directory.
jutils-3_0
A collection of SAP ASE utility programs including ribo, a tool to trace TDS traffic between
Utilities
a client program and SAP ASE.
®
SAP jConnect™ for Installed into the jConnect-16_0 directory. Provides a Java Database Connectivity (JDBC)
JDBC
driver for SAP ASE.
OData Server
Installed into the ODATA-16_0 directory, OData (Open Data Protocol) enables data services
over RESTful HTTP, allowing you to perform operations through URIs (Universal Resource
Identifiers) to access and modify information.
Note
We strongly recommend that you install the ECDA DirectConnect option or MainframeConnect™
DirectConnect™ for z/OS, including DirectConnect Manager, into its own directory.
Installation Guide for Linux
Planning Your SAP ASE Installation
© 2014 SAP SE or an SAP affiliate company. All rights reserved.
27
6.4
Creating the Sybase User Account
To ensure that SAP ASE product files and directories are created with consistent ownership and privileges, create
a system administrator account.
Context
One user—typically the system administrator, who has read, write, and execute privileges—should perform all
installation, configuration, and upgrade tasks.
Procedure
1.
To create a system administrator account, choose an existing account, or create a new account and assign a
user ID, group ID, and password for it.
This account is sometimes called the “sybase” user account. See your operating system documentation for
instructions on creating a new user account.
If you have installed other SAP software, the "sybase" user should already exist.
2.
Verify that you can log in to the machine using this account.
6.5
Preparing to Install SAP ASE
Before you start the installer, prepare your system.
Procedure
1.
Back up your current system.
2.
If you plan to run the installer in Chinese, Japanese, or Korean, install one of these RPM packages:
Option
Description
On RedHat 5.x
○
fonts-chinese
○
fonts-japanese
○
fonts-korean
○
ttf-founder-traiditional – traditional Chinese
○
sazanami-fonts – Japanese
○
baekmuk-ttf – Korean
On SuSE 0.x
28
© 2014 SAP SE or an SAP affiliate company. All rights reserved.
Installation Guide for Linux
Planning Your SAP ASE Installation
3.
Verify that you can uncompress files on your UNIX machine. To uncompress:
Option
Description
.zip files
Use the unzip command
.tgz files
Use gzip or GNU Tar
4.
Ensure that the account used to start the server has read and write permissions for the directory in which you
are installing the server. You may need to create nonadministrative logins to install the server into personal
directories.
5.
Unset the LD_ASSUME_KERNEL variable.
6.
Review the SySAM licensing procedures, and plan your server configuration using the configuration guide for
your platform.
7.
For consistency and security, create an account with administrative privileges. This user account could be
"sybase" or any other user name. Use this account to perform all installation and device-creation tasks.
This user must have permission privileges from the top (or root) of the disk partition or operating system
directory, down to the specific physical device or operating system file. Maintain consistent ownership and
privileges for all files and directories. A single user—the system administrator with read, write, and execute
permissions—should perform all installation, upgrade, and setup tasks.
If you are installing SAP ASE on more than one computer, create the "sybase" user account on each machine.
8.
Log in to the machine as “sybase.”
9.
If you have enabled the Java in the database feature, create the sybpcidb database and disable the feature
during the installation.
10. Decide where to install SAP ASE:
○
Make sure there is sufficient disk space and temporary directory space available.
○
Ensure there are no spaces in the path name of the directory.
11. Decide whether you want licensing events to trigger e-mail alerts, and the severity of the events that generate
e-mail messages.
If you choose to have e-mail notifications for license events, know your:
○
SMTP server host name
○
Port number for an SMTP server
Note
If SAP assigns any port numbers to you for use with SAP ASE, exclude these numbers from any portscanning software you run. SAP ASE attempts to service each scan as a login attempt, which may lead
to poor performance.
○
E-mail return address
○
Recipients of the notifications
○
Severity level of an event that triggers mail. Your choices are:
○
None
○
Informational
○
Warning
○
Error
12. Verify that your network software is configured.
Installation Guide for Linux
Planning Your SAP ASE Installation
© 2014 SAP SE or an SAP affiliate company. All rights reserved.
29
SAP ASE and client applications use network software even when they are installed on a machine that is not
connected to a network.
If you are having connection problems, or to verify your network configuration, ping the host.
13. Adjust the shared memory for your operating system.
6.5.1 Adjusting the Operating System Shared Memory
Parameters
Adjust shared memory segments if SAP ASE cannot obtain large memory as a single segment, or if Backup Server
stripes fail due to insufficient segments.
Context
Depending on the number and types of devices used for backup (dump) and recovery (load), you may need to
adjust the shared memory segment parameter in the operating system configuration file to accommodate
concurrent Backup Server processes. There are six default shared memory segments available for process
attachments.
If any reconfiguration through sp_configure requires additional memory, SAP ASE allocates shared memory
segments after start-up. To account for these additional segments, allocate the maximum memory that is
available to SAP ASE by using the allocate max shared memory configuration parameter. See the System
Administration Guide.
Procedure
1.
The operating system shared memory default, for most Linux releases, is 32MB. The minimum required by
SAP ASE is 64MB for a default server that uses 2K pages. A higher value is required if you plan to increase the
SAP ASE server’s total memory. Set the stack size to unlimited to avoid shared memory attachment
problems. Set this using ulimit -s unlimited on the Bourne shell, or limit stacksize unlimited on
the C shell.
2.
To check and adjust the operating system shared memory parameter, use the sysctl(8) method:
To check the current shared memory size, enter:
# /sbin/sysctl kernel.shmmax
To adjust the shared memory size at runtime, enter the following, where <nnn> is 1073741824 for 1GB of
shared memory:
# /sbin/sysctl -w kernel.shmmax=nnn
30
© 2014 SAP SE or an SAP affiliate company. All rights reserved.
Installation Guide for Linux
Planning Your SAP ASE Installation
Note
The default operating system shared memory for some older Linux releases is 32MB. The minimum
required by SAP ASE is 64MB for a default server with 2K pages. A higher value is required if you plan to
increase the SAP ASE max setting.
3.
To guarantee that the minimum operating shared value is applied every time the system is started, edit
the /etc/sysctl.conf file.
4.
For larger configurations, it may also be necessary to adjust the shmall parameter.
The default on RHEL5 is 8GB (2097152 4K pages). SuSE 11 and RHEL6 have a default high enough that no
adjustment should be necessary.
5.
By default, SAP ASE starts in threaded mode. If you need to switch to process mode, you must adjust the
Linux kernel parameters to maintain compatibility:
a) Add the following in /etc/sysctl.conf:
○
In Linux RHEL 5 and later:
kernel.exec-shield=0
kernel.randomize_va_space=0
○
In SLES 11 and later:
kernel.randomize_va_space=0
b) As super user (root), for the action to take effect, enter:
/sbin/sysctl -P
For information about
○
Kernel modes, see SAP ASE System Administration Guide Volume 2 > Managing Multiprocessor Servers.
○
Exec-Shield, see http://www.redhat.com/f/pdf/rhel/WHP0006US_Execshield.pdf
.
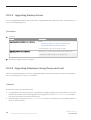
6.5.2 Managing Java in the Database During Installations and
Upgrades
If you have enabled Java in the database, create the sybpcidb database before installing or upgrading to SAP
ASE version 16.0.
Procedure
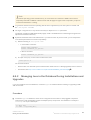
1.
Create the sybpcidb database, which stores configuration information for the pluggable component
interface (PCI) and all pluggable component adapter (PCA) components. This database is used by the
installpcidb script. For example:
1> disk init
2> name = "sybpcidb_dev",
Installation Guide for Linux
Planning Your SAP ASE Installation
© 2014 SAP SE or an SAP affiliate company. All rights reserved.
31
3>
4>
5>
1>
2>
physname = "${SYBASE}/data/sybpcidb_dev.dat",
size = "48M"
go
create database sybpcidb on sybpcidb_dev = 48
go
The device and database sizes depend on the SAP ASE server page size. The minimum and default size
requirements for sybpcidb are:
2.
○
2KB page size server – 48MB
○
(Default) 4KB page size server – 96MB
○
8KB page size server – 192MB
○
16KB page size server – 384MB
Disable Java in the database:
1> sp_configure 'enable java', 0
2> go
3.
Reenable the feature after you have successfully installed or upgraded to SAP ASE 16.0:
1> sp_configure 'enable java', 1
2> go
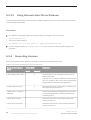
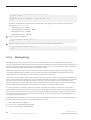
6.5.3
Multipathing
Multipathing is the ability of a server to communicate with the same physical or logical block storage device
across multiple physical paths between the host bus adapters (HBAs) in the server and the storage controllers for
the device, typically in Fibre Channel (FC) or iSCSI SAN environments. You can also achieve multiple connections
with direct attached storage when multiple channels are available.
Multipathing provides connection fault tolerance, failover, redundancy, high availability, load balancing, and
increased bandwidth and throughput across the active connections. Multipathing automatically isolates and
identifies device connection failures, and reroutes I/O to alternate connections.
Typical connection problems involve faulty adapters, cables, or controllers. When you configure multipathing for a
device, the multipath driver monitors the active connection between devices. Because multipathing is managed at
the device level, when the multipath driver detects I/O errors for an active path, it fails over the traffic to the
device’s designated secondary path. When the preferred path becomes healthy again, control can be returned to
the preferred path. Multipathing prevents single points of failure in any highly available system.
A common example of multipath connectivity is a SAN-connected storage device. Usually one or more Fibre
Channel HBAs from the host are connected to the fabric switch and the storage controllers are connected to the
same switch. A simple example of multipath connectivity is: two HBAs connected to a switch to which the storage
controllers are connected. In this case, the storage controller can be accessed from either of the HBAs that are
providing multipath connectivity.
All OS platforms provide their own solutions to support multipathing. There are numerous other vendors that also
provide multipathing applications for all available platforms, such as:
●
AIX – Multiple Path I/O (MPIO)
●
HP-UX 11.31 – Native MultiPathing (nMP)
●
Linux – Device-Mapper (DM) Multipath
32
© 2014 SAP SE or an SAP affiliate company. All rights reserved.
Installation Guide for Linux
Planning Your SAP ASE Installation
●
Solaris – Multiplexed I/O (MPxIO)
●
AntemetA Multipathing Software for HP EVA Disk Arrays
●
Bull StoreWay Multipath
●
NEC PathManager
●
EMC PowerPath
●
FalconStor IPStor DynaPath
●
Fujitsu Siemens MultiPath
●
Fujitsu ETERNUS Multipath Driver
●
Hitachi HiCommand Dynamic Link Manager (HDLM)
●
HP StorageWorks Secure Path
●
NCR UNIX MP-RAS EMPATH for EMC Disk Arrays
●
NCR UNIX MP-RAS RDAC for Engenio Disk Arrays
●
ONStor SDM multipath
●
IBM System Storage Multipath Subsystem Device Driver (SDD)
●
Accusys PathGuard
●
Infortrend EonPath
●
OpenVMS
●
FreeBSD - GEOM_MULTIPATH and GEOM_FOX modules
●
Novell NetWare
●
Sun StorEdge Traffic Manager Software
●
ATTO Technology multipath driver Fibreutils package for QLogic HBAs
●
RDAC package for LSI disk controllers
●
lpfcdriver package for Emulex HBAs
●
Veritas Dynamic Multi Pathing (DMP)
●
Pillar Data Systems
●
Axiom Path
●
iQstor MPA
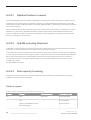
6.5.3.1
Setting Up Multipathing
If you choose to use it, set up multipathing before you install SAP ASE.
Context
There are several multipath applications are available. Native Linux Device-Mapper (DM) Multipath support has
been added to the Linux 2.6 kernel tree with the release of 2.6.13, and has been backported into Red Hat
Installation Guide for Linux
Planning Your SAP ASE Installation
© 2014 SAP SE or an SAP affiliate company. All rights reserved.
33
Enterprise Linux 4 in Update 2 and into Novell SUSE Linux Enterprise Server 9 in Service Pack 2. To setup
multipathing on Linux:
Procedure
1.
Edit the /etc/multipath.conf file:
○
Comment out the following lines at the top of the file. This section of the configuration file, in its initial
state, blacklists all devices. You must comment it out to enable multipathing:
blacklist {
devnode "*"
}
○
Add configuration information. For example:
multipath {
wwid
360060e80056fb70000006fb700000816
alias
TEST_DATA
path_grouping_policy failover
mode 660
uid 8205
gid 471
}
2.
Run these commands:
# modprobe dm-multipath – add multipathing module to Linux kernel
# modprobe dm-round-robin – add multipathing round-robin module to Linux kernel
# /etc/init.d/multipathd start – start multipath service
# multipath – automatically detect multiple paths to devices and configure
multipathing
# chkconfig multipathd on – turn on multipath service
# multipath –l – displays all paths to devices
The /dev/mapper/mpath<N> devices are persistent and they are created early in the boot process. Use
these device names to access the multipathed devices.
For example:
○
/usr2/sybase/ASE1503/dev/wdb_data – is a symbolic link pointing to /dev/raw/raw73.
○
/dev/raw/raw73 – is a raw character device mapped to /dev/mapper/mp_wdb_data.
○
/dev/mapper/mp_wdb_data – is a multipath device that contains two paths: /dev/sdbf
and /dev/sds.
○
/dev/sdbf – is a block device that corresponds to SCSI generic raw character device /dev/
sg61.
○
/dev/sds – is a block device that corresponds to SCSI generic raw character device /dev/
sg20.
34
© 2014 SAP SE or an SAP affiliate company. All rights reserved.
Installation Guide for Linux
Planning Your SAP ASE Installation
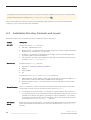
7
Installing SAP ASE
Install SAP ASE using your chosen method.
Prerequisites
Complete installation planning tasks.
Procedure
1.
Choose an installation method:
○
GUI wizard (recommended)
○
Console mode
○
Response file
2.
Follow the instructions for your chosen method.
3.
Perform postinstallation steps.
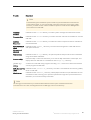
7.1
Installing SAP ASE in GUI Mode
Use GUI mode to install SAP ASE and related products.
Prerequisites
Shut down all programs before running the installer.
Context
The installer creates the target directory (if it does not yet exist) and installs the selected components into that
directory.
Note
Version 16.0 includes new major versions of SAP ASE and many supporting components. Installing version 16.0
into the same directory with existing products should not impact the existing products.
Installation Guide for Linux
Installing SAP ASE
© 2014 SAP SE or an SAP affiliate company. All rights reserved.
35
SAP ASE version 15.5 and later uses InstallAnywhere for its installation, while versions earlier than 15.5 and
other products use InstallShield Multiplatform. Do not use both installers to install products into the same
directory, as this creates files to be installed incorrectly and overwritten without warning.
At the end of the installation, verify that the product has installed correctly. You may also need to perform
additional configuration procedures.
Procedure
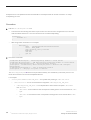
1.
Insert the installation media in the appropriate drive, or download and extract the SAP ASE installation image
from the SAP Service Marketplace (SMP).
2.
If you downloaded the product from SAP Service Marketplace, go to the directory where you extracted the
installation image and start the installer:
./setup.bin
3.
If you are installing using a CD or DVD, mount the disk.
The location of the mount command is site-specific and may differ from the instructions shown here. If you
cannot mount the drive using the path shown, check your operating system documentation or contact your
system administrator.
Log in as "sybase" and issue:
# mount -t iso9660 /dev/cdrom /mnt/cdrom
4.
Launch the installer:
cd /mnt/<device_name>
./setup.bin
Where:
○
<device_name> is the directory (mount point) you specified when mounting the CD or DVD drive.
○
setup.bin is the name of the executable file name for installing SAP ASE.
If there is not enough disk space in the temporary disk space directory, set the environment variable
IATEMPDIR to <tmp_dir> before running the installer again, where <tmp_dir> is where the installation
program writes the temporary installation files. Include the full path to <tmp_dir>.
5.
If you are prompted with a language selection list, specify the appropriate language.
6.
On the Introduction screen, click Next.
7.
Accept the default directory or enter a new path to specify where to install SAP ASE, then click Next.
Note
Do not use the following when specifying the installation path:
○
Double-byte characters
○
Single- or double-quote characters
The installer does not recognize these, and displays an error.
36
© 2014 SAP SE or an SAP affiliate company. All rights reserved.
Installation Guide for Linux
Installing SAP ASE
If you see Choose Update Installation, this means that there is an older version of SAP ASE in the directory you
specified for the installation, and you need to perform an upgrade rather than a new installation.
8.
Select the type of installation:
Option
Description
Typical
(Default) Recommended for most users, this option installs a default set of components,
including the SAP Control Center Remote Command and Control Agent plug-in. This option
does not install:
Full
○
SAP Control Center Management UI
○
SySAM license server
Installs every SAP ASE component, including all the supported language modules, as well as the
SCC Agent plug-in and Management UI.
Customize Lets you select the components to install. Some components are automatically installed if they
are required to run your selected components.
9.
Select the software license type for the SAP ASE suite:
○
Install licensed copy of SAP ASE Suite
○
Install Free Developer Edition of SAP ASE Suite
○
Install Express Edition of SAP ASE Suite
○
Evaluate SAP ASE Suite
An evaluation is valid for 30 days from the installation date.
10. Choose the most appropriate region, read the license terms, then click I agree. Click Next.
11. If you have a licensed copy of SAP ASE Suite:
a) Specify the license type:
○
Enter a license file. If it is a served license key, you are prompted to set up the license server.
○
Use an existing license server.
○
Proceed without specifying license information for the duration of 30 days from the installation date.
b) Specify the product edition:
○
Enterprise Edition
○
Small Business Edition
○
Developer Edition
○
Unknown – select this if you are unsure about the license type.
Note
Choosing Unknown prevents you from being able to select Optimize SAP ASE later in the installation
process.
Depending on the edition, you can also select the license type under which the product is licensed.
c) Configure your server to send e-mail notifications about license management events that require
attention:
○
SMTP server host name
○
SMTP server port number
○
E-mail return address
○
Recipient e-mail addresses
Installation Guide for Linux
Installing SAP ASE
© 2014 SAP SE or an SAP affiliate company. All rights reserved.
37
○
Message severity that triggers e-mail messages
12. In the preinstallation summary, verify the installation type and that you have enough disk space for the
installation. Click Next.
The installation status window displays the result of the installation process.
13. In the Configure New Servers window, configure:
○
SAP ASE
○
Backup Server
○
XP Server
○
Job Scheduler
○
SAP Control Center
14. If you select to configure an SAP ASE, you see:
a) The Configure with Different User Account window, which allows you to enable a different user for the
SAP ASE you are installing. If you click Yes to enable a different user for the SAP ASE you are installing,
enter:
○
The name of the account
○
The password of the account
SAP ASE, Backup Server, XP Server, and Job Scheduler are then automatically configured under the
account name you specify.
If you keep the default, No, the fields are disabled.
b) The User Configuration Data Directory window.
Note
The default directory is the installation directory. If you specified a different directory, make sure you
or the account specified in the Configure with Different User Account window has write permission to
it.
SAP ASE creates these files during installation to place in the data directory:
○
The interfaces file.
○
RUN_server file – in the ASE-16_0/install subdirectory.
○
Configuration utilities log files – in the ASE-16_0/init/logs subdirectory.
○
SAP ASE configuration file (.cfg) – in the ASE-16_0 subdirectory.
○
SAP ASE shared memory file (.krg) – in the ASE-16_0 subdirectory.
○
SAP ASE SySAM properties file – in the ASE-16_0/sysam subdirectory.
○
Job Scheduler template .ini files – in the ASE-16_0/jobscheduler/Templatessubdirectory.
Database device files and server error log files are also created in the data directory you specify, but you
can move them after the installation is finished.
Next Steps
Configure some basic settings for SAP ASE, Backup Server, Job Scheduler self-management, Web Services, and
the SAP Control Center.
38
© 2014 SAP SE or an SAP affiliate company. All rights reserved.
Installation Guide for Linux
Installing SAP ASE
Related Information
SAP ASE Upgrades [page 65]
Managing SAP ASE with SAP Control Center [page 10]
7.2
Installing SAP ASE in Console Mode
Choose command line installation if you prefer a nonwindowing interface, or if you are developing custom
installation scripts.
Prerequisites
Launch the installer in console mode. If the installer launches automatically, click Cancel to cancel the GUI
installation, then launch the setup program from a terminal or console.
Context
The steps for installing components in an interactive text mode are the same as those described for installing in
GUI mode, except you use setup -i console to execute the installer from the command line, and you enter
text to select installation options.
Procedure
1.
At the command line, start the installation program:
setup.bin -i console
2.
Follow the remaining prompts to install SAP ASE, then specify the basic settings for your installation. The flow
of the installation is identical to a GUI installation, except output is written to a terminal window and responses
are entered using the keyboard.
Installation Guide for Linux
Installing SAP ASE
© 2014 SAP SE or an SAP affiliate company. All rights reserved.
39
7.3
Minimally Configuring an SAP ASE Server
Use GUI mode to minimally configure an SAP ASE server and related products for use.
Prerequisites
The Configure screen shows a list of everything you can minimally configure. By default, all products are selected.
Unselect any products you do not want to configure now. If you are configuring in console mode, enter the
corresponding number:
●
1. Configure New SAP ASE
●
2. Configure New Backup Server – see the System Administration Guide
●
3. Configure New XP Server – see the Transact-SQL Users Guide
●
4. Configure Job Scheduler – see the Job Scheduler Users Guide
●
5. Enable Self Management
●
6. Configure SAP Control Center – see SAP Control Center Installation Guide
®
When finished, click Next in the GUI wizard, or enter 0 in console mode. You are now ready to begin configuring
the SAP ASE server.
Procedure
1.
Set the Configure New SAP ASE option:
Option
Description
SAP ASE Name
Default is the machine name.
System Administrator's
Password
Enter your password.
Confirm System
Administrator's Password
Enter your password.
Port Number
Default is 5000.
Error Log
Name and location of the error log file. Defaults to servername.log.
Application Type
These options are numbered only in console mode:
Page Size
40
○
1. (Default) MIXED – both OLTP and DSS.
○
2. OLTP – online transaction processing generally consists of smaller, less
complex transactions.
○
3. DSS – decision-support systems generally have less update activity with
large complex queries.
○
2KB
© 2014 SAP SE or an SAP affiliate company. All rights reserved.
Installation Guide for Linux
Installing SAP ASE
Option
Description
○
(Default) 4KB
○
8KB
○
16KB
The default page size selection changed from 2KB to 4KB in SAP ASE version
15.5. If you plan to load database dumps from an SAP ASE with a page size that
is not 4KB, enter the page size that matches the database dump.
Language
Default: us-english. In typical installations, only us-english is available.
Default Character Set
Default is iso_1.
Default Sort Order
Default is bin_iso_1.
Optimize SAP ASE Server
Configuration
Specify Yes if you want to optimize the configuration for your system. The
default is No.
Available Physical Memory
for SAP ASE Server
Appears when you select Yes for Optimize SAP ASE Configuration, and is the
numeric value is 80 percent of the sum of combined default physical memory
and default OS shared memory.
Note
If you specify a value that is larger than the available resource for allocation
to the server, the optimize configuration may fail, causing the server to not
start.
2.
Available CPU for SAP ASE
Appears when you select Yes for Optimize SAP ASE Configuration. The value is
80 percent of the physical CPU, with a default minimum of 1.
Create Sample Databases
Select this option for the installer to install sample databases.
After customizing your SAP ASE configuration, click Next to record the input fields. You see Enter the custom
configuration values:
Configuration
Value
Master Device
Name, including location, of the master device.
Master Device Size (MB)
The minimum sizes are:
○
2KB page size – 29MB
○
4KB page size – 45MB
○
8KB page size – 89MB
○
16KB page size – 177MB
The default sizes are:
Installation Guide for Linux
Installing SAP ASE
○
2KB page size – 36MB
○
4KB page size – 52MB
○
8KB page size – 104MB
○
16KB page size – 208MB
© 2014 SAP SE or an SAP affiliate company. All rights reserved.
41
Configuration
Value
master Database Size (MB) The minimum and default sizes are:
○
2KB page size – 18MB
○
4KB page size – 26MB
○
8KB page size – 52MB
○
16KB page size – 104MB
System Procedure Device
The complete file path name.
System Procedure Device
Size (MB) and System
Procedure Database Size
(MB)
The default for both is 196MB.
System Device
The complete file path name.
System Device Size (MB)
and System Database Size
(MB)
The default options for both are:
○
2KB page size server – 3MB
○
(Default) 4KB page size server – 6MB
○
8KB page size server – 12MB
○
16KB page size server – 24MB
Tempdb Device
The full path of the device.
Tempdb Device Size (MB)
The default for both is 100MB for all page sizes.
and Tempdb Database Size
(MB)
Enable PCI in SAP ASE
Enable the pluggable component interface. The PCI is a generic interface
internal to SAP ASE that is installed by default when you install or upgrade
SAP ASE. See Java in Adaptive Server Enterprise.
PCI Device
Appears when you select Enable PCI. The default is sybpcidbdev_data.dat
in $SYBASE/data.
PCI Device Size (MB) and
PCI Database Size (MB)
Appears when you select Enable PCI. The PCI device and PCI database size
are the same:
○
2KB page size server – 48MB
○
(Default) 4KB page size server – 96MB
○
8KB page size server – 192MB
○
16KB page size server – 384MB
After customizing your SAP ASE configuration, click Next to record the input fields.
3.
Set the Configure New Backup Server option:
Configuration
Value
Backup Server Name The default is <machinename>_BS.
42
Port Number
The port number of the Backup Server. The default is 5001.
Error Log
The full path to the error log file.
© 2014 SAP SE or an SAP affiliate company. All rights reserved.
Installation Guide for Linux
Installing SAP ASE
4.
5.
Configuration
Value
Allow Hosts
Comma-separated lists of hosts that are allowed to connect to this Backup Server.
When null, only the dataserver running on the same host as the Backup Server can
access this Backup Server. The default value is null.
Set the Configure New XP Server option:
Configuration
Value
XP Server Name
The XP Server name is set automatically, in the form of <machinename>_XP.
Port Number
The port number of the Backup Server. The default is 5002.
Error Log
The full path to the error log file.
Set the Configure Job Scheduler option:
Configuration
Value
Job Scheduler Agent name
The default is <<ASE Server Name>>_JSAGENT.
Port number
The default is 4900.
Management device
The full path to the device.
Management device size, in MB
The default is 75.
Management database size, in MB
The default is 75.
Click Next.
6.
Set the Configure Self Management option to create a scheduled job to run update statistics on any
table in any SAP ASE database:
7.
○
Self-management user name – default is "sa". Entering a new user name creates it in SAP ASE.
○
Self-management password.
Set the SAP Control Center – Configure Self Discovery Service Adapter option:
○
Configure UDP Adapter
○
Configure JINI Adapter – if you select this option, enter:
○
JINI host name – default is localhost.
○
JINI port number – default is 4160.
○
JINI heartbeat period, in seconds – default is 900.
Note
If you do not select an adapter, you see a message similar to:
You must choose at least one adapter to configure.
8.
If you installed the SAP Control Center Management User Interface for SAP ASE, set the SCC Configure HTTP
Ports option.
Accept the default options, or specify other, unused ports, ensuring that the port numbers do not conflict with
those used by other applications or services on your system:
○
HTTP port – choose an integer between 1025 and 65535.
○
HTTPs port – choose an integer between 1025 and 65535.
Installation Guide for Linux
Installing SAP ASE
© 2014 SAP SE or an SAP affiliate company. All rights reserved.
43
9.
Set the SAP Control Center – Configure RMI Port option with a port number (1025 to 65535) that is not used
by another application or service on the system. The default is 9999.
10. Set the user names and passwords in Configure Administration Passwords. If you installed:
Option
Description
If you installed the SAP Control Center Management User Interface
Enter:
for SAP ASE:
○
SCC administrator user
○
SCC administrator password
○
Confirm SCC administrator password
If you installed either the SAP Control Center Management User
Enter:
Interface for SAP ASE or the Remote Command and Control Agent for ○
○
SAP ASE:
○
SCC agent administrator user
SCC agent administrator password
Confirm SCC agent administrator password
11. Set the Repository Password – enter the password for the repository.
12. Verify that the values that appear in the Configure New Servers Summary window are correct, then click Next.
You see the Configure Server Progress window.
13. In the Installation Completed window:
Option
Description
GUI mode
Click Done
Console mode
press Enter to exit the installation
Results
SAP ASE and related products have been successfully installed, and minimally configured for use. See Installing
Sample Databases [page 56], to begin experimenting with your servers, or see the System Administration Guide
for more advanced topics.
If you encounter any errors, see the Troubleshooting Guide.
Related Information
Installing Sample Databases [page 56]
SAP ASE Upgrades [page 65]
Managing SAP ASE with SAP Control Center [page 10]
44
© 2014 SAP SE or an SAP affiliate company. All rights reserved.
Installation Guide for Linux
Installing SAP ASE
7.4
Installing SAP ASE Using a Response File
Unattended or silent installations are typically used to update multiple systems across the enterprise.
Procedure
To perform a silent, or "unattended" installation, run the installer and provide a response file that contains
your preferred installation configuration.
7.4.1
Creating a Response File
By saving installation configuration information into a response file during the initial GUI installation, you can
perform subsequent installations of SAP ASE using a silent—or unattended—method.
Context
Note
SAP ASE version 16.0 uses a rearchitected installation program that is incompatible with response files
generated for versions 15.0.3 and earlier. Do not use response files from these earlier versions; instead, create
a new one from a 16.0 installation.
To create a response file when installing in GUI or console mode, specify the -r command line argument. The -r
argument records your responses to the installation wizard prompts and creates a response file when the
InstallAnywhere wizard exits. The response file is a text file that you can edit to change any responses before you
use it in any subsequent installations. You can find a sample response file in <installer image>/
sample_response.txt.
Procedure
1.
Create a response file during GUI installation:
setup.bin -r [<response_file_name>]
Where:
○
-r – specifies the command line argument.
○
<response_file_name> – (Optional) is the absolute path of the file into which the installation
information is stored, such as /tmp/responsefile.txt.
Installation Guide for Linux
Installing SAP ASE
© 2014 SAP SE or an SAP affiliate company. All rights reserved.
45
Note
The directory path you specify must already exist.
2.
Verify that the response file includes the passwords for the SAP ASE sa login, SAP Control Center admin, and
SCC agent admin by including these lines in the file:
SY_CFG_ASE_PASSWORD=<<ASE sa password>>
CONFIG_SCC_CSI_SCCADMIN_PWD=<<SCC admin password>>
CONFIG_SCC_CSI_UAFADMIN_PWD=<<SCC agent admin password>>
CONFIG_SCC_REPOSITORY_PWD=<<SCC repository password>>
Each password must be at least six characters long. The sccadmin and uafadmin logins need not be the same
as the sa password.
You can also set these passwords using these environment variables:
○
SY_CFG_ASE_PASSWORD
○
CONFIG_SCC_CSI_SCCADMIN_PWD
○
CONFIG_SCC_CSI_UAFADMIN_PWD
○
CONFIG_SCC_REPOSITORY_PWD
Note
Secure these response files appropriately if they contain passwords.
3.
To enable a different user for the SAP ASE you are installing, define these properties:
SY_CFG_USER_ACCOUNT_CHANGE=<yes | no>
SY_CFG_USER_ACCOUNT_NAME=<<user name>>
SY_CFG_USER_ACCOUNT_PASSWORD=<<user password>>
SY_CFG_USER_DATA_DIRECTORY=<<data directory>>
You need not configure SY_CFG_USER_ACCOUNT_NAME or SY_CFG_USER_ACCOUNT_PASSWORD unless you
set SY_CFG_USER_ACCOUNT_CHANGE to yes.
For the SY_CFG_USER_DATA_DIRECTORY property, enter a directory other than the installed directory to
which SAP ASE can create all the data files during configuration.
SAP ASE creates these files during installation to place in the data directory:
○
The interfaces file.
○
RUN_server file.
○
Configuration utilities log files.
○
SAP ASE configuration file (.cfg) – under the ASE-16_0 subdirectory.
○
SAP ASE shared memory file (.krg) – under the ASE-16_0 subdirectory.
○
SAP ASE SySAM properties file – under the ASE-16_0/sysam subdirectory.
○
Job Scheduler template .ini files – under the ASE-16_0/jobscheduler/Templates subdirectory
Database device files and server error log files are created in the data directory, but you can move them after
the installation is finished.
46
© 2014 SAP SE or an SAP affiliate company. All rights reserved.
Installation Guide for Linux
Installing SAP ASE
Note
Make sure that the user you specify in this property setting has read/write/modify permissions to access
the data directory.
7.4.2
Installing in Silent Mode
To perform a silent, or unattended installation, run the installer and provide a response file that contains your
preferred installation configuration.
Prerequisites
Use setup.bin -r <responseFileName> to generate a installation response file during a console or GUI
installation.
Procedure
1.
Run the following, where <responseFileName> is the absolute path of the file name containing the
installation options you chose:
setup.bin –f responseFileName -i silent
-DAGREE_TO_SYBASE_LICENSE=true -DRUN_SILENT=true
Note
You must agree to the Sybase License Agreement when installing in silent mode. You can either:
○
Include the option -DAGREE_TO_SYBASE_LICENSE=true in the command line argument, or,
○
Edit the response file to include the property AGREE_TO_SYBASE_LICENSE=true.
Except for the absence of the GUI screens, all actions of InstallAnywhere are the same, and the result of an
installation in silent mode is exactly the same as one performed in GUI mode using the same responses.
2.
The installer for SAP ASE requires non-null passwords for the sa login in SAP ASE, and uafadmin and
sccadmin logins in SAP Control Center. For this reason, add these rows to the response file:
SY_CFG_ASE_PASSWORD=<ASE sa password>
CONFIG_SCC_CSI_SCCADMIN_PWD=<SCC admin password>
CONFIG_SCC_CSI_UAFADMIN_PWD=<SCC agent admin password>
CONFIG_SCC_REPOSITORY_PWD=<SCC repository password>
Each password must be at least six characters long. The sccadmin and uafadmin logins need not be the same
as the sa password.
You can also set these passwords using thse environment variables:
Installation Guide for Linux
Installing SAP ASE
© 2014 SAP SE or an SAP affiliate company. All rights reserved.
47
○
SY_CFG_ASE_PASSWORD
○
CONFIG_SCC_CSI_SCCADMIN_PWD
○
CONFIG_SCC_CSI_UAFADMIN_PWD
○
CONFIG_SCC_REPOSITORY_PWD
Note
For security purposes, treat response files with care if they contain passwords.
7.4.3
Command Line Options
Options for installing or uninstalling SAP ASE in console mode.
Option
Purpose
-i console
Uses the console interface mode, where messages appear on the Java console and the wiz
ard runs in console mode.
-i silent
Installs or uninstalls the product in silent mode, without user interaction.
-D
Passes custom variables and properties. For example, to override the default installation di
rectory when you run the installer, enter:
<install_launcher_name>
-DUSER_INSTALL_DIR=/sybase
-r
Generates a response file and a reference.
-f
References response files.
-l
Sets the installer’s locales.
-\?
Displays the installer help.
7.5
Uninstalling SAP ASE
To remove SAP ASE, run the installer. The uninstallation process reverses only those actions originally performed
by the installer, leaving intact any files or registry entries you created after the installation.
Prerequisites
Shut down all servers.
48
© 2014 SAP SE or an SAP affiliate company. All rights reserved.
Installation Guide for Linux
Installing SAP ASE
Procedure
1.
Execute:
$SYBASE/sybuninstall/ASESuite/uninstall
2.
Click Next in the Uninstall Welcome window.
3.
Choose one of the following, then click Next:
Option
Description
Complete Uninstall
Uninstalls everything originally installed by the installer.
Uninstall Specific
Features
Displays a list of features. If any unselected products/components are dependent on features
selected for uninstallation, you can still proceed with the uninstallation but dependent
features are not uninstalled.
You see a window indicating that the uninstallation process is being performed. There is no progress bar.
Note
You may need to confirm the deletion of some files that have been modified since installation.
4.
When you see the final window, click Done to exit the uninstallation program.
5.
Manually remove any files or registry entries you created after the installation.
7.5.1
Removing an Existing SAP ASE Server
Remove an existing SAP ASE server.
Procedure
1.
From $SYBASE and $SYBASE/$SYBASE_ASE, enter:
rm <servername>.*
2.
Change to $SYBASE/$SYBASE_ASE/install and run:
rm RUN_<servername>.*
rm <servername>.*
3.
Edit $SYBASE/interfaces, to remove all references to the SAP ASE.
4.
Remove any operating system files for existing database devices.
Installation Guide for Linux
Installing SAP ASE
© 2014 SAP SE or an SAP affiliate company. All rights reserved.
49
8
Starting and Stopping SAP Control Center
SAP Control Center (SCC) for SAP ASE is a Web-based tool for monitoring the status and availability of SAP ASE
servers. Set the $SYBASE environment variables and start an SCC agent on your SAP ASE server.
Prerequisites
Before starting SAP Control Center, make sure you have installed both:
●
SCC agent for SAP ASE – a remote command and control agent that runs on a managed server, and which is
required to manage SAP ASE tasks within SCC.
●
SCC Management User Interface for SAP ASE – provides the GUI that allows you to manage and monitor
activities in an SAP ASE server using a Web browser.
A "typical" installation includes the SCC agent, but the management UI is available only if you select the "custom"
installation option.
Context
There are several ways to run SCC:
●
From the command line in the foreground
●
From the command line in the background
●
Set up a daemon to run it as a service
Use these steps to run SAP Control Center for the first time and to verify the installation. For complete
instructions, see Get Started Launching SAP Control Center Starting and Stopping SAP Control Center
the SCC online help, as well as Starting and Stopping SAP Control Center in UNIX in the SAP Control Center
Installation Guide.
in
Procedure
●
To start SAP Control Center:
a) Before you start the SCC agent for the first time, source either the SYBASE.csh or SYBASE.sh
environment script.
b) Start the SCC agent:
$SYBASE/SCC-3_3/bin/scc.sh
c) Verify that the SCC agent is running. After you run the SCC script, you see the SCC console prompt. At
this prompt, enter:
scc-console> status
50
© 2014 SAP SE or an SAP affiliate company. All rights reserved.
Installation Guide for Linux
Starting and Stopping SAP Control Center
You should see a status message similar to:
Agent Home: /remote/perf_archive/mymachine/Install_Testing/157CE_C3/SCC-3_3/instances/
solstrs3 Connection URL: service:jmx:rmi:///jndi/rmi://solstrs3:9999/agent Status: RUNNING
●
To shut SCC down from the console:
scc-console> shutdown
Related Information
Managing SAP ASE with SAP Control Center [page 10]
Installation Guide for Linux
Starting and Stopping SAP Control Center
© 2014 SAP SE or an SAP affiliate company. All rights reserved.
51
9
Postinstallation Tasks
After you install the server, set it up.
The SAP ASE installation includes directories that contain sample client library applications. These sample
programs are included for training purposes only and are not intended to be installed in a production
environment.
If you are setting up a production environment, remove these directories:
●
$SYBASE/OCS-16_0/sample
●
$SYBASE/DataAccess*/ODBC/samples
●
$SYBASE/jConnect-16_0/sample2
●
$SYBASE/jConnect-16_0/classes/sample2
●
$SYBASE/ASE-16_0/sample
●
$SYBASE/WS-16_0/samples
Related Information
Installing Sample Databases [page 56]
9.1
Verifying That Servers are Running
Verify that the servers are running.
Prerequisites
Before starting the server, make sure you have stopped, then started the services related to the server.
Context
If you have already started the server, do not run the command a second time. Running it more than once can
cause problems.
52
© 2014 SAP SE or an SAP affiliate company. All rights reserved.
Installation Guide for Linux
Postinstallation Tasks
Procedure
1.
From a UNIX command line, set the environment variables.
○
In the C shell:
source <ASE_install_location>/SYBASE.csh
○
In the Bourne shell:
<ASE_install_location>/SYBASE.sh
2.
Show all SAP ASE-related processes that are on the system:
$SYBASE/$SYBASE_ASE/install/showserver
9.2
Verifying Your Connection to the Servers
Use isql to verify your connection to the servers.
Context
1.
At the command prompt, enter the following:
isql -Usa -P<password> -S<server_name>
Where:
○
<password> – is the password for sa.
○
<server_name> is the SAP ASE server name.
You see the isql prompt if the login is successful.
2.
At the isql prompt, enter:
1> select @@version
2> go
The output should show that you are at the current version and edition of SAP ASE.
If you encounter errors, see the Troubleshooting Guide.
9.3
Test the Installation and Network Connections
After installing SAP ASE, SAP Control Center, and the Java Runtime Environment, test the installation and
network connections. The SAP ASE server communicates with other SAP ASE servers, Open Server applications
Installation Guide for Linux
Postinstallation Tasks
© 2014 SAP SE or an SAP affiliate company. All rights reserved.
53
(such as Backup Server), and client software on your network. Clients can talk to one or more servers, and servers
can communicate with other servers using remote procedure calls.
For SAP Control Center to work, install both the SCC agent for SAP ASE as well as the SCC Management User
Inserface for SAP ASE. A "typical" installation includes the agent, while the SCC Management User Interface for
SAP ASE is available only if you select the "custom" installation option. See the SAP Control Center Installation
Guide for details about installing and setting up SCC.
For Sybase products to interact with one another, each product must know where the others reside on the
network. Sybase stores this information in the interfaces file on Windows or in a Lightweight Directory Access
Protocol (LDAP) server.
Follow the instructions in SAP Control Center for Adaptive Server Enterprise to launch SCC and configure the SAP
ASE server for monitoring. You can then view a list of monitored servers in the Administration Console of the
Perspective Resources view in SCC to verify your connections.
9.3.1
Configuring libtcl.cfg for LDAP
Use the libtcl.cfg file to specify an LDAP server name, port number, directory information tree (DIT) base,
user name, and password to connect to an LDAP server.
Context
When you specify an LDAP server in the libtcl.cfg file, the server information becomes accessible only from
the LDAP server; the interfaces file is ignored. Open Client and Open Server applications that use the -I option
at start-up override the libtcl.cfg file and use the interfaces file. See the Configuration Guide for UNIX.
Procedure
1.
Configure the libtcl.cfg file to use directory services, using any standard ASCII text editor:
○
Remove the semicolon (;) comment markers from the beginning of the LDAP URL lines in the
libtcl.cfg file under the [DIRECTORY] entry.
○
Add the LDAP URL under the [DIRECTORY] entry. See the Configuration Guide for UNIX for supported
LDAP URL values.
In its simplest form on 32-bit LDAP drivers, the libtcl.cfg file is in this format:
[DIRECTORY]
ldap=libsybdldap.dll
54
© 2014 SAP SE or an SAP affiliate company. All rights reserved.
Installation Guide for Linux
Postinstallation Tasks
Caution
Ensure that the LDAP URL is on a single line.
ldap=libsybdldap.dll
ldap://<host>:<port>/ditbase??scope??
bindname=username?password
For example (entry shown on multiple lines only for readability):
[DIRECTORY]
ldap=libsybdldap.dll
ldap://huey:11389/dc=sybase,dc=com??one??
bindname=cn=Manager,dc=sybase,dc=com?secret
Note
On Windows x64, the .dll file is called libsybdldap64.dll.
2.
Verify that the appropriate environment variable points to the required third-party libraries. The Netscape
LDAP SDK libraries are in %SYBASE%\%SYBASE_OCS%\dll.
The Windows PATH environment variable must include this directory.
9.3.2
Adding a Server to the Directory Service
Use dsedit utility to add a server to the directory service.
Procedure
1.
From Windows, select
Start
Programs
Sybase
2.
Select LDAP from the list of servers, and click OK.
3.
Click Add New Server Entry, and enter:
Connectivity
Open Client Directory Service Editor .
○
Server name
○
Security mechanism – (optional) there is a list of security mechanism objct identifiers in %SYBASE%\ini
\objectid.dat.
4.
5.
Click Add New Network Transport, and:
○
Select the transport type.
○
Enter the host name.
○
Enter the port number.
Click OK twice to exit the dsedit utility.
Installation Guide for Linux
Postinstallation Tasks
© 2014 SAP SE or an SAP affiliate company. All rights reserved.
55
9.4
The System Administrator Password
When you install SAP software, the software creates a system administrator account called "sa," which can use
any database on an SAP ASE server, including master, with full privileges.
When you log in to the SAP ASE server, you are prompted to set a password for "sa." See the Security
Administration Guide for more information about passwords.
9.5
Installing Sample Databases
The sample databases, which contain fictitious information, are designed to help you learn how to use SAP ASE.
The sample databases are intended for training purposes only. Do not install them in an SAP ASE production
environment.
File Name
Description
installpubs2 Installs the pubs2 sample database. This database contains data that represents a publishing
operation. Use this database to test your server connections and to learn Transact-SQL. Most
of the examples in the SAP ASE documentation query the pubs2 database.
Note
The master device size should be at least 30MB to install the full pubs2 database, including
the image data.
installpubs3 Installs the pubs3 sample database. This updated version of pubs2 uses referential integrity. In
addition, its tables are slightly different than the tables used in pubs2. Where noted, the SAP
ASE documentation uses the pubs3 database in its examples.
installpix2
Installs the image data that is used with the pubs2 database.
Run the installpix2 script after you run installpubs2.
The image data requires 10MB—there are six pictures, two each in the PICT, TIFF, and Sun
raster file formats. Run installpix2 script only to use or test the image datatype. SAP does
not supply any tools for displaying image data; you must use appropriate window graphics
tools to display the images after you have extracted them from the database.
Related Information
Postinstallation Tasks [page 52]
Minimally Configuring an SAP ASE Server [page 40]
56
© 2014 SAP SE or an SAP affiliate company. All rights reserved.
Installation Guide for Linux
Postinstallation Tasks
9.5.1
Default Devices for Sample Databases
The SAP ASE installation includes scripts for installing the us_english sample database, foreign language sample
databases, and the image data associated with the US English pubs2 sample database on a default device.
These scripts are located in $SYBASE/$SYBASE_ASE/scripts.
By default, these scripts install the sample databases on the master device. Because the databases use valuable
space on the master device that is best reserved for system tables—each sample database requires 3MB on a
2KB server, and multiples of 3MB on a 4KB, 6KB, 8KB, and 16KB server on your database device—we recommend
that you change the default to a device other than the master device.
To change the default location where the scripts install these databases, use sp_diskdefault. See
sp_diskdefault in Reference Manual: Procedures. Alternatively, use a text editor to revise the script directly.
9.5.2
Running the Database Scripts
After you determine your default device, run the scripts to install the sample databases.
Prerequisites
Back up the original installpubs2 and installpubs3 scripts, in case you have problems with the edited
scripts.
Procedure
1.
Start SAP ASE.
2.
Go to the scripts directory at $SYBASE/$SYBASE_ASE/scripts.
3.
Use isql to log in to the SAP ASE server and run the script:
isql -Usa -P*****-S<server_name> -i<script_name>
Where:
○
<server_name> – is the destination server for the database.
○
<script_name> – is the full path to and file name of the script to run.
For example, to install pubs2 on a server named VIOLIN, enter:
isql -Usa -P***** -SVIOLIN -i $SYBASE/$SYBASE_ASE/scripts/installpubs2
4.
Install the image data associated with pubs2:
isql -Usa -P<password> -S<servername>
-i$SYBASE/$SYBASE_ASE/scripts/installpix2
Installation Guide for Linux
Postinstallation Tasks
© 2014 SAP SE or an SAP affiliate company. All rights reserved.
57
The pubs3 database does not use image data.
For more information about running these scripts, see the Configuration Guide for UNIX.
9.5.3
Installing the interpubs Database
The interpubs database is similar to pubs2, and contains French and German data.
Prerequisites
Back up the original installintpubs script, in case you experience problems with the edited script.
Procedure
1.
Set your terminal to display 8-bit characters.
2.
Verify that iso_1, iso_15, Roman8, Roman 9, or UTF-8 is installed as either the default character set or as an
additional character set.
The interpubs database contains 8-bit characters and is available for use at SAP ASE installations using the
ISO 8859-1 (iso_1), ISO 8859-15 (iso_15), Roman 8, or Roman9 (for HP-UX) character set.
3.
Determine the type (raw partition, logical volume, operating system file, and so on) and location of the device
where you will be storing the interpubs database. You will need to provide this information later.
4.
Execute the script, using the -J flag to ensure that the database is installed with the correct character set:
isql -U<sa> -P<password> -S<servername> -Jiso_1 \
-i $SYBASE/$SYBASE_ASE/scripts/iso_1/installintpubs
9.5.4
Installing the jpubs Database
If you installed the Japanese language module with your server, you can run the installjpubs script to install
jpubs, which is a database similar to pubs2 that contains Japanese data. installjpubs uses the EUC-JIS
(eucjis), UTF-8 (utf8), or the Shift-JIS (sjis) character sets.
Prerequisites
Copy the original installjpubs script, in case you experience problems with the edited script.
58
© 2014 SAP SE or an SAP affiliate company. All rights reserved.
Installation Guide for Linux
Postinstallation Tasks
Procedure
1.
Set your terminal to display 8-bit characters.
2.
Verify that the EUC-JIS, Shift-JIS, or the UTF-8 character set is installed either as the SAP ASE default
character set or as an additional character set.
3.
Determine the type (raw partition, logical volume, operating system file, and so on) and location of the device
where you will be storing the jpubs database. You will need to provide this information later.
4.
Execute the installjpubs script, using the -J flag to ensure that the database is installed with the correct
character set:
isql -U<sa> -P<password> -S<servername> -Jeucjis \
-i $SYBASE/$SYBASE_ASE/scripts/eucjis/installjpubs
isql -U<sa> -P<password> -S<servername> -Jeucjis \
-i %SYBASE%\%SYBASE_ASE%\scripts\eucjis\installjpubs
or:
isql -U<sa> -P<password> -S<servername> -Jsjis \
-i $SYBASE/$SYBASE_ASE/scripts/sjis/installjpubs
isql -U<sa> -P<password> -S<servername> -Jsjis \
-i %SYBASE%\%SYBASE_ASE%\scripts\sjis\installjpubs
For more information on the -J option in isql, see the Utility Guide.
9.5.5
Maintaining Sample Databases
The sample databases contain a guest user option that allows authorized users to access the database. Guest
users have a wide range of privileges, including permissions to select, insert, update, and delete user tables.
Context
We recommend that you remove the guest user option from user databases in production systems. For more
information about the guest user and a list of guest permissions, see the System Administration Guide.
Procedure
●
If possible, and if space allows, give each new user a clean copy of the sample databases so that he or she is
not confused by other users’ changes.
●
If space is a problem, instruct users to issue the begin transaction command before updating a sample
database.
Installation Guide for Linux
Postinstallation Tasks
© 2014 SAP SE or an SAP affiliate company. All rights reserved.
59
●
After users have finished updating one of the sample databases, instruct them to issue the rollback
transaction command to undo the changes.
9.6
Raw Partitions on Linux
You can create and mount database devices on raw bound devices for raw disk I/O. Raw disk I/O enables direct
memory access from your address space to the physical sectors on the disk, while omitting needless memory
copy operations from the user address space to the kernel buffers.
Raw disk I/O assumes that logical and physical I/O are simultaneous, and that writes are guaranteed to flush to
the disk when the system write call returns. When preparing a raw partition device, follow these guidelines:
●
Do not initialize a database device on the partition that contains your installation software. Doing so destroys
all existing files on that partition.
●
A raw partition designated for use by by any other software application cannot be mounted for use by the
operating system for any other purpose, such as for file systems or swap space.
●
After a configuration utility or the disk init command has initialized a portion of a partition as a database
device, the entire partition cannot be used for any other purpose. Any space left on the partition beyond the
size specified for the device can be reused with the disk resize command.
●
To avoid any possibility of using a partition that contains the partition map, do not use cylinder 0.
●
Place the database device on a character device, because the server recovery system needs unbuffered
system I/O.
●
To determine whether a device is a block device or a character device, run:
ls -l <device path>
9.6.1
Choosing a Raw Partition
Select a raw partition on which to create and mount database devices.
Procedure
1.
Determine which raw partitions are available.
2.
Determine the sizes of the raw partitions.
3.
From the list of available raw partitions, select a raw partition for each device.
4.
Verify with the operating system administrator that the partition you have chosen is available.
5.
Make sure the "sybase" user has read and write privileges to the raw partition.
Note
For more information on choosing a raw partition, see your operating system documentation.
60
© 2014 SAP SE or an SAP affiliate company. All rights reserved.
Installation Guide for Linux
Postinstallation Tasks
9.6.2
Examples for Creating Raw Partitions
Specific system administration is required before you can enable and use raw devices. The available tools to
configure devices depend on the distribution configuration.
You must allocate physical disk space in partitions on the disks where you want to set up raw devices. The
physical I/O subsystem can be on either SCSI or EIDE devices.
Note
You can create partitions with the Linux default fdisk(8) utility. You must have root privileges to use the
command fdisk. See the fdisk(8) man pages for a complete description of the command.
Example
This example shows how to set up partitions as raw devices, on four SCSI disks in the system—sda, sdb, sdc,
and sdd.
1.
Start fdisk on /dev/sdd:
# fdisk /dev/sdd
The system returns:
The number of cylinders for this disk is set to 8683
....
Command (m for help):
2.
Enter p to print the current partition layout. The output is:
Disk /dev/sdd: 64 heads, 32 sectors, 8683 cylinders
Units = cylinders of 2048 * 512 bytes
Device Boot Start
End
Blocks Id System
/dev/sdd1
1 7499 7678960 83 Linux
/dev/sdd2
7500 8012
525312 82 Linux swap
/dev/sdd4
8013 8683
687104
5 Extended
Example
This example shows the extended partition (sdd4) has 687,104 free blocks, starting from 8013 and ending at
8683. You can assign the remaining partitions later. This example assigns an additional partition for raw bound
disk I/O:
1.
Use the n command to create a new partition, and enter l (for "logical") at this prompt:
Command (m for help): n
Command action
l logical (5 or over)
p primary partition (1-4)
2.
Accept the default by pressing Enter when you see:
First cylinder (8013-8683, default 8013):
3.
Accept the default by pressing Enter again, when you see:
Last cylinder or +size or +sizeM or +sizeK
(8013-8683, default 8683): 8269
Installation Guide for Linux
Postinstallation Tasks
© 2014 SAP SE or an SAP affiliate company. All rights reserved.
61
4.
Use the t command, enter 5 at this prompt:
Partition number (1-8): 5
5.
Enter 60 at this prompt:
Hex code (type L to list codes): 60
The output is:
Changed system type of partition 5 to 60 (Unknown)
6.
Repeat steps 1–5 to create four partitions for raw device I/O.
7.
Verify the setup using p to print the full partition table before writing it out. Make sure that there are no
overlapping partitions and the type for the unassigned partitions is Unknown type 60.
You can now write this partition table to disk and quit the fdisk(8) utility.
9.6.3
Administering Raw Devices
Administer raw disk partitions using a plain text file that contains comments and examples for possible
configurations.
Procedure
●
If you are using a Red Hat Enterprise Linux system running release 3 or 4:
a) Administer the partitions using the /etc/sysconfig/rawdevices file:
# raw device bindings
# format: <rawdev> <major> <minor
>#
<rawdev> <blockdev>
# example: /dev/raw/raw1 /dev/sda1
#
/dev/raw/raw2 8 5
/dev/raw/raw1 /dev/sdd1
/dev/raw/raw2 /dev/sdd2
/dev/raw/raw3 /dev/sdd3
/dev/raw/raw4 /dev/sdd4
b) Create the raw devices.
c) Bind the raw devices by starting them from /etc/rc.d/init.d/rawdevices:
[root@legolas init.d]# cd /etc/rc.d/init.d
[root@legolas init.d]# sh rawdevices start
Assigning devices:
/dev/raw/raw1 -->
/dev/sdd5
/dev/raw/raw1:
bound to major 3, minor
/dev/raw/raw2 -->
/dev/sdd6
/dev/raw/raw2:
bound to major 3, minor
/dev/raw/raw3 -->
/dev/sdd7
/dev/raw/raw3:
bound to major 3, minor
/dev/raw/raw4 -->
/dev/sdd8
/dev/raw/raw4:
bound to major 3, minor
done
62
© 2014 SAP SE or an SAP affiliate company. All rights reserved.
5
6
7
8
Installation Guide for Linux
Postinstallation Tasks
d) To make sure the raw device binding runs whenever you restart the system, enter:
# /sbin/chkconfig rawdevices on
●
If you are using Red Hat Enterprise Linux system running release 5 or later, modify the /etc/udev/
rules.d/60-raw.rules file:
# Enter raw device bindings here.
#
# An example would be:
#
ACTION=="add", KERNEL=="sda", RUN+="/bin/raw /dev/raw/raw1 %N"
# to bind /dev/raw/raw1 to /dev/sda, or
#
ACTION=="add", ENV{MAJOR}=="8", ENV{MINOR}=="1", RUN+="/bin/raw /dev/raw/
raw2 %M %m"
# to bind /dev/raw/raw2 to the device with major 8, minor 1.
ACTION=="add", KERNEL=="sdb5", OWNER=="sybase",RUN+="/bin/raw /dev/raw/raw1 %N"
ACTION=="add", KERNEL=="sdb6", OWNER=="sybase",RUN+="/bin/raw /dev/raw/raw2 %N"
ACTION=="add", KERNEL=="sdb7", OWNER=="sybase",RUN+="/bin/raw /dev/raw/raw3 %N"
●
If you are using SuSE:
a) Modify the /etc/raw file:
# /etc/raw
#
# sample configuration to bind raw devices
# to block devices
#
# The format of this file is:
# raw<N>:<blockdev>
#
# example:
# --------# raw1:hdb1
#
# this means: bind /dev/raw/raw1 to /dev/hdb1
#
# ...
raw1:sda7
raw2:sda8
raw3:sda9
b) Bind the raw devices by starting them with the script /etc/init.d/raw:
# cd
# sh
bind
bind
bind
...
/etc/init.d
raw start
/dev/raw/raw1 to /dev/sdb1... done
/dev/raw/raw2 to /dev/sdb2... done
/dev/raw/raw3 to /dev/sdb3... done
c) To make sure the raw device binding runs whenever you restart the system, enter:
# /sbin/chkconfig raw on
Installation Guide for Linux
Postinstallation Tasks
© 2014 SAP SE or an SAP affiliate company. All rights reserved.
63
9.6.4
Accessing Raw Devices from the Server
After you create partitions and bind the devices for raw disk I/O, Adaptive Server can use them.
Prerequisites
Confirm that you have root privileges to execute the raw -qa command on your system to avoid seeing a message
similar to:
Cannot open master raw device '/dev/rawctl' (Permission denied)
Context
If the SAP ASE server is running as user "sybase," then apply read, write, and owner permissions to
the /dev/raw/raw# device entries and the raw bound control device /dev/rawctl. See the chown(1),
chgrp(1), and chmod(1) commands to apply correct permissions.
Procedure
1.
Verify your settings by querying the device binding with the raw command:
# raw -qa
You should see:
/dev/raw/raw1:
/dev/raw/raw2:
/dev/raw/raw3:
/dev/raw/raw4:
2.
bound
bound
bound
bound
to
to
to
to
major
major
major
major
3,
3,
3,
3,
minor
minor
minor
minor
5
6
7
8
Using the raw devices, SAP ASE and the installation and configuration utility, srvbuild, detect and present
size automatically. Enter the absolute path to the raw device when creating devices such as master,
sybsystemprocs, sybtempdb.
64
© 2014 SAP SE or an SAP affiliate company. All rights reserved.
Installation Guide for Linux
Postinstallation Tasks
10 SAP ASE Upgrades
You can upgrade to SAP ASE version 16.0 from versions 12.5.4 or later.
Upgrades are supported only between nonclustered editions of SAP ASE. You cannot upgrade from SAP
®
Adaptive Server Enterprise Cluster Edition to a nonclustered edition.
®
You can upgrade to SAP ASE version 16.0 from versions 12.5.4, 15.0 through 15.7 by executing the upgrade
sequence from the same node on which the database resides. This is a major upgrade, and requires that you
perform preupgrade tasks.
You can upgrade from a 32-bit version to a 64-bit version.
You cannot upgrade to this version of SAP ASE from:
●
Version 11.9.x
●
Version 12.0.x
If you are running either of these versions, upgrade first to version 12.5.4 before upgrading to version 16.0.
If your server has replicated databases, consult the Replication Server Configuration Guide before starting the
upgrade preparatory tasks.
Only upgrades to and from the same page size are supported. Use sybmigrate to re-create the schema and load
data from one page size to another. See the Utility Guide.
SAP ASE version 16.0 includes both new and changed system catalogs that may affect your existing applications.
See the SAP Adaptive Server Enterprise New Feature Guide for a complete list.
Caution
Once you upgrade to SAP ASE 16.0, you cannot revert back to an earlier version.
Related Information
Installing SAP ASE in GUI Mode [page 35]
Minimally Configuring an SAP ASE Server [page 40]
10.1 Considerations When Upgrading from SAP ASE 15.0.x or
Earlier
A minor change was made to the format of a log record in SAP ASE version 15.5 that introduces an unlikely
possibility for the SAP ASE server to misinterpret this changed log record in cases where the upgraded server
contains a database that is the primary database for replication. This change should not affect your upgrade
process; however, it requires you to strictly follow some steps when you move from SAP ASE 15.0.x or earlier to
SAP ASE 15.5.x and later (nonclustered editions). See the following table for all possible combinations of
upgrades.
Installation Guide for Linux
SAP ASE Upgrades
© 2014 SAP SE or an SAP affiliate company. All rights reserved.
65
An upgrade is done by:
●
Upgrading your entire installation by switching binaries.
●
Upgrading a single database using online database, having first loaded it with a database dump and
transaction logs taken on a server with an earlier version.
Table 6: Upgrading Your Entire Installation
Current Ver
sion
Upgrading to
Special Upgrade Information
SAP ASE
15.0.x or ear
lier
SAP ASE 16.0
If you are using Replication Server to replicate one or more databases in the
version to be upgraded, ensure that all transactions have been replicated be
fore the polite shutdown is done, by draining the log. See Upgrading ASE in a
Replication System and Upgrading Replication Server in the Replication
Server Configuration Guide for your platform.
SAP ASE
Cluster Edi
tion 15.5.x or
later
SAP ASE 16.0
Upgrading any version of SAP ASE Cluster Edition to a nonclustered version
is not supported.
SAP ASE
15.5.x
SAP ASE 16.0
No special upgrade instructions.
Table 7: Upgrading a Single Database
Current Ver
sion
Upgrading to
Special Upgrade Instructions
SAP ASE
15.0.x and
earlier
SAP ASE 16.0
When you use online database to upgrade a single database in SAP ASE
SAP ASE
Cluster Edi
tion 15.5.x or
later
SAP ASE 16.0
Upgrading a database from any version of the Cluster Edition to a nonclus
tered version is not supported.
SAP ASE
15.5.x
SAP ASE 16.0
No special upgrade instructions.
16.0 (either the cluster or noncluster edition) after loading a database dump
and transaction logs from SAP ASE 15.0.x or earlier, if the database you are
upgrading is also replicated, make sure the database's transaction log is
truncated before you turn replication back on.
Related Information
Reenabling Replication Server After the Dataserver Upgrade [page 86]
Postupgrade Tasks [page 83]
66
© 2014 SAP SE or an SAP affiliate company. All rights reserved.
Installation Guide for Linux
SAP ASE Upgrades
10.2 Considerations for Component Integration Services
If you have both a local and a remote server running on SAP ASE version 15.x and are upgrading both of them to
version 16.0, upgrade the local server first. If you plan to upgrade one server but not the other, upgrade the local
server.
SAP does not certify that Component Integration Services running on earlier versions of SAP ASE can connect to
later versions. You may encounter errors if an earlier version of SAP ASE maps a proxy table to a later version and
if the remote table uses functionality that is unavailable in the earlier version.
SAP certifies that each version of SAP ASE connects to earlier versions through Component Integration Services.
Component Integration Services is tested and certified to connect to earlier versions of SAP ASE.
10.3 Preparing to Upgrade
Use the preupgrade, upgrade, sqlupgrade, and sqlupgraderes utilities to upgrade SAP ASE versions earlier
than 16.0.
Prerequisites
Caution
Since it is not possible to downgrade once you upgrade to SAP ASE 16.0, make sure to back up all databases,
including master and other system databases, before beginning the upgrade process.
Context
To perform an upgrade to SAP ASE version 16.0, run the preupgrade utility. You must have system
administrator privileges to perform an upgrade.
Each new server version contains features that introduce parameters, commands, reserved words, and so on. The
preupgrade utility prepares the old server by making sure all necessary directories and settings are correct for
the upgrade. When running the preupgrade utility, manually stop and start the server. You need not start the
server before running the sqlupgrade upgrade utility; the utility starts the server when needed.
If you are upgrading from:
●
Version 12.5.4 with cache bindings on sybsystemdb – drop the cache bindings for sybsystemdb that are
bound to a user-defined cache before you run the preupgrade utility.
●
Earlier than version 16.x but later than 12.5.4 – from the SAP ASE 16.0 installation directory, use the
preupgrade utility to perform the preupgrade checks on the old server. The utility is located in $SYBASE/
ASE-16_0/bin.
Installation Guide for Linux
SAP ASE Upgrades
© 2014 SAP SE or an SAP affiliate company. All rights reserved.
67
Manually drop objects before you execute procedures for the first time. The first time you run the server after an
upgrade, the server internally rebuilds procedures from the text in syscomments. The procedure may not execute
properly if it contains code that drops, then re-creates, an existing object.
Procedure
1.
Go to the directory where your current version of SAP ASE is installed.
2.
Enter cd in to go to the directory ASE-<version>, where <version> is your current version of SAP ASE.
3.
Perform cd in to the bin directory.
4.
Enter preupgrade to run the preupgrade utility.
10.4 Changes in SAP ASE Directories
The directory structures for SAP ASE installations differ, depending on version.
Directory Changes
Component
Location
SAP ASE
●
12.5.4 location – $SYBASE/ASE-12_5
●
15.0.2, 15.0.3, 15.5, 15.7 GA, and 15.7 ESD #1, ESD #2, ESD #3, and SP100 locations –
$SYBASE/ASE-15_0
●
16.0 location – $SYBASE/ASE-16_0
●
12.5.4 and 15.0.2 locations – $SYBASE/shared/sybcentral43
●
15.0.3, 15.5, 15.7 GA, and 15.7 ESD #1, ESD #2, ESD #3, locations – $SYBASE/shared/
sybcentral600
●
15.7 SP100 – $SYBASE/SCC-3_2
●
16.0 – $SYBASE/SCC-3_3
●
12.5.4 location – $SYBASE/shared/jre142
●
15.0.2 location – $SYBASE/shared/jre142_*
●
15.0.3 location – $SYBASE/shared/JRE-6_0*
●
15.5, 15.7 GA, and 15.7 ESD #1 locations – $SYBASE/shared/JRE-6_0*
●
15.7 ESD #2, ESD #3, and SP100 locations – $SYBASE/shared/JRE-7_0*
●
16.0 location – (32-bit) $SYBASE/shared/SAPJRE-7_1_*_32BIT and (64-bit)
$SYBASE/shared/SAPJRE-7_1_*_64BIT
SQL Central
SCC
JRE
68
© 2014 SAP SE or an SAP affiliate company. All rights reserved.
Installation Guide for Linux
SAP ASE Upgrades
Component
Location
Language
settings
(locales)
●
12.5.4 and 15.0.2 locations – $SYBASE/locales
●
15.0.3, 15.5, 15.7 GA, and 15.7 ESD #1, ESD #2, ESD #3, and SP100 locations – $SYBASE/
locales and $SYBASE/ASE-15_0/locales
●
Connectivity
Web Service
SySAM
Job Scheduler
Unified Agent
16.0 location – $SYBASE/locales and $SYBASE/ASE-16_0/locales
●
12.5.4 location – $SYBASE/OCS-12_5
●
15.0.2, 15.0.3, 15.5, 15.7 GA, and 15.7 ESD #1, ESD #2, ESD #3, and SP100 locations –
$SYBASE/OCS-15_0
●
16.0 location – $SYBASE/OCS-16_0
●
12.5.4 location – $SYBASE/WS-12_5
●
15.0.2, 15.0.3, 15.5, 15.7 GA, and 15.7 ESD #1, ESD #2, ESD #3, and SP100 locations –
$SYBASE/WS-15_0
●
16.0 location – $SYBASE/WS-16_0
●
12.5.4 location – $SYBASE/SYSAM-1_0
●
15.0.2, 15.0.3, 15.5, 15.7 GA, and 15.7 ESD #1, ESD #2, ESD #3, SP100, and 16.0 locations
– $SYBASE/SYSAM-2_0
●
12.5.4 location – $SYBASE/JS-12_5
●
15.0.2, 15.0.3, 15.5, 15.7 GA, and 15.7 ESD #1, ESD #2, ESD #3, and SP100 locations –
$SYBASE/ASE-15_0/jobscheduler
●
16.0 location – $SYBASE/ASE-16_0/jobscheduler
●
15.0.2 and 15.0.3 locations – $SYBASE/UAF-2_0
●
15.5, 15.7 GA locations – $SYBASE/UAF-2_5
●
15.7 ESD #1, ESD #2, ESD #3, and SP100 locations – $SYBASE/SCC-3_2
●
16.0 location – No longer shipped. Included with SCC.
10.5 Preupgrade Tasks
To ensure a successful upgrade, review and perform preparatory tasks as necessary. Depending on the old server
configuration, you may not need to perform all preparatory tasks.
Prerequisites
●
You need the master and system procedures files to upgrade the server. By default, the master
(master.dat) and system procedures device (sybsytemprocs.dat) files are in the $SYBASE/data
directory.
●
The previously installed version of the server must be running. If you are upgrading Backup Server, Historical
Server, or XP Server, those servers must not be running.
Installation Guide for Linux
SAP ASE Upgrades
© 2014 SAP SE or an SAP affiliate company. All rights reserved.
69
Context
Note
Follow these steps only if you are performing a major upgrade from an SAP ASE version earlier than 16.0.
Skip these preparatory tasks if you plan to use sqlupgrade, which performs these tasks automatically.
Procedure
1.
Install SAP ASE 16.0 into the old ASE directory.
2.
Check system and upgrade requirements.
3.
Ensure that the directory to which your TEMP environment variable points exists.
4.
Verify the name and location of the runserver file, and that you have renamed it to RUN_<servername> as it
appears in the interfaces file, where <servername> is the name of the old server.
The default RUN_<servername> file for a server called SYBASE is RUN_SYBASE. If the RUN_<servername>
file for your current server is named differently, use the actual name of your server during the upgrade
process.
5.
Verify that the text of all stored procedures you upgrade is available in syscomments by either:
○
Reinstalling the procedures with text, or,
○
Removing and reinstalling the procedures after the upgrade.
This step can allow you to inspect the stored procedures for any hidden or unwanted text.
6.
Make sure reserved words use quoted identifiers.
7.
Verify that users are logged off.
8.
Use dbcc to check for database integrity.
9.
Back up databases.
10. Dump the transaction log.
11. Verify that master is the default database for the "sa" user.
12. Prepare the database and devices for upgrade using the preupgrade utility. See preupgrade in the Utility
Guide for more information. After preupgrade finds no errors by exiting with status 0 (zero):
a) Create a sybsystemdb database if it does not already exist.
b) Disable auditing by running sp_configure 'auditing', 0.
c) Disable Job Scheduler.
d) Obtain the current audit settings for the pre-16.0 SAP ASE using sp_displayaudit; use this saved
information to reenable auditing after you complete the upgrade.
e) If you made any site-specific changes to the permissions for system stored procedures, obtain the
current permission settings for them using sp_helprotect; then use this saved information to reenable
the permissions after you complete the installation. Pay special attention to
70
○
Any stored procedures that are not granted execute permission to public, such as
sp_addauditrecord, sp_monitor, and sp_sysmon.
○
Any stored procedures where execute permission has been revoked from public.
© 2014 SAP SE or an SAP affiliate company. All rights reserved.
Installation Guide for Linux
SAP ASE Upgrades
f)
Disable disk mirroring.
g) Verify that your SYBASE environment variable points to the location of the new server software files you
just installed.
Fix any problems that preupgrade utility reports.
You can safely ignore any warnings SAP ASE issues about configuration parameters not being set to the
default, as these are only for your information.
13. If you are upgrading from a nonclustered 12.5.4, 15.0.2, 15.5, or 15.7 server, and archive database access has
been applied in the lower version server, disable the related functionality before upgrading.
14. Ensure that the procedure cache size is at least 150 percent of the default procedure cache size, or between
53,248 and 2,147,483,647 2KB pages.
15. Copy these files from earlier versions of the server to their corresponding SAP ASE 15.x installation locations:
○
$SYBASE/interfaces
○
$SYBASE/$SYBASE_ASE/<servername>.cfg – where <servername> is your server name.
○
$SYBASE/$SYBASE_OCS/config/libtcl.cfg
○
$SYBASE/SYSAM-2_0/licenses/license.lic
16. If you have enabled the Java in the database feature, create the sybpcidb database and disable the feature
during the installation.
17. Set the environment variables by sourcing the SYBASE.[csh, sh, env] file.
Caution
Do not run the environment variable script more than once.
18. Disable LDAP using:
sp_configure 'enable ldap' , 0
10.5.1 Upgrade Stored Procedures
If you modified any system stored procedures without altering their names, back them up before you upgrade
SAP ASE. The upgrade process overwrites these modified procedures with default versions.
10.5.2 Reserved Words
Reserved words are pieces of SQL syntax that have special meaning when used as part of a command.
Transact-SQL does not allow words that are part of command syntax to be used as identifiers unless they are
enclosed in quotation marks. If you are upgrading SAP ASE, you see errors when you run queries, stored
procedures, or applications that use these identifiers in your user databases.
Note
Before upgrading, use sp_renamedb to change the name of any user database that is a reserved word.
Installation Guide for Linux
SAP ASE Upgrades
© 2014 SAP SE or an SAP affiliate company. All rights reserved.
71
If you change an object name, also change applications and stored procedures that refer to that object. Conflicts
between object names do not prevent the upgrade process from completing. However, applications that refer to
conflicting object names may not work after the upgrade. Rename all objects that use reserved words.
As part of the preupgrade process, you can have sqlupgrade, sqlupgraderes, or preupgrade perform a
reserved-word check for you. See the Reference Manual: Building Blocks for a complete list of reserved words.
10.5.2.1
Running a Reserved Word Check
Run the reserved word check on the SAP ASE server you are upgrading.
Context
Even if you plan to use sqlupgraderes to upgrade SAP ASE noninteractively, you can still first run the interactive
sqlupgrade utility to perform reserved-word checks and other potential upgrade eligibility problems, and then
continue with the upgrade if no problems are found.
Both sqlupgrade and sqlupgraderes automatically install new reserved words and the sp_checkreswords
system procedure, which detects and displays identifiers in your existing databases that conflict with reserved
words in the new database. You can use sp_checkreswords at any time while performing preupgrade tasks.
Note
Do not use an older version of sp_checkreswords to check for reserved words, as it does not contain the
most current list of reserved words.
Procedure
1.
Checking for reserved words generates a list of identifiers that conflict with reserved words, and the owners of
those identifiers, in the file $SYBASE/$SYBASE_ASE/init/logs/sqlupgrade<MMDD.nnn>. Review this file
to determine which identifiers to change.
2.
72
The sqlupgrade utility installs sp_checkreswords and checks the reserved words during the upgrade.
© 2014 SAP SE or an SAP affiliate company. All rights reserved.
Installation Guide for Linux
SAP ASE Upgrades
10.5.2.2 Addressing Reserved Words Conflicts
Change any database names that are reserved words.
Procedure
1.
Use sp_dboption to set the database to single-user mode, then run sp_renamedb, specifying the new
name.
2.
If other identifiers are reserved words, you can use:
○
sp_rename to change the name of the object, before or after the upgrade.
○
Quoted identifiers.
○
Brackets around the identifier. For example:
create table [table] ( [int] int, [another int] int )
3.
Run sp_checkreswords in master and in each user database to display the names and locations of
conflicting identifiers.
See Reference Manual: Procedures for information about sp_dboption, sp_rename, and
sp_checkreswords.
10.5.2.3 Quoted Identifiers
To avoid reserved word conflicts, all users on the server must invoke the quoted_identifier option in all stored
procedures and queries that include the reserved words.
To invoke the quoted_identifier option of the set command in procedures and queries that include the
reserved words, enclose the reserved words that are identifiers in double quotation marks. The set
quoted_identifier option tells SAP ASE to treat any character string enclosed in double quotation marks as
an identifier.
See Reference Manual: Commands for more information on set quoted_identifier.
10.5.3 Preparing the Database and Devices
Before starting the upgrade process, confirm that you have enough space for the upgrade to succeed.
Procedure
1.
To calculate the free space required for the upgrade to succeed, double the size of the largest catalog that
you are going to upgrade, then add approximately 10 percent. For example, if you have a large number of
Installation Guide for Linux
SAP ASE Upgrades
© 2014 SAP SE or an SAP affiliate company. All rights reserved.
73
stored procedures or compiled objects in any database, the syscomments and sysprocedures system
tables require additional space.
The preupgrade utility scans the system catalogs and performs this calculation automatically.
2.
If you are:
○
Not using two-phase commit or distributed transaction management (DTM) applications, create a
sybsystemdb with a minimum of 4MB if it does not already exist.
○
Using two-phase commit or DTM, create either:
○
A minimum-sized sybsystemdb for upgrade and expand it later, or
○
A sybsystemdb of 5MB to 20MB, depending on your expected usage. Approximately 25 percent of
the database should be data storage, and 75 percent should be log storage.
3.
If it does not already exist, create the sybsystemdb database. Servers that use a 2KB logical page size
require a sybsystemdb that is at least 4MB. Servers that use a larger logical page size require a
sybsystemdb that is at least as large as the model database:
1>
2>
1>
2>
1>
2>
create database sybsystemdb on default = '4M'
go
use sybsystemdb
go
sp_create_syscoordinations
go
SAP ASE uses this database for tracking transactions, and during recovery. It is also used by applications
using two-phase commit and DTM.
4.
Verify that the sybsystemdb database is large enough. For an upgrade, the default size for sybsystemdb is
124MB, or enough free space to accommodate the existing sybsystemdb database, and the largest catalog
that is to be upgraded, plus 10 percent for logging upgrade changes. You may need more space if you are
adding user-defined stored procedures.
5.
If you use Java in the database, the preupgrade utility detects that you set sp_configure "enable
java" to 1, and requests that you enable PCI and configure sybpcidb before you upgrade the server.
6.
Increase the default database size:
a) Use alter database to increase the size of the master database.
For example:
1>
2>
1>
2>
alter database tempdb on master=<X>
go
alter database model on master=<X>
go
<X> is the megabytes of space you are adding.
Repeat this process for each temporary and model databases, making sure that model is at no point
larger than tempdb.
b) Use sp_helpdb to verify the size of each system database you increase in size.
c) Use sp_configure to update the values as indicated by the preupgrade utility.
This example updates the number of locks available for all users on the SAP ASE server to 6,000:
sp_configure "number of locks", 6000
74
© 2014 SAP SE or an SAP affiliate company. All rights reserved.
Installation Guide for Linux
SAP ASE Upgrades
10.5.4 The sybprocsdev device
Sybase system procedures are stored in the sybsystemprocs database, which is stored in the sysprocsdev
device. You may need to increase the size of sysprocsdev before upgrading SAP ASE.
Regardless of page size, when configuring a new server, the size of sybsystemprocs is:
●
Minimum – 184 MB
●
Default – 196 MB
For upgrades, you need an additional 10 percent of this.
You may need more space if you are adding user-defined stored procedures.
If your sybsystemprocs database does not meet these requirements and you have enough room on the device
to expand the database to the required size, use the alter database command to increase the database size.
Use:
●
sp_helpdb to determine the size of the sybsystemprocs database:
1> sp_helpdb sybsystemprocs
2> go
●
sp_helpdevice to determine the size of the sysprocsdev device:
1> sp_helpdevice sysprocdev
2> go
If the <db_size> setting is less than the required minimum, increase the size of sysprocdev.
10.5.4.1 Increasing the Size of the sybsystemprocs Database
Create a new database with sufficient space if your current sybsystemprocs database does not have the
minimum space required for an upgrade. The minimum size of sybsystemprocs is 184MB; the recommended
size is 196MB.
Prerequisites
Create a current backup of your old database.
Context
Although you can drop the old database and device and create a new sysprocsdev device, SAP recommends
that you leave the old database and device and add a new device that is large enough to hold the additional
memory, and alter the sybsystemprocs onto the new device.
Installation Guide for Linux
SAP ASE Upgrades
© 2014 SAP SE or an SAP affiliate company. All rights reserved.
75
Procedure
1.
In isql, use alter database to increase the size of the sybsystemprocs database. For example:
1>
2>
1>
2>
use master
go
alter database sybsystemprocs on sysprocsdev=40
go
In this example, "sysprocsdev" is the logical name of the existing system procedures device, and 40 is the
number of megabytes of space to add. If the system procedures device is too small, you may receive a
message when you try to increase the size of the sybsystemprocs database.
If there is space available on another device, expand sybsystemprocs to a second device, or initialize
another device that is large enough.
2.
Verify that the SAP ASE server has allocated more space to sybsystemprocs:
1> sp_helpdb sybsystemprocs
2> go
Results
When the database is large enough to accommodate the increased size of sybsystemprocs, continue with the
other preupgrade tasks.
10.5.4.2 Increasing Device and Database Capacity for System
Procedures
If you cannot fit the enlarged sybsystemprocs database on the system procedures device, increase the size of
the device and create a new database. The minimum size of sybsystemprocs is 184MB; the recommended size
is 196MB.
Prerequisites
This procedure removes all stored procedures you have created at your site. Before you begin, save your local
stored procedures using the defncopy utility. See the Utility Guide.
Context
This procedure involves dropping the database. For more information on drop database, see the Reference
Manual.
76
© 2014 SAP SE or an SAP affiliate company. All rights reserved.
Installation Guide for Linux
SAP ASE Upgrades
Procedure
1.
Determine which device you must remove:
select <d.name>, <d.phyname>
from sysdevices d, sysusages u
where u.vstart between d.low and d.high
and u.dbid = db_id("sybsystemprocs")
and d.status & 2 = 2
and not exists (select vstart
from sysusages u2
where u2.dbid != u.dbid
and u2.vstart between d.low and d.high)
Where:
○
< d.name> – is the list of devices to remove from sysdevices.
○
< d.phyname> – is the list of files to remove from your computer.
The not exists clause in this query excludes devices that are used by sybsystemprocs and other
databases.
Make a note of the names of the devices to use in subsequent steps.
Caution
Do not remove any device that is in use by a database other than sybsystemprocs, or you will destroy
that database.
2.
Drop sybsystemprocs:
1>
2>
1>
2>
use master
go
drop database sybsystemprocs
go
Note
In versions earlier than 15.x, use sysdevices to determine which device has a low through high virtual
page range that includes the vstart from step 2.
In version 15.x, select the <vdevno> from sysusages matching the <dbid> retrieved in step 1.
3.
Remove the device:
1> sp_configure "allow updates", 1
2> go
1> delete sysdevices
where name in ("<devname1>", "<devname2>", ...)
2> go
1> sp_configure "allow updates", 0
2> go
The where clause contains the list of device names returned by the query in step 1.
Note
Each device name must have quotes. For example, "devname1", "devname2", and so on.
Installation Guide for Linux
SAP ASE Upgrades
© 2014 SAP SE or an SAP affiliate company. All rights reserved.
77
If any of the named devices are OS files rather than raw partitions, use the appropriate OS commands to
remove those files.
4.
Remove all files that were returned in the <d.phyname> list.
Note
File names cannot be complete path names. If you use relative paths, they are relative to the directory from
which your server was started.
5.
Find another existing device that meets the requirements for additional free space, or use a disk init
command similar to the following to create an additional device for sybsystemprocs, where /sybase/
work/ is the full, absolute path to your system procedures device:
1>
2>
1>
2>
3>
4>
5>
use master
go
disk init
name = "sysprocsdev",
physname = "/sybase/work/sysproc.dat",
size = 200M
go
Note
Server versions 12.0.x and later accept, but do not require "vdevno=number". For information about
determining whether vdevno is available, see the System Administration Guide.
The size you provide should be the number of megabytes of space needed for the device, multiplied by 512.
disk init requires the size to be specified in 2KB pages. In this example, the size is 112MB (112 x 512 =
57344). For more information on disk init, see the Reference Manual: Commands.
6.
Create a sybsystemprocs database of the appropriate size on that device, for example:
1> create database sybsystemprocs on sysprocsdev = 180
2> go
7.
In the old server installation directory, enter:
isql -Usa -P<password> -S<server_name >-i$SYBASE/ASE-15_0/scripts/installmaster
78
© 2014 SAP SE or an SAP affiliate company. All rights reserved.
Installation Guide for Linux
SAP ASE Upgrades
10.6 Upgrade to SAP ASE 16.0
If you are performing a major upgrade from a version earlier than 16.x, you are ready to upgrade SAP ASE after
you successfully run the preupgrade utility.
10.6.1 Upgrading Interactively Using sqlupgrade
Use the interactive sqlupgrade tool to upgrade SAP ASE using an X-Windows or Motif GUI.
Prerequisites
Set the OLDSYBASE_ASE variable to the SYBASE_ASE that is appropriate to your older server. If you are
upgrading from 15.7 for example, OLDSYBASE_ASE should be ASE-15_0.
We recommend that you also set the OLDSYBASE, and OLDSYBASE_OCS environment variables to point to the
older version installation of SAP ASE, so the upgrade utility that you run from the new $SYBASE directory
automatically populates input fields with the correct information as you upgrade.
Source SYBASE.csh before running sqlupgrade if you have not already so.
Make sure your old server is running. If the server you are upgrading is not running, sqlupgrade prompts you to
start the server.
Procedure
1.
Verify that you have backed up databases, devices, and so on, and click Next.
2.
Enter:
$SYBASE/$SYBASE_ASE/bin/sqlupgrade
The available command options for sqlupgrade are:
○
-s <sybase_dir> – specifies the value to use for the SYBASE environment variable.
○
-r <resource_file> – executes the specified resource file.
○
-D <data_directory> – specifies a working directory that differs from the default $SYBASE directory.
This allows users other than the sa to configure and use SAP ASE without the need to have access
permission to the $SYBASE directory. If you do not use -D, SAP ASE uses $SYBASE as the default.
○
3.
-v – prints the version number and copyright message for sqlupgraderes and then exits.
In the Specify Sybase Directories dialog, enter:
○
The full path of the new SAP ASE release directory.
Installation Guide for Linux
SAP ASE Upgrades
© 2014 SAP SE or an SAP affiliate company. All rights reserved.
79
○
The full path of the data directory for the new SAP ASE release directory. This field allows you to specify a
working directory that differs from the default $SYBASE directory, which allows users other than the sa to
configure and use SAP ASE without the need to have access permission to the $SYBASE directory.
○
The name of the component directory that contains the new SAP ASE version.
○
The full path of the old release directory.
○
The name of the component directory that contains the earlier version of SAP ASE.
○
The name of the component directory that contains the earlier version of Open Client/Server Library.
Click OK.
4.
Select the server to upgrade from the list of servers.
5.
Enter the password for the sa login, then click OK.
6.
Specify an upgrade option, then click OK. sqlupgrade performs a preupgrade review to verify that your
current server meets the requirements for upgrade to the new version.
If your current server fails the preupgrade review, fix the problem based on the information from the results of
the test.
7.
Click OK to upgrade your server.
You see the Status Output window, which shows the completion status and informational messages about the
upgrade process.
Caution
Do not interrupt the upgrade, connect to SAP ASE, or run any stored procedures while the upgrade is in
progress.
You can also check progress by viewing the sqlupgrade log in $SYBASE/$SYBASE_ASE/init/logs/
sqlupgrade<MMDD>.<NNN>, where:
○
<MM> – is the month.
○
<DD> – is the date.
○
<NNN> – is a three-digit number identifying the sqlupgrade server upgrade session.
After all preupgrade checks are successful, sqlupgrade shuts the old server down, then starts the new SAP
ASE dataserver binary on the old master device.
Results
When the upgrade succeeds, you can:
●
Click OK to specify another server to upgrade, or
●
Exit sqlupgrade and perform post-upgrade tasks.
The upgrade process:
●
Creates the RUN_servername file, which contains the information required to restart the server
●
Runs the installmaster script to create system procedures
To verify that the upgrade was successful, log in to the server and run:
80
© 2014 SAP SE or an SAP affiliate company. All rights reserved.
Installation Guide for Linux
SAP ASE Upgrades
●
select @@version – SAP ASE should return 16.0.
●
sp_configure "upgrade version" – SAP ASE should return 16000000 (16 million).
10.6.2 Upgrading Noninteractively Using sqlupgraderes
You can upgrade SAP ASE without the graphical user interface (GUI), in noninteractive mode by using values from
a resource file that defines the attributes for the server to be upgraded.
Prerequisites
Set the OLDSYBASE_ASE variable to the SYBASE_ASE that is appropriate to your older server. If you are
upgrading from 15.7 for example, OLDSYBASE_ASE should be ASE-15_0.
We recommend that you also set the OLDSYBASE, and OLDSYBASE_OCS environment variables to point to the
older version installation of SAP ASE, so the upgrade utility that you run from the new $SYBASE directory
automatically populates input fields with the correct information as you upgrade.
Source SYBASE.csh before running sqlupgrade if you have not already so.
Make sure your old server is running. If the server you are upgrading is not running, sqlupgrade prompts you to
start the server.
Procedure
1.
Edit the sample resource file included in your SAP ASE distribution in $SYBASE/$SYBASE_ASE/init/
sample_resource_files. Use a text editor to edit the resource file.
2.
Execute sqlupgraderes by entering the following at the UNIX prompt, where <resource_file> specifies
the resource file containing the attributes that describe the server to upgrade:
$SYBASE/$SYBASE_ASE/bin/sqlupgraderes -r <resource_file>
The available command options for sqlupgraderes are:
○
-s <sybase_dir> – specifies the value to use for the SYBASE environment variable. •
○
-r <resource_file> – executes the specified resource file.
○
-D <data_directory> – specifies a working directory that differs from the default $SYBASE directory.
This allows users other than the sa to configure and use SAP ASE without the need to have access
permission to the $SYBASE directory.
○
-v – prints the version number and copyright message for sqlupgraderes and then exits.
Running the sqlupgraderes utility creates a new file containing the values you specified for the upgrade
session, and writes it to the sqlupgradeMMDD.NNN-server_name.rs file in $SYBASE/$SYBASE_ASE/
init/logs/.
Where:
Installation Guide for Linux
SAP ASE Upgrades
© 2014 SAP SE or an SAP affiliate company. All rights reserved.
81
○
<server_name> – is the server you are upgrading.
○
<MM> – is the month.
○
<DD> – is the date.
○
<NNN> – is a three-digit number identifying the sqlupgrade session.
If the resource file you are modifying was created by sqlupgrade, the prefix of the attribute name may vary.
sqlupgraderes ignores this prefix when processing the resource file. The attributes and their default values
are:
○
sybinit.release_directory – $SYBASE [<path = _name_of_old_release>]
○
sybinit.product – sqlsrv
○
sqlsrv.server_name – <server_name>
○
sqlsrv.new_config – no default value
○
sqlsrv.sa_login – <current_login>
○
sqlsrv.sa_password – <current_password>
○
sqlsrv.do_upgrade – Yes
○
sqlsrv.do_reserved_word_check –Yes
All attributes are required, and all values are case-sensitive.
10.6.3 Manually Upgrading SAP ASE
You can upgrade manually without using a wizard or utility.
Prerequisites
Source SYBASE.csh to set up the environment variables if you have not already done so.
Context
To upgrade SAP ASE manually, use the upgrade executable located in $SYBASE/ASE-16_0/bin.
Procedure
1.
2.
82
Shut down:
○
The pre-16.0 SAP ASE server
○
All additional servers that are using the same $SYBASE directory as the SAP ASE
If you installed ASE 16.0 into a directory other than the old ASE directory, copy the server entry from the old
interfaces file to the new interfaces file.
© 2014 SAP SE or an SAP affiliate company. All rights reserved.
Installation Guide for Linux
SAP ASE Upgrades
3.
Copy the <server_name>.cfg file from old directory to the new $SYBASE directory.
4.
Start the 16.0 server with the old master device from the old server.
5.
Restart all the additional servers you shut down after shutting down the pre-16.0 SAP ASE.
6.
Run upgrade. If problems occur, fix them, and re-run the upgrade process.
7.
Reinstall the SAP ASE-supplied stored procedures to prevent any errors caused from changes to the system
catalogs.
10.7 Postupgrade Tasks
After you have upgraded, make sure your new SAP ASE server is up and running.
Context
The upgrade process does not cause any changes in existing statistics, so you need not run update statistics
on any tables after the upgrade. If you are upgrading from SAP ASE version 15.x, however, restart the server to
make the statistics available.
Procedure
1.
To explicitly re-compile the objects, run dbcc upgrade_object() for each database.
2.
If you upgraded from SAP ASE version 12.5.2 or earlier, ensure there are no issues with OAM pages by running
dbcc checkcatalog with the fix option:
dbcc checkcatalog (<database_name>, fix)
3.
If you have any system stored procedures that you had saved from before the upgrade (because you had
modified them without altering their names), reload them now.
4.
Execute:
dbcc gam (<dbname>,0,0,'check')
This command performs upgrade operations on text and image columns that are deferred during the SAP
ASE upgrade process, and prevents dbcc checkstorage from taking a long time when it is run for the first
time after the upgrade.
Related Information
Considerations When Upgrading from SAP ASE 15.0.x or Earlier [page 65]
How Compiled Objects Are Handled When Upgrading SAP ASE [page 99]
Installation Guide for Linux
SAP ASE Upgrades
© 2014 SAP SE or an SAP affiliate company. All rights reserved.
83
10.7.1
Restoring Functionality in SAP ASE After Upgrading
Restore functionality in the server after an upgrade.
Procedure
1.
If you changed any configuration parameters before upgrading, use sp_configure to set them back to their
earlier values.
2.
Use sp_dboption to reset any database options you disabled before upgrading.
3.
Before you use the upgraded server, verify that all custom scripts point to SAP ASE 16.0.
4.
Verify procedure cache allocation. The size should be the same as before upgrading, unless the original size
was smaller than the default value.
5.
Check the procedure cache requirements. Version 16.0 stored procedures, triggers, and other compiled
objects require much more memory to run than earlier versions.
Use sp_configure to increase the procedure cache size during runtime, and sp_configure verify
to verify any changes you make to the configuration file without having to restart SAP ASE:
sp_configure "configuration file", 0, "verify", "<full_path_to_file>"
See Reference Manual: Procedures and the Performance and Tuning Guide for details about sp_configure
and sp_sysmon, and the System Administration Guide for information about configuring memory.
6.
Verify data cache allocation.
During the upgrade process, the server ensures that the default data cache size remains the same. Therefore,
during the preupgrade process before the upgrade, the size of the default data cache is obtained and written
to the configuration file as an absolute value, not as a default. This enables the server to have the same default
data cache size as before the upgrade. If this size is less than the default size of 8MB, the server allocates a
default data cache of 8MB.
7.
If you unmirrored devices, remirror them using the disk remirror command.
8.
If you used compiled objects, see How Compiled Objects Are Handled When Upgrading SAP ASE [page 99].
9.
If you used two-phase commit in the earlier version of SAP ASE, run the script to install the two-phase commit
tables:
isql -U<sa> -P<sa_password> -S<server_name>
-i$SYBASE/$SYBASE_ASE/scripts/installcommit
Related Information
How Compiled Objects Are Handled When Upgrading SAP ASE [page 99]
84
© 2014 SAP SE or an SAP affiliate company. All rights reserved.
Installation Guide for Linux
SAP ASE Upgrades
10.7.2 Reenabling Auditing
If the server you upgraded from was configured for auditing, reenable auditing in the upgraded server.
Procedure
1.
Enter:
sp_configure 'auditing', 1
2.
Reenable auditing for all system stored procedures for which auditing was enabled before the upgrade.
a) Use the output of sp_displayaudit recorded during the preupgrade process to identify the system
stored procedures for which auditing was enabled.
b) Reenter the audit options using sp_audit. For example, if you had enabled stored procedure auditing for
sp_addgroup stored procedure in your server before upgrading, run:
sp_audit "exec_procedure", "all", "sp_addgroup", "on"
10.7.2.1
Updating Threshold Procedures for Audit Segments
An post-upgrade task is required for threshold procedures used to archive audit segments.
If your previous installation used a threshold procedure, similar to this, execute the following to archive the
<sysaudits> table:
INSERT MyPre15SysAuditHistoryTable SELECT * FROM
sysaudits_0n
where <n> corresponds to the sysaudits table number 1–8 and MyPre15SysAuditHistoryTable is a table
defined prior to version 16.0, then you must alter MyPre15SysAuditHistoryTable to add a nodeid column
using:
alter table MyPre15SysAuditHistoryTable
add nodeid tinyint NULL
See the Reference Manual: Tables for system tables for details about the sysaudits tables.
Installation Guide for Linux
SAP ASE Upgrades
© 2014 SAP SE or an SAP affiliate company. All rights reserved.
85
10.7.3 Restoring Permissions
If the server you upgraded from had site-specific permissions on system stored procedures, restore those
permissions in the upgraded server.
Context
10.7.4 Reenabling Replication Server After the Dataserver
Upgrade
If you disabled replication before the upgrade, you must reenable replication.
Procedure
1.
Remove older formatted log records from your database.
2.
Use the dump tran command to dump the database and transaction logs to remove the older format log
records from your database. This prevents Replication Agent™ and other log readers from accessing the
preupgrade portion of the transaction logs.
1>
2>
1>
2>
1>
2>
3.
use master
go
dump database sales to dumpdev
go
dump transaction sales with truncate_only
go
Reenable replication.
Related Information
Considerations When Upgrading from SAP ASE 15.0.x or Earlier [page 65]
86
© 2014 SAP SE or an SAP affiliate company. All rights reserved.
Installation Guide for Linux
SAP ASE Upgrades
10.7.4.1
Restoring Replication on Replicate Databases
Restore replication if you have upgraded a destination-only dataserver in a replication system.
Context
Perform these steps for each replicate database and Replication Server System Database (RSSD).
Procedure
1.
Start the SAP ASE server if it is not already running.
2.
Log in to the SAP ASE server.
3.
If you have zeroed out the locator for the database, go to step 4. Otherwise, stop Replication Server, then run:
1>
2>
1>
2>
use <RSSD>
go
rs_zeroltm dataserver, <database>
go
4.
Restart the Replication Servers.
5.
Resume the data server interface (DSI) connections that were suspended before the upgrade by executing
the following Replication Server command for each suspended database:
1> resume connection to dataserver.<database>
2> go
Results
The replication system is now ready for SAP ASE 16.0, and applications can resume.
If you installed any SAP ASE-related client products, such as Open Client, use the dsedit utility to edit your
interfaces file and to specify the servers to which you want to connect.
For more information about establishing client/server connections, see the Open Client Configuration Guide.
Installation Guide for Linux
SAP ASE Upgrades
© 2014 SAP SE or an SAP affiliate company. All rights reserved.
87
10.7.4.2 Restoring Replication on Primary Databases
Restore replication if you have upgraded a source database, or primary database, in a Replication Server system,
or if the destination database is also a source for other Replication Servers.
Procedure
1.
If you have zeroed out the locator for the database, go to the next step. Otherwise, stop Replication Server,
then run:
1>
2>
1>
2>
2.
use <RSSD_name>
go
rs_zeroltm dataserver, <database>
go
Log in to each replicated primary, and replicated RSSD and issue:
1> use <database>
2> go
1> dbcc settrunc ('ltm', 'valid')
2> go
3.
Restart the Replication Server.
4.
If the database is also used as an RSSD, resume the Replication Server connection to the RSSD by issuing the
following command to the Replication Server specifying the same string that was specified during the
hibernate_on command:
1> sysadmin hibernate_off, '<Replication Server>'
2> go
5.
Log in to the Replication Server, and resume the log transfer connection for each replicated primary and each
replicated RSSD:
1> resume log transfer from <server.database>
2> go
If this is a replicated RSSD, you must log in to the replicate Replication Server.
6.
If you are using Rep Agent, log in to the SAP ASE server and restart the Rep Agent:
1> use <database>
2> go
1> sp_start_rep_agent <database
>2> go
7.
88
If you are using the Log Transaction Manager, restart it.
© 2014 SAP SE or an SAP affiliate company. All rights reserved.
Installation Guide for Linux
SAP ASE Upgrades
10.8 Migrate
You can migrate from 32-bit to 64-bit versions on different computers or partitions.
To migrate SAP ASE from the 32-bit to the 64-bit version, first install and configure the 64-bit operating system.
To migrate, you can:
●
Use dump and load.
●
Use the bcp utility.
●
Replace the binary.
10.8.1 Migrating Data Using a Dump-and-Load Method
To perform migrations, back up and restore databases using the dump and load commands.
Procedure
1.
In the 32-bit SAP ASE server, run dbcc checks (checkdb, checkalloc, checkcatalog, and
checkstorage) on all databases in the 32-bit SAP ASE server to ensure they are error free.
2.
Create a 64-bit server in a new directory.
3.
Create devices and databases to match those in the 32-bit server. Make sure the <sysusages> mapping is
correct.
Note
Allow 10 percent additional space for the sybsystemprocs database.
4.
Dump the databases from the 32-bit server.
5.
Load the databases to the 64-bit server.
6.
If you have partitioned tables, update partition statistics.
7.
Run dbcc checks on the 64-bit server and make sure they run cleanly.
For information on upgrading compiled objects, see Finding Compiled Object Errors Before Production [page
100].
Installation Guide for Linux
SAP ASE Upgrades
© 2014 SAP SE or an SAP affiliate company. All rights reserved.
89
10.8.2 Using bcp to Migrate Data
If you use DDL scripts to create devices, databases, tables, rules, stored procedures, triggers, and views, you can
use bcp to migrate data from a 32-bit SAP ASE to a 64-bit SAP ASE.
Context
If you:
●
Do not have DDL scripts, use the ddlgen utility to re-create the schema for the SAP ASE you are about to
migrate. See the Utility Guide.
●
Have DDL scripts to create devices, databases, tables, rules, stored procedures, triggers, and views, you can
use bcp to move data out of the old database and into the new.
Procedure
1.
In the 32-bit SAP ASE, run dbcc checks (checkdb, checkalloc, checkcatalog, and checkstorage) on all
databases in the 32-bit SAP ASE to ensure they are error free.
2.
Use bcp to extract all the data from all the tables in the databases.
3.
Create a new 64-bit SAP ASE in a new directory.
4.
Create devices, databases, and tables.
5.
Use bcp to bulk copy data into tables.
6.
Re-create all views, triggers, and stored procedures.
7.
Run dbcc checks on the 64-bit SAP ASE server and make sure they run cleanly.
10.8.3 Migrating Data by Replacing the Binary
Migrate data from a 32-bit server to a 64-bit server by replacing the binary.
Procedure
1.
In the 32-bit SAP ASE, run dbcc checks (checkdb, checkalloc, checkcatalog, and checkstorage) on all
databases in the 32-bit SAP ASE to ensure that they are error free.
2.
Copy the files for the 64-bit SAP ASE into a new directory.
3.
Shut down the 32-bit server.
4.
Copy the interfaces file and the configuration file from the 32-bit $SYBASE directory to the 64-bit $SYBASE
directory.
90
© 2014 SAP SE or an SAP affiliate company. All rights reserved.
Installation Guide for Linux
SAP ASE Upgrades
5.
Copy the 32-bit $SYBASE/$SYBASE_ASE/install/RUN_<server> file to the equivalent 64-bit $SYBASE/
$SYBASE_ASE/install directory.
6.
Edit the RUN_server file to reflect the new location of the interfaces, configuration, and log files.
7.
Remove all references to the 32-bit $SYBASE directories from your <$PATH> definition.
8.
Change to the 64-bit $SYBASE directory and source the SYBASE.csh script (C shell).
9.
Change to the 64-bit $SYBASE/$SYBASE_ASE/bin directory and execute:
startserver -f < RUN_server>
10. After the 64-bit server starts, run installmaster, installmodel, and instmsgs.ebf.
11. If you used dbccdb for dbcc checkstorage, run installdbccdb. This re-creates tables in the dbccdb.
This may cause you to lose data.
12. Drop and re-create the compiled objects, such as stored procedures, triggers, views, and defaults.
13. If you have partitioned tables, update partition statistics.
14. Run dbcc again on all databases to verify that they run cleanly.
10.9 SAP ASE Components and Related Products
After you finish upgrading SAP ASE, upgrade its components and related products.
Refer to Using Sybase Failover in a High Availability System for instructions on how to upgrade an SAP ASE
configured with high availability.
10.9.1 Upgrading Job Scheduler
After upgrading to a new SAP ASE server, upgrade Job Scheduler.
Context
Note
You must have $SYBASE/$SYBASE_OCS/bin directory in $PATH so the isql executable is accessible. Use
isql to perform all the steps in this task.
Procedure
1.
Copy the directory services entry for JSAGENT (or jsagent) from the old server to the new server.
Installation Guide for Linux
SAP ASE Upgrades
© 2014 SAP SE or an SAP affiliate company. All rights reserved.
91
2.
Make sure the new server is running.
3.
Ensure that at least 9000 locks are configured. If the number of locks on the server is fewer than 9000,
increase it:
1> sp_configure "number of locks", 9000
2> go
4.
Before you restart the SAP ASE server and run Job Scheduler, run the installjsdb script to update Job
Scheduler tables and stored procedures:
a) Disable Job Scheduler:
1>
2>
1>
2>
sp_configure "enable job scheduler", 0
go
sybmgmtdb..sp_sjobcontrol @name=NULL, @option="stop_js"
go
b) Run the installjsdb script:
isql –Usa –Psa_password –S<servername>
–i$SYBASE/$SYBASE_ASE/scripts/installjsdb
Note
The directory with the isql executable ($SYBASE/$SYBASE_OCS/bin) must be in your path.
The installjsdb script looks for the sybmgmtdb database.
c) Enable Job Scheduler:
sp_configure "enable job scheduler", 1
d) To start Job Scheduler, either restart the server, or enter:
1>
2>
1>
2>
use sybmgmtdb
go
sp_sjobcontrol @name=NULL, @option="start_js"
go
5.
Restart the SAP ASE server if you restarted Job Scheduler manually.
6.
(Optional) Add more log space. Some 64-bit platforms require additional space for the sybmgmtdb log:
1>
2>
1>
2>
7.
use master
go
alter database sybmgmtdb LOG on sybmgmtdev=20
go
To upgrade sybmgmtdb, run the installjsdb script that is included, saving the output to a file:
isql -Usa -P<sa_password> -S<servername> -n -i$SYBASE/$SYBASE_ASE/scripts/
installjsdb
-o<output_file>
Note
When upgrading from SAP ASE version 12.5.x to 15.5 and later, increase the size of sybmgmtdb from 50MB
to at least 160MB. sybmgmtdb must have free log space of at least 60MB.
92
© 2014 SAP SE or an SAP affiliate company. All rights reserved.
Installation Guide for Linux
SAP ASE Upgrades
10.9.1.1
Upgrading Job Scheduler Templates
After upgrading to the new server, upgrade the templates and jobs created by Job Scheduler.
Context
Note
Several changes impact the Job Scheduler templates. These changes make some templates incompatible with
earlier versions of the server. The current templates are version 3.0 in the XML files.
Procedure
1.
Disable Job Scheduler.
2.
Update any environment variables, scripts, or applications that refer to the Job Scheduler directory path. The
Job Scheduler directory is under the ASE-16_0 directory, in $SYBASE/$SYBASE_ASE/jobscheduler .
Directories below jobscheduler remain the same.
3.
Copy files from the jobscheduler directory to the ASE-16_0 directory. If you are installing the new server
directories over the old server directories, the installer automatically moves your files to the new
jobscheduler directory.
4.
If you modified SAP-supplied templates, stored procedures, or XML documents, do not overlay the new
templates with your modified versions. If you do, you lose the enhancements provided by the revised
templates. Carefully merge your template changes into the SAP template files, or better yet, rename your
modified templates.
5.
You may need to make minor modifications to jobs you created from 2.0 or earlier templates. In some
templates, parameters changed from varchar(5) to int. The following table lists the templates that
changed in version 2.1 and the changes you must make to the SQL code in the jobs created from the
templates.
Table 8: Changed Job Scheduler Templates
Template
Modified Files
Datatype for <parameter> Changed
from varchar(5) to int
dump database
jst_dump_databases
@use_srvr_name
dump database
log
jst_dump_log
@truncate_flag and
@use_srvr_name
update
statistics
jst_update_statistics
@index_flag
rebuild indexes
jst_reorg_rebuild_indexes
@dump_flag
Installation Guide for Linux
SAP ASE Upgrades
© 2014 SAP SE or an SAP affiliate company. All rights reserved.
93
6.
Template
Modified Files
Datatype for <parameter> Changed
from varchar(5) to int
rebuild table
jst_reorg_rebuild_tables
@dump_flag
reclaim indexes
jst_reclaim_index_spac
@dump_flag
reclaim tables
jst_reclaim_table_space
@resume_flag
Some Job Scheduler templates have been modified to support new server functionality. These changes are
related to new parameters for specifying a partition name, or a data change value for the new server
commands that added these options. If you have jobs created from any of the enhanced templates, modify
the SQL of the jobs for the 16.0 servers.
If you have a job scheduled to run on a pre-16.0 server and you need it to also run on 16.0 servers, leave the
existing job alone and create a new job for 15.7 ESD #2 servers, as the job commands are different.
You need not modify any jobs you run on pre-16.0 servers. The following table lists the templates that
changed in version 3.0 and the changes you must make to jobs created from them.
Note
All templates listed below, except delete statistics, are incompatible with pre-15.0.1 servers. Do not
use them to create jobs that are scheduled on pre-15.0.1 servers; you must use the 2.1 or 2.2 versions for
pre-15.0.1 servers.
Table 9: Modified Job Scheduler Templates
Template
Modified File
Change Description
Job Modifications
delete
statistics
jst_delete_statistics
Added @ptn_name as
Optional.
update
statistics
jst_update_statistics
Added @ptn_name as
third parameter.
fifth parameter,
@datachg_threshold
Required. Include values
(or NULL) for new param
eters.
as the 10th parameter,
and added reference.
rebuild
indexes
jst_reorg_rebuild_indexes
Added @ndx_ptn_name
reclaim
indexes
jst_reclaim_index_space
Added @ptn_name as
reclaim
tables
jst_reclaim_table_space
Added @ptn_name as
second parameter.
Required. Include value (or
NULL) for new parameter.
multiple
jst_get_freespace ,
jst_get_usedspace
Replace reserved_pgs
No impact on job SQL.
as third parameter.
third parameter.
Required. Include value (or
NULL) for new parameter.
Required. Include value (or
NULL) for new parameter.
and data_pgs with
reserved_pages and
data_pages.
94
© 2014 SAP SE or an SAP affiliate company. All rights reserved.
Installation Guide for Linux
SAP ASE Upgrades
7.
Install the template stored procedures and and move them to the Job Scheduler template stored procedure
directory. For example:
cd $SYBASE/$SYBASE_ASE/jobscheduler/Templates/sprocs
Run the stored procedure installation script for each server being upgraded:
installTemplateProcs <<servername>> <<username>> <<password>>
Note
Upgrade template stored procedures on all Job Scheduler servers and target servers that are upgraded to
SAP ASE version 16.0. Do not install them on pre-15.5 servers.
8.
Install and move the template XML documents into the JS template XML directory. For example:
cd $SYBASE/$SYBASE_ASE/jobscheduler/Templates/xml
9.
Before running the installTemplateXml XML installation script, set the SYBASE_ASE_SA_USER
environment variable and SYBASE_ASE_SA_PWD variable in the SYBASE.csh file before running the XML
installation script:
10. Run the XML installation script on 15.0.1 servers with Job Scheduler installed:
installTemplateXml <servername> <machinename> <serverport>
<username> <password> [<language_code>]
Use "en" for the <language_code> or omit the parameter completely, as "en" is the default.
Note
Upgrade template XML documents on all Job Scheduler servers upgraded to SAP ASE version 15.0.1. Do
not install them on pre-15.0.1 servers or servers where Job Scheduler is not installed.
10.9.2 Upgrading High Availability and Cluster Support
Upgrade the cluster subsystem.
Context
SAP ASE 16.0 supports these cluster platforms for high availability:
●
HPIA – MCSG 11.18
●
IBM AIX – PowerHA 7.1
●
Sun Solaris – VCS4.0, SunCluster 3.2
●
Linux-AMD – VCS4.1
●
Win2008 R2 – Failover Cluster
Installation Guide for Linux
SAP ASE Upgrades
© 2014 SAP SE or an SAP affiliate company. All rights reserved.
95
There are two ways to upgrade a cluster subsystem:
Procedure
●
Perform a major upgrade, which involves cluster downtime, then shut down and restart all servers. You must:
a) Run sp_companion suspend, as described in Using Sybase Failover in a High Availability System.
b) Take offline the resource groups of primary and secondary companions on both nodes. Ensure that the
companion server and corresponding resource groups are not automatically brought online until the
cluster system upgrade is complete.
c) Upgrade the cluster subsystem following the instructions from the cluster system vendor. You may find
options to migrate the current resource groups to the new cluster version. If such an option is not
available (or if the resource groups get deleted or corrupted), re-create the resource groups and
configure them appropriately after you have upgraded the cluster system.
d) Bring the resource groups online. This should bring primary and secondary companions online on their
respective nodes.
e) Run sp_companion resume as described in Using Sybase Failover in a High Availability System.
●
To avoid cluster downtime, perform a minor upgrade. Nodes are failed over to other nodes and upgraded one
at a time. For example, assuming ASE1 is the primary companion on node N1, and ASE2 is secondary
companion running on node N2:
a) Upgrade the primary companion:
1.
Relocate the primary resource group to N2 or shut down ASE1. This causes ASE1 to fail over from N1
to N2.
2.
Upgrade the cluster subsystem on N1 following the upgrade instructions provided by the vendor.
3.
Fail back ASE1 from N2 to N1. See the appropriate cluster chapter in Using Sybase Failover in a High
Availability System for more details on SAP ASE failback.
b) Upgrade the secondary companion. If you are using a symmetric configuration, follow the steps in
"upgrade the primary companion," above, for ASE2.
If you are using an asymmetric configuration:
96
1.
Take the secondary resource group offline and verify that ASE2 is shut down. ASE2 is unavailable
during this upgrade.
2.
Upgrade the cluster subsystem on N2 following the upgrade instructions from the vendor.
3.
Start ASE2 by bringing the secondary resource group online to N2.
© 2014 SAP SE or an SAP affiliate company. All rights reserved.
Installation Guide for Linux
SAP ASE Upgrades
10.9.3 Upgrading Java in the Database
If Java in the database functionality is currently enabled, you must run the installpcidb script, which creates
tables and stored procedures in the sybpcidb database.
Procedure
1.
Use isql to run the installpcidb script, saving the output to an operating system file.
isql -Usa -P<<sa_password>> -S<<server_name>>
-i$SYBASE/$SYBASE_ASE/scripts/installpcidb -o<<output_file>>
2.
Enable the Java in the database functionality:
1>
2>
1>
2>
sp_configure 'enable pci', 1
go
sp_configure 'enable java', 1
go
You may need to increase 'max memory' to enable these parameters. Restart the server for changes to take
effect. You can configure the maximum size of the PCI bridge memory pool through the 'pci memory
size' configuration parameter. For more information, see Java in Adaptive Server Enterprise.
10.9.3.1 Enabling Java in the Database in a High Availability
System
You can use the Java in the database feature on a system that also uses high availability.
Context
Drop high availability companionship before installing the sybpcidb database, and reestablish companionship
afterwards.
Java in the database functionality must be either enabled or disabled on both nodes of the high availability
system.
Installation Guide for Linux
SAP ASE Upgrades
© 2014 SAP SE or an SAP affiliate company. All rights reserved.
97
10.9.4 Upgrading Backup Server
You can upgrade Backup Server at any point after you upgrade SAP ASE using similar steps. XP Server does not
have a formal upgrade process.
Procedure
1.
If you are:
Option
Description
Upgrading during the initial server installation
Select:
○
Upgrade Existing Servers when the installer prompts
○
Upgrade SAP ASE Server and Backup Servers
This launches the sqlupgrade utility. Click OK.
Upgrading after the initial installation
Start the sqlupgrade utility from the command line. Enter:
$SYBASE/$SYBASE_ASE/bin/sqlupgrade
2.
Perform the upgrade steps as prompted.
10.9.5 Upgrading Databases Using Dump and Load
When you upgrade SAP ASE, you can also upgrade databases and transaction logs from versions of SAP ASE as
early as 12.5 using the dump and load commands.
Context
Some issues of which you should be aware:
●
The upgrade process requires space for copying data and logging changes to the system tables. If the source
database in the dump was full, the upgrade process might fail. You can use alter database to extend the
free space in the event of insufficient-space errors.
●
After reloading an older dump, run sp_checkreswords from the new installation on the loaded database to
check for reserved words.
98
© 2014 SAP SE or an SAP affiliate company. All rights reserved.
Installation Guide for Linux
SAP ASE Upgrades
10.9.6 How Compiled Objects Are Handled When Upgrading
SAP ASE
SAP ASE upgrades compiled objects based on their source text.
Compiled objects include:
●
Check constraints
●
Defaults
●
Rules
●
Stored procedures (including extended stored procedures)
●
Triggers
●
Views
The source text for each compiled object is stored in the syscomments table, unless it has been manually deleted.
The upgrade process verifies the existence of the source text in syscomments. However, compiled objects are not
actually upgraded until they are invoked.
For example, if you have a user-defined stored procedure named list_proc, the presence of its source text is
verified when you upgrade. The first time list_proc is invoked after the upgrade, SAP ASE detects that the
list_proc compiled object has not been upgraded. SAP ASE recompiles list_proc, based on the source text
in syscomments. The newly compiled object is then executed.
Upgraded objects retain the same object ID and permissions.
You do not receive any notification if the compiled objects in your database dump are missing source text. After
loading a database dump, run sp_checksource to verify the existence of the source text for all compiled objects
in the database. Then, you can allow the compiled objects to be upgraded as they are executed, or you can run
dbcc upgrade_object to find potential problems and upgrade objects manually.
Compiled objects for which the source text has been hidden using sp_hidetext are upgraded in the same
manner as objects for which the source text is not hidden.
For information on sp_checksource and sp_hidetext, see Reference Manual: Procedures.
Note
If you are upgrading from a 32-bit to a 64-bit SAP ASE, the size of each 64-bit compiled object in the
sysprocedures table in each database increases by approximately 55 percent when the object is upgraded.
The preupgrade process calculates the exact size; increase your upgraded database size accordingly.
To determine whether a compiled object has been upgraded when you upgrade to a 64-bit pointer size in the
same version, look at the <sysprocedures.status> column. It contains a hexadecimal bit setting of 0x2 to
indicate that the object uses 64-bit pointers. If this bit is not set, it indicates a 32-bit object, which means it has not
been upgraded.
To ensure that compiled objects have been upgraded successfully before they are invoked, upgrade them
manually using the dbcc upgrade_object command.
Installation Guide for Linux
SAP ASE Upgrades
© 2014 SAP SE or an SAP affiliate company. All rights reserved.
99
Related Information
Postupgrade Tasks [page 83]
Restoring Functionality in SAP ASE After Upgrading [page 84]
10.9.6.1 Finding Compiled Object Errors Before Production
Use dbcc upgrade_object to identify potential problem areas that may require manual changes to achieve the
correct behavior.
After reviewing the errors and potential problem areas, and fixing those that need to be changed, use dbcc
upgrade_object to upgrade compiled objects manually instead of waiting for the server to upgrade the objects
automatically.
Problem
Description
Solution
Missing, truncated, or
corrupted source text
If the source text in syscomments has been deleted,
If:
truncated, or otherwise corrupted, dbcc
●
upgrade_object may report syntax errors.
The source text was not hid
den – use sp_helptext to
verify the completeness of
the source text.
●
Temporary table ref
erences
Reserved word errors
100
Truncation or other corrup
tion has occurred – drop and
re-create the compiled ob
ject.
If a compiled object, such as a stored procedure or
trigger refers to a temporary table (#temp
<table_name>) that was created outside the body
Create the temporary table ex
actly as expected by the com
piled object, then execute dbcc
of the object, the upgrade fails, and dbcc
upgrade_object again. Do not
upgrade_object returns an error.
do this if the compiled object is
upgraded automatically when it
is invoked.
If you load a database dump from an earlier version
of SAP ASE into version 15.7 or later and the dump
contains a stored procedure that uses a word that is
now reserved, when you run dbcc
Either manually change the ob
ject name or use quotes around
the object name, and issue the
command set quoted
upgrade_object on that stored procedure, the
identifiers on. Then drop
command returns an error.
and re-create the compiled ob
ject.
© 2014 SAP SE or an SAP affiliate company. All rights reserved.
Installation Guide for Linux
SAP ASE Upgrades
10.9.6.1.1
Quoted Identifier Errors
Quoted identifiers are not the same as literals enclosed in double quotes. The latter do not require you to perform
any special action before the upgrade.
Context
dbcc upgrade_object returns a quoted identifier error if:
●
The compiled object was created in a pre-11.9.2 version with quoted identifiers active (set quoted
identifiers on).
●
Quoted identifiers are not active (set quoted identifiers off) in the current session.
For compiled objects the upgrade process automatically activates or deactivates quoted identifiers as
appropriate.
Procedure
1.
Activate quoted identifiers before running dbcc upgrade_object.
When quoted identifiers are active, use single quotes instead of double quotes around quoted dbcc
upgrade_object keywords.
2.
If quoted identifier errors occur, use the set command to activate quoted identifiers, and then run dbcc
upgrade_object to upgrade the object.
10.9.6.1.2
Determining Whether to Change select * in Views
Determine whether columns have been added to or deleted from the table since the view was created.
Context
Perform these queries when dbcc upgrade_object reports the existence of select * in a view:
Procedure
1.
Compare the output of syscolumns for the original view to the output of the table.
Installation Guide for Linux
SAP ASE Upgrades
© 2014 SAP SE or an SAP affiliate company. All rights reserved.
101
In this example, you have the following statement:
create view all_emps as select * from employees
Caution
Do not execute a select * statement from the view. Doing so upgrades the view and overwrites the
information about the original column information in syscolumns.
2.
Before upgrading the all_emps view, use these queries to determine the number of columns in the original
view and the number of columns in the updated table:
select name from syscolumns
where id = object_id("all_emps")
select name from syscolumns
where id = object_id("employees")
3.
Compare the output of the two queries by running sp_help on both the view and the tables that comprise the
view.
This comparison works only for views, not for other compiled objects. To determine whether select *
statements in other compiled objects need to be revised, review the source text of each compiled object.
If the table contains more columns than the view, retain the preupgrade results of the select * statement.
Change the select * statement to a select statement with specific column names.
4.
102
If the view was created from multiple tables, check the columns in all tables that comprise the view and
rewrite the select statement if necessary.
© 2014 SAP SE or an SAP affiliate company. All rights reserved.
Installation Guide for Linux
SAP ASE Upgrades
11
Downgrading SAP ASE
You cannot downgrade SAP ASE version 16.0 to an earlier version of SAP ASE.
Note
Do not run the sp_downgrade system procedure. The downgrade may appear to work but does not actually
occur, and you can neither start the previous version of SAP ASE or load databases you dumped from version
16.0
Installation Guide for Linux
Downgrading SAP ASE
© 2014 SAP SE or an SAP affiliate company. All rights reserved.
103
12
Troubleshoot the Server
Determine the cause of problems and apply the recommended solution.
To determine the cause of an error, first look in the log file of the utility being used, to identify the task the utility
was performing when it failed. Then check the server error log.
This table lists possible causes and solutions for common problems that you might encounter during a first-time
installation, or an upgrade. If you continue to have problems, retry the installation or upgrade.
If the installation program or srvbuild unexpectedly quits, or if you cannot correct the problem, see the Error
Messages and Troubleshooting Guide.
Problem
Solution
The installation program
cannot start the SAP ASE
server.
●
Make sure you meet RAM requirements. If you have the required amount of
RAM, remove, then reinstall all applications to the hard drive and restart the
installation.
●
After SAP ASE is installed, there should be 25MB of free disk space left in the
disk drive. SAP ASE needs approximately 18MB to create shared memory files.
●
The SAP ASE server may not start if it cannot find a SySAM license or if the
grace period has expired. Check the SAP ASE error log for the cause of the li
cense checkout failure and fix the issues.
The installation program
cannot connect to the up
graded SAP ASE server.
12.1
Verify that the environment variables and password are correct.
Error Logs for Installation Utilities
The information in the error logs may help determine the reason and possible solutions for problems with
installation-related utility programs.
Utility
Default Location and File Name
SAP ASE Installer $SYBASE/log/ASE_Suite.log
srvbuildres
$SYBASE/$SYBASE_ASE/init/logs/srvbuild<MMDD>.<NNN>
where:
●
<MM> – is the month.
●
<DD> – is the date.
●
<NNN> – is a three-digit number identifying the srvbuild session.
sqlupgraderes ●
●
$SYBASE/$SYBASE_ASE/init/logs/sqlupgradeMMDD.NNN
$SYBASE/$SYBASE_ASE/upgrade/upgrade.NNN – is a temporary file created by the
upgrade process.
104
© 2014 SAP SE or an SAP affiliate company. All rights reserved.
Installation Guide for Linux
Troubleshoot the Server
12.2 Error Logs for SAP ASE Servers
The information in the error logs may help to determine the reason and possible solution for an error message.
Server
Default Location and File Name
SAP ASE
$SYBASE/$SYBASE_ASE/install/<servername>.log
Backup Server
$SYBASE/$SYBASE_ASE/install/<servername>.log
XP Server
$SYBASE/$SYBASE_ASE/install/<servername>.log
12.3 Troubleshooting Common Installation Problems
Identify the cause of installation problems and apply the recommended solutions.
If your installation fails, review error messages and your SAP ASE error log to determine the cause of the failure.
Problem
Resolution
Cannot use XWindows.
If the setup and configuration utilities do not show correctly, you may need to adjust the
resolution on your monitor.
To change to a smaller font size, issue the following UNIX commands:
% cd $SYBASE/ASE-16_0
% chmod +w xappdefaults
% cd xappdefaults
% chmod +w *
% foreach i(*)
? cat $i | sed -e "s/140/100/g" | sed -e "s/^#D/D/g" | sed -e
"s/^#S/S/g" > p
? mv p $i
? end
%
The installation utilities will now use approximately 25 percent less window space.
Cannot eject the CD or If you cannot eject the CD from the drive, check:
DVD from the drive.
● Whether the disk drive path is the current directory (pwd) in a UNIX terminal
window. If it is, change (cd) to another directory.
●
For sybhelp processes. If these processes exist, kill them using the UNIX kill
command.
DISPLAY environment The resolution to the DISPLAY variable problem should instruct you to open Exceed
(under Hummingbird Connectivity) and set DISPLAY equal to hostname:<b>, where
variable not set
correctly.
Installation Guide for Linux
Troubleshoot the Server
<b> is the number in the parentheses following Exceed in the Exceed window.
© 2014 SAP SE or an SAP affiliate company. All rights reserved.
105
Problem
Resolution
Client not authorized
to connect to server.
This error message means a remote machine does not have permission to display the
user interface on the local machine where you start working:
Xlib: connection to "host_name" refused by server
Xlib: Client is not authorized to connect to Server
xhost: unable to open display "host_name"
To correct the problem:
1.
Enter the following command at the UNIX prompt of your local machine, where
<remote_machine> is the machine on which you are running the installer:
xhost +<remote_machine>
2.
Address already in
use.
Restart the installer.
Enter a different port number on the srvbuild window. The command netstat -a
produces a list of port numbers in use.
SAP ASE fails to start.
The shared memory of the operating system may not be set high enough. Adjust the
shared memory value. Restart the installation or upgrade process.
The installer fails to
start.
Verify that the operating system has all the patches required by the SAP JRE.
Cannot start XP
Server.
You may receive the following message from XP Server when it is invoked by
xp_cmdshell or some other extended stored procedure:
Msg 11018, Level 16, State 1:
Procedure "xp_cmdshell", Line 2:
XP Server must be up for ESP to execute.
(return status = -6)
Verify that there is an XP Server entry in the SAP ASE sysservers table. If you created
XP Server in a different srvbuild session than SAP ASE and you did not specify a
related SAP ASE server, srvbuild cannot update the sysservers table. Verify that
the XP server exists in the interfaces file or LDAP server.
Use sp_addserver to add an entry to the sysservers table.
Troubleshooting
resource file
installations.
If you encounter problems during the build, configuration, or upgrade process while
using the srvbuild[res], sqlloc[res], or sqlupgrade[res], it may be that these
utilities did not allow enough time for a SAP ASE server to shut down properly. Set the
SYBSHUTWAIT environment variable to force the utilities to wait for the SAP ASE server
to shut down. For example, this command forces the utility to wait for two minutes
before proceeding with the next task:
% setenv SYBSHUTWAIT 120
106
© 2014 SAP SE or an SAP affiliate company. All rights reserved.
Installation Guide for Linux
Troubleshoot the Server
12.3.1 If the Installation Quits While You Are Configuring an
SAP ASE Server
Perform specific steps if the installation suddenly quits.
Procedure
1.
View the contents of the log file generated by the SAP ASE server.
2.
Take any suggested actions to correct the problem. If the installation fails after the installation program:
3.
○
Created any operating system files, such as the master device or system procedures device files, delete
those files.
○
Starts the SAP ASE server that you are attempting to install, shut down that server.
Use Server Config to restart the configuration.
12.4 Stopping a SAP ASE Server After a Failure
If the installation or upgrade session fails after you start a SAP ASE server for any reason, use the shutdown
command.
Procedure
1.
Log on as "sa".
2.
Shut down the SAP ASE server using the shutdown with nowait command. This stops the SAP ASE server
immediately, without waiting for currently executing SQL statements to finish:
1> shutdown with nowait
2> go
3.
If the installation or upgrade session fails after you start the SAP ASE server, try using SAP Control Center to
shut down the server. If SAP Control Center cannot shut down the server, use the shutdown command.
Installation Guide for Linux
Troubleshoot the Server
© 2014 SAP SE or an SAP affiliate company. All rights reserved.
107
12.5 If SAP ASE Fails the Preupgrade Eligibility Test
Examine the log file to determine why SAP ASE is ineligible for an upgrade.
Context
If SAP ASE fails the preupgrade test, Server Config displays:
Server <SERVER_NAME> failed preupgrade eligibility test. See log for more information.
Procedure
1.
From the Upgrade window, select Exit.
2.
Examine the log file in $SYBASE/$SYBASE_ASE/init/logs.
After you resolve any problems, shut down the SAP ASE server and use sqlupgrade to complete the
upgrade session.
12.6 When an Upgrade Fails
If the upgrade process fails, the installation program displays error messages.
Once you start SAP ASE on the new version, you cannot start SAP ASE on the earlier version. Attempts to do so
result in having to restore from backups.
12.6.1
If You Can Identify the Cause of the Upgrade Failure
If the error logs or messages clearly indicate the cause of failure, and you are confident that your databases have
not been damaged, you can attempt to fix the problem and immediately re-run the upgrade.
Context
If the upgrade process fails again and you cannot determine the cause of failure, check the error log file to find out
when and where the upgrade failed, and contact SAP Product Support.
By default, the log file is located in $SYBASE/$SYBASE_ASE/install/<<servername>>log.
108
© 2014 SAP SE or an SAP affiliate company. All rights reserved.
Installation Guide for Linux
Troubleshoot the Server
Procedure
1.
Exit the sqlupgrade program.
2.
Perform the necessary actions to fix the problem.
For example, if the error log indicates that the upgrade failed because your existing databases do not contain
enough space, use the alter database command to increase the available space.
3.
If needed, shut down the SAP ASE server.
Shutting down the server enables the installation program to start the server and re-run the upgrade session.
4.
Start sqlupgrade again.
5.
Select Upgrade SAP ASE, and proceed with the upgrade.
12.6.2 Restoring Databases After a Failed Upgrade
You may need to restore your databases due to a failed upgrade.
Procedure
●
If you think the upgrade failure or its cause may have damaged your databases, restore the databases from
backups. For information about restoring databases, see the System Administration Guide.
●
If you are concerned about the possible corruption of your databases, exit Server Config, but do not
attempt to restart the upgrade session until you have restored the databases from backup. After restoration
is complete, retry the upgrade.
12.6.3 Recovering from a Failed Upgrade
Upgrade issues may be due to a failure to upgrade an individual database, or a failure to complete configuration
changes after all databases have been upgraded.
Context
Use the output from the upgrade utility to correct the problem that caused the failure.
Installation Guide for Linux
Troubleshoot the Server
© 2014 SAP SE or an SAP affiliate company. All rights reserved.
109
Procedure
●
If the upgrade failed because the process ran out of some resource, such as data or log space, locks, or
auxiliary scan descriptors, add space to the database using the alter database command.
You may also correct other resource failures by changing the server’s configuration using the sp_configure
stored procedure.
●
If an upgrade failure leaves a database offline, and the failure can be corrected only by making data changes in
the database, you can gain access to the failed database by using isql or a similar program to connect to the
affected server as user "sa" and issuing this command:
dbcc traceon(990)
Having set this trace flag, user "sa" can now use the offline database and make the necessary changes to
correct the upgrade failure.
Note
This trace flag grants access only to user "sa"; "sa_role" does not work. If you have disabled the "sa" login,
reenable it to get access using this method.
To restart a server that has not successfully upgraded, use:
online database <failed_db_name>
The server restarts that database’s upgrade from the point of failure.
●
If the failure occurs after all databases have been upgraded, or if a failure somehow causes the upgrade utility
to fail, manually re-run the utility. After you diagnose and correct the failure, run the upgrade utility:
$SYBASE/$SYBASE_ASE/upgrade/upgrade
When restarted in this way, the upgrade process says it is "verifying" the upgrade rather than "starting" it, but
it makes all the same checks as for the original upgrade.
●
To verify that a database has upgraded successfully, check any database’s upgrade status using the online
database command. If any upgrade is required for a database, this command performs it. You may also use
a procedure such as this to check all databases at a given installation:
declare @dbname varchar(255)
select @dbname = min(name)
from master..sysdatabases
while @dbname is not null
begin
online database @dbname
select @dbname = min(name)
from master..sysdatabases
where name > @dbname
end
●
Reinstall system stored procedures using the scripts from the new version:
isql -Usa -P<password> -i $SYBASE/$SYBASE_ASE/scripts/installmaster
110
© 2014 SAP SE or an SAP affiliate company. All rights reserved.
Installation Guide for Linux
Troubleshoot the Server
Note
When a server fails during an upgrade process, it attempts to upgrade the databases when it restarts.
When the installation is fully recovered, re-run the upgrade utility to ensure that all postupgrade
configuration work is done. Then reinstall the system stored procedures.
●
During the upgrade process, the log may become too full due to recorded catalog changes. If so, log in to the
new server using isql, and issue:
isql> dump tran <dbname> with truncate_only
a) If truncate_only indicates that it cannot truncate the log, retry the command as no_log instead.
b) If this does not truncate the log successfully, use the alter database command to extend the database
as explained below.
●
In some cases, preupgrade space estimations are insufficient for the data copy phase of upgrade. You see a
message that there is insufficient space in the system segment for the upgrade. When this happens, the
upgrade process stops responding, waiting for space to be provided. To increase the size of the database, log
in to the new server using isql, and use alter database:
isql> alter database <dbname> on <device_name> = "<2>m"
alter database allows you to specify the size to alter the database with the unit specifier "m", or "M".
Note
There are certain upgrade failures from which the server cannot recover. For example, attempts to
upgrade system tables to version 15.x are quite sensitive to failures at certain points during the required
changes. If you encounter such a failure, restore the failed database from backup. To prevent the upgrade
from failing again, correct the problem that caused the original failure before issuing the online
database command for that database. These catastrophic failures are nearly always caused by running
out of resources, as described above, which then causes a failure to undo the aborted transaction.
12.6.4 If You Cannot Identify the Cause of an Upgrade Failure
Your attempts to upgrade may continue to fail.
Procedure
1.
If attempts to upgrade continue to fail, check the error log file to identify where and where the upgrade failed.
By default, the log file is located in $SYBASE/$SYBASE_ASE/install/<servername>.log.
2.
Contact Product Support with the information.
Installation Guide for Linux
Troubleshoot the Server
© 2014 SAP SE or an SAP affiliate company. All rights reserved.
111
13
®
[conref] ASE Installation Guide
®
SAP Adaptive Server Enterprise is a high-performance relational database management system for missioncritical, data-intensive environments. It ensures highest operational efficiency and throughput on a broad range of
platforms.
This installation guide includes information on system requirements, planning the installation, installing ASE,
post-installation tasks, upgrades, and downgrades.
112
© 2014 SAP SE or an SAP affiliate company. All rights reserved.
Installation Guide for Linux
[conref] ASE Installation Guide
Important Disclaimers and Legal Information
Coding Samples
Any software coding and/or code lines / strings ("Code") included in this documentation are only examples and are not intended to be used in a productive system
environment. The Code is only intended to better explain and visualize the syntax and phrasing rules of certain coding. SAP does not warrant the correctness and
completeness of the Code given herein, and SAP shall not be liable for errors or damages caused by the usage of the Code, unless damages were caused by SAP
intentionally or by SAP's gross negligence.
Accessibility
The information contained in the SAP documentation represents SAP's current view of accessibility criteria as of the date of publication; it is in no way intended to be a
binding guideline on how to ensure accessibility of software products. SAP in particular disclaims any liability in relation to this document. This disclaimer, however, does
not apply in cases of wilful misconduct or gross negligence of SAP. Furthermore, this document does not result in any direct or indirect contractual obligations of SAP.
Gender-Neutral Language
As far as possible, SAP documentation is gender neutral. Depending on the context, the reader is addressed directly with "you", or a gender-neutral noun (such as "sales
person" or "working days") is used. If when referring to members of both sexes, however, the third-person singular cannot be avoided or a gender-neutral noun does not
exist, SAP reserves the right to use the masculine form of the noun and pronoun. This is to ensure that the documentation remains comprehensible.
Internet Hyperlinks
The SAP documentation may contain hyperlinks to the Internet. These hyperlinks are intended to serve as a hint about where to find related information. SAP does not
warrant the availability and correctness of this related information or the ability of this information to serve a particular purpose. SAP shall not be liable for any damages
caused by the use of related information unless damages have been caused by SAP's gross negligence or willful misconduct. All links are categorized for transparency
(see: http://help.sap.com/disclaimer).
Installation Guide for Linux
Important Disclaimers and Legal Information
© 2014 SAP SE or an SAP affiliate company. All rights reserved.
113
www.sap.com/contactsap
© 2014 SAP SE or an SAP affiliate company. All rights reserved.
No part of this publication may be reproduced or transmitted in any
form or for any purpose without the express permission of SAP SE
or an SAP affiliate company. The information contained herein may
be changed without prior notice.
Some software products marketed by SAP SE and its distributors
contain proprietary software components of other software
vendors. National product specifications may vary.
These materials are provided by SAP SE or an SAP affiliate company
for informational purposes only, without representation or warranty
of any kind, and SAP or its affiliated companies shall not be liable for
errors or omissions with respect to the materials. The only
warranties for SAP or SAP affiliate company products and services
are those that are set forth in the express warranty statements
accompanying such products and services, if any. Nothing herein
should be construed as constituting an additional warranty.
SAP and other SAP products and services mentioned herein as well
as their respective logos are trademarks or registered trademarks
of SAP SE (or an SAP affiliate company) in Germany and other
countries. All other product and service names mentioned are the
trademarks of their respective companies.
Please see http://www.sap.com/corporate-en/legal/copyright/
index.epx for additional trademark information and notices.