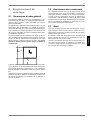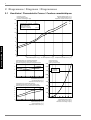
1
Luft/WasserWärmepumpe für Innenaufstellung Installation and Operating Instructions English Instructions d’installation et d’utilisation Français Montage- und Gebrauchsanweisung Air-to-Water Heat Pump for Indoor Installation Bestell-Nr. / Order no. / No de commande : 452160.66.01 Deutsch LIK 8TE Pompe à chaleur air-eau pour installation intérieure FD 8806 Inhaltsverzeichnis Bitte sofort lesen .......................................................................................................................... D-2 1.1 1.2 1.3 1.4 2 Wichtige Hinweise ..................................................................................................................................D-2 Bestimmungsgemäßer Gebrauch...........................................................................................................D-2 Gesetzliche Vorschriften und Richtlinien ................................................................................................D-2 Energiesparende Handhabung der Wärmepumpe .................................................................................D-2 Verwendungszweck der Wärmepumpe ...................................................................................... D-3 2.1 Anwendungsbereich ...............................................................................................................................D-3 2.2 Arbeitsweise ...........................................................................................................................................D-3 3 Lieferumfang................................................................................................................................. D-3 3.1 Grundgerät..............................................................................................................................................D-3 3.2 Schaltkasten ...........................................................................................................................................D-4 3.3 Beipack ...................................................................................................................................................D-4 4 Transport....................................................................................................................................... D-4 5 Aufstellung.................................................................................................................................... D-5 5.1 Allgemein ................................................................................................................................................D-5 5.2 Kondensatleitung ....................................................................................................................................D-5 5.3 Schall ......................................................................................................................................................D-5 6 Montage......................................................................................................................................... D-5 6.1 6.2 6.3 6.4 7 Allgemein ................................................................................................................................................D-5 Luftanschluss..........................................................................................................................................D-5 Heizungsseitiger Anschluss....................................................................................................................D-6 Elektrischer Anschluss............................................................................................................................D-7 Inbetriebnahme............................................................................................................................. D-7 7.1 Allgemein ................................................................................................................................................D-7 7.2 Vorbereitung ...........................................................................................................................................D-7 7.3 Vorgehensweise bei Inbetriebnahme .....................................................................................................D-7 8 Reinigung / Pflege ........................................................................................................................ D-8 8.1 Pflege......................................................................................................................................................D-8 8.2 Reinigung Heizungsseite ........................................................................................................................D-8 8.3 Reinigung Luftseite .................................................................................................................................D-9 9 Störungen / Fehlersuche ............................................................................................................. D-9 10 Außerbetriebnahme / Entsorgung .............................................................................................. D-9 11 Geräteinformation ...................................................................................................................... D-10 12 Garantieurkunde......................................................................................................................... D-11 Anhang / Appendix / Annexes ............................................................................................................ A-I www.dimplex.de D-1 Deutsch 1 1 1 Bitte sofort lesen 1.1 Wichtige Hinweise Deutsch ACHTUNG! Das Gerät ist nicht für Frequenzumrichterbetrieb geeignet. 1.2 Bestimmungsgemäßer Gebrauch Dieses Gerät ist nur für den vom Hersteller vorgesehenen Verwendungszweck freigegeben. Ein anderer oder darüber hinaus gehender Gebrauch gilt als nicht bestimmungsgemäß. Dazu zählt auch die Beachtung der zugehörigen Produktschriften. Änderungen oder Umbauten am Gerät sind zu unterlassen. ACHTUNG! Die Wärmepumpe darf beim Transport nur bis zu einer Neigung von 45° (in jeder Richtung) gekippt werden. ACHTUNG! Die Wärmepumpe und der Holzrost sind nur durch die Verpackungsfolie verbunden. ACHTUNG! Vor der Inbetriebnahme ist die Transportsicherung zu entfernen. ACHTUNG! Der Ansaug- und Ausblasbereich darf nicht eingeengt oder zugestellt werden. ACHTUNG! Bei großvolumigen Heizkreisen muss das eingebaute Ausdehnungsgefäß (24 Liter, 1,0 bar Vordruck) durch ein weiteres ergänzt werden. ACHTUNG! Rechtsdrehfeld beachten: Bei Betrieb mit falscher Drehrichtung des Verdichters, kann es zu Verdichterschäden kommen. ACHTUNG! Verwenden Sie nie sand-, soda-, säure- oder chloridhaltige Putzmittel, da diese die Oberfläche angreifen. ACHTUNG! Zur Vermeidung von Ablagerungen (z.B. Rost) im Kondensator der Wärmepumpe wird empfohlen, ein geeignetes Korrosionsschutzsystem einzusetzen. ACHTUNG! Vor Öffnen des Gerätes ist sicherzustellen, dass alle Stromkreise spannungsfrei geschaltet sind. ACHTUNG! Arbeiten an der Wärmepumpe dürfen nur vom autorisierten und fachkundigen Kundendienst durchgeführt werden. 1.3 Gesetzliche Vorschriften und Richtlinien Bei der Konstruktion und Ausführung der Wärmepumpe wurden alle entsprechenden EG-Richtlinien, DIN- und VDE-Vorschriften eingehalten (siehe CE-Konformitätserklärung). Beim elektrischen Anschluss der Wärmepumpe sind die entsprechenden VDE-, EN- und IEC-Normen einzuhalten. Außerdem müssen die Anschlussbedingungen der Energie-Versorgungsunternehmen beachtet werden. Beim Anschließen der Heizungsanlage sind die einschlägigen Vorschriften einzuhalten. Personen, insbesondere Kinder, die aufgrund ihrer physischen, sensorischen oder geistigen Fähigkeiten oder ihrer Unerfahrenheit oder Unkenntnis nicht in der Lage sind, das Gerät sicher zu benutzen, sollten dieses Gerät nicht ohne Aufsicht oder Anweisung durch eine verantwortliche Person benutzen. Kinder sollten beaufsichtigt werden, um sicher zu stellen, dass sie nicht mit dem Gerät spielen. 1.4 Energiesparende Handhabung der Wärmepumpe Mit dem Kauf dieser Wärmepumpe tragen Sie zur Schonung der Umwelt bei. Die Voraussetzung für eine energiesparende Betriebsweise ist die richtige Auslegung der Wärmequellen- und Wärmenutzungsanlage. Besonders wichtig für die Effektivität einer Wärmepumpe ist es, die Temperaturdifferenz zwischen Heizwasser und Wärmequelle möglichst gering zu halten. Deshalb ist eine sorgfältige Auslegung der Wärmequelle und der Heizungsanlage dringend anzuraten. Eine um ein Kelvin (ein °C) höhere Temperaturdifferenz führt zu einer Steigerung des Stromverbrauches von ca. 2,5 %. Es ist darauf zu achten, dass bei der Auslegung der Heizanlage auch Sonderverbraucher, wie z.B. die Warmwasserbereitung berücksichtigt und für niedrige Temperaturen dimensioniert werden. Eine Fußbodenheizung (Flächenheizung) ist durch niedrige Vorlauftemperaturen (30 °C bis 40 °C) optimal für den Einsatz einer Wärmepumpe geeignet. Während des Betriebes ist es wichtig, dass keine Verunreinigungen der Wärmetauscher auftreten, weil dadurch die Temperaturdifferenz erhöht und damit die Leistungszahl verschlechtert wird. Einen beträchtlichen Beitrag zur energiesparenden Handhabung leistet auch der Wärmepumpenregler bei richtiger Einstellung. Weitere Hinweise dazu sind der Gebrauchsanweisung des Wärmepumpenreglers zu entnehmen. In der Wärmepumpe ist eine Überströmmöglichkeit vorgesehen, um zu geringe Wasserdurchsätze in der Wärmepumpe zu verhindern. Der eingebaute Pufferspeicher erhöht die Wassermenge im Heizkreislauf und gewährleistet eine zuverlässige Abtauung. D-2 3.1 Verwendungszweck der Wärmepumpe 2.1 Anwendungsbereich Die Luft/Wasser-Wärmepumpe ist ausschließlich für die Erwärmung von Heizungswasser vorgesehen.Sie kann in vorhandenen oder neu zu errichtenden Heizungsanlagen eingesetzt werden. Die Wärmepumpe ist für den monoenergetischen und bivalenten Betrieb bis -25 °C Luftaußentemperatur geeignet. Im Dauerlauf ist eine Temperatur des Heizwasserrücklaufs von mehr als 18 °C einzuhalten, um ein einwandfreies Abtauen des Verdampfers zu gewährleisten. 3 Lieferumfang 3.1 Grundgerät Die Wärmepumpe wird in Kompaktbauweise geliefert und enthält bereits wichtige Baugruppen des Heizungskreislaufs: Ausdehnungsgefäß Heizungsumwälzpumpe Überstromventil und Sicherheitsbaugruppe (Überdruckventil, Manometer) Der Kältekreis ist "hermetisch geschlossen" und enthält das vom Kyoto-Protokoll erfasste fluorierte Kältemittel R404A mit einem GWP-Wert von 3260. Es ist FCKW-frei, baut kein Ozon ab und ist nicht brennbar. Die Wärmepumpe ist nicht ausgelegt für den erhöhten Wärmebedarf während der Bauaustrocknung, deshalb muss der zusätzliche Wärmebedarf mit speziellen, bauseitigen Geräten erfolgen. Für eine Bauaustrocknung im Herbst oder Winter empfiehlt es sich einen zusätzlichen Elektroheizstab (als Zubehör erhältlich) zu installieren. ACHTUNG! Das Gerät ist nicht für Frequenzumrichterbetrieb geeignet. 2.2 Arbeitsweise Außenluft wird vom Ventilator angesaugt und über den Verdampfer (Wärmetauscher) geleitet. Der Verdampfer kühlt die Luft ab, d.h. er entzieht ihr Wärme. Die gewonnene Wärme wird im Verdampfer auf das Arbeitsmedium (Kältemittel) übertragen. Mit Hilfe eines elektrisch angetriebenen Verdichters wird die aufgenommene Wärme durch Druckerhöhung auf ein höheres Temperaturniveau "gepumpt" und über den Verflüssiger (Wärmeaustauscher) an das Heizwasser abgegeben. Dabei wird die elektrische Energie eingesetzt, um die Wärme der Umwelt auf ein höheres Temperaturniveau anzuheben. Da die der Luft entzogene Energie auf das Heizwasser übertragen wird, bezeichnet man dieses Gerät als Luft/Wasser-Wärmepumpe. Die Luft/Wasser-Wärmepumpe besteht aus den Hauptbauteilen Verdampfer, Ventilator und Expansionsventil, sowie dem geräuscharmen Verdichter, dem Verflüssiger und der elektrischen Steuerung. Bei tiefen Umgebungstemperaturen lagert sich Luftfeuchtigkeit als Reif auf dem Verdampfer an und verschlechtert die Wärmeübertragung. Der Verdampfer wird durch die Wärmepumpe nach Bedarf automatisch abgetaut. Je nach Witterung können dabei Dampfschwaden am Luftausblas entstehen. 1) Verdampfer 2) Ventilator 3) Ausdehnungsgefäß 24 l 4) Schaltkasten 5) Verflüssiger 6) Verdichter 7) Überströmventil 8) Heizungsumwälzpumpe 9) Pufferspeicher 10) Filtertrockner 11) Schauglas 12) Expansionsventil www.dimplex.de D-3 Deutsch 2 3.2 3.2 Schaltkasten Der Schaltkasten befindet sich in der Wärmepumpe. Er ist nach Abnahme der unteren Frontabdeckung zugänglich. Deutsch Im Schaltkasten befinden sich die Netzanschlussklemmen, sowie die Leistungsschütze, die Sanftanlauf-Einheit und der Wärmepumpenmanager. Der Wärmepumpenmanager ist ein komfortables elektronisches Regel- und Steuergerät. Er steuert und überwacht die gesamte Heizungsanlage in Abhängigkeit von der Außentemperatur, die Warmwasserbereitung und die sicherheitstechnischen Einrichtungen. Der bauseits anzubringende Außentemperaturfühler incl. Befestigungsmaterial liegt dem Regler bei. Funktionsweise und Handhabung des Wärmepumpenmanagers sind in der beiliegenden Gebrauchsanweisung beschrieben. 3.3 Beipack Inhalt: 2x Ringdichtung für Kanalanschluss 3x 3x 6x 1x 1x Anschlussschlauch 1" Doppelnippel 1" Flachdichtung 1" Stopfen 1" Schlauchtülle Füll- und Entleerungshahn 2x 2x 2x 4x Befestigungswinkel Dübel 10 mm SHR 8x80 SHR M4x8 1x 1x 1x Außenfühler Dübel 6 mm SHR 4,5x50 4 ACHTUNG! Die Wärmepumpe und der Holzrost sind nur durch die Verpackungsfolie verbunden. Zur Nutzung der Transportbohrungen im Rahmen ist es zweckmäßig die jeweiligen Fassadierungsteile abzunehmen. Dazu werden jeweils zwei Schrauben am Sockel gelöst und die Bleche durch Zurückziehen, oben ausgehängt. Beim Einhängen der Blechteile sollten diese mit leichtem Druck nach oben geschoben werden. Transport ACHTUNG! Die Wärmepumpe darf beim Transport nur bis zu einer Neigung von 45° (in jeder Richtung) gekippt werden. Der Transport zum endgültigen Aufstellungsort sollte mit Holzrost erfolgen. Das Grundgerät bietet einerseits die Transportmöglichkeit mit Hubwagen, Sackkarre o.ä., oder mittels 3/4" Rohren, die durch Bohrungen in der Grundplatte, bzw. im Rahmen geführt werden. Öffnen des Deckels Schließen des Deckels Nach dem Transport ist die Transportsicherung im Gerät am Boden beidseitig zu entfernen. 7UDQVSRUWVLFKHUXQJ HQWIHUQHQHLQVFKUDXEHQ ACHTUNG! Vor der Inbetriebnahme ist die Transportsicherung zu entfernen. D-4 6.2 5.1 Aufstellung Allgemein 6 Montage 6.1 Die Wärmepumpe ist für die Eckaufstellung konzipiert. In Verbindung mit einem Luftkanal (als Zubehör erhältlich) an der Ausblasseite sind auch andere Aufstellungen möglich. Das Gerät ist grundsätzlich in Innenräumen auf einer ebenen, glatten und waagrechten Fläche aufzustellen. Dabei sollte der Rahmen rundum dicht am Boden anliegen, um eine geeignete Schallabdichtung zu gewährleisten. Ist dies nicht der Fall, können zusätzliche schalldämmende Maßnahmen notwendig werden. Die Wärmepumpe muss so aufgestellt sein, dass Wartungsarbeiten problemlos durchgeführt werden können. Dies ist gewährleistet, wenn ein Abstand von je 1 m an der Frontseite und links der Wärmepumpe, eingehalten wird. Die Seitenteile dürfen nicht durch Anschlussleitungen verdeckt sein. Allgemein An der Wärmepumpe sind folgende Anschlüsse herzustellen: Zu-/Abluft Deutsch 5 Vor-/Rückläufe der Heizungsanlage Kondensatablauf Ablauf des Überdruckventiles Stromversorgung 6.2 Luftanschluss ACHTUNG! Der Ansaug- und Ausblasbereich darf nicht eingeengt oder zugestellt werden. Die Ansaugöffnung des Gerätes ist ausschließlich zum direkten Anschluss an einen Mauerdurchbruch konzipiert. Dazu kann der Mauerdurchbruch, wie im Anhang unter Einbaumaße abgebildet, mit Luftkanal und Dichtmanschette vorbereitet werden. P Die als Zubehör angebotenen Luftkanäle aus Glasfaserleichtbeton sind feuchtigkeitsbeständig und diffusionsoffen. P Das Gerät sollte nie in Räumen mit hoher Luftfeuchtigkeit aufgestellt werden. Bei Luftfeuchtigkeiten von über 50 % und Außentemperaturen unter 0 °C kann an der Wärmepumpe und der Luftführung Kondensat entstehen. Die Dichtmanschette wird zur Abdichtung der Luftkanäle an der Wärmepumpe verwendet. Die Luftkanäle selbst werden nicht direkt mit der Wärmepumpe verschraubt. Im betriebsfertigen Zustand berührt lediglich der Dichtgummi die Wärmepumpe. Dadurch ist zum einen eine leichte Montage und Demontage der Wärmepumpe gewährleistet, zum anderen wird eine gute Körperschallentkopplung erreicht. Bei Installation der Wärmepumpe in einem Obergeschoss, ist die Tragfähigkeit der Decke zu prüfen und aus akustischen Gründen die Schwingungsentkopplung sehr sorgfältig zu planen. Eine Aufstellung auf einer Holzdecke ist abzulehnen. 5.2 Kondensatleitung Das im Betrieb anfallende Kondensatwasser muss frostfrei abgeleitet werden. Um einen einwandfreien Abfluss zu gewährleisten, muss die Wärmepumpe waagerecht stehen. Das Kondensatwasserrohr muss mindestens einen Durchmesser von 50 mm haben und sollte frostsicher in den Abwasserkanal geführt werden. Kondensat nicht direkt in Klärbecken und Gruben einleiten, da die aggresiven Dämpfe den Verdampfer zerstören können. 5.3 Schall Ansonsten ist darauf zu achten, dass der Mauerdurchbruch auf der Innenseite zwingend mit einer Kälteisolierung verkleidet wird, um eine Auskühlung bzw. Durchfeuchtung des Mauerwerks zu verhindern. Das beiliegende Befestigungsmaterial kann zur Fixierung an der Wand verwendet werden. Um Körperschallübertragungen ins Heizsystem zu vermeiden, muss die Wärmepumpe schwingungsgedämpft mit dem Heizsystem verbunden werden (mitgelieferte Schlauchanschlüsse spannungsfrei montieren). Evtl. verwendete Luftkanäle sind schalltechnisch von der Wärmepumpe zu entkoppeln, um eine Körperschallübertragung auf die Kanäle zu vermeiden. Bei direktem Anschluss beider Luftöffnungen an einem Wanddurchbruch, kann der Ventilator von Dreieck- auf Stern-Schaltung umgeklemmt werden (siehe dazu Hinweise im Klemmkasten des Ventilators). www.dimplex.de D-5 6.3 6.3 [ Heizungsseitiger Anschluss Zum Anschluss an das Heizsystem liegen der Wärmepumpe flexible Schlauchanschlussstücke und Doppelnippel mit 1" Außengewinde bei. Dadurch ist wahlweise eine gewindedichtende oder flachdichtende Verbindung zum Heizsystem möglich. Ist keine Warmwassererwärmung durch die Wärmepumpe vorgesehen, so ist der Warmwasserausgang durch den beiliegenden Dichtstopfen dauerhaft abzudichten. 0[ Deutsch Bevor die heizwasserseitigen Anschlüsse der Wärmepumpe erfolgen, muss die Heizungsanlage gespült werden, um eventuell vorhandene Verunreinigungen, Reste von Dichtmaterial oder ähnliches, zu entfernen. Ein Ansammeln von Rückständen im Verflüssiger kann zum Totalausfall der Wärmepumpe führen. Die Ausblasseite kann wahlweise direkt an einem Mauerdurchbruch oder an einem längeren Kanal (Zubehör) montiert werden. Dabei ist wie für die Ansaugseite beschrieben zu verfahren. Bei der Verwendung eines angeflanschten Luftkanales an der Ausblasseite wird dieser mit 4 Sechskantschrauben M8x16 an den vorgesehenen Gewindelöchern befestigt. Dabei ist zu beachten, dass der Luftkanalstutzen nur mit der Isolierung und nicht mit dem Außenblech in Berührung kommt. Für Anlagen mit absperrbarem Heizwasserdurchfluss, bedingt durch Heizkörper- bzw. Thermostatventile, ist ein Überströmventil eingebaut. Dies sichert einen Mindestheizwasserdurchfluss durch die Wärmepumpe und verhindert Störungen. Nach erstellter heizungsseitiger Installation ist die Heizungsanlage zu füllen, zu entlüften und abzudrücken. Das integrierte Ausdehnungsgefäß hat ein Volumen von 24 Liter. Dieses Volumen ist geeignet für Gebäude mit einer beheizten Wohnfläche bis maximal 200 m². Eine Überprüfung des Volumens ist durch den Anlagenplaner durchzuführen. Gegebenenfalls ist ein weiteres Ausdehnungsgefäß zu installieren (nach DIN 4751 Teil 1). Tabellen in Herstellerkatalogen vereinfachen die Auslegung nach Wasserinhalt der Anlage. Für die Berechnung ist das Pufferspeichervolumen von 80 Litern zu berücksichtigen. ACHTUNG! 0 [ Bei großvolumigen Heizkreisen muss das eingebaute Ausdehnungsgefäß (24 Liter, 1,0 bar Vordruck) durch ein weiteres ergänzt werden. PD[ Frostschutz PLQ Es sind die in der Skizze genannten Außen- sowie Innenmaße einzuhalten. Zusätzlich ist auf geeignete Schwingungsentkopplung und Kanalisolation zu achten. D-6 Bei Wärmepumpen, die frostgefährdet aufgestellt sind, sollte eine manuelle Entleerung (siehe Bild) vorgesehen werden. Sofern Regler und Heizungsumwälzpumpe betriebsbereit sind, arbeitet die Frostschutzfunktion des Reglers. Bei Außerbetriebnahme der Wärmepumpe oder Stromausfall ist die Anlage zu entleeren. Bei Wärmepumpenanlagen, an denen ein Stromausfall nicht erkannt werden kann (Ferienhaus), ist der Heizungskreis mit seinem geeigneten Frostschutz zu betreiben. 7.3 Elektrischer Anschluss Die Leistungsversorgung und Steuerspannung werden handelsübliche Leitungen zugeführt (Last: 4-adrig, Steuerung: 3-adrig). In der Leistungsversorgung ist eine allpolige Abschaltung mit mindestens 3 mm Kontaktöffnungsabstand (z.B. EVU-Sperrschütz, Leistungsschütz), sowie ein 3-poliger Sicherungsautomat, mit gemeinsamer Auslösung aller Außenleiter, vorzusehen (Auslösestrom gemäß Geräteinformation). Beim Anschließen ist das Rechtsdrehfeld der Lasteinspeisung sicherzustellen L1; L2; L3. ACHTUNG! Rechtsdrehfeld beachten: Bei Betrieb mit falscher Drehrichtung des Verdichters, kann es zu Verdichterschäden kommen. Die Steuerspannung muss mit 10 A abgesichert werden. Detaillierte Informationen siehe Anhang Stromlaufpläne. 7 7.1 Inbetriebnahme Allgemein Um eine ordnungsgemäße Inbetriebnahme zu gewährleisten, sollte diese von einem vom Werk autorisierten Kundendienst durchgeführt werden. Unter bestimmten Bedingungen ist damit eine Verlängerung der Gewährleistung verbunden (vgl. Garantieleistung). 7.2 Vorbereitung Vor der Inbetriebnahme müssen folgende Punkte geprüft werden: Alle Anschlüsse der Wärmepumpe müssen wie in Kapitel 6 beschrieben montiert sein. Im Heizkreislauf müssen alle Schieber, die den korrekten Fluss des Heizwassers behindern könnten, geöffnet sein. Der Luftansaug-/-ausblasweg muss frei sein. Die Drehrichtung des Ventilators muss der Pfeilrichtung entsprechen. Der Wärmepumpenregler muss gemäß seiner Gebrauchsanweisung auf die Heizungsanlage abgestimmt sein. Der Kondensatablauf muss sichergestellt sein. Der Ablauf des Heizwasserüberdruckventils muss sichergestellt werden. Entlüftung der Heizungsanlage: Es ist sicherzustellen, dass alle Heizkreise offen sind, die Heizungsumwälzpumpe muss in Betrieb (Stufe III) sein. Wärmepumpenregler unter Spannung setzen. Betriebsart zweiten Wärmeerzeuger wählen, System an höchster Stelle entlüften, ggf. Wasser nachfüllen (statischen Mindestdruck einhalten). 7.3 Vorgehensweise bei Inbetriebnahme Die Inbetriebnahme der Wärmepumpe erfolgt über den Wärmepumpenregler. Die Einstellungen müssen gemäß dessen Anleitung vollzogen werden. Die Leistungsstufe der Umwälzpumpe ist auf die Heizungsanlage abzustimmen. Die Einstellung des Überströmventiles ist an die Heizungsanlage anzupassen. Eine falsche Einstellung kann zu verschiedenen Fehlerbildern und einem erhöhten elektrischen Energiebedarf führen. Um das Überströmventil richtig einzustellen, empfehlen wir folgende Vorgehensweise: Schließen Sie alle Heizkreise, die auch im Betrieb je nach Nutzung geschlossen sein können, so dass der vom Wasserdurchsatz ungünstigste Betriebszustand vorliegt. Dies sind in der Regel die Heizkreise der Räume auf der Süd- und Westseite. Mindestens ein Heizkreis muss geöffnet bleiben (z.B. Bad). Das Überströmventil ist so weit zu öffnen, dass sich bei der aktuellen Wärmequellentemperatur die in der nachstehenden Tabelle angegebene maximale Temperaturspreizung zwischen Heizungsvor- und Rücklauf ergibt. Die Temperaturspreizung ist möglichst nahe an der Wärmepumpe zu messen. Bei monoenergetischen Anlagen ist der Heizstab zu deaktivieren. www.dimplex.de D-7 Deutsch 6.4 8 Wärmequellentemperatur bis -20 °C -15 °C 4K -14 °C -10 °C 5K -9 °C -5 °C 6K -4 °C 0 °C 7K 1 °C 5 °C 8K 6 °C 10 °C 9K 11 °C 15 °C 10 K 16 °C 20 °C 11 K 21 °C 25 °C 12 K 26 °C 30 °C 13 K 31 °C 35 °C 14 K Deutsch von max. Temperaturspreizung zwischen Heizungsvor- und Rücklauf Störungen während des Betriebes werden ebenfalls am Wärmepumpenregler angezeigt und können, wie in der Gebrauchsanweisung des Wärmepumpenreglers beschrieben ist, behoben werden. Bei Außentemperaturen kleiner 10 °C und Heizwassertemperaturen kleiner als 16 °C ist der Pufferspeicher mit dem zweiten Wärmeerzeuger auf mindestens 25 °C aufzuheizen. Folgender Ablauf ist einzuhalten um die Inbetriebnahme störungsfrei zu realisieren: 1) Alle Heizkreise schließen. 2) Überströmventil ganz öffnen. 3) Am Regler Betriebsart Automatik wählen. 4) Warten bis Pufferspeicher eine Temperatur von mindestens 25 °C erreicht hat. 5) Anschließend werden die Schieber der Heizkreise nacheinander wieder langsam geöffnet und zwar so, dass der Heizwasserdurchsatz durch leichtes Öffnen des betreffenden Heizungskreis stetig erhöht wird. Die Heizwassertemperatur im Pufferspeicher darf dabei nicht unter 20 °C absinken, um jederzeit eine Abtauung der Wärmepumpe zu ermöglichen. 6) Wenn alle Heizkreise voll geöffnet sind und eine Heizwassertemperatur im Pufferspeicher von ca. 20 °C gehalten wird, ist die Mindestvolumenstrommenge am Überströmventil und Heizungsumwälzpumpe einzustellen. 7) Neubauten haben wegen der zur Bauaustrocknung benötigten Energie einen erhöhten Wärmebedarf. Dieser erhöhte Wärmebedarf kann dazu führen, dass knapp dimensionierte Heizanlagen die gewünschte Wohnraumtemperatur nicht jederzeit erreichen. Es wird deshalb empfohlen, in diesem Fall den zweiten Wärmeerzeuger in der ersten Heizperiode in Betriebsbereitschaft zu halten. Dazu ist die Grenztemperatur am Wärmepumpenregler auf 15 °C hochzustellen. 8 Reinigung / Pflege 8.1 Pflege Vermeiden Sie zum Schutz des Lackes das Anlehnen und Ablegen von Gegenständen am und auf dem Gerät. Die Außenteile der Wärmepumpe können mit einem feuchten Tuch und mit handelsüblichen Reinigern abgewischt werden. ACHTUNG! Verwenden Sie nie sand-, soda-, säure- oder chloridhaltige Putzmittel, da diese die Oberfläche angreifen. Um Störungen durch Schmutzablagerungen im Wärmeaustauscher der Wärmepumpe zu vermeiden, ist dafür zu sorgen, dass der Wärmeaustauscher in der Heizungsanlage nicht verschmutzen kann. Zum Schutz des Verdampfers ist im Ansaugkanal ein Vogelschutzgitter mit mindestens 80 % freien Querschnitt empfohlen. Sollte es dennoch zu Betriebsstörungen wegen Verschmutzungen kommen, ist die Anlage wie unten angegeben zu reinigen. 8.2 Reinigung Heizungsseite Sauerstoff kann im Heizwasserkreis, insbesondere bei Verwendung von Stahlkomponenten, Oxidationsprodukte (Rost) bilden. Diese gelangen über Ventile, Umwälzpumpen oder Kunststoffrohre in das Heizsystem. Deshalb sollte besonders bei den Rohren der Fußbodenheizung auf eine diffusionsdichte Installation geachtet werden. ACHTUNG! Zur Vermeidung von Ablagerungen (z.B. Rost) im Kondensator der Wärmepumpe wird empfohlen, ein geeignetes Korrosionsschutzsystem einzusetzen. Auch Reste von Schmier- und Dichtmitteln können das Heizwasser verschmutzen. Sind die Verschmutzungen so stark, dass sich die Leistungsfähigkeit des Verflüssigers in der Wärmepumpe verringert, muss ein Installateur die Anlage reinigen. Nach heutigem Kenntnisstand schlagen wir vor, die Reinigung mit einer 5%-igen Phosphorsäure oder, falls häufiger gereinigt werden muss, mit einer 5%-igen Ameisensäure durchzuführen. In beiden Fällen sollte die Reinigungsflüssigkeit Raumtemperatur haben. Es ist empfehlenswert, den Wärmeaustauscher entgegen der normalen Durchflußrichtung zu spülen. Um zu verhindern, dass säurehaltiges Reinigungsmittel in den Heizungsanlagenkreislauf gelangt, empfehlen wir, das Spülgerät direkt an den Vor- und Rücklauf des Verflüssigers der Wärmepumpe anzuschließen. Danach muss mit geeigneten neutralisierenden Mitteln gründlich nachgespült werden, um Beschädigungen durch eventuell im System verbliebene Reinigungsmittelreste zu verhindern. Die Säuren sind mit Vorsicht anzuwenden und es sind die Vorschriften der Berufsgenossenschaften einzuhalten. Im Zweifelsfall ist mit dem Hersteller des Reinigungsmittels Rücksprache zu halten! Die Entwässerung des Pufferspeichers erfolgt über den Füll- und Entleerungshahn links unten am Gerät. Zusätzlich muss der Kugelhahn am Druckausdehnungsgefäß geöffnet werden, um die Luftzufuhr in den Pufferspeicher zu ermöglichen. D-8 10 Reinigung Luftseite Luftkanäle, Verdampfer, Lüfter und Kondensatablauf sind vor der Heizperiode von Verunreinigungen (Blätter, Zweige usw.) zu reinigen. Dazu ist die Wärmepumpe an der linken Seite und Frontseite zuerst unten und dann oben zu öffnen. ACHTUNG! Vor Öffnen des Gerätes ist sicherzustellen, dass alle Stromkreise spannungsfrei geschaltet sind. Das Abnehmen und Einhängen der Fassadierungsteile erfolgt wie in Kapitel 4 beschrieben. Die Verwendung von scharfen und harten Gegenständen ist bei der Reinigung zu vermeiden, um eine Beschädigung am Verdampfer und der Kondensatwanne zu verhindern. 9 Störungen / Fehlersuche Diese Wärmepumpe ist ein Qualitätsprodukt und sollte störungsund wartungsfrei arbeiten. Tritt dennoch einmal eine Störung auf, wird diese im Display des Wärmepumpenmanagers angezeigt. Schlagen Sie dazu auf der Seite Störungen und Fehlersuche in der Gebrauchsanweisung des Wärmepumpenmanagers nach. Wenn die Störung nicht selbst behoben werden kann, verständigen Sie bitte den zuständigen Kundendienst. ACHTUNG! Arbeiten an der Wärmepumpe dürfen nur vom autorisierten und fachkundigen Kundendienst durchgeführt werden. 10 Außerbetriebnahme / Entsorgung Bevor die Wärmepumpe ausgebaut wird, ist die Maschine spannungsfrei zu schalten und abzuschiebern. Umweltrelevante Anforderungen, in Bezug auf Rückgewinnung, Wiederverwendung und Entsorgung von Betriebsstoffen und Bauteilen gemäß den gängigen Normen, sind einzuhalten. Dabei ist besonders Wert auf eine fachgerechte Entsorgung des Kältemittels und Kälteöles zu legen. www.dimplex.de D-9 Deutsch 8.3 11 11 Geräteinformation 1 Typ- und Verkaufsbezeichnung LIK 8TE Deutsch 2 Bauform 2.1 Ausführung 2.2 Schutzart nach EN 60 529 für Kompaktgerät bzw. Heizteil IP 20 2.3 Aufstellungsort Innen 3 Leistungsangaben 3.1 Temperatur-Betriebseinsatzgrenzen: Kompakt Heizwasser-Vorlauf / -Rücklauf °C / °C Luft bis 58 / ab 18 °C -25 bis +35 3.2 Heizwasser-Temperaturspreizung bei A7 / W35 3.3 Wärmeleistung / Leistungszahl bei A-7 / W35 1 kW / --- bei A-7 / W45 1 kW / --- bei A2 / W35 1 kW / --- 7,5 / 3,3 7,4 / 3,2 kW / --- 9,3 / 3,9 9,2 / 3,8 bei A7 / W35 1 bei A7 / W45 1 bei A10 / W35 10,0 5,0 5,8 / 2,7 5,5 / 2,6 5,4 / 2,1 8,8 / 3,2 kW / --1 kW / --- 9,8 / 4,1 9,7 / 4,0 3.4 Schall-Leistungspegel Gerät / Aussen dB(A) 3.5 Schall-Druckpegel in 1m Entfernung (Innen) dB(A) 3.6 Heizwasserdurchfluss bei interner Druckdifferenz 2 m³/h / Pa 3.7 Freie Pressung Heizungsumwälzpumpe (max. Stufe) Pa 45000,0 3.8 Luftdurchsatz bei externer statischer Druckdifferenz m³/h / Pa 2500 / 20 3.9 Kältemittel; Gesamt-Füllgewicht Typ / kg 3.10 Schmiermittel; Gesamt-Füllmenge Typ / Liter 3.11 Leistung Elektroheizstab (2. Wärmeerzeuger) kW 53 / 60 48,0 0,8 / 2700 1,6 / 11900 R404A / 2,0 Polyolester (POE) / 1,5 2,0 4 Abmessungen, Anschlüsse und Gewicht 4.1 Geräteabmessungen H x B x L cm 4.2 Geräteanschlüsse für Heizung Zoll G 1'' a 4.3 Luftkanal-Eintritt u. -Austritt (Innenabmessungen min.) L x B cm 44 x 44 4.4 Gewicht der Transporteinheit(en) incl. Verpackung kg 4.5 Inhalt Pufferspeicher l 50 4.6 Nenndruck Pufferspeicher bar 6 5 Elektrischer Anschluss 190 x 75 x 68 264 5.1 Nennspannung; Absicherung 5.2 Nennaufnahme 1 V/A 5.3 Anlaufstrom m. Sanftanlasser A 5.4 Nennstrom A2 W35 / cos M A / --- 6 Entspricht den europäischen Sicherheitsbestimmungen 7 Sonstige Ausführungsmerkmale 7.1 Abtauung automatisch Abtauart Kreislaufumkehr A2 W35 kW Abtauwanne vorhanden 7.2 Heizwasser im Gerät gegen Einfrieren geschützt 7.3 Leistungsstufen 7.4 Regler intern / extern 400 / 16 2,27 2,33 19,5 4,1 / 0,8 4,2 / 0,8 3 ja (beheizt) 4 ja 1 intern 1. Diese Angaben charakterisieren die Größe und die Leistungsfähigkeit der Anlage. Für wirtschaftliche und energetische Betrachtungen sind weitere Einflussgrößen, insbesondere Abtauverhalten, Bivalenzpunkt und Regelung zu berücksichtigen. Dabei bedeuten z.B. A2 / W55: Außentemperatur 2 °C und Heizwasser-Vorlauftemperatur 55 °C. 2. Die Heizungsumwälzpumpe ist integriert. 3. siehe CE-Konformitätserklärung 4. Die Heizungs-Umwälzpumpe und der Regler der Wärmepumpe müssen immer betriebsbereit sein. D-10 12 Garantieurkunde Die nachstehenden Bedingungen, die Voraussetzungen und Umfang unserer Garantieleistung umschreiben, lassen die Gewährleistungsverpflichtungen des Verkäufers aus dem Kaufvertrag mit dem Endabnehmer unberührt. Für die Geräte leisten wir Garantie gemäß nachstehenden Bedingungen: Wir beheben unentgeltlich nach Maßgabe der folgenden Bedingungen Mängel am Gerät, die nachweislich auf einem Materialund/oder Herstellungsfehler beruhen, wenn sie uns unverzüglich nach Feststellung und innerhalb von 24 Monaten nach Lieferung an den Erstendabnehmer gemeldet werden. Bei gewerblichem Gebrauch innerhalb von 12 Monaten. Zeigt sich der Mangel innerhalb von 6 Monaten ab Lieferung und liegt eine erfolgreiche Inbetriebnahme (Heizungs-Wärmepumpe und zentrale Wohnungslüftungsgeräte) durch den autorisierten SystemtechnikKundendienst vor, wird vermutet, dass es sich um einen Material- oder Herstellungsfehler handelt. Dieses Gerät fällt nur dann unter diese Garantie, wenn es von einem Unternehmer in einem der Mitgliedstaaten der Europäischen Union gekauft wurde, es bei Auftreten des Mangels in Deutschland betrieben wird und Garantieleistungen auch in Deutschland erbracht werden können. Die Behebung der von uns als garantiepflichtig anerkannter Mängel geschieht dadurch, dass die mangelhaften Teile unentgeltlich nach unserer Wahl instandgesetzt oder durch einwandfreie Teile ersetzt werden. Durch Art oder Ort des Einsatzes des Gerätes oder schlechte Zugänglichkeit des Gerätes bedingte außergewöhnliche Kosten der Mängelbeseitigung werden nicht übernommen. Der freie Gerätezugang muss durch den Endabnehmer gestellt werden. Ausgebaute Teile, die wir zurücknehmen, gehen in unser Eigentum über. Die Garantiezeit für Nachbesserungen und Ersatzteile endet mit dem Ablauf der ursprünglichen Garantiezeit für das Gerät. Die Garantie erstreckt sich nicht auf leicht zerbrechliche Teile, die den Wert oder die Gebrauchstauglichkeit des Gerätes nur unwesentlich beeinträchtigen. Es ist jeweils der Original-Kaufbeleg mit Kauf- und/ oder Lieferdatum vorzulegen. Eine Garantieleistung entfällt, wenn vom Endabnehmer oder einem Dritten die entsprechenden VDE-Vorschriften, die Bestimmungen der örtlichen Versorgungsunternehmen oder unsere Montage- und Gebrauchsanweisung sowie die in den Projektierungsunterlagen enthaltenen Hinweise oder Einbindungsschemen nicht beachtet worden sind oder wenn unser funktionsnotwendiges Zubehör nicht eingesetzt wurde. Durch etwa seitens des Endabnehmers oder Dritter unsachgemäß vorgenommenen Änderungen und Arbeiten, wird die Haftung für die daraus entstehenden Folgen aufgehoben. Die Garantie erstreckt sich auf das Gerät und vom Lieferer bezogene Teile. Nicht vom Lieferer bezogene Teile und Geräte-/Anlagenmängel die auf nicht vom Lieferer bezogene Teile zurückzuführen sind fallen nicht unter den Garantieanspruch. Eine Verlängerung der Garantie auf 36 Monate für HeizungsWärmepumpen und zentrale Wohnungslüftungsgeräte ab Inbetriebnahmedatum, jedoch maximal 38 Monate ab Auslieferung Werk, wird gemäß den nachfolgenden Bedingungen gewährt: Voraussetzung für die Übernahme der verlängerten Garantie ist eine kostenpflichtige Inbetriebnahme durch den autorisierten Systemtechnik-Kundendienst mit Inbetriebnahmeprotokoll innerhalb einer Betriebszeit (Verdichterlaufzeit) von weniger als 150 Stunden. Im Inbetriebnahmeprotokoll vermerkte Mängel sind unverzüglich zu beseitigen. Dies ist Grundlage für die Garantie. Das Inbetriebnahmeprotokoll ist, innerhalb von einem Monat nach erfolgter Inbetriebnahme, an die unten angegebene Adresse einzureichen, von welcher auch die Garantiezeitverlängerung bestätigt wird. Die Inbetriebnahmepauschale beinhaltet die eigentliche Inbetriebnahme und die Fahrtkosten. Es wird keine Haftung für die ordnungsgemäße Planung, Dimensionierung und Ausführung der Gesamtanlage übernommen. Die Behebung von Anlagenmängel und Wartezeiten sind Sonderleistungen. Die Inbetriebnahmepauschale für alle Heizungs-Wärmepumpen von derzeit netto Euro 340,-- und für zentrale Lüftungsanlagen von netto Euro 400,--, jeweils je Gerät, wird durch den autorisierten Systemtechnik-Kundendienst dem Auftraggeber in Rechnung gestellt. Eine Preisanpassung ist vorbehalten. Im Kundendienstfalle wird der autorisierte Systemtechnik-Kundendienst vor Ort informiert, der für eine schnelle Abhilfe des Problems sorgt. Den für Ihre Region zuständigen autorisierten Systemtechnik-Kundendienst erfahren Sie über die zentrale Servicehotline der Glen Dimplex Deutschland GmbH. Glen Dimplex Deutschland GmbH Geschäftsbereich Dimplex Kundendienst Systemtechnik Am Goldenen Feld 18 95326 Kulmbach Tel.-Nr.: Fax.-Nr.: E-Mail-Adresse: Internet: +49 (0) 9221 709 562 +49 (0) 9221 709 565 [email protected] [email protected] www.dimplex.de Für die Auftragsbearbeitung werden die Erzeugnisnummer E-Nr. und das Fertigungsdatum FD des Gerätes benötigt. Diese Angaben befinden sich auf dem Typschild in dem stark umrandeten Feld. Kundendienstadresse: Sofern der Mangel nicht beseitigt werden kann, oder die Nachbesserung von uns abgelehnt oder unzumutbar verzögert wird, wird der Hersteller entweder kostenfreien Ersatz liefern oder den Minderwert vergüten. Im Falle einer Ersatzlieferung, behalten wir uns die Geltendmachung einer angemessenen Nutzungsanrechnung, für die bisherige Nutzungszeit, vor. Weitergehende oder andere Ansprüche, insbesondere solche auf Ersatz außerhalb des Gerätes entstandener Schäden sind soweit eine Haftung nicht zwingend gesetzlich angeordnet ist ausgeschlossen. Bei einer Haftung nach § 478 BGB wird die Haftung des Lieferers auf die Servicepauschalen des Lieferers als Höchstbetrag beschränkt. www.dimplex.de D-11 Deutsch 12 Table of contents 1 Please Read Immediately............................................................................................................. E-2 1.1 1.2 1.3 1.4 2 Important Information:.............................................................................................................................E-2 Intended Use...........................................................................................................................................E-2 Legal Regulations and Directives ...........................................................................................................E-2 Energy-Efficient Use of the Heat Pump ..................................................................................................E-2 Purpose of the Heat Pump ........................................................................................................... E-3 English 2.1 Application ..............................................................................................................................................E-3 2.2 Operating Principle .................................................................................................................................E-3 3 Scope of Delivery.......................................................................................................................... E-3 3.1 Basic Device ...........................................................................................................................................E-3 3.2 Switch Box ..............................................................................................................................................E-4 3.3 Accessories Pack....................................................................................................................................E-4 4 Transport ....................................................................................................................................... E-4 5 Set-UP ............................................................................................................................................ E-5 5.1 General Information ................................................................................................................................E-5 5.2 Condensed Water Pipe...........................................................................................................................E-5 5.3 Sound......................................................................................................................................................E-5 6 Installation ..................................................................................................................................... E-5 6.1 6.2 6.3 6.4 7 General Information ................................................................................................................................E-5 Air Connection ........................................................................................................................................E-5 Heating System Connection ...................................................................................................................E-6 Electrical Connection ..............................................................................................................................E-6 Start-UP ......................................................................................................................................... E-7 7.1 General Information ................................................................................................................................E-7 7.2 Preparation .............................................................................................................................................E-7 7.3 Start-Up Procedure .................................................................................................................................E-7 8 Maintenance / Cleaning ................................................................................................................ E-8 8.1 Maintenance ...........................................................................................................................................E-8 8.2 Cleaning the Heating System .................................................................................................................E-8 8.3 Cleaning the Air System .........................................................................................................................E-8 9 Faults / Trouble-Shooting ............................................................................................................ E-8 10 Decommissioning/Disposal ......................................................................................................... E-8 11 Device Information ....................................................................................................................... E-9 Anhang / Appendix / Annexes............................................................................................................. A-I E-1 1.4 Please Read Immediately 1.1 Important Information: ATTENTION! The device is not suitable for operation with a frequency converter. 1.2 This device is only intended for use as specified by the manufacturer. Any other use beyond that intended by the manufacturer is prohibited. This requires the user to abide by the manufacturers product information. Please refrain from tampering with or altering the device. 1.3 ATTENTION! When transporting the heat pump, ensure that it is not tilted more than 45° (in any direction). ATTENTION! The heat pump and the wooden pallet are only joined by the packing film. ATTENTION! The transport securing device is to be removed prior to commissioning. ATTENTION! Do not restrict or block the area around the air intake or outlet. ATTENTION! In the case of large-volume heating circuits, an additional expansion vessel must be used to supplement the installed expansion vessel (24 litres, 1.0 bar admission pressure). ATTENTION! Ensure that there is a clockwise rotating field: Operating the compressor in the wrong rotational direction could cause damage to the compressor. ATTENTION! Never use cleaning agents containing sand, soda, acid or chloride as these can damage the surfaces. ATTENTION! We recommend the installation of a suitable corrosion protection system to prevent the formation of deposits (e.g. rust) in the condenser of the heat pump. ATTENTION! Before opening the device, ensure that all circuits are isolated from the power supply. ATTENTION! Work on the heat pump may only be carried out by authorised and qualified after-sales service technicians. Intended Use Legal Regulations and Directives The construction and design of the heat pump complies with all relevant EU directives, DIN/VDE regulations (see CE declaration of conformity). When connecting the heat pump to the power supply, the relevant VDE, EN and IEC standards are to be fulfilled. Any further connection requirements stipulated by local utility companies must also be observed. When connecting the heating system, all applicable regulations must also be adhered to. Persons, especially children, who are not capable of operating the device safely due to their physical, sensory or mental abilities or their inexperience or lack of knowledge, must not operate this device without supervision or instruction by the person in charge. Children must be supervised to ensure that they do not play with the device. 1.4 Energy-Efficient Use of the Heat Pump With the purchase of this heat pump you are helping to protect the environment. A prerequisite for energy-efficient operation is the correct design of the heat source system and heating system (radiators and circulation pump). It is particularly important for the efficiency of a heat pump to keep the temperature difference between heating water and heat source as small as possible. For this reason, it is advisable to design the heat source and heating system very carefully. A temperature difference of approx. one Kelvin (1 °C) increases the power consumption by around 2.5 %. When designing the heating system, it should be borne in mind that special consumers such as e.g. hot water preparation should also be considered and dimensioned for low temperatures. Underfloor heating systems (panel heating) are optimally suited for heat pump use on account of the low flow temperatures (30 °C to 40 °C). It is important to ensure that the heat exchangers are not contaminated during operation because this increases the temperature difference, in turn reducing the COP. Correct adjustment of the heat pump controller is also important for energy-efficient use of the heat pump. Further information can be found in the heat pump controller's operating instructions. The heat pump is equipped with an overflow mechanism to prevent very low flow rates in the heat pump. The installed buffer tank increases the amount of water in the heating circuit and guarantees reliable defrosting. www.dimplex.de E-2 English 1 2 2 Purpose of the Heat Pump 2.1 Application The air-to-water heat pump is to be used exclusively for the heating of heating water. It can be used in newly built or previously existing heating systems. The heat pump is suitable for mono energy and bivalent operation down to an external temperature of -25 °C. English Proper defrosting of the evaporator is guaranteed by maintaining a heating water return flow temperature of more than 18 °C during continuous operation. 3 Scope of Delivery 3.1 Basic Device The compact heat pump is supplied complete with all of the important components of the heating circulation system: Expansion vessel Heat circulating pump Overflow valve and safety components (pressure relief valve, pressure gauge) The refrigerant circuit is hermetically sealed. It contains the Kyoto protocol approved refrigerant R404A with a GWP value of 3260. It is CFC-free, does not deplete ozone and is non-flammable. The heat pump is not designed for the increased heat consumption required when a building is being dried out. The additional heat consumption should be met using special devices provided by the customer. If a building is to be dried out in autumn or winter, we recommend installing an additional heating element (available as an accessory). ATTENTION! The device is not suitable for operation with a frequency converter. 2.2 Operating Principle Outside air is drawn in by the ventilator and fed via the evaporator (heat exchanger). The evaporator cools the air, i.e. it extracts heat from it. This extracted heat is then transferred to the working medium (refrigerant) in the evaporator. The heat is “pumped” to a higher temperature level by increasing its pressure with the aid of an electrically driven compressor. It is then transferred to the heating water using the liquifier (heat exchanger). Electrical energy is used to raise the temperature of the heat in the environment to a higher level. Because the energy extracted from the air is transferred to the heating water, this type of device is called an air-to-water heat pump. The air-to-water heat pump consists of the main components evaporator, ventilator and expansion valve, as well as the lownoise compressor, liquifier and electrical control system. At low ambient temperatures, humidity accumulates on the evaporator in the form of frost reducing the transfer of heat. The evaporator is defrosted automatically by the heat pump as required. Steam may be emitted from the air outlet depending on the atmospheric conditions. 1) Evaporator 2) Ventilator 3) 24 l expansion vessel 4) Switch box 5) Liquifier 6) Compressor 7) Overflow valve 8) Heat circulating pump 9) Buffer tank 10) Filter dryer 11) Inspection window 12) Expansion valve E-3 4 3.2 Switch Box The switch box is located in the heat pump. It can be accessed by removing the lower front cover. The switch box contains the supply connection terminals, as well the power contactors, the soft starter unit and the heat pump manager. Before using the holes in the frame, it is advisable to remove each of the side panel assemblies. This is done by loosening each of the two screws at the base and then withdrawing the panels by unhooking them from above. Rehang the panels by gently pushing them in an upwards direction. The heat pump manager is a convenient electronic regulation and control device. 3.3 Accessories Pack Contents: 2 Sealing rings for duct connection 3 3 6 1 1 1" connecting hoses 1" double nipples 1" flat gaskets 1" sealing plug Hose nozzle for filling and drain cock 2 2 2 4 Fixing brackets 10-mm dowels 8 x 80 screws M4 x 8 screws 1 1 1 External sensor 6-mm dowels 4.5 x 50 screws 4 English The enclosed operating instructions describe the function and use of the heat pump manager. Opening the cover ATTENTION! After the transport, the transport securing device is to be removed on either side at the bottom of the unit. 5HPRYHVFUHZLQ WUDQVSRUWORFN Transport When transporting the heat pump, ensure that it is not tilted more than 45° (in any direction). Closing the cover ATTENTION! The transport securing device is to be removed prior to commissioning. Use a wooden pallet for transporting the heat pump to the final installation location. The basic device can be transported with a lift truck, hand truck or by means of 3/4" pipes fed through the holes in the base plate or frame. ATTENTION! The heat pump and the wooden pallet are only joined by the packing film. www.dimplex.de E-4 5 5 5.1 Set-UP 6 General Information The heat pump is designed for installation in a corner. Other installation locations are also possible in combination with an air duct (available as an accessory) on the air outlet side. The unit must be installed indoors on a level, smooth and horizontal surface. The entire base of the frame should lie directly on the floor to ensure a good soundproof seal. If this is not the case, additional sound insulation measures may be necessary. English The heat pump must be installed so that maintenance work can be carried out without being hindered. This can be ensured by maintaining a clearance of 1 m in front and to the left of the heat pump. The side panel assemblies must not be covered by connecting pipes. Installation 6.1 General Information The following connections need to be established on the heat pump: Fresh and exhaust air Flow and return flow of the heating system Condensate outflow Outflow for the pressure relief valve Power supply 6.2 Air Connection ATTENTION! Do not restrict or block the area around the air intake or outlet. The air intake opening of the device is solely designed for direct connection to a wall opening. The wall opening can be provided with air duct and sealing collar for this purpose. See the illustration in the appendix under Installation Dimensions. P The glass fibre reinforced concrete air ducts offered as accessories are moisture-resistant and diffusion-free. P Never install the device in rooms subject to high humidity. Condensation can form on the heat pump and air circuit if the humidity exceeds 50 % and the external temperature is below 0 °C. The sealing collar is used to seal the air ducts on the heat pump. The air ducts are not screwed directly onto the heat pump. Only the rubber seal comes into direct contact with the heat pump when the system is installed correctly. This guarantees easy assembly and disassembly of the heat pump and also ensures that solid-borne sound is well insulated. If the heat pump is installed on an upper storey, the load-bearing capacity of the ceiling should be checked. On account of the acoustics, measures for isolating possible vibrations should also be very carefully planned in advance as well. Installation on a wooden floor is not recommended. 5.2 Condensed Water Pipe Condensed water that forms during operation must be drained off frost-free. The heat pump must be mounted on a level plane to guarantee proper drainage. The condensed water pipe must have a minimum diameter of 50 mm and should be fed frost-free into a sewer. Condensate should not be discharged directly into clearing tanks and cesspits because the aggressive vapours could destroy the evaporator. 5.3 Sound To prevent solid-borne sound from being transmitted to the heating system, a vibration-damped connection should be used for connecting the heat pump with the heating system (install the supplied hose connections free of strain). Installed air ducts should be sound-isolated from the heat pump to prevent the transmission of solid-borne sound to the ducts. If both air openings are connected directly to a wall opening, the ventilator terminals can be reversed from a delta to a star connection (see information in the ventilator terminal box). E-5 It must also be ensured that the interior side of the wall opening is lined with thermal insulation to prevent the wall from becoming cold and to prevent moisture from penetrating the wall. The enclosed fixing accessories can be used for attachment to the wall. 6.4 An overflow valve is installed in the device for systems in which the heating water flow can be shut off via the radiator or thermostat valves. This ensures a minimum heating water flow rate through the heat pump and helps to avoid faults. [ 0[ Once the heating system has been installed, it must be filled, deaerated and pressure-tested. The volume should be checked by the heating system engineer. If necessary, an additional expansion vessel must be installed (according to DIN 4751, Part 1). The tables listed in the manufacturers' catalogues simplify dimensioning the system on the basis of the water content. Allow for a buffer tank volume of 80 litres when making the calculation. ATTENTION! The air outlet can be optionally mounted directly to a wall opening or to a longer duct (available as an accessory). Use the same mounting procedure as for the air inlet. If a flange-mounted air duct is used on the air outlet side, it is secured with 4 M8 x 16 hexagon bolts in the threaded holes provided. When doing this, ensure that the air duct stubs only touch the insulation. There should be no contact with the external sheeting. In the case of large-volume heating circuits, an additional expansion vessel must be used to supplement the installed expansion vessel (24 litres, 1.0 bar admission pressure). Antifreeze A method of manual drainage (see illustration) should be provided for heat pumps which are exposed to frost. The antifreeze function of the heat pump controller is active whenever the controller and the heat circulating pumps are ready for operation. If the heat pump is taken out of service or in the event of a power failure, the system has to be drained. The heating circuit should be operated with a suitable antifreeze if heat pump systems are implemented in buildings where a power failure can not be detected (holiday home). PD[ 0 [ PLQ Observe the external and internal dimensions as specified in the figure. Also ensure that the vibration and duct isolation are adequate. 6.3 Heating System Connection To enable connection to the heating system, flexible hose connection pieces and double nipples with a 1" external thread are included with the heat pump. These allow the optional use of a threaded or flat gasket connection to the heating system. If the heat pump is not intended to be used to heat up the hot water, the hot water output must be permanently sealed using the supplied sealing plug. Before connecting the heating water system to the heat pump, the heating system must be flushed to remove any impurities, residue from sealants, etc. Any accumulation of deposits in the liquifier could cause the heat pump to completely break down. www.dimplex.de 6.4 Electrical Connection The power supply and control voltage are supplied using standard cables (load: 4-core, control: 3-core). An all-pole disconnecting device with a contact gap of at least 3 mm (e.g. utility blocking contactor or power contactor) as well as a 3-pole circuit breaker with common tripping for all external conductors must be installed in the power supply (tripping current in compliance with the Device Information). Ensure that the incoming supply has a clockwise rotating field when connecting multiphase devices L1; L2; L3. ATTENTION! Ensure that there is a clockwise rotating field: Operating the compressor in the wrong rotational direction could cause damage to the compressor. The control voltage must be protected by a 10 A fuse. For detailed information, see Circuit Diagrams in the Appendix. E-6 English The integrated expansion vessel has a volume of 24 litres. This volume is suitable for buildings with a living space area to be heated of maximum 200 m². 7 7 7.1 Start-UP Heat source temperature General Information To ensure that start-up is performed correctly, it should only be carried out by an after-sales service technician authorised by the manufacturer. This may be a condition for extending the guarantee (see Warranty Service). 7.2 Preparation The following items need to be checked prior to start-up: Max. temperature spread between heating flow and return flow From To -20 °C -15 °C 4K -14 °C -10 °C 5K -9 °C -5 °C 6K -4 °C 0 °C 7K 1 °C 5 °C 8K 6 °C 10 °C 9K 11 °C 15 °C 10 K 16 °C 20 °C 11 K English All of the heat pump connections must be established as described in Chapter 6. 21 °C 25 °C 12 K 26 °C 30 °C 13 K All valves that could impair the proper flow of the heating water in the heating circuit must be open. 31 °C 35 °C 14 K The air intake and air outlet paths must be clear. The ventilator must turn in the direction indicated by the arrow. The heat pump controller must be adapted to the heating system in accordance with the controller's operating instructions. Any faults occurring during operation are also displayed on the heat pump controller and can be corrected as described in the operating instructions of the heat pump controller. For external temperatures below 10 °C and heating water temperatures below 16 °C, the buffer tank should be heated up with the 2nd heat generator to at least 25 °C. Observe the following procedure to implement a smooth start-up: Ensure the condensate outflow functions. 1) Close all of the heating circuits. The outflow from the heating water pressure relief valve must also function correctly. 2) Fully open the overflow valve. 3) Use the controller to select the automatic operating mode. 4) Wait until the buffer tank has reached a temperature of at least 25 °C. 5) Now slowly reopen the heating circuit valves in succession so that the heating water throughput is constantly raised by slightly opening the respective heating circuit. The heating water temperature in the buffer tank must not be allowed to drop below 20 °C during this process. This ensures that the heat pump can be defrosted at any time. 6) Set the minimum volume flow quantity on the overflow valve and heat circulating pump when all heating circuits are fully open and a heating water temperature in the buffer tank of approx. 20 °C is maintained. 7) New buildings have an increased heat consumption on account of the energy required to dry them out. This increased heat consumption means that marginally dimensioned heating systems can not always achieve the desired room temperature. In such cases, we recommend keeping a 2nd heat generator on standby during the first heating period. The limit temperature on the heat pump controller should also be turned up to 15 °C. De-aeration of the heating system: Ensure that all heating circuits are open and the heat circulating pump is operating (level III). Connect the voltage to the heat pump controller. Select the heat generator 2 operating mode and de-aerate the system at its highest point. Top up with water if required (maintain static minimum pressure). 7.3 Start-Up Procedure The heat pump is started up via the heat pump controller. Adjustments should be made in compliance with the instructions. The performance level of the circulating pump must be adapted to the respective heating system. The overflow valve must be adjusted to the requirements of the respective heating system. Incorrect adjustment can lead to faulty operation and increased energy consumption. We recommend carrying out the following procedure to correctly adjust the overflow valve: Close all of the heating circuits that may also be closed during operation (depending on the type of heat pump usage) so that the most unfavourable operating state - with respect to the water flow rate - is achieved. This normally means the heating circuits of the rooms on the south and west sides of the building. At least one heating circuit must remain open (e.g. bathroom). The overflow valve should be opened far enough to produce the maximum temperature spread between the heating flow and return flow listed in the following table for the current heat source temperature. The temperature spread should be measured as close as possible to the heat pump. The heating element of mono energy systems should be disconnected. E-7 10 Maintenance / Cleaning 8.1 Maintenance To protect the paintwork, avoid leaning or putting objects on the device. External heat pump parts can be wiped with a damp cloth and domestic cleaner. ATTENTION! Never use cleaning agents containing sand, soda, acid or chloride as these can damage the surfaces. To prevent faults due to sediment in the heat exchanger of the heat pump, ensure that the heat exchanger in the heating system can not be contaminated. We recommend protecting the evaporator by installing a bird guard in the inlet duct. At least 80 % of the cross section of the grating should be open. In the event that operating malfunctions due to contamination still occur, the system should be cleaned as described below. 8.2 Cleaning the Heating System The ingress of oxygen into the heating water circuit may result in the formation of oxidation products (rust), particularly if steel components are used. These products enter the heating system via the valves, the circulating pumps and/or plastic pipes. It is therefore essential - in particular with respect to the piping of underfloor heating systems - that only diffusion-proof materials are used. ATTENTION! We recommend the installation of a suitable corrosion protection system to prevent the formation of deposits (e.g. rust) in the condenser of the heat pump. Residue from lubricants and sealants may also contaminate the heating water. In the case of severe contamination leading to a reduction in the performance of the liquifier in the heat pump, the system must be cleaned by a heating technician. According to today's state of knowledge, we recommend using a 5 % phosphoric acid solution for cleaning purposes. However, if cleaning needs to be performed more frequently, a 5 % formic acid solution should be used. 8.3 Cleaning the Air System Air ducts, evaporator, ventilator and condensate outflow should be cleaned of contamination (leaves, twigs, etc.) before the heating period. Do this by opening the left and front sides of the heat pump. The bottom should be opened first followed by the top. ATTENTION! Before opening the device, ensure that all circuits are isolated from the power supply. Remove and rehang the side panel assemblies as described in Chapter 4. To prevent the evaporator and the condensate tray from being damaged, do not use hard or sharp objects for cleaning. 9 Faults / TroubleShooting This heat pump is a quality product and is designed for troublefree and maintenance-free operation. In the event that a fault should occur, it will be shown on the heat pump manager display. Simply consult the Faults and Trouble-shooting page in the operating instructions of the heat pump manager. If you cannot correct the fault yourself, please contact your after-sales service technician. ATTENTION! Work on the heat pump may only be carried out by authorised and qualified after-sales service technicians. 10 Decommissioning/ Disposal Before removing the heat pump, disconnect it from the power source and close all valves. Observe all environmentally-relevant requirements regarding the recovery, recycling and disposal of materials and components in accordance with all applicable standards. Particular attention should be paid to the proper disposal of refrigerants and refrigeration oils. In either case, the cleaning fluid should be at room temperature. We recommend flushing the heat exchanger in the direction opposite to the normal flow direction. To prevent acidic cleaning agents from entering the heating system circuit, we recommend connecting the flushing device directly to the flow and return flow of the liquifier of the heat pump. It is important that the system be thoroughly flushed using appropriate neutralising agents to prevent any damage from being caused by cleaning agent residue remaining in the system. Acids must be used with great care and all relevant regulations of the employers' liability insurance associations must be adhered to. If in doubt, contact the manufacturer of the chemicals! The buffer tank is drained using the filling and drain cocks on the lower left of the device. Also open the ball valve on the pressure expansion vessel to vent the buffer tank. www.dimplex.de E-8 English 8 11 11 Device Information 1 Type and order code LIK 8TE 2 Design 2.1 Model 2.2 Degree of protection according to EN 60 529 for compact devices and heating components 2.3 Installation location Compact IP 20 Indoors 3 Performance data 3.1 Operating temperature limits: English Heating water flow/return flow °C / °C Air °C 3.2 Temperature spread of heating water (flow/return flow) at A7 / W35 3.3 Heat output / COP at A-7 / W35 1 kW / --- at A-7 / W45 1 kW / --- Up to 58 / above 18 -25 to +35 10.0 5.0 5.8 / 2.7 5.5 / 2.6 5.4 / 2.1 at A2 / W35 1 kW / --- 7.5 / 3.3 7.4 / 3.2 at A7 / W35 1 kW / --- 9.3 / 3.9 9.2 / 3.8 at A7 / W45 1 kW / --- at A10 / W35 1 kW / --- 8.8 / 3.2 9.8 / 4.1 9.7 / 4.0 3.4 Sound power level device / outdoors dB(A) 53 / 60 3.5 Sound pressure level at a distance of 1 m (indoors) dB(A) 48.0 3.6 Heating water flow with an internal pressure differential of 2 m³/h / Pa 3.7 Free pressure, heating circulating pump (max. stage) 3.8 Air flow rate with an external static pressure differential ofm³/h / Pa 3.9 Refrigerant; total filling weight 0.8 / 2700 Pa 45000.0 2500 / 20 type / kg 3.10 Lubricant; total filling weight 1.6 / 11900 R404A / 2.0 type / litres Polyolester (POE) / 1.5 3.11 Output of electric heating element (second heat generator)kW 2.0 4 Dimensions, connections and weight 4.1 Device dimensions H x W x L cm 190 x 75 x 68 4.2 Device connections to heating system Inch G 1'' external 4.3 Air duct inlet and outlet (min. internal dimensions) L x W cm 4.4 Weight of the transportable unit(s) incl. packing kg 264 44 x 44 4.5 Buffer tank volume l 50 4.6 Buffer tank pressure rating bar 6 5 Electrical Connection 5.1 Nominal voltage; fuse protection 1 V/A 5.2 Nominal power consumption 5.3 Starting current with soft starter A2 W35 kW A 5.4 Nominal current A2 W35 / cos M A / --- 6 Complies with the European safety regulations 7 Additional model features 7.1 Defrosting 2.27 2.33 19.5 4.1 / 0.8 4.2 / 0.8 3 Automatic Type of defrosting Reverse cycle Defrosting tray included Yes (heated) Heating water in device protected against freezing 4 7.2 400 / 16 7.3 Performance levels 7.4 Controller internal/external Yes 1 Internal 1. This data indicates the size and capacity of the system. For an analysis of the economic and energy efficiency of the system, other parameters, such as, in particular, the defrosting capacity, the bivalence point and regulation, should also be taken into consideration. The specified values, e.g. A2 / W55, have the following meaning: External temperature 2 °C and heating water flow temperature 55 °C. 2. The heat circulating pump is integrated. 3. See CE declaration of conformity 4. The heat circulating pump and the heat pump controller must always be ready for operation. E-9 Table des matières 1 A lire immédiatement !.................................................................................................................. F-2 1.1 1.2 1.3 1.4 2 Importantes informations ........................................................................................................................ F-2 Utilisation conforme ................................................................................................................................ F-2 Dispositions légales et directives............................................................................................................ F-2 Utilisation de la pompe à chaleur pour économiser de l'énergie ............................................................ F-2 Utilisation de la pompe à chaleur ................................................................................................ F-3 2.1 Domaine d’utilisation............................................................................................................................... F-3 2.2 Fonctionnement ...................................................................................................................................... F-3 Fournitures ....................................................................................................................................F-3 3.1 Appareil de base..................................................................................................................................... F-3 3.2 Boîtier électrique..................................................................................................................................... F-4 3.3 Fournitures supplémentaires .................................................................................................................. F-4 4 Transport........................................................................................................................................ F-4 5 Emplacement de montage............................................................................................................F-5 5.1 Remarques d’ordre général .................................................................................................................... F-5 5.2 Ecoulement des condensats................................................................................................................... F-5 5.3 Bruit ........................................................................................................................................................ F-5 6 Installation .....................................................................................................................................F-6 6.1 6.2 6.3 6.4 7 Remarques d’ordre général .................................................................................................................... F-6 Prise d’air................................................................................................................................................ F-6 Branchement côté installation de chauffage........................................................................................... F-7 Branchements électriques ...................................................................................................................... F-7 Mise en service.............................................................................................................................. F-8 7.1 Remarques d’ordre général .................................................................................................................... F-8 7.2 Préparation ............................................................................................................................................. F-8 7.3 Procédures à suivre à la mise en service ............................................................................................... F-8 8 Nettoyage / entretien..................................................................................................................... F-9 8.1 Entretien ................................................................................................................................................. F-9 8.2 Nettoyage côté chauffage....................................................................................................................... F-9 8.3 Nettoyage côté air................................................................................................................................... F-9 9 Défaillances/recherche de pannes ..............................................................................................F-9 10 Mise hors service / mise au rebut................................................................................................ F-9 11 Informations sur les appareils ...................................................................................................F-10 Anhang / Appendix / Annexes ............................................................................................................ A-I www.dimplex.de F-1 Français 3 1 1 A lire immédiatement ! 1.1 Importantes informations ATTENTION ! L’appareil ne convient pas au mode convertisseur de fréquence. ATTENTION ! Lors du transport, l’angle d’inclinaison de la pompe à chaleur ne doit pas dépasser 45° (quel que soit le sens). ATTENTION ! La pompe à chaleur et la palette en bois ne sont associées que par l’emballage. ATTENTION ! Avant la mise en service, il faut enlever la protection de transport. Français ATTENTION ! Les canaux d’aspiration et d’évacuation d'air ne doivent être ni rétrécis, ni obturés. ATTENTION ! Le vase d´expansion intégré (24 litres, 1,0 bar de pression d’alimentation) doit être complété par un autre en cas de circuits de chauffage à gros volume. ATTENTION ! Respecter la rotation à droite du champ magnétique : Le compresseur peut être endommagé si le sens de rotation est le mauvais. ATTENTION ! N’utilisez jamais de produits d’entretien contenant du sable, de la soude, de l’acide ou du chlore, car ils attaquent les surfaces. ATTENTION ! Il est recommandé de faire appel à un système approprié de protection contre la corrosion pour éviter les dépôts (rouille par ex.) dans le condensateur de la pompe à chaleur. ATTENTION ! Avant d’ouvrir l’appareil, assurez-vous que tous les circuits électriques sont bien hors tension. ATTENTION ! Les travaux sur la pompe à chaleur doivent être effectués uniquement par des techniciens qualifiés et agréés. 1.2 Utilisation conforme Cet appareil ne doit être employé que selon les conditions d'utilisation prévues par le fabricant. Toute autre utilisation est considérée comme non conforme. Les descriptions accompagnant les produits doivent également être prises en compte. Toute modification ou transformation de l'appareil est à proscrire. 1.3 Dispositions légales et directives Lors de la construction et de la réalisation de la pompe à chaleur, toutes les normes CE et prescriptions DIN et VDE concernées ont été respectées (voir déclaration de conformité CE). Les normes VDE, EN et CEI correspondantes sont à respecter lors du branchement électrique de la pompe à chaleur. D'autre part, les prescriptions de branchement des fournisseurs d'énergie doivent être respectées à la lettre. Lors du raccordement de l’installation, les prescriptions afférentes sont à respecter. Les personnes, en particulier les enfants, qui, compte tenu de leurs capacités physiques, sensorielles ou intellectuelles, ou de leur manque d'expérience ou de connaissances, ne sont pas en mesure d'utiliser l'appareil en toute sûreté, ne devraient pas le faire en l'absence ou sans instructions d'une personne responsable. Les enfants doivent être surveillés pour éviter qu'ils ne jouent avec l'appareil. 1.4 Utilisation de la pompe à chaleur pour économiser de l'énergie En utilisant cette pompe à chaleur, vous contribuez à préserver l'environnement. La condition de base pour un mode de fonctionnement économique en énergie est une conception correcte des installations de source de chaleur et d’exploitation de chaleur. Il est particulièrement important pour l’efficacité d’une pompe à chaleur de maintenir l’écart de température entre eau de chauffage et source de chaleur aussi petit que possible. C’est pourquoi, il est vivement conseillé de dimensionner précisément l'installation de chauffage et la source de chaleur. Une différence de température plus élevée d’un kelvin (un °C) engendre une augmentation de la consommation d’électricité d’env. 2,5 %. Il faut particulièrement veiller au fait que des consommateurs particuliers, comme la production d´eau chaude par ex., lors du dimensionnement de l’installation de chauffage, soient également pris en compte et dimensionnés pour des basses températures. Un chauffage au sol (chauffage par surfaces) convient particulièrement bien à l'utilisation d'une pompe à chaleur en raison des basses températures de départ (30 °C à 40 °C). Pendant le fonctionnement, veiller à ce qu’aucune impureté ne pénètre dans l’échangeur thermique car ceci élèverait l'écart de température, faisant ainsi diminuer le coefficient de performance. Le régulateur de la pompe à chaleur apporte également une contribution considérable à l’utilisation économique en énergie en cas de bon réglage. Vous trouverez d’autres informations dans les instructions d’utilisation du régulateur de pompe à chaleur. Une possibilité de trop-plein est prévue dans la pompe à chaleur pour éviter des débits d'eau trop faibles dans celle-ci. Le réservoir tampon intégré augmente la quantité d’eau dans les circuits de chauffage et garantit un dégivrage efficace. F-2 3.1 Utilisation de la pompe à chaleur 2.1 Domaine d’utilisation La pompe à chaleur air/eau est prévue exclusivement pour le réchauffement de l'eau de chauffage. Elle peut être utilisée sur des installations de chauffage existantes ou pour des installations nouvelles. La pompe à chaleur convient pour un fonctionnement en mode mono-énergétique et bivalent jusqu’à des températures extérieures de -25 °C. Une température du retour de l’eau de chauffage de plus de 18 °C doit être maintenue en fonctionnement continu pour garantir un dégivrage optimal de l’évaporateur. La pompe à chaleur n’est pas conçue pour le besoin en chaleur élevé requis pour le séchage de la construction, le besoin accru en chaleur devra donc être assuré par des appareils spéciaux, côté construction. Lors d’un séchage de la construction en automne ou en hiver, nous vous recommandons d’installer une cartouche chauffante électrique supplémentaire (disponible en accessoire). 3 Fournitures 3.1 Appareil de base La pompe à chaleur est livrée sous forme compacte et contient déjà d´importants modules du circuit de chauffage : Vase d´expansion Circulateur de chauffage Vanne de trop-plein et module de sécurité (vanne de surpression, manomètre) Le circuit réfrigérant est "hermétiquement fermé" et contient le fluide frigorigène fluoré R404A avec une valeur de PRG de 3260, répertorié dans le protocole de Kyoto. Il est sans HCFC, inoffensif pour la couche d'ozone et ininflammable. Français 2 ATTENTION ! L’appareil ne convient pas au mode convertisseur de fréquence. 2.2 Fonctionnement L’air extérieur est aspiré par le ventilateur et amené par l’évaporateur (échangeur thermique). L’évaporateur refroidit l’air par extraction de chaleur. La chaleur ainsi obtenue est transmise au fluide utilisé (fluide frigorigène) dans l’évaporateur. A l’aide d’un compresseur à commande électrique, la chaleur absorbée est « pompée » à un niveau de température plus élevé par augmentation de pression puis délivrée via le condenseur (échangeur de chaleur) à l'eau de chauffage. Il est fait appel à l’énergie électrique pour faire passer la chaleur de l'environnement à un niveau de température plus élevé. Comme l’énergie extraite de l’air est transmise à l’eau de chauffage, on appelle cet appareil « pompe à chaleur air/eau ». La pompe à chaleur air/eau comprend les principaux composants comme l’évaporateur, le ventilateur et la vanne d’expansion ainsi qu’un compresseur peu bruyant, un condenseur et une commande électrique. A basses températures de l’environnement, de l’humidité de l’air s’accumule sous forme de givre sur l’évaporateur amoindrissant ainsi la transmission de chaleur. L’évaporateur est dégivré automatiquement par la pompe à chaleur selon les besoins. En fonction des conditions météorologiques, des nuages de vapeur peuvent apparaître au niveau de l’évacuation d’air. 1) Evaporateur 2) Ventilateur 3) Vase d’expansion 24 l 4) Boîtier électrique 5) Condenseur 6) Compresseur 7) Vanne de trop-plein 8) Circulateur de chauffage 9) Réservoir tampon 10) Sèche-filtre 11) Voyant 12) Détendeur www.dimplex.de F-3 3.2 3.2 Boîtier électrique Le boîtier électrique est monté dans la pompe à chaleur. Pour y accéder, il suffit de retirer l'habillage inférieur de la façade. Dans le boîtier électrique se trouvent les bornes de connexion au secteur ainsi que les contacteurs de puissance, l'unité de démarrage progressif et le gestionnaire de pompe à chaleur. Le gestionnaire de pompe à chaleur est un appareil de commande et de régulation électronique facile à utiliser. ATTENTION ! La pompe à chaleur et la palette en bois ne sont associées que par l’emballage. Pour utiliser les orifices de transport dans le châssis, il conviendrait de retirer les habillages respectifs. Pour cela, desserrer deux vis du socle pour décrocher les plaques par le haut en les tirant. Pousser légèrement les plaques métalliques vers le haut pour les accrocher. Mode de fonctionnement et utilisation du gestionnaire de pompe à chaleur sont décrits dans les instructions d'utilisation livrées avec l'appareil. 3.3 Fournitures supplémentaires Contenu Français 2x joint circulaire pour raccord de conduit 3x 3x 6x 1x 1x flexible de raccordement 1" double nipple 1" joint plat 1" bouchon 1" embout à olive pour robinet de vidange et de remplissage 2x 2x 2x 4x équerre de fixation cheville 10 mm SHR 8x80 SHR M4x8 1x 1x 1x sonde extérieure cheville 6 mm SHR 4,5x50 4 Ouverture du couvercle Après le transport, il faut enlever la protection de transport sur les deux côtés du fond de l'appareil Transport ATTENTION ! eOLPLQHUYLVVHU OHEORFDJHGHWUDQVSRUW Lors du transport, l’angle d’inclinaison de la pompe à chaleur ne doit pas dépasser 45° (quel que soit le sens). Le transport vers l’emplacement définitif devrait s'effectuer à l’aide d’une palette en bois. L’appareil de base propose plusieurs possibilités de transport : avec un chariot élévateur, un diable, ou à l’aide de tubes 3/4" que l’on passe à travers les orifices prévus dans la plaque de base ou dans le châssis. F-4 Fermeture du couvercle ATTENTION ! Avant la mise en service, il faut enlever la protection de transport. 5.3 5.1 Emplacement de montage Remarques d’ordre général Cette pompe à chaleur est conçue pour une installation en coin. Si la machine est raccordée à un conduit d’air (disponible en accessoire) côté évacuation, d’autres possibilités de mises en place sont réalisables. 5.2 Ecoulement des condensats Les condensats se formant en cours de fonctionnement doivent être évacués sans risque de gel. Pour garantir un écoulement irréprochable, la pompe à chaleur doit se trouver à l’horizontale. Le tuyau à eau de condensation doit avoir un diamètre d’au moins 50 mm et devrait déboucher, isolé du gel, dans le canal des eaux usées. Ne pas diriger directement l’eau de condensation vers des bassins de décantation ou des fosses car les vapeurs corrosives détruiraient l’évaporateur. En règle générale, l'appareil doit être installé à l'intérieur, sur une surface plane, lisse et horizontale. Ici, le châssis de la pompe à chaleur doit adhérer au sol sur toute sa circonférence afin de garantir une isolation acoustique appropriée. Si tel n'est pas le cas, des mesures d'absorption acoustique complémentaires seront éventuellement nécessaires. 5.3 La pompe à chaleur doit être installée de telle façon que les travaux d’entretien puissent s’effectuer sans problèmes. Ce qui est le cas si on observe respectivement un écartement d’un mètre devant la pompe à chaleur et à gauche de celle-ci. Les parties latérales ne doivent pas être cachées par des conduites de raccordement. D’éventuels conduits d’air utilisés doivent être découplés de la pompe à chaleur d'un point de vue acoustique pour éviter les transmissions de bruit sur les conduits. Bruit Pour éviter les transmissions de bruit dans le système de chauffage, la pompe à chaleur doit être reliée au système de chauffage de façon à amortir les oscillations (monter les raccords de flexibles fournis sans tension). Lors d’un raccordement direct des deux ouvertures d’air au niveau d'une traversée murale, le ventilateur peut passer de la connexion couplage triangle à couplage étoile (voir sur ce point les remarques dans le boîtier du ventilateur). P P L’appareil ne devrait jamais être installé dans des pièces fortement humides. A un taux d’humidité de l’air de plus 50 % et des températures extérieures en dessous de 0 °C, de la condensation peut apparaître sur la pompe à chaleur et le système d’aération. Si la pompe à chaleur est installée à l’étage, il faudra contrôler la résistance au poids du plafond et le découplage vibratoire pour des raisons acoustiques. Une installation sur un plancher ne peut être acceptée. www.dimplex.de F-5 Français 5 6 6 Installation 6.1 [ 0[ Remarques d’ordre général Les raccordements suivants doivent être réalisés sur la pompe à chaleur : Aspiration/évacuation d’air Circuits départ et retour de l’installation de chauffage Ecoulement des condensats Ecoulement des vannes de surpression Alimentation électrique 6.2 Prise d’air ATTENTION ! La bouche d’aspiration d’air de l’appareil est conçue pour un raccordement direct sur la percée murale. La percée murale peut, comme représenté en annexe sous cotes de montage, être préparée avec le conduit d’air et l’embout d’étanchéité. Les conduits d’air en béton léger-fibre de verre, qui sont proposés comme accessoires, sont résistants à l’humidité et ouverts à la diffusion. En cas d’utilisation d’un conduit d’air fixé par bride du côté évacuation d’air, celui-ci est fixé aux alésages filetés prévus à cet effet à l’aide de 4 vis à tête hexagonale M8x16. Pour ce travail, il faut faire attention à ce que le manchon du conduit d’air soit en contact avec l’isolation et non avec la plaque métallique extérieure. 0 [ L’embout d’étanchéité est utilisé pour étancher les conduits d’air sur la pompe à chaleur. Les conduits d’air par eux-mêmes ne sont pas vissés directement sur la pompe à chaleur. Lorsque l’installation est mise en place, prête à fonctionner, seul le joint d’étanchéité en caoutchouc touche la pompe à chaleur. De cette manière, d’une part on peut monter et démonter la pompe à chaleur facilement, d’autre part on obtient un découplage des bruits de structure de bonne qualité. Le côté évacuation d’air peut être appliquée au choix directement sur la percée murale ou sur un conduit plus long (accessoire). Le montage s'effectue de manière analogue à celui du côté aspiration d’air. PD[ Français Les canaux d’aspiration et d’évacuation d'air ne doivent être ni rétrécis, ni obturés. PLQ Il faudra encore tenir compte du fait que la percée murale doit être obligatoirement revêtue côté intérieur d’une isolation contre le froid afin d´empêcher un refroidissement ou humidification complète du mur. Les éléments de fixation fournis peuvent être utilisés pour la fixation au mur. F-6 Il faut respecter les dimensions intérieures et extérieures indiquées dans le croquis. De plus, il convient de veiller à un découplage vibratoire et à une isolation de conduit appropriés. 6.4 Branchement côté installation de chauffage Pour le raccordement au système de chauffage, la pompe à chaleur possède des raccords de tuyaux flexibles et des nipples doubles avec un filetage extérieur 1". Il est ainsi possible d’effectuer au choix un raccordement au système de chauffage à filetage étanche ou par joint plat. Si aucun réchauffement de l’eau chaude par la pompe à chaleur n’est prévu, cette sortie d’eau chaude doit alors être bouchée définitivement. Avant de procéder au raccordement de la pompe à chaleur côté eau de chauffage, l’installation de chauffage doit être rincée pour éliminer d’éventuelles impuretés et les restes éventuels des matériaux d’étanchéité ou autres. Une accumulation de dépôts divers dans le condenseur est susceptible d'entraîner une défaillance totale de la pompe à chaleur. Une vanne de trop-plein est montée pour des installations avec écoulement d’eau de chauffage pouvant être bloqué, conditionné par les vannes à thermostat ou de radiateur. Ceci garantit un débit d'eau de chauffage minimum via la pompe à chaleur et empêche les dysfonctionnements. 6.4 Branchements électriques L'alimentation en puissance et la tension de commande sont amenées par des câbles disponibles dans le commerce (câble de puissance à 4 brins et câble de commande à 3 brins). Prévoir pour l’alimentation de puissance un débranchement de tous les pôles avec au moins 3 mm d’écartement d’ouverture de contact (par ex. sur le disjoncteur général ou sur le contacteur de puissance), ainsi qu’un coupe-circuit automatique tripolaire, avec déclenchement simultané de tous les conducteurs extérieurs (intensité de déclenchement conforme aux informations sur les appareils). Lors du raccordement, garantir la rotation à droite du champ magnétique de l’alimentation de charge L1 ; L2 ; L3. ATTENTION ! Respecter la rotation à droite du champ magnétique : Le compresseur peut être endommagé si le sens de rotation est le mauvais. La tension de commande doit être sécurisée avec 10 A. Pour des informations plus détaillées, cf. schémas électriques en annexe. Une fois le montage côté chauffage terminé, l’installation de chauffage devra être remplie, purgée et éprouvée à la pression. Le volume du vase d´expansion intégré est de 24 litres. Ce volume convient à des bâtiments ayant une surface habitée chauffée jusqu’à 200 m² maximum. Un contrôle du volume doit être effectué par la personne ayant planifié l’installation. Un autre vase d’expansion doit être monté le cas échéant (selon DIN 4751 partie 1). Les tableaux imprimés dans les catalogues des fabricants simplifient le dimensionnement selon le cubage d’eau de l’installation. Lors du calcul, il faut tenir compte d’un volume de réservoir tampon de 80 litres. ATTENTION ! Le vase d´expansion intégré (24 litres, 1,0 bar de pression d’alimentation) doit être complété par un autre en cas de circuits de chauffage à gros volume. Protection antigel Dans le cas de pompes à chaleur exposées au gel, une vidange manuelle du circuit de chauffage devrait être prévue. La fonction de protection antigel du régulateur fonctionne dès que le régulateur et le circulateur de chauffage sont opérationnels. L’installation doit être vidangée en cas de mise hors service de la pompe à chaleur ou coupure de courant. S'il n’est pas possible de s’apercevoir d’une panne de courant (installations dans des maisons de vacances), le circuit de chauffage doit être exploité avec une protection antigel appropriée. www.dimplex.de F-7 Français 6.3 7 7 7.1 Mise en service Remarques d’ordre général Pour garantir une mise en service en règle, cette dernière doit être effectuée par un service après-vente agréé par le constructeur. Ceci permet de prolonger la garantie sous certaines conditions (cf. Garantie). 7.2 La vanne de trop-plein est à ouvrir au maximum de telle sorte que, pour la température actuelle des sources d’énergie, l'étalement maximal de température, indiqué dans le tableau, entre circuit départ et retour du chauffage, soit obtenu. Il faut mesurer l'étalement de température le plus proche possible de la pompe à chaleur. La cartouche chauffante doit être désactivée pour des installations mono-énergétiques. Température de départ Préparation Différence de température max. entre circuits départ et retour du chauffage de à Avant la mise en service, il est impératif de procéder aux vérifications suivantes : -20 °C -15 °C 4K -14 °C -10 °C 5K tous les raccordements de la pompe à chaleur doivent être réalisés comme décrit au chapitre 6. -9 °C -5 °C 6K -4 °C 0 °C 7K dans les circuits de chauffage et d'eau glycolée, toutes les vannes susceptibles de perturber l'écoulement doivent être ouvertes. 1 °C 5 °C 8K 6 °C 10 °C 9K Français les voies d’aspiration et d'évacuation de l’air doivent être dégagées. le sens de rotation du ventilateur doit correspondre à la direction de la flèche. 11 °C 15 °C 10 K 16 °C 20 °C 11 K 21 °C 25 °C 12 K 26 °C 30 °C 13 K 31 °C 35 °C 14 K le régulateur de la pompe à chaleur doit être accordé à l'installation de chauffage conformément aux instructions de service qui l'accompagnent. Les anomalies qui se produisent lors du fonctionnement sont également affichées au régulateur PAC et peuvent être éliminées suivant les indications du manuel de service du régulateur. l’écoulement des condensats doit être assuré. Dans le cas de températures extérieures inférieures à 10 °C et de températures de l’eau de chauffage inférieures à 16 °C, le réservoir tampon doit être réchauffé par le deuxième générateur de chaleur à une température d’au moins 25 °C. l’écoulement de la vanne de trop-plein de l’eau de chauffage doit être assuré. purge de l’installation de chauffage Il faut s'assurer que tous les circuits de chauffage sont bien ouverts et que le circulateur de chauffage est en service (niveau III). Mettre sous tension le régulateur de pompe à chaleur. Choisir le mode d’exploitation du deuxième générateur de chaleur, purger le système au point le plus haut, le cas échéant, remplir d’eau (garantir la pression minimale statique). 7.3 Procédures à suivre à la mise en service Suivre la procédure indiquée ci-après pour réaliser une mise en service sans dysfonctionnements. 1) Fermer tous les circuits de chauffage. 2) Ouvrir complètement la vanne de trop-plein. 3) Choisir sur le régulateur le mode d’exploitation automatique. 4) Attendre que le réservoir tampon ait atteint une température d’au moins 25 °C. 5) Ensuite les vannes des circuits de chauffage sont réouvertes lentement l’une après l’autre, de telle sorte que le débit d’eau de chauffage augmente de façon régulière via la légère ouverture du circuit de chauffage concerné. La température de l’eau de chauffage dans le réservoir tampon ne doit pas descendre en dessous de 20 °C pour pouvoir permettre un dégivrage de la pompe à chaleur à tout moment. 6) Si tous les circuits de chauffage sont complètement ouverts et une température de l’eau de chauffage dans le réservoir tampon d’env. 20 °C est maintenue, il faut régler le flux volumique minimal au niveau de la vanne de trop-plein et du circulateur de chauffage. 7) Les nouvelles constructions ont un besoin en énergie accru en raison de l’énergie nécessaire pour le séchage de la construction. Ce besoin accru en énergie peut avoir pour effet que des installations de chauffage dimensionnées trop justes ne peuvent pas atteindre à tout moment la température souhaitée pour la pièce. Il est pour cela recommander de maintenir dans ce cas le deuxième générateur de chaleur prêt à l’emploi dans la première période de chauffage. La température limite au régulateur de pompe à chaleur doit être élevée à 15 °C. La mise en service de la pompe à chaleur s’effectue par le biais du régulateur de pompe à chaleur. Les réglages doivent être effectués selon les instructions de celui-ci. Les niveaux de puissance des circulateurs doivent être adaptés à l’installation de chauffage. Le réglage de la vanne de trop-plein doit être adapté à l’installation de chauffage. Un mauvais réglage pourrait conduire à divers messages d’erreur et à une augmentation du besoin en énergie électrique. Pour régler la vanne de trop-plein correctement, nous vous conseillons de procéder de la manière suivante : Fermez tous les circuits de chauffage pouvant l'être en phase de fonctionnement, selon l'utilisation qu'il en est faite ; ceci ayant pour but d'obtenir le débit d'eau le plus défavorable. En règle général, ce sont les circuits de chauffage des locaux donnant sur le côté sud et ouest. Au moins un des circuits de chauffage doit rester ouvert (par ex. salle de bains). F-8 10 Nettoyage / entretien 8.1 Entretien Afin de protéger la laque, il faut éviter d’appuyer ou de déposer des objets sur l’appareil. Les parties extérieures de la pompe à chaleur peuvent être essuyées avec un linge humide et des produits à nettoyer usuels vendus dans le commerce. ATTENTION ! N’utilisez jamais de produits d’entretien contenant du sable, de la soude, de l’acide ou du chlore, car ils attaquent les surfaces. Pour éviter des dysfonctionnements dus à des dépôts dans l’échangeur thermique de la pompe à chaleur, il faut veiller à ce que l'échangeur de chaleur dans l’installation de chauffage ne puisse pas s’encrasser. Pour protéger l’évaporateur, il est recommandé de monter dans le conduit d’aspiration d’air une grille protectrice contre les oiseaux ayant une section libre de grille d’au moins 80 %. Si des dysfonctionnements dus à des impuretés devaient se produire malgré cette mesure, l'installation devra être nettoyée comme indiqué ci-après. 8.2 La vidange du réservoir tampon se fait à l’aide du robinet de vidange et de remplissage en bas à gauche de l’appareil. De plus, le robinet à boisseau sphérique sur le vase d’expansion sous pression doit être ouvert pour permettre l’entrée d’air dans le réservoir tampon. 8.3 Nettoyage côté air Les conduits d’air, l’évaporateur, l’aérateur et l’écoulement des condensats doivent être nettoyés de leurs impuretés (feuilles, branches etc.) avant la période de chauffage. Ouvrir la pompe à chaleur sur le côté gauche et en façade, d’abord en bas puis en haut. ATTENTION ! Avant d’ouvrir l’appareil, assurez-vous que tous les circuits électriques sont bien hors tension. Le démontage et l’accrochage des panneaux de façade s’effectue comme décrit au chapitre 4. L’utilisation d’objets pointus et durs est à éviter lors du nettoyage afin d´empêcher toute détérioration de l’évaporateur et de la cuve de condensats. Nettoyage côté chauffage L’oxygène est susceptible d’entraîner la formation de produits d’oxydation (rouille) dans l’eau de chauffage, notamment lorsque des composants en acier sont utilisés. Ces produits d’oxydation gagnent le système de chauffage par les vannes, les circulateurs ou les tuyaux en matière plastique. C’est pourquoi il faut veiller à ce que l’installation reste étanche à la diffusion, notamment en ce qui concerne les tuyaux du chauffage au sol. ATTENTION ! Il est recommandé de faire appel à un système approprié de protection contre la corrosion pour éviter les dépôts (rouille par ex.) dans le condensateur de la pompe à chaleur. Il est également possible que l’eau de chauffage soit souillée par des restes de graisse et d’agents d’étanchéification. Si en raison d’impuretés la puissance du condenseur de la pompe à chaleur se trouve réduite, l’installation devra être nettoyée par l’installateur. Dans l'état actuel des connaissances, nous conseillons de procéder au nettoyage avec de l’acide phosphorique à 5% ou, si le nettoyage est plus fréquent, avec de l’acide formique à 5%. Dans les deux cas, le liquide de nettoyage doit être à la température ambiante. Il est recommandé de nettoyer l'échangeur de chaleur dans le sens contraire au sens normal du débit. Pour éviter l’infiltration de nettoyant contenant de l’acide dans le circuit de l’installation de chauffage, nous vous recommandons de raccorder l’appareil de nettoyage directement sur le départ et le retour du condenseur de la pompe à chaleur. Il faut ensuite soigneusement rincer à l’aide de produits neutralisants adéquats, afin d’éviter tous dommages provoqués par d’éventuels restes de produits de nettoyage dans le système. 9 Défaillances/recherche de pannes Cette pompe à chaleur est un produit de qualité et elle devrait fonctionner sans dysfonctionnements. Si un dysfonctionnement devrait quand même survenir, celui-ci sera affiché sur l’écran du gestionnaire de pompe à chaleur. Référez-vous pour cela à la page des dysfonctionnements et de recherche de panne dans les instructions du gestionnaire de pompe à chaleur. Si vous n'êtes pas en mesure de remédier vous-même au dysfonctionnement, veuillez vous adresser au service après-vente compétent. ATTENTION ! Les travaux sur la pompe à chaleur doivent être effectués uniquement par des techniciens qualifiés et agréés. 10 Mise hors service / mise au rebut Avant de démonter la pompe à chaleur, il faut mettre la machine hors tension et fermer toutes les vannes. Il faut se conformer aux exigences relatives à l'environnement quant à la récupération, la réutilisation et l’élimination de consommables et de composants en accord avec les normes en vigueur. Une attention toute particulière doit être prêtée à l’évacuation du réfrigérant et de l’huile de la machine frigorifique, qui doit s’effectuer selon les règles de l’art. Les acides doivent être utilisés avec précaution et les prescriptions des caisses de prévoyance des accidents doivent être respectées. En cas de doute, prendre contact avec les fabricants des produits chimiques ! www.dimplex.de F-9 Français 8 11 11 Informations sur les appareils 1 Désignation technique et commerciale LIK 8TE 2 Forme 2.1 Version 2.2 Type de protection selon EN 60 529 pour app. compact ou élt. de chauffe 2.3 Emplacement compacte IP 20 en intérieur 3 Indications de puissance 3.1 Température - limites d’exploitation : Départ/retour eau de chauffage °C / °C Air °C 3.2 Plage de température eau de chauffage pour A7 / W35 3.3 Capacité thermique / coef. de puissance pour A-7 / W35 1 kW / --- jusqu’à 58 / à p. de 18 entre -25 et +35 10,0 5,0 5,8 / 2,7 5,5 / 2,6 Français pour A-7 / W45 1 kW / --- pour A2 / W35 1 kW / --- 7,5 / 3,3 7,4 / 3,2 kW / --- 9,3 / 3,9 9,2 / 3,8 pour A7 / W35 1 pour A7 / W45 1 pour A10 / W35 5,4 / 2,1 8,8 / 3,2 kW / --1 kW / --- 3.4 Niveau de puissance sonore appareil / extérieur dB(A) 3.5 Niveau de pression sonore à 1 m de distance (intérieur) dB(A) 3.6 Débit d’eau de chauffage avec pression diff. int. 2 m³/h / Pa 3.7 Pression libre pompe de circulation de chauffage (au régime max.) Pa 9,8 / 4,1 9,7 / 4,0 53 / 60 48,0 0,8 / 2700 1,6 / 11900 45000,0 3.8 Débit d’air avec pression diff. statique externe m³/h / Pa 2500 / 20 3.9 Fluide frigorigène ; poids au remplissage total type / kg R404A / 2,0 3.10 Lubrifiant - poids total au remplissage type / litres 3.11 Puissance cartouche chauffante électr.e génér. chal. kW Polyolester (POE) / 1,5 2,0 4 Dimensions, raccordements et poids 4.1 Dimensions de l’appareil H x l x L cm 4.2 Raccordements de l’appareil pour le chauffage pouce G 1'' a 4.3 Conduit d’arrivée et de sortie d’air (dim. int. min.) L x l cm 44 x 44 4.4 Poids de/des unités de transport, emballage compris kg 264 190 x 75 x 68 4.5 Réservoir tampon contenance l 50 4.6 Réservoir tampon pression nominale bar 6 5 Branchements électriques 5.1 Tension nominale ; protection par fusibles 1 5.2 Consommation nominale 5.3 Courant de démarrage avec démarreur progressif A 5.4 Courant nominal A2 W35 / cos M A / --- 6 Conforme aux dispositions de sécurité européennes 7 Autres caractéristiques techniques 7.1 A2 W35 V/A kW Dégivrage Type de dégivrage Cuve de dégivrage disponible Eau de chauffage dans l’appareil protégée du gel 4 7.2 7.3 Niveaux de puissance 7.4 Régulateur interne / externe 400 / 16 2,27 2,33 19,5 4,1 / 0,8 4,2 / 0,8 3 automatique inversion de circuit oui (chauffée) oui 1 interne 1. Ces indications caractérisent la taille et le rendement de l’installation. D’autres valeurs influentes, notamment le comportement au dégivrage, le point de bivalence et la régulation sont à prendre en compte pour des considérations économiques et énergétiques. Ici, A2 / W55 signifie par ex. : température source de chaleur 2 °C et température départ eau de chauffage 55 °C. 2. Le circulateur de chauffage est intégré. 3. Voir la déclaration de conformité CE. 4. Le circulateur de chauffage et le régulateur de la pompe à chaleur doivent toujours être prêts à fonctionner. F-10 Anhang / Appendix / Annexes 1 Maßbilder / Dimension Drawings / Schémas cotés................................................................... A-II 1.1 Wärmepumpe / Heat pump / Pompe à chaleur ...................................................................................... A-II 1.2 Einbaumaße / Installation Dimensions / Cotes de montage .................................................................. A-III 2 Diagramme / Diagrams / Diagrammes ....................................................................................... A-IV 2.1 Kennlinien / Characteristic Curves / Courbes caractéristiques..............................................................A-IV 3 Stromlaufpläne / Circuit Diagrams / Schémas électriques....................................................... A-V 3.1 3.2 3.3 3.4 4 Steuerung / Control / Commande ...........................................................................................................A-V Last / Load / Charge ..............................................................................................................................A-VI Anschlussplan / Circuit Diagram / Schéma électrique ..........................................................................A-VII Legende / Legend / Légende...............................................................................................................A-VIII Hydraulisches Prinzipschema / Hydraulic Plumbing Diagram / Schéma hydraulique ......... A-IX 4.1 Darstellung / Schematic view / Représentation .....................................................................................A-IX 4.2 Legende / Legend / Légende..................................................................................................................A-X Konformitätserklärung / Declaration of Conformity / Déclaration de conformité ................. A-XI Anhang · Appendix · Annexes 5 www.dimplex.de A-I A-II 7X\DXHDXGH FRQGHQVDWLRQ &RQGHQVDWH RXWIORZKRVH .RQGHQVDWDEODXI VFKODXFK 5DFFRUGHPHQWV HDX :DWHU FRQQHFWLRQV :DVVHU DQVFKOVVH %HGLHQVHLWH 2SHUDWLQJVLGH &{WpGHFRPPDQGH /XIWULFKWXQJ 'LUHFWLRQRIDLUIORZ 6HQVG pFRXOHPHQWDLU 7RXVOHVUDFFRUGVG HDX\FRPSULV WX\DXGHPPHWQLSSOHGRXEOH OHVGHX[VRQWMRLQWV $OOZDWHUFRQQHFWLRQVLQFOPP KRVHDQGGRXEOHQLSSOHLQFOXGHGLQ WKHVFRSHRIVXSSO\ DOOH:DVVHUDQVFKOVVHLQFO PP6FKODXFKXQG'RSSHO QLSSHOEHLGHVEHLOLHJHQG +HDWLQJZDWHUIORZ +HDWSXPSRXWOHW +HDWSXPSRXWOHW LQWHUQDOH[WHUQDOWKUHDG &RPPRQUHWXUQIORZ +HDWSXPSLQOHW LQWHUQDODQGH[WHUQDOWKUHDGV )HHGDQGGUDLQWDS +RWZDWHUIORZ +HDWSXPSRXWOHW LQWHUQDOH[WHUQDOWKUHDG +HL]XQJVYRUODXI $XVJDQJDXVGHU:3 ´,QQHQ$XHQJHZLQGH JHPHLQVDPHU5FNODXI (LQJDQJLQGLH:3 ´,QQHQ$XHQJHZLQGH )OOXQG(QWOHHUXQJVKDKQ :DUPZDVVHUYRUODXI $XVJDQJDXVGHU:3 ´,QQHQ$XHQJHZLQGH (OHFWULFOLQHV 2YHUSUHVVXUHKHDWLQJ FLUFXLWLQWHUQDO¡PP hEHUGUXFN+HL]NUHLV ,QQHQ¡PP (OHNWUROHLWXQJHQ &RQGHQVDWHRXWIORZ LQVLGH¡PP .RQGHQVDWDEODXI ,QQHQ¡PP [LQWHUQDOWKUHDG0[ [,QQHQJHZLQGH0[ 7UDQVSRUW 'pSDUWHDXFKDXGH 6RUWLHGHOD3$& )LOHWDJHLQWH[W 5RELQHWGHUHPSOLVVDJHHWGHYLGDJH 5HIOX[FRPPXQ (QWUpHGDQVOD3$& )LOHWDJHVLQWH[W $OOHUHDXGHFKDXIIDJH $OOHUHDXGHFKDXIIDJH 6RUWLHGHOD3$& )LOHWDJHLQWpULHXUH[WpULHXU /LJQHVpOHFWULTXHV 6XUSUHVVLRQFLUFXLWGHFKDXIIDJH 6XUSUHVVLRQFLUFXLWGHFKDXIIDJH LQWpULHXU¡PP (FRXOHPHQWGXFRQGHQVDW ¡LQWPP [ILOHWDJHLQWpULHXU0[ 1.1 Anhang · Appendix · Annexes 1 1 Maßbilder / Dimension Drawings / Schémas cotés Wärmepumpe / Heat pump / Pompe à chaleur 1.2 Einbaumaße / Installation Dimensions / Cotes de montage KDQGHOVEOLFKHU%DXVFKDXPEDXVHLWV 6WDQGDUGSRO\XUHWKDQHIRDPWREHSURYLGHGE\WKHFXVWRPHU 0RXVVHGHFRQVWUXFWLRQFRXUDQWHjIRXUQLUSDUOHFOLHQW 'LFKWPDQVFKHWWHDOV=XEHK|UHUKlOWOLFK 6HDOLQJFROODUDYDLODEOHDVDQDFFHVVRU\ 0DQFKRQG¶pWDQFKHtWpGLVSRQLEOHHQDFFHVVRLUH /XIWNDQDODOV=XEHK|UHUKlOWOLFK $LUGXFWDYDLODEOHDVDQDFFHVVRU\ &RQGXLWG¶DpUDWLRQGLVSRQLEOHHQDFFHVVRLUH /XIWULFKWXQJ 'LUHFWLRQRIDLUIORZ 6HQVG pFRXOHPHQWDLU %HGLHQVHLWH 2SHUDWLQJVLGH &{WpGHFRPPDQGH www.dimplex.de 8PODXIHQGH$EVFKUlJXQJEDXVHLWV ]XU$EGLFKWXQJGHU6WRNDQWHXQG 9HUEHVVHUXQJGHU/XIWIKUXQJ &RQWLQXRXVFKDPIHUWREHSURYLGHGE\WKHFXVWRPHU WRVHDOWKHERUGHUDQGWRIDFLOLWDWHDLUFLUFXODWLRQ &KDQIUHLQSpULSKpULTXHjIRXUQLUSDUOHFOLHQWDVVXUDQW O¶pWDQFKpLWpGXERUGHWDPpOLRUDQWODFRQGXLWHGHO¶DLU %HL(LQVDW]HLQHV'lPPVWUHLIHQVXQWHUGHU:lUPHSXPSH PXVVGDV0DHQWVSUHFKHQGHUK|KWZHUGHQ 7KHGLPHQVLRQVPXVWEHLQFUHDVHGFRUUHVSRQGLQJO\ ZKHQDQLQVXODWLQJVWULSLVXVHGXQGHUWKHKHDWSXPS (QFDVG¶XWLOLVDWLRQG¶XQHEDQGHLVRODQWHVRXVODSRPSH jFKDOHXUDXJPHQWHUODFRWHHQFRUUHVSRQGDQFH A-III Anhang · Appendix · Annexes 1.2 2 2 Diagramme / Diagrams / Diagrammes 2.1 Kennlinien / Characteristic Curves / Courbes caractéristiques +HL]OHLVWXQJLQ>N:@ +HDWLQJFDSDFLW\LQ>N:@ 3XLVVDQFHGHFKDXIIDJHHQ>N:@ :DVVHUDXVWULWWVWHPSHUDWXULQ>&@ :DWHURXWOHWWHPSHUDWXUHLQ>&@ 7HPSpUDWXUHGHVRUWLHGHO HDXHQ>&@ %HGLQJXQJHQÂ&RQGLWLRQVÂ&RQGLWLRQV +HL]ZDVVHUGXUFKVDW] +HDWLQJZDWHUIORZUDWH 'pELWG HDXGHFKDXIIDJH PK Anhang · Appendix · Annexes /XIWHLQWULWWVWHPSHUDWXULQ>&@Â$LULQOHWWHPSHUDWXUHLQ>&@Â7HPSpUDWXUHG HQWUpHG DLUHQ>&@ /HLVWXQJVDXIQDKPHLQFO3XPSHQOHLVWXQJVDQWHLO 3RZHUFRQVXPSWLRQLQFOSRZHULQSXWWRSXPS &RQVRPPDWLRQGHSXLVVDQFH\FRPSULVSDUWGHFRQVRPPDWLRQGHODSRPSH 'UXFNYHUOXVWLQ>3D@ 3UHVVXUHORVVLQ>3D@ 3HUWHGHSUHVVLRQHQ>3D@ 9HUIOVVLJHU &RQGHQVHU &RQGHQVHXU /XIWHLQWULWWVWHPSHUDWXULQ>&@ $LULQOHWWHPSHUDWXUHLQ>&@ 7HPSpUDWXUHG HQWUpHG DLUHQ>&@ /HLVWXQJV]DKOLQFO3XPSHQOHLVWXQJVDQWHLO &RHIILFLHQWRISHUIRUPDQFHLQFOSRZHULQSXWWRSXPS &RHIILFLHQWGHSHUIRUPDQFH\FRPSULVSDUWGHFRQVRPPDWLRQGHODSRPSH /XIWHLQWULWWVWHPSHUDWXULQ>&@ $LULQOHWWHPSHUDWXUHLQ>&@ 7HPSpUDWXUHG HQWUpHG DLUHQ>&@ A-IV +HL]ZDVVHUGXUFKIOXVVLQ>PK@ +HDWLQJZDWHUIORZUDWHLQ>PK@ 'pELWG HDXGHFKDXIIDJHHQ>PK@ 3.1 3 Stromlaufpläne / Circuit Diagrams / Schémas électriques Steuerung / Control / Commande 1HW]0DLQV5pVHDX Anhang · Appendix · Annexes 3.1 www.dimplex.de A-V 1HW]0DLQV5pVHDX Anhang · Appendix · Annexes 3(9HUWHLOHU 3(GLVWULEXWRU 'LVWULEXWHXU3( 3.2 3.2 A-VI Last / Load / Charge 1HW]0DLQV5pVHDX 3.3 www.dimplex.de Anhang · Appendix · Annexes 1HW]6WHXHUXQJ0DLQV&RQWURO5pVHDX&RPPDQGH 3.3 Anschlussplan / Circuit Diagram / Schéma électrique A-VII 3.4 3.4 Legende / Legend / Légende A1 Drahtbrücke einlegen wenn kein EVU-Sperrschütz benötigt wird (Eingang offen = EVU-Sperre = Wärmepumpe „aus“) Wire jumper must be inserted if no utility blocking contactor is required (contact open = utility block = heat pump "off"). A2 Drahtbrücke bei Nutzung des 2ten Sperreinganges entfernen (Eingang offen = Wärmepumpe „aus“) Drahtbrücke Störung Verdichter M1 Thermostat Warmwasser Thermostat Schwimmbadwasser Pressostat Abtauende 2. Wärmeerzeuger Elektroheizung (Funktion ist über Regler wählbar) Sicherung für N1-Relaisausgänge an J12 und J13 4,0 ATr Sicherung für N1-Relaisausgänge an J15 bis J18 4,0 ATr Pressostat Hochdruck Pressostat Niederdruck Heißgasthermostat Wicklungsschutz Ventilator Leuchte Störfernanzeige (Relaisbaugruppe) Remove if the second disable connector is used (contact open = heat pump "off"). Wire jumper fault, M1 compressor Hot water thermostat Swimming pool water thermostat Defrost end controller 2nd heat generator, electric heating (function selectable via controller) Fuse for N1 relay outputs at J12 and J13 4.0 slow-acting Fuse for N1 relay outputs at J15 to J18 4.0 slow-acting High-pressure switch Low-pressure switch Hot gas thermostat Winding protection, ventilator Remote fault indicator lamp (relay module) Stromversorgung-N1 (24V AC) Niederspannungsein-/ausgänge Signalein-/ausgänge (230V AC) Ohne Funktion Steckdose für Bedienfeld Ohne Funktion Relaisausgänge zur Ansteuerung der Systemkomponenten Schütz Verdichter Relais Ventilator Elektron. Relais f. Störfernanzeige (Relaisbaugruppe) Elektron. Relais f. Schwimmbadwasserumwälzpumpe (Relaisbaugruppe) Schütz 2. Wärmeerzeuger EVU-Sperrschütz SPR-Hilfsrelais Verdichter Ventilator Heizungsumwälzpumpe Hauptkreis Heizungsumwälzpumpe 2. Heizkreis Zusatzumwälzpumpe Warmwasserumwälzpumpe Schwimmbadwasserumwälzpumpe Mischer Hauptkreis Mischer 2. Heizkreis Wärmepumpenregler Sanftanlaufsteuerung Verdichter Power supply N1 (24 V AC) Low-voltage inputs/outputs Signal inputs/outputs (230V AC) Has no function Socket for operating panel Has no function Relay outputs for the control of system components Relay module Operating element External temperature sensor Return flow sensor for heating system Hot water sensor (as an alternative to the hot water thermostat) Sensor for heating circuit 2 Flow sensor Safety isolating transformer 230/24 V AC-50 Hz/ 28 VA Terminal strip: mains control L/N/PE 230 V AC / 50 Hz; N and PE terminal block Terminal strip: terminal block for 24 V AC Terminal strip: terminal block for DC GND Terminal strip: pressure switches (HP/LP) Terminal strip: power supply 3L/PE-400VAC-50Hz Y1 Relaisbaugruppe Bedienteil Außentemperaturfühler Rücklauffühler-Heizung Warmwasserfühler (alternativ zum Warmwasserthermostat) Fühler für den 2ten Heizkreislauf Vorlauffühler Sicherheitstrenntransformator 230/24 VAC-50Hz/ 28VA Klemmenleiste: Netz-Steuerung L/N/PE 230VAC50Hz; N- und PE-Verteiler Klemmenleiste: Verteiler für 24VAC Klemmenleiste: Verteiler für DC-GND Klemmenleiste: Pressostate (HD/ND) Klemmenleiste: Leistungseinspeisung 3L/PE 400VAC-50Hz Vier-Wege-Umschaltventil Four-way valve Cavalier à fil à monter en absence de contacteur de coupure du fournisseur d'énergie (pont ouvert = coupure société électricité = pompe à chaleur « arrêtée ») Cavalier à fil à retirer si la 2e entrée de coupure est utilisée (pont ouvert = pompe à chaleur « arrêtée ») Cavalier dysfonctionnement compresseur M1 Thermostat eau chaude Thermostat eau de piscine Pressostat fin de dégivrage 2e générateur de chaleur chauffage électrique (fonction réglable par le régulateur) Fusible pour sorties de relais N1 en J12 et J13 4,0 ATr Fusible pour sorties de relais N1 en J15 jusqu’à J18 4,0 ATr Pressostat haute pression Pressostat basse pression Thermostat gaz de chauffage Blindage de l'enroulement ventilateur Témoin de télédétection de pannes (sur module de relais) Alimentation en courant N1 (24 V AC) Entrées et sorties de basse tension Entrées et sorties de signaux (230 V AC) Sans fonction Prise pour le panneau de commande Sans fonction Sorties de relais pour la commande des composants du système Contacteur compresseur Relais ventilateur Relais pour télédétection de pannes (sur module de relais) Relais pour circulateur d’eau de piscine (sur module de relais) Contacteur 2ème générateur de chaleur Contacteur de coupure du fournisseur d'énergie Relais auxiliaire « SPR » Compresseur Ventilateur Circulateur de chauffage circuit principal Circulateur de chauffage 2e circuit de chauffage Circulateur supplémentaire Circulateur d’eau chaude Circulateur d’eau de piscine Mélangeur circuit principal Mélangeur 2e circuit de chauffage Régulateur de pompe à chaleur Commande de démarrage progressif pour compresseur Module de relais Commande Sonde de température extérieure Sonde retour chauffage Sonde d’eau chaude (alternative au thermostat eau chaude) Sonde pour le 2e circuit de chauffage Sonde aller Transformateur sectionneur de sécurité 230/ 24 VAC-50Hz/28VA Bornier distributeur : commande secteur L/N/PE 230V AC-50 Hz ; distributeur N et PE Bornier distributeur : distributeur pour 24 V AC Bornier distributeur : distributeur pour DC-GND Bornier distributeur : pressostats (HD/ND) Bornier distributeur : alimentation puissance 3L/PE400 V AC-50 Hz Vanne d’inversion 4 voies EVU SPR MA MZ Abkürzungen: Energieversorgungsunternehmen Sperre Mischer AUF Mischer ZU Abbreviations: Utility company Block Mixer OPEN Mixer CLOSED Abréviations : Société de production et de distribution d'énergie Blocage Mélangeur OUVERT Mélangeur FERME * Bauteile sind extern beizustellen Components to be supplied from external sources Pièces à fournir par le client A4 B3* B4* E3 E10 F2 F3 F4 F5 F7 F23 H5* J1 J2...J7 J8 J9 J10 J11 J12...J18 Anhang · Appendix · Annexes K1 K2 K11* K12* K20 K22* K23* M1 M2 M13 M15* M16* M18* M19* M21* M22* N1 N7 N11* N14 R1 R2 R3 R5 R9 T1 X1 X2 X3 X4 X5 A-VIII Contactor for compressor Ventilator relay Electron. remote fault indicator relay (relay module) Electron. relay for swimming pool water circulating pump (relay module) Contactor, suppl. heating system Utility blocking contactor SPR auxiliary relay Compressor Ventilator Heat circulating pump of the main circuit Heat circulating pump for heating circuit 2 Auxiliary circulating pump Hot water circulating pump Swimming pool water circulating pump Mixer for main circuit Mixer for heating circuit 2 Heat pump controller Soft start control for compressor 4.1 4 Hydraulisches Prinzipschema / Hydraulic Plumbing Diagram / Schéma hydraulique Darstellung / Schematic view / Représentation Anhang · Appendix · Annexes 4.1 www.dimplex.de A-IX 4.2 4.2 Legende / Legend / Légende Anhang · Appendix · Annexes Absperrventil Shutoff valve Robinet d’arrêt Überstromventil Overflow valve Vanne de trop-plein Sicherheitsventilkombination Safety valve combination Groupe de valves de sécurité Umwälzpumpe Circulating pump Circulateur Ausdehnungsgefäß Expansion vessel Vase d´expansion Raumtemperaturgesteuertes Ventil Room temperature-controlled valve Valve commandée par température Absperrventil mit Rückschlagventil Shutoff valve with check valve Robinet d’arrêt avec clapet anti-retour Absperrventil mit Entwässerung Shutoff valve with drainage Robinet d’arrêt avec écoulement Wärmeverbraucher Heat consumer Consommateur de chaleur Temperaturfühler Temperature sensor Sonde de température Flexibler Anschlussschlauch Flexible connection hose Tuyau de raccord flexible Wärmepumpe Heat pump Pompe à chaleur Pufferspeicher Buffer tank Réservoir tampon Wärmepumpenregler Heat pump controller Régulateur de pompe à chaleur Elektroverteilung Electrical distribution system Distributeur courant électrique Warmwasserspeicher Hot water cylinder Ballon d’eau chaude Kondensatablauf Condensate outflow Ecoulement des condensats Überdruck Heizwasser Overpressure of the heating water Surpression eau de chauffage E8 Zusatzheizung Supplementary heating Chauffage d’appoint M13 Heizungsumwälzpumpe Heat circulating pump Circulateur de chauffage M18 Warmwasserumwälzpumpe Hot water circulating pump Circulateur d’eau chaude N1 Wärmepumpenregler Heat pump controller Régulateur de pompe à chaleur R1 Außentemperaturfühler External temperature sensor Sonde de température extérieure R2 Rücklauffühler Return flow sensor Sonde de retour R3 Warmwasserfühler Hot water sensor Sonde d’eau chaude EV Elektroverteilung Electrical distribution system Distributeur courant électrique KW Kaltwasser Cold water Eau froide MA Mischer AUF Mixer OPEN Mélangeur OUVERT WW Warmwasser Domestic hot water Eau chaude A-X 5 Anhang · Appendix · Annexes 5 Konformitätserklärung / Declaration of Conformity / Déclaration de conformité www.dimplex.de A-XI Glen Dimplex Deutschland GmbH Geschäftsbereich Dimplex Am Goldenen Feld 18 D-95326 Kulmbach Irrtümer und Änderungen vorbehalten. Subject to alterations and errors. Sous réserve d’erreurs et modifications. +49 (0) 9221 709 565 www.dimplex.de