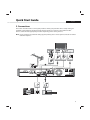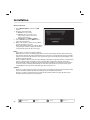
1
HD Digital Recorder User’s Manual HDR-FOX T2 The default password is 0000. Notice English Thank you for purchasing a Humax HDR-FOX T2 Freeview+ HD product. Freeview+ HD explained: • Accurate recording The start and end times of scheduled recordings will track the signal meaning the recording will start and stop at the times sent by the broadcasters. If a programme starts early or runs late the record time will automatically be adjusted to record the whole programme. • Series Link If a programme you wish to record is in a series, you can now record the whole series. If the programme changes to a different day or time the product will track these changes and still record the programme. • Alternate Instances If a scheduled recording(s) overlap with other programmes set to record you will be given the option to record one of the programmes later that day or week, on the same channel or a different channel. • Split Recordings If a programme has two parts split by another entry in the Guide (e.g. a film divided in to two parts by a News programme) you will be given the option to set both parts to record. Note: The above Freeview+ HD features are available on channels where the correct and accurate data is being broadcast. Some channels may not support all of the Freeview+ HD services. For more information on Freeview+ HD please visit http://www.freeview.co.uk/HD. 1 Notice Thank you for purchasing a HUMAX product. Please read this user’s manual carefully to be able to safely install, use and maintain the product at maximum performance. Keep this user’s manual next to your product for future reference. The information in this user’s manual is subject to change without notice. Copyright (Copyright © 2010 HUMAX Corporation) Not to be copied, used or translated in part or whole without HUMAX’s prior consent in writing except approval of ownership of copyright and copyright law. Warranty The warranty does not cover parts which may become defective due to misuse of the information contained in this manual. Meaning of Symbols To reduce the risk of electric shock, do not remove cover (or back). No user serviceable parts inside. Refer servicing to qualified service personnel. This symbol indicates dangerous voltage inside the product that presents a risk of electric shock or personal injury. This symbol indicates important instructions accompanying the product. Warnings, Cautions and Notes Throughout the whole manual, pay special attention to the following marks that indicate hazardous situations. Warning Indicates a hazardous situation which could result in serious injury. Caution Indicates a situation which could damage the equipment or other apparatus. Note Indicates additional information to make the user aware of possible problems and information of any importance to help understand, use and maintain the installation. 2 Notice English ‘WEEE’ Instructions This product should not be disposed with other household wastes at the end of its working life. Please separate this from other types of wastes and recycle it responsibly to promote the sustainable reuse of material resources. This will prevent possible harm to the environment or human health from uncontrolled waste disposal. Domestic users: Please contact either the retailer where you purchased this product or their local government office for details of where and how they can take this item for environmentally safe recycling. Business users: Contact your supplier and check the terms and conditions of the purchase contract. This product should not be mixed with other commercial wastes for disposal. Trademarks • • Manufactured under license from Dolby Laboratories. Dolby and the double-D symbol are trademarks of Dolby Laboratories. HDMI, the HDMI Logo, and High-Definition Multimedia Interface are trademarks of registered trademarks of HDMI Licensing LLC. 3 Contents Notice Thank you for purchasing a Humax HDR-FOX T2 Freeview+ HD product. Quick Start Guide 1. Checking Accessories 2. Product Overview 3. Connections 4. Powering On 5. Installation Wizard 6. Menu Overview Basic Operation Changing Channels Volume / Mute / Audio Display Format / Resolution Programme Information (i-plate) Sleep Timer Subtitle Option Text and Interactive Services Channel List Changing Channels Editing Channels in Channel List Managing Channels Editing Channels Editing Favourite Channels TV Guide Watching Programmes Setting Reminders Finding Programmes Scheduling Reminders and Recordings Recording and Playback Recording Playback Playback Controls Pausing and Rewinding Live TV (TSR) Media List Using Video List Using Music List Using Photo List 4 1 HUMAX TV Portal 46 1 Preferences 47 5 5 5 9 11 12 14 15 15 15 16 17 18 18 18 19 20 20 21 22 22 24 26 26 27 28 29 30 30 34 35 36 37 39 42 44 Parental Control Language Setting Setting Power On/Off Timer Video Setting Audio Setting Screen Display Installation Automatic Search Manual Search Software Update (OTA) Antenna Power Factory Default System System Information Signal Detection Power Management Common Interface Data Storage Internet Setting Appendix Specification Service and Support Safety Warning Trouble Shooting Error Message Glossary Remote Control Code List OPEN SOURCE SOFTWARE NOTICE 47 48 48 49 50 51 52 52 53 53 55 55 56 56 56 57 57 58 58 59 59 60 61 63 65 66 67 98 Quick Start Guide English 1. Checking Accessories Quick Start Guide User’s Manual Manual & Quick Start Guide Remote Control & Batteries SCART Cable HDMI Cable Note: The accessories may vary according to area. 2. Product Overview Front Panel Status Display STANDBY Switches between operation and standby modes. VOL-/VOL+ P-/P+ USB port Connect a USB storage device. Note: The image shown may differ from the actual product. 5 Quick Start Guide Rear Panel Common Interface Insert a CI-module. ANTENNA IN Connect your main aerial. ANTENNA OUT Connect to the TV or VCR using an RF cable. SPDIF Connect to the audio system using an S/PDIF cable. (digital audio). ETHERNET Connect a LAN cable. USB Port Connect a USB storage device. HDMI Connect to the TV using an HDMI cable. TV SCART Connect to the TV using a TV SCART cable. ON/OFF Powers on/off. VIDEO Connect to the TV or VCR using an RCA cable. AUDIO Connect to the TV or VCR using an RCA cable. Note: The image shown may differ from the actual product. Conditional Access Although most TV and radio services are free to air, others are available on a subscription basis and can only be enjoyed via a Conditional Access Module (CAM) and smartcard. Insert the CAM into the Common Interface slot. Note: The CAM and smartcard are not provided with the product and are available from the Pay TV provider. CAM 6 Quick Start Guide English Remote Control To control the product please make sure that the PVR mode is selected on the remote control. MUTE Mutes audio STANDBY Switches between operation and standby modes. MODE Changes the mode of remote. NUMERIC (0-9) TV Portal Access to Humax TV Portal. MENU Displays the main menu. ݣ Playback Control Buttons Play, II Pause, Stop, Record Rewind, ݤ COLOUR Buttons Colour keys for interactive applications. MEDIA Displays the media list. GUIDE Displays the programme guide. ARROW Buttons Moves the cursor up, down, left or right. OK Selects a menu or confirms. EXIT Exits all On-Screen Display (OSD) screens. BACK Returns to the previous screen. ݢ 1 2 3 Fast Forward, I Previous, I Next, Instant Replay, Skip Note: • The image shown may differ from the actual product. • Some playback control buttons may not function depending on the content/media files you are viewing. 7 Quick Start Guide VOLUME Adjusts the audio volume. P/P Changes the channel or page. LIST Displays the channel list. i (Information) Displays the channel and programme information. OPT+ Displays the channels attributes. AUDIO Displays the audio list. SUB Displays the subtitle language list. TV/RADIO Switches between TV and radio modes. TEXT Enters the digital text service. SOURCE Controls the output of TV SCART. SLEEP Sets the sleep timer. V-FORMAT Sets the resolution of video. WIDE Sets the display format. Add Bookmark/Show Bookmark List. Slow Play Inserting Batteries 8 i 1. Press the hook upward and lift the battery cover off. 2. Insert the batteries (supplied) matching the plus(+) and minus(-) at each end. 3. Close the cover. 4. Press the PVR button at the top of the remote control. Quick Start Guide English 3. Connections This section describes how to connect your product to match your particular devices setup and to gain optimum signal quality. The product provides various interfaces to connect to the TV, VCR or other devices. Select the most appropriate procedure depending on the device you have. Note: If you encounter any problems setting up your product, please contact your local retailer or Humax Customer Helpline. HDMI TV SCART DVI Connecter HDMI Cable 1 HDMI Cable RCA Cable SCART Cable 3 2 4 S/PDIF Cable Ethernet Cable LAN Router 9 Quick Start Guide Connecting the Antenna Connect the aerial to the ANTENNA IN. Connecting the TV You can select one of the following connections depending on the device you have. ݎTV with the HDMI connector; For the best picture quality, connect the product and TV using a HDMI cable. When using a HDMI cable it is not necessary to also use a scart cable. ݏTV with the DVI connector; For very good picture quality, connect the product and TV using a HDMI cable and a HDMI-to-DVI converter for video. You will also require a RCA cable(Audio L/R) connected to the necessary connection(s) on your TV/Display for Audio. Please refer to your TV/Display user manual for further information on the connections required for Audio. ݐTV with the SCART connector; For good picture quality, connect the product and TV using a SCART cable. For additional audio connections you can either 1. Connect the product and TV using an RCA cable (Audio L/R). 2. When using the digital audio system, connect the product and the digital audio system using a S/PDIF cable. Connecting the Network ݑConnecting to the LAN; Connect one end of the Ethernet cable to the receiver and the other end to the LAN router. 10 Quick Start Guide English 4. Powering On 1. Connect the power cord of the product to a wall outlet. 2. Ensure the power switch at the rear of the product is switched to ON. 3. Power on by pressing the STANDBY button on the remote control or touching the STANDBY button at the front of the product. Note: To control the product please make sure that the PVR mode is selected on the remote control. 11 Quick Start Guide 5. Installation Wizard When powering on your product for the first time after purchase or performing the factory default in menu, the Installation Wizard will appear on your TV screen. If you do not see the Installation Wizard please check: 1. Your TV is switched on. 2. The cables between the product and your TV are connected correctly. 3. Your TV is on the correct input (AV channel) for the connection you are using. (Please refer to your TV/Display user manual for further information to select the correct Input/channel.) Note: If you exit the installation wizard without fully completing the channel searching procedure, you may not have all of the channels available. In this case, you can use the Settings > Installation menu to search for more channels. 1. Preferred Language Select a language for audio and subtitles and press the OK button. 2. Display Set the video output settings you require. To continue to the next step select Next and press the OK button. Screen Ratio: 16:9 - Widescreen TV 4:3: Traditional TV Display Format: Select your Required Display Format, the image at the bottom of the screen will indicate how the picture will appear on your TV. Resolution: Select your Required Video Resolution (576i, 576p, 720p, 1080i, 1080p) Note: Some TVs/Displays may not support all Video Resolutions, to change this in the future please use the V-FORMAT button on your remote contol. 12 Quick Start Guide English 3. Automatic Search Channel search will begin automatically. When the search has completed press the OK button to save the channels found during the search. 4. Result The results of the Installation Wizard are displayed on screen. Select Finish and press the OK button to complete the Installation Wizard. 13 Quick Start Guide 6. Menu Overview Preferences • Parental Control • Language • Time • Video • Audio • Recording • Screen Display Channel List TV Guide Video Music Photo HUMAX TV Portal Settings Edit Channels • Edit Favourite List • Edit Channel List Installation • Automatic Search • Manual Search • Software Update • Antenna Power • Factory Default System • System Information • Signal Detection • Power Management • Common Interface • Data Storage • Internet Setting How to Navigate or Displays the Menu OSD Moves among menus or options Selects (Enters) a menu or confirms a selection Changes or adjusts the option Goes back to the previous screen Enters the number (0~9) Exit all On-Screen 14 Basic Operation English Changing Channels You can change the channels in several ways. Press the P/P button. Enter the channel number directly. (0-9) Go to the channel list or TV guide and select a channel. Note: Press the TV/RADIO button to switch between TV and radio channels. Volume / Mute / Audio To adjust the audio volume, press the +/- button. To mute the audio temporarily, press the MUTE button. Setting Audio Options Audio options are available only when the programme supports multiple audio languages. 1. Press the AUDIO button. Each time you press this button, the audio language changes or the Audio Description soundtrack will be selected. 2. Select the audio direction (if available) using the / arrows. Note: • The mute function remains set while you change channels. • You cannot set the audio direction when the programme is broadcast in Dolby Digital. Display Select Confirm 15 Basic Operation Display Format / Resolution Setting Display Format Press the WIDE button to set the display format according to the screen ratio. Each time you press this button, the value changes. Screen ratio 4:3: Auto - Letterbox 16:9 - Letterbox 14:9 - Centre Screen ratio 16:9: Auto – Pillar Box – Zoom Note: Refer to Display Format for details. Display Setting Resolution Press the V-FORMAT button to set the resolution of the screen. Each time you press this button, the value changes. 576i - 576p - 720p - 1080i - 1080p Note: When connected with an HDMI cable you may only be able to change to the resolutions that the TV supports. Display 16 Basic Operation English Programme Information (i-plate) The i-plate is an information banner that is displayed for a certain period of time whenever you change channels. Press the i button while watching a progamme to display the i-plate. Press the EXIT button to hide. Playing time Icons Signal strength and quality Programme name Channel number and name Group name Current time and date Display Navigation mode Viewing detailed programme information Press the i button again while the i-plate is displayed. Viewing previous/next programme information Press the / button while the i-plate is displayed. Press the OK button to set reminders for future programmes. Viewing programme information of other channels Press the / button while the i-plate is displayed. Press the OK button to change to the selected channel. Icons The icons represent the information and services provided. Locked programme Series Programme Pay TV / encrypted programmes (CAS icons) Resolution Parental guidance programme HD programme Scheduled programme (Red: Record, Blue: Reminder) Multiaudio Subtitle Dolby Digital audio Dolby Digital Plus audio Audio Description Note: Programme information is not displayed when there is no programme information. 17 Basic Operation Sleep Timer Press the SLEEP button to set the automatic turn off time. Each time you press this button, the value changes. Sleep Off - 10 - 20 - 30 - 60 - 90 - 120 minutes Display Subtitle You can select the subtitle language when subtitle information is provided. Press the SUB button. Each time you press this button, the subtitle language changes. Note: • You can choose to always display the subtitle when available. • The icon appears when the DVB subtitle is supported. Display Option You can set the options for the watching channel. 1. Press the OPT+ button. 2. Select an option. Favourite : Select the favourite group to add the channel Lock : Select On or Off. Delete: Press the OK button. 2. Select OK to save and exit. Display 18 Basic Operation English Text and Interactive Services If your chosen channel has digital text features, you can access them. Digital text services often load automatically shortly after the digital text window is displayed. In which case, simply follow the on screen instructions. (Press colour buttons) 1. Press the TEXT button to access digital text. 2. Press the TEXT button again to return to normal viewing. 3. Press the P/P button to exit this service. 19 Channel List The channel list will help you find the channel you want to watch quickly and easily. You can access the channel list in several ways. Press the LIST button. Press the MENU button and select Channel List. Changing Channels Select the channel you want to watch and press the OK button. The displayed channel will change. Note: • : Locked channel, : Pay TV / encrypted programmes (CAS icons) • Press the i button to view the detailed programme information. • Press the LIST or EXIT button to exit. Advanced Options Changing Group You can display the list of the selected channel group. TV, HDTV, Radio, Favourite 1~5, Recent 1. Press the arrow. 2. Select a channel group. 3. Press the OK button. Note: Press the TV/RADIO button to switch between TV and Radio groups. Sorting Channels Press the RED button to sort the list in numerical or alphabetical order. 20 Display/Change Select Confirm Channel List English Editing Channels in Channel List You can lock or delete each channel in the channel list, as well as in menu. To edit the multiple channels, go to MENU >Settings > Edit Channels. Locking / Deleting Channels 1. Select a channel you want to edit and press the GREEN button. 2. Select an option. Lock: Select On or Off. Delete: Press the OK button. 3. Select OK to save and exit. Note: The default password is 0000. If you have forgotten your password, please contact Humax Customer Support. Setting Favourite Channels GREEN Display Select Confirm You can select your favourite channels and include them in the five favourite groups. 1. Select a channel and press the GREEN button. 2. Select Favourite. 3. Select a favourite group you want to include the channel in and press the OK button. To remove a channel from a favourite group, select the group and press the OK button again. 4. Select OK to save and exit. 21 Managing Channels Editing Channels The Edit Channel List menu will help you delete or lock multiple channels. MENU Settings Edit Channels Edit Channel List Group name Marked / Total channels Function buttons : Coloured button Select Mark/Confirm Page up/down Note: • : Locked channel, : Pay TV / encrypted programmes (CAS icons) • Press the MENU or EXIT button to exit. Press the BACK button to return to the previous screen. Deleting Channels 1. Select the channels using the / and OK button. 2. Press the RED button. Locking / Unlocking Channels 1. Select the channels using the / and OK button. 2. Press the BLUE button. 3. Select Lock. To unlock, select Unlock. 22 Managing Channels English Advanced Options Changing Group To list the channels of other groups, press the GREEN button and select a group you want. Note: Press the TV/RADIO button to switch between TV and Radio groups. Changing Background You can change the channel displayed in the background while editing. 1. Select the channel you want to watch. 2. Press the YELLOW button. The displayed channel will change. Selecting / Releasing All Channels 1. Press the BLUE button. 2. Select Select All. 3. To release all, select Release All. 23 Managing Channels Editing Favourite Channels The Edit Favourite List menu will help you add or remove channels from the favourite groups. MENU Settings Edit Channels Edit Favourite List Group name Marked / Total channels Favourite group name Function buttons : Coloured or OPT+ button Select Mark/Confirm Page up/down Note: Press the MENU or EXIT button to exit. Press the BACK button to return to the previous screen. Adding / Removing Favourite Channels 1. Press the YELLOW button and select the favourite group you want to edit. 2. To add channels to the favourite list, select the channels you want to add using the / and OK button in the left column and then press the RED button. The added channels will appear in the right column. 3. To remove channels from the favourite list, select the channels you want to remove in the right column and then press the RED button. Moving Channels 1. Select the channels using the / and OK button. 2. Press the RED button. 3. Move the selected channels to the location you want using the / and OK button. Note: You can move the channels in the right column only. Renaming Favourite Groups 1. 2. 3. 4. 24 Press the YELLOW button and select the favourite group you want to edit. Press the OPT+ button Select Rename. Enter the name in the keyboard. Managing Channels English Advanced Options Changing Group To list the channels of other groups in the left column, press the GREEN button and select a group you want. Note: Press the TV/RADIO button to switch between TV and Radio groups. Changing Background To list the channels of other groups in the left column, press the BLUE button and select a group you want. Selecting / Releasing All Channels 1. Press the OPT+ button. 2. Select Select All. 3. To release all, select Release All. 25 TV Guide The TV guide is an on-screen guide of grid type which displays the programme information of channels in time and date order. You can access the TV guide in several ways. Press the GUIDE button. Press the MENU button and select TV Guide. Note: Press the GUIDE or EXIT button to exit. Press the BACK button to return to the previous screen. Preview Current time and date Information of the selected programme: channel number & name, programme name, simple information, favourite group, and icons Time bar Function buttons : Coloured button Select Tune/Reserve Page up/down Note: • Press the i button to view the detailed programme information. • : Scheduled programme (Red: Record, Blue: Reminder), : Recording programme, : Present time Watching Programmes 1. Select a programme and press the OK button. The programme will be displayed in the preview. 2. Press the OK button again to exit the TV guide and watch the programme. 26 TV Guide English Setting Reminders 1. Select a future programme and press the OK button. 2. Select Reminder and press the OK button. Press the OK button again to cancel the reservation. The reserved programmes will be added automatically in Schedule. Note: • If the programme is overlapped with another programme, adjust the reservation appropriately. • If the channel is locked, you will be prompted to enter your password before watching. The default password is 0000. If you have forgotten your password, please contact Humax Customer Support. • In standby mode the product will switch on to the channel when the programme starts. • You can reschedule reminders or recordings. (Refer to Scheduling Reminders and Recordings.) Advanced Options Quick Navigation Press the / button to move to the previous/next programme. Press the / button to jump back/ahead two hours. Press the I/I button to move to the previous/next day. Changing Group To list the channels of other groups, press the BLUE button and select a group you want. Note: • Press the TV/RADIO button to switch between TV and Radio groups. • To search specific programmes, go to Find by pressing the GREEN button. (Refer to Finding Programmes.) 27 TV Guide Finding Programmes Find will help you find the programmes more specifically using the keyword or genre. By Keyword 1. 2. 3. 4. Press the GREEN button. Select Keyword and press the button. Select a keyword and press the OK button. Press the YELLOW button to confirm. Note: To enter a new keyword, select New Keyword. By Genre 1. 2. 3. 4. Press the GREEN button. Select Genre and press the button. Select a genre and press the OK button. Select the specific genre and press the OK button. (if provided) GREEN Display Confirm Select Page up/down Note: • Press the i button to view the detailed programme information. • Press the OK button to watch a found programme. (Refer to Changing Channels.) • You can set reminders or recordings for future programmes. (Refer to Setting Reminders or Recordings.) 28 TV Guide English Scheduling Reminders and Recordings Schedule lists reminders and will help you manage them in more detail. 1. Press the YELLOW button. 2. You can add, edit or delete your reminders. To add, select New Reminder and press the OK button. To edit, select a reminder and press the OK button. To delete, select a reminder and press the BLUE button. 3. Reservation will pop up. You can change the options you want using the ///, NUMERIC(0~9) and OK buttons. 4. Select OK to save and exit. YELLOW Note: • Press the i button to view the detailed programme information. • You can easily set reminders or recordings in TV Guide, Find or i-plate navigation mode. Display Confirm Select Page up/down 29 Recording and Playback You can record programmes in the built-in hard disk drive and playback the recorded programmes whenever you want. Recording You can watch another channel while recording a channel or record programmes from two different channels at the same time. Instant Recording You can record the currently watching programme instantly and change the recording duration. To instantly record the current programme you are watching, press the RECORD button. The recording will start from the current broadcast point and the record banner will be displayed for a few seconds. Press the STOP button to stop recording the programme. The recording will continue till the end of the current programme. However, if the programme ends in less than ten minutes, it will continue till the end of the next programme. When no programme information is provided, the recording will continue for two hours. Note: You can also press the Record button while in the Guide to start recording a current programme on a different channel. Delayed Recording You can record the scenes of a live broadcast you have been watching until now by rewinding with the time shifted recording function. Find the starting point you want to record by using the REWIND, or buttons, then press the RECORD button. The recording will start from the point you select. Changing Recording Duration 1. Press the RECORD button on the currently recording channel. 2. Set the duration manually or select till the end of the current prorgramme or the next programme. Record 30 Select Confirm Enter 0~9 Recording and Playback English Scheduled Recording You can easily set the recording reservations in TV Guide, Schedule or i-plate navigation mode. While in the TV Guide highlight a future programme and press the OK button. Select from: Record Whole Series Record the Whole Programme Press the OK button on a future programme in i-plate and select either Record Series or Record the Whole Programme. (Refer to Programme Information.) The recording will start at the scheduled time and the record banner will be displayed for a few seconds. Press the STOP button to stop recording the programme. Note: • Press the GUIDE button to go to TV Guide. • Press the GUIDE button and press YELLOW button to go to Schedule. • Press the i button while watching a progamme to display the i-plate. Editing Recording Schedule You can edit or delete your reservations in Schedule. To edit, select a reservation and press the OK button. You can change the options such as channel, date, time, repeat mode, etc. To delete, select a reservation and press the OPT+ button. Record Select Confirm Enter 0~9 31 Recording and Playback Recording Conflict You can watch another channel while recording a channel or record programmes from two different channels at the same time. Recording Duration Conflict When an instant recording conflicts with one of the scheduled recordings (or reminders), you can either; Record for the automatically modified duration. Cancel either of the scheduled recordings (or reminders). Cancel the previous recording. Watching Conflict When a scheduled recording starts on a different channel while you are watching a channel and recording another channel, a record notice will pop-up 30 seconds before the scheduled recording starts. OK: The channel will change at the start time and the scheduled recording will start automatically. Cancel: The scheduled recording will be canceled. Scheduling Conflict When a new scheduled recording conflicts with one of the previously set recordings (or reminders), you will be prompted to select up to two programmes you want to keep. Select the programme using the / and OK button. Record 32 Select Confirm Enter 0~9 Recording and Playback English Setting Padding / Jump Time MENU Settings Preferences Recording Setting Padding Time You can set the recording padding time in case the recording starts earlier or ends later than scheduled. Start Padding Time : Additional recording time before the recording starts. End Padding Time : Additional recording time after the recording ends. Setting Jump Time You can set the jump time to replay or skip scenes during playback or time shifted recording. Instant Replay Time : 7 sec, 15 sec, 30 sec Skip Forward Time : 30 sec, 60 sec, 120 sec, 240 sec Note: • You can record radio programmes also. • The record banner will be displayed with the i-plate whenever pressing the i button. • You can change the recording duration by using the RECORD button for instant recording or by going to MENU > TV Guide > Schedule for scheduled recording. • When a new scheduled recording starts while a recording is already in progress, the record banner will be displayed for a few seconds to inform you that the recording has been started. If you are not watching the channel being recorded, a record notice will pop-up 30 seconds before the scheduled recording starts, and the channel will switch to the scheduled programme automatically at the start time. • Pressing the STANDBY button while recording will not stop the recording. New recordings will start even in standby mode. • While watching a recording programme, you can trick-play using the playback control buttons such as pause, fast rewind, instant replay, slow, etc. • You can record the digital TV or radio programmes only. The external AV inputs cannot be recorded. • Make sure that there is enough free space before recording. If the free space on the hard disk drive is insufficient, recording will stop. Recording HD programme requires more space than SD programme. Recording one hour of HD and SD programmes may require 8 GB and 2~3 GB of hard disk space, respectively. The space for recording one hour programme may differ depending on the programme. • To view the recorded programme list, press the MEDIA or MENU button and select Video. (Refer to Using Video List.) Record Select Confirm Enter 0~9 33 Recording and Playback Playback You can playback the recorded programmes that are stored in the built-in hard disk drive. Playing Recordings (Video) You can access the recorded file list easily and play the recorded programmes. Press the MEDIA button. Press the MENU button and select Video. Select a file and press the OK button. Playback will start. You can perform fast rewind, fast forward, slow motion and pause while playing back a recorded file. The green playbar is displayed when pressing the PLAY, FAST FORWARD, REWIND, SLOW or PAUSE button while playing. Present time Play status Start time Play pointer Record 34 Select Confirm Total time Enter 0~9 Recording and Playback English Playback Controls Play Pause the scene. Press the PAUSE button again to go back to play mode. Stop the playback of the current file and go to live TV. Fast Rewind Fast Forward Move to the previous chapter and replay the scenes. Move to the next chapter and skip scenes. / Jump to the previous or next scene. Add or delete a bookmark in your desired scene. The bookmarked scene is shown as a yellow pointer. Jump to bookmarked scenes directly. The play pointer will first move to the nearest bookmark. Watch the recording in slow video. Note: • When you press the BACK button during playback, the playback stops. • Chapters are made by dividing the recorded programme into eight portions. • Bookmarks are available only when playing back the recorded programmes. • Up to four bookmarks can be used, and the bookmarks will remain even if you stop playback. • Refer to Media List > Using Video List for more details about the recorded files. Record Select Confirm Enter 0~9 35 Recording and Playback Pausing and Rewinding Live TV (TSR) Time Shifted Recording (TSR) allows you to pause a live broadcast and return to it later and continue where you left off. The TSR function automatically saves the programmes you watch to the built-in hard disk drive temporarily. TSR lasts for 120 minutes. To pause the programme you are watching, Press the PAUSE button. Press the PLAY button to return. Pause makes a time gap between the live broadcasting point and watching point. The time gap is equivalent to the period the programme has been paused. Press the STOP button to close the time gap and go to live programme. To rewind and watch missed scenes, Press the REWIND button. Press the PLAY button at the point where you want to start watching. You can pause, rewind or fast forward within the programme. You can fast rewind to the start point. If you reach the start point while rewinding, the programme is automatically played at the normal speed. To fast forward and skip scenes, Press the FAST FORWARD button. You can fast forward only when there is a time gap between the current watching point and the live broadcasting point caused by pause, slow motion or fast rewind. You can fast forward up to the current broadcasting point. If you reach the live broadcasting point while fast forwarding, the programme is automatically played at normal speed. Note: Press the PREVIOUS/NEXT button to instantly replay or skip scenes at regular intervals you set in the menu. (Refer to Setting Jump Time.) To record the Time Shift Recording buffer Rewind to the point you wish to record and press the Record button on the remote control. Note: The recording will not appear immediately in the Media list as time is required to transfer the buffer into a recording. Record 36 Select Confirm Enter 0~9 Media List English You can retrieve video, music or photo files from the built-in hard disk drive, the USB storage devices, or the DLNA compliant devices. You can access Media List in several ways. Press the MEDIA button. Press the MENU button and select Video, Music or Photo. Connect a USB storage device for media and select your desired media type. Video Lists TV/Radio recordings or XviD files. Music Lists MP3 files. Photo Lists JPEG files. Note: • Press the MEDIA or EXIT button to exit. Press the BACK button to return to the previous screen. • When you connect a USB storage device, the media type menu is displayed automatically. • Select Copy to copy the media files to the different devices. (Refer to Using the Video List > Editing Files.) Switching Storage 1. Press the BLUE button to switch the storage. 2. Select the storage and press the OK button. HDD: Displays the internal HDD. USB: Displays each partition of the connected USB storage devices. Select a USB. Network: Displays the connected DLNA compliant devices. Select the server. Switching Media 1. Press the YELLOW button to switch the media type. 2. Select the media type and press the OK button. Video, Music, Photo Media On/Off Select Confirm Enter 0~9 37 Media List Note: • Please use only the USB storage device which was formatted with ext3, FAT or NTFS file system. • Compatible USB devices include portable flash memory (particularly keydrives) and digital audio players (MP3 players) of format FAT12/16/32. It is not possible to connect this unit to a personal computer for USB playback. • You can play back XviD/MP3/JPEG files (except files with copy-protection or restricted playback). • Supported features according to USB file system ext3: Read, Copy (Digital TV/Radio, MP3, JPEG, XviD) FAT: Read, Copy (Digital TV/Radio, MP3, JPEG, XviD) NTFS: Read (MP3, JPEG, XviD) • • • • • • • • • • • • • • • • • • USB ports on your product supply 800mA in total. This 800mA is shared among all devices connected to product. Please connect power to a USB storage device which requires an external power supply. If not, the device may not be recognized. Please connect a USB storage device with the cable offered by the device maker. If you use a cable which is not offered by the device maker or an excessively long cable (max 5m), the device may not be recognized. If the USB storage device is connected in standby mode, it will automatically be recognized when the product is turned on. A USB storage device using an automatic recognition programme may not be recognized. A USB storage device which uses its own driver may not be recognized. The recognition speed of a USB storage device may depend on each device. Please do not disconnect or turn off the USB storage device while playing back. When the USB storage device is suddenly separated or unplugged, the stored files or the USB storage device may be damaged. Be sure to back up important files since data stored in a USB storage device may be damaged. We will not be responsible for any data loss. If your USB storage device has multiple partitions, or if you use a USB multi-card reader, you can use up to 4 partitions or USB memory devices. If the USB memory stick does not work properly, disconnect and reconnect it. Some USB storage devices may not be supported or operated smoothly. How fast a USB storage device is detected differs from device to device. USB storage devices below USB 2.0 are supported as well. But they may not work properly. The system may require a longer time to read large amounts of data stored in a USB device. Only one USB icon will appear even when there are more than one USB. The network icon is displayed only when the network has been connected. HUMAX cannot guarantee compatibility (operation and/or bus power) with all USB mass storage devices and assumes no responsibility for any loss of data that may occur when connected to this unit. Media On/Off 38 Select Confirm Enter 0~9 Media List English Using Video List You can play TV/Radio recordings or XviD files from the built-in hard disk drive, the USB storage devices, or the DLNA compliant devices. MENU Video Note: • Press the YELLOW button to switch the media type. • Press the BLUE button to switch the storage. • Press the i button to view the detailed programme information. Path Storage New recorded file Recording file Playing file XviD file Function buttons : Coloured or OPT+ button Note: • : Recording icon, : Playing icon , : HD icon, : CAS icon, : Lock icon • When you record the whole series of the programme, the programmes will be recorded in the same series folder. Playing Files Select a file and press the PLAY button. Playback will start from the recently viewed point. To play multiple files successively, select the files using the RED button and press the PLAY button. Using Play Options 1. Select a file and press the OK button. 2. Select a play option. Resume Play: Plays from the recently viewed point. Play from the Start: Plays from the start. Delete: Deletes the selected files. Rename: Renames the selected file. Lock/Unlock: Locks or unlocks the selected files. 3. Press the OK button. You can perform fast rewind, fast forward, slow motion and pause while playing back a recorded file. Refer to Recording and Playback > Playback for details on playback control and playbar. Media On/Off Select Confirm Enter 0~9 39 Media List Note: • To play multiple files successively, select the files using the RED button and press the OK button. When multiple files are selected, Resume Play and Rename are not available in Play Options. • You will be prompted to enter the password when playing the locked files or the files with guidance policy. • Some playback control buttons may not function depending on the contents. Editing Files Sorting Files 1. Press the OPT+ button. 2. Select Sort and press the OK button. The files will be sorted in alphabetical order. 3. To sort the files in time order, repeat the above procedure. Note: Sorting files is available for video files only. Deleting Files 1. Select the file(s) you want to delete and press the OPT+ button. 2. Select Delete and press the OK button. 3. Select Yes and press the OK button. Locking Files 1. 2. 3. 4. Select the file(s) you want to lock and press the OPT+ button. Select Lock and press the OK button. To unlock, press the OPT+ button again and select Unlock. Enter the password. Moving / Copying Files 1. Select the file(s) you want to move and press the OPT+ button. 2. Select Move and press the OK button. 3. Select the folder or storage you want to move the file(s) to and press the OK button. Moving the file(s) within the same storage: Select the folder you want to move the file(s) to and press the OK button. Copying the file(s) to another storage: Select the storage and then select the folder to copy the file(s) to. Press the OPT+ button to create the folder. Note: • When moving a locked file, you will be prompted to enter the password. • When a file is moved to a different storage, it will be copied. However, video recordings cannot be copied to other storages. Media On/Off 40 Select Confirm Enter 0~9 Media List English Renaming Files 1. Select the file you want to rename and press the OPT+ button. 2. Select Rename and press the OK button. 3. Enter the name of the file in the keyboard and press the YELLOW button. Creating Folder 1. Press the OPT+ button. 2. Select New Folder and press the OK button. 3. Enter the name of the folder in the keyboard and press the YELLOW button. Media On/Off Select Confirm Enter 0~9 41 Media List Using Music List You can play MP3 audio files from the built-in hard disk drive, the USB storage devices, or the DLNA compliant devices. MENU Music Note: • Press the YELLOW button to switch the media type. • Press the BLUE button to switch the storage. Path Storage Title, Artist, Album Function buttons : Coloured or OPT+ button Playing Files Select a file and press the OK or PLAY button. All files in the folder will be played successively. To play the selected files only, select the files using the RED button and press the OK or PLAY button. Media On/Off 42 Select Confirm Enter 0~9 Media List English Music Player The music player is displayed while playing the music file(s). Plays or pauses Plays Pauses Plays the previous file RED Plays the next file Changes the play mode (once, repeat, repeat all, shuffle) Plays the first file Stops the music player and displays the list Plays the last file Exits the music player and goes to live TV Editing Files Deleting, moving, renaming the music files or creating new folders are the same as in the video list. Refer to Using Video List > Editing Files. Media On/Off Select Confirm Enter 0~9 43 Media List Using Photo List You can play JPEG photo files from the built-in hard disk drive, the USB storage devices, or the DLNA compliant devices. MENU Photo Note: • Press the YELLOW button to switch the media type. • Press the BLUE button to switch the storage. Path Storage Thumbnail Function buttons : Coloured or OPT+ button Photo Slideshow Select a file and press the OK or PLAY button. All files in the folder will be shown successively. To slideshow the selected files only, select the files using the RED button and press the OK or PLAY button. The info banner is displayed while slideshow is paused. Pauses or plays Plays Shows the previous photo Pauses Shows the next photo Stops slideshow and displays photo list Shows the first photo Exits slideshow and goes to live TV Shows the last photo Media On/Off 44 Select Confirm Enter 0~9 Media List English Editing Files Deleting, moving, renaming the photo files or creating new folders are the same as in the video list. Refer to Using Video List > Editing Files. Slide Mode You can play music files during slideshow. 1. Press the OPT+ button. 2. Select Slide Mode and press the OK button. Display Time: The duration a photo is displayed Music Play: Select On to play music files during slideshow. Folder: Select the folder the music files in located in using the RED button. 3. Select OK to save and exit. Media On/Off Select Confirm Enter 0~9 45 HUMAX TV Portal HUMAX TV Portal provides Catch-up TV services and various web applications. You can access HUMAX TV Portal in several ways. Press the TV Portal button. Press the MENU button and select HUMAX TV Portal. Note: • Press the TV Portal button to return to TV Portal home while using the portal service. • Press the EXIT button to exit. Press the BACK button to return to the previous screen. • Press the RED button to enter the simple mode. • Press the BLUE button to display the HUMAX Privacy Policy. • HUMAX TV Portal is powered by independent service providers and the services are subject to change without notice. Sky Player You can watch live TV programmes and TV on demand with a monthly subscription. For more information please visit http://www.humaxdigital.co.uk/skyplayer BBC iPlayer You can watch live TV or radio programmes and watch them again for seven days after they are broadcast. flickr / WIKI@TV You can access Flickr to view photos on your TV. You can also browse Wikipedia on the TV screen. Internet Radio You can browse your favourite music and listen to them from the internet radio stations around the world with streaming audio technology. Disclaimer: You agree that your use of the HUMAX TV Portal Service (“Service”) is at your sole risk and acknowledge that the Service and anything contained therein, including, but not limited to, content, services, goods or advertisements (the “Items”) are provided “AS IS” and that HUMAX makes no warranty of any kind, express or implied, as to the Items, including, but not limited to, merchantability, no infringement, title or fitness for a particular purpose or use. HUMAX is not responsible for the quality of the broadband, and any disruptions or discontinuation of the Services as a result of broadband provided by your Internet Service Provider (“ISP”). HUMAX does not warrant that the Service is compatible with your equipment or that the Service is free of errors or viruses and is not liable for any damage you may suffer as a result of such destructive features. You agree that HUMAX, its Suppliers and its third-party agents shall have no responsibility or liability for any injury or damages, whether caused by the negligence of HUMAX, its employees, subcontractors, agents, Suppliers or otherwise arising in connection with the Service and shall not be liable for any lost profits, losses, punitive, incidental or consequential damages or any claim against HUMAX by any other party or any fault, inaccuracy, omission, delay or any other failure in the Service caused by your equipment or arising from your use of the Service on such equipment. For any issues or questions about the compatibility with your broadband, please contact your ISP. TV Portal On 46 Select Confirm Exit Preferences English In this chapter you can set options for parental control, language, time, video, audio and screen display. Note: Press the MENU or EXIT button to exit. Press the BACK button to return to the previous screen. Parental Control MENU Settings Preferences Parental Control You will be prompted to enter the password to access this menu. Note: The default password is 0000. If you have forgotten your password, please contact Humax Customer Support. Guidance Policy You can set the guidance on the recordings or internet contents during the watershed which is the time period (21:00 to 05:30) for adult contents. 1. Select Guidance Policy. 2. Select an option. All Content All Guidance Marked Content Internet Content Only Off 3. Press the OK button. Note: The password is required to view the blocked programmes. Changing Password You can change the current password. This password is prompted every time a password blocked menu is accessed. 1. Select Change STB Password. 2. Enter the new password. 3. Enter the new password for verification. Menu On/Off Select Confirm Enter 0~9 47 Preferences Language Setting MENU Settings Preferences Language You can set the preferred language for audio and subtitle. 1. Select Preferred Language. 2. Select the language. Note: • You can change the audio or subtitle language by pressing the AUDIO or SUB button while watching a programme. • The Preferred Language will be the priority when you change channels or restart the product. Setting Power On/Off Timer MENU Settings Preferences Time 1. To turn on the product automatically, select Power On Timer and select Set Timer. 2. Enter the time. 3. Set the options for the power on timer. Channel: Select the channel to be displayed when powering on. Volume: Adjust the volume of the audio when powering on. Repeat: Select the repeat mode of the power on timer. 4. To turn off the product automatically, select Power Off Timer and select Set Timer. 5. Enter the time. Note: The power on time and power off time should be set different from each other. Menu On/Off 48 Select Confirm Enter 0~9 Preferences English Video Setting MENU Settings Preferences Video Setting TV Screen Ratio You can select the screen ratio of your TV. 1. Select Screen Ratio. 2. Select an option. 16:9 - 4:3 Setting Display Format You can select the display format according to the screen ratio of your TV. 1. Select Display Format. 2. Select an option. Screen ratio 4:3: Auto - Letterbox 16:9 - Letterbox 14:9 - Centre Screen ratio 16:9: Auto - Pillarbox - Zoom Note: You can set the display format by pressing the WIDE button while watching a programme. Refer to Display Format / Resolution. Screen ratio Display Format 4:3 Auto Letterbox16:9 Letterbox14:9 Auto Pillarbox Zoom Centre 16:9 Setting TV SCART You can select the video signal output option for the TV SCART. 1. Select TV SCART. 2. Select an option. CVBS – RGB Menu On/Off Select Confirm Enter 0~9 49 Preferences Audio Setting MENU Settings Preferences Audio Setting Audio Description You can set to narrate the on-screen visuals which is used for visually impaired viewers. 1. Select Audio Description. 2. Select an option. On - Off Note: Not all channels/programmes will provide Audio Description; for further information please contact the Broadcaster. Setting Digital Audio Output You can select the digital audio signal output of your product. 1. Select Digital Audio Output. 2. Select an option. Multi - channel - Stereo Item Audio Digital Audio Output MPEG PCM DD DD DD+ DD MPEG PCM DD PCM DD+ PCM Multichannel Stereo Setting Lip-Sync You can adjust the sound difference of audio and video. 1. Select Lip-Sync. 2. Adjust the lip-sync using the / button. Pressing the right button increases the audio speed and pressing the left button decreases it. Menu On/Off 50 Select Confirm Enter 0~9 Preferences English Screen Display MENU Settings Preferences Screen Display Setting Info Display Time You can set the duration the information box is displayed every time the channel is switched. 1. Select Info Display Time. 2. Select an option. Off - 1~20 sec Setting Transparency You can set the transparency of the On-Screen Display. 1. Select Transparency. 2. Select an option. Off - 25% - 50% - 75% Setting Subtitle Display You can set to display the subtitle automatically or not. 1. Select Subtitle Display. 2. Select an option. On - Off Setting Subtitle Font You can adjust the subtitle font. 1. Select Subtitle Font. 2. Select an option. Variable - Fixed Menu On/Off Select Confirm Enter 0~9 51 Installation Installation menu allows you to search the available TV and radio channels. Software update, antenna power and factory default setting are also available in this section. MENU Settings Installation Note: • You will be prompted to enter the password to access this menu. The default password is 0000. If you have forgotten your password, please contact Humax Customer Support. • Press the BACK button to save the changes and return to the previous screen. Press the MENU or EXIT button to exit. Automatic Search You can search channels automatically without entering any other information. 1. Select Automatic Search. Channel search starts. 2. Select Save and press the OK button to save the results. Note: Select Stop and press the OK button to stop the channel search. Menu On/Off 52 Select Confirm Enter 0~9 Installation English Manual Search You can search channels manually by searching parameters. 1. Select Manual Search. 2. Configure the search options. Channel: Select the channel. Frequency: Enter the frequency. Transmission: Select DVB-T or DVB-T2. Bandwidth: Select the bandwidth. Network Search: Select On or Off. 3. Select Search and press the OK button. 4. Select Save and press the OK button to save the results. Note: • Select Stop and press the OK button to stop the channel search. • For information on the correct channel numbers to use in your area please visit http://www.digitaluk. co.uk. Please select the “I am in the aerial installation trade” option when searching your postcode. Software Update (OTA) In order to maintain proper performance of the product, it is essential to have the most up-to-date software. Visit the HUMAX website to check the latest news and newly released software versions. (http:// www.humaxdigital.com) It is recommended that you periodically check for the availability of software update. OTA, an abbreviation of Over–the-Air, means that the software can be downloaded through your aerial. The manufacturer reserves the right to decide when and where to release software by this process. You can also search and download new software manually. MENU Settings Installation Software Update Automatic Update 1. Select Automatic Update and press the OK button to search for new software 2. When new software is detected, select Yes to start the update process now. Menu On/Off Select Confirm Enter 0~9 53 Installation Manual Update 1. Select Manual Update and press the OK button. 2. Enter the options manually Channel: Select the channel. Frequency : Enter the frequency. The corresponding frequency value will be automatically displayed. Transmission: Select DVB-T or DVB-T2. 3. Select Search and press the OK button to search for new software. 4. When new software is detected, select Yes to start the update process now. Please wait until the update is complete. When completing the software update, the product is automatically powered off and on again. Note: • It may take 5~10 minutes to update software. • Other functions such as scheduling programmes will not activate while software update takes place. • The software updates will only be downloaded over air if you are receiving the HD channels available. If you do not receive the HD channels at the current time please visit http://www.humaxdigital.co.uk/ update to upgrade via USB. • Be sure to update software when the signal strength and quality is high. If the weather is not favorable and the signal strength and quality are not recommendable, perform the software update later. • The product will search new software automatically during standby. If new software is detected, you can choose either to download immediately or later when you switch into operation mode. If you select Later, the message will be displayed again when you power on. Caution: • Please be careful to keep the power on and the power cord plugged in during software update. If the power is off during software update, fatal damage may be caused to the product. • Please be careful not to pull out the signal line (RF cable) during software update. Update may be interrupted and the product may not operate. Menu On/Off 54 Select Confirm Enter 0~9 Installation English Antenna Power MENU Settings Installation Antenna Power Active antenna is a portable or indoor antenna which needs power supply from the product because it does not have power cord for itself. Connect an active antenna to the ANTENNA IN on the rear of the product. 1. Select 5V Antenna Power. 2. Select an option. On: 5V power is supplied from the active antenna cable. Off: No power supplied Note: Most domestic aerial installation will not require the Antenna Power option to be switched on. Please check with your aerial installer if this is required for your aerial. Factory Default MENU Settings Installation Factory Default 1. Select Factory Default. 2. A popup will appear. Select Yes. 3. You will be prompted to enter the password. Enter the password. Note: • The default password is 0000. If you have forgotten your password, please contact Humax Customer Support. • To format the HDD, mark Format HDD. Warning: • Please note that once you perform Factory Default, all user configuration/settings will be reset to the Factory settings. After completing the factory default, the installation wizard will appear automatically in a few seconds. Menu On/Off Select Confirm Enter 0~9 55 System In System, system information, signal detection, power management , common interface, data storage and internet setting are available. Note: Press the MENU or EXIT button to exit. Press the BACK button to return to the previous screen. System Information MENU Settings System System Information The system information is displayed. Signal Detection MENU Settings System Signal Detection You can check the signal strength and quality of the searched channels. Note: We recommend that the Signal Strength is above 30% and the Signal Quality is above 70% in order to receive the channels without picture/sound breakup. Menu On/Off 56 Select Confirm Enter 0~9 System English Power Management MENU Settings System Power Management Setting Power Saving in Standby You can minimise the standby power consumption to below 1W. 1. Select Power Saving in Standby. 2. Select On to deactivate the certain features and minimise the power consumption. Note: When Power Saving in Standby is switched On the Time on the front display will not appear when in standby, nor will the Antenna Out loop-through the signal to a connected device. Setting Automatic Power Down The receiver automatically enters standby mode for power saving if no user interaction occurs for 3 hours. 1. Select Automatic Power Down. 2. Select On to enter standby mode automatically if no user interaction occurs for 3 hours. Note: The message will be displayed before entering standby mode. If no selection is made for 30 seconds, the receiver enters standby mode automatically. Common Interface MENU Settings System Common Interface The common interface information is displayed. Menu On/Off Select Confirm Enter 0~9 57 System Data Storage MENU Settings System Data Storage You can check the size of the internal HDD or external USB storage device. 1. Select storage to display the details for the storage. 2. To format the selected storage, select Format Storage. If you select Yes, you will be prompted to enter the password. Note: • The default password is 0000. If you have forgotten your password, please contact Humax Customer Support. • Supported Features according to USB file system. Ext3: Read, Copy (Digital TV/Radio, MP3, JPEG, XviD) FAT: Read, Copy (Digital TV/Radio, MP3, JPEG, XviD) NTFS: Read (MP3, JPEG, XviD) Internet Setting MENU Settings System Internet Setting Configuring IP (LAN) 1. You can configure the Ethernet setting options. DHCP: Apply the options according to the DHCP. Manual: Enter the options manually, 2. Select Apply and press the OK button. Note: When entering the IP address manually, enter 3 digits in a row. Menu On/Off 58 Select Confirm Enter 0~9 Appendix English Specification Tuner & Channel Input Connector IEC 169-2 Female Frequency Range 470 MHz to 862 MHz Signal Level -70 to -10 dBmV Demodulation OFDM Mode DVB-T : 2K, 8K DVB-T2 : 1K, 2K, 4K, 8K, 16K, 32K FEC Mode DVB-T: 1/2, 2/3, 3/4, 5/6, 7/8 DVB-T2: 1/2, 3/5, 2/3, 3/4, 4/5, 5/6 Guard Intervals DVB-T : 1/4, 1/8, 1/16, 1/32 DVB-T2 : 1/4, 1/8, 1/16, 1/32, 1/128, 19/128, 19/256 Audio/Video Decoding Audio Decoding Dolby Digital Plus Audio Mode Single channel/Dual channel/Joint stereo/Stereo Video Decoding HD MPEG2 /SD MPEG2 / MPEG4(H.264/AVC) Video Format 4:3, 16:9, Letter Box Video Resolution 1080p, 1080i, 720p, 576p, 576i Memory Flash Memory 32 MB MB RAM 320 MB EEPROM 8 KB Audio/Video In/Out Video TV-SCART, RCA, HDMI/HDCP Audio TV-SCART, Audio L/R, S/PDIF (Digital Audio Output) Data In/Out USB USB 2.0 Host (5 V 500mA Max.) RJ-45 Ethernet 10/100 Mbps Hard Disk HDD 500 GB / 1 TB (Optional) 59 Appendix Power Supply Input Voltage 90-250 V a.c., 50/60 Hz Type SMPS Power Consumption Max. 28 W (Standby: Under 1 W) Protection Separate internal fuse. The input should be protected against lightning. Physical Specification Size (w/h/d) 380 mm x 55 mm x 252 mm Weight 2.8 Kg Operating Temperature 0 °C to +45 °C Note: The specifications are subject to change without notice. Service and Support Information concerning troubleshooting, software upgrade and product support is provided in the following websites and call centers. Should your product require warranty service, please contact HUMAX to obtain the appropriate authorization. HUMAX Call Center UK 60 Tel: Opening Hours: E-mail: Website: Language: 0844 669 8800 Mon - Fri 09:00 – 17:30 (excluding Bank Holidays) [email protected] www.humax-digital.co.uk English Appendix English Safety Warning This product has been manufactured to comply with international safety standards. Please read the following safety precautions carefully. Safety Instructions and Precautions 1. MAINS SUPPLY • • Operate this product only from the type of power supply indicated on the marking label. If you are not sure of the type of power supplied to your home, consult your local power company. Disconnect the product from the mains before you start any maintenance or installation procedures. 2. OVERLOADING • Do not overload a wall outlet, extension cord or adapter as this may result in electric fire or shock. 3. LIQUID • The product should not be exposed to liquid of any kind. In addition, no objects filled with liquid should be placed on the apparatus. 4. CLEANING • • Disconnect the product from the wall outlet before cleaning. Use a light damp cloth (no solvents) to dust the product. 5. VENTILATION • • • The slots on top of the product must be left uncovered to allow proper airflow into the unit. Do not stand the product on soft furnishings or carpets. Do not stack electronic equipments on top of the product. 6. ATTACHMENTS • Do not use any unsupported attachments as these may be hazardous or cause damage to the product. 7. LIGHTNING, STORM OR NOT IN USE • Unplug the product from the wall outlet and disconnect the antenna during a thunderstorm or when left unattended and unused for long periods of time. This will prevent damage to the unit due to lightning and power-surges. 8. EXTRANEOUS OBJECTS • Do not insert anything through the openings in the unit, where they can touch dangerous voltage points or damage parts. 9. REPLACEMENT OF PARTS • When replacement of parts is required, be sure the service technician uses replacement parts specified by the manufacturer or those that have the same characteristics as the original part. Unauthorized substitution may result in additional damage to the unit. 10. CONNECTION [Satellite] CONNECTION TO THE SATELLITE DISH LNB • Disconnect the product from the mains before connecting or disconnecting the cable from the satellite dish. Failure to do so can damage the LNB. [Cable] CONNECTION TO THE CABLE TV SIGNAL • Connect all components before plugging any power cords into the wall outlet. Always turn off the product, TV and other components before you connect or disconnect any cables. [Terrestrial] CONNECTION TO THE AERIAL • Disconnect the product from the mains before connecting or disconnecting the cable from the aerial. Failure to do so can damage the aerial. 61 Appendix 11. CONNECTION TO THE TV • Disconnect the product from the mains before connecting or disconnecting the cable from the TV. Failure to do so can damage the TV. 12. LOCATION • • • • • Place the product indoors to avoid exposing it to lightning, rain or sun. Do not place it near a radiator or heat register. We recommend that the product has 10 cm clearance from any other appliances susceptible to electromagnetic influences, such as a TV or a VCR. Do not block the openings with any object, and do not place the product on a bed, sofa, rug, or other similar surface. If you place the product on a rack or a bookcase, ensure that there is adequate ventilation and that you have followed the manufacturer’s instructions for mounting. Do not place the product on an unstable cart, stand, tripod, bracket, or table where it can fall. A falling product can cause serious injury to a child or adult, and serious damage to the appliance. Warning 1. To avoid damage of the power cord or plug; • • • • • Do not modify or process the power cord or plug arbitrarily. Do not bend or twist the power cord. Make sure to disconnect the power cord holding the plug. Keep heating appliances as far as possible from the power cord in order to prevent the cover vinyl from melting. The mains plug, as a disconnection device, shall remain readily accessible by the user. 2. To avoid electrical shock; • • • • Do not open the main body. Do not insert metal or inflammable objects inside the product. Do not touch the power plug with wet hands. Disconnect the power cord in case of lightning. 3. To avoid damage of product; • • Do not use the product when it is out of order. If you continue to use the product when defective, serious damage can be caused. Make sure to contact your local product distributor if the product is out of order. Do not insert metal or alien substance into the slots for the modules or Smartcards. (where applicable) It may cause damage to the product and reduce its life span. 4. To avoid damage of the hard disk drive (PVR only) • • 62 Do not move the product or turn the power off suddenly while the hard disk drive is running. The company shall not be liable for any corruption of data on the hard disk drive caused by carelessness or misuse. Appendix English Trouble Shooting Before contacting your local service centre, please read the tips below carefully. If the problem persists after completing the following procedure, please contact your local product distributor or service centre for further instructions. 1. No message displayed on the front display. (The product will not switch on.) • • • • Check the main power cable and make sure it is plugged into a suitable power outlet. Check that the mains supply is switched on. Connect the power cable to a different power outlet. Check that the power switch is on at the rear of the product. (where applicable) 2. No picture • • • • • • • • • Make sure that the product is powered on and in operation mode. (Press the STANDBY button) Make sure that the AV cable is firmly connected to the TV. Make sure that the antenna cable is properly connected to the product. Make sure that you have selected the correct AV Channel / Input on your TV set (refer to your TV user manual for more information) Be sure to activate channel search. Check the brightness level of the TV. Check if the channel is currently on air. Contact the broadcaster to ensure that the channel is running. Press the SOURCE button if the product is in external input mode. (where applicable) Satellite: Make sure that the antenna setting in the menu is correct. 3. Poor picture/sound quality • • • • Install the antenna in an obstacle-free place. Make sure there is no mobile phone or microwave oven near the product. Keep the power and the antenna cables apart from each other. Check the signal levels and adjust your antenna if the level is too low. The signal level may be affected by weather conditions. Note: If the antenna is covered with snow or the RF is weakened by heavy rain, the condition of the sound and picture may temporarily be poor. However, the poor sound and picture quality due to weather conditions cannot be accepted as a malfunction of product. • • • • • • [Satellite] Check that your dish alignment is correct. [Satellite] Change the satellite dish for a larger one as this will increase the signal levels received. [Satellite] Replace the LNB with a lower noise factor in cases where the noise factor is too high. [Satellite] Replace the LNB with a new one in case it is damaged or out of order. [Terrestrial] Adjust the antenna direction to get a better picture. [Terrestrial] Set the antenna power in menu to On, if you use the active antenna to improve the reception. (where applicable) 4. No or poor sound • • • • Check that your AV cable is connected correctly. Check the volume levels of your TV set and the product. Check if the product or TV is on mute. Check audio type or soundtrack option in the AV menu. (where applicable) 5. Remote control does not operate. • • • • To control the product, the top end of the remote control should point directly towards the receiving part of the product. Remove and reinsert the batteries in the remote control. Replace the batteries in the remote control for a new set. Set the remote control to STB or PVR mode, if you are using the universal remote control. (where applicable) 63 Appendix 6. Cannot make reservations. • Check that no previous reservations are conflicting with the new reservation. 7. No password information is given. • The default password is always 0000. 8. Channel search does not work. • • • Satellite: Make sure that the antenna setting in the menu is correct. Terrestrial: Make sure that the antenna is connected correctly. Terrestrial: Use the appropriate antenna capable of receiving VHF or UHF channels for your area. 9. Cannot update new software. • You can get an update. If the product does not show a message requesting update, this means no software is available. 10. The product makes a humming noise. (PVR only) • The noise is from the fan; the hard disk is operating normally. This kind of noise is inevitable but seldom noticeable. 11. Cannot record progammes. (PVR only) • • • The hard disk is full. Delete unnecessary programmes and make space for new recording. Check if recording is overlapped with another channel. Stop the current recording or wait until the recording is finished. Check that the product is switched on when recording starts. 12. Cannot operate TSR (Time Shifted Recording). (PVR only) • • TSR may not be available during recording. Wait until recording is finished. Delete unnecessary programmes and make space for new recording. 13. Cannot playback. (PVR only) • • To playback the recorded file of a scrambled channel, use the Smartcard. In case it has been a long time since you last recorded, this may not work. Contact the product distributor. The signal during recording may be weak or the hard disk too full. 14. Cannot change channels while recording. (PVR only) • 64 Certain channels may not be changed due to restriction of the tuner or connection type. Appendix English Error Message Error message No or bad signal [Satellite] No or bad signal [Cable] No or bad signal [Terrestrial] The channel is scrambled or not available. The audio is not available. Possible causes What to do The satellite dish is not pointing at the satellite. Adjust dish alignment. Signal is too weak. Increase the LNB voltage or connect a signal amplifier. Satellite dish is too small. Change to a larger dish. Problem with LNB. Change the LNB. Wrong antenna setting. Set the antenna correctly. The cable is not connected. Make sure the cable is connected correctly. The cable may be damaged or defective. Exchange the cable. The channel is not broadcasting. Exchange the cable. The aerial is not pointing properly. Adjust aerial. Check the cable from the aerial. If you cannot resolve the problem, you may need to have your aerial and installation tested by a professional. The channel has a signal, but no audio or video. Confirm if the channel is currently on air. The channel has been deleted by the broadcasting company. Check if the channel is currently on air The channel is for data broadcasting. Remove the channel from the channel list and check for new transponder details. The channel has a video signal, but no audio. Press the audio button to confirm that the channel has audio options. No access Make sure you are subscribed to the channel. No authorization. If the product has been turned off for a long time (standby or power off ), please wait for authorization. It may take up to 60 minutes. No access 65 Appendix Glossary CVBS (Composite Video Baseband Signal) A technology for transmitting video signals via a cable. Mixes luminance (brightness) and the chrominance (colour) signals together. DiSEqC (Digital Satellite Equipment Control) A DiSEqC compatible receiver relies on a switching box which detects the 22kHz tone pulsing rapidly on and off. In this way, a specially designed receiver can control numerous LNBs through a DiSEqC switching box. Dolby Digital An encoding system that digitally compresses up to 5.1 discrete channels of audio (left front, centre, right front, left surround, right surround) into a single Bitstream. A low frequency effect (LFE) channel is included providing the sound needed for special effects. DVB (Digital Video Broadcasting) Set of standards that define digital broadcasts using satellite, cable or terrestrial systems. EPG (Electronic Programme Guide) An electronic equivalent to a printed television listings magazine; it is an application used with digital set-top boxes and digital television sets to list current and scheduled programs that are or will be available on each channel, including a short summary or commentary for each program. The information supplied in the EPG is sent and updated by the channel broadcaster. FEC (Forward Error Correction) A technique for error control of data transmission. Frequency The property of a signal measured in cycles per second (=Hz). FTA (Free- To-Air) An unscrambled broadcaster allowing customers to view channels or services without paying any subscription. HDD (Hard Disk Drive) The primary computer storage medium, which is made of one or more aluminum or glass platters, coated with a ferromagnetic material. HDMI (High-Definition Multimedia Interface) An all-digital audio/video interface that supports standard, enhanced, or high-definition video, plus multi-channel digital audio on a single cable. It transmits all ATSC HDTV standards and supports 8-channel digital audio. Hi-Fi (High Fidelity) The characteristics of audio devices that can play back all the audio frequencies a person can detect, which is the range of 16Hz-20KHz. Sometimes it is used to indicate good quality of audio devices such as stereo tape recorders. LNB (Low Noise Block) A device that is mounted on an arm facing your satellite dish, focusing on satellite signals. A LNB converts signals received from satellite to a lower frequency and sends them to a satellite receiver via coaxial cable. NVOD (Near Video On Demand) A technology that allows customers to view the start of popular programmes or films within a short period from the time they make their selection. This is possible as the broadcaster sends multiple copies with staggered start times. OSD (On Screen Display) OSD displays the basic information necessary for the users to configure monitor or TV settings. OSD information may include brightness, contrast, tuning, RGB adjustment, and screen size and position. OTA (Over the Air) A standard for the transmission of software for equipment, through a broadcast system. Manufacturers reserve the right for deciding the release of the software for their products. PID (Packet Identifier) A set of numbers identifying stream packets contained within a single data stream. 66 Appendix English Polarisation The direction of the electrical and magnetic fields of a signal. Satellites use both vertical and horizontal polarisation. Means that a frequency can be used twice. PVR (Personal Video Recorder) Video recorder that can record and playback programmes directly using the embedded hard disk drive(s). QPSK (Quaternary Phase Shift Keying) Digital modulation technique in which the carrier phase can have one of four possible values. RF (Radio Frequency) Television signals are modulated onto RF signals and are then demodulated by your television’s or STB’s tuner. RF Modulator Enables you to output the receiver’s digital signals to a TVs RF (Aerial) input, allowing you to connect the receiver to a TV set without a SCART connection. RGB (Red – Green – Blue) A technology for transmitting video signals via a cable. RGB is a system to represent red, green, and blue colours on a TV or monitor display. Red, green, and blue can be combined in various proportions to obtain any colour. RS-232C A connection to allow you to connect to a PC to update receiver’s software. SCART A 21-pin connector standard to connect two pieces of Audio-Visual equipment such as a TV and a VCR. Each device will have a 21-pin female connection; a cable with male connection at both ends is used for connecting the devices. Smartcard A credit card sized card that contains updateable chip memory. It is used for accessing Pay TV (encrypted) channel or services when inserted into an appropriate receiver. S/PDIF (Sony/Philips Digital Interface format) A standard format for the transfer of digital audio signals. It allows the transfer of digital audio between two devices without any conversion to and from analogue, which could degrade the signal quality. S-Video (Super-Video) Sometimes referred to as Y/C video; a technology for transmitting video signals via a cable. It is a video signal transmission in which the luminance (brightness) and the chrominance (colour) signals are transmitted separately to achieve superior picture clarity. Transponder A satellite is divided up in parts called transponders. A transponder is one distribution section of the satellite. Each transponder can be used for distribution of several channels or services. Trick-Play Pause, Fast Forward/Fast Rewind, Slow Motion, Instant Replay, Commercial Skip, Repeat A-B. TSR (Time Shifted Recording) A function that records the present programme temporarily to support trick-play. 67 Appendix Remote Control Code List 1. Using the Universal Remote Control 1. Select the mode(PVR, TV, DVD, AUDIO) you want to set by pressing the corresponding button on the remote control. The button will blink once. 2. Keep pressing the button for 3 seconds until the button lights on. 3. Enter the 3-digit code. Every time a number is entered, the button will blink. When the third digit is entered, the button will blink twice. 4. If a valid 3-digit code is entered, the product will power off. 5. Press the OK button and the mode button will blink three times. The setup is complete. 6. If the product does not power off, repeat the instruction from 3 to 5. Note: • When no code is entered for one minute the universal setting mode will switch to normal mode. • Try several setting codes and select the code that has the most functions. Remote Control Function List The keys on the remote control function as in the list below. Note: Some keys may not function depending on the product. Button TV DVD AUDIO STANDBY POWER POWER POWER MUTE MUTE MUTE 1 DIGIT 1 1 INPUT 1 2 DIGIT 2 2 INPUT 2 3 DIGIT 3 3 INPUT 3 4 DIGIT 4 4 INPUT 4 5 DIGIT 5 5 INPUT 5 6 DIGIT 6 6 INPUT 6 7 DIGIT 7 7 INPUT 7 8 DIGIT 8 8 INPUT 8 9 DIGIT 9 9 INPUT 9 0 DIGIT 0, 11 0 INPUT 0 MENU MENU MENU/MODE PVR TV DVD AUDIO TV Portal MENU 68 Appendix English Button TV DVD AUDIO TEXT EXPAND PLAY PLAY II TEXT HOLD PAUSE PAUSE PIP INPUT STOP STOP PIP MOVE RECORD, OPEN CLOSE RECORD PIP OFF REWIND, SEARCH REVERSE; SCAN DVD SEARCH REW, CD SEARCH REW, REW PIP FAST FORWARD, SEARCH FORWARD; SCAN FAST FORWARD, DVD SEARCH REW, CD SEARCH REW, REW I TEXT MIX SKIP -, TRACK -, CHAPTER - DVD SKIP -, CD SKIP -, SKIP - I TEXT OFF, TV SKIP, TRACK +, CHAPTER + DVD SKIP+, CD SKIP +, SKIP + RED RED RED RED GREEN GREEN GREEN GREEN YELLOW YELLOW YELLOW YELLOW BLUE BLUE PROGRAMME BLUE GUIDE GUIDE GUIDE DSP MODE OK OK OK OK UP UP UP UP LEFT LEFT LEFT LEFT MEDIA RIGHT RIGHT RIGHT RIGHT DOWN DOWN DOWN DOWN EXIT EXIT EXIT, RETIRN EXIT BACK LAST, RECALL; PP; LAST CHANNEL CLEAR REPEAT VOL+ VOL+ VOL+ VOL+ VOL- VOL- VOL- VOL- INFO, OSD; DISPLAY INFO, OSD; DISPLAY INFO LIST LIST P+ P+ P+ P+ P- P- P- P- TEXT TEXT PVR MENU SUB SUBTITLE, LANGUAGE; CC AUDIO, LANGUAGE SURROUND SUBTITLE 69 Appendix Button TV DVD AUDIO TV/RADIO TV/DTV ATV/DTV; D/A; DTV/TV; DTV; DIGITIAL HDD, DVD/HDD BAND OPT+ RANDOM TEXT SUBPAGE TEXT TIME RANDOM TEXT INDEX TITLE TEXT POSITION TEXT CANCEL; TEXT UPDATE SLOW; STEP SOURCE, AV, 55INPUT; TV/AV SOURCE, TV/DVD, TV/DISK SOURCE, FUNCTION SLEEP SLEEP SLEEP SLEEP V-FORMAT TEXT SIZE; TEXT EXPAND; FTB WIDE WIDE, FORMAT, 16:9, ASPECT; ZOOM SOURCE ZOOM 2. TV Code List Brand Code A.R. Systems 102, 006, 080, 066 Accent 006 Acer 261, 278, 305 Acoustic Solutions 210, 312, 324, 370, 386, 428, 477 Acura 002 Akai 102, 006, 098, 144, 145, 111, 061, 043, 074, 148, 232, 280, 128, 122, 461, 109, 462, 489, 094, 084, 083, 065, 035, 034, 033, 028, 023, 011, 004, 002, 154, 321 Akiba 006, 036, 080, 045 Akito 006, 044 Akura 006, 144, 134, 204, 043, 036, 002, 026, 045, 071, 298, 327, 376, 451 ADL 224 Admiral 043, 014, 015, 023 Advent 192, 342 Adyson 034, 035 AEG 211, 256, 327, 489 Agashi 043, 034, 035 AlfaView 220 AGB 094 All-Tel 190, 238 Agef 014 Allorgan 032, 035 Aiko 006, 061, 043, 074, 002, 004, 011, 028, 034, 035, 065 Allstar 006 Amitech 131, 241 Amoi 315 Amplivision 064, 035, 049 Aim 006, 171 Airis 316, 413, 473 Aiwa 139, 141, 445 70 Alaron 034 Alba 006, 144, 134, 204, 087, 064, 036, 005, 108, 473, 455, 447, 388, 099, 084, 077, 072, 065, 059, 034, 023, 002 Appendix Amstrad English 006, 204, 043, 036, 074, 002, 023, 026, 062, 065, 071, 094, 128, 410, 436, 451 Anam 006, 002 Anam National 006, 129 Andersson 210, 211 Anglo 043, 002 Anitech 006, 043, 002, 045 Ansonic 006, 134, 064, 002, 017, 023, 042, 048 , 066, 070, 285 AOC 120, 266, 335 Apollo 083 Apro 420 Arc En Ciel Baird 011, 012, 020, 033, 035, 054, 218 Bang & Olufsen 014 Barco 023 Basic Line 102, 006, 134, 204, 036, 080, 002, 023, 035, 045, 053, 066, 211 Bastide 035 Bauer 171, 344 Baur 006, 030, 061, 028, 056, 093, 096, 097, 101 Bazin 035 Beaumark 027 Beko 006, 144, 086, 145, 111, 064, 072, 172, 361, 405 020 Belson 138, 201, 215 Arcam 034, 035 Belstar 204 Ardem 006, 144 BenQ 223, 328, 329 Arena 006 Bensten 258, 436, 437 Aristona 102, 006 Beon 006, 072 ART 204 Berthen 134 Arthur Martin 023 Best 064 ASA 010, 014, 017, 018, 055 Bestar 006, 064, 066 Asberg 006 Bestar-Daewoo 066 Asora 002 Binatone 035 Asuka 043, 036, 034, 035, 045 Black Diamond 444, 204, 211 Atec 340, 387 Blackway 036, 045 Atlantic 006, 032, 034, 042, 049 Blaupunkt 030, 005, 080, 025, 028, 096, 101 Atori 002 Blue Media 340, 387 Auchan 023 Blue Sky Audiosonic 006, 144, 086, 145, 043, 064, 036, 002, 020, 035, 066, 190, 250, 405, 473 102, 006, 144, 134, 204, 145, 087, 036, 080, 091, 119, 045, 215, 229, 254, 265, 310, 361, 380, 445 Blue Star 045 Audioton 086, 043, 064, 035 BlueH 391 Audiovox 079 Boca 361 Aumark 009 Boman 256 Autovox 014, 032, 035, 056, 097 Boots 002, 035, 044 AVC 472 Bork 265 Avious 352 Bosch 049 Awa 111, 005, 019, 002, 003, 035, 079, 271 BPL 006, 033, 045, 202 Brandt 120, 144, 103, 020, 046, 052 Axxent 002 Baier 192 Brimax 380 Brinkmann 006, 134, 086, 072, 095 71 Appendix Brionvega 006, 014, 062 CMS Hightec Britannia 034, 035 Concorde 002 Brother 043 Condor Bruns 014 006, 043, 064, 002, 034, 045, 049, 070, 072 BSR 023 Conia 179, 201, 298, 376 Conrac 172 Contec 006, 005, 002, 034 Continental Edison 087, 020, 046 Cosmel 006, 002 Crosley 014, 023 Crown 006, 144, 134, 204, 086, 145, 087, 111, 143, 064, 361, 135, 072, 071, 053, 033, 002 BTC 036 Bush 102, 006, 144, 134, 204, 138, 087, 061, 043, 036, 005, 108, 376, 373, 370, 361, 355, 352, 327, 388, 430, 431, 432, 440, 448, 451, 473, 476, 477, 478, 002, 033, 035, 044, 045, 056, 059, 065, 066, 095, 133, 164, 210, 213, 229, 232, 250 Canton 036 035 Capsonic 043 Crown Mustang 135 Carad 134, 204, 113 CS Electronics 036, 034 Carena 006, 080 CTX 395 Carrefour 006, 005, 010 Curtis Mathes 009, 015, 021, 024, 079 Carver 025 Cybertron 036 Cascade 006, 002 Cytronix 246 Casio 006 D-Vision 102, 006, 451 Cat 373, 504 Daewoo Cathay 006, 386 102, 006, 124, 444, 036, 441, 406, 341, 338, 271, 249, 195, 192, 190, 164, 133, 119, 091, 079, 066, 035, 034, 002 036, 034 CCE 006 cello 397, 410, 418, 419, 420 Dainichi Centrum 204 Daitsu 237 Centurion 006 Dansai 006, 005, 002, 004, 033, 034, 035 Century 014 Dansette 071 CGE 064, 023, 072 Dantax 144, 204, 086, 145, 064, 361, 445, 450 Datsura 033 Dawa 006 Daytek 221, 269, 271 Dayton 002, 221, 269 Daytron 006, 002, 066 De Graaf 098, 007, 023, 033 Changhong 180 Chimei 475, 415 Cimline 036, 002 Cineral 079 Cinex Citizen 128, 213, 327 009 City 002 Clarivox 006, 010, 072 Classic 091 Clatronic 006, 144, 043, 064, 036, 002, 035, 049, 065, 256 Clayton 204 CMS 034 72 DEC 258 Decca 006, 011, 035, 044, 094, 118 Dell 235, 278 Denko 043 Denon 021 Appendix Denver English 006, 108, 214, 256, 352, 410, 453, 473, 489 Desmet 006, 002, 014, 049 DGM 436 Diamant 006 Diamond 181 DiBoss 293 Digatron 006 Digihome 210, 370 Digiline Elekta 043, 045 Element 376 Elfunk 204, 222 ELG 006 Elin 006, 098, 061, 002, 017, 056 Elite 006, 036, 049 Elta 043, 002 Emerson 006, 144, 134, 444, 086, 061, 064, 010, 014, 027, 045, 049, 065, 119 006, 134, 018 Emperor 045 Digimate 198 Envision 266 Digital Device 340 Epson 243, 184, 186 Digitek 310, 380 Erae 267 Digitrex 478 Erres 006 Digix Media 195 ESC 006, 035 Dixi 006, 002, 014, 035 Etron 002, 023 DL 199, 258 Eurofeel 043, 035 DMTech 260, 438, 449, 454, 456 Euroman 006, 043, 064, 034, 035 Domeos 134 Europa 006 Dream Vision 379 Europhon 006, 035, 094 DTS 002 Evesham 230, 340, 370, 382, 387 Dual 006, 204, 208, 035, 042, 054, 056, 095, 097, 164, 210, 219, 237, 468 Evesham Technology 387 Evolution 395 Dual Tec 035 Dumont 010, 011, 014, 017, 035 Durabrand 285, 361, 453 Dux 006 Dynatech 035 Dynatron 006 e-motion 380 E:max 256, 316 Easy Living 230, 326, 402 Ecco ECE Excors 467 Expert 023, 032, 042 Exquisit 006 FairTec 268 Fenner 002, 066 Ferguson 006, 120, 098, 103, 030, 204, 012, 020, 029, 046, 052, 054, 077, 292, 447, 476 Fidelity 006, 061, 043, 023, 026, 029, 034, 065, 071, 093, 097 162 Filsai 035 006 Finlandia 098, 061, 011, 023, 033, 055 Edison-Minerva 087 Finlux Eiki 150 102, 006, 144, 145, 333, 327, 172, 122, 118, 094, 089, 084, 083, 070, 055, 035, 023, 018, 017, 014, 011, 010 Firstline 102, 006, 144, 134, 204, 061, 341, 267, 265, 250, 215, 172, 119, 097, 070, 066, 056, 050, 035, 034, 033, 011, 002 Elba-Sharp 094 Elbe 102, 006, 113, 036, 028, 035, 042, 048, 062, 070, 075, 094, 099, 121 Elcit 014, 023, 094 73 Appendix Fisher 061, 064, 005, 008, 011, 014, 017, 033, 035, 056, 097 Flint 006, 113, 043, 036, 080, 011 Force 210 Forgestone 029 Formenti 006, 014, 023, 034, 049 Formenti-Phoenix 034, 049 Fortress 014, 015 Fraba 006, 064 Friac 006, 113, 064, 002, 091 Frontech 043, 002, 023, 035 Fujimaro 190 Gorenje 064 GPM 036 Gradiente 006, 025, 207 Graetz 144, 087, 061, 023, 053, 065, 211 Gran Prix 128 Granada 006, 098, 103, 005, 019, 038, 011, 023, 033, 035, 053, 054, 060, 081, 083, 094, 008 Grandin 102, 006, 144, 134, 204, 145, 113, 036, 080, 272, 270, 269, 246, 220, 215, 195, 190, 119, 066, 049, 045, 023, 002 Gronic 035 Grundig 102, 006, 030, 087, 142, 005, 108, 498, 476, 448, 447, 445, 430, 405, 370, 271, 267, 250, 225, 135, 121, 010, 101, 096, 028, 077 Fujitsu 002, 011, 032, 035, 042, 137, 173, 187 Fujitsu General 002, 032, 035, 137 Fujitsu Siemens 172, 211, 230, 246, 268, 369 Grunkel 211 Funai 144, 134, 043, 275, 336, 369, 407 H&B 172, 456 Galaxi 006 Haier 138, 344, 392, 339 Galaxis 006, 064 Halifax 043, 034, 035 Gateway 394 Hallmark 027 GBC 036, 002, 023, 066 Hampton 034, 035 GE 015, 027, 045, 052, 079, 150, 442 Hanimex 036, 443 GEC 006, 061, 011, 023, 035, 056, 094 Hanns.G 402 Geloso 002, 023, 066 Hannspree 262, 263, 264, 342, 401, 402, 463 General 020, 046, 082 Hanseatic General Technic 002 102, 006, 120, 144, 124, 061, 064, 172, 133, 097, 095, 091, 067, 056, 049, 048, 045, 035, 014, 002 Genexxa 006, 036, 002, 023, 071 Hantarex 006, 002, 094, 190, 260, 289 Gericom 172, 190, 195, 220, 224, 246, 340, 388 Hantor 006 Go Video 009 Gold 397, 413, 484, 485 Goldfunk 134 GoldHand 034 GoldStar 006, 144, 145, 111, 061, 001, 007, 020, 023, 027, 034, 035, 047, 067 Gooding 087 Goodmans 102, 006, 120, 144, 103, 134, 124, 444, 204, 087, 043, 036, 005, 478, 211, 232, 477, 250, 476, 271, 445, 355, 370, 373, 440, 376, 382, 383, 386, 002, 004, 011, 035, 047, 052, 054, 065, 066, 084, 091, 094, 119, 121, 133, 172, 195, 210 74 Harsper 190 Harwa 162, 218, 238 Harwood 006, 087, 002, 071 Hauppauge 006 Havermy 015 HCM 006, 043, 036, 002, 035, 045, 071, 072 Hema 002, 035 Hemmermann 056, 097 Hifivox 020 Higashi 034 Highline 006, 043 Appendix English Hikona 036, 452 Ingersol 002 Hinari 006, 043, 036, 005, 002, 033, 059, 077, 443 Inno Hit 036, 002, 011, 035, 045, 047, 094, 211 Hisawa 144, 113, 036, 080, 045 Innovation 095 Hisense 102, 092, 165, 254, 265, 366, 491 Innowert 190, 246 Hit 014 Interbuy 006, 043, 002 Hitachi 006, 098, 124, 204, 208, 005, 019, 037, 146, 152, 153, 163, 169, 193, 197, 007, 206, 210, 217, 227, 295, 296, 330, 377, 399, 424, 483, 020, 021, 023, 027, 035, 054, 056, 060, 076, 081, 083, 084, 085, 089, 091, 094, 018, 106, 107, 011 Interfunk 006, 061, 014, 020, 023, 056, 093 Internal 102, 444, 119 Intervision 006, 086, 087, 043, 036, 080, 002, 035, 045, 067, 095 Irradio 006, 036, 002, 047, 065, 147 019 Isukai 006, 036, 080, 045 Hitsu 113, 036, 080, 002 ITC 035, 049 HMV 014 ITS 006, 043, 036, 034, 045, 065 Hoeher 144, 190, 211, 327 ITT 098, 113, 061, 023, 029, 033, 053 055, 056, 083, 084, 097 Home Electronics 111 ITT Nokia Hornyphon 006 098, 113, 111, 061, 023, 033, 053 055, 056, 083, 084 Hoshai 036, 080, 045 ITV 006, 043, 066 Huanyu 034, 066 JDV 451 Hugoson 198, 224 Jean 005, 307, 308 Humax 505, 299, 506, 507, 245, 319, 322, 411, 433, 479 JEC 004 JMB 102, 124, 077, 091 JNC 378 Jocel 143 Jouge 284 Jubilee 102 JVC 111, 036, 005, 129, 130, 015, 029 065, 072, 137, 149, 207, 264, 362 408, 496 Kaisui 006, 036, 080, 002, 034, 035, 045 Kamp 034 Kapsch 061, 017, 023, 032, 042 Karcher 144, 113, 111, 043, 064, 045, 164, 327, 451 Hitachi Fujian HYD 271 Hygashi 034, 035 Hyper 002, 034, 035 Hypersonic 061 Hypson 102, 006, 144, 134, 204, 086, 145, 043, 080, 035, 045, 118 Hyundai 164, 190, 192, 241, 244, 271, 291, 317, 338, 340, 341, 439 Iberia 006 ICE 006, 043, 036, 034, 035, 065 ICeS 036, 034 iDEAL 327 Igo 226 Kathrein 102, 195 IISonic 271, 308, 342 Kawa 065 Iiyama 193, 198, 224 Kawasho 034 Imperial 006, 064, 056, 072, 121, 487 KB Aristocrat 023 Indiana 006 Kendo InFocus 212, 220, 283 006, 204, 113, 064, 062, 067, 070, 095, 099, 128, 210, 285, 333 Ingelen 144, 113, 087, 023 Kennedy 023, 032, 075 75 Appendix Kennex 204 Liesenk & Tter Keymat 258, 300, 398, 436, 437 Liesenkotter 006 Kingsley 034 Lifetec Kioto 142 006, 144, 134, 204, 208, 036, 002 066, 095, 137 Kiss 170 Kiton 006, 134 Kneissel 102, 006, 113, 064, 042, 048, 062 066, 070, 075, 091 Kobra 290 Kolster 006, 036, 056 Konig 006, 016 Konka 006, 144, 036, 065, 072, 126, 158, 201 006 Lloyd’s 002 Local India TV 002, 033, 109, 280 Lodos 204, 210 Loewe 006, 064, 014, 048, 093, 094, 123 131, 167, 414, 434 Logic 494 Logik 204, 001, 003, 029, 162, 195, 224, 292, 376, 464, 465, 466 Logix 134, 095 Luker 451 Luma 204, 002, 023, 032, 042, 062, 066, 070 Lumatron 006, 043, 012, 023, 032, 035, 042 Lux May 006, 002 Luxor 098, 204, 061, 023, 033, 035, 047, 055, 056, 060, 083, 084, 122, 211 Kontakt 087 Korpel 006 Korting 064, 014, 049 Kosmos 006 Kotron 071, 440 Koyoda 002 Kreisen 192, 293 LXI 022 035 M Electronic 006, 144, 124, 030, 061, 361, 133, 093, 089, 084, 070, 066, 056, 055, 054, 046, 035, 034, 023, 020, 018, 017, 002 KTV Kuba 056 Kyoshu 071, 072 Kyoto 023, 034, 035 Madison 006 L&S Electronic 144, 172, 190 MAG 298, 376 LaSAT 086 Magnadyne 014, 023, 094, 097 293 Magnafon 012, 034, 094 Lavis 204 Magnavox 005, 003 Leader 002 Magnin 442 Lecson 006 Magnum 006, 144, 145, 128, 242 Lemair 070 Mandor 043 Lenco 006, 108, 017, 066, 352, 452 Manesth 006, 043, 004, 035, 049 Lenoir 002, 214 Manhattan 006, 134, 204, 164, 192, 237, 293 Lentec 316 Maqma 290, 340, 378, 404 Lexsor 218, 303 Marantz 102, 006, 071, 140, 277, 317 Leyco 006, 043, 011 Marelli 014 102, 006, 144, 145, 138, 061, 064, 248, 281, 354, 367, 368, 384, 396, 416, 417, 425, 426, 215, 209, 067, 047, 035, 034, 027, 023, 002, 001, 236, 257 Mark 006, 144, 145, 002, 034, 035, 066 Marks and Spencer 420 Lava LG 76 Marquant 478 Mascom 327, 432 Appendix English Master’s 091 Morgan’s Masuda 036 Motorola 015 Matsui 102, 006, 144, 030, 204, 087, 005, 080, 074, 153, 195, 097, 094, 369, 445, 077, 447, 065, 059, 056, 052, 044, 035, 033, 028, 011, 008, 004, 003, 002 MTC 064, 009, 034, 056, 093 Matsushita 129 Maxent 394, 160 Maxim 213, 327, 451 Medialine 220, 449 Mediator 102, 006 Medion 006 MTEC 044 MTlogic 144, 473 Multibroadcast 029 Multitec 006, 134, 204, 086, 327 Multitech 006, 086, 043, 064, 002, 034, 035 Murphy 017, 023, 034 Musikland 036 Mx Onda 298, 376 102, 006, 144, 134, 204, 138, 208, 172, 195, 093, 040, 210, 213, 219, 230, 285, 327, 370, 440, 456 MyCom 271 Myrica 369 Megas 113 Myryad 102 Megatron 021, 027 NAD 006, 061, 190 MEI 204 Naiko 006, 111, 157, 451 Memorex 204, 002, 009, 027 Nakimura 006, 066 Memphis 002, 011 Narita 451 Mercury 006, 002 NAT 038 Metronic 120 National 038 Metz 006, 134, 030, 108, 014 ,028, 063 096, 101, 211, 318 NEC 005, 002, 003, 025, 035, 040, 049, 066, 140, 239, 379 MGA 027, 442 Neckermann Micromaxx 006, 134, 204, 121, 172, 256, 456 102, 006, 064, 014, 028, 049, 056, 070, 072, 101 Microspot 343 NEI 006, 204, 065 Microstar 172 Neon 237, 389 Mikomi 204, 153, 210 Neovia 190, 192, 220, 260, 267, 268, 271, 273, 449, 454 Minato 006 Nesx 389 Minerva 030, 087, 019, 010, 028, 094, 096, 101 Netsat 006 Minoka 006, 071 NetTV 160 Mirai 369, 423, 482 Neufunk 102, 006, 144, 113, 036, 002 Mirror 440 New Tech 102, 006, 002, 035, 054 Mistral Electronics 029 New World 036 327 Nextier 338 Mitsubishi 102, 006, 204, 005, 019, 014, 015, 027, 093, 096, 191, 311 NFREN 170 Nicam 097 Mivar 034, 035, 047, 048, 094, 112 Nicamagic 034 Mogen 374, 410 Nikkai Monaco 002 006, 043, 036, 005, 002, 004, 011, 034, 035 Nikkei 144 Mitsai 77 Appendix Nikko 027 Nobliko 010, 034 Nogamatic 020 Nokia 098, 113, 111, 061, 023, 033, 049, 053, 055, 056, 066, 083, 084, 089, 122 Norcent 266, 335 Nordic 035 Nordmende 006, 144, 103, 030, 020, 046, 054, 242, 280, 499 Normerel 006 Northern Star 220 Novatronic 006, 018, 066 Novita 273 Oceanic 098, 061, 023, 033, 083 Odeon 043 Okano Olidata 006, 043, 064, 002, 011 271 Omega 043 Onida 207, 226 Onimax 144 Onn 380, 465, 477, 495, 497, 500, 501 Onwa 036, 074, 065, 109 Onyx 380, 397 Otto Versand 102, 006, 030, 061, 005, 038, 028, 020, 035, 049, 054, 056, 015, 093, 096, 097, 101 Pacific 102, 144, 204, 208, 077, 256 Packard Bell 254, 293 Pael 034 Palladium 102, 006, 144, 064, 208, 035, 056, 028, 070, 072, 095, 101, 023, 121, 131 ,014 Palsonic 006, 138, 043, 001, 035, 072, 218, 238, 303 Panama 006, 043, 002, 034, 035 Panasonic 006, 098, 061, 129, 038, 023, 063, 094, 187, 251, 294, 353, 359, 279, 306 Panavision 006, 070 Pathe Cinema 023, 034, 048, 049 Pathe Marconi 020 Pausa 002 Penney 009, 022, 027, 442 Perdio 006, 011, 023, 034, 045, 049 Perfekt 006 Petters 006 Philco 006, 064, 014, 021, 072 Philex 029 Philharmonic 035 Philips 102, 006, 061, 459, 435, 429, 395, 310, 302, 297, 247, 125, 110, 101, 073, 066, 054, 029, 014, 002 Opera 006 Optimus 129, 024 Optoma 234, 346, 371 Orbit 006 Phocus 144, 242, 250, 361, 405 Orcom 300 Phoenix 006, 086, 064, 011, 014, 023, 034, 049 Orion 102, 006, 144, 204, 467, 458, 457, 456, 448, 445, 443, 385, 218, 195, 131, 097, 094, 077, 071, 059, 050, 049, 003 Phonola 102, 006, 014, 029, 034 Pilot 142 Pioneer 006, 086, 061, 064, 020, 023, 024, 046, 073, 093, 136, 159, 233, 277, 286, 381 Orline 006, 036 Ormond 134, 204 Orsowe 094 Pionier 086, 064, 327 Osaki 102, 006, 043, 036, 011, 035, 044, 059, 066, 071 Plantron 006, 043, 002 Playsonic 006, 144, 145, 035, 053, 361, 405 Osio 006, 047 Polaroid 298, 312, 355, 376, 383, 390, 240 Oso 036 Poppy 002 Osume 006, 036, 005, 011 Portland 066, 119 Otic 298, 376 78 Appendix English Powerpoint 006, 138, 087, 201 RBM 010 Prandoni-Prince 061, 094 RCA 120, 015, 442 Precision 035 RealiTV 237 Premier 199 Reality 237 Prima 043, 002, 071, 218, 238, 303 Recor 006 PrimeView 340 Rectiligne 006 Prinston 204, 145 Rediffusion 098, 061, 005, 055 Prinz 061, 011, 056, 097 Redstar 006 Profex 061, 002, 023 Reflex 006, 134, 204 Profi 002 Relisys Profilo 327 190, 192, 193, 194, 220, 221, 271, 310, 333, 338, 341, 355, 390 Profitronic 006 Remotec 006, 015, 021, 026 Reoc 144 Proline 006, 120, 124, 204, 011, 050, 070, 118, 121, 271, 324, 386, 450 Revox 006 Prosco 002 Rex 043, 023, 032, 042, 070, 099 Prosonic 006, 144, 134, 064, 034, 035, 065, 066, 389, 403, 428, 437, 467, 486 RFT 006, 043, 011, 014 Roadstar Protech 006, 134, 204, 086, 043, 002, 035, 045, 056, 072 006, 144, 134, 204, 145, 043, 036, 002, 045, 072, 214, 440 Proton 027 ProVision 102, 006, 144, 256 Proxima 150, 152 Pvision 192, 310, 456 Pye 102, 006, 014, 056, 066, 101 Pymi QONIX Robotron 014 Rolson 178, 267 Rover 193 Royal Lux 064, 052, 071 Saba 120, 098, 144, 103, 061, 014, 020, 023, 046, 052, 054, 090, 094, 335 002 Sagem 113, 080, 182, 253, 337 352 Saisho 043, 002, 003, 023, 035, 094, 097 Quadral 036 Saivod 006, 134, 204, 143, 211, 327, 451 Quasar 002, 190 Sakai 023 Quelle 006, 134, 030, 204, 061, 101, 097, 096, 093, 056, 028, 020, 017, 010, 003 Salora 098, 061, 023, 033, 047, 056, 060, 084, 094, 118, 122, 213, 219, 327 Salsa 052 Questa 005 R-Line 006 Radialva 036, 023 Radiola 102, 006, 035 Radiomarelli 006, 014, 094 RadioShack 006, 027 Radiotone 006, 134, 204, 043, 064, 002, 071, 072, 128 Rank 010 Rank Arena 005 Sambers 094 Sampo 394, 160 Samsung 102, 006, 043, 064, 108, 115, 231, 252, 276, 287, 332, 345, 350, 351, 372, 442, 474, 488, 490, 492, 228, 176, 175, 127, 095,047, 035, 034, 033, 027, 023, 011, 009, 002 Sandra 034, 035 Sansui 006, 142, 131, 148, 189, 267, 326 Santon 002 79 Appendix Sanyo 204, 064, 005, 019, 442, 370, 363, 358, 357, 356, 222, 200, 150, 140, 097, 053, 048, 035, 034, 033, 025, 023, 017, 011, 008, 003, 002, 240 SBR 102, 006, 029 Schaub Lorenz 098, 144, 086, 111, 061, 056, 066, 215, 256, 267 Schneider 102, 006, 144, 134, 204, 061, 208, 036, 451, 450, 293, 128, 097, 095, 065, 056, 054, 042, 035, 023, 010 Scotch 027 Scotland 023 Scott 214 Sears 022, 026, 027 Seaway 124 Seelver 204 SEG Sinudyne 006, 061, 014, 023, 032, 056, 094, 097 Skantic 060 SKY 006, 195, 271, 300, 307, 308, 340, 341, 342, 343, 344, 391, 400, 421 SKY Brazil 195 Sliding 170, 190, 195, 256, 269, 270, 272 SLX 134 Smaragd 087 Soemtron 190, 246 Sogera 049 Sogo 271, 473 Solavox 006, 098, 061, 011, 023 Sonawa 036 Soniko 006 006, 134, 204, 087, 043, 036, 005, 285, 211, 210, 119, 062, 056, 035, 034, 002 Sonitron 064, 033, 035, 053 Sonix 271, 389 SEI 006, 014, 023, 032, 056, 094, 097 Sonneclair 006 Sei-Sinudyne 006, 014, 032, 094, 097 Sonoko 006, 043, 002, 035, 045 Seleco 023, 032, 042, 055, 062, 065, 070, 075, 099 Sonolor 098, 061, 023, 033, 045 Sontec 006, 064, 002 Semp 022 Sony 006, 301, 005, 446, 412, 393, 375, 360, 325, 255, 203, 185, 174, 058, 003 036, 066 Sencora 002 Sentra 004 Serino 113, 080, 015, 034 Sound & Vision 005, 130, 216, 015, 029, 088, 094, 177, 274, 334, 365, 409, 166, 288 Soundesign 027 Soundwave 006, 204, 145, 049, 072, 420 Shintoshi 006 Spectra 002 Shivaki 006, 077 Squareview 026 Siarem 014, 023, 094 Ssangyong 002 Siemens 006, 030, 028, 096, 101 Standard Siera 102, 006 006, 204, 036, 002, 035, 049, 066, 380 Siesta 064 Starlite 006, 043, 002, 023 Silva 006, 061, 034, 128 Stenway 036, 045 Silva Schneider 006, 213, 327, 451 Stern 043, 023, 032, 042, 070, 099 108 Strato 006, 043, 002, 403 145, 061, 005 Strong 210, 211 SilverCrest 204 Stylandia 035 Singer 006, 074, 002, 014, 052, 075 SunBrite 284 162 Sungoo 470 Sunkai 113, 087, 036, 080, 050, 059, 190 Sharp Silvano Silver Sinotec 80 Appendix English Sunstar 006, 043, 002, 065 Technotrend 316, 378 Sunstech 456 Techwood 204, 211 Sunwood 006 Teckton 271 Superla 034, 035, 094 Tecnimagen 102 SuperTech 102, 006, 036, 002, 034 Teco 205 Supra 002, 066 Tedelex 002, 035, 380 Susumu 036, 046, 052 Teiron 002 Sutron 002 Tek 168 SVA 108, 190 Teknika 009 Swedx 340 TELE System 192 Swissflex 481 Teleavia 046, 054 Swisstec 481, 480, 422, 421, 401, 400, 391, 344, 343, 342, 341, 340, 308, 307, 300, 271, 195, 190 Telecor 006, 036, 023, 035, 042 Telefunken 006, 120, 144, 103, 086, 320, 202, 105, 090, 082, 055, 054, 052, 046, 020, 016, 012, 348 Sydney 034, 035 Sylvania 026, 275, 427 Telefusion 006 Sysline 006 Telegazi 006, 043, 036, 023, 042 Sytong 034 Telemagic 150 Tactus 044 Telemeister 006, 049 Tandberg 061, 020, 063 Telesonic 006 Tandy 036, 011, 015, 023, 035 Telestar 102, 006 Targa 237, 267 Teletech 006, 134, 204, 002 Tashiko 005, 023, 025, 034, 035 Teleton 005, 032, 035, 042, 056 Tatung 006, 003, 011, 035, 044, 094, 118, 215, 230, 256, 267, 326, 327, 382, 383, 395 Televideon 023, 034, 049 Teleview 006 Tempest 002 TCL 142, 321 TCM 144, 172, 242, 456 Tennessee 006 Tensai 006, 204, 145, 036, 002, 017, 018, 035, 049, 065, 066, 067 Tenson 002, 049 Tevion 102, 006, 144, 134, 204, 208, 468, 405, 403, 376, 355, 327, 298, 246, 242, 232, 230, 172, 128 036, 002, 034, 035, 066 Teac 006, 144, 134, 138, 143, 043, 080, 002, 025, 026, 027, 056, 093 Tec 006, 002, 035, 042, 052, 082 Tech Line 006, 134, 211, 285 Tech Lux 214 Techica 036 Texet Technema 049 Texla 165 Technica 118, 451 Thes 467, 469, 471 Technics 102, 129 Thomson Technika 422, 428, 465, 468, 480, 493 006, 120, 103, 020, 046, 052, 054, 056, 082, 335 TechniSat 102, 131, 237 Thorn Technisson 144, 242, 361 006, 061, 005, 100, 096, 093, 091, 054, 052, 044, 029, 020, 017, 012, 011, 004 Technosonic 102, 120, 091, 195, 256, 258, 436, 437, 451, 468 Thorn-Ferguson 012, 029, 052, 054, 091 81 Appendix Time 378, 454, 455 Univox 006, 014, 023 Tiny 238 V2max 190 TMK 027 V7 Videoseven 195, 224, 237, 271, 369, 394 Tobishi 310 Venturer 324, 386, 428 Tokai 006, 134, 204, 002, 011, 023, 035, 066 Vestel 006, 134, 204, 035, 211, 333, 370 Vexa 006, 002 Vibrant 044 Victor 005 Videocon 092 Videologic 036, 034 Videologique 036, 034, 035 VideoSystem 006 Videotechnic 034, 035, 049, 066 Videoton 023, 060 Vidikron 150, 277 Vidtech 027 Tokaido 204 Tokyo 004, 034 Tomashi 036, 045 Topline 134, 204 Toshiba 030, 204, 005, 115, 129, 092, 447, 364, 313, 304, 242, 212, 211, 183, 100, 039, 022, 020, 010, 009, 004, 236, 257 Tosumi 451 Towada 035, 056 Toyoda 002 Trakton 043 TRANS-continents 102, 006, 134, 204, 035, 118, 190, 269, 272 Transonic 006, 108, 002 Transtec 034 Trident 035, 094 Trio 298, 376 Tristar 043, 036, 029 Triumph 102, 006, 055, 094 Tsoschi 045 TVTEXT 95 102 TWF 432 Uher 006, 086, 064, 032, 042, 049, 066, 072, 084 Ultravox 006, 014, 023 034, 066 UMC 308, 340, 343, 391, 400, 422, 480, 481, 493 Unic Line 006, 080, 083 United 006, 144, 204, 145, 108, 397, 445, 451 Universal Universum 82 Viewpia 192 Viewsonic 307, 308, 323, 335, 349, 391, 394, 259, 331 Visiola 034 Vision 006, 035, 049 Vistar 032 Vistron 265, 460 Vivax 250, 258 Vivid 250 Vortec 006 Voxson 006, 014, 023, 072 Waltham 006, 134, 204, 020, 035, 060, 072, 077 Wards 009, 022, 024, 027 Watson 006, 144, 134, 204, 036, 002, 023, 049, 095, 271, 285 Watt Radio 023, 034, 056, 097 Wega 006, 005, 014 Wegavox 002 006 Welltech 014 006, 134, 030, 204, 061, 043, 064, 005, 115, 070, 072, 083, 084, 089, 093, 096, 097, 101, 122, 172, 211, 285, 062, 056, 055, 047, 035, 025, 020, 018, 017, 010, 003, 002 Weltblick 035, 049 Weltstar 204 Westinghouse 189 Wharfedale 102, 006, 095, 189, 256, 327, 370, 452, 453, 477, 502 Appendix English White Westinghouse 006, 034, 049, 119 Goodmans Wilson 102 Grandin 119 Windsor 134, 204 Grundig 102, 006, 030, 101, 445 Windstar 045 Hanimex 443 Windy Sam 102 Hinari 005, 443 World-of-Vision 190, 193, 195, 198, 224, 242, 246, 340, 389 Internal 444, 119 Irradio 147 X-View 215 LG 027 Xenius 124, 133 Magnin 442 XLogic 188 Matsui 445 Xomax 397 Xoro 218, 224, 229, 303, 404, 503 Xrypton 006 Yakumo 342 Yalos 398 Yamaha 169, 314, 330, 184 Yamishi 006, 036, 080, 035, 045 Yokan 006 Yoko 006, 043, 064, 036, 002, 034, 035, 053 Yorx 036 Ytawai 316 Zanussi 032, 035 Zenith 119, 236 Zenor 053 TV/VCR Combo Aiwa Amstrad 445 026 Beko 086 Black Diamond 444 Blue Sky 119, 445 Daewoo 444, 119 Dantax 445 Emerson 444, 119 Ferguson 120, 012 Fidelity 026 Finlux Firstline 017 119 GE 015, 442 GoldStar 006 444, 066, 119, 445 MGA 442 Mitsubishi 102, 015 Orion 443, 445 Penney 442 Philips 102, 006 Portland 119 Radiola 102 RCA 015, 442 Saba 120 Samsung 442 Sanyo 442 Schneider 102, 006 SEG 119 Sharp 015 Siemens 006 Sony 301, 446 Teac 026 Technics 102 Thomson 120 United 445 Universum 018 White Westinghouse 119 TV/VCR/DVD Combo Bush 448 Ferguson 447 Grundig 448 Matsui 447 Orion 448 83 Appendix 3. DVD Code List Brand Code Belson 136, 181 3D LAB 038 Belsonic 136 4Kus 106 Berthen 156 A-Trend 063 Binatone 181 Acoustic Solutions 066, 062, 114, 193, 208 Biostek 148 AEG 073, 077, 058, 075, 113, 181 Black Diamond 062 AFK 105, 181 Blu:sens 113, 117 Airis 057, 081, 109, 117, 216 Blue Nova International 117 Aiwa 036, 115 Blue Sky 059, 077, 057, 062, 086 Akai 077, 075, 093, 100, 113, 162, 212 BlueTinum 136 Akira 149 Boghe 094 Akura 093, 103, 113, 136 Boman 093 Alba 038, 059, 066, 057, 062, 064, 103, 140, 162, 185, 216 Bose 189 Brainwave 073, 100 Brandt 033, 039 Alize 104 Altacom 109 Amitech 073, 013, 087 Amstrad 073, 077, 062, 104, 136 Amuseer 120 AMW 091 Cambridge Audio 070 Ansonic 082, 071, 120, 136 Cat 076, 181 Apex Digital 057, 094, 116, 134 CCE 066 Arena 100 cello 164, 198, 205 038, 052, 214 Centrum 058, 062, 076, 110, 181, 185 181 CGV 070, 100 Asono 109 Chili 135, 136 Atacom 109 Cinea 085 Audiola 149, 224 Cinetec 062, 091 Audiosonic 181, 216 CJ Digital 156, 204 Audix 062 Classic 066, 164 062 Clatronic 057, 058, 075, 113, 181 Auvio 086 Clayton 062 Axion 066 CMX 156 Basic Line 062, 185 Coby 066, 120 Baze 093 Codex 113 BBK 109 Commax 117, 135 094 Compacks 081, 211 081 Contel 075 Continental Edison 082, 091 Aristona ASCOMTEC Autovox Bellagio Bellwood 84 Broksonic 059 Bush 066, 082, 057, 062, 064, 065, 103, 120, 127, 129, 140, 162, 172, 216, 217 Appendix English Crown 073, 062, 100 ECC 066 Cybercom 082 Eclipse 065, 070 CyberHome 063 Elfunk 062, 087 Cytron 061, 119 Elin 073 D-Vision 100 Ellion 013, 087 Daenyx 091 Elta Daewoo 073, 018, 061, 063, 083, 091, 129, 130, 159 073, 057, 075, 087, 100, 104, 113, 161, 204 Eltax 113, 117, 149 Dalton 097 Emerson 043, 061 Dansai 073, 100, 162 Enterprise 043 Dantax 038, 077, 062, 065, 122 EuroLine 058, 075, 100, 113, 120, 131, 156 Daytek 091 F&U 203 Dayton 091,106 Ferguson 059, 062, 093, 162, 164 DCE 082 Finlux 067, 043, 073, 057, 070 Decca 073, 100 Fintec 140 Denon 032, 049, 151 Firstline 062, 086, 090, 140 Denver 057, 075, 093, 117, 128, 136, 148, 181, 216 Fisher 056 Funai 059, 058 Gateway 106 GE 064 Global Link 109 Global Solutions 072 Global Sphere 105 Go Video 090 Denzel 055 Desay 086 Dgtec 057 Difrnce 211 Digihome 062 DigiLogic 062, 159 Digitech 172 Digitek 013 Digitrex 217 Digix Media 081 DiK Gold 198 GoldStar 067, 043 Goodmans 066, 077, 062, 065, 094, 103, 105, 116, 140, 164, 181, 217 082 GoWell 156 Dinamic 075 GPX 067 Disney 082 Graetz 055 DiViDo 061 Gran Prix 082, 093 DK Digital 082, 116 Grandin 062, 113, 116, 204 Dragon 082 Greenhill 064 DreamX 104 Grundig DSE 164 038, 039, 059, 077, 056, 061, 062,094, 097, 129, 156, 162, 164, 172 Dual 066, 082, 077, 055, 062, 129, 140 Grunkel 073, 082, 077, 136 Durabrand 082, 058, 062, 128, 140, 159 E:max 026, 113, 117, 156, 161 eBench 105 GVG 073 H&B 013, 062, 085, 087, 113, 204 85 Appendix Hanseatic 067, 077 KXD 088, 117, 135, 181 Harman/Kardon 060, 111, 135 Lawson 072 Harwa 211 Leiker 091 HCM 075 Lenco 073, 062, 124 HDT 061 Lexia 072 HE 066, 181 LG 067, 043, 077, 090, 143, 179, 186 Henss 062 Lifetec 082, 119 Hikona 124 Limit 072 HiMAX 086 LiteOn 106, 126, 157, 165 Hitachi 042, 054, 062, 185 LM 156 Hiteker 057, 181 Lodos 062 Hoeher 082 ,062, 081, 094, 109, 140 Loewe 038, 067 Home Electronics 073, 066 Logic 222 Home Tech Industries 109, 156, 181 Logik 062 HotMedia 105 Logix 061 Humax 052, 225 Lumatron HYD 113 067, 059, 061, 062, 100, 117, 172, 215 Hyundai 087 Lunatron 067 Luxman 042 Luxor 062, 064, 094, 162, 164 Ingelen 075 Inno Hit 062 International 159 Irradio 090, 100, 109, 113 ISP 059 it’s 064 Jamo 097 Jaton 055 JDB 066 JGC 140 JMB 059 JVC 045, 038, 033, 107, 147, 176 Kansas Technologies 113, 140 Kazuki 136 Kendo 082, 057, 062 Kennex 073, 062, 093 Kenwood 032, 037 KeyPlug 156 Kiiro 073 King Vision 136, 156 Kiss 055, 085 86 Magnat 181 Magnavox 038, 033, 052, 058, 062, 103 Magnex 065 Magnum 129 Majestic 149, 224 Manhattan 061, 062 Manta 136 Marantz 038 Mark 062 Marquant 073, 217 Matsui 059, 057, 062, 094, 162, 164 Maxim 062, 091, 114 MBO 066, 164 MDS 062 Mecotek 073 Mediencom 070 Medion 067, 082, 119, 157 MEI 077 Memorex 082 Appendix English Metz 041, 035, 062, 185 Oopla 106 MiCO 065, 070, 116 Opera 215 Micromaxx 059, 162 Optim 086 Micromedia 038, 033 Optimus 035 Micromega 038 Orbit 091, 156 Microsoft 163, 194 Orion 059, 062, 113, 127, 162 Microstar 082 Ormond 062 Minax 062 Pacific 082, 072, 077, 062, 071 Minoka 073, 100 Packard Bell 082, 117, 158 Mitsubishi 062 Palladium 059, 062, 179 MixSonic 101 Panasonic 032, 146, 155, 173, 178, 180 Mizuda 073 Panda 076, 135 Monyka 055 peeKTon 093, 109 MPX 086 Philips MTlogic 216 038, 033, 052, 058, 106, 118, 121, 137, 167, 170, 191, 192, 195, 196, 210, 209 Mustek 066, 148, 164 Pioneer Muvid 136, 156, 204 041, 035, 016, 048, 133, 141, 145, 175, 183, 220 Mx Onda 070, 116 PJ 181 Myryad 116 Play It 156 Mystral 082 Plu2 087 NAD 067 Polaroid 134 Naiko 073, 094 Powerpoint 091 Neom 136, 156 Prinz 082 Neon 013 Prism 082, 061 Neufunk 055 ProCaster 094, 200 Nevir 073, 082, 057 Proline 057, 094, 122, 165, 193 Nexius 077 Proson 062 Next Base 160 Prosonic 130, 208 NFREN 081 ProVision 066, 117, 136, 181 Nikkai 181 Pye 038, 052 Nikkei 116 QONIX 077 Norcent 181 Quartek 158 Nordmende 082 Radionette 067, 090, 179 Nortek 204 Radiotone 062 Oasis-Media 148 Raite 055 Olidata 057 RCA 168 Onkyo 033, 046, 169 REC 032 Onn 223 Redstar 073, 071, 075, 093, 125, 181 Onyx 198 Relisys 119 87 Appendix Reoc 072, 092 SKY 013 Revoy 085 Skymaster 066, 072 Richmond 113 Skyworth 093 Roadstar 066, 057, 062, 093, 110, 172 Sliding 100 Ronin 091 SM Electronic 066, 072, 105 Rotel 045 Smart 061, 062 Rowa 064 Sogo 136, 203, 216 Rownsonic 076 Sontech 131 Saba 039, 204 Sony Saivod 082, 071 036, 089, 096, 098, 139, 142, 150, 171, 177, 184, 188, 190, 201, 202 Salora 067 Sound Color 113 Sampo 117 Soundmaster 072 Soundwave 062, 140 Samsung 032, 042, 017, 022, 069, 099, 152, 166, 182, 197, 199, 219, 080 Standard 082, 072, 075, 093 Sansui 059, 013, 070 Star Clusters 105, 110 Sanyo 056, 062 Starmedia 109 Scan 061, 087 Stein 148 ScanMagic 066, 164 Strato 105, 123 ScanSonic 162 Strong 062 Schaub Lorenz 073, 075, 100, 104, 156 Sunkai 073, 087 Schneider 038, 082, 052, 077, 061, 062, 075, 090, 110, 122, 214 Sunstar 001 Sunstech 082, 148, 149 Schoentech 062 Scientific Labs 072 Scott 057, 097, 113, 125, 181 Seeltech 109, 156 SEG 055, 062, 091, 140, 185, 215 Shanghai 057 Sharp 058, 062, 090, 127 Sherwood 067, 064 Shinco 064 Siemssen 123 Sigmatek 109, 200 Siltex 109 Silva 075, 093 Silva Schneider 067, 082, 090, 093 SilverCrest 014, 015, 105 Sinudyne 116 Sistemas 057 Skantic 038, 062 88 Suntronic 001 Sunwood 075, 093 Supervision 072, 105 Supratech 203, 213 SVA 057 Swisstec 206, 218 Sylvania 058, 207 Symphonic 058 Synn 072 Syscom 081 Sytech 148, 200 Tamashi 125 Tandberg 062, 162, 185 Tangent 117 Targa 110, 157, 179 Tatung 073, 162 Tchibo 067 Appendix English TCM 067, 077 Walkvision 064 Teac 067, 072, 061, 064, 071, 110 Waltham 062, 140 Tec 093 Welkin 082 Technica 162 Wellington 062 Technics 032, 178 Weltstar 062 Technika 073, 082, 100, 140, 162, 206, 208, 218, 221 Wharfedale 077, 062, 070, 100, 124, 172 Wilson 082, 113 Technisson 100 Windsor 062 Technosonic 100 Windy Sam 042 Techwood 062, 140, 185 Telefunken 039 Teletech 072, 062 Tensai 073 Tevion 093, 097, 110, 123, 131, 164, 181, 215 Textorm 136 Theta Digital 041 Thomson 039, 116, 160, 168 Time 013 Tokai 077, 055, 075, 093, 113 Tom-Tec 076, 148 Top Suxess 109 Wintel 101 Woxter 104, 109 Xbox 163, 194 Xenius 077 Xomax 198 Xoro 108, 226 Yakumo 094 Yamada 091, 094, 104, 106, 126, 135, 136 Yamaha 032 ,038, 052, 079 Yamakawa 055, 091, 215 Yukai 066, 164 Zenith 033, 043 TV/DVD Combo Toshiba 033, 059, 132, 138, 153, 154, 169, 187 Acoustic Solutions 193, 208 TRANS-continents 082, 081, 091, 113, 117 Airis 216 Tredex 086 Akai 212 Trevi 082 Alba 216 TSM 109 Audiosonic 216 TVE 062 Bush 062, 216, 217 Umax 104 cello 198, 205 UMC 206, 218, 221 Dantax 122 United 059, 066, 058, 062, 075, 081, 100, 105, 113, 120, 131, 156, 172, 198 Denver 128, 216 Digitrex 217 Universum 067, 043, 077, 062, 090, 110, 140 Gold 198 Vecatech 136 Hikona 124 Venturer 077, 169, 193, 208 Logic 222 Vestel 062, 140, 185 Marquant 217 Vieta 061 MTlogic 216 Voxson 066, 082 Onn 223 Waitec 066, 104, 109, 113 Onyx 198 89 Appendix Philips 210 Technika Proline 193 UMC 208, 221 221 Prosonic 208 Venturer 193, 208 Sliding 100 Sogo 216 Ferguson 059 Swisstec 218 Matsui 059 TV/VCR/DVD Combo 4. VCR Code List Brand Code Bell & Howell 011 Accent 009 Bestar 021 Adventura 001 Black Diamond 051 Adyson 009 Black Panther 021 Aiwa 003, 028, 001, 029, 002, 068, 102 Blaupunkt 010, 019 Akai 028, 029, 023, 012, 020 Blue Sky Akiba 009 021, 003, 028, 051, 009, 029, 031, 068, 102 Akura 009 Bondstec 009 Alba 010, 021, 028, 001, 009, 029, 023 Brandt 024, 025 Allorgan 020 Brinkmann 028 Allstar 010 Bush 010, 021, 028, 001, 051, 009, 029, 023, 068 Calix 003 Carena 010 Carrefour 006 Carver 010 Casio 001 America Action 021 Amstrad 021, 001, 009 Anam 021, 003, 019, 020 Anam National 019 Anitech 009 Ansonic 001 Aristona 010 ASA 010, 003 Asha 020 Asuka 010, 003, 001, 009 Audiolab 010 Audiosonic 021 Audiovox 003 AVP 001, 029 Awa 003, 024, 005 Baird 021, 001, 011, 012 Basic Line 021, 009, 011 Beaumark 020 Beko 011 90 Cathay 021 CCE 021, 009 Centrum 044 CGE 001 Cimline 009 Cineral 021 Citizen 021, 003 Clatronic 001, 009 Colt 009 Combitech 029 Condor 021 Craig 003, 009, 020 Crown 021, 003, 009, 031 Appendix English Cybernex 020 GEC 010 Cyrus 010 General Technic 028 Daewoo 021, 050, 051, 029, 006 Genexxa 011 Dansai 021, 009 Go Video 030, 102 Dantax 029, 068 GoldHand 009 Daytron 021 GoldStar 003, 001, 031, 102 De Graaf 010, 011, 007, 004 Goodmans Decca 010, 001, 029, 008 010, 021, 050, 003, 028, 001, 051, 009, 029, 020, 068 Deitron 021 GPX 003 Gradiente 001 Graetz 011, 020 Granada 010, 003, 001, 011, 007, 004, 019, 020 Grandin 021, 003, 001, 009, 068 Grundig 010, 028, 009, 024, 029, 019, 068 Denko 009 Denon 004 Diamant 003 Dual 010, 021, 028, 001 Dumont 010, 001, 011 Durabrand 051, 044 Elbe 021 Elcatech 009 Electrophonic 003 Elin 020 Elsay 009 Elta 021, 009 Emerex 002 Emerson 021, 050, 003, 001, 009, 006, 005 ESC 021, 020 Ferguson 021, 028, 001, 024, 025, 068 Fidelity 001, 009, 029, 030, 020 Finlandia 010, 003, 001, 011, 007, 005, 004, 012, 019 Finlux 010, 001, 011, 004 Firstline 021, 003, 028, 009, 006, 005, 004, 031, 102 Fisher 011 Flint 028 Frontech 009 Fujitsu 001 Funai 001, 044 Galaxi 001 Galaxis Garrard GE 021 001 007, 020 Hanimex 029 Hanseatic 010, 003 Harley Davidson 001 Harwood 009 HCM 009 Hinari 021, 009, 029, 020 Hisawa 029 Hischito 006 Hitachi 010, 001, 004, 020, 044 Hoeher 021, 051 Hornyphon 010 Hughes Network Systems 004 Hypson 021, 003, 001, 009, 029, 031 Imperial 001 Ingersol 020 Inno Hit 009 Interbuy 003, 009 Interfunk 010, 011 Internal 021, 050 International 021, 003, 051 Intervision 021, 003, 028, 001 Irradio 010, 003, 009, 102 ITT 011, 012, 020 ITV 021, 003 91 Appendix JBL 021 Medion 028, 051, 029 JMB 028, 029, 068 Memorex 003, 028, 001, 011, 007, 020 Joyce 001 Memphis 009 JVC 008 Metronic 010 Kaisui 009 Metz 010, 144, 003, 019, 084 Karcher 010, 021, 051 MGA 005, 020 KEC 021, 003 MGN Technology 020 Kendo 021, 003, 028, 051, 009, 023, 012 Micormay 028 Kenwood 008 Migros 001 KLH 009 Minolta 004 Kneissel 021, 003, 028, 029 Mitsubishi 010, 051, 008, 007, 005, 031 Kodak 003 Motorola 007 Korpel 009 MTC 001, 020 Kyoto 009 Multitec 003 Lenco 021 Multitech 001, 009 Leyco 009 Murphy 001 LG 021, 003, 001, 031, 102 Myryad 010 Lifetec 028 NAD 011 Lloyd’s 001 Naiko 028, 051 Loewe 010, 144, 003 National 019 Logik 009, 012, 020 NEC 003, 011, 008 Lumatron 044, 102 Neckermann 010 Lunatron 102 Nesco 001, 009 Lux May 009 Neufunk 102 Luxor 009, 011, 007, 005, 023, 012 Nikkai 021, 009 LXI 003 Nikko 003 M Electronic 003, 001 Noblex 020 Magnasonic 021, 044 Nokia Magnavox 010, 001 010, 021, 011, 007, 004, 023, 012, 020 Magnin 020 Nordmende 051, 024, 008, 025 Oceanic 010, 001, 024, 011 ,007, 012 Okano 021, 028, 009, 023 Olympus 019 Magnum 051 Manesth 010, 009, 006 Marantz 010 Mark 021, 001 Mascom 051 Mastec 051 Master’s 021 Matsui 003, 028, 029, 020, 068 Mediator 010 92 Onimax 051 Optimus 007, 030, 044 Orbit 009 Orion 028, 029, 068 Orson 001 Osaki 003, 001, 009 Appendix English Osume 009 Royal 009 Otto Versand 010 Saba 021, 024, 025 Pace 029 Saisho 028 Pacific 028, 001, 051, 068 Salora 011, 005, 012 Palladium 003, 028, 009 Samsung 006, 030, 020, 068 Palsonic 001, 009 Sanky 007 Panasonic 144, 019, 084 Sansei 007 Pathe Cinema 005 Sansui 001, 009, 008, 012 Penney 003, 004, 020 Sanyo 011, 008, 007, 020 Pentax 004 Saville 021, 029, 020 Perdio 001 SBR 010 Philco 009 ScanSonic 020 Philips 010, 044 Schaub Lorenz 028, 001, 011, 023, 012 Phoenix 021 Schneider Phonola 010 010, 021, 003, 028, 001, 051, 009, 029, 004, 020, 102 Pilot 003 Scott 005, 044 Pioneer 010, 008, 004 Sears 003, 001, 011, 004 Portland 021, 050 Prinz 001 Profitronic 010, 020 Proline 021, 001, 051, 024, 025 Prosco 021 Prosonic 021 Protech ProVision 010, 009 021 Pye 010 Quasar 021 Quelle 010 Radialva 010, 003, 009, 007 Radiola 010 Radionette 003, 102 RadioShack 003, 001 Radix 003 Randex 003 RCA 024, 007, 004, 020 Realistic 003, 001, 011, 007 Reoc 028 RFT 009 Roadstar 010, 021, 003, 009, 020, 068 Seaway 021 SEG 010, 021, 050, 051, 009, 020, 044 SEI 010 Sei-Sinudyne 010 Seleco 003 Semp 006 Sentra 009 Setron 009 Sharp 007, 040, 102 Shintom 009, 011 Shivaki 003 Shogun 020 Siemens 010, 003, 024, 011 Siera 010 Silva 003 Silva Schneider 102 Silver 021 SilverCrest 051 Singer 009, 006 Sinudyne 010, 029 Smaragd 028 Sonneclair 009 93 Appendix Sonolor 007 Topline 028 Sontec 021, 003 Toshiba 010, 029, 006, 005, 030, 068 Sony 001, 002, 012, 095, 112 Totevision 003, 020 Soundwave 003, 028 Towada 009 Ssangyong 009 Tradex 010 Standard 021 Uher 020 Stern 021 Ultravox 021 Sunkai 021, 028 Unitech 020 Sunstar 011 United 028, 068 Suntronic 011 Universum Sunwood 009 010, 003, 028, 001, 011, 012, 020, 102 Supra 003 Vector 006 Sylvania 010, 001, 005 Victor 008 Symphonic 001, 044 Video Concepts 006 Tandberg 021 Video Technic 001 Tandy 001, 011 Videomagic 003 Tashiko 010, 003, 001, 007, 020 Videosonic 020 Tatung 010, 028, 001, 029, 007, 005 Villain 001 Tchibo 028 Wards 010, 001, 009, 006, 007, 004, 020 TCM 028 Watson 010, 051, 029 Teac 003, 001, 051 Weltblick 003 Tec 009 Wharfedale 044 Tech Line 009 White Westinghouse 021, 009 Technics 010, 019 World 028 TechniSat 028 XR-1000 001, 009 Technosonic 029 Yamishi 021, 009 Teknika 003, 001 Telefunken 021, 024, 025 Telerent 019 Teletech 021, 001, 009 Tenosal 009 Tensai 021, 003, 001, 009 Tevion 028, 051 Texet 021 Thomas 001 Thomson 021, 024, 008, 025 Thorn 003, 011 TMK 020 Tokai 003, 009, 011 94 Yokan 009 Yoko 003, 009, 020 Zenith 050, 001 ZX 028, 029 TV/VCR Combo Aiwa 001, 029, 068, 102 Alba 029 Amstrad 001 Beko 011 Bestar 021 Blue Sky 021, 029, 068 Bush 029, 068 Appendix English Citizen 021 Portland 050 Colt 009 Radiola 010 Daewoo 021, 050 RCA 007, 020 Dantax 029, 068 Saba 024 Emerson 021, 050 Samsung 030, 020, 068 Ferguson 021, 001, 025, 068 Sansui 001 Fidelity 001 Sanyo 020 Firstline 021 Saville 029 Funai 001 Schneider 010, 001 GE 007, 020 Sears 003, 001 GoldStar 003, 031 SEG 050 Goodmans 021, 050, 029, 068 Sharp 007 Grandin 021, 068 Siemens 010 Grundig 010, 029, 068 Sinudyne 029 Hanimex 029 Sony 001, 002, 112 Harley Davidson 001 Sylvania 010 Hinari 029 Symphonic 001 Hitachi 001 Tatung 029 Hypson 003 Teac 001 Internal 021, 050 Technics 010 JBL 021 Technosonic 029 JMB 029 Telefunken 021 Kneissel 021, 029 Thomas 001 LG 003, 031 Thomson 021, 025 Lloyd’s 001 Toshiba 029, 030, 068 Magnasonic 021, 044 United 068 Magnavox 010, 001 White Westinghouse 021 Magnin 020 Zenith 011 Matsui 029, 068 Medion 029 Memorex 003 MGA 020 Mitsubishi 010, 007 Orion 029, 068 Pace 029 Pacific 068 Penney 003, 020 Philips 010 95 Appendix 5. Audio & AUX Code List Brand Code Amplifier Arcam 044 ASCOMTEC 071 Acoustic Solutions 078, 082, 084, 094 Audiolab 043 Cambridge Audio 106 Audiosonic 071 Curtis Mathes 014 Audiotronic 043 Denon 012 Bang & Olufsen 028 Durabrand 089, 090 Basic Line 088 Goodmans 093 Belson 071 Hitachi 089 Binatone 071 JBL 042 Blue Sky 072, 087 Logitech 074 Bose 046, 099 Magnat 042 Bush 027 Magnum 094 Cambridge Audio 080, 101 Mustek 093 Cat 071 Optimus 014, 029 CCE 065 Pacific 094 Centrum 045, 071 Pioneer 014, 029 Clatronic 027, 071 RCA 014 Cosmotron 027 Sven 090 Daewoo 076 Tevion 094 Dantax 018, 072 Trice 090 Denon 067, 025, 036, 075 upXus 078 Denver 071 Vieta 042 DiK 027 Yamaha 016, 030 Dual 045, 072 Accessory eBench 024, 027 Apple 038 Elta 024, 027, 072 Sony 008 EuroLine 098 Yamaha 121, 122 Fine Arts 043 Firstline 027 Receiver Acoustic Solutions 087 Garrard 013, 018 AEG 071, 072 Genexxa 010 AFK 071 Global Sphere 098 Aiwa 005, 073 Goodmans 021, 024, 027, 071, 072 Akai 004, 021, 072, 087 Grundig 043, 013, 027, 035, 087 Alba 087, 088 Grunkel 024, 072 All-Tel 072 Hanseatic 072 Amstrad 024, 072 Harman/Kardon 043, 056, 003, 011, 057, 060 Anam 021 Harwood 024 96 Appendix English HCM 072 Onkyo 006, 063, 114 HE 071 Optimus 032, 010, 024 Hitachi 088 Orient Power 024 Hitech 024 Orion 018 Hiteker 071 Palladium 027, 045, 054, 072, 086 Home Tech Industries 071 Panasonic Hyundai 087 109, 085, 058, 059, 062, 110, 111, 113, 128 Inkel 020 Paramount Pictures 045 Intersound 024 JBL 056, 057 JVC 001, 019, 068 Kenwood 033, 061, 091, 010 Kioto 027 Kompernass 027 KXD 071 LG 054, 086, 125 Lifetec 027 LXI 024 Magnat 071 Magnavox 043, 035 Marantz 043, 049, 031, 035, 053 Matsui 024, 027 MBO 065 Medion 027, 087 MEI 072 Metz 088 Micromega 043 Microstar 027 MTlogic 087 Musicmagic 035 Mustek 065 Mx Onda 024, 027 Myryad 043 NAD 015, 021 Nexius 072 Nikkai 071 Nikkei 024 Norcent 071 NTDE Geniesom 024 PCCW 128 Philips 043, 049, 031, 035, 048, 053, 117 Phonotrend 020 Pioneer 052, 032, 010, 039, 081, 097 PJ 071 Polk Audio 053 Prima Electronic 027 Proline 027, 072 ProVision 071 QONIX 072, 087 Radionette 054, 100 Recco 027 Redstar 071 Revox 007, 010, 035 Roadstar 027 Rotel 026 Samsung 013, 055, 119, 123, 083 Sansui 021, 035, 098 Sanyo 024 Schneider 003, 024, 045, 072 Scott 071 SEG 088 Sharp 010, 022, 070, 100 Sherwood 020, 022 Siemens 021 Silva Schneider 027, 072, 086 SilverCrest 087 Sony 040, 034, 047, 103, 107, 037, 066, 077, 079, 096, 108, 116, 118, 124 Soundwave 021 Stereophonics 032 Sumida 024 97 Appendix Sunfire 061 United 072, 098 T+A 050, 105 Universum TAG McLaren 043 013, 021, 024, 027, 045, 072, 076, 095 Tandberg 088 Venturer 027 ,072 Vestel 088 Victor 001 Waitec 065 Watson 027 Wellfund 024 Welltech 027 Wharfedale 072 Targa 054 TCM 027 Teac 018, 021 Technics Techwood 109, 085, 058, 059, 011, 110 088 Tedelex 098 Tevion 071 Thorens 043 Thorn 024 Tokai 072 Toshiba 092 Xenius 072 Yamaha 009, 002, 010, 017, 023, 041, 051, 064, 069, 112, 115, 120 Yukai 065 Zenith 024 MDB1.3 98 Appendix English OPEN SOURCE SOFTWARE NOTICE HUMAX products use certain open source operating system software distributed pursuant to GNU GENERAL PUBLIC LICENSE Version 2 and GNU LESSER GENERAL LICENSE Version 2.1 each as defined and published by the Free Software Foundation, Inc. The following GPL and LGPL software source codes used in this product can be provided and this offer is valid for up to three years from the date of original download of the software or purchase of product containing such software. Please contact us at [email protected]. GPL Software linux busybox ntpclient tinyftp rt3070 e2fsprogs This package, the ext2 filesystem utilities, are made available under the GNU Public License version 2, with the exception of the lib/ext2fs and lib/e2p libraries, which are made available under the GNU Library General Public License Version 2, the lib/uuid library which is made available under a BSD-style license and the lib/et and lib/ss libraries which are made available under an MIT-style license. LGPL Software uClibc libexif id3lib FreeType License (FTL) Software freetype Portions of this software are copyright © <2007> The FreeType Project (www.freetype.org). All rights reserved. OpenSSL License Software OpenSSL This product includes cryptographic software written by Eric Young. ([email protected]) This product includes software written by Tim Hudson. ([email protected]) This product includes software developed by the OpenSSL Project for use in the OpenSSL Toolkit. ( http://www.openssl.org) 99 Appendix The GNU General Public License (GPL) Version 2, June 1991 Copyright (C) 1989, 1991 Free Software Foundation, Inc. 51 Franklin Street, Fifth Floor, Boston, MA 02110-1301, USA Everyone is permitted to copy and distribute verbatim copies of this license document, but changing it is not allowed. Preamble The licenses for most software are designed to take away your freedom to share and change it. By contrast, the GNU General Public License is intended to guarantee your freedom to share and change free software--to make sure the software is free for all its users. This General Public License applies to most of the Free Software Foundation’s software and to any other program whose authors commit to using it. (Some other Free Software Foundation software is covered by the GNU Lesser General Public License instead.) You can apply it to your programs, too. When we speak of free software, we are referring to freedom, not price. Our General Public Licenses are designed to make sure that you have the freedom to distribute copies of free software (and charge for this service if you wish), that you receive source code or can get it if you want it, that you can change the software or use pieces of it in new free programs; and that you know you can do these things. To protect your rights, we need to make restrictions that forbid anyone to deny you these rights or to ask you to surrender the rights. These restrictions translate to certain responsibilities for you if you distribute copies of the software, or if you modify it. For example, if you distribute copies of such a program, whether gratis or for a fee, you must give the recipients all the rights that you have. You must make sure that they, too, receive or can get the source code. And you must show them these terms so they know their rights. We protect your rights with two steps: (1) copyright the software, and (2) offer you this license which gives you legal permission to copy, distribute and/or modify the software. Also, for each author’s protection and ours, we want to make certain that everyone understands that there is no warranty for this free software. If the software is modified by someone else and passed on, we want its recipients to know that what they have is not the original, so that any problems introduced by others will not reflect on the original authors’ reputations. Finally, any free program is threatened constantly by software patents. We wish to avoid the danger that redistributors of a free program will individually obtain patent licenses, in effect making the program proprietary. To prevent this, we have made it clear that any patent must be licensed for everyone’s free use or not licensed at all. The precise terms and conditions for copying, distribution and modification follow. TERMS AND CONDITIONS FOR COPYING, DISTRIBUTION AND MODIFICATION 0. This License applies to any program or other work which contains a notice placed by the copyright holder saying it may be distributed under the terms of this General Public License. The “Program”, below, refers to any such program or work, and a “work based on the Program” means either the Program or any derivative work under copyright law: that is to say, a work containing the Program or a portion of it, either verbatim or with modifications and/or translated into another language. (Hereinafter, translation is included without limitation in the term “modification”.) Each licensee is addressed as “you”. Activities other than copying, distribution and modification are not covered by this License; they are outside its scope. The act of running the Program is not restricted, and the output from the Program is covered only if its contents constitute a work based on the Program (independent of having been made by running the Program). Whether that is true depends on what the Program does. 1. You may copy and distribute verbatim copies of the Program’s source code as you receive it, in any medium, provided that you conspicuously and appropriately publish on each copy an appropriate copyright notice and disclaimer of warranty; keep intact all the notices that refer to this License and to the absence of any warranty; and give any other recipients of the Program a copy of this License along with the Program. You may charge a fee for the physical act of transferring a copy, and you may at your option offer warranty protection in exchange for a fee. 2. You may modify your copy or copies of the Program or any portion of it, thus forming a work based on the Program, and copy and distribute such modifications or work under the terms of Section 1 above, provided that you also meet all of these conditions: a) b) c) You must cause the modified files to carry prominent notices stating that you changed the files and the date of any change. You must cause any work that you distribute or publish, that in whole or in part contains or is derived from the Program or any part thereof, to be licensed as a whole at no charge to all third parties under the terms of this License. If the modified program normally reads commands interactively when run, you must cause it, when started running for such interactive use in the most ordinary way, to print or display an announcement including an appropriate copyright notice and a notice that there is no warranty (or else, saying that you provide a warranty) and that users may redistribute the program under these conditions, and telling the user how to view a copy of this License. (Exception: if the Program itself is interactive but does not normally print such an announcement, your work based on the Program is not required to print an announcement.) These requirements apply to the modified work as a whole. If identifiable sections of that work are not derived from the Program, and can be reasonably considered independent and separate works in themselves, then this License, and its terms, do not apply to those sections when you distribute them as separate works. But when you distribute the same sections as part of a whole which is a work based on the Program, the distribution of the whole must be on the terms of this License, whose permissions for other 100 Appendix 3. English licensees extend to the entire whole, and thus to each and every part regardless of who wrote it. Thus, it is not the intent of this section to claim rights or contest your rights to work written entirely by you; rather, the intent is to exercise the right to control the distribution of derivative or collective works based on the Program. In addition, mere aggregation of another work not based on the Program with the Program (or with a work based on the Program) on a volume of a storage or distribution medium does not bring the other work under the scope of this License. You may copy and distribute the Program (or a work based on it, under Section 2) in object code or executable form under the terms of Sections 1 and 2 above provided that you also do one of the following: a) b) c) Accompany it with the complete corresponding machine-readable source code, which must be distributed under the terms of Sections 1 and 2 above on a medium customarily used for software interchange; or, Accompany it with a written offer, valid for at least three years, to give any third party, for a charge no more than your cost of physically performing source distribution, a complete machine-readable copy of the corresponding source code, to be distributed under the terms of Sections 1 and 2 above on a medium customarily used for software interchange; or, Accompany it with the information you received as to the offer to distribute corresponding source code. (This alternative is allowed only for noncommercial distribution and only if you received the program in object code or executable form with such an offer, in accord with Subsection b above.) The source code for a work means the preferred form of the work for making modifications to it. For an executable work, complete source code means all the source code for all modules it contains, plus any associated interface definition files, plus the scripts used to control compilation and installation of the executable. However, as a special exception, the source code distributed need not include anything that is normally distributed (in either source or binary form) with the major components (compiler, kernel, and so on) of the operating system on which the executable runs, unless that component itself accompanies the executable. If distribution of executable or object code is made by offering access to copy from a designated place, then offering equivalent access to copy the source code from the same place counts as distribution of the source code, even though third parties are not compelled to copy the source along with the object code. 4. You may not copy, modify, sublicense, or distribute the Program except as expressly provided under this License. Any attempt otherwise to copy, modify, sublicense or distribute the Program is void, and will automatically terminate your rights under this License. However, parties who have received copies, or rights, from you under this License will not have their licenses terminated so long as such parties remain in full compliance. 5. You are not required to accept this License, since you have not signed it. However, nothing else grants you permission to modify or distribute the Program or its derivative works. These actions are prohibited by law if you do not accept this License. Therefore, by modifying or distributing the Program (or any work based on the Program), you indicate your acceptance of this License to do so, and all its terms and conditions for copying, distributing or modifying the Program or works based on it. 6. Each time you redistribute the Program (or any work based on the Program), the recipient automatically receives a license from the original licensor to copy, distribute or modify the Program subject to these terms and conditions. You may not impose any further restrictions on the recipients’ exercise of the rights granted herein. You are not responsible for enforcing compliance by third parties to this License. 7. If, as a consequence of a court judgment or allegation of patent infringement or for any other reason (not limited to patent issues), conditions are imposed on you (whether by court order, agreement or otherwise) that contradict the conditions of this License, they do not excuse you from the conditions of this License. If you cannot distribute so as to satisfy simultaneously your obligations under this License and any other pertinent obligations, then as a consequence you may not distribute the Program at all. For example, if a patent license would not permit royalty-free redistribution of the Program by all those who receive copies directly or indirectly through you, then the only way you could satisfy both it and this License would be to refrain entirely from distribution of the Program. If any portion of this section is held invalid or unenforceable under any particular circumstance, the balance of the section is intended to apply and the section as a whole is intended to apply in other circumstances. It is not the purpose of this section to induce you to infringe any patents or other property right claims or to contest validity of any such claims; this section has the sole purpose of protecting the integrity of the free software distribution system, which is implemented by public license practices. Many people have made generous contributions to the wide range of software distributed through that system in reliance on consistent application of that system; it is up to the author/donor to decide if he or she is willing to distribute software through any other system and a licensee cannot impose that choice. This section is intended to make thoroughly clear what is believed to be a consequence of the rest of this License. 8. If the distribution and/or use of the Program is restricted in certain countries either by patents or by copyrighted interfaces, the original copyright holder who places the Program under this License may add an explicit geographical distribution limitation excluding those countries, so that distribution is permitted only in or among countries not thus excluded. In such case, this License incorporates the limitation as if written in the body of this License. 9. The Free Software Foundation may publish revised and/or new versions of the General Public License from time to time. Such new versions will be similar in spirit to the present version, but may differ in detail to address new problems or concerns. Each version is given a distinguishing version number. If the Program specifies a version number of this License which applies to it and “any later version”, you have the option of following the terms and conditions either of that version or of any later version published by the Free Software Foundation. If the Program does not specify a version number of this License, you may choose any version ever published by the Free Software Foundation. 10. If you wish to incorporate parts of the Program into other free programs whose distribution conditions are different, write to the author to ask for permission. For software which is copyrighted by the Free Software Foundation, write to the Free Software Foundation; we sometimes make exceptions for this. Our decision will be guided by the two goals of preserving the free status of all derivatives of our free software and of promoting the sharing and reuse of software generally. 101 Appendix NO WARRANTY 11. BECAUSE THE PROGRAM IS LICENSED FREE OF CHARGE, THERE IS NO WARRANTY FOR THE PROGRAM, TO THE EXTENT PERMITTED BY APPLICABLE LAW. EXCEPT WHEN OTHERWISE STATED IN WRITING THE COPYRIGHT HOLDERS AND/OR OTHER PARTIES PROVIDE THE PROGRAM “AS IS” WITHOUT WARRANTY OF ANY KIND, EITHER EXPRESSED OR IMPLIED, INCLUDING, BUT NOT LIMITED TO, THE IMPLIED WARRANTIES OF MERCHANTABILITY AND FITNESS FOR A PARTICULAR PURPOSE. THE ENTIRE RISK AS TO THE QUALITY AND PERFORMANCE OF THE PROGRAM IS WITH YOU. SHOULD THE PROGRAM PROVE DEFECTIVE, YOU ASSUME THE COST OF ALL NECESSARY SERVICING, REPAIR OR CORRECTION. 12. IN NO EVENT UNLESS REQUIRED BY APPLICABLE LAW OR AGREED TO IN WRITING WILL ANY COPYRIGHT HOLDER, OR ANY OTHER PARTY WHO MAY MODIFY AND/OR REDISTRIBUTE THE PROGRAM AS PERMITTED ABOVE, BE LIABLE TO YOU FOR DAMAGES, INCLUDING ANY GENERAL, SPECIAL, INCIDENTAL OR CONSEQUENTIAL DAMAGES ARISING OUT OF THE USE OR INABILITY TO USE THE PROGRAM (INCLUDING BUT NOT LIMITED TO LOSS OF DATA OR DATA BEING RENDERED INACCURATE OR LOSSES SUSTAINED BY YOU OR THIRD PARTIES OR A FAILURE OF THE PROGRAM TO OPERATE WITH ANY OTHER PROGRAMS), EVEN IF SUCH HOLDER OR OTHER PARTY HAS BEEN ADVISED OF THE POSSIBILITY OF SUCH DAMAGES. END OF TERMS AND CONDITIONS How to Apply These Terms to Your New Programs If you develop a new program, and you want it to be of the greatest possible use to the public, the best way to achieve this is to make it free software which everyone can redistribute and change under these terms. To do so, attach the following notices to the program. It is safest to attach them to the start of each source file to most effectively convey the exclusion of warranty; and each file should have at least the “copyright” line and a pointer to where the full notice is found. One line to give the program’s name and a brief idea of what it does. Copyright (C) yyyy name of author This program is free software; you can redistribute it and/or modify it under the terms of the GNU General Public License as published by the Free Software Foundation; either version 2 of the License, or (at your option) any later version. This program is distributed in the hope that it will be useful, but WITHOUT ANY WARRANTY; without even the implied warranty of MERCHANTABILITY or FITNESS FOR A PARTICULAR PURPOSE. See the GNU General Public License for more details. You should have received a copy of the GNU General Public License along with this program; if not, write to the Free Software Foundation, Inc., 51 Franklin Street, Fifth Floor, Boston, MA 02110-1301, USA. Also add information on how to contact you by electronic and paper mail. If the program is interactive, make it output a short notice like this when it starts in an interactive mode: Gnomovision version 69, Copyright (C) year name of author Gnomovision comes with ABSOLUTELY NO WARRANTY; for details type `show w’. This is free software, and you are welcome to redistribute it under certain conditions; type `show c’ for details. The hypothetical commands `show w’ and `show c’ should show the appropriate parts of the General Public License. Of course, the commands you use may be called something other than `show w’ and `show c’; they could even be mouse-clicks or menu itemswhatever suits your program. You should also get your employer (if you work as a programmer) or your school, if any, to sign a “copyright disclaimer” for the program, if necessary. Here is a sample; alter the names: Yoyodyne, Inc., hereby disclaims all copyright interest in the program `Gnomovision’ (which makes passes at compilers) written by James Hacker. signature of Ty Coon, 1 April 1989 Ty Coon, President of Vice This General Public License does not permit incorporating your program into proprietary programs. If your program is a subroutine library, you may consider it more useful to permit linking proprietary applications with the library. If this is what you want to do, use the GNU Library General Public License instead of this License. GNU Lesser General Public License (LGPL) Version 2.1, February 1999 Copyright (C) 1991, 1999 Free Software Foundation, Inc. 51 Franklin Street, Fifth Floor, Boston, MA 02110-1301 USA Everyone is permitted to copy and distribute verbatim copies of this license document, but changing it is not allowed. [This is the first released version of the Lesser GPL. It also counts as the successor of the GNU Library Public License, version 2, hence the version number 2.1.] Preamble The licenses for most software are designed to take away your freedom to share and change it. By contrast, the GNU General Public Licenses are intended to guarantee your freedom to share and change free software--to make sure the software is free for all its users. This license, the Lesser General Public License, applies to some specially designated software packages--typically libraries--of the Free Software Foundation and other authors who decide to use it. You can use it too, but we suggest you first think carefully about whether this license or the ordinary General Public License is the better strategy to use in any particular case, based on the explanations below. When we speak of free software, we are referring to freedom of use, not price. Our General Public Licenses are designed to make sure that you have the freedom to distribute copies of free software (and charge for this service if you wish); that you receive source code or can get it if you want it; that you can change the software and use pieces of it in new free programs; and that you are informed that you can do these things. 102 Appendix English To protect your rights, we need to make restrictions that forbid distributors to deny you these rights or to ask you to surrender these rights. These restrictions translate to certain responsibilities for you if you distribute copies of the library or if you modify it. For example, if you distribute copies of the library, whether gratis or for a fee, you must give the recipients all the rights that we gave you. You must make sure that they, too, receive or can get the source code. If you link other code with the library, you must provide complete object files to the recipients, so that they can relink them with the library after making changes to the library and recompiling it. And you must show them these terms so they know their rights. We protect your rights with a two-step method: (1) we copyright the library, and (2) we offer you this license, which gives you legal permission to copy, distribute and/or modify the library. To protect each distributor, we want to make it very clear that there is no warranty for the free library. Also, if the library is modified by someone else and passed on, the recipients should know that what they have is not the original version, so that the original author’s reputation will not be affected by problems that might be introduced by others. Finally, software patents pose a constant threat to the existence of any free program. We wish to make sure that a company cannot effectively restrict the users of a free program by obtaining a restrictive license from a patent holder. Therefore, we insist that any patent license obtained for a version of the library must be consistent with the full freedom of use specified in this license. Most GNU software, including some libraries, is covered by the ordinary GNU General Public License. This license, the GNU Lesser General Public License, applies to certain designated libraries, and is quite different from the ordinary General Public License. We use this license for certain libraries in order to permit linking those libraries into non-free programs. When a program is linked with a library, whether statically or using a shared library, the combination of the two is legally speaking a combined work, a derivative of the original library. The ordinary General Public License therefore permits such linking only if the entire combination fits its criteria of freedom. The Lesser General Public License permits more lax criteria for linking other code with the library. We call this license the “Lesser” General Public License because it does Less to protect the user’s freedom than the ordinary General Public License. It also provides other free software developers Less of an advantage over competing non-free programs. These disadvantages are the reason we use the ordinary General Public License for many libraries. However, the Lesser license provides advantages in certain special circumstances. For example, on rare occasions, there may be a special need to encourage the widest possible use of a certain library, so that it becomes a de-facto standard. To achieve this, non-free programs must be allowed to use the library. A more frequent case is that a free library does the same job as widely used non-free libraries. In this case, there is little to gain by limiting the free library to free software only, so we use the Lesser General Public License. In other cases, permission to use a particular library in non-free programs enables a greater number of people to use a large body of free software. For example, permission to use the GNU C Library in non-free programs enables many more people to use the whole GNU operating system, as well as its variant, the GNU/Linux operating system. Although the Lesser General Public License is Less protective of the users’ freedom, it does ensure that the user of a program that is linked with the Library has the freedom and the wherewithal to run that program using a modified version of the Library. The precise terms and conditions for copying, distribution and modification follow. Pay close attention to the difference between a “work based on the library” and a “work that uses the library”. The former contains code derived from the library, whereas the latter must be combined with the library in order to run. TERMS AND CONDITIONS FOR COPYING, DISTRIBUTION AND MODIFICATION 0. This License Agreement applies to any software library or other program which contains a notice placed by the copyright holder or other authorized party saying it may be distributed under the terms of this Lesser General Public License (also called “this License”). Each licensee is addressed as “you”. A “library” means a collection of software functions and/or data prepared so as to be conveniently linked with application programs (which use some of those functions and data) to form executables. The “Library”, below, refers to any such software library or work which has been distributed under these terms. A “work based on the Library” means either the Library or any derivative work under copyright law: that is to say, a work containing the Library or a portion of it, either verbatim or with modifications and/or translated straightforwardly into another language. (Hereinafter, translation is included without limitation in the term “modification”.) “Source code” for a work means the preferred form of the work for making modifications to it. For a library, complete source code means all the source code for all modules it contains, plus any associated interface definition files, plus the scripts used to control compilation and installation of the library. Activities other than copying, distribution and modification are not covered by this License; they are outside its scope. The act of running a program using the Library is not restricted, and output from such a program is covered only if its contents constitute a work based on the Library (independent of the use of the Library in a tool for writing it). Whether that is true depends on what the Library does and what the program that uses the Library does. 1. You may copy and distribute verbatim copies of the Library’s complete source code as you receive it, in any medium, provided that you conspicuously and appropriately publish on each copy an appropriate copyright notice and disclaimer of warranty; keep intact all the notices that refer to this License and to the absence of any warranty; and distribute a copy of this License along with the Library. 103 Appendix 2. You may charge a fee for the physical act of transferring a copy, and you may at your option offer warranty protection in exchange for a fee. You may modify your copy or copies of the Library or any portion of it, thus forming a work based on the Library, and copy and distribute such modifications or work under the terms of Section 1 above, provided that you also meet all of these conditions: a) b) c) d) The modified work must itself be a software library. You must cause the files modified to carry prominent notices stating that you changed the files and the date of any change. You must cause the whole of the work to be licensed at no charge to all third parties under the terms of this License. If a facility in the modified Library refers to a function or a table of data to be supplied by an application program that uses the facility, other than as an argument passed when the facility is invoked, then you must make a good faith effort to ensure that, in the event an application does not supply such function or table, the facility still operates, and performs whatever part of its purpose remains meaningful. (For example, a function in a library to compute square roots has a purpose that is entirely well-defined independent of the application. Therefore, Subsection 2d requires that any application-supplied function or table used by this function must be optional: if the application does not supply it, the square root function must still compute square roots.) These requirements apply to the modified work as a whole. If identifiable sections of that work are not derived from the Library, and can be reasonably considered independent and separate works in themselves, then this License, and its terms, do not apply to those sections when you distribute them as separate works. But when you distribute the same sections as part of a whole which is a work based on the Library, the distribution of the whole must be on the terms of this License, whose permissions for other licensees extend to the entire whole, and thus to each and every part regardless of who wrote it. Thus, it is not the intent of this section to claim rights or contest your rights to work written entirely by you; rather, the intent is to exercise the right to control the distribution of derivative or collective works based on the Library. In addition, mere aggregation of another work not based on the Library with the Library (or with a work based on the Library) on a volume of a storage or distribution medium does not bring the other work under the scope of this License. 3. You may opt to apply the terms of the ordinary GNU General Public License instead of this License to a given copy of the Library. To do this, you must alter all the notices that refer to this License, so that they refer to the ordinary GNU General Public License, version 2, instead of to this License. (If a newer version than version 2 of the ordinary GNU General Public License has appeared, then you can specify that version instead if you wish.) Do not make any other change in these notices. Once this change is made in a given copy, it is irreversible for that copy, so the ordinary GNU General Public License applies to all subsequent copies and derivative works made from that copy. This option is useful when you wish to copy part of the code of the Library into a program that is not a library. 4. You may copy and distribute the Library (or a portion or derivative of it, under Section 2) in object code or executable form under the terms of Sections 1 and 2 above provided that you accompany it with the complete corresponding machine-readable source code, which must be distributed under the terms of Sections 1 and 2 above on a medium customarily used for software interchange. If distribution of object code is made by offering access to copy from a designated place, then offering equivalent access to copy the source code from the same place satisfies the requirement to distribute the source code, even though third parties are not compelled to copy the source along with the object code. 5. A program that contains no derivative of any portion of the Library, but is designed to work with the Library by being compiled or linked with it, is called a “work that uses the Library”. Such a work, in isolation, is not a derivative work of the Library, and therefore falls outside the scope of this License. However, linking a “work that uses the Library” with the Library creates an executable that is a derivative of the Library (because it contains portions of the Library), rather than a “work that uses the library”. The executable is therefore covered by this License. Section 6 states terms for distribution of such executables. When a “work that uses the Library” uses material from a header file that is part of the Library, the object code for the work may be a derivative work of the Library even though the source code is not. Whether this is true is especially significant if the work can be linked without the Library, or if the work is itself a library. The threshold for this to be true is not precisely defined by law. If such an object file uses only numerical parameters, data structure layouts and accessors, and small macros and small inline functions (ten lines or less in length), then the use of the object file is unrestricted, regardless of whether it is legally a derivative work. (Executables containing this object code plus portions of the Library will still fall under Section 6.) Otherwise, if the work is a derivative of the Library, you may distribute the object code for the work under the terms of Section 6. Any executables containing that work also fall under Section 6, whether or not they are linked directly with the Library itself. 6. As an exception to the Sections above, you may also combine or link a “work that uses the Library” with the Library to produce a work containing portions of the Library, and distribute that work under terms of your choice, provided that the terms permit modification of the work for the customer’s own use and reverse engineering for debugging such modifications. You must give prominent notice with each copy of the work that the Library is used in it and that the Library and its use are covered by this License. You must supply a copy of this License. If the work during execution displays copyright notices, you must include the copyright notice for the Library among them, as well as a reference directing the user to the copy of this License. Also, you must do one of these things: a) b) 104 Accompany the work with the complete corresponding machine-readable source code for the Library including whatever changes were used in the work (which must be distributed under Sections 1 and 2 above); and, if the work is an executable linked with the Library, with the complete machine-readable “work that uses the Library”, as object code and/or source code, so that the user can modify the Library and then relink to produce a modified executable containing the modified Library. (It is understood that the user who changes the contents of definitions files in the Library will not necessarily be able to recompile the application to use the modified definitions.) Use a suitable shared library mechanism for linking with the Library. A suitable mechanism is one that (1) uses at run time a copy of the library already present on the user’s computer system, rather than copying library functions into the executable, and (2) will operate properly with a modified version of the library, if the user installs one, as long as the modified version is interface-compatible with the version that the work was made with. Appendix c) d) e) 7. b) 9. 10. 11. 12. 13. 14. Accompany the work with a written offer, valid for at least three years, to give the same user the materials specified in Subsection 6a, above, for a charge no more than the cost of performing this distribution. If distribution of the work is made by offering access to copy from a designated place, offer equivalent access to copy the above specified materials from the same place. Verify that the user has already received a copy of these materials or that you have already sent this user a copy. For an executable, the required form of the “work that uses the Library” must include any data and utility programs needed for reproducing the executable from it. However, as a special exception, the materials to be distributed need not include anything that is normally distributed (in either source or binary form) with the major components (compiler, kernel, and so on) of the operating system on which the executable runs, unless that component itself accompanies the executable. It may happen that this requirement contradicts the license restrictions of other proprietary libraries that do not normally accompany the operating system. Such a contradiction means you cannot use both them and the Library together in an executable that you distribute. You may place library facilities that are a work based on the Library side-by-side in a single library together with other library facilities not covered by this License, and distribute such a combined library, provided that the separate distribution of the work based on the Library and of the other library facilities is otherwise permitted, and provided that you do these two things: a) 8. English Accompany the combined library with a copy of the same work based on the Library, uncombined with any other library facilities. This must be distributed under the terms of the Sections above. Give prominent notice with the combined library of the fact that part of it is a work based on the Library, and explaining where to find the accompanying uncombined form of the same work. You may not copy, modify, sublicense, link with, or distribute the Library except as expressly provided under this License. Any attempt otherwise to copy, modify, sublicense, link with, or distribute the Library is void, and will automatically terminate your rights under this License. However, parties who have received copies, or rights, from you under this License will not have their licenses terminated so long as such parties remain in full compliance. You are not required to accept this License, since you have not signed it. However, nothing else grants you permission to modify or distribute the Library or its derivative works. These actions are prohibited by law if you do not accept this License. Therefore, by modifying or distributing the Library (or any work based on the Library), you indicate your acceptance of this License to do so, and all its terms and conditions for copying, distributing or modifying the Library or works based on it. Each time you redistribute the Library (or any work based on the Library), the recipient automatically receives a license from the original licensor to copy, distribute, link with or modify the Library subject to these terms and conditions. You may not impose any further restrictions on the recipients’ exercise of the rights granted herein. You are not responsible for enforcing compliance by third parties with this License. If, as a consequence of a court judgment or allegation of patent infringement or for any other reason (not limited to patent issues), conditions are imposed on you (whether by court order, agreement or otherwise) that contradict the conditions of this License, they do not excuse you from the conditions of this License. If you cannot distribute so as to satisfy simultaneously your obligations under this License and any other pertinent obligations, then as a consequence you may not distribute the Library at all. For example, if a patent license would not permit royalty-free redistribution of the Library by all those who receive copies directly or indirectly through you, then the only way you could satisfy both it and this License would be to refrain entirely from distribution of the Library. If any portion of this section is held invalid or unenforceable under any particular circumstance, the balance of the section is intended to apply, and the section as a whole is intended to apply in other circumstances. It is not the purpose of this section to induce you to infringe any patents or other property right claims or to contest validity of any such claims; this section has the sole purpose of protecting the integrity of the free software distribution system which is implemented by public license practices. Many people have made generous contributions to the wide range of software distributed through that system in reliance on consistent application of that system; it is up to the author/donor to decide if he or she is willing to distribute software through any other system and a licensee cannot impose that choice. This section is intended to make thoroughly clear what is believed to be a consequence of the rest of this License. If the distribution and/or use of the Library is restricted in certain countries either by patents or by copyrighted interfaces, the original copyright holder who places the Library under this License may add an explicit geographical distribution limitation excluding those countries, so that distribution is permitted only in or among countries not thus excluded. In such case, this License incorporates the limitation as if written in the body of this License. The Free Software Foundation may publish revised and/or new versions of the Lesser General Public License from time to time. Such new versions will be similar in spirit to the present version, but may differ in detail to address new problems or concerns. Each version is given a distinguishing version number. If the Library specifies a version number of this License which applies to it and “any later version”, you have the option of following the terms and conditions either of that version or of any later version published by the Free Software Foundation. If the Library does not specify a license version number, you may choose any version ever published by the Free Software Foundation. If you wish to incorporate parts of the Library into other free programs whose distribution conditions are incompatible with these, write to the author to ask for permission. For software which is copyrighted by the Free Software Foundation, write to the Free Software Foundation; we sometimes make exceptions for this. Our decision will be guided by the two goals of preserving the free status of all derivatives of our free software and of promoting the sharing and reuse of software generally. NO WARRANTY 15. BECAUSE THE LIBRARY IS LICENSED FREE OF CHARGE, THERE IS NO WARRANTY FOR THE LIBRARY, TO THE EXTENT PERMITTED BY APPLICABLE LAW. EXCEPT WHEN OTHERWISE STATED IN WRITING THE COPYRIGHT HOLDERS AND/OR OTHER PARTIES PROVIDE THE LIBRARY “AS IS” WITHOUT WARRANTY OF ANY KIND, EITHER EXPRESSED OR IMPLIED, INCLUDING, BUT NOT LIMITED TO, THE IMPLIED WARRANTIES OF MERCHANTABILITY AND FITNESS FOR A PARTICULAR PURPOSE. THE ENTIRE RISK AS TO THE QUALITY AND 105 Appendix PERFORMANCE OF THE LIBRARY IS WITH YOU. SHOULD THE LIBRARY PROVE DEFECTIVE, YOU ASSUME THE COST OF ALL NECESSARY SERVICING, REPAIR OR CORRECTION. 16. IN NO EVENT UNLESS REQUIRED BY APPLICABLE LAW OR AGREED TO IN WRITING WILL ANY COPYRIGHT HOLDER, OR ANY OTHER PARTY WHO MAY MODIFY AND/OR REDISTRIBUTE THE LIBRARY AS PERMITTED ABOVE, BE LIABLE TO YOU FOR DAMAGES, INCLUDING ANY GENERAL, SPECIAL, INCIDENTAL OR CONSEQUENTIAL DAMAGES ARISING OUT OF THE USE OR INABILITY TO USE THE LIBRARY (INCLUDING BUT NOT LIMITED TO LOSS OF DATA OR DATA BEING RENDERED INACCURATE OR LOSSES SUSTAINED BY YOU OR THIRD PARTIES OR A FAILURE OF THE LIBRARY TO OPERATE WITH ANY OTHER SOFTWARE), EVEN IF SUCH HOLDER OR OTHER PARTY HAS BEEN ADVISED OF THE POSSIBILITY OF SUCH DAMAGES. END OF TERMS AND CONDITIONS How to Apply These Terms to Your New Libraries If you develop a new library, and you want it to be of the greatest possible use to the public, we recommend making it free software that everyone can redistribute and change. You can do so by permitting redistribution under these terms (or, alternatively, under the terms of the ordinary General Public License). To apply these terms, attach the following notices to the library. It is safest to attach them to the start of each source file to most effectively convey the exclusion of warranty; and each file should have at least the “copyright” line and a pointer to where the full notice is found. one line to give the library’s name and an idea of what it does.> Copyright (C) year name of author This library is free software; you can redistribute it and/or modify it under the terms of the GNU Lesser General Public License as published by the Free Software Foundation; either version 2.1 of the License, or (at your option) any later version. This library is distributed in the hope that it will be useful, but WITHOUT ANY WARRANTY; without even the implied warranty of MERCHANTABILITY or FITNESS FOR A PARTICULAR PURPOSE. See the GNU Lesser General Public License for more details. You should have received a copy of the GNU Lesser General Public License along with this library; if not, write to the Free Software Foundation, Inc., 51 Franklin Street, Fifth Floor, Boston, MA 02110-1301 USA Also add information on how to contact you by electronic and paper mail. You should also get your employer (if you work as a programmer) or your school, if any, to sign a “copyright disclaimer” for the library, if necessary. Here is a sample; alter the names: Yoyodyne, Inc., hereby disclaims all copyright interest in the library `Frob’ (a library for tweaking knobs) written by James Random Hacker. signature of Ty Coon, 1 April 1990 Ty Coon, President of Vice 106