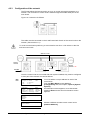
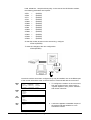
1
Analogue Addressable
Fire Panels
FP1500
Manual for Installation,
Configuration and
Commissioning
Version 2.1 / November 2003
Aritech is a GE Interlogix brand.
http://www.geindustrial.com/ge-interlogix/emea
© 2003 GE Interlogix B.V.. All rights reserved. GE Interlogix B.V. grants the right to reprint this manual for internal use only. GE Interlogix B.V.
reserves the right to change information without notice.
CONTENTS
1
Introduction............................................................................................................................................ 3
1.1 Contents of the package ............................................................................................................... 3
1.2 Glossary of symbols...................................................................................................................... 4
1.3 The FP1500 analogue system ...................................................................................................... 4
1.4 Safety precautions and warnings.................................................................................................. 5
2
The FP1500 analogue fire panel........................................................................................................... 7
2.1 Description of the control panel .................................................................................................... 7
2.2 Access levels and authorization codes ......................................................................................... 8
2.3 Features and functions.................................................................................................................. 9
3
Installation of the system ................................................................................................................... 10
3.1 Installation tools .......................................................................................................................... 10
3.2 Panel positioning......................................................................................................................... 11
3.3 Fixing the fire panel to the wall ................................................................................................... 11
3.4 Selecting a language................................................................................................................... 11
3.5 Electrical connections and cables............................................................................................... 12
3.5.1
Connecting power........................................................................................................ 12
3.5.2
Connections on the main electronic board .................................................................. 14
3.5.3
Connecting a loop........................................................................................................ 14
3.5.4
Connecting sensors ..................................................................................................... 16
3.5.5
Connecting modules .................................................................................................... 17
3.5.6
Connecting sounders................................................................................................... 18
3.5.7
Connecting relays ........................................................................................................ 19
3.6 Mounting optional elements ........................................................................................................ 19
4
System configuration.......................................................................................................................... 21
4.1 Basic configuration...................................................................................................................... 21
4.1.1
General parameters..................................................................................................... 22
4.1.2
Setting the Time and Date ........................................................................................... 23
4.1.3
Configuring a loop........................................................................................................ 24
4.1.4
Configuring a zone....................................................................................................... 25
4.1.5
Configuring elements................................................................................................... 26
4.1.6
Configuring sounder outputs ....................................................................................... 28
4.1.7
Configuring relay outputs............................................................................................. 30
4.2 Configuration with advanced options .......................................................................................... 31
4.2.1
Day mode setting......................................................................................................... 31
4.2.2
Sensitivity setting ......................................................................................................... 32
4.2.3
Configuration of the network........................................................................................ 33
4.2.4
Configuration of a repeater .......................................................................................... 34
4.2.5
Connection of a modem............................................................................................... 35
4.2.6
Connection to ethernet ................................................................................................ 39
4.2.7
Changing the firmware version.................................................................................... 40
4.2.8
Connection of a computer............................................................................................ 40
4.2.9
Connection to a printer ................................................................................................ 40
4.2.10 Changing the access level codes ................................................................................ 41
4.3 Graphics software ....................................................................................................................... 42
5
Commissioning of the system ........................................................................................................... 43
5.1 Checking the system................................................................................................................... 43
5.2 System power up ........................................................................................................................ 43
5.2.1
Initial system configuration .......................................................................................... 43
5.3 Operational tests ......................................................................................................................... 44
5.4 Troubleshooting guide................................................................................................................. 44
5.4.1
Earth faults................................................................................................................... 44
5.4.2
Communication errors ................................................................................................. 44
5.4.3
Double addresses........................................................................................................ 45
5.4.4
CPU failure .................................................................................................................. 45
5.4.5
Out of service............................................................................................................... 46
FP1500 Installation, Configuration and Commissioning Manual
1
5.4.6
5.4.7
5.4.8
Supply faults ................................................................................................................ 46
Low battery .................................................................................................................. 46
Others .......................................................................................................................... 46
6
Maintenance......................................................................................................................................... 47
7
Technical specifications..................................................................................................................... 50
8
Applicable standards .......................................................................................................................... 53
9
Appendix: Addresses of modules ..................................................................................................... 54
FP1500 Installation, Configuration and Commissioning Manual
2
1 INTRODUCTION
The FP1500 Aritech analogue addressable fire detection system has been designed and
manufactured in compliance with EN54-2:1997 and EN54-4:1997 and has approvals
pending.
Specialized staff with experience in manipulating and connecting electric and electronic
devices must perform the installation of the system. The installation should comply with
the guidelines and requirements of EN54-14 and any other applicable local authority laws
or requirements.
To avoid potential problems and accidents, carefully read this manual before starting the
installation.
1.1 Contents of the package
It is important to verify the contents of the package. Carefully check all the elements and
verify that they are in perfect condition. If not, return the panel to the supplier in its original
packing.
Figure 1. Contents of the package
FP1500 Fire Panel
Analogue Fire Panel
1 fuse 230 VAC
Language inserts
2 Resistors of 4k7 Ohms
Installation and User manuals
1 battery link cable
Not included in the package
- The 12 VDC batteries
- RS485 Upgrade IC
- Configuration software
- Configuration cable
- Detector address programmer
FP1500 Installation, Configuration and Commissioning Manual
3
1.2 Glossary of symbols
The symbols listed below appear throughout this manual to make it easier to understand
and as a reminder of important warnings and notes.
Ground connection: For your safety and protection of the system, it is
required to make this connection and ensure that is always correct.
Electronic equipment sensitive to electrostatic discharges: When
working with the electronic circuits, always wear an anti-static bracelet.
Potential electric discharge: Take precautions to avoid personal injury.
Lead batteries: There is risk of explosion in case of short-circuit and a risk
of corrosion in case of spillage.
Source of external electromagnetic radiation: The analogue system's
functions can be interfered with by external radiation from motors, radio
antennas, etc. Protect the installation as required.
Warning: Pay attention whenever you see this symbol. It can prevent
damage and accidents.
1.3 The FP1500 analogue system
The FP1500 has been designed using leading edge technology to guarantee high
reliability and ease of use. Its loop structure enables the user to define and group each of
the connected elements into zones. This makes for easy expansion of the installation
without having to reconfigure the system.
Sensors and analogue input modules may be connected to the loop to collect information
and warn of any risk situation. In the event of an alarm, the panel activates the output
modules, sounders and relays. Each of the devices occupies a unique address and
therefore are easily identified and managed independently.
The maximum cable length is 2 km using a 1.5 mm² diameter cable to ensure proper
operation of the system.
A FP1500 fire panel may be configured through its keypad and LCD display, with a
detailed, easy-to-navigate menu or through an external PC. Additionally there is a
windows-based graphics application that runs on a PC for an enhanced visual control and
monitoring of the whole installation.
The main electronic board has, in addition to the loop outputs, two serial ports (RS232
and/or RS485), two monitored sounder outputs, two voltage-free contact relays and an
auxiliary 24 VDC output.
Any kind of peripheral may be connected to the RS232 port for short-distance
communications (less than 15 meters). A PC, a printer, a modem, a GSM modem or an
ethernet network connection module may be installed.
The RS485 port supports communications of up to a maximum distance of 1.2 km and
allows the interconnection of fire and repeater panels.
Aritech offers two versions of analogue addressable fire panels:
FP1500/1: supplied with one loop
FP1500/2: supplied with two loops
FP1500 Installation, Configuration and Commissioning Manual
4
Figure 2. Basic diagram of the FP1500 analogue addressable fire detection system
RELAY OUTPUT
BIPOLAR
MAGNETO-THERMAL
SWITCH
ISOLATOR
KAL470
REMOTE
INDICATOR
SUPERVISED
SOUNDERS
FP1500
1 or 2 LOOPS
ANALOGUE ADDRESSABLE SENSORS:
OPTICAL
DP1551
IONISATION
DI1552
VOLTAGE-FREE
CONTACT RELAY
MODULE KAL430
RS485
REPEATER
PANEL
HEAT
DT1553
MANUAL CALL POINT
KAL450
RS232
CONVENTIONAL
MODULE
KAL410
CONVENTIONAL
REMOTE
INDICATOR
ANALOGUE PANEL
KAL440
SOUNDER
ISOLATOR
KAL470
SOUNDER
END-OF-LINE
RESISTOR
PC
CONVENTIONAL SENSORS AND MANUAL CALL POINTS
Applicable local authority laws and requirements must be respected where
modules and detectors are used on loops.
1.4 Safety precautions and warnings
It is important to bear the following warnings in mind to avoid possible mishaps or
accidents.
•
The fire panel is quite heavy once the batteries are installed. Use resistant fastening
elements.
•
The system must be installed as far away from other cables as possible to minimize
the risk of external interference. The use of stranded, shielded cable is
recommended.
•
Cable with a minimum section of 1.5 mm² and 250 VAC cable is recommended. The
cable length must not be longer than 2 km.
•
The fire panel must be connected to an external bipolar magneto-thermal switch.
•
Do not work on any connections without first disconnecting the external magnetothermal switch. Do not use the mains fuse to cut the power supply.
FP1500 Installation, Configuration and Commissioning Manual
5
•
Disconnect the mains (110 VAC or 230 VAC) and the batteries before connecting or
disconnecting any of the internal circuits of the fire panel.
•
The proper way of supplying current to the panel is:
First connect the mains magneto-thermal switch (110 VAC or 230 VAC), and then
connect the batteries.
Not following this procedure may cause a small discharge and damage the system.
•
Once the installation is complete, use a tester to ensure that there are no short
circuits in the lines before connecting the mains.
FP1500 Installation, Configuration and Commissioning Manual
6
2 THE FP1500 ANALOGUE FIRE PANEL
2.1 Description of the control panel
This section provides a visual diagram of the control panel keyboard and of the main
board connectors in order to facilitate the identification of each of the components of the
fire panel.
Figure 3. FP1500 Analogue addressable fire panels
1
23
2
4
16
10
17
5
6
7
11
12
19
20
8
9
24
18
13
14
21
22
15
FP1500 Installation, Configuration and Commissioning Manual
1.
2.
3.
4.
5.
6.
7.
8.
9.
10.
11.
12.
13.
14.
15.
16.
17.
18.
19.
20.
21.
22.
23.
24.
Liquid crystal display
Alarm/zone LED
Zone numbering
Fault/Disable/Test zone LED
Service LED
General alarm LED
General fault LED
General disable LED
General test LED
Triggering of sirens (LED and key)
Silence sounders (LED and key)
Reset
Silence Buzzer (LED and key)
Evacuation (LED and key)
Multi-language inserts
Out-of-service LED
Power supply fault LED
System fault LED
Sounder fault/disabled LED
Delay mode LED
Relay disable LED
Earth fault LED
Keypad with Enter key
Alphanumeric keyboard
7
Figure 4. FP1500 main electronic board and connectors
6
10
11
12
13
14
4
3
5
1
7
2
16
8
9
15
1.
Mains connector *
10. Potential-free relays connector
2.
Transformer
3.
Main electronic board
11. Supervised sounders and auxiliary 24 VDC
connectors
4.
Display contrast adjustment potentiometer
12. RS485 connector
5.
Auxiliary 24 VDC fuse *
13. RS232 connector
6.
RS485 IC socket
7.
Mains Input fuse *
14. Loop connector: FP1500/1 has only 1 where the
FP1500/2 has 2
8.
Battery charger voltage adjustment potentiometer
9.
Battery fuse *
15. Multi-language inserts
16. 12 V batteries: 7 A/h x 2 units
* See section 7 Technical specifications for fuse locations and characteristics.
2.2 Access levels and authorization codes
Following EN54-2:1997, the FP1500 fire panels have different access levels for security.
The configuration and control menus can be accessed only if the applicable code is
entered.
Level 1: All the panel indications are operational, but only visual access of the fire panel
is allowed to verify that everything is working properly. All controls are blocked. No code
is required to access this level.
Level 2: This level is reserved for the user responsible for controlling the proper
operation of the system. Up to 10 different codes may be defined. The user may access
the panel controls and switch on and off zones, adjust the time and the date, but cannot
make changes to the configuration.
Level 3: This level is for the installer who is also responsible for the configuration. It is
accessed with code 9898 (default code) and all the system configuration information is
FP1500 Installation, Configuration and Commissioning Manual
8
available at this level. The installer may add and remove sensors, control events, print,
etc.
To access the connectors and main electronic parts of the fire panel, a screwdriver is
required.
Level 4: This level is reserved for the manufacturer's staff i.e. GE Aritech personnel.
Changes in the operation of the fire panel may be performed and special tools and
software are necessary.
2.3 Features and functions
The FP1500 series share features and functions within the two models, FP1501 and
FP1502.
Features and functions of the control panel:
•
Display of alphanumeric characters (40 characters and 4 lines).
•
Possibility of configuring from the fire panel menu or through an external PC, with
the configuration software.
•
Auto-search option to automatically identify all the addressed elements connected.
•
Operator-indicator LEDs facilitate quick visual control of the state of the fire panel.
•
Event log that records all the events detected by the fire panel.
•
Capacity for 125 analogue addressable sensors + 125 analogue modules.
•
Two supervised sounder outputs on the main board.
•
Two voltage-free relay contacts on the main board.
•
An auxiliary 24 VDC output from the main board.
The number of sensors installed on a loop must be in accordance with local
regulations.
Features and functions of the RS485 and RS232 ports:
•
Possibility of networking of up to 10 fire panels and/or FR1500 repeater panels.
•
Connection to peripherals (modem, PC, GSM modem, printer).
•
Two serial ports (one RS232 and one RS485 - option) available.
FP1500 Installation, Configuration and Commissioning Manual
9
3 INSTALLATION OF THE SYSTEM
This chapter describes the installation process step by step, from fixing the fire panel to
the wall to connecting each of the possible components of the system.
Follow each of the listed procedures carefully.
3.1 Installation tools
For installation:
A flat screwdriver for connectors and a Phillips screwdriver for the star-headed screws of
the front casing, wire-stripping pliers and, multi-meter (tester) is required.
For fixing to the wall:
Appropriate drill bits, plugs and screws for the type and thickness of the wall where the
fire panel is to be mounted is needed
For configuring FP1500 panels and analogue sensors:
The PG700 Sensor Programmer is a portable unit for assigning addresses to 1500 Series
sensors. This unit has two operating modes:
Mode 1: Permits viewing the address of the detector by inserting it into the socket and
modifying it.
Mode 2: Permits viewing the analogue value of the detector.
The KSP701 is an optional serial cable for loading the configuration using the
configuration software. For running the software a PC with Windows 98 or later is also
required.
PG700
Figure 5. Configuration Tools
Configuration cable KSP701
FP1500 Installation, Configuration and Commissioning Manual
10
3.2 Panel positioning
For optimum operation and maintenance of the fire panel, several factors must be kept in
mind when deciding on the installation position.
The location must be protected by the fire detection system. Temperature should be
controlled between 5 and 40º C and the relative humidity must not exceed 95% (without
any condensation).
The location must be sheltered to avoid possible jolts or vibrations and away from cable
runs that could cause interference in the communications.
3.3 Fixing the fire panel to the wall
General recommendations
Place the fire panel at an approximate height of 1.5 m in a place with easy access and
where the light indicators are easily distinguishable.
Ensure that, once the fire panel is attached to the wall, the front casing could be removed
without any obstacle.
Bear in mind that the weight of the fire panel together with the batteries is quite high so
select the correct size of plugs and screws to hold it.
Installation steps
1. Place the metal box on the wall, orientate it correctly with the help of the level and
mark with a pencil the position of the 3 or 4 screws.
2. Remove the box from the wall and drill the holes and place the plugs.
3. Place the fire panel on the wall and attach it with the right screws.
Do not use the fire panel metal box as a guide for the drill.
Before fixing the frame to the wall, make the cables holes you require. Do not drill holes
in the fire panel box in places other than those indicated, and avoid shavings or pieces of
removed casing dropping inside the panel. This could damage the electronic circuits. If
you require, you may use PG11-type cable adapter.
3.4 Selecting a language
The FP1500 allows the user to choose the desired language. Take the sheet of language
inserts that is supplied with the panel, select the desired language and cut out the
corresponding inserts with a pair of scissors.
Insert each of the cards into the corresponding position on the front panel according to
the supplied number.
The sheet contains blank cards for configuring languages that have not been included.
The user may customize these cards with the desired language.
FP1500 Installation, Configuration and Commissioning Manual
11
3.5 Electrical connections and cables
The fire panel must be connected to the mains through an external bipolar magneto-thermal
switch. The mains cable must have a minimum section of 1.5 mm² and the voltage must be
110 VAC or 230 VAC. To avoid potential short-circuits and electromagnetic interference the
mains cable must be kept away from the loop connection cables and from the
communication ports.
To protect the connections, the use of PG11-type cable adapters or seals is recommended.
This way the cable is firmly fixed to the fire panel and, moreover, the use of pressuresensitive clamps to fix the cables to the housing is highly recommended.
If the system is exposed to an electromagnetic environment, the use of ferrite as close as
possible to the connection is recommended. (See drawing)
Once the fire panel is mounted on the wall, the connections can be started. The loops,
the mains and the additional elements are connected to the main board through the holes
on the top. The hole located away from the rest is for the mains.
Figure 6. Connection with cable seal and ferrite
1.
3.5.1
Cable adapter or seal
2.
Screen connection to earth
3.
Ferrite
4.
Terminals
5.
Connector socket
6.
Cables
7.
Nut
8.
Fire panel metal frame
9.
Input cable sleeve
Connecting power
Do not make any connections to the panel with the power supply turned on. Disconnect the
external bipolar magneto-thermal switch.
Location of bipolar magneto-thermal switch
1. Bipolar magneto-thermal switch
FP1500 Installation, Configuration and Commissioning Manual
12
For your safety, the order in which the power is reconnected must be: Mains first, then the
batteries. Do not connect the fire panel to the mains until you have completed the
commissioning procedure (See chapter 5).
Connect the mains on the outside of the cabinet and with an adequate earth connection. The
earth cable should be the longer of the three cables.
Figure 7. FP1500 mains connection
X 110 VAC
Y 230 VAC
1. Mains fuse
2. Mains fuse
3. Neutral
4. Clamp
For optimum fixation of the mains cable, use pressure-sensitive clamps
Mains fuses
The FP1500 fire panel can be supplied from a 230 VAC or a 110 VAC supply. The mains
fuse must be changed depending on the voltage.
•
For a 110 VAC power source, insert the fuse into the left fuse holder.
•
For a 230 VAC power supply, insert the fuse into the right fuse holder.
See section 7 Technical specifications for fuse locations and characteristics.
Do not use the mains fuse for connecting and disconnecting the fire panel from the
mains. Use the bipolar magneto-thermal switch.
Connecting the batteries
1. Place the batteries in the space reserved for them at the bottom of the fire panel box.
2. Connect the cables taking the colour codes into account (red positive, black negative).
Connect the battery bridge cable that is supplied with the package, between the two
batteries and the two cables that come out of the main electronic board to each of the
batteries as shown in the picture.
Figure 8. Placement of the batteries in the fire panel
FP1500 Installation, Configuration and Commissioning Manual
13
BLACK CABLE
+ RED CABLE
BATTERY
12V 7 A/h
BRIDGE CABLE
(BLACK)
3.5.2
Connections on the main electronic board
Figure 9. FP1500 main board connectors
RS232
3.5.3
NA
NC
C
NA
NC
C
RELAY2 RELAY1
LOOP 1
R+
R-
LOOP 2
RS485
R+
R-
1 + 1
O+
O-
+
RTS
RXB
TXA
1
B
A
B
A
+
O+
O-
24VDC AUX SND 2 SND 1
Connecting a loop
The loop structure is a closed (Class A) circuit. All the elements are connected to two
wires that exit from the fire panel and return back to the fire panel again.
The cable used in the sensor loop installation has to be at least stranded with a 1.5 mm²
diameter. It should be shielded to avoid external interference. See section 7 Technical
specifications for full cable recommendations.
The maximum length of the loop is 2 km. The resistance of the loop cable must be less
than 44 Ohm and the maximum capacitance of the line must be less than 500 nF.
•
Connect each detector and module to the loop along the cable run (See sections
3.5.4 and 3.5.7). Once the loop has been installed, connect it to the fire panel:
•
Connect the loop to the terminal corresponding to loop 1 or 2.
FP1500 Installation, Configuration and Commissioning Manual
14
•
Connect the output wires to points O+ and O- and the return wires to R+ and R-. The
colouring of the cables helps to distinguish between (+) and (-).
•
Connect the ground cable or shield to the ground terminal. Be careful to connect only
one of the ends, either the output (O) or the return (R) one.
It is important to have continuity in the shield at each of the connections of the loop.
FP1500 Installation, Configuration and Commissioning Manual
15
Each connection of the loop must give
continuity to the shield.
The loop ground connection
R+
R-
O+
O-
End of shield
well protected
If necessary, the fire panel has an auxiliary 24 VDC output. It allows powering of
additional elements that cannot be powered from the loop. It is also possible to connect
such elements to an independent power supply.
3.5.4
Connecting sensors
The analogue addressable sensors are the elements of the system that gather the
information. There are two types of detection elements: Thermal, which is activated by
temperature changes; and smoke (ionisation and optical), which is sensitive to smoke.
They all have a microprocessor that enables them to manage themselves and to
communicate with the fire panel.
Up to 125 sensors can be installed on the loop. Each of them occupies a physical
address on the loop from 1 to 125.
The number of sensors installed on a loop must be in accordance with local
regulations.
(It is recommended that you carefully read the technical specifications and the assembly
and installation manuals included in the packing of every product.)
Sensitive to smoke:
DI1552: Operates by the imbalance of its ionisation chambers in the presence of smoke.
DP1551: Operates by light dispersion due to the presence of smoke (Tyndall effect).
Sensitive to temperature:
DT1553: It is activated when a fixed temperature level is exceeded or when the
temperature rate-of-rise surpassed a pre-set rate.
Combined action:
DP1551T: Optical-thermal dual sensor that intelligently combines a photoelectric and two
thermal measurements to detect an ample spectrum of types of fire.
FP1500 Installation, Configuration and Commissioning Manual
16
All sensors must be installed in clean environments. During construction and refurbishing
work, they must be protected to keep them from being damaged and/or contaminated.
When you have identified the detector type that better fit the protection need, the
installation process can start. Installation is the same for any kind of sensor:
PG700
Portable unit for all types
•
Install the connection base DB304 (See Instruction Manual).
•
Once base DB304 is installed, connect it to the loop. The two wires from the system
are connected to the base and continuity should be given to the shield.
•
Assign the address to the detector using the PG700 portable address programmer
(See section 3.1 or the Instruction Manual). Detector address can also be assigned
through the fire panel keypad.
•
Lastly, mount the detector in the base.
Figure 10. Connection of the loop connector strip from the base plate
Continuity of the shield
Output to
base plate
connector strip
O+
O–
Z-700
Z-700
PA 25/3L
R+
R-
Return of protected
shield
3.5.5
Connecting modules
The modules are elements connected to the loop that handle the system's input and
output information. Up to 125 modules can be installed on a loop, with each occupying a
logical address from 128 to 252.
Some of the modules need additional external power. There are two possibilities for
providing this supply depending on the needs of the installation:
•
Through the auxiliary 24 VDC output located in the upper part of the main board.
The cable with the auxiliary 24 VDC runs parallel to the loop's cable.
•
An external source that provides the necessary 24 VDC, located as close as
possible to the module.
Before connecting the loop line to the panel, use a tester to verify that there is no connection
in any way with the auxiliary 24 VDC lines.
FP1500 Installation, Configuration and Commissioning Manual
17
Figure 11. Additional power supply
24 V power supply line
from the fire panel
Output auxiliary 24 VDC
External power supply
3.5.6
Connecting sounders
The FP1500 has 2 sounder outputs internally, identified as SND1 and SND2. On each of
these outputs, supervised sirens may be connected with a total consumption of 300 mA.
The installation and connection procedures are as follows:
1. Install the cable connecting any polarized siren (or with a corresponding diode) as
required (without exceeding 300 mA).
2. Place a 4K7 / ¼ W end-of-line resistance in last siren.
3. Connect the circuit to the control unit through the terminals on the main board
identified as SND1+ and SND1-.
Figure 12. Connection of supervised sirens to the base of the main board
Use polarized sounders or install a diode to prevent them from triggering when on standby.
DIODE
END OF LINE RESISTOR
Connection of non-polarized sirens
END OF LINE RESISTOR
Connection of polarized sirens
Aritech sirens are polarized (no diode is required)
FP1500 Installation, Configuration and Commissioning Manual
18
3.5.7
Connecting relays
Relays outputs can be connected to the corresponding sockets on the main board (the
ones furthest to the left). It is important to ensure that the terminals are tightly fixed.
Figure 13. Connection of relays on the main board
RELAY1
NA
NC
C
NA
NC
C
RELAY2
The relay output has three terminals:
C: common
NA: normally open
NC: normally closed
The EN54 standard requires a normally activated (fail-to-safe) fault relay. One of these
relays may be used for this function (See section 4.1.7 for the Configuration of relay output).
3.6 Mounting optional elements
In the FP1500 control unit, the only optional element is the RS485, which requires the
corresponding IC (KAL785/701).
When installing the optional elements, the panel must be disconnected from the power
supply. Disconnect the external magneto-thermal switch and the batteries before inserting
the IC.
For the RS485 connections, you must use cable that is stranded. Screening is
recommended.
The FP1500 has two serial communications ports on board. Port 1 is allocated to the
RS232 and is incorporated in the main board at the factory. Port 2 is allocated to RS485
and this is optional.
For the RS485 option to be available, the KAL785/701 IC must be installed in the
corresponding slot on the main board.
KAL 785/701
KAL785/701 IC optional for RS485
Installing the IC:
1. Disconnect the fire panel from the supply
FP1500 Installation, Configuration and Commissioning Manual
19
2. Check that the PINS on the IC are in good condition and unbent
3. Insert the IC into the correct position in the slot
4. Ensure the correct position of all the pins on the IC
FP1500 Installation, Configuration and Commissioning Manual
KAL 785/701
Slot on main board
for KA785/701 chip
The chip has an installation
position. Check position.
20
4 SYSTEM CONFIGURATION
The basic configuration of the system can be performed completely from the control unit.
However, if an external PC is available, the process is made easier.
From the control unit control panel:
•
Adjust the general parameters
Select a language
Standby and general fault message
Set time and date
•
Configure loops
Auto-search
From an external PC with configuration software:
•
Edit zone
•
Edit texts
•
Edit logic lines
•
Allocate logic lines to loop elements
Once the FP1500 system has been configured and all its elements have been installed,
the commissioning process begins. This configuration enables each element to be
identified and carry out its function appropriately in the system.
4.1 Basic configuration
When the system is connected for the first time, the control unit does not detect any of
the connected elements. The configuration is carried out through screen menus. Move
around these menus using the arrow keys and the numeric keys available on the front
face of the panel.
To confirm a selection, press the < ENTER > key.
To change a set value, press the < 9
> key.
To start the configuration, type in the code 9898 corresponding to level 3 (See section 2.2
regarding access levels).
Please type in
Your CODE:
FP1500 Installation, Configuration and Commissioning Manual
****
21
Figure 14. FP1500 keypad
4.1.1
General parameters
The alphanumeric LCD screen of the FP1500 has 4 lines of information of 40 characters
each.
[Screen title]: this reminds you at all times of the current screen.
[#Exit]: the <#> key takes you back to the previous menu
Index of menu actions: Numbered in accordance with the number of options. Key in the
number allocated to each action.
Screen title
Return to menu
[MAIN MENU]
[# Exit]
1. Configure
4. Connect
2. Test.
5. Disconnect
3. Time
6. Print
7. See
Options
Adjust general parameters
***
***
Any key
ALL CONNECTED DEVICES
ARE AT NORMAL STATE
00/00/0000
00:00
1
[MAIN MENU]
1. Configure
4
7. See
2. Test.
5. Disconnect
8. Day Mode
3. Time
6. Print
9. Codes
[CONFIGURE]
1. System
1
[# Exit]
4. Connect
[# Exit]
4. System Op.
7. Events
2. See Config.
5. Check. Prog.
8. Day Mode
3. Time/Date
6. Power supply
9. Codes
[SYSTEM OPTIONS]
[#Exit]
1. General
2. Messages
3. Modem
Language
: [SPANISH]
Calibration time
: [00:00]
LED Flashing
: [YES]
Historic Mode
: [NORMAL]
From the start screen, access option 1
<Configure>
If you are asked the code again, enter 9898.
Select option 4 <System Options>
Here, you can programme the parameters
1. General
2. Messages
3. Modem
by following the indications.
1-[General]: This screen lets you programme:
Language: Press the < 9 > key to select the
language.
E.g. [SPANISH] < > [ITALIAN] < > [PORTUGUESE]
< >[ENGLISH]
Calibration Time: At the hour indicated, the
calibration of the sensors is automatically
checked. An alert is given if the detector is out of
FP1500 Installation, Configuration and Commissioning Manual
22
checked. An alert is given if the detector is out of
its calibration limits or if it is close to the prealarm margin. Choose a time of the day when
the environment is usually in normal conditions.
By default, the control unit proposes 00:00
hours.
LED Flashing: All the elements of the loop send
information or are consulted by the control unit
regularly. Every time information is sent, the
corresponding LED flashes. You can activate or
deactivate the LED light; it is recommendable to
leave it on [YES].
Historic mode: The control unit keeps a list of
the events detected. From here, you can choose
two kinds of storage:
Normal: the default option, which registers all the
incidences shown on screen.
Debug: the control unit stores any event,
including individual communication errors not
shown on the control unit screen. This option is
advisable to locate sporadic events.
1
Network address
: [01]
Remote SND2 Reset
: [NO]
Installation reference
[
]
(Upper case letters and numbers]
3
[MODEM]
[#Exit]
1. General
2. Messages
Network Address: This value should be
changed only when there are several control
units connected together. In the case of a
network of control units, you must give each one
a different value.
Remote Reset: This option lets you configure
the SND2 sirens output as a remote RESET
input. If the terminals of the SND2 is shortcircuited whit this option configured, the system
RESETS This option must be restricted to
access level 2.
2-[Messages] Once configured and functioning
normally, the control unit displays a message
that can be customised from this menu. It is also
possible to customise the message that appears
in the case of fault. As a fault message, the
control unit automatically displays the name of
the maintenance company and its telephone
number. You may type in up to 20 characters.
3-[Modem] activate the type of MODEM to be
used:
3. Modem
- GSM
- Normal
- Telephone
(See section 4.2.5 Connection to modem)
If the modem is not used, do not change the
default parameters
4.1.2
Setting the Time and Date
Adjusting the time and day of the month is helpful when investigating any event involving
the control unit and exactly tracing the incidents.
[CONFIGURE]
[# Exit]
1. System
4. System Op.
7. Events
2. See Config.
5. Check Prog.
8. Day Mode
3. Time/Date
6. Power Supply
9. Codes
From [Configure], select option 3 <Time/Date>
FP1500 Installation, Configuration and Commissioning Manual
23
In option 1 <Date> select: Day / Month / Year
[DD/MM/YYYY]
In option 2 <Time> select: Hour / Minutes
[HH/MM]
The time is in 24-hour format.
[TIME/DATE]
[# Exit]
(DD/MM/YYYY)
1. Date
2. Time
27/02/2003
[TIME/DATE]
[# Exit]
(HH:MM)
1. Date
2. Time
4.1.3
23:30
Configuring a loop
Once the panel has been configured with the minimum general parameters, configure all
the connected elements. Begin with the loops and proceed as follows:
Auto-search
1
[MAIN MENU]
1. Configure
1
1
3
[# Exit]
4. Connect
2. Test.
5. Disconnect
3. Time
6. Print
[CONFIGURE]
[# Exit]
1. System
2. See Config.
3. Time/Date
4. System Op.
5. Check Prog.
6. Power Supply
[SYSTEM]
1. Loop 1
2. Loop 2
3. Loop 3
4. Loop 4
5. Loop 5
6. Peripherals
[Loop 1]
1. Zones
2. Elements
3. Auto-search
7. See
7. Events
8. Day Mode
9. Codes
[# Exit]
7. Sirens
8. Relays
9. PC
[# Exit]
4. Calibrate
5. Prog. Dir.
Searching…
Ionic:
Optical:
Thermal:
Zones:
Push-buttons:
LT Relays:
CT Relays:
Sirens:
This option lets the system automatically locate
all the elements that have been installed in a
specific loop.
It is of great help when a new system is
installed or when the configuration of a loop is
changed.
From the main menu:
1. Type in the code 9898 and select option 1
<CONFIGURE>
2. In the configure menu, select option 1
<SYSTEM>
3. A menu appears with all the configurable
elements. In this case, select option 1
<Loop1>
E. Log:
E. Anl:
Reten.:
Others:
The menu only allows access
to the loops that are physically
connected to the control unit.
4. In the Loop 1 menu, for example, select
option 3 <Auto-search>
The message “Searching...” appears.
5. The control unit scans the system and
detects all the connected elements. This
operation may take a few minutes.
6. A list appears with all the elements that are
connected and the corresponding address of
each device. This report must be checked
against the installed elements (as built
drawings) to ensure that the control unit has
detected all the devices correctly.
If the control unit detects any error, a warning
appears on the screen (See 5.4 for
troubleshooting). This process must be
repeated for each loop on the system and can
be executed as many times as required.
FP1500 Installation, Configuration and Commissioning Manual
24
If more detailed information is required about
the type and address of each device of the
loop, select option 2 <ELEMENTS> (See
section 4.1.5.).
From this point on, the configuration can be carried out using the software (external PC) or
continued with the fire panel menu.
4.1.4
Configuring a zone
[SYSTEM]
1. Loop 1
2. Loop 2
3. Loop 3
1
[# Exit]
7. Sirens
8. Relays
9. PC
4. Loop 4
5. Loop 5
6. Peripherals
[Loop 1]
1. Zones
2. Elements
3. Auto-search
[# Exit]
4. Calibrate
5. Prog. Dir.
All the devices of Loop 01
From the address
[000]
To the address
[255]
Are in Zone
[001]
Zone 001 is called
[Write the name of the zone]
The installation can be divided into zones. The
system enables the setting up of up to 20 zones
per panel. By default, all the devices are
allocated to zone 1. This makes it possible to
organise the installation correctly and enable
optimum identification of each element
connected to the panel.
To set up the zones, proceed as follows:
From the [SYSTEM] screen, select the loop you
wish to configure.
E.g. Option 1<Loop 1>, select option 1 <Zones>
This screen indicates the addresses of all the
elements in this zone.
E.g. The devices of Loop 1 with addresses
between [001] and [255] are in zone [001]
To change the values, use the arrow keys to go
to the text to be modified. The text flashes and
the new data may be supplied
When the new values have been inserted,
confirm with the <ENTER> key. The changes
are made instantly.
If you press <#>, the operation is cancelled and
the screen returns to the previous menu.
Pressing the <ENTER> key automatically
moves on to the next zone to be defined until
there are no further devices to be allocated.
Once all the elements have been allocated,
press the <ENTER> key to introduce the texts
for describing the zones.
Each zone may have a description allocated to
identify the area it covers. This text appears on
the screen if a fault or alarm is detected at any
of the devices allocated to the zone.
The description of the zone can be changed by
typing in letters and numbers or pre-defined
words (See section 4.1.5 Introduction and
modification of the location text).
FP1500 Installation, Configuration and Commissioning Manual
25
4.1.5
Configuring elements
[CONFIGURE]
1
2
[# Exit]
1. System
2. See Config.
3. Time/Date
4. System Op.
5. Check Prog.
6. Power Supply
[SYSTEM]
1. Loop 1
2. Loop 2
3. Loop 3
4. Loop 4
5. Loop 5
6. Peripherals
[Loop 1]
1. Zones
2. Elements
3. Auto-search
7. Events
8. Day Mode
9. Codes
[# Exit]
7. Sirens
8. Relays
9. PC
[# Exit]
4. Calibrate
5. Prog. Dir.
Begin inspection at address [001]
Loop: 01
Zone: 001
Address: 001
Text: Room 1005
Type: Ionic
Analog. Value: 16
Event: 018
Loop: 01
Zone: 001
Address: 001
Text: Room 1005
Type: Ionic
Analog. Value: 16
Event: 018
1
1. Sensor Text
2. Zone
3. Events
4. Alarm Thresholds
From the Loop 1 menu, you may access option
2 <Elements> This section provides specific
information about the types of devices
connected on the loop.
The system asks the question:
At what address do you wish to begin the
inspection?
Type in the desired address or press <ENTER>
to start the process from address 1.
The screen shows the complete information
about the device at the chosen address.
- The loop that it belongs to
- The zone that it has been configured in
- The text allocated
- The type of device
- Its current analogue value
- If it has an event allocated to it
To make changes to the configuration of the
element, press the < 9 > key. A menu appears
showing the fields that can be changed
depending on the device type.
If you press < # >, the operation is cancelled
and the screen returns to the previous menu.
Sensor text: to change the name of the
element
Zone: to change the zone allocated to the
element
Event: the elements generate events or
situations that alter the standby status of the
control unit. A number can be allocated to each
event the analogue system is capable of
detecting so that it can be identified (up to a
maximum of 1,000 different events). The input
elements (sensors and push-buttons) generate
an event and the output elements (sirens,
relays) can act as long as the event number
allocated to the input element and the output
element coincides.
The event type programmed for each element
can be changed (allocated number).
Alarm thresholds: The alarm and pre-alarm
threshold parameters, that sets the activation
level of a sensor, may be changed.
FP1500 Installation, Configuration and Commissioning Manual
26
Element 001 is called
[Write the name of the element]
[Upper Case Letters and Numbers]
Select the option you wish to change or go back
to continue with the other addresses.
Introduction and change of the location text
Element 001 is called
[Room 87- ]
[Lower case letters and numbers]
Element 001 is called
[PL.2 _
[Word 1]
]
0=Zone 1=Floor 2=Room
3=Corridor 4=Cupboard 5=Floor
Element 001 is called
[PL.2 _ CORRIDOR
]
[Word 1]
0=Zone 1=Floor 2=Room
3=Corridor 4=Cupboard 5=Floor
To make changes to the location text, press the
< 9 > key.
You can type in text in 3 ways: “upper case
letters and numbers”, “lower case letters and
numbers” and “words”.
The selected option appears at the bottom of
the screen.
Letters and numbers: this enables the
introduction of the signs on each key and the
forward and back keys are activated.
E.g. To change the room number, press the
<BACK> button once to delete the number,
then press the desired number button.
The cursor “-“, (flashing), indicates the position
on the screen.
Words: this mode is the simplest way of
introducing text that is frequently repeated for
many locations. The control unit has a series of
pre-programmed words that can be selected
using the < 9 > key to advance down the list.
E.g. To change a word (Room) to a different
one (Corridor), select the Words Mode and
delete the word with the <BACK> key.
The cursor remains in position ready for the
introduction of the new text. To enter the word
CORRIDOR, press <3>
Changing the alarm thresholds (detector sensitivity)
4
1. Sensor Text
2. Zone
3. Events
4. Alarm Thresholds
Alarm
Pre-Alarm
(normal 70)
(normal 60)
: [065]
: [050]
It is possible to programme alternative threshold
or pre-alarm and alarm limit values for each
detector (smoke or heat) as long as the control
unit software has the variable sensitivity mode
enabled.
E.g. There is a detector on Loop 1, address 26,
that requires that, between 06:30 and 17:45 a
pre-alarm should be set to 50 and fire alarm to
65, whilst for the rest of the day the levels
should return to the default values (pre-alarm at
60 and fire alarm at 70)
How is it configured?
During the element configuration, press the
< 9 > key and select option 4 <Alarm
Thresholds>. This option is displayed for smoke
or heat sensors only.
The control unit requests the alternative level it
will use during the day period (e g 6:30 to
FP1500 Installation, Configuration and Commissioning Manual
27
will use during the day period (e.g. 6:30 to
17:45). To change the alarm threshold to 65,
simply change the value.
When introducing the new value, the
programme asks for the alternative value for the
pre-alarm threshold. To change it to 50, simply
introduce the new value.
The pre-alarm threshold value
must be lower than the alarm
threshold otherwise the control
unit readjusts the input value
automatically.
Loop: 01
Zone: 001 Address: 026
Text: Room 1005
Type: Thermal
Analog. Value: 16
Event: 018 (p=50 A=65)
4.1.6
The screen displays the current analogue value
of the detector. As we have varied the
alternative values, the programme shows us
said values on the screen during the inspection
and configuration function of the detector.
Move forward to the next devices and adjust
them as required (See section 4.2.1 for Day
Mode and Sensitivity settings).
Configuring sounder outputs
The analogue detection system can activate:
• Two sounder outputs from the main board of
the control unit (SND1 and SND2).
• Sounders connected directly to the loop or
through sounder modules.
Sounder modules and loop sounders use the
address segment of the modules (from 128 to
252). The siren configuration is the same for
both methods.
Once the auto-search has been carried out on
the devices on the loop, by default the system
allocates the activation of all the sirens
immediately for any fire alarm in any zone.
Each output can be allocated a logic event.
1
[CONFIGURE]
1. System
2. See Config.
3. Time/Date
[# Exit]
4. System Op.
5. Check Prog.
6. Power Supply
7. Events
8. Day Mode
9. Codes
Logic event: This is the response generated by
an event in the installation. It activates, or
otherwise, the output elements (sirens and
relays) and determines the mode in which they
react.
Each logic event is allocated a different
identification number. There are 40 logic events
for the FP1500.
In this example, we shall allocate a logic line
number to a set of zones so that the output
elements are activated in a predetermined way.
E.g. We can define Logic Event 1 to work in
such a way that Zone 1 and Zone 2 trigger the
output. Zone three does not trigger it and Zone
4 triggers it with a delay.
This combination for the triggering of a siren is
called logic event programming. In the FP1500,
40 logic events can be defined.
FP1500 Installation, Configuration and Commissioning Manual
28
7
[SYSTEM]
[# Exit]
1. Loop 1
4. Loop 4
7. Sirens
2. Loop 2
3. Loop 3
5. Loop 5
6. Peripherals
8. Relays
9. PC
SIREN 1
Logic event
[003]
Events-1
[000]
Events-2
[000]
LOGIC EVENT 1
ZONE
MODE
[001] TO [012]
[YES]
b) NO: The output is not activated if a fire is
detected in the allocated zones (e.g. from 1
to 12).
LOGIC EVENT 1
ZONE
MODE
[001] TO [012]
[NO]
40 logic events can be defined.
From the configuration menu, access system
and from there select option 7 <Sirens>.
The sirens menu screen shows different
information. To advance to each siren, press
<ENTER> and to make modifications, press < 9
>.
Logic Event Number: allocate an identification
number to the logic event (from 1 to 40 for
FP1500).
Event-1 / Event-2: allocate a number to define
the type of event the logic event should activate
(from 1 to 40 for FP1500).
To define the logic event:
Press <ENTER> to limit the zones allocated to
this logic line. Once allocated, the cursor moves
on to [MODE], with the following options:
a) YES: The output is activated immediately
after it detects a fire in the allocated zones
(e.g. from 1 to 12)
LOGIC LINE 1
ZONE
MODE
[001] TO [012]
[10-sec DELAY]
LOGIC LINE 1
ZONE
MODE
[001] TO [012]
[10-sec PULSING]
c) DELAY: The output activates with a 10second delay after the fire has been
detected (e.g. from 1 to 12). The delay times
are adjustable in multiples of 10 up to 600
seconds. This is only applicable to the relay
outputs of the main board (R1 and R2), loop
sirens and SND1 and SND2.
d) PULSING: The output is activated in
PULSING mode and after 10 seconds
changes to continuous sound (the PULSING
times are adjustable in multiples of 10 to 600
seconds).
All the PULSING actions are applicable to the loop outputs and the main board outputs.
The following options make it possible for the
outputs to behave differently depending on
whether only one detector or several sensors
activates into alarm status:
LOGIC EVENT 1
ZONE
[001] TO [012]
DETECTION]
MODE
[DOUBLE
LOGIC EVENT 1
ZONE
Sensors
1/2
[001] TO [012][NO / PULSING -> YES 120 sec]
Double Detection: The output is activated
immediately only if two (or more) sensors
activate into alarm in the same zone.
1/2 sensors No / PULSING > 000 sec.: The
output pulses if two or more sensors activate
into alarm status in Zone 1, or if two or more
sensors activate into alarm status in Zone 2,
t Aft th ll
t d ti
th i
h
FP1500 Installation, Configuration and Commissioning Manual
29
etc. After the allocated time, the siren changes
to a continuous sound if one or more sensors
are in alarm.
This is only applicable to main board outputs
(SND1 and SND2) and loop sirens.
LOGIC EVENT 1
ZONE
[001] TO [012]
1 / 2 Sensors
[NO / YES -> YES 120 sec]
LOGIC EVENT 1
ZONE
1 / 2 Sensors
[001] TO [012][PULSING NO / YES -> YES 120 sec]
1/2 sensors No / Yes > Yes 000 sec.: The
siren activates if two or more sensors activates
into alarm status in Zone 1, or if two or more
sensors activates into alarm status in Zone 2,
etc. If only one detector is in alarm status in
any zone from 1 to 12, the siren is activated
after the allocated time.
1/2 sensors PULSING / Yes > Yes 000 sec.:
The siren will be activated if two or more
sensors activates into alarm status in Zone 1,
or if two or more sensors activates into alarm
status in Zone 2, etc. If only one detector is in
alarm status, the siren pulses.
Note: All timing of these logic events is
programmable. The time parameters
may be varied as required.
The configuration displayed on the screen
comes into effect when <ENTER> is pressed.
To cancel, press <#>
All the PULSING actions are only applicable to the loop and main board outputs.
4.1.7
Configuring relay outputs
The relays are configured in the same way as the sirens, with a few exceptions:
The main board relays may be configured to trigger with the <Trigger sirens> key,
activating the option <With evacuation – Yes>.
The EN54 standard requires the fault relay to be permanently activated, and it is deactivated
in fault status.
The 1 or 2 relay of the main board can be programmed to act in this way changing the
initial mode options of the relay and programming the appropriate event. By default relay
number 2 is set for general alarm and relay number 1 is ser for fault relay (normally
energized). The fault event is named 901.
E.g. A main board relay that is set to activate in initial mode [inverse], will turn OFF when
the alarm is activated. This will be opposite to others set to initial mode [normal] that
is turned ON when there is an alarm.
For this configuration to be effective:
7
[CONFIGURE]
[# Exit]
1. System
4. System Op.
7. Events
2. See Config.
5. Check Prog.
8. Day Mode
3. Time/Date
6. Power Supply
9. Codes
Enter the [CONFIGURE] screen in option 7
<Events>.
FP1500 Installation, Configuration and Commissioning Manual
30
1
[EVENTS]
In option 1 <General Events> allocate a
number to the <Fault Event> (e.g. [004]).
[# Exit]
1. General
2. Logical
Fault Event
: [004]
Pre-Alarm Event
: [000]
Recognised Event
: [000]
[CONFIGURE]
1
8
[# Exit]
1. System
4. System Op.
2. See Config.
5. Check Prog.
8. Day Mode
3. Time/Date
6. Power Supply
9. Codes
4. Loop 4
7. Sirens
[SYSTEM]
7. Events
[# Exit]
1. Loop 1
2. Loop 2
5. Loop 5
8. Relays
3. Loop 3
6. Peripherals
9. PC
Now return to [SYSTEM] and enter option 8
<Relays>.
Press < 9 > screen [RELAY1] or [RELAY2]
allocate the same event number to [Event-1]
(e.g. [004]) and set Initial Mode [Inverse]
RELAY 1:
Logic line:
[001]
With Evacuation: NO]
Event-1:
[000]
Initial Mode: [NORMAL]
Event-2:
[000]
RELAY 1:
Logic line:
[001]
With Evacuation: [NO]
Event-1:
[004]
Initial Mode: [INVERSE]
Event-2:
[000]
4.2 Configuration with advanced options
4.2.1
Day mode setting
The control unit can be pre-programmed to operate in certain ways at certain times of the
day:
Delayed day mode
The control unit can be configured to delay the triggering of outputs in any zone. During
the allocated delay period, the control unit receives an alarm warning. A complete fire
condition is executed if no action is executed in a time specified as a response to the
warning.
Configuration Delayed day mode
1
[CONFIGURE]
[# Exit]
1. System
2. See Config.
3. Time/Date
8
4. System Op.
5. Check Prog.
6. Power Supply
[DAY MODE]
7. Events
8. Day Mode
9. Codes
Proceed as follows:
1. From the main menu, access option 1
<Configure> and from there, type in
option 8 <Day mode>
[# Exit]
1. Delayed Mode
2. Sensitivity Mode
1
Allow Mode
Start Time
Alert 1
Alert 2
:
:
:
:
[NO]
[00:00]
[010]
[030]
End Time: [00:00]
Secs Delay
Secs Delay
2. Select: point 1 <Delayed Mode> and an
information screen appears. This screen
must receive two alerts before the control
unit triggers the full alarm.
FP1500 Installation, Configuration and Commissioning Manual
31
ZONE
[001] TO [012]
4.2.2
With Alert 1, the control unit warns of an alarm
situation. The operator must press
<RECEIVED> before the Alert 1 time,
otherwise the full alarm is generated. If the
control unit is on Received within the time,
Alert 2 begins. Alert 2 begins when Alert 1 is
triggered. For this reason, Alarm 2 must be
adjusted to a time longer than Alert 1, to give
the user time to investigate the cause of the
alarm and take the appropriate decisions. If
<RESET> is not pressed before the Alert 2
time, a full alarm situation is generated.
3. Once the times have been adjusted for
alerts 1 and 2, the control unit asks which
zones must be used in delayed mode. The
number of indicated zones shall act in
delayed mode or otherwise, depending on
whether [Yes] or [No] is allocated.
DELAYED MODE
[yes]
Sensitivity setting
Day mode sensitivity:
[MAIN MENU]
1. Configure
2. Test.
3. Time
[# Exit]
4. Connect
7. See
5. Disconnect
6. Print
This adjusts the pre-alarm and alarm thresholds of any
detector. Indicating the start and end time, we allocate
new values during periods of the day when we wish to
vary the default thresholds allocated in the factory.
This gives the sensors greater or lower sensitivity
depending on the zone in which they are located and
the activity carried out in the zone in which they act.
Configuration day mode sensitivity
1
2
[CONFIGURE]
1. System
4. System Op.
2. See Config. 5. Check Prog.
3. Time/Date 6. Power Supply
[# Exit]
7. Events
8. Day Mode
9. Codes
1.
From the main menu, select option 1 <Configure>
and then option 8 <Day mode>
[DAY MODE]
1. Delayed Mode
2. Sensitivity Mode
[# Exit]
2.
Select: point 2 <Sensitivity Mode> and an
information screen appears.
Allow Mode
Start Time
End Time
[NO]
[00:00]
[00:00]
You must choose the functioning mode:
• NO: this disables this function. Uses the default
values of the manufacturer
• YES: The control unit asks for the start and end
time of the mode. To change the times, press < 9
>, introduce the new values and press <Enter>
:
:
:
N.B. If the parameters “Start time” and “End time” are
left at [00:00] they shall be enabled 24 hours.
The alarm levels of the sensors may be changed. (See
section 4.2.2 Changing the Alarm Thresholds).
FP1500 Installation, Configuration and Commissioning Manual
32
4.2.3
Configuration of the network
The FP1500 allows the interconnection of up to 10 control units and/or repeaters on a
network. The connection of control units is made through the RS485 serial port on the
main board.
Figure 15. Connection for RS485
The cable must be connected on the A and B terminals of each of the control units on the
network. (See section 3.5.1)
To avoid communication problems, you must install a 150-Ohm / ¼ W resistor on the first
and last control units.
Maximum 1.2 Km
Resistor
150 Ohm
Resistor
150 Ohm / ¼ W
SLAVE
MASTER
Once the control units are connected with their system installed, they must be configured
to form part of the network. Proceed as follows:
1
[MAIN MENU]
1. Configure 4. Connect
2. Test.
5. Disconnect
3. Time
6. Print
[# Exit]
7. See
[CONFIGURE]
1. System
4. System Op.
2. See Config. 5. Check Prog.
3. Time/Date 6. Power Supply
[# Exit]
7. Events
8. Day Mode
9. Codes
[SYSTEM OPTIONS]
1. General
2. Messages
3. Modem
[#Exit]
[SYSTEM OPTIONS]
4. Network Address
[#Exit]
You must define a unique address for each of the
control units.
From the [Main Menu] access option 1
[Configuration] and, in this option, option 4 [System
Options].
An information screen appears, move downwards
pressing <Enter> and a second information screen
appears.
Allocate a different number to each control unit in
[Network Address].
FP1500 Installation, Configuration and Commissioning Manual
33
1
[CONFIGURE]
1. System
4. System Op.
2. See Config. 5. Check Prog.
3. Time/Date 6. Power Supply
[# Exit]
7. Events
8. Day Mode
9. Codes
Once all the control units have been identified, one of
them must be defined as the Master together with the
mode in which they are to communicate.
[SYSTEM]
1. Loop 1
2. Loop 2
3. Loop 3
[# Exit]
7. Loop 7
8. Loop 8
9. Loop 91
For this, from the [Configure] menu, access option 1
[System] and, from there, option 6 [Peripherals].
[#Exit]
Select the corresponding port 1 or 2 and in option 3
[Network Options], an information menu appears.
4. Loop 4
5. Loop 5.
6. Loop 6
[PERIPHERALS]
1. Port 1
2. Port 2
[PORT 1]
[#Exit]
1. Elements
4. Remote Connection
2. Auto-search
3. Network Options
In the FP1500 the RS485 port is always on port 2
(RS2).
Master?
[
Bi-directional: [
Share Zones: [
Global Events: [
Master: YES/NO Only one of these must be
configured as Master
]
]
]
]
Use MODEM:
Alm-Relay:
Relays-Disp:
[ ]
[ ]
[ ]
[PORT 1]
[#Exit]
1. Elements
4. Remote Connection
2. Auto-search
3. Network Options
Bi-directional: This option makes it possible for the
Master, all or only those affected by the event to know
when the general keys of the control panel are pressed
(Reset, Received, Silence, Sirens, Trigger Sirens) on
one of the network control units.
Share Zones: Each control unit can define up to 40
zones (FP1500). This option makes it possible for the
control units to share the same zones or for each one
to have its own.
Global events: By default, all the control units
connected on the network send the events to the rest
of the control units. Each of them must accept or reject
this function in accord with the chosen option. YES or
NO.
If YES is chosen: any event occurring on another
control unit is displayed.
If NO is chosen: only the events occurring on it shall be
displayed
Use Modem: Allocate [YES] or [NO], depending on
whether or not it is used. (See section 4.2.5)
All the control units are configured. They occupy a
specific address and the intercommunication mode has
been defined from the control unit identified as the
Master.
Perform the auto-search for peripherals from the
Master control unit.
The information about elements found displayed on the
screen must correspond to the elements installed on
that port.
4.2.4
Configuration of a repeater
The analogue system has FP1500R repeaters for managing and displaying the screen
information remotely.
A repeater is installed in the same way as a control unit, through the RS485 port. As with
the network control units, the repeater must have a unique address on the system. The
FP1500 Installation, Configuration and Commissioning Manual
34
configuration of the address and the language is made through micro-switches on the
bottom of the main board of the repeater.
ADDRESS
LANGUAGE
These are the combinations for defining the address and language:
Combinations for defining the address and language of the FP1500R repeaters
SPANISH
ITALIAN
PORTUGUESE
ENGLISH
Once the address has been set, perform the auto-search for peripherals from the master
control unit to configure all the elements installed on the network through the RS485 port.
Figure 16. FR1500 repeater
Figure 17. Repeater to control unit connection diagram
Output to the next element
4.2.5
Connection of a modem
The analogue fire detection system allows the connection of a GSM modem. This allows
sending of short text messages to mobile phones. In this way, fault or alarm messages
that appear on the screen of the control unit are sent to pre-programmed phones.
FP1500 Installation, Configuration and Commissioning Manual
35
TXA RXB A B
6
2
9
RXB
TXA
RS1
Before starting the installation of the modem, check that no element is connected to the
RS232 port, which is to be used for this function.
6
[MAIN MENU]
[# Exit]
1. Configure
4. Connect
2. Test.
3. Time
5. Disconnect
6. Print
7. See
[PRINT]
From the [Main Menu] screen, select option 6
<Print> select option 5 <Options> check that
the internal printer is on [NO] mode.
[# Exit]
1. Element
4. Disconnected
2. Historic
3. Mode
5. Options
Return to option 3 <Mode> and set the printer
Mode to [OFF].
Printer port: [ 01 ]
Internal printer: [ NO ]
[PRINT]
[# Exit]
1. Element
4. Disconnected
2. Historic
3. Mode
5. Options
Printer Mode: [ OFF ]
4
3
[CONFIGURE]
1. System
2. See Config.
3. Time/Date
4. System Op.
5. Check Prog.
6. Power Supply
[SYSTEM OPTIONS]
[#Exit]
1. General
2. Messages
3. Modem
1
[MODEM]
1. GSM
2. Normal
3. Telephones
[#Exit]
[# Exit]
7. Events
8. Day Mode
9. Codes
For the installation of the GSM modem:
1. Connect the modem serial cable to the
RS232 port of the control unit.
2. Connect the modem power supply cable to
the auxiliary 24 V output of the control unit.
Once installed, it must be configured in the
control unit:
1. From the [Configure] menu, select point 4
<System Options> and option 3
<MODEM>.
2. Choose the modem to be configured, in this
case, option 1<GSM>
3. Within the GSM modem menu, select point
FP1500 Installation, Configuration and Commissioning Manual
36
1
[GSM]
[#Exit]
1. Options
2. Status
3
Serial Port
[ ]
Activate MODEM:
[ ]
Fault Max.: [ ]
SMS messages:
[ ]
Telephone PIN:
[ 0000 ]
[MODEM]
[#Exit]
1. GSM
2. Normal
3. Telephones
[TELEPHONES]
1<Options>:
• Serial port: select the port where the
modem is connected.
• Activate modem: [NO]
• Activate SMS: [YES]
• PIN code: introduce the PIN number of
the GSM SIM card.
• Fault Maximum: this option enables the
selection of the maximum number of
alerts produced by faults.
4. Once the data has been introduced, exit the
menu [Options] and enter [Status]. If the
modem has been installed correctly, a
screen should appear with the information
of the telephone operator and the available
coverage. If the coverage is not correct,
change the position of the modem.
5. You now need to configure the telephones
to which the modem is to send the short
messages. The control unit differentiates
two phone numbers: one for alarms and
one for faults.
To set up the telephone numbers, from the
modem menu, select option 3
<Telephones>.
[#Exit]
1. Faults
2. Alarms
Fault telephone
[
]
[Upper case letters and numbers]
2
Alarm telephone
[
]
[Upper case letters and numbers]
In option 1 <Faults> allocate the telephone
number to be alerted in the case of faults
In option 2 <Alarms> the number that must
communicate in case of alarm.
Connection to conventional modem
The analogue fire detection system enables the connection of a conventional modem to
establish occasional communication: sending or receiving information about the control
unit or configuring the control unit from an external PC.
For this type of communication, two modems are required: the one on the control unit
and the one on the PC that is to receive the communication. Before installing them, they
must be configured through a PC:
E.g. The following represents the configuration of the US Robotics modem:
Install the modem with the corresponding drivers.
Open the HyperTerminal programme or the one that controls the serial port. Select
the modem installed or the port where it is connected. Write the command AT
(ENTER). If the modem is installed correctly, the OK message appears on the
screen.
From HyperTerminal, or the programme being used, both modems can be
configured with internal variables. The communication characteristics must be 9600
FP1500 Installation, Configuration and Commissioning Manual
37
baud, 8 data bits, 1 stop bit without parity. In the case of the US Robotics modem,
the following parameters are required:
ATE0
ATQ0
ATV1
ATX3
AT&B1
AT&D0
AT&H0
AT&I0
AT&K0
AT&N6
AT&R1
AT&S0
AT&U6
+
+
+
+
+
+
+
+
+
+
+
+
+
(ENTER)
(ENTER)
(ENTER)
(ENTER)
(ENTER)
(ENTER)
(ENTER)
(ENTER)
(ENTER)
(ENTER)
(ENTER)
(ENTER)
(ENTER)
So that the modem answers on the second ring, configure:
ATS0=2 (ENTER)
To save the changes of the new configuration:
AT&W (ENTER)
TXA RXB A B
2 TXA
3 RXB
5
RS1
Once both modems have been configured, they may be installed, one on the RS232 port
of the control unit and the other on the PC that is to communicate with the control unit.
4
[CONFIGURE]
1. System
4. System Op.
2. See Config. 5. Check Prog.
3. Time/Date 6. Power Supply
[# Exit]
7. Events
8. Day Mode
9. Codes
3
[SYSTEM OPTIONS]
1. General
2. Messages
3. Modem
[# Exit]
2
[MODEM]
1. GSM
2. Normal
3. Telephone
[# Exit]
1
[NORMAL]
1. Options
[# Exit]
1. To configure the modem on the control unit,
from the configure menu, select option 4
<System Options>, then, point 3 <Modem>
and choose <Normal>.
2. A submenu appears to establish the port of
the modem and asks whether or not to
activate the modem.
FP1500 Installation, Configuration and Commissioning Manual
38
[Serial Port:
Activate Modem:
3. If you use the configuration software, this
option must be disabled, for the graphics
software, it should be enabled.
[01]
[YES]
To establish the communication of the control unit with the configuration software, the
control unit must be in the [System menu] option 9 < PC >
To ensure correct working, the configuration software must be version 2.0 or higher.
4.2.6
Connection to ethernet
An FP1500 analogue system may be connected via an ethernet network to a PC with
configuration software or graphics software for controlling the installation.
To connect the control unit on an ethernet network, install an RS232 to external ethernet
converter module to the control unit and another converter module to the PC. The
converter modules must have their own configuration software installed and configured
with the following RS232 serial port communication data:
Configure the serial port:
Bits per second:
Bits of data:
Parity:
Parity bits (Stop bit):
Flow control:
9 600
8 bits
None
1
None
Set up a local IP address and a remote IP.
FP1500 control panel
PC with graphic software
RS232
A
RS232
IP NET
Ethernet
Module
Local IP:
Remote
B
Ethernet
Module
Local IP:
Remote IP
Communicate the analogue control unit with the configuration programme:
Connect the Ethernet equipment to the FP1500 control unit through the RS232 port.
To make the communication, proceed as for modem communication.
When using the configuration programme, the options for using the control unit modem must
be disabled.
The communication is carried out through the [System] menu option 9 <PC>
To communicate with the FP1500 control unit, you must install version 2.0 or higher of
the configuration programme.
FP1500 Installation, Configuration and Commissioning Manual
39
For other applications using an ethernet network, contact your supplier.
4.2.7
Changing the firmware version
When the version of the firmware is changed, the control panel clears the existing site
configuration.
To keep the configuration, download it to a PC with the configuration software
<download to PC>
In the FP1500 the change of the software version is made through the RS232 port with
special software. If necessary, please contact your supplier.
4.2.8
Connection of a computer
The connection of a FP1500 analogue control panel to a computer must be done through
RS232 and an RS232 card must be installed in one of the serial ports. In the FP1500,
you must use port 1 (RS1)
Requirements:
•
If graphics software is used:
1. Identify the control unit as “Master” (See section 4.2.3)
2. Give the control unit an address (See section 4.4.1)
3. Perform an auto-search for peripherals (See section 4.1.2)
•
If configuration software is used, the control unit cannot be configured as Master.
TXA RXB A B
2 TXA
3 RXB
5
RS1
4.2.9
Connection to a printer
To connect a FP1500 analogue control unit to a printer, it must have a serial input and be
configured with the following variables:
•
9 600 baud
•
8 bits of data
•
1 Stop bit
•
No parity
FP1500 Installation, Configuration and Commissioning Manual
40
•
Hardware flow control
(As an external printer, the EPSON LX300 is recommended)
To configure the printer:
6
[MAIN MENU]
1. Configure
5
7. See
From [Main Menu] select option 6 <Print>.
The control unit enters the printing menu.
[# Exit]
In [PRINT] select option 5 <Options>
[# Exit]
4. Connect
2. Test.
5. Disconnect
3. Time
6. Print
[PRINT]
1. Element
4. Disconnect
2. Historic.
5. Options
3. Mode
Select whether the printer is external or internal.
Printer port: [01]
Internal printer: [NO]
3
[PRINT]
[#Exit]
1. Element
4. Disconnected
2. Historic
5. Options
Exit 5<Options>
From [PRINT] select option 3 <Mode>
Adjust the printing mode with the < 9 > key.
3. Mode
[Manual]: Prints only when the user requires
[Auto]:
Automatically prints alarms or faults as
they occur
[OFF]:
The printer is disabled
Printer Mode: [Manual]
TXA RXB A
B
3
3
5
RXB
TXA
RS1
4.2.10 Changing the access level codes
The level 3 access code for the control unit (9898 factory setting) may be changed. As
with level 2 codes, up to 10 different codes may be added.
[CONFIGURE]
1. System
2. See Config.
3. Time/Date
9
[# Exit]
4. System Op.
5. Check Prog.
6. Power Supply
LEVEL CODES: [2]
7. Events
8. Day Mode
9. Codes
From [CONFIGURE] select option 9 <Codes>
The following screen displays the access level
of the control unit: [2] or [3]
On level 2:
You can add up to 10 different access codes.
FP1500 Installation, Configuration and Commissioning Manual
41
LEVEL CODES: [2]
From [01] to [01] Value: [
Duration: [05] Minutes
LEVEL CODES: [3]
LEVEL CODES: [3]
Current Code: [0000]
New Code: [0000]
]
Press: <ENTER>
The panel will indicates on what code number
(between 01 and 10) the code is allocated.
Write a 4-digit access code.
E.g. From [01] to [05] : [1234]
In this way, we only have 5 codes to allocate,
since the first five have the access code [1234]
If all ten codes are required:
From [01] to [01] : [1111]
From [02] to [02] : [2222]... etc.
Duration:
This parameter may be modified as required.
Normally, if after pressing any key on the
control unit no further action is taken, after the
programmed time (e.g. 05 minutes), the control
unit will ask for the access code again.
This ensures that only authorised personnel
use the control unit.
On level 3: key in <3>
On this level, only one code exists.
The control unit has the code: [9898] factory
setting, but this can be changed.
<ENTER> the control unit requires the current
code and then you may type in the new code.
The code is changed from this moment on.
Write down your access code and save it in a safe place.
4.3 Graphics software
The FP1500 analogue fire detection system has additional software that enables the
management and control of the installation via PC.
This software is made up of three components:
•
Plan Editor: a tool for creating a diagrammatic plan with the situation of each of the
components of the system in the installation. In this way, the identification in the
event of an alarm is faster and more efficient.
•
Events Viewer: record of the graphics software. It draws up a list of all the
movements made on the control unit.
•
User application: once the control unit has been configured and the installation plan
has been edited, this application enables full visual control of the system. Please ask
your distributor for more information.
FP1500 Installation, Configuration and Commissioning Manual
42
5 COMMISSIONING OF THE SYSTEM
Finally, the analogue detection system has been installed. Before powering it up, you
must check the control unit works correctly. Follow all the steps set forth in this chapter.
5.1 Checking the system
Before supplying power to the control unit, check all the following points.
•
Check that the control unit has been correctly mounted (See section 3.3).
•
Check the loops, ensuring that there is no cut or short circuit. Use the tester to check
the continuity of the line.
•
Check the connections of the main board output. Check that it is correctly installed
and working. (See section 3.4)
•
Check that the power voltage is 230 VAC or 110 VAC with a voltmeter and the
batteries have a voltage of 24 VDC.
•
Ensure that the sounder lines are connected with the correct polarity and that they
have the 4K7 end of line resistors. (See section 3.4.4)
•
Check that the RS485 lines (if used) have the 150-Ohm resistance at the ends).
•
Check the correct installation of all the elements. (See section 3.4.3 to 3.4.7)
•
Review the optional components (cards, memories, etc.) (See section 3.5)
Check that there are no short circuits between the Auxiliary 24 VDC output and the loop
communication lines.
5.2 System power up
An external bipolar magneto-thermal switch must protect the power supply input.
Once all the connections and installations have been checked, the correct order for
making the connection is as follows:
1. Connect the power supply (See section 3.4.1)
2. Connect the batteries (See section 3.4.1)
The first time that power is connected, the control unit displays RAM FAIL. This is
because the RAM check shows no configuration after first initialisation. Simply press the
RESET button to start with the configuration. (See chapter 4.1.1)
5.2.1
Initial system configuration
The basic configuration of the system may be made entirely from the control unit, but if
you have an external PC, it is easier.
From the control panel of the control unit:
FP1500 Installation, Configuration and Commissioning Manual
43
•
The general parameters are adjusted
Choose language (See section 4.1)
Standby and General Fault Message (See section 4.1.1)
Adjust Time and Date (See section 4.1.2)
•
Configure loops (See section 4.1.3)
Auto-search (See section 4.1.3)
From the external PC, configuration software:
(If you do not have a computer, it can also be configured through the control unit panel)
•
Editing of Zone (See section 4.1.4)
•
Editing of Texts (See section 4.1.5)
•
Editing of logic lines (See section 4.1.6)
•
Allocation of logic lines to the loop elements (See section 4.1.7)
•
Load the configuration from the PC to the control unit (See section 4.1.8)
5.3 Operational tests
Once the connections have been checked and the system is fully configured, it is
important to perform functioning tests on the connected elements.
The installer must trigger all the sensors and check that the system carries out the
appropriate logic lines, in accord with the implanted configuration.
5.4 Troubleshooting guide
5.4.1
Earth faults
The system detects if a current leakage to earth occurs. The FP1500 indicates this
through the “Earth Fault” LED. Even though this does not normally adversely affect the
operation of the system, this fault needs to be resolved as soon as possible.
A problem involving leakage to earth adversely affects the ability of the system to handle
external interference. This may lead to communication errors with the devices.
Disconnect the power supply when working with the system.
5.4.2
Communication errors
Caused by interference in the communication cables or by an open or short circuit fault in
the loop.
Leakage of the communication cables:
If the voltage is correct in the control unit and the sensors - approx. 32 V when checked
with a tester (see section 7 Technical specifications for details) - indicate that interference
or leakage has occurred in the cables:
•
To find the point of interference, disconnect one of the ends of the installation and
make a connection on the loop base, between S+ and R+ and between S- and R- to
ensure the functioning of the control unit and that there is no Open circuit fault.
FP1500 Installation, Configuration and Commissioning Manual
44
•
Disconnect half the installation and perform the auto-search. If the control unit
functions correctly, the problem is to be found in the other half. If it does not function
correctly, the problem is to be found on this section and you should shorten the
installation until you find the point of conflict.
Open circuit or short circuit fault in the loop:
During the cabling of the loop and/or the installation of sensors, there may be an open or
short circuit fault. The following shows how to detect the problem and solve it:
5.4.3
•
If a short circuit or Open circuit occurs, the control unit displays error messages.
•
Check the voltage with a tester, approx. 32 V (see section 7 Technical specifications
for details), at the output terminals of the main board of the control unit.
•
Check the voltage received by each of the connected elements.
•
Go to the elements identified by the control unit as communication errors and
measure their voltage.
Double addresses
During the configuration of the control unit, errors may occur in the process of allocating
addresses to the elements:
•
Two or more elements have the same address.
•
Not all the connected elements have been detected.
Steps to follow to re-address elements:
•
Once the configuration has finalized, the control unit displays the total of the
connected elements. If any of them has not been detected or if two or more
elements share the same address, they do not appear in the total sum.
•
Perform the auto-search again to ensure that the problem exists and that it has not
been an incidental communication failure.
If the problem persists:
5.4.4
•
After this step, a problem has been found with a certain element. Now the element
must be located. From the [System] menu, access the corresponding loop and then
select the <Elements> option.
•
From this option, check each of the elements and ensure that their addresses are
correct.
•
The element that does not appear is the one that is affecting the system. Once it has
been located, change its address or replace it.
•
If it is a case of double address, two (or more) elements are missing: the one that
has the incorrect and the one that has the correct address.
CPU failure
The LED on the front of the control unit displays “System Failure”.
Disconnect the control unit and restart it. Check that the LED is not on and carry out the
check of the correct functioning of the system.
If the problem persists, the processor of the control unit needs checking. In this case,
please contact your distributor.
FP1500 Installation, Configuration and Commissioning Manual
45
5.4.5
Out of service
The LED on the front of the control unit displays “Out of service”.
This warning is given when there is a lack of power supply and the voltage of the
batteries, after a prolonged period of functioning, drops below a certain level (22 V),
which does not guarantee the correct functioning of the control unit.
To solve the problem you can:
•
Change the batteries
•
Get power supply
It is recommended you disconnect the system if you cannot find an immediate solution.
5.4.6
Supply faults
If the control unit warns of a lack of power of any sort, use a tester to check the power
supply of the power input connections. If the voltage is correct, check the fuses of the
power input and the main board input.
5.4.7
Low battery
The voltage of the batteries may be low. With the control unit powered by batteries only,
check that the voltage is above 24V. Check that the fuse of the batteries on the main
board is in correct working order. Check that the output voltage of the batteries is 27.6V
when the control unit is connected to the mains without batteries.
If the batteries are in bad condition (losing liquid), they must be changed.
5.4.8
Others
The screen is not clear:
The control unit has a potentiometer for varying the screen contrast level. This option is
on the control unit connections panel. To alter the contrast, turn it slowly to the right or left
until it is clear. (See section 2.1)
The control unit does not accept the code:
To access level 3 of the configuration of the control unit, a code that is common to all
control units is required: 9898. This user code may be changed. If you change it (See
section 4.2.10) and you loose the new code, you would have to contact your distributor.
FP1500 Installation, Configuration and Commissioning Manual
46
6 MAINTENANCE
Fault repair and maintenance must be carried out by qualified personnel only.
Adopt the maintenance measures recommended in EN54-14 and any other applicable
local authority laws and requirements.
Daily Maintenance:
1. The control unit must indicate normal functioning. Otherwise, the faults must be noted
down in the register book and the maintenance company called.
2. Check that any previously noted fault has been corrected.
Monthly Maintenance:
1. As a minimum, a manual call point or detector must be activated to test the control
unit and the alert elements connected to it. It is recommendable to test a different
zone every month.
2. Any malfunction should be noted down in the register book, taking the corrective
measures as soon as possible.
Cleaning:
The control unit must be cleaned with a damp cloth. Do not use solvents.
Quarterly Maintenance:
1. Inspect the entries in the register book and the records of the control unit,
implementing the appropriate corrective actions as required.
2. Examine all the battery connections and the voltage.
3. In each zone, check the alarm, fault and auxiliary functions of the control and
signalling equipment.
4. Visual inspection of the control and signalling equipment to detect a possible increase
in humidity or any other type of deterioration.
5. Check if there has been any structural alteration that may affect the functioning of the
sensors, manual call points or sirens. If so, carry out a visual check.
Any defect must be noted down in the register book and the corrective actions taken as
soon as possible.
Annual Maintenance:
1. Put the control unit in “Test” and check the configuration of the system. Check that all
the sensors and call points function in accordance with the manufacturer’s
recommendations and programmed configuration.
2. Visually inspect all the equipment connections and make sure they are safely
fastened, that they have not been damaged and that they are appropriately protected.
3. Examine and test all batteries.
4. Any defect must be noted down in the register book and the corrective actions taken
as soon as possible.
FP1500 Installation, Configuration and Commissioning Manual
47
Batteries: Even though the batteries test OK, it is recommended they be changed every
four years.
FP1500 Installation, Configuration and Commissioning Manual
48
Replacing components
All the components used in this control unit have been chosen to obtain a highly reliable
and long-lasting product. However, the manufacturers of the products referred to below
indicate that their expected lifespan is below 15 years and they may therefore need to be
replaced in the future.
Expected lifespan (manufacturer)
Recommended replacement
Lithium Battery
Above 10 years
10 years in a control unit in continual service
Every 4 years for the circuits of a replacement
microprocessor that have not been connected to the
power supply.
Alphanumeric liquid crystal screen
Expected lifespan (manufacturer) Above 10 years
Recommended replacement
When the screen cannot read easily.
The liquid crystal screen with LED lighting has a lifespan that is appreciably longer than
most of the other screen technologies. The LCD contrast fades as the components age,
and therefore it may be changed when the normal contrast is visibly reduced.
FP1500 Installation, Configuration and Commissioning Manual
49
7 TECHNICAL SPECIFICATIONS
Mechanical
specifications:
Enclosure
420 mm x 335 mm x 110 mm
6.2 Kg without batteries
10 x 20 mm top; 10 x 20 mm inside.
Cable input holes:
Environmental:
Temperature:
Relative Humidity:
Protection index
Supports conditions:
-5°C to +40°C
95% maximum without condensation.
IP30
3K5 of the CEI 721-3-3:1978
Loop outputs:
FP1500/1:
FP1500/2:
Maximum loop capacity.
1 loop
2 loops
125 analogue sensors + 125 analogue modules
Applicable local authority laws and requirements
must be respected where modules and detectors
are used on loops.
From 26 VDC to 32 VDC
400 mA.
2 km
44 Ohm
500 nF
KAL21A:
2 wire cable 1.5 mm² stranded and shielded
Impedance: 115 Ω
Maximum voltage: 1500 V
Isolating resistance: > 10000 Ω / Km
Conductor resistance: ≤ 13.3 Ω / Km
Working temperature: -20°C to +85°C
1024 Baud
Proprietary
Loop output voltage:
Maximum loop current
Maximum loop length.
Maximum loop resistance:
Maximum loop capacity:
Recommended cable
Baud Rate:
Communication protocol:
Sounder output:
Number of outputs on
main board:
Supervision:
End of line resistor:
Maximum output current:
Output voltage:
Recommended cable:
Relay Output:
Voltage-free auxiliary
relays:
Number of relay outputs
on main board:
Maximum switching power
at contacts:
2 configurable outputs
Open circuit and short-circuit.
4K7 1/4W.
250 mA each.
Standby: between –5 and –9 V
Activated: between 18 and 28 V (nominal 24 V)
KAL21:
Stranded 2-wire cable 1.5 mm²
Conductor resistance: ≤ 13.3 Ω / Km
Working temperature: -20°C to +70°C
2 voltage-free outputs (contact C/NO/NC).
1 A, 30 VDC, Resistive
FP1500 Installation, Configuration and Commissioning Manual
50
Auxiliary 24 V output:
Recommended cable:
Serial ports:
Number of serial ports:
RS232
RS485
Recommended cable:
Power supply
Mains voltage:
Voltage tolerance:
Power supply input:
2
Port 1 RS232
Port 2 RS485 (optional). Galvanic isolation
Maximum Length 15m
Baud rate: 9600 Baud
Recommended cable
3-wire cable 1 mm² stranded and shielded
Maximum Length: 1200m
Recommended cable
1.5 mm² stranded cable, screening
recommended
Baud rate: 9600 Baud
End-of-line resistances: 150 ohm.
KAL21A:
2 wire cable 1.5 mm² stranded and shielded
Impedance: 115 Ω
Maximum voltage: 1500 V
Isolating resistance: > 10,000 Ω / Km
Conductor resistance: ≤ 13.3 Ω / Km
Working temperature: -20°C to +85°C
230 VAC 50 Hz
110 VAC 60 Hz
+ 10% - 15%
24 VAC
Mains fuse for 230 VAC: F12 1A (T) 250V
Mains fuse for 110 VAC: F11 2A (T) 250V
Mains input fuse (F3) 1: 3A (T) 20 mm HCR
Auxiliary 24 VDC fuse (F1): 0.3A (T) 20 mm HRC
Battery fuse (F2): 3A (T) 20 mm HCR
Power fuses:
Consumption on
standby:
Between 18 and 28 VDC, 250 mA; nominal 24
VDC
KAL21:
Stranded 2-wire cable 1.5 mm²
Conductor resistance: ≤ 13.3 Ω / Km
Working temperature: -20°C to +70°C
FP1500/2:
Control unit 175 mA
Loop with 125+125 elements 35 mA x 2= 70 mA
Option of 24 VDC Aux 300 mA.
Current on alarm:
FP1500/2:
Control unit 240 mA
Loop with 125+125 elements 35 mA x 2= 70 mA
Option of 24 VDC Aux 300 mA
Option of sounders output 500 mA
Battery charger
Voltage output:
Compensation:
Load current:
27.6 VDC nominal at 20°C
-3 mV/ºC
350 mA
FP1500 Installation, Configuration and Commissioning Manual
51
Batteries:
Alphanumeric screen:
Number of alarm zones
per control unit:
2 units of 12 VDC 7 A/h (lead type)
LCD screen 4 lines x 40 characters with back
lighting
FP1500/1 & /2:
20 zones with LED alarm indicator
20 zones with LED fault / disable indicator
Access codes:
Level 2:
Level 3:
10 user-definable codes (factory setting of 0000).
Code 9898.
FP1500 Installation, Configuration and Commissioning Manual
52
8 APPLICABLE STANDARDS
The FP1500 has been designed according to the EN54-2:1997 and EN544:1997 and EN60950 / A4+A11 (1997) standards.
EN54-2 has basic and optional requirements.
Optional requirements of the EN54-2:1997:
SUBJECT
Indication
Controls
Outputs
SECTIONS
8.4
7.12
7.11
9.5
10
7.8
NAME
Total loss of power supply
Coincidence detection
Output delay
Disconnection of an addressable
point
Test status
Fire alarm device output
Auxiliary functions not required in the EN54-2/4
Apart from the compulsory and optional functions with requirements
defined in the EN54-2/4, the FP1500 range incorporate auxiliary functions
not required by the standard, designed to enable the control and
understanding of the system:
•
Auto-search options
•
Allocation of 10 different codes for access level 2.
•
Possibility of configuration by zones: logical events, general events.
•
RS485 outputs
•
RS232 outputs
•
Auto-search serial ports
•
Editing of points from the control unit
•
Editing of zones from the control unit
•
Editing of logic line from the control unit
•
Storage of events in a history file
•
Language selection
FP1500 Installation, Configuration and Commissioning Manual
53
9 APPENDIX: ADDRESSES OF MODULES
ON
1 2
ON
ON
3
4
5
6
7
8
1 2
3
ON
3
4
5
6
7
8
3
4
5
1 2
3
4
4
5
6
7
8
1 2
3
4
6
7
8
1 2
5
7
8
3
1 2
4
5
6
7
8
1 2
4
3
4
4
5
6
7
8
1 2
3
4
4
5
6
7
8
7
8
5
5
3
4
5
1 2
4
5
6
7
8
1 2
6
7
8
4
5
3
4
5
4
5
6
7
8
6
7
8
1 2
5
6
7
8
1 2
6
7
8
3
4
5
4
5
6
7
8
6
7
8
4
5
1 2
5
6
7
8
1 2
5
6
7
8
1 2
1 2
6
7
8
1 2
4
5
4
5
6
7
8
4
5
7
8
1 2
4
5
7
8
1 2
4
5
201
1 2
3
4
1 2
6
7
8
1 2
7
8
1 2
4
5
7
8
1 2
3
7
8
1 2
7
8
1 2
4
3
4
5
7
8
1 2
5
5
4
5
3
4
5
4
5
7
8
1 2
4
5
6
7
8
4
5
6
7
8
4
5
6
7
8
7
8
1 2
4
5
6
7
8
7
8
1 2
4
5
202
4
1 2
1 2
1 2
6
7
8
1 2
4
5
7
8
1 2
3
7
8
1 2
4
5
7
8
1 2
4
3
7
8
1 2
4
5
7
8
1 2
6
7
8
4
5
5
6
7
8
7
8
1 2
4
5
4
5
6
7
8
7
8
1 2
4
5
3
1 2
4
3
1 2
4
3
3
4
5
6
7
8
1 2
4
3
7
8
1 2
6
FP1500 Installation, Configuration and Commissioning Manual
7
8
1 2
8
5
6
7
8
5
6
7
8
5
6
7
8
4
5
6
7
8
6
7
8
6
7
8
6
7
8
6
7
8
6
7
8
6
7
8
6
7
8
ON
3
4
5
6
7
8
1 2
3
4
5
169
ON
3
4
5
6
7
8
1 2
3
4
5
175
ON
3
4
5
6
7
8
1 2
3
4
5
181
ON
3
4
5
6
7
8
1 2
3
4
5
187
ON
3
4
5
6
7
8
1 2
3
4
5
193
ON
3
4
5
6
7
8
1 2
3
198
203
7
163
192
6
6
157
4
5
199
ON
ON
3
1 2
186
6
5
151
ON
3
4
145
ON
3
3
180
6
8
ON
197
6
5
ON
3
1 2
174
6
7
139
ON
3
6
ON
191
6
8
168
6
5
ON
185
6
7
162
ON
3
3
179
6
6
156
ON
3
1 2
4
ON
173
6
5
150
ON
3
4
144
ON
3
3
ON
3
3
133
ON
3
1 2
138
ON
3
1 2
167
6
8
ON
196
6
8
ON
3
7
ON
190
6
7
161
6
6
ON
155
6
5
ON
184
6
6
ON
3
4
ON
178
6
5
ON
3
3
132
ON
3
1 2
149
ON
3
4
172
6
8
143
ON
3
3
166
ON
4
4
3
195
ON
200
1 2
7
ON
189
194
3
1 2
6
137
ON
3
1 2
160
ON
3
8
ON
188
ON
7
154
ON
4
3
183
ON
3
1 2
5
ON
177
182
4
ON
148
ON
3
6
ON
176
ON
5
ON
3
3
142
ON
3
4
171
ON
1 2
5
1 2
131
ON
170
1 2
6
ON
3
3
165
ON
8
ON
164
1 2
5
ON
3
1 2
159
ON
7
136
ON
3
6
ON
158
1 2
8
153
ON
1 2
7
147
6
5
ON
152
1 2
6
ON
4
4
ON
141
ON
3
3
ON
146
1 2
5
ON
3
1 2
ON
ON
130
ON
ON
1 2
8
ON
140
1 2
7
135
ON
1 2
6
ON
134
1 2
5
129
128
1 2
4
ON
3
4
5
204
6
7
8
1 2
3
4
5
205
54
ON
1 2 3
ON
4 5 6 7 8
1 2 3
1 2 3
1 2 3 4 5 6 7 8
1 2 3 4 5 6 7 8
208
209
210
ON
1 2 3 4 5 6 7 8
1 2 3 4 5 6 7 8
214
215
216
1 2 3
ON
1 2 3 4 5 6 7 8
1 2 3 4 5 6 7 8
220
221
222
ON
1 2 3 4 5 6 7 8
1 2 3 4 5 6 7 8
226
227
228
1 2 3
ON
4 5 6 7 8
ON
1 2 3 4 5 6 7 8
1 2 3 4 5 6 7 8
1 2 3 4 5 6 7 8
231
232
233
234
ON
ON
ON
1 2 3 4 5 6 7 8
1 2 3 4 5 6 7 8
1 2 3 4 5 6 7 8
237
238
239
240
ON
ON
1 2 3 4 5 6 7 8
1 2 3 4 5 6 7 8
1 2 3 4 5 6 7 8
243
244
245
246
ON
8
223
1 2 3 4 5 6 7
8
229
1 2 3 4 5 6 7
8
235
1 2 3 4 5 6 7
8
241
ON
1 2 3 4 5 6 7 8
ON
1 2 3 4 5 6 7
ON
1 2 3 4 5 6 7 8
ON
8
217
ON
1 2 3 4 5 6 7 8
ON
248
ON
1 2 3 4 5 6 7
ON
1 2 3 4 5 6 7 8
242
ON
ON
225
ON
4 5 6 7 8
ON
1 2 3 4 5 6 7 8
236
1 2 3
ON
8
211
ON
1 2 3 4 5 6 7 8
ON
4 5 6 7 8
ON
219
ON
4 5 6 7 8
ON
1 2 3 4 5 6 7 8
230
1 2 3
ON
1 2 3 4 5 6 7
ON
1 2 3 4 5 6 7 8
224
ON
ON
213
ON
4 5 6 7 8
ON
1 2 3 4 5 6 7 8
218
1 2 3
ON
ON
4 5 6 7 8
ON
1 2 3 4 5 6 7 8
212
ON
ON
207
ON
4 5 6 7 8
ON
1 2 3 4 5 6 7 8
206
ON
ON
1 2 3 4 5 6 7
8
247
ON
1 2 3 4 5 6 7 8
1 2 3 4 5 6 7 8
1 2 3 4 5 6 7 8
1 2 3 4 5 6 7 8
249
250
251
252
FP1500 Installation, Configuration and Commissioning Manual
55