Download Air Purifier - FreshAirPro
Transcript
0000000
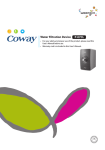
Air Purifier
Air Purifier
Air Purifier
The Letter of Guarantee is enclosed here with this Coway product
realizing "Quality is the best policy".
AP-1506DH
FEATURES
>> Coway Air Purifier(AP-1506DH) has differentiated functions
Excellent air cleaning
The device uses HEPA filter (treated with organic antibacterial microorganisms) with excellent anti-bacterial
and mold function to remove drifting fine dust and
bacteria. Filter system is designed to remove
pollutants instantly.
2
Artificial intelligence
It is an artificial intelligence function which uses a
learning algorithm. It is designed to provide a pleasant
indoor environment with speed adjustment of an air
purifier to prevent the occurrence of same type of
pollution by analyzing changing patterns in the user
environment.
4
First of all, we would like to thank you very much for purchasing this
Coway air purifier. This product is superior to the ones in the past in
function and we believe that it will provide you with cleaner and
healthier air. We would like to recommend you to read this User's
Manual carefully for proper operation and maintenance and keep this
manual well together with the warranty. This user's manual could
solve your problem resulted from that you can easily fix yourself in
just a few minutes.
Customized Filter
There are four different types (for yellow dust, for
babies, for new house owner and for old house
owner) of Customized filters, each designed for your
use according to needs.
3
DEAR CUSTOMERS
Contents
For information
Please Keep in Mind
15
Preparations
‐Operation Safety
04
04
07
09
17
17
19
Names of Each Part
11
Operation Part/Indication Part
20
Air Purified Process
13
How to use
22
Adjust Particle Sensor
24
Safety Information
‐Electricity Safety
‐Installation Safety
‐Filter Installation
‐Remote Control
Installation and cleaning
Cleaning Method
‐Product Filter
Dual sensor
Dust and odor sensors lead to improved sensor
function for indoor pollution.
02
How to use
Auto-swing system
It is designed for speedy disposal of the pollutants
by applying the appropriate auto-swing system for
indoors air circulation.
5
Features
1
C
O
W
A
Y
Filter Replacement Method
Others
25
25
27
Before Asking A/S
29
Specification
30
31
Warranty Information
※ Please keep the manual near your sight and in the reach of your hand.
03
For Information
SAFETY INFORMATION
If not observed, serious
injury or even death
Danger could occur.
If not observed, serious
injury or property damage
Warning
could occur.
If not observed, slight
injury or property damage
Caution
could occur.
If the cord or plug is wet, unplug
the unit and let it completely dry
before subsequent use.
Do not unplug by pulling the
cord or handle the plug with wet
hands.
Electrical shock or fire may occur
as a result.
Electrical shock or fire may occur
as a result.
Safety Information Electricity Safety
Be careful to keep this safety information.
Please read this information to prevent property loss and ensure your safety.
-
Do not use if the cord appears to
be damaged. Please ask Customer
Service to replace the cord.
Electrical shock or fire may occur
as a result.
Unplug the unit before repair,
inspection, or replacement.
Electrical shock may occur as
a result.
Electricity Safety
Connect it to voltage rating that
matches it on the rating plate.
Electrical shock or fire may occur
as a result.
Do not use if the cord appears
to be damaged. Please ask
Customer Service to replace
the cord.
Electrical shock or fire may occur as
a result.
04
Do not repeatedly plug and unplug
the unit from the electrical outlet.
Do not attempt to repair the
power cord.
Electrical shock or fire may occur
as a result.
Electrical shock or fire may occur
as a result.
05
Please read this information to prevent property loss and ensure your safety.
Do not run the power cord under
a heavy object to prevent it from
being damaged.
Electrical shock or fire may occur
as a result.
Installation Safety
Do not plug into an outlet or
power strip that is being used
by several other appliances.
Use a separate outlet for the unit.
Do not install unit in damp or
moist areas.
Do not install close to heating
units.
Electrical shock or malfunctioning
may occur as a result.
Fire may occur as a result.
Fire may occur as a result.
Safety Information Electricity Safety Installation Safety
Electricity Safety
Danger Warning Caution
For Information
SAFETY INFORMATION
-
Remove any dust or water if it’s
on the plug.
*Never use Benzene or gasoline
to clean the plug.
Do not carry the unit by its
power cord.
Electrical shock or fire may
occur as a result.
Electrical shock or fire may occur
as a result.
Do not place containers holding
water, medicines, small metallic
objects or inflammatory materials
on top of the unit.
Electrical shock, fire or malfunctioning
may occur as a result.
unplug the power cord when
not using for a long time.
Unplug the power cord when
cleaning the product.
Electrical shock or fire may occur
as a result.
Electrical shock or fire may
occur as a result.
Install the unit in a location where
there are no obstacles in its
surrounding making it ideal for air
circulation.
-
Do not install on a level area nor
apply force to the unit.
Breakage or malfunctioning may
occur as a result.
06
07
05
Please read this information to prevent property loss and ensure your safety.
Keep the device away from
lighting devices or direct sunlight.
Operations using remote control
may not become possible.
An object close to the wall or ceiling
could be contaminated.
Do not use the unit in places such
as restaurants where there are
heavy smoke, odor or oil.
Do not spray any inflammable
materials including insecticides
or aromatics near the product.
It could cause fire or mal
functioning.
Install the unit at least 2m away
from electrical appliances
including TV.
Do not use or keep flammable
gas or materials near the product.
Radio interference may occur.
There is risk of fire.
08
Do not insert finger or foreign
objects into the intake area or
outlet, and do not thrust unit with
sharp objects.
There are risks of injury and
malfunctioning.
Do not place the unit on electrical
appliances such as heater or
home appliances.
It could cause fading or decolorizing.
There is risk of fire.
-
It may become cause of a slower
performance.
Do not use under direct sunlight.
Upon detecting strange sound,
odd smell or smoke, immediately
unplug the product and call the
customer service center.
Safety Information Installation Safety Operation Safety
Operation Safety
Installation Safety
Place the unit 20cms away from
the wall and surrounding objects
and 30~60cms away from the
ceiling.
Danger Warning Caution
For Information
SAFETY INFORMATION
It could cause electric shock, fire or
malfunctioning of the electrical
appliances.
Be careful not to let parts of the
body or objects get caught on
the upper part of the product
when opening the front cover.
Do not allow people to climb
onto the unit.
There is risk of injury.
There is risk of injury.
-
09
05
NAMES OF EACH PART
Please read this information to prevent property loss and ensure your safety.
Operation Safety
It could cause electric shock or
product deterioration.
Change to new filter within given
period.
Safety Information Operation Safety
Never soak the unit in water.
Front
It could cause product deterioration.
/
Do not disassemble, repair or
modify the unit with one’s
discretion.
There are risks of electric shock or
product damage.
▶ Odor Sensor
▶ Remote Control
Receiving Part
▶ Control Panel
Do not operate the unit in areas
where there is oil mist.
It could cause fire or product
deterioration.
▶ Display Panel
▶ Front Cover
If you operate the outlet in your own
way, it could affect the function of
product.
※ When the outlet doesn’t return to
its normal angle(85�
), switch off
power and on again.
User Pre filter only after regular
cleaning with water and fully
drying.
-
Names of Each Part
▶ Inlet
Keep away from the outlet.
For Information
SAFETY INFORMATION
Customized, HEPA and Deodorant
filters will not be restored even after
washing with water. Never soak or
was with water.
10
11
AIR PURIFIED PROCESS
▶
▶
▶ Handle
▶ Ventilation
Grille
▶ Power cord
▶ Remote Control
Holding Slot
Remote Control
▶
▶
Pre Non-woven
fabric Filter
Customized Filter
HEPA Filter
Deodorant Filter
/
Air Purified Process
▶ Particle Sensor
▶
Pre Filter
Names of Each Part
Rear
For Information
NAMES OF EACH PART
▶ Power
▶ Mode
▶ Circulation
▶ Speed
12
13
▶ Air Purified System
The anti-bacterial Pre filter aids in sterilization and collects pet hair,
large size allergens and dust.
Pre Non-woven fabric Filter
It removes dust and hairs in front of the Customized filter and
protects Customized filter and HEPA filter.
▶ Key points for proper use of air purifiers!
1 Install filter.
Filter should be installed in order to
use the product. (See P.17)
※ Filter is delivered in packaged. Remove
filter wrapping first.
Air Purified Process
Pre Filter
PLEASE KEEP IN MIND
How to Use
AIR PURIFIED PROCESS
/
There are 4 filters(used for yellow dust-free, babies, new house owner, old house
owner), which you may choose based on needs.
The filter for yellow dust-free(Brown) efficiently reduces Yellow dusts including Sox.
(Test result 1)
The filter for babies(Orange) is helpful for the baby’s health, which reduces influenza
viruses such as H5N1, H3N1. (Test result 2)
The filter for new house owner(Black) effectively reduces Formaldehyde and
toluene(VOC). (Test result 3)
The filter for old house owner(Yellow) efficiently reduces legionella viruses that can be
easily found in old houses. (Test result 4)
Please Keep In Mind
Customized Filter
2 Connect power.
Power needs to be connected in
order for the air purifier to operate
properly. (See P.17)
※ Authorization and test institutions
1) Busan Techno-park (Authorized institution)
2) Veterinary Research Institute in China, Tottori University, Tsukuba University
3) Mitsubishi Paper Mills
4) Ecosphere Research Institute at Kyoto University
3 Select speed button for manual operations.
Press the power button and select fan speed. (See P.22)
HEPA Filter
The high-function HEPA filter significantly removes fine particles and cigarette
smoke while the anti-bacteria and anti-mold nano-silver and catechin eliminate
germs and mold.
�
Deodorant Filter
The activated carbon filter, efficiently eliminates food odors and unpleasant smells.
14
15
▶ Key points for proper use of air purifiers!
PREPARATIONS
▶ Must check before use!
Connect it to voltage rating that matches it on the rating plate.
Press the power button and select
auto mode. (See P.22)
How to install filter
5 Clean the product and filter
at regular intervals.
▶ Order
of filters
1
Pre filter→Pre Non-woven fabric Filter→
Customized filter→HEPA filter→Deodorant filter
/
Preparations
■ Always remove filter wrapping before installation.
■ The unit is for residential use and thus for indoor only.
■ Remove power plug from the socket when not in use.
■ Check front part of the filter when installing unit.
Please Keep In Mind
4 Press mode select button for
auto running.
Product and filter must be cleaned at
regular intervals for smooth operation
of the product and maintaining its
performance. (See P.25)
How to Use
PLEASE KEEP IN MIND
Open front cover.
Pull out lower part of the front cover
and open up by pushing it upwards.
6 Change filters within given period.
Filter should be changed within given periods in order to
maintain optimal performance of the product. (See P.27)
2
Take out the filter by pulling out the filter case
handle forward and remove filter wrapping.
�
�
16
17
How to Use
PREPARATIONS
▶ Must check before use!
Mount on the unit in the order of
Deodorant, HEPA, Customized, Pre
Non-woven fabric filter and Pre filters.
(Check direction and order of inserting
filters and make sure hooks on both
sides of the filters are well adjusted.)
Preparing remote control and how to use
Inserting filter
1
Push batteries container hook on the
bottom at the back side of the remote
control in � direction and at the same
time pull out the batteries container in
� direction.
2
Insert enclosed batteries in its
appropriate positions at the container
according to it’s + positions at the
hook.
● Pre Non-woven fabric filter on the front part should be
attached to the front part of Customized filters.
Refer to page 28 “How to Exchange Filters” to attach it.
※ On shipment, the Pre Non-woven fabric filter on the front part is
attached to Customized filters.
�
Preparations
3
※ Make sure + directions of the batteries
are checked.
3
Thrust in batteries container with
batteries into the remote control inlet
until you hear the clicking sound.
�
※ Use the same procedure above when switching batteries.
� Deodorant Filter
� HEPA Filter
�
fabric Filter
▶ While using the remote control
- If the remote control doesn’t work, check batteries lifespan.
- If necessary, switch batteries of CR2025.
- If you don’t use the remote control for a long time, be careful to pull out the
battery from it.
- The lifespan of remote control depends on the usage frequency.
�
� Pre Non-woven
18
� Customized Filter
▶ How to use remote control.
� Pre-Filter
- If you use the remote control, place it toward the receiving part of a product.
- The obstacles between the product and remote may prevent the remote
control from working.
- Do not apply force to the remote control.
- Do not place the remote control in a wet place or under the direct sunlight or
near heaters.
19
How to Use
OPERATION PART
/INDICATION PART
▶ Indication Part
Speed
To be used when changing
speed. Use speed button to
select 5 different speed modes
from level 1→2→3→4→turbo.
4
Power
Use to turn the power on and off.
※ Press the “power” button for
2~3 seconds in order to
power off.
20
Artificial intelligence mode 5 Anion mode
2
1
Sensor to detect the level
of brightness in the
surroundings.
2
3
Swing circulation mode
Speed
▶
6
2
Air pollution level
Auto mode
It indicates auto mode
status and it is run
automatically according
to level of pollution.
4
Swing circulation mode
Upon selection of the
swing circulation mode,
it displays the swing grill
in rotation mode.
Artificial intelligence mode
It is displayed upon selection
of the artificial intelligence
mode, which is designed to
efficiently remove indoor
pollutants.
5
Sleep mode
▶
4
Speed is automatically controlled
and displayed according to level
of indoor pollution under auto
mode. And under manual mode,
it will be displayed according to
speed button selection as per
levels 1→2→3→4→turbo.
Select mode
Use to switch operations
mode.
Operations mode can be
selected by pressing the
mode selection button which
will move in the order of auto
→artificial intelligence→turbo
modes.
Display light in the selected
operations mode will light up
whenever the button is
pressed.
※ Pressing speed button
during mode operations
will immediately switch to
manual mode.
Auto mode
7
▶
3
Speed
● Illumination sensor
Circulation/Anion
Use to select swing circulation
mode or anion mode. If swing
circulation is in operation,
circulation icon in the display
part will light up and the swing
grill will start rotating. If anion
mode is in operation, anion icon
in the display part will light up.
3
▶
3
Sensor to detect the level
of odor pollution.
1
Speed
▶
Circulation/Anion
● Odor sensor
1
▶
▶
1
Power
▶
▶
4
▶
Select mode
Operation Part/Indication Part
2
▶
▶ Operation Part
6
Air pollution level
It displays the level of
dust and odor pollution,
and it is displayed in 4
levels according to its
pollution level.
Anion mode
It displays the discharge of
anion together with purified air.
7
Sleep mode
It displays the air purifier
being run in silent mode
during sleep.
21
How to Use
HOW TO USE
▶ To run swing mode
■ Don't forget to plug power before operating the unit.
■ Unit will automatically start running with auto mode.
▶ To select manual mode
※ Operations can be confirmed on the swing mode light at the display panel.
Press the power button to turn on and select fan speed by selecting
the speed button. Level 1→2→3→4→Turbo
※ Pressing fan speed button even during mode operations (auto/ artificial
intelligence/ turbo) will immediately switch to manual operations mode.
How to Use
Select swing mode by pressing the power button and select swing
mode by pressing the button.
�
�
▶ To run sleep mode
▶ To select auto operations mode
Press the power button to turn on and select operations mode by
pressing the mode select button. Auto→artificial intelligence→turbo
Auto Mode
Fan speed will be adjusted
automatically (from levels 1~4)
for optimal operations depending
on the level of indoors pollution
detected by the dust and odor
sensors.
Artificial Intelligence
(Learning) Mode
Will store level of indoors pollution
detected by the dust and odor sensors
and self-adjust operations condition before
repeated pollution by analyzing user's
indoors environment change pattern.
Turbo Mode
Enables speedy cleaning of
indoors air by adjusting fan
speed a level faster than the
level of indoors pollution
detected by the dust and odor
sensors.
Artificial intelligence (learning) mode
When the unit's surrounding gets dimmer for more than 3 minutes while
running in auto/ artificial intelligence/ turbo mode, the unit will
automatically run in low wind, noise and electricity consumption mode.
When the surrounding becomes bright again, normal operations will
resume.
�Sleep mode operations under the artificial
intelligence mode will repeat the cycle of 10
minutes operation and 30 minutes
suspension of work.
(Selection of different mode buttons is
possible with sleep mode operations under
the artificial intelligence mode but in stop
condition, only the power button can be
used.)
�When the level of pollution continues at 1, operations will be repeatedly suspended for as long as 10~30 minutes.
�Operations mode will be switched when current level of pollution is higher than the level stored.
※ When switching from auto/artificial intelligence/turbo to manual operations mode, the manual operations
mode will start from level 1 (regular speed).
22
23
▶ To adjust particle sensors
1
Press both select speed/mode buttons at the
same time for 2~3 seconds while the unit is in
operations.
■ Always unplug power first prior to cleaning.
■ Do not use detergents including organic solvents, bleach, chlorine or abrasives.
■ Do not soak unit or sprinkle in water.
▶ Cleaning air intake and outlet (Cleaned every 2 months)
■ Clean air intake and outlet with soft brush or a vacuum cleaner.
※ Take caution not to let
dust fall to the inner part
of the unit.
Outlet
Adjust Particle Sensor
Upon product shipment, particle sensors are adjusted to normal level. When the level of pollution remains
at its height even after running the air purifier for more than 2 hours in highly polluted conditions or when it
maintains lowest level for more than an hour even in highly polluted conditions, use the following methods
to adjust the sensor before use.
CLEANING METHOD
Installation and Cleaning
ADJUST PARTICLE SENSOR
/
Intake
‘Dust pollution' display will start to flicker and
display that it's adjusting sensors.
▶ Cleaning particle sensor (Cleaned every 2 months)
■ Open the particle sensor cover located on the right side
3
Press speed select button and adjust to desired
sensor mode. Sensor level will be displayed on
the dust pollution
display panel.
�Level 1: Sensitive
�Levels 2~3: Average
�Level 4: Insensitive
4
Select desired sensor level and press select
speed/mode buttons at the same time for 2~3
seconds. The display panel will then resume
normal operations and sensor level will be
displayed accordingly.
※ When no buttons are selected for 10 seconds, the
corresponding value will automatically be given.
24
�
of the unit. Use a wet cotton swab to clean the lens,
dust inlet and outlet and wipe again using dry cotton
swab to remove moisture.
※ Failure to clean regularly will
result in mal functioning of
the particle sensor.
※ Clean more often in
environments with more
dust.
dust outlet
Cleaning Method
2
�
dust inlet
▶ Cleaning the unit (Cleaned every 2~4 weeks)
■ Use soft dry cloth to clean the unit.
Wipe with slightly moist cloth for more serious stains
(do not use abrasives).
25
▶ Cleaning pre filter (Cleaned every 2~4 weeks)
▶ How to change
Cleaning Methodr
■ Always unplug prior to cleaning filter.
■ Pre filters may be restored by removing dust or washing with water.
■ Failing to clean pre filters for a long time may cause mal functioning of
the unit.
■ Customized, HEPA and Deodorant filters will not be restored. Never
wash with water.
FILTER REPLACEMENT METHOD
■ Always unplug the unit before changing filters.
■ Always check on 'front part' in assembling filters.
■ Always use genuine Coway filters in order to maintain the
unit's optimal performance.
1
■ Change filters by referring to installation method
▶ Filter clean and changing cycle
Pull out the filter handle to release it.
※ Carefully release filter to prevent dust
from falling apart.
Clean/change cycle
Filter
3
4
Use vacuum cleaner or water to
remove dust from the filter.
When the moisture is completely dry, push
electrostatic filter back to the case and
complete its installation.
Front cover should be
put back to the product.
※ Filter case should be thrust
in accurately into the filter
case ring of the unit.
26
/
on page 17.
for residential use for business use
Clean/change
Pre Filter
Every 2~4 weeks
Every 2~4 weeks
Clean or wash
Pre Non-woven Fabric Filter
Every 2 months
Every 1 month
Replacement
Customized Filter
Every 6 months
Every 4 months
Replacement
HEPA Filter
Every 12 months
Every 12 months
Replacement
Deodorant Filter
Every 12 months
Every 12 months
Replacement
Filter Replacement Method
2
Softly pull out bottom of the front cover to
remove it from the unit.
Installation and Cleaning
CLEANING METHOD
※ It is based on 24 hours per day in an automatic operation.
※ The above replacement of filter is only recommendation. It depends on user's conditions.
�
27
▶How to replace the filters
Check front part of Customized and HEPA
filters before changing filters.
▶ Check the followings before asking A/S.
Air purifier may be running abnormally for reasons other than product defect which include
mishandling of the product or other miscellaneous reasons. In such cases, do check on
the below cases to get simple help even without calling for A/S. When problem still
remains even after checking through the list, please call customer service.
Problem
There is no air
coming out
Check Items
�
Is the unit plugged in?
Connect the power to the
voltage rating that matches
it on the rating plate.
�
Is the display panel switched off?
Press the power button and
select desired function.
�
Is there a blackout?
Operate the unit after electricity
has been restored.
2
the filter wrapping been
removed?
Speed doesn't
change in auto/
artificial
intelligence/turbo
mode.
Speed has
become
remarkably slow.
There is bad odor
from the diffuser.
� Has
the dust detection sensor been
cleaned?
� Is
the sleep mode lamp on?
� Isn't
it over filter cleaning or switch
period?
� Please
Remote control
is not working.
� Are
check batteries lifespan.
the batteries properly installed?
� Are
the lights inside the room
flickering?
� Is
the unit close to electrical
appliances?
First remove the filter
wrapping.
When much dust accumulates
in the dust detection sensor,
the sensor won't be able to
detect pollution properly thus it
needs regular cleaning.
During sleep mode, it will
be fixed to minimal speed.
/
Before Asking A/S
� Has
When exchanging non-woven fabric, remove
it from the side part of the Customized filter
and attach new non-woven fabric to the
filter.
Solutions
Filter Replacement Method
1
BEFORE ASKING A/S
Other Cautions for Safety
FILTER REPLACEMENT METHOD
Check filter clean/ switch period
and follow necessary procedure.
Switch batteries.
Install batteries in proper
directions.
Switch lamps or relocate unit.
Keep the unit at least 2m away
from electrical appliances.
A/S Phone No : 213-480-1600
28
29
Coway Air Purifier
Model
AP-1506DH
Power Supply
Phase
Rated Current
Dust Collection Method
Room Area
Maximum Volume of Air
Size
Weight
Voltage rating that matches it on the rating plate.
1
Product Guarantee
51W
-
HEPA Filter Type
51㎡
7.3㎥/min
530(W) X 300(D) X 685(H)mm
12.8kg
※ Without prior notice the unit could be changed to improve its performance.
Specification Warranty Information
Product
WARRANTY INFORMATION
Other Cautions for Safety
SPECIFICATION
1. Parts and components shall be replaced free of charge within the guarantee period if
the defects occur due to manufacturing defects in normal operation.
2. Contact us in case of breakdown.
3. In the following cases, repair work shall be charged even within the guarantee period.
▶Breakdown caused by careless operation or unreasonable repair and renovation.
▶Breakdown caused by nonperformance of the instructions specified in the manual.
4. Even after the expiration of guarantee period, it is possible to apply for charged repair.
5. Present this Letter of Guarantee whenever repair is needed.
6. This Letter of Guarantee is valid only in domestic where you buy this product.
7. Keep this Guarantee carefully as it is not re-issued.
Model
AP-1506DH
Guarantee Period
1 year
Serial No.
Date of Purchase
Guarantee Period
From
To
Customer’s Address
Customer’s Name
Tel.
Please contact our customer's service center in case you are not satisfied with our A/S service.
● Nationwide A/S Call : 213-480-1600
● Nationwide Periodical Inspection and Filter Replacement Call : 213-480-1600
● Customer Counseling Center Call : 213-480-1600
Fax :
☞ In case any other filters or parts which are not genuine
products of we are used, we is not responsible for any
problems related to water quality.
Coway Co., Ltd
658 Yugu-Ri, Yugu-Eub, Gongju-Si, Choongchungnam-Do, Korea
Tel : 82-41-850-7879 Fax : 82-41-841-7816
www.coway.com
30
31


