1
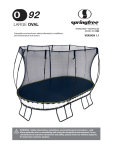
LARGE OVAL
SPRINGFREE™ TRAMPOLINE
MODEL NO. O92
Trampoline and enclosure safety information, installation,
and maintenance instructions
VERSION 1.2
WARNING: Safety information, installation, and maintenance instructions - read
these materials prior to assembling and using the trampoline and enclosure. In our
commitment to customer satisfaction and safety, please check our website regularly
for important customer updates.
Springfree™ Trampoline
www.springfree.com
WARNING: Read these materials prior to assembling and using
the trampoline and enclosure.
Do not attempt or allow somersaults. Landing on the
head or neck can cause serious injury, paralysis or
death even when landing on the middle of the bed.
Do not allow more than one person at the same time
on the trampoline or enclosure. Use by more than one
person can result in serious injury.
Keep face clear of loaded trampoline and enclosure
rods, particularly during assembly and disassembly.
Do not attempt to disassemble trampoline enclosure
rods from the rod joiner mechanism while the rods are
installed in the trampoline and under tension.
Do not hold onto, or place fingers between the rods
while someone is jumping on the trampoline.
Recommended jumper weight rating: 220 lbs (100 kg)
The Springfree™ Model O92 trampoline has been designed for optimal use by most healthy
children and adults. Persons at or near 220 lbs (100 kg) should be cautious in their maneuvers to
ensure they do not initiate contact with the ground via the mat which may cause injury. The O92
has been static load tested to 1100 lbs (500 kg) using methodology described in standard BS EN
13219-2001.
Stability recommendation
The FlexiNet™ safety enclosure system catches and cushions users from impact that may result
from leaving the jumping surface. Vigorous, high-speed contact with the FlexiNet™ safety enclosure by persons approaching the recommended weight limit may result in tilting or tipping of the
trampoline off its base.
For increased stability during use, especially for users approaching the 220 lbs (100 kg)
weight limit, we recommend that you use the supplied sandbags (described in the assembly
instructions). The sandbags also help keep the trampoline down in windy weather.
2
Springfree™ Trampoline
www.springfree.com
WARNINGS
1.
Do not attempt or allow somersaults. Landing on the head or neck can cause serious
injury, paralysis, or death, even when landing
in the middle of the bed.
2. Do not allow more than one person on the
trampoline/inside the enclosure. Multiple
jumpers increase the chances of loss of control and this can result in broken head, neck,
back, or leg, or other serious injury.
3. Use trampoline/enclosure only with mature,
knowledgeable supervision. Enforce all
safety rules and be familiar with the information in the User’s Manual to assist in following trampoline enclosure instructions and
trampoline safety.
4. Do not exceed the weight limit recommended by the manufacturer.
5. Trampolines over 20 in. (51 cm) tall, and
enclosures, are not recommended for use by
children under 6 years of age.
6. Inspect the trampoline/enclosure before
each use. Make sure the barrier and the
enclosure support system (rods) are correctly
and securely positioned. Replace any worn,
defective, or missing parts.
7. Climb on and off the trampoline at the
enclosure door, it is a dangerous practice
to jump from the trampoline to the floor or
ground when dismounting, or to jump onto
the trampoline when mounting. Do not use
the trampoline as a springboard to other
objects.
8. Do not jump from other objects, buildings,
or surfaces, onto the trampoline, or into or
over the trampoline enclosure.
9. Bounce in the center of the mat.
10. Stop bounce by flexing knees as feet come in
contact with the trampoline bed. Learn this
skill before attempting others.
11. Learn fundamental bounces and body positions thoroughly before trying skills that
are more advanced. A variety of trampoline
activities can be carried out by performing
the basic fundamentals in various series and
combinations, performing one fundamental
after another, with or without feet bounces
in between them.
12. Avoid bouncing too high or for too long. Stay
low until bounce control and repeated land-
Springfree™ Trampoline
13.
14.
15.
16.
17.
18.
19.
20.
21.
22.
23.
24.
ing in the center of the trampoline can be
accomplished. Always control your bounce.
Control is more important than height. Do
not try to jump over the enclosure.
While keeping the head erect, focus eyes on
the trampoline toward the perimeter. This
will help control your bounce.
Avoid bouncing when tired. Keep turns
short.
Bounce only when the surface of the bed is
clean and dry. Wind or air movement should
be calm to gentle. The trampoline must not
be used in gusty or severe winds.
Do not allow a child or other persons under
the trampoline.
Keep small children away from the trampoline while others are bouncing on it, because
the edge can move in and out vigorously.
There is potential for injury if the bouncer
lands heavily on or near the edge.
Do not use the trampoline/enclosure while
under the influence of alcohol or drugs.
Keep objects that could interfere with the
jumper out of the way. Maintain a clear area
around the trampoline.
Properly secure the trampoline/enclosure
when not in use. Protect it against unauthorized use. If a trampoline ladder is used,
the supervisor should remove it from the
trampoline when leaving the area to prevent
unsupervised access by children under 6
years of age.
Use only when the enclosure net has no
holes, mat rods are secure in the mat edge
sockets, the sockets are tightly secured to
the trampoline frame, and the enclosure is
properly suspended.
Do not intentionally rebound off the enclosure or intentionally jump into the enclosure.
Do not hang, kick, cut or climb on the enclosure. Do not attempt to jump over or climb
under the enclosure.
Wear clothing free of drawstrings, hooks,
loops or anything that could get caught
while using the trampoline/enclosure and
result in entanglement and/or strangulation.
Do not attach anything to the enclosure that
is not a manufacturer-approved accessory or
part of the enclosure system.
www.springfree.com
3
25. This enclosure is to be used only in connection with certain trampolines. Read and
follow all warnings and instructions before
using the trampoline/enclosure. Warnings
and instructions for the care, maintenance,
and use of this trampoline are included to
promote safe, enjoyable use of this equipment.
26. For information concerning skill training,
contact a certified trampoline instructor.
27. The Springfree™ Trampoline has the industry’s highest weight to area ratio. However,
in extreme wind conditions the large surface area of the mat can capture enough
wind energy to result in the trampoline
being lifted from its installation location.
Owners of trampolines installed in areas
susceptible to high winds, or owners who
wish to anchor their trampoline because
of this warning should consider applying
some type of anchoring system to the base
of the trampoline legs.
28. In our commitment to customer satisfaction and safety, please check our website
regularly for important customer updates
and all trampoline specifications.
29. For additional information concerning the
trampoline equipment, please contact the
manufacturer or regularly check our website for important customer updates.
The Springfree™ Trampoline and FlexiNet™ safety enclosure design is protected by a number of international patents (granted and pending) and registered designs. At the time of printing of this manual, these include: US patent 6319174; New Zealand patent 513331; China Patent ZL02825390.6; European
registered design 000126602-0001; Australian registered design 311568-75; other international patents pending. Please check http://www.uspto.gov for
latest updates. Springfree™ Trampoline is a registered trademark of Board & Batten International Inc. FlexiNet™ is a registered trademark of Board & Batten
International Inc.
© COPYRIGHT SPRINGFREE TRAMPOLINE 2005, 2010. ALL RIGHTS RESERVED.
4
Springfree™ Trampoline
www.springfree.com
CONTENTS
7
9
21
23
29
30
31
Before You Get Started
Trampoline and Enclosure Assembly Instructions
Trampoline and Enclosure Disassembly Instructions
Basic Trampoline Skills
Warranty
Springfree™ Worldwide Authorized Service Contacts
Springfree™ Trampoline Warranty Authorization Form
Springfree™ Trampoline
www.springfree.com
5
BEFORE YOU GET STARTED
Thank you very much for purchasing the Springfree™ Trampoline.
Before you assemble and enjoy the trampoline, please
ensure that you read and fully understand the Warnings, Installation and Placement Instructions, Care and Maintenance
Instructions, User and Owner Responsibilities and Assembly
Instructions. In our commitment to customer satisfaction
and safety, please check our website regularly for important
customer updates and all trampoline specifications.
Trampoline and Safety Enclosure Installation
and Placement Instructions
1.
2.
3.
4.
5.
6.
7.
8.
9.
Adequate overhead clearance is essential. A minimum
of 24 ft (7.32 m) from ground level is recommended.
Provide clearance for wires, tree limbs, and other possible
hazards.
Lateral clearance is essential. A minimum of 4 ft (1.22 m)
clearance around the perimeter of the trampoline must
be maintained at all times. Place the trampoline/enclosure away from walls, structures, fences, and other play
areas. Maintain a clear space on all sides of the trampoline/enclosure.
Place the trampoline/safety enclosure on a level surface
before use.
Use the trampoline/safety enclosure in a well-lit area. Artificial illumination may be required for indoor or shady
areas.
Secure the trampoline/safety enclosure against unauthorized and unsupervised use.
Remove any obstructions from beneath the trampoline/
safety enclosure.
Do not attempt to use the trampoline/safety enclosure
until it is completely assembled.
The owner and supervisors of the trampoline/safety
enclosure are responsible for ensuring all users are aware
of practices specified in the use instructions.
The trampoline safety enclosure is only to be used as an
enclosure for a trampoline and the trampoline must be of
the appropriate size as covered by the specific enclosure.
Springfree™ Trampoline
Care and Maintenance Instructions
Inspect the trampoline/ safety enclosure before each use and
replace any worn, defective, or missing parts. The following
conditions could represent potential hazards:
1.
Punctures, frays, tears, or holes in any part of the mat or
net.
2. Deterioration in the stitching or fabric in any part of the
mat or net.
3. Broken, missing, or splintered trampoline rods, or mat
rods disconnected from the mat edge.
4. A sagging bed, or a loose enclosure net; improperly or
insecurely attached bed or enclosure net.
5. Mat rods are not fully inserted into mat edge sockets or
ball joints not fully engaged in mat edge.
6. Deteriorated, missing or damaged plastic mat edge
sockets (If the mat edge sockets have deteriorated or
are damaged, rods may release and cause injury. Inspect
regularly, but keep face well clear in the process. Replace
damaged components).
7. Enclosure rods and attachment fittings are missing, broken or improperly assembled.
8. Enclosure rods not fully up into the net pockets.
9. Missing C-clips from the sockets on the frame.
10. A bent or broken frame or sharp protrusions on the
frame.
The soft edge of the Springfree™ Trampoline is designed
to reduce injury. It is not designed to cope with deliberate,
continuous, vigorous bouncing activity. Do not deliberately
bounce around the edge.
www.springfree.com
7
Your Springfree™ Trampoline is manufactured using leading
edge materials ranging from fiberglass to high tech polymer
compounds. Over extended periods of outdoor exposure,
and subject to the specific installation environment, the
trampoline will accumulate dirt and surface build-up. Over
prolonged periods, this can also include grime, moss, lichen,
and insects.
Responsibilities for Trampoline Safety and
Accident Prevention
RESPONSIBILITIES OF THE OWNER
AND SUPERVISOR
1.
1.
2.
3.
Do not use any household or industrial cleaners (including oil or solvent-based cleaners) or hydrocarbonpropelled insecticides on your Springfree™ Trampoline.
Applications of such products may result in degeneration of the product, and may void the consumer
warranty.
The only cleaning product that should be used on your
Springfree™ Trampoline is a mild liquid dishwashing
soap. Ensure that it is labelled as dye and chemical free,
non-toxic, and safe for use in hand washing.
Cleaning Your Springfree™ Trampoline:
· Use a bucket of clean warm water.
· Mix in 2 tsp (10 ml) of liquid dishwashing soap.
· Gently work the water/soap mix into the area to
be cleaned with a soft bristled scrub brush.
· When finished, rinse the trampoline thoroughly
with clean water .
If you have spider web build up on your trampoline, we
recommend the use of a soft bristled broom and/or a
cleaning product as described above.
2.
3.
4.
5.
6.
7.
8.
9.
RESPONSIBILITIES OF THE USER
1.
Winter Care Instructions
2.
Customers who live in colder climates frequently ask us
how to care for their trampoline in the winter. Springfree™
trampolines are constructed with all-weather parts including
rust-free fiberglass rods and UV-resistant polypropylene
mat and safety enclosure. However, there are several steps
you can take to protect your trampoline from winter climate
extremes and these special winter care instructions will
prolong the life and improve the performance of your
Springfree investment.
1.
2.
8
In areas where snow falls and accumulates over the
winter months, regularly clear the snow off your
trampoline. *Note: Do not use a shovel to remove the
snow from your trampoline, because it may damage
the mat or enclosure net. The most effective tool is a
soft bristle broom. Reach onto the center of the mat
and pull the snow load towards you and off the edge
of the mat.
We recommend the installation of our All Weather
Cover, where the trampoline is likely to be left unused
over the course of the winter. This is easily installed and
will protect both your FlexiNet™ Enclosure Net and mat
from the worst of winter weather and is designed to
make snow removal easier.
Springfree™ Trampoline
Use trampoline/enclosure only with mature knowledgeable supervision.
Provide supervision for all jumpers regardless of age or
skill.
Understand all of the safety rules and information in the
User’s Manual and ensure the rules are being followed.
Assess skill levels, provide basic jump instructions, and
ensure all users understand and follow the trampoline
safety guidelines.
Ensure that unsupervised or unauthorized users are not
permitted to jump.
Keep small children away from the trampoline while
others are bouncing on it.
Do not allow a child or other persons under the trampoline.
Do not allow more than one person on the trampoline/
in the enclosure at a time.
Inspect the trampoline/enclosure before each use to
avoid potential hazards.
3.
4.
5.
6.
Climb on and off the trampoline. Do not jump on or off
the trampoline.
Before jumping warm up the muscles. This increases
blood flow, which increases flexibility, joint mobility and
reduces the risk of injury.
When initially using the trampoline, begin in the center
of the mat with low controlled bounces.
Understand basic techniques such as stop bounce and
basic straight jump. Refer to Basic Trampoline Skills section at the end of this manual.
Understand and follow all the safety guidelines. In
particular, do not attempt or allow somersaults and do
not allow more than one person on the trampoline/in
the enclosure at a time.
Make sure someone is supervising at all times.
For further information or additional instructional materials, contact a certified trampoline instructor.
www.springfree.com
SPRINGFREE™ TRAMPOLINE AND
ENCLOSURE ASSEMBLY INSTRUCTIONS
Read the following steps before beginning the
assembly process.
Precautions
t Keep small children at least 25 ft (7.62 m)
away while assembling or disassembling
the trampoline; they could be injured
by improperly assembled rods releasing
and ejecting from the frame.
t Do not attempt to use the trampoline
until it is completely assembled.
t Two people are recommended for trampoline assembly.
t Gloves are recommended during the assembly process.
TRAMPOLINE
ENCLOSURE
t Be aware that when loaded, the rods can
spring back and may cause injury.
t Treat any loaded rod with caution until
you are sure it is properly installed. In
particular, keep your face well clear of
the rods during assembly or disassembly.
An improperly installed rod could release
and cause facial injury or blindness.
t The sleeves on the rods are intended to
provide protection from any fiberglass
fibers or splinters. Do not remove the
sleeve.
Preparation
Straight Frame
Sections
2
FlexiNetTM
1
Type A Curved
Frame Sections
2
C-clips
(attached to frame)
10
Type B Curved
Frame Sections
2
Enclosure Rods
10
Confirm all components are present (Table 1).
If you are missing any parts please call your
authorized Springfree™ service listed on Page
30 of this manual.
Bent Legs
2
Horizontal Rods
2
Note: Bolts & Nuts
Straight Legs
4
Leg Center Posts
6
Mat Rods
60
SPARES
Mat
1
1 Spare Small Bolt/Nut
Small Bolts & Nuts 12
Large Bolts & Nuts
6
Wrenches
2
Sandbags
4
3 C-clips
Small Bolts
Standard - 5/16” X 2”
Metric M8 X 50 mm
Large Bolts
Standard - 7/16” x 3 1/8”
Metric M12 x 80 mm
Table 1: Parts Itinerary
Springfree™ Trampoline
www.springfree.com
9
Step 1: Arranging the frame sections
10
1
2
Locate the four curved frame sections. Each curved
frame section will have a sticker at one end.
(Figure 1)
9
TYPE B: 10 Sockets
3
4
5
8
7
6
Sticker
Sticker
1
11
2
Type A: 11 sockets.
Type B: 10 sockets.
TYPE A: 11 Sockets
3
4
5
6
10
9
8
7
10
1
2
9
TYPE B: 10 Sockets
3
4
5
8
7
6
Sticker
Sticker
1
11
2
10
3
4
TYPE A: 11 Sockets
5
6
9
8
7
Figure 1: Curved frame sections
Step 2: Connecting two curved frame
sections together
Type B: 10 Sockets
Lay out the frame sections on the ground as in
Figure 2-A with the leg sockets facing upwards.
Assemble one pair of frame sections with
the leg sockets facing upwards as in Figure 2-B.
Then assemble the remaining pair.
*
NOTE: If you get this step wrong, you will likely not realize
the mistake until you are nearly finished assembly, at which
point you will be required to completely uninstall the trampoline and restart. Your trampoline has six frame pieces – two
straight sections and four curved sections. It is very important
to note that there are two different size curved sections, one
with 10 sockets and one with 11 sockets. You need to be extremely careful that you connect one 10 socket curved frame
with an 11 socket curved frame. The result is that once the
frame is fully assembled, the two 10 socket frame sections are
in opposite-corners to one another, as are the 11 socket frame
sections. To ensure that you connect the frames in the right sequence, there are 2 small dots on the end of each curved frame
section. You MUST ensure that the ends of the frames with the
stickers are connected together.
Type A: 11 Sockets
Sticker
Sticker
Type A: 11 Sockets
Type B: 10 Sockets
Figure 2-A: Laying out the frame sections
Type B: 10 Sockets
Sticker
Type A: 11 Sockets
Figure 2-B: Joining curved sections
10
Springfree™ Trampoline
www.springfree.com
Fasten the frame sections together with the
large bolt and nut provided. Do not over tighten. The nut should be towards the mat center;
the bolt head should be towards the outside.
Type B: 10 Sockets
Sticker
Type A: 11 Sockets
Figure 2-C: Fastening curved frame sections
Step 3: Attaching legs to the curved
frame sections
Leg piece
center post
STEP 1
STEP 2
Figure 3: Assembling the leg pieces
Locate the joint between two connected circular frame sections.
Insert a center post into the socket in the
centre of the leg (Figure 3).
Next, insert the center post into the sockets
of the frame (Figure 4-A).
Note that the center post is off to one side.
Make sure the saddle of the center post meets
at the joint in the frame. This will ensure the
center post saddle is positioned correctly. If it
does not, remove the leg and turn it around
(Figure 4, Details A and B).
Use the tools provided or manual tools such
as a socket wrench to fasten the bolts on the
trampoline frames or legs. Do not use a power
driver, torque wrench, or drill as these may over
tighten the bolts. Only do the bolts up snugly,
there is no need to do them up really tight. If
you are having trouble inserting the main frame
bolts, try to move the frame to a slightly flatter
location, as assembling the trampoline on
unlevel ground can make this difficult.
*
NOTE: The 2 bent legs should
be assembled on either end of the
trampoline (where the two curved
frame sections connect) and the 4
straight legs go on the sides of the
frame (where the curved frame
sections connect with the straight
sections).
Figure 4-A: Inserting a leg piece and a center post into
a half circle frame section
Springfree™ Trampoline
www.springfree.com
11
Step 4: Fastening the legs to the
frame
Fasten the legs to the frame with the small bolts
and nuts provided (Figure 4-B). Do not overtighten.
If the holes do not line up, check that the
leg has been inserted properly (refer to Figure
4-A) or lift the leg slightly. The nut should be
towards the mat centre; the bolt head should
be towards the outside.
Now, repeat Step 2 through Step 4 for the
remaining two half circle frame sections.
wrench
bolt
nut
Figure 4-B: Fastening the legs to the frame
Step 5: Inserting the straight frame
sections
Turn the two half circle sections over (Figure
5-A). Insert a shot center post into the socket of
the center of the leg (Figure 5-B).
Lift an end of the attached circular sections
and insert one side of a leg into the frame leg
socket, repeat this step on all circular section
ends. Leave the unconnected side of the leg
facing outwards from the trampoline center
(Figure 5-C).
Adjust the spacing between the half-circles
so that the straight sections fit between them
(Figure 5-D).
STEP 1
STEP 2
Figure 5-A: Turning the two circular sections over (half circles)
DETAIL A (Correct)
DETAIL B (Incorrect)
Figure 5-B: Inserting a straight leg piece and a center post
Figure 5-C: Attaching remaining legs
12
Springfree™ Trampoline
www.springfree.com
Figure 5-D: Adjusting spacing for straight section
While standing inside the trampoline frame,
lift the straight frame section and ensure the
spacing of the half-circles is correct; adjust if
necessary.
Insert a straight section into the two curved
sections. Fasten the sections together with
the large bolts and nuts provided. Do not over
tighten.
Repeat with the last straight section.
Figure 5-E: Attaching straight frame section onto half circle
frame sections
Step 6: Attaching the final legs
Figure 6: Inserting legs onto straight sections
The legs along the sides of the trampoline can
now be fully attached. Rotate each leg to align
with the sockets on the straight frame section.
Lift the half circle frame section to insert the
leg into the leg socket on the straight section
(Figure 6).
Repeat on all remaining legs.
Next, fasten the legs to the frame with the
small bolts and nuts provided. Do not overtighten. If the holes do not line up, check that
the leg is the right way round or lift the leg
slightly. The nut should be towards the mat
centre; the bolt head should be towards the
outside.
*
NOTE: When assembling the curved frame sections and
legs, you will likely notice that the frame looks somewhat
loose and the areas where the curved frame sections meet
may appear to buckle. Do not worry - this is completely normal
and occurs because the frame is not yet under tension. As you
continue installation, and particularly as you begin installing
the mat rods and the mat, the frame will become tight and
rigid. By the time your trampoline is fully installed, the frame
sections should fit tightly together.
Springfree™ Trampoline
www.springfree.com
13
Step 7: Positioning the enclosure
zipper door
*
NOTE: When placing the net around the frame, it is helpful
to imagine how it will look once it is fully assembled – the text
on the tab under the door and the pockets at the top of the net
should be facing out once the net is up. If you lay the net around
the frame with this perspective in mind, it will be much easier.
Then, after inserting the first couple of rods through the net into
the frame, it is a good idea to try lifting the top band of the net
(the thin strip around the top of the net where the pockets are)
up high enough to ensure you have it right. Ensure you have the
enclosure net door located in the correct position and the right
way around, i.e. not inside out.
Figure 7: The enclosure properly laid around the
trampoline frame
Lay the enclosure net around the frame with
the enclosure door (the zippers) between two
legs on a straight frame section (Figure 7).
WARNING: Ensure rods are seated
right down to the bottom of each
socket. Rods that are improperly
seated may eject unexpectedly,
which may cause injury.
Step 8: Inserting the first rod
Find the strip at the lower part of the net with
the holes in it. Select the hole that has a label
“1st Rod Position” sewn next to it (Figure 8-A).
Find the rod socket on the round frame section
that has the sticker “1st Rod Position” next to it
(Figure 8-B).
Put the rod through the net hole and back
into the socket hole you have located
(Figure 8-C).
Figure 8-A: The hole strip on the enclosure
Figure 8-B: The first rod socket
Figure 8-C: The rod going into first socket
14
Springfree™ Trampoline
www.springfree.com
Slide the net at the hole down to the bottom of
the rod. The first rod label should be facing out
The first rod label should be facing out (Figure
8-D).
Figure 8-D: Sliding the enclosure net down
Step 9: Inserting the remaining rods
Insert the remaining rods through each hole in
the bottom strip of the enclosure and into the
respective sockets (Figure 9).
Ensure the rods are seated right down to the
bottom of each socket.
Go around the trampoline and make sure the
net is not stuck under the leg or center posts
before attaching the mat.
Figure 9: The rest of the rods inserted through the
enclosure holes and into the frame sockets
Step 10: Laying down the mat
When all rods are in place, put the mat inside
the frame with the jumping surface facing up.
The jumping surface has the colored stripes
sewn around the edge (Figure 10).
stripes
Figure 10: The mat placed inside the trampoline frame
*
NOTE: It is extremely important that you check that the frame
is properly resting in the saddle of each of the center posts before
Step 12. If one of the center posts is not properly installed, the
frame integrity will be compromised and you will be forced to
uninstall all of the rods before resetting the center post. Before
moving to Step 13, stop and double check again that these are
properly installed.
Step 11: Attaching the first
rods to the mat
Figure 11-A: The first rod attached to the mat
Springfree™ Trampoline
Choose the rod in the mat edge socket with the
sticker “1st rod position.” Connect the ball end
of this rod to the mat edge socket in the mat
marked with a label “1st rod position” (Figure
11-A).
Connect the rod to the left of the first rod
with the corresponding cleat in the mat.
Repeat at the opposite end of trampoline.
WARNING: Treat any loaded rod
with caution until you are sure it is
properly installed or uninstalled.
Keep your face well away from any
loaded rod.
www.springfree.com
15
Tip: Make sure the ball
is correctly seated in
the mat-edge socket.
If the ball is properly
installed, you should
not be able to slide
the ball out of the mat
edge socket (Figure
11-B).
Edge of mat
Edge of mat
Edge of mat
Figure 11-B: Fitting the mat rod into the mat edge
socket
WARNING: Do not use the trampoline
until it is completely assembled.
Failure to follow these instructions
may cause rods to break or eject from
the frame.
Step 12: Attaching every fifth
rod to the mat
Working from right to left, count four empty
mat edge sockets in the edge of the mat. Mount
the fifth; this leaves four unconnected rods
between groups (Figure 12-A).
Continue around the tramp from right to left,
mounting every fifth mat edge socket to the
corresponding rod.
Figure 12-A: Every fifth rod attached to the mat
*
NOTE: Push the rod in with
your right hand, palm facing up,
and with your elbow to hip, while
pulling the mat edge socket left
and up with the left hand. This
method uses your body weight to
flex the rods (rather than pure arm
strength), and it also keeps your
face away from the loaded rods
(Figure 12-B).
*
NOTE: It is easiest to mount the
rod ball to the mat edge socket by
pushing the rod in and up towards
the mat, while pulling the mat
edge socket to the left. The ball
then pushes back naturally into
the mat edge socket (some rods
will need to be flexed a long way
at first).
16
Springfree™ Trampoline
Figure 12-B: Preferred rod bending technique
www.springfree.com
Step 13: Attaching the remaining
rods to the mat
WARNING: Treat any loaded rod
with caution until you are sure it is
properly installed or uninstalled.
Keep your face well away from any
loaded rod.
Now, install one more rod to the left of each
group, while circling the trampoline.
Continue to circle around the trampoline
installing one rod per group until all rods are
connected (Figure 13-A).
Figure 13-A: The remaining rods attached to the mat
Edge of mat
*
Edge of mat
NOTE: If you miscount, and
need to release a connected rod,
hold the mat to the left of the rod
with your left hand. Then using
the technique outlined in Figure
12-B push the rod sharply at an
angle towards the center of the
mat and a little to your left. You
should feel the rod move back in
the mat edge socket then up and
over a lip as shown in Figure 13-B.
Figure 13-B: Removing the mat rod from the mat edge
socket
Step 14: Sliding the enclosure
net up the rods
Figure 14: The enclosure being slid up the rods and up
onto the mat
Lift the enclosure net from the ground, up on to
the trampoline mat. (It may be a tight fit over the
mat edge). Please ensure the net does not snag on
the frame bolts as this may tear the net. Circling the
trampoline from right to left, slide the net bottom
strip up the rods to the top, just under the mat edge.
The long zip will now end along the straight edge of
the trampoline.To avoid unnecessary wear on the net,
please ensure that the bottom net weave band covers the edge of the mat. Be very careful that the net
is not snagged on any of the bolts or enclosure rod
sockets – if the net catches, it could result in a hole.
Step 15: Inserting the horizontal net
supports
Locate the top edge of the enclosure along the
straight edge of the trampoline. Slide the horizontal
rod into the pocket along the top enclosure edge
and secure with the Velcro tab (Figure 15).Repeat on
other side of the trampoline.
Figure 15: The horizontal rods being inserted into
their sleeves in the enclosure
Springfree™ Trampoline
www.springfree.com
17
WARNING: Treat any loaded rod
with caution until you are sure it is
properly installed or uninstalled.
Keep your face well away from any
loaded rod.
Step 16: Assembling the enclosure
rods
unfold
Straighten the enclosure rods and slide the
joiner down to secure the two rods together
(Figures 16-A, B and C).
Figure 16-A: Straightening an enclosure rod
align
Figure 16-B: Aligning rod parts at the joint
secure
Figure 16-C: Securing the joint
WARNING: Never attempt to remove
an enclosure rod from its pocket or
disengage (unlock) the joiner while
the enclosure rod is under tension.
Step 17: Inserting the first enclosure
rod into the net pockets
Insert the ball end of the rod up through the
loop and into a pocket in the top edge of the
net.
*
NOTE: Ensure the rod is pushed
right to the end of the pocket. Unless you do this, the internal catch
cannot prevent the rod from coming out during use. (Figure 17).
Figure 17: Inserting an enclosure rod into a pocket
18
Springfree™ Trampoline
www.springfree.com
Step 18: Bending the enclosure rod
into it’s socket
*
NOTE: Insert ALL of the enclosure rods into the pockets BEFORE
raising the enclosure net.
Next, hoist the net up. Bend the rod and insert
the bottom end into the socket on the frame
(Figure 18). Ensure that the rod is pushed right
down into its socket and secured in place by the
C-clip.
socket
Figure 18: The enclosure rod being bent and inserted
into the socket
Step 19: Completing the enclosure
Insert the next enclosure rod on the OPPOSITE
side of the trampoline by the same process.
Again, ensure that the joiner remains engaged.
Continue installing the remaining enclosure
rods using the same technique.
Figure 19: The completed trampoline with enclosure
Step 20: Checking C-Clips are secure
in sockets
C-clip
socket
Figure 20: C-clip attaching to socket on frame
Springfree™ Trampoline
C-clips should be pre-installed onto the sockets. Check and ensure the C-clips are on the
sockets. Ensure these clips capture the rods and
prevent them from being pulled out.
Congratulations! You have successfully
completed the assembly of your Springfree™
Trampoline!
Be sure to review all warnings and precautions with your family before using. Happy
jumping—the Springfree™ Trampoline way!
www.springfree.com
19
WARNING: The Springfree™ Trampoline has the
industry’s highest weight to area ratio. However,
in extreme wind conditions the large surface
area of the mat can capture enough wind energy
to result in the trampoline being lifted from its
installation location. Owners of trampolines
installed in areas susceptible to high winds, or
owners who wish to anchor their trampoline as
a result of this warning should consider applying
some type of anchoring system to the base of
the trampoline legs.
Recommended Step: Use sandbags
for increased stability
For increased stability, your trampoline comes
with four sandbags, which you fill with sand and
place over each leg (sand not included).
Fill the bag to approximately 6 inches (150
mm) below the top with wet or dry sand (Figure
21-A).
Fold the top of the bag twice over such that
the Velcro strips meet (Figure 21-B).
Place one sandbag over each trampoline leg
on the straight edge of the trampoline such
that it cannot slip off (i.e. the stitched seam in
the center should lay over the leg tube). (Figure
21-C).
6 in. (150 mm)
Figure 21-A: Filling the sandbag
Figure 21-B: Folding and sealing the sandbag
Figure 21-C: Placing the sandbag over the leg
20
Springfree™ Trampoline
www.springfree.com
TRAMPOLINE AND ENCLOSURE
DISASSEMBLY INSTRUCTIONS
The disassembly is largely the reverse of the assembly steps. The following points should be noted:
Enclosure
First, remove the C-clips at the bottom of the
enclosure rods and then lift the bottom of the
enclosure rods out of their sockets in the frame.
Once the net is slack, pull the rods from the
pockets at the top of the net. The net will then
be lying around the trampoline as in Step 14,
Figure 14-B of the Trampoline and Enclosure
Assembly Instructions.
Edge of mat
WARNING: Never attempt to remove
an enclosure rod from its pocket or
disengage (unlock) the joiner while
the enclosure rod is under tension.
TO FOLD THE ENCLOSURE ROD
1.
2.
3.
Remove the enclosure rod from the
enclosure rod socket in the base of the
trampoline.
Remove the rod assembly from the rod
pocket at the top of the net.
Slide the white joiner up and fold the
enclosure rods.
Edge of mat
Trampoline
1.
Figure 1: Removing the mat rod from the mat edge
socket
2.
3.
4.
Release each connected rod by hold the
mat to the left of the rod with your left
hand. Then using the technique outlined
in Figure 1, push the rod sharply at an
angle towards the centre of the mat and
a little to your left. You should feel the rod
move back in the socket then up and over
the lip.
Move around the trampoline releasing
every fifth rod.
Continue circling, releasing rods to the
right of the gap until all rods are released
(by working at the right of the gap rather
than the left, your knuckles have more
clearance).
Once the mat is free, the frame can be
disassembled.
WARNING: Treat any loaded rod with
caution. Keep your face well clear of
any loaded rod.
WARNING: Do not attempt to
disassemble any frame components
before the mat and rods have been
removed. The frame and legs need to
remain assembled to carry the
rod loads.
Figure 2: Preferred rod bending technique
Springfree™ Trampoline
www.springfree.com
21
BASIC TRAMPOLINE SKILLS
These instructions contain information on basic
skills, landing positions, and how to perform
series of drops. The instructions are ordered
according to difficulty. Further information is
available from Springfree™ Trampoline or from
a certified trampoline instructor. Basic jumping
and landing skills should be learned in a progression. Skills that are more difficult should not
be attempted until basic skills are mastered.
Bouncing
The most important thing about bouncing is
that it should be done with control in the center
of the bed. The basic bounce should always
begin low. High, reckless bouncing should
never be allowed.
THE STOP BOUNCE
This technique allows the jumper to gain control by stopping quickly. It is done by keeping
the feet in contact with the bed, and absorbing the rebound of the trampoline with the
knees and waist. This skill should be learned
right away and should be employed whenever
you feel out of balance, or land away from the
center area.
Figure 1: The Stop Bounce
To learn the Stop Bounce:
1. Stand in center of the bed with feet about
hip-width apart.
2. Attempt about three easy bounces. Keep
them low and controlled.
3. Focus your eyes towards the perimeter of
the trampoline while bounding in order to
keep your balance.
4. Stop the bounce by bending at your knees
and hips with your feet in contact with the
bed (see Figure 1).
ARM ACTION
Arms are very important for proper control and
lift. Whenever you go up, your arms go up.
They go up to a set position about shoulder
height and shoulder width. They should remain
in this balanced position until you start down.
Then they circle down and slightly behind the
hips, ready to lift again as you bounce up.
Figure 2: Arm Action
Springfree™ Trampoline
www.springfree.com
23
BOUNCE VARIATIONS
The figures show four variations: the tuck, the
pike, the star, and the straddle pike. These
should be assumed at the top of the bounce,
before resuming the normal landing position
on your feet.
Practice these simple variations and concentrate on perfect form. Make sure that your toes
are pointed and fingers are straight.
These are simple variations to the basic
bounce and are very important for gaining
experience in coordinated movement.
Figure 3: Tuck
Figure 4: Pike
Figure 5: Star
Figure 6: Straddle-pike
24
Springfree™ Trampoline
www.springfree.com
Basic Landing Positions
Positions for all drops: seat, hands and knees,
and front drops should first be practiced on the
ground, then in a stationary position, and only
then on the trampoline bed.
Drops should be performed after ‘priming’
the trampoline bed. Priming is done by bending your knees and pushing down repeatedly
on the trampoline bed, thereby setting the bed
in motion. The feet stay in contact with the bed
during the entire priming motion.
THE SEAT DROP
To learn the seat drop:
1. From the standing position, prime the bed
several times.
2. Pick up your feet at the top of the last
bounce, and sit down. You should land
so that your body is in a sitting position
with legs straight out in front and your
toes pointed. Hands should be flat on the
bed next to your hips. Fingers should be
together and pointed toward the toes.
3. Push on the bed with your hands to rebound up to your feet.
Figure 7: The seat drop
THE HANDS AND KNEES DROP
To do this drop properly, there should be just as
much weight on your hands as on your knees.
Your back should be about approximately parallel to the bed. Knees and hands should land
simultaneously, as with the middle of the body
landing in the center of the trampoline. Hands
should be directly under the shoulders. Knees
should be directly under the hips. Your toes
should be pointed.
Figure 8: The hands and knees drop
Springfree™ Trampoline
To learn the hands and knees drop:
1. Get down on your hands and knees on the
bed. Make sure you have weight on both
your hands and your knees. Do not sit on
your heels.
2. Remain in this position and try to bounce.
Do not rock back and forth between the
hands and knees, but develop an even
landing on all four points.
3. From the standing position, prime the bed
several times. Lift upward with your hips,
reach forward with your hands, and land
on all fours. Look slightly in front of your
hands on landing. Push to rebound to
your feet.
www.springfree.com
25
THE FRONT DROP
Contact with the trampoline bed should simultaneously take place with your hands, elbows,
chest, stomach, hips, and knees. Knees should
be bent.
You must come down level. If the landing
is made first on your chest and arms, they will
rebound before your knees hit which will result
in a straining action on your back. If this type
of landing is made with a traveling, diving
approach there is a chance that your elbows
may become skinned. If the landing is made so
that your knees and hips hit first, then they will
rebound and your shoulders and face will land
heavily.
Figure 9: The front drop
Step 1
1. Start from the hands and knees drop position.
2. As you rebound from the hands and knees,
stretch so that you land on your stomach.
From this position, rebound to your hands
and knees.
Step 2
1. Start from a standing position with knees
bent so that your upper body is low and
close to the trampoline bed.
2. Prime the bed several times.
3. Lift hips gently upward and backward.
4. Land in contact with the bed as described
in Step 1.
5. Push with your hands to return to your
feet.
Step 3
1. Start from a straight standing position.
2. Prime the bed several times.
3. Perform skill as in Step 2.
26
Springfree™ Trampoline
www.springfree.com
Series of Drops
Once you have mastered the individual
bounce variations and drops, practice them
in sequence. For example, seat drop-Hands
and knees drop-Front drop, or Seat drop-Front
drop-Hands and knees drop-Seat drop.
Beginning Twisting
The figures show a few of the many possible
twisting variations of the basic landing positions.
SEAT DROP-HALF TWIST-SEAT DROP
(SWIVEL HIPS)
Step 1
1. Perform a seat drop.
2. Push down on the bed with your hands
and come to a stand with your arms
stretched overhead.
Figure 10: Swivel hips
Step 2
1. Perform the movement in Step 1. As you
rebound up to your feet, move one shoulder in the direction you want to twist.
2. Finish standing with arms stretched
overhead, facing the opposite direction
(180-degree twist completed).
Step 3
Perform as in Step 2. Just before contacting
feet with the trampoline bed, lift your legs to
land in a sitting position.
FRONT DROP-HALF TWIST-FRONT DROP
(TURNTABLE)
Figure 11: Turntable
Step 1
1. Begin in a hands and knees position, with
hands forming a triangle, like in a front
drop.
2. Prime the bed in this position.
3. Push backward with your hands and
extend your body to land in the front drop
position.
4. Repeat several times in succession: Hands
and knees drop-Front drop-Hands and
knees drop-etc.
Step 2
Perform the movement as in Step 1. However,
do it at twice the speed so as to bring your
Springfree™ Trampoline
www.springfree.com
27
knees inward, under your hips and out again
without touching your knees on the bed.
Step 3
Perform the movement as in Step 2. Push sideways on the trampoline bed so that your body
rotates like the hands of a clock.
Step 4
From a standing position, prime the bed, and
then perform a front drop. Push sideways, as in
Step 3, and complete a 180-degree turn, finishing in a front drop facing the opposite position.
SEAT DROP-FULL TWIST-SEAT DROP
(FULL BARREL ROLL)
1.
2.
Perform this as you would a half-barrel
roll but keep moving your shoulder in the
direction of the twist so that you finish in
the seat drop position.
During the twist, hands should be placed
by your sides, with your body held straight.
Figure 12: Full barrel roll
Additional Twisting
You can combine a twist with each of the basic
landing positions. You can twist after the landing position.
Example: Seat drop – twist-feet
You can add more twists. Remember to practice and perfect the smaller twists before moving on to larger twists. You can also perform a
series of twists.
Example: Swivel hips
Perform several in a row, all twisting in one
direction, or alternating directions.
28
Springfree™ Trampoline
www.springfree.com
WARRANTY
Springfree™ Trampoline
Limited Trampoline Warranty
Warranty Coverage
Springfree™ Trampoline and its authorized service partners warrant its products to be free of defects in material and
workmanship under normal domestic recreational use and service conditions. The various component parts of the
trampoline are warranted against failure and defects in workmanship as follows:
Steel Frame
Fiberglass Rods
FlexiNet
10 years Jumping Mat
2 years
1 year
2 years
The warranty in respect of the mat and the enclosure net does not cover normal wear & tear (e.g. stitching wear due
to use), burns, cuts or snags. The warranty on the frame does not cover surface rust. Warranty claims resulting from
manufacturing QA defects e.g. cuts in mat, broken cleats, tears in net, missing components etc must be
reported within 45 days of the product being purchased. Warranty claims reported outside the initial 45 days purchase period may be rejected by Springfree™ Trampoline. Shipping costs associated with approved warranty claims
during this 45 day period will be borne by Springfree™ Trampoline. Beyond this 45 day period, all shipping costs
must be borne by the purchaser.
SPRINGFREE™ TRAMPOLINE IS NOT RESPONSIBLE OR LIABLE FOR INDIRECT, SPECIAL OR CONSEQUENTIAL DAMAGES ARISING OUT OF OR IN CONNECTION WITH THE USE OR PERFORMANCE OF THE PRODUCT OR ANY OTHER
DAMAGES WITH RESPECT TO ANY ECONOMIC LOSS, LOSS OF PROPERTY, LOSS OF REVENUE OR PROFITS, LOSS OF
ENJOYMENT OR USE, COST OF REMOVAL, INSTALLATION/DISASSEMBLY OR OTHER CONSEQUENTIAL DAMAGES.
SOME STATES/TERRITORIES DO NOT ALLOW THE EXCLUSION OR LIMITATION OF INCIDENTAL OR CONSEQUENTIAL DAMAGES. ACCORDINGLY THE ABOVE LIMITATION MAY NOT APPLY TO YOU.
THE WARRANTY EXTENDED HEREUNDER IS IN LIEU OF ALL OTHER WARRANTIES AND ANY IMPLIED WARRANTY
OF MERCHANTABILITY, OR FITNESS FOR A PARTICULAR PURPOSE IS LIMITED IN ITS SCOPE AND DURATION TO
THE TERMS SET FORTH HEREIN. SOME STATES/TERRITORIES DO NOT ALLOW LIMITATIONS ON HOW LONG AN
IMPLIED WARRANTY LASTS. ACCORDINGLY THE ABOVE LIMITATION MAY NOT APPLY TO YOU. THIS WARRANTY
IS NOT TRANSFERABLE.
How to Return Product
All returns must be pre-authorized. To obtain authorization, fax or email the completed Warranty Authorization Form (WAF) at the back of the manual, including a proof of purchase and a minimum of two high resolution
photos to your nearest Springfree™ Trampoline customer service centre or authorized service partner listed in the
“Springfree™ Trampoline Worldwide Authorized Service Contacts” section of this manual to obtain an authorization
number. If you do not have a copy of the WAF form, contact Springfree™ who will provide you with the required
authorization. Once the authorization is obtained, ship the product, freight prepaid to the designated service centre
and Springfree™ Trampoline reserves the right to replace or repair the product at Springfree™ Trampoline’s option.
This warranty gives you specific rights. You may also have other rights, which vary, from one state or territory to
another.
Springfree™ Trampoline
www.springfree.com
29
SPRINGFREE™ TRAMPOLINE WORLDWIDE
AUTHORIZED SERVICE CONTACTS
NORTH AMERICA
Springfree Trampoline Inc.
151 Whitehall Drive, Unit 2
Markham, Ontario L3R 9T1
Canada
Toll free: 1 877 JUMP SAFE
Fax:
1-905-948-0016
Email:
Web:
[email protected]
www.springfree.com
AUSTRALIA
Springfree Trampoline Aust Pty. Ltd.
Unit 1, 60 Hoopers Road
Kunda Park
Queensland, 4556
Australia
Free:
Fax:
1800 JUMP SAFE
1800 123 204
+61-7-5453-9444
Email:
Web:
[email protected]
www.springfree.com
NEW ZEALAND
Springfree New Zealand Ltd.
125 Blenheim Road, P.O. Box 80117
Riccarton, 8440
Christchurch, New Zealand
Free:
Ph:
Fax:
0800 JUMPSAFE
0800 586 772
+64-3-961-0529
+64-3-963-6999
Email:
Web:
[email protected]
www.springfree.com
If you require service on a Springfree™
Trampoline product and your territory is not included in this
list, then contact us via one of our registered e-mail addresses
above.
30
Springfree™ Trampoline
www.springfree.com
SPRINGFREE™ TRAMPOLINE
WARRANTY AUTHORIZATION FORM
Note: Proof of purchase and a minimum of two high resolution photos must be submitted with all warranty claims.
Please complete this form and forward it to SpringfreeTM Trampoline or your retailer when requesting product warranty assistance.
First name*
Last name*
Apt.
Street and Number*
City*
State/Province*
Phone number*
Email address
Zip/Postal Code*
Serial Number:
Model:
(Serial number is located on the trampoline frame)
Purchase details
In addition to the information below, please attach a copy of your receipt, packing slip, or credit card statement.
Place of purchase*
Date of purchase*
Please check the component(s) for which a warranty claim is being made:
Frame Component
Jumping Mat
Enclosure Net
Mat Rod
Enclosure Rod/Joiner
C-Clips
Please describe briefly the component fault and what you think caused it:*
Photos of component enclosed/attached
* Required field
† Springfree™ Trampoline Authorized Service Centers are listed in the rear of this manual.
Springfree™ Trampoline
www.springfree.com
31
Other