1
WWW.LIGHTEMOTION.COM.AU
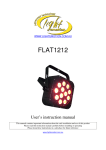
FLAT1012
User’s instruction manual
This manual contains important information about the safe installation and use of this product
Please read this instruction manual carefully before installing or operating
Please keep these instructions in a safe place for future reference
www.lightemotion.com.au
Congratulations on the purchase of your FLAT1012 by Light Emotion. We are confident that you will
be satisfied with your purchase. We have prepared this manual to assist you with the operation of this
item.
CONTENTS
SECTION
WHAT IS INCLUDED, SAFETY INSTRUCTION
POWER, FUSE, INSTALLATION
MAINTENANCE & PERIODIS CHECKS, DMX LEAD, DMX TERMINATOR, FEATURES
OPERATION
SPECIFICATIONS
Page
2
3
4
5
9
Please note that as part of out ongoing commitment to continuous improvement and product
development, the specifications in this manual are subject to change without notice. Whilst every care
has been taken in the preparation of this manual we reserve the right to change specifications in the
course of product improvement.
WHAT IS INCLUDED:
CAUTION: Do not use sharp objects whilst unpacking this product
• 1x FLAT1012
• 1x Warranty Card
• 1x User Manual
Please note: Some of the items above may be fitted to the product by the manufacturer.
SAFETY INSTRUCTIONS:
Please read these instructions carefully. It includes important information about the installation usage
and maintenance of this product.
• Please keep this User Manual for future consultation. If you sell the unit to another user, be sure
that they also receive this instruction booklet.
• Always make sure that you are connecting to the proper voltage and that the line voltage you are
connecting to is not higher than that stated on the rear panel of the fixture.
•
•
•
•
•
•
This product is intended for indoor use only! To prevent risk of fire or shock, do not expose
fixture to rain or moisture.
Make sure there are no flammable materials close to the unit while operating.
The unit must be installed in a location with adequate ventilation, at least 50cm from adjacent
surface. Be sure that no ventilation slots are blocked.
Always disconnect from power source before servicing or replacing fuse and be sure to replace
with same fuse source.
Secure fixture to fastening device using a safety chain.
Maximum ambient temperature is 40˚C. Do not operate fixture at temperatures higher than this.
2
•
•
•
•
•
•
In the event of serious operating problem, stop using the unit immediately. Never try to repair
the unit by yourself. Repairs carried out by unskilled people can lead to damage or malfunction.
Please contact the nearest authorized technical assistance center.
Never connect the device to dimmer pack.
Make sure power cord is never crimped or damaged.
Never disconnect power cord by pulling or tugging on the cord.
Never carry the fixture directly from the cord. Always use the hanging/mounting bracket.
Avoid direct eye exposure to the light source while it is on.
POWER:
CAUTION: This lighting effect is designed to operate at 240V.
Power Consumption: 105W
FUSE:
CAUTION: Only use the correct fuse as specified on the
rear panel of the lighting effect. Disconnect the lighting
effect from the mains before attempting to replace the
fuse.
To replace the fuse please follow the following steps:
1. Remove the fuse holder cover with a screwdriver.
2. Remove existing fuse.
3. Fit new fuse.
4. Refit the fuse holder.
Fuse: M205 2.5A fast blow
INSTALLATION:
CAUTION: For safe mounting read the following instructions carefully.
• Use suitable hook clamps* for hanging the lighting effect.
• Use a safety wire* with a breaking strain of more than double the
lighting effect.
• Do not look directly into the light source.
• Make sure the lighting effect has suitable ventilation as per the
instructions below.
• This lighting effect is intended for indoor use only.
• To avoid electrical shock keep away from rain and moisture.
• Keep unit out of reach from children.
NOTE:
Use washers* and spring washers* when attaching your hook clamp* to the
yoke.
1. For installation of the hook clamps* and safety wire*.
3
2. This lighting effect must be 0.5m away from any flammable materials or any walls or ceilings.
3. Do not block or inhibit the air flow from the ventilation holes.
Light Emotion have various hook clamps* and safety wires* suitable for your PAR 64LED Please
contact your local dealer for more information *Not included.
MAINTENANCE & PERIODIC CHECKS:
CAUTION:
Some maintenance and checks may require the product to be opened and should only be done by
qualified persons. Warranty may be void if damage has been caused by improper maintenance.
DMX LEAD:
The DMX lead is used to link up multiple units.
PIN
1
2
3
DMX512
FUNCTION
GND
DATA
DATA +
DMX TERMINATOR:
A DMX terminator helps to reduce ‘noise’ on the DMX chain, and makes the light respond to control
more accurately. It should be plugged in to the last fixture in any chain.
FEATURES:
Manual dimmer color mode
Sound active mode
Auto-run program mode
Static color select mode
Other program select mode
DMX mode
Slave mode
4
OPERATION:
There are six kinds of running modes which are selected by ‘MODE’ button. The DP dot of fourth
digital display will be flicking when you operate it, and then the DP dot will automatically turn off
after 60 seconds if there is not any other operation. The four digit display will show the current
operation mode. You have to press the ‘MODE’ button if you want the display to show again.
MODE
manual
SET UP manual
Address
DMX
MODE
SLAVE
MODE
DIMMER
MODE
SOUND
MODE
AUTO
RUN
MODE
STATIC
COLOR
SELECT
MODE
OTHER
MODE
UP/DOWN
manual
~
Instruction
Sets the DMX starting address
The unit occupies 5 DMX channels
The unit occupies 6 DMX channels
The unit occupies 7 DMX channels
The unit occupies 8 DMX channels
Set the unit into slave mode
Channels
Slave mode
Red dimmer
Green dimmer
Blue dimmer
White dimmer
UV dimmer
Flash
~
~
~
~
~
~
Mode select
Sensitivity select
~
~
Dreaming mode
set
Jumping mode set
Auto
Dreaming&Jumpi
ng mode
Speed set
~
Color select
Flash
~
~
Adjust the intensity of the red color
Adjust the intensity of the green color
Adjust the intensity of the blue color
Adjust the intensity of the white color
Adjust the intensity of the UV color
Adjust the flash speed,
is flash
off,
is slowest,
is fastest
Select the 16 built-in sound modes
Adjust the sensitivity of the soundactive,
is the lowest level,
the highest level
Select the 16 built-in dreaming mode
~
is
Select the 16 built-in jumping mode
Set the light in auto dreaming&jumping
mode,the dreaming mode and jumping mode
will run in a continuous cycle
Adjust the speed of the dreaming/jumping
mode
Select the 31 static colors
Adjust the flash speed,
is flash
off,
is slowest,
is fastest
~
Display
on/off
Display
normal/inverse
Initialization
mode
LED digital tube display always on
LED digital tube display off
LED digital tube display normal
LED digital tube display inversion
Initialize the unit at the extra factory setting
1. Manual dimmer color mode
Press ‘MODE’ button to select the manual dimmer color mode.
5
1) Manual dimmer color select
Press ‘MODE’ button until the display shows red ‘
~
’, then press the ‘SET UP’ to
choose different color, green ‘
~
’, blue ‘
~
’,
white
‘
~
’ and UV ‘
~
’, then press ‘UP’ or ‘DOWN’ button to set the
dimming rate 0 to 255.
2) Flash speed select
Under manual dimmer color mode, press ‘SET UP’ until the display shows ‘
~’, then press
‘UP’ or ‘DOWN’ button to select the flash speed 00 to 15, 00 is flash off, 01 is the slowest flash
speed, 15 is the fastest flash speed.
2. Sound active mode
Press ‘MODE’ button to select the sound active program mode.
1) Sound active program mode select
Press ‘MODE’ button until the display shows ‘
~
’. Press ‘UP’ or ‘DOWN’ to select
the sound active program mode 1 to 8 under this mode.
2) Sensitivity select mode
Under sound active mode, press ‘SET UP’ button until the display shows ‘
~
’, then
press ‘UP’ or ‘DOWN’ to select the sound active the sensitivity 1 to 8. 1 is off sound-active, 2 is
the lowest sensitivity, and 8 is the highest sensitivity.
3. Auto-run program mode
Press ‘MODE’ button, select the auto-run program mode. There are 4 auto-run program modes to
be selected by pressing the ‘SET UP’ button. Press ‘MODE’ button until the display shows
‘
~
’, ‘
~
’, ‘
’ or ‘
~
’.
1) Color dreaming program mode select
Under auto-run program mode, press ‘SET UP’ button until the display shows ‘
~
’,
then press ‘UP’ or ‘DOWN’ button to select the eight color dreaming programs 1 to 16.
2) Color jumping program mode select
Under auto-run program mode, press ‘SET UP’ button until the display shows ‘
~
’,
then press ‘UP’ or ‘DOWN’ button to select the eight color jumping programs 1 to 16.
3) Auto dreaming & jumping mode
Under auto-run program mode, press ‘SET UP’ button until the display shows ‘
’, and then
the dreaming mode and jumping mode will run in a continuous cycle. ‘UP’ or ‘DOWN’ buttons are
no function in this mode.
4) Color dreaming & jumping speed select
Under auto-run program mode, press ‘SET UP’ button until the display shows ‘
~
’,
then press ‘UP’ or ‘DOWN’ button to select the color dreaming/jumping speed 01 to 16, 01 is the
slowest speed, 16 is the fastest speed.
4. Static color select mode
Press ‘MODE’ button to select the static color select mode. There are 2 static color select modes.
You can select them by pressing the ‘SET UP’ button.
1) Static color select
~
’, then press ‘UP’ or ‘DOWN’ to
Press ‘MODE’ button until the display shows ‘
select static color 0 to 31. Please refer to color macros table.
2) Flash speed select
Under static color select mode, press ‘SET UP’ button until the display shows ‘
~
’,
then press ‘UP’ or ‘DOWN’ button to select the static color flash speed 00 to15, 00 is flash off, 01
is the slowest flash speed, 15 is the fastest flash speed.
6
5. Other program select mode
’ or ‘
’.
Press ‘MODE’ button until the display shows ‘‘
1) Display off/on select mode
Under other program select mode, press ‘SET UP’ button until the display shows ‘‘
’ or
‘
’, then press ‘UP’ or ‘DOWN’ to select display on or off mode. When the display shows
‘
’, the display will be on in any situation. When the display shows ‘
’, the display
will be off after 60 seconds automatically if there is not any further operation.
2) Display normal/inversion select mode
Under other program select mode, press ‘SET UP’ button until the display shows ‘
’ or
‘
’, then press ‘UP’ or ‘DOWN’ to select normal or inversion display mode. When the
’, the display shows normally. When the display shows ‘
’, the
display shows ‘
display shows inversion.
3) Initialization select mode
Under other program select mode, press ‘SET UP’ button until the display shows ‘
’, and the
display is flickering. Now press ‘UP’ and ‘DOWN’ button at the same time, you can initialize the
unit at extra factory setting, running on the first color jumping mode, and the display shows
‘
’.
6. Slave mode
Press ‘MODE’ button until the display shows ‘
no function under this mode.
’. ‘SET UP’, ‘UP’ or ‘DOWN’ buttons are
7. DMX mode
You can control the devices individually via your DMX-controller.
1) DMX address select mode
The control board allows you to assign the DMX address which is defined as the first channel of
FLAT1012. Press ‘MODE’ button until the display shows ‘
~
’, then press ‘UP’ or
‘DOWN’ button to set the DMX address. The four digital display will be flicking when there is no
controller signal.
2) DMX protocol
~
’, then press ‘UP’ or ‘DOWN’ to
Press ‘SET UP’ button until the display shows ‘
set the desired channels (5, 6, 7 or 8). There are total four DMX channels.
•
CH NO.
1
2
3
4
5
•
CH NO.
1
2
3
4
5
6
: 5 channels mode
DMX Value
0-255
0-255
0-255
0-255
0-255
: 6 channels mode
DMX Value
0-255
0-255
0-255
0-255
0-255
0-255
Function
Red
Green
Blue
White
UV
0% - 100%
0% - 100%
0% - 100%
0% - 100%
0% - 100%
Function
Red
0% - 100%
Green 0% - 100%
Blue
0% - 100%
White 0% - 100%
UV
0% - 100%
Master dimmer 0% - 100%
7
•
CH NO.
1
2
3
4
5
6
7
: 7 channels mode
DMX Value
Function
Red
0% - 100%
Green
0% - 100%
Blue
0% - 100%
White 0% - 100%
UV
0% - 100%
Master dimmer 0% - 100%
Color macros
Please refer to color macros table
NOTE: Channel 1, 2, 3, 4 and 5 have no function, when Channel 7 is working.
•
CH NO.
1
2
3
4
5
6
7
0-255
0-255
0-255
0-255
0-255
0-255
: 8 channels mode
DMX Value
Function
0-255
0-255
0-255
0-255
0-255
0-255
0-15
16-255
Red
0% - 100%
Green
0% - 100%
Blue
0% - 100%
White
0% - 100%
UV
0% - 100%
Master dimmer 0% - 100%
Strobing: off
Strobing: slow to fast
8
Color macros
Please refer to color macros table
NOTE: Channel 1, 2, 3, 4 and 5 have no function, when Channel 8 is working.
Color macros table as below:
DMX value Color
0
0-7
OFF(blackout)
1
8-15
Red
2
16-23
Green
3
24-31
Blue
4
32-39
White
5
40-47
UV
6
48-55
R+G
7
56-63
R+B
8
64-71
R+W
9
72-79
R+UV
10
80-87
G+B
11
88-95
G+W
12
96-103
G+UV
13
104-111
B+W
14
112-119
B+UV
15
120-127
W+UV
16
17
18
19
20
21
22
23
24
25
26
27
28
29
30
31
DMX value
128-135
136-143
144-151
152-159
160-167
168-175
176-183
184-191
192-199
200-207
208-215
216-223
224-231
232-239
240-247
248-255
8
Color
R+G+B
R+G+W
R+G+UV
R+B+W
R+B+UV
R+W+UV
G+B+W
G+B+UV
G+W+UV
B+W+UV
R+G+B+W
R+G+B+UV
R+G+W+UV
R+B+W+UV
G+B+W+UV
R+G+B+W+UV
SPECIFICATIONS:
•
•
•
•
•
•
•
•
•
•
•
Weight: 3.4 kg
Size: 310 x 285 x 115mm
Power input: AC 90V-240V/50HZ-60HZ
Wattage: 105W
LEDs: 12 pcs 10RGBWUV (5 in one)
Beam angle of LEDs: 40 degree
3-pin female XLR socket and 3-pin male XLR socket
Built-in microphone
Four button LED digit display
RF remote control optional
Maximum 5pcs fixtures can be daisy chained together
9