1
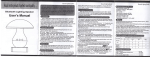
User Manual VP-861 USB Computer Internet Telephone Congratulations! You have just selected a Telex USB digital audio device. This product will give you consistently clear audio input for Internet phone, chat, and videoconferencing applications. VP-861 USB Computer Internet Telephone Contents System Requirements ........................................................................... 1 Installation ............................................................................................. 1 1. Connecting the phone to the USB Adapter ............................... 1 2. Connecting the USB Adapter to your PC ................................... 2 a. Windows 98 Instructions ................................................... 2 b.Windows ME Instructions ..................................................... 6 c. Windows 2000 Instructions ............................................... 8 d.Windows XP Instructions ................................................... 11 3. Installing Software ..................................................................... 13 Making and Ending Calls .................................................................... 14 Frequently Asked Questions .............................................................. 15 Contact Technical Support ................................................................. 15 Technical Specifications ..................................................................... 16 FCC Warnings ...................................................................................... 16 Safety............................................................................................... ...... 16 Figure 1 System Requirements This USB device works with any USB-compliant computer with the following operating systems: Windows 98, Windows ME, Windows 2000, and Windows XP. Installation The installation of the VP-861 is as easy as 1-2-3. First, connect the telephone to the USB adapter, second, connect the USB adapter to the computer, third, install the software from the CD. Read through all of the steps first before connecting any pieces. The connection of the phone to the USB adapter is the same process for every user. To install the USB adapter to your computer, follow the steps that apply to your Operating System. 1. Connecting the phone to the USB adapter. The telephone base adapter has one jack that the USB adapter connects to, and one power cable that connects to the wall. Connect the power cable for the phone to the base unit then plug the power cable into the wall socket. Connect the telephone line cord from the USB adapter to the back of the telephone base unit. Set the TONE\PULSE switch to TONE. Connect the battery cable to the battery. This is in the handset. Note: Allow the handset to fully charge for at least 12 hours prior to testing the adapter and making the first call. 1 Installation (cont.) Raise or reposition the antennas on the base adapter for best reception. It is recommended not to place the telephone base within two feet of any appliances, doing so may cause interference. 2. Plug the USB adapter into a USB port on your computer. Follow the installation steps that apply to your operating system. Windows 98 Instructions Installation The steps below were written for Windows 98. The steps are the same for Windows 98 and Windows 98 Second Edition. If you have another operating system, please refer to the section that refers to your version. Depending on your computer, the installation may or may not go through all of the installation steps. Your computer may go through many of the steps without prompting you. Please read through these steps carefully and completely before you make any adjustments to the PC. At the end of the process, if you can record your voice in Sound Recorder, the product is correctly installed and configured. If you cannot hear any playback from Sound Recorder, please contact Telex Computer Audio Technical Support for assistance. Two device drivers will be loaded, the USB Composite Device and the USB Audio Device. The USB Audio Device may also appear as the Telex USB Microphone. The drivers for the USB Composite and USB Audio Device/USB Microphone are found in the Windows operating system. Note: You do not need an installation disk to install the product. 1. Installation a. Close any program you may have running on your computer. b. Plug the usb connector into a USB port on the computer, not a hub or a keyboard. The Add New Hardware Wizard should find the USB Composite Device first. To begin installing the USB Composite Device, click Next. A powered USB hub might work after the installation is complete, but the product should be connected directly to the PC during the installation. 2 c. Select the option to let Windows search for the best driver for your device. (Recommended) and click Next d. Select the option to Specify a Location and type in c:\windows in the pathway and click Next e. Windows should find the driver and install it. Click Next to install the driver. Note: the location of the driver is c:\windows\inf\usb.inf f. When Windows has completed installing the USB Composite Device, click Finish g. After the USB Composite Device has been installed, the computer will start to install the USB Audio Device. Note: the USB Audio Device may also appear as the Telex USB Microphone 3 h. Select the option to let Windows search for the best driver for your device. (Recommended) and click Next i. Select the option to Specify a Location and type in c:\windows in the pathway and click Next j. Windows should find the driver and install it. Click Next to install the driver. Note the location of the driver is c:\windows\inf\wdma_usb.inf. k. When Windows has completed installing the USB Audio Device, click Finish To verify that installation has been completed, open the Device Manager. To open Device Manager, Click on Start, Settings, Control Panel. In the Control Panel, double click on the System icon. In the System Properties, click on the Device Manager tab, make sure View Devices by Type is selected. Open the category, Universal Serial Bus Controllers, you should see the USB Composite Device. Open the Sound Video and Game Controllers and you should see the Telex USB Microphone, or you may see USB Audio Device. If you have any trouble installing the USB Composite Device, or the USB Audio Device please contact Computer Audio Technical Support. 4 2. Configuration a. In the Control Panel, double Click on the Multimedia icon. In the Multimedia Properties, click on the Audio Tab. b. In the Recording section, there is a window for a Preferred Device. Select Telex USB Microphone/USB Audio Device as your Preferred Device. Ensure there is a check in the box titled Use only preferred devices. c. Under the word Recording, there is an unlabeled button. The button looks like a box with a blue microphone in it. Click on the blue microphone. This will bring up a volume control slider. Adjust the volume to full and then close the volume control slider. You may wish to adjust the volume to a different level depending on your application. d. In the Playback section, there is a window for a Preferred Device. Select Telex USB Microphone/USB Audio Device as your Preferred Device. e. Under the word Playback, there is an unlabeled button. The button looks like a box with a yellow speaker horn in it. Click on the yellow speaker. This will bring up a window with 3 or 4 volume control sliders. Adjust the volume to at full for each slider. After adjusting the volume, close the volume control slider window. You may wish to adjust the volume to a different level depending on your application. f. Click OK on the bottom of Sounds and Multimedia and then close the control panel. 3. Testing a. Open Windows Sound Recorder. To open Sound Recorder, click on Start, Programs, Accessories, Entertainment, Sound Recorder. b. Click on File, then Properties. In Properties, click on Convert Now, this will bring up the Sound Selection Window. c. Change the Name Box to read CD Quality from the drop down list. Press OK to close the Sound Selection Window. Press the OK button on the bottom of the Properties and that will bring you back to the Sound Recorder. d. Press the red record button and, speaking directly into your telephone, count to 10. The green line inside the black box will generally move and thicken slightly as you count. Press the stop button. Press the rewind button and then play. If you hear your voice, then the product is installed correctly. If you did not hear your voice, please contact Telex Computer Audio Technical Support. 5 Windows ME Instructions These steps were written for Windows ME. If you have another operating system, please refer to the section that refers to your version of Windows. Please read through these steps carefully and completely before you make any adjustments to the PC. At the end of the process, if you can record your voice in Sound Recorder, the product is correctly installed and configured. If you cannot hear any playback from Sound Recorder, please contact Telex Computer Audio Technical Support for assistance. Two device drivers will be loaded, the USB Composite Device and the USB Audio Device. The USB Audio Device may also appear as the Telex USB Microphone. The drivers for the USB Composite and USB Audio Device/USB Microphone are found in the Windows operating system. Note: You do not need an installation disk to install the product. 1. Installation a. Close any program you may have running on your computer. b. Plug the usb connector into a USB port on the computer, not a hub or a keyboard. The Add New Hardware Wizard should find the USB Composite Device first. A powered USB hub might work after the installation is complete, but the product should be connected directly to the PC during the installation. c. After the Composite Device is loaded the computer should detect the USB Microphone/USB Audio Device. d. After the computer detects the USB Microphone, it will install the drivers for it. To verify that installation has been completed, open the Device Manager. To open Device Manager, Click on Start, Settings, Control Panel. In the Control Panel, double click on the System icon. In the System Properties, click on the Device Manager tab, make sure View Devices by Type is selected. 6 Note: If this is your first time in the Control Panel for WinME, you will need to click on View All Control Panel Options to see the System Icon. Open the category, Universal Serial Bus Controllers, you should see the USB Composite Device. Open the Sound Video and Game Controllers and you should see the Telex USB Microphone, or you may see USB Audio Device. If those two items are in the appropriate categories, the product has been installed correctly. If you do not see either of the devices, please contact Telex Computer Audio Technical Support. Note: DO NOT delete anything from the Device Manager—doing so can severely impair the functioning of the computer. 2. Configuration a. In the Control Panel, double Click on the Sounds and Multimedia icon. In Sounds and Multimedia Properties, click on the Audio Tab. b. In the Sound Recording section, there is a window for a Preferred Device. Select Telex USB Microphone/USB Audio Device as your Preferred Device. Ensure that there is a check in the box titled Use only preferred devices. c. In Sound Recording, under the Preferred Device, there is a Volume button. Click the volume button. This will bring up a volume control slider. Adjust the volume to full and then close the volume control slider. You may wish to adjust the volume to a different level depending on your application. d. In the Sound Playback section, there is a window for a Preferred Device. Select Telex USB Microphone/USB Audio Device as your Preferred Device. e. In Sound Playback, under the Preferred Device, there is a Volume button. Click the Volume button. This will bring up a window with 3 or 4 volume control sliders. Slide the volume to full for each slider. After adjusting the volume, close the volume control slider window. You may wish to adjust the volume to a different level depending on your application. f. Click OK on the bottom of Sounds and Multimedia and then close the Control Panel. 7 3. Testing a. Open Windows Sound Recorder. To open Sound Recorder, click on Start, Programs, Accessories, Entertainment, Sound Recorder. b. Click on File, then Properties. In Properties, click on Convert Now. This will bring up the Sound Selection Window. c. Change the Name Box to read CD Quality from the drop down list. Press OK to close the Sound Selection Window. Press the OK button on the bottom of the Properties and that will bring you back to the Sound Recorder. d. Press the red record button and, speaking directly into the your telephone, count to 10. The green line inside the black box will generally move and thicken slightly as you count. Press the stop button. Press the rewind button and then play. If you hear your voice, then the product is installed correctly. If you did not hear your voice, please contact Telex Computer Audio Technical Support. Windows 2000 Instructions These steps were written for Windows 2000. If you have another operating system, please refer to the section that refers to your version. Please read through these steps carefully and completely before you make any adjustments to the PC. At the end of the process, if you can record your voice in Sound Recorder, the product is correctly installed and configured. If you cannot hear any playback from Sound Recorder, please contact Telex Computer Audio Technical Support for assistance. Two device drivers will be loaded, the USB Composite Device and the USB Audio Device. The USB Audio Device may also appear as the Telex USB Microphone. The drivers for the USB Composite and USB Audio Device/USB Microphone are found in the Windows operating system. Note: You do not need an installation disk to install the product. 1. Installation a. Close any program you may have running on your computer. b. Plug the USB connector into a USB port on the computer, not a hub or a keyboard. The Add New Hardware Wizard should find the USB Composite Device first. A powered USB hub might work after the installation is complete, but the product should be connected directly to the PC during the installation. 8 c. After the Composite Device is loaded the computer should detect the USB Microphone. d. After the computer detects the USB Microphone, it will install the drivers for it. To verify that installation has been completed, open the Device Manager. To open Device Manager, Click on Start, Settings, Control Panel. In the Control Panel, double click on the System icon. In the System Properties, click on the Hardware tab then click the Device Manager button. Make sure View Devices by Type is selected. Open the category, Universal Serial Bus Controllers. You should see the USB Composite Device. Open the Sound Video and Game Controllers and you should see the Telex USB Microphone, or you may see USB Audio Device. If those two items are in the appropriate categories, the product has been installed correctly. If you do not see either of the devices, please contact Telex Computer Audio Technical Support. Note: DO NOT delete anything from the Device Manager—doing so can severely impair the functioning of the computer. 2. Configuration a. In the Control Panel, double Click on the Sounds and Multimedia icon. In Sounds and Multimedia Properties, click on the Audio Tab. b. In the Sound Recording section, there is a window for a Preferred Device. Select Telex USB Microphone/USB Audio Device as your Preferred Device. Ensure that there is a check in the box titled Use only preferred devices. c. In Sound Recording, under the Preferred Device, there is a Volume button. Click the Volume button. This will bring up a volume control slider. Adjust the volume to full and then close the volume control slider. You may wish to adjust the volume to a different level depending on your application. 9 d. In the Sound Playback section, there is a window for a Preferred Device. Select Telex USB Microphone/USB Audio Device as your Preferred Device. e. In Sound Playback, under the Preferred Device, there is a Volume button. Click the Volume button. This will bring up a window with 3 or 4 volume control sliders. Slide the volume to at full for each slider. After adjusting the volume, close the volume control slider window. You may wish to adjust the volume to a different level depending on your application. f. Click OK on the bottom of Sounds and Multimedia and then close the Control Panel. 3. Testing a. Open Windows Sound Recorder. To open Sound Recorder, click on Start, Programs, Accessories, Entertainment, Sound Recorder. b. Click on File, then Properties. In Properties, click on Convert Now. This will bring up the Sound Selection Window. c. Change the Name Box to read CD Quality from the drop down list. Press OK to close the Sound Selection Window. Press the OK button on the bottom of the Properties and that will bring you back to the Sound Recorder. d. Press the red record button and, speaking directly into your telephone, count to 10. The green line inside the black box will generally move and thicken slightly as you count. Press the stop button. Press the rewind button and then play. If you hear your voice, then the product is installed correctly. If you did not hear your voice, please contact Telex Computer Audio Technical Support. 10 Windows XP Instructions These steps were written for Windows XP. If you have another operating system, please refer to the website for documentation that refers to your version of Windows. Please read through these steps carefully and completely before you make any adjustments to the PC. At the end of the process, if you can record your voice in Sound Recorder, the USB device is correctly installed and configured. If you cannot hear any playback from Sound Recorder, please contact Telex Computer Audio Technical Support for assistance. Two device drivers will be loaded, the USB Composite Device and the USB Audio Device. The drivers for the USB Composite and USB Audio Device are found in the Windows XP operating system. Note: You do not need an installation to install the Telex Computer Telephone Adapter. 1. Installation a. Close down any program or you may have running on your computer. b. Insert the USB plug of the device into an USB port on the computer, not a hub or a keyboard. The Found New Hardware Wizard should find a Telex USB Audio Device, then the USB Composite Device. After detecting the USB Composite Device, the computer will load the drivers for it. A powered USB hub might work after the installation is complete, but the USB device should be connected directly to the PC during the installation. c. After the Composite Device is loaded the computer, another Telex USB Audio Device will flash through the Found New Hardware. The computer should then detect the USB Audio Device. After the computer detects the USB Audio Device, it will install the drivers for it. To verify that installation has been completed, open the Device Manager. To open Device Manager, Click on Start, Control Panel. In the Control Panel, double click on the System icon. In the System Properties, click on the Hardware tab then click the Device Manager button, make sure View Devices by Type is selected. Open the category, Universal Serial Bus Controllers, you should see the USB Composite Device. Open the Sound Video and Game Controllers and you should see the USB Audio Device. If those two items are in the appropriate categories, you have the device installed. If you do not see either of the devices, please contact Telex Computer Audio Technical Support. Note: DO NOT delete anything from the Device Manager—doing so can severely impair the functioning of the computer. 11 2. Configuration a. In the Control Panel, click on Classic View, double Click on the Sounds and Audio Devices icon. In Sounds and Audio Devices Properties, click on the Audio Tab. b. In the Sound Playback Section, there is a window for a Default Device. Select Telex USB Audio Device as your Default Device. c. Under the Default Device, there is a Volume button. Press the volume button. This will bring up a volume control slider. You will see three or four volume control sliders. Slide the volumes to at least half to start with. You may wish to adjust the volumes higher or lower after you have tested the device. d. In the Sound Recording Section, there is a window for a Default Device. Select Telex USB Audio Device as your Default Device. e. Under the Default Device, there is a Volume button. Press the volume button. This will bring up a volume control slider. Slide the volume to at least half to start with. You may wish to adjust the volume higher or lower after you have tested the device. f. Ensure that there is a check in the box titled Use only default devices. Click OK on the bottom of Sounds and Audio Devices and then close the Control Panel. 12 3. Testing a. Open Windows Sound Recorder. To open Sound Recorder, click on Start, All Programs, Accessories, Entertainment, Sound Recorder. b. Click on File, then Properties. In Properties, click on Convert Now. This will bring up the Sound Selection Window. c. Change the Name Box to read CD Quality from the drop down list. Press OK to close the Sound Selection Window. Press the OK button on the bottom of the Properties and that will bring you back to the Sound Recorder. d. Press the red record button and, speaking directly into the microphone, count to 10. The green line inside the black box will generally move and thicken slightly as you count. Press the stop button. Press the rewind button and then play. If you hear your voice, then the device is installed correctly. 3. To install your software, follow the steps below. a) b) c) d) e) Insert the Software CD that came with your Telex VP-861. The Installation file will automatically install the iConnectHere software. The CD will guide you through installation of the Telex VP-861 with iConnecthere software. During the Playback and Recording Wizard, please make sure to select Telex VP-861 from the drop-down menu as the device you wish to use with your iConnectHere software. Activate your FREE minutes by going to www.iConnectHere.com/Telex. You will be instructed to enter your enclosed UserID, Password and email address to activate your account. Enter your UserID and PIN when prompted and click Login to begin making phone calls. 13 Making and Ending calls Note: Your computer will not recognize the dial tones from your telephone. You must use the computer software to dial or end all calls. To Make a Call: a) To dial the number, enter the country code, and then enter the phone number. Enter the numbers by using the number keypad on your computers keyboard, or by clicking on the numbers on the on-screen number pad with the mouse. Press the Enter key on the keyboard, or use the mouse to click the GREEN onscreen handset button to dial the number. Make sure you have pressed the Talk button on the handset of the telephone. Ending calls b) To end the call, click the RED on-screen handset button. Also be sure to press the Talk button on the handset of the telephone. 14 Frequently Asked Questions It recorded in Sound Recorder great the first time but not the second, why? When you close Sound Recorder and reopen it, Sound Recorder will revert back to Radio Quality. Reset to CD Quality and make a new recording. Do I need to change to CD Quality to use other programs? CD Quality is for the Sound Recorder program. You do not need to open Sound Recorder, change to CD Quality and then open your other program. Keep in mind the program you are using may have special settings you need to adjust. Can I use the product in a hub? Telex will not guarantee our products’ performance through third party hardware. For best results, you should plug the microphone into an USB port on the computer. My USB Composite Device has a Green Question Mark next to it, what do I do? In the Device Manager, click the USB Composite Device and look at the properties. Look at the General Tab, at Device Status. If the Device Status says the device is working properly, don’t do anything. If the status does not say working properly, contact our Technical Support Department. Contact Technical Support If you did not hear your voice, please contact Telex Computer Audio Technical Support for assistance by one of the following methods: 1) Complete a help request form on our website: http://www.computeraudio.telex.com/support/index.html 2) Email to [email protected] 3) Call 800-328-3771 ext. 2 If you experienced difficulties installing the included software, contact iConnectHere Technical Support for assistance by one of the following methods: 1) Review FAQs at http://www.iConnectHere.com/Telex 2) Email to [email protected] 15 Technical Specifications Compliant with USB General and Audio Class specifications. Plug & PlayAll drivers are included in Windows 98, Windows ME, Windows 2000, and Windows XP. Supports 8 and 16-bit formatting stream Variable sampling rate controlled by host for 8, 11, 22, 44 kHz Isochronous, high speed device. Gain range: -24dB to +30dB FCC Warnings This device complies with Part 15 of the FCC Rules. Operation is subject to the following two conditions: 1. this device may not cause harmful interference, and 2. this device must accept any interference received, including interference that may cause undesired operation. Note: This equipment has been tested and found to comply with the limits of a Class B digital device, pursuant to part 15 of the FCC Rules. These limits are designed to provide reasonable protection against harmful interference in a residential installation. This equipment generates, uses and can radiate radio frequency energy and, if not installed and used in accordance with the instructions, may cause harmful interference to radio communications. There is no guarantee however that interference will not occur in a particular installation. If this equipment does cause harmful interference to radio or television reception, which can be determined by turning the equipment off and on, the user is encouraged to try to correct the interference by one or more of the following measures: Reorient or relocate the receiving antenna Increase the separation between the equipment and receiver Connect the equipment into an outlet on a circuit different from that to which the receiver is connected Consult the dealer or an experienced radio/TV technician for help The user is cautioned that changes or modifications not expressly approved by the party responsible for compliance could void the users authority to operate the equipment. Safety For the safety of you and your equipment, always follow these precautions: Keep your converter away from heat sources, such as radiators, heat registers and other similar appliances. Keep your converter away from liquids. Protect your converter from dampness. Not recommended for small children. Children may choke through entanglement. May also contain small parts. 16 NOTES 17 38110-139 Rev B 7/02 18