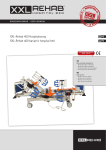
Download eBS Medical Device User Manual
Transcript
TGA e-Business Application Lodgement User Reference Workbook Medical Devices 1 NAVIGATION............................................................................................................. 6 Medical Device – Home Page............................................................................................................................... 6 Screen Buttons ................................................................................................................................................... 6 Search Screen Buttons ....................................................................................................................................... 7 Screen Adjustment............................................................................................................................................. 7 ARTG Clone Search Buttons............................................................................................................................. 7 Mandatory Fields ............................................................................................................................................... 8 Help ................................................................................................................................................................... 8 MANUFACTURERS EVIDENCE ............................................................................... 9 To Commence Manufacturer’s Evidence .......................................................................................................... 9 New Notification.............................................................................................................................................. 10 Certification Details ......................................................................................................................................... 11 Enter details for an Existing Manufacturer ...................................................................................................... 11 Enter Details for a New Manufacturer ............................................................................................................. 13 Selecting OTG/IVD as Certification Details.................................................................................................... 15 Manufacturer Evidence - Page 2 ....................................................................................................................... 16 Enter the Scope of the Certification as GMDN Codes..................................................................................... 16 To cease making a GMDN Selection............................................................................................................... 18 Entering Restrictions on Scope........................................................................................................................ 18 Manufacturer Evidence - Page 3 ....................................................................................................................... 19 Create Supporting Document List - Evidence Types....................................................................................... 19 Validating Manufacturer Evidence .................................................................................................................. 21 ACCEPTED MEDICAL DEVICE EVIDENCE AND CREATING A VARIATION ...... 22 To commence Creating a Variation to Accepted Medical Device Evidence ................................................... 23 Locating Accepted Manufacturer Evidence..................................................................................................... 23 Selecting your Accepted Manufacturer Evidence............................................................................................ 25 Creating a Variation......................................................................................................................................... 25 Updating Manufacturers Evidence (Variation)................................................................................................ 26 Additional GMDN Codes ................................................................................................................................ 28 Adding Supporting Documentation ................................................................................................................. 30 Validating your Variation to Accepted Medical Device Evidence .................................................................. 32 DEVICE CHANGE REQUEST ................................................................................. 33 Overview.............................................................................................................................................................. 33 To Commence a Device Change Request........................................................................................................ 33 Entering Device Change Request Details ........................................................................................................ 34 Change Request Type ...................................................................................................................................... 34 Validating a Change Request........................................................................................................................... 35 Printing a Tax Invoice...................................................................................................................................... 36 CONFORMITY ASSESSMENT ............................................................................... 38 Application for a Conformity Assessment Page 1............................................................................................ 38 To Commence a Conformity Assessment........................................................................................................ 38 Application for a Conformity Assessment Certificate ..................................................................................... 39 Applicant and Manufacturer Details ................................................................................................................ 39 Existing Manufacturer Name ........................................................................................................................... 40 New Manufacturer Name................................................................................................................................. 41 Completing Manufacture details...................................................................................................................... 41 2 Application for a Conformity Assessment - Page 2 ......................................................................................... 42 Certificate Device Details ................................................................................................................................ 42 Device Details List........................................................................................................................................... 42 Selecting a Device Classification Level........................................................................................................... 45 Conformity Assessment Procedure.................................................................................................................. 45 EU Medical Device Requirements................................................................................................................... 45 Application for a Conformity Assessment – Page 3......................................................................................... 46 Applicant’s Certifications ................................................................................................................................ 46 Validating Conformity Assessment ................................................................................................................. 46 Printing a Tax Invoice...................................................................................................................................... 47 CLASS III/AIMD VARIATION .................................................................................. 49 Variation of Device Class III/AIMD ARTG Entry - Page 1............................................................................ 49 To Commence Variation (Class III/AIMD)..................................................................................................... 49 Variation of a Device - Application Details..................................................................................................... 50 Identifying/Searching Class III/AIMD ARTG Entries .................................................................................... 50 Cloning a Class III/AIMD ARTG Entry.......................................................................................................... 52 Variation of Device application (other Classes) - Page 2B .............................................................................. 53 Manufacturing Details (Other Classes)............................................................................................................ 53 Developing a List of Device Details ................................................................................................................ 53 Variation of Device Application (other Classes) - Page 5................................................................................ 56 Certification of Variation of Class III/AIMD Application............................................................................... 56 Attaching Conformity Documents to a Variation of Device Application........................................................ 56 Validating a Variation of Device Application ................................................................................................. 58 Printing a Tax Invoice...................................................................................................................................... 58 DEVICE APPLICATION........................................................................................... 61 An Overview........................................................................................................................................................ 61 Device Application (Medical Device – Other Classes) – Page 1...................................................................... 61 To commence a Device Application (Other Classes) ...................................................................................... 62 Device Application Details .............................................................................................................................. 62 Sponsor Details ................................................................................................................................................ 63 Cloning an ARTG Inclusion For a Device Application................................................................................... 64 Specific Details for your Device Application .................................................................................................. 66 Device Product Type ....................................................................................................................................... 67 Device Single Product ..................................................................................................................................... 68 Device Procedure Pack .................................................................................................................................... 69 Device Packaged as a System .......................................................................................................................... 70 Device Application Medical Device – Included – (Class 1) - Page 1 .............................................................. 71 To commence a Device Application Medical Device – Included (Class 1)..................................................... 71 Application Details .......................................................................................................................................... 72 Sponsor Details ................................................................................................................................................ 72 Cloning an ARTG Inclusion For a Device Application................................................................................... 73 Application Class Details:................................................................................................................................ 75 Device Product Characteristics of your Device Application............................................................................ 76 1. Device Application Page - 2A (Export Only)............................................................................................... 77 Manufacturing Details (Class 1) Existing Manufacturer ................................................................................. 77 Manufacturing Details (Class 1) New Manufacturer ....................................................................................... 78 Manufacturing Details - Export Names ........................................................................................................... 78 Searching for GMDN....................................................................................................................................... 78 3 2. Device Application Page 2A (Other Therapeutic Goods).......................................................................... 81 Manufacturing Details (Class 1) Existing Manufacturer ................................................................................. 81 Manufacturing Details (Class 1) New Manufacturer ....................................................................................... 82 Searching for GMDN....................................................................................................................................... 82 3. Device Application - Page 2A Medical Device – Included (Class 1) ......................................................... 85 Manufacturing Details (Class 1) Existing Manufacturer ................................................................................. 85 Manufacturing Details (Class 1) New Manufacturer ....................................................................................... 86 Searching for GMDN....................................................................................................................................... 87 1. Device Application - Page 2B........................................................................................................................ 89 Manufacturing Details Other Therapeutic Goods Page 2B.............................................................................. 89 2. Device Application - Page 2B........................................................................................................................ 92 Manufacturing Details - Medical Device – Included (Other Classes), Packaged as a System ........................ 92 Additional Fields Class III/AIMD ................................................................................................................... 93 3. Device Application - Page 2B........................................................................................................................ 95 Manufacturing Details - Medical Device – Included (Other Classes), Procedure Pack or Single Product...... 95 Device Application - Page 3A............................................................................................................................. 98 Medicated or Formulated................................................................................................................................. 98 Develop an Ingredient List – Ingredient Name................................................................................................ 98 Adding a New Ingredient............................................................................................................................... 100 Finalising your Ingredient List....................................................................................................................... 101 Device Application - Page 3A – Medical Device – Included (Class 1) .......................................................... 102 Medicated or Formulated............................................................................................................................... 102 Develop an Ingredient List – Ingredient Name.............................................................................................. 103 Adding a New Ingredient............................................................................................................................... 104 Device Application - Page 4A.......................................................................................................................... 107 Procedure Pack or System Components Australian Market .......................................................................... 107 Developing a Component List ....................................................................................................................... 107 Device Application Page 4b.............................................................................................................................. 109 Procedure Pack or System Components Ancillary ........................................................................................ 109 Developing a Component List ....................................................................................................................... 109 Device Application - Page 5 ............................................................................................................................. 111 Applicant’s Certification................................................................................................................................ 111 Device Application Applicant’s Certification................................................................................................ 111 Attaching Supporting Documentation ........................................................................................................... 112 Validating Device Application ...................................................................................................................... 113 VIEW DRAFTS OVERVIEW .................................................................................. 115 VIEW DRAFTS ...................................................................................................... 116 Identifying your Draft Submission or Application ........................................................................................ 116 Printing a list of your Draft Submissions and Applications........................................................................... 116 Scrolling through View Drafts list ................................................................................................................. 117 Searching for your Draft Submission or Application..................................................................................... 117 Search options................................................................................................................................................ 117 Field Search options....................................................................................................................................... 117 Column Search Option................................................................................................................................... 119 Information Buttons and ................................................................................................................... 119 Deleting a Draft ............................................................................................................................................. 120 Print Preview a Draft (Not including Request Change)................................................................................. 120 4 Selecting your draft application/submission .................................................................................................. 121 VIEW LODGED SUBMISSIONS............................................................................ 122 Searching for your Lodged Submission or Application................................................................................. 122 Printing a list of your Lodged Submissions and Applications ....................................................................... 123 Scrolling through View Drafts list ................................................................................................................. 123 Search options................................................................................................................................................ 124 Field Search options....................................................................................................................................... 124 Column Search Option................................................................................................................................... 125 Information Buttons and ................................................................................................................... 126 5 NAVIGATION Medical Device – Home Page The Medical Device section of the TGA e-Business system enables you to submit a range of Device Applications electronically. The e-Business system allows you to: Submit Manufacturers Evidence (Manufacturers Evidence) Create a Variation to - (Accepted Medical Device Evidence) Submit a Device Change Request (Request Change) Apply for a Conformity Assessment Certificate (Conformity Assessment) Make a Variation to a Class II/AIMD Device (Class III/AIMD Variation) Lodge a Device Application (Device Application) View/Print ARTG Certificates (TGA Information) - Screen Buttons The following series of buttons can be found at the top and bottom of the eBusiness screens. They are used to navigate through, or initiate an action within an e-Business application. 6 The following series of buttons can be found within the e-Business search screens. They are used to initiate an action related to a field . Search Screen Buttons The following series of buttons are found within search screens in the eBusiness system. They are used to initiate an action within that particular search screen. Screen Adjustment At the home page, between the menu and the screen view there are sets of triangular shaped symbols. When you click on these symbols, the right hand screen view will expand to fill the entire screen. This may be of use when filling out electronic forms on the TGA ebusiness system. ARTG Clone Search Buttons These buttons are found within the ARTG Clone search screen. They are used to navigate or initiate an action. 7 Mandatory Fields A number of fields within the TGA e-Business sytem are mandatory. These mandatory fields are indicated with a ‘red star’ (*). If you miss filling out one of these mandatory fields, your e-Business application will not complete until the mandatory field is filled. Help There are different forms of help available in the TGA e-Business System. - Portal help Page help Question help User documentation Portal Help is found in the drop down list menu under your user name on the TGA e-Business home page. It contains help on navigating around the e-Business screens. Page help will give an outline of the information required within the page. Question help gives an explanation where a question has been asked. User documentation provides a step by step guide to eBS from a Medical Device perspective and is located under Training and then the Documentation link off the main menu drop down list. 8 MANUFACTURERS EVIDENCE Prior to making a Device Application for: An Included Medical Device (except for Class 1); Other Therapeutic Goods – Registered - IVD and Other Therapeutic Goods – Listed - IVD. the Manufacturers Evidence screen needs to be completed. The details entered on Manufacturers Evidence should demonstrate to the TGA that the correct Conformity Assessment steps have been taken to confirm the presence of a Quality Management System. Manufacturers Evidence - Page 1 NOTE: (Click on the (Click on the for an explanation of the current screen or field) for an explanation of a question) An Application Identifier will be generated automatically when you save, close, validate, or go to the next page of the form. A number of the fields will generate automatic information. This is based on your Log-In details. (Ie – Sponsor Details, address etc) Agent Details will only be displayed if you are logged in as an Agent. To Commence Manufacturer’s Evidence Select Portal – Therapeutic Goods Administration When the screen drops down Select Create Applications and submissions Select Medical Device then Click on Manufacturer Evidence to open the link 9 New Notification Notification Details At the Field Sponsor’s Own Reference: enter your own reference details (this can help you to identify your own manufacturers evidence) Sponsor Details At the Field Sponsor ID: If you are logged in as a sponsor your Sponsor ID will be automatically selected (based on your log-In); Or If you are logged in an an agent you will need to make a selection from the drop down Sponsor ID list The Contact Name and Contact Email will be automatically generated when you log-in. 10 Certification Details This field relates to the legislation the certificate was issued in accordance with (eg Council Directive 93/42EEC (MDD) ). You selection here sets up the page format for the remainder of this screen. (Selecting IVD/OTG Quality System Certification results in a slightly different screen – see alternative notes) At the field Certification Issued Under: Select your relevant option from the drop down list. Enter details for an Existing Manufacturer At the field Manufacturer Name: You will need to search for the correct Manufacturer of your device. Click on the button The following search screen will appear Search for your manufacturer by typing in the name or first few letters of the name (In this instance her) Then click on the Search button A list of recognised Manufacturers with the letters ‘her’ in the title will be listed. 11 Select your Manufacturer by pointing to it and clicking. This will highlight the Manufacturer Once you have selected your Manufacturer, Click on If you make an incorrect selection and need to make a different selection, Click on This will return you to the Notification of Manufacturer’s Conformity Assessment screen where you can commence your search again. This will take your selection and insert it in the Manufacturer Name field on the Manufacturers Evidence screen. It will also automatically enter the Manufacturer Address in the Manufacturer Address as on Evidence: field NOTE: There may be more than one address for this manufacturer – the address used here should be the address that is supplied with any supporting evidence for the submission. If you make a mistake or need to make a different selection, Click on This will clear the Manufacturers details from the screen where you can commence your search again. 12 Enter Details for a New Manufacturer If the manufacturer is new (does not appear on the TGA Client Database) you will need to add the Manufacturer details. Click on The following screen will appear. You will need to type in The New Manufacturer Name The New Manufacturer Address, and Select the Manufacturer Country from the drop down list. You will need to provide documents proving the manufacturer address details. These can be attached electronically. Click on This will access your own computer system where you can select the relevant documents relating to the manufacturer. The documents will be added to the Request for entry of a new manufacturer on the TGA Client Database. Once you have completed filling out the new manufacturer details, you should print a copy of your request. Click on And follow the prompts to print the request. Once you have printed your request, you can then forward it to the TGA. 13 Click on This takes you back to page 2A of your Device Application. At this point, you should and your application. Until the new manufacturer details are acknowledged by the TGA, you will not be able to submit the manufacturer evidence (new notification). You should receive an e-mail from the TGA confirming the receipt of your New Manufacturer details. Take note of your Application Identifier Number for accessing your draft manufacturer evidence (new notification) once your new manufacturer has been included on the TGA database. At a later date, you will receive an e-mail from the TGA advising that the new manufacturer has been added to the database. You will then be able to access your draft, add the manufacturer then continue with your application. Class of Device(s): Select the Class of Device(s): by clicking the relevant box You can select more than one class. Conformity Assessment Procedure Select a relevant Schedule from the drop down list at the Conformity Assessment Procedure: field. Assessment Body At Assessment Body: Select from the drop down list, the organisation that carried out the QMS certification. Type in Issuer’s File Reference Number 14 (This would be the specific number for your device, allocated by the Issuing Authority) Type in the Issuer Certificate Number Type in the Evidence Issue Date: Note: If left blank, the Evidence Expiry Date will default to 5 years from the Evidence Issue Date. Type in the Evidence Expiry Date: Click on at the top or bottom of the screen. This will initiate an Evidence Identifier Number which is listed at the top of the Screen Take note of this number for your reference. Selecting OTG/IVD as Certification Details If, at the Certification Issued Under drop down list you selected the option of IVD/OTG Quality System Certification, the options on this page change You will be required to fill out the Manufacturers (as above) And Type in the Source of Certification in the free text field provided. Click on This will take you to Page 2 of Manufacturers Evidence. 15 Manufacturer Evidence - Page 2 Enter the Scope of the Certification as GMDN Codes At the GMDN (Global Medical Device Nomenclature) Code field you will need to initiate a search to find the relevant GMDN Code(s) Click on the button. The following screen appears In the GMDN Text: field, type in the name or the starting letters of the device OR In the GMDN Code: field, type in the code Press (By typing in a minimum of the first 3 or 4 letters of the device, the system will list all GMDNs with those letters in the GMDN term.) 16 The system produces a Selection of GMDN (Global Medical Device Nomenclature) containing your particular selection. (In this instance – cotton) To select the specific GMDNdevice, point and click on the GMDN to highlight your selection. From this point, you can view the definition of the highlighted selection. You can make multiple selections of GMDN’s by holding down the Control Key on your keyboard. Click on A window screen similar to the above will appear, giving the definition for the highlighted GMDN. To close the window. Click on If the highlighted GMDN is correct, Click on This adds your selection to the list of selected GMDN codes. (you can select more than one GMDN – just repeat the selection process.) 17 If you make a mistake, or wish to remove a selection, point to and highlight the item to be removed from the list, then Click on If you wish to remove all of the items selected, simply Click on To cease making a GMDN Selection To cease making a GMDN selection, Click on This will return you to Manufacturers Evidence screen where you can commence your search again. Once you have finalised your selection of GMDN items, Click on This will automatically move your selection back to page 2 of the Manufacturers Evidence screen. Entering Restrictions on Scope If there is a Restriction on the Scope of your certification, enter the details in the Restrictions on Scope field, which is a free text field – simply type in the required text. Click on This takes you to page 3 of Manufacturers Evidence. 18 Manufacturer Evidence - Page 3 Create Supporting Document List - Evidence Types You are required to provide a copy of the supporting documentation / evidence for your device. What Type of Evidence? provides an explanation of the type of evidence required. In Electronic Format (Instructions on attaching an electronic copy of the supporting documentation/Evidence, (eg PDF, Word etc) to your Manufacturer Evidence. Click on This takes you to a File Upload screen where you must specify: - the Type of Conformity Document relating to your Manufacturer Evidence; And - allows you to select the actual document from your own computer system. 19 Select a relevant Conformity Document Type: from the drop down list. Now use the button to select the relevant document on your Desktop/Computer. When you identify the correct document, click on the document Click on The Type of Document and Selected Document will be added to Page 3 of the Manufacturers Evidence screen. Repeat this process to add any successive documents. If you make a mistake or need to make a different selection, Click on This will remove the attachment and you can commence your search again. You have the option of providing information on the time it has taken to complete the Manufacturers Evidence form. This should be entered in whole numbers. 20 You have now entered all the required information relating to Manufacturers Evidence. Validating Manufacturer Evidence Before you validate the details entered, you may wish to review the information entered into your Notification. Click on All the information you have entered will be set up in an easy to read, one page format. You may wish to print this for your (file) reference. To return to the last page of the Manufacturers Evidence Click on Once you are satisfied with the information you have entered finalise the process, Click on Successful completion of the Manufacturers Evidence form will return at the top of the screen as well as a Unique Evidence Identifier number. NOTE: If you miss an entry, the system will not Validate. The system will provide you with a message relating to any missing information - Eg You will need to go back and complete or correct the information before you can proceed. You can return to the relevant page by either clicking on the missed validation message or clicking on the previous button. You should record this number for later reference. ` Once your evidence has successfully validated, you will need to submit the application. Click on This completes Manufacturers Evidence. You will find your Notification (Evidence Identifier) under the e-Business list heading “View Lodged Submissions”. 21 ACCEPTED MEDICAL DEVICE EVIDENCE AND CREATING A VARIATION You may wish to use this option to review an accepted manufacturers evidence – to confirm the details. The option also enables you to Create a Variation of an Accepted Manufacturers Evidence. Such variations might include: - adding another GMDN term; - adding another Class; - amending Manufacturers details; or - updating certificate details (ie expiry date) NOTE: (Click on the (Click on the for an explanation of the current screen or field) for an explanation of a question) A variation to an accepted Manufacturer Evidence keeps the original Application Identifier - the version number will be updated. Once accepted by the Therapeutic Goods Administration (confirmed by email), your Manufactures Evidence will appear within Accepted Manufacturers Evidence about 24 hours later and can be used with device applications. From this point, you can identify Accepted Manufacturers Evidence and Create a Variation to an Existing Accepted Manufacturers Evidence. Variations must meet specific requirements. Please ensure you are able to make a variation and are not required to submit a new Manufacturer Evidence form. 22 To commence Creating a Variation to Accepted Medical Device Evidence Select Accepted Medical Device Evidence from the Main Menu Once you select Accepted Medical Device Evidence, the following screen appears. Locating Accepted Manufacturer Evidence Scroll through the list to locate your Evidence Identifier code. Use the button To bring up the next page. OR Click on Which brings up the following screen. 23 Type in any keywords from your application (eg cotton) and Click on This takes you back to the list of Manufacturers Evidence page where the section should have been greatly reduced – allowing you to make a quicker selection. The Limit the number of results to: is a drop down list allowing you to restrict the number of results for your search from 10 to 200 items. The Sort results by: allows you to sort the results by the oldest date or newest date. You are also able to use the sort option available on each heading to sort the evidence into alpha, numeric or date order. 24 Selecting your Accepted Manufacturer Evidence Once you have found the correct item, Point to and Click on the relevant Identifier code. This will display the accepted Manufacturer Evidence you have selected. You should print a copy of this screen for your reference. Click on And follow the prompts to print the information. Once you have confirmed that this is the correct Accepted Manufacturer Evidence, you can Create a (New) Variation. Creating a Variation Click on The below information message will be displayed. Click on OK. 25 When the variation has been created you will be shown the below message. This means that an identical document has been drafted and you can now access and amend that document under the View Drafts menu option. NOTE: You can only undertake one Variation at any time. If a variation already exists, you will get the following message: Click on This takes you back to the Manufacturer Evidence – Accepted page. Click on This will return you to the Home Page where you can then Select Portal – Therapeutic Goods Administration When the screen drops down Click on View Drafts. From this point you can identify and select your Variation document and make any necessary changes. Go to page 112 of View Drafts for search options. Updating Manufacturers Evidence (Variation) When you have identified your ‘cloned’ variation, point to and click on it. 26 This will bring up the Manufactures Evidence (Variation Screen) You are now able to make a variation of the cloned evidence. Note that the system gives a Version No: 2 to the Variation! At Sponsor’s Own Reference: You can Change or Add additional information to enable you to more easily identify your (cloned) Manufacturer’s Evidence (Variation). The Certification details, Manufacturer Name and Address fields have been automatically populated. Under special conditions, if the Manufacturers name or address has changed, you can update the details. To Change the manufacturers name and or address, Click on Which brings up the following additional fields Type in the new name and or address. 27 You can add additional Classes to your application by clicking on the relevant box(s) at Additional Classes(s) of Device: You can choose an alternative Conformity Assessment Procedure: (only if the conformity assessment procedures undertaken has increased in scope) and Assessment body by selecting from the drop down list. You will need to type in the Issuer’s File Reference Number: And Issuer Certificate Number: You are also able to amend Evidence Re-Issue Date And Evidence Expiry Date Additional GMDN Codes Your accepted evidence will have a list of GMDN Codes. You can add to these codes. Click on The following screen will appear In the GMDN Text: field, type in the name or the starting letters of the device OR In the GMDN Code: field, type in the code Type in at least the first three characters of the device name. 28 Click on By typing in a minimum of the first 3 letters of the device, the system will list all GMDNs with those letters in the device. You can make multiple selections of GMDN’s by holding down the Control Key on your keyboard. The system produces a Selection of GMDN (Global Medical Device Nomenclature) containing your particular selection. (In this instance – wrap) Point to and click on the required GMDN then Click on This takes you selection and puts it into a GMDN list box. You can continue to make further GMDN code selections by following this same sequence. If you select the incorrect line/item you can remove one or more selection. To remove one selection, point to the item and then Click on To remove all selected items Click on When you have found all the GMDN codes, that you require, scroll to the bottom of the screen and Click on When searching for your GMDN item, if you need to view a definition of that item, highlight your selection then Click on This brings up the definition of your selected item. 29 To close the definition screen Click on Close Window This takes you back to your search window At Restrictions on Scope: You should type in any restrictions on the scope of the manufacturer evidence. Adding Supporting Documentation You will need to attach an electronic copy of your supporting documentation. To do this Click on This takes you to a File Upload screen where you must: - specify the Type of Document you have relating to your application; and - select the actual document to be attached from your computer system. Select a relevant Document Type: from the drop down list 30 Now use the button to search for and select the relevant document(s) on your Desktop/Computer. Once you locate the relevant document, Click on This attaches a copy of the document to your Variation of Device Application. NOTE: If the document has not changed, attach the same document again. Once you have entered all the information required you can Validate your Variation to Accepted Medical Device Evidence. 31 Validating your Variation to Accepted Medical Device Evidence Click on This combines all the information for your Variation to Accepted Manufacturer Evidence into a neat, easy to read format. You should print a copy of this page for your own reference. Click on And follow the prompts to print a copy of the document. Click on This returns you to the Manufacturers Evidence (Variation) screen. Click on If all the information has been correctly added appear at the top of the screen. will NOTE: If you miss an entry, the System will not Validate. The system will provide you with a message relating to any missing information - Eg You will need to go back and complete or correct the information before you can proceed. You can return to the relevant page by either clicking on the missed validation message or clicking on the previous button. Click on Which will submit your Manufacturer Evidence (Variation). You should now find your submitted Manufacturer Evidence (Variation) under View Lodged Submissions. 32 DEVICE CHANGE REQUEST Overview A device change request form is used when an ARTG record needs to be changed. Circumstances where such a change may be necessary include, but are not restricted to: An expansion or contraction of the intended purpose of an included medical device; Amending the GMDN code to reflect a term which more accurately describes the kind of medical device covered by the ARTG entry; Correcting incorrect information supplied at the time of application; Notification of variations to product information in relation to Registered or Listed Therapeutic Goods. NOTE: (Click on the (Click on the for an explanation of the current screen or field) for an explanation of a question) An Application Identifier will be generated automatically when you save, close, validate, or go to the next page of the form). A number of the fields will generate automatic information. This is based on your Log-In details. (Ie – Sponsor Details, address etc) Agent Details will only be displayed if you have an Agent Log-In. To Commence a Device Change Request Select Portal – Therapeutic Goods Administration When the screen drops down Select Create Applications and submissions Select Medical Device then Click on Request Change to open the link to 33 Entering Device Change Request Details Sponsor Details At the Sponsor Name: field select the relevant sponsor name from the drop down list (if applicable) Agent Name: Contact Name: Email Address: Phone Number: will be automatically inserted and will depend your log-in. Change Request Type Type in your Australian Register of Therapeutic Goods Number at the ARTG No field. Change Type: You will need to select the type of change you are making by clicking the appropriate radio button . Your selection will generate a fee amount payable at Payment Details Fee: Type a brief Description: of the type of change you are making to your device. 34 Validating a Change Request When you have entered your description Click on The system will confirm if your Device Change Request has Passed Validation (ie Validation Passed). The system will advise you if you have missed any fields. It will also generate an Application Identifier number. The Application Identifier number will be listed at the top of the screen. You should take note of this number for your reference. Before you submit your Device Change, you will need to print off a copy for your records. Click on And follow the prompts to printo a copy of the Change Request. Keep this copy with your documentation relating to the Change Request. To Submit your Change Request Click on The system will warn you to print the form or press OK to submit. 35 Printing a Tax Invoice This produces a copy of your Tax Invoice from the TGA. Note: Please ensure you print this invoice. The invoice cannot be retrieved if you decide to submit your application without printing. If you do forget to print the invoice you will need to contact the Finance area of TGA on 1800 141 144 to obtain a copy. Click on To print a copy of the Tax Invoice. If you make a mistake or need to make a change, Click on This will return you to Device Change Request validated screen where you can make any necessary amendments. Once you are happy with your details, and have printed the Tax Invoice, 36 Click on You will again be warned to print the Tax Invoice. If you have printed the Tax Invoice, Click on The system will submit your Device Change Request and provide you with a confirmation similar to the following. This completes the Device Change Request form. 37 CONFORMITY ASSESSMENT The TGA e-Business system allows you to make an application to the TGA for certification of a manufacturers Quality Management System. The details of the application must be in line with Parts 1 to 8 of Schedule 3 of the TGA Regulations. Application for a Conformity Assessment Page 1 NOTE: (Click on the (Click on the for an explanation of the current screen or field) for an explanation of a question) An Application Identifier will be generated automatically when you save, close, validate, or go to the next page of the form). A number of the fields will generate automatic information. This is based on your Log-In details. (Ie – Sponsor Details, address etc) Agent Details will only be displayed if you have an Agent Log-In. To Commence a Conformity Assessment Select Portal – Therapeutic Goods Administration When the screen drops down Select Create Applications and submissions Select Medical Device then Click on Conformity Assessment to open the link to 38 Application for a Conformity Assessment Certificate You will need to read and understand the text and related information on Conformity Assessment at the start of this screen. Understanding the requirements of and your obligations in relation to Conformity Assessment are essential to the successful lodging of an Application for a Conformity Assessment Certificate. Once you are familiar with the information at the start of this screen, proceed to: Applicant and Manufacturer Details At Conformity Assessment Description: New applicants should type in your own reference; Existing holders of Conformity Assessment Certificates, type in the change required and the related Certificate number. Applicant Details At the Field Client Name: your Client Name will be automatically selected (based on your Log-In); Or you will need to make a selection from the drop down Client Name list The Contact Name and Contact Email will be automatically generated from your log-in. You may need to update your telephone and/or fax details. 39 Existing Manufacturer Name At the field Manufacturer Name: You will need to search for the correct Manufacturer of your device. Click on the button The following search screen will appear Search for your manufacturer by typing in the name or first few letters of the name then Click on A list of recognised Manufacturers with the letters you have typed in the title, will be listed. Select your Manufacturer by pointing to it and clicking. This will highlight the Manufacturer. If you click on the wrong selection and need to make a different selection, Click on This will return you to the Application for a Conformity Assessment Certificate screen where you can commence your search again. 40 Once you have selected your Manufacturer, Click on This will take your selection and insert it in the Manufacturer Name field on the Application for Conformity Assessment Certificate screen. It will also automatically enter the Manufacturer Address in the Manufacturer Address as on Evidence: field. Note: There may be more than one address for this manufacturer – the address used should be the address that is supplied with any supporting evidence for the application. If you make a mistake or need to make a different selection of manufacturer, Click on This will clear the Manufacturers details in order for you to commence a new search. New Manufacturer Name At New Manufacturer Name Type in the full name of the Manufacturer At New Manufacturer Address Type in the full address of the Manufacturer (eg street, Suburb, State) At New Manufacturer Country Select the Manufacturer’s Country from the drop down list Completing Manufacture details Once you have completed entering the Manufacture Name/Details (existing or new) Click on This will take you to Page 2 of the Conformity Assessment process. 41 Application for a Conformity Assessment - Page 2 An Application Identifier will be generated automatically when you save, close, validate, or go to the next page of the form). You should take a note of the Application Identifier Number for your later reference. Certificate Device Details Read the information relating to describing device details to get an idea of what is required regarding Device Details. Device Details List At the Unique Product Identifier (UPI) field type in your Unique Product Identifier or Description/Device Category. At the GMDN Code List: search for any GMDN (Global Medical Device Nomenclature) codes Click on The following screen will appear 42 In the GMDN Text: field, type in the name or the starting letters of the device OR In the GMDN Code: field, type in the code Type in at least the first three characters of the device name. Click on By typing in a minimum of the first 3 letters of the device, the system will list all GMDNs with those letters in the device. The system produces a Selection of GMDN (Global Medical Device Nomenclature) products containing your particular selection. (In this instance – wrap) When searching for your GMDN item, if you need to view a definition of that item, highlight your selection then Click on This brings up the definition of your selected item. To close the definition screen Click on Close Window This takes you back to your search window If you select the incorrect line/item. Scroll to the bottom of the screen and Click on This will return you back to Page 2 of the Conformity Assessment screen where you can commence your search again. 43 Once you have identified your selection, Point to and click on the correct item to highlight it. Scroll to the bottom of the screen and Click on This takes your selection back to Page 2 of the Conformity Assessment. Next - Select the Classification of the Device from the drop down list at Classification: At Classification Rule: type in the final classification rule from Schedule 2 of the TGA Medical Device Regulations And type in a short description of the intended use of the device at Intended Use: Click on The Device Description, GMDN Code, Classification, Classification Rule and the description of Intended Use is listed on the screen and formatted as follows: Repeat the above sequence for each new device. If you make a mistake or need to make an amendment, at Remove, Enter Item #, Click on the drop down list Point to and click on the line number of the item that needs to be removed, Click on This will clear the Device Description, GMDN Code, Classification, Classification Rule and Intended use fields. You can then re-build your device description starting at the Unique Product Identifier (UPI) or Device Category Description field. 44 Selecting a Device Classification Level Select the Highest Classification of a Device that is to be covered by this application by clicking on the relevant box. Conformity Assessment Procedure Select the relevant Conformity Assessment Procedure from the drop down list. EU Medical Device Requirements You then need to confirm whether Certification in accordance with EU Medical Device or Active Implantable Medical Device Directives is required by selecting either the Yes or No radio button. Once you have made your selection Click on At the top or the bottom of the screen. This will take you to Page 3 – Conformity Assessment. 45 Application for a Conformity Assessment – Page 3 Applicant’s Certifications Page three lists details that you have entered in relation to the Conformity Assessment. If all the information is correct, you can now electronically submit this information. If you are satisfied that all the information is correct and current, click on the Yes button. Note that a false declaration will result in the application being considered ineffective and will be terminated. If you identify any incorrect information and wish to correct it Click on And return to either screen 1 or 2 to correct the information. You should view and print the details of the entire document before you validate the form (this further ensures the details entered are correct). Validating Conformity Assessment Click on Check the details on the screen. If they are all correct Click on And follow the prompts to print the form and keep it for your reference. Click on 46 To return to page 3 of the Application for a Conformity Assessment Certificate form. Once you are satisfied with the information you have entered ensure you have agreed to the information and finalise the process. Click on Successful completion of the Application for a Conformity Assessment Certificate form will return at the top of the screen. NOTE: If you miss an entry, the system will not Validate. The system will provide you with a message relating to any missing information - Eg You will need to go back and complete or correct the information before you can proceed. You can return to the relevant page by either clicking on the missed validation message or clicking on the previous button. Printing a Tax Invoice You will now need to print your Tax Invoice and submit the application. To do this Click on This produces a Tax Invoice. Click on to print the Tax Invoice. 47 Once you have printed your Tax Invoice, you can submit the application. To submit your application, Click on The following warning pops up If you have printed your Tax Invoice, Click on The system will submit your Application for a Conformity Assessment Certificate and provide you with a confirmation similar to the following: Click on To return to the TGA e-Business Services Home Page. You should now find your lodged Conformity Assessment under View Lodged Submissions. 48 CLASS III/AIMD VARIATION The Class III/AIMD Variation section of the TGA e-Business system allows you to make changes to your Class III or AIMD ARTG entry. Changes relate to small details such as variants (ie length of a catheter). Changes must not change the intended purpose of the device. Variation of Device Class III/AIMD ARTG Entry - Page 1 NOTE: (Click on the (Click on the for an explanation of the current screen or field) for an explanation of a question) An Application Identifier will be generated automatically when you save, close, validate, or go to the next page of the form). A number of the fields will generate automatic information. This is based on your Log-In details. (Ie – Sponsor Details, address etc) Agent Details will only be displayed if you have an Agent Log-In. To Commence Variation (Class III/AIMD) If your variation relates to a ClassIII/AIMD ARTG entry then Select Portal – Therapeutic Goods Administration When the screen drops down Select Create Applications and Submissions Select Medical Device then Click on Class III/AIMD Variation to open the link to 49 Variation of a Device - Application Details Application for: Is automatically generated. At the Field Sponsor’s Own Reference: enter your own reference details You will need to come back and re-enter your Sponsor’s Own Reference after you have ‘Cloned’ your ARTG entry Number. The system automatically over-rides your own Sponsor’s Own Reference with wording similar to ‘Variation of Licence 123456’) Agent Name Is automatically generated (based on your Log-In) Sponsor Details At the Field Sponsor Name: your Sponsor Name will be automatically selected (if you are a sponsor); Or if you are an agent, you will need to make a selection from the drop down Sponsor Name list The Contact Name and Contact Email will be automatically generated from your log-in. This application is to: make a variation to an existing ARTG entry, the option is already identified Identifying/Searching Class III/AIMD ARTG Entries At This application is to: you can choose to type in the ARTG entry number if you know it and then Click on or Click on This will bring up a Code Picker list of your ARTG Class III/AIMD entries. 50 This pop up screen allows you to: Narrow the field of search by entering the first few numbers of the ARTG number (if known) or a few characters in the name of the device or manufacturer and pressing OR Scroll through the entire list to find the specific device. You can move through the pages of your ARTG Inclusions by using the following arrow keys. Clicking on Will reset the search and re-list all the device items. Once you have located your device, point to and click on the correct line. This automatically takes your selected ARTG code number and inserts it into the This application is to: field on your application. If you make a mistake or need to make a change, Click on This will return you to the Code Picker list where you can make an 51 alternative selection. Once you are satisfied with your selection you can now clone the ARTG inclusion to allow you to vary the details. NOTE: Making a clone, effectively initiates a new application by producing a replica/copy of the selected ARTG entry. Cloning a Class III/AIMD ARTG Entry Click on The following screen appears If this is the correct ARTG number required, Click on . This returns the following (or similar) information at the Application Class Details field now found at the bottom of the screen. If you have made a mistake or wish to select a different ARTG number Click on You can then select number again and search and select the correct ARTG Click on To take you to the second page of Manufacturing Details (Other Classes). 52 Variation of Device application (other Classes) - Page 2B Manufacturing Details (Other Classes) A new Application Identifier number will be allocated to the Application. This number is found at the top right hand side of the screen. You can amend certain information relating to the Manufacturing Details for (other Class) Variation of Device Application. Developing a List of Device Details A medical device is taken to be of the same kind as another medical device if they have the same Sponsor Manufacturer, GMDN, Classification and Are the same in relation to such other characteristics as the regulations prescribe (ie – intended purpose). Thus some of the fields on this screen cannot be changed as it would constitute the requirement for a new ARTG entry. The fields that cannot be changed include: Manufacturer And GMDN Code and Description: You can add or delete the information in the following fields: Unique Product Identifier and Functional Description: Use the scroll bar/arrows to scroll through the information. Place your cursor where you wish to made edits, click and type in your information. Remember, changes must not effect the intended purpose of the medical device. 53 The Total number of Devices Covered: field is a free text field. Adjust the number of Devices covered by typing in the number. Click on For information/guidance on the meaning of Variant to ensure you have an understanding of what an allowable Variant is. Note: You cannot remove any existing variant, you can only add a variant. At Variant Type Click on the drop down list for a list of allowable variant types Use the scroll bar to scroll through the selection. When you find your preferred variant, point and click on the selection. Variant Range is a free text field Type in your Variant Range Once you are satisfied with your Variant Type and Variant Range Click on Your selection will be added to the Variant List: at the bottom of the screen. Only Variations you have made on this application can be removed. If you make a mistake or wish to remove the selection from your Variant List, At To remove item number from list: 54 Select the line number of the item you wish to remove from the drop down list, then Click on . Once you are satisfied with the information on this screen, including the Variant List Click on This will take you to Page 5 of Variation of Device Application. 55 Variation of Device Application (other Classes) - Page 5 Certification of Variation of Class III/AIMD Application At the top of the page, you will find a number of your application details including: Check that the details are correct before proceeding. If you have made a mistake or the details are incorrect, you will need to go back to make any changes. To go back Click on Attaching Conformity Documents to a Variation of Device Application If you are satisfied that the details are correct you can now electronically attach your supporting documentation. At Function to attach/add supporting documentation Click on This takes you to a File Upload screen where you must: - specify the Type of Document you have relating to your application; and - select the actual document to be attached from your computer system. Note: You are required to attach new documentation. Existing attachments will remain in place and cannot be removed. 56 Select a relevant Document Type: from the drop down list Now use the button to search for and select the relevant document on your Desktop/Computer. Once you locate the relevant document, Click on This attaches a copy of the document to your Variation of Device Application. If you make a mistake or need to make a different selection, Click on This will remove the document in the Variation of Device Application screen. You can then Click on attach the correct document. to go back and search for and NOTE: Before you can finalise your application, you must read through the declaration in the scroll down screen. 57 Validating a Variation of Device Application Before you Validate your application, you should view and print your application. Click on Check the details on the screen. If they are all OK Click on And follow the prompts to print the form and keep it for your reference. You should also read the declaration on this page. Once you have read the information on this screen, Click on This will return you to the Variation of a Device Application screen. If you are satisfied that all the information is correct, you will need to agree to the declaration by clicking on the Yes button. You can now validate the application. Click on Successful completion of the Variation of a Device Application form will at the top of the screen. return The unique Application Identifier number will also be listed. You should record this number for later reference. NOTE: If you miss an entry or fail to click on the Yes in the declaration, the System will not Validate. The system will provide you with a message relating to any missing information - Eg You will need to go back and complete or correct the information before you can proceed. You can return to the relevant page by either clicking on the missed validation message or clicking on the previous button. Printing a Tax Invoice Once you have validated your Variation, you will need to print the system produced Tax Invoice. To do this 58 Click on The system will produce a Tax Invoice from the TGA. Click on To print a copy of the Tax Invoice. Note: Please ensure you print this invoice. The invoice cannot be retrieved if you decide to submit your application without printing. If you do forget to print the invoice you will need to contact the Finance area of TGA on 1800 141 144 for a copy. Once you are happy with your details, and have printed the Tax Invoice, Click on You will again be warned to print the Tax Invoice. If you have printed the Tax Invoice, Click on The system will submit your Variation of a Device Application and provide you with a confirmation similar to the following. 59 You should now find your application for a Class III/AIMD Variation under View Lodged Submissions. 60 DEVICE APPLICATION An Overview The Device Application form is used to include a Medical Device or to have an Other Therapeutic Good listed/registered on the Australian Register of Therapeutic Goods (ARTG). The form is made up of 12 pages of which you will only see a maximum of Five (5). Some pages have slight variations (ie Page 1 has 2 variations and Page 2A has 3 variations, 2B has 3 variations). The system will only display the pages relevant to the type of Application being submitted. Device Application (Medical Device – Other Classes) – Page 1 These notes relate to the above circled selections found in the drop down list at Application For: They are also relevant for : Medical Device – Included - Class 1 Measurement - Class 1 Sterile - Class IIa - Class IIb - Class III and - AIMD 61 NOTE: (Click on the (Click on the for an explanation of the current screen or field) for an explanation of a question) An Application Identifier will be generated automatically when you save, close, validate, or go to the next page of the form). A number of the fields will generate automatic information. This is based on your Log-In details. Agent Details will only be displayed if you have an Agent Log-In. If you are applying for a Device Application – Included (Class 1), please go to the Separate Section documented specifically for Device Application – Included (Class 1). To commence a Device Application (Other Classes) Select Portal – Therapeutic Goods Administration When the screen drops down Select Create Applications and submissions Select Medical Device then Click on Device Application to open the link to This brings you to the first page of Device Application Device Application Details Application For: Select your application type From the drop down list. 62 This will automatically initiate the creation of your Application Identifier: number at the top of the screen. At the Field Sponsor’s Own Reference: enter your own reference details. Sponsor Details Agent Name: will be automatically selected (based on your log-In); Sponsor Name: will be automatically selected (based on your log-In); Or you will need to make a selection from the drop down Sponsor Name: list. The Contact Name and Contact Email will be automatically inserted and will depend your log-in. Address Details Address(es) are automatically generated, based on your (log-In) You may have more than one address. If you have more than one address, ensure that your billing address and your Regulatory Address are stated separately in the correct field. At Billing Address: Select your correct address for billing/account purposes from the drop down list. At Regulatory Correspondence Address: Select your correct address for Compliance/Regulatory purposes from the drop down list. 63 The next step is already selected for you. Cloning an ARTG Inclusion For a Device Application Note: If you already have a similar medical device included on the ARTG, you can ‘Clone’ or copy the details of that ARTG entry and change any relevant details. ARTG entries - Included Medical Device (Export only) and Other Therapeutic Goods (Registered, listed and Export only) can not be cloned. You can choose to leave this field empty and go to the next step – Manufacturer’s intended purpose for the device: At ARTG Number: You can leave this box empty. If you have an ARTG inclusion and know the ARTG Number: Type the code in the ARTG Number box Or Click on This will bring up a Code Picker list of your ARTG inclusions. The Code Picker list allows you to: Narrow the field of search by entering the first few numbers of the ARTG number (if known) or a few characters in the name of the device or manufacturer and pressing OR Scroll through the entire list to find the ARTG entry. 64 You can move through the pages of your ARTG Inclusions by using the following arrow keys. Clicking on Will reset the search and re-list all the ARTG entries. Once you have located your ARTG entry, point to and click on the correct line. This immediately takes your selected ARTG code number and inserts it into the ARTG Number box on your application. If you make a mistake or need to make a change, Click on This will return you to the Code Picker list where you can make an alternative selection. Once you have the ARTG number you wish to copy details of Click on The following pop up, confirmation screen appears. If you are satisfied with the details of the new application, Click on Cloning will automatically populate a number of relevant fields within the Device Application. If you made a mistake or are not satisfied that the ARTG Number was the correct choice Click on You then have the option of Repeating the Search and Clone Function Or Deleting/ Clearing the ARTG number from the ARTG number field. Application Class Details: 65 NOTE: All Included-Medical Devices (Export Only) are classified as Class 1 and the system will automatically identify Included-Medical Devices (Export Only) as Class 1. Other Therapeutic Goods do not have Class Details. Notes on how to enter a Device Application for a Medical Device – included - Class 1 is documented separately. Manufactures Intended purpose of the device: Is a free text field. Type in a brief but thorough description of the device and its intended purpose. Specific Details for your Device Application At the Specific Details portion of Screen 1 you are presented with a series of questions that must be answered in relation to your device. How you answer these questions will determine the content of proceeding screens. All the following questions can be answered either Yes or No. Click on the radio buttons to answer each question. Answer the first seven (7) questions first. The next question relates to the use of contents of Human Origin. If you answer, Yes, you are required to answer an additional question – The next questions relates to how the device is packaged. You must answer yes to one of these questions to determine the ‘product type’ of your device. Following the determination of your ‘product type’, you will be presented with 2 to 4 further questions. 66 Device Product Type 1. If you have selected At Application for: you will be presented with the following three (3) options. : 2. If you have selected any of the following At Application for: you will be presented with the following two (2) options. NOTE: The selection of either OR Will result in the same sequence of questions being asked. For the purpose of this exercise, treat the selection as one and the same option. 67 Device Single Product Selecting Single Product Only The first question relates to materials or ingredients of Animal Origin If you answer Yes to this question, you will be asked to select Animal Species And Country of Origin From drop down lists You will need to answer either Yes or No as to whether the device is Medicated or Formulated. Once you have answered all the questions presented Click on To take you to Page 2 of Device Application How you answer these questions will determine the content of proceeding screens. 68 Device Procedure Pack Selecting Products Packaged as a Procedure Pack Or Answer Yes or No to the following four (4) questions Once you have answered all the questions presented Click on To take you to Page 2 of Device Application How you answer these questions will determine the content of proceeding screens. 69 Device Packaged as a System Selecting Products Packaged as a System Answer Yes or No to the following three (3) questions. Once you have answered all the questions presented Click on To take you to Page 2 of Device Application How you answer these questions will determine the content of proceeding screens. 70 Device Application Medical Device – Included – (Class 1) - Page 1 The Device Application form is used to submit a Medical Device-Included Class 1 onto the Australian Register of Therapeutic Goods (ARTG). The form is made up of 5 pages which may vary in content – depending on how you answer questions presented. The system will only display the pages relevant to the Device Application being submitted. NOTE: (Click on the (Click on the for an explanation of the current screen or field) for an explanation of a question) An Application Identifier will be generated automatically when you save, close, validate, or go to the next page of the form). A number of the fields will generate automatic information. This is based on your Log-In details. Agent Details will only be displayed if you have an Agent Log-In. To commence a Device Application Medical Device – Included (Class 1) Select Portal – Therapeutic Goods Administration When the screen drops down Select Create Applications and submissions Select Medical Device then Click on Device Application to open the link to This brings you to the first page of Device Application 71 Application Details At application for: from the drop down list select This will create of your Application Identifier: number at the top of the screen. Take note of this number. At the Field Sponsor’s Own Reference: Type in your own reference details. Sponsor Details Agent Name: will be automatically selected (based on your log-In); Sponsor Name: will be automatically selected (based on your log-In); Or you will need to make a selection from the drop down Sponsor Name: list The Contact Name and Contact Email will be automatically generated once the Sponsor Name: is selected. Address Details Address(es) are automatically generated, based on your (log-In) You may have more than one address. If you have more than one address, ensure that your Billing Address and your Regulatory Address are stated separately in the correct field. At Billing Address: Select your correct address for billing/account purposes from the drop down list. At Regulatory Correspondence Address: 72 Select your correct address for Compliance/Regulatory purposes from the drop down list. The next step, Create a new Register, is already selected for you. Cloning an ARTG Inclusion For a Device Application Note: If you already have a similar medical device included on the ARTG, you can ‘Clone’ or copy the details of that ARTG entry and change any relevant details. ARTG entries - Included Medical Device (Export only) and Other Goods (Registered, listed and Export only) can not be cloned. You can choose to leave this field empty and go to the next step – Manufacture’s intended purpose for the device: At ARTG Number: You can leave this field empty. If you have a similar ARTG inclusion and you know the ARTG Number: Type the code in the ARTG Number box, or Click on This will bring up a Code Picker list of your ARTG devices to choose from. The Code Picker allows you to: Narrow the field of search by entering the first few numbers of the ARTG number (if known) or a few characters in the name of the device or manufacturer and pressing OR 73 Scroll through the entire list to find the ARTG entry. You can move through the pages of ARTG Inclusions by using the following arrow keys. Clicking on Will reset the search and re-list all your ARTG entries for that classification. Once you have located the ARTG entry, point to and click on the correct line. This immediately takes your selected ARTG code number and inserts it into the ARTG Number box on your application. If you make a mistake or need to make a change, Click on This will return you to the Code Picker list where you can make an alternative selection. Once you have the ARTG inclusion you wish to copy details of Click on The following pop up, confirmation screen appears. If you are satisfied with the details of the new application, Click on This will automatically populate a number of relevant fields within the Device Application. 74 If made a mistake or are not satisfied that the ARTG Number was the correct choice Click on You then have the option of Repeating the Search and Clone Function Or Deleting/ Clearing the ARTG number from the ARTG number field Application Class Details: NOTE: When you select Medical Device – Included at Application For and then Class 1 in Application Class Details: A separate set of questions are asked which are specific to Medical Device – Included (Class 1). At the Field Class: you are required to select an option from the drop down list. As we are working on a Medical Device Included (Class 1) application Select Class 1: You will notice that the screen name is changed from TGA e-Business Device Application To TGA e-Business Device Application Auto Inclusion Class 1 The questions at the bottom of the screen change – they are specific for a Class 1 – Medical Device – Included. Manufactures Intended purpose of the device: Is a free text field. Type in a brief but thorough description of the device and its intended purpose. 75 Device Product Characteristics of your Device Application At Device Product Characteristics, you will be presented with a range of questions to which you must answer Yes or No. NOTE: You are legally required to supply accurate responses to the Device Product Characteristic’s questions. Therefore you must ensure that you are fully informed before entering any information. Penalties apply for false or misleading information. Be aware that the following list of questions is not a definitive list of questions. TGA may make changes to the questions and add alternative or supplementary questions. Individual questions may result in the presentation of further questions. If you are unsure as to what a question means Click on Which will provide information on that question. How you answer these questions will determine the content of proceeding screens. Once you have answered Yes or No to each question Click on This takes you to page 2 of Device Application. 76 1. Device Application Page - 2A (Export Only) NOTE: If your application is for, or at Page 1 you selected: - Medical Device – Included (Export Only); or - Other Goods – not medical device - Export Only Page 2A will appear as follows Manufacturing Details (Class 1) Existing Manufacturer To enter your Manufacturer Name Click on This will bring up the following screen By typing in the first 3 to 4 letters of your manufacturer and Clicking You will be provided with a list of Manufacturers. Make your selection by pointing and clicking on your Manufacturer and Clicking 77 This takes your selection back to the Device Application Screen Manufacturing Details (Class 1) New Manufacturer If you are entering a new Manufacturer you will be required to type in your New Manufacturer Name: New Manufacturer Address: And from the drop down list, select New Manufacturer Country: Manufacturing Details - Export Names If your application is for an Export Only Medical Device, you will be presented with the following field. Export Names: In this free text field, type in the Product Name (or Names) to be used overseas. Note: If you have more than one export name, press ‘ENTER’ after you have typed each export name to take you to the next line. Searching for GMDN At the GMDN Code and Description: search for the GMDN (Global Medical Device Nomenclature) code. Click on The following screen will appear 78 At the GMDN Text: Field Type in at least the first three characters of the device Or, At the GMDN Code: Field Type in the GMDN, then Press This brings up a list of all GMDN’s containing those three letters. If you select the incorrect line/item, Scroll to the bottom of the screen and Click on You will then need to Click on And start your search again. To Select the GMDN item, point to and click on required item. Scroll to the bottom of that screen and Click on This takes your selection back to the Device Application Screen. If you are then satisfied with the information on this screen Click on To move to the next screen. 79 How you have answered questions on screen 1 will determine which screen is presented next. 80 2. Device Application Page 2A (Other Therapeutic Goods) NOTE: If your application is for, or at Page 1 you selected: - Other Therapeutic Goods – Registered – disinfectant - Other Therapeutic Goods – Registered – other (i.e. human origin products) - Other Therapeutic Goods – Listed – disinfectant - Other Therapeutic Goods – Listed – other Page 2A will appear as follows: Manufacturing Details (Class 1) Existing Manufacturer To enter your Manufacturer Name Click on This will bring up the following screen By typing in the first 3 to 4 letters of your manufacturer and Clicking You will be provided with a list of Manufacturers. Make your selection by pointing and clicking on your Manufacturer and 81 Clicking This takes your selection back to the Device Application Screen Manufacturing Details (Class 1) New Manufacturer If you are entering a new Manufacturer you will be required to type in your New Manufacturer Name: New Manufacturer Address: And from the drop down list, select New Manufacturer Country: The UPI is the combination of words, numbers, symbols or letters assigned by the manufacturer to uniquely identify the device. Type in a description or product identifier for your device at Unique Product Identifier: Searching for GMDN At the GMDN Code and Description: search for the GMDN (Global Medical Device Nomenclature) code Click on The following screen will appear At the GMDN Text: Field Type in at least the first three characters of the device Or, At the GMDN Code: Field Type in the GMDN, then Press 82 This brings up a list of all GMDN’s containing those three letters. If you select the incorrect line/item, Scroll to the bottom of the screen and Click on You will then need to Click on And start your search again. To Select the GMDN item, point to and click on required item. Scroll to the bottom of that screen and Click on This takes your selection back to the Device Application Screen. If you are then satisfied with the information on this screen Click on To move to the next screen. 83 How you have answered questions on screen 1 will determine which screen is presented next. 84 3. Device Application - Page 2A Medical Device – Included (Class 1) NOTE: If your application is for, or at Page 1 you selected: - Medical Device – Included And then selected your Application Class Details as Class 1 Page 2A will appear as follows: Manufacturing Details (Class 1) Existing Manufacturer To enter your Manufacturer Name Click on This will bring up the following screen By typing in the first 3 to 4 letters of your manufacturer and Clicking You will be provided with a list of Manufacturers. Make your selection by pointing and clicking on your Manufacturer and Click This takes your selection back to the Device Application Screen and adds the address to the Manufacturer Address field. 85 Manufacturing Details (Class 1) New Manufacturer If the manufacturer is new (does not appear on the TGA Client Database) you will need to have the Manufacturer details added to the database before you can submit your application. Click on The following window will open. You will need to type in The New Manufacturer Name The New Manufacturer Address, and Select the Manufacturer Country from the drop down list. 86 You will need to provide documents proving the manufacturer address details. These can be attached electronically. Click on This will access your own computer system where you can select the relevant documents relating to the manufacturer. The documents will be added to the Request for entry of a new manufacturer on the TGA Client Database. Once you have completed filling out the new manufacturer details, you should print a copy of your request. Click on And follow the prompts to print the request. Once you have printed your request, you can then forward it to the TGA. Click on This takes you back to page 2A of your Device Application. At this point, you should and your application. Until the new manufacturer details are acknowledged by the TGA, you will not be able to submit the application. You should receive an e-mail from the TGA confirming the receipt of your New Manufacturer details. Take note of your Application Identifier Number for accessing your draft application once your new manufacturer has been included on the TGA database. At a later date, you will receive an e-mail from the TGA advising that the new manufacturer has been added to the database. You will then be able to access your Draft Application and Included Medical Device – Class 1, add the manufacturer then continue with your application. Device System Name is a free text field – type in the Device System Name used/to be used. Note: Device System Name field will only be shown if products packaged as a system was selected on previous page) Searching for GMDN At the GMDN Code and Description: search for the GMDN (Global Medical Device Nomenclature) code Click on 87 The following screen will appear At the GMDN Text: Field Type in at least the first three characters of the device Or, At the GMDN Code: Field Type in the GMDN, then Press This brings up a list of all GMDN’s containing those three letters. If you select the incorrect line/item, Scroll to the bottom of the screen and Click on You will then need to Click on And start your search again. To Select the GMDN item, point to and click on required item. Scroll to the bottom of that screen and Click on This takes your selection back to the Device Application Screen. 88 If you are then satisfied with the information on this screen Click on To move to the next screen. How you have answered questions on screen 1 will determine which screen is presented next. 1. Device Application - Page 2B If your application is for, or at Page 1 you selected: - Other Therapeutic Goods – Registered – IVD - Other Therapeutic Goods – Listed – IVD Page 2B will appear as follows: Manufacturing Details Other Therapeutic Goods Page 2B At Select Manufacturer for Evidence: click on the drop down list and scroll through to find the relevant Manufacturer. Click on the Manufacturer. This takes your selection back to Page 2B. Notice that an additional field Manufacturer Evidence Number: has been added to the screen. From this drop down list a list of Manufacturer Evidence Numbers are provided for the chosen manufacturer. 89 At Manufacturer Evidence Number: click on the drop down list and scroll through to find the relevant Manufacturer Evidence to support the application. Once you have selected the relevant Evidence number, you will notice that the address relating to that Evidence is provided automatically. The system will automatically provide the Manufacturer Address as on Evidence. This address is the address which corresponds with the selected Evidence. GMDN Code and Description gives you the list of the GMDN Codes which are on that Manufacturer Evidence. Select the relevant GMDN code from the drop down list. Note that at Certification Issued By: Details are automatically provided once you have selected your manufacturer and GMDN Code. The UPI is the combination of words, numbers, symbols or letters assigned by the manufacturer to uniquely identify the device. Type in a description or product identifier for your device At Unique Product Identifier: At Functional Description type in a description of how the device will operate or be used (Not the composition of the device). Click on Which will take you to the next ‘relevant’ screen. How you have answered questions on page 1 will determine which screen is presented next. 90 91 2. Device Application - Page 2B If your application is for, or at Page 1 you selected: - Medical Device – Included And the Application Class Details given were one of the following - Class 1 Measurement; Class 1 Sterile; Class lla; Class llb; or Class lll AIMD And, you identified that your device is Packaged as a System Page 2B will appear as follows Manufacturing Details - Medical Device – Included (Other Classes), Packaged as a System At Select Manufacturer for Evidence: click on the drop down list and scroll through to find the relevant Manufacturer. Click on the Manufacturer. This takes your selection back to Page 2B. Notice that an additional field Manufacturer Evidence Number: has been added to the screen. From this drop down list a list of Manufacturer Evidence Numbers are provided for the chosen manufacturer. At Manufacturer Evidence Number: click on the drop down list and scroll through to find the relevant Manufacturer Evidence to support the application. Once you have selected the relevant Evidence number, you will notice that the address relating to that Evidence is provided automatically. 92 Device System Name is a free text field – type in the Device System Name used/to be used. GMDN Code and Description gives you the list of the GMDN Codes which are on that Manufacturer Evidence. Select the relevant GMDN code from the drop down list. Note that at Certification Issued By: Classes on Evidence: and Class of this Application: Details are automatically provided once you have selected your manufacturer and GMDN Code. Additional Fields Class III/AIMD The UPI is the combination of words, numbers, symbols or letters assigned by the manufacturer to uniquely identify the device. Type in a description or product identifier for your device at Unique Product Identifier: At Functional Description type in a description of how the device will operate or be used (Not the composition of the device). At Total number of Devices Covered: Type in the number of devices to be covered by this Application. From the drop down list at Variant Type: select the type of variant/change to the device. Once you have selected your Variant Type, type in the Variant Range. Click on This adds your device Variants to the Variant list at the bottom of the screen 93 You can continue to build the variants to your device for repeating adding the additional Variant Type and Range. If you make a mistake or need to make an amendment to your variant list, Click on the drop down list Point to and click on the line number of the item that needs to be removed, Click on Once you have completed adding to your variant list Click on Which will take you to the next ‘relevant’ screen. How you have answered questions on page 1 will determine which screen is presented next. 94 3. Device Application - Page 2B If your application is for, or at Page 1 you selected: - Medical Device – Included And the Application Class Details given were one of the following - Class 1 Measurement; Class 1 Sterile; Class lla; Class llb; or Class lll AIMD And, you identified that your device is: - Packaged as a Procedure Pack; or - Single Product Only Page 2B will appear as follows. Manufacturing Details - Medical Device – Included (Other Classes), Procedure Pack or Single Product At Select Manufacturer for Evidence: click on the drop down list and scroll through to find the relevant Manufacturer. Click on the Manufacturer. This takes your selection back to Page 2B. Notice that an additional field Manufacturer Evidence Number: has been added to the screen. From this drop down list a list of Manufacturer Evidence Numbers are provided for the chosen manufacturer. At Manufacturer Evidence Number: click on the drop down list and scroll through to find the relevant Manufacturer Evidence to support the application. Once you have selected the relevant Evidence number, you will notice that the address relating to that Evidence is provided automatically. 95 GMDN Code and Description gives you the list of the GMDN Codes which are on that Manufacturer Evidence. Select the relevant GMDN code from the drop down list. Note that at Certification Issued By: Classes on Evidence: and Class of this Application: Details are automatically provided once you have selected your manufacturer and GMDN Code. The UPI is the combination of words, numbers, symbols or letters assigned by the manufacturer to uniquely identify the device. Type in a description or product identifier for your device at Unique Product Identifier: At Functional Description type in a description of how the device will operate or be used (Not the composition of the device). At Total number of Devices Covered: Type in the number of devices to be covered by this Application. From the drop down list at Variant Type: select the type of variant/change to the device. Once you have selected your Variant Type, type in the Variant Range. Click on This adds your device Variants to the Variant list at the bottom of the screen You can continue to build the variants to your device for repeating adding the additional Variant Type and Range. 96 If you make a mistake or need to make an amendment to your variant list, Click on the drop down list Point to and click on the line number of the item that needs to be removed, Click on Once you have completed adding to your variant list Click on Which will take you to the next ‘relevant’ screen. How you have answered questions on page 1 will determine which screen is presented next. 97 Device Application - Page 3A If at Page 1, you selected any Application – Excluding Medical Device – Included (Class 1) AND If you have answered YES to any question relating to your device being Medicated or Formulated you will be presented with the following screen. Page 3A will be presented as follows. Medicated or Formulated In this screen you are required to list all product ingredient(s) for your device. Develop an Ingredient List – Ingredient Name At Ingredient Name: Click on Which will bring up the following Ingredients Search Screen 98 You can search using the - entire name of the ingredient (Spelling and spacing must be exact) - first three letters at the start of the ingredient (the default option) - any three letters within the ingredient At Search on: Click the preferred field button At Enter Search Terms: Type in the name or part name of your ingredient. Click on This will bring up either your specific ingredient or a list of ingredients. (In this instance the letters searched for are ‘uten’. All the ingredients listed with ‘uten’ in the spelling will be listed) When you find the correct ingredient, point and click on the item then, Click on 99 This takes your selection and adds it to Page 3A of the Device Application page. At Quantity: Type in the quantity of ingredient used in the device. At Units: Select the appropriate unit of measurement for the ingredient from the drop down list. Once you have the ingredient, the quantity and unit measure Click on This adds your ingredient to the Ingredient List field on Page 3A You can continue this procedure until you have all the necessary ingredients listed under the Ingredient List. If you make a mistake or need to remove a line item, at To Remove item number from list Click on the drop down list Point to and click on the line item that needs to be removed Click on This will remove the line item concerned. Adding a New Ingredient If your device has a new ingredient (is not present in the ingredient search), you are required to type in the new ingredient at New Ingredient Name: Once you have typed in the new ingredient name At Quantity: Type in the quantity of ingredient used in the device. At Units: Select the appropriate unit of measurement for the ingredient from the drop down list. Once you have the ingredient, the quantity and unit measure Click on This adds your ingredient to the Ingredient List field on Page 3A. You can continue this procedure until you have all the necessary ingredients listed under the Ingredient List. 100 Finalising your Ingredient List Once you are satisfied with your Ingredient List (you have added known and new ingredients, Click on To take you to the next page of the application. How you have answered questions on page 1 will determine which screen is presented next. 101 Device Application - Page 3A – Medical Device – Included (Class 1) If at Page 1, you selected Medical Device – Included (Class 1) AND If you have answered YES to the question relating to your device being Medicated or Formulated you will be presented with the following screen. Page 3A will be presented as follows. Medicated or Formulated In this screen you are required to list all product ingredient(s) for your device. 102 Develop an Ingredient List – Ingredient Name At Ingredient Name: Click on Which will bring up the following Ingredients Search Screen You can search using the - entire name of the ingredient (Spelling and spacing must be exact) - first three letters at the start of the ingredient (the default option) - any three letters within the ingredient At Search on: Click the preferred field button At Enter Search Terms: Type in the name or part name of your ingredient. Click on This will bring up either your specific ingredient or a list of ingredients. (In this instance the letters searched for are ‘uten’. All the ingredients listed with ‘uten’ in the spelling will be listed) 103 When you find the correct ingredient, point and click on the item then, Click on This takes your selection and adds it to Page 3A of the Device Application page. At Quantity: Type in the quantity of ingredient used in the device. At Units: Select the appropriate unit of measurement for the ingredient from the drop down list. Once you have the ingredient, the quantity and unit measure Click on This adds your ingredient to the Ingredient List field on Page 3A. You can continue this procedure until you have all the necessary ingredients listed under the Ingredient List. If you make a mistake or need to remove a line item, at To Remove item number from list Click on the drop down list Point to and click on the line item that needs to be removed Click on This will remove the line item concerned. When you have completed your list of ingredients, Click on To take you to the next page of the application. Adding a New Ingredient If your device has a new ingredient (is not present in the ingredient search), you will need to send a request form to the TGA to have the new ingredient details added to the database. When you select a new ingredient, an electronic e-mail form is produced. You are required to fill out this form with the new ingredient details. The form will be sent automatically to the TGA for review and update of the database. To add the new ingredient Click on 104 This will bring up the following screen. Note that the Application Identifier Number is already included on the form. Type in the Proposed Name of the ingredient. At Chemical Abstract Service (CAS) number type in the Chemical Abstract Service Number that has been allocated to the chemical. At Other names by which the substance may also be known, you will need to include the Synonyms or other names by which the chemical is known. The Reference(s) field includes a drop down list of recognised monograph references. Select one or more of these to which you have referred to for recognition of your ingredient. You will need to add documents which will assist the TGA in determining information about your ingredient. You can add up to three such documents. To add a document Click on This takes you to a Choose File format where you can select the appropriate document from your desktop. Double click on the document name. This will take the document and place it in the Australian Device Name Nomination Form. 105 When you have completed filling out the form, you should print off a copy for your records. Click on And follow the prompts to print a copy of the Australian Device Name Nomination Form. If you are satisfied with the information you have added to the form, Click on This will take you back to page 3A Medicated or Formulated. You will receive an e-mail from the TGA advising that your application for a new ingredient has been received. If you have more than one new ingredient, you will need to repeat the above New Ingredient process. At this point, you should and your application. Until the new ingredient details are acknowledged by the TGA, you will not be able to submit the application. You should receive an e-mail from the TGA confirming the receipt of your New Ingredient details. Take note of your Application Identifier Number for accessing your draft application once your new ingredient has been included on the TGA database. At a later date you will receive an e-mail from the TGA advising that the ingredient name is available for use in your Class 1 application. Once you receive this information, you can complete your Device Application. 106 Device Application - Page 4A If you have answered YES to any question relating to your device containing a medicine that is supplied separately in Australia, you will see the following screen. Procedure Pack or System Components Australian Market Developing a Component List At Component Description Type in the description of the component And at Component ARTG Number: Type in the ARTG Number for the component When you have entered the required information Click on This will take your component and add it to the Component List. Continue this sequence until all components are listed. 107 If you make a mistake or need to remove a line item, at To Remove item number from list Click on the drop down list Point to and click on the line number of the item that needs to be removed, Click on This will remove the line item concerned. Once you are satisfied with your Ingredient List Click on How you have answered questions on page 1 will determine which screen is presented next. 108 Device Application Page 4b If you have answered YES to any question relating to your device a. Having content of animal origin And / Or b. Incorporates a medicine as an integral part and that has an action ancillary to the device you will be presented with Page 4b – Procedure Pack or System components Ancillary. Procedure Pack or System Components Ancillary Developing a Component List At Component Description Type in the description of the component making up the device. From the drop down list Select the Animal Species: And Select the Country of Origin When you have entered the required information Click on This will take your component and add it to the Component List. Continue this sequence until all components are listed. 109 If you make a mistake or need to remove a line item, at To Remove item number from list Click on the drop down list Point to and click on the line number of the item that needs to be removed, Click on This will remove the line item concerned. Once you are satisfied with your Ingredient List Click on This takes you to Page 5 of the Device Application process. 110 Device Application - Page 5 Applicant’s Certification Applicant’s Certification is where you are required to agree to the conditions relating to your device and your application. You should read the declaration carefully and ensure the information you have provided is true and correct. Device Application Applicant’s Certification At the top of the page, you will find a number of your application details including: Check that the details are correct before proceeding. If you have made a mistake or the details are incorrect, you will need to go back to make any changes. To go back Click on To take you back to any previous pages. 111 Attaching Supporting Documentation You must attach an electronic copy of the supporting documentation relating to your device for Included Medical Device – Class III/AIMD and Other Therapeutic Goods – Registered – other (i.e. human origin products). For other application types/classes, it is optional to attach an electronic copy of the supporting documentation relating to your device. Function to attach/add supporting information To add the supporting information Click on This takes you to a File Upload screen where you must specify: - the Type of Conformity Document you have relating to your device; And - allows you to select the actual document from your own computer system. At Document Type: Select the document type from the drop down list Click on to select the actual document on your Desktop/Computer. When you have selected your Document Type and have selected the relevant file from your computer, Click on This will take your selections back to page 5 of Device Application If you make a mistake or need to make a different selection, Click on This will return you to page 5 of the Device Application screen where you can commence your search again. You now need to carefully read the declaration. 112 Validating Device Application You should view and print the details of the entire document before you Validate. (This further ensures the details entered are correct and keeps a copy for your file). Click on Check the details on the screen. If they are all OK Click on And follow the prompts to print the form and keep for your reference. Click on To return to page 5 of Device Application. You now need to carefully read the declaration. Once you are satisfied that all the information is correct, you will need to agree to the declaration by clicking on the Yes button And you can now validate the application. Click on If you have made a mistake or have missed filling a required field, the form will not validate. At the top of the screen a message will advise on the missing fields. For example: You will need to go back and complete or correct the information before you can proceed. You can return to the relevant page by either clicking on the missed validation message or clicking on the previous button. Successful completion of the Device Application form will return at the top of the screen. This last screen (Page 5) completes the sequence of screens presented for an Application for a Medical Device. If the application type selected does not have an associated application fee Click on and the system will show a confirmation message. If the application type selected has an associated application fee Click on 113 This takes you to the Tax Invoice Screen. Click on To print a copy of the Tax Invoice. If you make a mistake or need to make a change, Click on This will return you to Device Change Request validated screen where you can make any necessary amendments. Once you are happy with your details, and have printed the Tax Invoice, Click on You will again be warned to print the Tax Invoice. If you have printed the Tax Invoice, Click on The system will submit your Device Application and provide you with a confirmation similar to the following. Your device application (excluding any Included Medical Device – class 1 submissions) should appear in View Lodged Submissions. 114 VIEW DRAFTS Overview If you have only partially complete entering details into one of your applications and then had to close the application, you will now need to get back into that application by using the View Drafts option of the TGA eBusiness system. You can access and update your draft submissions and applications via View Drafts. This means that you can go into a partially completed submission or application, and complete it using this option. When you login to the system, and select View Drafts, a list of all your current draft applications and submissions will be visible. The drafts will all have a minimum of the following information: - Date (last accessed) - Identifier (this is the unique identifier number created whenever you commence a submission or application. - Sponsor name Depending on the level of detail already entered into your draft application or submission, additional information may be visible in the fields: - Client Reference; (the reference you have entered) - Information (the manufacturer’s name/details) Keeping a record of your Unique Identification Number (which appears at the top of each submission or application you create), will assist you to quickly locate your drafted submission or application. 115 VIEW DRAFTS Select Portal – Therapeutic Goods Administration When the screen drops down Click on the View Drafts option Identifying your Draft Submission or Application If you have a number of draft applications/submissions in the system, you will need to be able to find and identify it. The TGA e-Business system provides a number of means to enable you to do this. Printing a list of your Draft Submissions and Applications It’s sometimes easier to look through your list from a paper copy. If you would like a paper copy of your Draft lists, you can print one. At the top of the screen you will see the following: Click on This will bring up a preview screen identifying your Draft Submissions and Applications. 116 Click on Which is found at the top of the preview screen and follow the prompts to print your list. Click on To close the pop up screen. Scrolling through View Drafts list You can use the usual scroll bar to scroll up and down the list of your Draft Applications/Submission on the visible page. If you however need to search further, there are page selection buttons at the top of the screen. Clicking on the particular number will take you directly to that page number where you can use the scroll bar to scroll up and down that page. The and button will take you either to the first page, or to the final page of your Draft list. Searching for your Draft Submission or Application Once you have selected View Drafts The system provides a list of all your current draft applications and draft submissions. These appear in the following format. Search options There are a number of other means by which you can search for your draft submission or application. Broadly, you can - filter using drop down lists; or - sort by using column headings Field Search options You can undertake a number of field search options including filtering by: Approval Area: 117 Sponsor: or Search On / For At Approval Area: you can select the following from the drop down list At Sponsor – The drop down screen provides a list of your sponsors. You can filter for application(s) using one of these Sponsors Search on: The options available for devices allows you to narrow your search to: - A specific date; - The Application Identifier number; - A Client reference you have used; - A Manufacturer (at Information); - The Class of your application; or (- The Status of your application does not relate to medical devices) An example of the specific search might be: Click on Identifier You know that the application you are searching for is for a Conformity Assessment (CA) Type CA in the for field This automatically lists all your current draft Conformity Assessment applications. 118 Column Search Option This is a very interactive option, you simply point and click on the preferred column heading. For Example, if you click on the Column heading ‘Date’ it will sort all the draft applications/submissions in either ascending or descending order. If you Click on the button All the draft applications and submissions will be re-listed enabling you to start a fresh search. Information Buttons and To the left hand side of the View Drafts list you will see the and buttons. Click on This will bring up a range of options including Copying the Application Deleting the Application Print Preview (and Print) the Application Click on This brings up an application status mini screen similar to the following. 119 At a glance it gives you a range of information about the application. This can help you to determine whether this is the application you are in fact searching for. Deleting a Draft When you Click on You are presented with the following options If you would like to delete an application, find the application you wish to delete and Click on The following warning appears If you are sure that this is the application you wish to delete Click on This deletes the application and removes the item from View Drafts. Print Preview a Draft (Not including Request Change) When you Click on You are presented with the following options If you would like to print information regarding the application, Click on This will bring up a window similar to the following. 120 To Print the details of this screen Click on Found at the top right hand of the pop up screen and follow the prompts to print the application details. Once you have printed the application details, Click on To close the pop up screen. Selecting your draft application/submission Once you have searched for and found the draft application/submission you were looking for, simply point to and click on that application/submission. This opens up the application enabling you to continue to work on or complete your application/submission. 121 View Lodged Submissions The View Lodged Submissions screen allows you to view the status of an Application/Submission you have lodged with the TGA. Select Portal – Therapeutic Goods Administration When the screen drops down Click on the View Lodged Submissions option This takes you to a list of all your submitted Applications/Submissions. Change Requests; and Included Medical Device – Class 1 will not appear in this list. Searching for your Lodged Submission or Application Once you have selected View Lodged Submissions The system provides a list of all your current ‘active’ applications and submissions. These appear in a similar format to the following. 122 If you have a number of Applications/Submissions lodged with TGA, you will need to be able to find and identify it. The TGA e-Business system provides a number of means to enable you to do this. Printing a list of your Lodged Submissions and Applications It’s sometimes easier to look through your list from a paper copy. If you would like a paper copy of your Lodged Submissions, you can print one. At the top of the screen you will see the following: Click on This will bring up a preview screen identifying your Lodged Submissions and Applications. Click on Which is found at the top of the preview screen and follow the prompts to print your list. Click on To close the pop up screen. Scrolling through View Drafts list You can use the usual scroll bar to scroll up and down the list of your Lodged Applications/Submission on the visible page. If you however need to search further, page selection buttons at the top of the screen. 123 Clicking on the particular number will take you directly to that page number where you can use the scroll bar to scroll up and down that page. The and button will take you either back to the first page, or to the final page of your Lodged Submissions. Search options There are a number of other means by which you can search for your Lodged Submission or Application. Broadly, you can - filter using drop down lists; or - sort by using column headings Field Search options Field Search areas include by: Approval Area: Sponsor: or Search On / For At Approval Area: you can select the following from the drop down list. At Sponsor – The drop down list provides a list of your sponsors. You can search for application(s) using one of these Sponsors The search on: option allows you to narrow your search to: Received (Date received by TGA) Identifier (the Unique Application Identifier number) Workflow Status (Whether it is under review or just submitted) Description (Of the Device) Product Name (If you have given it one) 124 An example of the specific search might be: Click on Identifier You know that the application you are searching for is for a Device Application (DA) Type DA in the for field This automatically lists all your Lodged Device Applications Column Search Option This is a very interactive option, you simply point and click on the preferred column heading. For Example, if you click on the Column heading ‘Date’ it will sort all the Lodged Applications/Submissions in either ascending or descending order. If you Click on the button All the draft applications and submissions will be re-listed enabling you to start a fresh search. 125 Information Buttons and To the left hand side of the View Drafts list you will see the and buttons. Click on This brings up a mini information screen which provides some details about the particular Application/Submission. The screen is similar to the following. If you wish to retrieve more information than that provided in the Mini Screen Click on This gives you the print preview option If you click on This will bring up a window similar to the following. 126 To Print the details of this screen Click on Found at the top right hand of the pop up screen and follow the prompts to print the application details. Once you have printed the application details, Click on To close the pop up screen. 127


