1
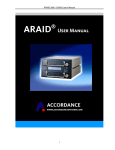
Warmer Operating Instructions Model Number 7939 | REF 7939-X For warming premoistened cloth and hair care products manufactured by Sage Products LLC. PLEASE READ AND UNDERSTAND THESE INSTRUCTIONS COMPLETELY PRIOR TO OPERATING THIS WARMER. IMPORTANT SAFETY INSTRUCTIONS This warmer is to be used SOLELY for warming premoistened cloth and hair care products manufactured by Sage Products LLC. The warmer has been designed and safety tested to be used exclusively with these products. ANY other use of the warmer by the facility including, but not limited to, use with other bathing products, can result in overheating, fire or other hazardous conditions and is expressly forbidden. WARNING: To reduce the risk of fire, burns, electrical shock or injury: 1. Read all instructions before using this warmer. 2. Grounding reliability can only be achieved when the equipment is connected to an equivalent receptacle marked “hospital only” or “hospital grade.” 3. Install this warmer only in accordance with the installation instructions found in this manual. 4. DO NOT cover or block any openings on this appliance. 5. DO NOT tamper with or make any adjustments to the control panel, housings, safety switches, or any other part of the warmer. 6. DO NOT remove any panel or cover. 7. DO NOT store or use this appliance outdoors. DO NOT use this product near water—for example, near a kitchen sink, in a wet basement, or near a swimming pool. 8. DO NOT use this warmer for any material other than premoistened cloth and hair care products manufactured by Sage Products, in accordance with instructions on the label. 9. DO NOT let the cord hang over edge of table or counter. 10. This warmer is to be used by adults familiar with its operation and these safety instructions. 11. DO NOT operate this warmer if it has a damaged cord or plug, if it is not working properly, or if it has been damaged or dropped. 12. DO NOT immerse cord or plug in water. 13. DO NOT operate this warmer if any component is broken. Contact Sage Products for repair or replacement. 14. Keep cord away from heated surfaces. 15. The warmer is to be serviced only by qualified service personnel. If there are no external or user-serviceable fuses, contact Sage Products for repair or adjustment. For external or user-serviceable fuses, check them and replace if necessary. If new fuses do not correct the condition, or if fuses continue to blow, contact Sage Products for repair or adjustment. 16. Use this appliance only for its intended purpose as described in this manual. DO NOT use corrosive chemicals or vapors in this appliance. This type of warmer is specifically designed to warm premoistened cloth and hair care products manufactured by Sage Products. It is NOT designed for industrial or laboratory use. The use of corrosive chemicals in heating or cleaning will damage the appliance and may result in product failure. 17. TO REDUCE THE RISK OF FIRE: • Warm only premoistened cloth and hair care products manufactured by Sage Products. • DO NOT use to heat or store any other material or products. • If materials inside the warmer should ignite, keep the door(s) closed, turn the warmer off, and disconnect the power cord, or shut off power at the fuse or circuit breaker panel. 18. DO NOT store flammable materials in the proximity of the warmer. It could be a fire hazard. 19. Equipment not suitable for use in the presence of a flammable anesthetic mixture with air, or with oxygen or nitrous oxide. 20. This warmer uses conduction heating. 21. The warmer should NOT be adjusted outside of menu driven options by anyone except properly qualified personnel. Contact Sage Products for authorized service. 22. Medical electrical equipment needs special precautions regarding electromagnetic compatibility (EMC) and needs to be installed and put into service according to these instructions. The end user of this product should assure it is used in such an environment that the power frequency magnetic fields should be at levels characteristic of a typical location in a typical commercial or hospital environment. -2- STATUS DISPLAY SYSTEM Your new warmer is equipped with a status display system that is designed to provide information on the heating status of the packages in the unit. The status lights are activated when a package is placed in a slot in the warmer. They alert the user when a package has reached the target temperature by showing a steady green light. The warmer is also capable of alerting the user as to which packages have been in the warmer for an extended period of time. Packages that have been in the warmer for 48 hours will display a flashing green light. These packages should be used first. This aids in package stock rotation so product remains fresh. If preferred, required by hospital policy, or if recommended for a specific product, the warmer can be set to display a red light indicating a need to dispose of packages that have remained in the warmer for an extended period. To change this setting, locate the switch on the back of the warmer and select either B or C. Below is a detailed description of the settings. TAKE FIRST (Switch position B) 1. NOT READY - Yellow Light The yellow light indicates the package in this slot has been in the warmer less than two hours and may not have reached the target temperature. 2. READY / TAKE FIRST - Steady Green Light / Flashing Green Light The steady green light indicates the package in this slot has been in the warmer long enough to reach the target temperature and is ready for use. After 84 hours, the green light will begin to flash, indicating which packages should be used first. This feature helps you use the products in your warmer in the order in which they were stocked. If more than a few packages of a certain product type have the flashing green light lit for an extended period of time, it may be appropriate to cut down on the number of slots filled with that product code and restock them with one of your higher usage products. If patient census is low and more than a few slots frequently indicate a flashing green light, it may be appropriate to leave a few slots empty until product usage increases. DISPOSE (Switch position C) - Time-limited setting; dispose of packages remaining in warmer for >84 hrs 1. NOT READY - Yellow Light The yellow light indicates the package in this slot has been in the warmer less than two hours and may not have reached the target temperature. 2. READY / TAKE FIRST - Steady Green Light / Flashing Green Light The steady green light indicates the package in this slot has been in the warmer long enough to reach the target temperature and is ready for use. After 48 hours, the green light will begin to flash, indicating which packages should be used first. This feature helps you use the products in your warmer in the order in which they were stocked. If more than a few packages of a certain product type have the flashing green light lit for an extended period of time, it may be appropriate to cut down on the number of slots filled with that product code. If patient census is low and more than a few slots frequently indicate a flashing green light, it may be appropriate to leave a few slots empty until product usage increases. 3. DISPOSE - Red Light The red light indicates the package in this slot has been in the warmer for greater than 84 hours and should be discarded. The temperature displayed on the front of the warmer reflects the target internal operating temperature of the warmer. Additionally, the warmer is equipped with a protective device designed to turn the unit off in the event of overheating. The warmer will remain inoperable until it has cooled. Please refer to individual product packaging for instructions, ingredients, warnings and other information. -3- INSTALLATION AND GROUNDING INSTRUCTIONS Examine Your Warmer Unpack warmer, remove all packing material and examine the unit for any damage such as dents, broken door hinges or cracks in the door. Notify Sage Products immediately if warmer is damaged. DO NOT install or operate if warmer is damaged. Remove Protective Plastic Film If a plastic film has been wrapped around the warmer to protect the painted finish from scratching during shipping, please remove this plastic film prior to use. (However, not all warmers have plastic film wrapping.) Attach Power Cord to Warmer Power cord ships inside warmer; remove from inside unit and attach to Warmer. Placement of Warmer 1. Warmer must be placed on a flat, stable surface. For proper operation, the warmer must have sufficient air flow. Allow 3 inches (7.62 cm) of space on both sides of the warmer and 1 inch (2.54 cm) of space on top of the warmer. a) DO NOT block air vent. If it is blocked during operation, the warmer may overheat. If overheating occurs, a thermal safety device will turn the unit off. The warmer will remain inoperable until it has cooled. b) DO NOT place warmer near a hot, damp surface, such as a gas or electric range. c) Be certain that power cord on the warmer can reach the electrical outlet. d) Be certain electrical outlet is not blocked by the warmer. Power cord must be able to be unplugged without moving the warmer. 2. Warmer should be located in or near the nurse’s station or supply room, and at least 5 feet (1.5 m) from patients. Grounding Instructions This appliance must be grounded. In the event of an electrical short circuit, grounding reduces the risk of an electric shock by providing an escape wire for the electric current. This appliance is equipped with a cord having a grounded wire with a grounded plug. The plug must be plugged into an outlet that is properly installed and grounded. WARNING: Improper use of the grounding plug can result in a risk of electric shock. Consult a qualified electrician or service person if the grounding instructions are not completely understood, or if doubt exists as to whether the appliance is properly grounded. If it is necessary to use an extension cord, use only a three slot receptacle that will accept the plug on the appliance. The marked rating of the extension cord should be equal to or greater than the electrical rating of the appliance. Wiring Requirements 1. US Configuration: Rating: 120V AC / 60 Hz / 7 AMP input. EU Configuration: Rating: 240V AC / 50 Hz / 3.5 AMP input. 2. The power cord is to be used for mains disconnection. 3. For US configuration, a hospital-grade receptacle is required. 4. For US customers without a proper hospital-grade receptacle, it is the responsibility and obligation of the user to have it replaced with a properly grounded, hospital-grade receptacle. 5. Using incorrect voltage may result in fire or other accident causing warmer damage. Sage Products LLC is not responsible for damage resulting from use of the warmer with voltages other than those specified. Voltage used must be the same as that specified on equipment rating label. 6. The warmer must be on a SEPARATE CIRCUIT. No other appliance, with the exception of another Sage Warmer, should share the circuit with the warmer. If it does, the branch circuit fuse may blow, the circuit breaker may trip or products may warm slower than expected. 7. If using more than one Sage Warmer: A maximum of 2 Sage Warmers may be used on the same circuit. Do not exceed capacity of circuit. -4- SAFETY PRECAUTIONS This warmer is to be used SOLELY with premoistened cloth and hair care products manufactured by Sage Products. The warmer has been designed and safety tested to be used exclusively with these products only. ANY other use of this warmer by the facility including, but not limited to, use with other brands of products, can result in overheating, fire or other hazardous conditions and is expressly forbidden. General Use 1. DO NOT tamper with or make any adjustments to the control panel, housings, safety switches, or any other part of the warmer. Repairs should only be done by a qualified service person. Contact Sage Products for authorized service. 2. DO NOT use warmer if door/window is shattered/cracked, broken or has sharp edges. Repairs should only be done by a qualified service person. Contact Sage Products for authorized service. 3. If a fire occurs in the warmer, LEAVE DOOR(S) CLOSED. Disconnect the power cord, or shut off power at the fuse or circuit breaker panel. 4. DO NOT store flammable materials next to, on top of, in or near the warmer. They could be a fire hazard. 5. Your warmer is equipped with a protective device designed to turn the unit off in the event of overheating. The warmer will remain inoperable until it has cooled. 6. No preventative maintenance is recommended except routine cleaning as described above. CAUTION: If there is any indication that the premoistened cloth and/or hair care products are excessively hot, do not use. Remember, gloves diminish your sensitivity to heat. Closely monitor heat level with infants, unresponsive or skin sensitive individuals. Products are for individual use only. INSTRUCTIONS FOR USE E xamine the warmer before plugging in power cord. If any part appears damaged, do not use the warmer. Contact your Sage Products Representative immediately. ON/OFF switch on back warmer ( | = ON, O = OFF) 1. To install warmer, position unit on a sturdy, flat surface, such as a counter top or cart provided by Sage Products. For proper grounding, plug cord into AC receptacle marked “hospital only” or “hospital grade.” Turn power switch on back panel to ON position. When power is turned on, the warmer goes through the following self-diagnostic tests: • All LED indicators will flash once. • Temperature indicator counts down. If no faults are found, LED indicators will turn off if no packages are present in warmer slots. If packages are present, the LED indicators for the filled slots will indicate NOT READY. If a fault condition exists, LED indicators will not light up if a package is present in the warmer slots. Unused slots will indicate a NOT READY status. Discontinue use of the warmer unit and contact Sage Products. 2. Before stocking the warmer, make sure you have set the Status Indicator Display to the desired setting [Position B or C] to display TAKE FIRST or DISPOSE for packages that have remained in the warmer for an extended period. See page 2 of this manual for information on how to change the Status Indicator Display. 3. To stock warmer, open door(s) and fill slots with one package per slot. Place packages on shelves so they do not interfere with closing of door(s). Packages should be placed far enough back that they contact rear of shelves, but not beyond. Close warmer door(s). DO NOT place previously opened packages into warmer. 4. Packages require approximately 2 hours to warm. Packages are ready for use when the READY indicator is illuminated. To remove a package for use, open door(s). Remove package(s). Close warmer door(s), making certain door(s) close completely. 5. Replacement parts and service: Before performing any repairs or service on this warmer, contact Sage Products. 6. Fuses: This warmer is equipped with two externally accessible fuses. Turn off and unplug the warmer before attempting to remove fuses. If the warmer stops running, check the fuses on the back side of the cabinet’s exterior. If a fuse is blown, replace it with another fuse of identical rating. If the new replacement fuse blows, contact Sage Products for further instructions. To replace fuse: Turn off and unplug unit. Find the round knob/receptacle on the rear panel of the warmer cabinet labeled FUSE and remove the fuse cover as indicated by the arrow on the fuse cover. Remove the fuse and replace it with an 10 AMP, 250 VOLT fuse (T10A, 250V) and replace the fuse holder cover. Plug the warmer into the power outlet and turn power switch to the ON position. If warmer will not run, or does not run properly after replacing the fuse, call Sage Products for further direction. 7. Premoistened cloth and hair care products manufactured by Sage Products LLC: Refer to individual product package for instructions, ingredients, warnings and other information. -5- CARE OF YOUR WARMER 1. Unplug the warmer before cleaning. 2. Keep the inside of the warmer clean. If spatters or fluid adhere to walls, wipe with a damp cloth. Mild detergent may be used if the warmer gets very dirty. The use of harsh detergent or abrasives is not recommended. NEVER clean the warmer with alcohol or solvent-based cleansers. Alcohol or solvents on door(s) or status indicator display columns can weaken and cause cracking of these components. 3. The outside warmer surfaces should be cleaned with a large, damp cloth, as needed. To prevent damage to the operating parts inside the warmer, water should not be allowed to seep into the ventilation openings or any other openings on the cabinet exterior. Use cloths that have been dampened with mild detergent solution only, but not so wet as to drip liquid or cause liquid to pool in warmer. 4. If external electrical components become wet, including the display columns, power cord, power switch on front of cabinet and external fuse access (if so equipped), clean with a soft, dry cloth and allow to air dry. DO NOT use harsh detergents or abrasives on any external components. 5. Cleaning inside the warmer outer panels and inside the warmer base should be performed only by qualified service personnel after taking precautions to drain all stored voltage potential. Contact Sage Products for authorized service. 6. Inspect warmer and power cord for wear or damage annually. 7. Warmer does not require maintenance or calibration. ACCESSING THE USER-DEFINED FEATURES Adjusting the Temperature - Fahrenheit (°F) or Celsius (°C) The warmer is capable of warming products to a user-defined temperature. The user has the ability to adjust the temperature between 100°F and 125°F (38°C - 52°C) for configuration B, or between 100°F and 125°F (38°C - 52°C) for configuration C. NOTE: Temperature performance of unit will vary. 1. Press the MENU key below the display from the default temperature display screen. 2. Using the UP/DOWN arrow keys located to the right of the display, highlight SET TEMPERATURE and press the SELECT key below the display. 3. When prompted, enter the following key sequence: UP ARROW, DOWN ARROW, UP ARROW. 4. Using the UP/DOWN arrow keys, select the desired temperature for the contents of the warmer. 5. After the desired temperature is selected, press the SAVE/EXIT key located below the display. If you wish to discard the changes, press the CANCEL key located below the display. 6. The warmer will then display the temperature set point on the main screen. If the temperature of the warmer falls outside of the set point ± 5°F, the display will read the actual temperature of the warmer. Adjusting the Temperature Display Units (°F or °C) The warmer is capable of displaying temperature in units of Celsius or Fahrenheit. 1. From the default temperature display screen, press the °C key located below the display if Fahrenheit is displayed and Celsius is desired. If Celsius is displayed and Fahrenheit is desired, press the °F key located below the display. Using the Inventory Tracking Feature The warmer has the ability to track the number of packages used over a period of time. The inventory tracking feature can display the amount of packages removed from the warmer for a specific month, or over the previous twelve-month period. 1. From the default temperature display screen, press the MENU key located below the display. 2. Using the UP/DOWN arrow keys located to the right of the display, highlight CHECK INVENTORY and press the SELECT key below the display. 3.The UP/DOWN arrow keys located to the right of the display can be used to select the month that you wish to be displayed. The display will initially display the current month’s usage and the usage over the previous twelve months. The total displayed is cumulative. 4. When done, press the EXIT key located below the display to return to the temperature display screen. FreeRTOS Software: This device uses FreeRTOS, version 5.1.1, which is licensed under a modified GPL. For a copy of the FreeRTOS source code, or details of the modified GPL, please visit www.FreeRTOS.org. You may also obtain a copy of version 5.1.1 of the FreeRTOS source code from Sage Products Customer Service by emailing [email protected] or calling 1-800-323-2220. -6- TECHNICAL SPECIFICATIONS Product Code 7939 (US Configuration) 7939-X (EU configuration) Input Rating 120 V AC / 60 Hz / 7 AMP 240 V AC / 50 Hz / 3.5 AMP Target Temperature (B Configuration) Adjustable between 100°F and 125°F (38°C - 52°C) Adjustable between 100°F and 125°F (38°C - 52°C) Target Temperature (C Configuration) Adjustable between 100°F and 125°F (38°C - 52°C) Adjustable between 100°F and 125°F (38°C - 52°C) Default Temperature Setting (B Configuration) 125°F (52°C) 125°F (52°C) Default Temperature Setting (C Configuration) 125°F (52°C) 125°F (52°C) Ambient Operating Range 60°F - 80°F (16°C - 27°C) 60°F - 80°F (16°C - 27°C) Relative Humidity Operating Range 50 - 70% 50 - 70% Operating Pressure 70 kPa - 106 kPa 70 kPa - 106 kPa Outer Dimensions (H x W x D) 18.38” x 27.56” x 15.38” (467mm x 700mm x 391mm) 18.38” x 27.56” x 15.38” (467mm x 700mm x 391mm) Net Weight (N.W.) Gross Weight (G.W.) N.W.: 49 lb. (22 kg) G.W.: 58.4 lb. (26.5 kg) N.W.: 49 lb. (22 kg) G.W.: 58.4 lb. (26.5 kg) Mass with Max Working Load (fully loaded unit) 66.1 lb. (30 kg) 66.1 lb. (30 kg) Mass with Max Working Load (fully loaded cart and unit) 146.6 lb. (66.5 kg) 146.6 lb. (66.5 kg) Classification Class I Class I Degree of Protection Against Ingress of Water IPXO IPXO Mode of Operation Suitable for Continuous Operation Suitable for Continuous Operation Storage / Transport Temperature -22 - 149°F (-30 - 65°C) -22 - 149°F (-30 - 65°C) Storage / Transport Relative Humidity 10% to 90% 10% to 90% Storage / Transport Atmospheric Pressure Range 500 to 1060 hPa 500 to 1060 hPa Standards - UL / EN / CSA / IEC 60601-1 UL 60601-1 Medical Electrical Equipment UL 60601-1 Medical Electrical Equipment UL Classification IEC 60601-1, 2nd Edition IEC 60601-1, 2nd Edition Third Party Evaluation and Testing IEC 60601-1, 3rd Edition IEC 60601-1, 3rd Edition Characteristics Powder Coated Steel Exterior / Plastic Door and Window / Steel Front Flange / Aluminum Interior and Shelves Powder Coated Steel Exterior / Plastic Door and Window / Steel Front Flange / Aluminum Interior and Shelves Fuse Type T10AH, 250V T10AH, 250V Disposal Follow national requirements Follow national requirements Consult Instructions for Use Refer to accompanying documents Refer to accompanying documents Protective Earth (Ground) Protective earth ground terminal Protective earth ground terminal Applied Parts No applied parts No applied parts Caution Equipment not suitable for use in the presence of flammable anesthetics Equipment not suitable for use in the presence of flammable anesthetics Medical equipment with respect to electric shock, fire and mechanical hazards only, in accordance with UL60601-1 and CAN/CSA C22.2 No. 601.1. E230169 -7- SAVE THESE INSTRUCTIONS FOR PROPER USE OF YOUR WARMER. READ ALL SAFETY CAUTIONS AND OPERATING INSTRUCTIONS. http://www.sageproducts.com/products/warmers-microwave/warmers.cfm Sage® 28-Count Warmer Reorder # 7939 | REF 7939-X Accessories: Comfort Personal Cleansing® Cart Reorder # 7920 R99038C © Sage Products LLC 2014 Rev. 000 Manufactured for: Sage Products LLC 3909 Three Oaks Road • Cary, IL 60013 800-323-2220 • +1 815-455-4700 www.sageproducts.com