1
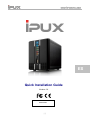
ES Quick Installation Guide Version 1.4 BARCODE [1] Introduction 1.1 System Requirements One or two 3.5" SATA hard drives with a capacity of 80GB - 3TB per HDD. Windows® Computer with Microsoft .NET Framework 4, NVR Setup Wizard, NVR Remote Client (or Internet Explorer browser). Network switch or router with one free Ethernet port (preferably with internet access). Optional mobile device (e.g. iPhone or iPad) running iOS or Android with iNVR Mobile App. 1.1.1 Supported USB Devices USB hard drives or USB flash drives using NTFS. 1.2 Safety Information 1.2.1 Location and placing precautions Avoid positioning the device in the following places: Locations with direct sunlight, next to radiators or other sources of heat with high temperatures (more than 35° C) or high humidity (more than 90%). Locations subject to vibration, shock, or with a slope. Do not expose the product to water or humid conditions. 1.2.2 Electricity and power plug Careful attention must be paid to the following points in order to avoid electric shock or fire: Always connect the power cord to your device before you plug it into the wall socket. Do not touch the power cable with wet hands and never try to modify the power cable. If the unit should emit smoke, an unusual odour or noise, switch it off immediately. Use only the cables supplied or recommended by your vendor in order to avoid malfunction. 1.3 How to login Use the NVR Setup Wizard to locate the device and open the NVR Remote Client or Internet Explorer browser to login. User name for the administrator: admin Default password: 1234 1.4 About this Manual Firmware, images and descriptions may slightly vary between this manual and the actual product you have. For a more detailed user manual, go to http://www.ipux.net/support.html 1.5 Trademarks Microsoft and Windows® are trademarks of Microsoft Corporation. All other third party brands and names are the property of their respective owners. © Copyright 2013 by IPUX. All Rights Reserved The information contained in this manual is believed to be accurate and reliable. IPUX assumes no responsibility for any errors contained in this manual. IPUX reserves the right to make changes in the specifications and/or design of this product without prior notice. The diagrams contained in this manual may also not fully represent the product that you are using and are there for illustration purposes only. IPUX assumes no responsibility for any differences between the product mentioned in this manual and the product you may have. [2] 1.6 Detailed View Label Description USB 2.0 host port Gigabit Ethernet port DC +12V Reset Power receptacle System reset button Security lock slot LED Meaning Power button (blue when turned on) Blue = System ready Flashing blue = System is starting up or shutting down OS Flashing green = Data access Red = System error or upgrade firmware Orange = USB drive connected (front port only) Flashing orange = Video clips copy from NVR to USB drive (front port only) USB copy button (press to copy video clips from NVR to USB drive on the front) Copy USB 2.0 host port Note: OS, and will flash when press and hold the Reset button for 5 seconds. 1.6.1 Power ON/OFF Procedure Connect the power supply to your device first and only then plug it into the wall socket. To turn on the device, press the power switch to start up the system. It will take about 1-2 minutes for the device to go online but the blue system LED (OS) will indicate when the system is ready. To safely turn off the device, press and hold the power switch for 3 seconds until the blue system LED (OS) starts flashing. The system will then shut down all services and about 20 seconds later, it will power down. If for some reason the system is unresponsive, press and hold the power switch for 6 seconds to forcefully shut down the system and cut off the power. 1.7 HDD Installation Remove the screw at the bottom of the case and lift the front panel upward and away from the housing to remove it. Install the hard drives as illustrated below with the top of the drives, where the label is located, facing each other. Push the drives lightly into place and then replace the front panel. Mount the front panel and the drives by fastening the screws at the bottom of the case. [3] 2 Getting Started 2.1 Before Use 2.1.1 Network Setup Do not connect the device directly to your computer but to a network switch or router on the same local network as the computer that is used to access the data. Note To make use of all the functions and features, make sure the device is connected to a network with internet access. 2.1.2 Setup NVR via Wizard The NVR Setup Wizard (SetupWizard program) performs the initial setup procedures on the NVR unit. After this procedure, you can begin access NVR via Windows® remote client or WEB remote client.. 1. 2. 3. 4. Get the NVR Client installation file. Double-click NVR Client Installation.exe to begin installation. Follow the instruction of NVR Client Installation.exe to install, or click the Exit button to close the installer. Click the Start button -> NVR Remote Client -> SetupWizard. [4] 5. Choose your preferred language and then click the Next button 6. Click Search button, the NVR Setup Wizard will start searching for all the available NVRs on the LAN currently. Choose one of them, and then click the Next button. [5] 7. Type in the admin password (default is “1234”), click the OK button and then click the Next button. 8. Type in the NVR hostname, http port (default is 80) and eth0/eth1 network setting, and then click the Next button. [6] 9. DHCP IP Setting: obtain IP Address, Netmask, Gateway, Primary DNS Sever and Secondary DNS Server automatically via DHCP Static IP Setting: configure IP Address, Netmask, Gateway, Primary DNS Sever and Secondary DNS Server manually. Add cameras for this server. Click Search to automatically find all IP cameras on the LAN currently. (adjust the Timeout parameter of the left bottom if can’t find any connected IP camera, the default value is 60 seconds) Select the check box next to the desired IP camera or All for all IP cameras, and then click Next button. [7] 10. Type in Admin Name and Password of searched IP camera or manually configuring the IP cameras for the Address, Port, Admin Name, Password, CH ID(video server only), Vendor, Model No. and click Apply and then Next button. 11. Click Start up NVR remote client or Start up NVR Web client to bring up the NVR remote client or Web client. 12. Click the Exit button to finish the settings procedure and activate the NVR unit. [8] 2.1.3 Remote login via NVR Remote Client Click the Start button -> NVR Client -> NVR Remote Client at your Windows® desktop. When the client is up, you will see the following login window. Login your NVR unit by entering its NVR Name, IP Address, Port No., User Name, Password, Language and Resolution and then click OK begin using this unit. (Note: The default administrator: User Name is admin, Password is “1234”). After entering the correct information, you will see the live display screen within 10 seconds. 2.1.4 Remote login via WEB Client Open Internet Explorer browser and enter NVR’s IP address in URL field. Go to the IP address, users have to choose a language and enter the correct User Name and Password to login this NVR system. Note: Using WEB client for the first time, please add this NVR as browser’s trusted sites to make sure WEB client has download privilege: 1. Click the Start button -> Internet Explorer at your Windows® desktop. 2. Click the Tools button, and then click Internet options. 3. Click the Security tab. 4. Now click on Trusted sites and then click on the sites button. 5. Enter the Website URL and click on Add. 6. When you are finished, click on Close [9]