1
User Manual
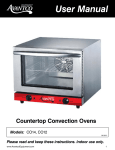
Countertop Convection Ovens
Intertek
Models: CO14, CO16, CO28
08/2014
Please read and keep these instructions. Indoor use only.
www.AvantcoEquipment.com1
User Manual
Index
Important Safety Information ������������������������������������������������������������� 3
Identification of Key Parts������������������������������������������������������������������� 4
Identification of Accessories���������������������������������������������������������������� 4
Before Using Your Oven����������������������������������������������������������������������� 5
Using Your Oven................................................................................... 5
Typical Operation Sequence���������������������������������������������������������������� 5
Timer................................................................................................... 6
Temperature Control Knob������������������������������������������������������������������ 6
Power and Heating Indicator Light������������������������������������������������������� 6
Protection Component������������������������������������������������������������������������ 6
Cleaning and Maintaining Your Oven��������������������������������������������������� 6
Specifications....................................................................................... 7
Limited Warranty................................................................................. 7
Troubleshooting................................................................................... 7
Parts List.............................................................................................. 8
2www.AvantcoEquipment.com
User Manual
IMPORTANT SAFETY INFORMATION
When using electrical appliances, basic safety precautions should always be followed,
including the following:
1.
2.
3.
4.
5.
6.
7.
8.
9.
10.
11.
12.
13.
14.
15.
16.
17.
18.
19.
20.
21.
22.
23.
24.
25.
26.
Read all instructions carefully and completely.
For commercial use only.
Do not touch hot surfaces.
Protect against electrical shock by keeping all cords, plugs, and other electrical components away
from water or other liquids.
Unplug this unit when not in use and before cleaning.
Allow the unit to cool before putting on or taking off parts.
Do not operate this or any appliance with a damaged electrical cord or plug.
Do not operate this or any appliance after it has malfunctioned or been damaged in any way.
Do not use outdoors.
Do not place on or near a hot gas or electric burner.
Attach plug to appliance first, then plug electrical cord into the wall outlet.
Disconnect the unit by turning the temperature and timer control to "OFF", then removing the
electrical plug from the wall outlet.
Do not use appliance for any application other than intended use.
Do not insert metal utensils or oversized foods into this unit as they may cause a fire and heighten
the risk of electrical shock.
Do not store any item on top of this unit when in operation.
Do not allow this oven to touch or be covered by flammable material, such as curtains, draperies,
walls, etc., when in operation.
Do not clean with metal scouring pads as pieces can break off and touch electrical components,
heightening the risk of electrical shock
Never place materials such as paper, cardboard, plastic, etc. in this oven.
Do not cover interior of this unit with metal foil as it may cause the oven to overheat.
Avoid scratching the surface or nicking the edges of this unit’s tempered, safety glass door. If the
oven door has a scratch or nick, contact customer service before use.
Turn the appliance off by turning the temperature and timer control to the "OFF" position.
Note that the use of accessories not recommended by the manufacturer may result in injury.
Children should be supervised to ensure that they do not play with the oven.
This appliance is not intended for use by persons (including children) with reduced physical
sensory or mental capabilities, or lack of experience and knowledge, unless they have been given
supervision or instruction concerning use of the appliance by a person responsible for their safety.
When using the appliance in shops, snack bars, hotels etc., check the voltage and outlet to make
sure the appliance is correctly connected with power.
Place unit on a flat surface that is well ventilated. The appliances must be supervised during
operation, DO NOT leave appliance without powering off.
NOTE: Save these instructions for future reference.
www.AvantcoEquipment.com3
User Manual
Identification of Key Parts
Identification of Accessories
Roasting Racks
- 177COTRAY1 for 177CO14
- 177COTRAY2 for 177CO16, 177CO28
Recommended Bun Pans
- Quarter Size (407BUNQRTR) for 177CO14
- Half Size (407BUNHALF) for 177CO16, 177CO28
4www.AvantcoEquipment.com
User Manual
BEFORE USING YOUR OVEN
Before cooking anything in your oven for the first time, please follow these simple instructions:
Using a small amount of detergent, wash the handle and roasting racks with soapy water. (NOTE: Do not use
a spray or abrasive polishing agent.) Gently wipe down interior walls with a damp cloth. While washing this
unit, do not to touch the electric heating element. Do not soak the inside of the oven with water.
After washing and thoroughly drying the surfaces noted above, place the roasting racks back inside the oven.
Close the oven door and preheat the oven to its highest temperature setting for 5 minutes.
Turn off the heating elements and open the oven door in order to remove any smoky residue from inside the
oven. The heating elements are well lubricated and this initial use will help burn off the extra grease. A
light amount of smoke is normal during this process.
Using Your Oven
To start your oven, you need to turn on the temperature dial to set your desired cooking
temperature, and turn on the timer dial to set the cooking time.
CAUTION: During the baking process, make sure that no metal accessory comes in contact with
the electric heating elements.
CAUTION: Foods baked in this oven will be hot. Wear protective hand coverings when reaching
into oven to retrieve food.
Typical Operation Sequence
ACTION
Plug in your oven
Adjust temperature control knob
RESULT
Power is connected but power light will go on after
turning the temperature dial
Heating indicator light comes on; heating elements
begin to heat up
Temperature light shuts off
Oven has reached desired temperature
Load product into oven
Product will begin to cook
Set timer to desired cook time between 0-120 min
Timer starts timing down
Timer reaches zero
Timer chimes
Unload oven
Product will be cooked/hot; use caution removing it
from the oven
www.AvantcoEquipment.com5
User Manual
Timer
The range of the timer on this unit is 0-120 minutes. Turning the timer to the "0" position, the cooking
time is over and the timer will "ding" to alert.
If you need to reset the baking time while the oven is in operation, simply turn the timer to a new
position. The oven will reset the time according to the revised requirement without needing to be
turned off.
When the set baking time has been reached, the oven will chime and the heating elements will NOT
automatically shut off.
Temperature Control Knob
The temperature range of this unit is 0-500 degrees Fahrenheit on 120V models and 0-550 degrees
Fahrenheit on 208/240V models. This thermostatic switch controls the temperature inside the
oven and helps to maintain the proper temperature during various heating, roasting, and baking
applications.
Power & Heating Indicator Light
Anytime this appliance is connected to the power supply with the temperature knob turned on, the
power and heating indicator light will be on and the fan motor will begin to operate.
Protection Component
If the temperature of this oven reaches an unsafe limit, the electrical components will shut off and it
will stop operating in order to prevent overheating.
Cleaning & Maintaining Your Oven
To clean, first remove the power cord’s plug from the wall outlet. Wait for the oven to cool. Use a
damp cloth or sponge to gently wipe down the inside of the oven. Avoid soaking the inside of the
oven or washing it in running water as this will cause serious damage to the unit.
6www.AvantcoEquipment.com
User Manual
Specifications
MODEL #
POWER SUPPLY
DIMENSIONS
UNIT WEIGHT SIZE
PLUG
177CO14 120
120V
60Hz 1440W
18¾"W x 18"D x 15"H
30 lbs. (35 lbs. shipping)
Quarter
NEMA 5-15
177CO16 120
120V
60Hz 1600W
23"W x 22½"D x 16"H
43 lbs. (50 lbs. shipping)
Half 120V
NEMA 5-15
177CO28 208/240
208/240V 60Hz 2800W
23"W x 22½"D x 20"H
50 lbs. (59 lbs. shipping)
Half 208/240V NEMA 6-20P
Limited Warranty
All equipment, which is sold under Avantco trademark and used for commercial purpose is warranted
against defects in materials and workmanship. The warranty runs for six months from the date
of original installation and is for the benefit of the original purchaser only. All other Warranties,
Expressed or Implied, Statutory or Otherwise, including Without Limitation any implied Warranty of
Merchantability or Fitness for Purposes are excluded. The Seller shall in no event be liable for direct,
indirect or consequential damages in connection with Avantco commercial products.
This warranty is not effective if damage occurs because of accident, carelessness, improper
installation, lack of proper set– up, supervision when required or if the equipment is installed or
operated in any manner contrary to the installation and operating instructions. Work performed by
unauthorized personnel or unauthorized service agencies voids this Warranty.
This warranty does not apply to, and Avantco is not responsible for, any warranty claims made on
products sold or used outside of the United States.
Troubleshooting
Problem: The oven does not become hot after being switched on.
• Make sure oven is plugged in.
• Be sure that the temperature control knob is set.
Problem: There is a metallic sound when the oven is in use.
• Do not attempt to dismantle the oven.
• Contact your service agent right away to examine the fan.
Problem: Food is often overcooked or burned, even when cooked according to the recipe.
• Check that the fan motor is operating normally.
• Contact your service agent to examine the temperature control knob.
www.AvantcoEquipment.com7
User Manual
Parts List
PART CATEGORY
ITEM NUMBER
COMPATIBLE MODELS
Compatible Discontinued
Models
INTERIOR RACK BOLT
177COBOLT
ALL MODELS
CO12 QUARTER 120V
DOOR
177CODOOR1
CO14 QUARTER 120V
-
DOOR
177CODOOR2
CO16 HALF 120V
CO12 QUARTER 120V
DOOR
177CODOOR3
CO28 HALF 208V/240V
-
HEATING ELEMENT
177COELEMT12
CO16 HALF 120V
CO12 QUARTER 120V
HEATING ELEMENT
177COELEMT14
CO14 QUARTER 120V
-
HEATING ELEMENT
177COELEMT28
CO28 HALF 208V/240V
-
FAN ASSEMBLY
177COFANASSY
ALL MODELS
CO12 QUARTER 120V
FOOT
177COFOOT
ALL MODELS
CO12 QUARTER 120V
GASKET
177COGASKET1
CO14 QUARTER 120V
-
GASKET
177COGASKET2
-
CO12 QUARTER 120V
GASKET
177COGASKET3
CO16 HALF 120V
-
GASKET
177COGASKET4
CO28 HALF 208V/240V
-
DOOR HANDLE
177COHANDLE1
CO14 QUARTER 120V
-
DOOR HANDLE
177COHANDLE2
CO16 AND CO28 HALF
208V/240V
CO12 QUARTER 120V
KNOB
177COKNOB
ALL MODELS
CO12 QUARTER 120V
POWER CORD
177COPCORD
CO14 QUARTER 120V AND
CO16 HALF 120V
CO12 QUARTER 120V
POWER CORD
177COPCORD2
CO28 HALF 208V/240V
-
POWER INDICATOR LIGHT
177COPLIGHT
ALL MODELS
CO12 QUARTER 120V
HEATING INDICATOR LIGHT
177COWLIGHT
ALL MODELS
CO12 QUARTER 120V
INTERIOR SUPPORT SIDE RACK
177CORACK1
CO14 QUARTER 120V
-
INTERIOR SUPPORT SIDE RACK
177CORACK2
CO16 HALF 120V
CO12 QUARTER 120V
INTERIOR SUPPORT SIDE RACK
177CORACK3
CO28 HALF 208V/240V
-
SCREW
177COSCREW
ALL MODELS
CO12 QUARTER 120V
THERMOSTAT
177COTHERM
CO14 QUARTER 120V
(Serial #CL13110001 CL13110640)
CO12 QUARTER 120V
THERMOSTAT
177COTHERM2
CO14 QUARTER 120V
(Serial #CL14060001 and
beyond)
CO16 HALF 120V AND
CO28 HALF 208V/240V
-
TIMER
177COTIMER
ALL MODELS
CO12 QUARTER 120V
ROASTING WIRE RACK
177COTRAY1
CO14 QUARTER
-
ROASTING WIRE RACK
177COTRAY2
CO16 AND CO28 HALF
-
8www.AvantcoEquipment.com