Download User guide

Transcript
User guide
Xperia™ M4 Aqua
E2303/E2306/E2353
Contents
Getting started...............................................................................6
About this User guide........................................................................6
Overview............................................................................................6
Assembly...........................................................................................7
Starting your device for the first time.................................................8
Why do I need a Google™ account?.................................................9
Charging your device.........................................................................9
Multiple user accounts.....................................................................11
Learning the basics......................................................................14
Using the touchscreen.....................................................................14
Locking and unlocking the screen...................................................16
Home screen....................................................................................16
Application screen...........................................................................18
Navigating applications....................................................................19
Small apps.......................................................................................19
Widgets............................................................................................20
Shortcuts and folders......................................................................21
Background and themes..................................................................22
Taking a screenshot.........................................................................23
Recording your screen.....................................................................23
Notifications.....................................................................................24
Icons in the status bar.....................................................................26
Application overview........................................................................28
Downloading applications............................................................30
Downloading applications from Google Play™...............................30
Downloading applications from other sources................................30
Internet and networks..................................................................31
Browsing the web............................................................................31
Internet and MMS settings ..............................................................31
Wi-Fi®..............................................................................................32
Sharing your mobile data connection..............................................34
Controlling data usage.....................................................................35
Selecting mobile networks...............................................................36
Virtual private networks (VPNs)........................................................37
Synchronising data on your device..............................................38
Synchronising with online accounts................................................38
Synchronising with Microsoft® Exchange ActiveSync®.................38
Synchronising with Outlook® using a computer.............................39
2
This is an Internet version of this publication. © Print only for private use.
Basic settings...............................................................................40
Accessing settings...........................................................................40
Sound, ringtone and volume............................................................40
Managing notifications.....................................................................41
SIM card protection.........................................................................42
Screen settings................................................................................43
Daydream.........................................................................................44
Screen lock......................................................................................45
Language settings............................................................................46
Date and time...................................................................................46
Enhancing the sound output............................................................46
Typing text...................................................................................48
On-screen keyboard........................................................................48
Phonepad.........................................................................................49
Entering text using voice input........................................................50
Editing text.......................................................................................50
Personalising the on-screen keyboard............................................51
Calling..........................................................................................53
Making calls.....................................................................................53
Receiving calls.................................................................................54
Ongoing calls...................................................................................56
Using the call log.............................................................................56
Forwarding calls...............................................................................57
Restricting calls................................................................................57
Multiple calls....................................................................................58
Conference calls..............................................................................58
Voicemail..........................................................................................59
Emergency calls...............................................................................59
Contacts.......................................................................................61
Transferring contacts.......................................................................61
Searching and viewing contacts......................................................62
Adding and editing contacts............................................................63
Adding medical and emergency contact information......................64
Favourites and groups.....................................................................65
Sending contact information............................................................66
Avoiding duplicate entries in the Contacts application...................66
Backing up contacts........................................................................66
Messaging and chat.....................................................................68
Reading and sending messages......................................................68
Organising your messages..............................................................69
Calling from a message...................................................................70
Messaging settings..........................................................................70
3
This is an Internet version of this publication. © Print only for private use.
Instant messaging and video chat...................................................70
Email.............................................................................................71
Setting up email...............................................................................71
Sending and receiving email messages..........................................71
Organising your email messages.....................................................72
Email account settings.....................................................................73
Gmail™............................................................................................73
Music............................................................................................75
Transferring music to your device...................................................75
Listening to music............................................................................75
Walkman® home screen menu.......................................................76
Playlists............................................................................................77
Sharing music..................................................................................78
Enhancing the sound.......................................................................78
Visualiser .........................................................................................78
Recognising music with TrackID™..................................................79
FM radio.......................................................................................80
Listening to the radio.......................................................................80
Favourite radio channels..................................................................81
Sound settings.................................................................................81
Camera.........................................................................................82
Taking photos and recording videos...............................................82
Face detection.................................................................................83
Using Smile Shutter™ to capture smiling faces..............................83
Adding the geographical position to your photos...........................84
General camera settings..................................................................84
Still camera settings.........................................................................87
Video camera settings.....................................................................91
Photos and videos in Album........................................................94
Viewing photos and videos..............................................................94
Sharing and managing photos and videos......................................95
Editing photos with the Photo editor application.............................96
Editing videos with the Movie Creator application..........................97
Hiding photos and videos................................................................97
Album home screen menu...............................................................97
Viewing your photos on a map........................................................98
Videos........................................................................................100
Watching videos in the Movies application...................................100
Transferring video content to your device.....................................101
Managing video content................................................................101
Movie Creator................................................................................102
Video Unlimited service.................................................................102
4
This is an Internet version of this publication. © Print only for private use.
Connectivity...............................................................................103
Mirroring the screen of your device wirelessly on a TV.................103
Sharing content with DLNA Certified™ devices............................103
NFC................................................................................................106
Bluetooth® wireless technology....................................................107
One-touch setup............................................................................109
Smart apps and features that save you time.............................111
Controlling accessories and settings with Smart Connect™........111
Using your device as a fitness hub with ANT+™...........................113
Using your device as a wallet........................................................113
Travel and maps.........................................................................114
Using location services..................................................................114
Google Maps™ and navigation.....................................................114
Using data traffic when travelling..................................................115
Airplane mode................................................................................115
Calendar and alarm clock..........................................................116
Calendar.........................................................................................116
Alarm and clock.............................................................................117
Support and maintenance..........................................................119
Support for your device.................................................................119
Computer tools..............................................................................119
Updating your device.....................................................................120
Finding a lost device .....................................................................121
Finding the identification number of your device...........................123
Battery and power management...................................................123
Memory and storage......................................................................125
Managing files using a computer...................................................126
Backing up and restoring content.................................................127
Running diagnostic tests on your device.......................................129
Restarting and resetting.................................................................129
Using your device in wet and dusty conditions.............................130
Recycling your device....................................................................132
Limitations to services and features..............................................132
Legal information...........................................................................132
5
This is an Internet version of this publication. © Print only for private use.
Getting started
About this User guide
This is the Xperia™ M4 Aqua User guide for the Android™ 5.0 software version. If
you're not sure which software version your device is running, you can check it via
the Settings menu. For more information about software updates, see Updating your
device on page 120.
To check the current software version of your device
1
2
From your Home screen, tap .
Find and tap Settings > About phone > Android version.
Overview
6
This is an Internet version of this publication. © Print only for private use.
1. Charging/Notification light
11. Main camera lens
2. Proximity/Light sensor
12. Camera light
3. Ear speaker
13. GPS antenna area
4. Front camera lens
14. NFC™ detection area
5. Nano SIM card slot cover
15. Headset jack
6. Power key
16. Second microphone
7. Volume/Zoom key
17. Charger/USB cable port
8. Camera key
18. Wi-Fi/Bluetooth antenna area
9. Loudspeaker
19. Memory card slot cover
10. Main microphone
Assembly
Your device only supports nano SIM cards.
Don’t confuse the nano SIM card slot with the memory card slot. Inserting a card in the wrong
slot could damage both the card and your device.
To insert the nano SIM card
To prevent damage to your device, do not insert a nano SIM card that has been directly cut
from a USIM card.
1
2
3
Detach the nano SIM card slot cover.
Insert the nano SIM card into the nano SIM card slot.
Re-attach the cover.
If you insert a nano SIM card while the device is powered on, the device restarts automatically.
To insert the memory card
1
2
Detach the memory card slot cover.
With the gold coloured contacts facing down, insert the memory card into the
memory card slot, then re-attach the memory card slot cover.
7
This is an Internet version of this publication. © Print only for private use.
To remove the nano SIM card
1
2
3
4
Detach the nano SIM card slot cover.
Press the nano SIM card inwards until it makes a clicking sound and then
release it immediately.
Draw the nano SIM card fully outwards and remove it.
Re-attach the cover.
To remove the memory card
1
2
3
4
Turn off the device and detach the memory card slot cover.
Press the memory card inwards and then release it immediately.
Draw the memory card fully outwards and remove it.
Remove the memory card from the slot and re-attach the cover.
Instead of turning off the device, you can leave it on and unmount the memory card under
Settings by tapping Storage > Unmount SD card.
Starting your device for the first time
The first time you start your device, a setup guide opens to help you configure basic
settings, sign in to online accounts and personalise your device. For example, if you
have a Sony Entertainment Network account, you can sign in to it here and get set up
straight away.
You can also access the setup guide later from the Settings menu. To access the setup guide
on a device with multiple users, you must be logged in as the owner, that is, the primary user.
To turn on the device
Make sure that the battery is charged for at least 30 minutes before you turn on the device for
the first time.
8
This is an Internet version of this publication. © Print only for private use.
1
2
3
Press and hold down the power key until the device vibrates.
.
Enter your SIM card PIN when requested, then tap
Wait a while for the device to start.
To turn off the device
1
2
Press and hold down the power key
In the options menu, tap Power off.
until the options menu opens.
It may take a while for the device to shut down.
Why do I need a Google™ account?
Your Xperia™ device from Sony runs on the Android™ platform developed by
Google™. A range of Google™ applications and services is available on your device
when you purchase it, for example, Gmail™, Google Maps™, YouTube™ and Google
Play™, the online store for downloading Android™ applications. To get the most out
of these services, you need a Google™ account. For example, a Google™ account is
mandatory if you want to:
•
•
•
•
Download and install applications from Google Play™.
Synchronise email, contacts and the calendar.
Chat with friends using the Hangouts™ application.
Synchronise your browsing history and bookmarks.
For more information about Android™ and Google™, go to
www.sonymobile.com/support.
To set up a Google™ account on your device
1
2
3
From your Home screen, tap .
Find and tap Settings > Account settings > Add account > Google.
Follow the registration wizard to create a Google™ account, or sign in if you
already have an account.
You can also sign in to or create a Google™ account from the setup guide the first time you
start your device. Or you can go online and create an account at www.google.com/accounts.
Charging your device
Your device has an embedded, rechargeable battery that should be replaced only by
Sony or an authorised Sony repair centre. You should never try to open or take apart
the device yourself. Opening the device can cause damage that voids your warranty.
The battery is partly charged when the device is shipped from the factory. Depending
on how long your device was in the box before you purchased it, the battery level
may be quite low. It is therefore recommended that you charge the battery for at least
30 minutes before starting up your device for the first time. You can still use your
device while it is charging. To read more about how to improve the battery
performance, see Battery and power management on page 123.
9
This is an Internet version of this publication. © Print only for private use.
After immersing your device in water or after getting the USB port wet, make sure the
USB port is dry before you insert a USB cable into the port, for example, to charge
your device or connect it to a computer.
After exposure to water, the USB port dries out naturally after a number of hours. If
you don't want to wait for the port to dry naturally, you can shake any excess
moisture from the USB port and then use a micro-fibre cloth to wipe away any
remaining moisture.
To dry the USB port
1
2
3
4
Using a micro-fibre cloth, wipe away any excess moisture from your device.
With the device held firmly and the USB port facing downwards, shake the
device vigorously at least 15 times.
If moisture is still visible in the USB port, shake the device again several times.
Use a micro-fibre cloth to wipe away any remaining moisture from the USB
port.
10
This is an Internet version of this publication. © Print only for private use.
To charge your device
1
2
3
4
Plug the charger into a power outlet.
Plug one end of the USB cable into the charger (or into the USB port of a
computer).
Plug the other end of the cable into the micro USB port on your device, with
the USB symbol facing up. The notification light illuminates when charging
begins.
When the device is fully charged, disconnect the cable from your device by
pulling it straight outwards. Make sure not to bend the connector.
The USB connector does not go all the way into the USB charging port on your device. Part of
the USB connector is still visible when it’s connected to the charger.
If the battery is completely discharged, it may take a few minutes before the notification light
illuminates and the charging icon appears.
Battery notification light status
Green
The battery charge level is greater than 90%
Flashing red
The battery is charging and the battery charge level is less than 15%
Orange
The battery is charging and the battery charge level is less than 90%
Multiple user accounts
Your device supports multiple user accounts so that different users can log in
separately to the device and use it. Multiple user accounts work well in situations
where you share the same device with other people or lend your device to someone
to use for a while. The user who sets up the device for the first time becomes the
owner of the device. Only the owner can manage the accounts of other users. Apart
from the owner account, there are two different types of accounts:
•
•
Regular User: This account type is suitable for someone who regularly uses your
device.
Guest User: Enable the guest account option for someone who just wants to use your
device temporarily.
Some features are only available to the owner. For example, only the owner can allow
downloads from sources other than Google Play™.
About the Regular User account
By adding Regular User accounts, you can allow different users to have different
home screens, wallpapers and general settings. They also get separate access to
11
This is an Internet version of this publication. © Print only for private use.
applications and memory storage for files such as music and photos. You can add up
to three regular user accounts on your device.
To add a regular user account
1
2
3
4
5
6
Make sure you are logged in as the owner, that is, the user who set up the
device for the first time.
From your Home screen, tap .
Find and tap Settings > Users > Add user.
Tap OK > Set up now. The screen locks and an icon representing the newly
added user appears in the top right corner.
Unlock the screen, for example, by swiping or entering your PIN.
Follow the on-screen instructions to complete the procedure.
You can also add a regular user account from the status bar on any screen. Just drag the
status bar downwards using two fingers and tap the user icon, then tap Add user.
To allow a regular user to make phone calls and use SMS
1
2
3
4
Make sure you are logged in as the owner.
From your Home screen, tap .
Find and tap Settings > Users.
Tap beside the name of the relevant user, then drag the slider beside Allow
phone calls and SMS to the right.
To delete a regular user account from your device
1
2
3
4
Make sure you are logged in as the owner.
From your Home screen, tap .
Find and tap Settings > Users.
Tap beside the name of the user that you want to delete, then tap Remove
user > Delete .
About the Guest User account
If someone just wants to use your device temporarily, you can enable a guest
account for this user. In guest mode, your device starts up as a freshly installed
system with only the pre-installed apps. Once your guest is finished using your
device, you can wipe the session clean so that the next guest can start fresh. The
guest user account is pre-installed and cannot be deleted.
To set up the guest user account
1
2
3
4
Make sure you are logged in as the owner, that is, the user who set up the
device for the first time.
From your Home screen, tap .
Find and tap Settings > Users > Guest.
Follow the on-screen instructions to complete the procedure.
You can also set up a guest user account from the status bar on any screen. Just drag the
status bar downwards using two fingers and tap the user icon, then tap Add guest.
To allow the guest user to make phone calls
1
2
3
4
Make sure you are logged in as the owner.
From your Home screen, tap .
Find and tap Settings > Users.
Tap beside Guest, then drag the slider beside Allow phone calls to the right.
12
This is an Internet version of this publication. © Print only for private use.
To clear the guest session data
1
2
3
4
5
Make sure you are logged in as a guest user.
From your Home screen, tap .
Find and tap Settings > Users.
Find and tap Remove guest.
Tap Remove.
You can also clear the guest session from the status bar on any screen. Just drag the status
bar downwards using two fingers and tap the user icon, then tap Remove guest.
Switching between multiple user accounts
To switch between multiple user accounts
1
2
3
To view the list of users, drag the status bar downwards using two fingers,
then tap the user icon at the top right of the screen.
Tap the icon representing the user account that you want to switch to.
If a password has been set for the account, enter this password to log in.
Otherwise, just unlock the screen.
When you switch to the guest account, tap Start over if you want to wipe the previous session
or tap Yes, continue to continue the previous session.
Settings for multiple user accounts
There are three different types of settings on devices with multiple users:
•
•
•
Settings that can be changed by any user and affect all users. Examples include
language, Wi-Fi®, Airplane mode, NFC and Bluetooth®.
Settings that only affect an individual user account. Examples include automatic data
syncing, screen lock, various accounts added, and wallpaper.
Settings that are only visible to the owner and affect all users, for example, VPN
settings.
13
This is an Internet version of this publication. © Print only for private use.
Learning the basics
Using the touchscreen
Tapping
•
•
•
Open or select an item.
Mark or unmark a checkbox or option.
Enter text using the on-screen keyboard.
Touching and holding
•
•
•
Move an item.
Activate an item-specific menu.
Activate selection mode, for example, to select several items from a list.
14
This is an Internet version of this publication. © Print only for private use.
Pinching and spreading
•
Zoom in or out on web pages, photos and maps, and when you’re taking photos or
shooting videos.
Swiping
•
•
Scroll up or down a list.
Scroll left or right, for example, between Home screen panes.
15
This is an Internet version of this publication. © Print only for private use.
Flicking
•
Scroll quickly, for example, in a list or on a web page. You can stop the scrolling
movement by tapping the screen.
Locking and unlocking the screen
When your device is on and left idle for a set period of time, the screen darkens to
save battery power and locks automatically. This lock prevents unwanted actions on
the touchscreen when you are not using it. When you buy your device, a basic screen
swipe lock is already set. This means that you have to swipe upwards on the screen
to unlock it. You can change the security settings later and add other kinds of locks.
See Screen lock on page 45.
•
To activate the screen
Briefly press the power key
•
To lock the screen
When the screen is active, briefly press the power key
.
.
Home screen
The Home screen is the starting point for using your device. It's similar to the desktop
on a computer screen. Your Home screen can have up to seven panes, which extend
beyond the regular screen display width. The number of Home screen panes is
16
This is an Internet version of this publication. © Print only for private use.
represented by a series of dots at the lower part of the Home screen. The highlighted
dot shows the pane that you are currently in.
•
To go to the Home screen
Press .
To browse the Home screen
Home screen panes
You can add new panes to your Home screen (up to a maximum of seven panes) and
delete panes. You can also set the pane that you want to use as the main Home
screen pane.
To set a pane as the main Home screen pane
1
2
Touch and hold an empty area on your Home screen until the device vibrates.
Flick left or right to browse to the pane that you want to set as your main Home
screen pane, then tap .
To add a pane to your Home screen
1
2
Touch and hold an empty area on your Home screen until the device vibrates.
To browse the panes, flick all the way to the right or left, then tap .
17
This is an Internet version of this publication. © Print only for private use.
To delete a pane from your Home screen
1
2
Touch and hold an empty area on your Home screen until the device vibrates.
Flick left or right to browse to the pane that you want to delete, then tap .
Application screen
The Application screen, which you open from the Home screen, contains the
applications that come pre-installed on your device as well as applications that you
download.
To view all applications on the Application screen
1
2
From your Home screen, tap .
Flick left or right on the Application screen.
•
To open an application from the Application screen
Flick left or right to find the application, and then tap the application.
To search for an application from the Application screen
1
2
When the Application screen is open, tap .
Enter the name of the application that you want to search for.
•
To open the Application screen menu
When the Application screen is open, drag the left edge of the screen to the
right.
To move an application on the Application screen
1
2
3
To open the Application screen menu, drag the left edge of the Application
screen to the right.
Make sure that Custom order is selected under SHOW APPS.
Touch and hold the application until it magnifies and the device vibrates, then
drag it to the new location.
To add an application shortcut to the Home screen
1
2
3
4
To open the Application screen menu, drag the left edge of the Application
screen to the right.
Make sure that Custom order is selected under SHOW APPS.
Touch and hold an application icon until the screen vibrates, then drag the icon
to the top of the screen. The Home screen opens.
Drag the icon to the desired location on the Home screen, then release your
finger.
18
This is an Internet version of this publication. © Print only for private use.
To arrange applications on the Application screen
1
2
To open the Application screen menu, drag the left edge of the Application
screen to the right.
Select the desired option under SHOW APPS.
To uninstall an application from the Application screen
1
2
3
To open the Application screen menu, drag the left edge of the Application
screen to the right.
Tap UNINSTALL. All uninstallable applications are indicated by .
Tap the application that you want to uninstall, then tap OK.
Navigating applications
You can navigate between applications using the navigation keys, the favourites bar,
and the recently used applications window, which lets you switch easily between all
recently used applications. Some applications are closed when you press to exit
while others are paused or continue to run in the background. If the application is
paused or runs in the background, you can continue where you left off the next time
you open the application.
1
Recently used applications window – Open a recently used application
2
Favourites bar – Use a shortcut to access applications or widgets
3
Task navigation key – Open the recently used applications window and the favourites bar
4
Home navigation key – Exit an application and go back to the Home screen
5
Back navigation key – Go back to the previous screen within an application or close the application
•
To open the recently used applications window
Press .
•
To open a menu in an application
While using the application, press .
A menu is not available in all applications.
Small apps
Small apps are miniature apps that run on top of other applications on the same
screen, to enable multi-tasking. For example, you can have a webpage open showing
details of currency exchange rates and then open the Calculator small app on top of
19
This is an Internet version of this publication. © Print only for private use.
it and perform calculations. You can access your small apps via the favourites bar. To
download more small apps, go to Google Play™.
To open a small app
1
2
To make the favourites bar appear, press
Tap the small app that you want to open.
.
You can open several small apps at the same time.
•
To close a small app
Tap on the small app window.
To download a small app
1
2
, then tap and tap .
From the favourites bar, tap
Search for the small app that you want to download, then follow the
instructions to download it and complete the installation.
•
To move a small app
When the small app is open, touch and hold the top left corner of the small
app, then move it to the desired location.
•
To minimise a small app
When the small app is open, touch and hold the top left corner of the small
app, then drag it to the right edge or to the bottom edge of the screen.
•
To rearrange the small apps in the favourites bar
Touch and hold a small app and drag it to the desired position.
To remove a small app from the favourites bar
1
2
Touch and hold a small app, then drag it to .
Tap OK.
To restore a previously removed small app
1
2
Open the favourites bar, then tap
.
Touch and hold the small app that you want to restore, then drag it into the
favourites bar.
To add a widget as a small app
1
2
3
4
To make the favourites bar appear, press .
Tap
> > .
Select a widget.
Enter a name for the widget, if desired, then tap OK.
Widgets
Widgets are small applications that you can use directly on your Home screen. They
also function as shortcuts. For example, the Weather widget allows you to see basic
weather information directly on your Home screen. But when you tap the widget, the
full Weather application opens. You can download additional widgets from Google
Play™.
20
This is an Internet version of this publication. © Print only for private use.
To add a widget to the Home screen
1
2
Touch and hold an empty area on your Home screen until the device vibrates,
then tap Widgets.
Find and tap the widget that you want to add.
To resize a widget
1
2
3
Touch and hold a widget until it magnifies and the device vibrates, then release
the widget. If the widget can be resized, for example, the Calendar widget,
then a highlighted frame and resizing dots appear.
Drag the dots inward or outward to shrink or expand the widget.
To confirm the new size of the widget, tap anywhere on the Home screen.
•
To move a widget
Touch and hold the widget until it magnifies and the device vibrates, then drag
it to the new location.
•
To delete a widget
Touch and hold the widget until it magnifies and the device vibrates, then drag
it to .
Shortcuts and folders
Use shortcuts and folders to manage your applications and keep your Home screen
tidy.
Shortcuts and folders overview
21
This is an Internet version of this publication. © Print only for private use.
1
Access an application by using a shortcut
2
Access a folder containing applications
To add an application shortcut to your Home screen
1
2
3
Touch and hold an empty area on your Home screen until the device vibrates
and the customisation menu appears.
In the customisation menu, tap Widgets & Apps > Apps.
Scroll through the list of applications and select an application. The selected
application gets added to the Home screen.
In step 3, alternatively, you can tap Widgets & Apps > Shortcuts and then select an application
from the list available. If you use this method to add shortcuts, some of the applications
available allow you to add specific functionality to the shortcut.
•
To move an item on the Home screen
Touch and hold the item until it magnifies and the device vibrates, then drag
the item to the new location.
•
To delete an item from the Home screen
Touch and hold an item until it magnifies and the device vibrates, then drag the
item to .
•
To create a folder on the Home screen
Touch and hold an application icon or a shortcut until it magnifies and the
device vibrates, then drag and drop it on top of another application icon or
shortcut.
•
To add items to a folder on the Home screen
Touch and hold an item until it magnifies and the device vibrates, then drag the
item to the folder.
To rename a folder on the Home screen
1
2
3
Tap the folder to open it.
Tap the folder's title bar to show the Folder name field.
Enter the new folder name and tap Done.
Background and themes
You can adapt the Home screen to your own style using wallpapers and different
themes.
22
This is an Internet version of this publication. © Print only for private use.
To change your Home screen wallpaper
1
2
Touch and hold an empty area on your Home screen until the device vibrates.
Tap Wallpapers and select an option.
To set a theme
1
2
3
Touch and hold an empty area on your Home screen until the device vibrates.
Tap Themes.
Select an option and follow the instructions in your device.
When you change a theme, the background also changes in some applications.
Taking a screenshot
You can capture still images of any screen on your device as a screenshot.
Screenshots you take are automatically saved in Album.
To take a screenshot
1
2
Press and hold down the power key until a prompt window appears.
Tap
You can also take a screenshot by pressing and holding the power key and volume down key
at the same time. Once the screenshot is captured, you can release the keys.
•
To view your screenshot
Drag the status bar fully downwards, then tap the screenshot you want to view.
You can also view your screenshots by opening the Album application.
Recording your screen
You can use the screen recording feature to capture videos of what’s happening on
your device’s screen. This feature is useful, for example, when you want to create
tutorials or record videos of you playing a game on your device. Recorded video clips
are automatically saved in Album.
Shortcuts and folders overview
1
Minimise/Restore the screen recording window
2
Record your screen
3
Record your screen when the front camera is activated
4
Access the screen recording settings
5
Close the screen recording window
To record your screen
1
2
3
4
Press and hold down the power key until a prompt window appears.
Tap .
After the screen recording window opens, tap . The record screen function
starts and a timer button is displayed.
To stop the recording, tap the timer button, then tap .
23
This is an Internet version of this publication. © Print only for private use.
To record your screen when the front camera is activated
1
2
3
4
When the screen recording window opens, tap . A window opens showing a
viewfinder for the front camera.
To start recording your screen and video captured by the front camera, tap .
To stop recording, tap the timer button, then tap .
To close the front camera viewfinder window, tap .
To record a still photo using the front camera while you are recording the screen, drag
the mini viewfinder to expand the view and then tap .
•
in
To view recent screen recordings
Drag the status bar downwards, then tap to view the most recent recordings of
your screen.
You can also view your screen recordings in the Album application.
Notifications
Notifications inform you of events such as new messages and calendar notifications
as well as activities in progress such as file downloads. Notifications appear in the
following places:
•
The status bar
•
The Notification panel
•
The lock screen
To open or close the Notification panel
1
2
To open the Notification panel, drag the status bar downwards.
To close the Notification panel, drag the panel upwards.
•
To take action on a notification in the Notification panel
Tap the notification.
•
To dismiss a notification from the Notification panel
Place your finger on a notification and flick left or right.
•
To clear all notifications from the Notification panel
Tap
.
•
To take action on a notification from the lock screen
Double-tap the notification.
24
This is an Internet version of this publication. © Print only for private use.
•
To dismiss a notification from the lock screen
Place your finger on the notification and flick left or right.
•
To expand a notification on the Notification panel
Drag the notification downwards.
Not all notifications are expandable.
•
To expand a notification on the lock screen
Drag the notification downwards.
Not all notifications are expandable.
Quick settings for interruptions
There are three modes available for interruptions on your device: Silent, Priority and
Sound. Within each mode, you can determine how and when notifications can
interrupt you, if at all. For example, you can set your device to only show you priority
notifications during the hours you’re at work or block all notifications while you’re
taking a nap. You can get quick access to the basic interruption and sound settings
by pressing the volume key up or down.
1
Silent – All interruptions get blocked, including alarms. There is no sound when alarms go off
2
Priority – Only allow priority interruptions
3
Sound – Allow all interruptions
To set priority interruptions
1
2
From your Home screen, tap .
Find and tap Settings > Sound & notification > Interruptions.
For more information about settings for notifications and interruptions, see Managing
notifications on page 41.
Notification light
The notification light informs you about battery status and some other events. For
example, a flashing white light means there is a new message or a missed call. The
notification light is enabled by default but can be disabled manually.
When the notification light is disabled, it only lights up when there is a battery status warning,
for example, when the battery level goes below 15 percent.
To enable the notification light
1
2
3
From your Home screen, tap .
Find and tap Settings > Sound & notification .
Drag the slider beside Notification light to the right.
25
This is an Internet version of this publication. © Print only for private use.
Icons in the status bar
Status icons
Signal strength
No signal
Roaming
Sending and downloading LTE data
Sending and downloading GPRS data
Sending and downloading EDGE data
Sending and downloading 3G data
Sending and downloading mobile data
A Wi-Fi® connection is enabled and data is being transmitted
Battery status
The battery is charging
STAMINA mode is activated
Low battery mode is activated
Airplane mode is activated
The Bluetooth® function is activated
SIM card error
The microphone is muted
The speakerphone is on
Silent mode
Only allow priority interruptions
Vibrate mode
An alarm is set
GPS is activated
Synchronisation is ongoing
Problem with sign-in or synchronisation
Depending on your service provider, network and/or region, the functions or services
represented by some icons in this list may not be available.
To manage status bar icons
1
2
3
From your Home screen, tap .
Find and tap Settings > Personalization> Status bar icons.
Mark the checkboxes for the system icons that you want to appear in the
status bar.
26
This is an Internet version of this publication. © Print only for private use.
Notification icons
New text message or multimedia message
Missed call
Call on hold
Call forwarding is turned on
New voicemail message
New email message
Downloading data
Uploading data
Mobile data is disabled
Perform a basic setup of your device
A software update is available
System updates are available
Downloading system updates
Tap to install the downloaded system updates
Screenshot captured
New Hangouts™ chat message has arrived
Video chat with friends using the Hangouts™ application
Upcoming calendar event
A small app is running
Smart Connect is activated
A song is playing
The radio is playing
The device is connected to a computer via a USB cable
Internal storage is 75% full. Tap to transfer data to the memory card
Warning
Error message
More (undisplayed) notifications
Not all icons that may appear in your device are listed here. These icons are for reference
purposes only, and changes may be made without notice.
To block an application from sending notifications
1
2
3
4
From your Home screen, tap .
Find and tap Settings > Sound & notification> App notifications.
Select an application.
Drag the slider beside Block to the right.
27
This is an Internet version of this publication. © Print only for private use.
Application overview
Use the Alarm & clock application to set various kinds of alarms.
Use your web browser to navigate and view web pages, manage bookmarks,
text and images.
Use the Calculator application to perform basic calculations.
Use the Calendar application to keep track of events and manage your
appointments.
Use the camera to take photos and record video clips.
Use the Contacts application to manage phone numbers, email addresses
and other information related to your contacts.
Access your downloaded applications, documents and pictures.
Use the Email application to send and receive emails through both private
and corporate accounts.
Use the Facebook™ application to engage in social networking with friends,
family members and colleagues around the world.
Browse and listen to FM radio stations.
Use the Album application to view and to work with your photos and videos.
Use the Gmail™ application to read, write and organise email messages.
Search for information in your device and on the web.
View your current location, find other locations and calculate routes using
Google Maps™.
Use the Play Store application to download free and paid applications for
your device.
Use the Messaging application to send and receive text and multimedia
messages.
Use the Video application to play videos on your device and share content
with your friends.
Use the Walkman® application to organise and play music, audio books and
podcasts.
View news stories and weather forecasts.
Make phone calls by dialling the number manually or by using the smart dial
function.
Optimise settings to suit your own requirements.
Use the Hangouts™ application to chat with friends online.
Identify music tracks that you hear playing in your surroundings, and get
artist, album and other info.
Use YouTube™ to share and view videos from around the world.
Use the Backup and restore application to back up or restore content on your
device, such as contacts, text messages, bookmarks, calendar data,
bookmarks, etc.
Use the Smart Connect application to set what happens in your device when
you connect or disconnect an accessory.
28
This is an Internet version of this publication. © Print only for private use.
Use the Support application to access user support in your device. For
example, you can access a User guide, troubleshooting information, plus tips
and tricks.
Some applications are not supported or listed by all networks and/or service providers in all
areas.
29
This is an Internet version of this publication. © Print only for private use.
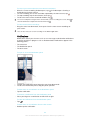
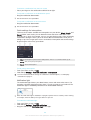
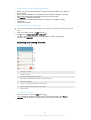
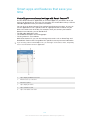
Downloading applications
Downloading applications from Google Play™
Google Play™ is the official online Google store for downloading applications,
games, music, movies and books. It includes both free and paid applications. Before
you start downloading from Google Play™, make sure that you have a working
Internet connection, preferably over Wi-Fi® to limit data traffic charges.
To use Google Play™, you need to have a Google™ account. Google Play™ may not be
available in all countries or regions.
To download an application from Google Play™
1
2
3
4
From the Home screen, tap .
Find and tap Play Store.
Find an item you wish to download by browsing categories, or by using the
search function.
Tap the item to view its details, and follow the instructions to complete the
installation.
Some applications may need to access data, settings and various functions on your device in
order to work properly. Only install and give permissions to applications that you trust.
You can view the permissions granted to a downloaded application by tapping the application
under Settings > Apps.
Downloading applications from other sources
When your device is set to allow downloads from sources other than Google Play™,
you can download applications directly from other websites by following the relevant
download instructions.
Installing applications of unknown or unreliable origin can damage your device. Only download
applications from reliable sources. Contact the application provider if you have any questions
or concerns.
If you are using a device with multiple users, only the owner, that is, the primary user, can
allow downloads from sources other than Google Play™. Changes made by the owner affect
all other users.
To allow the download of applications from other sources
1
2
3
4
From your Home screen, tap .
Find and tap Settings > Security.
Drag the slider beside Unknown sources to the right.
Tap OK.
Some applications may need to access data, settings and various functions on your device in
order to work properly. Only install and give permissions to applications that you trust.
You can view the permissions granted to a downloaded application by tapping the application
under Settings > Apps.
30
This is an Internet version of this publication. © Print only for private use.
Internet and networks
Browsing the web
The Google Chrome™ web browser for Android™ devices comes pre-installed in
most markets. Go to http://support.google.com/chrome and click the "Chrome for
Mobile" link to get more detailed information about how to use this web browser.
To browse with Google Chrome™
1
2
3
4
From your Home screen, tap .
Find and tap .
If you are using Google Chrome™ for the first time, select to either sign in to a
Google™ account or browse with Google Chrome™ anonymously.
Enter a search term or web address in the search and address field, then tap
Go on the keyboard.
Internet and MMS settings
•
•
•
•
To send multimedia messages, or to access the Internet when there is no available
Wi-Fi® network, you must have a working mobile data connection with the correct
Internet and MMS (Multimedia Messaging Service) settings. Here are some tips:
For most mobile networks and operators, Internet and MMS settings come preinstalled on your device. You can then start using the Internet and send multimedia
messages right away.
In some cases, you get the option to download Internet and MMS settings the first
time you turn on your device when a SIM card is inserted. It is also possible to
download these settings later from the Settings menu.
You can manually add, change or delete Internet and MMS settings on your device at
any time. If you change or delete an Internet or MMS setting by mistake, download
the Internet and MMS settings again.
If you cannot access the Internet over a mobile network or if multimedia messaging is
not working, even though the Internet and MMS settings have been downloaded
successfully to your device, refer to the troubleshooting tips for your device at
www.sonymobile.com/support/ for network coverage, mobile data, and MMS issues.
If STAMINA mode is activated to save power, all mobile data traffic gets paused when the
screen is off. If this causes connection problems, try excluding some applications and services
from being paused, or deactivate STAMINA mode temporarily. For more information, see
STAMINA mode feature overview on page 124.
If you are using a device with multiple users, only the owner, that is, the primary user, can
download Internet and messaging settings from the Settings menu, but the downloaded
settings are applicable to all users.
To download Internet and MMS settings
1
2
3
From your Home screen, tap .
Find and tap Settings > More > Internet settings.
Tap Accept. Once the settings have been downloaded successfully,
in the status bar and mobile data is turned on automatically.
appears
If the settings cannot be downloaded to your device, check the signal strength of your mobile
network. Move to an open location free from obstructions or get close to a window and then
try again.
31
This is an Internet version of this publication. © Print only for private use.
To add Internet and MMS settings manually
1
2
3
4
5
6
7
8
From your Home screen, tap .
Find and tap Settings > More > Mobile networks.
Tap Access Point Names > .
Tap Name and enter a name as desired.
Tap APN and enter the access point name.
Enter all other information as required. If you don’t know what information is
required, contact your network operator for more details.
When you're done, tap , then tap SAVE.
To select the APN that you have just added, tap the radio button besides the
name of the APN. Once selected, this APN becomes the default APN for
Internet and MMS services.
To view the downloaded Internet and MMS settings
1
2
3
4
From your Home screen, tap .
Find and tap Settings > More > Mobile networks.
Tap Access Point Names.
To view more details, tap any of the available items.
If you have several available connections, the active network connection is indicated by a
marked button .
Wi-Fi®
Use Wi-Fi® connections to surf the Internet, download applications, or send and
receive emails. Once you have connected to a Wi-Fi® network, your device
remembers the network and automatically connects to it the next time you come
within range.
Some Wi-Fi® networks require you to log in to a web page before you can get
access. Contact the relevant Wi-Fi® network administrator for more information.
Available Wi-Fi® networks may be open or secured:
•
•
next to the Wi-Fi® network name.
Open networks are indicated by
Secured networks are indicated by next to the Wi-Fi® network name.
Some Wi-Fi® networks do not show up in the list of available networks because they do not
broadcast their network name (SSID). If you know the network name, you can add it manually
to your list of available Wi-Fi® networks.
To turn on Wi-Fi®
1
2
3
From your Home screen, tap .
Find and tap Settings > Wi-Fi.
Tap the on-off switch to turn on the Wi-Fi® function.
It may take a few seconds before Wi-Fi® is enabled.
To connect to a Wi-Fi® network automatically
1
2
3
4
From your Home screen, tap .
Find and tap Settings > Wi-Fi.
Tap the on-off switch to turn on the Wi-Fi function. All available Wi-Fi®
networks are displayed.
Tap a Wi-Fi® network to connect to it. For secured networks, enter the
relevant password.
is displayed in the status bar once you are connected.
To search for new available networks, tap , then tap Refresh. If you cannot connect to a Wi-Fi
network successfully, refer to the relevant troubleshooting tips for your device at
www.sonymobile.com/support/.
32
This is an Internet version of this publication. © Print only for private use.
To add a Wi-Fi® network manually
1
2
3
4
5
6
7
8
From your Home screen, tap .
Find and tap Settings > Wi-Fi.
Tap > Add network.
Enter the Network name information.
To select a security type, tap the Security field.
If required, enter a password.
To edit some advanced options such as proxy and IP settings, mark the
Advanced options checkbox and then edit as desired.
Tap Save.
Contact your Wi-Fi® network administrator to get the network SSID and password.
Increasing Wi-Fi® signal strength
•
•
•
There are a number of things you can do to increase the strength of a Wi-Fi® signal:
Move your device closer to the Wi-Fi® access point.
Move the Wi-Fi® access point away from any potential obstructions or interference.
Don’t cover the Wi-Fi® antenna area of your device (the highlighted area in the
illustration).
Wi-Fi® settings
When you are connected to a Wi-Fi® network or when there are Wi-Fi® networks
available in your vicinity, it is possible to view the status of these networks. You can
also enable your device to notify you whenever an open Wi-Fi® network is detected.
If you are not connected to a Wi-Fi® network, your device uses a mobile data
connection to access the Internet (if you have set up and enabled a mobile data
connection on your device). By adding a Wi-Fi® sleep policy, you can specify when
to switch from Wi-Fi® to mobile data.
To enable Wi-Fi® network notifications
1
2
3
4
5
Turn on Wi-Fi®, if it is not already on.
From your Home screen, tap .
Find and tap Settings > Wi-Fi.
Tap > Advanced.
Drag the slider beside Network notification to the right.
To view detailed information about a connected Wi-Fi® network
1
2
3
From the Home screen, tap .
Find and tap Settings > Wi-Fi.
Tap the Wi-Fi® network that you are currently connected to. Detailed network
information is displayed.
33
This is an Internet version of this publication. © Print only for private use.
To add a Wi-Fi® sleep policy
1
2
3
4
From the Home screen, tap .
Find and tap Settings > Wi-Fi.
Tap , then tap Advanced > Keep Wi-Fi on during sleep.
Select an option.
WPS
WPS (Wi-Fi® Protected Setup) is a computing standard that helps you establish
secure wireless network connections. If you have little background knowledge of
wireless security, WPS makes it easy for you to set up Wi-Fi Protected Access (WPA)
encryption to secure your network. You can also add new devices to an existing
network without entering long passwords.
Use one of these methods to enable WPS:
•
•
Push button method – simply push a button on a WPS-supported device, for
example, a router.
PIN method – your device creates a random PIN (Personal Identification Number),
which you enter on the WPS-supported device.
To connect to a Wi-Fi® network using a WPS button
1
2
3
4
From your Home screen, tap .
Find and tap Settings > Wi-Fi.
Turn on Wi-Fi® if it is not already on.
Tap > Advanced > WPS Push Button, then press the WPS button on the
WPS-supported device.
To connect to a Wi-Fi® network using a WPS PIN
1
2
3
4
5
From your Home screen, tap .
Find and tap Settings > Wi-Fi.
Turn on Wi-Fi® if it is not already on.
Tap > Advanced > WPS PIN Entry.
On the WPS-supported device, enter the PIN that appears on your device.
Sharing your mobile data connection
•
•
•
You can share your mobile data connection with other devices in several ways:
USB tethering – share your mobile data connection with a single computer using a
USB cable.
Bluetooth® tethering – share your mobile data connection with up to five other
devices via Bluetooth®.
Portable Wi-Fi® hotspot – share your mobile data connection simultaneously with up
to 8 other devices, including devices that support WPS technology.
To share your data connection using a USB cable
1
2
3
4
5
6
Deactivate all USB cable connections to your device.
Using the USB cable that came with your device, connect your device to a
computer.
From your Home screen, tap .
Find and tap Settings > More > Tethering & portable hotspot.
Drag the slider beside USB tethering to the right, then tap OK if prompted. is
displayed in the status bar once you are connected.
To stop sharing your data connection, drag the slider beside USB tethering to
the left or disconnect the USB cable.
You cannot share your device's data connection and SD card over a USB cable at the same
time.
34
This is an Internet version of this publication. © Print only for private use.
To share your mobile data connection with another Bluetooth® device
1
2
3
4
5
6
Make sure that your device and the Bluetooth® device are paired with each
other and that mobile data traffic is activated on your device.
Your device: From your Home screen, tap .
Find and tap Settings > More > Tethering & portable hotspot and then drag the
slider beside Bluetooth tethering to the right.
Bluetooth® device: Set up the device so that it obtains its network connection
using Bluetooth®. If the device is a computer, refer to the relevant instructions
to complete the setup. If the device runs on the Android™ operating system,
tap the settings icon beside the name of the device that it is paired with under
Settings > Bluetooth > Paired devices, then mark the Internet access checkbox.
Your device: Wait for to appear in the status bar. Once it appears, the setup
is complete.
To stop sharing your mobile data connection, drag the slider beside Bluetooth
tethering to the left.
The Bluetooth tethering function is turned off every time you turn off your device or turn off the
Bluetooth® function.
For more information about pairing and turning on mobile data, see To pair your device with
another Bluetooth® device on page 108 and To add a virtual private network on page 37.
To use your device as a portable Wi-Fi® hotspot
1
2
3
4
5
6
7
8
9
From your Home screen, tap .
Find and tap Settings > More > Tethering & portable hotspot.
Tap Portable Wi-Fi hotspot settings > Configure Wi-Fi hotspot.
Enter the Network name information.
To select a security type, tap the Security field. If required, enter a password.
Tap Save.
Tap and drag the slider beside Portable Wi-Fi hotspot to the right.
If prompted, tap OK to confirm. appears in the status bar once the portable
Wi-Fi® hotspot is active.
To stop sharing your data connection via Wi-Fi®, drag the slider beside
Portable Wi-Fi hotspot to the left.
To allow a WPS-supported device to use your mobile data connection
1
2
3
4
5
6
Make sure that your device is functioning as a portable Wi-Fi® hotspot.
From your Home screen, tap .
Find and tap Settings > More > Tethering & portable hotspot > Portable Wi-Fi
hotspot settings.
Make sure that the Discoverable checkbox is marked.
Under Configure Wi-Fi hotspot, make sure that your portable hotspot is
secured by a password.
Tap WPS Push Button, then follow the relevant instructions. Alternatively, tap
> WPS PIN Entry, then enter the PIN that appears on the WPS-supported
device.
To rename or secure your portable hotspot
1
2
3
4
5
6
7
From the Home screen, tap .
Find and tap Settings > More > Tethering & portable hotspot.
Tap Portable Wi-Fi hotspot settings > Configure Wi-Fi hotspot.
Enter the Network name for the network.
To select a security type, tap the Security field.
If required, enter a password.
Tap Save.
Controlling data usage
Data is information sent from or received to your mobile device. You may use data on
your device when you access the Internet, check your email, play games, use apps
35
This is an Internet version of this publication. © Print only for private use.
(for example, Facebook™, Twitter™, and so on) and more. Background tasks, such
as syncing or location services, may also use data. Data usage is billed based on the
amount of data sent and received (megabytes or gigabytes), and it can be charged
per-use or as part of a data package.
To turn data traffic on or off
1
2
3
From your Home screen, tap .
Find and tap Settings > Data usage.
Drag the slider beside Mobile data traffic to turn data traffic on or off.
When data traffic is turned off, your device can still establish Wi-Fi®, NFC and Bluetooth®
connections.
To set a data usage warning
1
2
3
4
Make sure that mobile data traffic is turned on.
From your Home screen, tap .
Find and tap Settings > Data usage.
To set the warning level, drag the warning line to the desired value. You receive
a warning notification when the amount of data traffic approaches the level you
set.
To set a mobile data usage limit
1
2
3
4
5
Make sure that mobile data traffic is turned on.
From your Home screen, tap .
Find and tap Settings > Data usage.
Drag the slider beside Set mobile data limit to the right, then tap OK.
To set the mobile data usage limit, drag the data limit line to the desired value.
Once your mobile data usage reaches the set limit, mobile data traffic on your device gets
turned off automatically.
To control the data usage of individual applications
1
2
3
4
From your Home screen, tap .
Find and tap Settings > Data usage.
Tap the application that you want to control, then drag the slider beside
Restrict app background data to the right and tap OK.
To access more specific settings for the application (if available), tap App
settings and make the desired changes.
The performance of individual applications may be affected if you change the related data
usage settings.
To check your data usage
1
2
3
4
5
From your Home screen, tap .
Find and tap Settings > Data usage.
Tap , then tap Show Wi‑Fi.
To view information about the amount of data transferred via WI-Fi®, tap the
Wi-Fi tab.
To view the information about the amount of data transferred via mobile data
connection, tap the Mobile tab.
Selecting mobile networks
Your device automatically switches between mobile networks depending on which
mobile networks are available where you are. You can also manually set your device
to use a particular mobile network mode, for example, WCDMA or GSM.
Different status icons are displayed in the status bar depending on the type or mode
of network that you are connected to. Refer to Status icons on page 26 to see what
the different status icons look like.
36
This is an Internet version of this publication. © Print only for private use.
To select a network mode
1
2
3
From your Home screen, tap .
Find and tap Settings > More > Mobile networks.
Tap Preferred network type, then select a network mode.
To select another network manually
1
2
3
4
From your Home screen, tap .
Find and tap Settings > More > Mobile networks > Network operators.
Tap Search mode, then select Manual.
Select a network.
If you select a network manually, your device will not search for other networks, even if you
move out of range of the manually selected network.
To activate automatic network selection
1
2
3
From your Home screen, tap .
Find and tap Settings > More > Mobile networks > Network operators.
Tap Search mode, then select Automatic.
Virtual private networks (VPNs)
Use your device to connect to virtual private networks (VPNs), which allow you to
access resources inside a secured local network from a public network. For example,
VPN connections are commonly used by corporations and educational institutions for
users who need to access intranets and other internal services when they are outside
of the internal network, for example, when they are travelling.
VPN connections can be set up in many ways, depending on the network. Some
networks may require you to transfer and install a security certificate on your device.
For detailed information about how to set up a connection to your virtual private
network, contact the network administrator of your company or organisation.
If you are using a device with multiple users, you may need to log in as the owner, that is, the
primary user, to adjust the settings for VPN.
To add a virtual private network
1
2
3
4
5
6
From your Home screen, tap .
Find and tap Settings > More > VPN.
Tap .
Select the type of VPN to add.
Enter your VPN settings.
Tap Save.
To connect to a virtual private network
1
2
3
4
5
From your Home screen, tap .
Find and tap Settings > More > VPN.
In the list of available networks, tap the VPN that you want to connect to.
Enter the required information.
Tap Connect.
To disconnect from a virtual private network
1
2
Drag the status bar downwards.
Tap the notification for the VPN connection to turn it off.
37
This is an Internet version of this publication. © Print only for private use.
Synchronising data on your device
Synchronising with online accounts
Synchronise your device with contacts, email, calendar events and other information
from online accounts, for example, email accounts such as Gmail™ and Exchange
ActiveSync, Facebook™, Flickr™ and Twitter™. You can synchronise data
automatically for all accounts by activating the auto-sync function. Or you can
synchronise each account manually.
To set up an online account for synchronisation
1
2
3
From your Home screen, tap .
Tap Settings > Accounts > Add account, then select the account that you want
to add.
Follow the instructions to create an account, or sign in if you already have an
account.
To synchronise manually with an online account
1
2
3
From your Home screen, tap > Settings > Accounts.
Under Accounts, select the account type, then tap the name of the account
that you want to synchronise with. A list of items appears showing what can be
synchronised with the account.
Tap the items that you want to synchronise.
To remove an online account
1
2
3
4
From your Home screen, tap > Settings > Accounts.
Under Accounts, select the account type, then tap the name of the account
that you want to remove.
Tap , then tap Remove account.
Tap Remove account again to confirm.
Synchronising with Microsoft® Exchange ActiveSync®
Using a Microsoft Exchange ActiveSync account, you can access your corporate
email messages, calendar appointments and contacts directly on your device. After
setup, you can find your information in the Email, Calendar and Contacts
applications.
To set up an EAS account for synchronisation
1
2
3
4
5
6
7
8
9
Make sure that you have your domain and server details available (as provided
by your corporate network administrator).
From your Home screen, tap .
Tap Settings > Accounts > Add account > Exchange ActiveSync.
Enter your corporate email address and password.
Tap Next. Your device begins to retrieve your account information. If a failure
occurs, enter the domain and server details for your account manually and
then tap Next.
Tap OK to allow your corporate server to control your device.
Select what data you want to sync with your device, such as contacts and
calendar entries.
If desired, activate the device administrator to allow your corporate server to
control certain security features on your device. For example, you can allow
your corporate server to set password rules and set storage encryption.
When the setup is done, enter a name for the corporate account.
When you change the login password for an EAS account on your computer, you have to log
in again to the EAS account on your device.
38
This is an Internet version of this publication. © Print only for private use.
To change the settings of an EAS account
1
2
3
From your Home screen, tap .
Tap Email, then tap .
Tap Settings and select an EAS account, then change the settings of the EAS
account as desired.
To set a synchronisation interval for an EAS account
1
2
3
4
From your Home screen, tap .
Tap Email, then tap .
Tap Settings and select an EAS account.
Tap Check frequency > Check frequency and select an interval option.
To remove an EAS account
1
2
3
4
From your Home screen, tap > Settings > Accounts.
Under Accounts, tap Exchange ActiveSync, then select the EAS account that
you want to remove.
Tap , then tap Remove account.
Tap Remove account again to confirm.
Synchronising with Outlook® using a computer
You can use the Calendar and Contacts applications within the PC Companion and
the Sony Bridge for Mac computer programs to synchronise your device with the
calendar and contacts from your Outlook account. However, you cannot synchronise
any data from your device to your computer.
For more information on how to install the PC Companion on a PC or the Sony Bridge for Mac
application on an Apple® Mac® computer, see Computer tools on page 119.
To synchronise with your Outlook contacts using a computer
1
2
3
Make sure that the PC Companion application is installed on the PC or the
Sony Bridge for Mac application is installed on the Apple® Mac® computer.
Computer: Open the PC Companion application or the Sony Bridge for Mac
application.
Click Start to start the Contacts and Contacts Sync applications and follow the
on-screen instructions to synchronise your device with your Outlook contacts.
To synchronise with your Outlook calendar using a computer
1
2
3
Make sure that the PC Companion application is installed on the PC or the
Sony Bridge for Mac application is installed on the Apple® Mac® computer.
Computer: Open the PC Companion application or the Sony Bridge for Mac
application.
Click Start to start the Calendar and Calendar Sync applications and follow the
on-screen instructions to synchronise your device with your Outlook calendar.
39
This is an Internet version of this publication. © Print only for private use.
Basic settings
Accessing settings
View and change settings for your device from the Settings menu. The Settings menu
is accessible from both the Application screen and the Quick settings panel.
To open the device settings menu from the Application screen
1
2
From your Home screen, tap
Tap Settings.
.
To view information about your device
1
2
From your Home screen, tap .
Find and tap Settings > About phone.
•
To open the Quick settings panel
Using two fingers, drag the status bar downwards.
To select which settings to display on the Quick settings panel
1
2
Using two fingers, drag the status bar downwards, then tap .
In the bar at the top of the screen, touch and hold the icon for the quick setting
that you want to add, then drag and drop it in the lower part of the screen.
To rearrange the Quick settings panel
1
2
Using two fingers, drag the status bar downwards, then tap .
Touch and hold an icon, then move it to the desired position.
Sound, ringtone and volume
You can adjust the ringtone volume for incoming calls and notifications as well as for
music and video playback.
To adjust the volume levels
1
2
3
From your Home screen, tap .
Find and tap Settings > Sound & notification.
Drag the volume sliders to the desired positions.
You can also press the volume key up or down to adjust the ringtone and media playback
volume levels even when the screen is locked.
To set your device to vibrate for incoming calls
1
2
3
From your Home screen, tap .
Find and tap Settings > Sound & notification.
Drag the slider beside Also vibrate for calls to the right.
To set a ringtone
1
2
3
4
From your Home screen, tap .
Find and tap Settings > Sound & notification > Phone ringtone.
Select an option from the list or tap and select a music file that is saved to
your device.
To confirm, tap Done.
40
This is an Internet version of this publication. © Print only for private use.
To select the notification sound
1
2
3
4
From your Home screen, tap .
Find and tap Settings > Sound & notification > Default notification ringtone.
Select an option from the list or tap and select a music file that is saved to
your device.
To confirm, tap Done.
Some applications have their own specific notification sounds, which you can select from the
application settings.
To enable touch tones
1
2
3
From your Home screen, tap .
Find and tap Settings > Sound & notification > Other sounds.
Drag the sliders beside Dialpad tones and Touch sounds to the right.
Managing notifications
You can select which types of notifications are allowed to interrupt you and filter
interruptions based on who they come from. You can set time intervals for both
priority interruptions and silent mode. The most common types of notifications
include:
•
•
•
•
•
Calls
Messages
Events and reminders
Alarms
App notifications
To adjust the interruption settings
1
2
3
From your Home screen, tap .
Find and tap Settings > Sound & notification > Interruptions > When calls and
notifications arrive.
Select an option and follow the instructions in your device.
The interruption settings can also be accessed by pressing the volume key up or down until
the volume adjustment window appears at the top of the screen. See Quick settings for
interruptions on page 25.
Interruption setting options
Always interrupt
Allow all interruptions.
Allow only priority
interruptions
Only allow notifications that you have set as priority interruptions. Your device
sounds or vibrates when priority interruptions from specific contact types arrive
during the preset time intervals.
Don't interrupt
Don't allow any interruptions. Your device remains in silent mode when this
setting is active.
To set notifications as priority interruptions
1
2
3
From your Home screen, tap .
Find and tap Settings > Sound & notification > Interruptions.
Under Priority interruptions, drag the relevant sliders to the right.
To associate priority interruptions with specific contact types
1
2
3
From your Home screen, tap .
Find and tap Settings > Sound & notification > Interruptions > Calls/messages
from.
Select an option.
41
This is an Internet version of this publication. © Print only for private use.
To set time intervals for priority interruptions
1
2
3
4
5
From your Home screen, tap .
Find and tap Settings > Sound & notification > Interruptions > Days.
Mark the checkboxes for the relevant days, then tap Done.
To adjust the start time, tap Start time and select a value, then tap OK.
To adjust the end time, tap End time and select a value, then tap OK.
Managing notifications on the lock screen
You can set up your device so that only selected notifications get displayed on your
lock screen. You can make all notifications and their content accessible, hide
sensitive content for all notifications or specific apps, or choose not to show any
notifications at all.
To select the notifications to display on the lock screen
1
2
3
From your Home screen, tap .
Find and tap Settings > Sound & notification > When device is locked.
Select an option.
Notification display options on the lock screen
Show all notification Get all notifications on the lock screen. When you have this setting turned on, keep
content
in mind that all content (including the content of incoming emails and chats) will be
visible on your lock screen unless you designate the relevant apps as Sensitive in
the App notifications settings menu.
Hide sensitive
notification content
You must have a PIN, password, or pattern set up as your screen lock in order for
this setting to be available. Contents hidden is displayed on the lock screen when
sensitive notifications arrive. For example, you'll get a notification for an incoming
email or chat, but the content won't be visible on your lock screen.
Don't show
notifications at all
You won't get any notifications on the lock screen.
Setting the notification level for an app
You can set different notification behaviour for individual applications. For example,
you can block all email notifications, prioritise Facebook™ notifications and make the
content of messaging notifications invisible on the lock screen.
To set the notification level for an app
1
2
3
4
From your Home screen, tap .
Find and tap Settings > Sound & notification > App notifications.
Select the app for which you want to change the notification settings.
Drag the relevant slider to the right.
Notification levels and options for specific applications
Block
Never show notifications for the selected app.
Priority
Priority level notification appear on the lock screen above all other notifications.
Sensitive This option is only available if you set up a PIN, password or pattern as your screen lock and
selected Show all notification content under the When device is locked setting. Notifications for
the app appear on your lock screen but their content is not visible.
SIM card protection
You can lock and unlock each SIM card that you use in your device with a PIN
(Personal Identity Number). When a SIM card is locked, the subscription linked to the
card is protected against misuse, meaning that you have to enter a PIN every time
you start your device.
42
This is an Internet version of this publication. © Print only for private use.
If you enter the PIN incorrectly more times than the maximum number of attempts
allowed, your SIM card will become blocked. You then need to enter your PUK
(Personal Unblocking Key) and a new PIN. Your PIN and PUK are supplied by your
network operator.
To set up a SIM card lock
1
2
3
4
From the Home screen, tap .
Find and tap Settings > Security > Set up SIM card lock.
Mark the Lock SIM card checkbox.
Enter the SIM card PIN and tap OK. The SIM card lock is now active and you
will be prompted to enter this lock every time you restart the device.
To remove a SIM card lock
1
2
3
4
From the Home screen, tap .
Find and tap Settings > Security > Set up SIM card lock.
Unmark the Lock SIM card checkbox.
Enter the SIM card PIN and tap OK.
To change the SIM card PIN
1
2
3
4
5
6
From the Home screen, tap .
Find and tap Settings > Security > Set up SIM card lock.
Tap Change SIM PIN.
Enter the old SIM card PIN and tap OK.
Enter the new SIM card PIN and tap OK.
Re-type the new SIM card PIN and tap OK.
To unlock a blocked SIM card using the PUK code
1
2
3
.
Enter the PUK code and tap
Enter a new PIN code and tap
.
Re-enter the new PIN code and tap
.
If you enter an incorrect PUK code too many times, you need to contact your network operator
to get a new SIM card.
Screen settings
To adjust the screen brightness
1
2
3
From your Home screen, tap .
Find and tap Settings > Display > Brightness level.
Drag the slider to adjust the brightness.
Lowering the brightness level increases battery performance.
To set the screen to vibrate on touch
1
2
3
From your Home screen, tap .
Find and tap Settings > Sound & notification > Other sounds.
Drag the slider beside Vibrate on touch to the right. The screen now vibrates
when you tap soft keys and certain applications.
To adjust the idle time before the screen turns off
1
2
3
From your Home screen, tap .
Find and tap Settings > Display > Sleep.
Select an option.
To turn off the screen quickly, briefly press the power key
.
43
This is an Internet version of this publication. © Print only for private use.
Smart backlight control
The smart backlight control keeps the screen on as long as the device is held in your
hand. Once you put down the device, the screen turns off according to your sleep
setting.
To turn on the Smart backlight control function
1
2
3
From your Home screen, tap .
Find and tap Settings > Display > Smart backlight control.
Drag the slider beside Smart backlight control to the right.
Screen pinning
Use screen pinning to set your device to display only the screen for a specific
application. For example, if you are playing a game and you accidentally touch the
Home navigation key, the screen pinning feature prevents the active game app
screen from being minimised. You can also use this feature when you lend your
device to another person to make it harder for them to access more than one screen
or application. For example, you can lend your phone to somebody to make a phone
call and pin the screen to the Phone application so that the person can't easily use
other apps such as Messaging or Email.
Screen pinning is not a security feature and does not fully prevent other users from unpinning
a screen and accessing your device. To protect your data, you should set up your device to
request a screen lock PIN, password or pattern before someone can unpin the screen.
To activate screen pinning
1
2
3
From your Home screen, tap .
Find and tap Settings > Security > Screen pinning.
Drag the slider to the right.
To pin a screen
1
2
3
4
5
6
7
Make sure that screen pinning is activated on your device.
Open an app and go to the screen that you want to pin.
Tap .
To display , swipe upwards.
Tap .
If you have a PIN, password, or pattern set up as your screen lock, mark the
relevant checkbox to make sure the pattern, PIN or password is needed to
unlock the device before the screen can be unpinned.
Tap START.
To unpin a screen
1
2
On the pinned screen, touch and hold
Release both buttons.
and
at the same time.
If you marked a security option when you pinned the screen, you have to enter your pattern,
PIN or password to unlock the device before the screen can be unpinned.
Daydream
Daydream is an interactive screen saver that automatically displays colours, photos
or a slideshow while your device is docked or charging and the screen is idle.
On a device with multiple users, each user can have individual Daydream settings.
To activate the Daydream screen saver
1
2
3
From your Home screen, tap .
Find and tap Settings > Display > Daydream.
Drag the slider to the right.
44
This is an Internet version of this publication. © Print only for private use.
To select content for the Daydream screen saver
1
2
3
4
From your Home screen, tap .
Find and tap Settings > Display > Daydream.
Drag the slider to the right.
Select what you want to display when the screen saver is active.
To set when the Daydream screen saver starts
1
2
3
4
5
From your Home screen, tap .
Find and tap Settings > Display > Daydream.
Drag the slider to the right.
To activate the Daydream screen saver immediately, tap , then tap Start now.
To set automatic activation options, tap , then tap When to daydream and
select an option.
Screen lock
There are several ways to lock the screen. The security level of each lock type is
listed below in order of weakest to strongest:
•
•
•
•
Slide – no protection, but you have quick access to the Home screen
Pattern – draw a simple pattern with your finger to unlock your device
PIN – enter a numeric PIN of at least four digits to unlock your device
Password – enter an alpha-numeric password to unlock your device
It is very important that you remember your screen unlock pattern, PIN or password. If you
forget this information, it may not be possible to restore important data such as contacts and
messages.
To change screen lock type
1
2
3
From your Home screen, tap .
Find and tap Settings > Security > Screen lock.
Follow the instructions in your device and select another screen lock type.
To create a screen lock pattern
1
2
3
From your Home screen, tap .
Find and tap Settings > Security > Screen lock > Pattern.
Follow the instructions in your device.
If your lock pattern is rejected five times in a row when you try to unlock your device, you must
wait 30 seconds and then try again.
To change the screen lock pattern
1
2
3
4
From your Home screen, tap .
Find and tap Settings> Security > Screen lock.
Draw your screen unlock pattern.
Tap Pattern and follow the instructions in your device.
To create a screen lock PIN
1
2
3
4
5
From your Home screen, tap .
Find and tap Settings > Security > Screen lock > PIN.
Enter a numeric PIN, then tap Continue.
Re-enter and confirm your PIN, then tap OK.
Select an option to show notifications when the device is locked, then tap
Done.
45
This is an Internet version of this publication. © Print only for private use.
To create a screen lock password
1
2
3
4
From your Home screen, tap > Settings > Security > Screen lock >
Password.
Enter a password, then tap Continue.
Re-enter and confirm your password, then tap OK.
Select an option to show notifications when the device is locked, then tap
Done.
Language settings
You can select a default language for your device and change it again at a later time.
You can also change the writing language for text input. See Personalising the onscreen keyboard on page 51.
To change the language
1
2
3
4
From the Home screen, tap .
Find and tap Settings > Language & input > Language.
Select an option.
Tap OK.
If you select the wrong language and cannot read the menu texts, find and tap . Then select
the text beside
and select the first entry in the menu that opens. You can then select the
language you want.
Date and time
You can change the date and time on your device.
To set the date manually
1
2
3
4
5
6
From the Home screen, tap .
Find and tap Settings > Date & time.
Unmark the Automatic date & time checkbox, if it is marked.
Tap Set date.
Scroll up and down to select the desired date.
Tap OK.
To set the time manually
1
2
3
4
5
6
From your Home screen, tap .
Find and tap Settings > Date & time.
Unmark the Automatic date & time checkbox if it is marked.
Tap Set time.
Select the relevant values for the hour and minute.
Tap OK.
To set the time zone
1
2
3
4
5
From your Home screen, tap .
Find and tap Settings > Date & time.
Unmark the Automatic time zone checkbox, if it is marked.
Tap Select time zone.
Select an option.
Enhancing the sound output
You can enhance the sound of your device by manually enabling individual sound
settings such as Equaliser and Surround sound. You can also enable the Dynamic
normaliser to minimise volume differences between songs or videos.
46
This is an Internet version of this publication. © Print only for private use.
To enhance the sound output manually
1
2
3
From your Home screen, tap .
Find and tap Settings > Sound & notification > Audio settings.
Mark the ClearAudio+ checkbox.
To adjust the sound settings manually
1
2
3
4
5
From the Home screen, tap .
Find and tap Settings > Sound & notification > Audio settings.
Unmark the ClearAudio+ checkbox.
Tap Sound effects > Equalizer.
Adjust the sound settings by dragging the frequency band buttons up or down.
The manual adjustment of sound output settings has no effect on voice communication
applications. For example, there is no change in the voice call sound quality.
To minimise volume differences using the Dynamic normaliser
1
2
3
From the Home screen, tap .
Find and tap Settings > Sound & notification > Audio settings.
Mark the Dynamic normalizer checkbox.
47
This is an Internet version of this publication. © Print only for private use.
Typing text
On-screen keyboard
You can enter text with the on-screen QWERTY keyboard by tapping each letter
individually, or you can use the Gesture input feature and slide your finger from letter
to letter to form words. If you prefer to use a smaller version of the on-screen
keyboard and input text using only one hand, you can activate the one-handed
keyboard instead.
You can select up to three languages for text input. The Smart language detection
feature detects the language that you are using and predicts the words for that
language as you type. Some applications open the on-screen keyboard
automatically, for example, email and text messaging applications.
1 Delete a character before the cursor.
2 Enter a carriage return or confirm text input.
3 Enter a space.
4 Personalise your keyboard. This key disappears after the keyboard is personalised.
5 Display numbers and symbols. For even more symbols, tap
6 Switch between lower-case , upper-case
access extra characters in the language.
and caps
.
. For some languages, this key is used to
•
To display the on-screen keyboard to enter text
Tap a text entry field.
•
To use the on-screen keyboard in landscape orientation
When the on-screen keyboard is displayed, turn the device sideways.
You may need to adjust the settings in some applications to enable landscape orientation.
To enter text character by character
1
2
•
To enter a character visible on the keyboard, tap the character.
To enter a character variant, touch and hold a regular keyboard character to
get a list of available options, then select from the list. For example, to enter
"é", touch and hold "e" until other options appear, then, while keeping your
finger pressed on the keyboard, drag to and select "é".
To enter a period
After you enter a word, double-tap the space bar.
48
This is an Internet version of this publication. © Print only for private use.
To enter text using the Gesture input function
1
2
3
When the on-screen keyboard is displayed, slide your finger from letter to letter
to trace the word that you want to write.
After you finish entering a word, lift up your finger. A word suggestion appears
based on the letters that you have traced.
to see other options and
If the word that you want does not appear, tap
select accordingly. If the desired option does not appear, delete the entire
word and trace it again, or enter the word by tapping each letter individually.
To change the Gesture input settings
1
2
3
When the on-screen keyboard is displayed, tap .
Tap , then tap Keyboard settings .
To activate or deactivate the Gesture input function, mark or unmark the
Gesture input checkbox.
To use the one-handed keyboard
1
2
3
Open the on-screen keyboard in portrait mode, then tap .
Tap , then tap One-handed keyboard.
To move the one-handed keyboard to the left side or right side of the screen,
or accordingly.
tap
To return to using the full on-screen keyboard, tap
.
Phonepad
The Phonepad is similar to a standard 12-key telephone keypad. It gives you
predictive text and multi-tap input options. You can activate the Phonepad text input
method via the keyboard settings. The Phonepad is only available in portrait
orientation.
1 Choose a text input option. You can tap each character once and use word suggestions, or keep
tapping the key until the desired character is selected.
2 Delete a character before the cursor.
3 Enter a carriage return or confirm text input.
4 Enter a space.
5 Display symbols and smileys.
6 Display numbers.
7 Change the character case and turn on the caps lock.
To open the Phonepad for the first time
1
2
3
Tap a text entry field, then tap .
Tap , then tap Keyboard settings.
Tap Portrait keyboard, then select the Phonepad option.
49
This is an Internet version of this publication. © Print only for private use.
To enter text using the Phonepad
•
•
•
When appears in the Phonepad, tap each character key only once, even if
the letter you want is not the first letter on the key. Tap the word that appears
or tap
to view more word suggestions and select a word from the list.
When appears in the Phonepad, tap the on-screen key for the character you
want to enter. Keep tapping this button until the desired character is selected.
Then do the same for the next character you want to enter, and so on.
To enter numbers using the Phonepad
When the Phonepad is displayed, tap . A Phonepad with numbers appears.
To insert symbols and smileys using the Phonepad
1
2
. A grid with symbols and smileys
When the Phonepad is displayed, tap
appears.
Scroll up or down to view more options. Tap a symbol or smiley to select it.
Entering text using voice input
When you enter text, you can use the voice input function instead of typing the
words. Just speak the words that you want to enter. Voice input is an experimental
technology from Google™, and is available for a number of languages and regions.
To enable voice input
1
2
3
4
When you enter text using the on-screen keyboard, tap .
Tap , then tap Keyboard settings.
Mark the Google voice typing key checkbox.
Tap to save your settings. A microphone icon appears on your on-screen
keyboard.
To enter text using voice input
1
2
3
4
Open the on-screen keyboard.
Tap . When appears, speak to enter text.
When you're finished, tap again. The suggested text appears.
Edit the text manually if necessary.
To make the keyboard appear and enter text manually, tap
.
Editing text
You can select, cut, copy and paste text as you write. You can access the editing
tools by double-tapping the entered text. The editing tools then become available via
an application bar.
Application bar
1
Close the application bar
2
Select all text
3
Cut text
4
Copy text
5
Paste text
only appears when you have text saved on the clipboard.
50
This is an Internet version of this publication. © Print only for private use.
To select text
1
2
Enter some text, then double-tap the text. The word you tap gets highlighted
by tabs on both sides.
Drag the tabs left or right to select more text.
To edit text
1
2
•
Enter some text, then double-tap the entered text to make the application bar
appear.
Select the text that you want to edit, then use the tools in the application bar to
make your desired changes.
To use the magnifier
When you enter text, tap and hold on the text field to view the text magnified
and to place the cursor where you want within the text field.
Personalising the on-screen keyboard
When entering text using the on-screen keyboard, you can access keyboard and
other text input settings that help you, for example, to set options for writing
languages, text prediction and correction. You can get word suggestions for one
language at a time by deactivating the Smart language detection feature.
The keyboard can use text that you have written in messaging and other applications
to learn your writing style. There is also a Personalisation guide that runs you through
the most basic settings to get you started quickly. You can select to use other
keyboards and switch between keyboards. For example, you can select the Xperia™
Chinese keyboard or the Xperia™ Japanese keyboard.
To access the on-screen keyboard settings
1
2
3
4
When you enter text using the on-screen keyboard, tap .
Tap , then tap Keyboard settings and change the settings as desired.
To add a writing language for text input, tap Writing languages and mark the
relevant checkboxes.
Tap OK to confirm.
To change the word suggestion settings
1
2
3
When you enter text using the on-screen keyboard, tap
Tap , then tap Keyboard settings > Word suggestions.
Select an option.
.
To select a keyboard
1
2
When you enter text using the on-screen keyboard, tap
of the screen.
Select an option.
at the bottom right
To enable more keyboard options, tap Choose keyboards, then drag the relevant sliders to the
right.
•
To change writing language using the on-screen keyboard
When you enter text using the on-screen keyboard, tap the writing language
icon to switch between the selected writing languages. For example, tap
until the desired writing language appears.
This feature is only available if you have added more than one input language.
To use your writing style
1
2
When you enter text using the on-screen keyboard, tap .
Tap , then tap Keyboard settings > Use my writing style and select a source.
51
This is an Internet version of this publication. © Print only for private use.
To change the Smart language detection settings
Smart language detection may not be available for all writing languages.
1
2
3
When the on-screen keyboard is displayed, tap .
Tap , then tap Keyboard settings .
To activate or deactivate the Smart language detection function, mark or
unmark the Smart language detection checkbox.
To select a keyboard layout variant
Layout variants for the on-screen keyboard may not be available for all writing languages. You
can select different keyboard layouts for each writing language.
1
2
3
4
5
When you enter text using the on-screen keyboard, tap .
Tap , then tap Keyboard settings.
Tap Writing languages, then tap
beside a writing language.
Select a keyboard layout variant.
Tap OK to confirm.
52
This is an Internet version of this publication. © Print only for private use.
Calling
Making calls
You can make a call by manually dialling a phone number, by tapping a number
saved in your contacts list, or by tapping the phone number in your call log view. You
can also use the smart dial feature to quickly find numbers from your contacts list
and call logs. To make a video call, you can use the Hangouts™ instant messaging
and video chat application on your device. See Instant messaging and video chat on
page 70.
1
View more options
2
Delete number
3
Dialpad
4
Call button
To dial a phone number
1
2
3
4
From your Home screen, tap .
Find and tap Phone. The call log is displayed.
Tap to display the dialpad.
Enter the phone number and tap .
To delete a number entered by mistake, tap
.
To make a call using smart dial
1
2
3
4
5
From your Home screen, tap .
Find and tap Phone. The call log is displayed.
Tap to display the dialpad.
Use the dialpad to enter letters or numbers that correspond to the contact you
want to call. As you enter each letter or number, a list of possible matches
appears.
Tap the contact that you want to call.
To make an international call
1
2
3
4
5
From your Home screen, tap .
Find and tap Phone. The call log is displayed.
Tap to display the dialpad.
Touch and hold 0 until a “+” sign appears.
Enter the country code, area code (without the initial zeros) and phone number,
then tap .
53
This is an Internet version of this publication. © Print only for private use.
To add a direct dial number to your Home screen
1
2
3
4
Touch and hold an empty area on your Home screen until the device vibrates
and the customisation menu appears.
In the customisation menu, tap Widgets & Apps > Shortcuts.
Scroll through the list of applications and select Direct dial.
Select the contact and the number that you want to use as the direct dial
number.
Showing or hiding your phone number
You can select to show or hide your phone number on call recipients' devices when
you call them.
To show or hide your phone number
1
2
From the Home screen, tap .
Find and tap Settings > Call > Additional settings > Caller ID.
Receiving calls
If you receive an incoming call when the device is in sleep mode or the screen is
locked, the phone application opens in fullscreen format. If you receive an incoming
call when the screen is active, the incoming call is displayed as a floating notification,
that is, in a minimised window that floats at the top of whatever screen is open. When
such a notification arrives, you can choose to answer the call and open the phone
application screen, or you can reject the call and stay on the current screen.
•
To answer an incoming call when the screen is inactive
Drag to the right.
•
To answer an incoming call when the screen is active
In the floating notification that appears at the top of the screen, tap ANSWER.
Instead of answering the call, you can go to the main phone application screen by tapping the
upper part of the floating notification window. Using this method, you get more options to
manage the call. For example, you can decide to reject the call with a message or forward the
call to the answering machine.
•
To reject an incoming call when the screen is inactive
Drag to the left.
•
To reject an incoming call when the screen is active
In the floating notification that appears at the top of the screen, tap Decline.
Instead of rejecting the call, you can go to the main phone application screen by tapping the
upper part of the floating notification window. Using this method, you get more options to
manage the call. For example, you can decide to reject the call with a message or forward the
call to the answering machine.
•
To mute the ringtone for an incoming call
When you receive the call, press the volume key.
Using the answering machine
You can use the answering machine application in your device to answer calls when
you are busy or miss a call. You can enable the automatic answering function and
determine how many seconds to wait before the calls get answered automatically.
You can also manually route calls to the answering machine when you are too busy
to answer them. And you can access messages left on your answering machine
directly from your device.
Before using the answering machine, you must record a greeting message.
54
This is an Internet version of this publication. © Print only for private use.
To record a greeting message for the answering machine
1
2
3
From your Home screen, tap .
Find and tap Settings > Call > Xperia™ Answering Machine > Greetings.
Tap Record new greeting and follow the on-screen instructions.
To enable automatic answering
1
2
3
From your Home screen, tap .
Find and tap Settings > Call > Xperia™ Answering Machine.
Drag the slider beside Answering Machine to the right.
If you don't set a time delay for the automatic answering of calls, the default value is used.
To set a time delay for automatic answering
1
2
3
4
5
From your Home screen, tap .
Find and tap Settings > Call > Xperia™ Answering Machine.
Tap Pick up after.
Adjust the time by scrolling up and down.
Tap Done.
•
To forward an incoming call to the answering machine
When a call comes in, drag Response options upwards, then select Reject with
Answering Machine.
When a call comes in, you can also just wait until the preset time delay elapses so that the
answering machine picks up the call automatically.
To listen to messages on the answering machine
1
2
3
From your Home screen, tap .
Find and tap Settings > Call > Xperia™ Answering Machine > Messages.
Select the voice message that you want to listen to.
You can also listen to answering machine messages directly from the call log by tapping
.
Rejecting a call with a text message
You can reject a call with a text message. When you reject a call with such a
message, the message is automatically sent to the caller and stored in the Messaging
conversation with the contact.
You can select from a number of predefined messages available on your device, or
you can create a new message. You can also create your own personalised
messages by editing the predefined ones.
To reject a call with a text message
1
2
When an incoming call arrives, drag Response options upwards, then tap
Reject with message.
Select a predefined message or tap and write a new message.
To reject a second call with a text message
1
2
When you hear repeated beeps during a call, drag Reject with message
upwards.
Select a predefined message or tap and write a new message.
To edit the text message used to reject a call
1
2
3
4
From your Home screen, tap .
Find and tap Settings > Call > Reject call with message.
Tap the message that you want to edit, then make the necessary changes.
Tap OK.
55
This is an Internet version of this publication. © Print only for private use.
Ongoing calls
1
Enter numbers during a call
2
Turn on the loudspeaker during a call
3
Put the current call on hold or retrieve a call on hold
4
Make a second call
5
Mute the microphone during a call
6
End a call
•
To change the ear speaker volume during a call
Press the volume key up or down.
•
To activate the screen during a call
Briefly press .
Using the call log
In the call log, you can view missed calls
, received calls
and dialled calls .
To view your missed calls
1
2
When you have missed a call,
downwards.
Tap Missed call.
appears in the status bar. Drag the status bar
To call a number from your call log
1
2
3
From your Home screen, tap .
Find and tap Phone. The call log is displayed.
To call a number directly from the call log, tap the number. To edit a number
before calling, touch and hold the number, then tap Edit number before call.
To add a number from the call log to your contacts
1
2
3
4
5
From your Home screen, tap .
Find and tap Phone. The call log is displayed.
Touch and hold a number displayed in the call log, then tap Add to Contacts.
Select an existing contact to which you want to add the number, or tap Create
new contact.
Edit the contact details, then tap Done.
56
This is an Internet version of this publication. © Print only for private use.
To view call log options
1
2
3
From your Home screen, tap .
Find and tap Phone. The call log is displayed.
Tap .
You can also access general call settings using the instructions above.
Forwarding calls
You can direct calls to a different recipient, for example, to another phone number,
another device, or an answering service.
To forward calls
1
2
3
4
From your Home screen, tap .
Find and tap Settings > Call.
Tap Call forwarding and select an option.
Enter the number to which you want to forward calls, then tap Enable.
To turn off call forwarding
1
2
3
From your Home screen, tap .
Find and tap Settings > Call > Call forwarding.
Select an option, then tap Disable.
Restricting calls
You can block all or certain categories of incoming and outgoing calls. If you have
received a PIN2 code from your service provider, you can also use a list of Fixed
Dialling Numbers (FDNs) to restrict outgoing calls. If your subscription includes a
voicemail service, you can send all incoming calls from a specific contact directly to
voicemail. If you want to block a certain number, you can go to Google Play™ and
download applications that support this function.
FDN is not supported by all network operators. Contact your network operator to verify if your
SIM card or network service supports this feature.
To block incoming or outgoing calls
1
2
3
4
From your Home screen, tap .
Find and tap Settings > Call.
Tap Call Barring, then select an option.
Enter the password and tap Enable.
When you set up call blocking for the first time, you need to enter a password to activate the
call blocking function. You must use this same password later if you want to edit call blocking
settings.
To enable or disable fixed dialling
1
2
3
4
From your Home screen, tap .
Find and tap Settings > Call > Fixed dialing numbers.
Tap Activate fixed dialing or Deactivate fixed dialing.
Enter your PIN2 and tap OK.
To access the list of accepted call recipients
1
2
From your Home screen, tap .
Find and tap Settings > Call > Fixed dialing numbers > Fixed dialing numbers.
57
This is an Internet version of this publication. © Print only for private use.
To change the SIM card PIN2
1
2
3
4
5
6
From the Home screen, tap .
Find and tap Settings > Call.
Tap Fixed dialing numbers > Change PIN2.
Enter the old SIM card PIN2 and tap OK.
Enter the new SIM card PIN2 and tap OK.
Confirm the new PIN2 and tap OK.
To send incoming calls from a specific contact directly to voicemail
1
2
3
4
5
6
From your Home screen, tap .
Find and tap .
Select the contact for which you want to direct all incoming calls automatically
to voicemail.
Tap > .
Mark the checkbox beside All calls to voicemail.
Tap Done.
Multiple calls
If you have activated call waiting, you can handle multiple calls at the same time.
When it is activated, you will be notified by a beep if you receive another call.
To activate or deactivate call waiting
1
2
3
From your Home screen, tap .
Find and tap Settings > Call > Additional settings.
To activate or deactivate call waiting, tap Call waiting.
•
To answer a second call and put the ongoing call on hold
When you hear repeated beeps during a call, drag to the right.
•
To reject a second call
When you hear repeated beeps during a call, drag
to the left.
To make a second call
1
2
3
During an ongoing call, tap . The call log is displayed.
Tap to display the dialpad.
Enter the number of the recipient and tap . The first call is put on hold.
•
To answer a third call and end the ongoing call
When the third call comes in, tap End current call and answer.
•
To reject a third call
When the third call comes in, tap Decline incoming call.
•
To switch between multiple calls
To switch to another call and put the current call on hold, tap Switch to this
call.
Conference calls
With a conference or multiparty call, you can have a joint conversation with two or
more persons.
For details about the number of participants that you can add to a conference call, contact
your network operator.
58
This is an Internet version of this publication. © Print only for private use.
To make a conference call
1
2
3
4
5
During an ongoing call, tap . The call log appears.
To display the dialpad, tap .
Dial the number of the second participant and tap . The first participant is put
on hold temporarily.
To add the second participant to the call and start the conference, tap .
To add more participants to the call, repeat the relevant steps as described
above.
To have a private conversation with a conference call participant
1
2
3
During an ongoing conference call, tap Manage conference.
Tap the telephone number of the participant with whom you want to have a
private conversation.
To end the private conversation and return to the conference call, tap .
To release a participant from a conference call
1
2
During an ongoing conference call, tap Manage conference.
next to the participant you want to release.
Tap
•
To end a conference call
During the call, tap .
Voicemail
If your subscription includes a voicemail service, callers can leave voice messages for
you when you can't answer calls. Your voicemail service number is normally saved on
your SIM card. If not, you can get the number from your service provider and enter it
manually.
To enter your voicemail number
1
2
3
4
From the Home screen, tap .
Find and tap Settings > Call > Voicemail > Voicemail settings > Voicemail
number.
Enter your voicemail number.
Tap OK.
To call your voicemail service
1
2
3
4
From your Home screen, tap .
Find and tap Phone. The call log is displayed.
Tap to display the dialpad.
Touch and hold 1.
Emergency calls
Your device supports international emergency numbers, for example, 112 or 911.
You can normally use these numbers to make emergency calls in any country, with or
without a SIM card inserted if you are within range of a network.
To make an emergency call
1
2
3
4
From your Home screen, tap .
Find and Tap Phone. The call log is displayed.
Tap to display the dialpad.
Enter the emergency number, then tap .
You can make emergency calls even when no SIM card is inserted or when all outgoing calls
are blocked.
59
This is an Internet version of this publication. © Print only for private use.
To make an emergency call while the SIM card is locked
1
2
From the lock screen, tap Emergency call.
Enter the emergency number and tap .
To make an emergency call while the device is locked
1
2
3
4
To activate the screen, briefly press the power key .
Touch and hold the phone icon , then drag it to the right. The call log is
displayed.
Tap to display the dialpad.
Enter the emergency number and tap .
60
This is an Internet version of this publication. © Print only for private use.
Contacts
Transferring contacts
There are several ways to transfer contacts to your new device. You can sync
contacts from an online account or import contacts directly from another device.
Transferring contacts using a computer
Xperia™ Transfer is an application that helps you to collect contacts from your old
device and transfer them to your new device. Xperia™ Transfer, which you can
access from within the PC Companion and the Sony Bridge for Mac computer
programs, supports mobile devices that run on several operating systems, including
iOS, Android™, Windows® and BlackBerry™.
To use Xperia™ Transfer, you need:
•
•
•
•
•
An Internet-connected computer.
A USB cable for your old device.
A USB cable for your new Android™ device.
Your old device.
Your new Android™ device.
To transfer contacts to your new device
1
2
Search and download PC Companion (on a PC) or Bridge for Mac (on a Mac
computer) from www.sonymobile.com if the application is not already installed.
After successful installation, open the PC Companion application or the Sony
Bridge for Mac application, then click Xperia™ Transfer and follow the relevant
instructions to transfer your contacts.
Transferring contacts using an online account
If you sync the contacts in your old device or your computer with an online account,
for example, Google Sync™, Facebook™ or Microsoft® Exchange ActiveSync®, you
can transfer your contacts to your new device using that account.
To synchronise contacts to your new device using a synchronisation account
1
2
3
From your Home screen, tap , then tap .
Tap , then tap Settings > Accounts & sync.
Select the account that you want to sync your contacts with, then tap > Sync
now.
You need to be signed in to the relevant sync account before you can sync your contacts with
it.
Other methods for transferring contacts
There are several other ways to transfer contacts from your old device to your new
device. For example, you can copy contacts to a memory card, use Bluetooth®
technology, or save contacts to a SIM card. For more specific information about
transferring the contacts from your old device, refer to the relevant User guide.
To import contacts from a memory card
1
2
3
From your Home screen, tap , then tap .
Press , then tap Import contacts > SD card.
Select the files that you want to import and tap OK.
61
This is an Internet version of this publication. © Print only for private use.
To import contacts using Bluetooth® technology
1
2
3
4
5
Make sure you have the Bluetooth® function turned on and that your device is
set to visible.
When you are notified of an incoming file to your device, drag the status bar
downwards and tap the notification to accept the file transfer.
Tap Accept to start the file transfer.
Drag the status bar downwards. When the transfer is complete, tap the
notification.
Tap the received file.
To import contacts from a SIM card
You may lose information or get multiple contact entries if you transfer contacts using a SIM
card.
1
2
3
From your Home screen, tap , then tap .
Tap , then tap Import contacts > SIM card.
To import an individual contact, find and tap the contact. To import all
contacts, tap Import all.
Searching and viewing contacts
1
Search for contacts
2
View more options
3
Contacts, Favourites and Groups tabs
4
Edit and view medical and emergency contact information
5
View contact details
6
Jump to contacts starting with the selected letter
7
Access communication options for the contact
8
Add a contact
To search for a contact
1
2
From your Home screen, tap , then tap .
Tap and enter a phone number, name or other information in the Search
contacts field. The result list is filtered as you enter each character.
62
This is an Internet version of this publication. © Print only for private use.
To select which contacts to display in the Contacts application
1
2
3
From your Home screen, tap , then tap .
Press , then tap Filter.
In the list that appears, mark or unmark the desired options. If you have
synchronised your contacts with a synchronisation account, that account
appears in the list. To further expand the list of options, tap the account.
Adding and editing contacts
To add a contact
1
2
3
4
5
From your Home screen, tap , then tap .
Tap .
If you have synchronised your contacts with one or more accounts and you are
adding a contact for the first time, you must select the account to which you
want to add this contact. Alternatively, tap Phone contact if you only want to
use and save this contact on your device.
Enter or select the desired information for the contact.
When you are finished, tap Done.
After you select a synchronisation account in step 3, that account will show as the default
account offered the next time you add a contact. When you save a contact to a particular
account, that account will show as the default account to save to the next time you add a
contact. If you have saved a contact to a particular account and want to change it, you need to
create a new contact and select a different account to save it to.
If you add a plus sign and the country code before a contact's phone number, you do not
have to edit the number again when you make calls from other countries.
To edit a contact
1
2
3
4
From your Home screen, tap , then tap .
Tap the contact that you want to edit, then tap
Edit the desired information.
When you are finished, tap Done.
.
Some synchronisation services do not allow you to edit contact details.
To associate a picture with a contact
1
2
3
4
From your Home screen, tap , then tap .
Tap the contact that you want to edit, then tap .
Tap
and select a method for adding the contact picture.
After you add the picture, tap Done.
You can also add a picture to a contact directly from the Album application. If you want to
add a picture that is saved to an online account, you must download the picture first.
To personalise the ringtone for a contact
1
2
3
4
5
From your Home screen, tap , then tap .
Tap the contact that you want to edit, then tap .
Tap > Set ringtone.
Select an option from the list or tap to select a music file saved to your
device, then tap Done.
Tap Done.
To delete contacts
1
2
3
4
From your Home screen, tap , then tap .
Touch and hold the contact that you want to delete.
To delete all contacts, tap the downwards arrow to open the drop down menu,
then select Mark all.
Tap , then tap Delete.
63
This is an Internet version of this publication. © Print only for private use.
To edit contact information about yourself
1
2
3
4
From your Home screen, tap , then tap .
Tap Myself, then tap .
Enter the new information or make the changes you want.
When you are done, tap Done.
To create a new contact from a text message
1
2
3
4
From your Home screen, tap , then find and tap .
Tap > Save.
Select an existing contact, or tap Create new contact.
Edit the contact information and tap Done.
Adding medical and emergency contact information
You can add and edit ICE (In Case of Emergency) information in the Contacts
application. You can enter medical details, such as allergies and medications that you
are using, plus information about relatives and friends who can be contacted in case
of emergency. After setup, your ICE information can be accessed from the security
lock screen. This means that even if the screen is locked, for example, by a PIN,
pattern or password, emergency personnel can still retrieve your ICE information.
1
Go back to the main Contacts screen
2
View more options
3
Show your medical and personal information as part of the ICE information
4
Medical information
5
ICE contact list
6
Create new ICE contacts
7
Use existing contacts as ICE contacts
To show your medical and personal information as part of the ICE information
1
2
3
From your Home screen, tap , then tap .
Tap ICE – In Case of Emergency.
Tap , then mark the Show personal information checkbox.
To enter your medical information
1
2
3
4
5
From your Home screen, tap , then tap
Tap ICE – In Case of Emergency.
Tap , then tap Edit medical info.
Edit the desired information.
When you are finished, tap Done.
.
64
This is an Internet version of this publication. © Print only for private use.
To add a new ICE contact
1
2
3
4
5
From your Home screen, tap , then tap .
Tap ICE – In Case of Emergency, then tap .
If you have synchronised your contacts with one or more accounts and you are
adding a contact for the first time, you must select the account to which you
want to add this contact. Alternatively, tap Phone contact if you only want to
use and save this contact on your device.
Enter or select the desired information for the contact.
When you are finished, tap Done.
The ICE contact must have at least a phone number to which emergency personnel can make
a call. If your device is locked by a security screen lock, emergency personnel can only see the
phone number of the ICE contact, even if there is other information entered in the Contacts
application about the contact.
To use existing contacts as ICE contacts
1
2
3
4
From your Home screen, tap , then tap .
Tap ICE – In Case of Emergency, then tap .
Mark the contacts that you want to use as ICE contacts.
When you are finished, tap Done.
The ICE contacts that you select must have at least a phone number to which emergency
personnel can make a call. If your device is locked by a security screen lock, emergency
personnel can only see the phone number of the ICE contacts, even if there is other
information entered in the Contacts application about the contacts.
To make your ICE information visible from the security lock screen
1
2
3
4
From your Home screen, tap , then tap
Tap ICE – In Case of Emergency.
Tap , then tap Settings.
Mark the ICE in lock screen checkbox.
.
Your ICE information is visible from the security lock screen by default.
To enable calls to ICE contacts from the security lock screen
1
2
3
4
From your Home screen, tap , then tap
Tap ICE – In Case of Emergency.
Tap , then tap Settings.
Mark the Enable call in ICE checkbox.
.
Some networks and/or service providers may not support ICE calls.
Favourites and groups
You can mark contacts as favourites so that you can get quick access to them from
the Contacts application. You can also assign contacts to groups, to get quicker
access to a group of contacts from within the Contacts application.
To mark or unmark a contact as a favourite
1
2
3
From the Home screen, tap , then tap .
Tap the contact you want to add to or remove from your favourites.
Tap .
To view your favourite contacts
1
2
From your Home screen, tap
Tap Favorites.
, then tap
.
65
This is an Internet version of this publication. © Print only for private use.
To assign a contact to a group
1
2
3
4
In the Contacts application, tap the contact that you want to assign to a group.
Tap , then tap the bar directly under Groups.
Mark the checkboxes for the groups to which you want to add the contact.
Tap Done.
Sending contact information
To send your business card
1
2
3
4
From your Home screen, tap , then tap .
Tap Myself.
Tap , then tap Share.
Select an available transfer method and follow the on-screen instructions.
To send a contact
1
2
3
4
From your Home screen, tap , then tap .
Tap the contact whose details you want to send.
Tap , then tap Share.
Select an available transfer method and follow the on-screen instructions.
To send several contacts at once
1
2
3
4
From your Home screen, tap , then tap .
Press , then tap Mark several.
Mark the contacts you want to send, or select all if you want to send all
contacts.
Tap , then select an available transfer method and follow the on-screen
instructions.
Avoiding duplicate entries in the Contacts application
If you synchronise your contacts with a new account or import contact information in
other ways, you could end up with duplicate entries in the Contacts application. If this
happens, you can join such duplicates to create a single entry. And if you join entries
by mistake, you can separate them again later.
To link contacts
1
2
3
4
From your Home screen, tap , then tap .
Tap the contact that you want to link with another contact.
Press , then tap Link contact.
Tap the contact whose information you want to join with the first contact, then
tap OK to confirm. The information from the first contact is merged with the
second contact, and the linked contacts are displayed as one contact in the
Contacts list.
To separate linked contacts
1
2
3
From your Home screen, tap , then tap .
Tap the linked contact that you want to edit, then tap
Tap Unlink contact > Unlink.
.
Backing up contacts
You can use a memory card or a USB storage device to back up contacts. See
Transferring contacts on page 61 for more information about how to restore contacts
to your device.
66
This is an Internet version of this publication. © Print only for private use.
To export all contacts to a memory card
1
2
3
From your Home screen, tap , then tap .
Press , then tap Export contacts > SD card.
Tap OK.
67
This is an Internet version of this publication. © Print only for private use.
Messaging and chat
Reading and sending messages
The Messaging application shows your messages as conversations, which means
that all messages to and from a particular person are grouped together. To send
multimedia messages, you need the correct MMS settings on your device. See
Internet and MMS settings on page 31.
The number of characters that you can send in a single message varies depending on the
operator and the language you use. The maximum size of a multimedia message, which
includes the size of added media files, is also operator dependent. Contact your network
operator for more information.
1
Go back to the list of conversations
2
Call the message sender
3
View more options
4
Sent and received messages
5
Send a completed message
6
Text entry field
7
Add attachments
To create and send a message
1
2
3
4
5
6
From your Home screen, tap , then find and tap .
Tap .
Enter the recipient’s name or phone number, or other contact information that
you have saved about the recipient, then select from the list that appears. If the
recipient is not listed as a contact, enter the recipient's number manually.
Tap Write message and enter your message text.
If you want to add an attachment, tap and select an option.
To send the message, tap .
If you exit a message before sending, it gets saved as a draft. The conversation gets tagged
with the word Draft:.
68
This is an Internet version of this publication. © Print only for private use.
To read a received message
1
2
3
From your Home screen, tap , then find and tap .
Tap the desired conversation.
If the message is not yet downloaded, tap and hold the message, then tap
Download message.
All received messages are saved by default to the device memory.
To reply to a message
1
2
3
From your Home screen, tap , then find and tap
Tap the conversation containing the message.
Enter your reply and tap .
.
To forward a message
1
2
3
4
5
From your Home screen, tap , then find and tap .
Tap the conversation containing the message that you want to forward.
Touch and hold the message that you want to forward, then tap Forward
message.
Enter the recipient’s name or phone number, or other contact information that
you have saved about the recipient, then select from the list that appears. If the
recipient is not listed as a contact, enter the recipient's number manually.
Edit the message, if necessary, then tap .
To save a file contained in a message you receive
1
2
3
4
From your Home screen, tap , then find and tap .
Tap the conversation you want to open.
If the message has not been downloaded yet, tap and hold the message, then
tap Download message.
Touch and hold the file you want to save, then select the desired option.
Organising your messages
To delete a message
1
2
3
From your Home screen, tap , then find and tap .
Tap the conversation containing the message you want to delete.
Touch and hold the message you want to delete, then tap Delete message >
Delete.
To delete conversations
1
2
3
From your Home screen, tap , then find and tap .
Tap , then tap Delete conversations.
Mark the checkboxes for the conversations that you want to delete, then tap
> Delete.
To star a message
1
2
3
4
From your Home screen, tap , then find and tap .
Tap the conversation that you want to open.
Touch and hold the message that you want to star, then tap Add star.
To unstar a message, touch and hold the starred message, then tap Delete
star.
To view starred messages
1
2
3
From your Home screen, tap , then find and tap
Tap , then tap Starred messages.
All starred messages appear in a list.
.
69
This is an Internet version of this publication. © Print only for private use.
To search for messages
1
2
3
From your Home screen, tap , then find and tap .
Tap , then tap Search.
Enter your search keywords. The search results appear in a list.
Calling from a message
To call a message sender
1
2
From your Home screen, tap , then find and tap
Tap a conversation and tap , then tap .
.
To save a sender's number as a contact
1
2
3
4
From your Home screen, tap , then find and tap .
Tap > Save.
Select an existing contact, or tap Create new contact.
Edit the contact information and tap Done.
Messaging settings
To change your message notification settings
1
2
3
4
5
From your Home screen, tap , then find and tap .
Tap , then tap Settings.
To set a notification sound, tap Notification tone, then select an option or tap
and select a music file that is saved to your device.
To confirm, tap Done.
For other notification settings, check or uncheck the relevant checkboxes.
To turn the delivery report function on or off for outgoing messages
1
2
3
From your Home screen, tap , then find and tap .
Tap , then tap Settings.
Mark or unmark the Delivery report checkbox as desired.
After the delivery report function is turned on, a check mark is displayed in messages that have
been successfully delivered.
Instant messaging and video chat
You can use the Google Hangouts™ instant messaging and video chat application on
your device to chat with friends who also use the application on computers,
Android™ devices and other devices. You can turn any conversation into a video call
with several friends, and you can send messages to friends even when they are
offline. You can also view and share photos easily.
Before you start using Hangouts™, make sure that you have a working Internet
connection and a Google™ account. Go to http://support.google.com/hangouts and
click the "Hangouts on your Android" link to get more detailed information about how
to use this application.
The video call function only works on devices with a front camera.
To use the Hangouts™ application
1
2
From your Home screen, tap
Find and tap Hangouts.
.
70
This is an Internet version of this publication. © Print only for private use.
Email
Setting up email
Use the email application in your device to send and receive email messages through
your email accounts. You can have one or several email accounts at the same time,
including corporate Microsoft Exchange ActiveSync accounts.
To set up an email account
1
2
3
From your Home screen, tap .
Find and tap Email.
Follow the instructions that appear on the screen to complete the setup.
For some email services, you may need to contact your email service provider for information
on detailed settings for the email account.
To add an extra email account
1
2
3
4
5
From your Home screen, tap .
Find and tap Email.
Tap , then tap Settings > Add account.
Enter the email address and password, then tap Next. If the settings for the
email account cannot be downloaded automatically, complete the setup
manually.
When you are finished, tap Next.
Sending and receiving email messages
•
1
View a list of all email accounts and recent folders
2
Search for email messages
3
Access settings and options
4
List of email messages
5
Write an email message
To download new email messages
When the email inbox is open, swipe downwards on the message list.
Before trying to download new email messages, make sure that you have a working data
connection. For more information about ensuring successful data connections, see Internet
and MMS settings on page 31.
71
This is an Internet version of this publication. © Print only for private use.
To read your email messages
1
2
3
4
From your Home screen, tap .
Find and tap Email.
If you are using several email accounts, drag the left edge of the screen to the
right and select the account that you want to check. If you want to check all
your email accounts at once, drag the left edge of the screen to the right, then
tap Combined inbox.
In the email inbox, scroll up or down and tap the email message that you want
to read.
To create and send an email message
1
2
3
4
From your Home screen, tap , then find and tap Email.
If you are using several email accounts, drag the left edge of the screen to the
right and select the account from which you want to send the email.
Tap , then type the recipient's name or email address and select one or more
recipients from the drop down list.
Enter the email subject and message text, then tap .
To reply to an email message
1
2
In your email inbox, find and tap the message that you want to reply to, then
tap Reply or Reply all.
Enter your reply, then tap .
To forward an email message
1
2
3
In your email inbox, find and tap the message that you want to forward, then
tap Forward.
Enter the recipient's name or email address, then select one or more recipients
from the drop down list.
Enter your message text, then tap .
To view an email message attachment
1
2
3
Find and tap the email message containing the attachment that you want to
view. Email messages with attachments are indicated by .
After the email message opens, tap Load. The attachment starts to download.
After the attachment finishes downloading, tap View.
To save a sender's email address to your contacts
1
2
3
4
Find and tap a message in your email inbox.
Tap the name of the sender, then tap OK.
Select an existing contact, or tap Create new contact.
Edit the contact information, if desired, then tap Done.
Organising your email messages
To sort your emails
1
2
3
4
5
From your Home screen, tap .
Find and tap Email.
If you are using several email accounts, drag the left edge of the screen to the
right and select the account with the email that you want to sort. If you want to
sort email in all your email accounts at once, drag the left edge of the screen to
the right, then tap Combined inbox.
Tap , then tap Sort.
Select a sorting option.
72
This is an Internet version of this publication. © Print only for private use.
To search for emails
1
2
3
4
5
From your Home screen, tap , then find and tap Email.
If you are using several email accounts, drag the left edge of the screen to the
right and select the account that you want to search. If you want to search all
your email accounts at once, drag the left edge of the screen to the right, then
tap Combined inbox.
Tap .
Enter your search text, then tap on the keyboard.
The search result appears in a list sorted by date. Tap the email message that
you want to open.
To view all folders for one email account
1
2
3
From your Home screen, tap , then find and tap Email.
Drag the left edge of the screen to the right, then select the account that you
want to check.
Under the account that you want to check, select Show all folders.
•
To delete an email message
In your email inbox, flick the message that you want to delete to the right.
To move an email message to another folder
1
2
In your email inbox, flick the message that you want to move to the left.
Tap Move, then select a folder.
Email account settings
To remove an email account from your device
1
2
3
4
5
From your Home screen, tap .
Find and tap Email.
Press , then tap Settings.
Select the account you want to remove.
Tap Delete account > OK.
To change the inbox check frequency
1
2
3
4
5
From your Home screen, tap .
Find and tap Email.
Tap , then tap Settings.
Select the account for which you want to change the inbox check frequency.
Tap Check frequency > Check frequency and select an option.
To set an Out of Office auto-reply in an Exchange Active Sync account
1
2
3
4
5
6
7
8
From your Home screen, tap , then find and tap Email.
Press , then tap Settings.
Select the EAS (Exchange Active Sync) account for which you want to set an
Out of Office auto-reply.
Tap Out of office.
Drag the slider beside Out of office to the right to turn on the function.
If needed, mark the Set time range checkbox and set the time range for the
auto reply.
Enter your Out of Office message in the body text field.
Tap OK to confirm.
Gmail™
If you have a Google™ account, you can use the Gmail™ application to read and
write email messages.
73
This is an Internet version of this publication. © Print only for private use.
•
1
View a list of all Gmail accounts and folders
2
Search for email messages
3
List of email messages
4
Write an email message
To learn more about Gmail™
When the Gmail application is open, drag the left edge of the screen to the
right, then find and tap Help & feedback.
74
This is an Internet version of this publication. © Print only for private use.
Music
Transferring music to your device
•
•
•
There are different ways to get music from a computer onto your device:
Connect the device and computer using a USB cable and drag and drop music files
directly into the file manager application on the computer. See Managing files using a
computer on page 126.
If the computer is a PC, you can use the Media Go™ application from Sony and
organise your music files, create playlists, subscribe to podcasts, and more. To learn
more and download the Media Go™ application, go to http://mediago.sony.com/enu/
features.
If the computer is an Apple® Mac®, you can use the Sony Bridge for Mac application
to transfer your media files from iTunes to your device. To learn more and download
Sony Bridge for Mac, go to www.sonymobile.com/global-en/tools/bridge-for-mac/.
The Walkman® application may not support all music file formats. For more information about
supported file formats and the use of multimedia (audio, image and video) files, download the
White Paper for your device at www.sonymobile.com/support.
Listening to music
Use the Walkman® application to listen to your favourite music and audio books.
1
Open the Walkman® home screen menu
2
Search all songs saved to your device
3
View the current play queue
4
Album art (if available)
5
Tap to go to the previous song in the play queue
Touch and hold to rewind within the current song
6
Play or pause a song
7
Tap to go to the next song in the play queue
Touch and hold to fast forward within the current song
8
Shuffle songs in the current play queue
9
Repeat all songs in the current play queue
10
Progress indicator – Drag the indicator or tap along the line to fast forward or rewind
11
Total time length of current song
12
Elapsed time of current song
75
This is an Internet version of this publication. © Print only for private use.
Walkman® home screen
1
Drag the left edge of the screen to the right to open the Walkman® home screen menu
2
Scroll up or down to view content
3
Play a song using the Walkman® application
4
Return to the Walkman® music player screen
To play a song using the Walkman® application
1
2
3
4
From your Home screen, tap , then find and tap
Drag the left edge of the screen to the right.
Select a music category.
Tap a song to play it.
.
You might not be able to play copyright-protected items. Please verify that you have
necessary rights in material that you intend to share.
•
To find song-related information online
While a song is playing in the Walkman® application, tap Album art and then
.
tap the infinite button
The infinite button
gives you access to online resources related to the song, such as
videos on YouTube™, song lyrics, and artist information on Wikipedia.
•
•
To adjust the audio volume
Press the volume key.
To minimise the Walkman® application
When a song is playing, tap to go to the Home screen. The Walkman®
application stays playing in the background.
To open the Walkman® application when it is playing in the background
1
2
While a song is playing in the background, tap the
applications window.
Tap the Walkman® application.
to open the recently used
Walkman® home screen menu
The Walkman® home screen menu gives you an overview of all the songs on your
device . From here you can manage your albums and playlists, and you can organise
your music by mood and tempo using SensMe™ channels.
To open the Walkman® home screen menu
1
2
From your Home screen, tap , then find and tap
Drag the left edge of the screen to the right.
.
76
This is an Internet version of this publication. © Print only for private use.
To return to the Walkman® home screen
•
•
When the Walkman® home screen menu is open, tap Home.
When the Walkman® home screen menu is open, tap on the screen to the right
of the menu.
To update your music with the latest information
1
2
From the Walkman® home screen, tap .
Tap Download music info > Start. Your device searches online and downloads
the latest available album art and song information for your music.
The SensMe™ channels application is activated when you download music information.
•
To enable the SensMe™ channels application
From the Walkman® home screen, tap , then tap Download music info > Start.
This application requires a mobile or Wi-Fi® network connection.
To edit music information
1
2
3
4
From the Walkman® application, tap .
Tap Edit music info.
Enter the new information or make the changes you want.
When you are finished, tap Save.
To delete a song
1
2
3
From the Walkman® home screen menu, browse to the song that you want to
delete.
Touch and hold the song title, then tap Delete in the list that appears.
Tap Delete again to confirm.
Playlists
On the Walkman® home screen, you can create your own playlists from the music
that is saved on your device.
To create your own playlists
1
2
3
From the Walkman® home screen, touch and hold the name of the album or
song that you want to add to a playlist.
In the menu that opens, tap Add to... > Create new playlist.
Enter a name for the playlist and tap OK.
You can also tap the album art and then tap
to create a new playlist.
To play your own playlists
1
2
3
Open the Walkman® home screen menu, then tap Playlists.
Under Playlists, select the playlist that you want to open.
If you want to play all songs, tap Shuffle all.
To add songs to a playlist
1
2
3
From the Walkman® home screen, browse to the song or album that you want
to add to a playlist.
Touch and hold the song or the album title, then tap Add to....
Tap the name of the playlist to which you want to add the album or song. The
album or song is added to the playlist.
77
This is an Internet version of this publication. © Print only for private use.
To remove a song from a playlist
1
2
In a playlist, touch and hold the title of the song that you want to delete.
Tap Delete from playlist.
You might not be able to delete a song that is saved on the memory card or on your device's
internal storage.
To delete a playlist
1
2
3
4
Open the Walkman® home screen menu, then tap Playlists.
Touch and hold the playlist that you want to delete.
Tap Delete.
Tap Delete again to confirm.
You cannot delete smart playlists.
Sharing music
To share a song
1
2
3
From the Walkman® home screen, browse to the song or album that you want
to share.
Touch and hold the song title, then tap Share.
Select an application from the list, then follow the on-screen instructions.
You can also share albums and playlists in the same way.
Enhancing the sound
To improve the sound quality using the Equaliser
1
2
3
When a song is playing in the Walkman® application, tap .
Tap Settings > Sound enhancements > Sound effects > Equalizer.
To adjust the sound manually, drag the frequency band buttons up or down.
and select a style.
To adjust the sound automatically, tap
To turn on the Surround sound feature
1
2
3
When the Walkman® application is open, tap .
Tap Settings > Sound enhancements > Sound effects > Surround sound (VPT).
Flick left or right to select a setting, then tap OK to confirm.
Visualiser
The Visualiser adds visual effects to your songs as you play them. The effects for
each song are based on the characteristics of the music. They change, for example,
in response to changes in the music’s loudness, rhythm and frequency level. You can
also change the background theme.
To turn on the Visualiser
1
2
In the Walkman® application, tap .
Tap Visualizer.
Tap the screen to switch to full screen view.
To change the background theme
1
2
3
In the Walkman® application, tap , then tap Visualizer.
Tap the screen to display the controls.
Tap > Theme, then select a theme.
78
This is an Internet version of this publication. © Print only for private use.
Recognising music with TrackID™
Use the TrackID™ music recognition service to identify a song you hear playing in
your surroundings. Just record a short sample of the song and you’ll get artist, title
and album info within seconds. You can purchase songs identified by TrackID™ and
you can view TrackID™ charts to see what TrackID™ users around the globe are
searching for. For best results, use TrackID™ in a quiet area.
1
Create an online TrackID™ profile
2
View current music charts
3
View TrackID™ options
4
View the history of your previous searches
5
Identify the music that you are listening to
The TrackID™ application and the TrackID™ service are not supported in all countries/regions
or by all networks and/or service providers in all areas.
To identify music using TrackID™ technology
1
2
3
From your Home screen, tap .
Find and tap TrackID™, then hold your device close to the music source.
Tap . If the song is recognised by the TrackID™ service, the results appear
on the screen.
To return to the TrackID™ start screen, tap
.
To view artist information for a song
1
2
After a song is recognised by the TrackID™ application, the result is displayed
on the TrackID™ home screen.
Scroll to the result that you want to view, then tap to open it.
To delete a song from the track history
1
2
3
Open the TrackID™ application, then browse to the song that you want to
delete.
Touch and hold the screen to make appear.
Tap .
79
This is an Internet version of this publication. © Print only for private use.
FM radio
Listening to the radio
The FM radio in your device works like any FM radio. For example, you can browse
and listen to FM radio stations and save them as favourites. You must connect a
wired headset or headphones to your device before you can use the radio. This is
because the headset or headphones act as an antenna. After one of these devices is
connected, you can then switch the audio to the speaker, if desired.
1
Favourites list
2
Radio on/off button
3
View menu options
4
Tuned frequency
5
Save or remove a channel as a favourite
6
Tuning dial
7
Frequency band – drag left or right to move between channels
8
Move up the frequency band to search for a channel
9
A saved favourite channel
10
Move down the frequency band to search for a channel
To listen to the FM radio
1
2
3
Connect a headset or a set of headphones to your device.
From your Home screen, tap .
Find and tap FM radio . The available channels appear as you scroll through
the frequency band.
When you start the FM radio, available channels appear automatically. If a channel has RDS
information, it appears a few seconds after you start listening to the channel.
•
To move between radio channels
Drag the frequency band left or right.
To start a new search for radio channels
1
2
When the radio is open, press .
Tap Search for channels. The radio scans the whole frequency band, and all
available channels are displayed.
80
This is an Internet version of this publication. © Print only for private use.
To switch the radio sound to the speaker
1
2
When the radio is open, press .
Tap Play in speaker.
To switch the sound back to the wired headset or headphones, press and tap Play in
headphones.
To identify a song on the FM radio using TrackID™
1
2
3
While the song is playing on your device's FM radio, tap , then select
TrackID™.
A progress indicator appears while the TrackID™ application samples the
song. If identification is successful, you are presented with a result or a list of
possible results.
To return to the FM Radio, tap .
The TrackID™ application and the TrackID™ service are not supported in all countries/regions,
or by all networks and/or service providers in all areas.
Favourite radio channels
To save a channel as a favourite
1
2
3
When the radio is open, navigate to the channel that you want to save as a
favourite.
Tap .
Enter a name and select a colour for the channel, then press Save.
To listen to a favourite radio channel
1
2
Tap .
Select an option.
To remove a channel as a favourite
1
2
When the radio is open, navigate to the channel that you want to remove.
Tap , then tap Delete.
Sound settings
To switch between mono and stereo sound mode
1
2
3
When the radio is open, press .
Tap Enable stereo sound.
To listen to the radio in mono sound mode again, press and tap Force mono
sound.
To select the radio region
1
2
3
When the radio is open, press .
Tap Set radio region.
Select an option.
To adjust the Visualiser
1
2
3
When the radio is open, tap .
Tap Visualizer.
Select an option.
81
This is an Internet version of this publication. © Print only for private use.
Camera
Taking photos and recording videos
1
Front camera lens
2
Zoom in or out
3
Main camera screen
4
Camera key – Activate the camera/Take photos/Record videos
5
View photos and videos
6
Take photos or record video clips
7
Go back a step or exit the camera
8
Capturing mode settings icon
9
Camera settings icon and shortcut icons
To take a photo from the lock screen
1
2
3
To activate the screen, briefly press the power key .
To activate the camera, touch and hold the camera icon
left.
After the camera opens, tap .
, then drag it to the
To take a photo using the camera key
1
2
Activate the camera.
Press the camera key fully down.
To take a photo by tapping the on-screen camera button
1
2
3
Activate the camera.
Point the camera towards the subject.
Tap the on-screen camera button . The photo is taken as soon as you
release your finger.
To take a self-portrait using the front camera
1
2
3
Activate the camera.
Tap
.
To take the photo, press the camera key. The photo is taken as soon as you
release your finger.
To use the still camera flash
1
2
3
When the camera is open, tap .
Select your desired flash setting.
Take the photo.
82
This is an Internet version of this publication. © Print only for private use.
To use the zoom function
•
•
When the camera is open, press the volume key up or down.
When the camera is open, pinch in or pinch out on the camera screen.
To record a video
1
2
3
4
5
Activate the camera.
Point the camera towards the subject.
To start recording, tap .
To pause when recording a video, tap
To stop recording, tap .
•
To take a photo when recording a video
To take a photo when recording a video, tap
you release your finger.
. To resume recording, tap
.
. The photo is taken as soon as
To view your photos and videos
1
2
Activate the camera, then tap a thumbnail to open a photo or video.
Flick left or right to view your photos and videos.
To delete a photo or recorded video
1
2
3
4
Browse to the photo or video that you want to delete.
Tap the screen to make appear.
Tap .
Tap Delete to confirm.
Face detection
You can use face detection to bring an off-centre face into focus. The camera
automatically detects up to five faces, indicated by white frames. A coloured frame
shows which face has been selected for focus. Focus is set to the face closest to the
camera. You can also tap one of the frames to select which face should be in focus.
To turn on face detection
1
2
3
4
Activate the camera.
Tap , then select .
Tap , then tap .
Tap Focus mode > Face detection.
To take a photo using face detection
1
2
3
When the camera is open and Face detection turned on, point the camera at
your subject. Up to five faces can be detected, and each detected face is
framed.
Press the camera key halfway down. A coloured frame shows which face is in
focus.
To take the photo, press the camera key fully down.
Using Smile Shutter™ to capture smiling faces
Use Smile Shutter™ technology to photograph a face just as it smiles. The camera
detects up to five faces and selects one face for smile detection and auto focus.
When the selected face smiles, the camera automatically takes a photo.
To turn on Smile Shutter™
1
2
3
Activate the camera.
Tap , then tap
Tap Smile Shutter and select a smile level.
83
This is an Internet version of this publication. © Print only for private use.
To take a photo using Smile Shutter™
1
2
3
When the camera is open and Smile Shutter™ is turned on, point the camera
at your subject. The camera selects which face to focus on.
The face selected appears inside a coloured frame and the photo is taken
automatically.
If no smile is detected, press the camera key to take the photo manually.
Adding the geographical position to your photos
Turn on geotagging to add the approximate geographical location (a geotag) to
photos when you take them. The geographical location is determined either by
wireless networks or GPS technology.
When appears on the camera screen, geotagging is turned on but the
geographical position has not been found. When appears, geotagging is turned on
and the geographical location is available, so your photo can get geotagged. When
neither of these two symbols appears, geotagging is turned off.
To turn on geotagging
1
2
3
4
5
6
From your Home screen, tap .
Tap Settings > Location.
Tap the on-off switch.
Activate the camera.
Tap , then tap .
Drag the slider beside Geotagging to the right.
General camera settings
Capturing mode settings overview
Superior auto
Optimise your settings to suit any scene.
Manual
Adjust camera settings manually.
Sound Photo
Take photos with background sound.
AR fun
Play in your camera viewfinder with virtual objects and enrich your photos or videos.
Multi camera
Record the same scene from multiple angles on a single screen.
AR effect
Take photos or videos with virtual scenes and characters.
Creative effect
Apply effects to photos or videos.
Sweep Panorama
Take wide-angle and panoramic photos.
Portrait retouch
Take photos with real-time portrait styles.
Superior auto
Superior auto mode detects the conditions in which you are shooting and
automatically adjusts the settings to ensure that you take the best photo possible.
Manual mode
Use Manual mode when you want to manually adjust your camera settings for taking
photos and videos.
84
This is an Internet version of this publication. © Print only for private use.
AR effect
You can apply AR (augmented reality) effects to your photos or videos and make
them more fun. When using the camera, this setting lets you integrate 3D scenes into
your photos or videos. Just select the scene you want and adjust its position in the
viewfinder.
Creative effect
You can apply different effects on your photos or videos. For example, you can add a
Nostalgic effect to make photos look older or a Sketch effect for a more fun image.
Sweep Panorama
You can take wide-angle and panoramic photos from the horizontal or vertical
direction in an easy press-and-sweep motion.
To take a panoramic photo
1
2
3
4
Activate the camera.
Tap , then select .
To select a shooting direction, tap
.
Press the camera key and move the camera slowly and steadily to the direction
of movement indicated on the screen.
Multi camera mode
Multi camera mode lets you take a photo that combines images from two different
angles and devices. You see two images in the camera viewfinder of your device –
one from your own camera and one from a connected Xperia™ device or a Sony
camera that supports NFC and Wi-Fi direct technology. You can then edit what you
see in the viewfinder before taking a photo.
So if you’re at a concert venue, for example, and you want to capture a photo that
combines a view of the band from one angle and the audience from another, you can
use Multi camera mode for the best effect.
You can set up Multi camera mode using NFC, which launches the pairing of the two
devices using Wi-Fi direct technology. Both devices must support NFC.
To use Multi camera mode
1
2
3
4
5
6
7
8
9
Turn on the NFC functions on both devices that you want to connect.
Activate the camera on your device.
Tap , then select .
On the screens of both devices, tap .
Touch the NFC detection areas of each device to each other. Both devices
should now connect using Wi-Fi direct technology.
Once the devices are connected, two images appear in the viewfinder of your
device – one from the viewfinder of your camera and another from the
viewfinder of the connected device.
To edit the images in your viewfinder, tap .
Edit the images as desired. For example, you can tap and hold an image and
drag it to the other side of the viewfinder to change the order.
When you are finished editing and are ready to capture the final combined
image, tap Done > .
Portrait retouch
You can use the Portrait retouch feature to apply touch-up effects to portrait photos
as you take them, to ensure the best results. You can also use the Magic beam
setting to brighten and smoothen the subject's skin while adding a spotlight pattern
for the eyes.
85
This is an Internet version of this publication. © Print only for private use.
To use the Portrait retouch feature
1
2
3
4
5
6
Activate the camera.
Tap , then tap .
To display the style selector, swipe upwards on the screen, then select a
portrait style for your photos.
To hide the style selector, tap the screen or swipe downwards.
To display the frame selector, swipe to the left, then select a decorative frame.
To hide the frame selector, tap the camera screen or swipe to the right.
To use the Magic beam feature
1
2
3
4
Activate the camera.
Tap , then tap .
To enable the Magic beam feature, tap , then drag the slider beside Magic
beam to the right.
To apply an inside eye spotlight effect, select a customised pattern.
Downloading camera applications
You can download free or paid camera applications from Google Play™ or other
sources. Before you start downloading, make sure that you have a working Internet
connection, preferably over Wi-Fi® to limit data traffic charges.
To download camera applications
1
2
3
Open the camera application.
Tap , then tap DOWNLOADABLE .
Select the application that you want to download, and follow the instructions to
complete the installation.
Quick launch
Use Quick launch settings to launch the camera when the screen is locked.
Launch only
When this setting is activated, you can launch the camera when the screen is locked by pressing and
holding down the camera key.
Launch and capture
When this setting is activated, you can launch the camera and capture a photo automatically when the
screen is locked by pressing and holding down the camera key.
Launch and record video
When this setting is activated, you can launch the camera and start capturing video when the screen is
locked by pressing and holding down the camera key.
Off
Geotagging
Tag photos with details of where you took them.
Touch capture
Identify a focus area, and then touch the camera screen with your finger. The photo is
taken as soon as you release your finger.
Sound
Choose to turn on or turn off the shutter sound.
Data storage
You can choose to save your data either to a removable SD card or to your device's
internal storage.
Internal storage
86
This is an Internet version of this publication. © Print only for private use.
Photos or videos are saved on the device memory.
SD card
Photos or videos are saved on the SD card.
Touch Block
Activate to disable the touch operation to avoid unintentional touches.
White balance
This function adjusts the colour balance according to the lighting conditions. The
white balance setting icon is available on the camera screen.
Auto
Adjusts the colour balance automatically to suit the lighting conditions.
Incandescent
Adjusts the colour balance for warm lighting conditions, such as under light bulbs.
Fluorescent
Adjusts the colour balance for fluorescent lighting.
Daylight
Adjusts the colour balance for sunny outdoor conditions.
Cloudy
Adjusts the colour balance for a cloudy sky.
This setting is only available in Manual capturing mode.
Still camera settings
To adjust the still camera settings
1
2
3
Activate the camera.
To display all settings, tap .
Select the setting that you want to adjust, then edit as desired.
Still camera settings overview
Resolution
Choose between several resolutions and aspect ratios before taking a photo. A photo
with a higher resolution requires more memory.
13MP
4128×3096(4:3)
13 megapixel resolution with 4:3 aspect ratio. Suitable for photos that you want to view on nonwidescreen displays or print in high resolution.
9MP
3920×2204(16:9)
9 megapixel resolution with 16:9 aspect ratio. Suitable for photos that you want to view on widescreen
displays.
8MP
3264×2448(4:3)
8 megapixel resolution with 4:3 aspect ratio. Suitable for photos that you want to view on nonwidescreen displays or print in high resolution.
8MP
3840×2160(16:9)
8 megapixel resolution with 16:9 aspect ratio. Suitable for photos that you want to view on widescreen
displays.
3MP
2048×1536(4:3)
3 megapixel resolution with 4:3 aspect ratio. Suitable for photos that you want to view on nonwidescreen displays or print in high resolution.
87
This is an Internet version of this publication. © Print only for private use.
2MP
1920×1080(16:9)
2 megapixel resolution with 16:9 aspect ratio. Suitable for photos that you want to view on widescreen
displays.
VGA
640×480(4:3)
VGA format with 4:3 aspect ratio.
This setting is only available in Manual capturing mode.
Self-timer
With the self-timer, you can take a photo without holding the device. Use this
function to take self-portraits or group photos where everyone can be in the photo.
You can also use the self-timer if you want to avoid shaking the camera when taking
photos.
On (10 sec.)
Set a 10-second delay from when you tap the camera screen until the photo is taken.
On (2 sec.)
Set a 2-second delay from when you tap the camera screen until the photo is taken.
On (0.5 sec.)
Set a half-second delay from when you tap the camera screen until the photo is taken.
Off
The photo is taken as soon as you tap the camera screen.
Smile Shutter™
Use the Smile Shutter™ function to determine what kind of smile the camera reacts
to before taking a photo.
Focus mode
The focus function controls which part of a photo should be sharp. When continuous
autofocus is on, the camera keeps adjusting focus so that the area within the
coloured focus frame stays sharp.
Single autofocus
The camera automatically focuses on the selected subject. Continuous autofocus is on. Touch and hold
the camera screen until the yellow focus frame turns blue, indicating that the focus is set. The photo is
taken when you release your finger.
Face detection
The camera automatically detects up to five human faces, indicated by frames on the screen. The
camera automatically focuses on the nearest face. You can also select which face to focus on by tapping
it on the screen. When you tap the camera screen, a blue frame shows which face is selected and in
focus. Face detection cannot be used for all scene types. Continuous autofocus is on.
Touch focus
Touch a specific area on the camera screen to set the area of focus. Continuous autofocus is off. Touch
and hold the camera screen until the yellow focus frame turns blue, indicating that the focus is set. The
photo is taken when you release your finger.
Object tracking
When you select an object by touching it in the viewfinder, the camera tracks it for you.
This setting is only available in Manual capturing mode.
HDR
Use the HDR (High Dynamic Range) setting to take a photo against strong back light
or in conditions where the contrast is sharp. HDR compensates for the loss of detail
and produces a picture that is representative of both dark and bright areas.
This setting is only available in Manual capturing mode.
88
This is an Internet version of this publication. © Print only for private use.
ISO
You can reduce image blurring caused by dark conditions or moving subjects by
increasing the ISO sensitivity.
Auto
Sets the ISO sensitivity automatically.
100
Sets the ISO sensitivity to 100.
200
Sets the ISO sensitivity to 200.
400
Sets the ISO sensitivity to 400.
800
Sets the ISO sensitivity to 800.
1600
Sets the ISO sensitivity to 1600.
3200
Sets the ISO sensitivity to 3200.
This setting is only available in Manual capturing mode.
Metering
This function automatically determines a well-balanced exposure by measuring the
amount of light striking the image you want to capture.
Center
Adjusts the exposure to the centre of the image.
Average
Calculates the exposure based on the amount of light striking the whole image.
Spot
Adjusts the exposure in a very small part of the image that you want to capture.
This setting is only available in Manual capturing mode.
Image stabiliser
When taking a photo, it can be difficult to hold the device steady. The stabiliser helps
you by compensating for small movements of the hand.
This setting is only available in Manual capturing mode.
Preview
You can choose to preview photos or videos just after you shoot them.
Unlimited
The preview of the photo or video appears after you shoot it.
5 seconds
The preview of the photo or video apears for 5 seconds after you shoot it.
3 seconds
The preview of the photo or video appears for 3 seconds after you shoot it.
Edit
The photo or video opens for editing after you shoot it.
Off
The photo or video is saved after you shoot it, and no preview appears.
89
This is an Internet version of this publication. © Print only for private use.
Face registration
You can register faces with the Camera application so that the viewfinder
automatically focuses on these faces when they appear in the viewfinder.
Flash
Use the flash to take photos when lighting conditions are poor or when there is a
backlight. The following options are available when you tap the flash icon on the
camera screen:
Auto
The camera automatically determines if the lighting conditions require the use of a flash.
Fill flash
Use this setting when the background is brighter than the subject. This setting removes unwanted
dark shadows.
Red-eye reduction
Reduces the red colour of eyes when taking a photo.
Off
The flash is turned off. Sometimes photo quality can be better without the flash, even if lighting
conditions are poor. Taking a good photo without using the flash requires a steady hand. Use the
self-timer to avoid blurred photos.
Flashlight
The flash light is turned on when you take photos.
Scene selection
Use the Scene selection feature to quickly set up the camera for common situations
using pre-programmed scenes. The camera determines a number of settings for you
to fit the selected scene, ensuring the best possible photo.
Off
The Scene selection feature is off and you can take photos manually.
Soft skin
Take photos of faces using an enhanced beauty effect.
Soft snap
Use for shooting photos against a soft background.
Anti motion blur
Use for minimising camera shake when shooting a slightly dark scene.
Landscape
Use for landscape photos. The camera focuses on distant objects.
Backlight correction HDR
Use to improve details in high contrast shots. The built-in backlight correction analyses the image
and automatically adjusts it to give you a perfectly lit shot.
Night portrait
Use for portrait photos taken at night or in poorly lit environments. Due to long exposure time, the
camera must be held still or placed on a stable surface.
Night scene
Use when taking photos at night or in poorly lit environments. Due to long exposure time, the
camera must be held still or placed on a stable surface.
Hand-held twilight
Use for taking hand-held low-light photos with reduced noise and blur.
High sensitivity
Use for taking photos without a flash under low light conditions. Reduces blur.
Gourmet
Use for shooting food arrangements in bright colour.
Pet
Use for taking photos of your pet. Reduces blur and red eyes.
Beach
90
This is an Internet version of this publication. © Print only for private use.
Use for taking photos of seaside or lakeside scenes.
Snow
Use in bright environments to avoid overexposed photos.
Party
Use for indoor photos in poorly lit environments. This scene picks up indoor background lighting
or candlelight. Due to long exposure time, the camera must be held still or placed on a stable
surface.
Sports
Use for photos of fast-moving objects. Short exposure time minimises motion blurring.
Document
Use for photos of text or drawings. Gives the photo increased, sharper contrast.
Fireworks
Use for taking photos of fireworks in all their splendour.
This setting is only available in Manual capturing mode.
Video camera settings
To adjust the video camera settings
1
2
3
4
Activate the camera.
Tap one of the settings icons on the screen.
To display all settings, tap .
Select the setting that you want to adjust, then make your changes.
Video camera settings overview
Video resolution
Adjust the video resolution for different formats.
Full HD
1920×1080(16:9)
Full HD (Full High Definition) format with 16:9 aspect ratio.
HD
1280×720(16:9)
HD (High Definition) format with 16:9 aspect ratio.
VGA
640×480(4:3)
VGA format with 4:3 aspect ratio.
MMS
Record videos suitable for sending in multimedia messages. The recording time of this video format is
limited so that video files can fit in a multimedia message.
These settings are only available in Manual capturing mode.
Self-timer
With the self-timer, you can record a video without holding the device. Use it to
record group videos where everyone can be in the video. You can also use the selftimer if you want to avoid shaking the camera when recording videos.
On (10 sec.)
Set a 10-second delay from when you tap the camera screen until the video begins to record.
On (2 sec.)
Set a 2-second delay from when you tap the camera screen until the video begins to record.
On (0.5 sec.)
Set a half-second delay from when you tap the camera screen until the video begins to record.
Off
91
This is an Internet version of this publication. © Print only for private use.
The video begins to record as soon as you tap the camera screen.
Smile Shutter™(video)
Use the Smile Shutter™ function to determine what kind of smile the camera reacts
to before recording a video.
Focus mode
The focus setting controls which part of a video should be sharp. When continuous
autofocus is on, the camera keeps adjusting focus so that the area within the white
focus frame stays sharp.
Single autofocus
The camera automatically focuses on the selected subject. Continuous autofocus is on.
Face detection
The camera automatically detects up to five human faces, indicated by frames on the screen. The
camera automatically focuses on the nearest face. You can also select which face to focus on by tapping
it on the screen. When you tap the camera screen, a yellow frame shows which face is selected and in
focus. Face detection cannot be used for all scene types. Continuous autofocus is on.
Object tracking
When you select an object by touching it in the viewfinder, the camera tracks it for you.
This setting is only available in Manual capturing mode.
Metering
This function automatically determines a well-balanced exposure by measuring the
amount of light striking the image you want to capture.
Center
Adjusts the exposure to the centre of the image.
Average
Calculates the exposure based on the amount of light striking the whole image.
Spot
Adjusts the exposure in a very small part of the image that you want to capture.
This setting is only available in Manual capturing mode.
SteadyShot™
When recording a video, it can be difficult to hold the device steady. The stabiliser
helps you by compensating for small movements of the hand.
Microphone
Select whether to pick up the surrounding sound when recording videos.
Preview
You can choose to preview videos just after you shoot them.
On
The preview of the video appears after you shoot it.
Edit
The video opens for editing after you shoot it.
Off
The video is saved after you shoot it, and no preview appears.
92
This is an Internet version of this publication. © Print only for private use.
Flashlight
Use the flash light to record videos when lighting conditions are poor or when there is
a backlight. The video flash icon
is only available on the video camera screen.
Note that the video quality can sometimes be better without a light even if lighting
conditions are poor.
On
Off
Scene selection
The Scene selection feature helps you to quickly set up the camera for common
situations using pre-programmed video scenes. The camera determines a number of
settings for you to fit the selected scene, ensuring the best possible video.
Off
The Scene selection feature is off and you can shoot videos manually.
Soft snap
Use for shooting videos against soft backgrounds.
Landscape
Use for videos of landscapes. The camera focuses on distant objects.
Night
When turned on, light sensitivity is increased. Use in poorly lit environments. Videos of fastmoving objects may get blurred. Hold your hand steady, or use a support. Turn off night mode
when lighting conditions are good, to improve the video quality.
Beach
Use for videos of seaside or lakeside scenes.
Snow
Use in bright environments to avoid overexposed videos.
Sports
Use for videos of fast-moving objects. Short exposure time minimises motion blurring.
Party
Use for indoor videos in poorly lit environments. This scene picks up indoor background lighting
or candlelight. Videos of fast-moving objects may get blurred. Hold your hand steady, or use a
support.
This setting is only available in Manual capturing mode.
93
This is an Internet version of this publication. © Print only for private use.
Photos and videos in Album
Viewing photos and videos
Use the Album application to view photos and play videos that you’ve taken with your
camera, or to view similar content that you've saved to your device. All photos and
videos are displayed in a chronologically ordered grid.
1
Tap the icon to open the Album home screen menu
2
View a slideshow of all images or just the ones you've added to your favourites
3
Drag the left edge of the screen to the right to open the Album home screen menu
4
The date range of items in the current group
5
Tap a photo or video to open it in full screen view
6
Scroll up or down to view content
To view photos and videos
1
2
3
4
From your Home screen, tap .
Find and tap Album.
Tap a photo or video that you want to view, then tap Album > Just once.
Flick left to view the next photo or video. Flick right to view the previous photo
or video.
If you want to change an application that you have chosen as the default to always open
photos or videos, tap Settings > Apps and swipe over to the All tab, then select the application
and tap CLEAR DEFAULTS under Launch by default.
If the screen orientation does not change automatically when you turn your device sideways,
activate the Auto-rotate screen button under Settings > Display > Screen rotation.
•
To change the size of the thumbnails
When viewing thumbnails of photos and videos in Album, spread two fingers
apart to zoom in, or pinch two fingers together to zoom out.
To zoom a photo
•
When you are viewing a photo, spread two fingers apart to zoom in, or pinch two
fingers together to zoom out.
To watch a slideshow of your photos
1
2
When you are viewing a photo, tap the screen to display the toolbars, then tap
> Slideshow to start playing all the photos in an album.
Tap a photo to end the slideshow.
94
This is an Internet version of this publication. © Print only for private use.
To play a video
1
2
3
In Album, find and tap the video that you want to play.
Tap , then tap Movies > Just once.
If the playback controls are not displayed, tap the screen to display them. To
hide the controls, tap the screen again.
To pause a video
1
2
When a video is playing, tap the screen to display the controls.
Tap .
To fast forward and rewind a video
1
2
When a video is playing, tap the screen to display the controls.
Drag the progress bar marker left to rewind, or right to fast forward.
•
To adjust the volume of a video
Press the volume key.
Sharing and managing photos and videos
You can share photos and videos that you’ve stored on your device. You can also
manage them in different ways. For example, you can work with photos in batches,
delete photos and link them to contacts.
You might not be able to copy, send or transfer copyright-protected items. Also, some items
may not send if the file size is too large.
To share a photo or video
1
2
3
In Album, find and tap the photo or video that you want to share.
Tap the screen to display the toolbars, then tap .
Tap the application that you want to use to share the photo, then follow the
steps to send it.
To use a photo as a contact picture
1
2
When you are viewing a photo, tap the screen to display the toolbars, then tap
> Use as > Contact picture.
If asked, select Contacts > Just once, then select a contact.
To use a photo as wallpaper
1
2
When you are viewing a photo, tap the screen to display the toolbars, then tap
> Use as > Wallpaper.
Follow the instructions on the screen.
To rotate a photo
1
2
When you are viewing a photo, tap the screen to display the toolbars, then tap
.
Select Rotate. The photo is saved in the new orientation.
To delete a photo or video
1
2
When you are viewing a photo, tap the screen to display the toolbars, then tap
.
Tap Delete.
To work with batches of photos or videos in Album
1
2
3
When viewing thumbnails of photos and videos in Album, touch and hold an
item until it is highlighted.
Tap other items that you want to work with to select them. If you want to select
all items, tap , then tap Select all.
Use the tools in the toolbar to work with your selected items.
95
This is an Internet version of this publication. © Print only for private use.
Analysing photos with faces in Album
You can analyse any photos on your device that feature people's faces. Once
activated, the photo analysis feature stays on, and new photos get analysed as they
are added. After running an analysis, you can then group all photos of the same
person in one folder.
To turn on the photo analysis feature
1
2
3
From your Home screen, tap .
Find and tap Album.
Drag the left edge of the Album home screen to the right, then tap Faces. All
photos on your device get analysed and grouped in the Unnamed faces folder.
To name a face
1
2
3
In the Faces tile, tap the Unnamed faces folder, then browse to the Other faces
folder and choose the face that you want to name.
Tap Add name.
Type a name, then tap Done > Add as new person.
To edit a face name
1
2
3
4
When you are viewing a face in full screen view, tap the screen to display the
toolbars, then tap > Edit name tags.
Tap OK.
Tap the name of the face that you want to edit.
Edit the name, then tap Done >Add as new person.
Editing photos with the Photo editor application
You can edit and apply effects to original photos that you’ve taken with your camera.
For example, you can change the light effects. After you save the edited photo, the
original unchanged version of the photo remains on your device.
•
To edit a photo
When you are viewing a photo, tap the screen to display the toolbars, then tap
.
To crop a photo
1
2
3
4
5
6
7
8
9
When you are viewing a photo, tap the screen to display the toolbars, then tap
.
If prompted, select Photo editor > Just once.
Tap > Crop.
Select an option.
To adjust the crop frame, touch and hold the edge of the crop frame. When the
squares at the edges disappear, drag inward or outward to resize the frame.
To resize all sides of the crop frame at the same time, touch and hold one of
the four corners to make the squares at the edges disappear, then drag the
corner accordingly.
To move the crop frame to another area of the photo, touch and hold inside the
frame, then drag it to the desired position.
Tap Apply.
To save a copy of the photo as you cropped it, tap Save.
To apply special effects to a photo
1
2
3
4
When you are viewing a photo, tap the screen to display the toolbars, then tap
.
If prompted, select Photo editor > Just once.
Tap , then select an option.
Edit the photo as desired, then tap Save.
96
This is an Internet version of this publication. © Print only for private use.
Editing videos with the Movie Creator application
You can edit videos that you’ve taken with your camera. For example, you can trim a
video to the desired length or adjust the speed of a video. After you save the edited
video, the original unchanged version of the video remains on your device.
To trim a video
1
2
3
While the video is playing, tap the screen to display the toolbars, then tap
>
Trim.
To move the trim frame to another part of the timeline, touch and hold the edge
of the trim frame and drag it to the desired position, then tap Apply.
To save a copy of the trimmed video, tap Save.
To adjust the speed of a video
1
2
3
>
While the video is playing, tap the screen to display the toolbars, then tap
Speed.
Select an option, then touch and hold the edge of the timeline and drag it to
the desired position and tap Apply
To save a copy of the edited video, tap Save.
Hiding photos and videos
You can hide any photos and videos from the Album home screen. Once photos and
videos are hidden from the Album home screen, they can only be viewed from the
Hidden folder.
To hide a photo or video
1
2
3
In Album, find and tap the photo or video that you want to hide.
Tap the screen to display the toolbars, then tap .
Tap Hide > OK.
To view your hidden photos and videos
1
2
3
In Album, drag the left edge of the Album home screen to the right, then tap
Hidden.
Tap a photo or video to view it.
Flick left to view the next photo or video. Flick right to view the previous photo
or video.
To unhide a photo or video
1
2
3
4
In Album, drag the left edge of the Album home screen to the right, then tap
Hidden.
Tap a photo or video that you want to unhide.
Tap the screen to display the toolbars, then tap .
Tap Don't hide.
Album home screen menu
Through the Album home screen menu you can browse to all your photo albums,
including photos and videos taken by your device's camera using special effects, as
well as content that you share online via services such as PlayMemories Online,
Picasa™ and Facebook. Once you are logged in to such services, you can manage
content and view online images. From the Album application, you can also add
geotags to photos, perform basic editing tasks, and use methods such as
Bluetooth® wireless technology and email to share content.
97
This is an Internet version of this publication. © Print only for private use.
1
View photos and videos using the PlayMemories Online service
2
Return to the Album application home screen to view all content
3
View your favourite photos and videos
4
View all videos saved to your device
5
View your photos on a map or in Globe view
6
View photos and videos that you have hidden from view
7
View all photos and videos taken by your device's camera using special effects
8
View all photos and videos saved to your device in different folders
9
View all photos with faces
10
View photos and videos on devices in the same network
11
Open the settings menu for the Album application
12
Scroll up or down to view content
13
View photos and videos on Facebook™
The PlayMemories Online service is not available in all countries or regions.
To view photos from online services in Album
1
2
3
4
5
From your Home screen, tap .
Find and tap Album, then drag the left edge of the Album home screen to the
right.
Tap the desired online service, then follow the on-screen instructions to get
started with it. All available online albums that you have uploaded to the
service are displayed.
Tap any album to view its content, then tap a photo in the album.
Flick left to view the next photo or video. Flick right to view the previous photo
or video.
Viewing your photos on a map
Adding location information to photos is referred to as geotagging. You can view and
tag your photos on a map and show friends and family where you were when you
took a particular photo. See Adding the geographical position to your photos on
page 84 for more information.
If you have turned on location detection and activated geotagging in the camera, you can tag
your photos directly for map viewing at a later stage.
98
This is an Internet version of this publication. © Print only for private use.
1
View geotagged photos in Globe view
2
Search a location on the map
3
View menu options
4
Double tap to zoom in. Pinch to zoom out. Drag to view different parts of the map
5
A group of photos and/or videos geotagged with the same location
6
Thumbnails of the selected group of photos and/or videos. Tap an item to view it in full screen
If several photos were taken at the same location, only one of them appears on the map. The
total number of photos appears in the top right corner, for example, . To view all photos in
the group, tap the cover photo and then tap one of the thumbnails at the bottom of the
screen.
To add a geotag to a photo
1
2
3
4
When you are viewing a photo, tap the screen to display the toolbars, then tap
Tap to set location to open the map screen.
Find and tap the desired location to put the photo on the map.
To adjust the location of the photo, tap the location on the map to where you
want to move the photo.
When you are finished, tap OK to save the geotag and return to the photo
viewer.
To view geotagged photos on a map
1
2
3
4
From your Home screen, tap .
Find and tap Album.
Drag the left edge of the Album home screen to the right, then tap Places.
Tap the photo that you want to view on a map.
To view geotagged photos on a globe
1
2
3
4
From your Home screen, tap .
Find and tap Album.
Drag the left edge of the Album home screen to the right, then tap Places >
Tap the photo that you want to view on a globe.
.
To change the geotag of a photo
1
2
When viewing a photo on the map in Album, touch and hold the photo until its
frame turns blue, then tap the desired location on the map.
Tap OK.
To change the map view
•
When viewing the map in Album, tap , then select Classic view or Satellite view.
99
This is an Internet version of this publication. © Print only for private use.
Videos
Watching videos in the Movies application
Use the Movies application to play movies and other video content that you’ve saved
or downloaded to your device. The Movies application also helps you get poster art,
plot summaries, genre info and director details for each movie. You can also play
your movies on other devices that are connected to the same network.
Some video files may not be playable in the Movies application.
1
View menu options
2
Display the most recently played video
3
Drag the left edge of the screen to the right to browse all downloaded and saved videos
4
Tap to play saved or downloaded video files
5
Scroll up or down to view content
Sony Entertainment Network with Video Unlimited is not available in every market. Additional
terms and conditions apply.
To play a video in Movies
1
2
3
4
5
From your Home screen, tap , then find and tap Movies.
Find and tap the video that you want to play. If the video is not displayed on
the screen, drag the left edge of the screen to the right to open the Movies
home screen menu, then find and tap the video that you want to play.
To display or hide the controls, tap the screen.
To pause playing, tap . To resume playing, tap .
To rewind, drag the progress bar marker to the left. To fast forward, drag the
progress bar marker to the right.
To play a video on an external device
1
2
3
When the video is playing, tap the screen to display all the controls.
Tap > Throw.
Select an external device on which to play the video. If there is no external
device available, follow the on-screen instructions to add one.
To change settings in Movies
1
2
From your Home screen, tap , then find and tap Movies.
Tap > Settings, then change the settings as desired.
100
This is an Internet version of this publication. © Print only for private use.
To change the sound settings while a video is playing
1
2
While a video is playing, tap the screen to display the controls.
Tap > Sound settings, then change the settings as desired.
To share a video
1
2
When a video saved under Movies or TV shows is playing, tap , then tap
Share.
Tap the application that you want to use to share the selected video, then
follow the relevant steps to send it.
Transferring video content to your device
•
•
•
Before you start using the Movies application, it’s a good idea to transfer movies, TV
shows and other video content to your device from other devices, such as a
computer. There are several ways to transfer your content:
Connect your device to a computer using a USB cable and drag and drop the video
files directly using the file manager application on the computer. See Managing files
using a computer on page 126.
If you have a PC, use the Media Go™ application from Sony to organise content and
transfer video files to your device via the PC. To learn more and download the Media
Go™ application, go to http://mediago.sony.com/enu/features.
If your computer is an Apple® Mac®, you can use Sony Bridge for Mac to transfer
video files from iTunes to your device. To learn more and download Sony Bridge for
Mac, go to www.sonymobile.com/global-en/tools/bridge-for-mac/.
Managing video content
To get movie information manually
1
2
3
4
5
6
Make sure that your device has an active data connection.
From your Home screen, tap , then find and tap Movies.
Drag the left edge of the screen to the right to open the Movies home screen
menu, then browse through the different categories and to the video file that
you want to get information.
Touch and hold the thumbnail for the video, then tap Search for info.
In the search field, enter keywords for the video, then tap the confirm key on
the keyboard. All matches are displayed in a list.
Select a search result, then tap Done. The download of the information begins.
You can get information about newly added videos automatically every time the Movies
application opens if you mark the Get video details checkbox under Settings.
If the downloaded information is not correct, search again using different keywords.
To clear information about a video
1
2
3
From your Home screen, tap , then find and tap Movies.
Drag the left edge of the screen to the right to open the Movies home screen
menu, then browse through the different categories and to the video file that
you want to edit.
Touch and hold the video thumbnail, then tap Clear info.
To delete a video
1
2
3
4
From your Home screen, tap , then find and tap Movies.
Drag the left edge of the screen to the right to open the Movies home screen
menu, then browse through the different categories and to the video file that
you want to delete.
Touch and hold the video thumbnail, then tap Delete from the list that appears.
Tap Delete again to confirm.
101
This is an Internet version of this publication. © Print only for private use.
Movie Creator
The Xperia™ Movie Creator automatically creates short videos of around 30 seconds
in length using existing photos and videos. The application automatically determines
the timeline to create its movie. For example, it could take a selection of photos and
videos from a Saturday afternoon outing or from a random three-day period and
create a movie for you. When this highlight-style movie is ready, you get notified. You
can then edit it as desired. For example, you can edit the title, delete scenes or
change the music.
To open Movie Creator
1
2
From your Home screen, tap
Find and tap Movie Creator.
.
If no photos or videos are saved on your device, no functionality is available when you open
the Movie Creator application.
To turn off Movie Creator notifications
1
2
3
From your Home screen, tap .
Find and tap Movie Creator.
Tap , then tap Settings and deactivate Notifications.
To disable Movie Creator
1
2
3
From your Home screen, tap .
Find and tap Settings > Apps > All.
Find and tap Movie Creator > Disable.
Video Unlimited service
Use the Video Unlimited service to buy and rent movies or TV shows that you can
view not only on your Android™ device, but also on a PC, PlayStation® Portable
(PSP®), PlayStation® 3, PlayStation® 4 or PlayStation® Vita. Select your pick from the
latest Hollywood releases, action movies, comedies, classics, and a range of other
categories.
You need to create a Sony Entertainment Network account if you want to buy or rent
movies through the Video Unlimited service. If you already have a PlayStation®
network account, then you can use that account instead.
If you are using a device with multiple users, you must log in as the owner, that is, the primary
user, to use the Video Unlimited service.
Sony Entertainment Network with Video Unlimited is not available in every market. Additional
terms and conditions apply.
To get started with Video Unlimited
1
2
From your Home screen, tap .
Find and tap , then follow the on-screen instructions to get started with Video
Unlimited.
102
This is an Internet version of this publication. © Print only for private use.
Connectivity
Mirroring the screen of your device wirelessly on a TV
You can use Screen mirroring feature to show the screen of your device on a TV or
other large display without using a cable connection. Wi-Fi Direct™ technology
creates a wireless connection between the two devices, so you can sit back and
enjoy your favourite photos from the comfort of your couch. You can also use this
feature to listen to music from your device via the TV's speakers.
Your TV must support screen mirroring based on Wi-Fi CERTIFIED Miracast™ for the
functionality described above to work. If your TV does not support screen mirroring, you may
need to purchase a wireless display adapter separately.
When using screen mirroring, the image quality may sometimes be negatively impacted if there
is interference from other Wi-Fi® networks.
To mirror the screen of your device on a TV screen
1
2
3
4
5
TV: Follow the instructions in the User guide of your TV to turn on the screen
mirroring function.
Your device: From your Home screen, tap .
Find and tap Settings > Xperia™ Connectivity > Screen mirroring.
Tap Start.
Tap OK and select a device.
When using screen mirroring, do not cover the Wi-Fi antenna area of your device.
Your TV must support screen mirroring based on Wi-Fi CERTIFIED Miracast™ for the
functionality described above to work.
To stop screen mirroring between devices
1
2
3
From your Home screen, tap .
Find and tap Settings > Xperia™ Connectivity > Screen mirroring.
Tap Disconnect, then tap OK.
Sharing content with DLNA Certified™ devices
You can view or play media content saved to your device on other devices such as,
for example, a TV, or a computer. Such devices must be DLNA Certified™ by the
Digital Living Network Alliance and all devices must be connected to the same WiFi® network in order for content to be shared. You can also view or play content from
other DLNA Certified™ devices on your device.
After you set up the sharing of content between devices, you can, for example, listen
to music files stored on your home computer from your device, or view photos taken
with your device's camera on a large-screen TV.
Playing files from DLNA Certified™ devices on your device
When you play files from another DLNA Certified™ device on your device, this other
device acts as a server. In other words, it shares content over a network. The server
device must have its content sharing function enabled and give access permission to
your device. It also must be connected to the same Wi-Fi® network as your device.
103
This is an Internet version of this publication. © Print only for private use.
To play a shared track on your device
1
2
3
4
5
Make sure the devices that you want to share files with are connected to the
same Wi-Fi® network as your device.
From your Home screen, tap , then find and tap .
Drag the left edge of the Walkman® home screen to the right, and tap Devices.
Select a device from the list of connected devices.
Browse the folders of the connected device and select the track that you want
to play. The track starts playing automatically.
To play a shared video on your device
1
2
3
4
5
Make sure the devices that you want to share files with are connected to the
same Wi-Fi® network as your device.
From your Home screen, tap , then find and tap Movies.
Drag the left edge of the Movies home screen to the right, and tap Devices.
Select a device from the list of connected devices.
Browse the folders of the connected device and select the video that you want
to play.
To view a shared photo on your device
1
2
3
4
5
Make sure the devices that you want to share files with are connected to the
same Wi-Fi® network as your device.
From your Home screen, tap , then find and tap Album.
Drag the left edge of the Album home screen to the right, and tap Devices.
Select a device from the list of connected devices.
Browse the folders of the connected device and select a photo to view it.
Playing files from your device on DLNA Certified™ devices
Before you can view or play media files from your device on other DLNA Certified™
devices, you must set up file sharing on your device. The devices that you share
content with are called client devices. For example, a TV, computer or tablet can act
as client devices. Your device works as a media server when it makes content
available to client devices. When you set up file sharing on your device, you must
also give access permission to client devices. After you do so, such devices appear
as registered devices. Devices that are waiting for access permission are listed as
pending devices.
To set up file sharing with other DLNA Certified™ devices
1
2
3
4
5
6
Connect your device to a Wi-Fi® network.
From your Home screen, tap , then find and tap .
Tap , then tap Media server.
To turn on the Share media function, drag the slider. appears in the status
bar. Your device can now work as a media server.
Connect your computer or other devices to the same Wi-Fi® network as your
device.
A notification appears in the status bar of your device. Open the notification
and set access permissions for each device.
The instructions for setting up file sharing using DLNA™ differ depending on the client device.
Refer to your client device User guide for more information. If the device cannot connect to a
client on the network, check if your Wi-Fi® network is working.
You can also access the Media server menu under Settings > Xperia™ Connectivity > Media
server settings. If you close the Media server view, the file sharing function stays running in
the background.
To stop sharing files with other DLNA Certified™ devices
1
2
3
From your Home screen, tap .
Find and tap Settings > Xperia™ Connectivity > Media server settings.
Drag the slider beside Share media to the left.
104
This is an Internet version of this publication. © Print only for private use.
To set access permissions for a pending device
1
2
3
4
From your Home screen, tap .
Find and tap Settings > Xperia™ Connectivity > Media server settings.
Select a device from the Pending devices list.
Select an access permission level.
To change the name of a registered device
1
2
3
4
From your Home screen, tap .
Find and tap Settings > Xperia™ Connectivity > Media server settings.
Select a device from the Registered devices list, then select Change name.
Enter a new name for the device.
To change the access level of a registered device
1
2
3
4
From your Home screen, tap .
Find and tap Settings > Xperia™ Connectivity > Media server settings.
Select a device from the Registered devices list.
Tap Change access level and select an option.
To get help about sharing content with other DLNA Certified™ devices
1
2
3
From your Home screen, tap .
Find and tap Settings > Xperia™ Connectivity > Media server settings.
Tap .
Playing files on a Digital Media Renderer device
Using DLNA™ technology, you can push media content saved on your device to
another device connected to the same Wi-Fi® network. The other device must be
able to function as a Digital Media Renderer (DMR) device and render or play content
received from your device. A TV with DLNA features or a PC running Windows® 7 or
higher are examples of DMR devices.
The settings for enabling the Digital Media Renderer may vary depending on the device. Refer
to the user guide of the DMR device for more information.
Content secured with Digital Rights Management (DRM) cannot be played on a Digital Media
Renderer device using DLNA™ technology.
To view photos or videos from your device on a DMR device
1
2
3
4
5
6
Make sure that you have correctly set up the DMR device and that it is
connected to the same Wi-Fi® network as your device.
From your Home screen, tap .
Find and tap Album.
Browse and open the photos or videos that you want to view.
Tap the screen to display the toolbar, then tap
and select a DMR device
that you want to share your content with. The selected content start playing in
chronological order on the device that you select.
To disconnect from the DMR device, tap and select Disconnect. The file
stops playing on the DMR device but continues playing on your device.
You can also share a video from the Movies application on your device by tapping the video
and then tapping
.
105
This is an Internet version of this publication. © Print only for private use.
To play a music track from your device on a DMR device
1
2
3
4
5
Make sure that you have correctly set up the DMR device and that it is
connected to the same Wi-Fi® network as your device.
From your Home screen, tap , then find and tap .
Select a music category and browse to the track that you want to share, then
tap the track.
Tap
and select a DMR device to share your content with. The track plays
automatically on the device that you select.
To disconnect from the DMR device, tap and select your device. The track
stops playing on the DMR device but continues playing on your device.
NFC
Use Near Field Communications (NFC) to share data with other devices, such as a
video, photo, web page address, music file or contact. You can also use NFC to scan
tags that give you more information about a product or service as well as tags that
activate certain functions on your device.
NFC is a wireless technology with a maximum range of one centimetre, so the
devices sharing data must be held close to each other. Before you can use NFC, you
must first turn on the NFC function, and the screen of your device must be active.
NFC may not be available in all countries and/or regions.
To turn on the NFC function
1
2
3
From your Home screen, tap .
Find and tap Settings > More.
Tap the on-off switch beside NFC.
To share a contact with another device using NFC
1
2
3
4
5
6
Make sure that both devices have the NFC function turned on, and that both
screens are active.
To view contacts, go to your Home screen, tap , then tap .
Tap the contact that you want to share.
Hold your device and the receiving device back to back so that the NFC
detection areas of each device touch each other. When the devices connect, a
thumbnail of the contact appears.
Tap the thumbnail to start the transfer.
When the transfer is done, the contact information is displayed on the screen
of the receiving device and is also saved on the receiving device.
To share a music file with another device using NFC
1
2
3
4
5
6
7
Make sure that both your device and the receiving device have the NFC
function turned on, and that both screens are active.
To open the Walkman® application, tap , then find and tap .
Select a music category and browse to the track you want to share.
Tap the track to play it. You can then tap to pause the track. The transfer
works whether the track is playing or paused.
Hold your device and the receiving device back to back so that the NFC
detection areas of each device touch each other. When the devices connect, a
thumbnail of the track appears.
Tap the thumbnail to start the transfer.
When the transfer is done, the music file plays immediately on the receiving
device. At the same time, the file is saved on the receiving device.
106
This is an Internet version of this publication. © Print only for private use.
To share a photo or video with another device using NFC
1
2
3
4
5
6
Make sure that both devices have the NFC function turned on, and that both
screens are active.
To view photos and videos in your device, go to your Home screen, tap ,
then find and tap Album.
Tap the photo or video that you want to share.
Hold your device and the receiving device back to back so that the NFC
detection areas of each device touch each other. When the devices connect, a
thumbnail of the track appears.
Tap the thumbnail to start the transfer.
When the transfer is done, the photo or video is displayed on the screen of the
receiving device. At the same time, the item is saved on the receiving device.
To share a web address with another device using NFC
1
2
3
4
5
6
7
Make sure that both devices have the NFC function turned on, and that both
screens are active.
From your Home screen, tap .
To open the web browser, find and tap .
Load the web page that you want to share.
Hold your device and the receiving device back to back so that the NFC
detection areas of each device touch each other. When the devices connect, a
thumbnail appears.
Tap the thumbnail to start the transfer.
When the transfer is done, the web page is displayed on the screen of the
receiving device.
Scanning NFC tags
Your device can scan various kinds of NFC tags. For example, it can scan embedded
tags on a poster, on a billboard advertisement, or beside a product in a retail store.
You can receive additional information, such as a web address.
To scan an NFC tag
1
2
Make sure that your device has the NFC function turned on and that the screen
is active.
Place your device over the tag so that the NFC detection area touches it. Your
device scans the tag and displays the content collected. Tap the content of the
tag to open it.
Connecting to an NFC compatible device
You can connect your device to other NFC compatible devices produced by Sony,
such as a speaker or a headphone. When establishing this kind of connection, refer
to the User guide of the compatible device for more information.
You may need to have Wi-Fi® or Bluetooth® activated on both devices for the connection to
work.
Bluetooth® wireless technology
Use the Bluetooth® function to send files to other Bluetooth® compatible devices, or
to connect to handsfree accessories.Bluetooth® connections work better within 10
metres (33 feet), with no solid objects in between. In some cases you have to
manually pair your device with other Bluetooth® devices.
Interoperability and compatibility among Bluetooth® devices can vary.
If you are using a device with multiple users, each user can change the Bluetooth® settings,
and the changes affect all users.
107
This is an Internet version of this publication. © Print only for private use.
To turn on the Bluetooth® function
1
2
3
From your Home screen, tap .
Find and tap Settings > Bluetooth.
Tap the on-off switch beside Bluetooth so that the Bluetooth® function is
turned on. Your device is now visible to nearby devices and a list of available
Bluetooth® devices appears.
Naming your device
You can give your device a name. This name is shown to other devices after you
have turned on the Bluetooth® function and your device is set to visible.
To give your device a name
1
2
3
4
5
6
Make sure that the Bluetooth® function is turned on.
From your Home screen, tap .
Find and tap Settings > Bluetooth.
Tap > Rename this device.
Enter a name for your device.
Tap Rename.
Pairing with another Bluetooth® device
When you pair your device with another device, you can, for example, connect your
device to a Bluetooth® headset or a Bluetooth® car kit and use these other devices to
share music.
Once you pair your device with another Bluetooth® device, your device remembers
this pairing. When pairing your device with a Bluetooth® device, you may need to
enter a passcode. Your device will automatically try the generic passcode 0000. If
this does not work, refer to the user guide for your Bluetooth® device to get the
device passcode. You do not need to re-enter the passcode the next time you
connect to a previously paired Bluetooth® device.
Some Bluetooth® devices, for example, most Bluetooth® headsets, require you to both pair
and connect with the other device.
You can pair your device with several Bluetooth® devices, but you can only connect to one
Bluetooth® profile at the same time.
To pair your device with another Bluetooth® device
1
2
3
4
5
6
Make sure that the device you want to pair with has the Bluetooth® function
activated and is visible to other Bluetooth® devices.
From your device’s Home screen, tap .
Find and tap Settings > Bluetooth.
Drag the slider beside Bluetooth to turn on the Bluetooth® function. A list of
available Bluetooth® devices appears.
Tap the Bluetooth® device that you want to pair with.
Enter a passcode, if required, or confirm the same passcode on both devices.
To connect your device to another Bluetooth® device
1
2
3
From your Home screen, tap .
Find and tap Settings > Bluetooth.
Tap the Bluetooth® device to which you want to connect.
108
This is an Internet version of this publication. © Print only for private use.
To unpair a Bluetooth® device
1
2
3
4
From your Home screen, tap .
Find and tap Settings > Bluetooth.
Under Paired devices, tap beside the name of the device that you want to
unpair.
Tap Forget.
Sending and receiving items using Bluetooth® technology
Use Bluetooth® technology to share items with other Bluetooth® compatible devices
such as phones or computers. You can send and receive the following kinds of items:
•
•
•
Photos and videos
Music and other audio files
Web pages
To send items using Bluetooth®
1
2
3
4
5
6
7
8
9
Receiving device: Make sure the Bluetooth® function is turned on and that the
device is visible to other Bluetooth® devices.
Sending device: Open the application which contains the item that you want to
send, and scroll to the item.
Depending on the application and on the item that you want to send, you may
need to, for example, touch and hold the item, open the item, and press .
Other ways to send an item may exist.
Select Bluetooth.
Turn on Bluetooth® if you are asked to do so.
Tap the name of the receiving device.
Receiving device: If asked, accept the connection.
Sending device: If asked, confirm the transfer to the receiving device.
Receiving device: Accept the incoming item.
To receive items using Bluetooth®
1
2
3
4
5
6
7
Make sure that the Bluetooth® function is on and is visible to other Bluetooth®
devices.
The sending device now starts sending data to your device.
If prompted, enter the same passcode on both devices, or confirm the
suggested passcode.
When you are notified of an incoming file to your device, drag the status bar
downwards and tap the notification to accept the file transfer.
Tap Accept to start the file transfer.
To view the progress of the transfer, drag the status bar downwards.
To open a received item, drag the status bar downwards and tap the relevant
notification.
To view files you have received using Bluetooth®
1
2
3
From your Home screen, tap .
Find and tap Settings > Bluetooth.
Press and select Show received files.
One-touch setup
You can use the One-touch setup function to automatically launch the setup of
several features that work wirelessly between two Xperia™ devices. For example, you
can use One-touch setup to launch the configuration of basic settings for Screen
mirroring and Xperia Link™. Once you’ve completed the setup, you then only need
one touch every time to launch these features.
109
This is an Internet version of this publication. © Print only for private use.
The One-touch setup function is activated using NFC. For more information about
setting up Screen mirroring, Media Server, NFC and Bluetooth® on your device, refer
to the relevant sections of the User guide.
To start One-touch setup on your device
1
2
3
4
5
From your Home screen, tap .
Find and tap Settings > Xperia™ Connectivity > One-touch setup. The NFC
function is automatically turned on.
Make sure the NFC function on the other Xperia™ device is turned on.
Make sure the screens of both devices are unlocked and active.
Hold the two devices together so that the NFC detection area of each device
touches the other. The one-touch setup function launches automatically.
Both devices must support the One-touch setup function.
110
This is an Internet version of this publication. © Print only for private use.
Smart apps and features that save you
time
Controlling accessories and settings with Smart Connect™
Use the Smart Connect™ application to set what happens in your device when you
connect or disconnect an accessory. For example, you can decide to always start the
FM radio application when you connect a headset.
You can also set Smart Connect™ to read out incoming text messages. Or you can
use the application to set a specific action or a group of actions to launch on your
device at certain times of the day. For example, when you connect your headset
between 7am and 9am, you can decide that:
•
•
•
The FM radio application starts.
The web browser opens the morning paper.
The ring volume is set to vibrate.
With Smart Connect™, you can also manage accessories such as SmartTags and
SmartWatch. Refer to the User guide of the specific accessory for more information.
If you are using a device with multiple users, you must log in as the owner, that is, the primary
user, to use the Smart Connect™ application.
1
Tap to display available accessories
2
Add an accessory or an event
3
View menu options
4
Tap to display all events
5
Tap to activate an event
6
Tap to view details of an event
111
This is an Internet version of this publication. © Print only for private use.
To create a Smart Connect™ event
1
2
3
4
5
6
7
8
9
From your Home screen, tap , then find and tap .
If you are opening Smart Connect™ for the first time, tap OK to close the
introduction screen.
On the Events tab, tap .
If you are creating an event for the first time, tap OK again to close the
introduction screen.
Add conditions under which you want to trigger the event. A condition could be
the connection with an accessory, or a specific time interval, or both.
to continue.
Tap
Add what you want to happen when you connect an accessory, and set other
settings as desired.
to continue.
Tap
Set an event name, then tap Finish.
To add a Bluetooth® accessory, you have to first pair it with your device.
To edit a Smart Connect™ event
1
2
3
4
Start the Smart Connect™ application.
On the Events tab, tap an event.
If the event is switched off, drag the slider to the right to turn it on.
Tap Edit event, then adjust the settings as desired.
To delete an event
1
2
3
Start the Smart Connect™ application.
On the Events tab, touch and hold the event that you want to delete, then tap
Delete event.
Tap Delete to confirm.
You can also open the event that you want to delete, then tap > Delete event > Delete.
To set Smart Connect™ to read out incoming text messages
1
2
3
Start the Smart Connect™ application.
Tap , then tap Settings.
Mark the checkbox beside Text to speech, then confirm activation, if
necessary.
If this feature is turned on, all incoming messages are read aloud. To protect your privacy, you
may need to turn off this feature if you are using your device in a public place or at work, for
example.
Managing accessories
Use the Smart Connect™ application to manage a range of smart accessories that
you can connect to your device, including SmartTags, SmartWatch and Smart
Wireless Headset pro from Sony. Smart Connect™ downloads any necessary
applications and also finds third-party applications, when available. Previously
connected accessories show in a list that allows you to get more information about
the features of each accessory.
To pair and connect an accessory
1
2
3
4
Start the Smart Connect™ application. If you are opening Smart Connect™ for
the first time, tap OK to close the introduction screen.
Tap Accessories, then tap .
Turn on the Bluetooth® function if it is not already on, then tap the name of the
accessory that you want to pair and connect with.
If required, enter a passcode, or confirm the same passcode on both your
device and the accessory.
112
This is an Internet version of this publication. © Print only for private use.
To adjust the settings for a connected accessory
1
2
3
4
Pair and connect the accessory with your device.
Start the Smart Connect™ application.
Tap Accessories, then tap the name of the connected accessory.
Adjust the desired settings.
Using your device as a fitness hub with ANT+™
You can use your device with health and fitness products that also support ANT+™
technology. For example, if you go running with an ANT+™ compatible heart rate
monitor and a foot pod (to measure pace and distance), you can collect all the data
from the run on your device. You can then analyse your performance and see how
you can improve.
You can download a range of applications from Google Play™ that support ANT+™
sport, fitness and health devices. For information about ANT+™ compatible
products, go to www.thisisant.com/directory.
Using your device as a wallet
Use your device as a wallet to pay for goods without reaching for your real wallet. All
of your installed payment services are put together to be viewed and managed. Note
that when making a payment, you must first turn on the NFC function before your
device touches a card reader. For more information about NFC, see NFC on
page 106.
Mobile payment services may not yet be available in all regions.
To manage payment services
1
2
3
From your Home screen, tap .
Find and tap Settings > Tap & pay. A list of payment services appears.
Manage the payment services as desired, for example, change your default
payment service.
113
This is an Internet version of this publication. © Print only for private use.
Travel and maps
Using location services
Location services allow applications such as Maps and the camera to use information
from Wi-Fi® networks as well as Global Positioning System (GPS) information to
determine your approximate location. If you're not within a clear line of sight to GPS
satellites, your device can determine your location using the Wi-Fi® function.
In order to use your device to find out where you are, you need to enable location
services.
To enable or disable location services
1
2
3
From your Home screen, tap .
Find and tap Settings > Location, then tap the on-off switch accordingly to
enable or disable location services.
If you selected to enable location services in step 2, tap Agree to confirm.
Improving GPS accuracy
The first time you use the GPS function in your device, it can take 5 to 10 minutes for
your location to be found. To help the search, make sure you have a clear view of the
sky. Stand still and don't cover the GPS antenna (the highlighted area in the image).
GPS signals can pass through clouds and plastic, but not through most solid objects
such as buildings and mountains. If your location isn't found after a few minutes,
move to another location.
Google Maps™ and navigation
Use Google Maps™ to track your current location, view real-time traffic situations
and receive detailed directions to your destination.
The Google Maps™ application requires an Internet connection when used online.
You may incur data connection charges when you connect to the Internet from your
device. To get more detailed information about how to use this application, go to
http://support.google.com and click the “Maps for mobile” link.
The Google Maps™ application may not be available in every market, country or region.
To use Google Maps™
1
2
From your Home screen, tap
Find and tap Maps.
.
114
This is an Internet version of this publication. © Print only for private use.
Using data traffic when travelling
When you travel outside of your home mobile network, you might need to access the
Internet using mobile data traffic. In this case, you need to activate data roaming on
your device. It is recommended to check the relevant data transmission charges in
advance.
If you are using a device with multiple users, you may need to log in as the owner, that is, the
primary user, to activate or deactivate data roaming.
To activate or deactivate data roaming
1
2
3
From your Home screen, tap .
Find and tap Settings > More > Mobile networks.
Mark or unmark the Data roaming checkbox.
You can’t activate data roaming when mobile data is turned off.
Airplane mode
In Airplane mode, the network and radio transceivers are turned off to prevent
disturbance to sensitive equipment. However, you can still play games, listen to
music, watch videos and other content, as long as all this content is saved on your
memory card or internal storage. You can also be notified by alarms, if alarms are
activated.
Turning on Airplane mode reduces battery consumption.
To turn on Airplane mode
1
2
3
From your Home screen, tap .
Find and tap Settings> More.
Drag the slider beside Airplane mode to the right.
115
This is an Internet version of this publication. © Print only for private use.
Calendar and alarm clock
Calendar
Use the Calendar application to manage your time schedule. If you have signed into
and sychronised your device with one or several online accounts that include
calendars, for example, your Google™ account or Xperia™ with Facebook account,
then calendar events from these accounts will also appear in the Calendar
application. You can select which calendars you want to integrate into the combined
Calendar view.
When an appointment time approaches, your device plays a notification sound to
remind you. Also, appears in the status bar.
You can also synchronise your Outlook calendar with your device using PC Companion. If you
do so, all appointments from your Outlook calendar will appear in the calendar view of your
device.
1
Select a view type and the calendars that you want to view
2
Return to the current date
3
Access settings and other options
4
Flick left or right to browse more quickly
5
Agenda for the selected day
6
Add a calendar event
To create a calendar event
1
2
3
4
5
From your Home screen, tap , then tap Calendar.
Tap .
If you have synchronised your calendar with one or more accounts, select the
account to which you want to add this event. If you only want to add this event
on your device, tap Device calendar.
Enter or select the desired information and add attendees to the event.
To save the event and send out invitations, tap Save.
To view a calendar event
1
2
From your Home screen, tap , then tap Calendar.
Tap the event that you want to view.
To view multiple calendars
1
2
From your Home screen, tap , then find and tap Calendar.
Tap , then mark the checkboxes for the calendars that you want to view.
116
This is an Internet version of this publication. © Print only for private use.
•
To zoom the calendar view
When the Week or the Day view is selected, pinch the screen to zoom in.
To display national holidays in the Calendar application
1
2
3
4
From your Home screen, tap , then tap Calendar.
Tap , then tap Settings.
Tap National holidays.
Select an option, or a combination of options, then tap OK.
To display birthdays in the Calendar application
1
2
3
From your Home screen, tap , then tap Calendar.
Tap , then tap Settings > Birthdays.
Drag the slider beside Birthdays to the right.
To display weather forecasts in the Calendar application
1
2
3
4
From your Home screen, tap , then tap Calendar.
Tap , then tap Settings.
Tap Weather forecast, then drag the slider beside Weather forecast to the right.
If location services are disabled, tap Home location, then search for the city
that you want to add.
For more information about how to enable location services, see Using location services on
page 114.
To change weather forecast settings in the Calendar application
1
2
3
4
From your Home screen, tap , then tap Calendar.
Tap , then tap Settings.
Tap Weather forecast.
Adjust the settings as desired.
Alarm and clock
You can set one or several alarms and use any sound saved on your device as the
alarm signal. The alarm does not sound if your device is turned off.
The alarm time format displayed is the same as the format you select for your general
time settings, for example, 12-hour or 24-hour.
1
Access the alarm home screen
2
View a world clock and adjust settings
3
Access the stopwatch function
4
Access the timer function
117
This is an Internet version of this publication. © Print only for private use.
5
View options
6
Open date and time settings for the clock
7
Turn an alarm on or off
8
Add a new alarm
Alarms are always set as priority interruptions. However, if you use the Silent or Don't interrupt
settings for notifications, your alarms don't make a sound when they go off. If you need to use
an alarm, make sure you allow either all interruptions or priority interruptions. For more
information about how to set interruptions, see Managing notifications on page 41.
To set a new alarm
1
2
3
4
5
6
7
From your Home screen, tap .
Find and tap Alarm & clock.
Tap .
Tap Time and select the desired value.
Tap OK.
If desired, edit other alarm settings.
Tap Save.
•
To snooze an alarm when it sounds
Tap Snooze.
•
To turn off an alarm when it sounds
Slide to the right.
To edit an existing alarm
1
2
3
Open the Alarm & clock application, then tap the alarm that you want to edit.
Make the desired changes.
Tap Save.
•
To turn on or off an alarm
Open the Alarm & clock application, then drag the slider next to the alarm to
the on or off position.
To delete an alarm
1
2
Open the Alarm & clock application, then touch and hold the alarm that you
want to delete.
Tap Delete alarm, then tap Yes.
To set the sound for an alarm
1
2
3
Open the Alarm & clock application, then tap the alarm that you want to edit.
Tap Alarm sound and select an option, or tap and select a music file.
Tap Done, then tap Save.
To set a recurring alarm
1
2
3
4
Open the Alarm & clock application, then tap the alarm that you want to edit.
Tap Repeat.
Mark the checkboxes for the relevant days, then tap OK.
Tap Save.
To activate the vibrate function for an alarm
1
2
3
Open the Alarm & clock application, then tap the alarm that you want to edit.
Mark the Vibrate checkbox.
Tap Save.
118
This is an Internet version of this publication. © Print only for private use.
Support and maintenance
Support for your device
Use the Support application in your device to search a User guide, read
troubleshooting guides, and find information about software updates and other
product-related information.
To access the Support application
1
2
From your Home screen, tap .
Find and tap , then select the required support item.
Make sure that you have a working Internet connection, preferably over Wi-Fi®, to limit data
traffic charges when using the Support application.
Help in menus and applications
Some applications and settings have help available in the options menu, which is
normally indicated by in the specific applications.
Help us improve our software
You can enable the sending of usage info from your device so that Sony Mobile can
receive anonymous bug reports and statistics that help improve our software. None
of the information gathered includes personal data.
To allow the sending of usage info
1
2
3
4
From your Home screen, tap .
Find and tap Settings > About phone > Usage info settings.
Mark the Send usage info checkbox if it is not already marked.
Tap Agree.
Computer tools
There are a number of tools available to help you connect your device to a computer
and manage content such as contacts, movies, music and photos.
This device uses a capless USB port. After using your device in water, insert the cable into the
USB port only after the port has completely dried.
PC Companion for Microsoft® Windows®
PC Companion is a computer application that gives you access to additional features
and services which help you to:
•
•
•
•
•
Transfer contacts, music, video and pictures to and from your old device.
Transfer content from your old iPhone™, Blackberry™, Android™ or Sony device
using Xperia™ Transfer.
Update your device software.
Back up content on your computer.
Sync calendars between a computer and your device.
To use the PC Companion application, you need an Internet-connected computer
running one of the following operating systems:
•
•
•
•
Microsoft® Windows® 7
Microsoft® Windows® 8
Microsoft® Windows Vista®
Microsoft® Windows® XP (Service Pack 3 or higher)
You can download PC Companion at http://support.sonymobile.com/global-en/
tools/pc-companion.
119
This is an Internet version of this publication. © Print only for private use.
Media Go™ for Microsoft® Windows®
The Media Go™ application for Windows® computers helps you transfer photos,
videos and music between your device and a computer. You can install and access
Media Go™ from within the PC Companion application. To read more about how to
use the Media Go™ application, go to http://mediago.sony.com/enu/features.
To use the Media Go™ application, you need one of these operating systems:
•
•
•
Microsoft® Windows® 8 / 8.1
Microsoft® Windows® 7
Microsoft® Windows Vista®
Sony Bridge for Mac
Sony Bridge for Mac is a computer application that gives you access to additional
features and services which help you to:
•
•
•
•
•
Transfer contacts, music, video and pictures to and from your old device.
Transfer content from your old iPhone™, Blackberry™, Android™ or Sony device
using Xperia™ Transfer.
Update your device software.
Transfer media files between your device and an Apple® Mac® computer.
Back up content on an Apple® Mac® computer.
To use the Sony Bridge for Mac application, you must have an Internet-connected
Apple® Mac® computer that runs Mac OS version 10.6 or later. You can download
Sony Bridge for Mac at http://support.sonymobile.com/global-en/tools/bridge-formac/.
Updating your device
You should update the software on your device to get the latest functionality,
enhancements and bug fixes in order to ensure optimal performance. When a
software update is available, appears in the status bar. You can also check for new
updates manually.
The easiest way to install a software update is to do it wirelessly from your device.
However, some updates are not available for wireless download. You then need to
use the PC Companion application on a PC or the Sony Bridge for Mac application
on an Apple® Mac® computer to update your device.
For more information about software updates, go to www.sonymobile.com/update.
If you are using a device with multiple users, you must log in as the owner, that is, the primary
user, to update the device.
To check for new software
1
2
3
If you are using a device with multiple users, make sure you are logged in as
the owner.
From your Home screen, tap .
Find and tap Settings > About phone > Software update.
To download and install a system update
1
2
3
4
5
If you are using a device with multiple users, make sure you are logged in as
the owner.
From your Home screen, tap .
Find and tap Settings > About phone > Software update.
If a system update is available, tap the download icon to download it to your
device.
When the download is finished, tap Install and follow the on-screen instructions
to complete the installation.
120
This is an Internet version of this publication. © Print only for private use.
To download and install a system update from the Notification panel
1
2
3
4
If you are using a device with multiple users, make sure you are logged in as
the owner.
Drag the status bar downwards to open the Notification panel.
Scroll down and select the desired system update, then tap Download.
When the download is finished, open the Notification panel again if it is closed,
then tap Install and follow the on-screen instructions to complete the
installation.
Updating your device using a computer
You can download and install software updates on your device using a computer
with an Internet connection. You need a USB cable and a PC running the PC
Companion application or an Apple® Mac® computer running the Sony Bridge for
Mac application.
If you don’t have the PC Companion or the Sony Bridge for Mac application installed on the
relevant computer, connect your device to the computer using a USB cable and follow the onscreen installation instructions.
To update your device using a computer
1
2
3
4
Make sure you have the PC Companion application installed on your PC or the
Sony Bridge for Mac application installed on the Apple® Mac® computer.
Using a USB cable, connect your device to the computer.
Computer: Launch the PC Companion application or the Sony Bridge for Mac
application. After a few moments, the computer detects your device and
searches for new software.
Computer: If a new software update is detected, a popup window appears.
Follow the on-screen instructions to run the relevant software updates.
Finding a lost device
If you have a Google™ account, the “Protection by my Xperia” web service can help
you locate and secure your device if you ever lose it. If you have activated this service
on your device or at myxperia.sonymobile.com, you can:
•
•
•
•
Locate your device on a map.
Sound an alert even if the device is in silent mode.
Remotely lock the device.
Remotely clear the internal and external memory of the device, as a last resort.
The “Protection by my Xperia” service may not be available in all countries/regions.
121
This is an Internet version of this publication. © Print only for private use.
To activate the Protection by my Xperia service on your device
1
2
3
4
5
6
Make sure you have an active data connection.
From your Home screen, tap .
Find and tap Settings > Security > Protection by my Xperia > Activate.
If you are activating the service for the first time, mark the checkbox to agree
with the terms and conditions of using the Protection by my Xperia service,
then tap Accept.
If prompted, sign in to your Google™ account, or create a new one if you don’t
have one.
Enable location services on your device if this function is not already enabled.
To verify that the Protection by my Xperia service can locate your device after you activate the
service, go to myxperia.sonymobile.com and sign in using the Google™ account that you have
set up on your device.
If you are using a device with multiple users, note that the Protection by my Xperia service is
only available to the user who is logged in as the owner.
Lockdown mode
Lockdown mode is a feature of the Protection by my Xperia service. It gets enabled
when unusual activity is detected on your device. Once your device goes into
lockdown mode, you must sign in to the Google™ account that was used to activate
the Protection by my Xperia service in order to reactivate your device and recover it
from lockdown mode.
To prevent your device from being used or sold by thieves, lockdown mode does the
following:
•
•
•
•
•
Stops or disables all running applications.
Limits access to notifications.
Disables USB and Bluetooth® connections.
Blocks all outgoing calls and allows only emergency calls.
Connects incoming calls to voicemail, if available.
If you delete your Google™ account permanently via your Google™ Account Settings page at
https://myaccount.google.com, it becomes impossible to recover your device from lockdown
mode or deactivate the Protection by my Xperia service. If, for some reason, you delete your
Google™ account in this way, you only have a limited amount of time in which to restore it.
Actions that trigger lockdown mode
Lockdown mode is triggered in the following situations:
•
•
•
•
During a factory reset procedure.
When PC Companion or Bridge for Mac is used to wipe out user data.
When the Google™ account that was used to activate Protection by my Xperia on
your device gets removed from your device (but not permanently deleted).
When someone removes or tampers with security features on your device, for
example, when someone tries to input the credentials for the Google™ account that
you’ve used to activate Protection by my Xperia on your device but fails more than
three times in a row.
If you don't want lockdown mode to get triggered by any of the above actions or situations,
you can deactivate the Protection by my Xperia service.
To recover the device from lockdown mode
1
2
On the lockdown screen, tap Authenticate.
To complete the recovery procedure, sign in using the Google™ account that
was used to activate the Protection by my Xperia service.
Make sure that you have a working Internet connection, preferably over Wi-Fi®, to limit data
traffic charges when recovering your device from lockdown mode.
122
This is an Internet version of this publication. © Print only for private use.
To deactivate Protection by my Xperia
1
2
3
4
From your Home screen, tap .
Find and tap Settings > Security > Protection by my Xperia.
Tap Deactivate, then confirm deactivation.
To complete the procedure, sign in using the Google™ account that was used
to activate the Protection by my Xperia service.
Finding the identification number of your device
Your device has a unique ID (identification) number. In your device, this number is
referred to as the IMEI (International Mobile Equipment Identity). You should keep a
copy of this number. You may require it, for example, when you access the Xperia™
Care support service and need to register your device. Also, if your device is stolen,
some network providers can use this number to stop the device from accessing the
network in your country.
To view your IMEI number on the label tray
1
2
Detach the memory card slot cover.
Insert the tip of an unfolded paper clip (or a similar object with a long, fine tip)
into the hole in the label tray, then drag the tray outwards. The IMEI number is
displayed on the tray.
To view the IMEI number, you can also open the phone dialer and enter *#06#.
To view your IMEI number via the device settings
1
2
3
From your Home screen, tap .
Find and tap Settings > About phone > Status.
Scroll to IMEI to view the IMEI number.
Battery and power management
Your device has an embedded battery. You can keep track of your battery
consumption and see which applications are using the most power. You can remove
or restrict apps and activate a number of power saving modes to get more out of
your battery. You can also view an estimate of how much battery time is left and
adjust your battery settings to improve performance and make your battery last
longer.
To manage your battery consumption
1
2
3
From your Home screen, tap .
Find and tap Settings > Power management > App power consumption. An
overview appears showing applications that have high data traffic rates or that
you have not used for a long time.
Review the information, then act as required, for example, to uninstall an
application or restrict its usage.
To view which applications use the most battery power
1
2
From your Home screen, tap .
Find and tap Settings > Power management > Battery usage.
123
This is an Internet version of this publication. © Print only for private use.
To view the estimated battery time
1
2
From your Home screen, tap .
Find and tap Settings > Power management.
Power saving modes
There are several power saving modes available for you to use if you want to make
your battery last longer:
STAMINA mode
Disables Wi-Fi®and mobile data when the screen is turned off, and restricts
hardware performance. appears in the status bar when this mode takes effect.
Ultra STAMINA
mode
Limits your device’s functionality to core tasks such as making phone calls and
appears in the status bar once this mode is activated.
sending SMS messages.
Low battery mode
Modifies your device’s behaviour, for example, to adjust screen brightness and the
screen timeout setting, when the battery level drops below a certain percentage.
appears in the status bar when this mode takes effect.
Queue background Optimises outgoing traffic when the screen is off by sending data at pre-defined
data
intervals.
If you are using a device with multiple users, you may need to log in as the owner, that is, the
primary user, to activate or deactivate a power saving mode.
To activate a power saving mode
1
2
3
From your Home screen, tap .
Find and tap Settings > Power management.
To activate your preferred mode, select the mode name and tap the on-off
switch to activate the chosen mode, if necessary. In some cases, tap Activate
and confirm activation.
STAMINA mode feature overview
STAMINA mode has several features that allow you to optimise your battery
performance:
Extended
standby
Prevents applications from using data traffic by disabling Wi-Fi®and mobile data
when the screen is off. You can exclude some applications and services from being
paused when this feature is active.
STAMINA clock
Keeps network connections paused in situations where you frequently press the
power key to check the time.
Extended usage
Restricts hardware performance when you are using your device.
If you are using a device with multiple users, you may need to log in as the owner, that is, the
primary user, to activate or deactivate a STAMINA mode feature.
To activate STAMINA mode features
1
2
3
4
From your Home screen, tap .
Find and tap Settings > Power management, then tap STAMINA mode.
Activate STAMINA mode if it is deactivated.
Drag the sliders beside the features that you want to activate, then tap
Activate, if prompted.
124
This is an Internet version of this publication. © Print only for private use.
To select which applications to run in STAMINA mode
1
2
3
4
5
6
From your Home screen, tap .
Find and tap Settings > Power management, then tap STAMINA mode.
Activate STAMINA mode if it is deactivated.
Make sure that the Extended standby feature is turned on, then tap Apps active
in standby > Add applications.
Scroll left or right to view all applications and services, then mark the relevant
checkboxes for the applications that you want to run.
When you're finished, tap Done.
Memory and storage
•
•
•
•
Your device has different types of memory and storage options.
The internal storage is about 3/11 GB and is used to store downloaded or transferred
content along with personal settings and data. Some examples of data stored to the
internal storage are alarm, volume and language settings; emails; bookmarks;
calendar events; photos; videos and music.
You can use a removable memory card with a storage capacity of up to 128 GB to
get more storage space. Media files and some apps (with their data) can be moved to
this type of memory to free up internal storage. Some apps, for example, the Camera
app, can save data directly to a memory card.
When installing an app, you can choose to install it on either the internal storage or
the memory card. If the internal storage is full while the memory card has a lot of
available space, it is a good idea to install apps on the memory card.
The dynamic memory (RAM) is about 2 GB and cannot be used for storage. RAM is
used to handle running applications and the operating system.
You may have to purchase a memory card separately.
Read more about the use of memory in Android devices by downloading the White paper for
your device at www.sonymobile.com/support.
Improving memory performance
•
•
•
•
•
•
•
•
The memory in your device tends to fill up as a result of normal usage. If the device
starts to slow down, or applications suddenly shut down, you should consider the
following:
Always have more than 250 MB of free internal storage and more than 100 MB of free
RAM available.
Close down running applications that you are not using.
Clear the cache memory for all applications.
Uninstall downloaded applications that you don't use.
Move applications to the memory card if the internal storage is full.
Install applications to parts of the memory where there is more storage space.
Transfer photos, videos and music from the internal memory to the memory card.
If your device can't read content on the memory card, you may need to format the
card. Note that all content on the card gets erased when you format it.
If you are using a device with multiple users, you must log in as the owner, that is, the primary
user, to be able to perform certain actions such as transferring data to the memory card and
formatting the memory card.
To view the memory status
1
2
From your Home screen, tap .
Find and tap Settings > Storage.
To view the amount of free and used RAM
1
2
From your Home screen, tap .
Find and tap Settings > Apps > Running.
125
This is an Internet version of this publication. © Print only for private use.
To clear the cache memory for all applications
1
2
3
From your Home screen, tap .
Find and tap Settings > Storage.
Tap Cached data > OK.
When you clear the cache memory, you don't lose any important information or settings.
To transfer media files to the memory card
1
2
3
4
5
Make sure you have a memory card inserted in your device.
From your Home screen, tap .
Find and tap Settings > Storage > Transfer data to SD card.
Mark the file types that you want to transfer to the memory card.
Tap Transfer.
To move apps to the memory card
1
2
3
From your Home screen, tap .
Find and tap Settings > Apps.
Select the app that you want to move, then tap MOVE TO SD CARD.
Some apps cannot be moved to the memory card.
To stop applications and services from running
1
2
3
From your Home screen, tap .
Find and tap Settings > Apps > Running.
Select an application or service, then tap STOP.
To format the memory card
1
2
3
From your Home screen, tap .
Find and tap Settings > Storage > Erase SD card.
To confirm, tap Erase SD card > Erase everything.
All content on the memory card gets erased when you format it. Make sure you make backups
of all data that you want to save before formatting the memory card. To back up your content,
you can copy it to a computer. For more information, see Managing files using a computer on
page 126.
Managing files using a computer
Use a USB cable connection between a Windows® computer and your device to
transfer and manage your files. Once the two devices are connected, you can drag
and drop content between your device and the computer, or between your device's
internal storage and SD card, using the computer's file explorer.
If you have an Apple® Mac® computer, you can use the Sony Bridge for Mac
application to access the file system of your device. You can download Sony Bridge
for Mac from http://support.sonymobile.com/global-en/tools/bridge-for-mac/.
This device uses a capless USB port. After using your device in water, insert the cable into the
USB port only after the port has completely dried.
If you're transferring music, video, pictures or other media files to your device with a
Windows® computer, you can use the Media Go™ application. Media Go™ converts media
files so that you can use them on your device. To learn more and download the Media Go™
application, go to http://mediago.sony.com/enu/features.
USB Connection Modes
There are two USB connection modes available for you to use:
Media transfer mode Use MTP for managing files, updating device software and connecting via WLAN.
(MTP)
This USB mode is used with Microsoft® Windows® computers. MTP is enabled by
default.
126
This is an Internet version of this publication. © Print only for private use.
Mass storage mode
(MSC)
Use MSC for managing files using MAC OS® and Linux computers that don’t have
MTP support.
To change USB connection mode
1
2
3
4
From your Home screen , tap .
Find and tap Settings > Xperia™ Connectivity > USB Connectivity > USB
connection mode.
Tap Media transfer mode (MTP) or Mass storage mode (MSC).
Tap OK.
Backing up and restoring content
Generally, you should not save photos, videos and other personal content solely on
the internal memory of your device. If something should happen with the hardware, or
if your device is lost or stolen, the data stored on its internal memory is gone forever.
It is recommended to use the PC Companion or the Sony Bridge for Mac applications
to make backups which save your data safely to a computer, that is, an external
device. This method is especially recommended if you are updating your device
software from one Android version to another, for example, from Android version 4.4
to 5.0.
Once your data is safely backed up to a computer, you can also make a quick
backup of basic settings and data to the SD card in your device or to an external
USB storage device by using the Backup & Restore application.
It is very important that you remember the password that you set when you make a data
backup. If you forget the password, it may not be possible to restore important data such as
contacts and messages.
Backing up data to a computer
Use the PC Companion application or the Sony Bridge for Mac application to back
up data from your device to a PC or an Apple® Mac® computer. These backup
applications let you back up the following types of data:
•
•
•
•
•
•
•
Contacts and call logs
Text messages
Bookmarks
Calendar data
Settings
Media files such as music and videos
Photos and images
To back up your data using a computer
1
2
3
4
5
Make sure that the PC Companion application is installed on the PC or the
Sony Bridge for Mac application is installed on the Apple® Mac® computer.
Connect your device to the computer using a USB cable.
Computer: Open the PC Companion application or the Sony Bridge for Mac
application.
Click Start to start the Backup & Restore application.
Tap Backup, then follow the on-screen instructions to back up data from your
device.
127
This is an Internet version of this publication. © Print only for private use.
To restore your data using a computer
1
2
3
4
5
Make sure that the PC Companion application is installed on the PC or the
Sony Bridge for Mac application is installed on the Apple® Mac® computer.
Connect your device to the computer using a USB cable.
Computer: Open the PC Companion application or the Sony Bridge for Mac
application.
Click Start to start the Backup & Restore application.
Select a backup file from the backup records, then tap Restore and follow the
on-screen instructions to restore data to your device.
Backing up data with the Backup & Restore application
Depending on the version of the Backup & Restore application that’s installed on your device,
you may not be able to back up and restore data between different Android versions, for
example, when updating from Android version 4.4 to version 5.0. However, if you are running
version 2.0 (or later) of the Backup & Restore application, you can restore your data between
such updates. You can check the version of the Backup & Restore application under Settings
> Apps > All > Backup & restore.
Using the Backup & Restore application, you can back up data manually or turn on
the automatic backup function to save data periodically.
The Backup & Restore application is recommended for backing up data before you
do a factory data reset. With this application you can back up the following types of
data to an SD card or to an external USB storage device that you have connected by
the USB Host adapter to your device:
•
•
•
•
•
Bookmarks
Call logs
Contacts
Conversations
Calendar data
To set up the automatic backup function
1
2
3
4
5
6
If you are backing up content to a USB storage device, make sure the storage
device is connected to your device using the USB Host adapter. If you are
backing up to an SD card, make sure that the SD card is properly inserted into
your device.
From your Home screen, tap .
Find and tap Backup & Restore.
To enable the automatic backup function, drag the slider beside Automatic
backup to the right.
Tap Automatic backup again, then select a backup frequency, where to save
backup files, and the types of data to back up.
To save your settings, tap .
To back up content manually
1
2
3
4
5
6
If you are backing up content to a USB storage device, make sure the storage
device is connected to your device using the USB Host adapter. If you are
backing up to an SD card, make sure the SD card is properly inserted in your
device.
From your Home screen, tap .
Find and tap Backup & Restore.
Tap Manual backup, then select a backup destination and the data types that
you want to back up.
Tap Backup.
After the data is backed up, tap Finish.
128
This is an Internet version of this publication. © Print only for private use.
To restore backed up content
1
2
3
4
5
6
If you are restoring content from a USB storage device, make sure the storage
device is connected to your device using the USB Host adapter. If you are
restoring content from an SD card, make sure the SD card is properly inserted
in your device.
From your Home screen, tap .
Find and tap Backup & Restore.
Tap Restore data, then select a restore source and the data types that you
want to restore.
Tap Restore data.
After the content is restored, tap Finish.
Remember that any changes that you make to your data and settings after you create a
backup, including any applications you download, get deleted during a restore procedure.
Running diagnostic tests on your device
The Xperia™ Diagnostics application can test a specific function or run a full
diagnostic test to check if your Xperia™ device is working properly.
Xperia™ Diagnostics can:
•
•
•
•
Assess potential hardware or software issues on your Xperia™ device.
Analyse how well applications perform on your device.
Log the number of dropped calls during the previous 10 days.
Identify installed software and provide useful details about your device.
The Xperia™ Diagnostics application is pre-installed on most Android™ devices from Sony. If
the Diagnostics option is not available under Settings > About phone, you can download a
light version from Google Play™.
To run a specific diagnostic test
1
2
3
4
From your Home screen , tap .
Find and tap Settings > About phone > Diagnostics > Test .
Select a test from the list.
Follow the instructions and tap Yes or No to confirm if a feature works.
To run all diagnostic tests
1
2
3
From your Home screen , tap .
Find and tap Settings > About phone > Diagnostics > Test > Run all.
Follow the instructions and tap Yes or No to confirm if a feature works.
To view details about your device
1
2
From your Home screen , tap .
Find and tap Settings > About phone > Diagnostics > Facts.
Restarting and resetting
You can force your device to restart or shut down in situations where it stops
responding or won't restart normally. No settings or personal data get deleted.
You can also reset your device to its original factory settings, with or without deleting
some of your personal data, such as music and pictures. This action is sometimes
necessary if your device stops functioning properly, but note that if you want to keep
any important data, you have to first back up this data to a memory card or other
non-internal memory. For more information, see Backing up and restoring content on
page 127.
Your device may fail to restart if the battery level is low. Connect your device to a charger and
try restarting again.
If you are using a device with multiple users, you may need to log in as the owner, that is, the
primary user, to reset your device to its original factory settings.
129
This is an Internet version of this publication. © Print only for private use.
To force your device to restart
1
2
Press and hold down the power key .
In the menu that opens, tap Restart, then tap OK to confirm. The device
restarts automatically.
To force the device to shut down
1
2
Remove the cover of the memory card slot.
Using the tip of a pen or a similar object, press and hold down the OFF button
until the device shuts down.
Do not use overly sharp objects that could damage the OFF button.
To perform a factory data reset
To avoid permanent damage to your device, do not restart your device while a reset procedure
is underway.
1
2
3
4
5
6
7
Before you start, make sure to back up any important data that is saved on the
internal memory of your device to a memory card or other non-internal
memory.
From your Home screen, tap .
Find and tap Settings > Backup & reset > Factory data reset.
To delete information such as music and pictures from your internal storage,
mark the relevant checkbox.
Tap Erase everything.
If required, draw your screen unlock pattern or enter your screen unlock
password or PIN to continue.
To confirm, tap Erase everything.
Your device does not revert to an earlier software version of Android™ even if you perform a
factory data reset.
If you forget your screen unlock password, PIN or pattern in step 6, you can use the device
repair feature in PC Companion or Sony Bridge for Mac to erase the security layer. By running
the repair feature, you are reinstalling software for your device and you may lose some
personal data in the process.
Using your device in wet and dusty conditions
To ensure the water resistance of your device, all covers, including the covers for the SIM card
slot and the memory card slot, must be firmly closed.
Your smart device is waterproof and dust resistant in compliance with the Ingress
Protection (IP) ratings IP65 and IP68, as explained in the table below. To view more
specific IP information about your device, go to www.sonymobile.com/global-en/
legal/testresults/ and click on the relevant device name.
These specific IP ratings mean that your device is dust resistant and is protected
against low pressure water stream as well as against the effects of immersion for 30
minutes in fresh (non-saline) water up to 1.5 metres deep.
You can use your device:
•
•
in dusty environments, for example, on a windy beach.
when your fingers are wet.
130
This is an Internet version of this publication. © Print only for private use.
•
•
•
in some extreme weather conditions, for example, when it’s snowing or raining.
in fresh (non-saline) water depths of 1.5 metres or less, for example, in a fresh water
lake or river.
in a chlorinated swimming pool.
Even if your device is resistant to dust and water, you should avoid exposing it
unnecessarily to environments with excessive dust, sand and mud or to moist
environments with extreme high or low temperatures. The waterproof ability of the
micro USB port, the memory card slot and the headset jack cannot be guaranteed in
all environments or conditions.
Never immerse your device in salt water or let the micro USB port or headset jack
come in contact with salt water. For example, if you’re at the beach, remember to
keep your device away from the sea water. Also, never expose the device to any
liquid chemicals. For example, if you’re washing dishes by hand using liquid
detergent, avoid bringing your device in contact with the detergent. After exposure to
non-fresh water, rinse your device using fresh water.
Normal wear and tear along with damage to your device can reduce its ability to
resist dust or moisture. After using the device in water, dry off the areas around all
covers, including the covers for the SIM card slot and the memory card slot.
If the speaker or microphone get wet, their function may be impacted until the water
has completely dried. Please note that the drying time can be up to three hours
depending on the environment. During this time, you can, however, use other
features in the device that do not utilise the speaker or microphone. All compatible
accessories, including batteries, chargers, handsfree devices and micro USB cables,
are not waterproof and dust resistant on their own.
Your warranty does not cover damage or defects caused by abuse or improper use
of your device (including use in environments where the relevant IP rating limitations
are exceeded). If you have any further questions about the use of your products, refer
to our Customer support service for help. Also, for warranty information, refer to the
Important information which can be accessed via the Setup guide in your device.
After using your device in water, only insert a cable into the USB port after the port has
completely dried.
IP (Ingress Protection) rating
Your device has an IP rating, which means it has undergone certified tests to
measure its resistance levels to both dust and water. The first digit in the two-digit IP
rating indicates the level of protection against solid objects, including dust. The
second digit indicates how resistant the device is to water.
Resistance to solid objects and dust
Resistance to water
IP0X: No special protection
IPX0. No special protection
IP1X. Protected against solid objects
> 50 mm in diameter
IPX1. Protected against dripping water
IP2X. Protected against solid objects >
12.5 mm in diameter
IPX2. Protected against dripping water when tilted up to 15
degrees from normal position
IP3X. Protected against solid objects >
2.5 mm in diameter
IPX3. Protected against spraying water
IP4X. Protected against solid objects > 1
mm in diameter
IPX4. Protected against splashing water
IP5X. Protected against dust; limited
ingress (no harmful deposit)
IPX5. Protected against water jet spray for at least 3 minutes
IP6X. Dust tight
IPX6. Protected against heavy jet spray for at least 3 minutes
IPX7. Protected against the effects of immersion in up to 1
metre of water for 30 minutes
131
This is an Internet version of this publication. © Print only for private use.
IPX8. Protected against the effects of continued immersion in
water depths greater than 1 metre. The exact conditions are
specified for each device by the manufacturer.
For more information, go to www.sonymobile.com/global-en/legal/testresults/.
Recycling your device
Got an old device lying around the house? Why not recycle it? By doing so, you will
help us reuse its materials and components, and you’ll protect the environment, too!
Find out more about the recycling options in your region at
www.sonymobile.com/recycle.
Limitations to services and features
Some of the services and features described in this User guide are not supported in
all countries/regions or by all networks and/or service providers in all areas. Without
limitation, this applies to the GSM International Emergency Number, 112. Please
contact your network operator or service provider to determine availability of any
specific service or feature and whether additional access or usage fees apply.
Use of certain features and applications described in this guide may require access
to the Internet. You may incur data connection charges when you connect to the
Internet from your device. Contact your wireless service provider for more
information.
Legal information
Sony E2303/E2306/E2353
This User guide is published by Sony Mobile Communications Inc. or its local affiliated company, without any
warranty. Improvements and changes to this User guide necessitated by typographical errors, inaccuracies of
current information, or improvements to programs and/or equipment, may be made by Sony Mobile
Communications Inc. at any time and without notice. Such changes will, however, be incorporated into new
editions of this User guide. All illustrations are for illustration purposes only and may not accurately depict the
actual device.
All product and company names mentioned herein are the trademarks or registered trademarks of their
respective owners. All other trademarks are property of their respective owners. Any rights not expressly
granted herein are reserved. Visit www.sonymobile.com/us/legal/ for more information.
This User guide may reference services or applications provided by third parties. Use of such programming or
services may require separate registration with the third party provider and may be subject to additional terms
of use. For applications accessed on or through a third-party website, please review such websites’ terms of
use and applicable privacy policy in advance. Sony does not warrant or guarantee the availability or
performance of any third-party websites or offered services.
Your mobile device has the capability to download, store and forward additional content, for example,
ringtones. The use of such content may be restricted or prohibited by rights of third parties, including but not
limited to restriction under applicable copyright laws. You, and not Sony, are entirely responsible for additional
content that you download to or forward from your mobile device. Prior to your use of any additional content,
please verify that your intended use is properly licensed or is otherwise authorized. Sony does not guarantee
the accuracy, integrity or quality of any additional content or any other third party content. Under no
circumstances will Sony be liable in any way for your improper use of additional content or other third party
content.
Visit www.sonymobile.com for more information.
This product is protected by certain intellectual property rights of Microsoft. Use or distribution of such
technology outside of this product is prohibited without a licence from Microsoft.
Content owners use Windows Media digital rights management technology (WMDRM) to protect their
intellectual property, including copyrights. This device uses WMDRM software to access WMDRM-protected
content. If the WMDRM software fails to protect the content, content owners may ask Microsoft to revoke the
software's ability to use WMDRM to play or copy protected content. Revocation does not affect unprotected
content. When you download licences for protected content, you agree that Microsoft may include a
revocation list with the licences. Content owners may require you to upgrade WMDRM to access their content.
If you decline an upgrade, you will not be able to access content that requires the upgrade.
This product is licensed under the MPEG-4 visual and AVC patent portfolio licences for the personal and noncommercial use of a consumer for (i) encoding video in compliance with the MPEG-4 visual standard
("MPEG-4 video") or the AVC standard ("AVC video") and/or (ii) decoding MPEG- 4 or AVC video that was
encoded by a consumer engaged in a personal and non-commercial activity and/or was obtained from a video
provider licenced by MPEG LA to provide MPEG-4 and/or AVC video. No licence is granted or shall be implied
for any other use. Additional information including that relating to promotional, internal and commercial uses
and licensing may be obtained from MPEG LA, L.L.C. See www.mpegla.com. MPEG Layer-3 audio decoding
technology licenced from Fraunhofer IIS and Thomson.
SONY MOBILE WILL NOT BE LIABLE FOR ANY LOSS, ERASE AND/OR DATA-OVERWRITING OF PERSONAL
DATA OR FILES STORED ON YOUR DEVICE (INCLUDING BUT NOT LIMITED TO CONTACTS, MUSIC
TRACKS AND PICTURES) ARISING OUT OF ANY UPDATE OF YOUR DEVICE BY ANY OF THE METHODS
DESCRIBED IN THIS USER GUIDE OR DOCUMENTATION. IN NO EVENT SHALL SONY MOBILE’S OR ITS
SUPPLIERS’ TOTAL LIABILITY TO YOU FOR ANY AND ALL DAMAGES, LOSSES AND CAUSES OF ACTION
(WHETHER IN CONTRACT OR TORT, INCLUDING, BUT NOT LIMITED TO NEGLIGENCE OR OTHERWISE)
EXCEED THE AMOUNT ACTUALLY PAID BY YOU FOR YOUR DEVICE.
© 2015 Sony Mobile Communications Inc.
132
This is an Internet version of this publication. © Print only for private use.
All rights reserved.
133
This is an Internet version of this publication. © Print only for private use.