1
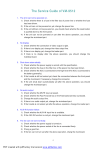
INSTRUCTION MANUAL
Car Audio/Video System
SCR-4710TVD
IR
REL
MUTE
/MOD
MIC
PUSH
SEL
VOL+
EQ
VOL-
CH1~6
AUX
PAIR
BND
USB
DEAR CUSTOMER
In order to achieve the best performance of your product, please read this
instruction manual carefully before using, and keep it for future reference.
If you need extra support, please write to [email protected]
PREMIER CUSTOMER SERVICE
Venezuela:
0800
Panama:
300-5185
Website
www.premiermundo.com
E-mail:
servicioalcliente@ premiermundo.com
ELECTRIC (353-2874)
NOTE
This unit may be submitted to changes in specifications, characteristics and/or operation without prior
notice to the user, in order to continue improving and developing its technology.
P-1
Precaution
Class 1 laser product
This car multi-media player is a class 1 laser product. However
This car multi-media player uses a visible/invisible laser beam
which could cause . Hazardous radiation exposure if directed.
Be sure to operate the car multi-media player correctly as
instructed. Use of controls or adjustments or performance of
procedures other than those specified herein may result in
hazardous radiation exposure. Do not open covers and do not
repair yourself. Refer servicing to qualified personnel.
P-2
Content
Premier Customer Service...................................................................
1
Precaution.........................................................................................
2
Content.............................................................................................
3
Installation steps................................................................................
4
General knowledge about remote control............................................
8
Locations and Names of controls on main unit......................................
9
Locations and Names of controls on remote control.............................. 10
Same functions in any work source mode............................................
11
Radio operation................................................................................
14
TV operation.....................................................................................
16
BT operation.....................................................................................
17
Disc/USB/card operation....................................................................
20
1. Loading or unloading a disc, USB or card........................................
20
1.1 Loading a disc, USB or card.........................................................
20
1.2 Unloading a disc, USB or card......................................................
21
2. Popping up Function Icons-board..................................................
21
2.1 Function Icons-board of Digital Video/VCD/MPEG4/Image
/MP3/WMA.................................................................................. 21
2.2 CD interface..............................................................................
22
3. Function of controls on the touch screen/main unit/remote
control........................................................................................
23
*
Region Code...............................................................................
32
*
Parental Control..........................................................................
33
AV IN operation.................................................................................
34
Rear View Camera............................................................................. 35
P-3
Troubleshooting................................................................................
36
Specification....................................................................................
37
INSTALLATION STEPS
1. Remove the 2 deck screws as right;
2. Mounting Slide Bracket Housing;
1) Remove the PLASTIC FRAME from the chassis ;
2) Insert the 2 KEY PLATES into the grooves at the both sides of the chassis till
they click; then pulling the two KEY PLATES to remove the chassis from the
Slide Bracket Housing ;
KEY PLATE
PLASTIC FRAME
KEY PLATE
If you want to take CHASSIS out of the SLIDE BRACKET HOUSING , first remove
the PLASTIC FRAME of the both sides away, then insert the two KEY PLATES into
left and right sides of chassis as above illustration.
3) Mount the Sliding Bracket Housing in the position of car multi-media system and
bend some tabs of Sliding Bracket Housing to fix it.(see Installation Diagram)
3. Connecting all wires:
1) Remove control panel from chassis as follows:
A. Press the REL button to flip down control panel .
REL button
P-4
B. Hold the left end of the control panel to slide rightwards a little and pull it towards
you to remove it .
2
1
2) Connecting all wires according ot the wiring diagram as follows:
RADIO ANTENNA JACK
TV ANTENNA IN
AUDIO L OUT (white)
AUDIO R OUT (red)
VIDEO OUTPUT (brown)
GREY
SUB WOOFER
(B+) 12V
REAR CAMERA SWITCH
BLUE
AUTO ANTENNA
PINK
YELLOW
(B-) PARKING BRAKE
BROWN
YELLOW
REAR CAMERA INPUT
FRONT
Lch SPK.
REAR
CONSTANT 12 VOLTS
BLACK
GROUND(B-)
RED
FUSE
WHITE
GREY
WHITE/BLACK
GREY/BLACK
GREEN
VIOLET
GREEN/BLACK
VIOLET/BLACK
Lch SPK.
IGNITION SWITCH
FRONT
Rch SPK.
REAR
Rch SPK.
WIRING DIAGRAM
NOTE:
1. Must use 4 ohms impedance of speakers.
2. After connecting parking Line, video on screen of control panel
will be displayed only after applying parking brake.
3. Before finishing wiring, do not attach control panel onto chassis.
P-5
3) Attach control panel onto chassis.
A. Make the right hollow of control panel aim at the right bulge of chassis, then push
and hold control panel rightwards; at one time, move the left end of control panel
towards chassis to make the left hollow of control panel aim at the left bulge of
chassis and then release holding .
Bulge
Hollow
Bulge
Hollow
B. Flip control panel up till hearing a click sound to attach onto chassis.
Connector
* How to clean panel connector
Frequent detachment will deteriorate panel connectors. To minimize deterioration,
periodically wipe the panel connectors with a clean/soft/dry cloth .
4) Testing it for making sure that it can work properly .
4. Installing main unit according to installation diagram:
1) Insert the chassis of the car multi-media system into the sliding metal housing.
2) Use the metal strap to fix the rear part of chassis.
* Uninstalling main unit:
1) Remove metal strap from main unit;
2) Remove plastic trim frame from main unit;
3) Insert a key plate into left and right side of main unit and draw main unit out of
sliding metal housing.
P-6
Installation diagram
DASH BOARD
HEX NUT
METAL MOUNTING
STRAP
CONSOLE
SPRING WASHER
PLAIN WASHER
TAPPING SCREW
FIXING TAB
HEX BOLT
SLIDE BRACKET
HOUSING
P-7
GENERAL KNOWLEDGE ABOUT REMOTE CONTROL
1. Removing insulating sheet
If using remote control for the first time, you
can see an insulating sheet at the bottom
side of remote control as right.
you must remove the insulating sheet as right.
Otherwise, the remote control is disabled.
2. Replace lithium cell
If the electric energy of lithium cell is weak,
replace it.
1 ) Press and hold the movable block as direction
indicated by arrow 1 as right, at one time pull
cell holder out of remote control as direction
indicated by arrow 2 as right.
2 ) Replace the old cell by a new one with (+)
polarity side upward as right.
3 ) Insert the cell holder into remote control again
as right.
3 . Note about using remote control
1 ) You should face the emitting window of remote control towards the sensor
window of the unit.
2 ) Operation angle for front panel: About 30 degree
3 ) The distance between the emitting window of remote control and the sensor
window of the unit : < 5M .
4 . Warning for lithium cells of remote control
1 ) Cell leakage may cause damage to remote control.
2 ) Do not throw cells into fire, it may cause explosion.
.
3.To avoid risk of accident, keep cells out of reach of children.
P-8
Locations and names of controls on main unit
1
9
4
18 5 6
IR
REL
MUTE
/MOD
MIC
PUSH
SEL
VOL+
EQ
VOL-
CH1~6
AUX
11
USB
BND
PAIR
3 13 10 2
7
8 12
Control Panel
14
15
16
17
Front Facet of Chassis after remo ving Control Panel
1. POWER/MODE TOUCH BUTTON
10. BAND/
2. > TOUCH BUTTON
11. < TOUCH BUTTON
3. PAIR/
12. SEL BUTTON AND VOL KNOB
TOUCH BUTTON
TOUCH BUTTON
4. MUTE TOUCH BUTTON
13. >|| OR CH1~6 TOUCH BUTTON
5. IR SENSOR WINDOW
14. DISC SLOT
6. REL BUTTON
15. CARD SLOT
7. USB PORT AND COVER
16. EJECT BUTTON
8. AUX IN JACK
17. RESET BUTTON
9. EQ TOUCH BUTTON
18. MICROPHONE
P-9
Locations and Names of Controls on Remote Control
1
2
3
5
7
9
11
13
15
MUTE
MODE
PLAY/PAUSE
STOP
ANGLE
MO/ST
20
ZOOM
4
6
23
PAIR
LOUD
MENU
EQ
CLK
LO/DX
8
25
27
OSD
10
BAND
29
ENTER
TITLE/PBC
12
31
A/PS
VOL
TOP
RPT
INT
1
2
3
32
VOL
RDM
4
5
6
33
SEL
7
8
9
SETUP
GOTO
10+
0
14
16
17
18
2. MUTE BUTTON
21
REDIAL
19
1. POWER or MODE BUTTON
22
3. HANG UP or REDIAL BUTTON
4. ZOOM BUTTON
24
26
28
30
35
5. CALL or PAIR BUTTON
6. MENU or SW BUTTON
7. >> or SEARCH BUTTON
8. SUBTITLE or LO/DX BUTTON
9. < or FINE+ BUTTON
10. BAND or OSD BUTTON
11. << or SKIP BUTTON
12. A/PS or TITLE/PBC BUTTON
34
13. TOP BUTTON
14. VOL+ BUTTON
15. RDM BUTTON
16. VOL- BUTTON
26. ^ or CH+ BUTTON
17. SEL BUTTON
27. >>| BUTTON
18. SETUP BUTTON
28. ENTER BUTTON
19. GOTO or * BUTTON
29. > or FINE- BUTTON
20. >|| BUTTON
30. V or CH- BUTTON
21. STOP BUTTON
31. |<< BUTTON
22. AUDIO or MO/ST BUTTON
32. INT BUTTON
23. ANGLE BUTTON
33. NUMBER(0~9) BUTTON
24. EQ or LOUD BUTTON
34. 10+ or # BUTTON
25. CLK BUTTON
35. RPT BUTTON
P-10
Same functions in any work source mode
1. POWER button and
icon
In power off mode, pressing POWER button on remote control or touching POWER button on
control panel powers on main unit.
In power on mode, long pressing POWER button on remote control or long touching POWER
button on control panel or touching
icon on source menu(see Source menu fig.on next page)
powers off main unit.
2. VOL knob & VOL+/VOL- buttons
To adjust volume level, rotate VOL knob on control panel or press or hold VOL+ or VOL- button
on remote control.
3. SEL button
To switch between BASS,TREBLE,BALANCE, FADE,COLOR,BRIGHTNESS,CONTRAST, TINT
and VOLUME, briefly and repeatedly press SEL button.
After switching on the desired mode above, rotate VOL knob or press VOL+/VOL- buttons to set it.
To switch between BT, LOUD, SWF, EQ, DX/LOCAL(in radio mode), STEREO/MONO(in radio mode),
TIME 12H/24H, CLOCK, BUZZ,EUR/USA FREQ,ANIMATION, BG and TV SYSTEM, long press SEL button
to switch on BT, then briefly and repeatedly press SEL button.
After switching on the desired mode above, rotate VOL knob or press VOL+/VOL- buttons to set it.
4. MUTE button
To switch MUTE mode on or off, press MUTE button on remote control or touch MUTE button on
control panel.
5. EQ button
To select a desired preset EQ mode from JAZZ, CLASSIC, POP, ROCK and USER, press EQ
button on remote control or touch EQ button on control panel continuously.
6. To switch LOUD mode
To switch on or off LOUD mode, long press EQ button on remote control .
7. SW button
To switch on or off SUBWOOFER mode, long press SW button on remote control.
8. CLK button
Press CLK button on remote control to display clock time .
9. MODE button and source menu
To switch work source between RADIO, DISC(after inserting a disc), USB(after inserting a USB
storage), CARD(after inserting a card) , TV, AV IN and BT MUSIC, press MODE button on
remote control or touch MODE button on control panel continuously.
During disc(non-CD)/USB/card playback, touch screen to pop up Function Icons-board and then
touch the
icon in the Function Icons-board to enter the source menu(refer to Disc/USB/Card
Operation) .
During AV IN or TV playback, touch screen to pop up AUX or TV interface and then touch
to enter the source menu(refer to AV IN Operation and TV Operation).
icon
In radio, BT MUSIC or CD mode, touch
icon to enter the source menu(refer to Radio Operation,
BT Operation and Disc/USB/Card Operation).
P-11
The source menu displays as follows:
Source Menu
In source menu, touch one icon of DISC, RADIO, TV, BT MUSIC, AUX, USB and SD Card
to enter one work source of DISC, RADIO, TV, BT MUSIC, AV IN, USB and SD Card.
10. SETUP icon
1) SETTING SYSTEM
In source menu, touch SETUP icon to display SYSTEM page of SETUP menu as follows:
BRIGHTNESS
CONTRAST
COLOR
15
System page of SETUP menu
In the SYSTEM page of SETUP menu, repeatedly touch the
or
icon to highlight one setting
item of BRIGHTNESS, CONTRAST, COLOR, TINT, ANIMATION, WALLPAPER, TV SYSTEM and BT. After
highlighting a desired setting item, touch the
or
icon to set it.
2) SETTING SOUND
In SETUP menu, touch SOUND icon to display SOUND page of SETUP menu as follows:
TREBLE
BASS
BALANCE
+03
Sound page of SETUP menu
P-12
In the SOUND page of SETUP menu, repeatedly touch the
or
icon to highlight one setting
item of TREBLE, BASS, BALANCE, FADE, SUBWOOFER, LOUDNESS, RADIO LOC/DX(entering
Source Menu in radio mode), RADIO STEREO(entering Source Menu in radio mode) and BUZZER
ON/OFF. After highlighting a desired setting item, touch the
or
icon to set it.
3) SETTING TIME
In SETUP menu, touch TIME icon to display TIME page of SETUP menu as follows:
HOUR
MINUTE
24H/12H
08:13AM
Time page of SETUP menu
In the TIME page of SETUP menu, repeatedly touch the
or
icon to highlight one setting
item of HOUR, MINUTE and 24H/12H. After highlighting a desired setting item, touch the
or
icon to set it.
After finishing setting, touch
icon to return back to normal playback.
11.REL button
Press REL button on control panel to flip down the control panel, then hold the left part of the
control panel to push it rightwards and pull it to you to remove it.
12.RESET button
When LCD displays wrongly or some buttons are not available or sound is distorted, press REL
button to flip down the control panel, then remove it as above, then use the sharp end of a pointed
object to press RESET button to reset the program to zero.
P-13
Radio Operation
1. To enter RADIO mode(MODE button or RADIO icon)
When you use MODE button or source menu (tapping RADIO icon) to enter RADIO
mode, it will display radio interface as follows:
FM1
1 87.50
2
90.10
3 98.10
*
87.50 MHZ
106.10
107.00
88.50
4
5
6
Some icons on radio interface correspond with the buttons on remote control or control
panel as follows:
SWF icon = SW button(remote control)(long pressing)
LOUD icon = EQ button(remote control)(long pressing)
icon = MUTE button
and
icons = VOL- and VOL+ buttons = VOL knob
EQ icon = EQ button
: To enter source menu.
icon : press it to pop up BT PHONE interface
2. To switch between bands (BAND)
The BAND icon or button can switch between bands of FM1, FM2, FM3, AM1 and AM2,
and the word FM1,FM2,FM3,AM1 or AM2 will be displayed on screen.
3. To search for a station ( < and > icons or v and ^ or < and > buttons)
1) Long touching < or > icon or long pressing v or ^ button on remote control or long
touching < or > button on control panel can automatically search down or up for
an available station beginning from the current frequency.
2) Briefly touching < or > icon or briefly pressing v or ^ button on remote control or
briefly touching < or > button on control panel can manually search down or up
for a your desired station beginning from the current frequency.
4. To preset and scan all memory stations (APS icon or A/PS button)
1) When long touching APS icon or long pressing A/PS button on remote control , the radio
searches from the lowest frequency and checks the signal strength level until 1 cycle
search is finished, and the 6 strongest stations are preset to corresponding preset
number memory bank for the current band.
The presetting function can be implemented in selected FM or AM band. (It can presets
3x6 stations for FM and 2x6 stations for AM in all)
2) When briefly touching APS icon or briefly pressing A/PS button, the radio scans
for each preset station in FM or AM band from NO.1 bank, each preset station broadcasts for 5 seconds. After finishing a circle of scanning, it will resume broadcasting the
station in NO.1 bank.
NOTE: In FM band, FM1,FM2 and FM3 are preset and scaned as one band at a time;
In AM band, AM1 and AM2 are preset and scaned as one band at a time.
P-14
5. To preset and listen to a memory station(1~6 icons or 1~6 buttons or CH1-6 button )
1) Long touching one of 6 number(1~6) icons or long pressing one of 6 number(1~6)
buttons can preset the current broadcasting station of the current band in the number
memory bank; .
2) Briefly touching one of 6 number(1~6) icons or briefly pressing one of 6 number(1~6)
buttons can listen to the memory station in the current band preset in the number
memory bank.
* CH1-6 button:
1) To preset a station in a memory bank with CH1-6 button, first select a desired
band; then touch CH1-6 button to select a desired memory bank; and then search
for a desired station; finally long touch CH1-6 button to store the station in the
memory bank.
2)T o listen to a preset station with CH1-6 button , first switch on a desired band, then
continuously touch CH1-6 button highlight and listen to it.
6. To switch on between stereo and mono mode (MO/ST button)
Press MO/ST button on remote control to select STEREO or MONO mode for FM band.
When the STEREO mode is activated, it can get better audio effect; when the
MONO mode is activated, it can get clearer audio signal.
7. To switch on between local and distance mode (LO/DX button)
P ress LO/DX button to turn LOC on to tune for local stations with weak interference;
Press LO/DX button to turn DX on to tune for distance stations with stronger signal.
P-15
TV operation
1. To enter TV mode (MODE button or TV icon)
When you use MODE button or source menu(tapping TV icon) to enter TV mode, first it
displays TV interface, and broadcastes program after a while.
During TV broadcasting, touching any place on touch screen can pop up TV interface as
follows:
SWF icon = SW button(long pressing)
LOUD icon = EQ button(remote control)
(long pressing)
icon = MUTE button
and
icons = VOL- and VOL+ buttons
= VOL knob
EQ icon = EQ button
icon : press it to pop up BT PHONE interface
icon: To enter source menu.
2. To search and save TV channels(SCAN icon or SEARCH button)
Touching SCAN icon or pressing SEARCH button can search for all available channels from
the lowest frequency to highest frequency. After searching for a circle, it will stop searching
and broadcast the available channel with the lowest frequency and all the available channels
from the lowest frequency to the highest frequency will be saved.
3. To select a desired channel with an available station (CH- and CH+ icon or CH- and CH+ or
< and > buttons)
After searching, touching CH- or CH+ icon or pressing CH- or CH+ button on remote control
or touching < or > button on control panel can select the channels with available stations.
4. To select a desired channel (0~9)
Use the 0~9 icons or the 0~9 buttons to directly select the channel.
*
the 10+ button is not available.
5. To fine tune the current channel(FINE- and FINE+)
Touching FINE- or FINE+ icon or pressing FINE- or FINE+ button to fine fune for better signal.
6. To add or delete a channel(SKIP)
After searching channels automatically, the CH+/CH- buttons on remote control and > / <
buttons on control panel and CH+/CH- icons can select only the channels with available signal.
1) Add Channels
Use the number buttons to select a channel, then press SKIP button or touch SKIP icon, the
screen will display SAVE, the channel will be available for the CH+/CH- & >/< buttons and
CH+ / CH- icons.
2) Skip Available Channels
Use the CH+/CH- or > / < buttons or CH+/ CH- icons to select a channel you want to skip
for the CH+/CH- & >/< buttons and CH+/CH- icons, then press SKIP button or touch SKIP
icon, the screen will display SKIP, the channel will be skipped for the CH+/CH- & > / <
buttons and CH+ / CH- icons.
P-16
BT operation
1. Pairing and Connecting
Prior to using the BT device named BC_HF_V03 as a handfree system for a BTenabled mobile phone for the first time, you must pair and connect them as follows:
*
Prior to pairing and connecting, when displaying No Video interface of radio, CD,
AV IN or BT music, BT logo flashes in the touch screen.
*
During using the BT device named BC_HF_V03 as a handfree system for a BTenabled mobile phone, place the BT-enabled mobile phone 3 meters from the Car
A/V System;
1) Long press PAIR button on remote control or long touch PAIR button on control
panel to display a blue frame to frame the the flashing BT logo;
2).Switch on the BT mode of your mobile phone; then s elect the item to find a BT
device and enter it; When it finds the BT device of the car A/V system, the name
BC_HF_V03 will be displayed , select it and enter it; then it will show an interface
that asks you to input a password, input 8888 and enter it; then i t will pair and
connect with the BT device BC_HF_V03 of the car A/V system, Confirm it, then
the frame of the BT logo will be filled by blue color and they are light all the time.
*
When finishing pairing and connect ing , the audio of the mobile phone transfers
to the car audio system whenever a call is made or received or the mobile phone
plays music .
2. BT PHONE
1) Make a call
(1) Dial with mobile phone directly;
(2)Dial with the controls on BT PHONE interface or on remote control or on control
panel
a. Long touch
button on control panel or long press
button on remote control
or touch
icon to pop up BT PHONE interface as follows:
: Same as MUTE button.
&
P-17
: Same as VOL+ and VOL- or
VOL knob.
b. Use the number icons or buttons to input your desired phone number;
* When inputting a wrong digit, use
icon or < button to delete it.
c. After finishing inputting, touch
icon or touch
button on remote control to dial out.
button on control panel or press
2) Redial last dialed phone number
Touch
icon or long touch
button on control panel or long press
remote control to dial out the last dialed phone number.
button on
3) Answer a call
During ringing, the incoming telephone number displays in the rectangle frame
of the BT PHONE interface. If you want to receive it, touch
icon or touch
button on control panel or press
button on remote control; if you want to
reject it, touch
icon or touch
button on control panel or press
button on
remote control.
4) End phone talking
When you want to end phone talking, touch
icon or use
or
button.
5) Switch audio between car A/V system and mobile phone
During phone talking using the BT handfree system of the car A/V system, if you
want to change the phone audio to your mobile phone, touch
icon or touch
button on control panel or press
button on remote control.
During phone talking using the mobile phone, if you want to change the phone
audio to the the car A/V system again, use
or
button.
6) Adjust volume level during phone talking
During phone talking, use
and
icon or VOL knob or VOL+ and VOLbuttons to adjust volume level ; use
icon or MUTE button to mute sound .
*
* / # icons and buttons
they perform as * / # buttons on mobile phone.
3 . BT MUSIC
1 ) Touching BT MUSIC on source menu or pressing MODE button can pop up BT
MUSIC interface as follows:
USER SWF
BT
MUSIC
P-18
and
icons = VOL- and VOL+ buttons = VOL knob
icon = MUTE button
EQ icon = EQ button
icon : Popping up BT PHONE interface.
icon =
icon =
and
button
button
icons =
and
button
icon: To enter source menu.
SWF icon : To switch SUBWOOFER mode on or off.
LOUD icon : To switch LOUD mode on or off.
2 ) When using your mobile phone with BT function to play audio/video , if it is paired
and connected with the BT device of the car A/V system, the audio of the mobile
phone will change into the car A/V system .
The BT device of the car A/V system support A2DP, if your mobile phone with BT
function support A2DP, the car A/V system can output stereo audio from your
mobile phone.
3 ) T he BT device of the car A/V system supports AVRCP, so these icons on the BT
MUSIC interface except BT Music and their corresponding buttons on control
panel or on remote control are available for audio/video playback of your mobile
phone during playback. But n o fast forward/backward functions for
/
icon
and
/
buttons, and the function of resume playback after pausing or stopping
is available only for some mobile phone .
* If you don’t want to use the BT function of the car A/V system , long press SEL
button to display BT, then use VOL knob or VOL+ and VOL- buttons to switch BT
off .
P-19
Disc/USB/Card Operation
1. Loading or unloading a disc, USB or card
1.1 Loading a disc, USB or card
To play files in a disc, press REL button on control panel to flip down the control
panel, then insert a disc with label surface up into disc slot, then flip up the control
panel and attach onto chassis till hear a click sound, finally it will automatically play.
*
CAUTION OF USING DISC
Label
surface up
1) Handle a disc by its edge, do not touch the surface of play side.
2) Before inserting disc, wipe the disc outwards from the disc
center with a clean, soft, dry, lint-free cloth. Do not use solvents
/thinner such as petrol/benzine, cleaner.
3) After taking a disc out of disc slot, put the disc inside disc case to
keep it clean.
4) Do not stick paper or tape on the disc surface of play side. If
there is glue (or analog) on the disc surface, must wipe it up
before using.
To play files in a USB, firstly open USB port cover, then insert USB storage into
USB port, and then it will play files in the USB automatically.
IR
RE L
MU TE
/M OD
MI C
PU SH
SE L
EQ
+
VO L
-
CH 1~ 6
AU X
PA IR
US B
BN D
To play files in a card, firstly press REL button to flip down control panel, then
hold the left part of the control panel to push it rightwards and pull it to you to
remove it, and then insert the card into card slot till hear a click sound, and then
attach the control panel onto chassis again, by now it will play files in the card
automatically .
Label side
facing upward
Press in till heard a “CLICK”
P-20
1. 2 Unloading a disc, USB or card
To unload the disc in disc slot, use STOP button to stop playback and then press
REL button to flip down the control panel, then press EJECT button to eject disc ,
then remove it.
To pull away the USB storage, use STOP button to stop playback, then you can
remove the USB storage.
To unload the card in card slot, use STOP button to stop playback, then press
REL button to flip down the control panel and then hold the left part of it to push
right wards and pull it to you to remove it, and then you can push the card for release
it and then pull it out of the card slot.
Press in till heard a “CLICK”
Remove the memory card
* During MP3/WMA playback, the information of file, folder, title, artist and album
will be scrolling on LCD display. As long as the current playing MP3/WMA music
contains relevant ID3 tag information in version 1.0/2.0 format, the 3 items
underlined above will be scrolling on LCD display; otherwise, they will not
* The supported max. Memory size of USB: 32GB
The supported max. Memory size of card: SD-16GB; MMC-2GB
* There is ESP function for all formats of discs.
2. Popping up Function Icons-board
2.1 Function Icons-board of Digital Video/VCD/MPEG4/Image/MP3/WMA
During Digital Video/VCD/MPEG4/Image playback, tapping any place on touch
screen can pop up Function Icons-board 1 as next page, then tap
icon to pop
up Function Icons-board 2 as next page.
During MP3/WMA playback, tapping any place except folder area, track area and
MP3/WMA&Image&MPEG4 icons can pop up Function Icons-board 1 same as one
of Digital Video/VCD/MPEG4/Image, then tap
icon to pop up Function Iconsboard 2 same as one of Digital Video/VCD/MPEG4/Image.
[MP3]
ITLE / SONG:
WMA
Mp3
Folder area
001
002
003
TRACK
03 /
001
002
003
004
005
006
007
008
MP3/WMA icon Image icon MPEG4 icon
P-21
Track area
The Function Icons-boards display as follows:
Function Icons-board 1
Function Icons-board 2
* Some icons on the Function Icons-boards descript as follows:
: Same as MUTE button.
: Same as EQ button.
: Same as VOL- button or rotating
VOL knob with anti-clock wise.
: Same as CLK button.
: Same as VOL+ button or rotating
VOL knob with clock wise.
: Poping up source Menu.
: Poping up Function Icons-board 2.
: Same as long pressing EQ button.
: Same as SW button.
: Poping up Function Icons-board 1.
: To redial the last dialed number.
: To pop up BT PHONE interface.
2.2 CD interface
During CD playback, the CD interface displays as follows:
* Some icons on the CD interface descript as follows:
: Poping up source Menu.
: Same as VOL+ button or rotating
VOL knob with clock wise.
EQ : Same as EQ button.
SWF : Same as SW button.
: Same as VOL- button or rotating
VOL knob with anti-clock wise.
: Same as MUTE button.
LOUD : Same as long pressing EQ button.
Icon : press it to pop up BT PHONE interface
P-22
3. Function of controls on the touch screen/main unit/remote control
1.
icon or button
During playback, use it to pause playback; in pause mode, use it to resume playback.
In CD interface, the icon displays as
2.
.
icon or button
During Digital Video/VCD/CD/MP3/WMA playback, tapping or pressing it pre-stop
or pause playback; in pre-stop or pause mode, use
icon or button to resume
playback.
During playback, tapping or pressing it twice to fully stop playback; in fully stop
mode, use
icon or button to start playback from the beginning of the media.
During MPEG4/image playback, use
follows:
icon or button to display root menu as
[MP3]
ITLE / SONG:
WMA
TRACK
03 /
001
002
Mp3
Folder area
001
003
004
005
002
003
Track area
006
007
008
MP3/WMA icon Image icon MPEG4 icon
During MP3/WMA playback, the root menu above displays all the time.
When displaying root menu, use < or > button to highlight the current chapter/
track, the current folder or the kind icons.
*
If there are no track /chapter for a kind icon, you can’t highlight the kind icon.
When highlighting a kind icon, press ENTER button to enter it.
When highlighting the current folder, use v or ^ button to highlight other folders
and then press ENTER button to enter it.
When highlighting the current track, use v or ^button to highlight other tracks and
then press ENTER button to play it.
*
For image, after highlighting a track, press ENTER button to display only the highlighted track; press >|| button to display all tracks step by step from the highlighted
track.
*
Tapping folder icon, track icon or kind icon can execute the operation above.
3.
/
icons or buttons
During playback, continuously tapping
or
icon or continuously pressing
or
button can fast backwards or forwards at the following multiple of normal
P-23
speed: x2, x4, x8, x20, x1.
During fast playback, use
icon or button to resume normal playback.
For image files, no this function.
4.
/
icons or buttons and < /> buttons
During playback, use one of them to play previous or next chapter/track.
During playback, continuously long touching < or > button on control panel can
fast backwards or forwards at the following multiple of normal speed: x2, x4, x8,
x20, x1.
5. Number buttons
During Digital Video/VCD(PBC OFF)/MPEG4/Image/CD/MP3/WMA playback,
use number buttons to input chapter/track SN. , then it will play or display it.
To input a chapter/track with an SN that is equal to or bigger than 10, use the 10+
button to input the digit in ten s place and then use 0-9 button to input the digit
in units order.
I.e. 10+ ~ 1 = 11 (number 11 chapter/track will be displayed/played.)
During VCD playback, when it is in PBC ON mode, the number buttons are disabled.
6.
MENU
PBC icon and MENU button
During Digital Video playback, use MENU icon or button to display the current
chapter list, then use direction buttons to select your desired chapter and then
press ENTER button to play it.
For VCD, MENU button is disabled, track list is displayed on the monitor screen
by pressing TITLE/PBC button or tapping MENU
icon.
PBC
For MPEG4/image, MENU button and MENU
icon are disabled, root menu is displayed
PBC
on the monitor screen by pressing
button or tapping
icon.
MENU
For MP3/WMA, MENU button and PBC icon are disabled, root menu displays on
the monitor screen all the time. Root menu of MP3/WMA is same as the one of
MPEG4/image.
For CD, MENU button is disabled.
7.
icon and TITLE/PBC button
During Digital Video playback, use TITLE/PBC button to display title list; then use
direction buttons to select your desired title and then press ENTER button to open
the chapter list of the title; then use direction buttons to select your desired chapter
and then press ENTER button to play.
*
You can also tap a desired title and then chapter to play.
MENU
PBC
During VCD playback, use MENU
icon or TITLE/PBC button to switch PBC mode on
PBC
or off. When PBC mode is switched on, it will play from the beginning of media till
it displays a track list. When a track list is displayed, use the number buttons to
select your desired track to play.
MENU
For MP3/WMA/MPEG4/image, PBC
icon and TITLE/PBC button are disabled.
For CD, the TITLE/PBC button is disabled.
P-24
8.
icon and GOTO button
For Digital Video/MPEG4/VCD/image/MP3/WMA, you can use
, , ,number
and ENTER icons or GOTO, <, >, number and ENTER buttons to select a chapter
/track or from a playback time point to play.
During playback, tap
icon or press GOTO button to display changeable
playback information bar as follows:
Digital Video:
MPEG4:
VCD:
Image:
MP3/WMA:
* During playback, tapping
as follows:
icon can also display the Goto Function icons-board
When displaying the changeable playback information bar, use
/
icon or
< or > button to highlight title SN.(only for Digital Video) , chapter/track SN. or
elapsed time of current chapter/track(disabled for image).
When highlighting title SN. or chapter/track SN. , use number icons or buttons to
input desired SN. of title or chapter/track, then use ENTER icon or button to play
the selected chapter/track.
When highlighting elapsed time of current chapter/track(disabled for image), use
number icons or buttons to input desired playback time point for the playback time
of the whole media for Digital Video/VCD and of the current chapter/track for
MPEG4/MP3/WMA, then use ENTER icon or button to play from the playback time
point.
For CD, GOTO button is disabled.
9.
icon or ZOOM button
During Digital Video/VCD/MPEG4/image playback, use
icon or ZOOM button
to switch zoom mode between ZOOM 2, ZOOM 3, ZOOM 4, ZOOM ½, ZOOM 1/3,
ZOOM 1/4 and ZOOM OFF.
When zooming in video/image, use direction buttons to move video/image
upwards, downwards, rightwards or leftwards.
When not zooming in image, direction buttons can switch on 4 fixed rotated
angles between >=90 deg cw, <=90 deg ccw, ^=UP-DOWN and LEFT-RIGHT.
P-25
For MP3/WMA,
icon and ZOOM button are disabled.
For CD, the ZOOM button is disabled.
10. OSD icon or button
During Digital Video /VCD /MPEG4/Image/MP3/WMA playback, use OSD icon or
button to display playback information bar as bellows:
Digital Video :
MPEG4:
VCD:
Image:
MP3/WMA:
For CD , OSD button is disabled.
11.
icon or REPEAT button
During Digital Video playback, use
icon or REPEAT button to switch repeat
mode between REP CHAPTER, REP TITLE, REP ALL and REP OFF.
During VCD(PBC OFF)/CD playback, use
icon or REPEAT button to switch
repeat mode between R E P 1 , REP ALL or REP OFF.
P-26
During MP3/WMA/MPEG4/image playback, use
icon or REPEAT button to
switch repeat mode between REP1,REP FOLDER(or DIR),REP ALL or REP OFF.
During VCD(PBC ON) playback,
icon and REPEAT button are disabled.
12.
icon or RDM button
During Digital Video/VCD(PBC OFF)/CD/MP3/WMA playback, tapping
long pressing RDM button switches random mode on or off.
For MPEG4/image/VCD(PBC ON) playback,
13.
icon or INT button
During VCD/CD playback, tapping
intro mode on or off.
icon or
icon and RDM button are disabled.
icon or long pressing INT button switches
For Digital Video/MP3/WMA/MPEG4/image,
icon and INT button are disabled.
icon or button
14 .
During Digital Video playback, use
icon or button to switch between audio
tracks (depending on the current playing media).
icon or button to switch audio channels between
During VCD /CD playback, use
MONO L, MONO R, MIX MONO and STEREO.
For MPEG4/MP3/WMA / image,
icon and button are disabled.
15.
icon or button
During Digital Video playback, use
icon or button to switch subtitle languages
on or off(depending on the current playing media).
For VCD/MP3/WMA/MPEG4/image,
For CD, the
icon and button are disabled.
button is disabled.
16. ANGLE icon or button
During Digital Video playback, use ANGLE icon or press ANGLE button to
play in different angles (depending on the current playing media).
For VCD/MP3/WMA/MPEG4/image, the ANGLE icon and button are disabled.
For CD, the ANGLE button is disabled.
P-27
17.
icon or SETUP button
Use
icon or SETUP button to enter Media Setup Menu for setting up all media
parameter values.
Use
icon or SETUP button to display Media Setup Menu(the default page is
SYSTEM SETUP);
Media Setup Menu has 4 pages in all. When highlighting a page, tap the aim page
icon or press > or < button to highlight another page;
After selecting a page, tapping the aim item icon or press ^ or v button to highlight
a setup item in the selected page;
After selecting a setup item, tapping the aim value; or press > button to enter the
setup item, then press v or ^ button to select a desired value, finally press ENTER
button to confirm it.
After finishing setting, tapping EXIT icon or press SETUP button to exit Media
Setup Menu to resume normal playback.
Description of the 4 pages:
1) SYSTEM SETUP
SYSTEM SETUP
TV SYSTEM
SCREEN SAVER
TV TYPE
PASSWORD
RATING
DEFAULT
EXIT
TV SYSTEM
This setup item is for setting up video system in NTSC, PAL or AUTO .
If you set a non-matched video system for playing a video, the playing video will
display white-black or flash.
SCREEN SAVER
This setup item is for switching screen saver on or off.
TV TYPE
This setup item is for setting up video display size.
P-28
(1) 4:3 PS: Choose this item when connecting a monitor with 4:3 screen. When
playing video with 16:9 size, the left and right part of video will be cut out, and
video will display in full screen.
(2) 4:3 LB: Choose this item when connecting a monitor with 4:3 screen. When
playing video with 16:9 size, the top and bottom part of the monitor screen will
be turned into a black square .
(3) 16:9: Choose this item when connecting a monitor with 16:9 wide screen.
PASSWORD
This setup item is for locking or unlocking parental control. The default mode
is locked. The default unlocking password is 0000.
To lock or unlock parental control:
(1) Highlight PASSWORD item and then press > or ENTER button to enter it;
(2) Input password 0000;
(3) Press ENTER button to confirm, then it will unlock or lock parental control.
*
Remove th e section of the PASSWORD of the User Manual to keep this sensitive
information confidential.
RATING
This setup item is for setting a new rating level of parental control.
(1) First highlight PASSWORD item to see whether parental control is locked or not.
If it is in locked mode, unlock parental control referring to PASSWORD above.
(2) Highlight RATING item and press > or ENTER button to enter it, then use ^ or v
button to select your desired rating level, and then press ENTER button to
confirm.
(3) Highlight PASSWORD item again and then press > or ENTER button to enter it,
then input password 0000, and press ENTER button to lock parental control
again.
DEFAULT
This setup item is to change all parameter back to the default factory values.
2) LANGUAGE SETUP
LANGUAGE SETUP
OSD LANGUAGE
AUDIO LANG
SUBTITLE LANG
MENU LANG
EXIT
P-29
OSD LANGUAGE
This item is for selecting the type of language displayed on the screen except for
subtitle language and menu language(depending on current playing media).
AUDIO LANG
This item is for selecting the type of audio language(depending on current playing
media).
SUBTITLE LANG
This item is for selecting the type of subtitle language(depending on current
playing media).
MENU LANG
This item is for selecting the type of menu language(depending on current playing
media).
3) VIDEO SETUP
VIDEO SETUP
BRIGHTNESS
CONTRAST
HUE
SATURATION
SHARPNESS
EXIT
BRIGHTNESS
For adjusting brightness of video output.
CONTRAST
For adjusting contrast of video output.
HUE
For adjusting hue of video output.
SATURATION
For adjusting saturation of video output.
SHARPNESS
For adjusting sharpness of video output.
P-30
4) DIGITAL SETUP
DIGITAL SETUP
DYNAMIC RANGE
EXIT
DYNAMIC RANGE
This item is for adjusting linear compression ratio. If you set it to FULL,
Peak-to-Peak value of audio signal is minimum; if you set it to OFF, Peak-to
-Peak value is maximum.
P-31
*
Region Code
If you insert a disc into the disc slot and REGION ERROR is displayed, the car
multi-media system can not play the disc. The reason is that the region codes
of the car multi-media system and the used disc do not match each other.
Appendix: Region code of D igital Video
Motion Picture Association of America (MPAA) divided the world into 6 regions, and
gave every region a region code for locking and unlocking D igital Video playback.
Basically, a coded D igital Video player can play only the discs if its region code is the
same as the code of the D igital Video player. Otherwise, it cannot play the disc.
Please note that only the D igital Video discs and D igital Video players produced by
the 8 biggest film-making companies of America impose this restriction. The D igital
Video discs and D igital Video players not produced by the 8 biggest film - making
companies of America are not restricted by the rule of region code. Generally, they
are called Free Region Code or Full Region Code.
The problems caused by area code inconsistency has motivated the production of
unlocked version D igital Video players and recodable D igital Video players .
Region codes and the countries or areas represented by region codes are as follows:
Region 1: America, Canada, East-Pacific Inlands;
Region 2: Japan, West Europe, North Europe, Egypt, South Africa, Middle East;
Region 3: South-east Asian countries include Taiwan, Hong Kong, South Korea,
Thailand, indonesia, etc.;
Region 4: Australia, New Zealand, Central South America, South Pacific Inlands;
Region 5: Russia, Mongolia, Indian Peninsula, Middle Asia, East Europe, North
Korea, North Africa, North-west Asia etc.;
Region 6: China mainland.
The 8 biggest film - making companies of America are as follows:
1. WarnerBros;
2. Columbia;
3. 20thCenturyFOX;
4. Paramount;
5. Universal;
6. UA(UnitedArtist);
7. MGM(MetroDogwynMayer);
8. WaltDisney
P-32
*
Parental Control
Q: After inserting a Digital Video disc into the disc slot, if a dialogue box pops up
and asks you to input a password, what should you do ?
A: The playing disc is locked by a rating level of parental control. If the current
rating level of parental control of the Digital Video player is lower than the one
of current disc, you must input the correct password of parental control to
unlock the parental control and enter a rating level equal to or higher than one
of the current disc in order to play the disc.
*
For factory preset password of parental control of Digital Video player, please
see the part of Media Setup Menu.
Appendix: Parental Control
Parental Control function of a Digital Video player can control playback of
movie ratings on a disc. You can set the Digital Video player to be a certain
rating level of parental control using the Media Setup Menu. If the rating level
of parental control of a disc is higher than the one of the Digital Video player,
the Digital Video player cannot play the disc.
The Digital Video movie can be designed so that the Digital Video player can
play different versions of content of a particular movie according to the different
rating levels of parental control. Depending on the D igital Video features , the
scenes that are not suitable for children will be cleared or replaced by suitable
scenes automatically.
The rating levels of Parental Control are as follows:
1
2
3
4
5
6
7
8
P-33
Kid Safe
G
PG
PG 13
PG R
R
NC 17
Adult
AV IN operation
An external AV system can use the car AV system as monitor and amplifier.
1. Use an AV cable to make the car AV system and the external AV system connected
through the AUX IN jack on control panel of the car AV system and the AV Out jacks
of the external AV system.
IR
REL
MUTE
/MOD
MIC
PU SH
SEL
EQ
+
VO L
DOM
-
CH1~6
AUX
PAIR
BND
USB
VIDEO IN (yellow)
RCH IN (red)
LCH IN (white)
2. Play the external AV system, then use MODE button or Source Menu to enter AV
IN mode for the car AV system. By now, the program played by the external AV
system can be output through the monitor of the car AV system and the speakers
connected to the car AV system.
*
The icons on the AUX interface descript as follows:
: Popping up Source Menu.
: Same as VOL+ button or rotating
VOL knob with clock wise.
: Same as VOL- button or rotating
VOL knob with anti-clock wise.
: press it to pop up BT PHONE interface
EQ : Same as EQ button.
: Same as MUTE button.
SWF : Same as long pressing SW button.
LOUD: Same as long pressing EQ button.
3. In AV IN mode, you can use SEL, +, -, VOL, MUTE, EQ , SW and LOUD buttons
or icons to adjust audio and video.
P-34
REAR VIEW CAMERA
The car AV system can make you look at the actual status behind your car when
you change the gear level to the back position.
1. Use an video cable to make the car AV system and the rear view camera connected through the REAR CAMERA INPUT jack in the rear cabinet of the car AV
system and the VIDEO OUTPUT jack of the rear view camera.
Make the REAR CAMERA SWITCH line in the rear cabinet of the car AV system
connected to (B+)12V power supply.
2. When you change the gear level to the back position, the screen of the car AV
system will display the actual status behind your car.
*
Note : the external monitor can not display the actual status behind your car.
P-35
Troubleshooting
Please read the user manual carefully before using the car A/V system. If you have any
difficulty using this car A/V system, refer to the troubleshooting guide . If you are still
unable to resolve the problem after using all the suggestions, please contact your dealer
or an authorised service centre .
*
*
NO PICTURE, SOUND
Ensure that the power switch is on.
Ensure that the power cord is not damaged or the fuse is not blown.
*
*
*
NO SOUND BUT HAVE PICTURE
Ensure that the player ’s audio output is properly connected to the speaker ’s audio
input.
Check whether the audio connector is damaged.
Check whether you have turned down the volume.
Ensure that the audio is not in MUTE mode.
*
BLACK AND WHITE PICTURE OR SCREEN ROLLING
Ensure that you have set right mode of video system (e.g. PAL, NTSC).
*
*
*
*
FLAWS OF PICTURE OR SOUND
Check whether disc is scratched or stained.
Check whether AV connector and output terminal is stained.
Check whether there is condensation inside the lens. If so, power on the player and do
not work for an hour or so, then try again.
*
DISPLAYS: NO DISC OR BAD DISC
Ensure that you have inserted a disc into the disc slot.
Check whether disc is inserted with label side upwards.
Check whether disc is bent.
Check whether disc is stained or scratched badly.
Ensure that disc format is compatible to the player.
Ensure that temperature inside the car is not too high. If so, cool off until the ambient
temperature returns to normal.
Insert another disc into the disc slot.
*
*
*
REMOTE CONTROL IS INSENSITIVE OR DOES NOT WORK
Check whether the lithium cell of the remote control is powerful and working properly.
Direct the IR emitting window of the remote control to the IR sensor of main unit.
Check whether there are some obstacles between remote control and main unit.
*
*
*
SOME FUNCTION BUTTONS DO NOT WORK
Turn off ACC power, then turn on again.
Reset unit to zero, then turn on again.
Remove control panel from chassis, reattach it onto the chassis and then turn it on again.
*
*
RADIO DOES NOT WORK
Check whether antenna cable is connected firmly.
Manually tune for a station.
*
*
*
*
*
*
P-36
Specification
General
Power Supply Requirement..................................................DC 12V
Current consumption........................................................15A MAX.
Output Power....................................................................4 x 25 W
Audio
Signal Output ............................................................ 2ch&4ch line out
Frequency Response................................................... 20 Hz - 20 KHz
S/N Ratio ........................................................................... 90 dB (JIS)
Wow and Flutter ............................................ Below measurable limits
TFT Monitor
Monitor Screen Size ......................................................4.3 Inch Wide
Color System ..................................................................... NTSC/PAL
D isc /USB/Card
Compatible Format. . .. D igital Video /MPEG4/VCD/IMAGE/MP3/WMA/CD
Radio
FM
Frequency range.............................................87.5MHz - 10 7 . 9 MHz
Usable sensitivity..................................................................15dBu
I.F Frequency...................................................................10.7MHz
AM
Frequency..........................................................5 30 KHz - 1 71 0KHz
Usable sensitivity..................................................................40dBu
I.F Frequency.....................................................................450KHz
TV
TV System ........................................................ NTSC/PAL/SECAM
TV Sensitivity ......................................... 45dB u V@CH25 in average
BT :
B T specification .............................................................. V1.2 Class 2
B T profile supported ............................................ Headset, Handsfree
and A2DP & AVRCP profiles
Range of frequency ................................................. 2.4GHz Spectrum
NOTE:
Specification and design are subject to modification, without notice,
due to improvements in technology.
P-37
P-38
P-39
P-40
P-41
D
C
B
A
5
BACK_V
CVBS
AGND
AGND
AGND
AGND
R22
R23
R24
R25
SDA
SCL
VOD18
VGNDDGND
5
AGND
AGND
L1 2.7uH
C2
330p
L4 2.7uH
AGND
R1
C3
330p
R7
0 BACK_V_
0 CVBS_
S_C
S_Y
AGND
4
L2 2.7uH
C5
680p
L3 2.7uH
AGND
R3
C6
330p
R5
C9
AGND
VDD33_IO
C8
AGND
AVDD33
C12
U1
SAR10
SAR11
SAR00
SAR01
IR1
CPUINT/RS232TX/VPWMP/DDCSDA
RSTB
SDA
SCL
LVCLK
LVC0
LVC1
LVC2
LVC3
LVC4
LVC5
LVC6
LVC7
GPD0
GPD1
GPD2
GPD3
SOYIN
ACR1
ACR0
AY1
AY0
ACB1
ACB0
C11
3
4
330p
7
8
680p
105
105
330p
AGND
105
40
38
35
36
37
100
41
42
43
44
46
47
48
49
53
54
55
56
111
11
12
C1
C4
105
C7
330p
R2
75
BACK_V_
S_C_
R4
75
S_Y_
R6
75
1N4818
C10
D1
+
112
113
114
115
XCLKI
XCLKO
C19
26
27
C18
22p
1M
22p
R21
Y1
27MHz
DGND
1u/6V3
TC3
22K
33
33
R18
CVBS_
R8
NC
R19
R20
0
0
NC
NC
AGND
SPI_CLK
SPI_D
SPI_Q
SPI_CSB
8
7 RN6
6 NC
5
DGND
DGND
1
2
3
4
4
0
0
S_C_
S_Y_
VOD18
VOD18
FB3
VDD33
FB4
VDD33
DGND
601
TC6
47u/6.3
+
+
C30
104
C31
104
3
C32
104
C33
104
C29
104
TC8
601
C38
FB5
VDD18
C37
AVDD33
C36
C39
104
C40
104
C41
104
C42
VOD18
104
104
C35
VDD33_IO
C34
104
+
DGND DGND DGND DGND DGND DGND DGND DGND
601
TC7
47u/6.3
33
33
1
2
3
4
1
2
3
4
1
2
3
4
1
2
3
4
1
2
3
4
33
33
NC
33
VDD33
601
R0
R1
R2
R3
R4
R5
R6
R7
G0
G1
G2
G3
G4
G5
G6
G7
B0
B1
B2
B3
B4
B5
B6
B7
HSYNC
VSYNC
DE
PCLK
1
2
3
4
U6
NC
S*
VCC
Q
HOLD*
W*
C
VSS
D
8
7
6
5
R44 NC
SPI_CLK
SPI_D
C49 +
NC
601
R46
10K
R27
L7
R31
47K
R32
R33
C20 C21
106 105
DGNDDGND
100
+
TSC2003
DGND
6
5
4
L5 22uH
U2
IN
SW
OV GND
EN
FB
FSP3305
C23
104
R29
10K
D2
1
C22
106
DGND
1N5819
DGND
R28
5R6
J1
VLED+
VLED-
C26
102
C27
102
C28
33
DGND
VLEDVLED+
R0
R1
R2
R3
R4
R5
R6
R7
G0
G1
G2
G3
G4
G5
G6
G7
B0
B1
B2
B3
B4
B5
B6
B7
PCLK
HSYNC
VSYNC
DE
VLEDVLED+
GND
VDD
R0
R1
R2
R3
R4
R5
R6
R7
G0
G1
G2
G3
G4
G5
G6
G7
B0
B1
B2
B3
B4
B5
B6
B7
GND
PCLK
DISP
HSYNC
VSYNC
DE
AVDD
GND
X1
Y1
X2
Y2
102
1
2
3
4
5
6
7
8
9
10
11
12
13
14
15
16
17
18
19
20
21
22
23
24
25
26
27
28
29
30
31
32
33
34
35
36
37
38
39
40
C25
X1
Y1
X2
Y2
FPC40
102
Y1
X1
Y2
X2
C24
DGND
104
R30
1
2
3
DGND
+
DGND
10u/10
TC5
DGND DGND
47u/6.3
TC4
10uH
Q1
KTC3875
R26
10K
DGND
DGND
L6
VDD33
10uH
U3
33
33
1
D
C
B
A
P-42
2
TFT+5V
FB2
2
BK_EN
VDD33
PENINT
SDA
SCL
TC14
NC
DGND DGND
VDD33_IO
DGND DGND DGND DGND DGND
104
C17
104
104
FB1
C16
R10
R11
DGND
SPI_CSB
SPI_Q
R45 NC
RN5
33
RN4
33
RN3
33
RN2
33
8
7 RN1
6 33
5
R12
R13
8
7
6
5
8
7
6
5
8
7
6
5
8
7
6
5
R14
R15
R16
R17
33
33
104
104
+
AGND AGND AGND AGND
47u/6.3
TC2
3
VDD33_IO
39
59
60
61
118
119
93
94
95
96
106
107
64
65
108
109
62
63
91
92
101
102
104
105
66
67
68
69
72
73
74
75
78
79
80
81
82
83
86
87
88
89
DGNDDGND DGND
100u/6
QE0/sD0/VOD0/GPA0
QE1/sD1/VOD1/GPA1
QE2/sD2/VOD2/GPA2
QE3/sD3/VOD3/GPA3
QE4/sD4/VOD4/GPA4
QE5/sD5/VOD5/GPA5
QE6
QE7
QE8
QE9
QE10
QE11
QE12
QE13
QE14
QE15
QE16
QE17
QE18
QE19
QE20
QE21
QE22
QE23
HSO/POL/VCOM/GPB0
VSO/STH1/GPB1
DEO/INVO/STH2/GPB2
CLKO/VOCLK/GPB3
Q1H/GPB4/PWM4
LP/OEH/VCOM_I/GPB5
GCLK/CKV
GOE/OEV
STV1/sD6/VOD6/GPB6
STV2/sD7/VOD7/GPB7
RL/GPA6/DBI0/VPWMP
UD/GPA7/DRI0/VCKP/VCKN
XCLK2MC/RS232RX/VCKP/DDCSCL
PWM1
PWM2/PWMDC
PWM3/VPWMN
VFB
VFBL/VFBI
T117AD
T117AD
AGND DGND
8
7
6
5
4
3
2
1
VREF
VBAT2
PENIRQ VBAT1
SDA
GND
SCL
YA1
XA0
Y+
IN2
X+
IN1
VDD
9
10
11
12
13
14
15
16
25
50
99
110
NC1
NC2
NC3
NC4
120
121
PVD33
PVD33
1
128
VO18
VO18
77
AVDD
32
57
58
97
GND
GND
GND
GND
AVS33
AVSS
AVS33
GND
GND
VS33PWM
GNDP
GNDP
28
29
51
52
70
76
84
90
103
117
124
125
AGNDB
AGNDG
AGNDR
AGNDA
5
6
13
14
SPI_S/GPC4
SPI_C/GPC5
SPI_D/GPC6
SPI_Q/GPC7
30
31
33
34
AOL
AOR
23
24
VDD18
VDD18
VDD18
VDD18
45
71
85
98
116
126
127
VDD33
AVD33
AVD33
VDD33
VD33PWM
DVD33
DVD33
2
9
10
21
22
AVDDB
AVDDG
AVDDR
AVDDA
AVDDA
122
123
FILT
VPLL
AIL1
AIR1
AIL3
AIR3
AIL2
AIR2
15
16
19
20
17
18
D
C
DGND
+
5
FB6
TFT+5V
EC1
NC
601
TC11
S_Y
S_C
VGND
CVBS
VGND
BACK_V
DGND
PENINT
MIC
DGND
AUX_L
AUX_R
AUX_V
+
1
3
5
7
9
11
13
15
17
19
21
23
25
27
29
31
C44
104
104
C47
DGND DGND DGND
47u/16
+
D3
1N5819
TC12
47u/16
DGND DGND DGND
+
2
4
6
8
10
12
14
16
18
20
22
24
26
28
30
32
R34
4
TC10
4
+
+
104
C45
104
C46
VDD33
20
19
18
17
16
15
14
13
12
11
104
C48
VDD18
DGND DGND DGND
47u/16
TC13
4
I7
I6
I5
I4
CS2
CS1
I3
I2
I1
I0
DGND DGND
47u/16
TCH685
S0
S1
VSS
BUZ
TS
T0
T1
VDD
BK
OUT
U7
100 DGND
TFT+5V
DGND
BK_EN
SCL
SDA
VOUT
2
4
2
1
2
3
4
5
6
7
8
9
10
SEL
VOL
IR
ACC+5V
USB+5
USB_DM
USB_DP
VIN
VOUT
U4
GND/ADJ
1117-3V3
VOUT
U5
VIN
VOUT
IR
GND/ADJ
1117-1V8
DGND
+ C50
47R
TC16
104
DGND DGND
10u/16
1
3
1
3
J2
ACC+5V
L8
TC15
DGND
47u/16
FFC PLUG 16x2
B
A
5
R56
R53
R52
R51
R50
R49
R48
R47
4K7
4K7
4K7
4K7
C52
KEY_8
KEY_7
KEY_6
KEY_5
C51
472
NC
4K7
KEY_4
4K7
KEY_3
4K7
KEY_2
4K7
KEY_1
DGND
R40
1K5
1K5
R36
47K
R41
1K5
TFT+5V
R42
MIC
4
1
2
DGND
+
-
R35
VOL
6
7
3
R43
47K
SEL
MIC
VOL
DGND
DGND
470
ACC+5V
R37
82K
LED1
LED2
LED3
DGND
TFT+5V
DGND
3
DGND
R55
220
R54
220
KEY_8
KEY_7
KEY_6
KEY_5
KEY_4
KEY_3
KEY_2
KEY_1
1
2
3
4
5
6
7
8
9
10
11
12
13
14
J3
IR
R39
4K7
ACC+5V
IR
HEADER 14
IR
104
C43
ACC+5V
R38
100
10u/10
+ TC9
DGNDDGND DGND
2
2
AUX
USB
1
2
3
4
5
6
DGND
USB+5
USB_DM
USB_DP
AUX_R
AUX_V
AUX_L
DGND
1
1
D
C
B
A
P-43
OUT
GND
VCC
1
2
3
1N4148
D4
5
1
2
3
P-44
P-45
P-46
P-47
P-48
P-49
P-50
P-51
P-52
P-53
P-54
P-55
P-56
P-57
P-58
P-59
P-60
P-61
P-62
P-63
KEY1
REST
EJ
1
1
2
1
1
MCU_5V KEY1
2
4K3
R250
LED1
LED2
MCU+5V
R214
39K
R2
R1
6K8
6K8
KB_REST
KEY1
+12V
+12V
CON3
38
1
MCU+5V
2
KEY1
3
KEY2
4
5
6
7
10
11
12
36P_0.5MM_DN
13
14
15
16
A5V
19
20
21
22
23
24
25
26
27
28
USB+5V
1 KB-DET
DIN2 16
KEY1
USB_DN
2 T_RESET
VS0 17
KEY2
USB_DP
3 GND
HSO 18
RESET
HSYNC
4 SDA
K-DET 19
S_SCL
VSYNC
5 SCL
GND 20
SPI_CS
SPI_DA
KB_DET_EJ
USB+5V
USB_DN
USB_DP
TFT_LED_ON/OFF
SPI_DA
SPI_CS
DCLK
6 SCEN
+12V 21
DIN0
7 DIN7
GND 22
DIN1
8 DIN6
IR 23
DIN2
9 DIN5 LED.ON/OFF 24
S_SCL
TFT_LED_ON/OFF
KB_DET_EJ
RESET
17
18
DIP1.5MM_15PX2
IR
8
9
CON15
E-VOL
A5V
DIN3
10 DIN4
VOL 25
DIN4
11 DIN3
MCU5V 26
DIN5
12 DIN1
MIC 27
DIN6
13 DIN0
GND 28
DIN2
DIN7
14 CLK
K1 29
AUX_R
DIN3
MIC_IN
15 GND
K2 30
AUX_L
HSYNC
VSYNC
DCLK
IR
E-VOL
DIN0
DIN1
+12V
DIN4
DIN5
DIN6
DIN7
29
30
KB_REST
31
32
33
34
AUX_R
AUX_L
+12V
35
36
MIC_IN
37
P-64