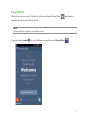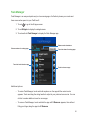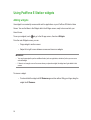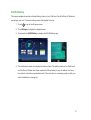
Download Using PadFone E widgets
Transcript
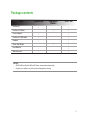
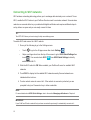
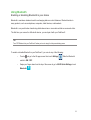
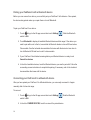
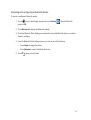
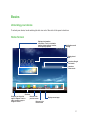
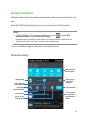
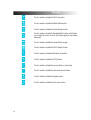
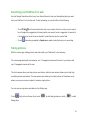
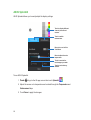
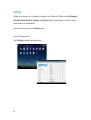
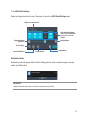
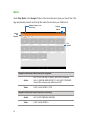
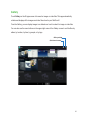
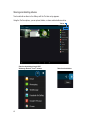
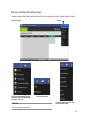
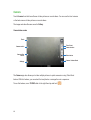
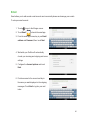
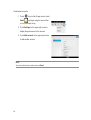
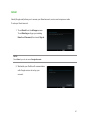
(T008) (T008P) User Manual E8642 First Edition January 2014 Copyright © 2014 ASUSTeK COMPUTER INC. All Rights Reserved. No part of this manual, including the products and software described in it, may be reproduced, transmitted, transcribed, stored in a retrieval system, or translated into any language in any form or by any means, except documentation kept by the purchaser for backup purposes, without the express written permission of ASUSTeK COMPUTER INC (“ASUS”). Product warranty or service will not be extended if: (1) the product is repaired, modified or altered, unless such repair, modification of alteration is authorized in writing by ASUS; or (2) the serial number of the product is defaced or missing. ASUS PROVIDES THIS MANUAL “AS IS” WITHOUT WARRANTY OF ANY KIND, EITHER EXPRESS OR IMPLIED, INCLUDING BUT NOT LIMITED TO THE IMPLIED WARRANTIES OR CONDITIONS OF MERCHANTABILITY OR FITNESS FOR A PARTICULAR PURPOSE. IN NO EVENT SHALL ASUS, ITS DIRECTORS, OFFICERS, EMPLOYEES OR AGENTS BE LIABLE FOR ANY INDIRECT, SPECIAL, INCIDENTAL, OR CONSEQUENTIAL DAMAGES (INCLUDING DAMAGES FOR LOSS OF PROFITS, LOSS OF BUSINESS, LOSS OF USE OR DATA, INTERRUPTION OF BUSINESS AND THE LIKE), EVEN IF ASUS HAS BEEN ADVISED OF THE POSSIBILITY OF SUCH DAMAGES ARISING FROM ANY DEFECT OR ERROR IN THIS MANUAL OR PRODUCT. SPECIFICATIONS AND INFORMATION CONTAINED IN THIS MANUAL ARE FURNISHED FOR INFORMATIONAL USE ONLY, AND ARE SUBJECT TO CHANGE AT ANY TIME WITHOUT NOTICE, AND SHOULD NOT BE CONSTRUED AS A COMMITMENT BY ASUS. ASUS ASSUMES NO RESPONSIBILITY OR LIABILITY FOR ANY ERRORS OR INACCURACIES THAT MAY APPEAR IN THIS MANUAL, INCLUDING THE PRODUCTS AND SOFTWARE DESCRIBED IN IT. Products and corporate names appearing in this manual may or may not be registered trademarks or copyrights of their respective companies, and are used only for identification or explanation and to the owners’ benefit, without intent to infringe. Table of Contents Package contents...............................................................................5 Using your PadFone E Basics..................................................................................................6 Setup Wizard.......................................................................................................7 Screen Views.......................................................................................................8 Navigating your PadFone E.................................................................................9 Making calls.......................................................................................................10 Setting up your contacts list...............................................................................10 Connecting to the world..................................................................11 Connecting to mobile networks..........................................................................11 Connecting to Wi-Fi networks............................................................................12 Using Bluetooth.................................................................................................13 Using your PadFone E Station Basics................................................................................................17 Unlocking your device........................................................................................17 Home Screen.....................................................................................................17 Touching and typing Using gestures.................................................................................18 Using the onscreen keyboard.........................................................19 Using Google voice typing..............................................................20 Using apps and widgets Using apps on the PadFone E........................................................21 Managing Apps..................................................................................................21 Launching apps.................................................................................................22 Messaging.........................................................................................................22 Surfing the web..................................................................................................22 Managing notifications.......................................................................................23 Searching your PadFone E or web....................................................................25 Taking pictures...................................................................................................25 ASUS Splendid ................................................................................................26 SuperNote ........................................................................................................27 Using apps on the PadFone E Station...........................................29 Managing Apps..................................................................................................29 Task Manager....................................................................................................33 File Manager . ..................................................................................................34 Play Store..........................................................................................................36 Settings . ..........................................................................................................38 Music .............................................................................................................40 Gallery .............................................................................................................41 Camera .............................................................................................................44 Email .............................................................................................................45 Gmail .............................................................................................................47 Maps .............................................................................................................49 Story .............................................................................................................50 SuperNote ........................................................................................................52 Using PadFone E widgets...............................................................54 Adding widgets..................................................................................................54 Task Manager....................................................................................................55 Using PadFone E Station widgets..................................................56 Adding widgets..................................................................................................56 ASUS Battery.....................................................................................................57 Package contents Item PadFone E PadFone E • PadFone E Station PadFone E Station Power adapter PadFone E USB cable Headset • • • Quick Start Guide User Manual Warranty card • • • • 2-in-1 set • • • • • • • • NOTES: • ASUS PadFone E and PadFone E Station are purchased separately. • Contact your retailer if any of the items is damaged or missing. Using your PadFone E 1 Use your PadFone E to enjoy the latest features and technologies of Android 4.3 (Jelly Bean) operating system. Do work and play on your PadFone E to fully appreciate the tons of interactive applications and features, and the seamless connectivity solutions in data sharing and communication that Android 4.3 has to offer. Basics IMPORTANT: • Before you start, ensure that you have read all the safety information and operating instructions in the User Manual that comes with the PadFone E package to prevent injury or damage to your device. • Refer to your User Manual that comes with the PadFone E package for instructions on installing the SIM card and charging your device. NOTES: • The screenshots are for reference only. Actual screens may vary on your device. • The home screen varies with the Android OS. • When upgrading the firmware of your PadFone E, do not insert into or remove from the PadFone E Station. • When turning on your PadFone E, do not insert into or remove from the PadFone E Station. • When upgrading the firmware of your PadFone E Station, do not remove the PadFone E. Setup Wizard The first time you turn on your PadFone E, you’ll see the Setup Wizard. Touch and follow the instructions to set up your PadFone device. NOTE: You can skip some of the steps and set them up later. To access it again, ������ touch to go to the All apps screen then touch Setup Wizard . Screen Views To enable/disable Auto-rotate screen, go to Settings > Display. You can also touch from ASUS Quick Settings. NOTES: • Auto-rotate function is not supported on the Home Screen and the locked screen of your PadFone E. • For more details about ASUS Quick Settings, refer to the section Managing notifications in Chapter 4. Landscape view Portrait view Navigating your PadFone E After you finish setting up your PadFone E, the Home Screen appears. At the bottom of your PadFone E, you’ll find three navigation icons , , . These icons allow you to instantly return to a previous page, jump back to the Home Screen, or launch a recent app. Icon Description Allows you to go back to the previous screen, until you are in the Home Screen. Tap to open your Home Screen. Opens a thumbnail list of your most recent apps. To launch an app, touch the thumbnail image. If you wish to remove a thumbnail app, swipe it to the left or right. Making calls To make a call: 1. Touch on the Home Screen. 2. Key ����������������������������������� in the number you wish to call. 3. Tap or to dial. NOTES: •You can also assign names to the call buttons and modify the functions of the SIM cards from Settings > Dual SIM card settings. • If there is only one SIM card installed, press 4. Tap or to dial. to end the call. Setting up your contacts list Adding a new contact: To add a new contact: 1. From the Home Screen, touch then select . 2. To save a new contact to your ASUS PadFone E, tap Device. To save a new contact to your SIM card, tap the SIM account. 3. Key in the details of the new contact, then tap Done. Importing contacts: To import contacts: 1. From the Home Screen, touch then tap > Manage contacts. 2. Touch Import/Export then tap the ��������������������������������������������������������� SIM that contains the contacts����������������������� you want to import to your PadFoneE. 3. Tap Device then tap the contacts. 4. When done, tap Import. 10 Connecting to the world Connecting to mobile networks After installing the SIM card, you are ready to use your PadFone E to make/receive voice calls or transmit/receive data. Different countries or regions may have different mobile networks available and you may have to configure your PadFone E to access these networks. To configure your Mobile networks setting: 1. Do any of the following to go to the Settings screen: to go to the All apps screen then touch Settings • Touch • Swipe your finger down from the top of the screen to go to ASUS Quick Settings then touch . . 2. From the Settings screen, touch More.... 3. Touch Mobile networks. NOTE: For more details about ASUS Quick Settings, refer to the section Managing notifications in Chapter 4. IMPORTANT: • If your PadFone E does not connect to a network, contact your mobile network carrier for assistance. • Refer to your PadFone E User Manual that ����������������������������������������������������������������� comes with the PadFone E package ��������������������������� for instructions on how to install a SIM card. 11 Connecting to Wi-Fi networks Wi-Fi wireless networking technology allows you to exchange data wirelessly over a network. To use Wi-Fi, enable the Wi-Fi feature in your PadFone E and connect to a wireless network. Some wireless networks are secured with a key or protected with digital certificates and requires additional steps to set up; others are open and you can easily connect to them. TIP: Turn OFF Wi-Fi when you’re not using it to help save battery power. To enable Wi-Fi and connect to a Wi-Fi network: 1. Do any of the following to go to the Settings screen: to go to the All apps screen then touch Settings • Touch • Swipe your finger down from the top of the screen to go to ASUS Quick Settings then touch . You can also touch Wi-Fi . from ASUS Quick Settings to directly enable/disable Wi-Fi. 2. Slide the Wi-Fi switch to ON. When enabled, your PadFone E scans for available Wi-Fi networks. 3. Touch Wi-Fi to display list of available Wi-Fi networks nearby. Secured networks are indicated with a lock icon. 4. Touch a network name to connect to it. If the network is secured or protected, you are prompted to key in a Password or key in other credentials. NOTE: For more details about ASUS Quick Settings, refer to the section Managing notifications in Chapter 4. IMPORTANT: If your PadFone E finds a network that you have connected to previously, it automatically connects to it. 12 Using Bluetooth Enabling or disabling Bluetooth in your device Bluetooth is a wireless standard used for exchanging data over short distances. Bluetooth exists in many products, such as smartphones, computers, tablet devices, and headsets. Bluetooth is very useful when transferring data between two or more devices that are near each other. The first time you connect to a Bluetooth device, you must pair it with your PadFone E. TIP: Turn OFF Bluetooth in your PadFone E when you’re not using it to help save battery power. To enable or disable Bluetooth in your PadFone E, you can do any of the following: • Touch to go to the All apps screen then touch Settings . Slide the Bluetooth switch to ON / OFF. • Swipe your finger down from the top of the screen to go to ASUS Quick Settings, touch Bluetooth . 13 Pairing your PadFone E with a Bluetooth device Before you can connect to a device, you must first pair your PadFone E to that device. Once paired, the devices stay paired unless you unpair them or turn off Bluetooth. To pair your PadFone E to a device: 1. Touch to go to the All apps screen then touch Settings . Slide the Bluetooth switch to ON. 2. Touch Bluetooth to display all available Bluetooth devices within range. If the device you want to pair with is not in the list, ensure that its Bluetooth feature is turned ON and set as Discoverable. See the technical documentation that came with the device to learn how to turn its Bluetooth ON and how to set it to discoverable. 3. If your PadFone E has finished scanning before your Bluetooth device is ready, touch Search for devices. 4. In the list of available devices, touch the Bluetooth device you want to pair with. Follow the succeeding screen instructions to complete the pairing. If necessary, refer to the technical documentation that came with the device. Connecting your PadFone E to a Bluetooth device After you have paired your PadFone E to a Bluetooth device, you can easily reconnect to it again manually, after it is back in range. To connect: 1. Touch to go to the All apps screen then touch Settings . Slide the Bluetooth switch to ON. 2. In the list of PAIRED DEVICES, touch the name of the paired device. 14 Unpairing and configuring a Bluetooth device To unpair or configure a Bluetooth device: 1. Touch to go to the All apps screen then touch Settings . Slide the Bluetooth switch to ON. 2. Touch Bluetooth to display the Bluetooth settings. 3. Touch the Bluetooth Quick Settings icon beside the connected Bluetooth device you want to unpair or configure. 4. From the Bluetooth Quick Settings screen, you can do any of the following: • Touch Unpair to unpair the device. • Touch Rename to rename the Bluetooth device. 5. Touch when you’re finished. 15 Using your PadFone E Station 2 Install your PadFone E into your PadFone E Station to extend its battery life and turn it into a tablet device. The screen view of the PadFone E Station rotates automatically when you hold your PadFone E Station horizontally to vertically, and vice versa. IMPORTANT: • Before you start, ensure that you have read all the safety information and operating instructions in the User Manual that comes with the PadFone E package to prevent injury or damage to your device. • Refer to your PadFone E Station Quick Start Guide for instructions on inserting your PadFone E into the PadFone E Station. NOTES: • The images used are for reference only and may look different on your PadFone E Station. • The Home Screen may update and change with the version of the Android OS. Landscape view 16 Portrait view Basics Unlocking your device To unlock your device, touch and drag the lock icon out of the circle to the open locked icon. Home Screen Displays local weather information. Touch to customize weather widget settings, location, and frequency updates. Notification area & Settings Displays local date Launches Google Text search Launches Voice search Shortcuts Returns to the previous screen Displays your favourite apps or widgets. Touch to add or remove an app or widget to the bar. Displays recent apps Returns to the Home Screen 17 3 Touching and typing Using gestures Use your fingers to launch apps, move icons, select menu items, press buttons, type on the onscreen keyboard, and perform other useful gestures on your PadFone E device’s touchscreen. To key in or type something, touch the part where you need to type and the onscreen keyboard will pop up. The following table describes more useful gestures. Gesture 18 Description Pinch Place two fingers on the screen and spread them apart to zoom in and bring them together to zoom out. This gesture can be used in selected apps, including Maps, Gallery, and Browser. Drag Touch and hold an icon or item then, without lifting your finger, move your finger on the screen to move the icon or item. Touch and hold Touch and hold an item until an action occurs. Swipe or slide Quickly move your finger across the screen in one sweeping motion. Using the onscreen keyboard You can type text using the onscreen keyboard. In most apps, the onscreen keyboard appears automatically when needed. In other apps, you can touch where you need to type to open the onscreen keyboard. Touch to turn caps lock ON, Fixed ON, or OFF. When ON, the alphabet keys are shown in capital letters Touch and hold to show input methods and keyboard settings Touch for back space Touch to toggle between numeric pad with special characters and QWERTY keyboard While typing on the onscreen keyboard, the keyboard displays suggestions that may match the text that you need. Touch a suggestion to use it. 19 Using Google voice typing Google voice typing uses Google’s speech-recognition technology, that converts spoken words into text input. You must be connected to the Internet when using this feature. As you speak, the converted text is underlined and you can continue speaking to keep it, or you can delete it. To use Google voice typing: 1. Touch text field where you want to type text. 2. Depending on the app you’re using, you can do either of the following: • If you see the microphone icon beside the text field, touch it. • If the onscreen keyboard is open, touch . 3. When you see the microphone icon, speak clearly what you want to type. When you pause, Google voice typing transcribes the text you spoke and displays it on the text field. TIPS: 20 • Say “period”, “comma”, “question mark”, or “exclamation point” to type these punctuation marks. • Touch the Backspace key to delete the underlined text. Using apps and widgets You can seamlessly use apps between your PadFone E and PadFone E Station. 4 NOTES: • PadFone E and PadFone E Station are purchased separately. • Some downloaded apps may work on your PadFone E but may not work on your PadFone E Station, and vice versa. Using apps on the PadFone E Managing Apps App shortcut You can create shortcuts for your favorite apps on your PadFone E Home Screen. 1. Touch to go to the All apps screen. 2. From the All apps screen, touch and hold the icon of the app you wish to move then drag and place the app on the Home Screen. App info You can view the detailed app information while you are creating a shortcut for the app. While holding an app from the All apps screen to the Home Screen, the App info will appear on the top of the Home Screen page. Drag the app to App info to display its detailed information. 21 Launching apps Touch to display all your apps. The main apps screen is where you can see all your apps. From the main apps screen you can: • Touch an icon to launch an app. • Swipe the screen to display more apps. • Drag an app icon into the Home Screen. • Explore widgets. • Get more apps from the Play Store. Messaging Touch to compose and send a message. Surfing the web Touch 22 to launch the browser and surf the web. Managing notifications Notifications alerts you about new messages, calendar events, media service connections, alarms, and more. Enable the ASUS Quick Settings app to see more and do more from your Notifications area. NOTES: then select ASUS • If ASUS Quick Settings is not enabled, go to the All Apps screen, touch customized settings and enable Use ASUS Quick Setting. • Depending on your sound settings, you will also hear a sound at the same time a notification icon is displayed on the top left of your screen - everytime a new notification arrives. To see your notifications, swipe your finger down from the top of the screen. ASUS Quick Settings Swipe sideways to see more options Display settings Slide to adjust the screen brightness Wi-Fi settings Touch to turn on / off Automatic brightness Clear notifications Launch AudioWizard Launch Miracast Touch to get into Settings screen Touch to respond to a notification or swipe sideways to dismiss 23 Description Touch to enable or disable the Wi-Fi connection. Touch to enable or disable the Mobile Data function. Touch to enable or disable the Smart Saving function. Touch to enable or disable the Reading Mode function, which allows you to adjust the screen or text of your chosen apps for your reading enjoyment. Touch to enable or disable the Instant Dictionary app. Touch to enable or disable the Wi-Fi Hotspot function. Touch to enable or disable the Bluetooth connection. Touch to enable or disable the GPS function. Touch to enable or disable the sound, vibrate, or mute mode. Touch to enable or disable the auto-rotate screen feature. Touch to enable or disable the Airplane mode. Touch to enable or disable the Auto-sync function. 24 Searching your PadFone E or web Use the Google Search bar at the top of your Home Screen to help you find anything that you need from your PadFone E or from the web. To start searching, you can do either of the following: • Touch on the search bar then key in your search item. As you key in your search item, Google lists suggestions that may match your search, touch a suggestion to search for it immediately or touch the arrow beside it to add the term into the search field. • Touch then when prompted to Speak now, speak clearly the item you’re searching. Taking pictures With the camera app, taking pictures and videos with your PadFone E is fun and easy. The camera app works with two cameras, one 1.2 megapixel camera at the front of your device and one 13 megapixel camera at the rear. The front camera allows you take pictures and videos, while the rear camera allows you to take high resolution pictures and videos. The rear camera also allows you to take pictures in Panorama mode, where you can pan across a subject to create a single picture. You can view your pictures and videos in the Gallery app. Touch on the Home Screen, then touch to start taking pictures or touch to start taking video. 25 ASUS Splendid ASUS Splendid allows you to easily adjust the display settings. Touch to display different views of pictures and screens Touch to switch between tabs Move to turn on/ off the Vivid Mode Move to adjust the color temperature Touch to reset to the last changes you made Touch to set to factory defaults To use ASUS Splendid: 1.������ Touch to go to the All apps screen then touch Splendid . 2. Adjust the screen color temperature and contrast through the Temperature and Enhancement taps. 3. Touch Done to apply the changes. 26 SuperNote SuperNote is a convenient app used for writing and painting on your PadFone E. You can take notes, send instant messages, draw sketches, create e-cards with audio recordings or diaries with video, and a lot more. To launch SuperNote, touch on the Home Screen. Selection Notebooks, Bookmark, Timestamp, All Pages Settings Show locked notebook, Import Notebook List by name / by last modified Add new notebook All your notebooks 27 Using SuperNote To create a new notebook: 1. Touch Add a new notebook. 2. Key in a name for the file and choose the notebook type to start writing on the page. The following screen describes the SuperNote screen features on your PadFone E. Save Goes back to SuperNote’s main page New page Settings Paste, Recognize, Baseline Return Previous page Space Page number Next page Backspace NOTE: For more details on using SuperNote on your PadFone E, tap Tutorial. 28 Using apps on the PadFone E Station Managing Apps App shortcut You can create shortcuts for your favorite apps on your PadFone E Station Home Screen. 1. Touch to go to the All apps screen. 2. From the All apps screen, touch and hold the icon of the app you wish to move then drag and place the app on the Home Screen. App info You can view the detailed app information while you are creating a shortcut for the app. While holding an app from the All apps screen to the Home Screen, the App info will appear on the top of the Home Screen page. Drag the app to App info to display its detailed information. 29 Removing App shortcuts from Home Screen You can remove app shortcuts from your PadFone E Home Screen. The original app will remain in your All apps screen. To remove an app in your Home Screen: 1. Touch and hold an app on your Home Screen until X Remove appears. 2. Drag the app to X Remove to remove it from the Home Screen. 30 App Folder Create folders to organize your applications and shortcuts on your PadFone E Station Home Screen. 1. On your PadFone E Station’s Home Screen, touch and drag an app or shortcut onto another app and a folder will appear. 2. Touch the new folder and tap Unnamed Folder to rename the folder. 31 Recent Apps The Recent Apps screen allows you to view a list of app shortcuts based from your recently launched apps. Using the Recent Apps screen, you can easily go back to or switch between the apps you recently launched. 1. Touch at the bottom of the Home Screen. 2. Swipe to the left or to the right to view Recent Apps. Swipe a recent app up or down to remove from the list. 3. Touch and hold a recent app to display the menu. Select to remove app from list or display app information. 32 Task Manager ASUS Task Manager displays a list of currently running utilities and apps and their usages in percentages on your PadFone E Station. 1. Touch to go to the All apps screen. 2. Touch WIDGETS to display the widgets menu. 3. Touch and hold ASUS Task Manager to display the ASUS Task Manager box on the Home Screen. 4. Touch and hold the widget to display the sizing brackets. Pull the sizing bracket upward or downward to show the complete list of tasks. 5. Tap beside each running app to close the app. Touch Close All to close running apps all at once. 33 File Manager File Manager allows you to easily locate and manage your data either on the internal storage device or the connected external storage devices. To access the internal storage device: 1. Touch to go to the All apps screen. 2.������ Go to All Apps screen, touch ������ File Manager, then go to My Storage. 3. The Internal Storage (/sdcard/) and any connected external storage devices (/Removable/) are displayed on the left panel. Touch the source icon on the left panel to display the content list, and touch to select an item. 34 4. Touch the Return folder icon to return to the root directory of My Storage. To copy, cut, delete, or share files: Tick the file you wish to copy, cut, share, or delete and touch the action icon found at the tool bar on the upper right corner of the File Manager screen. You can also tick the file and drag/drop it to your desired destination ������� folder. 35 Play Store Access lots of fun games and tools in the Play Store using your Google account. If you don’t have a Google account, please create one. To access the Play Store: 1. Touch to go to the All apps screen. 2. From the All apps screen, tap Play Store . 3. You need a Google account to access Google Play. If you don’t have an existing account, tap New. 4. Type your Email and Password to Sign in if you already have an account. 36 5. After signing in, you can start downloading and adding apps to your device from the Play Store. NOTES: •You cannot restore uninstalled apps, but you can login with the same Google account and download them again. • There are both free and paid applications in Google Play Store . 37 Settings Settings screen allows you to configure the settings of your PadFone E Station, including Wireless & networks, Device, Personal, Accounts, and System settings. Touch the tabs on the left to switch screens and do the configurations. There are two ways to go to the Settings screen. From the All apps screen: Touch Settings to display the settings menu. 38 From ASUS Quick Settings: Swipe your finger down from the top of the screen to launch the ASUS Quick Settings panel. Display local date and time Quick Setting Adjustment Panel. Touch the individual icons to turn on/ off the function. Brightness Manual Adjustment Auto Brightness Wi-Fi settings Launch AudioWizard Launch Miracast Settings Menu Notification Panels Notification panels will appear under the Quick Setting panel for alerts or updates in apps, incoming emails, and utillity status. IMPORTANT: Swipe a notification to the right or to the left to remove item from the list. 39 Music Touch Play Music in the Google Folder on the Home Screen to play your music files. This app automatically collects and lists all the audio files stored in your PadFone E. Display all music or on device only Settings Search Library and Playlists File options Supported audio and video formats for playback Audio AAC LC/LTP, HE-AACv1 (AAC+), HE-AACv2 (enhanced AAC+), AMR-NB, AMR-WB, MP3, FLAC, MIDI, PCM/WAVE, Vorbis, WAV a-law/mu-law, WAV linear PCM Video H.263, H.264, MPEG-4, VP8 Supported audio and video formats for encoding 40 Audio AAC LC/LTP, AMR-NB, AMR-WB Video H.263, H.264, MPEG-4 Gallery Touch Gallery on the All apps screen to browse for images or video files. This app automatically collects and displays all the images and video files stored in your PadFone E. From the Gallery, you can display images in a slideshow or touch to select for image or video files. You can also use the menu buttons on the upper right corner of the Gallery screen to sort the files by album, by location, by time, by people, or by tags. Gallery settings Quick launch camera 41 Sharing and deleting albums Touch and hold an album in the Gallery until the Tool bar on top appears. Using the Tool bar options, you can upload, delete, or share selected albums online. Tool bar Share the selected album through ASUS Webstorage, Bluetooth®, Gmail®, and more 42 Delete the selected album Sharing, deleting, and editing images Touch an image in the Gallery and use the tool bar on the upper right corner to share, delete, or edit a selected image. Share the selected album through Amazon Kindle, ASUS Webstorage, Bluetooth®, and more CAUTION! Tool bar Quick launch camera Check the image information, and edit the selected image You cannot restore a deleted file. 43 Camera Touch Camera from the Home Screen to take pictures or record videos. You can use the front camera or the back camera to take pictures or record videos. The image and video files are saved to Gallery. Camera/video mode Flash Turbo Burst Camera button Camera switch Camera filter effects Video button Camera / video effects Settings The Camera app also allows you to take multiple pictures in quick succession using Turbo Burst feature. With this feature, you can select the best photos or arrange them in a sequence. To use this feature, move TURBO slider to the right then tap and hold 44 . Email Email allows you to add several e-mail accounts and conveniently browse and manage your e-mails. To set up an email account: 1. Touch to go to the All apps screen. 2. Touch Email to launch the email app. 3. From the email app screen,key in your Email address and Password, then touch Next. 4. Wait while your PadFone E automatically checks your incoming and outgoing mail server settings. 5. Configure the Account options and touch Next. 6. Provide a name for the account and key in the name you want displayed on the outgoing messages. Touch Next to log into your mail inbox. 45 To add email accounts: 1. Touch Email to go to the All apps screen, touch and login using the account that you’ve previously set up. 2. Touch Settings on the upper right corner to display the preferences for this account. 3. Touch Add account on the upper right corner to add another account. NOTE: You can include all your e-mail accounts in Email. 46 Gmail Gmail (Google mail) allows you to access your Gmail account, receive, and compose e-mails. To set up a Gmail account: 1. Touch Gmail from the All apps screen. Touch Existing and type your existing Email and Password, then touch Sign in. NOTE: Touch New if you do not own a Google Account. 2. Wait while your PadFone E communicates with Google servers to set up your account. 47 3. You can use your Google account to backup and restore your settings and data. Touch to sign in to your Gmail. IMPORTANT: If you have several e-mail accounts in addition to Gmail, use Email to set up and access all your e-mail accounts at same time. 48 Maps Maps allows you to find establishments, view maps, and get directions. Touch the handle at the upper-left corner to change settings and specify search parameters. 49 Story Story allows you to create and share photo stories. To use ASUS Story: 1. From th������������������������� e All apps sc������������ reen, touch Story. 2. Touch Create Story to create a photo story. 3. Key in the story name and touch OK. 4. Select photos you want to add to the story and touch Done. 50 To edit and share a story: 1. Touch a story name from the ASUS Story main page. 2. Touch on the upper right corner of the screen to edit a photo story. Touch to rearrange the photos Touch for a full screen view Touch to add a photo Touch to add a map Touch to add text Touch to layout a page 3. Touch on the upper left corner of the screen then touch to share a photo story. 51 SuperNote SuperNote is a convenient app used for writing and painting on your PadFone E Station. You can take notes, send instant messages, draw sketches, create e-cards with audio recordings or diaries with video, and lots more. All your notebooks Settings Selection Notebooks, Bookmark, Timestamp, All Pages Create a new notebook 52 Show locked Notebook, import Notebook, Sort by name / last modified Using SuperNote To create a new notebook: 1. Touch Add a new notebook. 2. Key in a name for the file and choose the notebook type to start writing on the page. The following screen describes the SuperNote screen features on your PadFone E Station: Share Save New page Settings Goes back to SuperNote’s main page Backspace Space Enter Next page Page number Previous page NOTE: For more details using SuperNote on your PadFone E Station, tap Tutorial. 53 Using PadFone E widgets Adding widgets Widgets are useful and fun applications that brings information and services conveniently to your Home Screen at-a-glance. You can find them in the Widgets tab in the All Apps screen, ready to be moved into your Home Screen. To see your widgets, touch on your Home Screen then touch the Widgets tab at the top of screen. From the main Widgets screen, you can: • Drag a widget to another screen. • Swipe left or right to move between screens and view more widgets. IMPORTANT: • You may be prompted to perform additional tasks (such as registration, activation) before you can use a selected widget. • If there is not enough room on the screen where you placed a widget, the widget won’t get added to that screen. To remove a widget: • Touch and hold the widget until X Remove appears then without lifting your finger, drag the widget into X Remove. 54 Task Manager Task Manager is an easy and quick way to close running apps. It effectively cleans your cache and frees more cache space for your PadFone E. 1. Touch to go to the All apps screen. 2. Touch Widgets to display the widgets menu. 3. Touch and hold Task Manager to display the Task Manager app. Shows cache size status Shows number of running apps Touch to close all running apps Touch to lock/ unlock an app Touch to close an app Additional options: • To resize Task Manager, touch and hold anywhere on the app until the resize border appears. Touch and drag the sizing handle to adjust to your preferred screen size. You can do this to create additional room for more apps. • To remove Task Manager, touch and hold the app until X Remove appears, then without lifting your finger, drag the app into X Remove. 55 Using PadFone E Station widgets Adding widgets Use widgets to conveniently access useful and fun applications on your PadFone E Station’s Home Screen. You can find them in the Widgets tab in the All Apps screen, ready to be moved into your Home Screen. To see your widgets, touch to go to the All apps screen, then touch Widgets. From the main Widgets screen, you can: • Drag a widget to another screen. • Swipe left or right to move between screens and view more widgets. IMPORTANT: • You may be prompted to perform additional tasks (such as registration, activation) before you can use a selected widget. • If there is not enough room on the screen where you placed a widget, the widget won’t get added to that screen. To remove a widget: • Touch and hold the widget until X Remove appears then without lifting your finger, drag the widget into X Remove. 56 ASUS Battery This special widget shows the individual battery status of your PadFone E and PadFone E Station by percentage and color. The more battery power, the brighter the color. 1. Touch to go to the All apps screen. 2. Touch Widgets to display the widgets menu. 3. Touch and hold ASUS Battery to display the ASUS Battery app. 4. The notifications panel also display the battery status. The battery status of the PadFone E and PadFone E Station are shown separately. When battery is low, the battery icon turns from blue to red with an exclamation mark. There will also be a warning sound to notify you when the battery is running low. 57 58