1
Green
Mountain
Pellet Grill
WARRANTY
This LIMITED WARRANTY covers defects in workmanship and
materials for a period of two years from date of first retail purchase.
During the warranty period, GMG Products LLC (dba Green Mountain
Grills) will replace or repair, at its sole option, any defective Green
Mountain grill returned to us, or to one of our dealers, by its original
purchaser.
This warranty does not cover problems that result from abuse, accident, misuse, or problems with electrical power. It does not cover uses
not in accordance with the instruction manual. It does not cover commercial use of the product. It specifically excludes products for which
Green Mountain Grills has not received payment.
THIS WARRANTY GIVES YOU SPECIFIC LEGAL RIGHTS
WHICH MAY VARY FROM STATE TO STATE (PROVINCE
TO PROVINCE IN CANADA). GREEN MOUNTAIN GRILL’S
RESPONSIBILITY FOR DEFECTS IN MATERIAL AND WORKMANSHIP SHALL BE LIMITED TO REPAIR AND/OR
REPLACEMENT AS SET FORTH IN THIS WARRANTY. ALL
EXPRESS
AND
IMPLIED
WARRANTIES,
INCLUDING,
BUT NOT LIMITED TO, ANY IMPLIED WARRANTIES AND
WARRANTIES OF MERCHANTABILITY OR FITNESS FOR A PARTICULAR PURPOSE ARE DISCLAIMED.
WE DO NOT ACCEPT LIABILITY FOR INCIDENTAL OR
CONSEQUENTIAL DAMAGES, OR FOR ANY THIRD-PARTY CLAIMS FOR DAMAGES AGAINST THE RETAIL PURCHASER OF THIS PRODUCT. SOME STATES (PROVINCES IN CANADA) DO NOT ALLOW THE EXCLUSION OR LIMITATION OF
INCIDENTAL OR CONSEQUENTIAL DAMAGES, SO THIS MAY NOT
APPLY TO YOU.
To exercise your rights under this warranty, contact the dealer from
whom you purchased it, or call us at 530-347-9167.
Assembly and
Operating Manual
Jim Bowie Model
Daniel Boone Model
Accessories
Be sure to visit your local dealer to puchase
these accessories for your Green Mountain grill
Aprons
Oven Mitts
Caps
Shirts
Smoke Racks
Rib Racks
Thermal Blanket
Grill Covers
Assembly: 4-7
Quick Start 8-9
Operation: 10-17
Pellet Grill Basics: 18-22
Troubleshooting: 23-26
Recipes: 27-64 (Index on page 27)
Grill Accessories 83
Warranty: Back Cover
2
Green Mountain Pellet Grill Operating Manual
Rubs
Sauces
Accessories
83
Recipes
Iowa Pork Chops (Go Hawkeyes!)
Buy thick “bone-in” pork chops (1” or thicker). Season with
GMG Pork Rub. Marinate for at least 4 hours in either Stubb’s
Pork Marinade or Allegro in a Zip-Loc baggie.
Grill at 400°F (204°C) to an interior
temperature of 165° (74°C). This
makes a great summer meal with corn
on the cob, baked potatoes, and a
garden salad.
And speaking of salad . . .
Grilled Caesar Salad
Wash heads of romaine lettuce thoroughly, then dry and slice
lengthwise in half. Brush very lightly with olive oil.
Grill at 500°F (260°C) for 3-5 minutes per
side or until you get a suitable amount
of char.
Put on a salad plate and drizzle on more
olive oil. Garnish with fresh ground Parmesan cheese, mandarin oranges, sliced
or slivered
almonds,
and season
with fresh
ground
pepper.
82
Recipes
Thank you for purchasing a Green Mountain pellet grill. We
hope that it will provide you many years of trouble-free service and
allow you to cook extraordinary food that will enhance your enjoyment of eating.
Your new grill can roast, bake, smoke, slow-cook, simmer,
grill, barbecue, and sear at the touch of a button. This manual will
help you get the most out of your pellet grill, so please read it thoroughly.
Should an unforeseen problem occur, please check the
“Troubleshooting Guide” in this book, or visit our website at www.
greenmountaingrills.com. After exhausting those possibilities,
please feel free to call us at 530-347-9167 and select “Technical Support.”
If you have questions about cooking, please see the section
entitled “Pellet Grilling Basics” later on in this manual, or visit our
website.
Remember that your new pellet grill is extremely versatile.
While you can grill steaks, hamburgers and all the other traditional
“barbecue” fare, you can also prepare a pot roast, smoke fish, bake
cookies or bread, slow-cook a brisket or pork butt, roast vegetables,
and much more. About the only limit is your imagination, so get
creative!
Do not operate this pellet grill indoors, as it must have adequate ventilation.
Do not burn softwood pellets, as they contain phenols
which pose a health hazard with extended use. All of us have eaten
marshmallows roasted over an open softwood campfire and have
lived to tell about it, but exposure to softwood resins over long periods of time will produce adverse effects.
Carefully read and follow all instructions in this manual and
observe all warning labels on the grill itself. Do not use this grill
other than as an outdoor cooking device. Do not make modifications to this grill that Green Mountain has not approved.
Please read and understand the warranty. We warrant
defects in workmanship and materials but not problems that arise
because of modifications made not authorized by GMG, misuse, operation not in accordance with the design of this grill, uses other than
the purpose of this grill, and use not in conformity to the procedures
outline in this manual.
Feel free to send pictures of your cookouts to us –we would
love to see them. If you give permission, we will even post them on
our website.
Foreword
3
ASSEMBLY INSTRUCTIONS
Many of our dealers pre-assemble the grills, so this section will
not apply to you in that case.
If you bought your grill unassembled, then you may use this
manual to help you put your grill together. Or, if you prefer, you may
watch the enclosed DVD which will explain how to assemble your grill.
OVERVIEW - Assembly consists of 5 fairly easy steps: 1) attach the 4
legs; 2) attach the chimney and chimney cap; 3) reverse the handle;
and 4) insert the heat shield, grease tray, and grate; and 5) install the
side try and hang the grease bucket.
TOOLS – 10 mm wrench or socket
First, take the box off of the grill, leaving the Styrofoam intact.
With the grill right side up, take off the top Styrofoam pieces, open the
lid and remove all of the parts from inside the cavity of the grill:
Grate (2 pieces)
Grease tray
Chimney
Legs (4)
Heat Shield
Side tray
Now, open the hopper and remove these parts:
Chimney Cap
Grease Bucket
Assembly and Operating Manual (since you’re reading this, you’ve already done that, obviously)
Remote controller (if you’ve purchased a remote controlled grill)
Meat probe
Zip-Loc baggie of pellets
Recipes
Fattie (Warning: Hazardous to your girth)
Those of you who took a basket-weaving class will find this
rather easy - I had a little trouble with it at first until I realized
that it was just like threading a worm on a fishhook, only different.
Lay the sausage roll in the middle of the bacon-weave and the
wrap the bacon around the roll.
Place “fattie” on a foil-lined shallow pan (one with 1/2” sides)
and grill at 325° for 90 minutes. You may wish to turn the heat
up to 350 ° for the last 15 minutes to brown the bacon a little
more. If you cook eggs with this monster, be sure to baste
them in butter! I mean, what do you have left to lose? Seriously, though, this is pretty darn good fixins.
Next, replace the Styrofoam top pieces and carefully turn the grill
upside down.
4
Assembling Your Grill
Recipes
81
Recipes
Fattie (Warning: hazardous to your girth)
Okay, so health experts will throw shoes at you for eating this
one. And I believe a regular diet of this will lead to undesirable
results. I mean, this thing has more cholesterol than, well . . .,
than cholesterol. That being said, this is a real once-per-decade
treat which you will enjoy.
Ingredients
1 lb. breakfast sausage
1-11/2 cups shredded potatoes, pre-cooked
About 3/4 lb. bacon (not thick-sliced)
Start with a pound of your favorite breakfast sausage - here,
I used Jimmy Dean Regular, but any former country singer
turned businessman’s product will do.
Knead the sausage a bit and make a small loaf out of it. Form
a trough in the middle. Lightly salt the hash browns and insert
them into the trough in the sausage. Close up the trough,
encircling the potatoes.
Make a mesh out of the bacon as shown.
Note: Enhance the stuffing by adding sauteed onions and
green peppers to the potatoes, as well as cheese.
80
Recipes
1. ATTACH THE LEGS
Remove the two bolts from each of the four legs. Legs
are numbered, and those numbers match the
numbers on the grill.
Insert each leg into its matching
socket on the grill. The nuts welded onto the
leg must go on the side opposite the hole in
the socket. This will be easy with the wheel
legs - just keep the wheels to the outside of
the grill.
On the front legs, this will be somewhat more difficult to visualize. Just remember that the nut
welded on the leg cannot be up next to the hole in the leg
socket - it needs to go opposite, or away from it.
Next, insert the bolts into the holes in the leg sockets.
They screw into the nuts on the opposite side of the leg.
With the grill upside down, you can get both bolts in each leg.
• Tighten the bolts.
• Stand the grill up on its legs.
2. ATTACH THE CHIMNEY AND CHIMNEY CAP
Remove the 3 bolts from the right side of the grill. Install the chimney using those three bolts. Make sure
the gasket is between the chimney and the grill.
Turn the adjustment nut on the underside of the chimney lid until it is about
1/2” from the top. Then thread the rod
into the chimney. You can adjust the nut
up or down depending on your cooking
preference. Normal operation is about ½”
in the winter (your index finger should just
fit between the top of the chimney and the
cap) and about 1 ½” in summer (2 fingers
between the top of the chimney and the chimney cap).
Remember that your pellet grill operates similarly to a
fireplace: it needs to draft, so DO NOT choke the chimney cap
all the way down!
Assembling Your Grill
5
REVERSE THE HANDLE
Remove the two bolts from the handle and install it on
the outside of the grill.
Make sure that you put a thermal isolation washer between the stainless handles
base on the outside and the metal lid. Insert
another one between the bolt and metal lid
on the inside. This will prevent the handle
from becoming too hot.
INSERT THE PARTS
Important: Before you install these parts, skip forward to the
operating instructions and read the information on “Charging the Firebox.” You may wish
to pour the contents of the Zip-Loc bag into
the firebox before you install these parts if
you choose that method. Or you may wish to
leave the parts out until you see the first pellets emerge from
the auger tube into the firebox if you choose that method.
Pellet-Fried Chicken
•
•
•
•
•
•
•
•
•
•
Recipes
1 cut-up frying chicken
1 cube butter
1/3 cup evaporated milk
1 egg
¾ cup flour
1 tablespoon paprika (this helps brown the chicken)
1 tablespoon baking
powder
½ teaspoon salt
½ teaspoon seasoned salt
½ teaspoon pepper
Heat shield: the slots go in the front and rear
to match the metal strips inside the grill which
hold it in place.
Beat egg in small bowl. Add evaporated milk and stir thoroughly. Mix flour, paprika, baking powder, salts, and pepper in
a bowl. Use a small bowl to melt butter in microwave and then
pour into shallow metal baking pan large enough to hold the
chicken pieces.
Grease tray: Use these simple steps to insert
the grease tray.
Dip chicken pieces in egg/milk mixture and then roll in flour
mix. Place into metal baking pan.
Set the grill to 375° and wait until this temperature stabilizes.
Cook the chicken for 25 minutes. Then, reduce the heat to 325°,
turn the chicken pieces over, and cook for 30 more minutes or
until done. This one’s
just like my Mama used
to make!
Be sure to line up the grease tray so that the sensor
points to the middle of the crescent-shaped cutout
on the left side of the grease tray.
6
Assembling Your Grill
Recipes
79
INSERT THE PARTS, CONT’D
Recipes
Ham it up!
Pellet-roasted ham tastes delicious. Remember, though, that
what some sellers call a “picnic ham” does not qualify as ham at
all: true ham comes from the hind leg of the pig, while a “picnic
ham” comes from the front shoulder. If you buy a fresh ham,
be aware that it will not have the pink color you are used to,
nor will it taste the same. And the cooking method is entirely
different: with a cured ham, you are merely re-heating, while
you must fully cook a fresh ham. Do not use this method for
a fresh ham. Ham technology can get a little confusing, with
dry-cure, wet-cure, country, or city, but you will likely find wetcured city hams at your grocery.
Wash the ham thoroughly. Make shallow scores about ¾”
apart with a sharp knife on all sides of the meat in both directions in a checkerboard pattern.
Melt a cube of butter in the microwave and stir in 2 tablespoons of honey, 1 tablespoon of brown sugar, and 2 tablespoons of orange juice. Mix well. Use this mixture to glaze the
entire ham.
Smoke this in a shallow pan for 3-5 hours at 165°F (74°C).
Splash with orange juice several times during the process.
Install the grates as shown.
Install the side tray and hang the
bucket: Line up the bullets with the
pins on the side of the grill and slide to
the right. Lift the side tray support up
underneath the side tray and push the
side tray down to snap it into place.
If you purchased a cover for your
grill, you will need to fold the tray
down to install it.
Hang the bucket from the spout underneath the side tray.
Voilà! (there you go!)
Scalloped potatoes
and a green vegetable like broccoli
accompany this very
well.
78
Recipes
Assembling Your Grill
7
QUICK START
Recipes
Do NOT use this procedure the first time you operate the grill!
You must charge the firebox the very first time you use the grill
or each time that you subsequently run it out of pellets. See
the section entitled “Charging the Firebox” that follows this
section.
To turn the grill on:
•Push the power switch to ON (“-“ = “ON”; “o” =
“OFF”). The digital readout displays “OFF.”
•Press either the “UP” or “DOWN” button. The digital readout displays a state (0, 1, 2, 3).
•Except for a “HOT RESTART” you do not want to touch any
buttons during the time the grill goes through the 0-1-2-3
stages. See the section below entitled “BYPASS” or the section on “HOT RESTART” later in the manual.
•After State 3, the digital readout will display the current
temperature inside the grill.
•The grill will continue to climb to the default temperature
of 320°F (160°C) if you do nothing. On some models, the
default temperature is 150°F (66°C).
•You may override the default temperature by pressing the
appropriate UP or DOWN button after the grill shows its
first temperature (i.e., after it finishes the 0-1-2-3 cycles).
To turn the grill off, always use the “FAN” mode as follows:
•Push the DOWN button until the temperature reads 150.
•Release the button.
•Press the DOWN button once more – digital readout will
display “FAN.”
•The fans will continue to run for about 15 minutes to burn
up the excess pellets in the firebox and to blow out most of
the ash.
•The grill will then shut itself off, and the digital readout will
display “OFF.”
8
Monterey Bay Smoked Salmon
Remove the skin from 4-5 lbs.. of salmon filets and cut into approximately 2” X 4” pieces.
Marinade
• 2 cups soy sauce
• 2 tablespoons brown sugar
• 2 tablespoons honey
• 2 teaspoons garlic powder
• 1 teaspoon onion powder
• 2 tablespoons vinegar
• 1 teaspoon black pepper
• A few drops of Tabasco sauce
• Mix thoroughly
Marinade the fish overnight in the refrigerator.
Set grill at about 180°. Smoke the salmon for about 5-8 hours
until you like the texture. You can sprinkle the marinade over
the fish while it cooks for added flavor and aroma while it
smokes.
A “Seal-A-Meal” gadget works great for keeping this fish for
quite a while.
Recipes
Operating Your Grill
77
QUICK START, CONT’D
Recipes
Sweet Smoked Salmon
(A Teem Green recipe)
Smoked salmon not only tastes great but offers health benefits
as well. It contains Omega-3 which lowers blood triglycerides
and helps prevent clotting. It is high in Vitamin E, an important
antioxidant. It is low in carbohydrates. Eat up!
Mix 2 cups of brown sugar, ½ cup of Kosher salt, ¼ cup garlic
powder, ¼ cup onion powder, and 3 teaspoons white pepper.
This will make enough for about 4 medium salmon filets.
Lay a sheet of Saran Wrap on the counter and sprinkle a layer
of the dry mix on it. Then, place the first filet on it, skin side
down. Sprinkle a layer of the rub mix on this piece of salmon
and lay the next filet on it, skin side up. Then, add a layer of
dry mix on the skin of this filet, and then place the next filet
on that, skin side down. Continue until you’ve used up all the
filets. Wrap the whole thing up in Saran Wrap and seal tightly.
Refrigerate for 12-36 hours, flipping every six hours. Remove
form the refrigerator and wash the salmon. Dry on a wire rack
at room temperature for about two hours, or until a slight yellowish film appears on the salmon.
Smoke at 150-180°F (66-82°C)
for 5-8 hours to a minimum
internal temperature of 150°.
held for 30 minutes. It will
be safe but juicy at this point;
extending the time will result
in drier salmon if that’s your
preference. After removing
from the grill, be sure to wrap in aluminum foil for about 30
minutes to settle the juices.
76
BYPASS mode (for Hot Restarts)
If you have a power failure while the grill is in use, or if someone accidentally turns the grill off, or if you undercook something
and want to resume cooking for a little longer, use this method. This
method will not work unless there is significant fire left in the firebox
(usually no longer than about 6-7 minutes later). If you have run the
“FAN MODE” for any length of time (more than 2-3 minutes), this will
not work.
If the power switch is off, push it to the ON position (“-“ = ON;
“o” = OFF).
When the digital readout displays “OFF”, hold down the DOWN
button for approximately 8 seconds, or until the digital readout displays a temperature.
Now adjust the temperature to your desired setting. If you do
nothing, the grill will go to the default temperature of 320°F (160°C).
On some models, the default temperature is 150°F (66°C).
IMPORTANT SAFETY INFORMATION
•DO NOT use this grill indoors or in any area without adequate
ventilation.
•This is an electric appliance. Observe ALL normal safety
procedures for a high voltage apparatus.
•DO NOT modify this grill in any manner not in accordance with
manufacturer guidelines.
•Read, understand, and follow the directions in this manual.
•DO NOT operate this grill other than as specified in this
manual.
•Be aware of and respond to the inherent danger of any
appliance that produces flames.
Recipes
Operating Your Grill
9
OPERATING YOUR GRILL
Warning: do not use softwood pellets. The smoke they produce contains phenols which you do not want to ingest over
long periods of time. Do not use coal or charcoal. Use only
100% pure hardwood pellets.
Store your pellets in a cool, dry place. Do not allow them to get
wet, as they will turn back into sawdust.
The first time you use your grill, you must “burn it in” to get rid
of odors and deposits inherent in the manufacturing process.
Do this for about 30 minutes at 350 degrees.
Charging the Firebox
VERY IMPORTANT: The grill turns on when you depress the switch to the side with the line (-) and turns
off when you depress the switch to the side with the
o (o).
When you turn the grill on, the digital readout will display
“OFF”. To start the grill, simply push the UP or DOWN arrow
briefly.
Your hopper is equipped with a “LOW PELLET
ALARM.” If you do not cover this with pellets, it
will make a sound somewhat like a backhoe in
reverse.
The first time you start the grill, and any subsequent time you
accidentally run it out of pellets, you must CHARGE THE FIREBOX.
There is an auger inside a tube which conveys
the pellets from the hopper to the firebox.
When we talk about “charging the firebox” we
actually mean filling this tube with pellets so
that the grill has fuel available for the heating
element to ignite when it cycles on.
10
Kicked-up Garlic Smoked
Baby Back Ribs
Recipes
• 2 racks of baby back pork ribs (white membrane removed)
The Dry Rub
• 2.5 tablespoons garlic powder
• 1 tablespoon onion Powder
• ½ teaspoon cumin
• 1 teaspoon cayenne pepper
powder
• ½ teaspoon dry mustard powder
• ½ teaspoon smoked paprika
(or regular paprika if unavailable)
• ¼ teaspoon nutmeg
• 1 tablespoon fresh cracked black pepper
The Sauce
• ¼ cup Franks Red Hot or similar
• ¾ cup GMG Cherry Chipotle BBQ sauce
Wash and pat dry the Ribs.
Mix all the dry rub ingredients together.
Rub the Ribs with the dry rub 2 hours before or the night before.
Combine the ingredients for the sauce, refrigerate and set aside.
Set the grill at about 180°. Let the temperature stabilize before you
put the ribs in.
Smoke the ribs for 5 hours, and then finish at 225 until tender.
During the last hour apply the sauce to the ribs.
These ribs will fall off of the bone, and your guests will be asking
for more!
Recipes
Operating your grill
75
OPERATING YOUR GRILL, CONT’D
Recipes
Wing It!
If you need to improvise a snack for hungry kids or a party, this
is a great candidate. Buy the bags of frozen wings or drumettes available at warehouse groceries for the best value.
Marinate in soy sauce, garlic, Tabasco, and brown sugar for at
least two hours.
You can “charge the firebox” using two different methods:
You can pour the contents of the little Zip-Loc bag of pellets furnished with your grill into the firebox
before you install the heat shield, grease tray,
and grate. Then, after you install those parts,
you merely turn the grill on and walk away.
(Alternatively, you could use a small handful
of pellets to accomplish the same purpose.)
Grill at 275-325°F (135-163°C) for
45-60 minutes. If you want char,
baste frequently with GMG
Cherry Chipotle BBQ Sauce.
Be sure to eat these dipped
in my Mumbo Sauce!
•Before you install the heat shield, grease tray and grate,
turn the grill ON. The digital readout will display “OFF.”
•Briefly press either the UP or DOWN arrow. The digital readout will change to “0”.
•Wait until it changes to “1” and then turn the switch off.
•Turn the switch back on and briefly press either the UP or
DOWN arrow. The digital readout will display “0”.
•Watch the firebox. When the first pellet emerges from the
auger tube into the firebox, turn the grill off.
•Your auger tube is now charged (filled with pellets).
•Install the heat shield, grease tray, and grate.
•Now you are ready to use the grill.
Brats
These German sausages are made from pork, beef, or veal.
They make a terrific snack on a lonely afternoon or at a gathering. Grill at 400-450°F (204-232°C) for 5-10 minutes per side.
Serve them with your favorite mustard or dip in GMG Cattle
Drive BBQ Sauce.
In the future, you should not have to do this again unless you
run the grill out of pellets. Remember, your goal is to make
sure there are pellets inside the auger tube whenever you
turn the grill on. This will never be a concern
except for the first time you turn the grill on
or any subsequent time you accidentally run it
out of pellets.
74
OR
Auger tube
Recipes
Operating your grill
11
OPERATING YOUR GRILL, CONT’D
When you turn the grill on, the digital readout will display
“OFF.” This ‘default to OFF’ is a safety feature so that the grill will
not automatically restart in the event of a power failure. To get
your grill started, simply press either the UP or DOWN arrow
briefly. The digital readout will now display a 1-digit number
which indicates its ignition state. The chart that follows shows
each ignition state and its function.
0
1
2
3
Achieving
Target Temp
Fan
Mode
Off
Mode
Auger
ON
OFF
OFF
OFF
INTERMITTENT
OFF
OFF
Combustion Fan
OFF
OFF
ON
ON
INTERMITTENT
ON
OFF
Hopper Fan
OFF
OFF
ON
ON
INTERMITTENT
ON
OFF
Heating Element
ON
ON
ON
OFF
OFF
OFF
OFF
During State 0, the auger turns, and the igniter (heating element) comes on. In State 1, the igniter stays on, and the auger
quits. Then, the combustion and hopper fans turn on in State
2, and the igniter remains on. During State 3, the fans stay on,
and the igniter turns off.
The following chart shows the approximate times for each
state (0, 1, 2, 3), depending on whether your grill defaults to an
initial temperature of 150°F (66°C) or 320°F (160°C).
Default Temperature Model
150°
State
320°
Time
0
70 seconds
2 minutes
1
60 seconds
2 minutes
2
90 seconds
2 minutes
3
5 seconds
1 minute
Recipes
Pork Tenderloin
Seldom can you cook something that tastes this great that has
attendant health benefits. This cut of pork is lean and has a
multitude of vitamins - B1 (thiamin), B2 (riboflavin), B3 (niacin),
and B6. It also contains an abundance of important minerals
-phosphorous, magnesium, Iron, and zinc.
Start with a pork tenderloin or two. These usually get packaged in pairs, so if you plan to use only one of them at a time,
freeze them separately when you buy them since you will find
it almost impossible to split the pair after they’re frozen.
Rub generously with Green Mountain Pork Rub and let stand
for 4-24 hours.
Set your grill at 320°F (160°C). When the grill reaches temperature, put the tenderloin in and baste both sides with a sweet
marinade such as Yoshida’s or perhaps a teriyaki sauce.
Cook for about 1 - 1 1/4 hours, turning frequently, until the internal temperature is at least 165° (74°C). A slightly pink middle
is okay as long as it reaches 165°. You should not overcook this
as it will tend to dry out due to its leanness.
After State 3, the digital readout will display the temperature
inside the grill. This will continue to rise rapidly.
If you do nothing, the grill will always default to a cooking temperature of 320° F (160C) (Some models – 150F (65C)).
12
Recipes
Operating your grill
73
OPERATING YOUR GRILL, CONT’D
Recipes
Shrimp Chipotle
Start with uncooked deveined shrimp. Sometimes your grocer
sells these completely peeled, but oftentimes you must peel
them. Just make sure to take all of the shells off. Use a size you
prefer. The sizes refer to the number of shrimp per pound, so
a 31-40 size means that one pound will contain from 31 to 40
shrimp.
You can buy wooden skewers for next to nothing at a dollar store. Soak as many as you will use in a pan of water for
about 30 minutes, which will keep them from burning. Use
two of these and push the shrimp onto them. When you use
two skewers, you can flip the kabob (or shaslik) without them
rotating on the skewer. You don’t have to separate them, as on
shrimp, two adjacent ones will hold them in place.
Brush the kabobs with chipotle sauce (see recipe on page 54)
and refrigerate for about 3 hours.
Set your grill at 330° and cook these
for about eight minutes per side. Do
not overcook, as they will turn out
fairly tough if you do. Perfectly grilled
shrimp will have slightly pink flesh on
the outside and white, not translucent, meat on the inside.
Because we know that you will use the grill in a variety of weather
conditions, we tend to overshoot the initial default temperature of
320° F by 20-25 degrees on warm days. We do this so that it does
not take interminably long on a cold day to reach its target temperature. The grill will eventually cool back down to 320° on its own,
or you may speed the process by simply opening the lid to let out
excess heat.
Once your outside temperatures drop below 35°F (2°C), the Turbo
mode kicks in to accelerate the volume of pellets and air so that
you do not have to wait so long for the grill to heat up as you otherwise would without it.
If you wish to cook at a different temperature, just push the button
underneath the up or down arrows to set your target temp. It will
change 5° each time you push it, or, if you hold it down, it will cycle
continuously up or down.
You can set the grill as low as 150° (66°C) or as high as 500° (260°C).
You may change the temperature any time after State 3 expires.
The grill temperature will climb fairly rapidly. The temperature,
however, falls much more slowly. This is because we must keep
the fire going at all costs, which results in a fairly slow fall in inside
temperature. Here, too, you can speed the process by opening the
lid to let excess heat escape.
When you are within 5° of your set temperature, the indicator light
will flash about once per second. When you are not within this
range, the indicator light will be off.
Please note that the temperature on the digital readout reflects
only the temperature at the grilling surface on the left side of the
grate where the thermal sensor protrudes into the grill cavity. You
may notice differences between the dome thermometer and the
digital readout, depending on the quantity of cold food inside the
grill or how often you open and close the lid, or how much wind is
present. This is normal and no cause for concern.
72
Recipes
Cooking Tips
13
OPERATING YOUR GRILL, CONT’D
Please understand that if you cook, for instance, a stand-up
chicken, the temperature at the top of the cavity may be somewhat less than at the grilling surface. You might have decided
to cook the chicken at 275°, but you notice that the temp on
the dome thermometer If your grill has one) only reads 250°.
Since most of your chicken is well above the cooking surface,
you may want to adjust the digital temp of the grilling surface
up to about 300° in order to achieve your target cooking temperature of 275° at chicken level.
LOW PELLET ALARM: Inside the hopper you will find a low pellet alarm. When the level of pellets falls below this
sensor, an alarm sounds to let you know that you
need to fill the hopper back up. Once this alarm
goes off, you have approximately ½-3 hours before
the hopper runs dry, depending on the temperature you have set and the ambient temperature.
MEAT PROBE USE: Your new Green Mountain pellet grill has a
meat probe included as standard equipment. To use this feature, just plug the connector into the receptacle on the front of
the control panel. Lift the stainless flap on the left
side of the grill and push the probe
through the hole. Then, insert the
probe into the center of the food
you are cooking. When you press
the “FOOD” button on the control
panel, it will display the temperature of
whatever the probe touches, but this process takes a
minute or two to stabilize. To return to the grill temperature
display, simply press either the up or down button.
Vegetable Medley
Recipes
Marinate asparagus, small red potatoes (punch holes in these
with a fork), broccoli, cauliflower, and any others you wish in
Yoshida’s marinade
for about two hours.
Sprinkle with GMG
Wild Game Rub. Grill
at 350-375° until tender to your liking.
Corn on the Cob
This favorite continues to delight. Leave the corn in the husk
Soak in water for about an hour. Place on the grill at about
350°F (177°C) for about an hour. When you peel the husk, the
silk magically disappears!
If you do not have the probe installed in the control panel,
then your digital display will read “NO FD” (no food) when you
press the “FOOD” button.
The probe is not suitable for reading air temperatures above
257°F (150°C).
14
Operating your grill
Recipes
71
Recipes
Steve’s own Pulled Pork
Finish the meat to an internal temperature on your meat thermometer of 195°. You can eat pork safely at 165°, but you will
find it much more difficult to pull at the lower temp, and you
will not find it as tender. Let the roast(s) cool for about an hour.
Now just start shredding – pulling apart – the pork, separating
and discarding pieces of fat. Bear claws work great for this.
You can eat this as is, but many people like to add a favorite
barbecue sauce. Either way, with or without barbecue sauce,
or with or without
cheese and lettuce,
this will set you free.
Important: When
you reheat this for
sandwiches, just
add a small amount
of water in a saucepan and cook on low/simmer to warm it.
Prologue: The
culinary delight factor of pulled pork
lies in the different
textures and different tastes we find
in a single bite. We
sear this at 380° initially, not to seal in the juices (a huge myth!)
but rather to caramelize the sugars in the meat’s surface for a
sweet/pungent flavor and a crunchy texture. We also get the
sponge cake-like texture of the meat that comes from close to
the bone, as well as the pleasantly chewy texture of the meat
between the surface and the bone. All in all, this rather simple
dish has complex tastes which appeal to several of the taste
buds that comprise our palates. Enjoy!
70
Recipes
OPERATING YOUR GRILL, CONT’D
REMOTE CONTROL: If you purchased the remote control unit,
you will find its use quite similar to the non-remote
control grill. The buttons on the control panel operate exactly the same way, and so does the meat
probe. But the handheld remote device allows you
to control the temperature of the grill from up to
about 30 yards (about 100 ft.) away.
The transceiver is RF (radio frequency), so it will not get severely obstructed by trees, buildings, cars, etc.
There are six distinct remote controls, labeled A-F, so if you and
your neighbor happen to purchase exactly the same model,
one of you should probably get the dealer to exchange the
handheld device so that you cannot control each other’s grills.
The handheld device mimics the control panel’s operation.
Thus, it will display the current temperature of the grill, or the
temperature you have the grill set at if you press one of the
temperature control buttons. It will display the temperature
of whatever the probe touches if you press the FOOD button.
If you do not have the probe plugged into the controller, then
the remote will display “noFd” (No Food).
If the level of pellets falls below the low level sensor, the remote will beep, and its LED will display “FUEL.”
If for some reason the temperature sensor (not the food probe)
fails, the remote will display “SEn” (faulty sensor).
The handheld remote device shuts itself off automatically after
5 seconds. The handheld device uses 2 AA batteries. Always
replace both batteries, not just one.
Operating your grill
15
OPERATING YOUR GRILL, CONT’D
FAN ONLY MODE: You should use the “FAN” state each time
you finish cooking. To do this, simply hold down the “Down”
button until the digital readout displays “150.” (66C) Release
it and then press once more – the readout will display “FAn.”
The hopper fan and combustion fans will continue to blow for
about ten minutes. This will burn up most of the pellets in the
firebox and will exhaust some of the ash into the bottom of
the cooker cavity. The fans will turn off automatically, and the
grill will turn off, too. You may turn off the switch at this time,
but you do not have to. The LED’s use very little electricity, and
they rarely burn out, so it will not hurt to leave them on.
IMPORTANT
Steve’s own Pulled Pork
Recipes
Remove from the refrigerator and let stand about an hour to
bring it to room temperature.
Turn your grill on to 380°F (193°C). When the grill stabilizes at
that temp, put the roast(s) in fat side down.
Cook 30 minutes, turn the roast over, and cook another 30 minutes, fat side up. Cover the roast with aluminum foil.
Do NOT cover the crescent-shaped cutout on the left side of
the grease tray with aluminum foil. It is imperative that the
sensor is not obstructed in any way. Also, make certain that
you do not impede the air flow on the side of the grease tray
with foil. If you wrap sheets of foil to the outside edges of the
tray, make sure they do not block the air flow.
WEATHER
You will likely want to keep your grill out of rain and snow
when not in use. In a heavy driving rain, water can invade the
auger tube which will then magically change from pellets to
sawdust, and then expand and dry into something akin to concrete. This makes for an unpleasant repair. Melting snow can
also cause the same problem. A grill cover will clearly help the
situation, but the garage seems more foolproof.
THERMAL BLANKET
Tests from users have indicated that you can
reduce your pellet consumption by 40-50%
in very cold weather by using a GMG thermal
blanket. If you do not plan to use your grill
frequently in the wintertime, then you should
probably save the money. But if you grill regularly in cold
16
Operating your grill
Turn the grill down to 235°F (113°C). When the grill reaches this
temp, remove the foil. Barbecue the roast(s) for 6 hours. At this
point, spritz (spray) the meat with an apple juice/Worcestershire Sauce mix (to Taste) using a small spray bottle available at
most dollar stores or super centers and then wrap it completely with aluminum foil.
Insert the grill’s meat probe or a meat thermometer exactly
halfway into the thickest part of the roast, but do not touch the
bone.
Total cooking time will usually run about 1:20 per lb., so you
have about 3 1/2 hours to go for an 8-lb. roast and 6 1/2 hours
to go for a 10-lb. roast. The number of roasts you have in the
grill will not affect this time.
Recipes
69
Recipes
Steve’s own Pulled Pork
This staple barbecue dish takes 10-15 hours to cook and another half-hour or so to pull the pork. It makes little sense to me to
do a small amount of meat when you commit this much time.
You have a choice of using a pork shoulder roast or a picnic
roast. I prefer the shoulder roast, which for some odd reason
butchers call a butt roast. These come in 8-10 lb. hunks with a
blade bone. I usually do two of them at a time and freeze a lot
of meat for the future for family, friends, and visiting dignitaries. This is truly pork we can believe in.
The butt shoulder roast is a very inexpensive cut of meat and
will yield over 80% of its original weight in edible meat. Generally, people use it to make sandwiches, but nothing prevents
you from stuffing it in a flour tortilla or a casserole with corn
and mashed potatoes.
Wash the roast thoroughly with cold water and then pat dry.
Trim most of the fat from the roast. Rub generous amounts of
Green Mountain Pork Rub into all the nooks and crannies.
Wrap or cover and refrigerate overnight.
OPERATING YOUR GRILL, CONT’D
weather, this investment will likely pay off handsomely. Do not
use the thermal blanket in the summertime, as it provides no
noticeable benefit and may actually work against you on very
warm days.
MAINTENANCE
You can use a wire brush to clean the stainless steel grate.
Alternatively, you can use an old camper’s trick of wadding a
piece of aluminum foil and rubbing it lightly on the grate to
clean it. Clean ash out of the firebox periodically. The best way
is with a shop-vac. Normally, the fan will blow most of the
ash out of the firebox and into the bottom of the cavity. You
should expect to clean this out about every two months of
regular use.
LEVEL GROUND
The grill should be kept as level as possible so that the grease
flows into the trough and out into the bucket and also to
insure that the sensor reads evenly, as hot air displaced to one
side or the other will cause irregular operation.
SERVICE
Contact the dealer from whom you purchased the grill for any
problems you might have. While you will hopefully have no
problems, man-made things can go bad. Fortunately, each part
on the grill is modular, so either you or your dealer can easily
replace one if necessary.
DO NOT WORK ON THIS GRILL IF IT IS PLUGGED IN!! Always
unplug any electrical appliance before you work on it.
Check our website for service tips and the troubleshooting in
this manual. If you find no solution, then call technical support
at 530-347-9167.
68
Recipes
Operating your grill
17
Pellet Grilling Basics
Be sure to keep pellets in the hopper! Check this occasionally
so that your grill does not go out in the middle of cooking your
meal.
Wait until the grill heats up before cooking! Aside from the
soot contained in the early smoke, the grill will not cook evenly
until it gets hot, just as with a charcoal or gas grill. A slowly
blinking light indicates that the grill has achieved the target
temperature, while no light means the grill is still heating or
cooling. This will allow you to check to see if the grill is ready
from inside the house or some other distance away. It is much
easier to see a flashing light (thus the grill is ready to cook on)
from a distance than a steady one.
Marinade in sugar or salt or both anything you plan to smoke
for several hours beforehand in the refrigerator. This will normally cure it and should make it safe. We do not recommend
smoking poultry below 185° for health reasons. Cooking it at or
above that temperature will still impart a rich smoky flavor.
Clean the grate and grease pan regularly. Flavors from
previous cookouts will not usually improve the food you are
cooking now. Use a spatula or grill brush to clean the grease
tray, and use a wad of aluminum foil or a grill brush to gently
wipe off the grate. Also, grease may accumulate and cause a
fire. Should this highly unlikely event occur, unplug the grill
and keep the lid closed until the fire recedes. Line the tray with
aluminum foil, but do not block holes.
Spritz! Buy a plastic spray bottle for about a buck and fill it
with apple juice plus 2-3 tablespoons of Worcestershire. Spray
(spritz) the meats you’re cooking regularly. Pork butts and picnic roasts, steaks, burgers, chops, and ribs will all benefit from
regular, generous “spritzing.”
18
Pizza
Recipes
A recipe for great pizza dough is beyond the scope of this
missive. But if you have time and love a great thin crispy crust,
try Peter Reinhart’s Napoletana Pizza Dough recipe (a Google
search will find it for you.) You can actually freeze the dough
balls to use in the future, which makes the time investment
worthwhile.
For those of you with less time on your
hands, buy a “take-and-bake” pizza and follow the directions, using your GMG grill the
same way you would use your oven. But for
even better results, buy a pizza stone. Bring
it up to temperature for at least 15 minutes
before you use it. Be sure to sprinkle it with
corn meal so the pizza doesn’t stick. You
will be astounded at the impact a pellet grill
makes on a pizza.
Spuds Supreme
Wash a few russet potatoes and slice lengthwise into wedges.
Pile onto a piece of aluminum foil large enough to wrap them
up. Sprinkle with GMG South of the
Border Rub or GMG Wild Game Rub. Dice
a small onion and add this to the pile as
well. Sprinkle some crushed red pizza
pepper on and moisten the whole thing
with olive oil or melted butter. Don’t
saturate.
Cook at 400°F (204°C) for 30-45 minutes or until done, shaking
once or twice to distribute the oil.
Recipes
Pellet Grilling Basics
67
Recipes
Dynamite Ribs
•Use “babyback” ribs for best results.
•Peel membrane from shiny side of rib rack.
•Prepare marinade as follows (this makes
enough for two racks):
• 1 cup soy sauce
• 2 tablespoons red wine or apple cider vinegar
• ¼ cup wine (red or white) – optional
• ¼ cup olive oil
• 2 tablespoon brown sugar
• 1 teaspoon onion powder
• 5 cloves (use garlic press) or 2 tablespoons (from jar)
minced
garlic
• 2 teaspoons black pepper
• ½ teaspoon Tabasco (or other red pepper) sauce
Stir until frothy. Marinate the ribs in this sauce for NO LONGER
than 4 hours. Turn racks occasionally.
Smoke at about 180°F (82°C) for 4-6 hours, turning racks occasionally. Then, turn temperature up to 225°F (107°C) and finish
for another 2-4 hours until you are happy with the texture.
Baste with GMG Cherry Chipotle or Cattle Drive barbecue
sauce for the last hour.
66
PELLET GRILLING BASICS, CON’T’D
Be creative! You can cook almost anything on this grill. Try
pizza, bread, marinated vegetables, casseroles, and corn bread,
as well as steaks, roasts, hams, pork chops or tenderloins,, wild
game, fish, and poultry. Cook anything outside in this appliance that you would cook in your kitchen oven.
Keep the lid closed when cooking. The grill cooks with
convection heat, so an open lid only dissipates heat into the
atmosphere. “If you’re lookin’, you’re not cookin’.”
Caution! As with any barbecue, the potential for a grease fire
exists. To reduce this possibility, regularly clean the grease tray
to prevent flammable buildup. An easy way to do this is to line
the tray with aluminum foil, overlapping the left sheet onto the
right one so that grease does not get underneath on its way
down the slope of the tray. You could also put multiple sets
of sheets on the tray and then just peel one off each time you
cook.
Also, make sure the grease drain where the grease drains from
the inside of the cavity into the discharge tube is clean and
free of debris.
Smoke flavor: You will get more smoke flavor at low temperatures than at high ones. If you wish to infuse a piece of meat
with a smoky flavor, cook it at 150-160 for an hour or so before
you turn up the grill to finish it off.
Let meat rest. Beef, pork, poultry, and fish will generally continue to cook after you remove them from the grill as the hot
outer part of the meat influences the cooler interior. While it
seems possible to eat immediately upon finishing your grilling, that seldom works out as a practical matter. It makes
better sense to plan for the internal temperature to rise about
5 degrees after you take it off the grill. Also, resting allows the
juices to redistribute more evenly throughout the meat.
Recipes
Pellet Grilling Basics
19
PELLET GRILLING BASICS, CONT’D
Rookie Help
If you’re new to pellet grilling, what follows will help you to get
started. These guidelines are not immutable by any means.
Food
Method
Temperature
Time*
Brats
Grill
450-500
5-10 min./side
Brisket
Slow-cook
225-240-
6-10 hours
Burgers
Grill
450-500
7-10 min./side
Chicken pieces
Grill
375-425
15-20 min./side
Chicken - whole
Roast
275-325
1.5-2.5 hours
Fish
Grill
375-425
7-20 min./side
Hot Dogs
Grill
450-500
5-7 Min./side
Jerky
Smoke
150-170
4-6 hours
Pizza
Bake
400-450
14-18 minutes
Pork Butts/Picnics
Slow-cook
225-240
8-16 hours
Ribs
Roast
200-250
4-8 hours
Roast Beef
Roast
250-300
1.5-3.5 hours
Salmon - smoked
Smoke
150-175
6-10 hours
Steaks
Grill
450-500
6-10 min./side
Times depend on the size of what you’re cooking, the initial temperature of the food when you put it in, how often you open the
lid, and other variables.
Please check the RECIPES section elsewhere in this manual
for more precise techniques.
Always specify Green
Mountain Premium
Gold Blend Grilling
Pellets!
Pellet-Braised Pot Roast
Recipes
Bar none, this is my favorite winter meal. So
if you invite me to supper, make this and I will
be one happy Mountain Man (Green Mountain, that is).
Rub a 4-6-lb. rump roast (or another cut if you prefer) with
black pepper, garlic powder, and a small amount of salt. Grill
at 500 for about 3-5 minutes per side, flipping until all sides are
brown. You may also do this in a skillet on your stovetop.
In a disposable 9X13 aluminum pan, mix about 1.5 quarts of
boiling water, 3 beef bouillon cubes, ¼ cup of red wine, 5-10
drops of Tabasco sauce, ½ teaspoon ground thyme (or 1.5
tsp thyme leaves), 2 bay leaves, and 1 tablespoon of olive oil.
Make sure to dissolve the bouillon cubes. Use a garlic press to
add 3 peeled cloves of garlic to the mixture. Quarter one large
onion and add it, too. Place this on a cookie sheet, since the
disposable pan won’t handle the weight. Add the roast.
Grill, uncovered for 4-6 hours at 275, adding hot water as
needed and flipping roast occasionally, until meat is tender.
Add quartered potatoes, carrots,, and small quartered onions.
Cover and cook another 1-1.5 hours until potatoes are done.
Make gravy by bringing 4 cups
of the broth to a boil on your
stovetop, and then adding 2
tablespoons of cornstarch dissolved in enough cold water
to make a pourable liquid.
Remove the bay leaves before
serving.
Recipes
20
Pellet Grilling Basics
65
PELLET GRILLING BASICS, CONT’D
Recipes
Barbecued Beef Tri-Tip Roast
(a personal favorite)
Rubs
&
Sauces
Let the meat come to room temperature before you put it on
the grill. Cook it anywhere from 275 °-325°. At the higher end
of this range you will get a pink center and dark perimeter, and
at the lower temperature you will get more pink meat. Grill for
60-90 minutes. Do NOT overcook this. Use a meat thermometer and cook until 118 °-120 ° in the middle. It will continue
to cook after you take it off the grill, so you should eat it right
away. But you will enjoy it cold, too; just be aware that it will
get darker as it cools.
Do not worry about searing - the grate will get much hotter
than the surrounding air and will amply caramelize the sugars
in the rub and in the meat’s surface.
Cut this across the grain in
1/8” slices. You can use the
leftovers, if you have any, to
make stroganoff, beef bourguignon, or fajitas (be sure to
use Green Mountain South of
the Border Rub on the fajitas!).
Be sure to check out the
available GMG accessories on Page 83
Here are the suggested uses for GMG rubs and sauces:
Beef Rub: Burgers, steaks, roasts, bison, beef ribs, pot roast,
lamb;
Fish Rub: Halibut, catfish, walleye, scallops, shrimp, calamari,
bass, tilapia, orange roughy; (not recommended for salmon,
trout, or steelhead)
Pork Rub: Chops, pork spareribs, pork babyback ribs, loins,
butts and picnic roasts (pulled pork), whole hog;
Poultry Rub: Turkey, chicken, pheasant, quail, grouse. Get the
rub underneath the skin, as the skin will not allow the rub to
penetrate to the meat.
South of the Border Rub: Ground meats, enchiladas, tacos,
burritos, and other Mexican dishes
64
Recipes
Pellet Grilling Basics
21
PELLET GRILLING BASICS, CONT’D
Wild Game Rub: Deer, elk, bear, duck, lamb, antelope, rattlesnake
Cattle Drive BBQ Sauce: Steaks, chops, ribs, burgers (emphasis
on beef )
Cherry Chipotle BBQ Sauce: Ribs, chicken, pork roasts (emphasis on pork and chicken)
Mumbo Sauce: Chicken wings, French fries, ribs (emphasis on
snacks)
Orient Express: ribs, chicken, salads (emphasis on any attempt
to create an Asian flavor)
Tennessee Sour Mash: steaks, ribs, chicken, pork roast, chops,
loins (emphasis on anything that benefits from the flavor of
bourbon)
FROGMATS
We love this product. You can buy one from your local dealer
or from the good folks at www.frogmats.com. Not much will
stick to it, so it makes flipping fish, burgers, baked beans a
breeze. (Kidding about the baked beans). We find this especially useful for making jerky or smoking fish, cooking bacon,
and pizza. And you can run it through your dishwasher to
clean it.
22
Pellet Grilling Basics
Recipes
Barbecued Beef Tri-Tip Roast
(a personal favorite)
This relatively inexpensive cut of meat has a great flavor and
very little fat. Cut from the bottom sirloin, this roast normally
got ground into hamburger. Legend has it that In the late
1950’s, the owner of a grocery store in Santa Maria, California,
asked his butcher to find a new cut of meat that would put
his market on the map. The “Santa Maria” steak was born. They
soon renamed it the “tri-tip” because it has three corners. In
Europe, they call it the “Triangle Roast.”
It became very popular and a little pricey in the last two decades, but it has recently come back to earth. A steer has only 2
of these, so it seems somewhat surprising that it doesn’t fetch
more, given its taste and leanness.
A typical roast weighs 1.5-2.5 pounds and will yield over 90%
of that in edible meat.
You want to rub this roast and refrigerate it overnight. I prefer that you go to your dealer and buy two to three hundred
thousand bottles of Green Mountain Beef Rub. I get a royalty
for every bottle sold because it has my picture on it, so you can
buy even more if you wish! Anyway, use part of one bottle and
rub the tri-tip thoroughly.
Recipes
63
TROUBLESHOOTING
Recipes
Pellet Baked Beans
We can do this the easy way, or we can do it the hard way.
If you like easy, then skip the next paragraph. This makes
enough for about 6 hungry people, or 8 not-so-hungry people.
PROBLEM
SOLUTION
Grill does not turn on Check to make sure the power cord is
when you press the plugged in.
switch.
Check the circuit breaker and/or GFCI on
the circuit the cord is plugged into. Plug
a lamp or small appliance into the same
outlet to see if you have electricity there.
Soak 1 ¼ cups of navy beans overnight in cold water. In the
morning, cook the beans in the same water for about an hour
or more until the beans are tender. In the meantime, fry about
¼ lb. of bacon (or cook it on your Green Mountain grill at 275
for about 20 minutes). Drain the beans, but keep the liquid.
Mix the bacon into the beans.
Unplug the grill. Remove the control
panel. Check the fuses on the
circuit board.
Easy: use canned Campbell’s Pork and Beans
Mince a small onion and sauté it in 1 teaspoon of the bacon
grease or butter until translucent. Add 2 tablespoons of molasses, ¼ cup of dark brown sugar, ¼ cup of GMG Cattle Drive BBQ
Sauce, 1 teaspoon of dry mustard, and 1/2 teaspoon of salt.
Bring to a boil.
Add this mixture to the beans your prepared or to the Campbell’s beans if you used the lug nut method. Stir in an 8 oz.
can of crushed pineapple, including the liquid. Pour this into a
disposable aluminum pan. Add the water you saved, making
sure the beans are immersed..
Bake in your grill at
165 for an hour, and
then turn up to 325
for an additional hour.
Call us so that we can determine the
cause of the blown fuse. 530-347-9167.
Grill does not come
up to temperature
Check the firebox to see if it has overflowed with pellets. If it has, clean it out
and start over again. This overfill can
result from a power failure during the
initial 0-1-2-3 cycles, or from turning
the grill off and then back on without
using the “Fan” mode, or from charging
the firebox when it does not need to be
charged.
Re-read the section on “Charging the firebox” to understand that you only need to
“charge” the first time you use the grill or
any subsequent time when it runs out of
pellets.
Also, read the section on “Hot Restarts.”
62
Recipes
Troubleshooting
23
TROUBLESHOOTING
PROBLEM
SOLUTION
Erratic temperature
If the digital display reads “SEN,” call your
local dealer for a replacement sensor.
Otherwise, check to make
sure you do not have
aluminum foil blocking the
thermal sensor.
Also, check to make certain that foil does
not block the air flow from around the
front and back of the grease tray.
Smoke comes out of Make sure the hopper lid stays closed
when you have the grill on. Press firmly
the hopper
down on each of the four corners of the
lid to make certain.
If the hopper still belches smoke, you
may have a warped hopper lid (very rare)
or a defective hopper fan (extremely
rare). Call your dealer for a replacement.
Low pellet alarm
beeps continuously
24 Troubleshooting
Fill hopper with pellets above
the sensor. If this does not
solve the problem, check to
make sure that the sensor has
a clear plastic lens on the end
of it. If not, get one from your
dealer. Put your finger over the end of
the sensor. If it still beeps, you have a defective sensor. Get a new one from your
dealer. You can disconnect it from the
top of the circuit board (top left beige
plug with 4 wires; not the top right with
2 wires) to stop the noise in the interim.
Recipes
Pellet-Baked Blackberry Crisp
Okay, I’m back up on the soap box, proclaiming once again
that you can cook anything in your pellet grill that you can
cook in your oven. Here’s more delicious proof.
Topping: Combine 1 cup of lfour, 1 cup of sugar, and 1 teaspoon of baking powder in a small bowl. Beat an egg in a
separate bowl. Make a depression in the cneter of the dry mix
and pour the egg into it. Fold gently until the topping mixture
is crumbly.
Filling: Mix ¾ cup of sugar and 3 tablespoons of corn starch
in a small bowl. Put 6 cups of fresh or frozen blackberries (or
boysenberries) in a large bowl and sprinkle with the sugar/
corn starch mix. Toss gently to evenly coat the berries.
Grease a square 8” or 9” pan with butter. Put the berries in it
and sprinkle the topping over evenly. Melt a stick of butter
and drizzle it evenly over the topping.
Bake this at 375° for 45 minutes. I predict that unless you utterly disdain dessert, you will have a second helping of this,
especially if you serve it with vanilla ice cream . . .
As Thoreau said, “Every man
has to believe in something. I
believe I will go fishing!”
Recipes
61
TROUBLESHOOTING
Recipes
Mom’s Own Quiche
You can make this tasty breakfast fare either with or without
a crust. If you use a crust, be sure to buy the “deep dish” size,
or cut this recipe down a little. This makes 2 of the deep dish
(freeze one for later), so cut it in half if you only want one.
On your stove, melt ¼ cup of butter and stir in ½ cup of flour.
Mixture will be thick. Cook this roux until it reaches a golden
yellow color. Beat 6 eggs well and stir them in. Add 1 cup of
milk, 2 cups of cream-style cottage cheese, 1 3-oz. package of
softened cream cheese, 1 tablespoon of sugar, and 1 teaspoon
of baking powder.. Mix thoroughly.
If you use pre-made pie crusts, pour this mixture into them. If
not, pour it into a greased disposable aluminum 9X13 pan.
Cut 1 lb. of Monterey Jack cheese into 3/4” cubes and drop it
evenly into the quiche(s).
Bake this at 350°F (177°C) for 60-75 minutes
until a knife inserted in the center comes out
clean.
You can add fried bacon, ham, green onions,
or spinach (before you cook) to enhance the
flavor.
60
Recipes
PROBLEM
SOLUTION
No pellets in the
firebox
Assuming that you’ve charged the
firebox so that there are pellets in the
auger tube, turn the grill on an press the
up arrow to send the control to Cycle 0.
Examine the auger inside the firebox to
see if it’s turning. If it is, then just wait
until pellets emerge into the firebox, turn
the grill off, and start it again.
If the auger is not turning, check the
white fan on the end of the auger motor underneath the hopper. If this fan
is turning and the auger is not turning,
then something has jammed the auger.
It could be a piece of metal accidentally
dropped into the hopper or wet pellets.
Remove the pellets and then the 4 bolts
holding the hopper onto the frame and
carefully lay the hopper on its left side
on a lawn chair conveniently placed. You
will see where the auger attaches to the
auger motor, and the cotter pin will have
sheared. After you find the cause (metal
or wet pellets), just replace the cotter pin.
Your grill is water resistant, but it is not
waterproof. If you leave it outside and
uncovered in a driving rainstorm, the
pellets may get wet and turn into sawdust. You can often chisel and vacuum
to free the wet sawdust from the auger;
occasionally, you will need to remove the
hopper, remove the two bolts from the
auger motor mounting plate, and pull
the auger out.
Troubleshooting
25
TROUBLESHOOTING
PROBLEM
SOLUTION
Soot on the food
Soot results from incomplete combustion of pellets. If insufficient air flow
enters the firebox, soot may result.
Clean firebox, making sure that the fins
are not blocked by ash.
Make certain that no foil blocks any of
the air pathways around the grease tray.
If you overlap the tray with foil, wrap it
tightly so that it does not interfere with
airflow.
When you turn the temperature down
radically (>40°), cover the food with foil
until the grill reaches your new set temperature. Cooling off will result in incomplete combustion if there happened to
be an abundance of pellets in the firebox
at the time you turned the temperature
down.
After you turn on your grill, do not put
food in until it reaches the default temperature or one you’ve set.. Early smoke
contains soot, so wait until the fire burns
clean.
Make sure the chimney has adequate
draft. In the summer, you will want the
cap open about 1.5” (2 fingers) and about
.5” in the winter (one finger).
26 Troubleshooting
Chipotle Peppers
Chipotle results from the process of smoking a jalapeno pepper. Your Green Mountain grill lends itself very well to this task.
Prepare the jalapenos by cutting off the stems along with
about 1/8” of the bodies. Then, slice one
side of the pepper lengthwise to open it
up. Remove the seeds. You may wish to
use plastic gloves for this task, since the
pepper residue will burn your eyes if you
happen to rub them.
Now, take a fish basket you likely no longer need or a metal
colander (or any metal utensil with holes in it). Put the peppers
in this.
Set the grill to 150°. Put the utensil with the peppers on it
inside and roast until the peppers completely dry out, usually
about 6-8 hours.
When the peppers finish, you can either freeze them or grind
them into powder in a blender or food processor.
Be sure to see my
recipe for “Bordertown Chipotle
Sauce” on page 42!
And buy 2-3 tons
of my GMG “South
of the Border” rub
to further enhance
any Southwest dish
you prepare.
Recipes
59
Recipes
Chicken as good as it gets!
(2009 Great Grilling Contest Winner)
Thanks to John DeKruyter for this excellent, well-thought-out
recipe.
4 boneless, skinless chicken breasts
½ cup Canola Oil
¼ cup Bragg Liquid Amino (or soy sauce)
3 tablespoons Worcestershire sauce
3 tablespoons red wine vinegar
2 tablespoons lemon juice
2 teaspoons dry mustard
1 teaspoon black pepper
3 cloves of garlic, minced
1 teaspoon finely minced fresh parsley
½ teaspoon ginger
Mix the liquids thoroughly in a large bowl, and then stir in the
dry ingredients. Pour into a one-gallon Zip-Loc bag and refrigerate for several hours, messaging the chicken several times to
mix ingredients.
Grill at 320 for 25-35 minutes or until done, turning halfway
through.
58
Recipes
Recipes Index
Appetizers
40
French Bread
Ham
74
Lamb
35
54 Rack of Lamb
46 Shish-kabob
Pizza
56
Pork
72
74 Bratwurst (brats)
Baked Beans
62 Dynamite Ribs)
Beef Fattie
Brisket
44 Ham
Burgers
28 Hot Dogs
Hamburgers
28 Kicked-up Garlic Ribs
Hot Dogs
56 Pigs in a Blanket
Jerky, Black Pepper
46 Pork Chops
Pigs in a Blanket
56 Pork Tenderloin
Pot Roast
65 Pulled Pork
Quiche
Prime Rib
41
Ribs
Steaks
32
Tri-Tip
63
Dynamite Ribs
Blackberry Crisp
61 Kicked-up Garlic Ribs
Bacon-wrapped Shrimp
Brats
Chicken Conquistador
Chipotle Sauce
Jerky, Black Pepper
Pigs in a Blanket
Shrimp Chipotle
Wings
Bread
Salad
Breakfast
Sauces
French Bread
Fattie
Quiche
29 Grilled Caesar Salad
80 Chipotle Sauce
Seafood
60
Chicken Bacon-wrapped Shrimp
Beer-can Chicken
52 Grilled Salmon
Chicken Conquistador
35 Shrimp Chipotle
Cornish Game Hens
47 Monterey Smoked Salmon
Grilled Bresats
58 Sweet Smoked Slamon
Side Dishes
Herb Breasts
55
Pellet-fried Chicken
79 Baked Beans
Wings
74
Turkey
Chipotle Peppers
59
Vegetables
Dessert Chipotle Peppers
Blackberry Crisp
61 Corn on the Cob
Fish
Grilled Caaesar Salad
Grilled Salmon
36 Potatoes Supreme
Monterey Smoked Salmon
77 Vegetable Medley
Sweet Smoked Salmon
76
Recipes
29
78
34
49
67
74
66
80
78
56
75
56
82
73
68
60
66
75
82
54
40
36
72
77
76
62
37
59
71
82
67
71
27
Recipes
Burgers - Elementary to Extravagant
Let’s face it - the hamburger still reigns supreme as the “AllAmerican” food. While deep-fried chicken livers might run a
close second in polite company, most of us prefer a burger.
The argument between lean and fat
ground beef will never get settled.
Personally, I prefer the leanest I can
afford. I also like to make two thin
patties for a “double” rather than one
thick one, but that’s just me.
Take whatever size fistful of ground beef you decide to use
and add a few shakes of GMG Beef Rub. Mix it into the meat
and knead for a minute or so. Then form the meat into a patty.
Make a slight depression in the middle with your thumb. Pour
a small amount of water into the depression. Grill at 450-500°F
(232-260°C). Depending on the thickness of the burger and
your preference for doneness, you should grill it for about 5-11
minutes per side. Cut into the thickest part to check for doneness (red-rare; pink-medium rare; barely pink - medium; brown
- medium well/well).
Recipes
Pellet Dogs in a Blanket, cont’d
(Le Chien-chaud du Pelléts en Croûte)
It will take about 20-25 minutes or so to get the rolls golden
brown like a Kansas wheat field. As my buddy Robert says, “Use
lots of ketchup (or mustard if you prefer) and just wait for the
extra fat to appear on your belly.”
Seriously, though, these really taste good, and they are almost
always what you’re hungry for when you don’t know what
you’re hungry for.
HOPPED-UP BURGERS -Here’s the good stuff: Mince an onion
and a half slice of bacon. If you want, add some diced Ortega
chilies. Knead these into your burger. You should cook this
until medium-well to insure the bacon cooks
thoroughly. If you make thick burgers, sauté
the onion/bacon mix for a couple of minutes
on your stove top before you mix it in with
your ground beef. You can top the burgers
with cheese during the last 2 minutes or so,
and you can also toast your buns for about the same length of
time.
28
Recipes
Recipes
57
Recipes
Recipes
Pellet Dogs in a Blanket
(Le Chien-chaud du Pelléts en Croûte)
Ultra-Sourdough French Bread “a la
Pellét Grille”
You laugh, but kids love these, and so do a lot of adults. I grew
up on these! Heck, a world-famous restaurant in New York City
- the Hideaway - has pigs in a blanket on the menu for eight
bucks, and it can’t be a lot of them if french fries cost $7! Here,
for eight bucks you can have a couple of dozen!
Okay, if you’re making this recipe to save time and money,
you’re out of your mind. You can buy a pretty decent loaf of
french bread at your local market for around two bucks. I never
understood how they could make it that inexpensively absent
automation, but they do. Someone suggested “volume” but I’m
not too sure about that: in my younger days, I bought a pickup-load of apples for $125, but found I could only sell them for
$100. One of my friends suggested that to solve that problem,
all I needed was a bigger truck! (As you might expect, he tried
to run for Congress.)
So get your favorite pre-made crescent rolls (croissants) in the
cardboard tube that explodes when you open it and scares
your dog halfway across the room. Sprinkle one side of the
dough with Green Mountain Pork Rub or Beef Rub. Use quality
hot dogs (oxymoron?) and wrap them up inside the seasoned
triangles.
But if you want to have a bit of fun and turn out a couple of
nice loaves of great bread, do this one. It will take you back to
days of yesteryear and let you identify with your ancestry who
used similar wood-fired ovens to bake bread.
You will need:
Set on an ungreased cookie sheet. By now you have already
turned your grill on to 375 and got it up to temperature.
Neighborhood kids are pestering you to hurry. Friends and
neighbors you haven’t seen in years stop by to watch you
deftly cook these
and to taste this
delicacy when you
finish.
56
Recipes
About 5 1/4-5 1/2 cups of unbleached flour (okay, use
bleached if you must, but remember the old adage - “The
whiter your bread, the sooner you’re dead!”)
12 oz. warm beer or ale about 110°-120° (you can substitute
water if you must)
2 Tbsp white vinegar
2 packages fast yeast
1 Tbsp salt
1 Tbsp sugar
1/2 tsp baking soda
1 Tbsp vegetable oil
1 Tbsp cold water
1 egg white
Tbsp = tablespoon • tsp = teaspoon
Recipes
29
Recipes
Recipes
Ultra-Sourdough French Bread “a la
Pellét Grille”
Citrus Herb Chicken Breasts
Pour the warm beer or ale into a large mixing bowl. Add the
vinegar and swirl until mixed. Pour the yeast on top of the
beer/vinegar mixture and let stand for 15 minutes in order
to “proof” the yeast. Add the sugar, salt, baking soda, and oil,
and mix thoroughly with a fork. Mixture will be frothy. Let this
stand for another 15 minutes.
Marinade:
• Juice of 3 lemons
• 1 bunch of fresh cilantro, chopped
• 5 cloves of garlic, minced
• 1 medium red onion, minced
• 1 tablespoon fresh cracked black pep-
per
• 1 teaspoon kosher salt
• ¼ cup extra virgin olive oil
Add the flour, a little at a time,
mixing constantly to moisten
all
of the flour. You can do the first
3
1/2 cups with a spoon or fork,
but the next cup or so you will
need to use your hands. Stop adding flour when the dough
comes cleanly away from the sides of the bowl, but make sure
you use at least 5 1/4 cups.
Now your work begins. You must
knead this bread for five minutes.
This will require some effort,
especially from your wrists and
forearms, but the bread will not
work unless you do this. Your
grandmother likely did this nearly
every day!
Now, let this rise to double its
size, about 1-1 1/2 hours. Put the
dough in a warm closet to speed
this process.
30
Recipes
• 4 chicken breasts
Rinse and dry the chicken breasts. Mix marinade ingredients
together. Add chicken to marinade and put in the refrigerator
for 2 – 4 hours.
Set the grill to about 325°. When the grill reaches temperature,
add the chicken breasts directly from the marinade to the hot
grill.
Grill each side of the chicken breast for 8 minutes; make sure
they are not pink in the middle after cooking. Serve this savory
grilled chicken dish with a side of Long Grain Rice and green
beans for a healthy, balanced meal.
Note: You can marinade the
grilled chicken breasts in a
zip lock back lying flat in the
refrigerator to save room.
Recipes
55
Recipes
Border-Town Chipotle Sauce
• ¼ cup water
• ½ cup of tomato paste
• ½ cup of tomato sauce
• 2-3 chipotle chili peppers (from Chipotle Peppers recipe on pg. 59)
• 2 tsp cumin
• 2 tbsp lime juice or the juice from one whole lime
• 2 cloves garlic
• 1 tsp oregano
• ½ tsp cilantro
• 1 tbsp brown sugar (to taste)
• ¼ cup white vinegar (to taste)
• A couple of drops of liquid smoke
• ½ tsp salt (to taste)
Mash the garlic and chipotles together in a small food processor. Mix in the tomato paste, tomato sauce, water, and lime
juice. Stir in the cumin, oregano, and cilantro. Add a few drops
of liquid smoke.
Now, stir in about half of the brown sugar, half of the vinegar,
and half of the salt. Taste the sauce at this point. Continue to
add small amounts of sugar, salt, and vinegar until you like the
taste.
Recipes
Ultra-Sourdough French Bread “a la
Pellét Grille”
Next, punch the batter down and divide it in half. Make two
loaves. Cover a cookie sheet with aluminum foil and place the
bread on it. Let the bread rise to double its size, another 1-1 1/2
hours.
Make 4 diagonal cuts about 1/8”
deep across each loaf with a serrated knife.
Mix the water and egg white and brush the tops of both
loaves.
Set your grill at 375 and let the
temperature stabilize. Put the
bread in for about 45 minutes,
brushing every 15 minutes with
the egg whites and water mixture,
which will crispen the crust but
leave the bread inside light and airy. Let the loaves cool for a
few minutes on a wire rack before you gorge yourself.
You want to mix these distinct flavors, which you can do either
by refrigerating for a few hours or by simmering on the stove
for 30 minutes. Either way works well, but the stove top method yields a slightly more robust taste.
Keep this product refrigerated or frozen until ready to use.
54
Recipes
Recipes
31
Recipes
Recipes
Steaks How You Like ‘Em
Beer-can Chicken
Cuts: Rib Eye, T-Bone, New York Strip, Top Sirloin, Porterhouse,
Filet Mignon, Flat Iron
Set the grill to about 325°. Wait until the temperature stabilizes.
Okay, so fire up the grill, invite 100 or so close friends over, and
eat until your teeth get tired.
If you like a very tender steak, grill a filet mignon. Done right,
you can practically cut it with a fork. If you like a little more
texture, barbecue a T-Bone, New York, Rib Eye, or Porterhouse.
And if you want a bit of a workout with great flavor, fix a flat
iron or top sirloin.
You should know 4 important things about grilling steaks:
1. Bring the meat to room temperature before you put it on
the grill. If you don’t, the outside will cook much faster
than the cold inside, and you will get a dry exterior with a
cold interior.
2. Use rubs without a high salt content. (GMG Beef Rub
springs immediately to mind!) Copious quantities of salt
tend to draw moisture out of the steak. Sugar will caramelize and add that great char on the surface.
3. Baste with butter or spritz
with apple juice/Worcestershire mix. Or both!
4. Let the meat rest about 10
minutes after you’ve finished
cooking. This will keep the
flavorful juices inside the
steak where they belong. Cut
into one too early, and the juices will run all over the plate.
32
Cook for 2 hours 15 minutes or until done. Chicken is done
when leg moves freely in socket.
Recipes
Recipes
53
Recipes
Beer-can Chicken
Put 1/4 cup kosher salt in about a gallon of water in a large pot
and stir until dissolved.
Thoroughly wash and rinse a whole chicken, removing the
giblets. Immerse the chicken in the salt water, making sure the
water covers it completely and refrigerate for about 3 hours.
Melt two tablespoons of butter and stir it into 2 tablespoons of
vegetable oil. Rub the entire chicken, inside and out, with this
liquid.
Sprinkle generous amounts of garlic salt and black pepper on
the outside of the chicken and in the cavity.
If you use a chicken stand, pour about one-half of a can of
warm beer into the stand. Or, empty about one-half of the
beer from a can. Warm beer works best. Add one shot of tequila to the beer. (OPTIONAL)
Place the chicken on the chicken stand or on the beer can, inserting it into the cavity. If you’re using a beer can, the chicken
should stand up on the can by itself.
52
Recipes
Steaks How You Like ‘Em, cont’d
Technique: As a general rule, you should grill a high quality steak on high heat (450-500°F; 232-260°C). A lower quality
steak will probably benefit from a slower cook (275-350°F 135-177°C). Occasionally, if I have the time, I will cook a steak
for about an hour or so at 150° (66°C) and then turn it up to
500°F (260°C) to finish it off.
TIME: Grill about 7-10 minutes per side at high temperatures
or 15-20 minutes per side at the lower temperatures mentioned above. The amount of time will depend on the thickness of the meat and your preference for doneness.
DONENESS - Use one of these methods:
1. Cut into the steak in the center. Rare meat will be red; medium rare will have a little red in the center turning to pink;
medium will have some pink in the center; medium well
will have a mostly gray or brown color.
2. Use the “touch test.” Rare will feel soft and only a little
springy, with very little resistance. Medium rare will feel
more firm and springy, with some resistance against your
finger. Medium/medium well will be firm and will snap
back when pressed.
3. Use your meat probe. The USDA recommends that you
cook steaks to a minimum interior temperature of 145°F
(63°C). If you do so, your meat will be gray to brown and
about as tender as a bicycle tire. The reality is that you
risk getting sick from steaks
cooked to lower interior temperatures. I enjoy rare steak
enough to risk it, but you may
not.
Recipes
Recipes
33
Recipes
Recipes
Gourmet Rack of Lamb
If you do this right, you will never order it in a restaurant again!
Shaslik of Lamb (authentic Armenian
lamb shish-kabob),cont’d
Racks of lamb – approx. 4-6 bones per person served. You will
likely prefer Australian to New Zealand racks, but Californiagrown can also be very good.
These quantities are right for about 24 bones (3 normal racks).
• 1/3 cup olive oil
• 2 tablespoons fresh rosemary
• 12 cloves garlic
• 1 teaspoon salt
• ½ teaspoon black pepper
Do NOT trim any fat from the lamb racks.
Crush the rosemary in a small food
processor or mortar and pestle.
Mince the garlic with a garlic press
(or use equal
quantity – 4-5 tablespoons - of
minced garlic from a jar).
Make a paste with the olive oil, garlic, rosemary, salt, and
pepper. Use this paste to coat any
part of the rack of lamb that is not
covered with fat. Sprinkle salt and
pepper on the fat cap on the top
side of the rack.
Grill these kabobs at 360-380° for 25-35 minutes or until done.
Lamb is best when cooked medium-rare, but not everyone
likes that. It will taste great and still remain fairly tender even if
cooked medium-well.
Pre-heat the grill to about 400°. Grill the lamb for about 12 minutes per side or until done to your liking. This method should
get cooked to medium-rare only, but suit yourself.
34
Recipes
Recipes
51
Recipes
Shaslik of Lamb (authentic Armenian
lamb shish-kabob)
Rough-dice the onion and place in a large bowl. Chop a few
sprigs of fresh parsley and add to the onion.
In a separate bowl, mix one cup of olive oil, one cup of sherry,
and one tablespoon of ground black pepper. Peel five cloves
of garlic and either use a garlic press to mash them or the side
of a butcher’s knife. Add the garlic to the liquid and beat until
frothy. Add the liquid to the onion. Mix thoroughly.
Now, pour the onion mixture over the lamb cubes, cover , and
refrigerate overnight.
Chicken Conquistador
Recipes
You will have fun cooking this one. It does not require much
effort unless you skimp and buy bone-in thighs. De-boning
thighs can be a real pain, especially if the knife slips. So use
boneless, skinless thighs and/or breasts. You will need bacon
slices, a can of Ortega whole chilies, toothpicks, and your chicken pieces. You can up the ante on this one with a jalapeno or
habanero pepper at your own risk, but first remove the seeds.
Wash and pat dry the chicken pieces. Rub each with a small
quantity of Green Mountain “South of the Border” Spice Rub.
Place a chili on each of the chicken pieces. Wrap each of them
up in a piece of bacon and spike in place with a toothpick.
I’ve heard the rumor for years that the dye in toothpicks of
color will harm you, but I figure the FDA would never let that
happen. Plus, there would be a whole
lot of people in the hospital suffering
from TDS (Toothpick Dye Syndrome)
and somehow word of this would have
gotten out. So use them - they are a
lot stouter than the regular ones, and
they’re much easier to find when you
drop yours on the ground!
Skewer the lamb chunks onto 2 wooden skewers. If you use
only one, then turning them will cause you some difficulty as
the single skewer will just rotate inside the meat. Two insures
that you can flip them easily. Pack the meat on tightly.
50
Recipes
You’ve thought ahead on this one and already have your grill
going and stabilized at 275 °. Put the chicken pieces on the
grate and cook for 80-90 minutes or until done. Turn the pieces
a few times while they cook and spritz with apple juice when
you do. The bacon usually finishes at the same time as the
chicken unless you’ve skimped again and bought bacon so
thin you can shave with it.
Recipes
35
Recipes
Grilled Salmon Filets
Go to your local boat store, buy a boat, a truck to pull it, a
salmon rod, a license, and tow the whole rig to the west coast
in late summer or
early fall to hopefully
catch one of these. Or,
go to the local market
and pay a few bucks
per pound.
Lightly salt and pepper both sides if the
fish has been skinned.
Salt and pepper the side without skin otherwise. Melt a few
tablespoons of butter (olive oil an acceptable substitute), and
brush both sides of the fish with it.
Place on the grill at 400-450°F (204-232°C), skin side down
(won’t matter which side if it’s skinless). This is a great dish to
cook on a Frogmat. (see page 22).
Turn the fish after about 8 minutes (assuming 1” filet). Peel
the skin off. If it does not come off easily, flip the fish back
over for a couple more minutes and then try again. Salt and
pepper lightly after you remove the skin. Baste with butter.
Cook another 5-6 minutes and then turn over for about 2 more
minutes. Check doneness by
separating the center with a
fork. Fish should be just slightly
pink with only a small amount
of juice. Remove from the grill,
cover, and let stand for 5 minutes as it will continue to cook.
36
Recipes
Recipes
Shaslik of Lamb (authentic Armenian
lamb shish-kabob)
Okay, so not everyone likes lamb. But I have served this numerous times to guests who claimed to disdain this meat, only
to have them eat a lot more than their fair share. If you buy a
boneless leg of lamb, it will make your job much easier. If you
buy a bone-in leg, though, it will cement your friendship with
Fido. Also, California or Australian lamb is preferable to New
Zealand lamb, but even the Kiwi offering will not disappoint.
You will need, in addition to a leg of lamb, a jumbo red onion
or two medium ones, one cup of olive oil, one cup of sherry,
one tablespoon of ground black pepper, about five cloves of
garlic, and a tablespoon of Green Mountain Wild Game Spice
Rub.
Trim the fat cap from the lamb. Then cut the leg of lamb into
approximately 1 1/2 cubes. Place into a large bowl and sprinkle the Wild Game Rub over the meat, tossing until evenly
mixed. If you don’t have our rub available, mix together a
teaspoon of brown sugar, a teaspoon of salt, 1/4 teaspoon of
ginger, and 1/4 teaspoon of turmeric. The Wild Game Rub has
several additional exotic spices in it, but this shortened version
will get you by until you barbecue that elk backstrap.
Recipes
49
Recipes
Recipes
Cornish Game Hens Stuffed With
Long Grain and Wild Rice
When your grill’s temperature stabilizes, put the hens inside,
directly on the grate, with the breasts up (wings down).
Cook for about 90 minutes or until leg moves
freely in socket and
skin is golden brown.
Mountain Man’s Turkey Recipe
Turkey takes a bit of time, so I see no reason to cook a small
one. You can always freeze the leftovers – they
will stay moist for several weeks if you use a
vacuum-seal gadget, available at many fine
stores everywhere and a worthwhile investment. Turkey costs very little, and you will pay
for the whole bird just in the savings on sandwiches you make
from the leftovers that you would otherwise buy. You’ll have
enough to make a lot of foot-long sandwiches.
Thaw the turkey in the refrigerator. This will take anywhere
from 2-5 days depending on the size of the bird. You can also
thaw it in cold water in 8-12 hours.
Remove the neck and the giblets from the bird’s cavities.
If you don’t own a pan large enough to brine the turkey, just
go to a box store and buy a 5-gallon plastic
pail. Put the turkey in the pan or pail and then
add enough water to completely cover it.
Remove the turkey.
Add enough kosher salt to the water until a raw egg just seems
buoyant. Stir. Add 3 tablespoons of brown sugar or molasses
plus 5 tablespoons of GMG Poultry Rub.
Use a garlic press or mash several cloves of garlic with the side
of a butcher’s knife and add to the brine. Stir thoroughly.
Brine the turkey overnight. Make sure no part of the turkey is
out of the water.
Remove the turkey and pat dry with paper towels.
48
Recipes
Recipes
37
Recipes
Mountain Man’s Turkey Recipe, cont’d
Push a wooden spoon underneath the skin all the way around
the bird, top and bottom, to break the skin away from the flesh.
The goal is to make enough room to get your hand between
the skin and the flesh.
Rub reasonable amounts of
Green Mountain Poultry Rub
on the flesh with your hands
between the skin and the meat.
Do this top and bottom – wherever you can reach. You can put the rub on
the skin, but this will merely make the skin
taste good, not the meat – the skin acts as a perfect insulator.
So unless you have a huge fondness for flavorful grilled turkey
skin, you will waste your money putting a spice rub on it.
Place the turkey, breast side down, in a disposable aluminum pan (unless you really love to
clean pots and pans and want to use your good
oven roaster).
Turn the grill on and set it to 185°. When that temperature
stabilizes, put the turkey in the grill. On humid days, I recommend that you cover it for the first hour, since some sooting
may occur until the atmosphere inside dries out.
Cornish Game Hens Stuffed With Long
Grain and Wild Rice
This is an easy cook, so you can do it even if you’re feeling a bit
petulant. It presents well, tastes great, and will earn accolades from
your diners. I make this for Tina frequently just so that I can hear
her rave about it. Or sometimes, she fixes it for me, which just goes
to show you that even a woman can operate a Green Mountain
grill! Grilled asparagus accompanies well.
Thaw your birds overnight or longer in the refrigerator, or in cold
water for several hours.
Prepare one box of Uncle Ben’s Long Grain & Wild Rice for each 3
birds you plan to cook. Let the rice cool to room temperature.
Wash the hens thoroughly, inside and out, and pat dry with paper
towels.
Spread a small amount of olive oil on the hens, especially in the
cavity.
Rub inside and out with a generous amount of Green Mountain
Poultry Rub.
Turn the grill on to 320 °. (it will default to that temperature automatically.)
Stuff the cavity of each bird with your rice mixture.
Make a mixture of 1 cup of apple juice and 1 teaspoon of
Worcestershire sauce. Put this in a small spray bottle which you
can get at Wal-Mart for about one dollar.
Spritz (spray) the turkey about once per hour. Make sure that
you spritz thoroughly, especially inside the bird’s cavities.
38
Recipes
Recipes
47
Recipes
Recipes
Black Pepper Smoked Jerky
Mountain Man’s Turkey Recipe, cont’d
Jerky probably developed in several cultures before refrigeration, as a way to store food for longer periods of time. It
remains a tasty and nutritious snack.
Cook the turkey for about 8 hours, regardless of the size of the
bird.
(A Teem Green recipe)
You will need the following:
3 lbs. lean beef or game meat, thin sliced with the grain
1 Cup Soy Sauce
½ cup Worcestershire Sauce
½ cup dry White Wine or cooking sherry
¼ cup GMG Cherry Chipotle BBQ Sauce
½ cup white sugar
2 tablespoons black pepper
*1-2 tablespoons Sriracha sauce
(optional for heat)
Mix all the ingredients (except the meat) in a glass or plastic
bowl. Make sure to dissolve all of the sugar. Put the liquid and
the meat into a one gallon Zip-Loc bag, seal tightly, and refrigerate for 3-12 hours. The longer the meat marinates, the more
intense the flavor.
Drain the juices on a wire rack or a wad of paper towels.
Smoke at 165°F (74C) for 6-12 hours. Jerky is done when it no
longer feels soft. Longer smoking times yield drier jerky.
46
Recipes
After 8 hours, turn the bird over. Turn the grill up to 275°.
Install the grill’s meat probe into the socket on the control
panel and insert the probe end through the access hole on the
side of the grill. Stick the probe into the thickest part of the
breast, about 3/4” away from the bone. Push it straight down
into the bird until it touches the bone, and then back it out
about 1/2”. Leave the probe in. Alternatively, you could use a
meat thermometer.
Continue to cook for about 10-12 minutes per pound until
the temperature on the probe or meat thermometer reaches
160°. If the skin becomes browner than you like during this
period, you can cover the breast with aluminum foil. Remove
the turkey from the grill, cover it completely with foil, and let it
rest for 20-30 minutes, during which time the temperature will
continue to rise to 165.
Carve your turkey. Overeat.
Watch football.
Recipes
39
Recipes
Recipes
Bacon-Wrapped Shrimp
Kansas-style Beef Brisket, cont’d
Use extra jumbo (16-20 shrimp per lb.), jumbo (21-25 pcs/lb)
or extra large (26-30 pcs/lb). You can usually buy these frozen,
peeled and de-veined. Or you can buy them fresh and do that
work yourself. Remove the tails because you cannot digest
shellfish exoskeleton.
Mix about 1 ½ cups of apple juice plus 2 tablespoons of
Worcestershire sauce. Cook the brisket at 165°F (74°C), fat side
up, for 4 hours. Spritz with the apple juice mix every hour or
so. Then, turn it over and cook for 2 more hours. After that, set
the grill at 185°F (85°C), turn the brisket back over to fat side
up and cook until the brisket’s internal temperature (leave
your grill’s probe inserted sideways into the thickest part of the
roast, or use a meat thermometer) reaches 165°F (74°C), usually
about another 4 hours. Next, remove the brisket from the grill.
Wrap the brisket completely in aluminum foil and drizzle at
least ½ cup of the apple juice mix inside the foil onto the meat.
Buy very thin bacon and grill 1/2 slice per shrimp on a frogmat
at 275°F (135°C) until it is almost edible. Let the bacon cool a
few minutes until it is easy to handle. Clean the bacon grease
off of the grease tray.
Drizzle a small amount of lime juice and pineapple juice on the
shrimp. Wrap each shrimp tightly with 1/2 slice of the bacon.
If you wrap very tightly you will not need toothpicks, but if you
need to use them, pre-soak for 20-30 minutes in cold water.
Grill at 425 for 5-7 minutes per side until the shrimp is pink and
the bacon crisp. Don’t overcook the shrimp as they will get
rubbery and chewy.
40
Recipes
Turn the grill up to 225°. Cook until the internal temperature of
the meat reaches 198-201° (2-6 hours). Lay newspaper or paper towels in a cooler and lay the meat, still wrapped up in the
aluminum foil, on the paper. Close the cooler and let the meat
rest for about an hour and a half.
Drain the juices and cut the meat in 1/8” slices across the grain.
You will be able to cut this with a plastic fork. You may also
wish to cool the drained juices in the refrigerator, skim the fat
from the surface of the liquid, and then reheat for an au jus dip.
Recipes
45
Recipes
Kansas-style Beef Brisket
Many thanks to Joe Martin, a culinary legend, for this great recipe
The brisket embodies the essence of BBQ.
If you can prepare a brisket that tastes
great, has a good, clean smoke ring, and
cuts with a plastic fork, you’ve stepped
outside the envelope of casual grilling
and into the realm of serious barbecue.
The brisket challenges you because it is a pretty crummy cut
of meat that handicaps you before you start. It’s analogous
to making a silk purse out of a sow’s ear. Sure, you could boil
a brisket to make it tender as a Mother’s love, but the texture
and taste would not earn many accolades from people with
even a hint of a palate.
So try this. It takes a long while, but if you succeed, you will do
it again and again.
Start with one whole brisket – 7-10 lbs. Use Choice grade instead of Select (Standard) so that the meat gets tender without
being flaky and dry.
Trim the fat cap to ¼” thick. Then, score the fat in 3/8” squares,
like a waffle. This allows the rub, heat, and smoke to penetrate
into the meat. Rub with GMG Beef Rub or similar. Massage
the rub thoroughly into the meat. Refrigerate for 6-8 hours or
overnight. Return the brisket to room temperature before you
begin to cook it..
44
Recipes
Holiday Prime Rib
Actually, prime rib is a bit of
a misnomer, as less than 2%
of all American beef is graded
“prime.” Most of that grade
goes to expensive restaurants,
although some specialty
butcher shops carry it as well.
Your local grocery stores will
carry USDA Choice or Select. If
your budget permits, buy USDA Choice because it will be more
tender and flavorful.
Your body really benefits from eating beef. Beef ranks as the #3
source of iron which you need to carry oxygen to your muscles
to prevent fatigue. It also provides zinc to improve your immune system, B-Complex vitamins to convert food into energy,
and protein to promote strength and endurance.
Okay, let’s begin:
Start with a 3-7 bone roast. As a rule of thumb, one
“bone” will feed two people, so if you have a group of 8, you
likely need a 4-rib roast. A “prime rib” roast is simply a “standing
rib” roast - the terms are interchangeable. Don’t buy a boneless
roast, as it will have much less flavor.
Recipes
Recipes
41
Recipes
Recipes
Holiday Prime Rib, cont’d
Holiday Prime Rib, cont’d
Wash the roast thoroughly with cold water and dry completely
with paper towels. If the fat cap is thicker than ¾”, trim it down
to about ½-¾”. Score the fat cap in both directions with a sharp
knife just to the meat in a checkerboard pat-tern. Lightly coat
the roast with olive oil and
then rub with GMG Beef Rub.
Buy thousands and thousands
of bottles! Stock up for the
future! If you don’t have our
rub, use something else if you
must. Our beef rub contains
smoked paprika, cayenne,
brown sugar, sea salt, marjoram, cumin, black pepper,
and thyme, and some combination of those ingredients will
enhance the flavor of your roast. Put the roast in the refrigerator for several hours, or preferably, overnight.
middle of the roast.
Cook the roast to an internal
temperature of 125 (rare), 132
(medium rare), 140 (medium),
148 (medium well), and 160
(well done). Remove the roast
from the grill, cover with aluminum foil, and let it rest for
about 20-30 minutes. The internal temperature of the meat will
rise another 3 degrees during this time. Then carve and enjoy!
Please be aware that the USDA recommends a minimum internal temperature of 145°F (63°C) for safe eating of beef roasts
and steaks.
Plan about 5-8 hours cooking time depending on the size of
your roast. So working backwards, if you want to eat a 6:00
PM, you should start cooking the roast around noon, again
depending on the size. Take the roast out of the refrigerator
about two hours before you plan to cook it. This allows the
meat to cook more evenly throughout since the grill will not
have to overcome a very cold temperature in the middle of the
roast, and it will also cut down on your cooking time since the
roast starts out at a higher internal temperature.
Set your grill at 500°F (260°C). When the temperature stabilizes,
put the roast in, fat side down, right on the grate. Let it cook for
15 minutes. Then turn it over, fat side up, and cook for another
15 minutes. Turn the temperature down to 190°. Insert the
probe or a meat thermometer into the middle of the side of
the roast so that the end of the probe is approximately in the
42
Recipes
Recipes
43
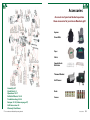
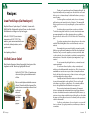


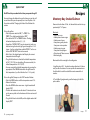
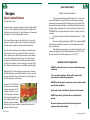


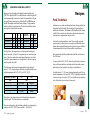
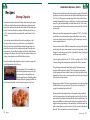


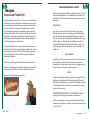


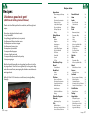
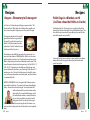
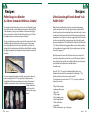
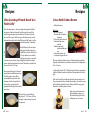


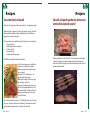
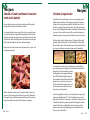

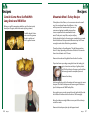
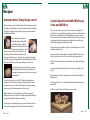


![Echo27 [ENG].docx](http://vs1.manualzilla.com/store/data/005976885_1-e0af01262414116599497eec32cd1fc5-150x150.png)