1
Instruction Manual
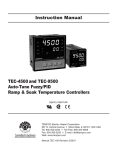
TEC-220 and TEC-920
Auto-Tune Fuzzy / PID Process
Temperature Controller
Agency Approvals
TEMPCO Electric Heater Corporation
607 N. Central Avenue • Wood Dale, IL 60191-1452 USA
Tel: 630-350-2252 • Toll Free: 800-323-6859
Fax: 630-350-0232 • E-mail: [email protected]
Web: www.tempco.com
Manual TEC-220/920 Revision 12/2012
Blank Page
NOTE:
Warning Symbol
This symbol calls attention to an operating procedure, practice, or
the like which, if not correctly performed or adhered to, could
result in personal injury or damage to or destruction of part or all
of the product and system. Do not proceed beyond a warning symbol until the indicated conditions are fully understood and met.
Using the Manual
Installers . . . . . . . . . . . . . . . . . . . . . . . . . . . Read Chapter 1, 2
System Designer . . . . . . . . . . . . . . . . . . . . . Read All Chapters
Expert User . . . . . . . . . . . . . . . . . . . . . . . . . Read Page 11
It is strongly recommended that a process should incorporate
a LIMIT CONTROL like TEC-910 which will shut down the
equipment at a preset process condition in order to preclude
possible damage to products or system.
Information in this user's manual is subject to change without
notice.
Copyright © 2010, Tempco Electric Heater Corporation, all
rights reserved. No part of this publication may be reproduced,
transmitted, transcribed or stored in a retrieval system, or translated into any language in any form by any means without the
written permission of Tempco Electric Heater Corporation.
Contents
Figures & Tables
Page No.
Chapter 1 Overview
1-1 General . . . . . . . . . . . . . . . . . . . . . . . . . . . . . . . . . . . . . 1
1-2 Ordering Code . . . . . . . . . . . . . . . . . . . . . . . . . . . . . . . 2
1-3 Programming Port . . . . . . . . . . . . . . . . . . . . . . . . . . . . 2
1-4 Keys and Displays . . . . . . . . . . . . . . . . . . . . . . . . . . . . 3
1-5 Menu Overview . . . . . . . . . . . . . . . . . . . . . . . . . . . . . . 4
1-6 Parameter Descriptions . . . . . . . . . . . . . . . . . . . . . . . . . 5
Chapter 2 Installation
2-1 Unpacking . . . . . . . . . . . . . . . . . . . . . . . . . . . . . . . . . . . 7
2-2 Mounting . . . . . . . . . . . . . . . . . . . . . . . . . . . . . . . . . . . 7
2-3 Wiring Precautions . . . . . . . . . . . . . . . . . . . . . . . . . . . . 7
2-4 Power Wiring . . . . . . . . . . . . . . . . . . . . . . . . . . . . . . . . 8
2-5 Sensor Installation Guidelines . . . . . . . . . . . . . . . . . . . 8
2-6 Sensor Input Wiring . . . . . . . . . . . . . . . . . . . . . . . . . . . 8
2-7 Control Output Wiring . . . . . . . . . . . . . . . . . . . . . . . . . 8
2-8 Alarm Wiring . . . . . . . . . . . . . . . . . . . . . . . . . . . . . . . . 10
2-9 Data Communication . . . . . . . . . . . . . . . . . . . . . . . . . . 10
Chapter 3 Programming
3-1 Lockout . . . . . . . . . . . . . . . . . . . . . . . . . . . . . . . . . . . . 11
3-2 Signal Input . . . . . . . . . . . . . . . . . . . . . . . . . . . . . . . . . 11
3-3 Control Outputs . . . . . . . . . . . . . . . . . . . . . . . . . . . . . . 11
3-4 Alarm . . . . . . . . . . . . . . . . . . . . . . . . . . . . . . . . . . . . . . 13
3-5 Configuring the Display . . . . . . . . . . . . . . . . . . . . . . . 14
3-6 Ramp . . . . . . . . . . . . . . . . . . . . . . . . . . . . . . . . . . . . . . 14
3-7 Dwell Timer . . . . . . . . . . . . . . . . . . . . . . . . . . . . . . . . . 14
3-8 PV Shift . . . . . . . . . . . . . . . . . . . . . . . . . . . . . . . . . . . . 15
3-9 Digital Filter . . . . . . . . . . . . . . . . . . . . . . . . . . . . . . . . 15
3-10 Failure Transfer . . . . . . . . . . . . . . . . . . . . . . . . . . . . . 15
3-11 Auto-tuning . . . . . . . . . . . . . . . . . . . . . . . . . . . . . . . . 16
3-12 Manual tuning . . . . . . . . . . . . . . . . . . . . . . . . . . . . . . 16
3-13 Manual Control . . . . . . . . . . . . . . . . . . . . . . . . . . . . . 17
3-14 Data communication. . . . . . . . . . . . . . . . . . . . . . . . . . 17
3-15 Process Variable (PV) Retransmission. . . . . . . . . . . . 17
Chapter 4 Applications
4-1 Heat Only Control With Dwell Timer . . . . . . . . . . . . . 19
4-2 Cool Only Control . . . . . . . . . . . . . . . . . . . . . . . . . . . . 19
4-3 Heat-Cool Control . . . . . . . . . . . . . . . . . . . . . . . . . . . . 20
Chapter 5 Calibration . . . . . . . . . . . . . . . . . . 21
Chapter 6 Specifications . . . . . . . . . . . . . 23
Chapter 7 Modbus Communications
7-1 Functions Supported . . . . . . . . . . . . . . . . . . . . . . . . . . 25
7-2 Exception Responses . . . . . . . . . . . . . . . . . . . . . . . . . . 26
7-3 Parameter Table . . . . . . . . . . . . . . . . . . . . . . . . . . . . . . 26
7-4 Data Conversion . . . . . . . . . . . . . . . . . . . . . . . . . . . . . . 28
7-5 Communication Examples . . . . . . . . . . . . . . . . . . . . . . 29
Appendix
A-1 Error Codes . . . . . . . . . . . . . . . . . . . . . . . . . . . . . . . . . 30
A-2 Warranty . . . . . . . . . . . . . . . . . . . . . . . . . . . . . . . . . . . 31
Page No.
Figure 1.1 Fuzzy Control Advantage. . . . . . . . . . . . . . . . . . 1
Figure 1.2 Programming Port Overview . . . . . . . . . . . . . . . 2
Figure 1.3 Front Panel Description . . . . . . . . . . . . . . . . . . 3
Figure 1.4 Display in Initial Stage. . . . . . . . . . . . . . . . . . . . 3
Figure 2.1 Mounting Dimensions and Panel Cutout . . . . . . 7
Figure 2.2 Lead Termination for TEC-920 . . . . . . . . . . . . . 7
Figure 2.3 Lead Termination for TEC-220 . . . . . . . . . . . . . 7
Figure 2.4 Rear Terminal Connection for TEC-220 . . . . . . 8
Figure 2.5 Rear Terminal Connection for TEC-920 . . . . . . 8
Figure 2.6 Power Supply Connections . . . . . . . . . . . . . . . . 8
Figure 2.7 Sensor Input Wiring . . . . . . . . . . . . . . . . . . . . . 8
Figure 2.8 Output 1 Relay or Triac (SSR) to
Drive Load . . . . . . . . . . . . . . . . . . . . . . . . . . . . 8
Figure 2.9 Output 1 Relay or Triac (SSR) to
Drive Contactor . . . . . . . . . . . . . . . . . . . . . . . . . 8
Figure 2.10 Output 1 Pulsed Voltage to Drive SSR . . . . . . 9
Figure 2.11 Output 1 Linear Current . . . . . . . . . . . . . . . . . . 9
Figure 2.12 Output 1 Linear Voltage . . . . . . . . . . . . . . . . . . 9
Figure 2.13 Output 2 Relay or Triac (SSR) to
Drive Load . . . . . . . . . . . . . . . . . . . . . . . . . . . . 9
Figure 2.14 Output 2 Relay or Triac (SSR) to
Drive Contactor . . . . . . . . . . . . . . . . . . . . . . . . 9
Figure 2.15 Output 2 Pulsed Voltage to Drive SSR . . . . . . 9
Figure 2.16 Output 2 Linear Current. . . . . . . . . . . . . . . . . . 9
Figure 2.17 Output 2 Linear Voltage . . . . . . . . . . . . . . . . . 9
Figure 2.18 Alarm Output to Drive Load . . . . . . . . . . . . . 10
Figure 2.19 Alarm Output to Drive Contactor . . . . . . . . . . 10
Figure 2.20 RS-485 Wiring . . . . . . . . . . . . . . . . . . . . . . . . 10
Figure 2.21 RS-232 Wiring . . . . . . . . . . . . . . . . . . . . . . . . 10
Figure 2.22 Configuration of RS-232 Cable . . . . . . . . . . . 10
Figure 3.1 Conversion Curve for Linear Type
Process Value . . . . . . . . . . . . . . . . . . . . . . . . . . 11
Figure 3.2 Heat Only ON-OFF Control . . . . . . . . . . . . . . . 12
Figure 3.3 Output 2 Deviation High Alarm . . . . . . . . . . . . 13
Figure 3.4 Output 2 Process Low Alarm . . . . . . . . . . . . . . 13
Figure 3.5 RAMP Function . . . . . . . . . . . . . . . . . . . . . . . . 14
Figure 3.6 Dwell Timer Function . . . . . . . . . . . . . . . . . . . . 14
Figure 3.7 PV Shift Application . . . . . . . . . . . . . . . . . . . . . 15
Figure 3.8 Filter Characteristics . . . . . . . . . . . . . . . . . . . . . 15
Figure 3.9 Effects of PID Adjustment . . . . . . . . . . . . . . . . 16
Figure 4.1 Heat Control Example. . . . . . . . . . . . . . . . . . . . 19
Figure 4.2 Cooling Control Example . . . . . . . . . . . . . . . . . 19
Figure 4.3 Heat-Cool Control Example . . . . . . . . . . . . . . . 20
Figure 5.1 RTD Calibration . . . . . . . . . . . . . . . . . . . . . . . . 21
Figure 5.2 Cold Junction Calibration Setup . . . . . . . . . . . . 22
Table 1.1 Display Form of Characters . . . . . . . . . . . . . . . . 3
Table 3.1 Heat-Cool Control Setup Value . . . . . . . . . . . . . 11
Table 3.2 PID Adjustment Guide . . . . . . . . . . . . . . . . . . . . 16
Table A.1 Error Codes and Corrective Actions . . . . . . . . . 30
Appendix
Warranty . . . . . . . . . . . . . . . . . . . . . . . . . . . . . . . . . . . . . . . 31
Returns . . . . . . . . . . . . . . . . . . . . . . . . . . . . . . . . . . . . . . . . 31
Blank Page
Chapter 1 Overview
1–1 General
Tempco’s TEC-220 and TEC-920 Fuzzy Logic plus PID microprocessor-based controllers incorporates a bright easy to read 4digit LED display, indicating process value or set point value.
Fuzzy Logic technology enables a process to reach a predetermined set point in the shortest time with a minimum of overshoot
during power-up or external load disturbance.
TEC-220 is a 1/32 DIN size panel mount controller. TEC-920 is
a 1/16 DIN size panel mount controller. These units are powered
by 11–26 or 90–250 VDC/VAC 50/60 Hz supply, incorporating
a 2 Amp control relay output as standard. The second output can
be used as a cooling control, an alarm or a dwell timer. Both outputs can select triac, 5V logic output, linear current or linear
voltage to drive an external device. There are six types of alarm
plus a dwell timer that can be configured for the second output.
The units are fully programmable for PT100 RTD and thermocouple types J, K, T, E, B, R, S, N, and L with no need to modify the unit. The input signal is digitized by using an 18-bit A to
D converter. Its fast sampling rate allows the unit to control fast
processes.
Digital communications RS-485 is available for TEC-220 or
TEC-920. RS-232 is available for the TEC-220 only. These
options allow the units to be integrated with supervisory control
systems and software.
A programming port is available for automatic configuration,
calibration, and testing without the need to access the keys on the
front panel.
By using proprietary Fuzzy modified PID technology, the control loop will minimize overshoot and undershoot in a short time.
The following diagram is a comparison of results with and without Fuzzy technology.
PID control when properly tuned
PID + Fuzzy control
Temperature
Set
point
Figure 1.1
Fuzzy Control
Advantage
Warm Up
Load Disturbance
Time
High accuracy
Digital communication
Lockout protection
This series is manufactured with custom
designed ASIC (Application Specific
Integrated Circuit) technology which
contains an 18-bit A to D converter for
high resolution measurement (true 0.1°F
resolution for thermocouple and RTD)
and a 15-bit D to A converter for linear
current or voltage control output. The
ASIC technology provides improved
operating performance, low cost,
enhanced reliability, and higher density.
The units are equipped with an optional
RS-485 or RS-232 interface cards to provide digital communication. By using the
twisted pair wires up to 247 units can be
connected together via RS-485 interface
to a host computer.
Depending on security requirements, one
of four lockout levels can be selected to
prevent the unit from being changed
without permission.
Fast sampling rate
The sampling rate of the input A to D
converter is 5 times/second. The fast
sampling rate allows this series to control
fast processes.
Fuzzy control
The function of Fuzzy control is to adjust
PID parameters from time to time in
order to make manipulation of the output
value more flexible and adaptive to various processes. The result is to enable a
process to reach a predetermined set point
in the shortest time with the minimum of
overshoot and undershoot during powerup or external load disturbance.
Programming port
A programming port can be used to connect the unit to a PC for quick configuration. It also can be connected to an ATE
system for automatic testing and calibration.
Auto-tune
The auto-tune function allows the user to
simplify initial setup for a new system.
An advanced algorithm is used to obtain
an optimal set of control parameters for
the process, and it can be applied either as
the process is warming up (cold start) or
when the process is in a steady state
(warm start).
Bumpless transfer
Bumpless transfer allows the controller to
continue to control if the sensor breaks by
using its previous value. Hence, the
process can be controlled temporarily as
if the sensor is normal.
Soft-start ramp
The ramping function is performed during power up as well as any time the set
point is changed. It can be ramping up or
ramping down. The process value will
reach the set point at a predetermined
constant rate.
Digital filter
A first order low pass filter with a programmable time constant is used to
improve the stability of the process value.
This is particularly useful in certain
applications where the process value is
too unstable to be read.
1
1–2 Ordering Code
Figure 1.2
Programming Port Overview
Front
Panel
A special connector can be used to
connect the programming port to a PC
for automatic configuration; it also
can be connected to an ATE system
for automatic calibration and testing.
The programming port is used for offline automatic setup and testing procedures only. Don't attempt to make any
connection to these pins when the unit
is used for a normal control purpose.
642
1–3 Programming Port
Control Board
Pin 1
531
Access Hole
Programming Port
Power Board
Open Housing
Top view of TEC-920
2
Rear
Terminal
TEC-220
1–4 Keys and Displays
KEYPAD OPERATION
SCROLL KEY:
This key is used to select a parameter to be
viewed or adjusted.
UP KEY:
This key is used to increase the value of the
selected parameter.
Figure 1.3
Front Panel Description
DOWN KEY:
This key is used to decrease the value of the
selected parameter.
RESET KEY:
R
for TEC-920,
for TEC-220
This key is used to:
1. Revert the display to show the process value.
2. Reset the latching alarm, once the alarm condition is removed.
3. Stop the manual control mode, auto-tuning
mode, and calibration mode.
4. Clear the message of communication error and
auto-tuning error.
5. Restart the dwell timer when the dwell timer has
timed out.
6. Enter the manual control menu when in failure
mode.
ENTER KEY: Press
for 5 seconds or longer.
Press
for 5 seconds to:
1. Enter setup menu. The display shows
.
2. Enter manual control mode — when manual
control mode
or
is selected.
3. Enter auto-tuning mode — when auto-tuning
mode
(for 220) or AT (for 920) is selected.
4. Perform calibration to a selected parameter during the calibration procedure.
Press
for 6.2 seconds to select calibration
mode.
Table 1.1 Display Form of Characters
A
B
C
E
F
G
H
h
c
D
I
J
K
L
M
N
O
P
Q
R
S
T
U
V
W
X
Y
Z
?
=
: Abstract Characters
OP1 OP2
°C
PV
SP1 SP2 MAN
°F
AT
Displays program code of the
instrument for 2.5 seconds.
The diagram at left shows
program no. 34, version 16
for the TEC-920.
The program no. is 33 for the
TEC-220.
R
TEMPCO
TEC-920
Figure 1.4
Display in Initial Stage
3
1–5 Menu Overview
Setup menu*1
User menu *1
PV
PV
SP1
SP1
SP2
SP2
Calibration Mode
6.2 sec.
5 sec.
7.4 sec.
2 sec.
MAN
H
MAN
C
*2
3 sec. Manual
Mode
3 sec. Manual
Mode
TEC-920
3 sec. Auto-tuning
PV
AT
Mode
INPT
UNIT
DP
PB
TI
TD
CYC1
ADDR
Value
Value
User Menu *1
(DISP=PV) (DISP=SP1)
PV or
SP1
SP1 or
PV
Value
SP2
TEC-220
H
3 sec.
Manual
Mode
C
3 sec.
Manual
A-T 3 sec.
INPT
UNIT
DP
PB
TI
TD
CYC1
ADDR
4
Value
Mode
Auto-tuning
Mode
Value
Value
LOCK
INPT
UNIT
DP
INLO
INHI
SP1L
SP1H
SHIF
FILT
DISP
PB
TI
TD
OUT1
O1TY
O1FT
O1HY
CYC1
OFST
RAMP
RR
OUT2
O2TY
O2FT
O2HY
CYC2
CPB
DB
ALMD
COMM
ADDR
BAUD
DATA
PARI
STOP
RELO
REHI
SEL1
SEL2
SEL3
SEL4
SEL5
SEL6
SEL7
SEL8
Value
ADLO
ADHI
RTDL
RTDH
CJLO
CJHI
Value
Value
Press
for
3 seconds to
perform calibration.
Applying these modes will
break the control loop and
change some of the
previous setting data.
Make sure that the
system is able to
apply these modes.
*1: The flow chart shows a
complete listing of all
parameters. In actual
application, the number of
available parameters
depends on setup
conditions, and should be
less than that shown in
the flow chart.
*2: Release
, press
again for 2 seconds or
longer (but not longer
than 3 seconds), then
release to enter the
calibration menu.
*3:
Value
Pressed together
at any time exits settings
and returns display to
process and setpoint values.
1–6 Parameter Descriptions
5
1–6 Parameter Descriptions, continued…
Parameter Parameter Description
Notation
(Refer to Page:)
O2HY
CYC2
Output 2 hysteresis
value when output 2
performs alarm
function
Output 2 cycle time
Low: 0.1
DB
0)
ALMD
Alarm operation
mode
(Page 13)
COMM
ADDR
BAUD
Address assignment
for digital
communication
Baud rate of digital
communication
(Page 25)
50.0°C
High: (90.0°F)
0.1°C
(0.2°F)
High: 300%
18.0
100
SEL1
: Normal alarm action
: Latching alarm action
2)
: Hold alarm action
3)
: Latching & Hold
action
SEL1
0
Range
0)
: No parameter
selected
1)
: LOCK is put ahead
2)
: INPT is put ahead
3)
: UNIT is put ahead
4)
: DP is put ahead
5)
: SHIF is put ahead
6)
: PB is put ahead
Select 1st parameter 7)
8)
for user menu
(Page 4)
9)
: TD is put ahead
: CYC1 is put ahead
11)
: OFST is put ahead
12)
: RR is put ahead
13)
: O2HY is put ahead
1)
: Modbus RTU mode
protocol
14)
: CYC2 is put ahead
15)
: CPB is put ahead
16)
: DB is put ahead
17)
: ADDR is put ahead
18)
: ALHY is put ahead
3)
: 0 - 20 mA
retransmission output
4)
:0-5V
retransmission output
5)
:1-5V
retransmission output
6)
: 0 - 10 V
retransmission output
Low: 1
1
SEL2
Select 2nd parameter
for user menu
Same as SEL1
3
SEL3
Select 3rd parameter
for user menu
Same as SEL1
4
SEL4
Select 4th parameter
for user menu
Same as SEL1
6
SEL5
Select 5th parameter
for user menu
Same as SEL1
7
SEL6
Select 6th parameter
for user menu
Same as SEL1
8
SEL7
Select 7th parameter
for user menu
Same as SEL1
10
SEL8
Select 8th parameter
for user menu
Same as SEL1
17
High: 255
0)
: 2.4 Kbits/s baud rate
1)
: 4.8 Kbits/s baud rate
2)
: 9.6 Kbits/s baud rate
3)
: 14.4 Kbits/s baud rate
4)
: 19.2 Kbits/s baud rate
5)
: 28.8 Kbits/s baud rate
6)
: 38.4 Kbits/s baud rate
Data bit count of
digital
communication
0)
1)
: 7 data bits
PARI
0)
1)
2)
: Even parity
Parity bit of digital
communication
STOP
Stop bit count of
digital
communication
0)
1)
RELO
Retransmission low
scale value (Page 17)
Low: -19999
High: 45536
Retransmission high
scale value (Page 17)
Low: INLO+50
High: 45536
REHI
: 8 data bits
: Odd parity
2
1
0
: No parity bit
: One stop bit
: Two stop bits
0
0.0°C
(32.0°F)
100.0°C
(212.0°F)
2
: O1HY is put ahead
10)
: No communication
: 4 - 20 mA
retransmission output
Default
Value
: TI is put ahead
0)
DATA
6
Parameter Parameter Description
Notation
(Refer to Page:)
0
1)
2)
Communication
function
(Page 17 & 25)
Default
Value
High: 90.0 sec.
Low: 0.1
Cooling proportional Low: 50
band value (Page 12)
Heating-cooling dead
band (negative value=
overlap) (Page 12)
CPB
Range
Chapter 2 Installation
Dangerous voltages capable of causing death are sometimes present in this instrument. Before installation or
beginning any troubleshooting procedures, the power to all
equipment must be switched off and isolated. Units suspected of
being faulty must be disconnected and removed to a properly
equipped workshop for testing and repair. Component replacement and internal adjustments must be made by a qualified maintenance person only.
This instrument is protected by double insulation. To
minimize the possibility of fire or shock hazards do not
expose this instrument to rain or excessive moisture.
2–1 Unpacking
Upon receipt of the shipment, remove the unit from the carton
and inspect the unit for shipping damage.
2–2 Mounting
Make the panel cutout according to the dimensions shown in figure 2.1.
Take the mounting clamp away and insert the controller into the
panel cutout. Reinstall the mounting clamp.
Do not use this instrument in areas under hazardous conditions such as excessive shock, vibration, dirt, moisture,
corrosive gases or oil. The ambient temperature of the area
should not exceed the maximum rating specified in chapter 6.
Remove stains from this instrument using a soft, dry
cloth. To avoid deformation or discoloration do not use
harsh chemicals, volatile solvent such as thinner or strong detergents to clean this instrument.
Note: All model TEC-220 controls are supplied with both mounting clamps and mounting screws. The
mounting screws have to be used in NEMA 4X applications as they allow the control to be held tighter
into the panel. The mounting clamp teeth are released by depressing the ends of the clamp together.
2–3 Wiring Precautions
.08" max
(2.0mm)
• Before wiring, verify the correct model number and options
on the label. Switch off the power while checking.
• Care must be taken to ensure that the maximum voltage rating
specified on the label is not exceeded.
• It is recommended that the power for these units be protected by
fuses or circuit breakers rated at the minimum value possible.
All
• units should be installed inside a suitably grounded metal
enclosure to prevent live parts from being accessible to human
hands and metal tools.
All
• wiring must conform to appropriate standards of good practice and local codes and regulations. Wiring must be suitable for
the voltage, current, and temperature rating of the system.
Beware
not to over-tighten the terminal screws.
•
• Unused control terminals should not be used as jumper points as
they may be internally connected, causing damage to the unit.
• Verify that the ratings of the output devices and the inputs as
specified in chapter 6 are not exceeded.
20 AWG Wire
1/4" (6.4 mm) Strip
Figure 2.3
Lead Termination for TEC-220
Transit Damage
If there is any damage due to transit, report it and file a claim
with the carrier. Write down the model number, serial number,
and date code for future reference when corresponding with
our service center. The serial number (S/N) is labeled on the
box and the housing of the control.
Wiring, continued…
7
Wiring, continued…
OP1
OP2
_
3
4
5
6
2A/240 VAC
V+,mA+
TC+
PTB
9
V-,mATCPTB
10
COM
11
B
+
V
B
_
7
2A/240 VAC
RE+
TX1
TXD
12
_
+
RTD
A
+
PTA
8
+
1
2
N
L
90-250 VAC
47-63 Hz,10VA
or 11-26 VAC-VDC
_
RETX2
RXD
13
14
RS-485 or
Retransmission
RS-232
I
Figure 2.4
Rear Terminal Connections for TEC-220
2–4 Power Wiring
The controller is designed to operate at 11–26VAC/VDC
or 90–250VAC. Check that the installation voltage corresponds to the power rating indicated on the product label
before connecting power to the controller.
2–5 Sensor Installation Guidelines
Proper sensor installation can eliminate many problems in a control system. The probe should be placed so that it can detect any
temperature change with minimal thermal lag. In a process that
requires fairly constant heat output, the probe should be placed
close to the heater. In a process where the heat demand is variable,
the probe should be close to the work area. Some experimentation
with probe location is often required to find the optimum position.
In a liquid process, the addition of a stirrer will help to eliminate
thermal lag. Since the thermocouple is basically a point measuring device, placing more than one thermocouple in parallel can
provide an average temperature readout and produce better
results in most air heated processes. Proper sensor type is also a
very important factor in obtaining precise measurements. The
sensor must have the correct temperature range to meet the
process requirements. In special processes, the sensor might have
requirements such as leak-proof, anti-vibration, antiseptic, etc.
Standard sensor limits of error are ±4°F (±2°C) or 0.75% of the
sensed temperature (half that for special) plus drift caused by
improper protection or an over-temperature occurrence. This
error is far greater than controller error and cannot be corrected
on the sensor except by proper selection and replacement.
2–6 Sensor Input Wiring
8
This equipment is designed for installation in an
enclosure which provides adequate protection against
electric shock. The enclosure must be connected to
earth ground.
Local requirements regarding electrical installation should be
rigidly observed. Consideration should be given to prevent
unauthorized personnel from accessing the power terminals.
2–7 Control Output Wiring
TEC
220
TEC
920
5
6
10
9
Load
120V/240VAC
Mains Supply
Figure 2.8
Output 1 Relay or
Triac (SSR) to Drive Load
TEC TEC
220 920
5
6
10
9
120V / 240V
Mains Supply
Three Phase
Delta Heater
Load
Three Phase
Heater Power
Contactor
No Fuse
Breaker
Figure 2.9
Output 1 Relay or Triac (SSR)
to Drive Contactor
Control Output Wiring, continued…
TEC TEC
220 920
TEC
220
TEC
920
3
4
2
1
+
+
5
6
10
9
+
_
SSR
Load
_
_
120V / 240V
Mains Supply
120V / 240V
Mains Supply
Internal Circuit
30mA/5V
Pulsed
Voltage
5V
33
Three Phase
Delta Heater
Load
+
Three Phase
Heater Power
No Fuse
Contactor Breaker
33
0V
Figure 2.10 Output 1 Pulsed
Voltage to Drive SSR
Figure 2.14 Output 2 Relay or Triac (SSR)
to Drive Contactor
TEC
220
TEC
920
+
+
3
2
4
1
0-20mA,
4-20mA
Load
120V / 240V
Mains Supply
_
_
Internal Circuit
+
10
9
5
6
+
_
TEC TEC
220 920
SSR
Load
_
30mA/5V
Pulsed
Voltage
Maximum Load
500 ohms
5V
33
Figure 2.11 Output 1 Linear Current
+
33
0V
Figure 2.15
TEC TEC
220 920
0-1V, 0-5V
1-5V, 0-10V
Figure 2.12
Load
_
+
+
10
9
TEC TEC
220 920
+
5
6
Minimum Load
10K ohms
_
Output 1 Linear Voltage
2
1
3
4
0-20mA,
4-20mA
_
TEC
220
120V/240VAC
Mains Supply
Output 2 Relay or
Triac (SSR) to Drive Load
_
+
Figure 2.13
Load
Maximum Load
500 ohms
TEC
920
+
2
1
Load
Figure 2.16 Output 2 Linear Current
TEC TEC
220 920
3
4
Output 2 Pulsed
Voltage to Drive SSR
5
10
6
9
0-1V, 0-5V
1-5V, 0-10V
_
Load
Minimum Load
10K ohms
Figure 2.17 Output 2 Linear Voltage
9
2–8 Alarm Wiring
TEC TEC
220 920
TEC TEC
220 920
3
4
2
1
Load
120V / 240VAC
Mains Supply
3
4
2
1
120V / 240V
Mains Supply
Figure 2.18 Alarm Output to Drive Load
Three Phase
Delta Heater
Load
Three Phase
Heater Power
No Fuse
Breaker
Relay Output to Drive Contactor
Contactor
Figure 2.19 Alarm Output to
Drive Contactor
2–9 Data Communication
TEC 220
RE+ TX1 TXD
RE- TX2 RXD
COM
12
13
11
PC
9-pin
RS-232
port
CC94-1
Figure 2.21
RS-232 Wiring
If you use a conventional 9-pin RS-232 cable instead
of CC94-1, the cable must be modified according to
the following circuit diagram.
10
Chapter 3 Programming
Press
for 5 seconds and release to enter the setup menu.
Press
to select the desired parameter. The display indicates
the parameter symbol. Press
or
to view or adjust the
value of the selected parameter.
3–1 Lockout
There are four security levels that can be selected using the
LOCK parameter.
If NONE is selected for LOCK, then no parameter is locked.
If SET is selected for LOCK, then all setup data are locked.
If USER is selected for LOCK, then all setup data as well as
user data (refer to section 1-5) except the set point are
locked to prevent them from being changed.
If ALL is selected for LOCK, then all parameters are locked to
prevent them from being changed.
3–2 Signal Input
INPT: Selects the sensor type or signal type for signal input.
Range: (thermocouple) Type J, K, T, E, B, R, S, N, L
(RTD) PT.DN, PT.JS
(Linear) 4–20 mA, 0–20 mA, 0–60 mA, 0–1V,
0–5V, 1–5V, 0–10V
UNIT: Selects the process unit
Range: °C, °F, PU (process unit). If the unit is set for
neither °C nor °F, then it defaults to PU.
DP: Selects the resolution of process value.
Range: (For T/C and RTD) NO.DP, 1-DP
(For linear) NO.DP, 1-DP, 2-DP, 3-DP
INLO: Selects the low scale value for the linear type input.
INHI: Selects the high scale value for the linear type input.
How to use Conversion Curve for
Process Value:
If 4–20mA is selected for INPT, SL specifies the input signal low
(i.e., 4mA), SH specifies the input signal high (i.e., 20mA), S
specifies the current input signal value, and the conversion curve
of the process value is shown as follows:
SL = Setpoint Low Limit
SH = Setpoint High Limit
3–3 Control Outputs
There are four kinds of control modes that can be configured as shown in table 3.1.
11
Control Outputs, continued…
Heat only ON-OFF control: Select REVR for OUT1. Set PB
(Proportional Band) to 0. O1HY is used to adjust dead band for
ON-OFF control. The output 1 hysteresis (O1HY) is enabled in
case PB=0. The heat only on-off control function is shown in the
following diagram:
The ON-OFF control may introduce excessive process oscillation
even if hysteresis is minimized. If ON-OFF control is set (i.e.,
PB=0), TI, TD, CYC1, OFST, CYC2, CPB, and DB will be hidden and have no function in the system. The auto-tuning and
bumpless transfer function will be disabled as well.
Heat only P (or PD) control: Select REVR for OUT1, set TI to
0. OFST is used to adjust the control offset (manual reset). O1HY
is hidden if PB is not equal to 0. OFST function: OFST is measured by % with a range of 0–100.0%. In the steady state (i.e.,
process has been stabilized), if the process value is lower than the
set point, a definite value, say 5°C, while 20°C is used for PB,
that is lower 25%, then increase OFST 25%, and vice-versa. After
adjusting OFST value, the process value will be varied and eventually coincide with set point. Using the P control (TI set to 0),
disables auto-tuning.
Refer to section 3-12 "manual tuning" for the adjustment of PB
and TD. Manual reset (adjust OFST) is not practical because the
load may change from time to time and OFST may need to be
adjusted repeatedly. The PID control can avoid this situation.
Heat only PID control: If REVR is selected for OUT1, PB and
TI should not be zero. Perform auto-tuning for the new process,
or set PB, TI, and TD with historical values. See section 3-11 for
auto-tuning operation. If the control result is still unsatisfactory,
then use manual tuning to improve control. See section 3-12 for
manual tuning. The unit contains a very advanced PID and Fuzzy
algorithm to create a very small overshoot and very quick
response to the process if it is properly tuned.
12
Cool only control: ON-OFF control, P (PD) control, and PID
control can be used for cool control. Set OUT1 to DIRT (direct
action). The other functions for cool only ON-OFF control, cool
only P (PD) control, and cool only PID control are the same as for
heat only control except that the output variable (and action) for
cool control is inverse to heat control.
NOTE: ON-OFF control may result in excessive overshoot and
undershoot problems in the process. P (or PD) control will result
in a deviation of process value from the set point. It is recommended to use PID control for heat-cool control to produce a stable and zero offset process value.
Other setup required: O1TY, CYC1, O2TY, CYC2, O1FT and
O2FT are set in accordance with the types of OUT1 and OUT2
installed. CYC1 and CYC2 are selected according to the output 1
type (O1TY) and output 2 type (O2TY). Generally, select 0.5~2
seconds for CYC1 if SSRD or SSR is used for O1TY; 10~20 seconds if relay is used for O1TY and CYC1 is ignored if linear output is used. Similar conditions are applied for CYC2 selection.
You can use the auto-tuning program for the new process or
directly set the appropriate values for PB, TI, and TD according
to historical records for the repeated systems. If the control
behavior is still inadequate, then use manual tuning to improve
the control. See section 3-12 for manual tuning.
CPB (Cooling Proportional Band) Programming: The cooling
proportional band is measured by % of PB with a range of
50-300. Initially set 100% for CPB and examine the cooling
effect. If the cooling action should be enhanced, then decrease
CPB, if the cooling action is too strong, then increase CPB. The
value of CPB is related to PB and its value remains unchanged
throughout the auto-tuning procedures.
Adjustment of CPB is related to the cooling medium used. If air
is used as the cooling medium, adjust CPB to 100%. If oil is used
as the cooling medium, adjust CPB to 125%. If water is used as
the cooling medium, adjust CPB to 250%.
DB (Heating-Cooling Dead Band) programming: The adjustment of DB is dependent on the system requirements. If a more
positive value of DB (greater dead band) is used, an unwanted
cooling action can be avoided but an excessive overshoot over the
set point will occur. If a more negative value of DB (greater overlap) is used, an excessive overshoot over the set point can be minimized, but an unwanted cooling action will occur. It is adjustable
in the range -36.0% to 36.0% of PB. A negative DB value shows
an overlap area over which both outputs are active. A positive DB
value shows a dead band area over which neither output is active.
Output 2 ON-OFF control (alarm function): Output 2 can also
be configured with an alarm function. There are six kinds of
alarm functions that can be selected for output 2. These are:
DE.HI (deviation high alarm), DE.LO (deviation low alarm),
DB.HI (deviation band out of band alarm), DB.LO (deviation
band in band alarm), PV.HI (process high alarm), and PV.LO
(process low alarm). Refer to figure 3.3 and figure 3.4 for
descriptions of the deviation alarm and the process alarm.
3.3 & 3.4 Alarm Figures
PV
3–4 Alarm
OUT2 = DE.HI
SV+SP2
SV+SP2-O2HY
OUT2
Action
Time
ON
OFF
Figure 3.3
Output 2 Deviation High Alarm
Time
Output 2 can be selected as an alarm output. There are six
types of alarm functions and one dwell timer that can be
selected, and four kinds of alarm modes (ALMD) are available for each alarm function.
A process alarm sets two absolute trigger levels. When the
process is higher than SP2, a process high alarm (PV.HI)
occurs, and the alarm is off when the process is lower than
SP2-ALHY. When the process is lower than SP2, a process
low alarm (PV.LO) occurs, and the alarm is off when the
process is higher than SP2+ALHY. A process alarm is independent of the set point.
A deviation alarm alerts the user when the process deviates
too far from the set point. When the process is higher than
SV+SP2, a deviation high alarm (DE.HI) occurs, and the
alarm is off when the process is lower than SV+SP2-ALHY.
When the process is lower than SV+SP2, a deviation low
alarm (DE.LO) occurs, and the alarm is off when the process
is higher than SV+SP2+ALHY. The trigger level of the deviation alarm moves with the set point.
A deviation band alarm presets two trigger levels relative to
the set point. The two trigger levels are SV+SP2 and SV-SP2
for alarm. When the process is higher than (SV+SP2) or
lower than (SV-SP2), a deviation band high alarm (DB.HI)
occurs. When the process is within the trigger levels, a deviation band low alarm (DB.LO) occurs.
There are four types of alarm modes available for each alarm
function. These are: normal alarm, latching alarm, holding
alarm and latching/holding alarm. They are described as follows:
Normal alarm: ALMD=NORM
When a normal alarm is selected, the alarm output is de-energized in the non-alarm condition and energized in an alarm
condition.
Latching alarm: ALMD=LTCH
If a latching alarm is selected, once the alarm output is energized, it will remain unchanged even if the alarm condition
is cleared. The latching alarm is reset when the RESET key
is pressed after the alarm condition is removed.
Holding alarm: ALMD=HOLD
A holding alarm prevents an alarm when the control is powering up. The alarm is enabled only when the process reaches the set point value. Afterwards, the alarm performs the
same function as a normal alarm.
Latching/holding alarm: ALMD=LT.HO
A latching/holding alarm performs both holding and latching
functions. The latching alarm is reset when the RESET key
is pressed after the alarm condition is removed.
Alarm failure transfer is activated as the unit enters failure
mode. The alarm will go on if ALFT is set for ON and go off
if ALFT is set for OFF. The unit will enter failure mode when
a sensor break occurs or if the A-D converter of the unit fails.
13
3–5 Configuring the Display
The TEC-220 can be configured to display the process value by
selecting PV for DISP or to display the set point value by selecting SP1 for DISP.
If LOCK is set to NONE, OUT2 is set to DEHI, and DISP is set
to PV, set SEL1=SHIF, SEL2=ADDR. SEL3=PB,
SEL4~SEL8=NONE, then the display scrolling for the TEC-220
will become:
PV
If LOCK is set to NONE, OUT1 is set to REVR, a non-zero value
is set for PB and TI, OUT2 is set to COOL, and DISP is set to
SP1, set SEL1=INPT, SEL2=PB, SEL3=TI, SEL4~SEL8=
NONE, then the display scrolling for the TEC-220 will become:
SP1
Note: When the ramp function is used, the lower display will
show the current ramping value. The ramping value is an artificially determined setpoint created and updated by the control to
match the ramp rate set by the user. However, it will revert to
show the set point value as soon as the up or down key is touched
for adjustment. The ramping value is initiated to process value
either on power-up or when RR and/or the set point are changed.
Setting RR to zero means no ramp function.
3–7 Dwell Timer
Example for TEC-920:
Set OUT2=PVLO, LOCK=NONE, SEL1=INPT, SEL2=UNIT,
SEL3=DP, SEL4~SEL8=NONE, then the display scrolling for
the TEC-920 will become:
PV
SP1
SP2
PV
SP1
SP2
MAN
AT
PV
Output 2 can be configured as a dwell timer by selecting TIMR
for OUT2. As the dwell timer is configured, the parameter SP2 is
used for dwell time adjustment. The dwell time is measured in
minutes ranging from 0.1 to 4553.6 minutes. Once the process
reaches the set point the dwell timer starts to count down to zero
(time out). The timer relay will remain unchanged until time out.
The dwell timer operation is shown in the following diagram.
After time out, the dwell timer can be restarted by pressing the
RESET key.
The timer stops counting during manual control mode, failure
mode, the calibration period and the auto-tuning period.
3–6 Ramp
Ramp
The ramping function is performed during power up as well as
any time the set point is changed. If MINR or HRR is chosen for
RAMP, the unit will perform the ramping function. The ramp rate
is programmed by adjusting RR. The ramping function is disabled as soon as failure mode, manual control mode, auto-tuning
mode or calibration mode is entered.
Example without dwell timer
Select MINR for RAMP, select °C for UNIT, select 1-DP for DP,
set RR=10.0. SV is set to 200°C initially, and changed to 100°C
30 minutes after power-up. The starting temperature is 30°C.
After power-up, the process runs like the curve shown in
Figure 3.5:
If output 2 is configured as a dwell timer, ALMD will be hidden.
14
3–8 PV Shift
In certain applications it is desirable to shift the
controller display value from its actual value. This
can easily be accomplished by using the PV shift
function.
The SHIF function will alter PV only.
Here is an Example: A process is equipped with a
heater, a sensor, and a subject to be warmed up. Due
to the design and position of the components in the
system, the sensor could not be placed any closer to
the part. Thermal gradient (differing temperatures)
is common and necessary to an extent in any thermal system for heat to be transferred from one point
to another. If the difference between the sensor and
the subject is 35°C, and the desired temperature at
the subject to be heated is 200°C, the controlling
value or the temperature at the sensor should be
235°C. You should enter -35°C to subtract 35°C
from the actual process display. This in turn will
cause the controller to energize the load and bring
the process display up to the set point value.
3–9 Digital Filter
In certain applications, the process value is too unstable to be read due
to possible electrical noise. A programmable low-pass filter incorporated in the controller can be used to improve this. It is a first-order
filter with the time constant specified by the FILT parameter. The
default value of FILT is set at 0.5 seconds before shipping. Adjust
FILT to change the time constant from 0 to 60 seconds. 0 seconds
means no filter is applied to the input signal. The filter is characterized
by the following diagram:
Note
The filter is available only for PV, and is performed for the displayed
value only. The controller is designed to use unfiltered signal for control even if the filter is applied. A lagged (filtered) signal, if used for
control, may produce an unstable process.
3–10 Failure Transfer
The controller will enter failure mode if
one of the following conditions occurs:
1. SBER occurs due to input sensor break
or input current below 1mA if 4–20 mA
is selected or input voltage below 0.25V
if 1–5V is selected.
2. ADER occurs due to the A-D converter
of the controller failing.
Output 1 and output 2 will perform the failure transfer function as the controller
enters failure mode.
Output 1 failure transfer, if activated,
will perform:
1. If output 1 is configured as proportional
control (PB≠ 0), and BPLS is selected
for O1FT, then output 1 will perform
bumpless transfer. Thereafter, the previous averaging value of MV1 will be
used for controlling output 1.
2. If output 1 is configured as proportional control (PB≠ 0), and a value of 0 to
100.0% is set for O1FT, then output 1
will perform failure transfer. Thereafter,
the value of O1FT will be used for controlling output 1.
3. If output 1 is configured as ON-OFF
control (PB=0), then output 1 will be
driven OFF if OFF is set for O1FT and
will be driven ON if ON is set for
O1FT.
Output 2 failure transfer, if activated,
will perform:
1. If OUT2 is configured as COOL, and
BPLS is selected for O1FT, then output
2 will perform bumpless transfer.
Thereafter, the previous averaging
value of MV2 will be used for controlling output 2.
2. If OUT2 is configured as COOL, and a
value of 0 to 100.0% is set for O2FT,
then output 2 will perform failure transfer. Thereafter, the value of O1FT will
be used for controlling output 2.
3. If OUT2 is configured as alarm function, and O2FT is set to OFF, then output 2 will go off. Otherwise, output 2
will go on if O2FT is set to ON.
15
3–11 Auto-tuning
3–12 Manual Tuning
The auto-tuning process is performed near the set
point. The process will oscillate around the set point
during the tuning process. Set the set point at a lower value
if overshooting beyond the normal process value is likely to
cause damage.
Auto-tuning is applied in cases of:
• Initial setup for a new process
• The set point is changed substantially from the previous
auto-tuning value
• The control result is unsatisfactory
In certain applications auto-tuning may be inadequate for the
control requirements. You can try manual tuning for these
applications.
If the control performance using auto-tuning is still unsatisfactory, the following rules can be applied for further adjustment
of PID values:
Figure 3.9 shows the effects of PID
adjustment on process response.
Operation:
1. The system has been installed normally.
2. Set the correct values for the setup menu of the unit, but don't
set a zero value for PB and TI, or the auto-tuning program will
be disabled. The LOCK parameter should be set at NONE.
3. Set the set point to a normal operating value, or a lower value
if overshooting beyond the normal process value is likely to
cause damage.
4. Press
several times until
(for TEC-220), or AT indicator
is lit (for TEC-920).
appears on the display
5. Press
for at least 5 seconds. The AT indicator (for TEC920) or the display (for TEC-220) will begin to flash and the
auto-tuning procedure will begin.
NOTE: The ramping function, if used, will be disabled when
auto-tuning is taking place.
Auto-tuning mode is disabled as soon as either failure mode or
manual control mode is entered.
Procedures:
Auto-tuning can be applied either as the process is warming up
(cold start), or when the process has been in a steady state
(warm start). After the auto-tuning procedures are completed,
the AT indicator will cease to flash and the unit will revert to
PID control using its new PID values. The PID values
obtained are stored in the nonvolatile memory.
Auto-Tuning Error
If auto-tuning fails an ATER message will appear on the display
in the following cases:
• If PB exceeds 9000 (9000 PU, 900.0°F or 500.0°C),
• if TI exceeds 1000 seconds,
• if the set point is changed during the auto-tuning procedure.
Solutions to
1. Try auto-tuning again.
2. Don't change the set point value during the auto-tuning procedure.
3. Don't set a zero value for PB and TI.
4. Use manual tuning instead of auto-tuning (see section 3-12).
5. Touch RESET key to reset
message.
16
3–13 Manual Control
Operation:
To enable manual control, the LOCK parameter should be set to
NONE, then press
several times;
(heating output) or
(cooling output) will appear on the display. Press
for
5 seconds, then the MAN indicator (for TEC-920) or the display
(for TEC-220) will begin to flash. The controller is now in manual control mode.
indicates output control variable for
output 1, and
indicates control variable for output 2. Now
you can use the up and down keys to adjust the percentage values
for the heating or cooling output.
The controller performs open loop control as long as it stays in
manual control mode.
3–15 Process Variable (PV)
Retransmission
Model TEC-220 controller can output (retransmit) process value
via its retransmission terminals RE+ and RE- provided that the
retransmission option is ordered. The correct signal type should
be selected for COMM parameter to meet the retransmission
option installed. RELO and REHI are set to specify the low
scale and high scale values of retransmission.
Model TEC-920 does not have this feature.
Exit Manual Control
Model TEC-920: Pressing the R key will cause the controller to
revert to its normal display mode.
Model TEC-220: Press and release the up and down buttons.
3–14 Data Communication
The controllers support RTU mode of Modbus protocol for data
communication. Other protocols are not available for this series.
Two types of interface are available for data communication.
These are RS-485 and RS-232 interface. Since RS-485 uses a
differential architecture to drive and sense signal instead of a single-ended architecture like the one used for RS-232, RS-485 is
less sensitive to noise and suitable for communication over a
longer distance. RS-485 can communicate without error over a
1km distance while RS-232 is not recommended for a distance of
over 60 feet (20 meters).
Using a PC for data communication is the most economical
method. The signal is transmitted and received through the PC
communication port (generally RS-232). Since a standard PC
can't support an RS-485 port, a network adapter (such as
TEC99001) has to be used to convert RS-485 to RS-232 for a PC
if RS-485 is required for data communication. Up to 247 RS-485
units can be connected to one RS-232 port; therefore a PC with
four comm ports can communicate with 988 units.
Setup
Enter the setup menu. Select RTU for COMM. Set individual
addresses for any units that are connected to the same port. Set
the baud rate (BAUD), data bit (DATA), parity bit (PARI) and
stop bit (STOP) so that these values are accordant with PC setup
conditions.
If you use a conventional 9-pin RS-232 cable instead of
TEC99014, the cable should be modified for proper operation of
RS-232 communication according to section 2-9 on page 10.
Refer to Chapter 7 for a complete technical description of the
Modbus Communications Protocol.
17
NOTES
18
Chapter 4 Applications
4–1 Heat Only Control with
Dwell Timer
An oven is designed to dry products at 150°C for
30 minutes and then stay unpowered for another
batch. A TEC-920 equipped with dwell timer is
used for this purpose. The system diagram is
shown at right:
To achieve this function, set the following parameters in the setup menu:
INPT=K_TC
UNIT=°C
DP=1_DP
OUT1=REVR
O1TY=RELY
CYC1=18.0
O1FT=BPLS
OUT2=TIMR
O2FT=ON
Auto-tuning is performed at 150°C for a new oven.
4–2 Cool Only Control
A TEC-920 is used to control a refrigerator at temperatures
below 0°C. This temperature is lower than the ambient, so a
cooling action is required. Select DIRT for OUT1. Since output
1 is used to drive a magnetic contactor, O1TY selects RELY. A
small temperature oscillation is tolerable, so use ON-OFF control to reduce the over-all cost. To use ON-OFF control, set PB
to zero and O1HY at 0.1°C.
Setup Summary:
INPT=PT.DN
UNIT=°C
DP=1-DP
OUT1=DIRT
O1TY=RELY
Refrigerator
RTD
Mains
Supply
User Menu:
PB=0 (°C)
O1HY=0.1 (°C)
4
3
5
OP1 OP2
9
10
°C
°F
PV SP1 SP2 MAN AT
R
TEC-920
Figure 4.2 Cooling Control Example
19
4–3 Heat-Cool Control
An injection mold is required to be controlled at 120°C to ensure a consistent
quality for the parts. An oil pipe is buried in the mold. Since plastics are
injected at a higher temperature (e.g., 250°C), the circulation oil needs to be
cooled as its temperature rises. Here is an example:
Injection Mold
120°C
Plastics
Oil
Pump
Oil Tank
Freezer
RTD
Heater
Supply
4-20 mA
OUT2
1,2
OUT1
9
10
OP1 OP2
°C
°F
5
4
3
INPT
PV SP1 SP2 MAN AT
R
TEC-920
20
Figure 4.3
Heat-Cool Control Example
The PID heat-cool is used for the above example. To
achieve this, set the following parameters in the setup
menu:
INPT=PT.DN
UNIT=°C
DP= 1-DP
OUT1=REVR
O1TY=RELY
CYC1=18.0 (sec.)
O1FT=BPLS
OUT2=COOL
O2TY=4–20
O2FT=BPLS
Set SV at 120.0°C, CPB at 125(%) and DB at -4.0(%).
Apply auto-tuning at 120°C for a new system to get
optimal PID values. See section 3-11.
Adjustment of CPB is related to the cooling medium
used. If water is used as the cooling medium instead of
oil, the CPB should be set at 250(%). If air is used as
the cooling medium instead of oil, the CPB should be
set at 100(%). The adjustment of DB is dependent on
the system requirements. A higher positive value of DB
will prevent unwanted cooling action, but will increase
the temperature overshoot, while a lower negative
value of DB will result in less temperature overshoot,
but will increase unwanted cooling action.
Chapter 5 Calibration
Do not proceed through this section unless there is a definite need to recalibrate the controller. If you recalibrate,
all previous calibration data will be lost. Do not attempt recalibration unless you have the appropriate calibration equipment. If
the calibration data is lost, you will need to return the controller
to your supplier who may charge you a service fee to recalibrate
the controller.
Entering calibration mode will break the control loop.
Make sure that the system is ready to enter calibration
mode.
Equipment needed for calibration:
1. A high-accuracy calibrator (Fluke 552A calibrator
recommended) with the following functions:
0–100mV millivolt source with ±0.005% accuracy
0–10V voltage source with ±0.005% accuracy
0–20mA current source with ±0.005% accuracy
0–300 ohm resistant source with ±0.005% accuracy
2. A test chamber providing 25°C–50°C temperature range
3. A switching network (SWU16K, optional for automatic
calibration)
4. A calibration fixture equipped with programming units
(optional for automatic calibration)
The calibration procedure described in the following section is a
step-by-step manual procedure.
Manual Calibration Procedures
• Perform step 1 to enter calibration mode.
Step 1.
Set the lock parameter to the unlocked condition
(LOCK=NONE).
Press and hold the scroll key until
appears on the display, then release the scroll key.
Press the scroll key for 2 seconds, and the display will show
and the unit will enter the calibration mode.
• Perform step 2 to calibrate zero of A to D converter and
step 3 to calibrate gain of A to D converter.
Step 2.
Short the thermocouple input terminals, then press the scroll key
for at least 5 seconds. The display will blink for a moment until
a new value is obtained. If the display didn't blink or if the
obtained value is equal to -199.9 or 199.9, then calibration failed.
Step 3.
Press scroll key until the display shows
. Send a 60mV
signal to the thermocouple input terminals in the correct polarity. Press the scroll key for at least 3 seconds. The display will
blink for a moment and a new value is obtained. If the display
didn't blink or if the obtained value is equal to -199.9 or 199.9,
then the calibration failed.
• Perform both steps 4 and 5 to calibrate RTD function (if
required) for input.
Step 4.
Press scroll key until the display shows
. Send a 100
ohms signal to the RTD input terminals according to the connection shown below:
Press scroll key for at least 5 seconds. The display will blink for
a moment; if it does not this calibration failed.
Step 5.
Press the scroll key and the display will show
. Change
the ohm's value to 300 ohms. Press the scroll key for at least 5
seconds. The display will blink for a moment and two values will
be obtained for RTDH and RTDL (step 4). If the display didn't
blink or if any value obtained for RTDH or RTDL is equal to -199.9
or 199.9, then calibration failed.
• Perform step 6 to calibrate offset of cold junction compensation, if required.
21
Manual Calibration Procedures, continued…
525A
Calibrator
K-TC
K+
K-
TEC
220
TEC
920
9
10
4
5
Wait at least 20 minutes
in still-air room.
Room temperature 25±3°C.
Figure 5.2
Cold Junction Calibration Setup
Step 6.
Set up the equipment according to the diagram above for calibrating the
cold junction compensation. Note that a K type thermocouple must be
used.
The 525A calibrator is configured as K type thermocouple output with
internal compensation. Send a 0.00°C signal to the unit under calibration.
The unit under calibration is powered in a still-air room with temperature
25±3°C. Wait at least 20 minutes for warming up. Perform step 1 as stated
above, then press the scroll key until the display shows
.
Press the scroll key for at least 5 seconds. The display will blink for a
moment until a new value is obtained. If the display didn't blink or if the
obtained value is equal to –5.00 or 40.00, then calibration failed.
• Perform step 7 to calibrate gain of cold junction compensation if
required.
Step 7.
Setup the equipment same as step 6. The unit under calibration is powered
in a still-air room with temperature 50 ±3°C. Wait at least 20 minutes for
warming up. The calibrator source is set at 0.00°C with internal compensation mode.
Perform step as 1 stated above, then press the scroll key until the display
shows
. Press the scroll key for at least 5 seconds. The display will
blink for a moment until a new value is obtained. If the display didn't blink
or if the obtained value is equal to –199.9 or 199.9, then calibration failed.
This setup is performed in a high-temperature chamber, therefore it is recommended to use a computer to perform the procedures.
• Input modification and recalibration procedures for a linear voltage or a
linear current input:
1. Remove R60(3.3K) and install two 1/4W resistors RA and RB on the
control board with the recommended values specified in the following
table.
Low temperature coefficient resistors should be used for RA and RB.
2. Perform step 1 and step 2 to calibrate the linear input zero.
3. Perform step 3 but send a span signal to the input terminals instead of
60mV. The span signal is 1V for 0~1V input, 5V for 0~5V or 1~5V
input, 10V for 0~10V input and 20mA for 0~20mA or 4~20mA input.
• Final step
Step 8.
Set the LOCK value to your desired function.
22
Chapter 6 Specifications
Power
90–250VAC, 47–63 Hz, 10VA, 5W maximum
11–26VAC/VDC, 10VA, 5W maximum
Input
Resolution: 18 bits
Sampling rate: 5 times/second
Maximum rating: -2VDC minimum, 12VDC maximum
(1 minute for mA input)
Temperature effect: ±1.5uV/°C for all inputs except mA
input
±3.0uV/°C for mA input
Sensor lead resistance effect:
T/C: 0.2uV/ohm
3-wire RTD: 2.6°C/ohm of resistance difference of two leads
2-wire RTD: 2.6°C/ohm of resistance sum of two leads
Common mode rejection ratio (CMRR): 120dB
Normal mode rejection ratio (NMRR): 55dB
Sensor break detection:
Sensor open for TC, RTD and mV inputs,
Sensor short for RTD input,
Below 1mA for 4–20mA input,
Below 0.25V for 1–5V input,
unavailable for other inputs.
Sensor break responding time:
Within 4 seconds for TC, RTD, and mV inputs, 0.1 second
for 4–20mA and 1–5V inputs.
Output 1/Output 2
Relay rating: 2A/240VAC, 200,000 life cycles for
resistive load
Pulsed voltage: Source voltage 5V, current limiting
resistance 66Ω.
Linear Output
Resolution: 15 bits
Output regulation: 0.02% for full load change
Output settling time: 0.1 sec. (stable to 99.9 %)
Isolation breakdown voltage: 1000VAC
Temperature effect: ±0.01% of SPAN/°C
Triac (SSR) Output
Rating: 1A/240 VAC
Inrush current: 20A for 1 cycle
Min. load current: 50mA rms
Max. off-state leakage: 3mA rms
Max. on-state voltage: 1.5V$& rms
Insulation resistance: 1000MΩ min. at 500 VDC
Dielectric strength: 2500VAC for 1 minute
23
Specifications, continued…
Output 2 functions: Dwell timer
Deviation high/low alarm
Deviation band high/low alarm
PV high/low alarm
PID cooling control
Alarm modes: Normal, latching, hold, latching/hold.
Dwell timer: 0.1–4553.6 minutes
Data Communication
Digital Filter
Function: First order
Time constant: 0, 0.2, 0.5, 1, 2, 5, 10, 20, 30, 60 seconds
programmable
Environmental and Physical
Output Signal: 4-20 mA, 0-20 mA, 0-5V, 1-5V, 0-10V
Resolution: 15 bits
Accuracy: ±0.05% of span ±0.0025%/°C
load Resistance: 0-500 ohms (for current output)
10K ohms minimum (for voltage output)
Output Regulation: 0.01% for full load change)
Operating temperature: 14°F (-10°C) to 122°F (50°C)
Storage temperature: -40°F (-40°C) to 140°F (60°C)
Humidity: 0 to 90% RH (non-condensing)
Insulation resistance: 20Mohms min. (at 500VDC)
Dielectric strength: 2000VAC, 50/60 Hz for 1 minute
Vibration resistance: 10–55 Hz, 10 m/s≈ for 2 hours
Shock resistance: 200m/s ≈ (20g)
Moldings: Flame retardant polycarbonate
Dimensions:
TEC-220 — 1-3/64" (26.5 mm) H × 2" (50 mm) W
× 4-3/8" (110.5 mm) D
Depth behind panel: 3-7/8" (98 mm)
TEC-920 — 1-7/8" (48 mm) H × 1-7/8" (48 mm) W
× 3-3/4" (94 mm) D
Depth behind panel: 3-3/8" (86mm)
Weight: TEC-220—.26 lbs. (120 grams)
TEC-920—.31 lbs. (140 grams)
User Interface
Approval Standards
Single 4-digit LED display
Keypad: 3 keys for TEC-220, 4 keys for TEC-920
Programming port: For automatic setup, calibration, and
testing
Communication port: Connection to PC for supervisory
control
Safety: UL61010C-1
CSA C22.2 No. 24-93
EN61010-1 (IEC1010-1)
Protective class:
IP65 front panel for TEC-220
IP30 front panel for TEC-920, all indoor use
IP20 for terminals and housing with protective cover.
All indoor use.
EMC: EN61326
Interface: RS-232 (1 unit), RS-485 (up to 247 units)
Protocol: Modbus protocol RTU mode
Address: 1–247
Baud rate: 0.3 - 38.4Kbits/sec
Data bits: 7 or 8 bits
Parity bit: None, even or odd
Stop bit: 1 or 2 bits
Communication buffer: 160 bytes
Analog Retransmission
Control Mode
Output 1: Reverse (heating) or direct (cooling) action
Output 2: PID cooling control, cooling P band 50~300% of PB,
dead band -36.0-36.0% of PB
ON-OFF: 0.1-90.0 (°F) hysteresis control (P band=0)
P or PD: 0–100.0% offset adjustment
PID: Fuzzy logic modified
Proportional band 0.1-900.0°F
Integral time 0–1000 seconds
Derivative time 0–360.0 seconds
Cycle time: 0.1–90.0 seconds
Manual control: Heat (MV1) and cool (MV2)
Auto-tuning: Cold start and warm start
Failure mode: Auto-transfer to manual mode while sensor
break or A-D converter damage
Ramping control: 0–900.0°F/minute or
0–900.0°F/hour ramp rate
24
Chapter 7 Modbus Communications
This chapter specifies the Modbus Communications protocol as
RS-232 or RS-485 interface module is installed. Only RTU mode is supported. Data is transmitted
as eight-bit binary bytes with 1 start bit, 1 stop bit and optional parity checking (None, Even or
Odd). Baud rate may be set to 2400, 4800, 9600, 14400, 19200, 28800 and 38400.
7-1 Functions Supported
Only function 03, 06 and 16 are available for this series of controllers. The message formats for
each function are described as follows:
Function 03: Read Holding Registers
Query: (from Master)
Slave address (0-255)
Function code (3)
Starting address of register Hi (0)
Starting address of register Lo
(0-79, 128-131)
No. of words Hi (0)
No. of words Lo (1-79)
CRC16 Hi
CRC16 Lo
Function 06: Preset Single Register
Query: (from Master)
Slave address (0-255)
Function code (6)
Register address Hi (0)
Register address Lo (0-79, 128-131)
Data Hi
Data Lo
CRC16 Hi
CRC16 Lo
Function 16: Preset Multiple Registers
Query: ( from master )
Slave address (0-255)
Function code (16)
Starting address of register Hi (0)
Starting address of register Lo (0-79, 128-131)
No. of words Hi (0)
No. of words Lo (1-79)
Byte count
(2-158)
Data 1 Hi
Data 1 Lo
Data 2 Hi
Data 2 Lo
•
•
•
•
•
CRC16 Hi
CRC16 Lo
Response: (from Slave)
Byte count
Data 1 Hi
Data 1 Lo
Data 2 Hi
Data 2 Lo
•
•
•
•
•
CRC16 Hi
CRC16 Lo
Response: (from slave)
Response: (from slave)
CRC16 Hi
CRC16 Lo
25
7-2 Exception Responses
If the controller receives a message which contains a corrupted character (parity check error, framing error etc.),
or if the CRC16 check fails, the controller ignores the message. However, if the controller receives a syntactically
correct message which contains an illegal value, it will send an exception response, consisting of five bytes as follows:
slave address +offset function code + exception code + CRC16 Hi +CRC16 Lo
Where the offset function code is obtained by adding the function code with 128 (ie. function 3 becomes H'83), and the exception
code is equal to the value contained in the following table:
Exemption Code
1
Name
Bad Function Code
Cause
Function code is not supported by the controller
2
Illegal data address
Register address out of range
3
Illegal data value
Data value out of range or attempt to write
a read-only or protected data
7-3 Parameter Table
Register
Address
0
1
2
3
4
5
6
7
8
9
10
11
12
13
14
15
16
17
18
19
20
21
22
23
24
25
26
27
28
29
30
31
32
26
Parameter
Notation
SP1
SP2
SP3
LOCK
INPT
UNIT
DP
INLO
INHI
SP1L
SP1H
SHIF
FILT
DISP
PB
TI
TD
OUT1
O1TY
O1FT
O1HY
CYC1
OFST
RAMP
RR
OUT2
RELO
O2TY
O2FT
O2HY
CYC2
CPB
DB
Parameter
Set Point 1
Set Point 2
Set Point 3
Lock code
Input sensor selection
Measuring unit
Decimal point position
Low scale value for linear input
High scale value for linear input
Low limit of SP1
High Limit of SP1
PV shift value
Filter time constant
Display form
P (proportional) band
Integral time
Derivative time
Output 1 function
Output 1 signal type
Output 1 failure transfer
Output 1 ON-OFF hysteresis
Output 1 cycle time
Offset value for P control
Ramp function
Ramp rate
Output 2 function
Retransmission low scale value
Output 2 signal type
Output 2 failure transfer
Output 2 ON-OFF hysteresis
Output 2 cycle time
Cooling P band
Heating-cooling dead band
Scale
Low
*4
*7
*6
0
0
0
0
*4
*4
*4
*4
*4
0
0
*5
0
0.0
0
0
-1999.9
*5
0.0
0.0
0
*5
0
*4
0
-1999.9
*5
0.0
0
-1999.9
Scale
High
*4
*7
*6
65535
65535
65535
65535
*4
*4
*4
*4
*4
65535
65535
*5
65535
6553.5
65535
65535
4553.6
*5
6553.5
6553.5
65535
*5
65535
*4
65535
4553.6
*5
6553.5
65535
4553.6
Notes
R/W
R/W
R/W
R/W
R/W
R/W
R/W
R/W
R/W
R/W
R/W
R/W
R/W
R/W
R/W
R/W
R/W
R/W
R/W
R/W
R/W
R/W
R/W
R/W
R/W
R/W
R/W
R/W
R/W
R/W
R/W
R/W
R/W
Register
Address
33
34
35
36
37
38
39
40
41
42
43
44
45
46
47
48
49
50
51
52
53
54
55
56
57
58
59
60
61
62
63
64, 128
65, 129
66
130
67
131
68
69
70
71, 140
72
73
74
75
76
77
78
79
Parameter
Notation
ALFN
REHI
ALMD
ALHY
ALFT
COMM
ADDR
BAUD
DATA
PARI
STOP
SEL1
SEL2
SEL3
SEL4
SEL5
SEL6
SEL7
SEL8
ADLO
ADHI
RTDL
RTDH
CJLO
CJHI
DATE
SRNO
HOUR
BPL1
BPL2
CJCL
PV
SV
MV1
MV2
TIMER
EROR
MODE
PROG
CMND
JOB1
JOB2
JOB3
CJCT
Parameter
Alarm Function
Retransmission high scale value
Alarm operation mode
Alarm hysteresis
Alarm failure transfer
Communication function
Address
Baud rate
Data bit count
Parity bit
Stop bit count
Selection 1
Selection 2
Selection 3
Selection 4
Selection 5
Selection 6
Selection 7
Selection 8
mV calibration low coefficient
mV calibration high coefficient
RTD calibration low coefficient
RTD calibration high coefficient
Cold junction calibration low coefficient
Cold junction calibration high coefficient
Date code
Serial number
Working hours of the controller
Bumpless transfer of OP1
Bumpless transfer of OP2
Cold junction signal low
Process value
Current set point value
OP1 control output value
OP2 control output value
Remaining time of dwell timer
Error code *1
Operation mode and alarm status *2
Program code *3
Command code
Job code
Job code
Job code
Cold Junction Temperature
Reserved
Reserved
Reserved
Scale
Low
0
*4
0
*5
0
0
0
0
0
0
0
0
0
0
0
0
0
0
0
-1999.9
-1999.9
-1999.9
-1999.9
-199.99
-1999.9
0
0
0
0
0.00
0.000
*4
*4
0.00
Scale
High
65535
*4
65535
*5
65535
65535
65535
65535
65535
65535
65535
65535
65535
65535
65535
65535
65535
65535
65535
4553.6
4553.6
4553.6
4553.6
455.36
4553.6
65535
65535
65535
65535
655.35
65.535
*4
*4
655.35
0.00
655.35
-1999.9
0
0
0.00
0
0
0
0
-199.99
0
0
0
4553.6
65535
65535
655.35
65535
65535
65535
65535
455.36
65535
65535
65535
Notes
R/W
R/W
R/W
R/W
R/W
R/W
R/W
R/W
R/W
R/W
R/W
R/W
R/W
R/W
R/W
R/W
R/W
R/W
R/W
R/W
R/W
R/W
R/W
R/W
R/W
R/W
R/W
R/W
R
R
R
R
R
Read only unless
in manual control
Read only unless
in manual control
R
R
R
R
R/W
R/W
R/W
R/W
R
R
R
R
27
*1 The error code is shown in the first column of Table A.1 page 30.
*2 Definition for the value of MODE register:
H’000X = Normal mode
H’010X = Calibration mode
H’020X = Auto-tuning mode
H’030X = Manual control mode
H’040X = Failure mode
*3 The PROG Code is defined in the following table
Model No. TEC-9100
PROG Code
6.XX
TEC-8100
11.XX
TEC-4100
12.XX
H’0X00 = Alarm status is off
H’0x01 = Alarm status is on
The alarm status is shown in MV2 instead of
MODE for models TEC-220 and TEC-920.
TEC-7100 TEC-220
TEC-920
13.XX
33.XX
34.XX
(xx denotes the software version)
*4 The scale high/low values are defined in the following table for SP1, INLO, INHI, SP1L, SP1H, SHIF, PV, SV, RELO and REHI:
Conditions
Scale low
Scale High
Non-linear Linear input
input
DP = 0
-1999.9
-19999
4553.6
45536
Linear input
DP = 1
-1999.9
4553.6
Linear input
DP = 2
-199.99
455.36
Linear input
DP = 3
-19.999
45.536
*5 The scale high/low values are defined in the following table for PB, O1HY, RR, O2HY, and ALHY:
Conditions
Scale low
Scale High
Non-linear Linear input
input
DP = 0
0.0
0
6553.5
65535
Linear input
DP = 1
0.0
6553.5
Linear input
DP = 2
0.00
655.35
Linear input
DP = 3
0.000
65.535
*6 The scale high/low values are defined in the following table for SP3:
Conditions
Linear input
DP = 1
-1999.9
4553.6
Linear input
DP = 2
-199.99
455.36
Linear input
DP = 3
-19.999
45.536
*7 The scale high/low values are defined in the following table for SP2:
For TEC-220 and TEC-920
Conditions
OUT2=1
Non-linear
Linear input Linear input
(TIMR)
input
DP = 0
DP = 1
Scale low
-1999.9
-1999.9
-19999
-1999.9
Scale High
4553.6
4553.6
45536
4553.6
Linear input
DP = 2
-199.99
455.36
Linear input
DP = 3
-19.999
45.536
Scale low
Scale High
ALFN=1
(TIMR)
-1999.9
4553.6
Non-linear
input
-1999.9
4553.6
Linear input
DP = 0
-19999
45536
For TEC-9100, TEC-8100, TEC-7100 and TEC-4100:
Conditions Non-linear Linear input Linear input
input
DP = 0
DP = 1
Scale low
-1999.9
-19999
-1999.9
Scale High
4553.6
45536
4553.6
Linear input
DP = 2
-199.99
455.36
Linear input
DP = 3
-19.999
45.536
7-4 Data Conversion
The word data are regarded as unsigned (positive) data in the Modbus message. However, the actual value of the parameter may be
a negative value with decimal point. The high/low scale values for each parameter are used for the purpose of such conversion.
Let
M = Value of Modbus message
A = Actual value of the parameter
SL = Scale low value of the parameter
SH = Scale high value of the parameter
M=
28
× (A – SL)
(SH65535
– SL )
(
A = SH – SL × (M + SL)
65535
)
7-5 Communication Examples:
Example 1: Download the default values via the programming port
The programming port can perform Modbus communications regardless of the incorrect setup values of address, baud, parity, stop
bit, etc. It is especially useful during the first time configuration for the controller. The host must be set with 9600 baud rate, 8 data
bits, even parity and 1 stop bit.
The Modbus message frame with hexadecimal values is shown as follows:
01
10
Addr. Func.
00
00
Starting Addr.
00
34
No. of words
68
Bytes
00
01
INPT = 1
00
00
UNIT = 0
00
4D
6D
INLO = -17.8
51
C4
INHI = 93.3
4D
6D
SP1L = -17.8
63
21
SP1H = 537.8
4E
1F
SHIF = 0.0
00
02
FILT = 2
00
00
DISP = 0
00
64
PB = 10.0
00
64
TI = 100
00
FA
TD = 25.0
00
00
OUT1 = 0
00
00
O1TY = 0
4E
1F
O1FT = 0
00
01
O1HY = 0.1
00
B4
CYC1 = 18.0
00
FA
OFST = 25.0
00
00
RAMP = 0
00
00
RR = 0.0
00
02
OUT2 = 2
4E
1F
RELO = 0.0
00
00
O2TY = 0
4E
1F
O2FT = 0
00
01
O2HY = 0.1
00
B4
CYC2 = 18.0
00
64
CPB = 100
4E
1F
DB = 0
00
02
ALFN = 2
52
07
REHI = 100.0
00
00
ALMD = 0
00
01
ALHY = 0.1
00
00
ALFT = 0
00
01
COMM = 1
00
01
ADDR = 1
00
02
BAUD = 2
00
01
DATA = 1
00
00
PARI = 0
00
00
STOP = 0
00
02
SEL1 = 2
00
03
SEL2 = 3
00
04
SEL3 = 4
00
06
SEL4 = 6
00
07
SEL5 = 7
00
08
SEL6 = 8
00
0A
SEL7 = 10
00
11
SEL8 = 17
Hi
Lo
CRC16
01
DP = 1
4F
19
SP1=25.0
Example 2: Read PV, SV, MV1 and MV2
Send the following message to the controller via the COMM
port or programming port:
03
Addr. Func.
H’40
H’80
Starting Addr.
00
00
04
No. of words
Hi
Lo
00
H’48
Register Addr.
Example 6: Read All Parameters
Query
H’68 H’28
Data Hi/Lo
4E
83
Sp3=10.0
00
00
LOCK = 0
Example 3: Perform Reset Function
(same effect as pressing R key)
Query
06
Addr. Func.
00
H’48
Register Addr.
H’68 H’25
Data Hi/Lo
Hi
Lo
CRC16
CRC16
Example 4: Enter Auto-tuning Mode
Query
06
Addr. Func.
4E
83
SP2=10.0
Example 5: Enter Manual Control Mode
Query
Hi
Lo
CRC16
06
Addr. Func.
00
H’48
Register Addr.
H’68 H’27
Data Hi/Lo
Hi
Lo
CRC16
Example 7: Modify the Calibration Coefficient
Preset the CMND register with 26669 before attempting to
change the calibration coefficient.
29
A–1 Error Codes
Table A.1 Error Codes and Corrective Actions
Error Display
Code Symbol
4
10
11
Error Description
Illegal setup values being used:
Before COOL is used for OUT2,
DIRT (cooling action) has already
been used for OUT1, or PID mode
is not used for OUT1 (that is,
PB=0 and/or TI=0)
Corrective Action
Check and correct setup values of
OUT2, PB, TI and OUT1. If OUT2
is required for cooling control, the
control should use PID mode
(PB=0, TI=0) and OUT1 should
use reverse mode (heating action).
Otherwise, don't use OUT2 for
cooling control.
Communication error: bad function Correct the communication
code
software to meet the protocol
requirements.
Don't issue an over-range
Communication error: register
register address to the slave.
address out of range
14
Communication error: attempt
to write a read-only data or a
protected data
Don't write a read-only data or a
protected data to the slave.
15
Communication error: write a
value which is out of range to a
register
Don't write an over-range data
to the slave register.
1.The PID values obtained after
auto-tuning procedure are out
of range. Retry auto-tuning.
26
Fail to perform auto-tuning
function
2.Don't change set point value
during auto-tuning procedure.
3.Use manual tuning instead of
auto-tuning.
4. Don't set a zero value for PB.
5. Don't set a zero value for TI.
6. Press RESET key
29
EEPROM can't be written correctly Return to factory for repair.
30
Cold junction compensation for
thermocouple malfunction
39
40
30
Return to factory for repair.
Input sensor break, or input
current below 1 mA if 4-20 mA is Replace input sensor.
selected, or input voltage below
0.25V if 1-5V is selected
A to D converter or related
Return to factory for repair.
component(s) malfunction
A–2 Warranty
WARRANTY
RETURNS
Tempco Electric Heater Corporation is pleased to offer suggestions on the use of its various products. However, Tempco makes
no warranties or representations of any sort regarding the fitness
for use, or the application of its products by the Purchaser. The
selection, application, or use of Tempco products is the
Purchaser's responsibility. No claims will be allowed for any
damages or losses, whether direct, indirect, incidental, special, or
consequential. Specifications are subject to change without
notice. In addition, Tempco reserves the right to make
changes–without notification to the Purchaser–to materials or
processing that do not affect compliance with any applicable
specification. Tempco products are warranted to be free from
defects in material and workmanship for two years after delivery
to the first purchaser for use. Tempco's sole responsibility under
this warranty, at Tempco's option, is limited to replacement or
repair, free of charge, or refund of purchase price within the warranty period specified. This warranty does not apply to damage
resulting from transportation, alteration, misuse, or abuse.
No product returns can be accepted without a completed Return
Material Authorization (RMA) form.
TECHNICAL SUPPORT
Technical questions and troubleshooting help is available from
Tempco. When calling or writing please give as much background information on the application or process as possible.
E-mail: [email protected]
Phone: 630-350-2252
800-323-6859
Note: Information in this manual was deemed correct at the time of printing.
The policy of Tempco is one of continuous development and product
improvement, and we reserve the right to modify specifications and designs
without prior notice. Not responsible for typographical errors.
31
Complete Your Thermal Loop System
With Over 100,000 Various Items
Available from Stock
• Electric Heating Elements
• Videographic Data Recorders
• Thermocouples and RTD Assemblies
• Temperature Measurement
• SCR Power Controls
• Current Indicators
• Solid State Relays
• Thermocouple and Power Lead Wire
• Mechanical Relays
• Wiring Accessories
TEMPCO’s Visionary Solutions
™
The Electric Heating Element, Temperature Controls and
Temperature Sensors Handbook
REQUEST YOUR FREE 864 PAGE COPY TODAY!
Call (800-323-6859) or E-mail ([email protected])
Specify Print Edition, CD-ROM or Both
Serving Industry Since 1972
Experience the Advantages of our Diverse and Innovative Products
TEMPCO Electric Heater Corporation
607 N. Central Avenue Wood Dale, IL 60191-1452 USA
Tel: 630-350-2252 Fax: 630-350-0232
Web: www.tempco.com
© Copyright 2010 TEHC. All Rights Reserved.
8P250M12