1
ADJUSTABLE-HEIGHT WORKTABLE
USER’S MANUAL
WARNING!
Read carefully and understand all ASSEMBLY AND OPERATION INSTRUCTIONS
before operating. Failure to follow the safety rules and other basic safety precautions may
result in serious personal injury.
Item# 155101
Page: 1 of 5
Thank you very much for choosing a Wel-Bilt™ Product! For future reference, please complete the
owner’s record below:
Model: _______________
Purchase Date: _______________
Save the receipt, warranty and these instructions. It is important that you read the entire manual to
become familiar with this product before using it.
This machine is designed for certain applications only. The distributor strongly recommends that
this machine is not modified and/or used for any application other than that for which it was
designed. If you have any questions relative to a particular application, DO NOT use the machine
until you have first contacted the distributor to determine if it can or should be performed on the
product.
For technical questions and replacement parts, please call 1-800-222-5381.
Specifications
Tabletop Dimensions
Tabletop Material
Frame Material
Table Height
20 1/8in.W x 17 3/4in.D x 3/4in. thick
3/4in. pressboard
Formed and stamped sheet steel
23 3/4in. (minimum)
30 1/4in. (maximum)
15 5/16in.W x 13 1/8in.W x 1/8in. thick
19 1/2in.W x 17 3/16in.D x 1/8in. thick
1000 lbs.
Top Shelf Dimensions
Bottom Shelf Dimensions
Max. Load Capacity
SAVE THIS MANUAL
You will need this manual for the safety warnings and precautions, assembly, operating, inspection,
maintenance and cleaning procedures, parts list and assembly diagram. Keep this manual and
invoice in a safe and dry place for future reference.
WARNINGS & PRECAUTIONS
Warning: Failure to follow these rules may result in serious personal injury!
1. For your own safety, read instruction manual before using the worktable. Learn the
application and limitation of the worktable.
2. Keep work area clean. Cluttered areas invite injuries.
3. Dress properly. Do not wear loose clothing or jewelry as they can be caught in moving parts.
Protective, electrically non-conductive clothes and non-skid footwear are recommended when
working. Wear restrictive hair covering to contain long hair.
4. Do not overreach. Keep proper footing and balance at all times. Do not reach over or across
running machines.
5. Check for damaged parts. Before using this worktable, any part that appears damaged should
be carefully checked to determine that it will operate properly and perform its intended function.
Check for alignment and binding of moving parts; any broken parts or mounting fixtures; and any
other condition that may affect proper operation. Any part that is damaged should be properly
repaired or replaced.
Page: 2 of 5
Unpacking
When unpacking, check to make sure that all the parts are included. Refer to the Parts List and
Assembly Drawing at the end of this manual. If any parts are missing or broken, please call the
distributor at the number shown on the head page of this manual as soon as possible.
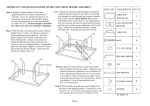
ASSEMBLY AND OPERATING INSTRUCTIONS
1. Assemble two legs (#1) to one lower short beam (#5) and two lower long beams (#6) by bolt
(#13), washer (#14) and nut (15).
2. Put the table feet (#10) on each of the table leg.
3. Assemble the short middle beam (#3) and two long middle beams (#4) to the legs, just
assembled. Depending on the desired table height, mount the height adjuster (#2) on the
outside of the legs, using bolt (#13) and washer (#14), tighten tightly.
4. Assemble the other two legs with short middle beam (#3) and short lower beam (#5). Use bolt
through the height adjuster, screw through short lower beam and washer; tighten securely.
5. Slide the middle table board (#8) into the long middle beam (#4)
6. Slide the lower table board (#9) into the long lower beam (#6)
7. Attach the leg subassembly (done in step 4) to the extending long middle beam and the long
lower beam. Use bolt through the height adjuster, screw through short lower beam and washer;
tighten securely.
8. Put the table top (#7) upside down on the floor, exposing the mounting holes.
9. Mount the connector (#11) using screw (#12); tighten securely.
10. Place the completed frame assembly over the connector and screw tightly.
11. Turn the completed worktable over so that it stands on its feet.
NOTE: Do not expose worktable to rain or wet conditions.
Warning: Maximum Weight Capacity = 1000 lbs. load. Do not exceed this maximum weight
capacity.
Warning: Only use normal sized table top equipment on this worktable. Oversized or
overweight equipment can damage, and possibly collapse the worktable.
Maintenance
1. Periodically check and tighten all screws and nuts on the worktable assembly.
2. Store the worktable in a clean and dry location.
3. When moving; do not drag the worktable. Lift and carry it.
Page: 3 of 5
Parts List
Part #
Part Description
Quantity
1
Leg
4
2
Height Adjuster
4
3
Beam, Short Middle
2
4
Beam, Long Middle
2
5
Beam, Short Lower
2
6
Beam, Long Lower
2
7
Table Top
1
8
Table Board, Middle
1
9
Table Board, Lower
1
10
Table Feet
4
11
Connector
4
12
Screw
4
13
Bolt
36
14
Nut
36
15
Washer
36
16
Magnetic Strap, Short
1
17
Magnetic Strap, Long
1
Diagram
Page: 4 of 5
Distributed by
Northern Tool + Equipment Co., Inc.
Burnsville, MN 5337-0499
Made in China
Page: 5 of 5