1
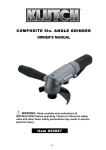
6 in. CENTRAL VACUUM RANDOM
ORBITAL SANDER
OWNER’S MANUAL
WARNING: Read carefully and understand all
INSTRUCTIONS before operating. Failure to follow the safety
rules and other basic safety precautions may result in serious
personal injury.
Item #19982
1 OF 7
Thank you very much for choosing a Klutch™ product! For future reference, please complete the
owner’s record below:
Model: _______________
Purchase Date: _______________
Save the receipt, warranty and these instructions. It is important that you read the entire manual to
become familiar with this product before you begin using it.
This machine is designed for certain applications only. The distributor cannot be responsible for issues
arising from modification. We strongly recommend this machine is not modified and/or used for any
application other than that for which it was designed. If you have any questions relative to a particular
application, DO NOT use the machine until you have first contacted the distributor to determine if it can
or should be performed on the product.
For technical questions please call 1-800-222-5381.
INTENDED USE
This 6in. Central Vacuum Random Orbital Sander provides effortless power and enough speed to
complete a variety of drilling applications. Its right-angle head is ideal for use in tight quarters, providing
better efficiency and productivity. This tool stops rotation within few seconds after releasing the lever.
Reduced noise level and lightweight construction allow you to work longer with less fatigue.
TECHNICAL SPECIFICATIONS
Item
Description
Noise Level
80 dBA
Speed
11,000 RPM Free Speed
Sanding Pad
6in.
Random Orbit
5mm
5-blade rotor produces more useful power using less air.
Anti-dust system insulates motor and bearings from residue.
GENERAL SAFETY RULES
WARNING: Read and understand all instructions. Failure to follow all instructions listed below
may result in electric shock, fire and/or serious injury.
WARNING: The warnings, cautions, and instructions discussed in this instruction manual
cannot cover all possible conditions or situations that could occur. It must be understood by the
operator that common sense and caution are factors, which cannot be built into this product, but must be
supplied by the operator.
2 OF 7
SAVE THESE INSTRUCTIONS
WORK AREA
•
Keep work area clean, free of clutter and well lit. Cluttered and dark work areas can cause
accidents.
•
Do not use your Central Vacuum Random Orbital Sander where there is a risk of causing a
fire or an explosion; e.g. in the presence of flammable liquids, gasses, or dust. An Central
Vacuum Random Orbital Sander can create sparks, which may ignite the dust or fumes.
•
Keep children and bystanders away while operating the Central Vacuum Random Orbital Sander.
Distractions can cause you to lose control, so visitors should remain at a safe distance from the
work area.
•
Be aware of all power lines, electrical circuits, water pipes and other mechanical hazards in
your work area, particularly those hazards below the work surface hidden from the operator’s view
that may be unintentionally contacted and may cause personal harm or property damage.
•
Be alert of your surroundings. Using the Central Vacuum Random Orbital Sander in confined
work areas may put you dangerously close to cutting tools and rotating parts.
PERSONAL SAFETY
•
Stay alert, watch what you are doing and use common sense when operating the Central Vacuum
Random Orbital Sander. Do not use the Central Vacuum Random Orbital Sander while you are tired
or under the influence of drugs, alcohol or medication. A moment of inattention while operating the
Central Vacuum Random Orbital Sander may result in serious personal injury.
•
Dress properly. Do not wear loose clothing, dangling objects, or jewelry. Keep your hair, clothing
and gloves away from moving parts. Loose clothes, jewelry or long hair can be caught in moving
parts. Air vents often cover moving parts and should be avoided.
•
Use safety apparel and equipment. Use ANSI-approved safety goggles or safety glasses with
side shields, or when needed, a face shield. Use as dust mask in dusty work conditions. This
applies to all persons in the work area. Also use non-skid safety shoes, hardhat, gloves, dust
collection systems, and hearing protection when appropriate.
•
Do not overreach. Keep proper footing and balance at all times.
•
Remove adjusting keys or wrenches before connecting to the power supply or turning on the tool.
A wrench or key that is left attached to a rotating part of the tool may result in personal injury.
PNEUMATIC TOOL USE AND CARE
•
Do not force the tool. Pneumatic tools do a better and safer job when used in the manner for
which they are designed. Plan your work, and use the correct tool for the job.
•
Never use a tool with a malfunctioning switch. Any power tool that cannot be controlled with the
switch is dangerous and must be repaired by an authorized service representative before using.
•
Disconnect air supply from tool and place the switch in the locked or off position before making
any adjustments, changing accessories, or storing power tools. Such preventive safety measures
reduce the risk of starting the power tool accidentally.
3 OF 7
•
Secure work with clamps or a vise instead of your hand to hold work when practical. This safety
precaution allows for proper tool operation using both hands.
•
Store idle tools. When tools are not is use, store them in a dry, secure place out of the reach of
children. Inspect tools for good working condition prior to storage and before re-use.
•
Use only accessories that are recommended by the manufacturer for your model. Accessories
that may be suitable for one tool may create a risk of injury when used on another tool.
•
Keep guards in place and in working order.
•
Never leave tool running unattended.
•
USE COMPRESSED AIR ONLY. Use clean, dry and regulated compressed air to power this tool.
Never use oxygen, carbon dioxide or any other bottled gas as a power source for this tool.
TOOL SET UP
Fig. 1 (Above) shows an optimal set-up that includes an inline filter, regulator and oiler. All of these
components are sold separately.
NOTE: If you are not using an automatic oiler system, before operation, add a few drops of
Pneumatic Tool Oil to the airline connection. Add a few drops more after an hour of continual use.
1. Prepare the 1/4in. air nipple to connect to the air inlet on the Central Vacuum Random
Orbital Sander. First, wrap the 1/4in. air nipple with pipe thread seal tape (not included)
before threading it into the inlet. Connect the 3/8in. I.D. air hose (not included) to a
quick-disconnect coupler (not included) and then to the air nipple.
2. Turn on the air pressure on your compressor to 90 PSI. Do not exceed the recommended
air pressure of 90 PSI.
3. Check the air connection for leaks.
AIR SUPPLY
WARNING: Ensure the air supply is clean and does not exceed 90 PSI while operating the tool. Too
much air pressure and unclean air will shorten the product life due to excessive wear, and may cause
damage and/or personal injury.
1. Make sure that the air valve (or trigger) is in the “off” position before connecting to the air
supply.
4 OF 7
2. An air pressure of 90 PSI is required.
3. Drain the air tank daily. Water in the airline can damage the tool.
4. Clean the air inlet filter weekly.
5. Line pressure should be increased to compensate for longer air hoses (over 26 feet or 8
meters).
6. Keep the hose away from heat, oil and sharp edges. Check the hose for wear and make
certain that all connections are secure.
MAINTENANCE
WARNING: Make sure the Central Vacuum Random Orbital Sander is disconnected from its power
source before attempting any maintenance, cleaning, or inspection.
•
Maintain your Central Vacuum Random Orbital Sander. It is recommended that the general
condition of any tool be examined before it is used. Keep your Central Vacuum Random Orbital
Sander in good repair by adopting a program of conscientious repair and maintenance in
accordance with the recommended procedures found in this manual. If any abnormal vibrations or
noise occurs, turn the Central Vacuum Random Orbital Sander off immediately and have the
problem corrected before further use. Have necessary repairs made by qualified service personnel.
•
Keep all cutting tools sharp and clean. Properly maintained cutting tools with sharp cutting edges
are less likely to bind and are easier to control. Keep handles dry, clean, and free from oil and
grease.
•
Cleaning. Use only soap and a damp cloth to clean your Central Vacuum Random Orbital Sander.
Many household cleaners are harmful to plastics and other insulation. Never let liquid get inside the
Central Vacuum Random Orbital Sander.
OPERATING INSTRUCTIONS
Check if the maximum air pressure is set to the specified value.
. Setting the speed
Use the speed regulator handle to adjust the speed regulator to the preferred speed.
. Installing sanding discs
Stick the Velcro sanding discs to the sanding pad.
The discs must be centered and the dust extraction holes must be aligned with the sanding pad.
. Connecting a dust extractor
Connect a dust extractor unit to the suction connection.
To prevent damage to the pneumatic motor let the dust extraction run for a short period after the tool has
stopped.
. Check if the sanding pad is fitted properly
If the sanding pad is no longer adhesive, you should change to a new one. To change for it, turn up the
shroud and insert the supplied wrench to fix the screw bolt in the central then turn the pad as shown in
the illustration as below.
Let the tool run at free speed for 30 s in a safe position.
Stop immediately if vibration is too high or other problems are detected.
5 OF 7
DIAGRAM & PARTS LIST
NO
PART NO
DESCRIPTION
Q'TY
NO
PART NO
DESCRIPTION
Q'TY
01
OB-01
REGULATOR
1
24
STOB-22
CYLINDER
1
02
OB-02
O-RING
2
25
OB-24
O-RING
1
03
OB-30
SNAP RING
1
26
STOB-25
FRONT PLATE
1
04
OB-04
O-RING
1
27
OB-26A
BEARING(6002ZZ)
1
05
OB-05
VALVE STEM
1
28
OB-28.1
WASHER
1
06
OB-06
WASHER
1
WASHER
1
07
OB-16.1
WASHER
1
29
E-29
WASHER
1
08
STOB-08
VALVE
1
30
ST70407
ROTOR KEY
1
09
OB-09-1
SPRING
1
31
STS560-29
MOTOR SHAFT BALANCER(6")
1
10
70426
AIR INLET
1
32
OB-30
SNAP RING
1
11
OB-11
MUFFLER BODY
33
OB-31.3
BEARING(6001LU)
1
12
OB-11.1
O-RING
BEARING
1
13
OB-11
EXHAUST SLEEVE
14
OB-11
NUT
15
OB-13
LEVER
16
OB-14
PIN
17
18
1
28A OB-28
33A OB-31.4
(6001)
34
81326
PIN(3*8)
1
35
OB-33
SNAP RING
1
1
36
S560-34
SHAFT
1
1
37
OB-35.2
HOUSING COVER
1
STOB-15-3 HOUSING
1
38
OB-36
SCREW
4
OB-16.2
RUBBER BUSHING
1
40
BTOB-38-6V6Y PAD HOOK-UP (6-HOLE)
1
RUBBER BUSHING
1
40
BTOB-38-6V7Y PAD HOOK-UP (7-HOLE)
1
18A OB-16
19
70410
SNAP RING
1
41
BTOB-39-22
STOP SPANNER
1
20
70048A
BEARING (6000ZZ)
1
44
S560-41.1
VACUUM ADAPTER
1
21
STOB-19
REAR PLATE
1
45
OB-42
SHROUD
1
6 OF 7
22
OB-20
ROTOR BLADE
5
49
OB-101-23
PIN (3*14L)
1
23
STOB-21
ROTOR
1
50
OB-23.2A
SHIM
1
For replacement parts and technical questions, please call 1-800-222-5381.
WARRANTY
One-Year Limited Warranty
WARNING
Some dust created by power sanding, sawing, grinding, drilling, and other construction activities contains
chemicals known to the State of California to cause cancer, birth defects or other reproductive harm. Some
examples of these chemicals are:
• lead from lead-based paints,
• crystalline silica from bricks and cement and other masonry products, and
• arsenic and chromium from chemically treated lumber.
Your risk from these exposures varies, depending on how often you do this type of work. To reduce your
exposure to these chemicals: work in a well-ventilated area, and work with approved safety equipment, such as
those dust masks that are specially designed to filter out microscopic particles.
Distributed by
Northern Tool + Equipment Co.,
Burnsville, MN 53306
Made in Taiwan
7 OF 7