1
Superb Comfort in every room of your home
12-80-1182/A
quality european heating appliances
AUSTRALIA Ph:03 9852 9599 www.atlantics.com.au [email protected]
S4/13-25 Church Street Hawthorn 3122 Victoria Australia
NEW ZEALAND Ph:0800 422 000 www.atlantics.co.nz [email protected]
PASS PROGRAM HEATERS - MODULAR TECHNOLOGY
Wattage
Standard
Low
High
Plinth
1000
1500
2000
2400
1000
1500
2000
1000
1500
2000
500
1250
Width
(mm)
445
590
740
890
665
890
1035
370
520
665
665
1185
Height
(mm)
450
450
450
450
340
340
340
670
670
670
250
250
Depth Room
(mm) (m2)
78
10
78
15
78
20
78
24
78
10
78
15
78
20
78
10
78
15
78
20
78
5
78
13
Code
516913
519617
519622
519627
519912
519917
519922
519412
519417
519422
519507
519513
MODULAR ADD ONS
Castors
572000
Timer
602019
1 Zone Wall Switch
602007
BATHROOM HEATERS
Wattage
Tatou Bath
Doris Chrome
Nefertiti
Electric
Electric
1000w fan
Electric
1000w fan
Hydronic
1000
1500
300
500
Width
(mm)
470
470
500
500
Height
(mm)
775
1070
915
1360
Depth
(mm)
95
95
85
85
Code
516410
516415
950103
950105
500
750
500
750
500
750
550
550
550
550
550
550
1167
1436
1167
1436
1167
1436
137
137
137
137
137
137
850005
850007
850015
850017
851015
851017
1
2
5
4
3
Feet and castors not
to be fitted on high
end plinth models
Diagram
corresponding
to high version 6
500W
8
7
9
The product you have just purchased has undergone numerous tests and inspections to guarantee the highest quality.
We hope it will give you entire satisfaction.
INSTALLATION OF THE PANEL HEATER
Please read the instructions before starting to install the heater. Disconnect the power before carrying out any work on
the heater. Keep these instructions even once you have installed your heater.
1) Where to install your heater ?
- This equipment was designed to be installed in a residence. Please ask your distributor before using it for any other purpose.
- The panel heater should be installed according to normal trade practice and in compliance with legislation in the
relevant country (the IEE Wiring Regulations).
and is protected against splashed water IP 24. Therefore it can be installed in
- The equipment is class 2
volume 2, provided the panel heater’s controls cannot be reached by a person using the shower or bath. 1
- Comply with the minimum clearance distances for positioning of the panel heater. 2
- If your wall covering is laid on foam, a spacer the same thickness as the foam must be placed under the panel
heater’s support. This ensures there is free space behind the panel heater to make sure its control settings are not
adversely affected.
- Do not install the panel heater:
➫ In a draught likely to affect the control settings (under a fan, etc.).
➫ Under a fixed mains power socket.
Except in the UK. Please refer to the IEE Regulations 601-06-01 and 601-08-01 (BS7671).
It is strongly recomended not to install vertical products we manufacture above an altitude of 1000
metres. If the device is installed at altitude the air discharge temperature will be increased (by
approximately 10°C per 1000 m of altitude).
It is forbiden to install vertical product in horizontal position.
2) How to install the panel heater ?
2-1) Mount the wall support
A : Standard and high version 346
B : Plinth and Low version 78
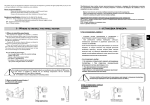
- Mount the panel heater on mounting S as shown. Lock the lock V. 4
Note : Do not use the device in mobile or feets or on casters 5, except the range kit feet (ref. 417010 - 417015 417020) and Australian ranges : Standard and Low.
2-2) Connecting the panel heater
- The panel heater must be powered with 220-240V 50Hz
- The panel heater must be connected to the mains, either by a 2-wire cable (Brown = Phase, Blue = Neutral) via a power
socket.
In humid areas such as bathrooms and kitchens the power socket must be installed at least 25 cm above the floor.
- The installation must be equipped with a omnipole disconnexion mechanism with a break contact distance of at least 3mm.
- Earthing is prohibited. Do not connect the pilot wire (black) to earth.
- The heater must be installed by a qualified electrician in accordance with the local regulations. The heater and the pilot
wire (black) must NOT be connected to earth. If the heater wire is damaged, it must be replaced by a qualified person
to avoid hazard.
If a pilot or piloted panel heater is protected by 30mA differential (e.g. bathroom) the pilot wire’s power must be
protected on this differential.
Commands
received
No current
Complete
alternation
230 V
Négative
half-alternation
- 115 V
Positive
half-alternation
+ 115 V
COMFORT
EC O
ANTI-FREEZE
POWER CUT
STOP
Oscilloscopes
Réf/Neutral
Mode
obtained
USING THE PANEL HEATER
1) Description of the control unit : 9
➊ ➔ Mode cursor.
➋ ➔ Temperature adjustment control knob.
V1 ➔ Heating indicator light
2) Fixing the comfort temperature
The comfort temperature is the temperature that you would like while the room is occupied.
.
a) Put the ➊ cursor to
b) Set the ➋ control knob on 5, the heating indicator V1 comes on if the room temperature is below the required
temperature.
c) Wait a few hours for the temperature to stabilise.
d) If the setting is satisfactory (if necessary use a thermometer to check), mark the position for future use.
e) If the setting is not satisfactory, adjust it and start again from point c.
3) Fixing the Eco temperature :
This is the required temperature during periods when the room is unoccupied. It is recommended that this mode
should be used if the room is unoccupied for no more than 2 hours.
a) Set the n to .
b) This will reduce the temperature of the thermostat by 3°C to 4°C from 2 setting. The heating light V1 comes
on, if the ambient temperature is lower than the Eco temperature.
c) Wait a few hours until the temperature stabilizes.
Note : When switching n°1 (on the picture) is set on Programming system (clock symbol) with the PassProgram
On/Off, please refer to paragraph n°8.
4) Frost-Free mode
This mode is used to keep the temperature at approximately 7°C in the room when you are absent from the house for
a prolonged period (i.e. more than 24 hours).
.
a) Set the ➊ switch on
5) The heating indicator : V1
This light comes on when the heating element is working. It may flash when the temperature has stabilised.
6) Locking the controls :
It is possible to lock or limit use of the ➋ control knob and lock the ➊ switch to prevent unauthorised manipulation of
the panel heater (children, etc.).
a) Unhook the panel heater from its wall mounting.
b) Remove the slugs P on the back of the thermostat from their mountings.
c) Select position B to lock the control knob or position L to limit the amount it can be turned. Position M blocks the switch
for Electronic Model.
7) Using the pilote wire :
The product with pilote wire can receive the following signals from a master unit :
- comfort (temperature of (2) control knob)
- eco (comfort temperature -3°C to -4°C)
- frost free (approximately 7°C)
- off.
Put the switch (1) to the programming mode (clock symbol).
The product must be connected through the pilote wire to a programming control or a product equipped with pass
program system in order to use these different modes. You can control several convectors with a single programmer or a product equipped with pass program system.
Warning: When the programme turns to Frost Free or Off in the main programming system or using a Pass Program
system, these functions will override the manual switch of the Panel Heater.
8) Using the On/Off PassProgram system. Ref 602019
When using programming mode (clock symbol) with the on/off pass program system (interface + timer), the moon
symbol on the timer refers to the off mode (no heating).
Warning: When the programme turns to Off using a Pass Program system (ref. 602019), this function will override
the manual switch of the Panel Heater.
RECOMMENDATIONS FOR USE
- There is no point in setting maximum heating, the room temperature will not rise any quicker.
- When you air the room, disconnect the panel heater by putting the n switch to off.
- If you leave for several hours, remember to reduce the temperature.
Absence for: less than 2 hours, set the cursor n switch knob to moon .
2 to 24 hours, put the
control Knob to 7 or off.
- If you have several units in a room, let them operate simultaneously. This will give you a more uniform
temperature without increasing electricity consumption.
WARNINGS
This appliance is not for use by young children or infirm persons unless they have been adequately
supervised by a responsible person to ensure that they can use the appliance safely. Young children should
be supervised to ensure that they do not play with the appliance, lean against the front or insert objects
or paper in it. Do not totally or partially block the grilles on the front or inside of the appliance, as this may
cause overheating. If the supply cord is damaged, it must be replaced by a service agent or similarly qualified
person in order to avoid a hazard (applies to units fitted with a supply cord and plug). Units fitted with a
three core supply cord (brown, blue & black), must be directly connected to fixed wiring by a licensed
electrician. All work on the interior of the appliance must be carried out by a licensed electrician.
MAINTENANCE
To maintain performances of your unit, you should clean the upper and lower grilles of the unit about twice a year using a
vacuum cleaner or a brush.
Have a professional check the inside of the unit every five years.
Dirt may collect on the grille of the unit if the atmosphere is polluted. This phenomenon is due to the poor quality of the
ambient air. In this case, it is recommended to check that the room is well ventilated (ventilation, air inlet, etc.), and that
the air is clean. The unit will not be replaced under the guarantee because of this type of dirt.
The unit casing should be cleaned with a damp cloth, never use abrasive products.
TROUBLE-SHOOTING
✁
If the unit does not heat :
Check that the programmer is in COMFORT mode (electronical).
Make sure that the installation circuit breakers are switched on, or that the load shedder (if you have one) has not
switched off the unit power supply. Check the air temperature in the room.
The unit does not carry out programming orders : (version with pilot wire)
Make sure that the programming unit is being correctly used (refer to its user’s manual) or that the Chronopass is
properly inserted in its housing and that it is operating normally (batteries ?).
The unit is permanently heating :
Make sure that it is not in a draft and that the temperature setting has not been changed.
This unit with electronic control is equipped with a microprocessor that can be distribued by some severe mains voltage
disturbances (outside EC standards defining the disturbance protection level). If there are any problems (thermostat blocked,
etc.) switch off the unit power supply (fuse, circuit breaker, etc.) for about 5 minutes to allow the unit to start again.
Have your energy distributor check your power supply if the phenomenon occurs frequently.
WARRANTY CONDITIONS :
KEEP THIS DOCUMENT IN A SAFE PLACE
(This certificate should only be produced if you are making a complaint, attached with the invoice of the purchase)
- This guarantee is applicable for 2 years from the date of original purchase and shall be valid for no more than 30 months from
the date of manufacture.
- Your Atlantic distributor will exchange parts shown to be defective in manufacture. The replacement parts will be of charge but
Atlantic does not accept responsability for freight or labor charges or losses in transit.
- This guaranteeexcludes damage by neglect, shipping or accident and any damage due to incorrect installation, use or purposes
other than those intended or failure to observe the instructions given.
UNIT TYPE *
:
SERIAL NUMBER *
:
CUSTOMER’S NAME AND ADRESS :
* This information is shown on the plate which can be seen on the left-side or behind the front grille of the unit.
FOR SALES IN NEW ZEALAND
ATLANTIC AUSTRALASIA - Phone : 0800 422 000 - Fax : 04 3800 509
FOR SALES IN AUSTRALIA
ATLANTIC AUSTRALASIA PTY LTD
4/13-25 Church Street
Hawthorn Victoria 3122
Australia
Free call : 1800 677 857
Phone : 03 9852 9599
Fax : 03 9852 9844
web : www.atlantics.com.au
INSTALLER’S STAMP
MODULAR TECHNOLOGY
Pass Program Heaters
Stylish and innovative, Atlantic heaters are renowned for superb warmth and comfort.
They now incorporate new modular technology for greater flexibility. You can start with
one panel, adding heaters and timers as required.
Perfect for all rooms, as they are dust free and do not alter the relative humidity levels.
Panels can either be wall mounted or free standing.
Atlantic Products are silent and all electric. They come with
wallbrackets for easy installation. Other features include
double installation, splash proof design,childproof controls
and safe surface temperatures.
All Atlantic products can be interconnected and fully
programmed as a central heating system.
Selecting Heater Size
Multiply width x length of room to get square metres (m2).
Eg. length 3m x width 3m = 9m2. 100 watts x 9m2 = 900 watts.
This would require a 1000 watt heater, ideal for smaller rooms.
Living & Bedroom: Allow 100 watts per m2 of room area with a ceiling height of up to
3m. For example, a 15m2 area requires a 1500 watt heater.
Bathroom: Allow 200 watts per m2 of bathroom area. For example, a 5m2 area requires
a 1000 watt heater.
Running costs for Room Heaters
Based on a 1000 watt heater, if the electricity tariff is 14 cents Kw/Hr it will cost 14 cents
per hour to operate.
If the panel is sized correctly for the room the electronic thermostat will monitor the
room temperature every 40 seconds. This creates a running cycle of 50% once the
desired temperature is reached.
Effectively an Atlantic 1000 watt panel heater will cost approximately 7 cents per hour
to run, saving running costs by half.
Under these conditions Atlantic panel heaters can cost from approximately 7 cents per
hour for a 1000 watt heater, to an economical 17 cents per hour for the larger 2400 watt
heater.
*Running costs will vary depending on conditions such as insulation, curtains, and
room size. For effective heating, rooms should be fully insulated, preferably with
curtains and floor coverings. All doors should be closed.
Pass Program Plinth
The Tatou Bath is a true radiant heater,
you can feel its luxurious warmth radiating
into the bathroom. The Tatou Bath range
is available in two sizes, 1000 watt or
1500 watt. This heater also features an
anti-corrosion frame for long life. An optional
timer is available to save on running costs.
The Plinth model is an ideal way to warm
your bathroom and dry the towels. It is
available in a 500 or 1250 watt unit. Simply
fix it to your wall, under your towel rail and
plug in to a power point.
Nefertiti
Doris Chrome
Not only does the Nefertiti dry towels
rapidly but features a powerful 1000 watt
room heater with air filter for added
comfort. Available in 3 different models:
with fan, without fan or as a hydronic
model. Towels and fabrics slide easily in
from the side and a push button timer
controls drying time.
For luxurious, warm towels and a cosy
bathroom install the Doris Chrome. It not
only dries your towels, but warms your
bathroom as well. In addition, a two hour
push-button timer saves on running costs
compared to other units that run
continuously.
12-80-1182/A
Tatou Bath