1
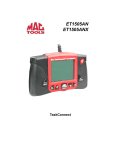
Mac TaskConnect ET1505AN ET1505ANX TM The Quick Start Guide was developed to help you get started using the Tool. If there are any problems following these steps or extra information is required refer to the User’s Guide located on the included CD. All Safety Information is contained in the User’s Guide that is on CD. Read User’s Guide completely before operating Tool. Contents General Scan Tool Information................................................. 3 User Interface............................................................................. 3 Display Icons.............................................................................. 3 Using the Scanning Suite CD.................................................... 4 Using Your Scan Tool................................................................. 4 Installing Internal Batteries ..................................................... 4 Locating Data Link Connector ................................................. 5 Connect the Tool........................................................................ 5 MAC TOOLS CONNECT Feature............................................... 5 Tool Menus.................................................................................. 8 Diagnostic Functions................................................................. 8 Limited Warranty...................................................................... 12 2 General Scan Tool Information User Interface The Tool is designed for easy use. All menus and lists operate the same way. 1 2 8 7 3 4 UP or menus. 5 6 5 4 DOWN arrow keys allow movement through lists and LEFT or RIGHT arrow keys moves between Answers and Recorded Data Frames. They will also page up and page down for faster movement through lists and menus. ENTER key selects item. BACK key returns to previous screen. ON/OFF key turns scan tool on or off when powered by batteries. MAC TOOLS CONNECT key allows the operator to access vehiclespecific repair information. Display Icons i Shows additional information is available by scrolling down. h Shows additional information is available by scrolling up. Shows if the internal batteries need replaced or are not installed. √ Shows selected items in a data list, or data is available for items on the Review Data and Print Data Menu. 3 gR Shows graphical viewing of data items is available in View Data and Record Data. M Shows MAC TOOLS CONNECT key is active. A C Using the Scanning Suite CD The included CD is NOT required to operate the Tool. Install the CD application prior to connecting the Tool to the PC. Some of the items included on the CD are: Manuals included with Tool Tool update software Adobe Acrobat Reader Installer To be able to use the included CD the PC must meet the following minimum requirements: Microsoft Windows 2000, XP, Vista, and 7. CD ROM Drive Adobe Acrobat Reader Internet Explorer 4.0 or newer Screen Resolution of 800 x 600 ⇒⇒ If screen resolution is 800 x 600, in Display Properties, Settings Tab, set Font Size to Small Fonts. ⇒⇒ Use Scanning Suite to determine if any updates are available for your tool by clicking Check for Update button. ⇒⇒ You can also configure the Scanning Suite Frequency (SS Frequency) to automatically check every xx minutes. The default frequency is 30 minutes. Using Your Scan Tool Installing Internal Batteries Scan Tool requires 4-AAA alkaline batteries only when operating tool without vehicle power, otherwise tool is powered by vehicle battery. When internal batteries need replaced, the low-battery icon () displays. 1. Place display face down on a non-abrasive surface. 2. Remove battery cover by turning screw counterclockwise and sliding cover off. 3. Remove batteries and properly discard. 4. Install 4 new AAA Alkaline Batteries. 5. Reinstall battery cover by sliding on and turning screw clockwise. 4 NOTE: Do not overtighten screw. Locating Data Link Connector • The Data Link Connector (DLC) is usually located under the driver’s side dash. • Refer to user’s manual for DLC location. • For more information on OBD II connectors, go to http://www. obdclearinghouse.com/oemdb. NOTE: When tool is connected to the vehicle’s DLC, power to the tool comes from the vehicle. Connect the Tool 1. Locate the OBD II connector under the steering column. If the connector is not there, a label should be there indicating the whereabouts of the connector. 2. If necessary, remove the cover from the vehicle connector. 3. Turn the ignition switch to the ON position. Do not start the engine. 4. Plug the OBD II connector attached to the Tool into the vehicle connector. 5. Select Vehicle Diagnostics from Main Menu. 6. Select vehicle. • Auto ID™ for vehicles model year 2000 and newer. When Auto ID™ is selected, the tool attempts to retrieve VIN and populate the tool with Year, Make, Model, and Engine information. If Auto ID™ is unsuccessful, tool will proceed to Manual selection. • Manual selection for vehicles typically model year 1999 and older. Use this selection for vehicles that could not previously be Auto ID™. 7. Review Quick Test Results. Quick Test displays I/M Monitors and codes read from vehicle. 8. Go to Diagnostic Menu by pressing 5 ENTER. MAC TOOLS CONNECT Feature MAC TOOLS CONNECT is an experience-based database derived from over 4.7 million phone calls from technicians seeking assistance diagnosing repair problems on their vehicles. MAC TOOLS CONNECT brings the technology of professional diagnostic technicians to a triage scan tool. Don’t waste time trying to find the answer. With the information MAC TOOLS CONNECT offers, it takes vehicle repairs to the next level. Get the Top Reported Fixes for the cause of the Malfunction Indicator and ABS warning lights. IMPORTANT In order for MAC TOOLS CONNECT to work, you must select your specific vehicle during vehicle selection. A Global OBD II vehicle selection will not provide any code information. The power of MAC TOOLS CONNECT is that repair information is vehicle and trouble code specific and is based on the largest experience-based database available. MAC TOOLS CONNECT information is available whenever the MAC icon is visible on the display. The MAC icon has the potential of being displayed while trouble codes are being displayed from Read Codes or while Viewing Freeze Frame data. Also, when you print codes to your PC, the MAC TOOLS CONNECT information, if available, will also be printed. √ MAC TOOLS CONNECT information is currently only available in English, so if your tool is set to Spanish or French, don’t be alarmed if your DTC text is in one language and your code information is shown in English. M A C How to use MAC TOOLS CONNECT: P0122 M A C 1. When the MAC icon is shown on the display, press the MAC TOOLS CONNECT key. 6 1 of 3 MOD $10 Throttle/Pedal Position Sensor A Circuit Low Input M A C 2. Scroll through the codespecific repair information. TOP REPORTED FIXES 1-Replaced Throttle Position Sensor(TPS) 2-Replaced Air Conditioner(A/C) Pressure Sensor FREQ REPORTED FIXES • Use UP or DOWN arrow keys to scroll one line at a time. • Use LEFT or RIGHT arrow keys to scroll lines at a time, or a whole screen. There are 3 levels of reported fixes: Fix Level 1-Wire Harness Description Top Reported Fix More likely to be the solution over other choices provided. Frequently Reported Fix As likely as other solutions. ALSO REPORTED FIXES 1-Air Conditioning (A/C) Compressor Clutch Coil 2-Oxygen (O2) Sensor 3-In-Line Fuse Also Reported Less likely than Fix other solutions provided, but worth considering. 4-Throttle Position Sensor (TPS) Wiring 5- 5 Volt Reference 6- Air Conditioning (A/C) Compressor Clutch 3. To return to the screen from where you pressed the MAC TOOLS CONNECT key, press BACK. ++ ++ ++ ++ ++ ++ ++ ++ ËË ËË ËË ËË Tool Menus The Main Menu and Diagnostic Menu are broken down into the following menus: ∆∆ ++ ++ ++ ++ ++ ++ Vehicle Diagnostics I/M Monitors Read Codes Erase Codes MIL Status State OBD Check View Data 7 Record Data View Freeze Data Drive Cycle Monitor O2 Monitor Tests Diag Monitor Tests On-Board Systems Vehicle Information Modules Present Component Locator Acronyms Review Data Print Data I/M Monitors DTCs (Codes) State OBD Check Recording View Freeze Data O2 Monitor Tests Diag Monitor Tests Vehicle Information Modules Present ËË Code Lookup ËË System Setup English/Metric Adjust Contrast Auto-Power Off Quick Test Print Header Language Setup Long PID names Tool Information Display Test Keypad Test Memory Test Program Mode ∆∆ Function is only on Main Menu. ++ Function is only on Diagnostic Menu. ËË Function is on both the Main Menu and Diagnostic Menu. Diagnostic Functions Vehicle Diagnostics Use this function to select a vehicle and then proceed to the Diagnostic Menu. I/M Monitors Displays a snapshot of the state of the vehicle’s OBD II Monitors. Read Codes Reads DTCs from vehicle’s computer with KOEO or KOER. Erase Codes Deletes DTCs from vehicle’s memory. MIL Status Displays whether the Malfunction Indicator Lamp is on or off. State OBD Check Displays a basic status of the vehicle’s OBD system. View Data Views vehicle Parameter Identification Data (PIDs) in real time. PIDs are displayed in either a text format or graph format when available. Record Data Records vehicle PIDs while vehicle is parked or being driven. This function is for diagnosing intermittent driveability problems. View Freeze Data Displays a snapshot of operating conditions at the time of a fault. 8 Drive Cycle Monitor Displays the current state of the vehicle’s OBD II Monitors in Real-Time. O2 Monitor Tests The O2 Monitor Tests is NOT an ON-DEMAND TEST. This Function displays oxygen sensor monitoring test results from the vehicle’s memory. Diag Monitor Tests Reads test results for emission related powertrain components and systems that are and are not continuously monitored. On-Board Systems Scan tool controls the operation of vehicle components, tests or systems. Vehicle Information Scan tool displays the vehicle’s VIN number, Calibration ID(s) and CVN that identify the software version in the vehicles control module(s.) The tool also displays In-Use Performance Tracking of important readiness monitors. Modules Present Views the status of all OBD II compliant modules. Component Locator Tool will display a list of components and their locations on the vehicle. This function will always appear on the Main Menu. This selection will appear on the Diagnostic Menu only when the tool has a list of component locations for the currently selected vehicle. Acronyms Allows the user to view acronyms and abbreviations used by the Scan Tool. Review Data Allows review of data stored in Scan Tool. Print Data Prints diagnostic information stored in the Scan Tool. (Refer to Users Manual) DTCs (Codes) Five-digit alphanumeric codes that help determine the cause of problems with a vehicle. Recording Plays back a recording that allows viewing of previously-recorded PIDs. Code Lookup Looks up definitions of DTCs stored in Scan Tool. 9 System Setup Changes tool settings, displays tool information, and performs self-tests. English/Metric Changes measurement units. Adjust Contrast Adjusts the contrast on the display screen. Auto-Power Off Allows the tool to turn off automatically after a selected amount of time when tool is not being used. Quick Test Allows the user to turn off the Scan Tool performing Read Codes and I/M Monitors after vehicle selection when the Scan Tool is connected to the vehicle. Print Header Allows the user to turn off the Scan Tool printing the currently-selected vehicle prior to the retrieved vehicle data when selecting items from the Print Data menu. Language Setup Allows the user to change the language used by the tool. English is the default. Long PID Names Allows the user to enable/disable the tool scrolling the complete PID name on the bottom line of the display while viewing live data or viewing freeze data. Tool Information Allows the user to view specific tool information that may be needed when contacting customer service. Display Test Used to check the display. Keypad Test Verifies that the keys are working correctly. Memory Test Checks RAM and Flash ROM. Program Mode Used for updating the Scan Tool. MAC Tools Connect Allows the operator to access vehicle-specific repair information. 10 Declaration of Conformity: This product is declared to be in compliance with the European RoHS Directive 2002/95/EC which restricts the following substances in electrical and electronic equipment: Substance Maximum Concentration Cadmium (Cd) 100 ppm Hexavalent Chromium (CrVI) 1000 ppm Lead (Pb) 1000 ppm Mercury (Hg) 1000 ppm Polybrominated Biphenyls (PBB) 1000 ppm Polybrominated Diphenyl Ethers (PBDE) 1000 ppm This product is declared to conform to the following standard under the EMC directive 89/336/EEC. EN 61326-1:2006 Disposal Information This product should be disposed of separately from household waste. When the product reaches its end of life, dispose of it according to local laws and regulations. Matthew Koran Hardware Development Manager SPX Corporation Service Solutions Brook Park, Ohio, USA April 27, 2011 11 Limited Warranty THIS WARRANTY IS EXPRESSLY LIMITED TO ORIGINAL RETAIL BUYERS OF SPX ELECTRONIC DIAGNOSTIC TOOLS (“UNITS”). SPX Units are warranted against defects in materials and workmanship for one year (12 months) from date of delivery. This warranty does not cover any Unit that has been abused, altered, used for a purpose other than that for which it was intended, or used in a manner inconsistent with instructions regarding use. The sole and exclusive remedy for any Unit found to be defective is repair or replacement, the option of SPX. In no event shall SPX be liable for any direct, indirect, special, incidental or consequential damages (including lost profit) whether based on warranty, contract, tort or any other legal theory. The existence of a defect shall be determined by SPX in accordance with procedures established by SPX. No one is authorized to make any statement or representation altering the terms of this warranty. DISCLAIMER THE ABOVE WARRANTY IS IN LIEU OF ANY OTHER WARRANTY, EXPRESSED OR IMPLIED, INCLUDING ANY WARRANTY OF MERCHANTABILITY OR FITNESS FOR A PARTICULAR PURPOSE. SOFTWARE Unit software is proprietary, confidential information protected under copyright law. Users have no right in or title to Unit software other than a limited right of use revocable by SPX. Unit software may not be transferred or disclosed without written consent of SPX. Unit software may not be copied except in ordinary backup procedures. TECHNICAL SUPPORT If you have any questions on the operation of the product, please call 1-800-MAC-TOOLS. REPAIR SERVICE • Please contact Technical Support for troubleshooting and service options prior to sending any unit in for repair. • To send a unit in for repair, go to www.Repairtrack.spx.com and follow the online instructions. This web site will also have the latest Service policies and service center locations. If you do not have internet access, please call 1-800-MAC-TOOLS. © 2011 SPX. All Rights Reserved. 0002-002-3145