1
Release 3
Release Notes
For
WIN-PAK PRO Release 3 SP1
WIN-PAK PRO Release 3 SP1
WIN-PAK PRO Release 3, SP1,
Build #408
Release Notes
Note: Please read this document carefully before installing WIN-PAK PRO SP1
or upgrading a previous version of WIN-PAK. The information contained within
this document supersedes any information in the WIN-PAK PRO User's Guide,
Operator Quick Reference Guide, Help and all previous Release Notes.
Table of Contents
SQL Installation Requirements .......................................................................................................... 3
MSDE Installation Requirements ....................................................................................................... 3
Upgrade Requirements ..................................................................................................................... 3
Database Upgrade Procedures.......................................................................................................... 4
Installation and Upgrade Issues ..................................................................................................... 5
Possible Sources of Upgrade Problems ......................................................................................... 6
Manual Upgrade Procedures ......................................................................................................... 7
Operational Theory..................................................................................................................... 8
Manual Database Upgrade Procedure ........................................................................................ 9
Manual Archive Database Upgrade Procedure ......................................................................... 13
Known Software Problems and Undocumented Updates ................................................................. 16
TD4567_rev0801
Page 2 of 24
WIN-PAK PRO Release 3 SP1
SQL Installation Requirements
1. SQL 2000 or 7.0 with SP2 is now required for WIN-PAK PRO SP1 installation. If you
are installing WIN-PAK PRO SP1 with SQL and SP2 is not installed you will be
notified. WIN-PAK PRO SP1 requires SP2 but the installation does not force an
automatic install. Before installing SP2, it is recommended that this upgrade be
cleared by the customer’s IS department. The installation will not continue unless
SP2 is installed. Service Pack 3 is available on the CD.
2. The System Account (SA) cannot have a password on it otherwise the database
cannot be created. It is assumed that there is no password on SA during a new
installation or an upgrade. The System Account can be found in Enterprise Manager
/ Security / Logins. If a password is already present it must be deleted before a fresh
installation or upgrade. A password can be added afterwards without problems.
3. Authentication must be set for SQL Server and Windows NT, not to Windows NT
Only. The default setting in SQL 2000 is Windows NT Only. This must be changed.
To verify:
a) Open Enterprise Manager and expand the Tree so that you can see your SQL
Server for the Local PC.
b) Right-click on the Server and select from Properties.
c) When the menu opens select the "Security" tab.
d) The "Authentication" section will show you two different selections: SQL Server
and Windows NT, and Windows NT Only. If Windows NT Only is selected you
MUST change it to SQL Server and Windows NT.
MSDE Installation Requirements
1. WARNING: Never install MSDE on a PC that already has SQL installed. You will
corrupt the SQL Server on the PC.
2. Service Pack #2 is required by MSDE. After verifying SP2 is installed SP3 is then
automatically installed.
3. MSDE will install to C:\MSSQL7 regardless of where your operating system is
located. If you have a dual-boot PC and SQL Server 7.0 installed on the boot
partition for "C:” MSDE will want to overwrite it and errors will occur.
Upgrade Requirements
WARNING: Always create a valid backup on tape or another location before upgrading.
System failure during the "Automatic" installation may result in loss of data. A "manual"
installation is also available which does not create a new database or archive database
on the PC.
1. Database Maintenance
Database maintenance should be done before an upgrade is performed. The
database should be at a minimum, compacted and backed up to tape or another
drive for duplicity before starting the upgrade procedure.
2. Disk Space Requirements
TD4567_rev0801
Page 3 of 24
WIN-PAK PRO Release 3 SP1
Upgrades for any database require sufficient hard drive space. It is recommended
that at least 250 to 500% free space be available on the hard drive where the
database will reside and the conversion will take place. For example, if the database
was 500MB then you should have at least 1.5GB to 2GB available on that hard drive.
Additional free space is also required for SQL’s tempdb file. The location of that file
can be found using Enterprise Manager. The conversion process will fail if there is
insufficient hard disk space available.
3. SQL Upgrades
Authentication must be set for SQL Server and Windows NT, not to Windows NT
Only. The default setting in SQL 2000 is Windows NT Only. This must be changed.
To verify:
1) Open Enterprise Manager and expand the Tree so that you can see your SQL
Server for the Local PC.
2) Right-click on the Server and select from Properties.
3) When the menu opens select the "Security" tab.
4) The "Authentication" section will show you two different selections: SQL Server
and Windows NT, and Windows NT Only. If Windows NT Only is selected you
MUST change it to SQL Server and Windows NT.
Database Upgrade Procedures
Warning: Always make a backup copy of the database before performing an upgrade.
The automatic upgrade looks at the Winpak2.exe (User Interface) file and deciphers
what version it is. Based on that, the information is stored temporarily and the upgrade
will call the appropriate SQL scripts, rename the original database file and then continue.
You will notice that the PC reboots a few times and that the software files have been
upgraded. If the automatic upgrade fails DO NOT run the automatic upgrade procedure
again. The renamed database file will be deleted. You must run the manual upgrade
procedure. Refer to the Manual Upgrade Procedure section and the SQL scripts to
upgrade the customer's database.
1. Upgrade Release 2.01 of WIN-PAK 2.0 or Pro to WIN-PAK PRO SP1
a) If you are using the automatic upgrade the Operator Level “rights” information is
overwritten when upgrading from one build to the next. Because there were
changes to the Operator Levels from versions 2.01 through 2.03 of the software
the Operator Level names will be converted, but the “Rights” for that Operator
Level will not. It is suggested that an Operator Level Report be run before the
upgrade is performed. The Operator Level report will provide the Operator Level
Rights information that will be required for manual reprogramming.
b) After upgrading from version 2.01 WIN-PAK PRO, some databases will have all
the Accounts Selected for the records. For example, if you edit a Timezone or an
Access Level the list of Accounts will be on the “selected” side. It will be
necessary to "deselect" the Accounts you want for those records. The Operator
database requires that you “select” which account the Operator(s) will have.
TD4567_rev0801
Page 4 of 24
WIN-PAK PRO Release 3 SP1
2. Upgrade Release 2.01 of WIN-PAK 2.0 to WIN-PAK PRO SP1
The upgrade process will work from WIN-PAK 2.0, but it is necessary to change the
name of a folder in the registry from WINPAK2 to WIN-PAK PRO before you
upgrade.
1) Go to Start / Run and type in Regedit then click "OK"
2) Expand the HKEY_LOCAL_MACHINE folder
3) Expand the SOFTWARE folder
4) Expand the Northern Computers folder
5) Change the name of Winpak2 to WIN-PAK PRO
6) Close the registry editor
3. Upgrade Release 2.02, Build #64 to WIN-PAK PRO SP1
Upgrade from existing 2.02 to 2.03: Depending on what version you are upgrading
from you will need to reconfigure the Operator Level Access for the Operator Levels
displayed in the tree. The data permissions to this tree have changed so the
Operator Level needs to be reprogrammed. It is suggested that the installer first
generate a Report on Operator Levels so that they can easily be reprogrammed.
4. Upgrade Release 2.03 of WIN-PAK Pro or International to WIN-PAK PRO SP1
a) If you are upgrading from version 2.03 builds "less than" Build #170, then the
Operator Level information will need to be added back in.
b) If you are upgrading from version 2.03 builds "greater than or equal to" Build
#170, then the Operator Level information will be intact. You can check what
build number you have by going into the menu Help / About WIN-PAK Pro.
Installation and Upgrade Issues
WARNING: Installations that are done automatically and fail cannot be done again with
success. The upgrade looks for the Winpak2.exe file on the system to define what build
and version. Once it has found the file it knows what scripts to use to correctly import the
data from the old database to the new one. If the automatic upgrade fails for some
reason the install process can no longer find the old Winpak2.exe file because it was
replaced with the new one. If you attempt to reinstall and select automatic again, the
upgrade will think that it is the new software build and version and then select to do a
2.03 to 2.03 upgrade and that will fail. It is necessary to select a "Manual" upgrade at
this point. Refer to the Manual Upgrade Procedure section and the SQL scripts to
upgrade the customer's database.
1. After upgrading, the database you were using has been renamed to “WIN-PAK
OLD”. A new database should have been created with your old database
information. If you choose to reinstall yet again over what is there, the installation
process will look to see if there is any database files named “WIN-PAK OLD” and
then delete them. If something went wrong during the first installation and you didn’t
back up your old database you would be overwriting it with a second install.
2. If you are converting from Build #27 you will need to change your WinPakPro icon
after the installation so that they are updated. The installation does not overwrite it.
TD4567_rev0801
Page 5 of 24
WIN-PAK PRO Release 3 SP1
3. After an upgrade you may see the SQL Install directory located in the WIN-PAK PRO
directory. This directory is only there for temporary use during the installation and
can be removed when the upgrade is done.
Possible Sources of Upgrade Problems
In some instances the upgrade will fail and the database will not get created nor will an
upgrade occur. Manual upgrading will then be necessary. Refer to the Manual Upgrade
Procedure section and SQL scripts to upgrade the customer's database.
1. POSSIBLE DESCRIPTION #1:
There is a setting in the Enterprise Manager that stops the SQL scripts from running
which causes the upgrade of the database to fail.
a) Open Enterprise Manager and expand the tree so that you can see your SQL
Server for the Local PC.
b) Right-click on the Server and select from Properties.
c) When the menu opens you should see a "Security" tab. Select it.
d) The "Authentication" section will show you two different selections:
i. SQL Server and Windows
ii. Windows NT Only
e) If Windows NT Only is selected you MUST change it to SQL Server and
Windows NT. When our upgrade process attempts to validate the SA (System
Account) it will fail if "Windows NT Only" is selected. By default the Windows NT
Only selection is checked in SQL 2000. After the upgrade the selection can be
set back if the user so desires.
2. POSSIBLE DESCRIPTION #2:
The software installation will look for the default "WINPAKProData.mdf" database
filename. Customers may have an "unattached" default database resident in the
same directory as the database they were connected to through SQL / MSDE. If
there is an unattached default database file in the directory move it to another
location if it is necessary to keep it. If the installation sees the unattached default
database it will attempt to upgrade it, fail in its routine and the upgrade of the
database will not occur.
3. POSSIBLE DESCRIPTION #3:
There is a password on the System Account. This needs to be removed until after
the upgrade. Once the upgrade is completed you can put the password back. If a
password was on the System Account (SA), then we would be unable to write
manage the existing database and create another for upgrade.
4. POSSIBLE DESCRIPTION #4:
If the database is in use at the time of the upgrade it will fail. An example of this
would be a backup or maintenance routine or if a database has been marked for
publication. Verify database maintenance is not occurring before starting and during
the upgrade.
5. POSSIBLE DESCRIPTION #5:
Some upgrades have failed because there isn't enough database space to upgrade.
Example: If the database size is 500mb it is recommended that you have 2 1/2 times
TD4567_rev0801
Page 6 of 24
WIN-PAK PRO Release 3 SP1
or more room on that drive for the database to upgrade to. Temporary file creation
and room for the new database is necessary. If there isn't enough room to continue it
is possible that the database may never be created, or that only some of the
information is converted.
6. POSSIBLE DESCRIPTION #6:
The link to the database is not correct or is not pointed to the database where
necessary. Necessary links for database, software, SQL and ODBC:
a) WIN-PAK Pro uses the System Manager to point to a DSN (Database) name
which should be present in the ODBC System DSN Tab. The default name is
"WIN-PAK Database".
b) ODBC points to an SQL / MSDE database name. This name is not the name of
the database file, but rather a name that is given to the database. For example,
WINPAK_Pro. ODBC must be able to find that name.
c) SQL / MSDE should be attached to a database file. For example,
WINPAKProData.mdf If SQL is not attached then a database name will not be
provided and ODBC will not see the link nor will the WIN-PAK PRO software. If
any one of these items is incorrect then the upgrade of the database will fail. To
ensure that they are correct, you can log into the software. If you can login then
you know you have a database connection through all the required links. You
should also consider testing and verifying your ODBC connection, this would
allow you to see that you are connected to the database you thought you were.
There may be more than one ODBC link to an SQL database due to earlier
trouble-shooting or customer intervention.
7. POSSIBLE DESCRIPTION #7:
The user has "restored" a database backup file that is not compatible with their
current version / build of the software. Example: The customer is having problems
with their software and they decide to restore from an old backup. The backup file
was created from Build #50 but they are running Build #337. They will of course have
problems logging in and getting their system to work.
Q. What happens if the automatic upgrade has failed, can I run it again?
A. No, you will need to run the upgrade manually. The automatic upgrade will take a
look at the Winpak2.exe (User Interface) file and decipher what version it is. Based
on that, the information is stored temporarily and the upgrade will call the appropriate
SQL scripts to perform the upgrade and then continue. You will notice that the PC
reboots a few times and that the software files have been upgraded. The new
Winpak2.exe file will no longer be the same version that it was when you started the
upgrade. If the upgrade failed and you rerun the auto upgrade again you would
retrieve the new version of the Winpak2.exe file, rerun the SQL scripts and the
upgrade will fail.
Manual Upgrade Procedures
Warning: It is strongly recommended that only individuals that have an understanding of SQL use this
manual upgrade procedure. Incorrect usage may result in user data being lost.
In the past, the installation program for WIN-PAK PRO utilized Data Transformation Services (DTS)
to perform database upgrades. While DTS is a convenient and powerful tool, it’s not designed for this.
TD4567_rev0801
Page 7 of 24
WIN-PAK PRO Release 3 SP1
An optimized suite of SQL scripts has replaced the DTS packages. Manual upgrades of WIN-PAK
PRO SP1 now require the procedures listed below. These manual procedures will upgrade old MS
Access, MSDE, and SQL databases to new MSDE or SQL databases.
Section a - identifies the prerequisites necessary to perform the manual upgrade.
Section b - details the theory of operation.
Section c - is the Manual Database Upgrade procedure.
Section d - describes the Manual Database Upgrade procedure for the archive database.
Section e - contains the Data Transfer Upgrade procedure where a new database already exists and
you just want to transfer the old data into the new database.
Prerequisites
1. Your old database is backed up.
2. MSDE/SQL Server is installed correctly on the system and SQL Service Pack 2 or
greater has been correctly applied.
3. You have selected Manual Upgrade during the installation process.
Note: If you have completed a standard install with auto database creation, and you want
to just transfer your data to the new database, please refer to Section E, Data Transfer
Upgrade.
4. All WIN-PAK services are stopped.
Operational Theory
There are 3 phases of the manual database upgrade procedure.
Phase 1: Prepare Old Database
This is where the Old Database is discovered, renamed and SQL/MSDE
prepared for the upgrade.
Phase 2: Create New Database
This is where the new database is created and filled with tables,
constraints, indices and default data. These steps can be skipped when the
database has already been created.
Phase 3: Transfer Data from Old to New
This is where the data is taken from the old database and placed in the new
database.
Each phase consists of several steps that must be performed in sequential order. In order to
minimize problems with the manual upgrade, the SQL files are named to reflect the order in
which they should be performed. Some of the files need to be modified in some way prior to
usage. The InstallShield script usually handles this modification process during an Automatic
Upgrade. The specific modifications you must make are detailed below. Once all steps have
been performed the database conversion is complete.
TABLE I. Default naming convention for WP2 is as follows:
Variable
Main
Install
C:\Program Files\WINPAK2\
Database\SQL Install
DBPath
C:\MSSQL7\Data
OldDBFilePath
C:\Program Files\WINPAK2
TD4567_rev0801
Archive
C:\Program Files\WINPAK2\
Database\SQL Install
C:\MSSQL7\Data
C:\Program Files\WINPAK2
Page 8 of 24
WIN-PAK PRO Release 3 SP1
DSNString
HISTORY
SQLDBOLD
SQLDBNEW
UPGRADE
DBFNAME
DBLNAME
LOGICALDB
LOGICALLOG
\Database\WINPAK2.MDB
WIN-PAK Database
1 (=YES)
WINPAK2OLD
WIN-PAK 2
NONE
WINPAK2_Data.MDF
WINPAK2_Log.LDF
WINPAK2_Data
WINPAK2_Log
\Database\WINPAK2.MDB
WIN-PAK Archive
1 (=YES)
WINPAK2ARCHIVEOLD
WIN-PAK Archive
NONE
WINPAKArchive_Data.MDF
WINPAKArchive_Log.LDF
WINPAKArchive_Data
WINPAKArchive_Log
TABLE II. Default naming conventions for WIN-PAK PRO SP1 and WIN-PAK PRO INTERNATIONAL
are the same and as follows:
Variable
Main
Archive
Install
C:\Program Files\WINPAKPRO\
C:\Program Files\WINPAKPRO\
Database\SQL Install
Database\SQL Install
DBPath
C:\MSSQL7\Data
C:\MSSQL7\Data
OldDBFilePath
C:\Program Files\WINPAKPRO
C:\Program Files\WINPAKPRO
\Database\WINPAK2.MDB
\Database\WINPAK2.MDB
DSNString
WIN-PAK Database
WIN-PAK Archive
HISTORY
1 (=YES)
1 (=YES)
SQLDBOLD
WINPAKOLD
WINPAKARCHIVEOLD
SQLDBNEW
WIN-PAK PRO
WIN-PAK Archive
UPGRADE
NONE
NONE
DBFNAME
WINPAKPRO_Data.MDF
WINPAKArchive_Data.MDF
DBLNAME
WINPAKPRO_Log.LDF
WINPAKArchive_Log.LDF
LOGICALDB
WIN-PAKPRO_Data
WINPAKArchive_Data
LOGICALLOG
WIN-PAKPRO_Log
WINPAKArchive_Log
Manual Database Upgrade Procedure
This procedure is used for manually upgrading a database where no new (destination) database exists. It
will upgrade old MS Access, MSDE, and SQL databases to new MSDE or SQL databases.
Warning: We recommend you save these scripts in a safe place, and only edit a copy. The search and
replace operations MUST have the correct 'destinationDB' string set when run. For example, when you edit
‘WINPAK4CreateScheme.sql’ the first time, you must replace ‘destinationDB’ with ‘WIN-PAK PRO’. If
you also want to upgrade the archive database, you should start with a fresh set of files and replace the
‘destinationDB’ with ‘WIN-PAK Archive’ for example.
Step 1: Backup old database
Make sure your old database is backed up. Failure to do so may lead to loss of data.
Step 2: Stop Services
Make sure all the WIN-PAK services have been stopped.
Step 3: ManualCreateAndLoadWPPaths.sql
This file is the heart of the installation/upgrade sequence. In an automatic install, this file is
generated by the InstallShield script and then executed locally. In a manual upgrade, this file
TD4567_rev0801
Page 9 of 24
WIN-PAK PRO Release 3 SP1
must be edited by the installer and then executed. This file contains all the variables needed
by the remaining SQL scripts. Edit the variables according to the informational comments in
bold and prefixed with "--".
INSERT INTO
tempdb..wppaths (Step1,
Step2,
ConvertType,
Install,
DBPath,
OldDBFilePath,
DSNString)
VALUES (1,
-- Constant should be 1
1,
-- Constant should be 1
1,
-- Constant should be 1
'C:\Program Files\WINPAKPRO',
-- Enter the installation Root directory
'C:\MSSQL7\Data',
-- Enter the local SQL data directory
'C:\<Path To Database>\WINPAK2.MDB', -- Enter the fully qualified path of the Access Database,
if it is a SQL upgrade, put the location of the WIN-PAK
DATABASE directory here.
'WIN-PAK Database')
-- Enter the ODBC Name of the database
go
-- The following lines are a duplication of the above data. The above command will go away at some point in the
future. The important thing is that you edit both sets CORRECTLY!
insert into WPVars (keyname,value) values ('Install','C:\Program Files\WINPAKPRO')
insert into WPVars (keyname,value) values ('DBPath','C:\MSSQL7\Data')
insert into WPVars (keyname,value) values ('OldDBFilePath','C:\ :\<Path To Database>\WINPAK2.MDB')
insert into WPVars (keyname,value) values ('DSNString', 'WIN-PAK Database')
-- These are the new variables that must be edited:
insert into WPVars (keyname,value) values ('HISTORY','1')
-- If you want to convert history insert ‘1' (for YES) otherwise
insert ‘0' (for NO)
insert into WPVars (keyname,value) values ('SQLDBOLD','WINPAKOLD')
-- Name of the OLD Database. The script
attaches the Access database as this name.
MUST NOT BE AN EXISTING DATABASE!
insert into WPVars (keyname,value) values ('SQLDBNEW','WIN-PAK PRO') -- Name of the New database. This is what the
script will name the new DB.
insert into WPVars (keyname,value) values ('UPGRADE','ACCESS')
-- Enter the name of the old database type, either
ACCESS, SQL or NONE. Use of NONE does not
create an upgrade.
insert into WPVars (keyname,value) values ('DBFNAME','WINPAKPRO_Data.MDF') -- SQL Filename for Database. If you
have a file with this name in your SQL
Database Directory, the install will fail.
insert into WPVars (keyname,value) values ('DBLNAME','WINPAKPRO_Log.LDF')
-- SQL Filename for Log. If you have a
file with this name in your SQL
Database Directory, the install will fail.
insert into WPVars (keyname,value) values ('LOGICALDB','WIN-PAKPRO_Data') -- Logical Name for Database. If you
have a database with this logical name
in your SQL Database, the install will
fail.
insert into WPVars (keyname,value) values ('LOGICALLOG','WIN-PAKPRO_Log') -- Logical Name for Log. If you have a
database with this logical name in your
SQL Database, the install will fail.
TD4567_rev0801
Page 10 of 24
WIN-PAK PRO Release 3 SP1
Once your edits are complete, execute this command file with the following command line:
OSQL.EXE -Usa –P –i”C:\Program Files\WINPAKPRO\ManualCreateAndLoadWPPaths.sql”
You can verify that the table was created by looking in tempdb.
Step 4: WINPAK2RenameOld.sql
NOTE: Access upgrades do not need to run this step. The MDB file is attached in a later step
as SQLDBOLD.
This file performs the renaming of the old database. It gets all of its data from the tempdb
table. If the old database isn’t named EXACTLY what it is in the SQLDBNEW record, then the
manual upgrade will fail. InstallShield traverses the registry to find the name of the database
from a known point, that is:
1. Look in System Manager settings for a DSN key. If it exists, get the string as the DSN
Name. If it doesn’t exist, use the default for the product being installed, i.e. ‘WIN-PAK
Database’
2. Look in the ODBC registry keys for a DSN named exactly ‘WIN-PAK Database’ or
whatever was extracted from the above step. If it exists ( It most definitely should! ) get
the database name from the Database key. If it doesn’t, then the database NEVER
connected to WIN-PAK.
Once the database name is known, this script then gets the filenames for the database,
detaches the database, renames the files, and re-attaches the database as SQLDBOLD.
Execute this command file with the following command line:
OSQL.EXE -Usa –P –i”C:\Program Files\WINPAKPRO\WINPAK2RenameOld.sql”
Step 5: WINPAK3CreateDB.sql
This script creates the basic database. It gets all information from the tempdb table.
Execute this command file with the following command line:
OSQL.EXE -Usa –P –i”C:\Program Files\WINPAKPRO\WINPAK3CreateDB.sql”
Step 6: WINPAK4CreateScheme.sql
This script creates the tables. It requires a bit of touch-up prior to execution. You must do a
search and replace on the exact string:
destinationDB
and replace it with the value that’s in SQLDBNEW, i.e. WIN-PAK PRO. No quotes, no braces,
no leading spaces, no trailing spaces, just the plain text!
Execute this command file with the following command line:
OSQL.EXE -Usa –P –i”C:\Program Files\WINPAKPRO\WINPAK4CreateScheme.sql”
Step 7: WINPAKPROLoadEnglish.sql (for WIN-PAK PRO SP1)
TD4567_rev0801
Page 11 of 24
WIN-PAK PRO Release 3 SP1
Note: All of these scripts are included on the CD, but use only one of them based on your
WIN-PAK type and language.
This script creates the default database entries. It requires a bit of touch-up prior to
execution. You must do a search and replace on the exact string:
destinationDB
and replace it with the value that’s in SQLDBNEW, i.e. WIN-PAK PRO. No quotes, no braces,
no leading spaces, no trailing spaces, just the plain text!
Execute this command file with the following command line:
OSQL.EXE -Usa –P –i”C:\Program Files\WINPAKPRO\WINPAKPROLoadEnglish.sql”
Step 8: WINPAK6ExtendTempDB.sql
This script splits the tempdb database across available drives to prevent the upgrade from
filling up the primary drive and aborting. It gets all data from tempdb tables.
Execute this command file with the following command line:
OSQL.EXE -Usa –P –i”C:\Program Files\WINPAKPRO\WINPAK6ExtendTempDB.sql”
Step 9: WINPAK7RunUpgrade.sql
The actual upgrade script. This script takes all the info gathered so far and copies the data
across the databases.
NOTE: Access databases are attached as Remote Servers to SQL and the same algorithm is
applied as the SQL – SQL upgrade. The MDB file is attached as a remote server named in
SQLDBOLD, i.e. WINPAK2OLD.
Execute this command file with the following command line:
OSQL.EXE -Usa –P –i”C:\Program Files\WINPAKPRO\WINPAK7RunUpgrade.sql”
Step 10: WINPAK8db_settings.sql
rd
This script sets the maximum MSDE memory usage to 1/3 the total system RAM. It requires
a bit of touch-up prior to execution. You must do a search and replace on the exact string:
destinationDB
and replace it with the value that’s in SQLDBNEW, i.e. WIN-PAK PRO. No quotes, no braces,
no leading spaces, no trailing spaces, just the plain text!
NOTE: This is NOT executed on customer automatic installs that are using an existing SQL
or MSDE installation. The administrator may have optimized settings and it is our policy to not
change those settings.
Execute this command file with the following command line:
OSQL.EXE -Usa –P –i”C:\Program Files\WINPAKPRO\WINPAK8db_settings.sql”
Step 11: WINPAK9RemovePath.sql
TD4567_rev0801
Page 12 of 24
WIN-PAK PRO Release 3 SP1
This is the final step for the main DB manual upgrade. It removes the tempdb tables, and
shrinks/merges the tempdb table back to its original configuration. It gets its variables from
tempdb, so no editing is required.
Execute this command file with the following command line:
OSQL.EXE -Usa –P –i”C:\Program Files\WINPAKPRO\WINPAK9RemovePath.sql”
Step 12: Fix ODBC
Remove the WIN-PAK Database entry that points to the Access database and create a new
SQL entry called “WIN-PAK Database”. Point it to “WIN-PAK PRO”.
To fix the ODBC:
1. Go to ODBC Data sources (For 95/98/NT its in Control Panel, W2K it's in Admin tools)
2. Select System DSN tab
3. Click Add
4. Select SQL Server (driver)
5. Set Name = WIN-PAK Database
6. Set Description = anything you want
7. Set Server = [Local]
8. Click Next
9. Select SQL Server Authentication
10. Click Next
11. Select default database to WIN-PAK PRO
12. Click Next
13. Click Finish
14. Select Test Data Source
15. Click OK
16. Click OK
17. Click OK
Step 13: Verify
Once the conversion has completed, you should determine that the database has
successfully been converted. If the database has user images, floor plans and/or signature
files, these should now be copied to their appropriate directory. Restart the WIN-PAK
services, and attempt to log in to WIN-PAK. Verify the control map has all devices, the card
table has all cards and the access levels have all access levels.
Step 14: Backup
Backup the new database immediately after conversion.
Step 15: Clean up
The old database should be saved to a safe location until proper WIN-PAK operation can be
verified completely. Delete the files used in conversion.
Manual Archive Database Upgrade Procedure
TD4567_rev0801
Page 13 of 24
WIN-PAK PRO Release 3 SP1
The archive database can also be converted by following the same basic procedure. Just edit
the ‘ManualCreateAndLoadWPPaths.sql’ file to the correct archive DB information (as shown
in Table II) and run everything over again.
Warning: We recommend you save these scripts in a safe place, and only edit a copy. The
search and replace operations MUST have the correct destinationDB string set when run. For
example, when you edit ‘WINPAK4CreateScheme.sql’ the first time for the archive, you
should start with a fresh set of files and replace the ‘destinationDB’ with ‘WIN-PAK Archive’.
Data Transfer Upgrade
The upgrade of an installed system with a newly created, but empty database, will be referred
to as a ‘Data Transfer Upgrade'. Essentially, you want to populate the new database with the
old data. Data Transfer Upgrades require only a subset of the above procedure, in fact, only
2 of the steps, aside from some preparation. This scenario is most commonly encountered
when a client computer is upgraded. The WIN-PAK software is installed on a new PC with a
fresh database and the old Access database is available via some backup medium.
Step 1: Backup old database
Make sure your old database is backed up. Failure to do so may lead to loss of data.
Step 2: Stop Services
Make sure all the WIN-PAK services have been stopped.
Step 3: Make the old access database available
Copy or otherwise move the WINPAK2.MDB file to a local drive on the target system.
Step 4: Create ODBC link
Remove the existing SQL System ODBC data source named “WIN-PAK Database.” Create a
new MSAccess System Data Source in ODBC named “WIN-PAK Database” and point it to
the MDB file mentioned in the previous step.
Step 5: Edit ManualCreateAndLoadWPPaths.SQL
Ensure the following fields are correct. Edit the variables according to the informational
comments in bold and prefixed with "--".
INSERT INTO tempdb..wppaths (Step1,
Step2,
ConvertType,
Install,
DBPath,
OldDBFilePath,
DSNString)
VALUES (1,
1,
1,
'C:\Program Files\WINPAKPRO',
'C:\MSSQL7\Data',
TD4567_rev0801
-- Constant should be 1
-- Constant should be 1
-- Constant should be 1
-- Enter the installation Root directory
-- Enter the local SQL data directory
Page 14 of 24
WIN-PAK PRO Release 3 SP1
'C:\<Path To Database>\WINPAK2.MDB', -- Enter the fully qualified path of the Access
Database, if it is a SQL upgrade, put the location
of the WIN-PAK DATABASE directory here.
'WIN-PAK Database')
-- Enter the ODBC Name of the database
-- The following lines are a duplication of the above data. The above command will go away at some point in the
future. The important thing is that you edit both sets CORRECTLY!
insert into WPVars (keyname,value) values ('OldDBFilePath','C:\<Path To Database>\WINPAK2.MDB')
insert into WPVars (keyname,value) values ('DSNString', 'WIN-PAK Database')
insert into WPVars (keyname,value) values ('HISTORY','1')
-- If you want to convert history insert ‘1' (for
YES) otherwise insert ‘0' (for NO)
-- These are the new variables that must be edited:
insert into WPVars (keyname,value) values ('SQLDBOLD','WINPAK2OLD') -- Name of the OLD Database. The script
attaches the Access database as this name.
MUST NOT BE AN EXISTING DATABASE!
insert into WPVars (keyname,value) values ('SQLDBNEW','WIN-PAK PRO') -- Name of the existing new database. Any
data in the new database prior to upgrade will
be lost.
insert into WPVars (keyname,value) values ('UPGRADE','ACCESS')
-- Enter the name of the old database type,
either ACCESS, SQL or NONE. Use of NONE
does not create an upgrade.
Once your edits are complete, save the file.
Step 6: Run ManualCreateAndLoadWPPaths.SQL
Execute this command file with the following command line:
OSQL.EXE -Usa -P -m -n –i”C:\Program Files\WINPAK2\ManualCreateAndLoadWPPaths.sql”
Step 7: Run WINPAK7RunUpgrade.SQL
Execute this command file with the following command line:
OSQL –Usa –P -m -n –i”C:\WINPAK7RunUpgrade.SQL”
Step 8: Fix ODBC
Remove the WIN-PAK Database entry that points to the Access database and create a new
SQL entry called “WIN-PAK Database”. Point it to “WIN-PAK PRO”.
Step 9: Verify
Once the conversion has completed, you should determine that the database has
successfully been converted. If the database has user images, floor plans and/or signature
files, these should now be copied to their appropriate directory. Restart the WIN-PAK
TD4567_rev0801
Page 15 of 24
WIN-PAK PRO Release 3 SP1
services, and attempt to log in to WIN-PAK. Verify the control map has all devices, the card
table has all cards and the access levels have all access levels.
Step 10: Backup
Backup the new the database immediately after conversion.
Step 11: Clean up
The old database should be saved to a safe location until proper WIN-PAK operation can be
verified completely. Delete the files used in conversion.
Known Software Problems and Undocumented Updates
ACTION GROUPS
Camera to Monitor Switching has been taken out as part of the action group. When editing the
Action Group database you can still see where the Camera to Monitor feature existed. When
editing the Device Map hardware and action groups, the feature no longer exists.
Action Groups set for Outputs and Groups do not have any effect.
BADGE UTILITY
When the "Show Badge" box is checked you are not able to use the up and down arrows to scroll
through the list of programmed badges.
BULK CARD DELETE
Custom Access Levels are not deleted with Bulk Card Delete.
CCTV
Drag and drop of a camera to a monitor does not function on the Control Map.
COMMUNICATIONS
The software does not support 485 Firmware older than version 1.01. You will experience
problems with Poll Response Alarms and Poll Response Normals.
CONVERSION BETA TO WP2.0
It appears that the Tool Tip and description information for floorplans is not converting when an
earlier build of the software has been upgraded.
CONTROL MAP
The Control Map uses the same priority scheme as the Alarm View. Therefore events that have
thresholds lower than what would be displayed in the Alarm View are also not displayed in the
control map as events requiring actions such as acknowledgements
DATACARD SELECT AND EXPRESS SERIES PRINTERS
TD4567_rev0801
Page 16 of 24
WIN-PAK PRO Release 3 SP1
If the printer drivers are loaded after WIN-PAK PRO Release 3 Service Pack 1 is installed they
will over write existing files that are critical to WIN-PAK’s operation. To restore WIN-PAK
functionality you must perform the following.
NOTE: This is ONLY required to be run on the WIN-PAK Database Server Machine
AFTER installing the printer driver.
a. Procedure for NT/2000 Database Server
1. Insert the WIN-PAK PRO Release 3 Service Pack 1 CD-ROM
2. Stop all services in WIN-PAK Service Manager
3. Click Start>Run
4. Type CMD <enter>
5. In the DOS box change to the CDROM drive. Type d: <enter> where d is the
CDROM drive letter
6. In the DOS box change to the datacard fix directory type cd\utilities <enter>
7. Run the script. In the DOS box type datcdfix.bat <enter>
8. Reboot the Machine.
DEVICE MAP
When upgrading from a previous build, the time zones (GMT) within the loop configuration are
reset. In the loop configuration, the time zone (GMT) is set to Eniwetok, Kwajalein. This is the
first choice in the GMT time zones. This seems to work sometimes and not others. If the user
does not edit the Loop configuration the Scheduler should still send out the previous GMT time.
Once the user edits the loop configuration they must reselect the appropriate GMT time or else
the time and date will be sent out 'Eniwetok, Kwajalein" and the time zones will be out of sync.
EVENT VIEW
The Event View does not provide as much information as WIN-PAK 1 did. You will not see if a
command file was sent successfully or if an output was pulsed, energized or de-energized
successfully.
FARGO PRINTERS
The Fargo printers supported by WIN-PAK PRO Release 3 Service Pack 1 are those
manufactured by Fargo for Northern. When WIN-PAK detects a Fargo printer, the Configure
Badge Printer setup Printer Type allows for the selection of Fargo – 4250/C25/l20 as the printer
supported for use with magnetic stripe encoding or duplex printing. If the Northern/Fargo printer
is not detected, then only simplex printing is allowed. Select Generic Badge Printer as the Printer
Type.
FLOORPLANS
Creating a floor plan from a workstation, the wmf file name cannot exceed 26 characters in
length. Creating the floor plan from the database server does not have this limitation.
HELP
There is no Help File associated with the WIN-PAK System Manager.
INSTALLATION
If the software has been selected to be installed on the root directory without a folder designation
you will have problems with the services. This issue occurs with all root directories on any drive C:, D:, etc.
TD4567_rev0801
Page 17 of 24
WIN-PAK PRO Release 3 SP1
Accesses to MSDE upgrade error log missing. Earlier installations of the software created an
Error log describing the Access to MSDE/SQL database conversion. The log showed which
tables did and did not get upgraded. The DTS packages were taken out and the log was based
off of that logic.
Compare function not working during installation: Earlier builds allowed you to open both of the
.txt files created in each upgrade in the MSSQL7/Data directory. The user was able to compare
what was in the DB before and after the upgrade. Problem: In WIN-PAK PRO SP1, there isn't an
"rpt_OLD-PAK_2.0.txt" being created. It was agreed that this feature would not be available.
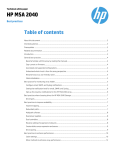
NCICore.exe error occurring after fresh installation on a Windows 2000 Operating System only.
Problem: After the installation is complete and you log on the operating system you may receive
an error.
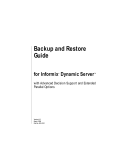
This error is not detrimental and is caused because of a timing issue with some PC's. After a
fresh installation we require Crypkey to start as well as SQL Server before the Database
Server starts. In some cases the Database Server is being started before the other items and
then an error message is generated. You may click on the "Cancel" button if you want or wait
for 10-45 seconds the error will change to:
Clicking OK to either error does not have an ill effect on the Database Server. The Database
Server will start after Crypkey and SQL Server have been started and you may log into the
software without any problems. You may click on the "OK" button on the error message at any
time or the message may close on its' own. The error will go to the Event Viewer of the
Operating System.
TD4567_rev0801
Page 18 of 24
WIN-PAK PRO Release 3 SP1
LIVE MONITOR
The WIN-PAK PRO Release 3 Service Pack 1 User Interface will crash under a unique set of
circumstances. Both the Live Monitor view and the Badge Layout Utility are open and an image
was just captured and saved and then the Live Monitor View window is moved. It is not
necessary to have the Live Monitor view open when capturing images as the same video capture
device is used in both operations. The correct procedure is to select the camera (if CCTV
interface is used) from the Live View and then close the view off before launching any video
capture features used in the production of badge layouts or cardholder images
OPERATOR LEVEL
If you restrict a user from seeing images in the cardholder database it will not stop them from
seeing the image of a person if Autocard Lookup is also used.
OPERATOR NOTES
Right-clicking on a transaction in the alarm view: If the count for an alarm is more than one and
you are required to put an operator note on the transaction, once you click to acknowledge it the
transaction will go to the cleared portion of the Alarm View. You are not given the opportunity to
add an operator note to each instance of the alarm. If the user works from the detail view box
they are able to add operator notes for each instance.
PACKET SIZES
The Following are applicable average WIN-PAK data sizes, data size could be different by using
longer or sorter names for Reader, Controllers, Devices, Cardholders etc., no overhead of
transport is calculated. All data sizes are expressed in bytes.
TD4567_rev0801
Page 19 of 24
WIN-PAK PRO Release 3 SP1
Alarm Acknowledged
Database Server
WIN-PAK User Interface
155
145
441
WIN-PAK User Interface
441
Communication Server
Alarm Cleared
Database Server
WIN-PAK User Interface
155
145
520
WIN-PAK User Interface
520
Communication Server
Alarm Received
Database Server
WIN-PAK User Interface
143
364
Communication Server
Auto Card Lookup
Database Server
290
17500
WIN-PAK User Interface
450
Communication Server
TD4567_rev0801
Page 20 of 24
WIN-PAK PRO Release 3 SP1
Card swipe
Database Server
Muster Server
Guard Tour Server
440
WIN-PAK User Interface
500
500
520
500
Communication Server
CardHolder Save
Communication Server
500
WIN-PAK User Interface
1000
For Every Controller
3020
1510
Database Server
Photo Capture
WIN-PAK User Interface
Database Server
3 2,00 0
1 6,00 0
Signature Capture
WIN-PAK User Interface
Database Server
8 ,0 00
4 ,0 00
TD4567_rev0801
Page 21 of 24
WIN-PAK PRO Release 3 SP1
Tracking And Muster View
Updates every
5 Seconds
WIN-PAK User Interface
Muster Server
157
170
+ 100 for every
card in areas
PANEL FIRMWARE
The software User Interface now provides new firmware selection options:
8.02, 8.03, 8.04, 8.05, 8.06, 8.07 for the PW2000-3/4 panels.
Versions 8.04, 8.05, 8.06 perform the same functions as the old "later" option.
Version 8.07 adds the “Duress Feature” for the PW-2000-III/IV to the Advanced options lists. This duress
feature works similarly to the duress on the PW-2000-II (refer to the User Manual TD0076 for operational
details). Support for up to 4 duress relays on the PW-2000-IV panel. Typically you would set up the PW2000-IV panel to pulse output relays 5, 6, 7, and 8 under duress for card readers 1, 2, 3, and 4, respectively.
The PW-2000-III would typically be set up to pulse output relays 4 and 5 under duress for card readers 1
and 2 respectively. The PW-2000-II panel retains its present duress functionality.
PRO-2200
New SIO board firmware differentiates model numbers for PW-5000 and PRO-2200 SIO boards.
This allows a check for correct configurations and to disable SIO boards that are used with wrong
IC boards. If WIN-PAK PRO detects an SIO board that doesn't match the IC board an alarm
"Unsupported Panel Version" is generated and all I/O on that board is set to unknown state.
PW-5000 and PRO-2200 I/O reverse order polling has been added to help correct an alarm “Forced Door”
when the rex shunts the door contact and doesn’t pulse the relay. The panel now polls the inputs (and other
I/O) from last to first. This feature is defaulted “On
PW-5000
Unsupported Panel Version feature scenario will show unexpected results. Problem: IC Panel will
report incorrectly in Control Map and Floor Plan as a Normal after Acking and clearing an
unsupported Panel Version alarm. When the PW-5000 IC has been programmed in WIN-PAK
PRO SP1, but connected to a PRO-2200 IC an Unsupported Panel Version alarm is received.
When the PRO-2200 IC has been programmed in WIN-PAK PRO SP1, but connected to a PW5000 IC an Unsupported Panel Version alarm is received. In either case this is expected,
however when the alarm is cleared along with a Poll Response alarm the Control Map and
Floorplan still show the IC as Normal (Green).
REPORTS
The Printer page keeps defaulting to "Landscape". Since the Attendance Report was added it
was necessary to layout the report as landscape. When other reports are brought up they may
default to landscape. It would be necessary to use the "Properties" button from within the report
print screen to select "Portrait" if needed.
TD4567_rev0801
Page 22 of 24
WIN-PAK PRO Release 3 SP1
The Card Report does not show the PIN number of a user. The Card report in WIN-PAK 1 did
show the PIN number. Showing the PIN number could be construed as a security breech.
SCHEDULES (DATABASE FUNCTIONALITY)
There currently isn't a flag that tells the user that other schedules may be using the same time
and date frequency. It will be necessary for the user to be aware of their programming.
SERVICES
With NT 4.0, if you attempt to stop all services you may find that the Database Server won't stop
until you reselect it and again click the stop button. There are dependencies to the Database
Server and sometimes they are not released until the server is reselected to stop.
TCP/IP
When configuring a Port Setting for TCP/IP Encrypted Connection the Encryption Password must
be in upper case letters.
Upgrading other than UI or Complete
When upgrading a WIN-PAK PRO Release 3 Service Pack 1 installation that was originally
installed as a Communication Server Only, Database Server Only or User Interface and Comm
Server Only the following additional steps must be taken.
1. In the WIN-PAK PRO Release 3 Service Pack 1 System Manager, Remove the installed
services.
2. Uninstall the existing server using the Add/Remove Programs from the Windows Control
Panel.
3. Now install the appropriate configuration of WIN-PAK PRO Release 3 Service Pack 1.
When upgrading a previous Complete or User Interface only installation no additional steps are
required.
Windows 2000 and Active Directory
When using active directory with WIN-PAK a remote UI User requires at least Windows 2000
Power User rights to be set. This allows the UI the ability to read and write UI settings to the
registry.
Windows 2000 and Video Capture Cards
1. Only the PBVC10 (Flashpoint 3D) card is compatible for use in Windows 2000 applications.
2. Install Flashpoint setup and video drivers.
3. Stop all services in WIN-PAK Service Manager
4 From the WIN-PAK PRO Release 3 Service Pack 1 CD, Utilities directory, flashcdfix
subdirectory:
a) Copy the fp3d32.dll to c:\winnt\system32.
Windows 2000 Installation
After the installation is complete a WIN-PAK error will appear. Reboot the computer and the error
will go away. This error only occurs once after the initial installation and goes away after the
reboot.
In both Windows 2000 and NT installations, if you attempt to stop all services at the same time,
you may find that the database server won’t stop until you reselect it and again click the stop
button. There are dependencies to the database server and sometimes they are not released
until the server is reselected to stop.
TD4567_rev0801
Page 23 of 24
WIN-PAK PRO Release 3 SP1
The WIN-PAK user interface running on a Windows 2000 Professional machine is unable to log in
to the WIN-PAK database server running on a Windows NT 4.0 machine. The computers can be
pinged by IP Address and Computer Name but still won't connect. Windows 2000 uses "Fully
Qualified Domain Name" (FQDN) to locate computers on the network. An example of is:
Dbachand.marketing.nciaccess.com.
The solution to the problem is as follows:
1. Enable DNS on the Windows NT 4.0 Server (check with IT department for the IP
address for the DNS server).
2. Reboot the NT Server.
3. From a command prompt on the NT Server, ping the Windows 2000 client by the FQDN.
For example: ping dbachand.marketing.nciaccess.com
If the Windows 2000 computer can be pinged by the FQDN the client will connect properly and
the user will be able to log in.
TD4567_rev0801
Page 24 of 24