1
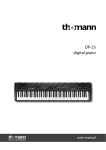
DP-50
digital piano
user manual
Musikhaus Thomann
Thomann GmbH
Hans-Thomann-Straße 1
96138 Burgebrach
Germany
Telephone: +49 (0) 9546 9223-0
E-mail: [email protected]
Internet: www.thomann.de
06.08.2015, ID: 233872
Table of contents
Table of contents
1
General notes............................................................................................................................ 5
2
Safety instructions................................................................................................................. 6
3
Features....................................................................................................................................... 8
4
Setup guide................................................................................................................................ 9
5
Operating elements and connections........................................................................ 13
6
Connection options............................................................................................................. 16
7
Switching on / off and basic operation......................................................................
7.1 Switching the digital piano on.................................................................................
7.1.1 Switching on, automatic switchoff, volume control.....................................
7.1.2 Setting the brilliance................................................................................................
18
18
18
18
8
Functions..................................................................................................................................
8.1 Rehearsal songs.............................................................................................................
8.1.1 Selecting, playing and quitting rehearsal songs............................................
8.2 Voices and effects.........................................................................................................
8.2.1 Selecting voices..........................................................................................................
8.2.2 Demo songs.................................................................................................................
8.2.3 Dual mode....................................................................................................................
8.2.4 ACMP split point........................................................................................................
8.2.5 Touch sensitivity........................................................................................................
8.2.6 Reverb and chorus....................................................................................................
8.2.7 Transposing.................................................................................................................
8.2.8 Historical tunings.......................................................................................................
8.2.9 Pedals.............................................................................................................................
8.3 Metronome.....................................................................................................................
8.4 Style operation...............................................................................................................
8.4.1 Selecting a style.........................................................................................................
8.4.2 Starting and stopping a style................................................................................
8.4.3 Fill A/B............................................................................................................................
8.4.4 Accompaniment volume........................................................................................
8.4.5 Tempo............................................................................................................................
8.5 Recording and playback.............................................................................................
8.5.1 Recording.....................................................................................................................
8.6 Lesson mode...................................................................................................................
8.7 SD memory card............................................................................................................
8.7.1 Functions......................................................................................................................
8.7.2 Buttons in the SD CONTROL area........................................................................
8.8 MIDI functions................................................................................................................
19
19
19
20
20
20
21
21
22
23
23
24
24
25
25
25
25
26
26
26
26
27
28
28
29
29
30
9
Cleaning.................................................................................................................................... 31
10
Voice list.................................................................................................................................... 32
11
Styles list................................................................................................................................... 33
DP-50
3
Table of contents
12
Rehearsal song list............................................................................................................... 34
13
MIDI implementation chart............................................................................................. 36
14
Technical specifications.................................................................................................... 38
15
Protecting the environment........................................................................................... 39
digital piano
4
General notes
1
General notes
This user manual contains important information on safe operation of the device.
Read and follow all safety notes and all instructions. Save this manual for future refer‐
ence. Make sure that it is available to all persons using this device. If you sell the
device to other users, be sure that they also receive this manual.
Our products are subject to a process of continuous development. We therefore
reserve the right to make changes without notice.
Symbols and signal words
This section provides an overview of the symbols and signal words used in this user
manual.
Signal word
Meaning
DANGER!
This combination of symbol and signal word indicates
an immediate dangerous situation that will result in
death or serious injury if it is not avoided.
CAUTION!
This combination of symbol and signal word indicates
a possible dangerous situation that can result in minor
injury if it is not avoided.
NOTICE!
This combination of symbol and signal word indicates
a possible dangerous situation that can result in mate‐
rial and environmental damage if it is not avoided.
Warning signs
Type of danger
Warning – high-voltage.
Warning – danger zone.
DP-50
5
Safety instructions
2
Safety instructions
Intended use
This device is intended to be used for electronic sound generation using a piano key‐
board. Use the device only as described in this user manual. Any other use or use
under other operating conditions is considered to be improper and may result in per‐
sonal injury or property damage. No liability will be assumed for damages resulting
from improper use.
This device may be used only by persons with sufficient physical, sensorial, and intel‐
lectual abilities and having corresponding knowledge and experience. Other persons
may use this device only if they are supervised or instructed by a person who is
responsible for their safety.
Safety
DANGER!
Danger for children
Ensure that plastic bags, packaging, etc. are disposed of properly and
are not within reach of babies and young children. Choking hazard!
Ensure that children do not detach any small parts (e.g. knobs or the
like) from the unit. They could swallow the pieces and choke!
Never let children unattended use electrical devices.
DANGER!
Electric shock caused by short-circuit
Always use proper ready-made insulated mains cabling (power cord)
with a protective contact plug. Do not modify the mains cable or the
plug. Failure to do so could result in electric shock/death or fire. If in
doubt, seek advice from a registered electrician.
DANGER!
Electric shock caused by high voltages inside
Within the device there are areas where high voltages may be present.
Never remove any covers.
There are no user-serviceable parts inside.
CAUTION!
Possible hearing damage
With loudspeakers or headphones connected, the device can produce
volume levels that may cause temporary or permanent hearing impair‐
ment.
Do not operate the device permanently at a high volume level.
Decrease the volume level immediately if you experience ringing in
your ears or hearing impairment.
digital piano
6
Safety instructions
CAUTION!
Risk of injury due to heavy weight
Due to the heavy weight of the device, at least two persons are required
for transport and installation.
NOTICE!
Operating conditions
This device has been designed for indoor use only. To prevent damage,
never expose the device to any liquid or moisture. Avoid direct sunlight,
heavy dirt, and strong vibrations.
NOTICE!
Power supply
Before connecting the device, ensure that the input voltage (AC outlet)
matches the voltage rating of the device and that the AC outlet is pro‐
tected by a residual current circuit breaker. Failure to do so could result
in damage to the device and possibly injure the user.
Unplug the device before electrical storms occur and when it is unused
for long periods of time to reduce the risk of electric shock or fire.
DP-50
7
Features
3
Features
Special features of the digital piano:
n Keyboard: 88 weighted keys with hammer action, touch velocity in three steps.
n Operation: use the [+]/[–] buttons or the direct selection keys to select the
desired function and parameter.
n Voices: 20 voices to choose from via 10 direct selection keys.
n Styles: 20 piano styles can be called using the [+]/[–] buttons.
n Self-learn function.
n Recording function: one song with two tracks.
n SD memory card: for midi file playback and storing recorded songs.
n Style control buttons: [START/STOP], accompaniment volume [ACC VOL],
[FILL A/FILL B].
n Function buttons with indicator: [FILL A/FILL B], [RECORD], [PLAY/STOP], [ACC VOL],
[SPLIT], [DUAL], [REVERB/CHORUS], [TOUCH], [METRO], [(SD)STORE],
[(SD)PLAY/STOP], [TRACK 1/SONG MELODY OFF], [TRACK2], [SCALE.]
n Further function buttons: [DUAL], [SPLIT], [REVERB/CHORUS], [METRONOME],
[TRANSPOSE +/–], etc.
n Pedals: sustain pedal, soft pedal, sostenuto pedal.
n Connections: MIDI In/out, USB, headphones, AUX output.
digital piano
8
Setup guide
4
Setup guide
You need a Phillips screwdriver (not supplied) to assemble the digital piano. Open
the packaging and please make sure prior to assembly that you have the full scope of
delivery available as listed below.
1. Piano housing
10. Right metal strip
2. Music stand
11. Handscrews (4 pcs.)
3. Left side panel
12. Screws 6 ´ 45 (2 pcs.)
4. Left front leg
13. Screws 6 ´ 18 (6 pcs.)
5. Right side panel
14. Screws 6 ´ 35 (4 pcs.)
6. Right Front leg
15. Screws 6 ´ 12 (2 pcs.)
7. Pedal box
16. Screws 4 ´ 15 (4 pcs.)
8. Back panel
17. Cable holder (2 pcs.)
9. Left metal strip
DP-50
9
Setup guide
Mechanical assembly
Proceed according to the figures.
1.
Use the 6 ´ 45 screws to attach the front legs to both sides panels.
2.
Use the 6 ´ 18 screws to attach the metal strips to both side panels.
3.
Put the pedal box between the two side panels and screw the parts together
using the 4 screws (6 ´ 35, 2 pcs. per side).
4.
Use two screws 6 ´ 12 and four screws 4 ´ 15 to attach the rear panel to the
base frame that you have assembled in step 3.
digital piano
10
Setup guide
5.
Place the piano case on the base frame. Then fix the housing using the four
handscrews and two screws 6 ´ 18.
6.
Connect the cable from the pedal box to the ‘PEDAL’ socket on the rear panel
of the unit. Stick one of the cable holder on the inside of the side panel and
attach the pedal cable to it.
1.
Make sure that the piano is switched off before connecting the device to the
power grid or disconnecting it.
2.
Turn the volume control down to the left stop.
Mains connection
DP-50
11
Setup guide
3.
Connect the mains cable to an AC 230 V power wall outlet.
4.
Now you can turn on the device.
If the piano is not in use or when a thunder-storm threatens, disconnect the
unit from the mains to ensure safety.
digital piano
12
Operating elements and connections
5
Operating elements and connections
General
1. Control panel
7. MIDI IN/OUT port
2. Music stand
8. AUX output
3. Headphones socket
9. Soft pedal
4. Piano keyboard
10. Sostenuto pedal
5. Pedal cable connection
11. Sustain pedal
6. USB port
12. Pedals
DP-50
13
Operating elements and connections
13 [POWER]
14 Rotary control [VOLUME] to adjust the volume.
15 Rotary control [BRILLIANCE] to adjust the brilliance of the sound.
16 [START/STOP] button to start or stop styles.
17 [FILL A/FILL B] button to insert fill bars into styles.
18 [ACC VOL] button to adjust the accompaniment volume.
19 [TRANSPOSE +/–] buttons to transpose note values.
20 [TEMPO +/–] buttons to increase or decrease the tempo.
21 [RECORD] button to call the recording function.
22 [TRACK 1/SONG MELODY OFF] button to select and mute track #1.
23 [TRACK 2 ] button to select track #2.
24 [PLAY/STOP] button to play or stop rehearsal songs.
25 [METRO] button to call the metronome function.
26 LED ‘BEAT’ indicators.
27 LED display
n
n
n
‘VOICE’
‘STYLE’
‘SONG’
28 [+/YES] and [–/NO] buttons to select values and parameters.
29 [STYLE] button to call styles.
30 [VOICE] button to select voices.
digital piano
14
Operating elements and connections
31 [SONG] button to call the ‘SONG’ mode.
32 Direct selection buttons to call voices.
33 [VOICE DEMO] button to call rehearsal songs.
34 [SCALE] button to call historical tunings.
35 [REVERB/CHORUS] button to select various reverb and chorus effects.
36 [DUAL] button to call the dual mode.
37 [SPLIT] button to call the split mode.
38 [TOUCH] to adjust the touch sensitivity.
39 SD card control
n [PLAY/STOP] button to start or stop the playback of SD card songs.
n [STORE] button to store songs on the SD card.
40 SD card slot.
DP-50
15
Connection options
6
Connection options
Headphones
To the left beneath the keyboard you find the headphones outlets 1 and 2.
1.
Connecting headphones (not supplied) to outlet 2 mutes the speakers.
2.
Using outlet 1 maintains the sound output through the speakers.
3.
You can connect 2 headphones, for example, in order to rehearse with your
teacher without disturbing anyone.
–
–
Never operate headphones at high volume as this can permanently
damage your hearing.
Before connecting the mains voltage or other devices to the piano turn
the volume to minimum to avoid damage to the speakers.
AUX output
Use the AUX/OUT sockets to connect the digital piano to an amplifier, stereo device,
mixing console or recording device. For stereo operation, connect these external
audio devices to the AUX OUT L – R sockets. For mono operation, connect only one of
the sockets. Connect the AUX/OUT sockets on the rear panel of the digital piano to
the input of the respective audio device.
Pedals
Connect the plug of the pedal cable to the corresponding socket on the rear panel of
the unit. Then you can use the soft, sostenuto and sustain pedal.
MIDI interface
MIDI stands for ‘Musical Instrument Digital Interface’ and represents a world wide
standard for the communication of numerous electronic instruments and sound
modules.
n MIDI IN: the device receives MIDI data from other devices through this port.
n MIDI OUT: MIDI data from the digital piano are sent to other MIDI devices
through this port.
digital piano
16
Connection options
USB port
1.
Connect a computer or other device with USB support.
2.
The USB port is an integrated MIDI-USB adapter. For devices with USB cable,
you can simply connect the MIDI / USB converter to the USB port and connect
the MIDI IN or MIDI OUT cable to the piano. After the driver is installed and the
installation is complete, you can select the USB audio device in Device menu of
the software to transfer the MIDI data.
DP-50
17
Switching on / off and basic operation
7
Switching on / off and basic operation
7.1 Switching the digital piano on
7.1.1 Switching on, automatic switchoff, volume control
1.
Press the [POWER] switch. The LED display lights up.
Automatic switchoff
–
When the digital piano is not used, it will switch off automati‐
cally after 30 minutes. To switch it on again, press the POWER
switch twice.
Deactivating the automatic switchoff
–
2.
To deactivate the automatic switchoff function, hold the first
white key at the very left of the keyboard pressed while you
switch on the digital piano.
Turn the [VOLUME] control to adjust the desired volume.
3.
Keep both [+/YES] and [–/NO] buttons pressed while switching the
device on to reset all parameters to factory default values. This will
irretrievably erase all your settings.
–
–
–
If the display does not light up after switching the digital piano on,
check the power supply.
If you hear nothing from the speakers, the volume may be set to ‘min‐
imum’.
Even if the digital piano is switched off using the [POWER] switch, it is
not disconnected from the mains power supply. This is achieved only if
you unplug the power cord.
7.1.2 Setting the brilliance
Use the rotary control [BRILLIANCE] to adjust the sonic brilliance of the digital piano.
Turn the knob clockwise for a brighter and more brilliant sound of the whole key
range. Turn it counter-clockwise for a more mellow and darker sound.
Adjusting the brilliance may lead to a slight volume change.
digital piano
18
Functions
8
Functions
8.1 Rehearsal songs
8.1.1 Selecting, playing and quitting rehearsal songs
The digital piano offers 60 rehearsal songs for practising in total (see Ä Chapter 12
‘Rehearsal song list’ on page 34).
1.
Press the button [SONG] to enter the playback mode for rehearsal songs. The
‘SONG’ indicator appears in the display and all rehearsal songs are played in an
endless loop.
2.
Press the button [START/STOP] to finish the currently played rehearsal song.
This will not quit the mode for rehearsal song playback. If you press the
[START/STOP ] button again, this song will be repeated in an endless loop until
you press the [START/STOP] button again.
3.
Selecting rehearsal songs
Use the [+/YES] or [–/NO] buttons to select the desired rehearsal song. If you
select a new rehearsal song, the display will show its number first, then the
‘BEAT’ LED indicators light up in sequence.
4.
Pre-count
After pressing the [START/STOP] button the display will pre-count one bar. The
bar indicator starts with a negative value. The playback starts on ‘1’.
5.
Press the button [TRACK1/SONG MELODY OFF] to start the self-learn function
and to turn track 1 of the song on or off.
DP-50
19
Functions
8.2 Voices and effects
8.2.1 Selecting voices
The digital piano offers 20 voices in total (see Ä Chapter 10 ‘Voice list’ on page 32).
1.
On power up the ‘VOICE’ indicator lights up in the display and the number
‘001’ is displayed.
2.
Press the button [VOICE] to call the voice selection mode. The display shows
the number for the right hand voice (VOICE R1).
3.
Press the button [DUAL] to call the dual mode. The display shows the number
for the second right hand voice in dual mode (VOICE R2).
4.
Use the [+/YES] or [–/NO] button or the [VOICE] direct selection buttons to
select other voices.
Direct selection buttons
10 direct selection buttons are available to select the 20 voices. Press one of
these buttons once to activate the voice labelled above the button. Press the
button twice to activate the voice labelled below the button. Depending on
whether the upper or lower voice is selected, the indicator to the right of the
button lights up accordingly.
8.2.2 Demo songs
If you press the [VOICE DEMO] button a demo song for the respectively selected
instrument voice is played.
1.
Press the [VOICE DEMO] button in VOICE R1 mode to play the demo song for
the right hand voice.
2.
Press the [VOICE DEMO] button in dual mode to play the demo song for the
second right hand voice.
3.
Press the [VOICE DEMO] button again to quit the demo song playback mode.
If you change the voice during playback of a demo track, this mode is
also cancelled.
digital piano
20
Functions
8.2.3 Dual mode
In dual mode, two voices sound simultaneously if you press a key in the right key‐
board area.
1.
Press the button [DUAL] to activate the dual mode. The ‘VOICE’ indicator lights
up in the display and the indicator of the [DUAL] button lights up. The number
for the second voice of the right hand is also shown.
2.
Press the button [+/YES] or [–/NO] or one of the direct selection buttons to
select the desired voice. By default, the second voice is set to ‘007’ (Strings).
3.
Press the button [DUAL] again to quit the dual mode. The indicator turns off.
The setting for the second voice of the right hand only affects the keys to the
right of the split point of the keyboard.
8.2.4 ACMP split point
With this function, you can split the piano keyboard into a melody and a chord
(ACMP = accompaniment) area.
1.
Press the button [SPLIT]. The display indicates the current split point parameter
‘XXX’ .
2.
Press the button [+/YES] or [–/NO] or the desired piano key to change the split
point. The new split point is applied on closing this setting. ‘34’ (F#3) is the
default split point.
The new split point is part of the left keyboard area.
DP-50
21
Functions
8.2.5 Touch sensitivity
This function lets you adjust the touch response of the keyboard in four steps.
Parameter
Description
‘OFF’
Touch sensitivity is off, very recommendable
when playing the organ voice.
‘001’
Soft
In this setting, the volume is higher than usual
even when playing with a soft touch.
‘002’
Normal
This setting corresponds to the usual touch
response of a keyboard.
‘003’
Hard
In this setting, the volume is lower than usual
even when playing with a hard touch.
1.
Press the button [TOUCH]. The indicator of the button [TOUCH] and the setting
‘002’ is briefly shown.
2.
Press the [TOUCH] button repeatedly to select one of the settings.
3.
When selecting ‘OFF’ , the ‘TOUCH’ indicator and the touch sensitivity are
deactivated.
If you don't press a button for two seconds after calling the function
setting, the menu will automatically quit.
digital piano
22
Functions
8.2.6 Reverb and chorus
With the functions for reverb and chorus, you can simulate acoustic effects under dif‐
ferent environmental conditions.
1.
The indicator of the button [REVERB/CHORUS] lights up on switching the piano
on.
2.
Press the button [REVERB/CHORUS] to activate the desired setting.
3.
Repeatedly press the button [REVERB/CHORUS] to toggle between the setting
modes for reverb and chorus.
4.
The buttons [+/YES] and [–/NO] allow you to choose from 32 effects level. The
chorus level ‘00’ and reverb level ‘08’ are preset by default.
8.2.7 Transposing
This function lets you adjust the keyboard pitch in 12 semitone steps up or down.
1.
First, press the [TRANSPOSE +] or [TRANSPOSE –] button to open the TRANS‐
POSE menu. The display briefly shows the current setting.
2.
Press one of these buttons again to shift the pitch up or down. The default
value is ‘000’ .
3.
Press the buttons [TRANSPOSE +] and [TRANSPOSE –] simultaneously to restore
the preset ‘000’ (no transposing).
If you don't press a button for two seconds after opening the TRANSPOSE
menu, it will automatically quit.
DP-50
23
Functions
8.2.8 Historical tunings
This feature allows you to experiment with different historical tunings, if you play cer‐
tain music genres that are not composed according to the equal temperament
tuning.
1.
Press the button [SCALE] to enter the mode for historical tunings. The indicator
of the button [SCALE] lights up. By default, ‘001’ (Pythagoras) is set as historical
tuning.
2.
Besides the equal temperament tuning, the following six historical tunings are
available: Pythagoras, perfect major, perfect minor, meantone, Werckmeister
and Kirnberger.
3.
Press the button [SCALE] again to quit the mode for historical tunings. The indi‐
cator turns off.
4.
Keep the [SCALE] button pressed for two seconds in the mode for historical
tunings to activate the selection function. The display will flash and the LED
display shows the number.
5.
Use the buttons [+/YES] or [–/NO] to select the historical tunings that are
shown in the LED display. You set the root note with the piano keys C7 to B7.
For example, to select ‘perfect minor’ with the root note ‘G’ , press the
[+/YES] button until ‘003’ appears briefly in the LED display. Then
press the button [G7] to select this as root note. The LED display
shows the root note ‘G’ .
8.2.9 Pedals
1.
Sustain pedal:
Using the Sustain pedal while playing lets the tones last - as if the keys were
held.
2.
Sostenuto pedal:
When using the Sostenuto pedal while playing, only those keys are held that
are played when stepping on the pedal. The pedal has no effect on keys played
afterwards.
3.
Soft pedal:
When stepping on the Soft pedal while playing, the keys sound quieter.
digital piano
24
Functions
8.3 Metronome
1.
Press the button [METRO] to activate the metronome. Then you hear the click
sound.
2.
Press the button [METRO] again to turn the metronome off.
3.
If the style mode is deactivated the beat follows the setting of the metronome
after turning it on. If the style mode is activated the beat setting follows the
current style.
4.
The metronome can be activated together with the style. If the style plays at
first, the metronome will be enabled with the next bar. On the other hand, the
metronome responds at once to the first beat of the style.
8.4 Style operation
The digital piano comprises of 20 styles in total (see Ä Chapter 11 ‘Styles list’
on page 33).
8.4.1 Selecting a style
1.
Press the button [STYLE] to select the STYLE mode. The dot next to ‘STYLE’
appears in the display as well as the selected number.
2.
Press the buttons [+/YES] or [–/NO] to select the desired style.
8.4.2 Starting and stopping a style
1.
When style is not playing, you can press the [START/STOP] button to call the
SYNC START mode. The ‘BEAT’ indicators flash simultaneously. The style starts
now when you press a key in the chord area.
2.
Press the buttons [+/YES] or [–/NO] again to stop style playing.
DP-50
25
Functions
8.4.3 Fill A/B
Use this function to add fill bars.
1.
In NORMAL mode, press the [FILL A/FILL B] button to insert one fill bar. The indi‐
cator of the button [FILL A/FILL B] is flashing. When the bar has ended the dig‐
ital piano returns to VARIATION mode.
2.
In VARIATION mode, press the [FILL A/FILL B] button to insert one fill bar. The
indicator of the button [FILL A/FILL B] is flashing. When the bar has ended the
piano returns to NORMAL mode.
3.
When switching on, the digital piano is set to NORMAL mode by default.
1.
Press the button [ACC VOL] to adjust the accompaniment volume in style
playing. The display briefly shows the current accompaniment volume.
2.
Use the buttons [+/YES] or [–/NO] to set the volume in a range of 0 to 31. The
default value is 24. The indicator of the [ACC VOL] button flashes simultane‐
ously.
3.
If you press the buttons [+/YES] and [–/NO] in ACC VOL mode simultaneously
the accompaniment track will be muted.
4.
Press the buttons [+/YES] and [–/NO] in ACC VOL mode simultaneously again to
unmute the accompaniment track.
1.
Press the buttons [TEMPO+]/[TEMPO–] to adjust the tempo within a range of 30
to 280 bpm.
2.
Press the buttons [TEMPO+]/[TEMPO–] simultaneously to reset the tempo to
the preset default value.
8.4.4 Accompaniment volume
8.4.5 Tempo
8.5 Recording and playback
With this digital piano, you can record your playing on two tracks.
digital piano
26
Functions
–
The recorded data won't be deleted when you turn off the digital piano.
8.5.1 Recording
1.
Recording standby
Press the button [RECORD] to enable the recording mode. The indicator of the
button [REC] lights up. ‘BEAT 1’ to ‘BEAT 4’ start flashing synchronously, thus
indicating the recording standby mode. At the same time an empty track is
automatically selected for recording and the corresponding track indicator of
the button [TRACK 1] or [TRACK 2] is flashing.
The selection order is [TRACK 1], [TRACK 2]. If no unused track is available,
[TRACK 1] is selected and the previous recording will be overwritten. You can
also press the button [TRACK 1] or [TRACK 2] and select the track to be recorded
to directly.
2.
Start recording
When ‘BEAT 1’ to ‘BEAT 4’ are flashing in the display, press the [START/STOP]
button or one of the piano keys to start the recording.
If you start recording, any existing data on the selected track will be
deleted.
3.
Stop recording
Press the [RECORD] button again to stop the recording. The recording stops
automatically when the memory is full. In this case ‘FUL’ appears in the display.
DP-50
27
Functions
8.5.1.1
Playing the recording
1.
First, press the [PLAY/STOP] to play recorded data. Choose one or both tracks
for playback, the indicator lights accordingly.
2.
Press the button [PLAY/STOP] again or press [START/STOP] to stop the playback.
3.
During playback, you can press the buttons [TRACK 1/SONG MELODY OFF] or
[TRACK 2] to turn the related track on or off.
If no record exists and you press the [PLAY/STOP] button, the display briefly
shows ‘NUL’ .
8.6 Lesson mode
1.
Press the [TRACK 1/SONG MELODY OFF] button in SONG mode to call the
Lesson mode.
2.
If you press the button [TRACK 1/SONG MELODY OFF] the indicator of the
button [TRACK 1/SONG MELODY OFF] lights up and the melody of the song is
muted. Now you can play the melody yourself and thus practise the song.
3.
Press the button [TRACK 1/SONG MELODY OFF] again to unmute the melody.
The indicator for the [TRACK 1/SONG MELODY OFF] button turns off.
8.7 SD memory card
The digital piano offers a card slot for SD memory cards with a capacity of 16 MB to
2 GB that are formatted for the FAT 16/32 file system.
Press one of the two buttons [PLAY/STOP] or [STORE] in the ‘SD CONTROL’ area to call
the respective function mode (Playback/Stop or Storing). If no card is inserted, ‘ERR’
appears in the display for about two seconds.
digital piano
28
Functions
8.7.1 Functions
n Press the [PLAY/STOP] button to play MIDI files located in the root directory of the
SD card. Formats 0 and 1 are supported.
n Press the [STORE] button to save recorded data as MIDI file in the root directory,
that can be played by a MIDI player.
In SD mode, the digital piano responds to the buttons [VOICE], [STYLE] and [SONG]
only.
8.7.2 Buttons in the SD CONTROL area
The digital piano stores and plays MIDI files in the root directory.
n [PLAY/STOP]
When the digital piano is switched on, press the [PLAY/STOP] button to play all
files in the root directory of the SD card. The indicator of the button [PLAY/STOP]
lights up.
In SD mode, you can select the MIDI files using the [+/YES] or [–/No] buttons. By
default, ‘001’ is the number of the first file.
Press the [PLAY/STOP] or [START/STOP] button to stop the MIDI file playback.
Press the [START/STOP] button again to play the file repeatedly.
If there is no MIDI file on the SD card and you press the button [PLAY/STOP], ‘noF’
appears for two seconds in the LED display. Then, the digital piano returns to the
previous mode.
n [STORE]
When the digital piano is switched on, press the [STORE] button to activate the
storage mode. The indicator of the button [STORE] lights up.
The recorded data can be saved as a MIDI file in the root directory of the SD card.
The MIDI file name is generated by the system to prevent double naming.
If the SD card is full, the storing is cancelled automatically and the LED display
shows ‘FUL’ . The storage mode is exited and the digital piano returns to the pre‐
vious mode.
After saving, the indicator of the [STORE] button goes off. The LED display briefly
shows ‘End’ and thus indicates the successful completion of the saving.
DP-50
29
Functions
8.8 MIDI functions
What is MIDI?
1.
MIDI stands for 'Musical Instrument Digital Interface' and is the standard inter‐
face for connecting musical instruments and computers.
2.
The digital piano is equipped with a standard MIDI interface providing a MIDI
IN and OUT.
3.
You can connect the digital piano to a computer or other MIDI devices via this
interface.
1.
Notes on connection
MIDI connection
With MIDI connections, the device that controls other devices is called 'master'.
A device that is controlled via MIDI is called 'slave'. The MIDI OUT of the master
is connected to the MIDI IN of the slave. You can not connect the MIDI OUT of a
device to the MIDI IN of the same unit.
2.
MIDI IN
Here you can connect the MIDI OUT port of another device that, for example,
should use the tone generator of the digital piano.
MIDI OUT
Here you can connect the MIDI IN port of another device that you want to con‐
trol via the digital piano. If you play a note or send a program change com‐
mand, the connected device will respond accordingly.
3.
Connection example
Connect the MIDI interface to the computer.
Connect further devices via the MIDI interface.
MIDI applications
1.
The digital piano can control other equipment or electronic instruments.
2.
You can use other devices to control the digital piano.
3.
The digital piano can play MIDI files from a computer.
digital piano
30
Cleaning
9
Cleaning
Only clean the device with a soft, dry cloth. More stubborn stains may be removed
with a slightly damp cloth. Never use cleaners such as alcohol or thinner. Do not
place vinyl items on the device, as this can cause discolouration or residues on the
unit.
DP-50
31
Voice list
10
Voice list
No.
Voice
Key labelling
001
Acoustic Grand Piano
GRD.PIANO
002
Epiano1
E.PIANO1
003
Harpsichord
HARPSICD
004
Hammond Organ
DRAWBAR
005
Accordion
ACORDION
006
Steel Guitar
ST.GUITAR
007
String
STRING
008
Trumpet
TRUMPET
009
Folk Sax
FOLK SAX
010
Jazz Flute
JZ.FLUTE
011
Bright Acoustic Piano
BRT.PIANO
012
Epiano2
E.PIANO2
013
Vibes
VIBES
014
Church Organ
CHR.ORGAN
015
Harmonica
HAMONICA
016
STR.TRIO
STR.TRIO
017
Slow String
SLOW.STR
018
Brass Section
BRASS
019
Oboe
OBOE
020
Pan Flute
PANFLUTE
digital piano
32
Styles list
11
Styles list
No.
Style
001
Pianist
002
8 Beat
003
16 Beat
004
Ballad
005
Pop Piano
006
Boogie
007
Slow Rock
008
Swing
009
Jazz
010
Jazz Waltz
011
Swing Fox
012
Shuffle
013
Twist
014
Country Ballad
015
Bossa Nova
016
Latin
017
March
018
6/8 March
019
Waltz
020
Slow Waltz
DP-50
33
Rehearsal song list
12
No.
Rehearsal song list
Title
Piano
No.
Title
028
O Sole Mio
001
For Alice
029
Silent Night
002
Habanera
030
Ave Maria
003
Four Little Swans
031
Five Hundred Miles
004
Moseta Dance
032
Happy New Year
005
Germanic Dance
033
It's Beginning To Look A Lot Like Christmas
006
Turkish March
034
Jeanie With The Light Brown Hair
007
March
035
My Bonnie
008
Away In A Manger
036
Song Of The Pearlfisher
009
Chopsticks
037
The Stage Coach
010
2-Part Invention #13 In A Minor. B.W.Iii
038
Entertainer
Folk & Country
039
Annie Laurie
011
Country
040
Killing Me Softly With His Song
012
Jambalaya
041
Last Rose Of Summer
013
Susanna
042
The Old King Cole
014
Bridge
Jazz & Fusion
015
Battle Hymne Of The Republic
043
Maple Leaf Rag
016
The Old Gray Mare
044
June Samba
017
American Patrol
045
Funk
018
In The Rain
046
I Can.....
019
Sippin' Cider Through A Straw
047
Sea Shore
020
Are You Lonesome Tonight
048
Guitar&Saxphone
Golden & Pop
049
The Hip Hop's Night
021
Only You
050
Blue Lunch
022
End Of The World
051
Cobweb
023
House Of Rising Sun
052
Wine
024
The Blue-Bells Of Scotland
053
Jazz Old Man
025
Over The Rainbow
054
Dark Eyes
026
Beautiful Dreamer
055
Carlos
027
Edelweiss
056
Sad
digital piano
34
Rehearsal song list
No.
Title
No.
Title
057
The Jazz
059
Give You A Rose
060
Flowing Rill
Chinese
058
Sout Mud Bay
DP-50
35
MIDI implementation chart
13
MIDI implementation chart
Function
Basic Channel
Mode
Sent
Received
Default
1
ALL
Changed
1-16
1-16
Default
No
Mode 3
Messages
No
Mode 3
Altered
********
No
0 – 127
0 – 127
True voice
********
0 – 127
Note ON
Yes, 9nH,
Yes, 9nH,
v = 1 – 127
v = 1 – 127
No, 9nH,
Yes, 9nH,
v=0
v = 0 or 8nH,
v = 0 – 127
Keys
No
No
Channels
No
No
No
Yes
0
Yes
Yes
Bank Select
1
No
Yes
Modulation
5
No
Yes
Portamento Time
6
Yes
Yes
Data Entry
7
Yes
Yes
Volume
10
No
Yes
Pan
11
No
Yes
Expression
64
Yes
Yes
Sustain Pedal
65
No
Yes
Portamento ON/OFF
66
Yes
Yes
Sostenuto Pedal
67
Yes
Yes
Soft Pedal
80
No
Yes
Reverb Program
81
No
Yes
Chorus Program
91
Yes
Yes
Reverb Level
93
Yes
Yes
Chorus Level
120
No
Yes
All Sound Off
121
No
Yes
Reset All Controllers
123
Yes
Yes
All Notes Off
Note Number
Velocity Note
Note OFF
After Touch
Pitch Bend
Control Change
digital piano
36
Remarks
MIDI implementation chart
Function
Program Change
Sent
Received
Yes
Yes
********
0 – 127
No
Yes
Song Position Pointer
No
No
Song Select
No
No
Tune Request
No
No
Clock
No
No
Commands
No *1
No *1
Local ON/OFF
No
Yes
ALL Notes OFF
Yes
Yes
Active Sensing
Yes
No
System Reset
No
Yes
True #
System Exclusive
System Common
System Real Time
Aux Messages
Notes:
Remarks
*1
When the accompaniment starts, an FAH message is transmitted.
When the accompaniment stops, an FCH message is transmitted.
When an FAH message is received, the accompaniment starts.
When an FCH message is received, the accompaniment stops.
MIDI channel mode
POLY
MONO ON
OMNI ON
Mode 1
Mode 2
OMNI OFF
Mode 3
Mode 4
DP-50
37
Technical specifications
14
Technical specifications
Display
LED display
Keyboard
88 keys, touch velocity in 3 steps
Polyphony
64-voiced
Voices
20
Styles
20
Rehearsal songs
60
Demo songs
20
Operating elements
[POWER], [VOLUME], [REVERB CHORUS], [DUAL TOUCH], [RECORD], [TRACK 1]
[TRACK 2], [PLAY/STOP], [SPLIT], [METRO],[TRANSPOSE +/– ], [SD CONTROL],
[VOICE DEMO], [SONG], [VOICE], [STYLE], [BRILLIANCE], [SCALE], [START/STOP],
[ACC VOL], [ FILL A/FILL B]
Pedals
Soft, sostenuto, sustain
Connections
Voltage supply AC 230 V , 2 × headphones (1/4" phone sockets),
AUX OUT (L/R), MIDI IN, MIDI OUT
Speakers
2 × 25 W, 8 Ω
Operating supply voltage
AC 230 V
Dimensions (W × D × H)
1380 mm × 520 mm × 830 mm
Weight
62.5 kg
digital piano
38
Protecting the environment
15
Protecting the environment
Disposal of the packaging material
For the transport and protective packaging, environmentally friendly materials have
been chosen that can be supplied to normal recycling.
Ensure that plastic bags, packaging, etc. are properly disposed of.
Do not just dispose of these materials with your normal household waste, but make
sure that they are collected for recycling. Please follow the notes and markings on
the packaging.
Disposal of your old device
This product is subject to the European Waste Electrical and Electronic Equipment
Directive (WEEE). Do not dispose with your normal household waste.
Dispose of this device through an approved waste disposal firm or through your local
waste facility. When discarding the device, comply with the rules and regulations
that apply in your country. If in doubt, consult your local waste disposal facility.
DP-50
39
Notes
digital piano
40
Notes
DP-50
41
Notes
digital piano
42
Musikhaus Thomann · Hans-Thomann-Straße 1 · 96138 Burgebrach · Germany · www.thomann.de




![Overture 2 Owner`s Manual [US]](http://vs1.manualzilla.com/store/data/005690862_1-0f7bb48baaf3473aa086657512069e12-150x150.png)