Download P2 Gun 313213F

Transcript
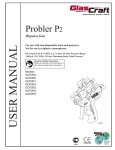
Probler P2
USER MANUAL
Dispense Gun
For use with non-flammable foam and polyurea.
Not for use in explosive atmospheres.
90-110 psi (0.62-0.76 MPa, 6.2-7.6 bar) Air Inlet Pressure Range
3200 psi (22 MPa, 220 bar) Maximum Static Fluid Pressure
Important Safety Instructions
Read all warnings and instructions in
this manual. Save these instructions.
Models:
GCP2RA
GCP2R0
GCP2R1
GCP2R2
GCP2R3
GCP2R4
GCP2R5
US Patent
6,796,461
7,527,172
r_gcp2ra_313213_1_1d
Table Of Contents
Section 1 Installation
Warnings ............................................................................................................................................................
Introduction ........................................................................................................................................................ Standard Equipment ..........................................................................................................................................
Translations ........................................................................................................................................................ Equipment Assembly .........................................................................................................................................
3
7
8
8
9
Section 2 Operation
Start-up Instructions ........................................................................................................................................... 11
Section 3 General Information
Assembly Drawings .............................................................................................................................................
Maintenance ........................................................................................................................................................
Options ................................................................................................................................................................
13
15
20
Section 4 Warranty and Reference Information
Graco Warranty ..................................................................................................................................................
Technical Assistance ...........................................................................................................................................
For Your Reference .............................................................................................................................................
2
25
26
27
Warnings
The following warnings are for the setup, use, grounding, maintenance, and repair of this equipment. The exclamation
point symbol alerts you to a general warning and the hazard symbol refers to procedure-specific risk. Refer back to these
warnings. Additional, product-specific warnings may be found throughout the body of this manual where applicable.
WARNING
TOXIC FLUID OR FUMES HAZARD
Toxic fluids or fumes can cause serious injury or death if splashed in the eyes or on skin, inhaled, or swallowed.
• Read MSDS’s to know the specific hazards of the fluids you are using.
• Store hazardous fluid in approved containers, and dispose of it according to applicable guidelines.
• Always wear impervious gloves when spraying or cleaning equipment.
PERSONAL PROTECTIVE EQUIPMENT
You must wear appropriate protective equipment when operating, servicing, or when in the operating area of
the equipment to help protect you from serious injury, including eye injury, inhalation of toxic fumes, burns,
and hearing loss. This equipment includes but is not limited to:
• Protective eyewear
• Clothing and respirator as recommended by the fluid and solvent manufacturer
• Gloves
• Hearing protection
SKIN INJECTION HAZARD
High-pressure fluid from gun, hose leaks, or ruptured components will pierce skin. This may look like just a
cut, but it is a serious injury that can result in amputation. Get immediate surgical treatment.
• Do not point gun at anyone or at any part of the body.
• Do not put your hand over the spray tip.
• Do not stop or deflect leaks with your hand, body, glove, or rag.
• Close material shutoff valves and shutoff or disconnect air supply when not spraying.
• Follow Pressure Relief Procedure in this manual, when you stop spraying and before cleaning, checking,
or servicing equipment.
BURN HAZARD
Equipment surfaces and fluid that’s heated can become very hot during operation. To avoid severe burns, do
not touch hot fluid or equipment. Wait until equipment/fluid has cooled completely.
FIRE AND EXPLOSION HAZARD
Flammable fumes, such as solvent and paint fumes, in work area can ignite or explode. To help prevent fire
and explosion:
• Use equipment only in well ventilated area.
• Eliminate all ignition sources; such as pilot lights, cigarettes, portable electric lamps, and plastic drop
cloths (potential static arc).
• Keep work area free of debris, including solvent, rags and gasoline.
• Do not plug or unplug power cords, or turn power or light switches on or off when flammable fumes are
present.
• Ground all equipment in the work area.
• Use only grounded hoses.
• Hold gun firmly to side of grounded pail when triggering into pail.
• If there is static sparking or you feel a shock, stop operation immediately. Do not use equipment until
you identify and correct the problem.
• Keep a working fire extinguisher in the work area.
3
Warnings
WARNING
EQUIPMENT MISUSE HAZARD
Misuse can cause death or serious injury.
• Do not operate the unit when fatigued or under the influence of drugs or alcohol.
• Do not exceed the maximum working pressure or temperature rating of the lowest rated system component. See Technical Data in all equipment manuals.
• Use fluids and solvents that are compatible with equipment wetted parts. See Technical Data in all
equipment manuals. Read fluid and solvent manufacturer’s warnings. For complete information about
your material, request MSDS forms from distributor or retailer.
• Check equipment daily. Repair or replace worn or damaged parts immediately with genuine manufacturer’s replacement parts only.
• Do not alter or modify equipment.
• Use equipment only for its intended purpose. Call your distributor for information.
• Route hoses and cables away from traffic areas, sharp edges, moving parts, and hot surfaces.
• Do not kink or over bend hoses or use hoses to pull equipment.
• Keep children and animals away from work area.
• Comply with all applicable safety regulations.
PRESSURIZED ALUMINUM PARTS HAZARD
Do not use 1,1,1-trichloroethane, methylene chloride, other halogenated hydrocarbon
solvents or fluids containing such solvents in pressurized aluminum equipment. Such
use can cause serious chemical reaction and equipment rupture, and result in death,
serious injury, and property damage.
4
Warnings
To prevent exposing ISO to moisture:
Isocyanate Hazard
Spraying materials containing isocyanates creates
potentially harmful mists, vapors, and atomized
particulates.
Read material manufacturer’s warnings and
material MSDS to know specific hazards and
precautions related to isocyanates.
Prevent inhalation of isocyanate mists, vapors, and
atomized particulates by providing sufficient ventilation in the work area. If sufficient ventilation is not
available, a supplied-air respirator is required for
everyone in the work area.
To prevent contact with isocyanates, appropriate
personal protective equipment, including chemically
impermeable gloves, boots, aprons, and goggles, is
also required for everyone in the work area.
Material Self-Ignition
Some materials may become self-igniting if applied
too thickly. Read material manufacturer’s warnings
and material MSDS.
Moisture Sensitivity of
Isocyanates
Isocyanates (ISO) are catalysts used in two component
foam and polyurea coatings. ISO will react with moisture
(such as humidity) to form small, hard, abrasive crystals,
which become suspended in the fluid. Eventually a film will
form on the surface and the ISO will begin to gel, increasing in viscosity. If used, this partially cured ISO will reduce
performance and the life of all wetted parts.
The amount of film formation and rate of crystallization varies depending on the blend of ISO,
the humidity, and the temperature.
5
•
Always use a sealed container with a desiccant dryer
in the vent, or a nitrogen atmosphere. Never store ISO
in an open container.
•
Keep the ISO lube pump reservoir filled with Graco
Throat Seal Liquid (TSL), Part 206995. The lubricant
creates a barrier between the ISO and the atmosphere.
•
Use moisture-proof hoses specifically designed for
ISO, such as those supplied with your system.
•
Never use reclaimed solvents, which may contain
moisture. Always keep solvent containers closed when
not in use.
•
Never use solvent on one side if it has been contaminated from the other side.
•
Always park pumps when you shutdown.
•
Always lubricate threaded parts with Part 217374 ISO
pump oil or grease when reassembling.
Warnings
Keep Components A and B
Separate
Changing Materials
•
When changing materials, flush the equipment multiple times to ensure it is thoroughly clean.
CAUTION
•
Always clean the fluid inlet strainers after flushing.
•
Check with your material manufacturer for chemical
compatibility.
•
Most materials use ISO on the A side, but some use
ISO on the B side.
•
Epoxies often have amines on the B (hardener) side.
Polyureas often have amines on the B (resin) side.
To prevent cross-contamination of the equipment’s wetted parts, never interchange component A (isocyanate)
and component B (resin) parts. The gun is shipped with
the A side on the left. The fluid manifold, fluid housing, side seal assembly, check valve cartridge, and mix
chamber are marked on the A side.
Foam Resins with 245 fa
Blowing Agents
New foam blowing agents will froth at temperatures above
90°F (33 °C) when not under pressure, especially if agitated. To reduce frothing, minimize preheating in a circulation
system.
6
Section 1 - Installation: Introduction
Introduction
The information in this document is intended only to indicate the components and their normal working relationship
typical use. Each assembly should be directed by a GlasCraft distributor or made from the GlasCraft Assembly
instructions provided.
Before operating, maintaining or servicing any GlasCraft system, read and understand all of the technical
and safety literature provided with GlasCraft products.
If you do not have the proper or related manuals and
safety literature for your GlasCraft system, contact your
GlasCraft distributor.
This manual provides information for the assembly, operation, maintenance and service of this GlasCraft product as
used in a typical configuration. While it lists standard specifications and procedures, some deviations may be found.
In this GlasCraft technical and safety publication, the
following advisories will be provided where appropriate:
In order to provide our users with the most up-to-date
technology possible, we are constantly seeking to improve
products. If a technological change occurs after a product is on the market, we will implement that technology in
future production and, if practical, make it available to current users as a retrofit, update or supplement. If you find
a discrepancy between your unit and the available documentation, contact your GlasCraft distributor to resolve the
difference.
Information about the procedure in progress.
WARNING
Indicates a hazardous situation that can result in death
or serious injury.
Careful study and continued use of this manual will provide a better understanding of the equipment and process,
resulting in more efficient operation, longer trouble-free
service and faster, easier troubleshooting.
7
Section 1 - Installation: Standard Equipment
Standard Equipment
Part
Description
Number
GCP2RX
Probler P2 Dispense Gun
313213
User Manual
Translations
Manual No.
Language
8
3A0472
Spanish
3A0473
French
Section 1 - Installation: Equipment Assembly
How The Gun Works
Piston Lock
Engage piston lock whenever you stop spraying, to avoid
accidental triggering.

The trigger actuates a small valve in the gun handle that
controls the flow of air into the piston assembly. When the
trigger is pulled, air flows through the valve to the front of
the piston. Air pressure forces the piston towards the rear
of the gun, simultaneously closing off the purge air and
moving the mixing chamber to a position where the mixing
chamber orifices are aligned with the orifices in both the
side block seal and check valve assemblies.
Always use piston lock in conjunction with fluid ball valves
to avoid accidental triggering.
WARNING
Read warnings, page 3.
To engage Piston lock: push knob in and turn clockwise.
If engaged, gun will not actuate.
The proper alignment of the orifices is determined by
the setting of the adjustment nut, located on the piston lock assembly. This adjustment nut determines
the length of travel of the air piston and has been
preset at the factory and should not require adjustment. (SEE MAINTENANCE SECTION)
r_257826_313266_1_2b
The two fluids (isocyanate and polyol) then flow through
the material shut-off valves, seal, and check valve assemblies and into the mixing chamber. The two fluids impinge
against one another and exit the mixing chamber in a swirling, conical spray pattern.
To disengage piston lock: push knob in and turn counterclockwise until it pops out. There will be a gap between
knob and gun body.
When the trigger is released, the mixing chamber returns
to its original position and purge air flows into the mixing
chamber housing. The front tip o-ring, keeps air purge inside the gun head, forcing all of the air through the orifices
in the mixing chamber, for a complete, total and constant
purge.
r_257826_313266_1_1b
This purge air continues to flow through the mixing chamber until the air switch is pulled up to shut-off all air to the
gun; or until the trigger is pulled again.
See page 19 for piston lock adjustment or installation.
Loss of Air Pressure
In event of loss of air pressure, gun will continue to spray.
To shut off gun, do one of the following:
• Push in piston lock, see Engage piston lock.
• Close ball valves A and B.
9
Section 1 - Installation: Equipment Assembly
GlasCraft Equipment
Installing P2 on Other Equipment
WARNING
Air Hose is ¼ in. NPS
Do not place any part of the body in the path of the
material spray. Do not point the gun at or near other
personnel. Do not look into the mixing chamber orifice at any time. Because of the hazardous materials
used in this equipment, it is recommended that the
operator use an air mask, goggles, protective clothing, and other safety equipment as prescribed by
current regulations, recommendations of the chemical suppliers, and the laws in the area where the
equipment is being used.
JIC and SAE Fittings DO NOT require the use of PTFE
tape.
Once the fittings are attached and tight, refer to system
manuals for start-up instructions.
ISO
If original equipment does not require the use of an unheated whip hose or isolation hose, the P2 can be directly
installed on to the material hose.
*AIR
1. Remove the fittings from the original gun.
POLY
2. Remove swivel fittings from ball valves. Ball valves are 1/8 in. NPT female. Remove swivel fitting from air slide valve. The air slide valve is a ¼ in. NPSM.
r_gcp2ra_313213_1_2d
*Fitting GC2394 is an unattached part that may need to be
connected to the air hose first, depending on air hose fitting,
then connected to the gun.
r_gcp2ra_313213_1_3d
3. Install the original fittings into ball valves.
It is recommended to use a non-permanent thread
lock on the 1/8 in. NPT threads to assist as a sealant
and keep the fittings from twisting with gun movement.
4. Install the gun on the original hoses.
WARNING
Relieve ALL system fluid and air pressure according
to manufacturer’s instructions.
10
Section 2 - Operation: Start-Up Instructions
Refer to specific system user manuals for complete
system installation.
WARNING
If purge air is to be turned OFF, BOTH MATERIAL SHUTOFF VALVES, MUST BE TURNED TO THEIR “OFF” POSITION AND PISTON-LOCK ENGAGED BEFORE TURNING
“OFF” THE PURGE AIR !
Failure to follow this procedure will possibly result in the
gun head becoming encased with mixed product.
Pre operation Checklist
Check that all fittings are tight and air regulators are
turned to “zero pressure”.
WARNING
Do not place any part of the body in the path of the material
spray.
Do not point the gun at or near other personnel.
Do not look into the mixing chamber orifice at anytime.
Because of the hazardous materials used in this equipment, it is recommended that the operator use an air mask,
goggles, protective clothing, and other safety equipment
as prescribed by current regulations, recommendations of
the chemical suppliers, and the laws in the area where the
equipment is being used.
For proper purging following use, the air switch must be left
OPEN for at least 15 SECONDS after the trigger has been
released.
The flow of material into the mixing chamber is controlled
by the ON or OFF position of the two material shut-off
valves.
Both material shut-off valves must be FULLY OPEN
and piston lock DISENGAGED during dispensing and must be FULLY CLOSED and piston lock
ENGAGED during service or extended shut-down
periods.
WARNING
Operating Requirements
•
8-10 CFM at 90-110 psi (0.62-0.76 MPa,
6.2-7.6 bar)
•
MAXIMUM Static Fluid Pressure - 3200 psi (22
MPa, 220 bar)
BOTH MATERIAL SHUT-OFF VALVES, MUST BE
TURNED TO THEIR “OFF” POSITION AND ALL FLUID
PRESSURE RELIEVED BEFORE REMOVING SIDE
BLOCK SCREWS!!
Failure to follow this procedure will possibly result in the
gun head becoming encased with mixed product.
WARNING
The GlasCraft Probler P2 Gun is designed and manufactured to operate at a maximum static fluid pressure not to
exceed 3200 psi (22 MPa, 220 bar). When attached to a
GlasCraft proportioning system, this pressure will not be
exceeded. However, if the GlasCraft Probler P2 Gun is
installed on any other manufacturer’s self-designed equipment, great care must be taken to ensure that the maximum static fluid pressure not be exceeded.
If the gun is being used for short periods of spraying,
GlasCraft recommends that the purge air be left ON.
ON
OFF
Refer to system manuals for start-up and
shut-down procedures.
11
Section 2 - Operation: Start-Up Instructions
Higher pressures and temperatures may be used to
increase material break-up, improve mixing and speed
rise times. With hose lengths over 50 ft., or when material viscosities are high, higher material pump pressures
may be necessary.
Spray Technique
Always operate safely and follow all safety procedures
outlined.
To achieve the optimum spray pattern for each application,
the appropriate mixing chambers are available in seven
spray sizes.
The gun air switch assembly MUST BE OPENED (down
position) prior to spraying to provide air for trigger operation
and purge air when the trigger is released.
The standard mixing chamber supplied with your gun will
be adequate for all but the smallest and largest applications.
Foam rise and cure times will vary according to the material and substrate temperature. Higher material or substrate
temperature will increase rise and cure times; lower material or substrate temperatures will decrease rise and cure
times. Consult your chemical manufacturer’s data specification sheets for their recommended spray temperatures.
Under most circumstances, both components will be used
at identical temperatures.
When spraying, the gun trigger may be depressed continuously, or triggered at the end of each stroke. A smooth,
even layer is best achieved by moving the gun back and
forth in a slow, even motion, overlapping the previous pass
about 50 to 75 percent. DO NOT SPRAY OVER RISING
FOAM! The ideal gun-to-surface distance is about 18 to 24
inches. Be sure to point the gun directly at the surface to
be sprayed. Spraying at an angle to the surface will cause
the foam to be rough and will generate overspray.
12
13
2 56d
56b
1
2 56e
30
3
3 56f
29
44
37
56c
27
14
55
r_257826_313213_1_1b
56a
41
43 16 42
GC2502
GC2504
GC2505
GCP2R4
GCP2R5
GC2501
GCP2R1
GC2503
GC2500
GCP2R0
GCP2R2
GC250A
GCP2RA
GCP2R3
A
Probler P2
GC2515
GC2514
GC2513
GC2512
GC2511
GC2510
GC251A
B
GC1949
GC1949
GC1947
GC1947
GC1947
GC1947
GC1948
Hardware Kit
3 Adjust counter-clockwise until it bottoms out.
2 Apply liberal coating of lubricant to seals and surfaces specified.
1 Apply permanent threadlocker and torque to 35-40 in-lbs (4-4.5 N•m).
56
45 15
55
24
38
46
53
A
10
6
31
4
1
r_gcp2ra_313213_1_4d
7 33
20
48
51
19
8
2
17
B
21
32
35 22
40
10
34
31
39
47
22 35
5
8a
52
12
36
34
51
8b
32 21
1
8d
18
r_gcp2ra_313213_1_5d
23
54
8c
Section 3 - General Information: GCP2RX P2 Dispense Gun
Section 3 - General Information: GCP2XX P2 Parts List
Ref.
No.
Part
No.
Description
Qty.
1
GC2337
2-WAY BALL VALVE
2
2
GC2340
PROBLER TRIGGER
1
3
GC2341
COMPRESSION SPRING
1
4
117634
SWIVEL HOSE FITTING
1
5
117635
SWIVEL HOSE FITTING
1
6
GC0043
O-RING
2
7
GC0044
O-RING
2
8
GC0128
AIR SWITCH ASSEMBLY
1
10
GC0259
1/4 DIA BALL
3
Ref.
No.
Part No.
Description
Qty.
12
GC1198
LUBE FITTING
1
8a
110242
O-RING
1
13*
GC2394
SWIVEL FITTING
1
8b
106555
O-RING
2
8c
GC0126
AIR SWITCH
TUBE
1
8d
GC0127
AIR SWITCH
SPOOL
1
14
GC1898
1-3/8” AIR PISTON
1
15
GC1899
1-1/2” AIR PISTON
1
16
GC1900
CYLINDER SPACER
1
17
GC1901
VALVE INSERT
1
18
GC1902
ISO SIDE BLOCK
1
19
GC1903
POLY SIDE BLOCK
1
20
GC1904
CHECK VALVE FILTER
2
21
GC2494
SEAL
2
22
GC2495
SEAL HOUSING
23
GC1914
AIR CAP
24
GC2499
25
GC1916
27
GC1918
29
GC1920
30
31
32
GC1923
33
GC2496
2
Ref.
No.
Part
No.
Description
Qty.
1
45
C20207
O-RING
1
HANDLE
1
46
GC2060
O-RING
1
PROBLER P2 HEAD
1
47
GC2079
SET SCREW
1
TRIGGER PISTON
1
48
GC2081
SET SCREW
11
TRIGGER PLUG
1
49
GC2187
MACHINE SCREW
2
GC1921
RETAINING RING
1
51
GC2196
FITTING
2
GC1922
SPRING
3
52
GC2237
SHOULDER SCREW
1
SPRING
2
53
GC2243
SET SCREW
1
FILTER SCREEN, 40 MESH
2
54
GC2248
MACHINE SCREW
4
2
55
GC2241
MACHINE SCREW
2
56
258761
PISTON LOCK ASSEMBLY
1
34
GC2498
SEAL
35
111450
O-RING
2
36
117517
O-RING
1
37
C20988
O-RING
1
38
GC2056
O-RING
1
39
110242
O-RING
1
40
GC2057
O-RING
1
41
GC2058
O-RING
3
42
108833
O-RING
1
43
107563
O-RING
1
44
GC2059
O-RING
1
Ref.
No.
Part
No.
Description
Qty.
56a
AIR CAP
1
56b ♦
STOP SHAFT
1
56c ♦
PISTON STOP
1
56d ♦
COMPRESSION SPRING
1
56e ♦
O-RING
1
56f
ADJUSTMENT NUT
1
* Not shown.
100 Mesh filter GC2497 also available.
♦ Included with kit 258762.
14
Section 3 - General Information: Maintenance
WARNING
2. Check the material valves, p/n GC2337 for any leaks:
Before attempting to perform any maintenance on
this gun, relieve All Fluid and Air Pressures!
•
•
•
•
•
•
• Turn OFF both material valves.
To relieve fluid and air pressures:
Turn OFF all air supplies at system except gun trigger
air.
Trigger the gun until all fluid pressures have been relieved.
Turn OFF the gun trigger air at the system.
Turn proportioner off.
Trigger the gun until all trigger air pressure has been relieved.
Perform Gun maintenance as follows:
1. Check for leaking seals (34):
• Engage piston lock.
• Turn OFF the gun incoming air by closing gun air switch.
•
•
•
•
•
•
Air Switch
Disengage piston lock.
Trigger the gun several times.
Wait approximately 10-20 seconds.
Trigger the gun several times.
If additional material is purged, the material valves are leaking.
Correct the leaks by taking off black knobs and turning packing 1/8 in. to 1/4 in. turns at a time until the leak has stopped. Re-check.
3. Check side blocks
•
•
•
•
Wait approximately 10 - 20 seconds, then turn ON the incoming air by opening gun air switch.
Repeat two or three times.
If any material has been purged from the gun, the seals (34) are leaking, or o-ring (35).
Correct leaks by replacing the seals or o-rings and re-checking.
• Turn OFF the air switch on the gun.
WARNING
Before removing the side blocks make certain that both
material valves are in the OFF positions and trigger several
times to depressurize fluid in gun!
If the material valves are on when the side blocks are
removed the gun will quickly become encased in urethane!
WARNING
Point gun side blocks down, away from all personnel.
Existing fluid pressures could cause material to exit the
side blocks with considerable force.
15
Section 3 - General Information: Maintenance
• Take the side blocks off by removing screws.
•
Use correct size drill bit to clean out the mixing chamber exit passage. Use correct size drill bit to clean the inlet side holes of the mixing chamber tak-
ing care not to scratch the mixing chamber’s polished surfaces (refer to the drill chart).
•
Re-assemble the side blocks and tighten the screws. Grease should appear at the tip of the mixing cham-
ber.
r_gcp2ra_313213_1_6d
•
Examine the sides of the mixing chamber for scratch-
es and/or material build-up. Carefully, without scratching the seal surfaces (sides), remove any accumulated material. Solvent can be used to wash accumulated material off of chamber, side blocks, etc. Keep the gun chamber tilted toward the ground so that solvent does not run back into gun. Certain solvents will attack o-rings on chamber shaft causing swelling and deterioration of o-rings.
r_gcp2ra_313213_1_6d
•
Place generous amounts of high quality, white lithium grease in each side of the gun front housing and on the side block seals.
16
DO NOT open the air switch on the gun because this
will purge grease from the gun. The grease should
be allowed to remain in the gun overnight.
Section 3 - General Information: Maintenance
Daily Shut-Down
For experienced users
5. Inject white lithium grease into zerk fitting until a light Once you have used the gun with a product and system,
and you have become comfortable with techniques on
how all the variables are affecting your operations and
maintenance requirements, Daily, Weekly, and Monthly
maintenance requirements can be addressed specific to
your operation.
mist of grease is purged through the snout shut off the air purge.
1. Turn the ball valves off, activate and deactivate the gun 5 - 6 times to purge residual pressure.
Zerk Fitting
6. Remove the air cap and set to side. If solvent soaking is required, remove the o-ring before soaking.
7. Remove the snout insert and soak in solvent until next usage.
Insert
Air Cap
2. Engage piston lock.
3. Drill out the chamber insert snout with correct size drill O-ring
bit for insert (see drill chart).
r_gcp2ra_313213_1_7d
4. Pull slide valve halfway back to limit the air purge.
Daily Start-Up
Air Switch
8. Clean the snout insert. Be sure both, the face and bot-
tom flat are clean. Drill the snout bore out with the cor-
rect size bit for snout (see drill chart).
9. Clean the inner bore of the chamber. Drill out the cham-
ber snout inlet bore as required.
10. Install the snout insert.
11. Install the air cap on to the chamber. Tighten finger 17
tight until the cap bottoms out. Snug down with a ½ in. wrench. This does not require high torque. Over tightening can result in chamber damage.
Section 3 - General Information: Maintenance
Refer to specific system user manuals for complete
system installation.
Routine Care
WARNING
Parts Replacement Procedure
Before attempting to perform any maintenance on this
gun OR before removing side blocks, make certain that
both gun material valves are in the fully OFF positions
and trigger several times to depressurize fluid in gun!
WARNING
Before attempting to perform any maintenance on this
gun OR before removing the side blocks, make certain
that both gun material valves are in the OFF positions
and trigger several times to depressurize fluid in gun!
If the material valves are on when side blocks are removed,
the gun will quickly become encased in urethane!
If the material valves are on when side blocks are
removed, the gun will quickly become encased in urethane!
It is recommended that the following service be performed on a daily basis.
1. Read each procedure entirely before beginning and 1. Clean the gun using a brush and an appropriate clean refer to the illustrations as needed.
solvent.
2. Inspect the side block seals making certain they are 2. Flush and clean all chambers and passages as they become accessible.
clean and free of scratches, nicks or foreign material. Clean and replace as required.
3. Remove, clean or replace the filter screen.
3. Clean all parts before assembly.
4. Maintain a reasonable stock level of “wear” items such 4. Replace all o-rings and seals with new parts from the appropriate kit.
5. Inspect all parts for wear or damage and replace as re-
quired with new genuine GlasCraft replacement parts from your authorized GlasCraft distributor.
6. Inspect all threads for wear or damage and replace as required.
7. Tighten all threaded parts securely, but not excessively, upon assembly.
8. Lightly lubricate all o-rings and threads with lithium grease.
9. Check all springs for resilience. They should return quickly to their original (new) length.
18
as seals and o-rings. (see Service & Repair Parts Kits listed in Parts & Illustrations section.)
Section 3 - General Information: Maintenance
Piston Lock Adjustment and Installation
Procedure
5. Remove one of the side block seal housings, from side block. Leave the seal (34) in housing and rinse with suitable solvent.
The P2 gun piston throw is factory set and as a rule, should
not require adjustment. The piston throw refers to how far
back the air piston will travel when the gun is triggered.
Proper throw adjustment will align the mixing chamber side
ports with the side block seal thru port.
Determine if the piston throw is correct:
1. Follow the pressure relief procedure on page 15 and disconnect material hoses from the gun.
6. Place the side seal housing in the gun head so the face 2. Turn the material ball valves to the OFF position.
of the seal sets against the mix chamber.
WARNING
If the material valves are on when side blocks are
removed, the gun will quickly become encased in urethane!
7. Turn the gun trigger air supply on , then trigger the gun.
The purge air will not shut off with the side block
removed.
3. Verify that the piston lock cap has been tightened and 8. If the impingement port is not fully visible through the fully threaded into the gun.
4. Remove the side blocks.
side seal housing turn the trigger-air off and trigger the gun to relieve pressure. Use a 9/16 in. open-end wrench to adjust the adjustment nut in the appropriate direction. Repeat steps 7 and 8 until it is adjusted properly.
9. If the impingement port on the mix chamber is fully visible through the side seal housing (either on center or slightly forward), the piston lock adjustment nut is properly aligned.
Non-permanent thread locker can be applied to the
adjustment nut if necessary.
10. Reassemble the gun.
r_gcp2ra_313213_1_6d
Before each use: Verify that the piston lock assembly is
installed and working properly.
• Engage piston lock.
• Pressurize the system to working pressure.
• Open material ball valves.
• Point the gun in a safe direction and trigger gun. No material should flow from gun tip.
• DO NOT USE IF IT IS NOT WORKING PROPERLY.
19
Section 3 - General Information: Options
Optional Equipment
Part
Description
GC1938
Flat Spray Kit
GC1952
Jet Stream Nozzle (.059 ID)
GC1953
Jet Stream Nozzle (.070 ID)
GC1954
Pour Adapter
GC1892
* P2 Elite Conversion Kit
20
Part
GC1892
Description
Qty.
GC0024
PIPE PLUG
3
GC0275
FITTING
1
GC0490
ELBOW FITTING
1
GC0502
FITTING
1
GC0712
ELBOW FITTING
2
GC1842
BALL VALVE
1
GC1880
P2-ELITE HEAD
1
GC1881
POLY SIDE BLOCK
1
GC1882
ISO SIDE BLOCK
1
GC1883
PISTON SPACER
1
GC1884
MOUNTING PLATE
1
GC1885
SWIVEL ADAPTER
1
GC1886
WHIP HOSE
1
GC1887
WHIP HOSE
1
GC2212
FITTING
3
GC2244
SET SCREW
1
GC2334
FITTING
3
GC2337
BALL VALVE
2
313266
USER MANUAL
1
Section 3 - General Information: Options
Service & Repair Kits
GC1937, Standard Repair Kit
GC1946, Side Seal Kit
GC1948, Hardware Kit -AA
Part
Description
Qty.
C20988
O-Ring
1
Part
Description
Qty.
GC2056
O-Ring
1
GC0081
Drill Bit
1
110242
O-Ring
2
GC0082
Drill Bit
1
106555
O-Ring
2
GC0086
Ball Driver
1
1
GC0087
Ball Driver
1
Vise Pin
1
GC2057
O-Ring
GC2058
O-Ring
3
GC0175
108833
O-Ring
1
GC2496
Filter Screen
2
107563
O-Ring
1
111450
O-Ring
2
GC2059
O-Ring
1
117517
O-Ring
1
C20207
O-Ring
1
GC2060
O-Ring
1
GC0043
O-Ring
2
GC0044
O-Ring
2
111450
O-Ring
2
117517
O-Ring
1
GC1949, Hardware Kit 04-05
GC1947, Hardware Kit 00-03
Part
GC0068
Description
Drill Bit
Part
Description
Qty.
GC2498
SST Side Seal
2
111450
O-Ring
2
GC1950, Premium Repair Kit
Part
Description
Qty.
GC1931
O-Ring
1
111516
O-Ring
1
111450
O-Ring
4
113137
O-Ring
2
111316
O-Ring
2
1
Qty.
118594
O-Ring
1
117724
O-Ring
2
117517
O-Ring
1
GC0069
Drill Bit
1
GC0073
Drill Bit
1
GC1932
O-Ring
3
GC1933
O-Ring
1
GC0077
Drill Bit
1
GC0083
Drill Bit
1
GC1934
O-Ring
1
O-Ring
1
Part
Description
Qty.
GC2394
Fitting
1
GC1935
GC0086
3/16” Ball Driver
1
GC2212
Fitting
1
GC1936
O-Ring
1
GC0087
5/32” Ball Driver
1
GC2334
Fitting
1
117610
O-Ring
1
GC0175
Pin Vise
1
GC0086
3/16” Ball Driver
1
GC0087
5/32” Ball Driver
1
GC2496
Screen Filter
2
GC0075
Drill Bit
1
GC0175
Pin Vise
1
Screen Filter
2
GC0076
Drill Bit
1
GC2496
117517
O-Ring
1
GC0074
Drill Bit
1
111450
O-Ring
2
GC0070
Drill Bit
1
GC2394
Adapter Fitting
1
GC0072
Drill Bit
1
GC2212
Connector Fitting
1
117517
O-Ring
1
GC2334
Connector Fitting
1
111450
O-Ring
2
21
258762, Piston Lock Repair
Kit
Part
Description
Qty.
Stop Shaft
1
Piston Stop
1
Compression
Spring
1
O-Ring
1
Section 3 - General Information: Options
Round Mixing
Chamber
Mixing Chamber Nozzle
Cleaning Drill
Mixing Chamber
Hole Cleaning Drill
GC250A
GC0081
.033
GC0082
.022
GC2500
GC0083
.049
GC0080
.035
GC2501
GC0068
.057
GC0073
.042
GC2502
GC0069
.071
GC0074
.052
GC2503
GC0072
.086
GC0070
.059
GC2504
GC0075
.094
GC0071
.067
GC2505
GC0076
0.116
GC0072
.086
DRILL PIN VISE GC0175
Tungsten Carbide Tip
Part
Orifice
Spray Width
No.
Diameter
(degrees)
Tungsten Carbide Tip
Part
Orifice
Spray Width
No.
Diameter
(degrees)
GC2573
0.015 in.
25
GC2593
0.036 in.
40
GC2574
0.015 in.
40
GC2594
0.036 in.
50
GC2575
0.018 in.
25
GC2595
0.038 in.
40
GC2576
0.018 in.
40
GC2596
0.038 in.
50
GC2577
0.018 in.
50
GC2597
0.043 in.
50
GC2578
0.021 in.
25
GC2598
0.043 in.
65
GC2579
0.021 in.
40
GC2599
0.052 in.
25
GC2580
0.021 in.
50
GC2600
0.052 in.
40
GC2581
0.021 in.
65
GC2601
0.052 in.
65
GC2582
0.023 in.
25
GC2602
0.052 in.
25
GC2583
0.023 in.
40
GC2603
0.062 in.
25
GC2584
0.023 in.
50
GC2604
0.062 in.
40
GC2585
0.023 in.
60
GC2605
0.062 in.
50
GC2586
0.026 in.
40
GC2606
0.062 in.
65
GC2587
0.026 in.
50
GC2607
0.072 in.
40
GC2589
0.031 in.
25
GC2608
0.072 in.
50
GC2590
0.031 in.
40
GC2609
0.078 in.
40
GC2591
0.031 in.
50
GC2592
0.036 in.
25
22
Section 3 - General Information: Options
P2 Spray Options
E
D
Standard Round Spray Air Cap
N
D
P
GC1956 Standard Flat Spray Kit Configuration
A
Tungsten airless tip
(See page 22)
R
D
Pour Configuration
B
J
C
K
Jet Stream Configuration
D
M
P2 Spray Options
Ref.
Part
Description
A
GC1916
Gun Head
B
GC250X
Mix Chamber Body
C
GC251X
Mix Chamber Insert
D
117517
O-ring
E
GC1914
Front Tip
J
GC1954
Pour Cap
Tubing, 1/4 in. ID
KI
M
GC1952
GC1953
N
GC2335
Seal
P
GC0257
Retaining Nut
R
GC1926
Flat Spray Adapter
Jet Nozzle
I Purchase locally.
23
Section 3 - General Information: Options
Static Mixer Kit
GC1956
GC0331
GC0257
117517
GC2335
GC0480
GC1955
Tungsten airless tip
(See page 22)
GC1956, Static Mixer Kit
Part
Description
Qty.
Number
GC2335
Fluid Nozzle Seal
1
GC0257
Nozzle Nut
1
GC0331
Plug Fitting
1
GC0480
Spiral Mixing Element
1
117517
O-Ring
1
GC1955
Static Mixer Adapter
1
24
Graco Standard Warranty
Graco warrants all equipment referenced in this document which is manufactured by Graco and bearing its name to be free from defects
in material and workmanship on the date of sale to the original purchaser for use. With the exception of any special, extended, or limited
warranty published by Graco, Graco will, for a period of twelve months from the date of sale, repair or replace any part of the equipment
determined by Graco to be defective. This warranty applies only when the equipment is installed, operated and maintained in accordance
with Graco’s written recommendations.
This warranty does not cover, and Graco shall not be liable for general wear and tear, or any malfunction, damage or wear caused by
faulty installation, misapplication, abrasion, corrosion, inadequate or improper maintenance, negligence, accident, tampering, or substitution of non-Graco component parts. Nor shall Graco be liable for malfunction, damage or wear caused by the incompatibility of Graco
equipment with structures, accessories, equipment or materials not supplied by Graco, or the improper design, manufacture, installation,
operation or maintenance of structures, accessories, equipment or materials not supplied by Graco.
This warranty is conditioned upon the prepaid return of the equipment claimed to be defective to an authorized Graco distributor for
verification of the claimed defect. If the claimed defect is verified, Graco will repair or replace free of charge any defective parts. The
equipment will be returned to the original purchaser transportation prepaid. If inspection of the equipment does not disclose any defect
in material or workmanship, repairs will be made at a reasonable charge, which charges may include the costs of parts, labor, and transportation.
THIS WARRANTY IS EXCLUSIVE, AND IS IN LIEU OF ANY OTHER WARRANTIES, EXPRESS OR IMPLIED, INCLUDING BUT NOT
LIMITED TO WARRANTY OF MERCHANTABILITY OR WARRANTY OF FITNESS FOR A PARTICULAR PURPOSE.
Graco’s sole obligation and buyer’s sole remedy for any breach of warranty shall be as set forth above. The buyer agrees that no other
remedy (including, but not limited to, incidental or consequential damages for lost profits, lost sales, injury to person or property, or any
other incidental or consequential loss) shall be available. Any action for breach of warranty must be brought within two (2) years of the
date of sale.
GRACO MAKES NO WARRANTY, AND DISCLAIMS ALL IMPLIED WARRANTIES OF MERCHANTABILITY AND FITNESS FOR A
PARTICULAR PURPOSE, IN CONNECTION WITH ACCESSORIES, EQUIPMENT, MATERIALS OR COMPONENTS SOLD BUT NOT
MANUFACTURED BY GRACO. These items sold, but not manufactured by Graco (such as electric motors, switches, hose, etc.), are
subject to the warranty, if any, of their manufacturer. Graco will provide purchaser with reasonable assistance in making any claim for
breach of these warranties.
In no event will Graco be liable for indirect, incidental, special or consequential damages resulting from Graco supplying equipment hereunder, or the furnishing, performance, or use of any products or other goods sold hereto, whether due to a breach of contract, breach of
warranty, the negligence of Graco, or otherwise.
FOR GRACO CANADA CUSTOMERS
The Parties acknowledge that they have required that the present document, as well as all documents, notices and legal proceedings
entered into, given or instituted pursuant hereto or relating directly or indirectly hereto, be drawn up in English. Les parties reconnaissent
avoir convenu que la rédaction du présente document sera en Anglais, ainsi que tous documents, avis et procédures judiciaires exécutés,
donnés ou intentés, à la suite de ou en rapport, directement ou indirectement, avec les procédures concernées.
Graco Information
For the latest information about Graco products, visit www.graco.com.
TO PLACE AN ORDER, contact your Graco distributor or call to identify the nearest distributor.
Phone: 612-623-6921 or Toll Free: 1-800-328-0211 Fax: 612-378-3505
25
Technical Assistance
Thank You for selecting GlasCraft spray equipment
Should you have any questions or need technical assistance, contact your factory authorized
GlasCraft distributor.
Distributor: _________________________
Phone: ____________________________
Contact: ___________________________
For any issues your distributor cannot address, the GlasCraft technical service department is
always available to assist you with the operation of your spray equipment. To help our technical
representatives expedite your call and better address your questions, please have the following
information ready and available when you phone GlasCraft.
* If your questions are not urgent, You can e-mail all correspondence to [email protected]
For Air Powered Systems:
Model: _____________________________
Serial number: _______________________
Air compressor size: __________________
CFM generated: _____________________
Type of spray gun: ____________________
Serial number: _______________________
Pressure at the system:
Hydraulic ________ Pneumatic _________
Is your equipment:
Dynamic fluid pressure:
Single phase: _______ Three phase ______
ISO __________ POLY ___________
What is the inbound voltage
to your equipment: ____________________
Spray gun chamber size: ______________
Material being sprayed: _______________
Temperature setting ISO: _______________
Viscosity: ISO _________ POLY ________
Temperature setting POLY: ______________
Approximate material temperature: ______
Temperature setting HOSE: _____________
26
For Your Reference
Date Purchased
__________________________________________________
Distributor
______________________________________________________
______________________________________________________
Contact
______________________________________________________
Phone
______________________________________________________
E-mail
______________________________________________________
GlasCraft manufactures a complete line of polyurethane foam and polyurea coating spray systems.
If your application is in-plant or a field contractor - GlasCraft has a system package to meet your
requirements.
GUARDIAN - AIR POWERED / A5 & A6 SERIES EQUIPMENT
. 6000 OR 12000 WATTS OF HEAT
. 1600, 2200, OR 3000 PRESSURE SET-UPS AVAILABLE
MH, MH II, & MH III HYDRAULIC POWERED SYSTEMS
. UP TO 45 LBS / MINUTE OUTPUT
. EXCELLENT PERFORMANCE AND RELIABILITY
GUARDIAN MMH - MOBILE MODULAR HYDRAULIC SYSTEMS
. SPECIFICALLY DESIGNED FOR ANY TYPE OF SPRAY RIG
. GIVE COMPLETE UTILIZATION OF FLOOR SPACE IN MOBILE RIG
PROBLER P2 SPRAY GUN
. IMPINGEMENT MIX / AIR PURGE
. OPTIONAL NOZZLE FOR SPRAYING STUD WALLS, POURING & STREAM JET
For more information concerning any of these GlasCraft products,
contact your local authorized Graco distributor or visit www.graco.com
Quality and Performance…
GENUINE GLASCRAFT
www.glascraft.com
313213F
ENG
Original instructions. This manual contains English.
GRACO INC.
P.O. BOX 1441
MINNEAPOLIS, MN 55440-1441
Phone
Toll Free
Fax
612-623-6921
1-800-328-0211
612-378-3505