1
AC TRIAC DMX512 Dimmer
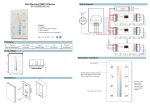
Wiring diagram
Model: SR-2102AC
(1)With dimmable LED light
Dimmable LED light
DMX+
DMXGND
D1+
D2-
AC Output
100-240V
D2+
N2
DMX512 Signal
D1-
N1
L1
AC100-240V output
GND
DMX Master
Dimmable LED light
L2
0-5
0-9
0-9
L
AC Output
100-240V
SR-2102AC
AC TRIAC DMX Dimmer
Preset
N
AC100-240V
input
L
N
(2)With dimmable LED driver
LED light
Dimmable LED
Driver
DMX+
DMXGND
D1+
D2-
LED light
N2
AC Output
100-240V
D2+
DMX512 Signal
D1-
L2
N1
L1
Dimmable LED
Driver
GND
DMX Master
0-5
0-9
0-9
AC Output
100-240V
SR-2102AC
AC TRIAC DMX Dimmer
Preset
N
L
L
AC100-240V
input
N
Operation
5
ISO9001:2008
Feature
display
•Safe and reliable full isolation design
“3" button
“2" button
“1" button
•Triac dimmable and Mosfet dimmable
•Forward-phase control dimmer(TRIAC) & Reverse-phase control dimmer both available
After the device correctly connected and power on.You can do below settings:
•Great compatibility with a variety of DMX512 controls
1. How to set its DMX512 decoder address:
•Innovative minimum brightness setting function
Hold any one of the three buttons(for example button 1) until the display flashes,then press button 1, 2, 3 to set
•To dim and switch single color dimmable LED lamps, traditional incandescent and halogen lights
the DMX512 address,then hold any one of the buttons until the flashing stops to confirm the address.
2. How to set DMX channel:
Parameter
Hold button 2 & 3 together until the display “cH” flashes, then press button 1 to choose 1cH or 2cH or 3cH
Part No.
Input Voltage
Output Voltage
Output Power
Remarks
SR-2102AC
100-240VAC
2x(100-240VAC)
2x(120-288)W
DMX512 Dimmer
output, then hold any one of the buttons to confirm it.1 cH=1 DMX address for all outputs, 2cH=2 DMX
addresses for all outputs After the device correctly connected and power on. You can do below settings:
the factory defaults is 2cH for 2 outputs.
Product Size
3. Choose dimming way:
Hold button 1 and 3 simultaneously until the display flashes, then press button 2 to select
29
,then hold any one button to confirm.
Reverse-phase control dimmer
Forward-phase control dimmer(TRIAC)
Reverse-phase control dimmer
170
Voltage
Voltage
59
Forward-phase control
dimmer(TRIAC)
or
4. Set the minimum dimming brightness point.
The factory dimming range is 0%~100%, but the 0% can be can be re-set as below:
Operate the DMX master to dim the light to any brightness you want, then press the Preset button
, the light
flashes, means the minimum point is set at this brightness now. You can not dim lower than this brightness
point. The minimum point will be covered by repeating doing that.
How to reset it to factory defaults: dim up light to 100% , then press Preset button until flash.
Warranty Agreement
1) Lifetime technical support is available for this product:
We provide 5-year limited warranty for this product dated from the time of purchasing. We print date on every
product, for example 1125 means year 2011, week 25. The warranty is for free repair or replacement and
covers manufacturing faults only. For faults beyond the 3-year warranty we reserve the right to charge for time
and parts.
2) The warranty shall be void under but not limited to following conditions:
Any defects caused by wrong operation.
Any damages caused by unauthorized removal, maintenance, modifying, incorrect connection and
replacement of chips.
Any damages caused due to transportation, vibration etc. after purchase.
Any damages caused by earthquake, fire, lightning, pollution and abnormal voltage.
Any damages caused by negligence, inappropriate storing at high temperatures and humidity or near
harmful chemicals.
Product has been updated.
3) Repair or replacement as provided under this warranty is the exclusive remedy to the customer.
Safety & Warnings
1) The product shall be installed and serviced by a qualified electrician.
2) IP20. Please do not expose the product to the sun and rain. When installed outdoors, please ensure it is
mounted in a waterproof enclosure.
3) Always be sure to mount this unit in an area with proper ventilation to avoid overheating.
4) Please make sure the output voltage of LED power supplies used comply with the working voltage of the
product.
5) Never connect any cables while power is on and always assure correct connections to avoid short circuits
before switching on.
6) Please ensure that the cable is secured tightly in the connector.
7) For update information please consult your supplier.