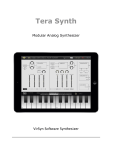
1
Owner’s Manual E2 * Apple, iPad, iPhone, iPod touch, and iTunes are trademarks of Apple Inc., registered in the U.S. and other countries. * All product names and company names are the trademarks or registered trademarks of their respective owners. Table of Contents Introduction................................................................................. 6 Main features............................................................................................................. 7 Getting Ready............................................................................................................ 8 Selecting and playing a Program............................................. 10 Selecting a Program................................................................................................ 11 Playing the Program............................................................................................... 13 Editing and Saving a Program.................................................. 17 Editing Program Parameters.................................................................................. 17 Editing Effect Parameters....................................................................................... 18 Saving an Edited Program...................................................................................... 19 Adding and Playing MIDI Files.................................................. 21 Adding a MIDI file from your computer to the iPad............................................. 21 Selecting and Playing a MIDI File........................................................................... 22 Recording your performance.................................................... 24 3 Using the Set List Feature......................................................... 27 Creating a Set List................................................................................................... 28 Adding Programs to the Set List............................................................................ 31 Adding Notes or Comments................................................................................... 36 Using the Score Viewer........................................................................................... 38 Playing a Program from the Set List...................................................................... 42 Creating a Song List................................................................................................ 43 Playing Songs from a List....................................................................................... 46 Editing a List............................................................................................................ 48 Module........................................................................................ 52 Header...................................................................................................................... 52 A.Piano..................................................................................................................... 54 E.Piano..................................................................................................................... 56 Organ....................................................................................................................... 59 Clav........................................................................................................................... 61 Multi......................................................................................................................... 63 Effects....................................................................................................................... 65 4 Set List Screen............................................................................ 75 1. Header.................................................................................................................. 76 2. Set list name........................................................................................................ 77 3. List........................................................................................................................ 77 4. Program Level...................................................................................................... 78 5. Text....................................................................................................................... 78 6. Score viewer......................................................................................................... 79 7. Music player......................................................................................................... 80 Parameters that can be controlled via MIDI............................ 82 Operating Requirements.......................................................... 84 Specifications............................................................................. 85 Support and Service ................................................................. 87 Information to Provide When Contacting Us........................................................ 87 Before You Contact Us............................................................................................. 87 5 Introduction Congratulations, and thanks for choosing the Korg Module for iPad Mobile Sound Module app. To fully enjoy your purchase, please read this manual carefully and retain it for future reference, and use this product only as directed. Maintaining its position at the forefront of mobile music apps, KORG now offers you a new style of performance and production with Korg Module for iPad. Ideal for performance and music production, KORG Module is a high-quality sound module app for iPad that contains a sound library over 1 GB. If you have an external MIDI keyboard and an iPad, you can play studio-quality keyboard and grand piano sounds anywhere. You can also use the sounds of KORG Module for the KORG Gadget music production app. 6 Main features • Five dedicated sound engines containing powerful sounds • Welcome to a new mobile world, where your iPad and a MIDI keyboard is all you need for a complete setup • Convenient set list function with a PDF/image score viewer and music player • Easily record your performances, and share song sketches on SoundCloud • Integrating iOS technology that’s indispensable for the mobile environment • Mobile music production in tandem with KORG Gadget 7 Getting Ready 1.First, connect a MIDI keyboard or other controller to your iPad. 2.Tap the icon on the Home screen of your iPad to launch the app. When you first start the Korg Module app, the Module screen will appear. 8 This screen should display an instrument such as a piano or electric piano. If it does not, simply touch the word “Module” in the upper right of the screen. From this screen you can select and play a sound. 3.Make sure that your iPad is set to play audio, and that the volume is set to a suitable level. 4.Now that the Korg Module app is running, play a few notes on the MIDI keyboard that’s connected to the iPad, or use the on-screen keyboard. If you hear sound, your Korg Module is ready to use. Tip: Use headphones, self-powered speakers, or an amplifier and speaker system to enjoy higher quality sound. 9 Selecting and playing a Program Your Korg Module for iPad app comes with a full set of 100 sounds; each program has been created using one of the five internal sound engines: • Acoustic Piano • Electric Piano • Clav •Organ • Multi All programs are conveniently organized into eight categories for easy access: 1. Acoustic Piano 6. Brass 7. Synth 2. Electric Piano 3. Clav 4. Organ 5. Strings 8. User Key parameters of each sound can be adjusted to suit your taste. Even with programs created using the same sound engine, adjusting the parameters can produce a wide range of variation. 10 Selecting a Program 1.Tap the Category name and Program name shown in the Module screen to access the Program Browser. 11 In the Program Browser, the program categories appear in the left-hand columns, and the available programs in that category appear in the right-hand columns. 2.Choose a Category. 12 3.Select a Program The selected program is now active. The module that appears will depend on the selected program. In order to audition the Program, simply tap one of the three “Phrase” buttons to play a musical loop or phrase using the selected sound. 4.Once you have selected a program, simply tap outside the list. Playing the Program Now you can play the selected program using the attached MIDI keyboard, or by tapping the onscreen keyboard. You can also enhance your performance by changing the Octave range, choosing a Velocity Curve, editing the Program parameters, and modifying the Master Effect settings. Any changes you make to the Program can be saved to the User Bank for future. Tip: The procedure for saving a Program begins on page 19. 13 Changing the Octave Setting The pitch range of the keyboard can be changed, in one-octave steps. 1.Use the and buttons at the left of each module’s keyboard to shift the pitch range Up or Down in one-octave steps 14 Choosing a Velocity Curve The Velocity Curve determines how the volume and the tone of a Program will change based on how strongly individual notes are played using a connected MIDI controller. By adjusting the Velocity Curve, you can customize the response of the Korg Module to match your own playing style 1.In the upper left of the screen, tap the icon to open the Velocity Curve edit screen. 15 2.Use the buttons in the right side of the screen to select a velocity curve. Soft, Soft2: If you play with a soft touch, these curves will allow you to increase your dynamic range, allowing you to achieve higher dynamic levels without having to play the keyboard forcefully. Soft 2 provides the greater change in dynamic levels. Normal: This is the standard velocity curve setting Hard, Hard2: If you play with a heavy touch, these curves will allow you to increase your dynamic range, allowing increased expression to play softer passages than your playing would normally allow. Hard 2 provides the greater change in dynamic levels. 3.When you’ve finished simply, tap outside the edit screen. 16 Editing and Saving a Program Editing Program Parameters The knobs and buttons that appear on the front panel are available to edit the sound of the program. For example, you can use the Variation + / – buttons to change the basic character of the sound. In addition, the various knobs, sliders, buttons, and switches can be used to edit control the major parameters of each sound. 17 Tip: The complete list of the available parameters for each sound engine, or Module, begins on page 52. Editing Effect Parameters Each Program is equipped with two Master Effects. One is a Modulation Effect; the second is an Ambient Effect. Each effect provides an effect type, plus two editable parameters. Tip: The complete list of the available parameters for each Effect begins on page 65. Tip: To save your edits, follow the Saving an Edited Program procedure starting on the next page. 18 Saving an Edited Program If you want to keep the sound and effect settings that you have edited, you can save them as a User Program. 1.Tap the Category name and Program name shown in the screen. 2.Select “User” as the Category, and then tap the “Save Program...” option. 19 3.Use the on-screen keyboard that appears to give your edited Program a new name. When you’ve finished entering the name, tap the button . Your edited Program is now saved. Note: You cannot overwrite a Preset Program. 20 Adding and Playing MIDI Files The Korg Module contains a MIDI player that is capable of playing Standard MIDI Files. In order to play a MIDI file, you must first add the file to your iPad. Adding a MIDI file from your computer to the iPad 1.Connect the iPad to your computer. 2. Start iTunes. 3.In the right side of the upper tabs in iTunes, choose iPad. 4.In the upper tabs, choose “Apps.” 5.Scroll down, and choose “Module” from the apps below file sharing. Below the “Module types” shown in the right side, click [Add file]. 6.Select the MIDI file that you want to play, adding it to the iPad. 7.Disconnect the iPad from your computer, and close iTunes. 21 Selecting and Playing a MIDI File Here’s how to use the MIDI player to play a MIDI file that you’ve added to the iPad. 1.Tap the icon in the upper left side of the screen to access the MIDI player. 22 2.Tap “Tap to Select File,” and select the MIDI data from the list that appears. 3.Tap the [Start] button to play the MIDI data. 4.Tap the [Stop] button to stop playback. 5.To close the MIDI player, tap outside the player. 23 Recording your performance KORG Module provides a recorder that you can use to record your practicing or to sketch ideas for songs. The audio data you record can be uploaded directly to the SoundCloud music sharing site, or you can share your performance with your friends via a social networking service. 1.Tap the icon in the upper left of the screen to access the recorder. 24 2.In the center of the recorder screen, tap . Recording starts. 3.Perform. 4.When you’ve finished performing, tap The recording completion screen appears. . 25 If you want to retry the recording, tap “Back.” You return to the recording screen, and recording starts. 5.If you want to save the recorded data, tap “Save.” The data is saved, and the share screen appears. 6.Choose the sharing destination. If you don’t want to share your recording, tap “Close.” 26 Using the Set List Feature One of the most innovative Korg Module features is the Set List. The Set List allows you to create a collection of your favorite songs and programs into a single list for convenient access. Using the Set List, you can: • Create a list containing all the programs that you use for a live performance, and select them quickly during performance. • Display a photo or a PDF image on the screen—including a musical score or lyrics. • Use the built-in music player to playback your favorite songs from a list that you’ve created. The songs can play back in sync to the music, so you can playback songs as you perform. You can also adjust the speed of the playback making it easier to learn new songs. 27 Creating a Set List Here’s how to register programs and songs in a set list. First you’ll need to access the Set List screen. 1.In the upper right of the screen, tap “Set List” to access the Set List screen. The right side of the screen displays the titles of the existing set lists. The left side of the screen displays—from top to bottom—the title of the selected set list, a volume slider, a score viewer for PDFs or images, and at the bottom is the music player that indicates “Tap here to import song.” 28 2.In the upper left, tap the icon; in the file menu that appears, choose “New.” 29 3.In the dialog box that appears; use the on-screen keyboard to assign a title to the set list, and then tap “OK.” For this example, use the name “Set List 1.” 30 Adding Programs to the Set List 1.Tap the Browser. button that’s at the right edge of the row of the list to open the Program 31 2.From the Program Browser, select the program that you want to add to the Set List. The list shows the program name and icon. 32 3.Tap the button at the upper right of the list. A row will be added, and the “Natural Grand” is now registered to the Set List. 33 4. Repeat the previous steps to open the Program Browser and add additional Programs to the Set List. 34 5.Tap the icon to open the file menu, and choose “Save” to save your Set List. 35 Adding Notes or Comments By adding performance notes or comments to the Set List, you can keep track of any important performance information, such as “Sing harmony on Verse 3,” “Wait for Drum Solo after Chorus,” or “Introduce the band now,” etc. 1.From the Set List, select a registered Program or Song. 2.Tap the white space to the left of the list. 36 3.Use the on-screen keyboard that appears to enter your comment(s). When you’ve finished, tap the button. 37 Using the Score Viewer With the Score Viewer, it’s possible to use the Korg Module to display PDFs or image data (such as musical scores) that you have saved to your iPad. Adding a PDF file from your computer to the iPad 1.Connect the iPad to your computer. 2. Start iTunes. 3.In the right side of the upper tabs in iTunes, choose iPad. 4.In the upper tabs, choose “Apps.” 5.Scroll down, and choose “Module” from the apps below file sharing. Below the “Module types” shown in the right side, click [Add file]. 6.Select the PDF file that you want to display, adding it to the iPad. 7.Disconnect the iPad from your computer, and close iTunes. 38 Displaying a PDF file in the Score viewer 1.From the Set List, tap the button to access the Score Viewer. 2. When the dialog box appears, select the file that you want to be displayed in the Score Viewer. 39 3.The selected file will appear in the Score Viewer. 40 4.Tap the displayed score to enter the full-screen mode. Tip: If the displayed file consists of multiple pages, you can turn pages directly from the full-screen display. Tip: In full-screen display, you can swipe to zoom a PDF or photo. 41 Playing a Program from the Set List 1.To select a program from the list, simply tap the program name shown in the list. 2.You can now play the selected Program using the external MIDI keyboard that’s connected to the iPad. 42 Creating a Song List 1.In the upper left, tap the icon; in the file menu that appears, choose “New.” 2.In the dialog box that appears; use the on-screen keyboard to assign a title to the set list, and then tap “OK.” For this example, use the name “Song List 1.” 3.At the bottom of the screen, tap “Tap here to import song.” 43 4.Select the song you wish to add to Song List 1 from the list of installed songs that will appear. 5. The selected song is now registered to the first location in the Song List. In place of the “Tap here to import song” prompt, the Korg Module song player control panel will appear. 44 6.Tap the button at the right edge of the screen to open the Program Browser. By selecting a Program, you will be able to play the Korg Module from the attached MIDI keyboard controller using the selected sound while the Song is playing. 7.Tap the icon to open the File menu, and choose “Save” to save your Song List. 45 Playing Songs from a List 1 2 4 3 5 6 46 1.From the list, select the song that you want to play. button to play the selected song. As the 2.In the Korg Module music player, tap the song is playing, you can perform using the selected program using an external MIDI keyboard/controller that’s connected to the iPad. 3.This slider located to the right edge will control the playback volume. 4.These buttons will change the playback speed of the song. 5.The sliders at the bottom edge of the music player indicate the playback progress, and below that is the Mark slider. The Mark slider indicates the point in the song button is pressed. where playback will continue from, each time the 6.The list. button will open the library, so you can re-select the registered song from the 47 Editing a List In the List Edit mode, you can delete items or change the order of items in a list. 1.Tap the button located at the upper right of the list to enter the List Edit mode. A button (Delete) and a row in the list. button (Drag) will appear at opposite ends of each 48 2. Moving an Item: To change the order of an item in the list, touch the button for that item, drag it to the new location, and then release your finger. For this example, take the first item on the list and drag it to the third position. 49 The first item on the list has been moved to the third position. 50 3.Deleting a Item: To remove an item from the list. For this example, remove the second item on the list, Program 2. Clav CA, by tapping the button for row 2. A button appears at the right edge of the row. 4.Tap this button to confirm that you want to delete this item. The item is deleted from the list. Note: If there is only one item in a list, it cannot be deleted. 51 Module Module is the main screen, where you select and play programs. Your Korg Module comes with a full set of 100 sounds; each program has been created using one of the five internal sound engines: • Acoustic Piano • Electric Piano • Clav •Organ • Multi Each module provides several parameters that let you adjust the sound. You can use the preset programs without change, or modify their sound to your taste. Header These are the items that appear in the header bar: (Settings) : Here you can control settings such as Bluetooth MIDI, Stereo/Mono operation, etc. (INFO) : Displays a help screen that shows the version of the app and provides information about using it. Tips: Displays operating hints on the screen. Manual: Displays the user’s manual. FAQ: Displays the “Korg App Help Center.” 52 Note: In order to view the user’s manual or the “Korg App Help Center,” you must be able to connect to the Internet. (VELOCITY CURVE): This item opens the screen where you can choose a velocity curve to match your playing style. See page 15 “Choosing a Velocity Curve.” (MIDI PLAYER): Tapping this item (while the module screen is visible) will open the MIDI Player. See page 21 “Adding and Playing MIDI Files.” Velocity: This bar-graph meter displays the velocity values as you perform. Output: This stereo meter displays the volume while you perform. Set List: Tapping this item will open the Set List screen. See page 75 “Set List Screen.” Module: Displays the module screen. Store: Tap on this item to enter a screen where you can purchase additional sound engines for the Korg Module. Note:In order to view the screen for purchasing additional sound engines, you must be able to connect to the Internet. 53 A.Piano This is a premium acoustic piano module that features un-looped data carefully sampled from world renowned acoustic pianos. If you’re using an external MIDI keyboard, your playing dynamics will shift between various levels of sampled data, responding to your touch and expressing your sound with a rich dynamic range. The sympathetic resonance of the open strings when the damper pedal is pressed has also been reproduced. Sounds such as upright piano and electric grand piano as well as other variations that add layered strings or pads are also provided, allowing a wide variety of high-quality sounds. 54 Octave These buttons shift the pitch range in steps of +/– one octave. Variation Here you can select the acoustic piano variations. Equalizer - Low Adjusts the level of the low-frequency range of the sound. Equalizer - Mid Adjusts the level of the mid-frequency range of the sound. Equalizer - High Adjusts the level of the high-frequency range of the sound. Release Time Adjusts the release time of the sound. Damper / Layer Level Adjusts how the sound resonates when you press the damper pedal, and adjusts the volume of the layered sound. Output Level Adjusts the volume level. 55 E.Piano This is an electric piano module that realistically reproduces the distinctive tones of a sweet-sounding vintage electric piano. Since multiple levels of velocity layers are provided, the sound is extremely realistic throughout the full dynamic range of soft to strong notes. This module also provides the EQ and tremolo, as well as a drive circuit that’s ideal for producing funkytones. . You’ll never tire of immersing yourself in the sweet sounds of this module. 56 OCTAVE These buttons shift the pitch range in steps of +/– one octave. VARIATION Here you can select the electric piano variations. KEYOFF NOISE Adds authentic key noise when the note is released. RELEASE TIME Adjusts the release time of the sound. HIGH Adjusts the level of the high-frequency range of the sound. LOW Adjusts the level of the low-frequency range of the sound. TREMOLO switch Specifies the tremolo effect. OFF: Tremolo off MONO: Tremolo on, monaural STEREO: Tremolo on, stereo 57 TREMOLO - DEPTH Adjusts the depth of modulation when tremolo is on. TREMOLO - SPEED Adjusts the speed of modulation when tremolo is on. AMP SWITCH the amp simulation effect on/off. DRIVE Adjusts the amount of drive for the amp. OUTPUT LEVEL Adjusts the volume level. 58 Organ This is a powerful organ model that samples a range of sound variations from a traditional vintage organ. With a powerful rotary speaker, vibrato and chorus that adds character to the sound, and an overdrive circuit that generates warm distortion, it’s easy to produce realistic organ sounds. 59 OCTAVE These buttons shift the pitch range in steps of +/– one octave. ROTATION Specifies the rotary effect. STOP: Stops the rotation of the rotor. SLOW: Slows the rotation of the rotor. FAST: Speeds up the rotation of the rotor. VIBRATO & CHORUS - ON/OFF Switches the vibrato/chorus effect on/off. VIBRATO & CHORUS - V-C Selects a preset for the vibrato/chorus effect. V-1, V-2, and V-3 are vibrato; C-1, C-2, and C-3 are chorus. OVERDRIVE Adjust the amount of overdrive distortion. OUTPUT LEVEL Adjusts the volume level. VARIATION Here you can select the variation of organ. 60 Clav This is a clav module that reproduces the sharp attack and percussive sound of a classic instrument. Since the pickup and filter can be controlled by individual switches, you can easily try out different changes in the sound. Additional parameters indispensable to the clav sound have been carefully selected, such as a mute slider that adjusts to the sound. 61 OCTAVE These buttons shift the pitch range in steps of +/– one octave. FILTER - PRESENCE Sets the tonal character of the high-frequency range. FILTER - TREBLE Sets the high-frequency range of the sound. FILTER - MEDIUM Sets the mid-frequency range of the sound. FILTER - BASS Sets the low-frequency range of the sound. Note:If all of these are OFF, no sound is output. PICKUP - C/D Switch, A/B Switch A variety of sounds can be produced by using different pickup (and filter) combinations. OUTPUT LEVEL Adjusts the volume level. KEYOFF NOISE Adjusts the amount of authentic key noise added when the note is released. MUTE Adjust the amount of muting. 62 Multi The multi module lets you produce a wide range of sounds including strings, brass, and synth. It provides acrisp, high-quality sound, with each tone displaying a set of the most suitable parameters for editing, so you can easily and efficiently attain the sound you desire. 63 OCTAVE These buttons shift the pitch range in steps of +/– one octave. WAVE VARIATIONS In this screen, you can choose from the available waveforms. CHARACTER These four knobs provide control of additional sound parameters. The actual parameter being controlled will appear in the “scribble-strips” above each knob. Tip: The character parameters will differ depending on the waveform that’s selected in WAVE VARIATIONS. AMPLIFIER - Attack Time Adjusts the attack time of the EG (envelope generator). AMPLIFIER - Release Time Adjusts the release time of the EG. AMPLIFIER - Output Level Adjusts the volume level. 64 Effects The Korg Module contains two effect processors to enhance the sound quality and to provide an additional dimension to your sonic creations; the Modulation Effect (Mod) and the Ambient Effect. The Modulation Effect provides 22 types of Dynamic, Filter, and Motion-style effects. The Ambient Effect offers 7 Delay and Reverb-type effects. For each effect there are two editable parameters. Effect type Effect parameter 1 Effect parameter 2 Effect type Selects the effect type. Effect parameters 1, 2 Here you can adjust the parameters of the effect selected in effect type. The editable parameters differ depending on the effect chosen. For details on the available effect types and their effect parameters, refer to page 66 “Effect parameters.” 65 Effect parameters Modulation effects COMPRESSOR This effect compresses the level of the input signal to provide more consistency and punch. It is also an effective way to emphasize the sense of attack. SENS: Adjusts the sensitivity of the compressor. Raising this value will boost low-level sounds. LEVEL: Adjusts the output level. 2BAND EQ This is a shelving-type equalizer. It boosts or cuts the level of the low and high frequency ranges. LOW GAIN: Adjusts the low frequency range. HIGH GAIN: Adjusts the high frequency range. PEAKING EQ This boosts or cuts the level of the frequency range that you specify. FREQ: Specifies the center of the frequency range that will be boosted or cut. GAIN: Adjusts the gain. When the knob is in the center, the response is flat. At the maximum and minimum positions, the level will be boosted or cut by +/-15 dB. 66 LOWPASS FILTER This is a filter that allows only the low-frequency sound to pass, making the sound darker and more mellow. CUTOFF: Adjusts the cutoff frequency. RESONANCE: Boosts the region near the cutoff frequency, adding a distinctive character to the sound. HIGHPASS FILTER This is a filter that allows only the high-frequency sound to pass, making the sound harder and brighter. CUTOFF: Adjusts the cutoff frequency. RESONANCE: Boosts the region near the cutoff frequency, adding a distinctive character to the sound. BANDPASS FILTER This is a filter that cuts all but the frequency range you specify, allowing you to emphasize just a portion of the sound. CUTOFF: Adjusts the cutoff frequency. RESONANCE: Boosts the region near the cutoff frequency, adding a distinctive character to the sound. 67 AUTO WAH Automatically applies a wah effect that follows the strength of the input sound. SENS: Sets a threshold level for the auto wah effect. FREQUENCY: Specifies the center frequency of the wah. TAKING MOD This effect adds vowel formants to the input sound, producing the impression of a human voice. FORMANT: Adjusts the formant. Turning the knob clockwise will smoothly change the formant through the range of [a]-[e]-[o]-[u]-[i]. OFFSET: Specifies the pitch of the formant frequency. DECIMATOR This lowers the sample rate and bit depth to intentionally simulate the rough sound of an inexpensive sampler. FREQ: Adjusts the tonal character. Increasing this value will lower the sample rate, making the sound more “lo-fi.” BALANCE: Adjusts the balance of the effect sound and direct sound. 68 DRIVE This effect drives the input signal, boosting it to create natural distortion. GAIN: Adjusts the amount of distortion by adjusting the input level of the distortion circuit. LEVEL: Adjusts the output level. DISTORTION This distortion effect creates hard distortion. GAIN: Adjusts the amount of distortion by adjusting the input level of the distortion circuit. LEVEL: Adjusts the output level. TUBE DRIVE This effect simulates the soft distortion and fatness that are characteristic of a vacuum tube amp circuit. TUBE GAIN: Adjusts the amount of distortion and fatness. LEVEL: Adjusts the output level. FLANGER Flanger adds spaciousness and a sense of vibrato by mixing the original sound with a pitch-modulated sound. Compared with Polysix Chorus/Phase, it produces an effect with more of an edge. SPEED: This controls the speed of the flanger’ LFO. DEPTH: This sets the depth of LFO modulation. 69 EP CHORUS This effect is inspired by a rare chorus that was built into an early version of a famous modified electric tine piano. SPEED: This controls the speed of the chorus’ LFO. DEPTH: This sets the depth of LFO modulation. POLYSIX CHORUS This effect reproduces the chorus effect that was built into the original Korg Polysix. It adds modulation, spaciousness, and a sense of vibrato to the sound by mixing the original sound with a pitch-modulated sound. SPEED: Adjusts the speed at which the pitch is modulated. SPREAD: Adjusts the left/right spaciousness. POLYSIX PHASER This effect reproduces the phase effect that was built into the original Korg Polysix. It adds modulation, spaciousness, and a sense of vibrato to the sound by mixing the original sound with a pitch-modulated sound. You can obtain a distinctive sense of transparency by combining this with Polysix Chorus in different ways. SPEED: Adjusts the speed at which the pitch is modulated. SPREAD: Adjusts the left/right spaciousness. 70 POLYSIX ENSEMBLE This effect reproduces the ensemble effect that was built into the original Korg Polysix. It adds a deep sense of chorus by mixing multiple copies of pitch-modulated sound. SPREAD: Adjusts the left/right spaciousness. DEPTH: This sets the depth of effect. SMALL PHASER This classic phaser, made in New York City during the 70s, has a notably warm and rich tone with liquid transparency. SPREAD: Adjusts the left/right spaciousness. COLOR: This adjusts the strength of the effect. ORANGE PHASER This phaser pedal is a favorite on many recordings. It’s useful for adding sparkle, animating chord passages, and widening and fattening the sound. SPEED: This controls the speed of the phaser’s LFO. COLOR: This adjusts the strength of the effect. 71 TREMOLO This effect modulates the of the level of input signal. It produces a pulsating or wavering effect. FREQ: This controls the tremolo speed. DEPTH: Adjusts the depth of the effect. AUTO PAN This effect modulates the left/right volume of the input signal. Increasing the Depth will produce a greater left/right spread. FREQ: Adjusts the rate at which the left/right volume is modulated. DEPTH: Adjusts the depth of the auto pan effect. RING MOD This modulates the sound to add a metallic resonance or give it a sound-effect-like character. FREQ: Specifies the frequency at which modulation will be applied. Turning the knob clockwise will raise the frequency. BALANCE: Adjusts the balance between the effect sound and direct sound. 72 Ambient effects DELAY This effect delays the sound. This is a cross feedback delay with a short delay time. It is not synchronized to the tempo. TIME: Specifies the delay time. DEPTH: Adjusts the delay depth and the amount of feedback. PING PONG DELAY This is a stereo delay which alternates the sound between left and right. TIME: Specifies the delay time. DEPTH: Adjusts the delay depth and the amount of feedback. MOD DELAY This delay lets you create a modulating or wavering effect. TIME: Specifies the delay time. DEPTH: Adjusts the delay depth and the amount of feedback. 73 TAPE ECHO This effect models a tape echo unit with three playback heads, including the distortion and tonal changes typical of magnetic tape. TIME: Specifies the delay time. DEPTH: Adjusts the delay depth and the amount of feedback. ROOM REVERB This simulates the reverberation and ambience of a room. TIME: Adjusts the reverberation time. LEVEL: Adjusts the level of reverberation. CHAMBER REVERB This simulates the reverberation of an echo chamber. TIME: Adjusts the reverberation time. LEVEL: Adjusts the level of reverberation. HALL REVERB This simulates the reverberation of a large hall or stadium. TIME: Adjusts the reverberation time. LEVEL: Adjusts the level of reverberation. 74 Set List Screen The Set List provides away for you to organize all of your favorite programs and songs into a single list providing easy access so that you can select them quickly during performance. For details on how to register programs and songs in a list, refer to page 27 “Using the Set List Feature.” 1 2 4 3 5 6 7 75 1. Header These are the items that appear in the header bar: (Settings): Here you can control settings such as Bluetooth MIDI, Stereo/Mono operation, etc. (INFO): This item displays a help screen that shows the version of the app and provides helpful operation information. (see page 52 “Header”) (File Menu): Opens the File Menu. New: Creates a new set list. Open: Opens a saved set list. Save: Overwrites the currently open set list. Save as...: Saves the currently open set list under a different name. Velocity: This bar-graph meter displays the velocity values as you perform. Output: This stereo meter displays the volume while you perform. Module: Tapping this item will open the Module Screen. (see page 52 “Module”) Store: Tap on this item to enter a screen where you can purchase additional sound engines for the Korg Module. 76 Note: In order to view the screen for purchasing additional sound engines, you must be able to connect to the Internet. 2. Set list name This shows the name of the set list. You can tap this to edit the name. 3. List List The list shows all the songs and programs registered or assigned to the list. (EDIT) button Use the Edit button to change the order of the list or delete items from the list. (Add) button Use the Add button to add a program or song to the list. (Program) button Use the Program button to open the Program Browser and to register or assign a program to the list. 77 4. Program Level Adjusts the volume of the registered program. Level slider Adjusts the volume of the entire program. +6dB button Tap this to increase the volume by 6 dB. 5. Text Here you can enter comments or performance notes for each item on the list. See page 36 “Adding Notes or Comments.” 78 6. Score viewer Here you can display PDFs or image data such as musical scores that are saved on your iPad. Tap the PDF or image data to expand it to full-screen. See page 38 “Using the Score Viewer.” (PDF) button Displays the PDFs that are saved on your iPad. Tap this to see a list of the saved PDFs. (Photo) button Displays the image data that is saved on your iPad. Tap this to see the file names and thumbnails of the saved image data. (Camera) button Displays photos that you took using the camera of your iPad. Tap this to start the camera; the image data captured by camera is shown in the screen. 79 7. Music player 1 2 3 4 5 6 9 7 10 8 1. Song name Shows the name of the currently selected song. 2. (stop) butt Stops song playback. 3. (play) button Plays the song. 4. (mark) button Moves to the location specified by the mark slider. 80 5. Digital Counter Mark: The top number shows the current Mark location. Elapsed Time: These left-hand numbers show the current playback location. Total Time: These right-hand numbers show the total time of the selected song. 6. Playback speed button Specifies the playback speed of the song. 7. Volume slider Adjusts the playback volume level of the song. 8. (library) button Registers a song in the list. 9. Location slider Indicates the currently-playing location. 10. Mark slider Specifies the mark location within the song. 81 Parameters that can be controlled via MIDI KORG Module can receive MIDI messages to control the following parameters. A.Piano Parameter Equalizer - Low Equalizer - Mid Equalizer - High Release Time Damper / Layer Level Output Level Organ CC# 100 101 102 72 71 11 Parameter ROTATION SLOW/FAST VIBRATO & CHORUS - ON/OFF VIBRATO & CHORUS - V-C OVERDRIVE OUTPUT LEVEL E.Piano Parameter KEYOFF NOISE RELEASE TIME HIGH LOW Tremolo TREMOLO - DEPTH TREMOLO - SPEED AMP SWITCH DRIVE OUTPUT LEVEL CC# 100 101 102 103 11 Clav CC# 71 72 100 101 102 103 104 105 106 11 Parameter FILTER - PRESENCE FILTER - TREBLE FILTER - MEDIUM FILTER - BASS PICKUP - C/D PICKUP - A/B KEYOFF NOISE OUTPUT LEVEL MUTE 82 CC# 100 101 102 103 69 70 71 11 104 Multi Parameter Edit 1 Edit 2 Edit 3 Edit 4 AMPLIFIER - Attack Time AMPLIFIER - Release Time AMPLIFIER - Output Level Switching programs or songs in a Set List Programs or songs that you registered in a Set List will switch when a program change message is received. CC# 100 101 102 103 73 72 11 Damper pedal operation When a damper pedal (CC#64) message is received, the four sound engines other than organ will switch their damper on/off setting. For the organ sound engine, the damper on/off setting will switch if the header (settings) Organ Pedal is set to Damper; if it is set to Rotary, the rotary speaker slow/fast setting will be toggled. Effects (common to all sound engines) Parameter Modulation Effect Parameter 1 Modulation Effect Parameter 2 Ambience Effect Parameter 1 Ambience Effect Parameter 2 CC# 12 13 16 17 CC# = Control change number 83 Operating Requirements OS iOS 8.1 or later Device iPad Air 2, iPad mini 3, iPad Air, iPad mini 2, Fourthgeneration iPad, Third-generation iPad, iPad 2, iPad mini *To enjoy the best experience, we recommend using the latest model of iPad. Devices and approximate polyphony iPad Air 2: 72 voices iPad Air, iPad mini 3, iPad mini 2: 64 voices Fourth-generation iPad: 48 voices Third-generation iPad, iPad 2, iPad mini: 32 voices *To enjoy the best experience, we recommend using the latest model of iPad. *The polyphony will depend on the sounds and on the latency setting. Required Free space 1.2GB 84 Specifications Sound Generator NATIVE ENGINE The number of Programs 100 Module Five types • Acoustic Piano • Electric Piano • Organ • Clav • Multi Master Effect Modulation effect Ambience effect Usable simultaneously MIDI Play using an external MIDI keyboard Program change The damper pedal can be used to switch the rotary speed Virtual MIDI Interoperation with KORG Gadget Usable in Gadget as five types of Gadget 85 Set List Functionality Change programs for each song you perform View images or PDF scores Use the internal camera to capture memos, etc. Edit text to create memos Load text files Load and play songs from the library of the Music app Adjust the playback speed of songs MIDI Player Load and play Standard MIDI Files Audio Recording Upload to SoundCloud Upload to Dropbox Export to Mac/PC via iTunes file sharing Velocity Curve Dynamics can be varied by your playing on a MIDI keyboard Others Inter-App Audio Audiobus 2 support 86 Support and Service If you have questions about this product, please contact the Korg distributor in the country where you purchased it. Information to Provide When Contacting Us In order for us to help you, we’ll need the following information since product support cannot be provided without it • Your name • The name and version of the product (How to check the version) • The name of the device that you’re using • The version of the operating system • Your question (provide as much detail as possible) Before You Contact Us Before you contact us, check whether this manual or Online FAQ has an answer for your question. Please be aware that we cannot answer questions about products that are not made by Korg, such as basic operation of your hardware device, or general questions about creating songs or sounds. 87