1
User’s Manual
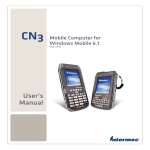
CN3 Series Mobile
Computer
User’s Manual
CN3 Series Mobile
Computer
Intermec Technologies Corporation
Worldwide Headquarters
6001 36th Ave.W.
Everett, WA 98203
U.S.A.
www.intermec.com
The information contained herein is provided solely for the purpose of allowing customers to
operate and service Intermec-manufactured equipment and is not to be released, reproduced, or
used for any other purpose without written permission of Intermec Technologies Corporation.
Information and specifications contained in this document are subject to change without prior
notice and do not represent a commitment on the part of Intermec Technologies Corporation.
© 2008 by Intermec Technologies Corporation. All rights reserved.
The word Intermec, the Intermec logo, Norand, ArciTech, Beverage Routebook, CrossBar,
dcBrowser, Duratherm, EasyADC, EasyCoder, EasySet, Fingerprint, i-gistics, INCA (under
license), Intellitag, Intellitag Gen2, JANUS, LabelShop, MobileLAN, Picolink, Ready-to-Work,
RoutePower, Sabre, ScanPlus, ShopScan, Smart Mobile Computing, SmartSystems, TE 2000,
Trakker Antares, and Vista Powered are either trademarks or registered trademarks of Intermec
Technologies Corporation.
There are U.S. and foreign patents as well as U.S. and foreign patents pending.
Wi-Fi is a registered certification mark of the Wi-Fi Alliance.
Microsoft, Windows, and the Windows logo are registered trademarks of Microsoft Corporation
in the United States and/or other countries.
Bluetooth is a trademark of Bluetooth SIG, Inc., U.S.A.
This product includes software developed by the OpenSSL Project for use in the OpenSSL
Toolkit (www.openssl.org).
This product includes cryptographic software written by Eric Young ([email protected]).
miniSD is a trademark of hte SD Card Association. The SD logo is a trademark.
ii
CN3 Series Mobile Computer User’s Manual
Document Change Record
This page records changes to this document. The document was
originally released as Revision 001.
Version
Number Date
Description of Change
002
01/2007
Added information about the InstallSelect
application, the clean boot method, the
color camera, and the CDMA radios.
003
04/2007
• Added information about GPS.
• Added information about using the
FTP server.
• Created an appendix for specifications
and accessories.
004
07/2007
• Added information on GPSID and the
iGPS Settings application.
• Added information on the Power
Profiler application.
• Added undocumented keys to the
keypad tables.
005
10/2007
Added information on the larger key CN3e
Mobile Computer.
006
1/2008
• Added information on CN3e
alphanumeric keypad.
• Updated information on CDMA
carriers and activation.
• Updated Power Profiler information.
• Revised the section on keypads to
reduce repetition.
CN3 Series Mobile Computer User’s Manual
iii
iv
CN3 Series Mobile Computer User’s Manual
Contents
Contents
Before You Begin. . . . . . . . . . . . . . . . . . . . . . . . . . . . . . . . . . . . . . . . . . . . . . . . . . . . ix
Safety Information . . . . . . . . . . . . . . . . . . . . . . . . . . . . . . . . . . . . . . . . . . . ix
Global Services and Support . . . . . . . . . . . . . . . . . . . . . . . . . . . . . . . . . . . . ix
Warranty Information . . . . . . . . . . . . . . . . . . . . . . . . . . . . . . . . . ix
Web Support . . . . . . . . . . . . . . . . . . . . . . . . . . . . . . . . . . . . . . . . . x
Telephone Support . . . . . . . . . . . . . . . . . . . . . . . . . . . . . . . . . . . . x
Service Location Support . . . . . . . . . . . . . . . . . . . . . . . . . . . . . . . xi
Who Should Read This Manual . . . . . . . . . . . . . . . . . . . . . . . . . . . . . . . . . xi
Related Documents . . . . . . . . . . . . . . . . . . . . . . . . . . . . . . . . . . . . . . . . . . xii
Patent Information . . . . . . . . . . . . . . . . . . . . . . . . . . . . . . . . . . . . . . . . . . . xii
1 Using the Computer
. . . . . . . . . . . . . . . . . . . . . . . . . . . . . . . . . . . . . . . . . . . .1
Introducing the CN3 Mobile Computer. . . . . . . . . . . . . . . . . . . . . . . . . . . . . . . . . . . 2
What’s New?. . . . . . . . . . . . . . . . . . . . . . . . . . . . . . . . . . . . . . . . . . . . . . . . . 3
Finding the Software Build Versions . . . . . . . . . . . . . . . . . . . . . . . . . . . . . . . 3
Using the Battery . . . . . . . . . . . . . . . . . . . . . . . . . . . . . . . . . . . . . . . . . . . . . . . . . . . . 4
Charging the Battery . . . . . . . . . . . . . . . . . . . . . . . . . . . . . . . . . . . . . . . . . . 4
Removing and Installing the Battery. . . . . . . . . . . . . . . . . . . . . . . . . . . . . . . 5
Maximizing Battery Life . . . . . . . . . . . . . . . . . . . . . . . . . . . . . . . . . . . . . . . . 6
Checking the Battery Status . . . . . . . . . . . . . . . . . . . . . . . . . . . . . . . . . . . . . 7
Using the Keypad . . . . . . . . . . . . . . . . . . . . . . . . . . . . . . . . . . . . . . . . . . . . . . . . . . . . 9
Using the Color-Coded Keys . . . . . . . . . . . . . . . . . . . . . . . . . . . . . . . . . . . 10
Capitalizing Characters. . . . . . . . . . . . . . . . . . . . . . . . . . . . . . . . . . . . . . . . 11
Entering Characters on the QWERTY Keypad. . . . . . . . . . . . . . . . . . . . . . 12
Entering Characters on the Numeric Keypads . . . . . . . . . . . . . . . . . . . . . . 12
Using the Power Button . . . . . . . . . . . . . . . . . . . . . . . . . . . . . . . . . . . . . . . 12
Configuring the Backlight Settings . . . . . . . . . . . . . . . . . . . . . . . . . . . . . . . 13
Managing Power on the CN3 . . . . . . . . . . . . . . . . . . . . . . . . . . . . . . . . . . . 14
Understanding the Audio Features . . . . . . . . . . . . . . . . . . . . . . . . . . . . . . . . . . . . . . 16
Using the CN3 as a Cell Phone . . . . . . . . . . . . . . . . . . . . . . . . . . . . . . . . . 16
Adjusting the Volume of the Rear Speaker . . . . . . . . . . . . . . . . . . . . . . . . . 17
Using the Screen . . . . . . . . . . . . . . . . . . . . . . . . . . . . . . . . . . . . . . . . . . . . . . . . . . . . 19
Using the Stylus . . . . . . . . . . . . . . . . . . . . . . . . . . . . . . . . . . . . . . . . . . . . . 20
Understanding the Screen Icons . . . . . . . . . . . . . . . . . . . . . . . . . . . . . . . . . 20
Aligning the Touch Screen . . . . . . . . . . . . . . . . . . . . . . . . . . . . . . . . . . . . . 21
Understanding the Status LEDs . . . . . . . . . . . . . . . . . . . . . . . . . . . . . . . . . . . . . . . . 21
CN3 Series Mobile Computer User’s Manual
v
Contents
Scanning Bar Codes. . . . . . . . . . . . . . . . . . . . . . . . . . . . . . . . . . . . . . . . . . . . . . . . . 22
Scanning with the Area Imager . . . . . . . . . . . . . . . . . . . . . . . . . . . . . . . . . 23
Improving the Performance of the Area Imager . . . . . . . . . . . . . . . . . . . . . 23
Using the Color Camera . . . . . . . . . . . . . . . . . . . . . . . . . . . . . . . . . . . . . . . . . . . . . 24
Using the Storage Card . . . . . . . . . . . . . . . . . . . . . . . . . . . . . . . . . . . . . . . . . . . . . . 26
Setting Up GPS on Your CN3 . . . . . . . . . . . . . . . . . . . . . . . . . . . . . . . . . . . . . . . . . 27
Using the GPSID Installed on the CN3 . . . . . . . . . . . . . . . . . . . . . . . . . . 28
Learning About Additional GPS Options for the CN3 . . . . . . . . . . . . . . . 30
2 Windows Mobile
. . . . . . . . . . . . . . . . . . . . . . . . . . . . . . . . . . . . . . . . . . . . . . 31
Understanding Windows Mobile 5.0 . . . . . . . . . . . . . . . . . . . . . . . . . . . . . . . . . . . . 32
Finding Information in Windows Mobile . . . . . . . . . . . . . . . . . . . . . . . . . . . . . . . . 32
Learning the Basic Skills . . . . . . . . . . . . . . . . . . . . . . . . . . . . . . . . . . . . . . . . . . . . .
Today Screen . . . . . . . . . . . . . . . . . . . . . . . . . . . . . . . . . . . . . . . . . . . . . . .
Accessing Programs . . . . . . . . . . . . . . . . . . . . . . . . . . . . . . . . . . . . . . . . . .
Navigation Bar and Command Bar . . . . . . . . . . . . . . . . . . . . . . . . . . . . . .
Using Pop-Up Menus . . . . . . . . . . . . . . . . . . . . . . . . . . . . . . . . . . . . . . . .
Entering Information . . . . . . . . . . . . . . . . . . . . . . . . . . . . . . . . . . . . . . . .
Typing With the Onscreen Keyboard . . . . . . . . . . . . . . . . . . . . . . . . . . . .
Using Block Recognizer . . . . . . . . . . . . . . . . . . . . . . . . . . . . . . .
Using Transcriber . . . . . . . . . . . . . . . . . . . . . . . . . . . . . . . . . . . .
Selecting Typed Text . . . . . . . . . . . . . . . . . . . . . . . . . . . . . . . . .
Writing on the Screen . . . . . . . . . . . . . . . . . . . . . . . . . . . . . . . . . . . . . . . .
Notifications . . . . . . . . . . . . . . . . . . . . . . . . . . . . . . . . . . . . . . . . . . . . . . .
Finding and Organizing Information . . . . . . . . . . . . . . . . . . . . . . . . . . . .
Customizing the Computer . . . . . . . . . . . . . . . . . . . . . . . . . . . . . . . . . . . .
Adjusting Settings . . . . . . . . . . . . . . . . . . . . . . . . . . . . . . . . . . . .
Adding or Removing Programs . . . . . . . . . . . . . . . . . . . . . . . . . .
33
33
34
34
35
35
36
37
37
38
38
39
40
41
41
43
Using Microsoft ActiveSync . . . . . . . . . . . . . . . . . . . . . . . . . . . . . . . . . . . . . . . . . . . 43
Using Internet Explorer Mobile . . . . . . . . . . . . . . . . . . . . . . . . . . . . . . . . . . . . . . . . 45
vi
CN3 Series Mobile Computer User’s Manual
Contents
3 Configuring the Computer
. . . . . . . . . . . . . . . . . . . . . . . . . . . . . . . . . . . 47
Configuring the Computer Parameters . . . . . . . . . . . . . . . . . . . . . . . . . . . . . . . . . . . 48
Configuring the Computer With Intermec Settings . . . . . . . . . . . . . . . . . . 48
Remotely Configuring the Computer Using SmartSystems Foundation . . . 49
Synchronizing the Computer System Time with a Time Server . . . . . . . . . 49
Configuring Personal Area Networks . . . . . . . . . . . . . . . . . . . . . . . . . . . . . . . . . . . . 49
Configuring the Computer to Communicate With a Wireless Scanner. . . . 52
Configuring Bluetooth Communications for Wireless Printing . . . . . . . . . 54
Creating an Application That Lets You Print Wirelessly. . . . . . . . 54
Selecting the Current Wireless Printer on the Computer . . . . . . . 55
Connecting to a Bluetooth Audio Device . . . . . . . . . . . . . . . . . . . . . . . . . . 57
Configuring Local Area Networks . . . . . . . . . . . . . . . . . . . . . . . . . . . . . . . . . . . . . . . 58
Configuring USB Communications . . . . . . . . . . . . . . . . . . . . . . . . . . . . . . 58
Configuring Ethernet Communications . . . . . . . . . . . . . . . . . . . . . . . . . . . 58
Configuring 802.11 Radio Communications . . . . . . . . . . . . . . . . . . . . . . . 59
Configuring the Network Parameters for a TCP/IP Network . . . 59
Configuring the Network Parameters for a UDP Plus Network . . 60
Checking the Status of Your Wireless Connection . . . . . . . . . . . . . . . . . . . 61
Viewing Detailed 802.11 Radio Connection Information . . . . . . . . . . . . . 61
Configuring the Phone . . . . . . . . . . . . . . . . . . . . . . . . . . . . . . . . . . . . . . . . . . . . . . . 67
Turning On the Phone Using the Wireless Manager . . . . . . . . . . . . . . . . . . 67
Activating the CDMA Phone . . . . . . . . . . . . . . . . . . . . . . . . . . . . . . . . . . . 68
Activating the GSM/EDGE Phone. . . . . . . . . . . . . . . . . . . . . . . . . . . . . . . 70
Making a Phone Call . . . . . . . . . . . . . . . . . . . . . . . . . . . . . . . . . . . . . . . . . 70
Connecting to an ISP . . . . . . . . . . . . . . . . . . . . . . . . . . . . . . . . . . . . . . . . . . . . . . . . 71
Connecting to a Private Network With a RAS Account . . . . . . . . . . . . . . . . . . . . . . 72
Connecting to a Private Network with a VPN Server . . . . . . . . . . . . . . . . . . . . . . . . 74
Configuring Security on the Wireless Network . . . . . . . . . . . . . . . . . . . . . . . . . . . . . 76
Choosing Between Microsoft and Funk Security . . . . . . . . . . . . . . . . . . . . 79
Configuring Funk Security Using Intermec Settings . . . . . . . . . . 80
Configuring Funk Security Using the Profile Wizard . . . . . . . . . . 84
Creating A Debug Log for Funk Security. . . . . . . . . . . . . . . . . . . 96
Configuring Microsoft Security . . . . . . . . . . . . . . . . . . . . . . . . . . 96
Loading a Certificate . . . . . . . . . . . . . . . . . . . . . . . . . . . . . . . . . . . . . . . . . 99
Disabling Security . . . . . . . . . . . . . . . . . . . . . . . . . . . . . . . . . . . . . . . . . . 101
CN3 Series Mobile Computer User’s Manual
vii
4 Developing and Installing Applications
. . . . . . . . . . . . . . . . . . 103
Developing Applications for the Computer . . . . . . . . . . . . . . . . . . . . . . . . . . . . . . 104
Installing Applications on the Computer . . . . . . . . . . . . . . . . . . . . . . . . . . . . . . . .
Installing Applications Using SmartSystems Console. . . . . . . . . . . . . . . .
Installing Applications Using Microsoft ActiveSync. . . . . . . . . . . . . . . . .
Installing Applications Using a Storage Card . . . . . . . . . . . . . . . . . . . . . .
Installing Applications Using the FTP Server . . . . . . . . . . . . . . . . . . . . .
Installing Applications Using Wavelink Avalanche. . . . . . . . . . . . . . . . . .
104
106
106
108
108
109
Freeing Up Virtual Memory for Applications. . . . . . . . . . . . . . . . . . . . . . . . . . . . . 109
Launching An Application Automatically . . . . . . . . . . . . . . . . . . . . . . . . . . . . . . . 111
Upgrading the System Software . . . . . . . . . . . . . . . . . . . . . . . . . . . . . . . . . . . . . . . 113
Upgrading the CN3 Using a miniSD Card . . . . . . . . . . . . . . . . . . . . . . . 114
Upgrading the CN3 Using the SmartSystems Console . . . . . . . . . . . . . . 115
5 Troubleshooting and Maintaining the CN3
. . . . . . . . . . . . . . 117
Calling Product Support . . . . . . . . . . . . . . . . . . . . . . . . . . . . . . . . . . . . . . . . . . . . 118
Troubleshooting Your CN3 . . . . . . . . . . . . . . . . . . . . . . . . . . . . . . . . . . . . . . . . . . 119
Resetting the CN3 . . . . . . . . . . . . . . . . . . . . . . . . . . . . . . . . . . . . . . . . . . . . . . . . .
Warm Booting the CN3 . . . . . . . . . . . . . . . . . . . . . . . . . . . . . . . . . . . . .
Cold Booting the CN3 . . . . . . . . . . . . . . . . . . . . . . . . . . . . . . . . . . . . . .
Clean Booting the Computer . . . . . . . . . . . . . . . . . . . . . . . . . . . . . . . . .
123
124
124
125
Cleaning the CN3 . . . . . . . . . . . . . . . . . . . . . . . . . . . . . . . . . . . . . . . . . . . . . . . . . 126
A Specifications
. . . . . . . . . . . . . . . . . . . . . . . . . . . . . . . . . . . . . . . . . . . . . . . . 127
Physical and Environmental Specifications. . . . . . . . . . . . . . . . . . . . . . . . . . . . . . . 128
Accessories . . . . . . . . . . . . . . . . . . . . . . . . . . . . . . . . . . . . . . . . . . . . . . . . . . . . . . . 131
Index . . . . . . . . . . . . . . . . . . . . . . . . . . . . . . . . . . . . . . . . . . . . . . . . . . . . . . . . . . . . . .
viii
133
CN3 Series Mobile Computer User’s Manual
Before You Begin
Before You Begin
This section provides you with safety information, technical
support information, and sources for additional product
information.
Safety Information
Your safety is extremely important. Read and follow all warnings
and cautions in this document before handling and operating
Intermec equipment. You can be seriously injured, and
equipment and data can be damaged if you do not follow the
safety warnings and cautions.
This section explains how to identify and understand warnings,
cautions, and notes that are in this document.
A warning alerts you of an operating procedure, practice,
condition, or statement that must be strictly observed to avoid
death or serious injury to the persons working on the
equipment.
A caution alerts you to an operating procedure, practice,
condition, or statement that must be strictly observed to
prevent equipment damage or destruction, or corruption or
loss of data.
Note: Notes either provide extra information about a topic or
contain special instructions for handling a particular condition or
set of circumstances.
Global Services and Support
Warranty Information
To understand the warranty for your Intermec product, visit the
Intermec web site at www.intermec.com and click Support >
Returns and Repairs > Warranty.
Disclaimer of warranties: The sample code included in this
document is presented for reference only. The code does not
necessarily represent complete, tested programs. The code is
provided “as is with all faults.” All warranties are expressly
disclaimed, including the implied warranties of merchantability
and fitness for a particular purpose.
CN3 Series Mobile Computer User’s Manual
ix
Before You Begin
Web Support
Visit the Intermec web site at www.intermec.com to download
our current manuals (in PDF). To order printed versions of the
Intermec manuals, contact your local Intermec representative or
distributor.
Visit the Intermec technical knowledge base (Knowledge
Central) at www.intermec.com and click Support > Knowledge
Central to review technical information or to request technical
support for your Intermec product.
Telephone Support
These services are available from Intermec.
Services
Description
Order Intermec • Place an order.
products
• Ask about an existing
order.
1 and then choose 2
Order Intermec Order printer labels and
media
ribbons.
1 and then choose 1
Order spare
parts
Order spare parts.
1 or 2 and then
choose 4
Technical
Support
Talk to technical support
about your Intermec
product.
2 and then choose 2
Service
• Get a return authorization 2 and then choose 1
number for authorized
service center repair.
• Request an on-site repair
technician.
Service contracts • Ask about an existing
contract.
• Renew a contract.
• Inquire about repair
billing or other service
invoicing questions.
x
In the USA and
Canada call 1-800755-5505 and
choose this option
1 or 2 and then
choose 3
CN3 Series Mobile Computer User’s Manual
Before You Begin
Outside the U.S.A. and Canada, contact your local Intermec
representative. For technical support in South Korea, see the next
section. To search for your local representative, from the
Intermec web site, click Contact.
Service Location Support
For technical support in South Korea, use the after service
locations listed below:
AWOO Systems
102-1304 SK Ventium
522 Dangjung-dong
Gunpo-si, Gyeonggi-do Korea, South 435-776
Contact: Mr. Sinbum Kang
Telephone: +82-31-436-1191
Email: [email protected]
Sammi Information Systems Co Ltd
7-9FL, Seo Jo Building
103-15, Galwor-Dong
Seoul, Yong San-ku Korea, South 140-807
Contact: Kyung-Hee Koo
Telephone: +82-2-790-5508
Email: [email protected]
Who Should Read This Manual
This manual is written for the person who is responsible for
installing, configuring, and maintaining the CN3 and CN3e
Mobile Computer.
This manual provides you with information about the features of
the CN3 and CN3e, and how to install, configure, operate,
maintain, and troubleshoot it.
Before you work with the CN3 or CN3e, you should be familiar
with your network and general networking terms, such as IP
address.
CN3 Series Mobile Computer User’s Manual
xi
Before You Begin
Related Documents
This table contains a list of related Intermec documents and their
part numbers.
Document Title
Part Number
Intermec Computer Command Reference Manual
073529-xxx
TE 2000 Terminal Emulation Programmer’s Guide 235-099-001
The Intermec web site at www.intermec.com contains our
documents (as PDF files) that you can download for free.
To download documents
1 Visit the Intermec web site at www.intermec.com.
2 Click Support > Manuals.
3 In the Select a Product field, choose the product whose
documentation you want to download.
To order printed versions of the Intermec manuals, contact your
local Intermec representative or distributor.
Patent Information
Product is covered by one or more of the following patents:
4882476; 4894523; 4953113; 4961043; 4970379;
4988852; 5019699; 5021642; 5038024; 5081343;
5095197; 5144119; 5144121; 5182441; 5187355;
5187356; 5195183; 5216233; 5216550; 5195183;
5195183; 5218191; 5227614; 5233172; 5241488;
5243602; 5258606; 5278487; 5288985; 5308966;
5322991; 5331136; 5331580; 5342210; 5349678;
5359185; 5371858; 5373478; 5389770; 5397885;
5410141; 5414251; 5416463; 5442167; 5464972;
5468947; 5468950; 5477044; 5486689; 5488575;
5500516; 5502297; 5504367; 5508599; 5514858;
5530619; 5534684; 5536924; 5539191; 5541419;
5548108; 5550362; 5550364; 5565669; 5567925;
5568645; 5572007; 5576529; 5592512; 5594230;
5598007; 5608578; 5616909; 5619027; 5627360;
5640001; 5657317; 5659431; 5671436; 5672860;
xii
CN3 Series Mobile Computer User’s Manual
Before You Begin
5684290; 5719678; 5729003; 5742041; 5761219;
5764798; 5777308; 5777309; 5777310; 5786583;
5793604; 5798509; 5798513; 5804805; 5805807;
5811776; 5811777; 5818027; 5821523; 5828052;
5831819; 5834753; 5834749; 5837987; 5841121;
5842070; 5844222; 5854478; 5862267; 5869840;
5873070; 5877486; 5878395; 5883492; 5883493;
5886338; 5889386; 5892971; 5895906; 5898162;
5902987; 5902988; 5912452; 5923022; 5936224;
5949056; 5969321; 5969326; 5969328; 5979768;
5986435; 5987192; 5987499; 5992750; 6003775;
6012640; 6016960; 6018597; 6024289; 6034379;
6036093; 6039252; 6064763; 6075340; 6095422;
6097839; 6102289; 6102295; 6109528; 6119941;
6128414; 6138915; 6149061; 6149063; 6152370;
6155490; 6158661; 6164542; 6164545; 6173893;
6195053; 6234393; 6234395; 6244512; 6249008;
6328214; 6330975; 6345765; 6356949; 6367699;
6375075; 6375076; 6375344; 6431451; 6435411;
6484944; 6488209; 6497368; 6532152; 6538413;
6539422; 6621942; 6641046; 6681994; 6687403;
6688523; 6732930
Docking Station/Device
5052943; 5195183; 5317691; 5331580; 5544010;
5644471
There may be other U.S. and foreign patents pending.
CN3 Series Mobile Computer User’s Manual
xiii
Before You Begin
xiv
CN3 Series Mobile Computer User’s Manual
1
Using the Computer
This chapter introduces the CN3 and CN3e Mobile Computers
with Windows® Mobile® 5.0. It also contains hardware and
software configuration information to assist you in getting the
most out of your computer.
CN3 Series Mobile Computer User’s Manual
1
Chapter 1 — Using the Computer
Introducing the CN3 Mobile Computer
The Intermec CN3 and CN3e Mobile Computers are
ergonomically designed mobile computers built on the Microsoft
Windows Mobile 5.0 operating system. They are lightweight,
easy-to-use, and run most software developed for the Windows
Mobile platform, including standalone, client-server, and
browser-based applications.
The CN3 and CN3e support similar feature sets. The CN3e
offers extended environmental specifications and larger keys for
data intensive applications. The CN3 Series of mobile computers
includes both the CN3 and CN3e computers. Throughout this
manual, both versions of the computer are referred to as CN3 or
CN3 Series.
CN3 and the CN3e Mobile Computer
The CN3 Mobile Computer with an IEEE 802.11b/g radio
installed is Wi-Fi® certified for interoperability with other
802.11b/g wireless LAN devices.
The CN3 and CN3e are available with the following features:
• 802.11b/g radio standard
• Bluetooth® radio standard
2
CN3 Series Mobile Computer User’s Manual
Chapter 1 — Using the Computer
• 128 MB RAM
• QWERTY or numeric keypads
• Imaging Options:
• EA11 Standard Area Imager
• Color Camera
• Wireless Wide Area Network Options:
• GSM/GPRS/EDGE
• CDMA/1xRTT/EV-DO
Use this manual to understand how to use the features and
options available on the CN3 and CN3e.
What’s New?
This version of the manual contains these changes:
• Addition of the CN3e alphanumeric keypad.
• Updated information on CDMA carriers and phone
activation.
Finding the Software Build Versions
You can easily check to see what version of the operating system
and the SmartSystems Platform Bundle (SSPB) are loaded on
your CN3.
To find your operating system version
1 Tap Start > Internet Explorer.
CN3 Series Mobile Computer User’s Manual
3
Chapter 1 — Using the Computer
2 Tap the Intermec logo. The Intermec page appears and
displays the software build information.
Using the Battery
The CN3 uses an AB8, AB9, AB15, or AB16 Lithium-ion (Liion) battery as its main power source. The CN3e uses an AB9 or
AB16 extended battery for the main power source. Standard
batteries have 8.1 Watt hours capacity and extended batteries
have 14.8 Watt hours capacity. You must fully charge the battery
before you can use the CN3.
When you change the battery, an internal super capacitor
maintains your status, memory, and real-time clock for
approximately 5 minutes.
The battery used in this device may present a fire or chemical
burn hazard if it is mistreated. Do not disassemble it, heat it
above 100°C (212°F) or incinerate it.
If you fail to replace the low battery immediately, you may lose
important data or applications.
Note: If the CN3 is not on external power and you remove the
battery pack, it goes into Suspend mode.
Dispose of used batteries promptly. Keep away from children.
Contact your Intermec representative for replacement batteries.
Several factors determine the life of your battery such as extreme
temperatures, input devices, and your usage. When you change
the battery, an internal super capacitor maintains your status,
memory, and real-time clock for approximately 5 minutes.
Charging the Battery
The battery pack should be fully charged before you use the CN3
for the first time. If temperatures are within the battery charging
range of 0° to 40°C (32° to 104°F), the standard battery pack
takes up to four hours to charge; the extended battery pack takes
up to five hours.
4
CN3 Series Mobile Computer User’s Manual
Chapter 1 — Using the Computer
The battery is fully charged when its battery status LED shows a
steady green.
To charge the battery
• Insert the battery into a quad battery charger, a single dock, or
attach external power to the CN3 with the battery installed.
For information on these accessories, see “Accessories” on
page 131.
Use the next table to understand how long it will take to charge
your batteries in some of the CN3 charging accessories.
Charging Times for CN3 Batteries
Charging Accessory
Model
Charging time
CN3 Quad Battery Charger
AC14
5 hours or less
CN3 Single Dock
AD10
5 hours or less
Removing and Installing the Battery
To maximize the time allowed to replace the main battery pack,
put the CN3 in a suspend mode before removing the battery
pack.
To remove and install the battery
1 Press and hold the Power button for about 2 seconds until the
CN3 turns off.
2 Press the battery release tab to the left until the battery
releases, and then lift it away from the CN3.
Battery release tab
Removing the Battery in a CN3
CN3 Series Mobile Computer User’s Manual
5
Chapter 1 — Using the Computer
Battery release tab
Removing the Battery in a CN3e
3 Align the battery contacts and insert the battery.
4 Press down on the battery until it clicks into place.
Maximizing Battery Life
Batteries are chemical devices. If the batteries are left sitting on a
shelf for long periods of time outside the CN3, the batteries
slowly discharge, eventually to zero if left uncharged. The battery
chemistry resists normal degradation if you store the battery in a
charger as opposed to leaving the battery in a discharged state.
See the following table for tips you can do to maximize the life of
your battery.
6
CN3 Series Mobile Computer User’s Manual
Chapter 1 — Using the Computer
Battery Conservation Tips
When You Want To:
Do This to Save Battery Power:
Operate the CN3 and the
Low Battery status icon
appears or the Battery light
comes on.
Press the power button to turn off the
CN3. Remove the battery and insert
another fully charged battery within five
minutes or you may lose data. Or, you
can connect the CN3 to an external
power source.
Stop using the CN3 for five Make sure the low battery icon is not on
minutes or longer.
the screen and that the Battery light is not
turned on. Press the power button to turn
off the CN3.
Store the CN3 for more
than a day.
If you are storing the CN3 for a few days,
like over the weekend, install the charged
battery or attach the CN3 to a power
source.
If you are storing the CN3 for longer,
remove and charge the battery, then store
both the battery and the CN3 in a cool
location.
If the battery in storage is not used in
several months, you should recharge the
battery to keep it at its performance peak.
Store the battery outside
the CN3.
Store the batteries in a charger.
Checking the Battery Status
The Battery Status LED above your CN3 display, as shown in the
following illustration, indicates the status of your battery. See the
following table to understand the meanings of the lights emitted
from the LED.
Battery status LED
CN3 Series Mobile Computer User’s Manual
7
Chapter 1 — Using the Computer
Understanding the Battery Status LED
Battery Status
Description
Steady green
The battery is more than 95% charged and
CN3 is on a charger.
Blinking red
The battery is low. CN3 goes into Suspend
mode. Charge or replace the battery.
Steady red and the
CN3 is attached to
external power.
The battery is charging.
Steady red and the
The software is not working properly.
CN3 is not attached to
external power.
Steady amber
The battery is missing or is unable to charge
because the temperature is outside of the
charging range.
Off
The CN3 is not on external power and the
battery is operating normally.
You can also check the battery status by using the Power
application.
To check the battery status
• Tap Start > Settings > the Systems tab > Power > the Battery
tab.
8
CN3 Series Mobile Computer User’s Manual
Chapter 1 — Using the Computer
Using the Keypad
The CN3 can have a QWERTY keypad or numeric keypad. The
CN3e supports larger numeric keypads with either a 10-key
(7-8-9 on top) or phone style (1-2-3 on top) layout.
CN3
+
%
Q
E
W
:
&
A
S
‘
Z
R
X
*
2
1
4
F
G
C
V
N
K
L
M
.
4
ABC
Esc
#
Enter
End
Caps
DEF
+
GHI
4
6
TUV
#
*
WXYZ
3
2
Space
0
Enter
CN3e Numeric 10-Key Keypad
CN3 Series Mobile Computer User’s Manual
ABC
Esc
3
JKL
MNO
6
5
TUV
PQRS
7
.
DEF
2
1
MNO
5
sym
.
Send
9
JKL
PQRS
1
.
+
CN3 Numeric Keypad
8
4
*
Esc
WXYZ
WX
YZ
9
Space
End
GHI
6
TUV
8
0
Send
Caps
MNO
5
7
Enter
CN3 Qwerty Keypad
7
3
JKL
PQRS
Esc
Es
DEF
ABC
2
0
Space
+
1
P
GHI
9
8
B
sym
5
J
H
7
Caps
O
I
6
5
End
Send
3
U
Y
T
/
D
’
CN3
End
Send
sym
#
WXYZ
9
8
Space
0
Enter
CN3e Numeric Phone Style Keypad
9
Chapter 1 — Using the Computer
.
Esc
End
Send
A
G
=
H
‘
,
S
5
4
N
O
T
U
P
L
6
R
Q
8
7
F
3
K
J
I
#
E
2
1
+
/
M
C * D
B
&
sym
V
9
W
X
Z
Enter
0
Y
CN3e Alphanumeric Keypad
The full alphabetic QWERTY keypad and the alphanumeric
keypad are for applications that require primary input of
alphabetic data. This keypad also provides special characters,
numbers, symbols, and functions by pressing color-coded key
sequences.
The large numeric keypads are for applications that require
mainly numeric data. These keypads also lets you enter special
characters, including the alphabet, by pressing color-coded key
sequences. The CN3e provides larger input keys better suited for
blind entry or glove usage.
Using the Color-Coded Keys
Each keypad available for the CN3 provides color-coded keys to
let you access additional characters, symbols, and functions
printed on the keypad overlay. Once you understand how to use
the color-coded keys and key sequences, you can access all of the
additional features printed on the keypad overlay. There are two
color-coded modifier keys on the numeric keypad: the orange B
key and the green C key. The QWERTY and alphanumberic
keypads have only the orange B color-coded modifier key.
10
CN3 Series Mobile Computer User’s Manual
Chapter 1 — Using the Computer
Using the Color-Coded Keys
You Want to:
Press:
Example
Use an orange
character or function
printed above a key.
On the CN3 Qwerty keypad, press
B key (LED illuminates) and
then the key with the character or B and then Q to type the @
function printed above it (LED
character.
turns off ).
Use a green character
or function printed
above a key.
C key (LED illuminates) and
On the CN3 numeric keypad, press
then the key with the character or C and then 2 to type a lowercase
function printed above it (LED
a.
turns off ).
Lock the orange or
green key to stay on.
B or C twice.
On the CN3e numeric keypad,
press C twice and the green LED
illuminates and stays on.
Unlock a green or
orange key.
B or C once.
Press the B or C once to unlock
the key and turn off the LED.
Capitalizing Characters
To capitalize a single character on QWERTY keypads, press the
shift key, and then the character. To type all alphanumeric
characters as uppercase letters, you can enable the Caps Lock
feature on the CN3 keypad.
To enable Caps Lock
• On the QWERTY keypad, press B, then the Shift key. Press
the same key sequence to disable the Caps Lock.
• On the CN3 numeric keypad, press C 1.
• On the CN3e keypads, press C C 1.
The Caps Lock LED lights up green to show that the CN3 is in
the Caps Lock mode.
To exit Caps Lock
• On the CN3 keypads, press the color modifier key again.
• On the CN3e keypads, press 1.
CN3 Series Mobile Computer User’s Manual
11
Chapter 1 — Using the Computer
Entering Characters on the QWERTY Keypad
There are a few hidden characters on the QWERTY keypad that
require using the color-coded keys and the Shift key to access.
Use the following table to understand how to access these hidden
characters on the keypad.
QWERTY Keypad Hidden Characters
To Enter
Press
“
Shift B Z
>
Shift B .
<
Shift B X
Entering Characters on the Numeric Keypads
Above most of the number keys, there is a grouping of three or
four characters of the alphabet. For example, above the 2 key
there are the letters “ABC.” To access each letter above the key,
you press the key one to four times depending on the placement
of the letter.
For example, to type the letter “c” you need to
• Press C 2 2 2.
To type a letter on the same key as the last letter entered, wait two
seconds, then enter the correct series of keystrokes to create the
next letter.
Using the Power Button
When you press the Power ( ) button, you put the CN3 into a
lower power mode. In this lower power mode, the CN3
continues to supply power to all memory, but turns off power to
most hardware such as the display. This power-saving feature is
designed to prolong battery life.
Note: If you do not have a SIM card installed, it may take up to
30 seconds for the CN3 to suspend.
12
CN3 Series Mobile Computer User’s Manual
Chapter 1 — Using the Computer
Configuring the Backlight Settings
By default, the CN3 goes into Screen Off mode when there is no
activity on the computer. Screen Off mode turns off the backlight
and display. Press a key or tap the screen to resume activity.
It is possible to override the backlight settings by changing the
power management settings. For more information on
configuring power management, see the next section, “Managing
Power on the CN3.”
To configure the backlight
1 Tap Start > Settings > the System tab > the Backlight icon >
the Battery Power tab.
2 With Turn off backlight if device is not used for checked,
select the timeout value (10 seconds, 30 seconds, or 1 to 5
minutes).
You can also use Intermec Settings to configure the backlight
settings.
CN3 Series Mobile Computer User’s Manual
13
Chapter 1 — Using the Computer
Managing Power on the CN3
By default, the CN3 goes into a lower power mode or turns off
after two minutes of inactivity. You can press the Power button to
resume activity at any time. If you would like to manage power
based on the usage of your CN3, Intermec provides an
application called Power Profiler with three power management
profiles:
• Windows Mobile Classic
• Windows Mobile Standard
• Windows Mobile Phone
Understanding the Power Profiler Settings
Power Profiler Setting
Screen Off
Enabled
Windows Mobile Classic
Device Off
Enabled
X
Windows Mobile Standard
(default)
X
Windows Mobile Phone
X
X
Use the Windows Mobile Classic profile for systems that batch
data and upload it several times a day. This profile does not
support constant data connections over WAN, LAN, or
Bluetooth. It can only maintain data connections when the CN3
is on and all peripherals are enabled. If the screen is off, you do
not have any WAN, LAN, or Bluetooth connections, but the
CN3 will still receive incoming phone calls. To wake up the CN3
and restore network connections, you need to press Power or a
Scan button.
Use the Windows Mobile Standard profile for applications such
as inventory management or terminal emulation applications
that power off infrequently. The Windows Mobile Standard
profile adds the ability for the system to maintain data
connections in a low power state. If the CN3 does not have any
activity, the screen will turn off. If there continues to be no
activity, the CN3 will eventually turn off the WAN, LAN, or
Bluetooth radio connections and enter the Windows Mobile
Classic power management profile.
14
CN3 Series Mobile Computer User’s Manual
Chapter 1 — Using the Computer
Use the Windows Mobile Phone profile when you have a system
that requires network wakeup or you need the CN3 to always be
connected to the network. Although the connections are
maintained at a low power mode, this setting typically consumes
the most power. If the screen turns off, the radios continue to
maintain the network connections.
To select a power management profile
1 Tap Start > Settings > the System tab > Power Profiler.
2 From the drop-down list, select Windows Mobile Class,
Windows Mobile Standard, or Windows Mobile Phone.
3 Tap ok in the upper right corner to save your changes and
close Power Profiler.
Power Profiler also provides advanced settings that allow you to
fine-tune the power usage of the CN3. You can choose to have
the Power button turn off the screen or turn off the device. You
can also configure all of the settings in Power Profiler with
Intermec Settings.
CN3 Series Mobile Computer User’s Manual
15
Chapter 1 — Using the Computer
Understanding the Audio Features
There are several audio features available on the CN3. There are
two speakers, a microphone, an external volume control, and
multiple software tools for configuring the volume of sounds.
Using the CN3 as a Cell Phone
If your version of the CN3 has a phone, you can use the
microphone and a front speaker for talking on the phone.
Front speaker
(located on end)
Microphone
To adjust the volume of the front speaker
1 Tap the Volume (
) icon at the top of the screen.
2 In the Volume adjust box, tap On.
16
CN3 Series Mobile Computer User’s Manual
Chapter 1 — Using the Computer
3 Use your stylus to move the volume slider for the phone to
the desired volume level.
Phone volume
slider
Adjusting the Volume of the Rear Speaker
You can adjust the computer volume for your needs and your
environment. The volume includes sounds you hear when you
tap the screen or scan bar codes with a scanner. You can set the
volume to off, very low, low, medium, high, and very high
(default). Use the following table to understand the different
ways to adjust the volume.
Rear speaker
Volume up
Volume down
Location of the Rear Speaker and Volume Control
CN3 Series Mobile Computer User’s Manual
17
Chapter 1 — Using the Computer
.
Changing the Volume of the Rear Speaker
Way to Adjust Volume
Procedure
Tap the Volume ( ) icon
in the navigation bar.
Use the stylus to move the volume slider
up or down for the computer. You can
also turn the volume on or off and
choose to use Vibrate mode.
Use Intermec Settings.
From the Start menu, choose Settings >
the System tab > Intermec Settings. Go
to Device Settings > Beeper > Volume.
Select the setting you prefer and save
your changes before exiting. For help, see
“Configuring the Computer With
Intermec Settings” on page 48.
Press the side volume
control.
Press the top of the side volume control
to turn the volume up. Press the bottom
of the side volume control to turn the
volume down.
Note: For detailed information on the commands available in
Intermec Settings, see the Intermec Computer Command Reference
Manual (P/N 073529) available from the Intermec web site.
The CN3 has a built-in vibrate feature that enables you to receive
scanner feedback despite the noise level. When enabled, the CN3
vibrates when the scanner performs a good read or when the
phone receives a call.
To enable the vibrate feature
1 Tap the Volume (
) icon at the top of the screen.
2 In the Volume adjust box, tap Vibrate.
18
CN3 Series Mobile Computer User’s Manual
Chapter 1 — Using the Computer
Note: The Volume icon in the Navigation bar changes to look
like a vibrating CN3 ( ) when the computer is in Vibrate
mode.
Using the Screen
The CN3 has a 3.5" diagonal, 240x320 pixel (QVGA)
transflective TFT-LCD 64K color display.
• The Navigation bar displays the Start flag, the Connectivity
icon, the Volume icon, and the time and next appointment.
• The Today screen displays shortcuts to some of the
applications installed on the CN3 and important information
for the day.
• The Command bar displays the onscreen keyboard icon,
Windows Mobile 5.0 links, and icons to any applications that
are running, but are hidden from view.
Navigation bar
Today screen
Command bar
The Windows Mobile Today Screen
CN3 Series Mobile Computer User’s Manual
19
Chapter 1 — Using the Computer
Using the Stylus
Your computer has a stylus for selecting items and entering
information on the touch screen.
Functions You Can Perform With the Stylus
Action
Description
Tap
Touch the screen once with the stylus to select
options, open or close applications, or launch menus
from the Command bar.
Drag
Hold the stylus on the screen and drag across the
screen to select text and images.
Tap and hold
Tap and hold the stylus on an item to see a menu of
actions available for that item. On the pop-up menu
that appears, tap the action you want to perform.
Understanding the Screen Icons
Use the screen icons on the Navigation bar and the Command
bar to see the battery status, network connections, and so on.
Some standard Microsoft icons are included in this table.
Computer Screen Icons
Icon
Description
The battery is full.
The battery is low. You need to replace or charge the battery
very soon.
The battery is charging.
The volume is turned off. To turn the volume back on, tap
this icon and choose your setting.
The computer is connected to the network.
The computer is not connected to the network.
The 802.11b/g radio is connected to the wireless network.
The computer is connected through the USB port to your
desktop PC.
The iConnect application icon. Tap it to set up Ethernet or
Wireless settings.
20
CN3 Series Mobile Computer User’s Manual
Chapter 1 — Using the Computer
Aligning the Touch Screen
If the touch screen does not respond when you tap it with the
stylus, you may need to calibrate the screen.
To calibrate the touch screen
1 Tap Start > Settings > the Systems tab > Screen.
2 Tap Align Screen and follow the instructions to align the
screen.
3 Click ok.
If the touch screen is so out of alignment that you cannot open
the Start menu, you may need to perform a clean boot. After the
computer clean boots, it prompts you to align the screen. For
more information about performing a clean boot, see “Clean
Booting the Computer” on page 125.
Understanding the Status LEDs
The status LEDs above the display show the following
information:
Good Read LED and Intermec Ready-to-Work indicator
Notification LED
Battery status LED
For more information on the Battery Status LED, see
“Understanding the Battery Status LED” on page 8.
Understanding the LEDs
LED
Color
Description
Notification
Orange
The CN3 is notifying you of a pending
alarm or message.
Good Read
Green
The CN3 has successfully decoded a bar
code.
CN3 Series Mobile Computer User’s Manual
21
Chapter 1 — Using the Computer
Understanding the LEDs (continued)
LED
Color
Description
Ready-to-Work Blue
indicator
The CN3 is suspending or resuming
with the display turned off.
Blinking
blue
You have successfully loaded and
activated TE 2000.
The TE 2000 application is loaded, but
is inactive.
Off
The TE 2000 application is missing or
disabled.
Note: The blue light may stay on for up to 30 seconds, but will
usually turn off after less than 10 seconds. During this time, do
not toggle the CN3 on or off and do not remove the battery, or
you may corrupt the CN3.
The Read-to-Work indicator (blue light) is for the SmartSystems
Foundation application that is part of a wireless network using all
Intermec devices. For more information, see “Remotely
Configuring the Computer Using SmartSystems Foundation”
on page 49 or contact your Intermec representative. Selected
application software programs may also use the blue light, either
steady or flashing, for other purposes.
Scanning Bar Codes
Use the area imager to scan and enter bar code data. If your CN3
has an area imager, you cannot have the color camera option too.
The CN3 supports reading 1D and 2D images, composite and
postal codes. These bar code symbologies are enabled by default
on the CN3: Code 39, Code 128, UPC-A, UPC-E, EAN-8,
EAN-13, and DataMatrix.
If you are using bar code labels that are encoded in a different
symbology, you need to enable the symbology on the computer.
Use Intermec Settings to enable and disable symbologies. For
help, see “Configuring the Computer With Intermec Settings”
on page 48.
22
CN3 Series Mobile Computer User’s Manual
Chapter 1 — Using the Computer
Scanning with the Area Imager
The CN3 has an area imager that can scan 1D and 2D bar code
symbologies, composite, and postal codes. It also supports omnidirectional (360°) scanning where you can position the CN3 in
any orientation to scan a bar code label. Using the 2D imager is
like taking a picture with a digital camera.
Imager
Scan button
Locating the Imager and the Scan Button
To use the area imager
1 Press the power button to turn on the CN3, point the scanner
window a few inches from the bar code label, and hold steady.
2 Press the Scan button and center the red aiming beam over
the bar code label. The aiming beam is smaller when the
imager is closer to the bar code and larger when it is further
away.
When a bar code label is successfully read, a high beep is emitted
and the Good Read LED lights briefly. Release the Scan button.
Improving the Performance of the Area Imager
If you experience problems scanning a bar code with the 2D
imager, try following some of these tips to improve the
performance of your imager.
• Keep your hand as steady as possible while scanning a label.
• Position the imager as close to the bar code as possible while
still being able to capture the entire bar code.
• Enable only the bar codes that you need to use every day.
CN3 Series Mobile Computer User’s Manual
23
Chapter 1 — Using the Computer
• Choose a Predefined mode in Intermec Settings:
a Tap Start > Settings > the System tab > Intermec Settings.
b Tap Data Collection > Internal Scanner > Imager
Settings > Predefined Modes and then select one of these
options:
Predefined Mode
Select if You Are Scanning:
1D
Only 1D labels.
1D and 2D Standard
All types of bar code labels.
1D and 2D Bright
Environment
In high ambient light, such as outdoors
in the sunshine.
1D and 2D Reflective
Surface
Glossy labels.
Custom
In conditions that require customized
settings. For more information about
these settings, commands, and
parameters, see the Intermec Computer
Command Reference Manual available
from the Intermec web site at
www.intermec.com.
Using the Color Camera
The color camera with flash is an optional feature that is factoryinstalled into the upper back of the CN3, as shown in the
following illustration.
Color camera
Flash
Color Camera and Flash
24
CN3 Series Mobile Computer User’s Manual
Chapter 1 — Using the Computer
If you have the color camera option, you cannot have the area
imager option because they occupy the same space. You can take
photos in either high-resolution or compressed format, with
resolutions up to 1200 x 1024 pixels. When you take a picture,
the images are saved as .jpg files and stored in the /My
Documents/My pictures folder.
You can use the Pictures & Videos application on the CN3 to
take, view, and edit pictures or record and launch video clips
stored on the CN3 or a storage card. You can also send pictures
and video clips to others or save an image as the background on
the Today screen.
After the color camera is enabled, you can configure camera
options by going to Menu > Options. While you are in the
Pictures & Videos application, you can select Start > Help for
complete information on using the camera.
To take a picture with the camera
1 Tap Start > Programs > Pictures & Videos.
2 Tap the Camera option in the grid or tap Camera in the
taskbar.
3 Using the screen display as a viewfinder, move the camera
until you have the image you want to capture.
4 Press Enter or tap the screen to save the image. If you select to
save your pictures to main memory, they are saved to
permanent storage on the CN3.
CN3 Series Mobile Computer User’s Manual
25
Chapter 1 — Using the Computer
To save picture files
1 Tap the Camera tab.
2 Select where you want to save files to, type a filename prefix,
and select a compression level.
3 Tap ok.
Using the Storage Card
The CN3 uses a miniSD card to increase file storage and install
software. The miniSD card slot is located under a door that is
beneath the battery pack. Remove the two screws holding the
door to reach the miniSD card.
You can corrupt your miniSD card if you do not follow these
installation and removal procedures exactly. Before installing a
miniSD card, inspect the gasket on the door for any damage or
wear, and contact your Intermec representative if you find any
damage or wear.
Note: The CN3 will reset if you open the miniSD/SIM door. The
screws to this door must be in place and torqued to 1.0 in-lbs
(0.11 Nm) to ensure normal operation.
To insert the miniSD card
1 Press the Power button to suspend the CN3, and then remove
the battery pack from the back of the CN3.
2 Remove the two screws on the miniSD/SIM card slot door.
3 Gently lift the door to the card slot, then with the metal
contacts facing down, insert the storage card into the miniSD
card slot.
26
CN3 Series Mobile Computer User’s Manual
Chapter 1 — Using the Computer
miniSD card slot
4 Close the miniSD/SIM card slot door and insert the two
screws.
Do not over-torque the two screws that secure the card slot
door. You can damage the door.
5 Replace the battery pack and then press the Power button.
Once the door to the miniSD is opened and closed (for changing,
installing, or removing the SIM or miniSD card), the CN3
performs a cold boot.
Setting Up GPS on Your CN3
If your CN3 comes equipped with an integrated Global
Positioning System (GPS) receiver, it can deliver standards-based
National Marine Electronics Association (NMEA) data strings to
GPS applications. However, Intermec recommends that you use
the GPS Intermediate Driver (GPSID) instead of directly
accessing the GPS hardware. The GPSID is a Microsoft software
component that interacts between applications and the GPS
hardware.
Using the GPSID allows Intermec support for Extended
Ephemeris, which enhances GPS performance by:
• reducing the amount of time it takes your GPS receiver to
acquire a fix.
• eliminating the need to obtain precise satellite data
information from the GPS satellites.
CN3 Series Mobile Computer User’s Manual
27
Chapter 1 — Using the Computer
And, as a Microsoft software component, the GPSID also
provides these benefits:
• Allows multiple applications to simultaneously access the
GPS data stream.
• Provides access to GPS data without requiring applications to
recognize and parse NMEA syntax.
Using the GPSID Installed on the CN3
To use the GPSID installed on your CN3, you need to configure
the GPSID settings.
To configure your GPSID settings
1 Tap Start > Settings > the System tab.
2 Tap GPS. The GPS Settings screen appears.
3 On the Programs tab, select the COM port that you want
your programs to use to get GPS data from your CN3.
Note: COM1 and COM3 are reserved.
4 Tap the Hardware tab, and select these settings.
28
GPS hardware port:
COM3
Baud rate:
57600
CN3 Series Mobile Computer User’s Manual
Chapter 1 — Using the Computer
5 Tap the Access tab and select the Manage GPS automatically
check box.
6 Tap ok.
To enable extended ephemeris
1 Tap Start > Settings > the System tab.
2 Tap iGPS settings. The iGPS Settings screen appears.
3 Tap the Advanced tab.
CN3 Series Mobile Computer User’s Manual
29
Chapter 1 — Using the Computer
4 Select the Enable extended ephemeris check box.
5 Tap ok.
Learning About Additional GPS Options for the CN3
Intermec provides enhanced feature support for the Extended
Ephemeris data capability. For the latest Extended Ephemeris
data files and other CN3 downloads, visit the CN3 downloads
page on the Intermec web site at www.intermec.com. For more
information about programming for Extended Ephemeris GPS,
visit the Intermec Developer Library at www.intermec.com/idl.
30
CN3 Series Mobile Computer User’s Manual
2
Windows Mobile
This chapter introduces Microsoft Windows Mobile 5.0 for
Pocket PC. In this chapter you will find these sections:
• Understanding Windows Mobile 5.0
• Finding Information on Windows Mobile
• Learning the Basic Skills
• Using Microsoft ActiveSync
• Using Internet Explorer Mobile
CN3 Series Mobile Computer User’s Manual
31
Chapter 2 — Windows Mobile
Understanding Windows Mobile 5.0
This chapter introduces Microsoft Windows Mobile 5.0. While
using the CN3, keep these key points in mind:
• Tap Start on the navigation bar, located at the top of the
screen, to quickly move to programs, files, and settings. Use
the command bar at the bottom of the screen to perform tasks
in programs. The command bar includes menus, icons, and
the onscreen keyboard.
• Tap and hold an item to see a pop-up menu containing a list
of actions you can perform. Pop-up menus give you quick and
easy access to the most common actions.
• Tap Start > Help, and then select a topic on your computer to
find additional information on Windows Mobile
components.
Microsoft Windows Mobile 5.0 contains these standard Office
Mobile programs:
• Word Mobile
• Excel Mobile
• PowerPoint Mobile
Finding Information in Windows Mobile
This section describes how to find Windows Mobile information
on your computer.
Finding Information in Windows Mobile
For Information On:
See This Source:
Programs on the CN3.
This chapter and the computer help. To view help, tap Start >
Help, and then select a topic.
Additional programs that can be The Windows Mobile Companion CD.
installed on the CN3.
Connecting to and
synchronizing with a desktop.
ActiveSync help on your desktop. To view help, click Help >
Microsoft ActiveSync Help.
Last-minute updates and
detailed technical information.
The Read Me files, located in the Microsoft ActiveSync folder
on the desktop and on the Windows Mobile Companion CD.
Up-to-date information on
Windows Mobile.
www.microsoft.com/windowsmobile/resources/
communities/default.mspx
32
CN3 Series Mobile Computer User’s Manual
Chapter 2 — Windows Mobile
Use these URLs for additional information about Microsoft
Windows Mobile (Pocket PC):
• msdn2.microsoft.com/en-us/support/default.aspx
• support.microsoft.com/
• http://msdn.microsoft.com/newsgroups/
And, most importantly, the Intermec front-line support
personnel can help assist you work with many of the Windows
Mobile and technologies that you find on the CN3. See “Global
Services and Support” on page ix for more information.
Learning the Basic Skills
Learning to use your CN3 is easy. This section describes the basic
concepts of using and customizing your CN3.
Today Screen
When you turn on your CN3 for the first time each day (or after
four hours of inactivity), you see the Today screen. You can also
display it by tapping Start > Today. On the Today screen, you
can see important information for the day.
To customize what displays on the Today screen
• Tap Start > Settings > the Personal tab > Today > the Items
tab.
CN3 Series Mobile Computer User’s Manual
33
Chapter 2 — Windows Mobile
Status icons display information such as when the computer is
connected to the network or to the Internet. You can tap an icon
to open the associated setting or program.
Accessing Programs
You can switch from one program to another by selecting it from
the Start menu. You can customize which programs you see on
this menu. For information, see “Adjusting Settings” on page 41.
To access programs
• Tap Start > Programs, and then tap the program name.
The following list contains some of the programs on your
computer. Look on the Windows Mobile Companion CD for
additional programs that you can install onto your computer.
• ActiveSync
• Excel Mobile
• PowerPoint Mobile
• Word Mobile
Navigation Bar and Command Bar
The navigation bar is located at the top of the screen. It displays
the active program and current time, and it allows you to switch
between programs and close screens.
Windows Mobile Navigation Bar
The command bar is located at the bottom of the screen. Use the
command bar to perform tasks in programs. The command bar
includes menu names, functions, and the Input Panel icon when
needed.
Windows Mobile Command Bar
34
CN3 Series Mobile Computer User’s Manual
Chapter 2 — Windows Mobile
Using Pop-Up Menus
Use pop-up menus to quickly perform an action on an item. For
example, you can use a pop-up menu to delete or make a copy of
an item. To access a pop-up menu, tap and hold the item on
which you want to perform the action. When the menu appears,
tap the action you want to perform, or tap anywhere outside the
menu to close the menu without performing the action.
Entering Information
You can enter information on your computer in several ways
depending on the program you are using.
Understanding the Ways to Enter Information
Enter Information By: Do This:
Synchronizing
Use Microsoft ActiveSync to synchronize or
copy information between your desktop PC
and the computer. For more information on
ActiveSync, see Microsoft ActiveSync Help
on your desktop PC.
Typing
Use Microsoft ActiveSync to synchronize or
copy information between your desktop PC
and the computer. For more information on
ActiveSync, see Microsoft ActiveSync Help
on your desktop PC
Writing
Use the stylus to write directly on the screen.
Drawing
Use the stylus to draw directly on the screen.
Recording
Create a stand-alone recording or embed a
recording into a document or note.
Use the input panel to enter information in any program on your
computer. You can either type using the onscreen keyboard or
write using Block Recognizer, Letter Recognizer, or Transcriber.
In any case, the characters appear as typed text on the screen.
To show or hide the input panel
1 Tap the Input Panel icon (
).
2 Tap the arrow next to the Input Panel icon to see your
choices.
CN3 Series Mobile Computer User’s Manual
35
Chapter 2 — Windows Mobile
When you use the input panel, your computer anticipates the
word you are typing or writing and displays it above the input
panel. When you tap the displayed word, it is inserted into your
text at the insertion point. The more you use the computer, the
more it learns to anticipate what you are going to do.
To change word suggestion options, such as the number of words
suggested at one time, tap Start > Settings > the Personal tab >
Input > the Word Completion tab.
Typing With the Onscreen Keyboard
Tap the input panel arrow, and then tap Keyboard. On the soft
keyboard that displays, tap the keys with your stylus.
• To type lowercase letters, tap the keys with the stylus.
• To type a single uppercase letter or symbol, tap the Shift key.
To tap multiple uppercase letter or symbols, tap the CAP key.
To use larger keys
1 Tap the input panel arrow and then tap Options.
2 On the Input Method tab, select Large keys.
36
CN3 Series Mobile Computer User’s Manual
Chapter 2 — Windows Mobile
Using Block Recognizer
Character recognition software gives you a fast and easy method
for entering information in any program on the computer.
Letters, numbers, and punctuation you write are translated into
typed text.
To use Block Recognizer
1 Tap the input panel arrow and then tap Block Recognizer.
2 Write a letter in the box. In converts to typed text that appears
on the screen.
For specific instructions on using Block Recognizer, tap the
question mark next to the writing area.
Using Transcriber
With Transcriber, you can write anywhere on the screen using the
stylus just as you would on paper. Unlike Letter Recognizer and
Clock Recognizer, you can write an entire sentence of
information.
To use Transcriber
1 Tap the input panel arrow and then tap Transcriber.
2 Tap ok.
CN3 Series Mobile Computer User’s Manual
37
Chapter 2 — Windows Mobile
3 Write anywhere on the screen. Pause and let Transcriber
change the written characters into typed characters.
For help using Transcriber, tap the question mark in the lower
right-hand corner of the screen.
Selecting Typed Text
If you want to edit or format typed text, you must select it first.
To select typed text
1 Drag the stylus across the text you want to select.
2 Double-tap text or drag the stylus across text you want to
select.
3 Do one of the following:
a Tap and hold the stylus on the text to bring up the pop-up
menu and select a command.
b Select a command by tapping Menu from the command
bar.
Writing on the Screen
In any program that accepts writing, such as the Notes program,
you can use your stylus to write directly on the screen. Write the
way you do on paper. You can edit and format what you have
written and convert the information to text in the future.
To convert the writing to text
1 Write your information on the screen with the stylus.
38
CN3 Series Mobile Computer User’s Manual
Chapter 2 — Windows Mobile
2 Tap Menu > Tools > Recognize. Your writing is converted to
text.
Notifications
When you have an appointment or a task to do, your computer
can notify you in a variety of ways. For example, if you have set
up an appointment in Calendar, you can be notified in any of the
following ways:
CN3 Series Mobile Computer User’s Manual
39
Chapter 2 — Windows Mobile
• A message box appears on the screen.
• A sound, which you can specify, plays.
• A light flashes on your computer.
• The computer vibrates.
To choose how you are notified
1 Tap Start > Settings > Sounds & Notifications > the
Notifications tab.
2 Choose your settings and then click ok.
Finding and Organizing Information
You can use File Explorer to find files on your computer and
organize these files into folders.
To open File Explorer
• Tap Start > Programs > File Explorer.
40
CN3 Series Mobile Computer User’s Manual
Chapter 2 — Windows Mobile
Once you open File Explorer, it becomes available from Start
menu.
Customizing the Computer
You can customize your computer by adjusting settings and by
adding or removing programs.
Adjusting Settings
You can adjust the computer settings to suit the way you work.
To view the Settings options
• Tap Start > Settings > either the Personal tab or the System
tab.
You might want to adjust settings on the following screens.
CN3 Series Mobile Computer User’s Manual
41
Chapter 2 — Windows Mobile
Personal Tab
System Tab
Adjustable Settings on the Computer
Setting
Why Adjust It?
Menus
To customize what appears on the Start menu.
Owner Information To enter your contact information.
42
CN3 Series Mobile Computer User’s Manual
Chapter 2 — Windows Mobile
Adjustable Settings on the Computer (continued)
Setting
Why Adjust It?
Lock
To limit access to the computer.
Today
To customize the look and information that
displays on the Today screen.
Clock & Alarms
To change the time or to set alarms.
Power
To maximize battery life.
You can view the status of the backup battery and
determine the length of time it takes for the
computer to turn off if not used.
Adding or Removing Programs
Programs added to your computer at the factory are stored in
ROM (Read Only Memory). You cannot remove this software,
and you cannot accidentally lose ROM contents. Applications
added to your computer go into the Object Store, which is
located in Flash ROM. See “Installing Applications on the
Computer” on page 104 for more information about the Object
Store.
You can install any program created for the CN3 mobile
computer, as long as there is enough memory. A popular place to
find software for your computer is on the Windows Mobile Web
site (www.microsoft.com/windowsmobile/resources/
communities/default.mspx).
Using Microsoft ActiveSync
Use Microsoft ActiveSync to synchronize the information on
your desktop with the information on the computer.
Synchronization compares the data on the computer with your
desktop PC and updates both computers with the most recent
information.
Note: By default, ActiveSync does not automatically synchronize
all types of information. Use ActiveSync options to turn
synchronization on or off for specific information types.
You can also perform these functions with ActiveSync:
• Copy files between the computer and the desktop.
CN3 Series Mobile Computer User’s Manual
43
Chapter 2 — Windows Mobile
• Back up and restore the computer data.
• Control when synchronization occurs by selecting a
synchronization mode.
• Select which information types are synchronized and control
how much data is synchronized.
To use ActiveSync
1 Insert the computer into communications dock attached to
your PC with a USB cable.
2 Install ActiveSync on your desktop. ActiveSync is available
from the Windows Mobile Companion CD or from the
Microsoft web site. ActiveSync is already installed on the
computer.
After installation, ActiveSync automatically launches the
ActiveSync Setup Wizard.
3 Follow the screens of the ActiveSync Setup Wizard to
complete the synchronization process. The wizard helps you
connect to the computer, set up a partnership for
synchronization, and customizes synchronization settings.
The synchronization process automatically begins when you
finish the wizard.
4 Disconnect the computer from your desktop and go to work.
Once you have set up ActiveSync and completed the first
synchronization process, you can initiate synchronization from
your computer.
To open ActiveSync on your computer
• Tap Start > Programs > ActiveSync. ActiveSync opens and
shows you the synchronization status.
44
CN3 Series Mobile Computer User’s Manual
Chapter 2 — Windows Mobile
For more information about ActiveSync on your computer, open
ActiveSync and tap Start > Help.
Using Internet Explorer Mobile
You can use Internet Explorer Mobile to run web-based
applications, and view pages downloaded to the computer. You
can also connect to the Internet through an ISP or a network
connection and browse the Web.
You can make connections using a modem, a wireless network, or
an Ethernet connection. You can use a modem connection to set
up connections with an external modem.
To use Internet Explorer
1 Set up a connection to your ISP or corporate network by
going to Start > Settings > the Connections tab >
Connections. Use the Connections Help to understand the
process you need to go through to set up a connection.
2 Tap Start > Internet Explorer. The default page that appears
when you open Internet Explorer contains links to Intermecspecific information and to the Windows Mobile web site.
CN3 Series Mobile Computer User’s Manual
45
Chapter 2 — Windows Mobile
Default Internet Explorer Web Page
46
CN3 Series Mobile Computer User’s Manual
3
Configuring the Computer
Use this chapter to understand how to configure the CN3 to
communicate in your network. In this chapter, you will find
these sections:
• Configuring the Computer Operating Parameters
• Configuring Personal Area Networks
• Configuring Local Area Networks
• Configuring the Phone
• Connecting to an ISP
• Connecting to a Private Network With a RAS Account
• Connecting to a Private Network With a VPN Server
• Configuring Security
CN3 Series Mobile Computer User’s Manual
47
Chapter 3 — Configuring the Computer
Configuring the Computer Parameters
You can configure many parameters on the computer, such as the
bar code symbologies it decodes or the network settings. These
characteristics are controlled by configuration parameters. The
values you set for these configuration parameters determine how
the computer operates.
Configuring the Computer With Intermec Settings
Use Intermec Settings to configure the computer and view system
information. You can access Intermec Settings while running any
application.
To open Intermec Settings
• Tap Start > Settings > the System tab > Intermec Settings.
For detailed information on most of the commands available in
Intermec Settings, see the Intermec Computer Command Reference
Manual (P/N 073529) on the Intermec web site.
Navigating in Intermec Settings
To Do This Function
48
Do This
Select a command.
Tap the command or press
or
.
Expand a command.
Tap the command or press
or
.
Select text in a text box.
Tap in the text box and drag the stylus over
the text.
Save your settings.
Tap File > Save Settings or tap
.
CN3 Series Mobile Computer User’s Manual
Chapter 3 — Configuring the Computer
Remotely Configuring the Computer Using SmartSystems Foundation
SmartSystems™ Foundation lets you manage all of your
SmartSystems-enabled devices at the same time from a central
server. The mobile computer ships with the SmartSystems client,
which means it is SmartSystems enabled. The SmartSystems
server has a console that displays all of the computers in your
network. In the console, you can right-click a computer and a
menu appears. To configure the computer, choose Intermec
Settings from the menu.
SmartSystems Foundation is available from the Intermec web
site. To download SmartSystems Foundation, go to
www.intermec.com/SmartSystems. For information on how to
use the SmartSystems server, see the online help.
Synchronizing the Computer System Time with a Time Server
It is important that the time on all of your computers be
synchronized with a network time server to ensure real-time
communications and updates. Network time servers acquire
Coordinated Universal Time (UTC) from an outside source such
as the U.S. Naval Observatory (USNO). The CN3 uses Simple
Network Time Protocol (SNTP) to synchronize with a network
time server.
The default reference time server is the USNO
(tock.usno.navy.mil). To synchronize the time on your
computer with this time server, you must have a valid connection
to the Internet. You can also synchronize the computer system
time with a corporate network server within your firewall that is
SNTP-capable. To use an internal corporate network server, you
need to set the command name in the registry.
Configuring Personal Area Networks
Bluetooth™ is a technology standard that uses short-range radio
links, intended to replace cables connecting portable and fixed
electronic devices. The key features of Bluetooth are robustness,
low complexity, low power, and low cost. The technology offers
wireless access to LANs, the mobile phone network, and mobile
computers.
CN3 Series Mobile Computer User’s Manual
49
Chapter 3 — Configuring the Computer
You can also print wirelessly by using Microsoft APIs, including
Bluetooth extensions for Winsock and Bluetooth virtual COM
ports. Information about other Bluetooth software is in the
Bluetooth Resource Kit and the Bluetooth Resource Kit User’s
Guide which is part of the Intermec Developer Library (IDL).
The IDL is available as a download from the Intermec web site at
www.intermec.com/idl.
You can send and receive information to a Bluetooth device
wirelessly using the Bluetooth radio in the computer. The
communication range of the Bluetooth connection depends on
the capabilities of the remote device, environmental conditions,
and obstructions.
You can use the Bluetooth radio to perform these wireless
activities:
• Print to a Bluetooth printer
• Connect to a Bluetooth scanner
• Connect to a Bluetooth Audio Device
The Bluetooth radio is disabled by default. You must turn on the
Bluetooth radio before you can discover and connect to other
remote devices.
To turn the Bluetooth radio on
1 Tap Start > Settings > the Connections tab > Bluetooth.
2 Tap Turn on Bluetooth.
3 (Optional) Tap Make this device visible to other devices if
you want your computer to be discoverable by other
Bluetooth devices.
50
CN3 Series Mobile Computer User’s Manual
Chapter 3 — Configuring the Computer
4 Click ok.
Once Bluetooth is enabled, it stays enabled through a warm or
cold boot and maintains virtual COM ports (such as printing)
registration. However, you must reactivate connections because
they are not done automatically.
You can also use Intermec Settings to turn on the radio and
enable Bluetooth settings. Use this table to understand the
settings you see in the Bluetooth menu in Intermec Settings.
Bluetooth Settings
Setting
Description
Set and view whether the Bluetooth radio is on
or off.
Discoverable
Allows other Bluetooth devices to be able to
discover the computer during a device discovery.
Connectable
Allows other Bluetooth devices to connect to
your computer.
Class of Device Determines how the device appears to other
devices during discovery.
Power
IBT
Displays the Intermec Bluetooth Library version.
Radio
Displays the Bluetooth Radio Hardware version.
Device Address Displays the Bluetooth address of your computer.
CN3 Series Mobile Computer User’s Manual
51
Chapter 3 — Configuring the Computer
Configuring the Computer to Communicate With a Wireless Scanner
This section explains how to configure the computer to
communicate with Bluetooth wireless scanners. The computer
ships with a Bluetooth association label attached to the left side.
Scan the association label to quickly connect the computer to the
Bluetooth wireless scanner, such as the SF51 or SR61.
Note: If for some reason the Bluetooth association label does not
work, you can follow the procedure for configuring the computer
from Intermec Settings at the end of this section.
To configure Bluetooth communications on the computer
1 Select Start > Settings > the System tab > Intermec Settings.
2 Select Communications > Bluetooth.
3 If you want to allow incoming connections from wireless
scanners, you must enable these two parameters:
• Discoverable
• Connectable
Note: If you do not want to allow incoming connections,
make sure both parameters are disabled.
4 Save your changes and exit Intermec Settings.
To connect to the wireless scanner using the association label
1 Using your wireless scanner, scan the Bluetooth association
label on the side of the CN3.
2 The CN3 prompts you to enter the passcode for your scanner.
The default passcode for Intermec Bluetooth scanners is
0000.
3 Tap Finish.
To connect to the wireless scanner using Bluetooth Scanner Wizard
1 Select Start > Settings > the System tab > Bluetooth Scanner
Wizard.
2 Tap Add Device. The wizard advances to the next screen.
52
CN3 Series Mobile Computer User’s Manual
Chapter 3 — Configuring the Computer
3 Select how you would like to set your scanner (the default is
Search) and then click Next. The computer starts discovering
scanners.
4 Select the scanner you want to connect to from the Devices
list and then tap Next.
5 When prompted to add the scanner to your device list, tap
Yes.
6 In the Passcode text box, enter the passcode for your scanner.
The default passcode for Intermec Bluetooth scanners is
0000.
7 Tap Next. The computer connects to the scanner and displays
the remote device information.
8 Tap Finish.
9 Refresh Intermec Settings to see the Bluetooth scanner under
Data Collection. You can now view and modify any
symbology settings.
To remove a wireless scanner from the computer
1 Select Start > Settings > the System tab > Bluetooth Scanner
Wizard.
2 Tap Remove Device.
CN3 Series Mobile Computer User’s Manual
53
Chapter 3 — Configuring the Computer
3 Select the Bluetooth scanner from the DCE Device(s) list that
you want to disconnect and then tap Disconnect.
The scanner you wanted to remove no longer appears in the
list.
4 Tap Finish.
Configuring Bluetooth Communications for Wireless Printing
This section explains how to configure the computer for
Bluetooth wireless printing. You need to:
• make sure Bluetooth power is on. For help, see the procedure
in “Configuring Personal Area Networks” on page 49.
• create an application that lets you print. For help, see the next
section.
• select the current wireless printer on the computer. For help,
see “Selecting the Current Wireless Printer on the
Computer” on page 55.
Creating an Application That Lets You Print Wirelessly
The computer does not ship with an application that lets you
print wirelessly. You must create an application that opens the
wireless printing COM port on the computer. For help, see the
Bluetooth Resource Kit.
The Wireless Printing application is available from Start >
Settings > the System tab. The application separates the task of
wireless printing setup from other Bluetooth management tasks.
The Wireless Printing application uses the concept of a “current
wireless printer.” The computer connects to the current wireless
printer when your application opens the wireless printing COM
port on your computer. If there is no current wireless printer
selected on your computer, there is no wireless printing COM
port registered on your computer. You must select a current
wireless printer as described in the next section.
The Wireless Printing application performs these tasks on the
computer:
• Helps you select the current wireless printer
• Stores the current wireless printer in the registry
• Registers/deregisters the wireless printing COM port
54
CN3 Series Mobile Computer User’s Manual
Chapter 3 — Configuring the Computer
• Stores the wireless printing COM port in the registry as the
WPort
Specifically, the current wireless printer is registered and
deregistered on Bluetooth stack load/unload. If you select a
different current wireless printer, the existing wireless printing
COM port is deregistered and the new one is registered instead.
The Wireless Printing application uses the Bluetooth COM Port
Control to handle COM port registration/deregistration.
Selecting the Current Wireless Printer on the Computer
By default, there is no current wireless printer selected on the
computer.
There are three ways to select the current wireless printer:
• Discovering the printer using Bluetooth device discovery
• Manually entering the printer’s Bluetooth device address
• Choosing the printer from a list of previously discovered
printers
To discover the printer with Bluetooth device discovery
1 Select Start > Settings > the Systems tab > Wireless
Printing. The Wireless Printing wizard appears.
CN3 Series Mobile Computer User’s Manual
55
Chapter 3 — Configuring the Computer
2 Tap Search to initiate printer discovery. All Bluetooth printers
discovered within range appear in the devices list.
3 Select the printer you want to connect to and then tap OK.
4 If your preferred printer does not appear, make sure the
printer is turned on and discovery is enabled, and then repeat
Steps 1 through 3.
5 Tap Print Test Page. The printer prints out the test page.
To manually enter the device address of the printer
1 Select Start > Settings > the Systems tab > Wireless
Printing. The Wireless Printing wizard appears.
2 Tap Manual. The wizard advances to the next screen where
you enter the device address.
3 Type the address of the printer in the Enter Device Address
text box and then tap OK. The keyword -unknown- appears
in the Device Name field in the Current Wireless Printer box.
The name of the printer is not sent to the computer when you
manually enter the printer address.
4 Tap Print Test Page. The printer prints out the test page.
To choose the printer from a list of previously discovered printers
1 Make sure you have already performed a Bluetooth device
discovery.
56
CN3 Series Mobile Computer User’s Manual
Chapter 3 — Configuring the Computer
2 Select Start > Settings > the Systems tab > Wireless
Printing. The Wireless Printing wizard appears.
3 Tap Set Different Printer. The Devices list appears with the
list of previously discovered printers.
4 Select the printer you want and tap OK.
5 Tap Print Test Page. The printer prints out the test page.
Connecting to a Bluetooth Audio Device
Use the Bluetooth Audio applet to discover, activate, and connect
to Bluetooth audio devices such as a Bluetooth headset. You can
control the audio volume and the amplification for the
microphone for the connected Bluetooth audio device (if the
connected device has these capabilities).
To connect to a Bluetooth headset
1 Select Start > Settings > Control Panel > Bluetooth Audio.
2 Tap Search for Devices. The CN3 searches for audio devices.
3 When searching for a device, select Yes when you are
prompted to add a device to your list.
4 Enter the passcode provided by your Bluetooth audio device
and then tap Next.
The passcode is provided by the manufacturer of your
Bluetooth audio device. You can usually find your passcode in
the user’s manual that comes with your audio device.
5 Select the services tied to the Bluetooth audio device you are
connecting to and then tap Finish.
Once the pairing is successfully completed, the Bluetooth audio
device appears in the list of devices that are found. To open a
pop-up menu for setting the device as the default, making a
connection, refreshing the connection, or deleting a device from
the list, double-tap a device in the list.
You can only select one Bluetooth audio device as the default
device. You must set a device to default before you can connect to
that device.
CN3 Series Mobile Computer User’s Manual
57
Chapter 3 — Configuring the Computer
Configuring Local Area Networks
Your CN3 is a versatile mobile computer that easily adds to your
wired or wireless data collection network. You can connect your
computer to a network using:
• USB communications.
• Ethernet communications.
• 802.11 radio communications.
Configuring USB Communications
You can place your computer in a single dock, multidock,
modem dock, or vehicle dock to transfer data to and receive data
from another device using USB communications. The USB cable
and all of the docks are sold separately. For information on
accessories and how to order them, see “Accessories” on
page 131.
To use USB communications with your computer
1 Connect the dock to the USB port of the other device using
an appropriate USB cable.
2 Make sure your USB device is configured for USB
communications.
3 Insert the computer into the dock and turn it on.
A status box appears on the screen to show that the computer is
making a USB connection.
Configuring Ethernet Communications
You can use your computer directly in an Ethernet network if you
use the Ethernet and modem adapter and one of the
communications docks. The modem adapter provides an RJ-45
connector off of it to connect to your Ethernet network.
To use your computer in an Ethernet network
1 Tap the iConnect icon (
Today screen.
58
) in the lower right corner of the
CN3 Series Mobile Computer User’s Manual
Chapter 3 — Configuring the Computer
The iConnect pop-up menu appears:
2 Select Enable > Ethernet.
3 (Optional) Configure the IP Settings for the Ethernet Adapter
if you are not using DHCP. DHCP is the default setting.
4 (Optional) If required for your network, you may also need to
set these parameters on each computer:
• Primary and secondary DNS servers
• Primary and secondary WINS servers
5 Make sure that your computer is talking to the network and
that the network can see your computer.
Configuring 802.11 Radio Communications
The CN3 Mobile Computer may have an internal 802.11 b/g
radio to transfer data using wireless communications. This
section of the manual assumes that you have already set up your
wireless communications network including your access points. If
you are using a UDP Plus network, have your Intermec
Application Server communicate with a host computer.
Your computer supports these network protocols:
• TCP/IP
• UDP Plus
The next sections explain the parameters you need to configure
for the CN3 to work in your wireless network.
Configuring the Network Parameters for a TCP/IP Network
In a TCP/IP network, the CN3 communicates with a host
computer directly using TCP/IP. The access point acts as a bridge
to allow communications between the wired network and the
wireless network.
CN3 Series Mobile Computer User’s Manual
59
Chapter 3 — Configuring the Computer
To use wireless communications in a TCP/IP network
1 Go to Start > Settings > the Systems tab > Intermec
Settings.
2 Configure these network parameters on each CN3 in the
network:
• Network name (SSID)
• IP settings (if not using DHCP)
3 Make sure the CN3 is talking to the network and that the
network can see the CN3.
4 Configure security. For help, see “Configuring Security on
the Wireless Network” on page 76.
The easiest way to configure the network parameters on the CN3
is to use Intermec Settings. For help, see“Configuring the
Computer With Intermec Settings” on page 48.
Configuring the Network Parameters for a UDP Plus Network
In a UDP Plus network, the CN3 communicates with a host
computer through the Intermec Application Server. The
Intermec Application Server translates UDP Plus packets on the
wireless network into TCP/IP packets on the wired networks and
vice versa. The access point acts as a bridge to allow
communications between the wired network and the wireless
network.
To use wireless communications in a UDP Plus network
1 Go to Start > Settings > the Systems tab > Intermec
Settings.
2 Configure these network parameters on the CN3:
• Network name (SSID)
• Controller IP address
• IP settings (if not using DHCP)
• Network port
3 Make sure the CN3 is talking to the network and that the
network can see the CN3.
4 Configure security. For help, see “Configuring Security on
the Wireless Network” on page 76.
60
CN3 Series Mobile Computer User’s Manual
Chapter 3 — Configuring the Computer
Checking the Status of Your Wireless Connection
After you configure your wireless settings, you can use iConnect
to check the status of your connection.
To check the status of your wireless connection
1 Tap the iConnect icon (
Today screen.
) in the lower right corner of the
2 From the iConnect menu, select Status > Wireless. The
Wireless Status screen appears and checks the connection.
You can also use iConnect to configure or change the network
settings by tapping Tools > Wireless Settings from the iConnect
menu.
To test the connection of the CN3 against your network
• From the iConnect menu, select Tools > Ping Test.
Viewing Detailed 802.11 Radio Connection Information
Use the ISpyWiFi to view detailed information for the 802.11
radio connection in your CN3, such as MAC address, access
point information, association, encryption, power management,
antenna status, RSSI, data link rates, and supplicant status.You
can also use ISpyWiFi to scan for access points in your network
and ping for detailed information.
The ISpyWiFi utility is installed in your CN3 as an executable.
You can either start the utility using File Explorer or create a
shortcut to start the utility from the CN3 desktop.
To start the ISpyWiFi utility with File Explorer
1 Tap Start > Programs > File Explorer.
CN3 Series Mobile Computer User’s Manual
61
Chapter 3 — Configuring the Computer
2 Navigate to the Windows folder and scroll down to find
ISpyWiFi.
3 Double-tap ISpyWifi.
To add an ISpyWiFi shortcut to the CN3 Programs folder
1 Press and hold your stylus on the ISpyWiFi executable until
the pop-up menu appears.
2 Select Copy from the pop-up menu.
3 Navigate to the Windows\Start Menu\Programs folder on the
CN3
4 Press and hold the stylus in the empty area at the bottom of
the screen until the pop-up menu appears.
62
CN3 Series Mobile Computer User’s Manual
Chapter 3 — Configuring the Computer
5 Select Paste Shortcut.
6 Close File Explorer.
7 Select Start > Programs to locate the Shortcut to ISpyWiFi.
8 Tap Shortcut to ISpyWiFi to open the utility.
To view the ISpyWiFi tab
• Tap the ISpyWiFi tab.
The ISpyWiFi tab contains network interface, configuration,
access point, and radio frequency information.
The ISpyWiFi Tab
CN3 Series Mobile Computer User’s Manual
63
Chapter 3 — Configuring the Computer
Use the following tables to understand the ISpyWiFi
information.
Understanding the ISpyWiFi Tab
Setting
Description
BCMCFI
A WLAN adapter and its associated driver version.
MAC
The client radio MAC address.
IP (DHCP)
The IP address of the client radio, if using DHCP.
IP (static)
The IP address of the client radio, if using a static IP
address.
Status
Shows whether the radio is associated with the access
point.
Channel
The channel on which the radio is communicating
with the access point.
ESSID
The text SSID for your network.
BSSID
The MAC address of the access point that the client
radio is communicating with.
Association
Shows the type of association: Open, WPA, WPAPSK, WPA2, or Network EAP
Encrypt
Shows potential encryption for the association.
Power
CAM (Constantly Awake Mode) or FAST PSP
(Power Save Poll)
Antenna
Diversity (multiple antennas, Primary (one antenna)
TX Power
Transmit power level in milliwatts (mW).
RSSI
The Received Signal Strength Indicator. The closer to
zero, the better for this indicator.
Link
The data rate at which the radios are communicating.
Use the WiFi Scan tab to scan your network and bring back
information about any access points with which you can
communicate.
To use the WiFi Scan tab
1 Tap the WiFi Scan tab.
2 Tap the Scan button.
3 Tap any of the columns to sort in ascending or descending
order.
64
CN3 Series Mobile Computer User’s Manual
Chapter 3 — Configuring the Computer
Use the Supplicant tab to view information on security and
authentication settings that you have configured on the CN3.
The Supplicant Tab
To use the Supplicant tab
• Click Configure Profile to launch the Profile Wizard and
configure 802.11 options.
• Click Reconnect to disassociate the radio, momentarily
dropping its connection. The radio then reassociates and
reauthenticates, but does not do anything with the driver.
• Click Clear Events to remove the information shown in the
Supplicant Event box.
CN3 Series Mobile Computer User’s Manual
65
Chapter 3 — Configuring the Computer
Use the Ping tab to contact with any host in your network for
information.
The Ping Tab
To ping a host
1 From the Host drop-down list, select an IP address for the
host you want to ping. Enter a new IP address using the input
panel or the keypad. Select Clear List to remove all the IP
addresses from the drop-down list.
2 From the Repetitions drop-down list, select the number of
times to ping the selected host. These repetitions are done
once per second.
3 Tap Ping to initiate contact with the selected host.
4 Depending on how the screen is set up, you can toggle
between a graph and a list of ping results:
• Tap Graph to toggle to the graphical view of 25 of the
most recent pings and their response results, like in the
following sample graph:
66
CN3 Series Mobile Computer User’s Manual
Chapter 3 — Configuring the Computer
• Tap List to toggle to detailed information showing what
ping touched what host and the RTT (Round Trip Time).
Configuring the Phone
The CN3 supports two types of cellular phone technology:
• CDMA EV-DO Rev 0
• GSM/EDGE
With a radio module installed in the CN3, you can send and
receive telephone calls as well as transmit data through wide-area
(WAN) cellular networks.
The CN3 provides a phone speaker, microphone, and
speakerphone. It also supports the use of a Bluetooth headset or
hands-free kit. The factory default setting for the phone is
disabled.
After you have turned on the phone and activated it, you can
customize the features of the phone and network settings. For
help, refer to the online help on your CN3.
Turning On the Phone Using the Wireless Manager
You can use the Wireless Manager application to turn on the
phone if Microsoft Zero Configuration is enabled. If you have
Intermec Security enabled, you cannot access the Wireless
Manager. For information on enabling and configuring
Microsoft security, see “Configuring Microsoft Security” on
page 96.
You can use the Wireless Manager to enable and disable
Bluetooth, Wi-Fi, and the phone if it is built into your CN3.
To turn on the phone using the wireless manager
1 Tap Start > Settings > the Connections tab > Wireless
Manager.
2 In the Wireless Manager, tap Phone. The phone turns on.
CN3 Series Mobile Computer User’s Manual
67
Chapter 3 — Configuring the Computer
3 Tap Menu > Phone Settings to configure the phone. For
help, see the next procedure, “Activating the CDMA Phone.”
4 Tap Done to close the Wireless Manager.
Activating the CDMA Phone
The CDMA WAN radio module is installed at the factory. To
activate your CDMA CN3 device, you need to contact the carrier
you have chosen and set up accounts for each device. Use the
following table to view the carriers that Intermec currently
supports. If your carrier is not listed in the table, please contact
Intermec product support to see if it is now supported.
Currently Supported Carriers
Country
Carriers
United States
Alltel, Sprint, Verizon
Canada
Bell Mobility, Telus
New Zealand
Telecom New Zealand
The carrier will require the Electronic Serial Number (ESN) to
start the activation process. You can find the ESN:
• on a label located in the upper right corner of the battery
compartment.
• on the outside of the CN3 shipping box.
68
CN3 Series Mobile Computer User’s Manual
Chapter 3 — Configuring the Computer
The activation process is slightly different for each CDMA
carrier. Your carrier sales contact and an Interme representative
can guide you through the process.
After you supply the ESN to your carrier, they will respond with
values that you must enter using the Windows Mobile Activation
Wizard (if required). Some of the supported carriers do not
require you to enter any values. The following table shows the
carriers, the correct activation method to use, and the values that
you need to activate your phone.
Values Required for CDMA Phone Activation
Carrier
Activation Method
Activation Values You Need
Alltel
Dial *22899
None - all parameters are automatically transferred
wirelessl.y
The Activation Wizard is disabled for Alltel.
Bell Mobility
Activation Wizard
• Service Programming Code (SPC), also called
the activation code
• Mobile Directory Number (MDN)
• Mobile Station Identification Number (MSIN)
• System ID (SID)
• Network ID (NID)
• Mobile Country Code (MCC)
• Mobile Network Code (MNC)
• Username
• Password
Sprint
Activation Wizard
• Master Subsidy Lock (MSL), also called the
activation code
• MDN
• Mobile Station Identifier (MSID)
Telecom New
Zealand
Activation Wizard
• SPC
• SID
• NID
Telus
Dial *22803
None - all parameters are automatically transferred
wirelessly.
Verizon
Dial *22899
None - all parameters are automatically transferred
wirelessly.
You can also use the Activation Wizard with
Verizon.
CN3 Series Mobile Computer User’s Manual
69
Chapter 3 — Configuring the Computer
After you complete the activation process, the settings you enter
are permanently stored in the CDMA module. Changing the OS
or SSPB loads will not affect any of the settings or activation
parameters stored in the WAN modem.
To start the Activation Wizard
1 Tap Start > Phone from the Today screen.
2 In the Phone application, tap Menu > Activation Wizard
from the bottom of the screen.
Activating the GSM/EDGE Phone
You use a SIM card to activate the GSM/EDGE phone on the
CN3. You can purchase the SIM card from your network
provider. You insert the SIM card in the miniSD/SIM door in the
back of the CN3. For more information, please contact your
local Intermec representative.
To insert the SIM card
1 Press the Power button to suspend the CN3, and then remove
the battery pack from the back of the CN3.
2 Remove the two screws from the miniSD/SIM door.
3 Lift the door and insert the SIM card into the card slot with
the metal contacts facing outward.
4 Close the miniSD/SIM door and insert the two screws.
Tighten the screws to 1.5 in-lbs torque.
5 Replace the battery pack.
The CN3 cold boots and you can start using your phone.
Making a Phone Call
After you activate your phone, you are ready to start making
phone calls.
To make a phone call
1 Tap Start > Phone.
2 Tap the keys to enter the telephone number you want to call.
3 Tap the Talk button.
70
CN3 Series Mobile Computer User’s Manual
Chapter 3 — Configuring the Computer
Connecting to an ISP
You can connect to your Internet Service Provider (ISP), and use
the connection to send and receive e-mail messages and view web
pages. Get an ISP dial-up access telephone number, a user name,
and a password from your ISP.
Tap the Help icon at any time to view additional information for
the wizard or the settings.
To connect to an Internet service provider
1 Tap Start > Settings > Connections.
2 Under My ISP, tap Add a new modem connection.
3 Enter a name for the connection, such as “ISP Connection.”
4 If using an external modem connected to your CN3 with a
cable, select Hayes Compatible on COM1 from the Select a
modem drop-down list.
5 Tap Next.
6 Enter the access phone number and then tap Next.
7 Enter the User name, Password, and Domain (if provided by
an ISP or your network administrator).
8 Tap Finish.
9 Tap the Advanced tab from the Connections screen and then
tap Dialing Rules.
CN3 Series Mobile Computer User’s Manual
71
Chapter 3 — Configuring the Computer
10 Select Use dialing rules, tap OK at the dialog box, and then
tap Edit.
11 Specify your current phone type and then tap ok until you
exit and return to the Settings page.
Once the CN3 is connected, you can:
• send and receive message by using Messaging (Outlook Email).
• visit web pages by using Internet Explorer Mobile. For more
information, see “Using Internet Explorer Mobile” on
page 45.
Connecting to a Private Network With a RAS Account
If you have access to a network at work, you can send e-mail
messages, view intranet pages, synchronize your CN3, and
possibly access the Internet. Create a modem connection through
a RAS (Remote Access Server) account. Before you can create this
modem connection, your network administrator needs to set up a
RAS account for you. Your network administrator may also give
you Virtual Private Network (VPN) settings.
Tap the Help icon at any time to view additional information for
the wizard or the settings.
72
CN3 Series Mobile Computer User’s Manual
Chapter 3 — Configuring the Computer
To connect to a private network
1 Tap Start > Settings > Connections.
2 Under My Work Network, tap Add a new modem
connection.
3 Enter a name for the connection, such as “Company
Connection.”
4 Select your modem type.
• If using an external modem connected to your CN3 with a
cable, select Hayes Compatible on COM1 from the
Select a modem drop-down list.
• If using any type of external modem, select the modem by
name. If a listing does not exist for your modem, select
Hayes Compatible on COM1.
5 Tap Next.
6 Enter the access phone number and then tap Next. Use these
guidelines when entering a phone number:
• Enter the phone number exactly as you want it dialed. For
example, if you call from a business complex or hotel that
requires a nine before dialing out, enter 9 in front of the
phone number.
• Enter the access point name (APN) provided by your
mobile phone service provider.
CN3 Series Mobile Computer User’s Manual
73
Chapter 3 — Configuring the Computer
• If you want to use dialing rules, see the online help for
information.
7 Enter the User name, Password, and Domain (if provided by
an ISP or your network administrator).
8 Tap Finish.
Connecting to a Private Network with a VPN Server
A VPN connection helps you to securely connect to servers, such
as a corporate network, through the Internet. Before you can
make a VPN connection, you will need the following items from
your network administrator:
• User name
• Password
• Domain name
• TCP/IP settings
• Host name or IP address of the VPN server
To create a VPN server connection to work
1 Tap Start > Settings > Connections.
2 Under My Work Network, tap Add a new VPN connection.
3 In the Name field, enter a name for the connection, such as
your company name.
74
CN3 Series Mobile Computer User’s Manual
Chapter 3 — Configuring the Computer
4 In the Host name / IP field, enter the VPN server name or IP
address.
5 Select the VPN type of authentication to use with your CN3.
If you are not sure which option to choose, check with your
network administrator.
6 Tap Next.
7 Select a way for the CN3 to authenticate the connection. If
you select A pre-shared key, enter the key provided by your
network administrator.
8 Click Next.
9 Enter the User name, Password, and Domain (if provided by
an ISP or your network administrator).
10 Tap Finish.
11 Insert the necessary equipment, such as a network card, into
the CN3 and begin connecting.
CN3 Series Mobile Computer User’s Manual
75
Chapter 3 — Configuring the Computer
Configuring Security on the Wireless Network
Your wireless adapter (network interface card) connects to
wireless networks of two types: infrastructure networks and adhoc networks.
• Infrastructure networks connect you to your corporate
network and the internet. Your computer establishes a wireless
connection to an access point, which links you to the rest of
the network.
• Ad-hoc networks are private networks shared between two or
more clients, even without an access point.
Each wireless network is assigned a name (or SSID) to allow
multiple networks to coexist in the same area without
infringement.
Intermec recommends using security measures with wireless
networks to prevent unauthorized access to your network and to
ensure the privacy of transmitted data. These elements are
required for secure networks:
• Authentication by both the network and the user
• Authentication is cryptographically protected
• Transmitted data
There are many schemes available to implement these features.
Use the following tables to understand the common terminology
for wireless network security.
Encryption Terminolog y
Acronym Description
AES
Advanced Encryption Standard. A block cipher, a type of
symmetric key cipher that uses groups of bits of a fixed
length - called blocks. A symmetric key cipher is a cipher
using the same key for both encryption and decryption.
As implemented for wireless, this is also known as CCMP,
which implements AES as TKIP and WEP are
implementations of RC4.
CKIP
Cisco Key Integrity Protocol. This protocol is Cisco’s
version of the TKIP protocol, compatible with Cisco
Aironet products.
76
CN3 Series Mobile Computer User’s Manual
Chapter 3 — Configuring the Computer
Encryption Terminolog (continued)y
Acronym Description
TKIP
Temporal Key Integrity Protocol. This protocol is part
WEP
of the IEEE 802.11i encryption standard for wireless
LANs, which provides per-packet key mixing, a
message integrity check and a re-keying mechanism,
thus overcoming most of the weak points of WEP.
This encryption is more difficult to crack than the
standard WEP. Weak points of WEP include: No
Initiation Vector (IV) reuse protection, weak keys,
no protection against message replay, no detection of
message tampering, and no key updates.
Wired Equivalent Privacy encryption. With
preconfigured WEP, both the client CN3 and access
point are assigned the same key, which can encrypt
all data between the two devices. WEP keys also
authenticate the CN3 to the access point - unless the
CN3 can prove it knows the WEP key, it is not
allowed onto the network. WEP keys are only
needed if they are expected by your clients. There are
two types available: 64-bit (5-character strings,
12345) (default) and 128-bit (13-character strings,
1234567890123).
Key Management Protocols Terminology
Acronym
Description
WPA
Wi-Fi Protected Access. This is an enhanced version of
WEP that does not rely on a static, shared key. It
encompasses a number of security enhancements over
WEP, including improved data encryption via TKIP and
802.11b/g authentication with EAP. WiFi Alliance
security standard is designed to work with existing 802.11
products and to offer forward compatibility with 802.11i.
WPA2
Wi-Fi Protected Access. Second generation of WPA
security. Like WPA, WPA2 provides enterprise and
home Wi-Fi users with a high level of assurance that
their data remains protected and that only
authorized users can access their wireless networks.
CN3 Series Mobile Computer User’s Manual
77
Chapter 3 — Configuring the Computer
Authentication Terminology
Acronym
Description
EAP
Extensible Authentication Protocol. 802.11b/g uses
EAP-FAST
EAP-PEAP
EAP-TLS
78
this protocol to perform authentication. This is not
necessarily an authentication mechanism, but is a
common framework for transporting actual
authentication protocols. Intermec provides a
number of EAP protocols for you to choose the best
for your network.
Flexible Authentication via Secure Tunneling. A
publicly accessible IEEE 802.1X EAP type
developed by Cisco Systems. It is available as an
IETF informational draft. An 802.1X EAP type
that does not require digital certificates, supports a
variety of user and password database types,
supports password expiration and change, and is
flexible, easy to deploy, and easy to manage.
Protected Extensible Authentication Protocol.
Performs secure authentication against Windows
domains and directory services. It is comparable to
EAP-TTLS both in its method of operation and its
security, though not as flexible. This does not
support the range of inside-the-tunnel
authentication methods supported by EAP-TTLS.
Microsoft and Cisco both support this protocol.
Transport Layer Security. Based on the TLS
(Transport Layer Security) protocol widely used to
secure web sites. This requires both the user and
authentication server have certificates for mutual
authentication. While cryptically strong, this
requires corporations that deploy this to maintain a
certificate infrastructure for all users.
CN3 Series Mobile Computer User’s Manual
Chapter 3 — Configuring the Computer
Authentication Terminology (continued)
Acronym
Description
LEAP
Lightweight Extensible Authentication Protocol.
Also known as Cisco-Wireless EAP, provides
username/password based authentication between a
wireless client and a RADIUS server. In the 802.1x
framework, traffic cannot pass through a wireless
network access point until it successfully
authenticates itself.
Tunneled Transport Layer Security. This protocol
provides authentication like EAP-TLS but does not
require certificates for every user. Instead,
authentication servers are issued certificates. User
authentication is done using a password or other
credentials that are transported in a securely
encrypted “tunnel” established using server
certificates.
EAP-TTLS
EAP-TTLS works by creating a secure, encrypted
tunnel through which you present your credentials
to the authentication server. Thus, inside EAPTTLS there is another inner authentication
protocol that you must configure via Additional
TTLS Settings.
The CN3 provides three types of security for your wireless
network: Wi-Fi Protected Access 2 (WPA2/802.11i), WPA, and
WEP. 802.1x should be referred to as an authentication method
used for WPA and WPA2. Another authentication method for
WPA and WPA2 would be the Pre-Shared Key (PSK).
Choosing Between Microsoft and Funk Security
Before you can implement a security solution on the CN3, you
need to choose between Microsoft and Funk security:
• By default, Funk security is enabled. It provides everything
you get with Microsoft security plus the addition of Cisco
Compatible Extensions features. It also provides additional
authentication types like EAP-TTLS, LEAP, and EAP-FAST.
CN3 Series Mobile Computer User’s Manual
79
Chapter 3 — Configuring the Computer
• Microsoft security, with its Microsoft Zero Config feature, is
also available. To switch to Microsoft security, go to
“Configuring Microsoft Security” on page 96 to start.
Note: Your security choice does not depend on your
authentication server. For example, you can choose Funk security
if you use Microsoft Active Directory® to issue certificates.
If you want to use the default Funk security, you need to select a
profile. For help, see one of the following sections, “Configuring
Funk Security Using Intermec Settings” on this page or
“Configuring Funk Security Using the Profile Wizard” on
page 84.
If you want to use Microsoft security, you need to select it as your
security choice. For help, see “Configuring Microsoft Security”
on page 96.
Configuring Funk Security Using Intermec Settings
You can define up to four profiles for Funk security. Different
profiles let your CN3 communicate in different networks
without having to change all of your security settings. For
example, you may want to set up one profile for the
manufacturing floor and one for the warehouse. By default, the
active profile is Profile_1.
To select a profile for Funk security
1 Select Start > Settings > the Systems tab > Intermec
Settings.
2 Select Communications > 802.11 Radio > Funk Security.
3 Select Active Profile, choose a profile from the list, and save
your settings.
4 Tap the active profile to expand it.
5 (Optional) Give your profile a meaningful name:
• Select Profile Label and a text box appears.
• Select the text in the box, type a meaningful name, and
save your settings.
6 Select one profile as the active profile by tapping Active
Profile and choosing a profile fro the drop-down list.
7 Save your settings.
80
CN3 Series Mobile Computer User’s Manual
Chapter 3 — Configuring the Computer
Configuring WPA Security With Funk Security
Use these procedures to set WPA-802.1x, WPA2-802.1x, WPAPSK, or WPA2-PSK security on your CN3 with Funk security.
To configure WPA-802.1x or WPA2-802.1x with Funk security
1 Make sure you have configured the communications and
radio parameters on your CN3.
2 Make sure you have selected Funk as your security choice.
3 Open Intermec Settings.
4 Choose Communications > 802.11 Radio > Funk Security
> Profile.
5 For Association, choose WPA or WPA2 and press Enter.
Encryption automatically defaults to TKIP if you are using
WPA. Encryption automatically defaults to AES if you are
using WPA2.
6 For 8021x, choose TTLS, PEAP, EAP-FAST, or TLS and
press Enter.
If you choose TTLS or PEAP:
a For Prompt for Credentials, choose Enter credentials
now.
Note: You can use Prompt for credentials to troubleshoot
your connection to the network if you have problems.
b Select User name and type your user name.
c Select User Password and type a user password.
d For Validate Server Certificate, choose Yes.
Note: You must have the date on the CN3 set correctly when
you enable Validate Server Certificate.
If you choose TLS:
a Load a user and root certificate on your CN3. For help,
see “Loading a Certificate” on page 99.
b For Validate Server Certificate, choose Yes.
CN3 Series Mobile Computer User’s Manual
81
Chapter 3 — Configuring the Computer
c You must enter a User Name and Subject Name. You can
also enter a Server Common Name if you want to
increase your level of security.
7 Exit Intermec Settings.
To enable WPA-PSK or WPA2-PSK with Funk security
1 Make sure you have configured the communications and
radio parameters on your CN3.
2 Make sure you have selected Funk as your security choice.
3 Open Intermec Settings.
4 Choose Communications > 802.11 Radio > Funk Security
> Profile.
5 For Association, choose WPA or WPA2.
6 For 8021x, choose None.
7 For Pre-Shared Key, enter the pre-shared key or the
passphrase.
The pre-shared key must be a value of 32 hex pairs preceded
by 0x for a total of 66 characters. The value must match the
key value on the access point. The passphrase must be from 8
to 63 characters. After you enter a passphrase, the CN3
internally converts it to a pre-shared key.
This value must match the passphrase on the authenticator.
8 Exit Intermec Settings.
Configuring 802.1x Security With Funk Security
1 Make sure you have configured the communications and
radio parameters on your CN3.
2 Make sure you have selected Funk as your security choice.
3 Open Intermec Settings.
4 Choose Communications > 802.11 Radio > Funk Security
> Profile.
5 For Association, choose Open.
6 For Encryption, choose WEP.
7 For Authentication, choose TTLS, PEAP, or TLS.
82
CN3 Series Mobile Computer User’s Manual
Chapter 3 — Configuring the Computer
If you choose TTLS or PEAP:
a Select User name and type your user name.
b Select Password prompt, and choose Enter password
now.
Note: You can use Prompt for password to troubleshoot your
connection to the network if you have problems.
c Select User Password and type a user password.
d For Validate Server Certificate, choose Enabled.
If you choose TLS:
a Load a user and root certificate on your CN3. For help,
see “Loading a Certificate” on page 99.
b For Validate Server Certificate, choose Yes.
c You must enter a User Name and Subject Name. You can
also enter a Server Common Name if you want to
increase your level of security.
8 Exit Intermec Settings.
Configuring LEAP Security on the CN3
1 Make sure you have selected Funk as your security choice.
2 Make sure you have configured the communications and
radio parameters on your CN3.
3 From Intermec Settings, choose Communications > 802.11
Radio > Funk Security > Profile.
4 For 8021x, choose LEAP.
5 For Association, choose Open, WPA, WPA2, or Network
EAP. Encryption automatically defaults to TKIP if you
choose WPA, to AES if you choose WPA2, and to WEP if
you choose Open or Network EAP.
6 For Prompt for Credentials, choose Enter credentials now.
7 Select User name and type your user name.
8 Select User Password and type a user password.
9 Exit Intermec Settings.
CN3 Series Mobile Computer User’s Manual
83
Chapter 3 — Configuring the Computer
Configuring Static WEP Security With Funk Security
1 Make sure you have selected Funk as your security choice.
2 Make sure you have configured the communications and
radio parameters on your CN3.
3 Open Intermec Settings.
4 Choose Communications > 802.11 Radio > Funk Security
> Profile.
5 For Association, choose Open.
6 For Encryption, choose WEP.
7 For 8021x, choose None.
8 Define a value for the keys you want to use. You can define up
to four keys (Key 1 through Key 4).
Enter an ASCII key or a hex key that is either 5 bytes or 13
bytes long depending on the capability of the radio. Set a 5byte value for 64-bit WEP or a 13-byte value for 128-bit
WEP. Hex keys must be preceded by 0x and contain 5 or 13
hex pairs.
9 For Transmit key, choose the key you want to use for
transmitting data.
10 Exit Intermec Settings.
Configuring Funk Security Using the Profile Wizard
You can start 802.11 b/g communications on the CN3 using the
Profile Wizard. A profile contains all the information necessary to
authenticate you to the network, such as login name, password or
certificate, and protocols by which the CN3 is authenticated. You
can have up to four profiles for different networks. For example,
you may have different login names or passwords on different
networks.
To select a profile for Funk security
1 Select Start > Settings > the Systems tab > Wireless
Network.
or
Tap the iConnect icon ( ) in the lower right corner of the
Today screen and select Tools > Wireless Settings.
84
CN3 Series Mobile Computer User’s Manual
Chapter 3 — Configuring the Computer
The Profile Wizard appears.
2 From the Profile list, select the profile you want to configure.
3 Tap Edit Selected Profile.
4 (Optional) Give your profile a meaningful name by selecting
the text in the Profile Label text box and typing a meaningful
name.
5 From the Network type list, select either Infrastructure or
Ad-Hoc.
Select Infrastructure if the network uses access points to
connect to the corporate network or internet. Select Ad-Hoc
to set up a private network with one or more participants.
6 Enter the SSID (Network Name) if different than the profile
name.
7 (Optional) Check the Enable Power Management box to
conserve battery power.
8 Click OK.
Configuring WEP Security With Profile Wizard
1 In the Profile Wizard, select the Security page.
2 For 8021x Security, choose None.
CN3 Series Mobile Computer User’s Manual
85
Chapter 3 — Configuring the Computer
3 For Association, choose Open or Shared to match the
settings on your access point.
4 For Encryption, choose WEP.
5 From the Data TX Key list, select the key you want to use for
transmitting data.
6 Define a value for the keys you want to use. You can define up
to four keys (Key 1 through Key 4).
Enter an ASCII key or a hex key that is either 5 bytes or 13
bytes long depending on the capability of the radio. Set a 5byte value for 64-bit WEP or a 13-byte value for 128-bit
WEP. Hex keys must be preceded by 0x and contain 5 or 13
hex pairs.
7 Tap OK.
Configuring WPA-PSK Security With Profile Wizard
1 In the Profile Wizard, select the Security page.
2 For 8021x Security, choose None.
86
CN3 Series Mobile Computer User’s Manual
Chapter 3 — Configuring the Computer
3 For Association, choose WPA.
4 For Pre-Shared Key field, enter the passphrase as ASCII. The
passphrase must be 8 to 63 characters and match the
passphrase on the access point.
5 Tap OK.
Configuring WPA2-PSK Security With Profile Wizard
1 In the Profile Wizard, select the Security page.
2 For 8021x Security, choose None.
3 For Association, choose WPA2.
CN3 Series Mobile Computer User’s Manual
87
Chapter 3 — Configuring the Computer
4 For Encryption, choose TKIP or AES.
5 For Pre-Shared Key field, enter the passphrase as ASCII
(12345).
6 Tap OK.
Configuring PEAP Security With Profile Wizard
Protected EAP (PEAP) performs secure authentication against
Windows domains and directory services. It is comparable to
EAP-TTLS, though not as flexible.
To configure PEAP security
1 In the Profile Wizard, select the Security page.
88
CN3 Series Mobile Computer User’s Manual
Chapter 3 — Configuring the Computer
2 For 8021x Security, choose PEAP.
3 For Association, choose Open, WPA, WPA2, or Network
EAP.
4 For Encryption, choose TKIP or AES if you selected WPA2
for association, or WEP or CKIP if you selected Network
EAP for association.
5 For Username, type a unique username for this protocol.
6 In the Password field, type a unique password for this
protocol.
7 Select Prompt for password to have the user enter this
password each time to access the protocol, or select Use
following password to use the protocol without entering a
password each time you use the CN3.
8 Tap Get Certificates to obtain or import server certificates.
For help with certificates, see “Loading a Certificate” on
page 99.
9 Tap Additional Settings to assign an inner PEAP
authentication and set options for server certificate validation
and trust.
10 From the Inner PEAP Authentication list, choose EAP/MSCHAP-V2, EAT/Token Card, or EAP/MD5-Challenge.
CN3 Series Mobile Computer User’s Manual
89
Chapter 3 — Configuring the Computer
11 Check Validate Server Certificate to verify the identity of the
authentication server based on its certificate when using
PEAP.
12 Tap Root CA, select a root certificate, and then tap OK.
13 Enter the Common Names of trusted servers.
14 Tap OK.
Configuring TLS Security With Profile Wizard
EAP-TLS is a protocol based on the Transport Layer Security
(TLS) protocol widely used to secure web sites. This protocol
requires both the user and authentication server to have
certificates for mutual authentication.
To configure TLS security
1 In the Profile Wizard, select the Security page.
2 For 8021x Security, choose TLS.
3 For Association, choose Open, WPA, WPA2, or Network
EAP.
4 For Encryption, choose TKIP or AES if you selected WPA2
for association, or WEP or CKIP if you selected Network
EAP for association.
5 For Subject Name, type a unique subject name for this
protocol.
90
CN3 Series Mobile Computer User’s Manual
Chapter 3 — Configuring the Computer
6 For User Name, type a unique user name for this protocol.
7 Tap Get Certificates to obtain or import server certificates.
For help with certificates, see “Loading a Certificate” on
page 99.
8 Tap Additional Settings to server certificate validation and
trust.
9 Check Validate Server Certificate to verify the identity of the
authentication server based on its certificate when using TLS.
10 Tap Root CA, select a root certificate, and then tap OK.
11 Enter the Common Names of trusted servers.
12 Tap OK.
Configuring TTLS Security With Profile Wizard
TTLS protocol provides authentication like EAP-TLS but does
not require user certificates. User authentication is done using a
password or other credentials that are transported in a securely
encrypted “tunnel” established using server certificates.
To configure TTLS security
1 In the Profile Wizard, select the Security page.
2 For 8021x Security, choose TTLS.
CN3 Series Mobile Computer User’s Manual
91
Chapter 3 — Configuring the Computer
3 For Association, choose Open, WPA, WPA2, or Network
EAP.
4 For Encryption, choose TKIP or AES if you selected WPA2
for association, or WEP or CKIP if you selected Network
EAP for association.
5 For Username, type a unique username for this protocol.
6 In the Password field, type a unique password for this
protocol.
7 Select Prompt for password to have the user enter this
password each time to access the protocol, or select Use
following password to use the protocol without entering a
password each time you use the CN3.
8 (Optional) Tap Get Certificates to obtain or import server
certificates. For help with certificates, see “Loading a
Certificate” on page 99.
9 Tap Additional Settings to assign an inner TTLS
authentication, inner EAP, and set options for server
certificate validation and trust.
10 From the Inner TTLS Authentication list, choose PAP,
CHAP, MS-CHAP, MS-CHAP-V2, PAP/Token Card, or
EAP.
11 If you select EAP for the inner authentication protocol, select
an inner EAP protocol from the Inner EAP list.
12 Check Validate Server Certificate to verify the identity of the
authentication server based on its certificate when using
TTLS.
13 Tap Root CA, select a root certificate, and then tap OK.
14 Enter the Common Names of trusted servers.
15 For Anonymous EAP-TTLS Name, type an outer identity to
protect your login name or identity.
16 Tap OK.
92
CN3 Series Mobile Computer User’s Manual
Chapter 3 — Configuring the Computer
Configuring LEAP Security With Profile Wizard
LEAP is the Cisco Lightweight version of EAP.
To configure LEAP security
1 In the Profile Wizard, select the Security page.
2 For 8021x Security, choose LEAP.
3 For Association, choose Open, WPA, WPA2, or Network
EAP.
4 For Encryption, choose TKIP or AES if you selected WPA2
for association, or WEP or CKIP if you selected Network
EAP for association.
5 For Username, type a unique username for this protocol.
6 In the Password field, type a unique password for this
protocol.
7 Select Prompt for password to have the user enter this
password each time to access the protocol, or select Use
following password to use the protocol without entering a
password each time you use the CN3.
8 Tap OK.
CN3 Series Mobile Computer User’s Manual
93
Chapter 3 — Configuring the Computer
Configuring EAP-FAST with Profile Wizard
The EAP-FAST protocol is a client-server security architecture
that encrypts EAP transactions with a TLS tunnel. While similar
to PEAP, EAP-FAST differs significantly since tunnel
establishment is based on strong secrets unique to users. These
secrets are called Protected Access Credentials (PACs), which
CiscoSecure ACS generates using a master key known only to
CicsoSecure ACS. EAP-FAST does not require certificate
management.
To configure EAP-FAST security
1 In the Profile Wizard, select the Security page.
2 For 8021x Security, choose EAP-FAST.
3 For Association, choose Open, WPA, WPA2, or Network
EAP.
4 For Encryption, choose WEP or CKIP if you selected
Network EAP for association.
5 For Username, type a unique username for this protocol.
6 In the Password field, type a unique password for this
protocol.
94
CN3 Series Mobile Computer User’s Manual
Chapter 3 — Configuring the Computer
7 Select Prompt for password to have the user enter this
password each time to access the protocol, or select Use
following password to use the protocol without entering a
password each time you use the CN3.
8 Tap Additional Settings to set options for PAC management
and assign an anonymous EAP-FAST name.
9 Tap PAC Manager to view the PAC files currently installed
on the CN3. Tap ok to return to the Additional Settings
screen.
10 If you already have a PAC on the CN3, clear Allow
Automatic PAC provisioning to avoid receiving more PACs
from the server.
11 If you select Allow Automatic PAC provisioning, you can
check:
• Prompt before acquiring a new PAC for notification of
any incoming PACs.
• Prompt before replacing a PAC for notification whether
to replace a current PAC with an incoming PAC.
12 For Anonymous EAP-FAST Name, type the outer identity
assigned for public usage.
13 Tap OK.
CN3 Series Mobile Computer User’s Manual
95
Chapter 3 — Configuring the Computer
Creating A Debug Log for Funk Security
If you reach a situation where you need to send in debug
information to Intermec Product Support, you can use the
Intermec Funk Security logging feature.
To enable the logging feature
1 In the Profile Wizard, select the Advanced tab.
2 Select Enable Logging and then tap OK.
Configuring Microsoft Security
The default security setting is Funk. If you want to use Microsoft
security, you need to select it as your security choice. After you
select Microsoft as your security choice, you will be prompted to
save your settings and reset your computer for your change to
take effect.
To select Microsoft security as your security choice
1 Select Start > Settings > the System tab > Intermec Settings.
The Intermec Settings application appears.
2 Select Communications > 802.11 Radio > Security Choice.
3 From the Security Choice list, select Microsoft Security and
save your settings. An alert box appears telling you that you
must save your settings and warm boot the CN3 for the new
security choice to take effect.
4 Tap Yes. The CN3 resets and starts with Microsoft Security as
the Security Choice.
Networks already configured are preferred networks. You can
connect to only preferred networks or search for and connect to
any available network.
You can add a wireless network when the network is detected or
manually by entering settings information. To determine if
authentication information is needed, see your network
administrator.
96
CN3 Series Mobile Computer User’s Manual
Chapter 3 — Configuring the Computer
To configure Microsoft security
1 Select Start > Settings > the Connections tab > WiFi > Add
New.
2 Enter a Network name. If the network was detected, the
network name is entered and cannot be changed.
3 From the Connects to list, select where you want your
network to connect:
• If you select Work, you can create a VPN connection or
use proxy servers.
• If you select The Internet, you can connect directly to the
internet.
4 (Optional) To connect to an ad-hoc connection, select This is
a device-to-device (ad-hoc) connection.
5 Tap Next.
6 Follow these steps to disable authentication:
a Set Authentication to Open if WEP keys are not required
or to Shared when WEP keys are required for association.
b Set Data Encryption to Disabled.
CN3 Series Mobile Computer User’s Manual
97
Chapter 3 — Configuring the Computer
Follow these steps to enable WEP encryption:
a Set Authentication to Open if WEP keys are not required
or to Shared when WEP keys are required for association.
b Set Data Encryption to WEP.
c To change the network key, clear The key is
automatically provided check box, enter the new
Network key, and then select the appropriate Key index.
Follow these steps to enable WPA authentication:
a Set Authentication to WPA.
b Set Data Encryption to either WEP or TKIP.
Follow these steps to enable WPA authentication using a
preshared key:
a Set Authentication to WPA-PSK.
b Set Data Encryption to either WEP or TKIP.
c Enter the new Network key.
Follow these steps to enable WPA2 authentication:
a Set Authentication to WPA2.
b Set Data Encryption to AES or TKIP.
c Enter the new Network key.
Follow these steps to enable WPA2 authentication using a
preshared key:
a Set Authentication to WPA2-PSK.
b Set Data Encryption to AES or TKIP.
c Enter the new Network key.
7 Tap Next.
8 From the EAP type list, select either PEAP or Smart Card or
Certificate and then tap Finish.
9 From the Networks to access list, select All Available, Only
access points, or Only computer-to-computer.
98
CN3 Series Mobile Computer User’s Manual
Chapter 3 — Configuring the Computer
10 Tap ok to close the screen.
Note: If you select to automatically connect to non-preferred
networks, the CN3 detects any new networks and provides you
with the opportunity to configure them.
Loading a Certificate
If you choose to use transport layer security (TLS) with WPA or
802.1x security, you need to have a unique client certificate on
the CN3 and a trusted root certificate authority (CA) certificate.
Certificates are pieces of cryptographic data that guarantee a
public key is associated with a private key. They contain a public
key and the entity name that owns the key. Each certificate is
issued by a certificate authority.
To import a root certificate
1 Tap the <<< button next to the Import Root Certificate field
to select the root certificate (DER-encoded .cer file) to
import.
2 Click Import Root Cert to install the selected certificate.
CN3 Series Mobile Computer User’s Manual
99
Chapter 3 — Configuring the Computer
To import a user certificate
1 Tap the <<< button next to the Certificate Path field to select
the user certificate (DER-encoded .cer file without the private
key) to import.
2 Tap the <<< button next to the Key Path field to select the
private key (.pvk file) which corresponds to the user certificate
chosen in Step 1.
To import a user certificate from an IAS server
1 Tap Web Enrollment.
2 Enter the User, Password, and Server (IP address) to log into
the server.
3 Tap OK. A dialog box appears asking if you want to load the
root certificate.
4 Tap OK for yes. The Enrollment Tool message box appears
telling you that the certificate has been added.
5 Tap OK to close the message box.
100
CN3 Series Mobile Computer User’s Manual
Chapter 3 — Configuring the Computer
Disabling Security
If you choose not to use security with your wireless network, you
can disable it on the CN3. Intermec recommends that you always
set security in your network.
To disable security
1 Open Intermec Settings.
2 Choose Communications > 802.11 Radio > Microsoft
Security.
3 For Network Authentication, choose Open.
4 For Data Encryption, choose Disabled.
5 Close Intermec Settings.
CN3 Series Mobile Computer User’s Manual
101
Chapter 3 — Configuring the Computer
102
CN3 Series Mobile Computer User’s Manual
4
Developing and Installing
Applications
Use this chapter to understand the guidelines for developing
applications for use on the CN3. This chapter contains these
sections:
• Developing Applications for the Computer
• Installing Applications on the Computer
• Freeing Up Virtual Memory for Applications
• Launching an Application Automatically
• Upgrading the System Software
CN3 Series Mobile Computer User’s Manual
103
Chapter 4 — Developing and Installing Applications
Developing Applications for the Computer
The CN3 runs applications programmed in Microsoft Visual
Studio 2005. You can also use Microsoft eMbedded Visual C++
4.0 to program applications, but some features may not be
available. Use this section to understand the hardware and
software you need to develop a new application for the computer.
Use the Intermec resource kits to develop new applications to run
on the CN3. The Intermec resource kits are a library of C++ and
.NET components grouped by functionality that you can use to
create applications for the computer. The resource kits are part of
the Intermec Developer Library (IDL), and can be downloaded
from the Intermec web site at www.intermec.com/idl.
You need the following hardware and software components to use
the resource kits:
• Pentium desktop, 400 MHz or higher
• Windows 2000 (Service Pack 2 or later) or Windows XP
(Home, Professional, or Server)
• For native and managed development, Microsoft Visual
Studio 2005
• 128 MB RAM (196 MB recommended)
• 360 MB hard drive space for minimum installation (720 MB
for complete)
• CD-ROM drive compatible with multimedia desktop
specification
• VGA or higher-resolution monitor (Super VGA
recommended)
• Microsoft Mouse or compatible pointing device
Installing Applications on the Computer
There are several ways you can install applications on your
mobile computer:
• You can package your application as a cabinet (.cab) file.
• If you have a simple application, you may only need to deliver
the .exe file.
104
CN3 Series Mobile Computer User’s Manual
Chapter 4 — Developing and Installing Applications
• You can copy a directory structure that contains the
application, supporting files, DLLs, images, and data files.
Intermec recommends using .cab files to install your applications.
The mobile computer uses standard Windows Mobile .cab files
and will install third-party .cab files. You can have your .cab files
place your application in any of these memory locations on the
mobile computer:
• The Object Store or the Flash File Store. The Object Store is a
DiskOnChip® flash that looks like a disk. The Flash File Store
is an area of storage which is embedded in a section of the
system flash memory. This storage is not erased during a reset,
although it might be erased during the reflashing process. In
addition to storing applications and data files, you have the
option to store persistent registry information to the Flash
File Store region.
• The optional miniSD card. If you are using a miniSD card,
this should be the primary location to place application
installation files. The miniSD card creates the Storage Card
folder on the CN3.
• The non-volatile Flash File Store region of the storage. Use
the small non-volatile Flash File Store region to hold .cab files
that rebuild the system at clean boot or install applications
from a .cab file into the Flash File Store so that they are
“ready-to-run” when you perform clean boot. Since the flash
in the system has a limited number of write cycles, do not use
the Flash File Store for excessive writing.
Files copied to any of these locations are safe when you cold boot
the computer as long as the AutoRun system is installed in the
appropriate location. You can find information about this system
in the Intermec Developer’s Library (IDL) Resource Kit Developer’s
Guide which is available from www.intermec.com/idl. When you
copy a .cab file to the \CabFiles folder, the folder automatically
extracts that .cab file on every cold boot.
There are several ways you can install files and applications on the
computer:
• SmartSystems console
• ActiveSync
• miniSD card
CN3 Series Mobile Computer User’s Manual
105
Chapter 4 — Developing and Installing Applications
• FTP server
• Wavelink Avalanche
The following sections explain how to use each one of these
processes to install your application on the computer.
Installing Applications Using SmartSystems Console
You can use the SmartSystems console to drag-and-drop
Intermec applications onto your mobile computers. The
computer ships with the SmartSystems client, which means it is
SmartSystems-enabled. The console is part of SmartSystems
Foundation, which you can download from www.intermec.com/
SmartSystems. For help using the console, see the online help.
To use SmartSystems console to install an application
1 Download your application file from the Intermec web site
and unzip it on your desktop PC.
2 Double-click the application file to install it. The application
file should appear in the Software Vault.
3 From the SmartSystems console in the Software Vault, dragand-drop the application onto each mobile computer in your
network.
Installing Applications Using Microsoft ActiveSync
You can use Microsoft ActiveSync to establish a connection
between your PC and the computer. ActiveSync transfers files,
synchronizes files, performs remote debugging, and other device
management activities. For more information on installing and
using ActiveSync, see “Using Microsoft ActiveSync” on page 43.
You can have a serial or USB ActiveSync connection to the
mobile computer. When you only have a few computers to
update, you can copy files using Windows Explorer on a PC.
This procedure assumes that Microsoft ActiveSync is installed on
your PC and is up and running.
To install an application on the computer using ActiveSync
1 Connect the CN3 to a PC using a USB cable. You may have
to disconnect and then connect the cable to “wake” the
connection.
106
CN3 Series Mobile Computer User’s Manual
Chapter 4 — Developing and Installing Applications
2 Wait for a “Connected” message to appear in the Microsoft
ActiveSync application to signal a connection to the mobile
computer. If necessary, select File > Get Connected to initiate
a connection.
3 Click Explore to open the Mobile Device window that shows
the files and folders on the CN3.
4 On your desktop PC, locate the .cab file you want to
download to the mobile computer and copy it.
5 From the Mobile Device window, open the My Windows
Mobile-Based Device folder and navigate to the folder where
you want to paste the .cab file.
6 Paste the .cab file into the desired folder.
7 When you are done copying files, clean boot the mobile
computer.
8 After the mobile computer is done booting, tap Start >
Programs > File Explorer to locate the newly copied files.
9 Tap the .cab files to install them.
CN3 Series Mobile Computer User’s Manual
107
Chapter 4 — Developing and Installing Applications
Installing Applications Using a Storage Card
If you have a miniSD card for your CN3, it is the best place for
you to install applications.
To install applications using the storage card
1 Suspend the CN3 and remove the miniSD card.
2 Insert the miniSD card into a miniSD adapter card and then
place it in the storage card reader connected to your PC.
3 Copy your application file to the miniSD card.
4 Remove the miniSD card from the adapter card and insert it
into the CN3.
5 On your CN3, navigate to the storage card folder and run
your application.
Installing Applications Using the FTP Server
The CN3 has a built-in FTP Server that connects to a network
through Ethernet, 802.11 b/g, or WAN (Wireless Access
Network). You can use the server to transfer your application file
to the computer. Another benefit of using the FTP server is that
you can create FTP scripts to automate the process of copying
your files to the computer. This option is useful when you need
to send files to a large number of computers.
The easiest way to manage the FTP server is to enable the FTP
menu within iConnect.
To enable the FTP menu
• Create this DWORD registry key and set it to a value of 1:
HKEY_CURRENT_USER\Software\iConnect2\IConnect\Settings\ShowFTPMenu
The iFTP menu is available the next time your start
iConnect.
To manage the state of the FTP server
• Modify these existing registry keys:
HKEY_CURRENT_USER\Software\iConnect2\IConnect\Settings\FtpAutoStart
HKEY_CURRENT_USER\Software\iConnect2\IConnect\Settings\FtpHeartbeat
Where 1 = enable and 0 = disable.
108
CN3 Series Mobile Computer User’s Manual
Chapter 4 — Developing and Installing Applications
Installing Applications Using Wavelink Avalanche
You can use the Wavelink Avalanche device management system
to install applications on all of your wireless CN3s. The CN3
ships with the Avalanche Enabler already loaded on it.
Each time the Avalanche Enabler is activated (typically on a
reset), the CN3 attempts to connect to the Avalanche Agent.
When the CN3 connects to the agent, the agent determines
whether an update is available and immediately starts the
software upgrade, file transfer, or configuration update.
Note: If you manually activate the Avalanche Enabler on the
CN3, you may be prompted for a password when you exit the
Avalanche Enabler. The default password is leave.
To use Avalanche to remotely manage the CN3
1 Install software packages and updates for the CN3 using the
Avalanche Administrative console.
2 Schedule the CN3 updates or manually initiate an update
using the Avalanche Administrative console.
For more information on using Wavelink Avalanche, contact
your local Intermec representative or visit the Wavelink web site
at www.wavelink.com.
Freeing Up Virtual Memory for Applications
You can use the InstallSelect application to reduce the amount of
virtual memory used by portions of the SmartSystems Platform
Bundle (SSPB). Freeing up virtual memory provides you with
more space to load and run custom applications. In technical
terms, virtual memory allows software to run in a memory
address space whose size and addressing are not necessarily tied to
the physical memory of the computer.
Note: InstallSelect is designed for use only by administrators,
developers, integrators, or Intermec service representatives.
Note: Do not run InstallSelect while using any other applications.
CN3 Series Mobile Computer User’s Manual
109
Chapter 4 — Developing and Installing Applications
InstallSelect manages the installation of value-added software
features of the computer. Removing software features may result
in loss of computer functionality or the ability to manage device
settings. See “Understanding the InstallSelect Software
Components” on page 111 or contact your Intermec service
representative for information about each software feature before
making changes.
To free up virtual memory, select items from the InstallSelect list
that you do not want to install. When you perform a clean boot,
the items you selected are not installed. However, you can
reinstall any of these SSPB components at any time with
InstallSelect. Be sure to back up any related files that you want
before you use the InstallSelect application. The InstallSelect
application is part of the SSPB and is installed at the factory.
For more information on SSPB, see “Upgrading the System
Software” on page 113.
To free up virtual memory
1 Go to Start > Programs > File Explorer.
2 Tap the Windows folder.
3 Scroll down to the InstallSelect application and tap the icon
( ). The InstallSelect application appears on the display
with a Caution dialog box.
4 Tap OK to close the Caution dialog box.
5 Clear the check box of any components you do not want
installed after a clean boot.
110
CN3 Series Mobile Computer User’s Manual
Chapter 4 — Developing and Installing Applications
By default, components already installed on the computer are
automatically checked to be installed again after you perform
a clean boot.
6 Tap Apply to initiate the clean boot and install only the files
that are selected.
7 Tap Yes to continue with the clean boot. The computer
performs a clean boot and restarts with all of the checked
components installed.
Understanding the InstallSelect Software Components
Component Name
Description
Data Collection &
Intermec Settings
Data collection and Intermec Settings. Also includes on-unit SDK
libraries.
If you disable this CAB file, you cannot scan or collect data on the
device and you cannot use Intermec Settings.
Intermec security supplicant that provides a wireless security
solution with several features that are not supported by Microsoft.
Provides Intermec printer driver support.
Provides the Intermec DHCP client application.
Provides the Intermec Bluetooth application support.
Enables the client to the Wavelink Device Management solution.
Funk Wireless Security
Printer Support
Intermec DHCP Client
Bluetooth
Avalanche Enabler
You will see other components available from the InstallSelect
application based on the options you selected for your CN3.
Launching An Application Automatically
There are two ways to automatically launch your application
when you perform a reset on the computer:
• Make sure your CAB file places a shortcut to your application
in the \Windows\StartUp folder.
• Configure the AutoRun program to launch your application.
The computer contains a program called AutoRun.exe which
automates operations such as launching other processes. You can
configure AutoRun.exe through the AutoRun data file,
AutoRun.dat. For compatibility with other Intermec computers,
you can place a copy of AutoRun.exe in the same folder as your
AutoRun.dat file but it is not required.
CN3 Series Mobile Computer User’s Manual
111
Chapter 4 — Developing and Installing Applications
To create and install the AutoRun.dat file on your computer
1 Create a folder called System on your CN3.
2 Open the Notepad application on your PC.
3 Write commands for AutoRun.dat using the supported
AutoRun script commands.
4 Save the Notepad file as AutoRun.dat.
5 Copy the AutoRun.dat file to the System folder on the CN3.
During every boot, the system scans for AutoRun.dat in the
System folder.
AutoRun supports the following script commands in
AutoRun.dat:
AutoRun Script Commands
Command
Description
EXEC
Launches a specified program and waits for it to finish
(up to 10 minutes)
Processes a specified file of commands and returns.
Processes a specified file of commands and does not
return.
Loads a specified program and executes it.
Loads a specified program and executes it.
CALL
CHAIN
RUN
LOAD
AutoRun handles quoted file names for the first parameter, which
allows you to specify path names or file names that contain white
spaces. AutoRun only supports one set of quotes per command.
112
CN3 Series Mobile Computer User’s Manual
Chapter 4 — Developing and Installing Applications
Upgrading the System Software
When you upgrade your computer, you are updating the
operating system (OS) and the SmartSystems Platform Bundle
(SSPB) files.
The SSPB files are stored on the DiskOnChip and deliver
Intermec Value Add (IVA) functionality such as data collection,
configuration, the Intermec wireless security suite, and the
SmartSystems™ Foundation. As new features are added to these
components, you can upgrade your SSPB files without needing
to upgrade the operating system. Alternately, you can choose to
upgrade only the operating system if you need new functionality.
There are two ways to upgrade your computer:
• You can upgrade your computer using an storage card. For
help, see the next section, “Upgrading the CN3 Using a
miniSD Card.”
• You can upgrade your computer using the SmartSystems
Console. For help, see “Upgrading the CN3 Using the
SmartSystems Console” on page 115.
You need to download the latest upgrade files from the Intermec
web site to your desktop PC.
To download the upgrade files
1 Start your web browser and go to the Intermec web site at
www.intermec.com.
2 Go to Support > Downloads.
3 Click the link to search the product downloads.
4 Select your computer from the Downloads list. The
Downloads page displays all of the downloads available for
your computer.
5 Download the upgrade file you need. If you want to upgrade
both the OS and the SSPB, you will need to download both
files.
CN3 Series Mobile Computer User’s Manual
113
Chapter 4 — Developing and Installing Applications
Upgrading the CN3 Using a miniSD Card
To use a miniSD card to upgrade the computer, you need an SD
card reader and a miniSD adapter card formatted as FAT16.
To upgrade the operating system using a miniSD card
1 Insert a miniSD card into a miniSD adapter card and then
place it in the storage card reader connected to your PC.
2 Copy all required OS upgrade files to the miniSD card.
3 Remove the miniSD card from the adapter card and insert it
into the CN3.
4 Place the CN3 in a dock connected to external power and
press the Reset button (using a stylus) located in the battery
cavity on the back of the CN3. For help, see “Cold Booting
the CN3” on page 124.
5 Remove the miniSD card when the Installation Complete
menu appears.
6 Remove the CN3 from the dock and replace the battery.
To upgrade the SSPB using a miniSD card
1 Insert a miniSD card into a miniSD adapter card and then
place it in the storage card reader connected to your PC.
2 Copy all required SSPB upgrade files to the miniSD card.
3 Remove the miniSD card from the adapter card and insert it
into the CN3.
4 Using the stylus, press the Reset button in the battery cavity
on the back of the CN3.
5 Press and hold the Power button as you insert the battery
back into the CN3.
6 Continue to hold the Power button until a Warning message
appears on the display.
7 Release the Power button, read the message, and press either
button on the right side to continue.
8 Perform the screen alignment and wait for the CN3 to load
files from the miniSD card.
114
CN3 Series Mobile Computer User’s Manual
Chapter 4 — Developing and Installing Applications
When the progress is complete, the CN3 warm boots to reset
the configuration.
9 Remove the miniSD card and delete the files.
10 Set the date, time, and network communication parameters to
reestablish communications with the other devices in the
wireless network.
Upgrading the CN3 Using the SmartSystems Console
You can use the SmartSystems console to upgrade the operating
system on your computer. The console is part of SmartSystems
Foundation and is available from the Intermec web site via the
Intermec Developer Library (IDL). Before you can upgrade your
computer, you need:
• the SmartSystems Foundation. To download SmartSystems
Foundation, go to www.intermec.com/idl and open the
Device Management page.
• the device upgrade .exe file. This file is available from the
Intermec web site at www.intermec.com. Go to Support >
Downloads. Make sure the file you select is for your
language.
To upgrade the computer using SmartSystems console
1 Install SmartSystems Foundation on your PC and open the
SmartSystems console.
2 Make sure the SmartSystems console and the computers are
on the same subnet.
3 Make sure your computers are either in a communications
dock or charging dock or that power management is disabled.
4 Download the device upgrade .exe file to your desktop PC.
5 Double-click the .exe file on your desktop PC. An
InstallShield application starts and walks you through the
process of extracting the upgrade files in the default location.
Note: Do not change the default location where InstallShield
extracts the files. The SmartSystems console requires that the files
be in this location.
CN3 Series Mobile Computer User’s Manual
115
Chapter 4 — Developing and Installing Applications
6 From the SmartSystems console, locate the device upgrade to
install.
7 Drag-and-drop the device upgrade onto each computer you
want to upgrade. The SmartSystems console will tell you that
it is installing the upgrade on your computer.
Once the upgrade is done downloading to your computer, your
computer replaces the operating system and then automatically
performs a cold-boot. Progress messages appear on the computer
screen.
Note: The SmartSystems console will show your computer as
offline (note the red stop sign) until the computer reboots and
reconnects to the system.
116
CN3 Series Mobile Computer User’s Manual
5
Troubleshooting and
Maintaining the CN3
If you encounter any problems while using the mobile computer,
look in this chapter to find a possible solution. You will also find
information on routine maintenance. This chapter contains these
sections:
• Calling Product Support
• Troubleshooting the CN3
• Resetting the CN3
• Cleaning the CN3
CN3 Series Mobile Computer User’s Manual
117
Chapter 5 — Troubleshooting and Maintaining the CN3
Calling Product Support
If you cannot find the answer to your problem in the
“Troubleshooting the Computer” section, you can visit the
Intermec technical knowledge base (Knowledge Central) at
intermec.custhelp.com to review technical information or to
request technical support. If you still need help after visiting
Knowledge Central, you may need to call Product Support.
To talk to an Intermec Product Support representative, call:
1-800-755-5505
Before you call Intermec Product Support, make sure you have
the following information ready:
• Configuration number
• Operating system version
• SmartSystems Platform Bundle (SSPB) version
• If you are using security, know the type (Funk or Microsoft)
and the full set of parameters
• Power management settings
• If you are using terminal emulation (TE), know the version
and protocol
• If you are not using TE, know the language your custom
application was written in and the tools you used to create it
You can find most of the information listed above in Intermec
Settings. Consult your application developer for information on
your custom application.
To find your configuration number
• Look at the label on the back of the computer.
118
CN3 Series Mobile Computer User’s Manual
Chapter 5 — Troubleshooting and Maintaining the CN3
To find your operating system version
1 Tap Start > Internet Explorer.
2 Tap the Intermec logo. The Intermec page appears and
displays the software build information.
Troubleshooting Your CN3
If you send the CN3 in for service, it is your responsibility to save
the computer data and configuration. Intermec is responsible
only for ensuring that the hardware matches the original
configuration when repairing or replacing the computer.
Problems While Configuring the CN3
Problem
Solution
You scan a configuration command, If you are working in Intermec Settings, you cannot scan
such as Beeper Volume, and you hear configuration commands. Exit the application to scan
three low beeps.
configuration commands.
You scan or enter an option for the
Scanner Model configuration
command and you hear three low
beeps.
You may have scanned or entered a Scanner Model
command that does not apply to the type of scanner that
you have installed. Try scanning or entering the Scanner
Model command again and select an option for the type
of device you are using.
You cannot type a character on the
keypad or you can only type
uppercase or lowercase letters.
You may have locked a modifier key on the keypad.Press
the necessary key sequence to unlock the key. For help,
see “Using the Keypad” on page 9.
CN3 Series Mobile Computer User’s Manual
119
Chapter 5 — Troubleshooting and Maintaining the CN3
Problems While Operating the CN3
Problem
Solution
You press the Power button and
nothing happens.
• Make sure the backlight is on.
• Make sure you have a charged battery that is installed
correctly. For help, see “Charging the Battery” on
page 4.
• The battery may be discharged. Replace the battery
with a spare charged battery, or charge the battery.
• Perform a warm boot or a cold boot.
The Battery status LED is on.
The battery status LED indicates the following states:
• If the battery status LED is a steady green, the
battery is more than 95% charged and computer is
on a charger.
• If the battery status LED is blinking red, then the
battery is low. Replace or charge the battery.
• If the battery status LED is a steady red, the main
battery is on charge.
The computer appears to be locked up • Press the power key to turn off the computer, then
and you cannot enter data.
press the power key again to turn it on.
• Press and hold the power key ten seconds to warm
boot the computer.
• Try reloading the firmware. See “Upgrading the
System Software” on page 113 .
• If the computer does not boot or reset, contact your
Intermec representative for help.
You tap the screen and nothing
happens.
Align your screen. For help, see “Aligning the Touch
Screen” on page 21.
Problems With Wireless Connectivity
Problem
Solution
When you turn on the computer after
it was suspended for a while (10 to 15
minutes or longer), it can no longer
send or receive messages over the
network.
Host may have deactivated or lost current terminal
emulation session. In a TCP/IP direct connect network,
turn off the “Keep Alive” message from host to maintain
the TCP session while the computer is suspended.
The CN3 is connected to the network
and you move to a new site to collect
data. Your CN3 now shows you are
not connected to the network.
Move closer to an access point or to a different location
to reestablish communications until you reconnect with
the network. Any data collected while out of range is
transmitted over the network.
120
CN3 Series Mobile Computer User’s Manual
Chapter 5 — Troubleshooting and Maintaining the CN3
Problems With Wireless Connectivity (continued)
Problem
Solution
The CN3 appears to be connected to
the network, but you cannot establish
a terminal emulation session with the
host computer.
There may be a problem with the host computer, with
the connection between the Intermec Application Server
and the host computer, or with the connection between
the access point and the host computer. Check with
network administrator to make sure the host is running
and allowing users to login to the system.
The CN3 appears to be connected to
the network, but the host computer is
not receiving any information from
the CN3.
In a UDP Plus network, there may be a problem with
the connection between the Intermec Application Server
and the host computer. Check with network
administrator or see the user’s manual for the Intermec
Application Server.
In a TCP/IP network, there may be a problem with the
connection between the access point and the host
computer. Check with network administrator or use
your access point user’s manual.
Problems While Configuring 802.1x Security
Problem
Solution
The CN3 indicates that it is
authenticated, but it does not
communicate with the host.
Make sure the CN3 IP address, host IP address, subnet
mask, default router are configured for network.
The CN3 does not appear to be
authenticating and a network
connection icon does not appear on
the toolbar.
The CN3 may not be communicating with the access
point. Make sure the CN3 network name matches the
access point network name (SSID).
802.1x security network may not be active. Make sure
the server software is properly loaded and configured on
the server PC. See server software documentation for
help.
A network connection icon appears in The CN3 may not be communicating with the intended
the toolbar, but then disappears.
access point. Make sure the CN3 network name matches
the access point network name. Default network name is
“INTERMEC.”
Access point may not be communicating with server.
Ensure the access point is turned on, properly
configured, and has 802.1x security enabled
You are setting up multiple access
points in a network, with different
SSIDs, and the connection fails.
CN3 does not save WEP key values when changing the
SSID. Reenter the WEP key values and apply the
network settings. You should now be able to connect.
CN3 Series Mobile Computer User’s Manual
121
Chapter 5 — Troubleshooting and Maintaining the CN3
Problems While Configuring 802.1x Security (continued)
Problem
Solution
You are setting up multiple access
points in a network, with different
SSIDs, and the connection fails.
The CN3 does not save WEP key values when changing
the SSID. Reenter the WEP key value after changing the
SSID and save your changes. You should now be able to
connect to the different access points.
The CN3 indicates it is not
authenticated.
Make sure that:
• the User Name and Password parameters on the CN3
must match the user name and password on
authentication server. You may need to reenter the
password on both the CN3, authentication server.
• on your authentication server, the user and group are
allowed and the group policy is allowed to log into
the server. For help, see the documentation that
shipped with your authentication server software.
• the IP address and secret key for access point must
match the IP address and secret key on the
authentication server. You may need to reenter the IP
address and secret key on both your access point and
authentication server.
• the authentication server software is running on the
server PC.
You receive a message saying “The
server certificate has expired or your
system date is incorrect” after you
perform a clean boot on the CN3.
Date and time are not saved when you perform a clean
boot. Reenter the date and time, and then save your
changes.
Problems While Scanning Bar Codes
Problem
Solution
• You may be too far away from the bar code label. Try
You cannot see a red beam of light
moving closer to the bar code label and scan it again.
from the scanner when you press the
Scan button and aim the scanner at a • You may be scanning the bar code label “straight on.”
bar code label.
Change the scanning angle and try again.
• Move within two feet of a wall to test the effective
scan of the scanner. For help scanning bar codes, see
“Scanning Bar Codes” on page 22.
The input device attached to the
Set the Scanner Model command to the specific
computer does not work well or read attached input device. Check enabled bar code
bar code labels very quickly.
symbologies and enable only the symbologies being
used.
122
CN3 Series Mobile Computer User’s Manual
Chapter 5 — Troubleshooting and Maintaining the CN3
Problems While Scanning Bar Codes (continued)
Problem
Solution
When you release a Scan button or
handle trigger, the Good Read light
does not turn off.
The Good Read light will remain on if you configure
the computer to use continuous/edge triggering. If you
configure the computer for level triggering and the
Good Read light remains on, there may be a problem.
Press one of the Scan buttons or pull the trigger again
without scanning a bar code label. If the light is still on,
contact your local Intermec representative.
The scanner will not read the bar code • Aim the scanner beam to cross entire bar code label
label.
in one pass. Vary the scanning angle.
• Check the quality of the bar code label, Scan a bar
code label that you know will scan. Compare the two
bar code labels to see if the bar code quality is too
low. You may need to replace the label that you
cannot scan.
• Make sure the bar code symbology is enabled. Use
Intermec Settings to check the symbologies. Expand
Data Collection > Symbologies beneath devices
listed (scanner, virtual wedge) to check and enable
symbologies, then scan the bar code label again.
• Make sure the computer application is expecting
input from a bar code. You may need to type this
information instead.
The scanner does not read the bar
code labels quickly, or the scanning
beam seems to be faint or obscured.
The scanner window may be dirty. Clean the window
with a solution of ammonia and water. Wipe dry. Do
not allow abrasive material to touch the window
You scan a valid bar code label to
enter data for your application. The
data decoded by the scan module does
not match the data encoded in the bar
code label.
The computer may have decoded the bar code label in a
symbology other than the label’s actual symbology. Try
scanning the bar code label again. Make sure you scan
the entire label.
Resetting the CN3
You rarely need to reset the computer. If the computer does not
resume after pressing the Power button, or if the computer or an
application lock up, you may need to reset the CN3. The CN3
uses the configuration currently saved in flash memory during
the boot process. There are three ways to reset the CN3:
• Warm booting the CN3
CN3 Series Mobile Computer User’s Manual
123
Chapter 5 — Troubleshooting and Maintaining the CN3
• Cold booting the CN3
• Clean booting the CN3
Warm Booting the CN3
You may need to perform a warm boot to correct conditions
where an application stops responding to the system.
To warm boot the computer
• Press and hold the Power button for 10 seconds.
The computer systematically shuts down, restarts, and goes
through the initialization process.
Cold Booting the CN3
In some cases where the computer completely stops responding,
it may be necessary to perform a cold boot. Because cold booting
may result in data loss, only use this method if all other recovery
methods have failed.
Note: Cold booting the CN3 does not guarantee that cached disk
data will be saved, so transactional data may be lost during the
reset. All other data is preserved.
To cold boot your CN3
1 Press the Power button to suspend the CN3.
2 Remove the battery pack from the CN3.
3 Press the Reset button on the back of the CN3.
Reset button
Locating the Reset button on the CN3
124
CN3 Series Mobile Computer User’s Manual
Chapter 5 — Troubleshooting and Maintaining the CN3
Reset button
Locating the Reset button on the CN3e
4 Press and hold the Power button as you insert the battery
pack back into the CN3.
Clean Booting the Computer
When you clean boot the CN3, it loads only those files and
programs that are absolutely required by the operating system.
Use the clean boot to troubleshoot the CN3 by getting it up and
running so that you can perform diagnostic tests to determine
which elements of the normal boot process are causing problems.
The clean boot process will erase the memory in the mobile
computer, including all applications and data files found in
the object store.
To preserve application programs through a clean boot, you
must store them in the Flash File Store.
To clean boot the computer
1 Press the Power button to suspend the CN3.
2 Remove the battery pack from the back of the CN3.
3 With a stylus, press the Reset button on the battery cavity.
CN3 Series Mobile Computer User’s Manual
125
Chapter 5 — Troubleshooting and Maintaining the CN3
4 Press and hold the Power button as you insert the battery
back into the CN3.
5 Continue to hold the Power button until a Warning message
appears on the display.
6 Release the Power button, read the message, and press either
button on the right side to continue.
7 Perform the screen alignment and wait for the CN3 to load
files from the miniSD card.
Cleaning the CN3
To keep the CN3 in good working order, you may need to clean
the imager window, color camera window, and the touch screen.
Clean the windows and the touch screen as often as needed for
the environment in which you are using the CN3. To clean the
CN3, use a solution of ammonia and water.
There are no user-serviceable parts inside the CN3. Opening
the CN3 will void the warranty and may cause damage to the
internal components.
To clean the imager window, camera window, and touch screen
1 Press the Power button to suspend the CN3.
2 Dip a clean cloth towel in the ammonia solution and wring
out the excess.
3 Wipe off the imager window, camera lens, and flash area. Do
not allow any abrasive material to touch these surfaces.
4 Wipe dry.
126
CN3 Series Mobile Computer User’s Manual
A
Specifications
CN3 Series Mobile Computer User’s Manual
127
Appendix A — Specifications
Physical and Environmental Specifications
CN3 Physical Dimensions (excluding overmold)
Length:
Width:
Height:
Weight:
16.0 cm (6.3 in)
8.1 cm (3.2 in)
3.3 cm (1.3 in) with standard battery
Non-WAN units: 14 oz
WAN units w/standard battery: 15 to 16 oz
WAN units w/extended battery: 16 to 17 oz
CN3e Physical Dimensions (excluding overmold)
Length:
Width:
Height:
Weight:
19.5 cm (7.7 in)
8.1 cm (3.2 in)
3.3 cm (1.3 in) with standard battery
Non-WAN units: 17 to 18 oz
WAN units w/extended battery: 18 to 19 oz
Hardware
Microprocessor:
Application processor:
Memory:
Persistent storage:
Removable storage:
Keypad:
Scanner options:
Bluetooth QD ID:
Intel XScale PXA270
520 MHz RAM
128 MB RAM
128 MB NAND flash, provides
onboard non-volatile storage
miniSD card slot, user-accessible
numeric, QWERTY, CN3e 10-key,
CN3e numeric
EA11, EA11HD scan engine, color
camera
B013037
Operating System
Microsoft Windows Mobile 5.0
Standard Communications
USB host, USB client, Bluetooth, 802.11b/g, GPRS, CDMA
(CN3 only), GPS
Touchscreen Specifications
Transflective TFT; QVGA color with touch panel; 240 x 320
pixels; 8.9 cm (3.5 in) diagonal active area; 5-level LED backlight
control with settings
Electrical Specifications
External charge power: 5 V +/- 5% @3.5 A max (18 W max)
128
CN3 Series Mobile Computer User’s Manual
Appendix A — Specifications
Environmental
Operating temperature: -10° to 50°C (14° to 122°F)
Storage temperature:
-20° to 70°C (-13° to 158°F)
Humidity:
5% to 95% non-condensing
Rain and dust resistance: IP54 compliant
Drop specifications:
Multiple 1.5 m (5 ft) drops to steel or
concrete
Power Specifications
Battery type:
Recharge time:
Battery capacity:
Backup battery:
Rechargeable Lithium-Ion (Li-ion)
batteries:
AB8: 3.7 VDC, 2.2 Ah
AB9: 3.7 VDC, 4.0 Ah
4 hours or less
AB8: 8 Watt-hours
AB9: 14 Watt-hours
Super capacitor supplies 5 minutes
bridge time
Wireless LAN
Standards compliant:
Data rates:
Radio power output:
Security:
Certifications:
IEEE 802.11g (2.4 GHz, OFDM)
IEEE 802.11 b (2.4 GHz, DSSS)
Up to 54 Mbps for 802.11g
Up to 11 Mbps for 802.11b
100 mW
WEP, WPA, 802.11i, 802.1x (EAPTLS, TTLS, LEAP, PEAP, EAP-FAST)
Wi-Fi, WPA, WPA2, Cisco
Compatible Extensions
Bar Code Symbologies
Australian Post, British Post, Codabar, Codablock A, Codablock
F, Code 11, Code 2 of 5, Code 39, Code 93, Code 93i, Code
128, DataMatrix, Dutch Post, ISBT 128, Interleaved 2 of 5,
Macro 2 of 5, Matrix 2 of 5, Maxicode, Micro PDF417, MSI,
PDF417, Planet, Plessey, Postnet, QR Code, RSS 14, RSS
Expanded, RSS Limited, Telepen, TLC39, KUCC-EAN
Composite Code, UPC/EAN
Regulatory Approvals
UL and cUL Listed, UL60950 and UL 1604 and CSA 22.2 No.
157, FCC Part 15, TUV, CE mark
CN3 Series Mobile Computer User’s Manual
129
Appendix A — Specifications
Scanner Reading Distances
Typical reading distances are done in an office environment using
office lights (4 lux). Minimum distances are measured in the dark
(0 lux). Both reading distances are provided in respective scan
engine integration guides. Contact your local Intermec
representative for more information.
Below are minimum standard reading distances for the CN3 and
CN3e built with integrated scan engines. When correctly
mounted, and exit window reduces reading distances by about
4% for all scan engines.
EA11 Standard Minimum Reading Distances
Symbology
Density
Minimum Distance
Maximum Distance
Code 39
0.125 mm (5 mil)
0.20 mm (8 mil)
0.25 mm (10 mil)
0.50 mm (20 mil)
7.26 cm (2.86 in)
3.96 cm (1.56 in)
3.45 cm (1.36 in)
4.98 cm (1.96 in)
12.09 cm (4.76 in)
20.98 cm (8.26 in)
25.04 cm (9.86 in)
40.28 cm (15.86 in)
UPC/EAN
0.33 mm (13 mils)
4.98 cm (1.96 in)
29.62 cm (11.66 in)
Data Matrix
0.191 mm (7.5 mils)
0.254 mm (10 mils)
0.381 mm (15 mils)
3.71 cm (2.46 in)
5.98 cm (2.35 in)
*
16.41 cm (6.46 in)
20.73 cm (8.16 in)
27.58 cm (10.86 in)
PDF417
0.168 mm (6.6 mils)
0.254 mm (10 mils)
0.381 mm (15 mils)
6.25 cm (2.46 in)
4.47 cm (1.76 in)
4.98 cm (1.96 in)
13.87 cm (5.46 in)
21.74 cm (8.56 in)
33.43 cm (13.16 in)
* Minimum distance depends on symbology length and scan angle
130
CN3 Series Mobile Computer User’s Manual
Appendix A — Specifications
0"
4"
8"
12"
16"
in
10"
25
8"
20
Data Matrix 7.5 mils
6"
15
PDF417 6.6 mils
4"
10
2"
5
0"
0
2"
5
4"
10
0.125mm / 5mils
6"
15
0.25 mm / 10 mils
20
8"
100% contrast UPC EAN
10"
25
0.5 mm / 20 mils
cm
0
10
20
30
40
50
EA11 Standard Minimum Reading Distances With 0.04 Inch Setbacks
Accessories
All of the accessories listed below work for both the CN3 and
CN3e models unless otherwise noted.
AC14 Quad Battery Charger (P/N 852-065-001)
Use the quad battery charger to charge up to four CN3 battery
packs.
AD10 Single Dock (P/N 871-025-001)
Use the single dock to hold a CN3 with its battery installed,
charge a spare battery pack, charge the main battery pack, and
provide power to the CN3. The dock has USB host and client
connectors. Optional modules are available to convert the USB
host to Ethernet or to a landline modem.
CN3 Series Mobile Computer User’s Manual
131
Appendix A — Specifications
AD11 Multidock (P/N 871-026-001)
Use the multidock to hold up to four CN3s with batteries
installed. The multidock charges the batteries and provides power
and Ethernet connections to each CN3.
AD12 Charge-Only Multidock (P/N 875-026-002)
Use the charge-only multidock to hold up to four CN3s with
batteries installed, charge batteries, and provide power to CN3s.
AV6 Vehicle Dock (P/N 871-027-001)
Use the vehicle dock to hold and charge the CN3 while using it
on a vehicle.
AV9 Vehicle Dock (P/N 871-027-101)
Use the vehicle dock to hold and charge the CN3e while using it
on a vehicle.
AR1 Magnetic Card Reader (P/N 850-557-001)
The magnetic card reader provides magnetic stripe reading
capability to the CN3.
132
CN3 Series Mobile Computer User’s Manual
I
Index
CN3 Series Mobile Computer User’s Manual
133
Index
Numerics
2D imager, using to scan bar codes, 23
802.11 radio communications,
configuring, 59
802.1x security
configuring Funk, 82
troubleshooting, 121–122
A
AC14
charging time, 5
quad battery charger accessory,
described, 131
accessories, described, 131
activating CDMA phone, 69
Activation Wizard, starting, 70
ActiveSync, using to install
applications, 106
AD10
charging time, 5
single dock accessory, described, 131
AD11 multidock accessory, described, 132
AD12 charge-only multidock accessory,
described, 132
ad-hoc, wireless network connection, 76
AES (Advanced Encryption Standard),
definition, 76
aligning screen, 21
alphanumeric keypad, illustrated, 10
amber battery LED, understanding, 8
application
developing for CN3, 104
installing
using ActiveSync, 106
using SmartSystems Console, 106
using the FTP server, 108
using the SD card, 108
with Wavelink Avalanche, 109
launching automatically, 111
stops responding, troubleshooting, 124
AR1 magnetic card reader accessory,
described, 132
area imager
improving performance, 23
using to scan bar codes, 23
association label, scanning to connect to
scanner, 52
134
audio device, connecting to wireless, 57
audio features of CN3, 16
authentication, troubleshooting
802.1x, 121, 122
AutoRun
script commands, 112
using to launch other processes, 112
AutoRun.dat, 111
AutoRun.exe, 111
AV6 vehicle dock accessory, described, 132
AV9 vehicle dock accessory, described, 132
Avalanche
Enabler, InstallSelect component, 111
using to remotely manage the 751, 109
B
backlight settings, configuring, 13
bar code symbologies, supported, 129
battery
charging, 4
charging times, 5
description, 4
icons, illustrated, 20
installing, 5
internal backup, 4
maximizing life, 6
specifications, 129
status LED, 7
status, checking, 8
troubleshooting status LED, 120
beeps
enabling, 25
three low, troubleshooting, 119
blue LED, understanding, 21
Bluetooth
association label, 52
audio device, connecting to CN3, 57
communications, configuring on the
CN3, 52
device addres, 51
InstallSelect component, 111
QD ID, 128
Radio Hardware version, 51
Resource Kit, downloading, 50
Scanner Wizard, using to connect to
scanner, 52
selecting wireless printer, 55
CN3 Series Mobile Computer User’s Manual
Index
Bluetooth (continued)
turning radio on, 50
wireless printing, configuring, 54
wireless scanner, configuring
communications, 52
boot
clean, performing, 125
cold, performing, 124
warm, performing, 124
C
cab file, using to install applications, 104
calibrating screen, 21
calling product support, 118
camera
cleaning window, 126
using, 24
capacitor, internal super, 4
Caps Lock,enabling, 11
card, SD, using to install applications, 108
carriers, supported, 68
CDMA
activation values table, 69
carriers, supported, 68
phone, activating, 70
cell phone, using CN3, 16
certificate
import user, 100
importing a root, 99
loading for security, 99
charge-only multidock accessory,
described, 132
charging, battery, 5
CKIP (Cisco Key Integrity Protocol),
definition, 76
Class of Device, Bluetooth setting, 51
clean boot
performing, 125
storing files to rebuild system, 105
cleaning computer, 126
CN3 features, 2
cold boot, performing, 124
color-coded keys
locking and unlocking, 11
using, 10
command bar, using, 34
CN3 Series Mobile Computer User’s Manual
communications
802.11 radio, configuring, 59
configuring Bluetooth scanner, 52
Ethernet, configuring, 58
standard, 128
USB, configuring, 58
configuration commands,
troubleshooting, 119
configuration number, finding on your
computer, 118
configuring
backlight settings, 13
parameters, 48
Connectable, Bluetooth setting, 51
D
Data Collection & Intermec Settings,
InstallSelect component, 111
debug log, creating Funk security, 96
Device address, Bluetooth setting, 51
diagnostic tests, running to
troubleshoot, 125
dimensions, physical, 128
discover printer, 55
Discoverable, Bluetooth setting, 51
DiskOnChip, storing applications, 105
display, specifications, 19
drop specification, 129
E
EA11
reading distances, 130
reading distances, illustration, 131
EAP, definition, 78
EAP-FAST
configuring with Profile Wizard, 94
definition, 78
EAP-PEAP, definition, 78
EAP-TLS
configuring with Profile Wizard, 90
definition, 78
EAP-TTLS
configuring with Profile Wizard, 91
definition, 79
electrical specifications, 128
Electronic Serial Number (ESN),
locating, 68
135
Index
environmental specifications, 128
Ethernet communications, configuring, 58
extended ephemeris
benefits, 27
enabling, 29
F
features of CN3, 2
Flash File Store, using to install
applications, 105
front speaker, adjusting volume, 16
FTP server, using to install
applications, 108
Funk security
configuring
802.1x, 82
LEAP, 83
Profile Wizard, 84
WEP, 84
WPA, 81
WPA2, 81
creating a debug log, 96
selecting a profile, 80
Funk Wireless Security, InstallSelect
component, 111
G
Good Read LED
troubleshooting, 123
understanding, 21
GPSID (GPS Intermediate Driver)
configuring settings, 28
overview, 27
green battery LED, understanding, 8
green key, using, 10
green LED, understanding, 21
H
hardware specifications, 128
hardware, required for developing, 104
hidden characters on QWERTY
keypad, 12
humidity, 129
I
IAS server, importing user certificate, 100
iConnect
using to check wireless connection, 61
136
using to configure Funk security, 84
using to enable Ethernet, 58
using to enable FTP server, 108
icons, understanding screen, 20
IDL (Intermec Developer Library), 104
IDL website, using to download
smartsystems foundation, 115
iGPS settings, 29
imager, cleaning window, 126
infrastructure, wireless network
connection, 76
installing
applications using the SD card, 108
battery, 5
portions of SSPB to free up
memory, 109
InstallSelect
understanding the components, 111
using to free up memory, 109
Intermec Bluetooth Library (IBT)
version, 51
Intermec DHCP Client, InstallSelect
component, 111
Intermec Settings, using to configure
computer, 48
Internet Explorer, using to find OS
version, 3, 119
ISP (Internet Service Provider)
connecting to CN3, 71
ISpyWiFi utility, troubleshoot 802.11
connection, 61–67
IVA functionality, description, 113
K
keypads
illustrated, 9
troubleshooting keys, 119
using color-coded keys, 10
Knowledge Central web site, 118
L
launching applications automatically, 111
LEAP
definition, 79
security, configuring with Funk, 83
security, configuring with Profile
Wizard, 93
CN3 Series Mobile Computer User’s Manual
Index
LED
battery status, 7
understanding status, 21
locked computer, troubleshooting, 120
lower power mode, 12
M
magnetic card reader accessory,
described, 132
Master Subsidy Lock (MSL), 69
memory
freeing up virtual for applications, 109
installing applications in, 105
microphone, locating, 16
Microsoft security
configuring, 96–99
selecting as security choice, 96
miniSD card
inserting, 26
using to increase storage, 26
using to upgrade computer, 114
Mobile Country Code (MCC), 69
Mobile Directory Number (MDN), 69
Mobile Network Code (MNC), 69
Mobile Station Identification Number
(MSIN), 69
Mobile Station Identifier (MSID), 69
modem, connecting through RAS, 72
multidock accessory, described, 132
N
navigation bar, using, 34
network connection icon, 20
Network ID (NID), 69
network protocols, supported, 59
Notification LED, understanding, 21
numeric keypad
entering letters and symbols, 12
illustrated, 9
O
Object Store, storing applications, 105
operating system
finding version, 3, 119
how to upgrade, 113
specification, 128
operating temperature, 129
CN3 Series Mobile Computer User’s Manual
orange key, using, 10
orange LED, understanding, 21
P
PACs (Protected Access Credentials), 94
parameters, configuring, 48
PEAP
choosing with WPA security, 81
configuring with Profile Wizard, 88
persistent storage manager, how to
upgrade, 113
personal area network, configuring, 50
phone
activating CDMA values, 69
configuring, 67
enhabling vibrate, 18
making a call, 70
turning on, 67
using the features, 16
physical specifications, 128
Pictures & Videos, using to take
pictures, 25
pictures (.jpg), storage location, 25
Power application, using to check battery
status, 8
Power button, understanding how to
use, 12
Power Profiler
understanding, 14
using, 15
power specifications, 129
Power, Bluetooth setting, 51
power, managing, 14
Predefined mode, Intermec Settings, 24
Printer Support, InstallSelect
component, 111
printer, selecting wireless, 55
printing application, creating wireless, 54
private network, connecting to with VPN
server, 74
problems, troubleshooting, 119–123
product support
calling, 118
Knowledge Central web site, 118
Profile Wizard
configuring Funk security, 84
illustration, 85
137
Index
profile, selecting for Funk security, 80
Q
quad battery charger accessory, 131
QWERTY keypad
hidden characters, 12
illustrated, 9
R
radio, turning on Bluetooth, 50
rain and dust resistance, 129
RAM, amount on CN3, 3
RAS (Remote Access Server) account,
creating a model connection, 72
reading distances, scanner, 130
Ready-to-Work indicator LED,
understanding, 21
rear speaker
adjusting volume, 18
locating, 17
red battery LED, understanding, 8
regulatory approvals, 129
reset, performing, 123
resource kits
required software and hardware, 104
smartsystems foundation, 115
root certificate, importing, 99
S
scanner, reading distances, 130
scanning, troubleshooting, 122–123
screen
aligning touch, 21
cleaning, 126
entering information with stylus, 20
icons, understanding, 20
no response, troubleshooting, 120
specifications, 19, 128
Windows Mobile Today, 19
Screen Off mode, 13
SD card
using to copy and install files, 108
using to install applications, 108
security
choosing between Microsoft and
Funk, 79
configuring, 76
Microsoft, 96
138
disabling, 101
Funk, defining profiles, 80
loading certificates, 99
Service Programming Code (SPC), 69
settings, configuring with Intermec
Settings, 48
SIM card, inserting, 70
single dock accessory, 131
SmartSystems
upgrading computer, 115
using to install applications, 106
SmartSystems Console
using to install applications, 106
using to upgrade the computer, 115
SmartSystems Foundation
described, 106
downloading, 106
managing devices remotely, 49
SmartSystems Platform Bundle (SSPB),
finding version, 3
software version, finding, 3
software, required for developing, 104
Sounds & Notifications applet, enable
beeps, 25
speakers, locating, 16
specifications, physical and
environmental, 128
SSPB
finding version, 3
upgrading with miniSD card, 114
storage temperature, 129
stylus, using, 20
support, calling product, 118
symbologies
enabled by default, 22
supported bar code, 129
System ID (SID), 69
T
TCP/IP, configuring network
parameters, 59
terminal emulation, troubleshooting
connection, 121
terminology, encryption, 76
test page, printing wireless, 56
time, synchronizing with time server, 49
CN3 Series Mobile Computer User’s Manual
Index
TKIP (Temporal Key Integrity Protocol),
definition, 77
Today screen, Windows Mobile, 33
touch screen, aligning, 21
troubleshooting, guide to finding
solutions, 119
TTLS, choosing with WPA security, 81
turning on CN3, troubleshooting, 120
U
UDP Plus, configuring network
parameters, 60
upgrade files, downloading, 113
upgrading
operating system, overview, 113
persistant storage manager,
overview, 113
using a miniSD card, 114
using SmartSystems console, 115
uppercase letters, typing, 11
URLs
Microsoft support, 32
Windows Mobile, 32
Windows Mobile support, 32
USB communications, configuring, 58
user certificate, importing, 100
USNO time server, 49
V
vehicle dock accessories, described, 132
version, finding software, 3
vibrate, enabling, 18
virtual memory, freeing up, 109
volume
adjusting front speaker, 16
adjusting rear speaker, 18
icon, 20
VPN connection, creating, 74
W
warm boot, performing, 124
Wavelink Avalanche, using to install
applications, 109
CN3 Series Mobile Computer User’s Manual
WEP
definition, 77
security
configuring, 84
configuring with Profile Wizard, 85
troubleshooting, 121
Windows Mobile
basic usage, 33
command bar, using, 34
navigation bar, 34
programs, 34
support URLs, 32
Today screen, 33
where to find information, 32
Windows Mobile Classic setting, 14
Windows Mobile Phone setting, 14
Windows Mobile Standard setting, 14
Windows Mobile Today screen,
illustrated, 19
wireless
connection, checking status, 61
connectivity, troubleshooting, 120–121
LAN, specifications, 129
manager application, using to turn on
phone, 67
printer, discovering, 55
printer, selecting, 55
printing application, creating, 54
printing wizard, 55
security, configuring, 76
WPA
configuring security, 81
definition, 77
security
configuring with Profile Wizard, ??–
88
security, configuring with Profile
Wizard, 86–??
WPA2
configuring security, 81
definition, 77
www.intermec.com/idl, 30, 104
139
Index
140
CN3 Series Mobile Computer User’s Manual
Worldwide Headquarters
6001 36th Avenue West
Everett, Washington 98203
U.S.A.
tel 425.348.2600
fax 425.355.9551
www.intermec.com
CN3 Series Mobile Computer User’s Manual
*935-003-006*
P/N 935-003-006