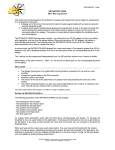
1
Owner's Instructions
I. GENERAL INFORMATION
You have just acquired a piece of high precision equipment which has been created using the most modern technology. It has been designed to
stand up to intensive use. However, in order to maintain its appearance and its precision, we recommend that you treat it with care and pay
careful attention to these operating instructions.
The SKYWATCH® Xplorer is fitted with an impeller and with sensors which allow it to carry out measurements in the open air.
It will give you all the information essential for your open air activities such as hang-gliding, rambling, climbing or water sports. It will give you the
instant wind speed and the maximum wind speed (Xplorer 1, 2, 3 and 4), ambient temperature and wind chill temperature (Xplorer 2, 3 and 4),
an electronic compass (Xplorer 3 and 4) as well as altitude, pressure, and trends in the weather (Xplorer 4).
The SKYWATCH® Xplorer range has been designed to withstand short-term immersion in water at a depth of up to one metre.
IMPORTANT !
This instrument is designed as an aid to users who are in an open air environment, but IT CANNOT replace advice and warnings from the local
weather station. This means that you should regularly check and compare the measurements provided by your instrument with the information
put out by the weather station.
Open-air climatic conditions can sometimes change quite dramatically and this can happen very quickly indeed. Sunny weather can, for
example, change to thunderstorm conditions in the space of half an hour and sometimes less. You should therefore always follow basic safety
rules whenever you undertake open air activity.
JDC ELECTRONIC SA can in no way be held responsible for any consequences, direct or indirect, or for any prejudice, which might result from
the use of this instrument.
Technical specifications:
Size: 41 x 93 x 17 mm
Weight : 51 gr (Xplorer 1), 52 gr (Xplorer 2 and 3), 53 gr (Xplorer 4)
Operational temperatures : -30°C to +60°C
15
Xplorer 1 – 2 – 3 - 4
II. MAINTENANCE
The design and manufacture of this instrument have been the subject of a great deal of care. In order to make best use of the proposed
functions you are advised to use the instrument in accordance with the following observations :
•
•
•
•
Avoid at all costs items such as hair, thread, sand and other dust materials getting into the impeller, as they could cause defective
rotation of the impeller and therefore a loss of precision. If a hair or a piece of thread should manage to get into the impeller, extract it
gently using tweezers; in the case of dust or sand, you can run clean water over the impeller.
Avoid exposing the instrument to extreme climatic conditions for over-long periods. While it uses components resistant to such
temperatures, we recommend that you do not expose your instrument to strong sources of heat, for example under the windscreen of
a vehicle.
Avoid careless use or sharp impacts.
DO NOT EXPOSE the instrument to powerful chemicals. Such products could damage it.
Xplorer 1 – 2 – 3 - 4
III. Switching on
To switch on your SKYWATCH® Xplorer, all that you need to is press briefly on the button (represented by :
on the diagram below). The
instrument switches on and displays the software version and the instrument model (see fig. D0.0 on the diagram below), after which the
instrument moves into the mode for measuring the current wind speed (Xplorer 1) or to the last mode displayed before the instrument was
switched off (Xplorer 2, 3 and 4).
Complete flow-charts of the displays available on http://www.jdc.ch.
16
Xplorer 1 – 2 – 3 - 4
IV. Switching off
Switching off automatically (Auto-off):
Your SKYWATCH® Xplorer goes off automatically 1 minute after the button was last pressed or after the wind was last measured. This means
that it does not stop while the impeller is still turning (more than 10 seconds).
Switching off manually :
In order to switch Xplorer off manually (valid in every mode), hold the button pressed down until it switches off, then release.
IMPORTANT ! Permanent operation possible :
Either at the time of the manual switching off by releasing the button during the flashing of the large digits, or at the time of automatic switching
off by pressing briefly on the button during the flashing.
During permanent operation, any pressure on the button returns Xplorer into automatic off mode.
Note : if the instrument is on permanently the battery discharges rapidly (400 to 500 hours according to the model).
Xplorer 1 – 2 – 3 - 4
VI. Supply
Your SKYWATCH® Xplorer gets its power supply from a replaceable lithium battery 3V type CR2032. To change the battery:
IMPORTANT !
1.
2.
3.
4.
5.
6.
This operation must be carried out with care!
ANY DEFECTIVE MANIPULATION DURING THE REPLACEMENT OF THE BATTERY CAN CAUSE LASTING DAMAGE
TO YOUR INSTRUMENT. IN CASE OF DOUBT CONSULT YOUR WATCH DEALER OR REPAIRER.
Unscrew the metal back (6 screws).
Unscrew the screw of the battery cover.
Gently remove the cover in order to extract the battery.
Put in the new battery observing the polarity (+ upwards), then screw back the battery cover. Make sure that the tiny tongue in the
centre of the top is raised so that it touches the metal back.
Before refitting the back make sure that the seal is clean and securely positioned in its slot.
Refit the back and the 6 screws.
Normal battery life :
Xplorer 1, 2 and 3 : approximately 30,000 measurements of 1 minute (auto-off) and more than 20 years when off.
Xplorer 4 :
without records : same as Xplorer 1, 2 and 3.
with records : approximately 25,000 measurements of 1 minute (auto-off), but 7 years maximum when off.
17
Xplorer 1 – 2 – 3 – 4
1. Backlight
To get the backlight to light up keep the button pressed for 1 second and as soon as the backlight lights up, release the button. The backlight
remains illuminated for 3 seconds. If within the 5 seconds which follow you re-illuminate the backlight, it stays lit up for 15 seconds. Beyond
these 5 seconds, it lights up again for 3 seconds.
Note : the backlight lights up in the same way in all modes.
IMPORTANT : intensive use of the backlight reduces the life of the battery / consumption approximately 100 x greater than without
backlight.
Xplorer 1 - 2 – 3 – 4
2. Modes and mode changing
Brief pressure on the button allows you to move to the following mode.
MODES :
Xplorer 1 (1 mode)
Xplorer 2 (3 modes)
Xplorer 3 (4 modes)
Xplorer 4 (9 modes)
1. wind + max. wind
1. wind + max. wind
2. wind +temperature
3. wind + wind chill temperature
1. wind + max. wind
2. wind +temperature
3. wind + wind chill temperature
4. wind + compass
1. wind + max. wind
2. wind +temperature
3. wind + wind chill temperature
4. wind + compass
5. wind + altitude and max. altitude
6. wind + relative and absolute pressure
7. record of pressure trends
8. record of relative pressure
9. record of altitude
Please refer to the following sections to consult the functions available in each mode.
18
Xplorer 1 – 2 – 3 – 4
3. Mode for measuring the instant wind speed with maximum
Choice of unit of measurement :
By keeping the button pressed for approximately 4 seconds, the units start to go past. You can choose between the
following units : km/h (kilometres per hour), mph (miles per hour), knots, m/s (metres per second), and fps (feet per
second). When the unit of your choice appears, release the button and the unit of measurement is thereby selected.
Measurement of speed :
For the measurement to be as exact as possible it is necessary to align the instrument along the axis of the wind.
Precision: +/- 3 %
Measuring range: from 0 to 150 km/h (42 m/s, 81 knots, 93 mph, 136 fps)
Measuring cycle: 2 measurements per second
Display:
The display of the current speed is done on the large digits and the maximum speed reached on the small digits with the indication
Resolution : to one decimal place up to 99.9, then in whole units.
.
Deletion of the maximum :
The maximum is retained even when the instrument is off. In order to reset it to zero keep the button pressed for at least 2 seconds, then
release it.
19
4. Mode for measuring the instant wind speed with ambient temperature
Xplorer 2 – 3 – 4
Choice of unit of measurement :
By keeping the button pressed down for at least 2 seconds the 2 units start to go past. You have the possibility to
choose between : °C (degrees Celsius) and °F (degrees Fahrenheit) When the unit of your choice appears, release
the button and the unit of measurement is thereby selected.
Measuring ambient temperature :
Note : the temperature sensor is integrated with the metal back of the casing, and therefore it is the temperature of
the back of the casing which is displayed. This special feature makes it possible to measure very accurately the
temperature of milieu such as :
water (springs, streams, etc.) by immersing the instrument several centimetres;
surfaces (ground, metal parts, refrigerator interiors etc) by laying as closely as possible the back of the instrument on the surface to be
measured;
ambient air, either by allowing the instrument to reach the air temperature, which can take several minutes, or even several dozens of
minutes according to the wind speed (avoid direct sun rays and contact of the back of the casing with your fingers). Otherwise, to get a
rapid and precise measurement, but the back of the casing into contact with an object which is the same temperature as the air (vehicle
bodywork, metal barrier, smooth walls etc.) avoiding surfaces in dark colours and exposed to sunlight).
Measuring range of the sensor : from -50°C to100°C
Measuring cycle: one measurement every 0.5 seconds
Display:
The display of the instant wind speed is done on the large digits while the ambient temperature is displayed on the small digits.
Resolution (temperature) : to the tenth of a degree
20
5. Mode for measuring the current wind speed with the wind chill temperature
Xplorer 2 – 3 – 4
Low temperatures present a danger to the human body and this danger is aggravated by the speed of the wind. The
Xplorer models 2, 3 and 4 show immediately the temperature felt by the body and warn of risks of chilblains and
hypothermia.
WHICH MEANS : The wind chill factor is calculated on the basis of ambient temperature and wind speed. In the event
of wind, it gives an indication of the loss of heat by the body if the temperature is less than 10°C. This is the formula
which was adopted in January 2003 by the United States Federal Office for Meteorological Coordination with the
Meteorological Service of Canada (MSC), the US Department of Defence (DoD) and the United States National
Oceanic and Atmospheric Administration (NOAA).
Example: an ambient temperature of 0°C and a wind of 30 km/h act on your body as if the temperature were -7.8°C !
Choice of the unit of measurement for temperature :
See section 4, choice of the unit of measurement.
Display:
The display of the instant wind speed is made on the large digits and the wind chill temperature on the small digits with the indication
Resolution (temperature) : to the tenth of a degree
Measuring cycle: 2 measurements per second
21
.
Xplorer 3 – 4
6. Mode for measuring the instant wind speed with electronic compass
Choice of the unit of measurement (wind) :
See section 3, choice of the unit of measurement.
Compass display :
The compass display is given in degrees on the small digits.
WHICH MEANS ! Your SKYWATCH® Xplorer tells you magnetic north, and
not geographical north !
Measurement :
To carry out a measurement as accurate as possible, hold your instrument perfectly vertical (fig. A). If the figures are replaced
, that means that the instrument is too tilted or that it is being disturbed by a nearby magnetic source.
by
fig. A
Calibration :
IMPORTANT ! Calibrate your Xplorer before the first use and at each change of environment or battery.
When the instrument is first energised, the compass shows
. So you carry out a calibration as follows :
Hold the button pressed down for approximately 3 seconds, and when
appears in the large digits, release. Then turn
yourself round until the instrument is showing , then, in order to validate the calibration, press briefly on the button.
During the calibration, the instrument shows in succession ,
, then
and finally
in front of the small digits.
This operation needs to take place at the speed of 1 turn in approximately 30 seconds.
To obtain an accurate calibration, the impeller MUST NOT turn ! If there is wind, shelter the impeller between your thumb
and your index finger.
Note : The lines of a terrestrial magnetic field are disturbed by metal environments, buildings, electricity pylons, vehicle
interiors, metal boats and also by magnetic fields generated by any electrical machinery or equipment and by magnets. It is
therefore necessary, in order to obtain accurate measurements, to move away from the sources of disturbance, or to
recalibrate.
22
Xplorer 4
7. Mode for measuring instant wind speed with current altitude
IMPORTANT ! This instrument calculates altitude by using air pressure. It is therefore quite normal for the
altitude to change when the air pressure changes. For this reason the instrument needs to be calibrated as often
as possible.
Choice of the unit :
By keeping the button pressed for approximately 4 seconds, the units start to go past. You can choose between the
following units : m (metres) and ft (feet). When the unit of your choice appears, release the button, and the unit of
measurement is thereby validated and the instrument returns to the mode of measuring the instant wind speed with
display of the altitude.
Display of the maximum altitude :
Hold the button pressed down for approximately 2 seconds and at the moment when the indication
is displayed, release the
button; in this way the instrument goes into the mode for measuring the instant wind speed with display of the maximum altitude.
In order to quit this mode press once on the button. The instrument then returns to the wind/altitude mode.
Calibration of the altitude :
Hold the button pressed down for approximately 3 seconds, and when
appears in the large digits, release. Hold the button
pressed down to increase the figure for the altitude in steps of 1 unit. To reduce the same, release then once again hold the
button pressed down.
A brief pressure on the button validates the new altitude.
Deletion of the maximum :
The maximum is retained even when the instrument is off. To delete the figure for the maximum, hold the button pressed down for
approximately 2 seconds, then release it. This operation should be carried out after the mode of display of the max. altitude.
23
8. Mode for measuring the wind speed with display of relative and absolute pressure
WHICH MEANS : The instrument offers 2 modes for displaying pressure: QFE pressure and QNH pressure. These two abbreviations (QFE and
QNH) are taken from the famous “Q” code. This code was instituted by the London conference of 1912. It is made up of a list of three letter
indicators, valid for all the countries of the world. Intended mainly for telegraphic and radio-telegraphy transmissions (in Morse) it is made up of
a list of abbreviations, using three letters to summarise without ambiguity phrases, questions or responses which would take too long to
formulate in clear text, thus eliminating the risks of errors arising out transmission, reception, language and interpretation.
The “Q” is still widely used in our day by ships and amateur radio enthusiasts. It is still official usage in radio telephony. The aeronautical world
does not use all of it, but regularly uses part of it.
CODE
MEANING
QFE
Atmospheric pressure at ground level, also known as absolute pressure.
QNH
Atmospheric pressure obtained by calculation at sea level in standard atmospheric conditions,
also known as relative pressure.
This is the pressure mentioned in meteorological bulletins or on the television.
Choice of the unit :
If the button is kept pressed down for at least 4 seconds the units start to pass by, and you have the possibility of choosing between the
following units: hPa (hecto Pascals) and inHg (inches of mercury). When the unit of your choice appears, release the button. This validates the
unit of measurement and the instrument goes back to the mode wind / relative pressure (QNH).
Display of absolute pressure (QFE) :
(QFE) is
Keep the button pressed down for approximately 2 seconds and at the very moment when the indication
displayed in the large digits, release it. The instrument then goes into the mode for displaying absolute pressure. To quit this
mode, press once on the button, and the instrument returns to the mode wind / relative pressure (QNH).
Calibration of relative pressure (QNH) :
Hold the button pressed down for approximately 3 seconds, then release it at the moment when
is displayed on the large
digits. Then the adjustment (increase/reduction) is carried out in the same way as for the calibration of altitude, see section 7
(altitude calibration).
24
Comments:
7. If QNH figure is steady (is not flashing) this indicates the current relative pressure (QNH), credible because deduced from a
meteorologically slow variation.
8. The QNH sign flashes if this pressure has changed since the last calibration.
9. If the QNH figure is flashing, it indicates the QNH pressure entered at the last calibration.
10. A rise in altitude or a meteorological variation when the recording is not active makes the QNH figure flash.
11. Calibration of the QNH or of the altitude (known datum) makes it possible to re-adjust the '
Xplorer in relation to the measured ambient
pressure. This varies continually according to the altitude and the current meteorological conditions.
12. The only reference for the '
Xplorer is the air pressure which it is measuring, from which it deduces the altitude. Any variations in this
pressure makes the altitude change : 9 metres per hPa a low altitudes, 14 metres at 5,000 metres, and this is why it is necessary to
calibrate as often as possible to maintain a credible display (even airline pilots have this to comply with!).
Xplorer 4
9. Recording modes
WHICH MEANS : The three recording modes operate in the same way and are connected. They display under
different forms one of the 48 pressure measurements stored each hour. By default : 24 h are displayed.
The record stores just the pressure on the sensor, the QNH or the altitude displayed is calculated, depending on the
current calibration.
Trend :
QNH :
Altitude :
This is the variation in pressure over the last 24 hours (or 48 hours, or 1 hour etc.). This is valid if the
Xplorer is in the same place (same altitude). A negative figure indicates a drop in pressure (arrival of a
depression), a positive figure, an increase (anticyclone). Pressure naturally varies during the day, and the
weather trend is more accurate at 24 hours or 48 hours (same time of the day).
This is the relative pressure at 24 hours ago (or 48 hours, etc.). Valid if the ‘Xplorer is at the same place
and is recalibrated.
If you set off for a mountain walk or go paragliding, you can check the altitudes achieved hour by hour. The
altitude will be accurate if you force the QNH calibration of the Xplorer on the weather pressure that was
present when you recorded.
Display of a particular moment in the record :
Example: you want to know the trend, the QNH or the altitude 12 hours ago. Keep the button pressed down, then when 12 h
appears on the large digits, release it.
25
Battery economy (stop recording)
This feature is possible by disabling the pressure sensor while the instrument is off. The measurements of pressure and
altitude are only active when the instrument is on.
(zero hours).
To turn off the sensor, put one of the three records on
Comments:
4. If you consult the record and you leave displayed 5 h for example, the next time you switch on the Xplorer, it will display 24 h if there
has been a new pressure measurement, this being generated by the internal clock (one measurement per hour).
5. On releasing on 0h, the record will no longer do a measurement each hour (but will retain the current contents) thereby giving you
battery economy.
6. In going back to active record mode (anything other an 0h) the current measurement is stored as the starting time and displayed
under 1h.
Xplorer 3 and 4
10. General reset
This mode resets by default all figures and removes the calibration of the compass. In order to carry out a general reset, switch
off the instrument as normal. Then, to restart, hold the button pressed down. At the moment where all the LCD digits appear (see
opposite), release it, then again hold the button down until off. You can then start up your instrument in the normal way.
26
NTech USA
PO Box 284
Holmen, WI 54636 USA
608.498.4021 (phone)
608.531.2608 (fax)
[email protected]
www.ntechusa.com
Developed and manufactured by :
JDC ELECTRONIC SA
UTTINS 40
1400 YVERDON-LES-BAINS
SWITZERLAND
FAX +41 24 445 21 23