1
SKT type structures
Low Level Support
Structure
Installation & Users
Manual
Low Level ground mount support
structure kit
SKT
Installation and users Manual
Low level Structures
INTRODUCTION ............................................................................................................... ................................. 3
HEALTH & SAFETY ......................................................................................................................... ................. 3
STRUCTURE ASSEMBLY.......................................................... ................................................................................. 3
ELECTRICAL INTERCONNECTION ............................................................................................................................. 3
INSTALLATION SEQUENCE........................................................................................................ ................... 4
PART IDENTIFICATION ....................................................................................................................................... ...... 4
WHAT'S INVOLVED ? ....................................................................................................................................... ........ 4
ASSEMBLY OF SUB ARRAYS ......................................................................................................................... 5
MODULE PREPARATION................................................................................................... ........................................ 5
SUB ARRAY TUBE PREPARATION ............................................................................................................................ 5
SUB ARRAY ASSEMBLY...................................................................................................................... ..................... 6
EARTHING ............................................................................................................................................ ................... 8
ASSEMBLY OF SUPPORT LEGS TO THE SUB ARRAY ............................................................................ 8
FRONT LEGS. .................................................................................................................................................. ......... 9
REAR LEGS ....................................................................................................................................... ....................... 9
SLIDE CLAMPS.................................................................................................................................... ..................... 9
REAR STRUTS ............................................................................................................................................. ............. 9
FEET ........................................................................................................................................... ............................. 9
PLACING THE ARRAY ................................................................................................................................ ............... 9
INSTALLATION OF THE ARRAY ONTO A BOLTED FOUNDATION. ............................................................................... 9
COMMISSIONING TESTS .................................................................................... .......................................... 10
SUPPORT STRUCTURE........ .................................................................................................................................... 10
MAINTENANCE ................................................................................................................ ............................... 10
SOLAR MODULES ..................................................................................................................................... ............. 10
ARRAY STRUCTURE................................................................................................................................ ............... 10
SITE................................... .................................................................................................................................... 10
Page 2 of 10
Installation and user manual
Low level Structures
SKT
INTRODUCTION
This manual provides a basic guide to the assembly of the low level support structure, it is recommended that
you read through the manual before attempting to assemble the structure taking note of the health & safety
issues detailed below.
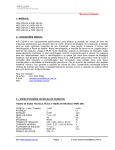
Typical three module solar array on a T3 type structure
HEALTH & SAFETY
Structure Assembly
Construction must not be attempted in high winds. Care must be taken in lifting structural members and
in working at high levels. Protective headgear should be worn.
Electrical Interconnection
Potentially lethal voltages can be developed from arrays. Take the following precautions;
Electrically isolate the array from the rest of the system.
The modules should be shaded from the sun by opaque sheeting, before any electrical connections are
made to the sub-array junction boxes or at the control unit.
Page 3 of 10
SKT
Installation and users Manual
Low level Structures
INSTALLATION SEQUENCE
Part Identification
Refer to the drawings and photographs within this manual to familiarize yourself with the components
of this structure prior to attempting assembly.
What's Involved ?
Concrete foundations are required for this structure, see the foundation details at the back of this manual.
Preparation of tools (Table 6.1) and checking that all components are present.
Assembly of sub array (if not supplied pre assembled), and assembly of supports to the sub-array.
Compass
To ensure correct orientation
Tape measure (5 metres long)
Measure out mounting points etc.
Hammer drill
To drill the footings
10mm masonry bits
To drill the footings
Hammer
To tap in the parabolts
Allen key (¼" or 6.25mm) (SUPPLIED)
General structure assembly Chalk/felt
marking pen
Mark out correct mounting positions
Half round file
To clear bolt holes of excess zinc
Zinc touch up paint and brush (Galvafroid)
For touching up transit damage
13mm A/F spanners
Module to structure assembly
Sponge, cloth and clean water
For cleaning the modules
Opaque sheeting
To shade the modules as required
Inclinometer (angle setter)
To ensure the correct tilt angle is set
Table 6.1 : Recommended tools for structure assembly.
Right angle clamp
Swivel base clamp
End cap
Ground anchor bolt
Slide clamp
Module clamp
Page 4 of 10
Short tee clamp
Installation and user manual
Low level Structures
SKT
ASSEMBLY OF SUB ARRAYS
Assembly of the Sub-Array - (If the modules have been supplied pre-arrayed, then this section may be
omitted - move on to Section 6 Assembly of Support Legs to the Sub-Array).
The modules must first be mechanically assembled to the support tubes, and then electrically connected
as for the required voltage. The illustrations depict assembly of a three module array - however, exactly
the same principles apply to larger sub-arrays, see the main drawing at the back of this manual.
Module Preparation
Lay the solar modules face down on a smooth flat surface that will not damage the glass as shown in
Figure 6.1. Ensure all the module junction boxes are grouped together on one side. Note - it is important
to protect the back of the modules during assembly, use sheets of cardboard so that any components
dropped on the back of the module do not damage the tedlar backing material.
Figure 6.1 : Lay modules face down on a smooth surface
Sub Array Tube Preparation
Locate the sub-array tubes. They can be identified by measuring their length and comparing it with the
values in the Table 6.1. Figure 6.2 depicts typical tube preparation.
Upper Sub array Tube - Slide the Tee clamps and module clamps onto one length of tube. The upper
tube is fitted to the junction box end of the modules. Push on two plastic end caps into the end of the
tube. Position the clamps as shown in the Figure 6.3 (see also the foundation drawing for distance
between clamps) and pinch up using a ¼" Allen key in the grub screw.
Lower Sub Array Tube - Slide the right-angle clamps and module clamps onto the other tube in same
positions as for the Tee clamps on the upper sub array tube, pinch up, and fit two plastic end caps.
Note - Only tighten the clamps sufficiently to stop them sliding on the tube, they will need to be adjusted
when the support legs are fitted later.
Page 5 of 10
SKT
Installation and users Manual
Low level Structures
Plastic end cap
Short Tee clamp
Top Sub-array Tube Assembly
Stainless steel module clamp
Pole Joiner
Corner clamp
Bottom Sub-array Tube Assembly
Figure 6.2 : Fitting components onto the upper and lower sub array tubes.
Sub Array Assembly
Lay the tube assemblies on to the back of the solar modules with the Tee clamps at the module junction
box end and the right angle clamps at the bottom.
Position the module clamps so as to line up with the module mounting holes. Using
the M8 fastener kits, bolt the module clamps onto the modules (Figure 6.4). Mount
the junction box (if supplied) as required.
Figure 6.3 : Place tubes across modules back and clip the module clamps over the tubes in the positions shown.
Page 6 of 10
Installation and user manual
Low level Structures
Solar module frame
M8 Nut
Stainless steel
module clamp
Sub-array tube
M8 Spring washer
M8 washer
M8 x 30 Hex set screw
Figure 6.4 : Upper tube assembly detail.
Page 7 of 10
SKT
SKT
Installation and users Manual
Low level Structures
Insert 2 part joint into the ends
of both poles as far as possible
then tighten grub-screw to
secure into place
Grub screw
2 Part pole joiner
Sub-array pole
Figure 6.5 : Pole joint details 3 module to 7 module kits only
Earthing
The module frames are earthed to one another through the stainless steel module clamps and the structure
tubes.
When the structure assembly is completed the array structure should be earthed to ground using a suitable
earth. Use earth rods as required.
Assembly of the support legs to the sub-array
Ensure that the Tee clamps on the back of the array are in the correct position as shown in the detailed
drawing at the back of this manual. Their separation must correspond to the separation of the foundation
points for the structure. The position of the clamps is easily adjusted by loosening the grub screw using
the Allen key supplied, moving the clamp and then re-tightening the grub screw. Figure 6.6 depicts the
positions of components after assembly.
Figure 6.6 : T structure final assembly.
Page 8 of 10
Installation and user manual
Low level Structures
SKT
Front legs
Fit the front legs into each of the right angle clamps on the lower sub array tube. Tighten the grub screws
using the Allen key to secure the tubes.
Rear legs
Fit the rear legs into the right angle clamps on the lower sub array tube. Again, the grub screws should
be tightened with the Allen key to secure.
Slide Clamps
Now add the slide clamps to the rear legs and set to approximate tilt angle required, the tilt angle must
be checked when in position.
Rear Struts
Insert each rear strut between the slide clamp and the corresponding tee clamp on the upper sub array
tube. Tighten the grub screws using the Allen key.
Feet
Secure the four swivel bases (feet) to the ends of the front and rear legs.
Placing the array
Turn the array over and place it on its feet, as depicted on page 3
Installation of the Array onto a Bolted Foundation.
The array must be secured to foundations.
Parabolts (expanding) are fitted as illustrated in Figure 6.7 following steps 1 to 4. It is best to drill and
fit only one parabolt in each foot (preferably the one that will be difficult to get at when the assembly is
finally positioned). Drill the holes 80mm deep with a 10mm masonry bit.
Place the sub array in position and mark out the other holes.
Remove the sub array, drill the remaining holes and fit the parabolts.
Replace the sub array over the parabolts and fix down..
80mm
Figure 6.7 : Fixing of parabolts.
Page 9 of 10
SKT
Installation and users Manual
COMMISSIONING TESTS
In order to ensure that the system has been properly installed and will function correctly, the following tests
should be performed immediately after installation.
Support Structure
Check module fasteners are tight.
Check all structure fasteners are tight.
Check tilt angle is correct to within ±2°
Ensure array is within ±5° of the azimuth specified.
Inspect for any damage to the galvanised steel work; touch up with Galvafroid (or similar) zinc paint as
required.
MAINTENANCE
The following maintenance schedule should be followed at 12 monthly intervals. However, in some areas
prone to excessive dust or bird deposits, module cleaning could be necessary more frequently and can only be
determined taking local conditions into account.
Solar Modules
Check that modules are clean; wash down glass and frames with water. Do not use detergents or solvents.
Inspect modules for damage; ensure glass is undamaged, and that there are no tears in plastic on back of
modules.
Inspect module junction boxes; check seal is in place.
Array Structure
Inspect for rusting; brush off any rust. Paint affected area with zinc paint.
Ensure all nuts and bolts are tight.
Site
Ensure that arrays are not shadowed by growing vegetation; trim vegetation as necessary.
All SKT type structures are covered by a 5 year warranty.
Page 10 of 10