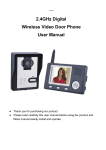
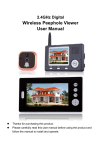
Download 2.4GHz Digital Wireless Peephole Viewer User Manual
Transcript
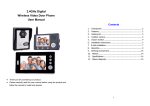
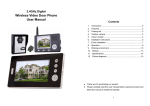
2.4GHz Digital Wireless Peephole Viewer User Manual z
Thanks for purchasing our product. z
Please read carefully this user manual before using the product and follow manual exactly install and operate. 1
7.
Wireless unlock control and e‐lock installation .......................16
8.
Operation Instructions.......................................................20
9.
Failure diagnosis ..............................................................36
10.
Remarks..........................................................................40
Contents 1.
2.
3.
Introduction ...................................................................... 4
Features ........................................................................... 5
Packing list ....................................................................... 6
4.
Peephole ........................................................................... 8
5.
Indoor monitor .................................................................. 9
6.
Installation instructions of peephole.................................... 10
2
3
1. Introduction 2. Features The product is widely used in apartment, hotel, villas, office, building and so on. 1
2.4GHz hopping and encryption, no obstacle transmission distance is up to 300m; It is made of peephole, indoor monitor and wireless unlock control. 2 Infrared light of peephole can capture image in low‐illumination environment; Peephole can install in variable types of doors the door thickness ranges from 35 to 3 Monitor, Unlock, Talk, 16 pieces of chord ring, adjust volume; 110mm, the peephole diameter of door ranges from 14 to 38mm , Indoor monitor can be 4 3.5" TFT LCD screen; handheld or placed on the table or hang on the wall, Wireless unlock control connect e‐lock, 5 Indoor monitor can automatically capture, store and view photo with time stamp. Wireless connection among such three parts. 6 Both peephole and indoor monitor are charged with USB connector, both BL‐ 5J 4
5
rechargeable Lithium batteries. 2
7 Peephole supports two work modes: 1 ON 1, it save power, works for about one year. 2 ON 2, it costs more power, works for at most 5 days. 8 One peephole support up to 4 indoor monitors simultaneously and vice versa. 9 Wireless unlock control supports unlock with power on and power off mode. Power adaptor of peephole and indoor monitor, input: 100‐240V 50/60Hz, output: 5V/1A, USB cable length: 80cm. 4 Extended pole with diameter 35mm, extended pole with diameter 24mm, flexible PCB extended line, fixed pole A, B, C. 5 Battery of peephole and indoor monitor both two batteries are BL‐5J 6 Indoor monitor, size: 141 87 20mm 7 Wireless unlock control 8 User manual 3. Packing list 1
Camera of peephole, size: 126 93 42mm, Peephole host, diameter: 140mm. 6
7
4. Peephole 5. Indoor monitor 1 Microphone 2 Infrared light and camera lens 3 ‘Call’ button 4 Speaker 1 Speaker 2 3.5” TFT screen 3 Antenna 4 Microphone 5 5 USB interface for charge 6 Power switch 7 ‘Pairing’ button 6 8 Indicating light for low voltage 9 Indicating light for recharge 10 Battery lid 11 Working light 12 charging light 13 8
’Unlock’ button 7 ’Talk’ button 8 Left 9 ‘monitor’ button Down 10 ‘Camera’ button 14 9
Up Right 15 USB interface 16 Power switch 17 Fixed slot 18 Battery lid 19 Bracket 6. Installation instructions of peephole Remark: Please make sure that the power switch is off before installation. Peephole is made of camera and peephole host, the peephole installation process is as follows, Base the diameter of peephole install on the door to select the corresponding extended Step 1, install camera process is shown in the figure. pole and fix it in the original column. 10
11
If 14mm
24mm
peephole diameter 24mm, extended pole is not required else if peephole diameter 35mm, extended pole with diameter 24mm is required, else peephole diameter
35mm,extended pole with diameter 35mm is required. Carefully insert camera into the peep hole to let flexible PCB spread out of the peephole. Step 2, Install peephole host process is shown in figure. Remark: please be careful in this step, flexible PCB is easily twist and flectional, but gently lift to avoid drape, nick, crunch caused by bump with other hard thing. You can take a look at 12
13
door thickness. And then tighten the saddle of flexible pcb and the saddle of peephole host whether there is crack at the corner. If crack, you can exchange it. When install host, select the fixed pole corresponding to door thickness 35mm
thickness
60mm, select fixed pole A, 60mm door thickness
B, 85mm door thickness
door 85mm, select fixed pole 110mm, select fixed pole C . Firstly fix fixed the board and as the arrow direction. Here user has to do three basic function tests for peephole firstly turn peephole power switch to “ON1” level, it will enter power on mode, the peephole will make a sound of fixed pole, and then insert fixed pole into peephole along flexible PCB. And then clockwise “DU…DU…”. And then turn on indoor monitor, the display shows image clearly. Lastly, press rotate fixed pole to make it tight. The fixed board is shown in the figure, and here the call button, indoor monitor make a ring. Press talk button, peephole can talk with indoor flexible pcb has spread out of fixed pole. User can add flexible PCB extended line based on monitor. After testing, please turn power switch to “OFF” level. If not pass, it means that 14
15
the connection between flexible PCB and peephole board is wrong or flexible PCB is broken on requirement. Wireless unlock control which is set up on the e‐lock, shares with e‐lock down. Otherwise, it means that the connection between flexible and peephole host is ok. when it works. This wireless unlock control provides two unlock modes and 3 durative Lastly, use 4 small screws in the fixed board to fix the four holes as figure, open the times. 1 sec, 4 sec, 8 sec are provided for door control relay to drive e‐lock to open the door. battery door, and then fix peephole host using 4 poles, and then close battery lid, and then Notes: You should guarantee that the distance between wireless unlock control and do three peephole basic function tests, peephole install successfully if pass. peephole host should be within 20m so that wireless unlock control can receive unlock 7. Wireless unlock control and e‐lock installation This system doesn’t provide e‐lock and power of e‐lock, user can purchase them based 16
command. E‐lock connection 17
1. If select unlock with power on, then you should connect two lines of lock with No, COM , these two lines have no electrical signal. When press unlock button, these two lines has Unlock time setting electrical signal then open e‐lock. The setting 1 is default setting. You can configure it based on the parameter of lock. 2. If e‐lock uses unlock with power off, you should connect two lines of lock with NC, The setting for level 1 and level 2 delay times for relay Setting 1: level 1 OFF, level 2 OFF 1 second Setting 2:level 1 ON,level 2 OFF 4 seconds Setting 3:level 1 OFF,level 2 ON 8 seconds COM , these two lines have signal. When press unlock button, these two lines have no signal then open e‐lock. 18
19
Remarks: when the lock is connected with line, if e‐lock is wrongly connected with line NC, COM , it will cause e‐lock burning for e‐lock line power on for long time such mode, indoor monitor can’t monitor peephole, long sleep time make user convenient to reduce recharging time, so work time up to one year. Off: Turn the power switch to off to close the peephole. 8. Operation Instructions 2 Indoor monitor A Operation Power on: Turn the switch power to ON, Working light on and along with chord ring at 1 Peephole the same time. On: Turn the power switch to ON1 then start monitor mode, indoor monitor can monitor Power off: Turn the power switch power to OFF, Working light off. peephole in such mode. When turn the power switch to ON2, exit monitor mode, in 20
21
Press Communication signal intensity is up to 6 bars, the full battery is 4 bars. button of one indoor monitor to speak to visitor before unlocking. Other indoor monitors can see the image but not hear sound of the visitor. If you want to allow other indoor monitor to talk, press 3 Talk, unlock another indoor monitor press button to speak to visitor. When under talking mode, press The visitor presses the “call” button of the peephole, all indoor monitors will sound melody and show the image of visitor. shows on the screen, when release Press 22
button to close the current dialogue, then button to release the door lock, the unlock signal button, the unlock signal will disappear.
button to turn off the screen and enter standby mode, or it will turn into 23
indoor monitors. standby mode automatically after 30 seconds. B. If do not want to receive the visitor after seeing the video, no operation or press the button to turn off the screen and then enter into standby mode. 4 Monitor If one peephole with one or more indoor monitor system and there is no call from the Indoor monitor enter into the standby mode after 30 seconds if no any operation. Note: if you use multiple indoor monitors, please keep distance between indoor monitors to avoid affecting talk effect peephole and the indoor monitors in standby mode. User can press the monitor, press button again to enter monitor mode and monitor the peephole as long as you like, monitor signal will display on the screen. Press close the screen. Remark: if use multiple indoor monitor, you’d better keep the suitable distance among the 24
button to 25
button again to quit and For several peepholes with one indoor monitor, Under monitor mode, press button show the image from the CAM1, CAM2, CAM3, CAM4 if the system has in sequence, At the last camera, press button again to quit and close the screen. Note: If one peephole using, Please do not press other peephole to disturb the system. 5 Recharge is about 100 hours. In monitor off mode, the standby time for peephole is about 1 year. The indicating light with green color shows recharge done. When the battery bar is not enough to work, the battery bar is 0 and the battery capacity sign displays red. The low voltage indicating light flicks with red color when battery capacity is very low, When user needs to recharge battery, he can exchange it with indoor The battery for indoor monitor and peephole should be charged for over 5 hours for first time. The standby time for indoor monitor and peephole working in monitor mode 26
monitor battery generally more convenient for indoor monitor charge . B Set 27
1 date/time 2 Select ring and volume Indoor monitor works in non‐talking mode, press button for 3 seconds, the screen shows “T” character on the left side of battery bar, user can set current date year/month/day and time hour: minute for indoor monitor only one peephole and one indoor monitor system supports date , the time is displayed as 24 hours, press to select the parameter, press
,
In indoor monitor non‐talking mode, press chord ring as current ring. 16 chord melodies are Ding‐dong, To Alice, Westminster bell, Butterfly lovers, The cygnet, Red river valley, My heart will go on, Turbutton’s march, Small dance, Congratulations you, William's prelude, Love romance hudson, Memory, The Little Mermaid, button to update the value Green sleeves, Romeo and Juliet. 28
button to select one of the 16 pieces of 29
Press
3
button to adjust the ring volume, the range is 1~2. 1 Take photo Adjust talking volume In talking mode, press
Press button to adjust the volume, the adjustment range is 0~7. button of indoor monitor to take photo when video display on the screen. The visitor can press call button, if no talk button is pressed within 10 seconds, the indoor monitor will automatically capture one photo. If the memory is full, the latest photo 4
Brightness will overflow the oldest photo. In talking mode, when video shown in the screen, user press to adjust the 2 View photo brightness, the adjustment range is 0~7 In non‐talk mode, press t button to page up and down to view photo, and then C Photo 30
31
press button or no operation lasting 10 seconds, automatically exit view status. D Pairing 3 Delete photo Remarks: the system only support 3 types, user can’t mix it when purchase it. For First turn off the indoor monitor, then press and button at the same time, turn One‐to‐one system, to add peephole item can’t become multiple‐to‐one system. To add on the indoor monitor, press and button still the screen display text: ’Delete all indoor monitor can’t directly become one‐to‐multiple system. photo, please wait’ ‘no photo , Please Power off’, After that all pictures have been 1 One peephole and one indoor monitor system deleted. Please turn off the indoor monitor Press pairing button of peephole, indicating light on, press and button of indoor monitor at the same time, when screen display “1V1 paring…”, then enter pairing, if 32
33
pairing succeeds, the video from peephole will be shown in the screen of indoor monitor. 2 One peephole and up to 4 indoor monitors system Firstly, press Pairing button of peephole, indicating light on, press Remarks: Pairing this system is more complex than that for the above two system. After turn and button of indoor monitor at the same time, when screen display “1V4 pairing…”, then enter pairing, if pairing succeeds, the video from peephole will be shown in the screen of indoor monitor. 3 More up to 4 peepholes and one indoor monitor system on peephole and indoor monitor, press button asap so not let any part enter into standby mode. Firstly, press the pairing button of peephole, indicating light on, press and button of indoor monitor at the same time, screen will show “4V1 pairing…”, it enter Secondly, repeat the above operation asap until finish all pairing. 34
pairing, if pairing succeeds, the video from peephole will be shown in the screen of indoor 35
monitor. Secondly, repeat the above operation asap until finish pairing. Indoor monitor or If turn the switch to the “on”? peephole unable to If the power of li‐ion batteries is Turn the switch to the On Charge the li‐ion batteries Thirdly, check whether pair succeed, let system power on again, and then press monitor button continuously to monitor each peephole, if each one can monitor, it means start not enough? Indoor monitor or If the plug of power adaptor Re‐connect the devices and that system pairing successfully. Otherwise repeat the first operation. peephole unable to correctly plug into USB power adaptor charge 9. Failure diagnosis Defect Judgment charging? Operation 36
37
Open battery cover, insert mobile monitor which has
battery, and then insert the microwave oven and magnetic battery cover. wave? magnetic wave. If battery is in indoor monitor or peephole? Speaking state no If the volume is adjusted to be To adjust the volume to be The indoor monitor If the peephole doesn’t connect Keep peephole work. voice the least suitable shows no signal the power? The image is flicking If the indoor monitor is close to Keep off these things which image If the indoor monitor is far away Keep the distance within 60 or noise TV set, fluorescent lamps, have microwave oven and from the indoor monitor? meters 38
39
If there is other strong magnetic Put the indoor device out of 4 Don’s privately disassembly machine and break down tag, if any defect for space bother? the strong magnetic space examination and repair, please contact with the dealer or our technology department if any problem. 10. Remarks 5 Before setup and debug the devices, please strictly follow the manual, if user has 1 Work temperature range: ‐25℃ — 55℃ any problem during setup, please contact with our technology support and service 2 When microphone and speaker works, nothing covers it. center for consulting. 3 Only specified power adaptor or same model of power adaptor with same voltage and current is used. Otherwise, it may break down the system and its parts. 40
41


