1
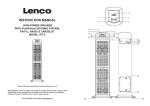
32" BLUETOOTH SOUND BAR
MODEL:SB323
PLEASE READ THE INSTRUCTIONS CAREFULLY BEFORE USING
AND KEEP IT FOR FUTURE REFERENCE
Congratulations
Technical specification
Congratulation on your purchase. For a better use of your new
device, we recommend you to read carefully this user manual and
keep it for record.
Package contents
•
•
•
•
•
•
•
Instruction Manual
Remote Control with CR 2025 button cell
Stereo audio connection cable with 3.5mm stereo plug
RCA line in cable
Wall mount brackets
Wall mount screws
Wall plugs
x1
x1
x1
x1
x2
x4
x4
Features
•
•
•
•
•
•
•
•
•
Speaker Output Power:
Power Adaptor Input:
Power Adaptor Output:
Remote Control Battery
Maximum Distance:
Net weight:
40 W
100-240V~, 50/60Hz
DC
18V; 2.5A
3V
; CR2025 Battery
10 Meters
2.462 kg
Safety precaution
Slim Soundbar for TV use
Bluetooth V3.0 EDR with A2DP, Range up to 10M
Digital Volume Control
Aux IN RCA at the back side for TV and other devices (Left and
Right Audio Jack)
3.5mm Line in jack(side panel) for input the analogue stereo audio
signals from extra devices such as MP3 player,etc.
Remote Control (Need control with power, source, volume +/-,
bass +/-, treble +/-, EQ, mute etc.)
Build in 2x2.5” High powered speaker system (2x10W full range)
and 2x2.5” subwoofer speaker (2x10W)
18V, 2.5A)
AC/DC Operated (AC 100V-240V~, DC
Both adjustable wall-mount and desktop design
Read, keep and follow these instructions.
Heed all warnings on the product and in the instruction manual.
For your safety, read and follow this manual carefully to ensure
proper use of the product and avoid any danger or physical damage.
• Place the unit on a flat surface and ventilated condition. The
ventilation should not be impeded by covering the ventilation
openings with items, such as newspapers, tablecloths, curtains,
etc. to avoid overheating and malfunction.
• No naked flame sources, such as lighted candles, should be placed
on the apparatus
• Keep the appliance away from rain and any moisture. Do not
place the unit in moist and humid conditions, which could lead to
malfunction.
• When the unit is suddenly moved from a cold environment to a
warm one, if moisture forms inside it, it may not operate properly.
GB-2
GB-3
To correct this problem wait about one hour for the moisture to
evaporate.
• Do not expose the unit under direct sunlight or nearby objects that
radiate heat to avoid damaging the unit.
• The apparatus should be used in moderate climate.
• The plug of the appliance shall remain readily operable.
• Do not pull on the connection cord, but rather on the plug, to
separate the appliance from the mains.
• The On/Off button does not completely isolate the product from
the power supply. To disconnect the product from the mains
power supply, you must unplug the power cord.
• Pull out the mains plug if the appliance is not to be used over a
longer period of time.
• Disconnect the main plug during thunderstorms.
• The apparatus shall not be exposed to dripping or splashing, no
objects filled with liquids, such as vases, shall be placed on the
apparatus.
Note:
Servicing - Do not attempt to service this product yourself as opening
or removing covers may expose you to dangerous voltage. Refer all
servicing to qualified service personnel.
Damage Requiring Service - Unplug this product from the wall outlet
and refer servicing to qualified service personnel under the following
conditions:
• When the power-supply cord or plug is damaged.
• If liquid has been spilled, or objects have fallen into the product; if
the product has been exposed to rain or water.
• If the product does not operate normally by following the
operating instructions. Adjust only those controls that are covered
by the operating instructions as improper adjustment may result
in damage and will often require extensive work by a qualified
technician to restore the product to its normal operation.
• If the product has been dropped or damaged in any way.
GB-4
CAUTION
RISK OF
ELECTRIC SHOCK
DO NOT OPEN
The lightning flash
symbol within an
equilateral triangle is
intended to alert the
user to the presence
of un-insulated
“dangerous voltage”
within the product’s
enclosure that may
be of sufficient
magnitude to
constitute a risk of
electric shock to
persons.
WARNING: TO
REDUCE THE RISK OF
ELECTRIC SHOCK DO
NOT REMOVE COVER
(OR BACK), NO USER
SERVICEABLE PARTS
INSIDE REFER
SERVICING TO
QUALIFIED SERVICE
PERSONNEL.
The exclamation
point within an
equilateral triangle
is intended to
alert the user
to the presence
of important
operating and
maintenance
(servicing)
instructions in
the literature
accompanying the
appliance.
WARNINGS
• Batteries are to be inserted with the correct polarity. Make sure
that the (+) and (-) terminals are placed in the correct direction.
• Do not mix used and new batteries or batteries of different types:
alkaline, standard (carbon-zinc) or rechargeable (nickel-cadmium).
• Never use batteries that show signs of electrolyte leaks or cracking.
• Never dispose of used batteries in an open fire, risk of explosion.
• Keep batteries out of reach of children.
• Never short circuit battery terminals.
• Exhausted batteries are to be removed from the product.
• Remove batteries from the appliance before disposing of it at the
end of its service life, or during long periods of non-use.
• Do not try to open the batteries.
• Batteries (battery pack or batteries installed) shall not be exposed
GB-5
to excessive heat such as sunshine, fire or the like.
• Do not charge non-rechargeable batteries.
• Ensure the battery compartment panel is secure.
CAUTION
• Danger of explosion if battery is incorrectly replaced.
• Replace only with the same or equivalent type.
IMPORTANT
• When replacing used batteries, please comply with applicable
regulation relating to their disposal.
• Please return them to a suitable collection facility for
environmentally friendly disposal.
• For indoor use only.
This device complies with Industry Canada licence-exempt RSS
standard(s). Operation is subject to the following two conditions:
this device may not cause interference, and this device must accept
any interference, including interference that may cause undesired operation
of the device.
Installation and maintenance
Placing on table
When placing the sound bar on an entertainment center, bookshelf,
or any type of closed space, be sure to allow at least 2-3 inches
of space around the sound bar for ventilation. If the sound bar is
enclosed in a tight space without ventilation, heat generated from
sound bar could produce a potential heat hazard.
2-3 inches
AU X 2
Le présent appareil est conforme aux CNR d'Industrie Canada applicables
aux appareils radio exempts de licence. L'exploitation est autorisée aux deux
conditions suivantes : (1) l'appareil ne doit pas produire de brouillage, et
(2) l'utilisateur de l'appareil doit accepter tout brouillage radioélectrique subi,
même si le brouillage est susceptible d'en compromettre le fonctionnement.
Mounting the sound bar onto a wall
We recommend mounting the sound bar professionally by using the
included mounting accessories.
16.3 inches
GB-6
GB-7
Mounting on the wooden wall
You may use 4 pieces of supplied screws and 2 metal brackets.
Wo
o
Mounting onto the wall
You may use 4 pieces of supplied screws, 4 plastic inserts and 2 metal
brackets.
de
Metal Bracket
nW
all
Wa
ll
Screw
Fixing Plug
Metal Bracket
Screw
Fixing Plug
Metal Bracket
Metal Bracket
Screw
Screw
A. Mark the distance 16.3 inches of the mounting screws on the
wall using a pencil.
B. Drill holes on same horizontal level by a powerful electric drill
(Not Supplied).
C. Put the sound bar onto the mounting brackets and make sure
they are firm and stable.
A. Mark the distance 16.3 inches of the mounting screws on the
wall using a pencil.
B. Drill holes on same horizontal level by a powerful electric
drill(Not Supplied).
C. Insert the plastic inserts and hammer them into the wall.
D. Secure the metal brackets by screws.
E. Put the sound bar onto the mounting brackets and make sure
they are firm and stable.
GB-8
GB-9
Remote Control
Locations of controls
Control Panel
1
Mode Function
Volume Up
Aux 2 Jack
Standby
AU X 2
2
8
3
9
4
10
5
11
6
7
12
13
Volume Down
Rear Panel
DC IN 18V
AUX 1
A1 3 0 9 1 0 1 5 5 0 0 0 0 0 0 1
AUX 1 Jack
GB-10
DC IN Jack
1.
2.
3.
4.
5.
6.
7.
Source button
Standby button
Volume down button
Bass down button
Treble down button
EQ button
Previous button
8.
9.
10.
11.
12.
13.
GB-11
Mute button
Volume up button
Bass up button
Treble up button
Next button
Play/pause button
Battery installation
Power control
Before installation
Remove and discard the insulation tab as figure above:
Replace battery for the remote control
When replacing the battery in the remote control, refer to the
diagram below:
1. Press the catch across. While holding the catch, open the battery
door.
To turn the speaker on
Connect the supplied AC/DC adapter and the indicator will turn red.
Press Standby button to place the unit to working status. The
indicator will turn to corresponding color.
FUNCTION
LED
AUX 1
green
orange
AUX 2
BLUETOOTH
blue
Power On
red
NOTE: Before using different external connection functions, please
complete external connection with other devices , then power on the
unit!
To turn the speaker off
Press Standby button on the remote control or hold Standby button
on the side of the unit.
2. Fit the battery observing polarity as shown. When replacing the
battery, use only the same CR2025 type specified.
NOTE:If the unit is not used for a long period of time, disconnect the
power adapter.
Aux In source
Aux In source may include:
TV/DVD/VCR
Battery care
Dispose of used batteries with regard to the recycling regulations in
your area.
Weak batteries can leak and damage the remote control.
Do NOT short circuit batteries or throw them into water, the general
rubbish or in a fire.
Replace them in good time!
GB-12
AUX 1 connection
1. Connect the AV cable to audio output jack (white jack=L, red
jack=R) on DVD Player and to the audio input jack inlet on the rear
of the unit.
2. Press Source button repeatedly until the indicator turns Green.
GB-13
NOTE: If there is no sound or if the volume is not loud enough, you
may increase the setting on the music/sound source.
White
Connect to the output
socket of external
audio devices (MP3,
Computer,ext.)
POWER
Red
RESET
AUX 1
To AUX 1 Jacks
on the rear of the unit
During playback
• Press MUTE button to turn off the sound. Press again to resume
the sound.
• Press VOLUME+/- buttons to adjust the volume level.
• Press BASS+/- buttons to adjust bass level.
• Press TREBLE+/- buttons to adjust treble level.
• Press EQ button to switch between POP/ JAZZ/ CLASSIC /ROCK and
NORMAL.
Line in source
LINE IN sources may include:
Personal audio players
Personal computers or laptops
MP3
AU X 2
Computer
Supplied audio
connection cable
To AUX 2 Jack
on the unit
During playback
• Press MUTE button to turn off the sound. Press again to resume
the sound.
• Press VOLUME+/- buttons to adjust the volume level.
• Press BASS+/- buttons to adjust bass level.
• Press TREBLE+/- buttons to adjust treble level.
• Press EQ button to switch between POP/ JAZZ/ CLASSIC /ROCK and
NORMAL.
Bluetooth source
AUX 2 connection:
1. Connect a stereo 3.5mm jack cable (supplied) between the
headphone or LINE/Audio output of the personal audio player and
the AUX 2 jack on the side of the unit.
2. Power on the unit and press source button repeatedly until the
indicator turns orange. Set your personal audio player/computer to
play.
GB-14
Pairing
1. Press “SOURCE” button on remote control or Source button on
side panel of sound bar until the indicator turns blue.
2. Turn off the Bluetooth functionality of other devices that are
paired with your unit. Only one device can be used with the
Bluetooth function at a time.
3. Turn on Bluetooth functionality on your Bluetooth device.
GB-15
Typically, Bluetooth controls are found on the device’s tools
or settings menu (see your user manual). Turn on Bluetooth
connectivity and make your device “discoverable”.
4. Choose“add a new Bluetooth device”or “setup Bluetooth
device”on your device. It will start to search. Once “SYLVANIA”
shows on your device, select it. If your device prompts you for a
code, please enter 0000. If the pairing attempt fails or times
out, please start pairing procedure again.
5. After your device and the “SYLVANIA”have connected to each
other, a tone can be heard.
NOTE:
The unit will automatically reconnect the last paired device when
Bluetooth mode is reselected from other mode. If for some reason
the Bluetooth connection is lost due to external factors or will not
auto reconnect, you must clear the SYLVANIA from you Bluetooth
Devices list and start the pairing process again.
During playback:
• Press PLAY/PAUSE button to suspend momentarily the playing
track. Press again to resume playing.
• Press TUNE+ button to skip forward to the next track and TUNEbutton to skip backward to the previous track.
• Press MUTE button to turn off the sound. Press again to resume
the sound.
• Press VOLUME+/- buttons to adjust the volume level.
• Press BASS+/- buttons to adjust bass level.
• Press TREBLE+/- buttons to adjust treble level.
• Press EQ button to switch between POP/ JAZZ/ CLASSIC /ROCK and
NORMAL.
Troubleshooting guide
Check the followings before requesting service.
SYMPTOM
No power
No sound
Remote not
working
AUX IN / LINE IN
not working
POSSIBLE CAUSE
POSSIBLE SOULTION
Power adapter not
connected
Connect the adapter
The unit is in Standby
mode
Press the Standby
button on the unit
or remote control to
power on the unit.
Volume in minimum
position
Raise volume level
by pressing the VOL
(Volume)+Button
The connected device Play the music/movie
in the connected
is not in playback
mode
device
Sound output of the
device is weak
Raise volume level of
the connected device
The batteries in the
remote control are
exhausted
Replace with new
battery
Wrong mode is
selected
Press source button
until indicator turns
Green (AUX 1 ) /
Orange (AUX 2)
Wrong mode is
selected
Press Source button until
The unit is connected
No response from with another
Bluetooth source Bluetooth device
indicator turns Blue
Disconnect the
connection and retry.
The connected device Activate the
is deactivated
connected device and
start the playback
GB-16
GB-17