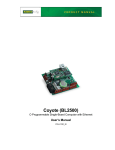
1
Keypad/Display Interface (RN1600) RabbitNet LAN Interface Card User’s Manual 019–0138 • 040415–A RN1600 User’s Manual Part Number 019-0138 • 040415–A • Printed in U.S.A. ©2004 Z-World Inc. • All rights reserved. Z-World reserves the right to make changes and improvements to its products without providing notice. Trademarks Rabbit and Rabbit 3000 are registered trademarks of Rabbit Semiconductor. RabbitNet is a trademark of Z-World Inc. Dynamic C is a registered trademark of Z-World Inc. Z-World, Inc. 2900 Spafford Street Davis, California 95616-6800 USA Telephone: (530) 757-3737 Fax: (530) 753-5141 www.zworld.com RabbitNet Keyapd/Display Interface (RN1600) TABLE OF CONTENTS Chapter 1. Overview 1 1.1 RabbitNet Keypad/Display Interface Features .....................................................................................2 1.1.1 Software ........................................................................................................................................2 1.1.2 Connectivity Tools and Expansion Kit .........................................................................................2 1.1.3 DIN Rail Mounting .......................................................................................................................3 1.2 Connecting Peripheral Cards ................................................................................................................4 1.2.1 Power-Supply Connections...........................................................................................................5 1.3 Key RabbitNet Keypad/Display Interface Components .......................................................................6 1.3.1 Headers and Jacks .........................................................................................................................6 1.3.1.1 Keypads................................................................................................................................ 6 1.3.1.2 Liquid Crystal Displays........................................................................................................ 7 1.3.2 LEDs .............................................................................................................................................7 1.3.3 Buzzer ...........................................................................................................................................7 1.4 Liquid Crystal Display Backlights........................................................................................................8 1.5 Display Contrast ...................................................................................................................................9 Chapter 2. RabbitNet Keypad/Display Interface Software 11 2.1 Dynamic C Libraries...........................................................................................................................12 2.1.1 Accessing and Downloading Dynamic C Libraries ....................................................................13 2.2 Sample Programs ................................................................................................................................14 2.2.1 General RabbitNet Operation......................................................................................................14 2.2.2 RabbitNet Keypad/Display Interface ..........................................................................................15 2.3 RabbitNet Keypad/Display interface Function Calls..........................................................................17 2.3.1 Buzzer .........................................................................................................................................17 2.3.2 LEDs ...........................................................................................................................................18 2.3.3 Keypad ........................................................................................................................................19 2.3.4 Display ........................................................................................................................................22 2.3.5 Status Byte ..................................................................................................................................28 Appendix A. RabbitNet Display Specifications 29 A.1 Electrical and Mechanical Specifications ..........................................................................................29 A.1.1 Physical Mounting .....................................................................................................................31 A.2 Jumper Configurations.......................................................................................................................32 Appendix B. RabbitNet 33 B.1 General RabbitNet Description ..........................................................................................................33 B.2 Physical Implementation ....................................................................................................................35 B.2.1 Control and Routing ...................................................................................................................35 B.3 Function Calls ....................................................................................................................................36 B.3.1 Status Byte..................................................................................................................................42 User’s Manual Appendix C. Keypad/Display Interface Expansion Kit 43 C.1 Keypads ............................................................................................................................................. 44 C.1.1 Keypad Templates ..................................................................................................................... 45 C.2 LCD Displays .................................................................................................................................... 48 C.2.1 2 × 20 Character LCD................................................................................................................ 49 C.2.2 4 × 20 Character LCD................................................................................................................ 49 C.3 ZMENU.C ......................................................................................................................................... 50 C.4 Configuring Key Code Indexes and Physical Keypad Arrangement ................................................ 54 C.4.1 Basics of Assigning Key Code Indexes..................................................................................... 54 C.4.2 Expansion Kit Keypads ............................................................................................................. 56 C.4.2.1 3 × 4 Keypad..................................................................................................................... 56 C.4.2.2 2 × 6 Keypad..................................................................................................................... 57 C.4.2.3 4 × 10 Keypad ................................................................................................................... 58 C.5 2 × 6 Keypad Datasheet..................................................................................................................... 59 C.6 3 × 4 Keypad Datasheet..................................................................................................................... 60 C.7 4 × 10 Keypad Datasheet................................................................................................................... 61 C.8 2 × 20 Character LCD Datasheet....................................................................................................... 62 C.9 4 × 20 Character LCD Datasheet....................................................................................................... 86 Notice to Users 93 Index 95 Schematics 97 RabbitNet Keypad/Display Interface (RN1600) 1. OVERVIEW Chapter 1 describes the features and the use of the RabbitNet Keypad/Display interface, one of the peripheral I/O cards designed for use with the RabbitNet expansion ports on Z-World’s Coyote (BL2500) and Badger (BL2600) single-board computers, and on the eDisplay (OP7200) operator control panel. The RabbitNet expansion ports enable a modular and expandable embedded control system whose configuration of I/O cards, keypads, and displays can be tailored to a large variety of demanding real-time control, display, and data-acquisition applications. A typical RabbitNet™ system consists of a master single-board computer and one or more peripheral I/O cards. A high-performance Rabbit 3000® or Rabbit 2000® microprocessor on the master provides fast data processing, and the master also provides the DCIN and +5 V power for the peripheral cards. Figure 1 shows a conceptual view of the RabbitNet Keypad/Display Interface connected to a master. RabbitNet LAN Keypad/Display Interface Card SLAVE MASTER Rabbit 3000® Microprocessor KEYPAD DISPLAY +5 V Figure 1. RabbitNet Keypad/Display Interface (Slave) Connected to Master NOTE: Only one RabbitNet Keypad/Display interface per master is supported at this time. NOTE: The OP7200 master does not supply any power to the slave. User’s Manual 1 1.1 RabbitNet Keypad/Display Interface Features • accepts one generic keypad with a maximum of 16 terminals, a maximum of 64 keys in an 8 × 8 matrix, and with a flex connector tail whose traces are spaced 0.1" center-tocenter. • supports one character liquid crystal display with up to 4 × 20 characters with or without a backlight, accepts standard 1 × 16 or 2 × 8 connectors with 0.1" pitch. • onboard series resistance configuration for backlight LEDs on liquid crystal display • onboard contrast adjustment for liquid crystal display • 5 LED status indicators. • can be mounted in standard 100 mm DIN rail trays sold by other suppliers • Interfaces with master through RabbitNet™ serial protocol at 1 Megabit per second using standard Ethernet cable, can be up to 10 m (33 ft) away from master 1.1.1 Software The RabbitNet Keypad/Display interface is a preprogrammed slave; the master to which it is connected is programmed using version 8.50 or later of Z-World’s Dynamic C. 1.1.2 Connectivity Tools and Expansion Kit Z-World also has available additional tools and parts to allow you to make your own wiring assemblies to interface with the connectors on the RabbitNet Display. • Crimp tool (Z-World Part No. 998-0013) to secure wire in crimp terminals. • Keypad/Display Interface Expansion Kit (Z-World Part No. 101-0887)—provides the necessary hardware components required to run the sample programs and to demonstrate the functionality of the Keypad/Display interface. In addition to a Keypad/ Display interface, two types of liquid crystal displays and three keypad styles are included in the Expansion Kit along with various cables and connectors. Appendix C provides complete information about the Keypad/Display Interface Expansion Kit and its contents. Visit our Web site at www.zworld.com or contact your Z-World sales representative or authorized distributor for further information. 2 RabbitNet Keypad/Display Interface (RN1600) 1.1.3 DIN Rail Mounting The Keypad/Display interface may be mounted in 100 mm DIN rail trays as shown in Figure 2. J7 Keypad/Display Interface Card J5 IC P R1 5 R1 9 AU X R1 8 J3 MA IN R1 R1 6 0 R1 7 R9 PR OG RA M M IN G RP 1 C5 R1 4 LC DM LC DM J4 U3 C4 Q3 Q4 Y1 RP 2 INT ER FA INT CE ER FA CE C1 1 LS 1 CL OC KE D R1 1 R1 2 R1 3 D2 D1 0 U2 U8 RP 5 U4 D1 D9 RP 6 RP 3 D3 D1 1 SE RIA L INT ER FA CE R2 U7 D4 D1 2 C9 J8 R4 RP 8 R6 U9 D6 D1 4 C1 3 C3 U1 D5 D1 3 INT ER FA CE C7 J6 KE YP AD C1 0 RP 4 U1 0 U6 C8 C1 2 D7 D1 5 D8 D1 6 C6 RP 7 R7 C2 C1 DS 5 R3 R1 DS 3 Tray Side DS 1 GOPW ODR Q1 BAµP D Q2 AL IVE R8 DS 2 AC TIV ITY R5 DS 4 BA LIG CK HT Modular PC Board Trays DIN Rail Figure 2. Mounting Keypad/Display Interface Card in DIN Rail Trays DIN rail trays are typically mounted on DIN rails with “feet.” Table 1 lists Phoenix Contact part numbers for the DIN rail trays, rails, and feet. The tray side elements are used to keep the Digital I/O Card in place once it is inserted in a DIN rail tray, and the feet are used to mount the plastic tray on a DIN rail. Table 1. Phoenix Contact DIN Rail Mounting Components DIN Rail Mounting Component Phoenix Contact Part Description Phoenix Contact Part Number Trays UM 100-PROFIL cm* 19 59 87 4 Tray Side Elements UM 108-SE 29 59 47 6 Foot Elements UM 108-FE 29 59 46 3 * Length of DIN rail tray in cm NOTE: Other major suppliers besides Phoenix Contact also offer DIN rail mounting hardware. Note that the width of the plastic tray should be 100 mm (3.95") since that is the width of the Digital I/O Card. 108 mm plastic trays may be used with spacers. User’s Manual 3 1.2 Connecting Peripheral Cards Use a straight-through Ethernet cable to connect the RabbitNet Keypad/Display interface RJ-45 RabbitNet jack to a RabbitNet port on the master. You may use either port if you are connecting to a BL2500 or other master that has two RabbitNet ports. NOTE: The RJ-45 RabbitNet jacks are serial I/O ports for use with a master and a network of peripheral cards. The RabbitNet jacks do not support connections to an Ethernet network. The OP7200 master has only one RabbitNet port and does not have a frictionlock power terminal. Master RabbitNet Power-supply cable Keypad/Display Interface AUX LCDM INTERFACE J5 CLOCKED SERIAL INTERFACE J7 MAIN LCDM INTERFACE C3 U3 Y1 POR T J2 U1 RP4 R4 R2 RP3 J3 ICP PRO GRA MMIN G RAB BITN ET U PST REA M U2 R12 R13 R11 C10 Q3 J8 U4 R14 RP2 LS1 R10 R16 R17R9 R18 R19 C5 C11 J4 Q4 R15 RP1 C6 R6 U10 C7 C2 C1 Straight-through Ethernet cable DCIN RP7 J1 PWR GOOD DS1 DS3 DS5 DS4 DS2 J6 µP BAD R1 R3 R8 R5 R7 D7 D8 D6 D4 D5 D2 D3 D1 BACK ACTIVITY ALIVE LIGHT Q1 Q2 D16 D15 D13 D14 D11 D12 D9 D10 C8 C13 U9 C9 U7 U8 U6 RP6 KEYPAD INTERFACE +5V RAB GND BITN ET P OWE R C4 RP8 RP5 C12 X Ethernet Figure 3. Connect RabbitNet Keypad/Display Interface to Master You will also have to provide +5 V DC power to your RabbitNet Keypad/Display interface. The power supply is connected via the friction-lock terminal at header J1. If you are using a BL2500 or BL2600 as your master, you may draw this power from the BL2500 or BL2600 as shown in Figure 3. You may assemble a suitable cable using the friction-lock connectors from the Connectivity Kit described in Section 1.1.2. Although there is a standard RabbitNet DCIN power-supply input on the RabbitNet Keypad/Display interface, the interface does not need DCIN power. NOTE: Even if you are not drawing power from a BL2500 or BL2600 master, you will need to at least connect the RabbitNet Keypad/Display interface ground to the ground on your master. The GND pin on header J1 should be used. At the present time, the number of peripheral cards you can use with one master is limited by the number of RabbitNet ports on the master. Only one Keypad/Display interface per master is supported at the present time. 4 RabbitNet Keypad/Display Interface (RN1600) 1.2.1 Power-Supply Connections Figure 4 illustrates the assembled friction-lock connector wiring diagram for the power supplies used to supply power to the RabbitNet Keypad/Display interface. DCIN (pin 1 on header J1) is not used by the Keypad/Display interface, and does not have to be connected. +5 V +5 V GND GND +5V J2 n.c. DCIN J1 Pin 1 Figure 4. Power-Supply Connections Use 18-gauge (AWG) wire (1 mm2) for power-supply connections up to 10 m away from the master. If the wire length is less than 3 m, 22 gauge (AWG) wire (0.4 Daisy Chain mm2) is acceptable. Do not daisy-chain the power supply connections between different peripheral cards, but use a star configuration from the master when there are several peripheral cards. X Star Figure 5. Daisy Chain vs. Star Configurations It is best to use a type of cable where the wires for the ground and positive(s) of any power supply are bound together or twisted, and ideally the power-supply wires should not be bundled with other wires. If you are not drawing power from the master, Z-World strongly recommends that you have a physical ground connection between the Keypad/Display interface and the master. User’s Manual 5 1.3 Key RabbitNet Keypad/Display Interface Components The locations of key RabbitNet Keypad/Display interface components are shown in Figure 6. Auxiliary LCDM Interface Vcc GND SPI_MOSI SPI_MISO SPI_CLK SPI_CS BL +BL DB7 DB6 DB5 DB4 DB3 DB2 DB1_R DB0_R DISP_ENAB /WR A0 VL Vcc GND Clocked Serial Interface +BL DB6 DB4 DB2 DB0_R /WR VL GND J5 ST Microcontroller Program Port BL DB7 DB5 DB3 DB1_R DISP_ENAB A0 Vcc J4 J8 Main LCDM Interface Contrast Adjustment R12 RabbitNet J2 J3 Buzzer GND J1 +5 V n.c. Power Supply 1 2 3 4 5 6 7 8 9 10 11 12 13 14 15 16 Keypad Interface DS1 DS3 DS5 DS2 J6 DS4 DCIN PWR BACK ACT ALIVE µP BAD GOOD LIGHT Figure 6. RabbitNet Display Pinouts 1.3.1 Headers and Jacks RabbitNet Keypad/Display interfaces are equipped with one 1 × 4 friction-lock terminal at J1 (DCIN and +5 V power supplies), and an RJ-45 RabbitNet jack. No header is installed at J3, which is used to program the onboard microcontroller at the factory. No header is installed at J8, which is reserved for future use. 1.3.1.1 Keypads A 1 × 16 IDC header at J6 with a 0.1" pitch provides the keypad interface, and can accommodate keypads with up to 16 leads. A maximum of 64 keys can be handled in an 8 × 8 matrix. To insure compatibility with the software driver routines, pin 1 on header J6 must always be connected to a keypad strobe or data line; do not leave pin 1 unconnected. Manufacturers typically supply keypads with flex connector tails, and can usually be ordered with or without a connector on the flex connector tail. The traces on the connector tails are most often spaced 0.1" center-to-center, and this is the only spacing supported by the RabbitNet Keypad/Display interface since the pins on header J6 are spaced 0.1" apart. Suitable keypads will not necessarily use all the pins that are available on header J6, but will work as long as they meet the other criteria described in this section. 6 RabbitNet Keypad/Display Interface (RN1600) FCI/Berg is one manufacturer of connectors that may be used to connect the flex connector tails from the keypad to header J6 on the Keypad/Display interface. Their connectors, called series 65801 “Clincher,” are available in various widths and may be purchased online from Mouser Electronics. It is expensive to develop a custom keypad, particularly if the anticipated volume will be low. A good source for generic keypads is Xymox Technologies Inc. 9099 W. Dean Rd., Milwaukee, WI 53224. Their available keypads can be viewed online by visiting their Web site at www.xymox.com and searching for “stock membrane switches.” 1.3.1.2 Liquid Crystal Displays A 2 × 8 IDC header at J4 and a 1 × 16 socket at J5 with a 0.1" pitch provide the interface for character liquid crystal displays either with or without a backlight. A standard signal pin assignment is used by most manufacturers for each of the two types of connectors. The command set is the same across all character liquid crystal displays. Pins 15 and 16 are reserved for the backlight function. In some cases when there is no backlight or the backlight is internal to the liquid crystal display, the manufacturer sometimes uses a 1 × 14 in-line or a 2 × 14 dual-row connector. In this case, pins 15 and 16 on the Keypad/Display interface are not used, and you need to only connect pins 1–14 to the corresponding pins on the liquid crystal display. 1.3.2 LEDs The RabbitNet Keypad/Display interface has five status LEDs: Backlight, Activity, Alive, Microprocessor Bad, and Power Good. The Backlight LED at DS4 turns on to indicate that the backlight was turned on by the rn_dispBacklight() software function call. The Activity LED at DS2 indicates network activity in that data are being transferred between the Keypad/Display interface and the master. The Alive LED at DS5 blinks continuously once the onboard microprocessor has performed its self-tests and is running properly. The microprocessor is not working properly if this LED remains either on or off. The red Microprocessor Bad LED at DS3 indicates the status of the RabbitNet Keypad/ Display interface. Following a reset, DS4 will be ON and will remain ON while the microcode on the onboard microprocessor performs its self-tests. This LED is turned off if the self-test completes successfully, and can subsequently be user-controlled in the application. The green Power Good LED at DS1 indicates when power is applied to the RabbitNet Keypad/Display interface and that Vcc is above 3.6 V. The LED turns off when the RabbitNet Keypad/Display interface is being reset. 1.3.3 Buzzer An audible buzzer can be turned on in software for variable intervals of time. User’s Manual 7 1.4 Liquid Crystal Display Backlights Liquid crystal displays are manufactured with and without backlighting. Electroluminescent (EL), cold-cathode fluorescent (CCFL), vacuum fluorescent (VFD), or LED backlighting are the types of backlighting available. The RabbitNet Keypad/Display interface supports only LED backlighting because this is the most common type and is the most likely to require external support. Liquid crystal displays with LED backlighting derive their voltage or current via pins 15 and 16 of header J4 or J5. In those cases where a voltage source is used, the Keypad/ Display interface can be configured to supply 5 V to the liquid crystal display. Series resistors on the liquid crystal display limit the current to the LED backlight and set its intensity. To provide the 5 V voltage source, install 2-pin jumpers across pins 7–8 and 9–10 on header J7. When the LCD backlight specifications call for a current source, the series resistors on the Keypad/Display interface are used to limit the current. The series resistance can be set from 3.3 Ω to 20 Ω with the 2-pin jumpers on header J7. The liquid crystal display specifications list the voltage required across its internal LEDs and indicate the allowable range of current corresponding to the LED intensity. Subtract this LED voltage from 5 V, then divide that by the current for the selected LED intensity to determine the required series resistance. Install 2-pin jumpers on header J7 to configure the resistance value closest to that calculated without exceeding the maximum current in the specification. Table 2 gives the resistance values and maximum current corresponding to various jumper settings. Table 2. Header J7 Pins to Jumper to Configure LCD Series Resistance Header J7 Pins Resistance 1–2 3–4 5–6 7–8 9–10 Max. Current (mA) 0.00 Ω 350 3.33 Ω 333 5.00 Ω* 222 10.0 Ω 111 13.3 Ω 111 15.0 Ω 111 20.0 Ω 111 infinite 0 * Factory default. NOTE: Make sure that the jumpers are set appropriately before connecting the liquid crystal display to the Keypad/Display interface. The backlight on your liquid crystal display may be destroyed when subjected to a current above the maximum specified. Pay close attention when using the 0 Ω resistance setting to source 5 V to the LCD. 8 RabbitNet Keypad/Display Interface (RN1600) Example For example, let’s consider a case where the specifications indicate that the typical LED voltage is 4.2 V and the typical LED backlight current is 200 mA. 1. Subtract 4.2 V from 5 V: 5.0 V - 4.2 V = 0.8 V. 2. Divide by the current: 0.8 V ------------------- = 4 Ω 200 mA Choose the next higher resistance, 5 Ω, which is the default factory setting. As a sanity check, the maximum current in Table 2 for this configuration is 222 mA, and so the backlight current of 200 mA is safely below the maximum. 1.5 Display Contrast Each different size and configuration of a liquid crystal display often requires a unique contrast setting. Even otherwise identical liquid crystal displays with the same part number from the same vendor sometimes require different settings The contrast or viewing angle of the liquid crystal display can be adjusted using potentiometer R12 on the Keypad/ Display interface. The contrast setting is sensitive and can be somewhat difficult to achieve until some experience is obtained. A good way to set the contrast is to first connect the liquid crystal display to the RabbitNet Keypad/Display interface, and then power up the complete RabbitNet system. Do not run any of the sample programs at this time. Adjust the contrast potentiometer until the liquid crystal display shows 1 or 2 rows of fully filled character cells. Now run one of the sample programs that corresponds to the liquid crystal display being used and further adjust R12 for optimum contrast. User’s Manual 9 10 RabbitNet Keypad/Display Interface (RN1600) 2. RABBITNET KEYPAD/DISPLAY INTERFACE SOFTWARE The RabbitNet Keypad/Display interface operates via a Dynamic C program running on the master. Dynamic C is an integrated development system for writing embedded software. It runs on an IBM-compatible PC and is designed for use with Z-World and other single-board computers based on the Rabbit microprocessor. Chapter 2 provides the libraries, function calls, and sample programs related to the RabbitNet Keypad/Display interface. User’s Manual 11 2.1 Dynamic C Libraries In addition to the library associated with the master single-board computer such as the BL2500, BL2600, or OP7200, several other libraries are needed to provide function calls for the RabbitNet Keypad/Display interface. • RN_CFG_BL25.LIB—used to configure the BL2500 for use with RabbitNet peripheral cards. Function calls for this library are discussed in the Coyote (BL2500) User’s Manual. • RN_CFG_BL26.LIB—used to configure the BL2600 for use with RabbitNet peripheral cards. Function calls for this library are discussed in the Badger (BL2600) User’s Manual. • RN_CFG_OP72.LIB—used to configure the OP7200 for use with RabbitNet peripheral cards. Function calls for this library are discussed in the eDisplay (OP7200) User’s Manual. • RNET.LIB—provides functions unique to the RabbitNet protocol. Function calls for this library are discussed in Appendix B., “RabbitNet.” • RNET_DRIVER.LIB—provides background functions unique to the SPI data transmission protocol. • RNET_KEYIF.LIB—provides function calls for the RabbitNet Keypad/Display keypad interface. These function calls are described in this chapter. • RNET_LCDIF.LIB—provides function calls for the RabbitNet Keypad/Display LCD display interface. These function calls are described in this chapter. Other functions applicable to all devices based on Rabbit microprocessors are described in the Dynamic C Function Reference User’s Manual. Functions relevant to the other peripheral cards are described in the manual specific to the peripheral card. 12 RabbitNet Keypad/Display Interface (RN1600) 2.1.1 Accessing and Downloading Dynamic C Libraries The libraries needed to run the RabbitNet Keypad/Display interface are available on the CD included with the Tool Kit for the master single-board computer, or they may be downloaded from http://www.zworld.com/support/downloads/ on Z-World’s Web site. When downloading the libraries from the Web site, click on the product-specific links until you reach the links for the RabbitNet peripheral cards download. Once you have downloaded the RabbitNetExpansionCards.exe file, double-click on the file name to begin the installation. InstallShield will install the files for you at a location you designate, and a pop-up readme file will explain the available options to add the files to your existing Dynamic C installation or to modify the relevant files in your existing Dynamic C installation. You will now be ready to use Dynamic C with the RabbitNet Keypad/Display interface, and you will continue to be able to use Dynamic C with all the other Z-World products you were able to use before. User’s Manual 13 2.2 Sample Programs Sample programs are provided in the Dynamic C SAMPLES folder. The various folders contain specific sample programs that illustrate the use of the corresponding Dynamic C libraries. For example, the sample program PONG.C demonstrates the output to the STDIO window. The RABBITNET folder provides sample programs specific to the RabbitNet peripheral cards. Each sample program has comments that describe the purpose and function of the program. Follow the detailed instructions at the beginning of the sample program to help you set up your boards to run the sample program. To run a sample program, open it with the File menu (if it is not still open), compile it using the Compile menu, and then run it by selecting Run in the Run menu. The RabbitNet peripheral card must be connected to a master such as the BL2500. The BL2500 or other master must be in Program Mode, and must be connected via the programming cable to a PC. More complete information on Dynamic C is provided in the Dynamic C User’s Manual. 2.2.1 General RabbitNet Operation The SAMPLES\RABBITNET\ subdirectory contains the following sample programs. • ECHOCHAR.C—Demonstrates a simple character echo to any RabbitNet peripheral card. This program will first look for a peripheral card that is connected directly to each master port using rn_device(). The last peripheral card found will echo characters sent by the master. Otherwise, the status byte will indicate there is no connection. • ECHOTERM.C—Demonstrates a simple character echo to any RabbitNet peripheral card through a serial terminal on the master. This program will first look for a peripheral card connected directly to each master port using rn_device(). The last peripheral card found will echo characters sent by the master. Otherwise, the status byte will indicate there is no connection. • HWATCHDOG.C—Demonstrates setting the hardware watchdog on a RabbitNet peripheral card. This program will first look for a peripheral card that is connected directly to each master port using rn_device(). The last peripheral card found will be used. The hardware watchdog will be set and a hardware reset should occur in approximately 1.5 seconds. The hardware watchdog will be disabled after the reset is done and the hardware reset bit will be set. • SWATCHDOG.C—Demonstrates setting and hitting the software watchdog on a RabbitNet peripheral card using costatements. This program will first look for a peripheral card that is connected directly to each master port using rn_device(). The last peripheral card found will be used. The software watchdog will be set for 2.5 seconds. The watchdog will be hit at an ever-increasing timeout until the timeout is longer than 2.5 seconds. A software reset will occur and the software watchdog will be disabled. 14 RabbitNet Keypad/Display Interface (RN1600) 2.2.2 RabbitNet Keypad/Display Interface The SAMPLES\RABBITNET\RN1600 subdirectory contains the following sample programs. You will need to install the specified keypad and/or the specified display provided in the RabbitNet Keypad/Display Interface Expansion Kit before you run these sample programs. Appendix C provides details and diagrams showing how to attach the appropriate keypad or LCD display needed to run a sample program. Each sample program has complete setup and operating instructions. • ALPHANUM.C—Demonstrates the use of the 2 × 6 keypad and the 4 × 20 display provided in the RabbitNet Keypad/Display Interface Expansion Kit. The sample program demonstrates how you can create messages with the keypad and then display them on the LCD. • BUZZER.C—Demonstrates control of the buzzer on the RabbitNet Keypad/Display interface by using the function calls rn_keyBuzzer() and rn_keyBuzzerAct(). Although the buzzer is monotone, some pitch and motorboat effects can be demonstrated with this sample program. • KEYBASIC.C—Demonstrates the keypad function using the 4 × 10 keypad provided in the RabbitNet Keypad/Display Interface Expansion Kit. The sample program demonstrates the following features. • Custom ASCII keypad return values. • Use of the buzzer on the RabbitNet Keypad/Display interface. • Keypad character assignment for a specific example provided. Once you compile and run this program, press each key on the keypad. The results are displayed in the Dynamic C STDIO window. • LCDBASIC.C—Demonstrates the use of the 2 × 20 display provided in the RabbitNet Keypad/Display Interface Expansion Kit. The sample program demonstrates various display functions. Note that the backlight function will work only on displays that are equipped with a backlight. • PONG.C—Demonstrates the use of the 3 × 4 keypad and the 2 × 20 display provided in the RabbitNet Keypad/Display Interface Expansion Kit. • ZMENU.C—Demonstrates a menu system that allows you to list a set of action options for an operator to choose from. Keypads and character displays included in the Expansion Kit are used with this program. All the parameters required for the menu system can be changed via the Zmenu_Config() function included with the sample program. This sample program has three menus, a main menu, a data-entry menu, and a TCP/IP menu. The main menu allows you to select either of the other two menus, and includes provisions for erasing the STDIO window and for turning the backlight on or off if the character display is equipped with a backlight. Depending on the actual display, you may have to scroll down to see all the options. The data-entry menu demonstrates the data-entry capability for longs, floats, strings, passwords, and a time/date stamp. The TCP/IP menu demonstrates how to change IP addresses via the keypad. User’s Manual 15 As selections are made, the current menu number and the selection made are displayed in the STDIO window. When a data entry or a TCP/IP menu selection is made, the appropriate values entered are also be displayed in the STDIO window. The ZMENU.C sample program is built around the Zmenu_Config() function, which is described in Appendix C.3. 16 RabbitNet Keypad/Display Interface (RN1600) 2.3 RabbitNet Keypad/Display interface Function Calls The RabbitNet Keypad/Display interface uses keypad function calls that are similar to those used by other Z-World devices such as the OP6800, the OP7200, and the LCD/ keypad module. 2.3.1 Buzzer The buzzer on the RabbitNet Keypad/Display interface can be programmed in software to sound for specified time intervals or to provide an audible click when a keypress occurs. These function calls are provided in the RNET_KEYIF.LIB library. int rn_keyBuzzer(int handle, int onOff, int reserved); Turns the buzzer on or off. This function will override any setting by rn_keyBuzzerAct. Calling rn_keyBuzzer does not affect the keypress buzzer setting. PARAMETERS handle is an address index to device information. Use rn_device() or rn_find() to establish the handle. onOff is the buzzer on/off control 0—buzzer off 1—buzzer on reserved is reserved for future use. Set to 0. RETURN VALUE The status byte from the previous command. -1 means that device information indicates the Keypad/Display interface is not connected to the master. SEE ALSO rn_keyBuzzerAct int rn_keyBuzzerAct(int handle, unsigned int period, int reserved); Activates the buzzer for a specified interval of time. rn_Buzzer will override this function. Calling rn_keyBuzzerAct does not affect the keypress buzzer setting. PARAMETERS handle is an address index to device information. Use rn_device() or rn_find() to establish the handle. period is the length of time the buzzer will be activated. Select 1–65535 ms reserved is reserved for future use. Set to 0. RETURN VALUE The status byte from the previous command. -1 means that device information indicates the Keypad/Display interface is not connected to the master. SEE ALSO rn_keyBuzzer User’s Manual 17 2.3.2 LEDs The functions used to control any LEDs are contained in the RNET_KEYIF.LIB library located in the Dynamic C RABBITNET library directory. int rn_keyLedOut(int handle, int led, int onOff, int reserved); The Microprocessor Bad LED is user-controllable and can be set to a specified state until called again. PARAMETERS handle is an address index to device information. Use rn_device() or rn_find() to establish the handle. led is the LED to control. Use 0 for Microprocessor Bad LED. onOff is the LED on/off control. 0 = LED Off 1 = LED On reserved is reserved for future use. Set to 0. RETURN VALUE The status byte from the previous command. -1 means that device information indicates the Keypad/ Display interface is not connected to the master. SEE ALSO rn_keyBuzzer 18 RabbitNet Keypad/Display Interface (RN1600) 2.3.3 Keypad The functions used to control the keypad are contained in the RNET_KEYIF.LIB library located in the Dynamic C RABBITNET library directory. This library supports keypads with up to 64 keys. int rn_keyInit(int handle, unsigned int iobits, int buzzerperiod); Initializes keypad and buzzer control for when a key is pressed. Call this function prior to any keypad operations. Calling this function more than once will reinitialize key-processing queues. To ensure keypad driver compatibility, the keypad must be installed so that a strobe line or data line starts on J6 pin 1. PARAMETERS handle is an address index to device information. Use rn_device() or rn_find() to establish the handle. iobits is a 16-bit number that consists of 1’s for outputs and 0’s for inputs. Each bit represents one of the 16 lines available for a keypad interface. For example, a value of 0x1F00 (= 0001111100000000) assigns strobe lines to 13, 12, 11, 10, and 9 on header J6 of the Keypad/Display interface to serve as the output strobe lines. The other bit lines are either inputs or are unused. buzzerperiod indicates how long the buzzer remains activated whenever a key is pressed. 0 = buzzer does not sound when a key is pressed 1–255 ms = enable the buzzer for the specified period for each keypress detected (a value of 10 produces a short click) RETURN VALUE -1 means that device information indicates the Keypad/Display interface is not connected to the master. void rn_keyConfig(int handle, char cRaw, char cPress, char cRelease, char cCntHold, char cSpdLo, char cCntLo, char cSpdHi); Assigns each key with key press and release codes, and hold and repeat ticks for auto repeat and debouncing. To ensure keypad driver compatibility, the keypad must be installed so that a strobe line or data line starts on J6 pin 1. PARAMETERS handle is an address index to device information. Use rn_device() or rn_find() to establish the handle. cRaw is a raw key code index, 0–63 for 1–64 keys. Because keypad configurations will differ, assign the raw code indexes according to your keypad configuration. For example: 2 × 6 keypad matrix with raw key code index assignments [in brackets] [ 13 ] [ 12 ] [ 11 ] [ 10 ] [ 9 ] [ 8 ] [ 5] [ 4] [ 3] [ 2][ 1][ 0] User’s Manual 19 4 × 10 keypad matrix with raw key code index assignments [in brackets] [ 32 ] [ 33 ] [ 24 ] [ 25 ] [ 16 ] [ 17 ] [ 8 ] [ 9 ] [ 0 ] [ 1 ] [ 34 ] [ 35 ] [ 26 ] [ 27 ] [ 18 ] [ 19 ] [ 10 ] [ 11 ] [ 2 ] [ 3 ] [ 36 ] [ 39 ] [ 28 ] [ 31 ] [ 20 ] [ 23 ] [ 12 ] [ 15 ] [ 4 ] [ 7 ] [ 38 ] [ 37 ] [ 30 ] [ 29 ] [ 22 ] [ 21 ] [ 14 ] [ 13 ] [ 6 ] [ 5 ] cPress is a keypress code. An 8-bit value or character is returned when a key is pressed. 0 = Unused. For example: [ 1 ][ 2 ][ 3 ][ 4 ][ 5 ][ ] [ 6 ][ 7 ][ 8 ][ 9 ][ 0 ][ E ] or [1][2][ 3][ 4][ 5][ 6][ 7][ 8][ 9][ 0] [A][B][C][D][E][F][G][H][I][J] [K][L][M][N][O][P][Q][R][S][T] [U][V][W][X][Y][Z][*][#][<][>] cRelease is a key-release code. An 8-bit value or character (not necessarily the one in cPress) is returned when a key is released. 0 = Unused. cCntHold is a hold tick. How long to hold before repeating. 0 = No Repeat. cSpdLo is a low-speed repeat tick. How many times to repeat. 0 = None. cCntLo is a low-speed hold tick. How long to hold before going to high-speed repeat. 0 = Slow Only. cSpdHi is a high-speed repeat tick. How many times to repeat after low-speed repeat. 0 = None. RETURN VALUE None. SEE ALSO rn_keyProcess 20 RabbitNet Keypad/Display Interface (RN1600) int rn_keyProcess(int handle, int reserved); Scans and processes keypad data for key assignment, debouncing, press and release, and repeat. This function is able to process a maximum of 64 keys organized as an 8 × 8 matrix. Key processing will abort if a busy or -1 status byte is detected. To ensure keypad driver compatibility, the keypad must be installed so that a strobe line or data line starts on J6 pin 1. PARAMETERS handle is an address index to device information. Use rn_device() or rn_find() to establish the handle. reserved is reserved for future use. Set to 0. RETURN VALUE The status byte from the previous command. -1 means that device information indicates the Keypad/Display interface is not connected to the master. SEE ALSO rn_keyConfig, rn_keyGet char rn_keyGet(int handle, int reserved); Get the next keypress. PARAMETERS handle is an address index to device information. Use rn_device() or rn_find() to establish the handle. reserved is reserved for future use. Set to 0. RETURN VALUE The next keypress, or 0 if none SEE ALSO rn_keyProcess, rn_keyUnget void rn_keyUnget(int handle, char cKey, int reserved); Pushes the value of cKey to the top of the input queue, which is 16 bytes deep. PARAMETERS handle is an address index to device information. Use rn_device() or rn_find() to establish the handle. cKey is the value to be pushed. reserved is reserved for future use. Set to 0. RETURN VALUE None. SEE ALSO rn_keyProcess, rn_keyGet User’s Manual 21 2.3.4 Display The functions used to control the character display are contained in the RNET_LCDIF.LIB library located in the Dynamic C RABBITNET library directory. int rn_dispInit(int handle, int nrows, int ncols); Initializes the display. Specifically, the function call reinitializes the display controller by: 1. sending an 8-bit interface command 3 times to reset, 2. setting the display to 1 or 2 lines or rows, 3. setting 5 × 7 dots, 4. disabling display shift, 5. setting the display on and cursor off, and 6. clearing the display and putting the cursor in the upper left corner. Call this function before invoking any display operations. This function may be altered to suit your display type. Remember to check your display specifications to match the connector pinouts. PARAMETERS handle is an address index to device information. Use rn_device() or rn_find() to establish the handle. nrows is the number of lines or rows in the display (max. 4 rows). ncols is the number of columns in the display (max. 20 columns). RETURN VALUE The status byte from the previous command. -1 means that device information indicates the Keypad/Display interface is not connected to the master. SEE ALSO rn_dispCmd, rn_dispClear 22 RabbitNet Keypad/Display Interface (RN1600) int rn_dispBacklight(int handle, int onOff, int reserved); Turns the display backlight on or off. This is not supported on some LCDs or vacuum fluorescent displays. PARAMETERS handle is an address index to device information. Use rn_device() or rn_find() to establish the handle. onOff turns the backlight on or off 1—turn the backlight on 0—turn the backlight off reserved is reserved for future use. Set to 0. RETURN VALUE The status byte from the previous command. -1 means that device information indicates the Keypad/Display interface is not connected to the master. SEE ALSO rn_dispOnoff int rn_dispOnoff(int handle, int onOff, int reserved); Sets the display screen on or off. Data are preserved when the screen is off. PARAMETERS handle is an address index to device information. Use rn_device() or rn_find() to establish the handle. onOff turns the display screen on or off 1—turn the display screen on 0—turn the display screen off reserved is reserved for future use. Set to 0. RETURN VALUE The status byte from the previous command. -1 means that device information indicates the Keypad/Display interface is not connected to the master. SEE ALSO rn_dispBacklight, rn_dispClear User’s Manual 23 int rn_dispClear(int handle, int reserved); Clears the display and homes cursor to the upper left corner of the display. This function will wait approximately 3 ms for the display to settle. PARAMETERS handle is an address index to device information. Use rn_device() or rn_find() to establish the handle. reserved is reserved for future use. Set to 0. RETURN VALUE The status byte from the previous command. -1 means that device information indicates the Keypad/Display interface is not connected to the master. SEE ALSO rn_dispOnoff, rn_dispGoto, rn_dispCursor int rn_dispGoto(int handle, unsigned wX, unsigned wY, int reserved); Positions the cursor. PARAMETERS handle is an address index to device information. Use rn_device() or rn_find() to establish the handle. wX is the column position—the typical range is 0 to 19, and depends on the actual display type you are using. wY is the row position—the typical range is 0 to 3, and depends on the actual display type you are using. reserved is reserved for future use. Set to 0. RETURN VALUE The status byte from the previous command. -1 means that device information indicates the Keypad/Display interface is not connected to the master. -2 means that the row or column position is not valid. SEE ALSO rn_dispClear, rn_dispCursor 24 RabbitNet Keypad/Display Interface (RN1600) int rn_dispCursor(int handle, unsigned int style, int reserved); Sets cursor type to be on, off, or blinking. PARAMETERS handle is an address index to device information. Use rn_device() or rn_find() to establish the handle. style is one of the following cursor macros: RNDISP_CUROFF—cursor off RNDISP_CURON—cursor on RNDISP_CURBLINKOFF—cursor blink off RNDISP_CURBLINKON—cursor blink on reserved is reserved for future use. Set to 0. RETURN VALUE The status byte from the previous command. -1 means that device information indicates the Keypad/Display interface is not connected to the master. -2 means that the cursor style is not valid. SEE ALSO rn_dispClear, rn_dispGoto, rn_dispCmd int rn_dispPrintf(int handle, int reserved, char *pcFormat, ...); Prints a formatted string to the display, and will line-wrap. The format is similar to that in the printf call. This function will block approximately 1 ms per character byte. Therefore, the size of the formatted string should be kept to a minimum. PARAMETERS handle is an address index to device information. Use rn_device() or rn_find() to establish the handle. reserved is reserved for future use. Set to 0. pcFormat is the formatted output string whose character buffer size should not exceed 128 bytes. Any other parameters are arguments. RETURN VALUE The status byte from the previous command. -1 means that device information indicates the Keypad/Display interface is not connected to the master. SEE ALSO rn_dispPutc, rn_dispData User’s Manual 25 int rn_dispPutc(int handle, char cByte, int reserved); Puts a character on the display, and will automatically increment to next cursor position and line-wrap. PARAMETERS handle is an address index to device information. Use rn_device() or rn_find() to establish the handle. cByte is the character to display. reserved is reserved for future use. Set to 0. RETURN VALUE The status byte from the previous command. -1 means that device information indicates the Keypad/Display interface is not connected to the master. SEE ALSO rn_dispPrintf, rn_dispData int rn_dispData(int handle, char cData, char msdelay, int reserved); This function is a low-level routine to send a byte to the display data register. PARAMETERS handle is an address index to device information. Use rn_device() or rn_find() to establish the handle. cData is the character to display. msdelay is the delay from 0 to 255 ms that is needed between each command; 1 delay of 1 ms is recommended unless otherwise specified. reserved is reserved for future use. Set to 0. RETURN VALUE The status byte from the previous command. SEE ALSO rn_dispPutc, rn_dispPrintf, rn_dispCmd 26 RabbitNet Keypad/Display Interface (RN1600) int rn_dispCmd(int handle, char cmd, char msdelay, int reserved); This function is a low-level routine to send a command to the display control register. PARAMETERS handle is an address index to device information. Use rn_device() or rn_find() to establish the handle. cmd is the command to send to the display. msdelay is the delay from 0 to 255 ms that is needed between each command; 1 delay of 1 ms is recommended unless otherwise specified. reserved is reserved for future use. Set to 0. RETURN VALUE The status byte from the previous command. SEE ALSO rn_dispData User’s Manual 27 2.3.5 Status Byte Appendix B.3.1 28 provides information on the status bytes returned by various function calls. RabbitNet Keypad/Display Interface (RN1600) APPENDIX A. RABBITNET DISPLAY SPECIFICATIONS A.1 Electrical and Mechanical Specifications Figure A-1 shows the mechanical dimensions for the RabbitNet Keypad/Display interface. 0.79 (20) 0.16 (4) AUX LCDM INTERFACE CLOCKED SERIAL INTERFACE J5 (14) 0.55 (75) U3 C6 DCIN RP7 DS1 R1 DS3 PWR GOOD (6.4) DS4 DS2 R3 DS5 R8 R5 R7 D7 D8 D6 J6 (88) µP BAD Q1 Q2 D16 D15 D13 D14 D4 D5 D2 D3 D1 BACK ACTIVITY ALIVE LIGHT 3.44 (33) J1 0.250 U9 U7 C9 D11 D12 D9 D10 C8 C13 1.30 C2 C1 C7 U8 U6 RP6 +5V GND R6 U10 C4 RP8 KEYPAD INTERFACE (6.4) 2.95 U1 Y1 C12 (15) R4 R2 RP3 J3 ICP PROGRAMMING RP4 0.60 C3 LS1 C5 RP5 0.250 RABBITNET UPSTREAM PORT J2 U2 R12 R13 C10 Q3 R11 RP2 J8 C11 R14 R10 R16 R9 R17 R18 R19 RP1 U4 J4 Q4 R15 RABBITNET POWER J7 MAIN LCDM INTERFACE 3.94 (19) 0.75 (100) 0.77 (20) 3.94 (100) Figure A-1. RabbitNet Keypad/Display Interface Dimensions NOTE: All diagram and graphic measurements are in inches followed by millimeters enclosed in parentheses. User’s Manual 29 Table A-1 lists the electrical, mechanical, and environmental specifications for the RabbitNet Keypad/Display interface. Table A-1. RabbitNet Keypad/Display Interface Specifications Feature Microprocessor Specification ST72F264G Keypad Handles any keypad with up to 16 pins and with up to 64 keys; traces on flex connector tail are at a 0.1" pitch Display Accepts one character liquid crystal display from 1 × 8 to 4 × 20 characters with or without backlight using standard 1 × 16 or 2 × 8 connectors with 0.1" pitch, Vcc = 5.0 V. Contrast and backlight support are provided. LEDs RabbitNet™ Serial Port Power Temperature Humidity Connectors Board Size 5 hardware- or software-driven: 1 red, 1 green, 3 yellow RS-422 SPI, 1 Mbits/s Vcc: +5 V DC, 60 mA maximum* –40°C to +70°C 0°C to +50°C typ. with customer-supplied LCD 5% to 95%, noncondensing IDC connectors: one 1 × 16 header with 0.1" pitch one 1 × 16 socket with 0.1" pitch one 2 × 8 header with 0.1" pitch Friction-lock connectors: one polarized 4-position header with 0.156" pitch One RJ-45 RabbitNet™ jack 2.95" × 3.94" × 0.77" (75 mm × 100 mm × 20 mm) * Current specified does not included current consumed by LCD or backlight. 30 RabbitNet Keypad/Display Interface (RN1600) A.1.1 Physical Mounting Figure A-2 shows position information to assist with interfacing other boards with the Keypad/Display interface. 1.770 (45.0) 1.370 (34.8) J5 J4 (65.5) 2.577 (11.5) J1 0.452 (60.4) 2.377 J2 (1.8) (2.6) 0.070 0.103 J6 3.125 (79.4) Figure A-2. Board Footprint for Keypad/Display Interface User’s Manual 31 A.2 Jumper Configurations Figure A-3 shows the header and jumper locations used to set the current required by an LED backlight on a display. 9 7 5 3 1 J7 10 8 6 4 2 Figure A-3. Location of RabbitNet Keypad/Display Interface Resistor Configurations Table A-2 lists the configuration options. Standard pluggable jumpers are used. Table A-2. Header J7 Pins to Jumper to Configure LCD Series Resistance Header J7 Pins Resistance 1–2 3–4 5–6 7–8 9–10 Max. Current (mA) 0.00 Ω 350 3.33 Ω 333 5.00 Ω* 222 10.0 Ω 111 13.3 Ω 111 15.0 Ω 111 20.0 Ω 111 infinite 0 * Factory default. NOTE: Make sure that the jumpers are set appropriately before connecting the liquid crystal display to the Keypad/Display interface. The backlight on your liquid crystal display may be destroyed when subjected to a current above the maximum specified. Pay close attention when using the 0 Ω resistance setting to source 5 V to the LCD. 32 RabbitNet Keypad/Display Interface (RN1600) APPENDIX B. RABBITNET B.1 General RabbitNet Description RabbitNet is a high-speed synchronous protocol developed by Z-World to connect peripheral cards to a master and to allow them to communicate with each other. A communication path is established and controlled by the master, and each master can, in theory, control up to 196 peripheral cards. All RabbitNet connections are made point to point, and until a port-expansion method is available, a RabbitNet master port can only be connected directly to a peripheral card, and the number of peripheral cards is limited by the number of available RabbitNet ports on the master. SLAVE Straight-through Ethernet cable SLAVE Rabbit 3000® Microprocessor MASTER Crossover Ethernet cable MASTER SLAVE Power Supply Straight-through Ethernet cable Figure B-1. Connecting Peripheral Cards to a Master User’s Manual 33 Use a straight-through Ethernet cable to connect the master to slave peripheral cards, unless you are using a device such as the OP7200 that could be used either as a master or a slave. In this case you would use a crossover cable to connect an OP7200 that is being used as a slave. Distances between a master unit and peripheral cards can be up to 10 m or 33 ft. The following low-cost peripheral cards are currently available. • Digital I/O 24 inputs, 16 push/pull outputs, 4 channels of 10-bit A/D conversion with ranges of 0 to 10 V, 0 to 1 V, and -0.25 to +0.25 V. The following connectors are used: Signal = 0.1" friction-lock connectors Power = 0.156" friction-lock connectors RabbitNet = RJ-45 connector • A/D converter 8 channels of programmable-gain 12-bit A/D conversion, configurable as current measurement and differential-input pairs. 2.5 V reference voltage is available on the connector. The following connectors are used: Signal = 0.1" friction-lock connectors Power = 0.156" friction-lock connectors RabbitNet = RJ-45 connector • D/A converter 8 channels of 0–10 V 12-bit D/A conversion. The following connectors are used: Signal = 0.1" friction-lock connectors Power = 0.156" friction-lock connectors RabbitNet = RJ-45 connector • Display/Keypad interface allows you to connect your own keypad with up to 64 keys and one character liquid crystal display from 1 × 8 to 4 × 20 characters with or without backlight using standard 1 × 16 or 2 × 8 connectors. The following connectors are used: Signal = 0.1" headers or sockets Power = 0.156" friction-lock connectors RabbitNet = RJ-45 connector • Relay card 6 relays rated at 250 V AC, 1200 V·A or 100 V DC up to 240 W. The following connectors are used: Relay contacts = screw-terminal connectors Power = 0.156" friction-lock connectors RabbitNet = RJ-45 connector Visit Z-World’s Web site for up-to-date information about additional cards and features as they become available. The Web site also has the latest revision of this user’s manual. 34 RabbitNet Keypad/Display Interface (RN1600) B.2 Physical Implementation There are four signaling functions associated with a RabbitNet connection. From the master’s point of view, the transmit function carries information and commands to the peripheral card. The receive function is used to read back information sent to the master by the peripheral card. A clock is used to synchronize data going between the two devices at high speed. The master is the source of this clock. A slave select (SS) function originates at the master, and when detected by a peripheral card causes it to become selected and respond to commands received from the master. The signals themselves are differential RS-422, which are series-terminated at the source. With this type of termination, the maximum frequency is limited by the round-trip delay time of the cable. Although a peripheral card could theoretically be up to 45 m (150 ft) from the master for a data rate of 1 MHz, Z-World recommends a practical limit of 10 m (33 ft). Connections between peripheral cards and masters are done using standard 8-conductor Ethernet cables. Masters and peripheral cards are equipped with RJ-45 8-pin female connectors. The cables may be swapped end for end without affecting functionality. B.2.1 Control and Routing Control starts at the master when the master asserts the slave select signal (SS). Then it simultaneously sends a serial command and clock. The first byte of a command contains the address of the peripheral card if more than one peripheral card is connected. A peripheral card assumes it is selected as soon as it receives the select signal. For direct master-to-peripheral-card connections, this is as soon as the master asserts the select signal. The connection is established once the select signal reaches the addressed slave. At this point communication between the master and the selected peripheral card is established, and data can flow in both directions simultaneously. The connection is maintained so long as the master asserts the select signal. User’s Manual 35 B.3 Function Calls The function calls described in this section are used with all RabbitNet peripheral cards, and are available in the RNET.LIB library in the Dynamic C RABBITNET folder. int rn_init(char portflag, char servicetype); Resets, initializes, or disables a specified RabbitNet port on the master single-board computer. During initialization, the network is enumerated and relevant tables are filled in. If the port is already initialized, calling this function forces a re-enumeration of all devices on that port. Call this function first before using other RabbitNet functions. PARAMETERS portflag is a bit that represents a RabbitNet port on the master single-board computer (from 0 to the maximum number of ports). A set bit requires a service. If portflag = 0x03, both RabbitNet ports 0 and 1 will need to be serviced. servicetype enables or disables each RabbitNet port as set by the port flags. 0 = disable port 1 = enable port RETURN VALUE 0 int rn_device(char pna); Returns an address index to device information from a given physical node address. This function will check device information to determine that the peripheral card is connected to a master. PARAMETER pna is the physical node address, indicated as a byte. 7,6—2-bit binary representation of the port number on the master 5,4,3—Level 1 router downstream port 2,1,0—Level 2 router downstream port RETURN VALUE Pointer to device information. -1 indicates that the peripheral card either cannot be identified or is not connected to the master. SEE ALSO rn_find 36 RabbitNet Keypad/Display Interface (RN1600) int rn_find(rn_search *srch); Locates the first active device that matches the search criteria. PARAMETER srch is the search criteria structure rn_search: unsigned int flags; unsigned int ports; char productid; char productrev; char coderev; long serialnum; // // // // // // status flags see MATCH macros below port bitmask product id product rev code rev serial number Use a maximum of 3 macros for the search criteria: RN_MATCH_PORT RN_MATCH_PNA RN_MATCH_HANDLE RN_MATCH_PRDID RN_MATCH_PRDREV RN_MATCH_CODEREV RN_MATCH_SN // // // // // // // match match match match match match match port bitmask physical node address instance (reg 3) id/version (reg 1) product revision code revision serial number For example: rn_search newdev; newdev.flags = RN_MATCH_PORT|RN_MATCH_SN; newdev.ports = 0x03; //search ports 0 and 1 newdev.serialnum = E3446C01L; handle = rn_find(&newdev); RETURN VALUE Returns the handle of the first device matching the criteria. 0 indicates no such devices were found. SEE ALSO rn_device int rn_echo(int handle, char sendecho, char *recdata); The peripheral card sends back the character the master sent. This function will check device information to determine that the peripheral card is connected to a master. PARAMETERS handle is an address index to device information. Use rn_device() or rn_find() to establish the handle. sendecho is the character to echo back. recdata is a pointer to the return address of the character from the device. RETURN VALUE The status byte from the previous command. -1 means that device information indicates the peripheral card is not connected to the master. User’s Manual 37 int rn_write(int handle, int regno, char *data, int datalen); Writes a string to the specified device and register. Waits for results. This function will check device information to determine that the peripheral card is connected to a master. PARAMETERS handle is an address index to device information. Use rn_device() or rn_find() to establish the handle. regno is the command register number as designated by each device. data is a pointer to the address of the string to write to the device. datalen is the number of bytes to write (0–15). NOTE: A data length of 0 will transmit the one-byte command register number. RETURN VALUE The status byte from the previous command. -1 means that device information indicates the peripheral card is not connected to the master, and -2 means that the data length was greater than 15. SEE ALSO rn_read int rn_read(int handle, int regno, char *recdata, int datalen); Reads a string from the specified device and register. Waits for results. This function will check device information to determine that the peripheral card is connected to a master. PARAMETERS handle is an address index to device information. Use rn_device() or rn_find() to establish the handle. regno is the command register number as designated by each device. recdata is a pointer to the address of the string to read from the device. datalen is the number of bytes to read (0–15). NOTE: A data length of 0 will transmit the one-byte command register number. RETURN VALUE The status byte from the previous command. -1 means that device information indicates the peripheral card is not connected to the master, and -2 means that the data length was greater than 15. SEE ALSO rn_write 38 RabbitNet Keypad/Display Interface (RN1600) int rn_reset(int handle, int resettype); Sends a reset sequence to the specified peripheral card. The reset takes approximately 25 ms before the peripheral card will once again execute the application. Allow 1.5 seconds after the reset has completed before accessing the peripheral card. This function will check peripheral card information to determine that the peripheral card is connected to a master. PARAMETERS handle is an address index to device information. Use rn_device() or rn_find() to establish the handle. resettype describes the type of reset. 0 = hard reset—equivalent to power-up. All logic is reset. 1 = soft reset—only the microprocessor logic is reset. RETURN VALUE The status byte from the previous command. -1 means that device information indicates the peripheral card is not connected to the master. int rn_sw_wdt(int handle, float timeout); Sets software watchdog timeout period. Call this function prior to enabling the software watchdog timer. This function will check device information to determine that the peripheral card is connected to a master. PARAMETERS handle is an address index to device information. Use rn_device() or rn_find() to establish the handle. timeout is a timeout period from 0.025 to 6.375 seconds in increments of 0.025 seconds. Entering a zero value will disable the software watchdog timer. RETURN VALUE The status byte from the previous command. -1 means that device information indicates the peripheral card is not connected to the master. User’s Manual 39 int rn_enable_wdt(int handle, int wdttype); Enables the hardware and/or software watchdog timers on a peripheral card. The software on the peripheral card will keep the hardware watchdog timer updated, but will hard reset if the time expires. The hardware watchdog cannot be disabled except by a hard reset on the peripheral card. The software watchdog timer must be updated by software on the master. The peripheral card will soft reset if the timeout set by rn_sw_wdt() expires. This function will check device information to determine that the peripheral card is connected to a master. PARAMETERS handle is an address index to device information. Use rn_device() or rn_find() to establish the handle. wdttype 0 enables both hardware and software watchdog timers 1 enables hardware watchdog timer 2 enables software watchdog timer RETURN VALUE The status byte from the previous command. -1 means that device information indicates the peripheral card is not connected to the master. SEE ALSO rn_hitwd, rn_sw_wdt int rn_hitwd(int handle, char *count); Hits software watchdog. Set the timeout period and enable the software watchdog prior to using this function. This function will check device information to determine that the peripheral card is connected to a master. PARAMETERS handle is an address index to device information. Use rn_device() or rn_find() to establish the handle. count is a pointer to return the present count of the software watchdog timer. The equivalent time left in seconds can be determined from count × 0.025 seconds. RETURN VALUE The status byte from the previous command. -1 means that device information indicates the peripheral card is not connected to the master. SEE ALSO rn_enable_wdt, rn_sw_wdt 40 RabbitNet Keypad/Display Interface (RN1600) int rn_rst_status(int handle, char *retdata); Reads the status of which reset occurred and whether any watchdogs are enabled. PARAMETERS handle is an address index to device information. Use rn_device() or rn_find() to establish the handle. retdata is a pointer to the return address of the communication byte. A set bit indicates which error occurred. This register is cleared when read. 7—HW reset has occurred 6—SW reset has occurred 5—HW watchdog enabled 4—SW watchdog enabled 3,2,1,0—Reserved RETURN VALUE The status byte from the previous command. int rn_comm_status(int handle, char *retdata); PARAMETERS handle is an address index to device information. Use rn_device() or rn_find() to establish the handle. retdata is a pointer to the return address of the communication byte. A set bit indicates which error occurred. This register is cleared when read. 7—Data available and waiting to be processed MOSI (master out, slave in) 6—Write collision MISO (master in, slave out) 5—Overrun MOSI (master out, slave in) 4—Mode fault, device detected hardware fault 3—Data compare error detected by device 2,1,0—Reserved RETURN VALUE The status byte from the previous command. User’s Manual 41 B.3.1 Status Byte Unless otherwise specified, functions returning a status byte will have the following format for each designated bit. 7 × 6 5 4 3 2 1 0 00 = Reserved 01 = Ready 10 = Busy 11 = Device not connected × 0 = Device 1 = Router × 0 = No error × 1 = Communication error* Reserved for individual peripheral cards × Reserved for individual peripheral cards × 0 = Last command accepted 1 = Last command unexecuted × × 0 = Not expired 1 = HW or SW watchdog timer expired† * Use the function rn_comm_status() to determine which error occurred. † Use the function rn_rst_status() to determine which timer expired. 42 RabbitNet Keypad/Display Interface (RN1600) APPENDIX C. KEYPAD/DISPLAY INTERFACE EXPANSION KIT Z-World offers a Keypad/Display Interface Expansion Kit for that includes a Keypad/ Display interface (Z-World part number 101-0879) and provides the necessary hardware components required to run the sample programs and to demonstrate the functionality of the Keypad/Display interface. Table C-1 lists the items in the Expansion Kit along with their part numbers. Table C-1. Keypad/Display Interface Card Expansion Kit Parts Description Quantity Supplier Part Number Rubber Foot 4 Z-World 804-0023 4 × 20 Character Display 1 Z-World 535-0026 2 × 20 Character Display 1 Z-World 535-0031 3 × 4 Keypad 1 Z-World 505-0013 2 × 6 Keypad 1 Z-World 505-0027 10-position Flex Connector for above keypads 2 FCI/Berg 65801-010 4 × 10 Keypad 1 Z-World 505-0004 13-position Flex Connector for above keypad 1 FCI/Berg 65801-013 2 × 8 IDC Header 2 Pinrex PH1S-208GB-1160 2 × 8 IDC Socket 2 Pinrex SBQ-16P-D-100-TG 1 × 16 Male-Male Hi-Rel Pin Strip 1 MilMax 800-10-016-10-0001 1 × 16 Hi-Rel Socket Strip 2 Pinrex MSS-116SB 6" 2 × 8 F-F IDC Ribbon Cable 1 DigiKey M3AAA-1606J-ND 1 × 16 Male-Male 4" Flex Strip 1 Amp/Tyco 5-1437145-7 1 × 16 IDC Header 2 Pinrex PH1S-116GB-1160 0.156" 4-position Friction-Lock Housing 2 Molex 09-50-3041 0.156" Crimp Pins 8 Molex 08-50-0108 0.1" 2-pin Jumper 2 Pinrex MJ1B-BGB Straight-Through Ethernet Cable 1 Z-World 540-0076 User’s Manual 43 Peel off the backing to expose the adhesive on the rubber feet included with the Expansion Kit, and attach the rubber feet to the bottom side of your Keypad/Display interface. The rubber feet will help protect the bottom side of your Keypad/Display interface from abrasion while you run the sample programs and do your application development. C.1 Keypads Three keypads are supplied with the Expansion Kit. Each keypad already has its corresponding flex connector installed. Connect pin 1 of the keypad to pin 1 of the Keypad/Display interface header J6 as shown in Figure C-1. Follow the pin 1 locations as shown in the diagram and disregard the blue dot that may be present on one side of the connector. Pin 1 Pin 1 ICP PROGRAMMING J3 R15 C8 Y1 U3 R19 R18 R17 R10 R16 R9 AUX LCDM INTERFACE U8 U10 J4 C7 D3 D11 D4 D12 D5 D13 D6 C10 D14 D7 D15 U9 D16 D8 R11 R12 RP8 R13 D2 D10 C9 U7 LS1 C11 RP7 R7 RP3 DS4 U1 U2 R5 R6 R2 DS2 R8 R4 C3 R3 DS5 C6 Q2 R1 DS3 C2 Q1 C1 J8 DS1 J1 RABBITNET UPSTREAM PORT J2 PWR GOOD +5V GND RABBITNET POWER CLOCKED SERIAL INTERFACE µP BAD DCIN MAIN LCDM INTERFACE R14 Q3 RP4 C13 U4 D1 D9 RP2 Q4 J6 U6 C4 C5 RP5 RP6 BACK ACTIVITY ALIVE LIGHT Pin 1 J7 RP1 C12 KEYPAD INTERFACE J6 J5 Pin 1 Figure C-1. Connecting Keypads to Keypad/Display Interface Header J6 NOTE: To insure compatibility with the software driver routines, pin 1 on header J6 must always be connected to a keypad strobe or data line; do not leave pin 1 unconnected. 44 RabbitNet Keypad/Display Interface (RN1600) Two of the keypads supplied with the kit use 10-pin connectors, and the third keypad uses a 13-pin connector. Since the Keypad/Display interface can support a keypad with up to 16 lines, some of the connection points on header J6 will remain unused when using the keypads from the Expansion Kit. Flex connectors of this style can be obtained in various widths that will accommodate most keypads with 0.1" trace spacing. The connectors are made by FCI/Berg and are referred to as series 65801 “Clincher.” They can be purchased online from Mouser Electronics. When running one of the sample programs be sure to attach the keypad associated with that sample program. Table C-2. Keypads Used In Sample Programs Keypad Sample Program 3×4 PONG.C 2×6 ALPHANUM.C 4 × 10 KEYBASIC.C C.1.1 Keypad Templates You may wish to print out, then cut and insert the keypad templates into your keypads to facilitate your interactions with the keypad while running the sample programs. < < > + A B < 2 × 6 Keypad C D E INSERT THIS SIDE User’s Manual 45 3 × 4 Keypad 1 2 3 + 4 5 6 7 8 9 0 INSERT THIS SIDE 46 RabbitNet Keypad/Display Interface (RN1600) Remove adhesive backing, then stick on character template. 1 A K U 2 B L V 3 C M W 4 D N X 5 E O Y 6 F P Z 7 8 9 0 G H I J Q R S T * # < > 4 × 10 Keypad User’s Manual 47 C.2 LCD Displays Two LCD displays are supplied with the Expansion Kit. The displays do not have any connectors attached so that you may select connectors from the Expansion Kit that will be convenient for your testing. 2 × 20 J4 Pin 1 J3 R18 J5 C8 Y1 R19 U3 J7 R10 R16 R9 R17 AUX LCDM INTERFACE U8 U10 C7 J4 D3 D11 D4 D5 C9 D13 U7 LS1 D6 C10 D14 D7 D15 U9 D16 D8 R11 RP8 R12 RP7 R13 D2 D10 D12 C11 MAIN LCDM INTERFACE R14 Q3 RP4 C13 U4 D1 D9 RP2 Q4 J6 U6 C4 C5 RP5 RP6 R7 RP3 DS4 U1 U2 R5 R6 R2 DS2 R8 R4 C3 R3 DS5 C6 Q2 R1 DS3 C2 Q1 C1 Pin 1 DS1 J1 RABBITNET UPSTREAM PORT J2 PWR GOOD J8 µP BAD +5V GND RABBITNET POWER CLOCKED SERIAL INTERFACE BACK ACTIVITY ALIVE LIGHT DCIN 4 × 20 ICP PROGRAMMING R15 RP1 C12 KEYPAD INTERFACE Pin 1 J5 Figure C-2. Connecting Displays to Keypad/Display Interface Headers J4 and J5 48 RabbitNet Keypad/Display Interface (RN1600) C.2.1 2 × 20 Character LCD The 2 × 20 display does not have a backlight, so the jumpers on header J7 do not need to be set, and may be left in place as is. This display uses the dual-row 2 × 8 connector. Two ways are available to attach the display to the Keypad/Display interface. 1. To attach the 2 × 20 display directly to the Keypad/Display interface, solder a 2 × 8 socket to the bottom side of the display printed circuit board (the side that does not have the actual display). The display can now be attached to the Keypad/Display interface at header J4. Make sure that pin one on the display is aligned with pin 1 on J4. 2. A 6" flat ribbon cable (included with the Expansion Kit) can also be used to attach the 2 × 20 display. The cable has 2 × 8 female IDC connectors at each end. To use the cable, solder a 2 × 8 header to the top side of the display printed circuit board (the same side that has the actual display). Now you can use the 6" flat ribbon cable to connect the display to header J4 on the Keypad/Display interface, making sure that pin 1 is connected to pin 1 on both sides. When you port this design to your own use, the ribbon cable can be up to 2 m long. The LCDBASIC.C and PONG.C sample programs illustrate the use of the 2 × 20 display. C.2.2 4 × 20 Character LCD The 4 × 20 display has an LED backlight, and the factory-default jumpers at J7 are already set to provide the necessary series resistance for the LED backlight. (The factory default is for 2-pin jumpers across pins 3–4, 5–6, and 9–10, which provides a series resistance of 5.0 Ω.) The 4 × 20 display uses a 1 × 16 in-line connector interface. Three ways are available to attach the display to the Keypad/Display interface. 1. Solder one end of the 1 × 16 male-male 4" flex strip into either the top or bottom side of the LCD display printed circuit board. Press the other end is into the socket strip at J5 on the Keypad/Display interface. When installing the flex strip into J5, work from one end towards the other, inserting 3 or 4 pins as you go. The flex strip provides a tight fit to the socket strip. Make sure that pin 1 is connected to pin 1 on both ends of the cable. When you port this design to your own use, the flex strip can be up to 2 m long. 2. The display can be connected directly to the Keypad/Display interface by first soldering a 1 × 16 Hi-Rel pin strip onto the bottom side of the display printed circuit board (the side that does not have the actual display). The pins on one side of the pin strip have a slightly larger diameter than the pins on the other side. Solder the larger pins into the display. Next press the display with the pin strip installed into J5 on the Keypad/Display interface. Make sure that pin 1 is connected to pin 1 on both sides. The pin strip provides a tight fit. Working from the display side of the display, press directly above the pins while working back and forth across the connector until it is fully seated into J5 on the Keypad/Display interface. The connection was designed to be tighter than normal so the display can stand off the side of the Keypad/Display interface without bending. The ALPHANUM.C sample program illustrates the use of the 4 × 20 character display. User’s Manual 49 C.3 ZMENU.C ZMENU.C demonstrates a menu system that allows you to list a set of action options for an operator to choose from. Keypads and character displays included in the Expansion Kit are used with this program. All the parameters required for the menu system can be set dynamically while the sample program is running, and can be changed via the Zmenu_Config() function included with the sample program. The instructions below explain how to set up the hardware and then run ZMENU.C. 1. Connect pin 1 of the 2 × 6 keypad to pin 1 of the Keypad/Display interface header J6 as shown in Figure C-1. The 2 × 6 keypad character assignment is as follows. [ U ][ S ][ L ][ R ][ [ D ][ P ][ – ][ + ][ ][ ] ][ E ] where U scrolls up one menu option D scrolls down one menu option S pages up to the next set of menu items P pages down to the next set of menu items L—cursor left, used in the data-entry section to move the cursor to the next character for selection. R—cursor right, used in the data-entry section to move the cursor to the next character for selection. – —delete item,used in the data-entry section to delete the last character selected. + —add item, used in the data-entry section to select the character highlighted. E selects the highlighted item. A keypad template is provided below for your convenience. U S L R D P + E INSERT THIS SIDE 50 RabbitNet Keypad/Display Interface (RN1600) 2. Connect the 4 × 20 display to header J5 on the Keypad/Display interface as shown in Figure C-2. 3. Compile and run ZMENU.C. 4. The LCD will display Menu Title, followed by user-selectable options. Use the scrolling and paging keys to view all the items in the menu. Choose an item to select, then press the E[nter] key to select the item. This sample program can also be used with a 3 × 4 keypad (included in the Expansion Kit) and with a 4 × 6 keypad (not included in the Expansion Kit). Uncomment the appropriate ZMENU_KEYSTROBELINES macro in the configuration section in the sample program. Once ZMENU.C has compiled, the menu display information can also be viewed via HyperTerminal, Tera Term, or another serial port emulator by moving the programming cable connector on the master single-board computer from PROG to DIAG and then cycling the power. The HyperTerminal setup is shown here. The ZMENU_COLUMNS and ZMENU_ROWS macros are used to define the size of the display, and can be changed in the configuration section in the sample program. User’s Manual 51 The function Zmenu_KeyConfig() is available in the sample program to allow you to lay out your own keypad character assignment. int Zmenu_Config(int MenuNumber, ...); Sets up a menu for use with keypads and character displays. The function uses identifiers to determine the course of action. Each call to Zmenu_Config() must incorporate one of the two identifiers, ZMENU_TITLE or ZMENU_OPTION, and must end with the identifier ZMENU_END. PARAMETERS MenuNumber is the menu number to configure. The remaining parameters are identifiers and parameters used for the menu. IDENTIFIER MACROS ZMENU_TITLE identifies the next set of settings to be associated with the menu parameters. A 1 parameter following the identifier is the title of the menu, a 2 parameter specifies the characteristics of the menu. The following characteristics are allowed. ZMENU_BORDER places a border around the menu. ZMENU_KEYPAD uses the keypad to control the menu. These parameters can be OR'ed together as needed. A 3 parameter after ZMENU_TITLE is a pointer to the font that will be used for the menu and its associated items. NULL can be used if the menu is being used on a character-style LCD that has no fonts. ZMENU_OPTION identifies the next set of parameters to be associated with a particular option within the menu. A 1 parameter following the identifier is always the title of the option. A 2 parameter is the item action that will be taken if the item is selected. The parameter following the action parameter depends on the action parameter itself. The following action parameters are allowed. ZMENU_FUNCTION—The next parameter is a pointer to a user-defined function that will be called when the item is selected. The function must return a non-zero when completed, and must be nonblocking. ZMENU_SUBMENU—The next parameter is the menu number to be displayed when the item is selected. ZMENU_LASTMENU—No parameter is entered. The item selected will display the previous menu. ZMENU_SET_FLAG—Two parameters are required. The first parameter is a pointer to an int that this item is associated with; the next parameter is the value to place in that int. ZMENU_LONG is a data-entry function. Two parameters are required. The first parameter is a long pointer to a long value that will be used for data entry. The second parameter is the maximum number of digits that the long value will have (in decimal format) when this item is selected. A data-entry window will be displayed to allow the operator to enter a numeric value. ZMENU_FLOAT is a data-entry function. Two parameters are required. The first parameter is a float pointer to a float value that will be used for data entry. The second parameter is the maximum number of digits that the float value will have (in decimal format) when this item is selected. A data-entry window will be displayed to allow the operator to enter a numeric value. 52 RabbitNet Keypad/Display Interface (RN1600) ZMENU_STRING is a data-entry function. Two parameters are required. The first parameter is a char pointer to a char array value that will be used for data entry. The second parameter is the maximum number of digits that the char array value will have (in decimal format) when this item is selected. A data-entry window will be displayed to allow the operator to enter an alphanumeric value. ZMENU_TIMEDATE is a data-entry function. The only parameter required is a pointer to the time structure that will be used for the data entry. When this item is selected, a data-entry window will be displayed to allow the operator to enter a time/date value. ZMENU_PASSWORD can be OR’ed with the above data-entry functions to enable password protection. EXAMPLE int Zmenu_Config(0, ZMENU_TITLE,"MAIN MENU", ZMENU_KEYPAD | ZMENU_BORDER, NULL, 20,4,0,0,3, ZMENU_ITEM,"Toggle Backlight", ZMENU_FUNCTION,zbacklight, ZMENU_ITEM,"Increment LEDs", ZMENU_SET_INT,&ledState,1, ZMENU_ITEM,"Turn Off LEDs", ZMENU_SET_INT,&ledState,0, ZMENU_ITEM,"GOTO DATA MENU",ZMENU_SUBMENU,1, ZMENU_ITEM,"GOTO LOG MENU",ZMENU_SUBMENU,2, ZMENU_END); User’s Manual 53 C.4 Configuring Key Code Indexes and Physical Keypad Arrangement The keypads supplied in the Expansion Kit and the sample programs use a keypad driver scheme that has an 8 × 8 matrix array with a maximum of 8 strobe pins. This allows a maximum of 64 keys in a keypad. There is no standard keypad layout, and you should check the manufacturer’s specifications for the physical key arrangement and for the strobe and data lines. Regardless of the keypad you chose, a data or strobe pin must be connected to J6 pin 1 of the Keypad/Display interface connector for the keypad drivers to work properly. The examples in this section explain how to assign key code indexes for the keypads supplied in the Expansion Kit. C.4.1 Basics of Assigning Key Code Indexes The sample programs have already set up the key code index assignments and character keypresses for the keypads supplied in the Expansion Kit. The cRaw key code index in the rn_keyConfig() function does this for you. The key code index parameter which is explained further in this section. First, let’s look at some basics. The keypad interface connector contains 16 pins, which you configure as strobe pins and data pins using the rn_keyInit() function. 15 14 13 12 11 10 9 8 7 6 5 4 3 2 1 0 Keypad drivers follow a scheme that assigns key code indexes in a 8 × 8 matrix array. The table below shows a representation of the array with the key code index ranging from 0 to 63 in an 8 × 8 matrix. 54 63 62 61 60 59 58 57 56 55 54 53 52 51 50 49 48 47 46 45 44 43 42 41 40 39 38 37 36 35 34 33 32 31 30 29 28 27 26 25 24 23 22 21 20 19 18 17 16 15 14 13 12 11 10 9 8 7 6 5 4 3 2 1 0 RabbitNet Keypad/Display Interface (RN1600) Combining the two tables, our indexing table might look like this. 15 14 13 12 11 10 9 8 63 62 61 60 59 58 57 56 55 54 53 52 51 50 49 48 47 46 45 44 43 42 41 40 39 38 37 36 35 34 33 32 31 30 29 28 27 26 25 24 23 22 21 20 19 18 17 16 15 14 13 12 11 10 9 8 7 6 5 4 3 2 1 0 7 6 5 4 3 2 1 0 The shaded blocks describe how key code indexes are arrived at using strobe and data pins in a 4 × 6 arrangement of keys. Physical Connections Pins 15 through 10 are shown, but are unused. Pins 9, 8, 7 and 6 are strobe pins. Pins 5 through 0 are data pins. Assigning Key Code Indexes Data pins 5 through 0 determine the key code indexes (shaded area): Pin 0 is networked to 0, 8, 16, 24. Pin 1 is networked to 1, 9, 17, 25. Pin 2 is networked to 2, 10, 18, 26. Pin 3 is networked to 3, 11, 19, 27. Pin 4 is networked to 4, 12, 20, 28. Pin 5 is networked to 5, 13, 21, 29. Strobe pins 9 through 6 strobe the key code indexes (black blocks): Pin 9 strobes key indexes 29 through 24. Pin 8 strobes key indexes 21 through 16. Pin 7 strobes key indexes 13 through 8. Pin 6 strobes key indexes 5 through 0. The remaining pins and indexes are unused. User’s Manual 55 C.4.2 Expansion Kit Keypads C.4.2.1 3 × 4 Keypad The physical arrangement of the keys has the 3 × 4 arrangement of key code indexing as shown in the shaded area below. 63 62 61 60 59 58 57 56 55 54 53 52 51 50 49 48 47 46 45 44 43 42 41 40 39 38 37 36 35 34 33 32 31 30 29 28 27 26 25 24 23 22 21 20 19 18 17 16 15 14 13 12 11 10 9 8 7 6 5 11 3 2 1 0 7 6 5 4 3 2 1 0 Physical Connections Pins 15 through 8 are not shown, and are unused. Pins 6, 5, 4 are strobe pins, and pins 3 through 0 are data pins. Key Code Indexes Data pins 3 through 0 determine the key code indexes—19, 18, 17, 16; 11, 10, 9, 8; 3, 2, 1, 0. Pin 6 strobes key code indexes 19, 18, 17, 16. Pin 5 strobes key code indexes 11, 10, 9, 8. Pin 4 strobes key code indexes 3, 2, 1, 0. The remaining pins and indexes are unused. 56 RabbitNet Keypad/Display Interface (RN1600) C.4.2.2 2 × 6 Keypad The physical arrangement of the keys has the 2 × 6 arrangement of key coding indexing as shown in the shaded area below. 63 62 61 60 59 58 57 56 55 54 53 52 51 50 49 48 47 46 45 44 43 42 41 40 39 38 37 36 35 34 33 32 31 30 29 28 27 26 25 24 23 22 21 20 19 18 17 16 14 13 12 11 10 9 8 5 4 3 2 1 0 5 4 3 2 1 0 7 7 6 Physical Connections Pins 15 through 8 are not shown, and are unused. Pins 7, 6 are strobe pins, and pins 5 through 0 are data pins. Key Code Indexes Data pins 5 through 0 determines the key code indexes—13, 12, 11, 10, 9, 8; 5, 4, 3, 2, 1, 0. Pin 7 strobes key code indexes 13, 12, 11, 10, 9, 8. Pin 6 strobes key code indexes 5, 4, 3, 2, 1, 0. The remaining pins and indexes are unused. User’s Manual 57 C.4.2.3 4 × 10 Keypad The physical arrangement of the keys has a different arrangement of key code indexing. Because of the manufacturer’s design, the physical arrangement of key indexes will have the following arrangement. 32 33 24 25 16 17 8 9 0 1 34 35 26 27 18 19 10 11 2 3 36 39 28 31 20 23 12 15 4 7 38 37 30 29 22 21 14 13 6 5 The 4 × 10 key code indexing is still derived in the same way as the other two keypads. Although the diagram below appears to be a 5 × 8 keypad arrangement, note that the strobe pins still strobe the same key code indexes as in the 4 × 10 arrangement above. 12 11 10 9 8 63 62 61 60 59 58 57 56 55 54 53 52 51 50 49 48 47 46 45 44 43 42 41 40 39 38 37 36 35 34 33 32 31 30 29 28 27 26 25 24 23 22 21 20 19 18 17 16 15 14 13 12 11 10 9 8 7 6 5 4 3 2 1 0 7 6 5 4 3 2 1 0 Physical Connections Pins 15 through 13 are not shown, and are unused. Pins 12, 11, 10, 9, 8 are strobe pins, and pins 7 through 0 are data pins. Key Code Indexes Data pins 7 through 0 determines the key code indexes—39 through 0. Pin 12 strobes key code indexes 39 through 32. Pin 11 strobes key code indexes 31 through 24. Pin 10 strobes key code indexes 23 through 16. Pin 9 strobes key code indexes 15 through 8. Pin 8 strobes key code indexes 7 through 0. The remaining pins and indexes are unused. 58 RabbitNet Keypad/Display Interface (RN1600) C.5 2 × 6 Keypad Datasheet 10 9 8 7 6 5 4 3 2 1 FLEX CABLE CONTACTS 0.4 × 0.4 pocket window, 12 places 0.62 R typ. 3.725 0.550 1.495 0.525 typ. 0.525 typ. 0.485 0.200 1.500 0.250 0.31 R, 2 places exposed contact area, near side User’s Manual 59 C.6 3 × 4 Keypad Datasheet 10 9 8 7 6 5 4 3 2 1 FLEX CABLE CONTACTS 2.50 2.09 1.69 1.29 0.89 0.317 0.717 1.117 1.500 0.95 0.62 R corners 0.25 × 0.25 window, 12 places 1.75 0.250 exposed contact area, top side 60 RabbitNet Keypad/Display Interface (RN1600) C.7 4 × 10 Keypad Datasheet 13 11 9 7 5 3 1 FLEX CABLE CONTACTS User’s Manual 61 C.8 2 × 20 Character LCD Datasheet 62 RabbitNet Keypad/Display Interface (RN1600) History of Version Version Chap. d1 - d2 - d3 - Contents New Version Change as follow by: Wintek 1.Modified Spec. Style Note 06.May.1996 SPEC. 20.Aug.1996 SPEC. & Sample 30.Nov.1996 SPEC. & Sample d4 Contents Change as follow by: Wintek 1.1 1.Modified IC: 1.2 KS0066UP-00CCШST7066-0A 1.5 13.Jul.2000 SPEC. & Sample d5 Contents Change as follow by: Wintek 1.1 1.Modified IC: 1.2 ST7066-0AШKS0066UP-00CC 1.5 15.Jan.2001 SPEC. & Sample d6 Contents Change as follow by: Wintek 1.1 1.Modified IC: 1.2 KS0066UP-00CCШST7066U-0A 1.5 28.Apr.2001 SPEC. & Sample 16.Oct.2001 SPEC. & Sample d7 - WM-C2002M-1GLYd User’s Manual Change as follow by: Wintek 1.Modified Spec. Style Date Change as follow by: Wintek 1.Modify Spec. Style 2/24 63 Contents Page (1) Electronic Units ............................................................................................... 4 1.1 Absolute Maximum Ratings ........................................................................ 4 1.3 Interface Pin Function................................................................................. 5 1.4 Power Supply for LCD Module ................................................................... 6 1.5 Block Diagram with Display RAM Address and Initialization Table ............................................... 7 1.6 CGROM Map .............................................................................................. 8 (2) Electro-optical Units........................................................................................ 9 2.1 Electro-optical Characteristics .................................................................... 9 2.2 Optical Definitions....................................................................................... 9 (3) Mechanical Units ........................................................................................... 11 3.1 Mechanical Specification .......................................................................... 11 3.2 Mechanical Diagram ................................................................................. 12 3.3 Back-light Specification............................................................................. 13 3.4 Packing Method ........................................................................................ 14 (4) Quality Units .................................................................................................. 15 4.1 Specification of Quality Assurance............................................................ 15 4.2 Standard Specification for Reliability......................................................... 22 4.3 Precautions in Use of LCM ....................................................................... 24 Reference Data : Sitronix ST7066U-0A&ST7063 Specifications WM-C2002M-1GLYd 64 3/24 RabbitNet Keypad/Display Interface (RN1600) User’s Manual 65 1.3 Interface Pin Function JP1: NO SYMBOL I/O FUNCTION 1. VSS P POWER SUPPLY FOR LOGIC ( 0V ) 2. VDD P POWER SUPPLY FOR LOGIC ( +5V ̈́5% ) 3. VO P CONTRAST ADJUSTMENT 4. RS I REGISTER 5. R/W I READ / WRITE 6. E I ENABLE 7. DB0 I/O 8. DB1 I/O 9. DB2 I/O 10. DB3 I/O 11. DB4 I/O 12. DB5 I/O 13. DB6 I/O 14. DB7 I/O 15. N.C. - NO CONNECTION 16. N.C. - NO CONNECTION 1. LED+ P POWER SUPPLY FOR LED (+4.2V) 2. LEDA - CONNECTED TO LED 3. LEDK - CONNECTED TO LED 4. LED- P POWER SUPPLY FOR LED (0V) SELECT SIGNAL SELECTION SIGNAL DATA BUS JP2: WM-C2002M-1GLYd 66 5/24 RabbitNet Keypad/Display Interface (RN1600) 1.4 Power Supply for LCD Module 1.Signal Supply Voltage Types VDD VDD-VO WEE V0 LCM VR VSS VDD-VOΚLCD Driving Voltage VR=10k~20k 2. Dual Supply Voltage Types WEE WEE WEE.WP WP WS MDN WFF WTT VDD-VOΚLCD Driving Voltage VR=10k~20k WM-C2002M-1GLYd User’s Manual 6/24 67 1.5 Block Diagram with Display RAM Address and Initialization Table LCD PANEL (100*16DOTS) COM1 COM8 1 2 3 4 5 6 7 8 9 10 11 12 13 14 15 16 17 18 19 20 00 01 02 03 04 05 06 07 08 09 0A 0B 0C 0D 0E 0F 10 11 12 13 COM9 40 41 42 43 44 45 46 47 48 49 4A 4B 4C 4D 4E 4F 50 51 52 53 COM16 SEG1 SEG40 SEG41 SEG100 SEG41 79(PAD) SEG100 ST7063 19(PAD) LED DL1 CL1 CL2 M SHL1SHL2GND SEG1 SEG40 COM8 COM1 22(PAD) 54(PAD) 63(PAD) 47(PAD) VSSVDD V0 D CL1 CL2 M GND COM16 62(PAD) ST7066U-0A RS R/W E COM9 55(PAD) DB0-DB7 LED+ LED- Relation between DD RAM addresses and positions on the are shown above. The DD RAM address(ADD) is set in the address counter(AC) and is represented in hexadecimal. Initialization Table: Instruction Setting Command Description Function Set Duty=1/16,8-bit mode,2-line display, 00111*** 5x8 dots format display mode WM-C2002M-1GLYd 68 7/24 RabbitNet Keypad/Display Interface (RN1600) 1.6 CGROM Map WM-C2002M-1GLYd User’s Manual 8/24 69 (2) Electro-optical Units 2.1 Electro-optical Characteristics ITEM SYMBOL CONDITION MIN. TYP. MAX. UNIT VIEW ANGLE (V) Ӱ CRЊ2 -40 - +40 deg. VIEW ANGLE (H) ӿ CRЊ2 -40 - +40 deg. CONTRAST RATIO CR Ta=25к - 5 - - RESPONSE TIME tr Ta=25к - 200 300 ms RESPONSE TIME td Ta=25к - 200 300 ms Ta=0к - 4.8 - Ta=25к - 4.5 - Ta=50к - 4.2 - OPERATING VOLTAGE FOR LCD VLCD DUTY 1/16 BIAS 1/5 V DRIVE METHOD LCD TYPE STN-Gray (Positive / Transflective ) VIEWING DIRECTION 6 O’CLOCK 2.2 Optical Definitions Nonselected Condition Nonselected Condition Selected Condition Brightness 90% 100% 10% tr td Rise Time Decay Time (fall time tf) Response Time WM-C2002M-1GLYd 70 9/24 RabbitNet Keypad/Display Interface (RN1600) User’s Manual 71 72 RabbitNet Keypad/Display Interface (RN1600) WM-C2002M-1GLYd User’s Manual 12/24 73 74 RabbitNet Keypad/Display Interface (RN1600) 3.4 Packing Method 1. Packaging Material : (per carton) NO Item 1 LCM Module 2 Tray Model Dimensions (mm) Unit Weight (Kg) Quantity 116.0*37.0 0.054 240 320*217 0.06 40 320*219*70 0.131 10 1.208 1 0.023 10 WM-C2002M-1GLYd PETA V146 3 Product Box C01 4 Carton C61 475*345*389 5 Package Bag C5 467*321*0.08 6 Total Weight Kg± 5% Kgf5% 17.9 2. Packaging Specifications and Quantity : (1) LCM quantity per tray : no per row 2 x no per column 4 = 8 (2) LCM quantity per box : no of trays 8 x quantity per tray 3 = 24 (3) Total LCM quantity in carton : no of boxes 24 x quantity per box 10 = 240 Use package bag Use empty tray ʾ Put products into the tray ː Tray stacking The tape to seal carton Carton label A Detail B B Scotch tape Tray Tray Tray Tray A 4 3 2 1 Rotate tray 180 degrees and place on top of stack. Check the tray stack using Fig. B. QC inspection label Remark 3. Label Specifications : (1) QC Inspection Label MODEL: ˆ˅ˁ˃ LOT NO: QC CHECK: Label Color----Green DATE: ˌ˃ˁ˃ (2) Carton Label WM-C2002M-1GLYd Purchase Order No: (According to each order) Q'ty: ˇ˅ˁˇ Wintek Part No: Label Color----White (According to shipping) ˄˃ˈˁ˃ WM-C2002M-1GLYd User’s Manual 14/24 75 4.1 Specification of Quality Assurance WM-C2002M-1GLYd 76 15/24 RabbitNet Keypad/Display Interface (RN1600) WM-C2002M-1GLYd User’s Manual 16/24 77 6. Inspection specification WM-C2002M-1GLYd 78 17/24 RabbitNet Keypad/Display Interface (RN1600) WM-C2002M-1GLYd User’s Manual 18/24 79 WM-C2002M-1GLYd 80 19/24 RabbitNet Keypad/Display Interface (RN1600) WM-C2002M-1GLYd User’s Manual 20/24 81 WM-C2002M-1GLYd 82 21/24 RabbitNet Keypad/Display Interface (RN1600) 4.2 Standard Specification for Reliability 50 0 70 -20к 40к WM-C2002M-1GLYd User’s Manual 90 22/24 83 WM-C2002M-1GLYd 84 23/24 RabbitNet Keypad/Display Interface (RN1600) 4.3 Precautions in Use of LCM WM-C2002M-1GLYd User’s Manual 24/24 85 C.9 4 × 20 Character LCD Datasheet 86 RabbitNet Keypad/Display Interface (RN1600) User’s Manual 87 88 RabbitNet Keypad/Display Interface (RN1600) User’s Manual 89 90 RabbitNet Keypad/Display Interface (RN1600) Electrical Characteristics Item Symbol Condition Min Typ Max Input Voltage (high) Vih H Level 2.2 V — Vdd Input Voltage (low) Vil L Level 0V — 0.6 V 0°C — 4.8 V 5.4 V 25°C 4.2 V 4.6 V — 50°C 3.9 V 4.3 V — -20°C — 6.4 V 7.2 V 0°C — 4.8 V — 50°C — 4.3 V — 70°C 3.7 V 4.2 V — Recommended LCD Driving Voltage (Standard Temp.) Recommended LCD Driving Voltage (Wide Temp.) Vdd - Vo Vdd - Vo Power Supply Current Idd Vdd = 5.0 V ν = 270 kHz — 0.5 mA 1.0 mA LED Backlight Voltage Vf R = 6.8 Ω — 4.6 V 5.0 V LED Backlight Current If R = 6.8 Ω — 240 mA 480 mA User’s Manual 91 92 RabbitNet Keypad/Display Interface (RN1600) NOTICE TO USERS Z-WORLD PRODUCTS ARE NOT AUTHORIZED FOR USE AS CRITICAL COMPONENTS IN LIFESUPPORT DEVICES OR SYSTEMS UNLESS A SPECIFIC WRITTEN AGREEMENT REGARDING SUCH INTENDED USE IS ENTERED INTO BETWEEN THE CUSTOMER AND Z-WORLD PRIOR TO USE. Life-support devices or systems are devices or systems intended for surgical implantation into the body or to sustain life, and whose failure to perform, when properly used in accordance with instructions for use provided in the labeling and user’s manual, can be reasonably expected to result in significant injury. No complex software or hardware system is perfect. Bugs are always present in a system of any size. In order to prevent danger to life or property, it is the responsibility of the system designer to incorporate redundant protective mechanisms appropriate to the risk involved. All Z-World products are 100 percent functionally tested. Additional testing may include visual quality control inspections or mechanical defects analyzer inspections. Specifications are based on characterization of tested sample units rather than testing over temperature and voltage of each unit. Z-World products may qualify components to operate within a range of parameters that is different from the manufacturer’s recommended range. This strategy is believed to be more economical and effective. Additional testing or burn-in of an individual unit is available by special arrangement. User’s Manual 93 94 RabbitNet Display (RN1500) INDEX C P connectivity tools crimp tool ............................ 2 peripheral cards connection to master ... 33, 34 physical mounting Keypad/Display interface . 31 pinout RabbitNet Keypad/Display interface headers ............. 6 power supplies RabbitNet Keypad/Display interface .......................... 4 wiring diagram .................... 5 D dimensions Keypad/Display interface . 29 DIN rail mounting ................... 3 components ......................... 3 Dynamic C .............................. 2 downloading RabbitNet libraries ......................... 13 libraries ............................. 12 E Expansion Kit ......................... 2 datasheets 2 × 20 character LCD .... 62 2 × 6 keypad .................. 59 3 × 4 keypad .................. 60 4 × 10 keypad ................ 61 4 × 20 character LCD .... 86 keypad connections ........... 44 LCD connections .............. 48 2 × 20 character LCD .... 49 4 × 20 character LCD .... 49 templates 2 × 6 keypad .................. 45 3 × 4 keypad .................. 46 4 × 10 keypad ................ 47 F features .................................... 2 J jumper configurations Keypad/Display interface . 32 J7 (LED backlight) ........ 32 jumper locations ............ 32 LED backlight ............... 32 User’s Manual R RabbitNet Ethernet cables to connect peripheral cards .......... 33, 34 general description ............ 33 peripheral cards ................. 34 physical implementation ... 35 RabbitNet Keypad/Display interface connection to master ........... 4 power supplies .................... 4 S sample programs ................... 14 RabbitNet Keypad/Display interface ALPHANUM.C 15, 45, 49 BUZZER.C ................... 15 KEYBASIC.C ......... 15, 45 LCDBASIC.C ......... 15, 49 PONG.C ............ 15, 45, 49 ZMENU.C ............... 15, 50 RabbitNet operation ECHOCHAR.C ............. 14 ECHOTERM.C ............. 14 HWATCHDOG.C ......... 14 SWATCHDOG.C ......... 14 software ............................ 2, 12 downloading RabbitNet libraries ......................... 13 libraries ............................. 12 RN_CFG_BL25.LIB ..... 12 RN_CFG_BL26.LIB ..... 12 RN_CFG_OP72.LIB ..... 12 RNET.LIB ............... 12, 36 RNET_DRIVER.LIB .... 12 RNET_KEYIF.LIB ....... 12 RNET_LCDIF.LIB ....... 12 RabbitNet Keypad/Display interface buzzer rn_keyBuzzer ............ 17 rn_keyBuzzerAct ....... 17 display rn_dispBacklight ....... 23 rn_dispClear .............. 24 rn_dispCmd ............... 27 rn_dispCursor ............ 25 rn_dispData ............... 26 rn_dispGoto ............... 24 rn_dispInit ................. 22 rn_dispOnoff ............. 23 rn_dispPrintf .............. 25 rn_dispPutc ................ 26 keypad rn_keyConfig ............ 19 rn_keyGet .................. 21 rn_keyInit .................. 19 rn_keyProcess ........... 21 rn_keyUnget .............. 21 LEDs rn_keyLedOut ........... 18 95 RNET.LIB rn_comm_status .............41 rn_device .......................36 rn_echo ..........................37 rn_enable_wdt ...............40 rn_find ...........................37 rn_hitwd .........................40 rn_init ............................36 rn_read ...........................38 rn_reset ..........................39 rn_rst_status ...................41 rn_sw_wdt .....................39 rn_write .........................38 sample programs ...............14 ZMENU Zmenu_Config ...............52 specifications Keypad/Display interface ..29 dimensions .....................29 electrical ........................30 header footprint .............31 physical mounting .........31 relative pin 1 locations ..31 temperature ....................30 status byte ..............................42 96 RabbitNet Display (RN1500) SCHEMATICS 090-0192 RabbitNet Keypad/Display Interface Schematic www.zworld.com/documentation/schemat/090-0192.pdf The schematics included with the printed manual were the latest revisions available at the time the manual was last revised. The online versions of the manual contain links to the latest revised schematic on the Web site. You may also use the URL information provided above to access the latest schematics directly. User’s Manual 97