1
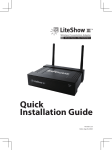
TEACHER - PROCEDURE
1. Connecting the LiteShow III (See User’s Manual p.7)
1.1. Attach the antennas to the LiteShow box.
1.2. Connect the power supply into electrical socket. A blue light appears at the front of the
box.
1.3. If available, connect the Ethernet cable.
1.4. Connect the VGA cable to the projector.
1.5. Turn on the projector. Information en how to download and install the software will
appear (A), as well as the server IP (B) (used to download the software), the name of
the wifi network (C) and the login code (D).
D
A
B
C
.
2. Installing the software (See User’s Manual p.7)
2.1. Connect to LiteShow3 network with a computer.
2.2. Open an internet browser, and type in the address box the server IP displayed on the
screen (B).
2.3. Connect as admin, password: LiteShow123.
2.4. To install the LiteShow software on the computer, click on Software Download. From
this page, select, download Utility for Windows (Windows XP, Vista, 7) or Utility for
MAC (Mac OS).
Windows
Mac
2.5. Execute downloaded program, and follow instructions. A shortcut will appear on
desktop.
3. Using the LiteShow III to screenshare (See User’s Manual p.9-11)
3.1. Follow steps 2.1 to 2.3 to connect the computer to the LiteShow III network and log in
as the administrator.
3.2. Double-click on LiteShow3 icon.
3.3. Select LiteShow3 from network list and click on Connect.
3.4. Select LiteShow3 from the equipment list and click on OK.
3.5. Type your name in Username (A), and the login code in the Login Code field (B) (as
shown in step 1.5).
A
B
3.6. A warning about the display setting may appear onscreen. Click OK to change the
settings, or Cancel to keep them.
3.7. A box will appear onscreen. The computer is now ready to display.
3.8. Back on the admin website, click on Moderator Control. All the computers that are
connected to the LiteShow III will appear on this panel.
3.9. To select the screens to be displayed, click on the first icon (square) for fullscreen, or
use the numbers to screenshare in quadrants.
1
3
2
4
STUDENT - PROCEDURE
1. Installing the software
1.1. Connect to LiteShow3 network with a computer.
1.2. Open an internet browser, and type in the address box the server IP displayed on the
screen (B).
1.3. Connect as None and click on Login.
1.4. To install the LiteShow software on the computer, click on Software Download. From
this page, select, download Utility for Windows (Windows XP, Vista, 7) or Utility for
MAC (Mac OS).
Windows
Mac
1.5. Execute downloaded program, and follow instructions. A shortcut will appear on
desktop.
2. Using the LiteShow III to screenshare
2.1. Follow steps 2.1 to 2.3 to connect the computer to the LiteShow III network and log in
as the administrator.
2.2. Double-click on LiteShow3 icon.
2.3. Select LiteShow3 from network list and click on Connect.
2.4. Select LiteShow3 from the equipment list and click on OK.
2.5. Type your name in Username (A), and the login code in the Login Code field (B).
A
B
2.6. A warning about the display setting may appear onscreen. Click OK to change the
settings, or Cancel to keep them.
2.7. A box will appear onscreen. The computer is now ready to display.