1
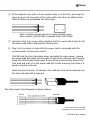
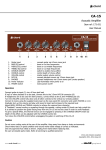
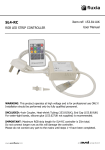
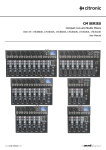
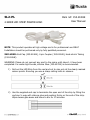
SL2-PL
2-WIRE LED STRIP POWER LEAD
Item ref: 153.810UK
User Manual
NOTE: This product operates at high voltage and is for professional use ONLY!
Installation should be performed only by fully qualified personnel.
INCLUDED: End Cap (153.814UK), 2-pin Coupler (153.812UK), Heat-shrink Tubing
(153.815UK)
WARNING: Please do not connect any part to the mains until steps 1-4 have been
completed. For water-tight bonds, silicone Glue (153.627UK) is recommended.
1) Roll out the LED Strip from the reel and cut to size only at the clearly marked
scissor points. Ensuring you use a sharp cutting knife or scissors.
2) Use the supplied end cap to terminate the open end of the strip by filling the
end cap ½ way with silicone glue and pushing firmly on the end of the strip.
Wipe excess glue away and leave to dry for 10 minutes.
3) At the opposite end, push a 2 pin coupler firmly in to the strip, ensuring the
sharp pins go into the centre of the wires within the strip. For safety check
that pins have not penetrated the outer layer.
Note: a similar process can join 2 strips together using
strip couplers (153.812UK) or flexible links (153.813UK)
4) Connect to the 2-pin power lead, checking that the round side of pins fit into
the power lead before applying the silicone glue.
5) Plug in to the mains to check that the power lead is connected with the
correct polarity (correct way round).
If all OK and the strip illuminates when connected to mains power, remove
the power lead and place a 6cm length of heat shrink sleeving over the strip.
Apply the silicone glue length ways in 2cm strips 4 times evenly around the
joint area and push in to the power lead PVC socket ensuring that there is a
good connection and seal.
Allow the glue to dry for 10 minutes, then slide the heat shrink sleeving over
the joint and seal with a heat gun.
The final product should appear as shown below:
Errors and omissions excepted.
Copyright© 2013. AVSL Group Ltd.
153.810UK User Manual