Download Ventilator Manual ENGLISH
Transcript
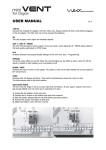
OWNER’S MANUAL
CONTENTS
Page
I WELCOME
II. CONNECTIONS AND CONTROL SETTINGS
III. CONTROL FEATURES
IV. SPECIFICATIONS
V. SAFETY GUIDELINES
VI. WARRANTY TERMS
3
4
7
10
11
12
The brand names Hammond® and Leslie® used in this
operating manual are protected trademarks of HammondSuzuki Corporation.
2
I. WELCOME
Congratulations and thank you for purchasing Neo Instruments’
VENTILATOR. If you wish to make the most of this device’s
many features and full sound-shaping potential, we
recommend that you read this manual and keep it for later
reference. Be sure to also save the packaging just in case you
have to send it at a later date.
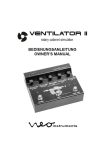
VENTILATOR is a digital FX device that simulates a model 122
Leslie rotary speaker cabinet mic’ed up with a stereo pair on
top for the treble horn and a single mono mic below for the
bass woofer. Designed to deliver great results with organ and
guitar, its outstanding features include:
- Sophisticated modeling algorithms and a faithful replication of
the model 122 Leslie’s rotary effect
- Independent emulations of bass and treble rotors
- Faithful replication of the original’s mechanical properties
- Speaker simulation emulating the 122’s frequency response
- Same 800Hz crossover as the original
- Adjustable rotary speed and acceleration
- Drive section that simulates distortion / power tube saturation
in the Leslie’s amp
- Variable placement of virtual microphones
- Relay-equipped true bypass circuit
- Speaker simulation may be switched off for guitar amps
- Port for a remote footswitch / half-moon switch
- Remotely switchable rotary stop
- Rugged die-cast aluminum chassis and recessed buttons
- Simple, straightforward analog handling
3
II. CONNECTIONS AND CONTROL SETTINGS
VENTILATOR comes with a mono input and a stereo output.
The Lo / Hi switch matches input gain to the signal source. You
can insert VENTILATOR between your instrument and amp or
mixing console as well as into an FX loop. We recommend
using an FX loop for guitars, if available.
Input
This jack accepts mono organ, keyboard, and guitar signals.
Lo / Hi
This switch adjusts input gain. The Lo position works for most
organs, keyboards, and guitars. Only very low-output guitars
and keyboards require you to switch over to Hi. The output
signal is automatically compensated to ensure a constant level
at both settings. The Overload LED serves as a level meter.
Overload LED
This LED lights up to indicate the input or output signal level
has reached the circuit’s threshold. For the best possible
signal-to-noise ratio and AD converter resolution, turn up the
input signal until the LED just begins lighting up at signal
peaks. Then back the input signal off again until the LED no
longer lights up. That’s the optimum level for this device.
4
Output
VENTILATOR provides a stereo output. If you connect the
device to a mixing console, turn the mixer’s panorama knobs to
the far left and right to achieve a realistic-sounding spatial
effect. If you need just a mono signal – say, in an elaborate
composite mix or when using a stage monitor or guitar amp –
tap it by plugging into the R/MONO output only.
Remote
This jack accepts two external footswitches (not pushbuttons!)
or one Hammond CU-1 type manual switch to remotely control
the Slow / Fast function. It also gives you a kill switch to stop
the rotors. Note that when you stop the rotors, the internal Slow
/ Fast button remains active.
Here are the mandatory terminal assignments for footswitches:
STOP
SLOW / FAST
S1
S2
5
Key / Git
Setting this switch to the KEY position activates
VENTILATOR’s speaker simulation, which faithfully replicates
the frequency response of a 122 model Leslie. Use this
speaker simulation when playing an organ or organ sound over
a ‘neutral’ sound system such as studio monitors, high-quality
stage monitors, and PA cabinets.
If you are using a guitar plugged into a guitar amp, set the
switch to GIT to disable the speaker simulation. The device
then delivers a practically linear output signal, which prevents
the speaker simulation from coloring the amp’s sound.
Depending on the speaker, amp, and your taste in tone, the
GIT setting can yield interesting results in combination with
organ sounds, as can the KEY setting with guitar amps.
12V DC
Connect the included AC adapter (12V DC, 2.5A) only; do not
use any other wall-wart or power supply. VENTILATOR cannot
be powered by batteries.
HEADS UP:
To ensure flawless operation, always connect all other cords
before you plug in the AC adapter.
6
III. CONTROL FEATURES
Although VENTILATOR is a digital device, it handles much like
an analog effect, with similar convenience and ease of use.
A good way to get to know the device is to start with this setup:
- Set Speed, Acceleration, Balance, and Distance to the 12
o’clock position.
- Turn Drive to the far left (off).
- Set the switch on the back to KEY for an organ, and to GIT
for guitar.
Bypass
This stomp-switch turns the rotary effect on and off. Its red LED
lights up when the device is bypassed (= effect off) and the
input signal is relayed to both outputs via a true bypass circuit.
Slow / Fast
This stomp-switch determines the speed of the rotary effect by
switching between slow and fast. As on the original, the bass
and treble rotors run out of sync at slightly different speeds.
Acceleration and deceleration times also differ, with the bass
rotor taking much longer to speed up and slow down.
One LED each indicates the respective rotor’s current speed
(bass rotor = LO / yellow; treble rotor = HI / red).
7
Speed
The Speed knob adjusts the bass and treble rotors’ speeds for
both Slow and Fast settings. Twist the knob to the far left for
slower speeds and to the far right for faster speeds:
SLOW
Bass 0.61Hz – 0.91Hz (0.76Hz)
Horn 0.64Hz – 0.96Hz (0.8Hz)
FAST
Bass 5.2Hz – 7.8Hz (6.5Hz)
Horn 5.44 – 8.16Hz (6.8Hz)
The 12 o’clock positions yield the values shown in brackets,
which correspond to the speeds of an average 122 model
Leslie.
Acceleration
This knob adjusts the amount of time it takes both rotors to go
from slow to fast and from fast to slow. Set the knob to the far
left for the fastest acceleration and deceleration time. Twist it to
the right and the effect will be slower to speed up and slow
down. The 12 o’clock positions yield the values shown in
brackets, which correspond to the speeds of an average 122
model Leslie. You can only stop the rotors with a remote
switch. The time it takes for the rotors to stop is fixed and
cannot be varied using the Acceleration knob.
SLOW > FAST
Bass 4.2sec - 8sec (5.5sec)
Horn 0.5sec – 2sec (1sec)
FAST > SLOW
Bass 4.2sec – 8sec (5.5sec)
Horn 0.8sec – 3.2sec (1.6sec)
8
Balance
The Balance knob adjusts the relative volumes of the bass and
treble speakers. Use it much like you would an equalizer,
adapting the unit’s sound to suit different types of input signals
and the musical context, amp, or monitor.
Twisting it to the right from the 12 o’clock position cuts low
frequencies; turning it to the left cuts higher frequencies.
Drive
This knob activates VENTILATOR’s on-board tube simulator.
To make the most of the Drive section, ensure you dial in the
optimum input level as described in the section above entitled
Overload LED. Then set the organ’s volume pedal to the
maximum level and twist VENTILATOR’s Drive knob to dial in
the maximum distortion level. This lets you ride the organ’s
volume pedal to control the amount of saturation, which is a
convenient and musically expressive way of modulating
between clean and distorted sounds the fly.
The Drive section is level-compensated; that is, the output level
does not change as you turn up the Drive knob.
Distance
The Distance parameter determines how far away from the
Leslie the virtual microphones are placed. The further you twist
the knob clockwise, the greater the distance.
Turning the knob to the far left adds lots of amplitude
modulation so the result sounds like a close mic’ed Leslie on
stage. Twisting the Distance knob to the right conjures more
diffuse sounds with less amplitude modulation, replicating a
studio setup with the mics placed a meter or two away.
9
IV. SPECIFICATIONS
Signal processing
Analog Digital Conversion
Digital Analog Conversion
Noise Level
Input Sensivity
Input Impedance
Output Level
Output Impedance
Recommended Load Impedance
Weight
Dimensions (W x D x H)
Mains Voltage
Current Draw
Connectors
Controls
Options
10
32 Bit SHARC DSP
48khz, 24 Bit
48khz, 24 Bit
-80 dBA
0 dBV (Hi), +6 dBV (Lo)
1 MOhm
+6 dBV
100 Ohm
10 KOhm or greater
1,1 kg / 2 lbs 7 oz (without
Power Supply)
192 x 153 x 55 mm / 7-9/16
x 6 x 5-5/32 inch
100V-240V, 47Hz-63Hz
< 300mA
Input Mono
Output L
Output R / Mono
Remote
Speed Trim
Acceleration Trim
Rotor Balance
Drive Gain
Mic Distance
Effect Bypass
Slow / Fast
Hi / Lo Gain
Key / Git (Speaker
Simulation on/off)
Hammond CU-1 Halfmoon
Switch
V. SAFETY GUIDELINES
- Do not open the device – no user serviceable parts inside!
- Clean with a dry cloth or brush only.
- Do not operate this device near water.
- To avoid malfunctions and electric shock, do not expose the
device or its AC adapter to rain or moisture.
- Do not operate the unit near radiators or other heat sources.
- Do not expose the device to direct sunlight.
- Power the device with the included AC adapter and the
indicated mains voltages only.
- Do not expose the device to vibrations and hard shocks.
- Pull the power plug when the device is unsupervised for
longer periods and to protect it from the effects of lightning.
- Never touch the power cable’s plugs with wet hands.
- Always disconnect the device by pulling the plug, and not the
cord.
Intended Use
This device is intended exclusively for generating lowfrequency audio signals used for sound-engineering purposes.
Any other use is not permitted and automatically invalidates the
warranty extended by Neo Instruments.
11
VI. WARRANTY TERMS
Neo Instruments extends a warranty covering all verifiable defects in
material and workmanship for a period of 12 months from the date of
original purchase. Statutory warranty rights remain unaffected hereby.
To obtain warranty coverage, the card must be filled out completely,
including the serial no., date of purchase, company stamp, signature of
the authorized dealer, and name and address of the buyer, and
returned with a copy of the proof of purchase.
The warranty covers the remedying of manifest defects by replacing or
repairing defective parts. Any other claims, in particular those for a
reduction in price or cancellation of contract, may only be made after
an attempt to rectify the defect or deliver a replacement has failed.
The warranty does not cover damage incurred during transit, as well as
damage caused by non-compliance with the operating manual and
improper or negligent handling of the device. Beyond that, the warranty
does not cover defects or damage caused by acts of God (including
but not limited to lightning, floods, etc.) or other external influences, as
well as mechanical damage or flaws that are not attributable to
manufacturing defects.
If defects occur during the warranty period, please contact us at the
following address:
NEO Instruments
Flemingstrasse 20-22
D-36041 Fulda
+49 (0)661-9619805
[email protected]
www.neo-instruments.de
12


