1
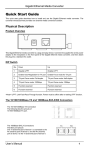
OAM Managed Dual Rate Media Converter Quick Start Guide This quick start guide describes how to install and use the OAM managed dual rate media converter. Functional Description Complies with IEEE802.3 10Base-T, IEEE802.3u 100Base-TX/FX, IEEE802.3ab 1000Base-T, and IEEE802.3z 1000Base-SX/LX. Complies with IEEE802.3ah OAM standard. Supports SNMP v1 & v2c Management. Supports Q in Q double tagged frame transparent. Supports IN-BAND Loop Back and Diagnostic. DIP switch configuration for “Link-Fault-Pass-Through”. One fiber interface supports dual rate 100Base-FX/BX or 1000BaseSX/LX/BX fiber transmission. SFP fiber interface supports 100Base and 1000Base dual rate fiber transmission. Gigabit transmission supports 9K Bytes jumbo frame. 1000Mbps-Auto/Full-duplex, 10/100Mbps-Full/Half-duplex, AutoNegotiation, Auto-MDI/MDIX. Supports IEEE802.3x Flow control: Flow control for Full-duplex and Back pressure for Half-duplex. Full wire-speed forwarding rate. Built-in Fiber Tray, for ease of fiber cable management and installation. Operating voltage and Max. current consumption: 0.25A @ 12VDC. Power consumption: 3W Max. Power Supply: 12VDC external universal PSU. -5℃ to 55℃ (-23℉ to 131℉) operating temperature range. Physical Description Product Overview User’s Manual 1 OAM Managed Dual Rate Media Converter Connect the supplied AC to DC power adaptor to the receptacle on the front panel of the OAM managed dual rate media converter, and then attach the plug into a standard AC outlet. DIP Switch No. Down Up 1 Disable LFPT Enable LFPT 2 Enable Auto-Negotiation for TX port Enable Force mode for TX port 3 TX port Force mode: Full-duplex TX port Force mode: Half-duplex 4 TX port Force mode: 100Mbps TX port Force mode: 10Mbps 5 Function reserved Function reserved 6 Function reserved Function reserved <Note> LFPT: Link-Fault-Pass-Through function. Power must be off/on after re-setting LFPT function. The 10/100/1000Base-TX, 100Base-FX/BX, and 1000Base-SX/LX/BX Connectors The 10/100/1000Base-TX Connection The following lists the pinouts of 10/100/1000Base-TX port. The 100Base-FX Connections The 1000Base-SX/LX Connection The fiber port pinouts The Tx (transmit) port of device I is connected to the Rx (receive) port of device II, and the Rx (receive) port of device I to the Tx (transmit) port of device II. The WDM 100Base-BX Connection The WDM 1000Base-BX Connection The fiber port pinouts Only one optical fiber is required to transmit and receive data. 2 User’s Manual OAM Managed Dual Rate Media Converter The SFP Connection The SFP socket for 100Base and 1000Base fiber optic expansion. For SFP expansion The Port Status LEDs LEDs POWER OAM LOOP State Steady Off Test pass Test fail Indication Power on Power off Blink when testing and light in 3 seconds if pass Blink when testing and until if fail Off No test SPEED Steady (TX Port 10/100/1000Mbps) Off FDX (TX) Steady Off LNK/ACT (TX) User’s Manual Steady Green: Connection at the speed of 1000Mbps Amber: Connection at the speed of 100Mbps Connection at the speed of 10Mbps TX port at Full-duplex mode FDX stands for Full-duplex At Half-duplex mode A valid network connection is established on TX port LNK stands for LINK 3 OAM Managed Dual Rate Media Converter Flashing Transmitting or receiving Data ACT stands for ACTIVITY Off No network connection is established LNK/ACT (FX) Steady A valid network connection is established on Fiber port LNK stands for LINK Flashing Transmitting or receiving Data ACT stands for ACTIVITY Off No network connection is established Web Configuration 4 Login the OAM managed dual rate media converter: Specify the default IP address (192.168.1.10) of the OAM managed dual rate media converter in the web browser. A login window will be shown as below. Enter the factory default Username (admin). Enter the factory default Password (no password). Then click on the “Login” button to log on to the OAM managed dual rate media converter. User’s Manual OAM Managed Dual Rate Media Converter User’s Manual 5 OAM Managed Dual Rate Media Converter FCC Warning This equipment has been tested and found to comply with the limits for a Class A digital device, pursuant to Part 15 of the FCC Rules. These limits are designed to provide reasonable protection against harmful interference when the equipment is operated in a commercial environment. This equipment generates, uses, and can radiate radio frequency energy and, if not installed and used in accordance with this user’s guide, may cause harmful interference to radio communications. Operation of this equipment in a residential area is likely to cause harmful interference in which case the user will be required to correct the interference at his own expense. CE Mark Warning This is a Class A product. In a domestic environment, this product may cause radio interference in which case the user may be required to take adequate measures. All brand names are registered trademarks of their relative holders. Trademarks Product names mentioned in this manual may be trademarks or registered trademarks of those products and are hereby acknowledged. 6 Ethernet is a trademark of Xerox Corporation. Microsoft Windows is a trademark of Microsoft Corporation. User’s Manual OAM Managed Dual Rate Media Converter Preface This OAM Managed Dual Rate Media Converter can be monitored and configured through management via SNMP and Web-based. This manual describes how to install and use the OAM Managed Dual Rate Media Converter. The OAM Managed Dual Rate Media Converter introduced here provides one channel media conversion solution: 10/100/1000Base-TX to 100Base or 1000Base dual rate fiber interface The OAM Managed Dual Rate Media Converter fully complies with IEEE802.3 10Base-T, IEEE802.3u 100BaseTX/FX, IEEE802.3ab 1000Base-T, and IEEE802.3z 1000Base-SX/LX Ethernet standards. In this manual, you will find: Product overview Features on the media converter Illustrative LED functions Installation instructions System configuration Specifications User’s Manual 7 OAM Managed Dual Rate Media Converter Table of Contents QUICK START GUIDE ......................................................1 FUNCTIONAL DESCRIPTION ..................................1 PHYSICAL DESCRIPTION ......................................1 WEB CONFIGURATION .........................................4 FCC WARNING ...............................................................6 CE MARK WARNING ......................................................6 TRADEMARKS .................................................................6 PREFACE .........................................................................7 TABLE OF CONTENTS ......................................................8 INTRODUCTION ...............................................................9 PRODUCT OVERVIEW ..........................................9 PRODUCT FEATURES ..........................................9 PACKING LIST ..................................................10 ONE-CHANNEL MEDIA CONVERTER ............................ 11 PORTS.............................................................11 FRONT PANEL & LEDS .....................................11 INSTALLATION ............................................................. 13 SELECTING A SITE FOR THE EQUIPMENT .............13 CABLE MANAGEMENT TRAY ..............................13 CONNECTING TO POWER ...................................15 SYSTEM CONFIGURATION ............................................ 16 LOGGING ON TO THE MEDIA CONVERTER ............16 MAIN MENU .....................................................16 NETWORK INFORMATION ...................................17 LOCAL SETTING ...............................................18 REMOTE SETTING .............................................30 TOOLS.............................................................33 LOGOUT ..........................................................34 SPECIFICATIONS ........................................................... 36 8 User’s Manual OAM Managed Dual Rate Media Converter Introduction The OAM Managed Dual Rate Media Converter provides one channel for media conversion between 10/100/1000Base-TX to 100Base or 1000Base dual rate fiber interface. Product Overview Product Features Complies with IEEE802.3 10Base-T, IEEE802.3u 100Base-TX/FX, IEEE802.3ab 1000Base-T, and IEEE802.3z 1000Base-SX/LX. Complies with IEEE802.3ah OAM standard. Supports SNMP v1 & v2c Management. Supports Q in Q double tagged frame transparent. Supports IN-BAND Loop Back and Diagnostic. DIP switch configuration for “Link-Fault-Pass-Through”. One fiber interface supports dual rate 100Base-FX/BX or 1000BaseSX/LX/BX fiber transmission. SFP fiber interface supports 100Base and 1000Base dual rate fiber transmission. Gigabit transmission supports 9K Bytes jumbo frame. 1000Mbps-Auto/Full-duplex, 10/100Mbps-Full/Half-duplex, AutoNegotiation, Auto-MDI/MDIX. Supports IEEE802.3x Flow control: Flow control for Full-duplex and Back pressure for Half-duplex. Full wire-speed forwarding rate. Built-in Fiber Tray, for ease of fiber cable management and installation. Operating voltage and Max. current consumption: 0.25A @ 12VDC. Power consumption: 3W Max. Power Supply: 12VDC external universal PSU. -5℃ to 55℃ (-23℉ to 131℉) operating temperature range. DIP Switch User’s Manual 9 OAM Managed Dual Rate Media Converter No. Down Up 1 Disable LFPT Enable LFPT 2 Enable Auto-Negotiation for TX port Enable Force mode for TX port 3 TX port Force mode: Full-duplex TX port Force mode: Half-duplex 4 TX port Force mode: 100Mbps TX port Force mode: 10Mbps 5 Function reserved Function reserved 6 Function reserved Function reserved <Note> LFPT: Link-Fault-Pass-Through function. Power must be off/on after re-setting LFPT function. Packing List When you unpack this product package, you will find the items listed below. Please inspect the contents, and report any apparent damage or missing items immediately to our authorized reseller. 10 The Media Converter User’s Manual AC to DC Power Adaptor User’s Manual OAM Managed Dual Rate Media Converter One-Channel Media Converter Ports This converter provides one TX port and one dual rate 100Base-FX/BX or 1000Base-SX/LX/BX fiber interface. For the dual rate 100Base-FX/BX or 1000Base-SX/LX/BX fiber interface, it provides options of multi-mode/single-mode or WDM multi-mode/single-mode fiber. For the TX port, it uses RJ-45 connector and supports auto MDIX for uplink purpose. Front Panel & LEDs LED Indicators The LED indicators give you instant feedback on status of the converter: User’s Manual 11 OAM Managed Dual Rate Media Converter LEDs POWER OAM LOOP State Steady Off Test pass Test fail Indication Power on Power off Blink when testing and light in 3 seconds if pass Blink when testing and until if fail Off No test SPEED Steady (TX Port 10/100/1000Mbps) Off FDX (TX) Steady Off LNK/ACT (TX) Steady LNK/ACT (FX) Steady 12 Green: Connection at the speed of 1000Mbps Amber: Connection at the speed of 100Mbps Connection at the speed of 10Mbps TX port at Full-duplex mode FDX stands for Full-duplex At Half-duplex mode A valid network connection is established on TX port LNK stands for LINK Flashing Transmitting or receiving Data ACT stands for ACTIVITY Off No network connection is established A valid network connection is established on Fiber port LNK stands for LINK Flashing Transmitting or receiving Data ACT stands for ACTIVITY Off No network connection is established User’s Manual OAM Managed Dual Rate Media Converter Installation This chapter gives step-by-step installation instructions for the Converter. Selecting a Site for the Equipment As with any electric device, you should place the equipment where it will not be subjected to extreme temperatures, humidity, or electromagnetic interference. Specifically, the site you select should meet the following requirements: The ambient temperature should be between -5 to 55 degrees Celsius (-23 and 131 degrees Fahrenheit). The relative humidity should be less than 95 percent, non-condensing. Surrounding electrical devices should not exceed the electromagnetic field (RFC) standards for IEC 801-3, Level 2 (3V/M) field strength. Make sure that the equipment receives adequate ventilation. Do not block the ventilation holes on each side of the equipment. The power outlet should be within 1.8 meters of the product. Cable Management Tray User’s Manual 13 OAM Managed Dual Rate Media Converter Cable management tray, board of cable outlet hole, and cable outlet hole. Route the fiber cable. Bend the board of cable outlet hole. 14 User’s Manual OAM Managed Dual Rate Media Converter Cable ties. Connecting to Power This Converter is a plug-and-play device. Connect the supplied AC to DC power adaptor to the receptacle on the front panel of the converter, and then attach the plug into a standard AC outlet with a voltage range from 100 to 240VAC. User’s Manual 15 OAM Managed Dual Rate Media Converter System Configuration This chapter provides network managers and system administrators with information about how to configure the OAM Managed Dual Rate Media Converter via the Web Browser. Logging on to the Media Converter The default IP Address for the OAM Managed Media Converter is 192.168.1.10. Enter the factory default Username (admin). Enter the factory default Password (no password). Then click on the “Login” button to log on to the OAM Managed Media Converter. Main Menu 16 User’s Manual OAM Managed Dual Rate Media Converter Network Information User’s Manual 17 OAM Managed Dual Rate Media Converter It will show local device information and local port status. Local Setting IP Configuration 18 DHCP Client: Click “DHCP Client” drop-down menu to choose “Disable” or “Enable” from the “DHCP Client” drop-down list to disable or enable DHCP Client setting for the media converter. You need to set the IP Address, Subnet Mask, and Gateway by self if DHCP Client is disabled. The IP Address would be provided by DHCP Server if the DHCP Client is enabled. IP Address: Click in “IP Address” text box and type a new address to change the IP Address. Subnet Mask: Click in “Subnet Mask” text box and type a new address to change the Subnet Mask. User’s Manual OAM Managed Dual Rate Media Converter Gateway: Click in the “Gateway” text box and type a new address to change the Gateway. Description: Click in the “Description” text box and type a description for the media converter. Description field can only be a number, in English, or “*@_-“. Apply: Click “Apply” button when you finished IP Configuration. Password Setting Login Name: The factory default login name “admin” can’t be changed. Old Password: Click in “Old Password” text box and type the old password. You must type the old password into this field if you want to set a new password. The password must be “a”-“z”, “A”-“Z”, “0”-“9”, and “_”. The max length is 16 characters. New Password: Click in “New Password” text box and type a new password. User’s Manual 19 OAM Managed Dual Rate Media Converter Confirm: Click in “Confirm” text box and type the new password in “Confirm” text box again to verify it. Apply: Click “Apply” button when you finished Password Setting. Converter Configuration 20 Jumbo Frame (9K): The media converter could pass the max 9KB packet if enable this function. Link Transparent: Toggle up Pin 1 on DIP Switch inside media converter to enable the Link Transparent (LinkFault-Pass-Through) then to enable Remote Fault Detect and Link Loss Carry Forward. User’s Manual OAM Managed Dual Rate Media Converter Remote Fault Detect: The media converter will set local UTP port link up or link down according to remote device’s UTP port link status if enable this function. Link Loss Carry Forward: If enable this function, when the UTP port link down, the fiber port will be forced link down. And the fiber will be resumed when UTP port link up. Forward CRC Error Frame: The CRC error packets will be passed if enable this function. Otherwise the CRC error packets will be dropped. Forward Pause Frame: The media converter will forward pause frame and regard it as a normal packet if enable this function. Management Packet High Priority: Need to reset media converter then this function will take effect. All management packet will be allocated to high priority queue to guarantee bandwidth when Management Packet High Priority is enabled. Media converter will enable QoS and four queues and set queue 3 as strict priority if enable this function. All management packets such as 802.3ah OAM and SNMP packets will be in queue 3 to guarantee bandwidth. Broadcast Storm Filter: If enable this function, when too many broadcast packets arrive in a period time, the broadcast packets will be dropped. Multicast Storm Filter: If enable this function, when too many multicast packets arrive in a period time, the multicast packets will be dropped. Unknown DA Unicast Storm Filter: If enable this function, when too many unknown DA unicast packets arrive in a period time, the unknown DA unicast packets will be dropped. Apply: Click “Apply” button when you finished Converter Configuration. Port Configuration User’s Manual 21 OAM Managed Dual Rate Media Converter 22 Mode: The mode of TP port can be set by DIP Switch inside media converter. Click “Mode” drop-down menu to choose “Auto Speed”, “1000 Full”, or “100 Full” from the “Mode” drop-down list for FX port. Flow Control: Click “Flow Control” drop-down menu to choose “Disable” or “Enable” from the “Flow Control” drop-down list to disable or enable Flow Control for TP or FX port. Ingress Rate Limit (kbps): Click “Ingress Rate Limit” drop-down menu to choose the ingress rate limit from the “Ingress Rate Limit” drop-down list for TP or FX port. Or click “Ingress Rate Limit” drop-down menu to choose the “User Setting” from the “Ingress Rate Limit” drop-down list for TP or FX port. Then click in “Ingress Rate Limit” text box and type an ingress rate limit for TP or FX port. The ingress rate limit should be divided exactly by 64 because 64kbps is as a minimal step for ingress rate limit. The program will change the ingress rate limit to 64 automatically if the ingress rate limit is not divided by 64, for example 65. Egress Rate Limit (kbps): Click “Egress Rate Limit” dropdown menu to choose the egress rate limit from the User’s Manual OAM Managed Dual Rate Media Converter “Egress Rate Limit” drop-down list for TP or FX port. Or click “Egress Rate Limit” drop-down menu to choose the “User Setting” from the “Egress Rate Limit” drop-down list for TP or FX port. Then click in “Egress Rate Limit” text box and type an egress rate limit for TP or FX port. The egress rate limit should be divided exactly by 64 because 64kbps is as a minimal step for egress rate limit. The program will change the egress rate limit to 64 automatically if the egress rate limit is not divided by 64, for example 65. Apply: Click “Apply” button when you finished Port Configuration. Refresh: Click “Refresh” button to show the current Port Configuration again. MIB Counter This page shows local device’s MIB counters. User’s Manual 23 OAM Managed Dual Rate Media Converter Clear: All MIB counters will be cleared to zero if click “Clear” button. Refresh: Click “Refresh” button to show the current MIB counters again. SNMP Configuration 24 SNMP Ability: Click “SNMP Ability” drop-down menu to choose “Disable” or “Enable” from the “SNMP Ability” drop-down list to disable or enable SNMP functions. Trap Mode: Click “Trap Mode” drop-down menu to choose “Disable” or “Enable” from the “Trap Mode” dropdown list to disable or enable to send trap event to SNMP server. SNMP Trap IP Address: Click in “SNMP Trap IP Address” text box and type SNMP server’s IP address used for trap destination IP. User’s Manual OAM Managed Dual Rate Media Converter Apply: Click “Apply” button when you finished SNMP Configuration. SNMP Community Setting This OAM Managed Media Converter supports up to 5 SNMP Read/Write Communities. SNMP Read Community: Add Read Community: Click in “Add Read Community” text box and type a read community name. Delete Read Community: Click in “Delete Read Community” text box and type a read community name to be deleted. SNMP Write Community: Add Write Community: Click in “Add Write Community” text box and type a write community name. User’s Manual 25 OAM Managed Dual Rate Media Converter Delete Write Community: Click in “Delete Write Community” text box and type a write community name to be deleted. ClearReadAll: Click “ClearReadAll” button to clear all read community names. ClearWriteAll: Click “ClearWriteAll” button to clear all write community names. Apply: Click “Apply” button when you finished SNMP Community Setting. VLAN VLAN Group: 26 VLAN Mode: Click “VLAN Mode” drop-down menu to choose “Disable” or “Enable” from the “VLAN Mode” User’s Manual OAM Managed Dual Rate Media Converter drop-down list to disable or enable 802.1Q VLAN Group. User could set 16 VLAN entries if enable 802.1Q VLAN Group functions. Each VLAN entry could set VID and member port. The VID should be 1~4094. Apply: Click “Apply” button when you finished VLAN Group setting. VLAN Per Port Setting: Egress Link Type: Replace Tag: The media converter will remove VLAN tags from packets then add new tags to them. The inserted tag is the ingress port’s “Default tag”, which is indexed by port “Port based VLAN index”. This is a replacement processing for tagged packets and an insertion for untagged packets. Remove Tag: The media converter will remove VLAN tags from packets if they are tagged when these packets are User’s Manual 27 OAM Managed Dual Rate Media Converter output. The media converter will not modify packets received without tags. Add Tag: The media converter will add VLAN tags to packets if they are not tagged when these packets are output on this port. The media converter will not add tags to packets already tagged. The inserted tag is the ingress port’s “Default tag”, which is indexed by port’s “Port based VLAN index”. Don’t Touch Tag: Do not insert or remove VLAN tags to/from packet which is output on this port. Port VLAN Entry: Select Port based VLAN index. The number means VLAN table entry index, not VID. Ingress Filter: Click “Ingress Filter” drop-down menu to choose “Disable” or “Enable” from the “Ingress Filter” drop-down list to disable or enable VLAN ingress filter. Apply: Click “Apply” button when you finished VLAN Group setting. Please make sure the VLAN port entry can go through CPU port. Q-in-Q 28 User’s Manual OAM Managed Dual Rate Media Converter Q in Q Enable: Click “Q in Q Enable” drop-down menu to choose “Disable” or “Enable” from the “Q in Q Enable” drop-down list to disable or enable Q in Q function. Out Layer VLAN Tag EtherType (HEX): Click in “Out Layer VLAN Tag EtherType” text box and type user defined Q-in-Q out layer VLAN tag Ether type. Out Layer VLAN VID (DEC): Click in “Out Layer VLAN VID” text box and type user defined Q-in-Q out layer VLAN tag VID. VLAN Tag Priority Decision: Click “VLAN Tag Priority Decision” drop-down menu to choose “Use Internal VLAN Tag Priority” or “Use 802.1p remarking decision Priority” from the “VLAN Tag Priority Decision” dropdown list to decide out layer VLAN Tag’s priority. Q in Q direction: Click “Q in Q direction” drop-down menu to choose “P0 Add QinQ Tag. P1 Remove Tag.” or “P1 Add QinQ Tag. P0 Remove Tag.” from the “Q in Q direction” drop-down list to select Q in Q direction. User’s Manual 29 OAM Managed Dual Rate Media Converter Apply: Click “Apply” button when you finished VLAN Group setting. Web connection may be lost because of the VLAN tag if Qin-Q is enabled. Remote Setting 802.3ah Functions 802.3ah Configuration: 30 802.3ah Function: Choose “Disable” or “Enable” to disable or enable 802.3ah function. 802.3ah Mode: Choose “Passive” or “Active” to set passive or active 802.3ah mode. Remote Loopback: Choose “Disable” or “Enable” to disable or enable remote loopback. Apply: Click “Apply” button when you finished 802.3ah OAM Configuration. Refresh: Click “Refresh” button to show the current 802.3ah status again. User’s Manual OAM Managed Dual Rate Media Converter Loopback Test: Send Packet Number (1~255): Click in “Send Packet Number” text box and type packet number to be sent. Packet Length (Not include CRC) (60~1514): Click in “Packet Length” text box and type packet length. Apply: Click “Apply” button when you finished 802.3ah Loop Back Test. 802.3ah Status: User’s Manual 31 OAM Managed Dual Rate Media Converter 32 User’s Manual OAM Managed Dual Rate Media Converter This page shows 802.3ah Status Information of the media converter. Tools System Reboot OK: Click “OK” button to restart the media converter. OK: Click “Cancel” button to cancel the media converter restarting. Save and Restore SaveToFlash: Click “SaveToFlash” button to save all current configurations to media converter as backup. User’s Manual 33 OAM Managed Dual Rate Media Converter LoadFromFlash: Click “LoadFromFlash” button to restore to previous backup configuration. The Web Interface may be disconnected for restoration. ResetToFactory: Click “ResetToFactory” button. The Web Interface will be disconnected. The system will back to factory default mode after media converter resets all configurations. The default IP address is 192.168.1.10. Firmware Upgrade Browse: Click “Browse” button to select the location and file of the new firmware image file on your computer. Upgrade: Click “Upgrade” button. The new firmware image file will be burned into the flash. Reset the media converter to use the new firmware. Logout 34 User’s Manual OAM Managed Dual Rate Media Converter OK: Click “OK” button to logout of the media converter. OK: Click “Cancel” button to cancel the media converter logout. User’s Manual 35 OAM Managed Dual Rate Media Converter Specifications Applicable Standards Fixed Ports Speed 10Base-T 100Base-TX 100Base-FX/BX 1000Base-T 1000Base-SX/LX/BX Forwarding rate LED Indicators Dimensions Weight Power Power Consumption Operating Temperature Storage Temperature Humidity Emissions 36 IEEE802.3 10Base-T IEEE802.3u 100Base-TX/FX IEEE802.3ab 1000Base-T IEEE802.3z 1000Base-SX/LX 1 10/100/1000Base-TX port 1 dual rate 100Base-FX/BX or 1000BaseSX/LX/BX fiber interface 1 100Base and 1000Base dual rate SFP fiber interface 10/20Mbps for half/full-duplex 100/200Mbps for half/full-duplex 200Mbps for full-duplex 2000Mbps for full-duplex 2000Mbps for full-duplex 14,880pps for 10Mbps 148,810pps for 100Mbps 1,488,100pps for 1000Mbps POWER, OAMLOOP Fiber port: LNK/ACT TX port: SPEED, FDX, LNK/ACT 100mm (W) × 122mm (D) × 32.5mm (H) (3.94” (W) x 4.8” (D) x 1.28” (H)) 0.5Kg (1.1lbs.) External power adaptor 12VDC, 0.25A 3W Max. -5℃ ~ 55℃ (23℉ ~ 131℉) -20℃ ~ 70℃ (-4℉ ~ 158℉) 5 ~ 95%, non-condensing CE Mark Class A FCC part 15 Class A VCCI Class A User’s Manual