1
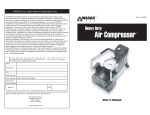
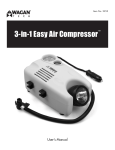
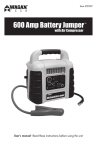
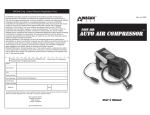
WAGAN Corp. Limited Warranty Registration Form
All WAGAN Corporation products are warranted to the original purchaser of this product.
Warranty Duration: This product is warranted to the original purchaser for a period of one (1)
Year from the original purchase date, to be free of defects in material and workmanship. WAGAN
Corporation disclaims any liability for consequential damages. In no event will WAGAN
Corporation be responsible for any amount of damages beyond the amount paid for the product
at retail. In the even of a defective item, please ship the item, prepaid, with a complete
explanation of the problem, your name, address and daytime phone number. WAGAN
Corporation will, at its option, replaces or repair the defective part. This warranty is void if the
product has been damaged by accident, in shipment, unreasonable use, misuse, neglect,
improper service, commercial use, repairs by unauthorized personnel or other causes not arising
out of defects in materials or workmanship. This warranty is effective only if the product is
purchased and operated in the USA and does not extend to any units which have been used in
violation of written instructions furnished.
Warranty Disclaimers: This warranty is in-lieu of all warranties expressed or implied and no
representative or person is authorized to assume any other liability in connection with the sale of
our products. There shall be no claims for defects or failure of performance or product failure
under any theory of tort, contract or commercial law including, but not limited to negligence,
gross negligence, strict liability, breach of warranty and breach of contract.
Warranty Performance: During the above one (1) Year warranty period, a product with a defect
will be replaced with a comparable model when the product is returned to WAGAN Corporation
with an original store receipt. The replacement product will be in warranty for the balance of the
one (1) Year warranty period.
R
Item no. 2239
3 in 1 Air Compressor
with Inflator/Deflator
TM
Please activate my limited warranty for WAGAN Corp. 3-In-1 Air Compressor
with Inflator / Deflator
Enclosed copy of original sales receipt.
Air Compressor
Name
Inflator
Deflator
Mail Address
City
State, Zip Code
Item Purchased
3-In-1 Air Compressor with Inflator / Deflator
Stores Name
Date of Purchase
Signature
Date
nozzle adapters and
sports needle included
All WAGAN Corporation Products must be registered within (30) days of purchased to activate this warranty.
Mail the complete registration form, along with a copy of the original receipt to:
Attn: Customer Service
WAGAN Corporation
3589 Yale Way
Fremont, CA 94538
c 2004 WAGAN Corp.
User's Manual
3-In-1 Air Compressor with Inflator / Deflator by Wagan Tech
USER’S MANUAL — Please read before using this equipment.
________________________________________________________________________________________________________________________________________________________________
Thank you for purchasing the 3-In-1 Air Compressor with Inflator /
Deflator by Wagan Tech. Please read this manual thoroughly before
operating your new product as it contains the information you need
to become familiar with its features and obtain the performance that
will bring you continued enjoyment for many years. Please keep this
manual on file for future reference.
3. Plug the 12 Volt power cord into the vehicle’s cigarette lighter socket
4. Turn the Power Switch to “II” (Air Compressor). The compressor will now
ready for operation
IMPORTANT
- Make sure vehicle battery is fully charged prior to use this device
- Do not use additional attachment other than recommended or
provided by manufacturer
- Start your car to ensure maximum power to unit while continuous
using
- This unit is recommended to operate in 10-minute intervals
- Allow unit to cool down before next operation
- Keep away from water and do not expose to rain
- Inflating items only to manufacturers recommended pressure or
less. NEVER OVERINFLATE AN ITEM. Over inflation can
cause damage to the item and possible personal injury
- Always prevent hoses from kinking
- Make sure all connections no leaking while inflating
- DO NOT insert compressor or inflator into objects while unit
is running. Always turn unit off before attach hoses &
accessories
- Check inflation pressure of items regularly with pressure
gauge
- NEVER leave unit running under unattended
PRIOR TO USE, READ AND UNDERSTAND ALL WARNINGS,
CAUTIONS AND INSTRUCTIONS INCLUDED IN THIS
INSTRUCTION MANUAL, AND THOSE PUBLISHED BY YOUR
VEHICLE BATTERY MANUFACTURER AND MANUFACTURER OF
ANY DEVICE INTENDED TO BE USED WITH THIS UNIT. RETAIN
THESE INSTRUCTIONS FOR FUTURE REFERENCE.
INFLATOR OPERATION (High Volume – Low Pressure)
1. Attach High Volume – Low Pressure Hose to inflating outlet
2. Select and attach correct adapter to the hose and insert into
inflatable item
3. Plug the 12 Volt power cord into the vehicle’s cigarette lighter
socket
4. Turn the Power Switch to “I” (Inflator). The inflator will now ready
for operation
5. Monitor inflatable item to prevent over inflation. After you have
completed inflating beach ball, air mattress, raft etc. to the desired
pressure, turn the switch back to “O” (Off) position and remove the
adapter from the item
AIR COMPRESSOR OPERATION (Low Volume – High Pressure)
CAUTIONS:
ACCESSORIES:
-
3 pieces of nozzle adapters
Low pressure extension hose with 1 adapter to connect with the
unit
1. Attach the valve adapter to the valve stem for tires or insert the
appropriate nozzle adapter for the low volume, high-pressure
inflatable item
2. Push the valve adapter lever down to lock into place
2
© 2003 Wagan Corporation.
All Rights Reserved.
Wagan and Wagan.com are trademarks used by Wagan Corporation.
www.wagan.com