1
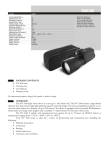
USER MANUAL FP1010 Standalone AD Display Version 08.1 Before connecting, operating or adjusting this product, please read these instructions completely. Please keep this manual of future reference. Product and brand names mentioned in this manual are trademarks of registered trademarks of their respective holders. Specification is subject to change without notice. Important Information Please do not open or remove the cover plate because it may generate a high voltage shocking or other dangers. Please do not precede the maintenance or repairing of this unit by yourself. Carefully read the instruction manual before use, and keep the manual for future reference. Please read and comply with all warnings, cautions, and the manual thoroughly. You might lose your warranty if you modify or revise this item in such as manner not approved by this manual. y AC cords enclosed in this product are for 110V or 220V. y If any liquid or solid objects fall inside the cabinet, unplug the set immediately and have it checked by qualified service personnel before operating it again. y Never add any attachments and/or equipments without approval of the manufacturer. Such additions can increase the risk of fire, electric shock, or other personal injury. Important Warnings and Safety Precautions y Read instructions‐ all the safety and operating instructions should be read before the product is operated. y Keep the safety and operating instructions for future reference. y Never push objects of any kind into this product through openings as they may touch dangerous y y y y y y y y y y voltage points or short‐out parts that could result in fire or electric shock. Never spill liquid of any kind on the product. Do not remove/insert the plug into the socket with wet hands in order to prevent electric shock. Do not overload wall outlets, extension cords, or integral convenience receptacles as this can result in a risk of fire or electric shock. Do not attempt to service this product by yourself as opening or removing covers may expose you to dangerous voltage or other hazards. Refer all services to qualified service personnel. The manufacturer will not be responsible for any injuries or damage caused to the product. AC cords should be routed so that they are not likely to be walked on or pinched by items placed upon or against them, pay attention particularly to cords at plugs, convenience receptacles, and the points where they exit from the product. Unplug the unit from the wall outlet before cleaning. Use a damp cloth; do not use liquid or aerosol cleaners. Please refer to the cleaning instruction. Do not place the product on an unstable cart, stand, tripod, bracket, or table where it may fall. A falling unit can cause serious injury to a child or adult and serious damage to the appliance. Follow the manufacturer’s instructions when mounting the unit, and use a mounting accessory recommended by the manufacturer. The unit is designed with slots in the cabinet for ventilation to protect it from overheating. Do not block these openings with any object, and do not place this unit on a bed, sofa, rug, or other similar surfaces. Do not place it near a radiator or heat register. The plug provided by this unit will fit into the power outlet in only one way. If you are unable to insert the plug fully into the outlet, try reversing the plug. If the plug still does not fit, contact your electrician to replace your outlet. Use wall or ceiling mounts when mounting the product on a wall or ceiling, be sure to install the product according to the method recommended by the manufacturer. For safety reasons, do not leave children along with the unit. DO NOT ALLOW CHILDREN TO CLIMB ON THE UNIT. Contents 1. 2. 3. INTRODUCTION .................................................................................................... 1 Product Description ............................................................................................... 1 Product Features .................................................................................................... 1 Package Contents ................................................................................................... 2 Assembly and Connection ...................................................................................... 2 Remote Control function ....................................................................................... 4 ON SCREEN DISPLAY OPERATING INSTRUCTIONS .......................................... 5 Device Selection (Home Page) ............................................................................... 5 Function Selection .................................................................................................. 6 Setup Screen .......................................................................................................... 6 1. INTRODUCTION Product Description Thank you for choosing the Solid State Standalone AD Display and for your continued support and use of our products. This Standalone AD Display allows you to play back high quality still image for JPEG files as well as video files through 24/7 looping as required. Product Features y y y y y y y The high efficiency decoder supports HD JPEG file decoding. High quality 2W speaker built‐in for superior audio effect. Support audio file format: AAC, MP3, WMA Support photo file format: BMP, JPEG Support video file format: MPEG‐1, MPEG‐2, MPEG‐4, H.264 BP, Flash Video (.flv). Firmware can be upgraded by using flash memory card. Power‐on play: automatically play. ‐1‐ Package Contents Please check the package to make sure is contains the following items FP1010‐T AC Adapter User Manual Remote Controller Assembly and Connection Top View 1 1 RS‐232 is reserved for special custom feature. ‐2‐ Front View 2 Back View 2 Option: Motion sensor. ‐3‐ 2. Remote Control function No 1 2 3 4 Key name Monitor Remote Control Unit Mute LEFT / RIGHT For navigation key / MENU/ EXIT Confirm / Exit function Output No function ◄/▲/►/▼/ For navigation key / Confirm function 5 6 Description Previous file No function 7 Setup Into setup screen 3 8 VOL + / ‐ Adjust volume up / down 9 Motion No function 10 Next file 3 Functional only when non‐play back mode. ‐4‐ 3. ON SCREEN DISPLAY OPERATING INSTRUCTIONS Device Selection (Home Page) Turn on device power without memory card loaded. "Device Selection" will be seen on screen. Click arrow key◄/▲/►/▼of remote control to select "Flash" icon and use enter key to enter / confirm the selection into "Function Select" screen. You may also use keypad operation other than object control on touch screen. menu Æ represent "enter" or "select" 4 volume up / down Æ represent arrow keys exit Æ represent "back" or "exit" 4 Default different functions under different mode. ‐5‐ Function Selection Select and enter "Setup" icon to get into setup mode. To get into setup mode screen while memory card is loaded; turn off the power, press and hold the menu key on keypad then reboot. 5 Setup Screen 5 Please turn off the power after setup completed. Load the memory card and reboot to play back. ‐6‐ System Setup – Brightness & Contrast Level 1 Level 2 Function System Setup Brightness & Contrast Slideshow Setup Time Setup Volume Setup Version Touch Calibrate Adjust brightness and contrast value. Please use arrow key ◄/▲/►/▼as movement, Select / icon, then use enter key as confirmation for adjustment. Brightness: 30%‐90% Contrast: 30%‐70% System Setup – Time Setup Level 1 Level 2 Function System Setup Brightness & Contrast Slideshow Setup Time Setup Volume Setup Version Touch Calibrate RTC Clock Adjust RTC clock. Default "YY/MM/DD" or "hr/min". Please use arrow key ◄/▲/►/▼as movement, Select / icon, then use enter key as confirmation for adjustment. System Setup – Version Level 1 Level 2 Function System Setup Brightness & Contrast Slideshow Setup Time Setup Volume Setup Version Touch Calibrate Firmware version. Display the current firmware version. ‐7‐ Slideshow Setup – Interval Setup Level 1 Level 2 System Setup Interval Setup Slideshow Setup Effect Setup Volume Setup Touch Calibrate Function Fast/Medium/Slow/Very Slow To adjust the interval timing for slideshow. Slideshow Setup – Effect Setup Level 1 Level 2 System Setup Interval Setup Slideshow Setup Effect Setup Volume Setup Touch Calibrate Function To adjust effect between slideshow change. Random/Top down/Bottom up/ …. Volume Setup Level 1 Level 2 System Setup Slideshow Setup Volume Setup Touch Calibrate Function 0‐10 Speaker volume control. Please use arrow key ◄/▲/►/▼as movement, Select / icon, then use enter key as confirmation for adjustment. ‐8‐ Touch Calibrate Level 1 Level 2 Function System Setup Slideshow Setup Volume Setup Touch Calibrate The function is not available. ‐9‐ MEMO