1
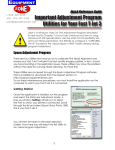
Bidirectional Adjustment
Ensure Correct Output with the
Bidirectional Adjustment
Know Before You Print
Bidirectional Adjustment - Know Before You Print
Bidirectional Adjustment - Know Before You Print
The function of the Bidirectional adjustment is to align the print passes of the head carriage when printing in any Bidirectional
mode. This means that the print head carriage in this mode will be printing on the pass from right to left and then back again from left
to right. An indication that the Bidirectional adjustment could need to be adjusted are
prints that appear more grainy than normal, blurry or colors that do not appear to be
aligning properly.
Ideally the Bidirectional adjustment should be set for each media type used because
the variation in thickness of media will effect where the ink droplets land. Also this
adjustment will have to periodically be performed due to changes that can occur with a
printer over time.
Tech Tip: For higher quality output try printing in Unidirectional Mode. This is
available in Versaworks under Job Settings, Quality, Details and Direction as
shown in the image on the right. When using this feature the printer will output only
when the print carriage is travelling from its home position towards the left edge of the
printer. Unidirectional Mode is always a higher quality mode but usually runs around
35% slower than the Bidirectional Mode.
Note: The XC and VP printer/cutter models it is especially important to make sure the
Bidirectional adjustment is accurate. This is because the adjustment is factored in for
print and cut accuracy. Always perform this adjustment before starting any Print & Cut
adjustment procedures.
Performing the Bidirectional Adjustment
The first step in performing the Bidirectional Adjustment is setting up the media
that will be used. Once the media is set up press the Menu key and press the
Down Arrow until Adjust Bi-Dir is displayed. Press the Right Arrow to enter
this menu. At this time Test Print will be shown. Press The Down Arrow key until
Detail Setting is displayed. Press the Right Arrow to enter this menu. Detail
Setting and Test Print should be shown at this time. Press Enter to perform the
Detail Bidirectional Adjustment.
Note: On the XC, XJ, RS, VP, LEC and AJ series devices there is a Simple and a Detail version of this test pattern. The
Simple setting shows only the Black print head while the Detail setting allows for adjusting all of the heads individually. In this
document the Detail version of the test pattern will be covered. For information on performing the Simple test pattern please consult
the User’s Manual.
Continued Next page
Roland Support Document
Date: 06/10/09
Revision 1.0
Bidirectional Adjustment - Know Before You Print
Bidirectional Adjustment - Know Before You Print
Reviewing the Bidirectional Test Print
Depending on the model device you have this test print can appear in a couple different variations. Regardless the adjustment method is
the same.
A. The ideal out put shows the printed lines overlapping making the straightest line
possible.
B. The current setting is highlighted with a carat.
C. The numerical value listed under the line you choose will be the setting you
enter.
A.
C.
B.
D. There are four adjustment groupings which adjust for different droplet sizes and
different head heights. Each one is notated with a number in the bottom left corner
of each adjustment.
Tech Tip: Roland printers feature variable droplet technology which allows for
smoother printing. Most Roland devices utilize three droplet sizes. Sections NO.1
and NO.3 of the Detail Bidirectional test pattern are showing the large droplets
when the head height is on Low and High respectively. Sections NO.2 and NO.4
show the smaller droplet alignments when the head height is on Low and High
respectively.
E.
E. Within each adjustment grouping there is a separate adjustment for each head
denoted with H and the number of the head.
D.
Continued Next Page
Roland Support Document
Date: 06/10/09
Revision 1.0
Bidirectional Adjustment - Know Before You Print
Bidirectional Adjustment - Know Before You Print
Adjusting the Bidirectional Test Print
A. To perform the adjustment press the Down Arrow (the machine will be reading Detail
Setting and Test Print after completing the output of the pattern) until Setting NO. 1 is
shown.
B. Press the Right Arrow to enter the Setting NO. 1 menu
C. The cursor will be flashing under the value for H1. Press Up or Down until the value
reaches the desired setting for H1.
D. Press the Right Arrow key so the cursor moves under H2. Press Up or Down until the
value reaches the desired setting for H2.
E. Continue this process for H3, H4, H5 & H6.
F. Once all selections have been made for Setting NO. 1 press the Enter key to save the settings.
G. At this time the LCD panel will read Detail Setting with Setting NO. 1 below it. Press the Down Arrow once for Setting NO. 2.
H. Press the Right Arrow to enter Setting NO. 2 and follow the same process as steps F. - I.
I. Repeat this process for Settings NO. 3 and 4.
Tech Tip: The Bidirectional adjustment settings can be saved in a Preset to be recalled at any time to avoid reprinting every time
media is switched. For more information on saving a Preset please consult your user manual.
Further Support
Should further support be needed or any additional questions arise about the processes in this document please contact your local
supporting dealer. As always, thank you for choosing Roland.
Roland Support Document
Date: 06/10/09
Revision 1.0