1
Register Your Game Today!
®
• Free tips, tricks, demos, trailers, and more!
• Receive free technical and customer support.
• Be the first to know about beta tests, tournaments,
game testing opportunities, and other events.
• Plus, stay informed on the latest VU Games news,
updates, discounts & more!
Go to
http://reg.vugames.com
Now!
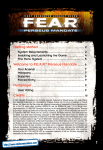
System Requirements . . . . . . . . . . 2
Minimum Specification . . . . . . . . 2
Recommended Specification . . . . 2
Internet/Multiplayer
Requirements . . . . . . . . . . . . . . 2
Installation . . . . . . . . . . . . . . . . . 2
Menus and Options . . . . . . . . . . . . 3
© 2005 Sierra Entertainment, Inc. All rights reserved. Sierra, the Sierra logo, SWAT and the SWAT logo are trademarks
or registered trademarks of Sierra Entertainment, Inc., in the U.S. and/or other countries. Developed exclusively by
Irrational Games. Developer Modifications Copyright © 2005 Irrational Games. Benelli product images, product
names, trademarks and logos used with permission from Benelli USA, Inc. http://www.benelliusa.com. COLT, COLT
(STYLIZED "C"), COLT M16, COLT M4, COLT M203, COLT 1991A1, COLT 1911, COLT 1911A1, and AR-15 (in combination and/or alone) are registered and/or common law trademarks of New Colt Holding Corp. or Colt's Mfg. Co., Inc.
These trademarks and any trade dress associated with these weapons are used with permission of its owners. All
rights reserved. Havok.com™ © Copyright 1999-2005 Havok.com Inc. (and its Licensors). All rights reserved. See
www.havok.com for details. This product contains software technology licensed from GameSpy Industries, Inc.
© 1999-2005 GameSpy Industries, Inc. GameSpy and the “Powered by GameSpy” design are trademarks of GameSpy
Industries, Inc. All rights reserved. Windows and DirectX are either registered trademarks or trademarks of Microsoft
Corporation in the U.S. and/or other countries and are used under license from Microsoft. Pentium is a registered
trademark of Intel Corporation. AMD Athlon is a trademark of Advanced Micro Devices, Inc. ATI and Radeon are used
under license and are registered trademarks or trademarks of ATI Technologies Inc. in the United States and other
countries. NVIDIA and GeForce are registered trademarks or trademarks of NVIDIA Corporation in the United States
and/or other countries. All other trademarks are property of their respective owners.
Team Viewports . . . . . . . . . . . . 20
Controlling Team Members
Through Viewports . . . . . . . . . . 20
Quick Command . . . . . . . . . . . . 21
Cooperative Responses . . . . . . . 22
Other Context-Sensitive Actions . 22
Pause Menu . . . . . . . . . . . . . . 22
Single-Player Game . . . . . . . . . . . 3
Career . . . . . . . . . . . . . . . . . . . 3
Briefing . . . . . . . . . . . . . . . . . . 4
Equipment . . . . . . . . . . . . . . . . 4
Weapons . . . . . . . . . . . . . . . . . 5
Training . . . . . . . . . . . . . . . . . 11
Instant Action . . . . . . . . . . . . . 11
Create and Play Your
Own Missions . . . . . . . . . . . . . 11
Playing SWAT 4 . . . . . . . . . . . . . 23
Commanding Your Team . . . . . . 23
Securing Evidence . . . . . . . . . . 24
Using Tactical Equipment . . . . . 24
Taking Damage . . . . . . . . . . . . 24
Reporting to TOC . . . . . . . . . . . 24
Snipers and Viewports . . . . . . . 24
Pause and Objective Screen. . . . 25
Completing and Failing Missions 25
Scoring. . . . . . . . . . . . . . . . . . 25
Tips and Tricks. . . . . . . . . . . . . 25
Multiplayer Game . . . . . . . . . . . . 14
Hosting a Game . . . . . . . . . . . . 14
Joining a Game . . . . . . . . . . . . 16
Credits . . . . . . . . . . . . . . . . . . . 27
Settings. . . . . . . . . . . . . . . . . . . 17
Audio Settings . . . . . . . . . . . . . 17
Video Settings . . . . . . . . . . . . . 17
Customer Support . . . . . . . . . . . . 31
License Agreement . . . . . . . . . . . 32
Game Controls . . . . . . . . . . . . . . 19
Classic Command Interface . . . . 19
Graphic Command Interface . . . . 19
Playing the Game . . . . . . . . . . . . 20
Commanding Your Team . . . . . . 20
1
SYSTEM REQUIREMENTS
MINIMUM SPECIFICATION
•
•
•
•
•
Intel® Pentium® III 1.0 GHz / Intel® Celeron® 1.2 GHz / AMD® Athlon™ 1.2 GHz
256 MB RAM
2 GB free hard disk space
DirectX® 8.1-compatible audio support
Minimum: NVIDIA® GeForce® 2 (MX 200/400 not supported) w/32 MB or ATI®
Radeon® 8500 w/64 MB with Microsoft® DirectX® 9 drivers installed
• One of the following operating systems must be installed for SWAT 4 to run:
Windows® 98SE, Windows® 2000 with Service Pack 3 installed or Windows® XP with
Service Pack 1 installed.
RECOMMENDED SPECIFICATION
The recommended specification is exactly the same as the minimum specification with the
following changes:
• 2.4 GHz Pentium® 4, Athlon™ XP 2500+, or equivalent
• GeForce® 4 Ti (not MX) w/128 MB, ATI® Radeon® 9500 w/128 MB with Microsoft®
DirectX® 9 drivers installed
• Windows® XP with Service Pack 2 installed
INTERNET/MULTIPLAYER REQUIREMENTS
32-bit Internet service provider with 56k modem or a (LAN) local area network
INSTALLATION
Insert the game CD into your CD-ROM drive. If your CD-ROM drive has AutoPlay enabled,
click the “Install” tab and follow the on-screen instructions. If AutoPlay is disabled, click
on the “My Computer” icon located on your desktop. Double click on the CD-ROM drive
icon and follow the on-screen instructions.
You will be asked to install DirectX during your installation if you have not already done
so. This software is required to run SWAT 4. Carefully read and follow the on-screen
instructions during the installation process. When the installation is complete, you will be
asked to register your product with Sierra Entertainment. Registration is strongly advised,
as it will allow you to receive important product update information.
Several icons will be placed on your Start Menu or Desktop (whichever you indicated during the installation process). Double click on the SWAT 4 icon to play. After an introduction movie, you will be taken to the MAIN MENU.
2
MENUS AND OPTIONS
The main menu allows you to start a new
career, jump straight into instant action,
play multiplayer or even create your own
missions. You can return to the main
menu by clicking on a main menu button
when available.
SINGLE-PLAYER GAME
CAREER
To begin playing SWAT 4, click on Play
Career. You will be taken to the Career
Menu where you will be asked to name
your new SWAT officer.
After entering your name, click on the
“Create Career” button to start your career
in law enforcement. If you have already
created a career, you can continue by selecting your officer’s name in the dropdown box
and clicking on “Play Career.” Whether you are starting a new career or resuming a previously saved one, you will be taken to the Mission screen.
SELECTING A MISSION
From the Mission screen, you can select the mission you would like to play. A listing of all
available missions is displayed in the column on the left. The newest mission is always
displayed at the bottom of the list. Highlight the mission you would like to play.
Difficulty: You can select the difficulty for the mission on this screen. Be careful with this
one. Raising the difficulty will make suspects harder to apprehend and you will need a
higher score to complete missions:
Easy
Normal
Hard
Elite
You may move on to the next level regardless of score.
You must achieve a score of 50 to advance.
You must achieve a score of 75 to advance.
You must achieve a score of 95 to advance.
3
Mission Results: The best score achieved for each difficulty is displayed under
Mission Results.
You can choose to start the mission immediately if you would like. But it is recommended
that you listen to your Commander’s briefing first, as there may be mission-critical
information that could affect your squad’s objective, deployment and equipment.
You can change the primary and secondary weapons as well as the tactical and breaching
equipment each officer is carrying. To do this, click the arrows underneath each item. This
will allow you to scroll through the list of available items.
CHOOSING THE RIGHT EQUIPMENT FOR THE JOB
It’s your duty to give your squad the tactical advantage through the proper selection of
equipment. Consider the environment you’ll be entering in the mission, the number of
hostages and whether or not the suspects may be wearing body armor.
BRIEFING
In the briefing, you’ll receive the latest updates on the crisis at hand. You’ll use this intel
to determine the best point of entry and what equipment you need to bring.
Objectives: View the mission’s briefing and objectives here. You can listen to the mission
briefing and any related 911 calls. As a SWAT officer, your primary goal is always to bring
order to chaos. Fail any of the mission objectives and you will fail your mission.
Entry:
Displays a map of the location if available. You can also choose an entry point
if there is more than one.
If you’re going to be in close quarters combat with a lot of hostages, you may want to
consider taking some less-lethal weapons with you. You’ll still be able to take the suspects
down, but you won’t be as much of a danger to the hostages in a furious firefight.
Consider also which type of ammunition you should take along with you. Jacketed hollow
point rounds are effective against unarmored opponents behind little cover. If you’re up
against barricaded suspects wearing body armor, you’re going to need the full metal jacket
rounds. They can punch through body armor and even through doors.
WEAPONS
Suspects: Any known information on the suspects is displayed here.
PRIMARY WEAPONS
Civilians: Known civilians that could be in danger are shown here.
Timeline: The chronological order of events that lead up to the mission are plotted out
on this screen.
EQUIPMENT
In SWAT 4, you can outfit your entire
squad to suit the situation you will be
facing. Consider the situation you’ll be
entering when you choose your weapons.
Each squad member can be configured to
have an entirely different weapon setup.
To do this, click on the squad member’s
portrait. After you select the squad member,
the screen will update with what he is
currently carrying. If you do not change
what the officers are carrying, your squad will use pre-set weapon defaults. These defaults
are good for most situations but may not always be the best decision.
4
Colt M4A1 Carbine
The Colt M4A1 carbine is based on the tried-and-true design
of the M16 assault rifle used by the United States Army. The
shorter carbine design makes it a more viable weapon than
the M16 in close-quarters situations. Using .223 caliber rifle
ammunition in both full metal jacket and jacketed hollow
point configurations, the Colt carbine is the most powerful
weapon available to SWAT officers. It is equipped with a fire
mode selector allowing semiautomatic as well as fullyautomatic firing.
.45 SMG
The .45 caliber submachine gun is comparable to the 9mm
SMG in almost every way. Built largely of glass-fiber
reinforced polymers, this lightweight submachine gun
provides the same reliability as the 9mm model with the
added punch of the larger .45 caliber round. The heavier bullet
provides superior penetration of armored targets with FMJ
rounds than the 9mm, despite having a lower muzzle velocity
and slower cyclical rate of fire. This model is equipped with
a fire mode selector allowing semiautomatic and fullyautomatic firing modes.
5
Suppressed 9mm SMG
This 9mm submachine gun is designed by a world-renowned
German manufacturer. It is preferred by many paramilitary
groups throughout the world for urban tactical engagements.
This versatile SMG can fire either full metal jacket or jacketed
hollow point 9mm pistol ammunition, but it lacks the stopping
power of the Colt Carbine. Its key advantage is its compact
design, which allows superior maneuverability in indoor
situations. This model is equipped with a fire mode selector
allowing semiautomatic and three-round-burst firing modes. It
also sports a sound and flash suppressor for when stealth
is paramount.
9mm SMG
Identical to the Suppressed 9mm SMG but without the
silencer and flash suppressor. Even though this weapon is
louder than its suppressed counterpart, the muzzle velocity is
slightly higher, allowing for better stopping power.
Pepper-ball Gun
The Pepper-ball gun is based on technology originally
designed for recreational paintball. Compressed carbon
dioxide ejects the ammunition at relatively high velocities.
The Pepper-ball gun allows officers to quickly deploy OC at
specific targets in more easily controlled quantities and at
significantly longer ranges than a grenade or standard pepper
spray. With its large ammunition hopper, this weapon never
needs to be reloaded under normal operating conditions.
Less-Lethal Shotgun
The less-lethal shotgun is a Benelli Nova pump-action
shotgun which is always loaded with less-than-lethal beanbag
rounds. It is most often used on an uncooperative suspect or
civilian. The specially-designated less-lethal shotgun is
necessary to eliminate errors that can occur from individually
loading lethal or less-than-lethal munitions into the same
weapon. To remind the operators that this particular weapon
is only to be loaded with less-than-lethal ammunition, it has
been painted green. The beanbag ammunition provides a
powerful blunt force impact on the target. This causes
extreme pain and disorientation.
6
Nova Pump
A relatively new design from Benelli, the Nova pump is the top
of the line in pump-action shotguns. Although it fires a bit
slower than the semiautomatic M4 Super 90, its attached
magazine extender allows the Nova pump to hold up to 8
shells at one time.
M4 Super 90
The Benelli M4 Super 90 tactical shotgun is a highly reliable
12-gauge shotgun that has proven itself time and again in
the field. This model features an auto loader, allowing for
semiautomatic firing of its five-round magazine. This
powerful weapon is capable of dealing extreme damage
quickly and accurately. It has only two drawbacks: its bulk
can make it difficult to handle in close quarters, its magazine
is relatively small.
GB36s Assault Rifle
The GB36s Assault Rifle is a lightweight, full-sized assault rifle
originally developed in the 1990s for the German Bundeswehr.
It is now world-renowned as an incredibly reliable all-around
assault rifle. Firing a mid-sized 5.56mm rifle round, this
weapon is equipped with a fire mode selector allowing for a
2-round burst as well as fully-automatic firing.
AK-47
The AK-47 was developed in the Soviet Union in 1947 and
became standard issue in the Soviet army in 1951. It has
remained in service in many third-world armies as well
as terrorist organizations around the world due to its
dependability and the ease with which it can be maintained. It
has a slower rate of fire and lower muzzle velocity than the
Colt M4A1, but it uses a higher-caliber bullet which makes it
comparable to its American counterpart at short ranges. Since
the weapon is not normally used by SWAT, it is not equipped
with a tactical flashlight.
Gal Submachine Gun
The Gal is a compact and reliable submachine gun that was
developed in the early fifties in Israel. It has a very high rate
of fire and can be hard to control when fired in full-auto
mode. This model is equipped with a suppressor, making it a
good choice for stealth. Since the weapon is not normally
used by SWAT, it is not equipped with a tactical flashlight. 7
SECONDARY WEAPONS
M1911 Handgun
The Colt M1911 handgun has been a mainstay in law
enforcement for decades. This .45 caliber weapon packs a
powerful punch and is the most common backup weapon for
SWAT officers. This semiautomatic weapon has an 8-round
magazine and can fire both full metal jacket and jacketed
hollow point ammunition.
Colt Python Revolver
The Colt Python is among the most famous of Colt revolvers
and was introduced in 1955. It is chambered for the powerful
.357 Magnum ammunition making it one of the most powerful
hand guns on the market. Its power is offset by its slow rate
of fire and arduous reload. It also it is not equipped with a
tactical flashlight.
Taser Stun Gun
The Taser stun gun works on the principal of Electro-Muscular
Disruption (EMD). It fires small electrodes into the target and
then sends a powerful electric charge down the thin wires.
The EMD effect causes involuntary contraction of the target's
muscle tissue regardless of an individual's pain tolerance or
mental focus. The effect is painful and demoralizing to
even the most aggressive suspects.The Taser has two key
drawbacks: it has a relatively short range and new electrodes
must be loaded after each shot.
9mm Handgun
This Austrian-designed handgun is largely made of high-tech
polymer plastics. This construction results in a weapon that is
incredibly easy to handle and manipulate. Although less
powerful than the Colt M1911, it boasts a 17-round magazine.
Its ease of use, accuracy and "safe-action" trigger has made
it a popular choice for law enforcement agencies.
8
Pepper Spray
While generally used for riot control, handheld pepper spray
canisters can be an effective tool for subduing uncooperative
targets. The active ingredient in pepper spray is Oleoresin
Capsicum or OC. OC is an inflammatory agent that causes
the eyes to swell up and close. It also causes a burning
sensation on any exposed skin. Due to its limited range and
area of effect, it is best used in addition to other non-lethal
devices to cause a suspect or hostage to comply.
Stinger Grenade
The sting grenade, or Stinger, is filled with many small
rubber balls. Upon detonation, these balls are ejected from the
grenade, bombarding targets with blunt force projectiles. The
rubber balls will not penetrate the skin but can cause dizziness,
disorientation and severe pain from the impact. While
considered less-lethal, the sting grenade can cause severe
injury if it detonates in very close proximity to someone.
Flashbang
The flashbang is a diversionary device that stuns and
disorients people with an explosive report and a brilliant flash.
People who are affected by the device can be temporarily
blinded and deafened by the blast, including your own squad
mates. However, targets wearing flash suppression goggles
won’t be affected. During this time, SWAT has a significant
tactical advantage over the affected persons. Flashbangs are
designed so that they will not fragment upon detonation.
However they can cause serious injury if detonated occurs in
close proximity to a person. Caution is advised.
CS Gas
This grenade emits Chlorobenzylidene malonitrile or CS.
CS is a chemical agent that causes tearing in the eyes and
irritation of the mucus membranes. Commonly known as
tear gas, this agent causes people to lose visual acuity and
have difficulty breathing. While under the influence of tear gas,
suspects are at a significant disadvantage when
encountering officers.
9
Door Wedge
This specially-designed tactical wedge is slid under the door
and then activated. The spring-loaded action flips up wedges,
preventing the door from opening in either direction. The
rubber coating along the bottom of the wedge increases
friction, making it extremely difficult to push open with brute
force. It can only be removed with a special SWAT tool kit,
reducing the risk of a suspect dislodging the device.
Optiwand
The optiwand is a sophisticated observation device that allows
officers to examine situations around corners and under
closed doors without exposing themselves to lines of fire. On
top of the device is a small LCD screen which displays the
images seen by the camera at the end of the expandable rod.
It is an invaluable tool for gathering intelligence on suspect
and civilian locations before performing dangerous clear
routines and potentially exposing your team to fire.
BREACHING EQUIPMENT
Shotgun
The breaching shotgun is a specially-modified, pump-action
shotgun designed to breach locked doors. The weapon fires
breaching ammo that is designed to quickly break into very
small pieces upon impact. This behavior reduces penetration
and increases damage upon impact with hard surfaces. These
factors make it ideal for breaking locks on doors without
penetrating the door and harming someone on the other side.
The toothed extender on the barrel allows officers to jam the
weapon into the door and ensures the correct distance from
the lock for the breaching ammo to be most effective. The
breaching shotgun’s compact design permits officers to carry
it on their backs, allowing it to be carried in addition to the
primary weapon.
C2 Explosives
The C2 breaching charge is a powerful and devastating
method of breaching a door. The compact, and speciallydesigned charge destroys the locking mechanism of the door
and forcefully opens the door at the same time. The noise
and shock of the detonation causes people on the opposite
side of the door to react in a similar manner to a flashbang
detonation, which can provide a tactical advantage for using
C2 instead of the breaching shotgun. The C2 breaching
charge is an explosive and can injure or kill anyone unlucky
enough to be directly behind the door.
TRAINING
Play the training mission and learn all the basic skills needed to play the game. It is highly
recommended that all officers complete this training course, where all the fundamentals
of commanding your element, or squad, are taught.
INSTANT ACTION
Play the most recent mission with the default options.
Clicking on this option will take you directly into the most recent mission you have
completed with the default options set. This will take you directly into the game. If you
have not completed any missions yet, this will take you to the tutorial.
CREATE AND PLAY YOUR OWN MISSIONS
With SWAT 4, you’re able to create your very own missions using a variety of options with
the Quick Mission Maker. There are a number of options that you can set. You can use
the map from that mission to create your very own scenario. You can even save these
missions and share them with your friends.
PLAY QUICK MISSION
Play missions that you have created with the Quick Mission Maker.
QUICK MISSION MAKER
You can create your own scenarios based on the single-player missions in the game.
10
11
EDIT
CIVILIANS
Scenario: Select an existing scenario from the list. Click on this text to sort the scenarios
alphabetically by name.
Use Campaign Settings:
Check this box to use the civilians specified in the
original mission.
Pack:
Click on this text to sort alphabetically by pack name.
Available Archetypes:
Play:
Play the selected scenario.
Any model from the game can be selected as a civilian.
Highlight the model type and click the right-facing arrow to
add it to the selected list.
New:
Create a new scenario.
Selected Archetypes:
Edit:
Edit the selected scenario.
The civilian types for your scenario. Highlight a civilian type
and click the left-facing arrow to remove it from the list.
Delete:
Delete the selected scenario.
Number of Hostages:
Adjust the minimum and maximum number of civilians that
appear in the level.
Morale:
Set the minimum and maximum resistance to compliance
yells. A morale of 1 means they will never give up unless their
morale is modified by less lethal weapons. Higher morale
score means they will almost never give up.
MISSION
Mission:
Select the map to use for this scenario.
Use Campaign Objectives: Check this box if you wish to use the campaign objectives
from the single-player mission.
SUSPECTS
Difficulty:
Select the difficulty for your scenario.
Use Campaign Settings:
Available Objectives:
Select a mission objective and use the right-facing arrow
button to move it to the selected mission objectives on
the right.
Check this box to use the suspects specified in the
original mission.
Available Archetypes:
The mission objectives for your scenario. Select an objective
and use the left-facing arrow button to remove it from the list.
Any model from the game can be selected as a suspect.
Highlight the model type and click the right-facing arrow to
add it to the selected list.
Selected Archetypes:
Entry Point:
Force Primary, Secondary (if available) or let the
player choose.
The suspect types for your scenario. Highlight a suspect type
and click the left-facing arrow to remove it from the list.
Number of Suspects:
Time Limit:
Set the time limit for the mission. Check the box if you do not
want any time restrictions.
Adjust the minimum and maximum number of suspects that
appear in the level.
Skill:
Set the skill level of the suspects in this scenario.
Morale:
Set the minimum and maximum resistance to
compliance yells.
Selected Objectives:
SQUAD
Lone Wolf:
Check this box to remove all officers from the squad and go
it alone.
Officers:
Click on an officer to add or remove him from the squad.
Loadout:
Select a predefined set of equipment for each officer.
12
Primary Weapon /
Backup Weapon:
Select the types of weapons the suspects can use.
SAVE
Scenario name:
Enter a name for the newly-created scenario.
Pack Name:
Select a pack or create a new one. Packs are collections of
custom missions created through the Quick Mission Maker by
you or other members of the SWAT 4 community.
13
Missions are saved with the .pak extension in the SWAT4\content\scenarios folder.
Share these missions with friends or download new ones that have been created by
other people. All scenarios must be placed in the scenarios folder for them to show up
in the Edit menu can be played through “play quick missions.”
Enter a note about the custom mission. This message will be
seen on the Mission screen when the mission is played. This
is a good place for you to enter information about the mission
for people who have downloaded your custom mission.
Notes:
Number of Rounds:
Game Type:
Set the number of rounds to be played on each map.
All game types are team-based, SWAT vs. Suspects.
Barricaded Suspects:
Both SWAT and the Suspects gain points by neutralizing or
arresting members of the opposing team. The winner is the
first team to reach the score limit or the team with the highest
score when the round timer ends.
VIP Escort:
One SWAT member is randomly selected to be the VIP. The
Suspects must arrest the VIP and hold him captive for two
minutes before they can assassinate him. SWAT must escort
the VIP to the extraction point in the mission area while
preventing the Suspects from arresting him. SWAT wins if the
VIP successfully reaches the extraction point or if the Suspects
kill the VIP without arresting and holding him for two minutes.
The Suspects win if they assassinate the VIP after arresting
and holding him for two minutes or if the VIP is killed by a
SWAT officer.
Rapid Deployment:
3 to 5 bombs are randomly placed around the mission area.
SWAT must locate and disable all bombs within the designated
time limit to win the round. If SWAT does not disable all of
the bombs within the designated time limit, the bombs will
detonate and the Suspects will win the round.
CO-OP:
This Cooperative mode allows you to play through the Single
Player missions with up to four other people.
Score Limit:
The team that reaches this score first before time runs out
wins the round.
Max Players:
The total number of players allowed to enter your game.
The maximum is 16.
Quick Round Reset:
If Number of Rounds is set to more than one, this setting will
start the new round on the same map without reloading. This
saves on loading time but all interactive elements of a level,
such open doors and broken windows, will remain in the same
state as the previous round.
LAN/Internet:
Play a multiplayer or cooperative game over the Internet or
Local Area Network.
Friendly Fire:
Modifies the damage inflicted by weapons fired on teammates.
MULTIPLAYER GAME
HOSTING A GAME
Server Name:
Type a name for the server. The default server name is
“SWAT 4 Server.”
Player Name:
Enter the name you would like to use to identify yourself in
multiplayer and cooperative games.
Password:
You can password-protect your server so only those who have
the password can join.
Available Map List:
Use this to determine the levels that you wish to use and the
order in which they will be played. Available maps are on the left.
Click on a map name to highlight it. A picture and brief
description of that level will be displayed on the right side of
screen. Click the right-facing arrow button to add a map to the
selected Map Rotation list on the right.
Map Rotation:
Round Time:
Selected maps are listed here. To remove a map from the list,
click on the map name to highlight it and then click on the leftfacing arrow button. The map name displayed in green will be the
first map that will be loaded. Double click any map name to make
that the first map loaded in the rotation.
This is the maximum time limit for the round.
Time Between Rounds: The time before the server loads the next map after the current
round ends. This can be bypassed when all players select Ready.
Mission Ready Time:
14
The time before a round starts. This time can be used to select
player equipment and wait for new players to join in. This can be
bypassed when all players select Ready.
15
Disable Respawn:
Show Enemy Names:
Only available in Barricaded Suspects game mode. Players
that are killed or arrested will not be able to rejoin until
the next round.
Names of enemies will be displayed on screen when the
crosshair is on them.
Show Teammate Names: Names of teammates will be displayed on screen when
the crosshair is on them.
Arrests Only
(Disable Damage):
Lethal weapons will not do any damage. The only method of
eliminating your opponent is by arresting them. This option is
not available in the VIP Escort multiplayer game type.
Use Primary Entry Point: Use the primary entry point for all maps that have two
entries in the Map Rotation list.
Update:
Update the server list.
Refresh:
Quickly update all of the data in the current list of servers
including ping, number of players and current maps.
Direct IP:
Join a specific IP address.
Filters:
Select any of the following filters for server lists: Max. Ping,
Hide Password Protected, Game Type, and Full. Select the
Check to confirm or X to cancel. Click Update for the filter to
take effect.
Internet/LAN:
Select whether to display Internet or Local Area Network
games.
Join:
Join the selected server.
JOINING A GAME
Password Protected:
A padlock icon will be shown to the left of the server name if
that server requires a password to join.
Server Name:
Lists the name of each server in a column. Select this text to
sort the list alphabetically based on the server name.
Players:
Ping:
Lists the number of players/max. players for each server in a
column. Select this text to sort the list in ascending or
descending order based on number.
Lists the ping of each server in a column. Select this text to sort
the list in ascending or descending order based on ping rate.
Game Type:
Lists the type of game mode in a column. Select this text to
sort the list alphabetically based on the server name.
Map Name:
Lists the current map on each server in a column. Select this
text to sort the list alphabetically based on map name.
IP address:
Lists the IP address of each server. Select this text to sort by
IP address.
Player Name:
Enter the name you want to be displayed for multiplayer and
cooperative games.
16
SETTINGS
AUDIO SETTINGS
Music Volume:
Increase or decrease the music volume in the game.
Sound Volume:
Increase or decrease the sound effects volume in the game.
Voice Volume:
Increase or decrease the voice volume in the game.
VIDEO SETTINGS
When you start Swat 4 for the first time, the settings are automatically set to the best
balance of performance and graphic quality. Changing these settings could
affect performance.
RENDER DETAIL
Choosing “Very High”, “High”, “Medium” or “Low” for the Render Detail video option
will automatically configure the individual rendering options for best performance
on various machine types (for example, choosing "Very High" render detail will choose
appropriate settings for a top-of-the-line machine and video card). When you choose
"Custom" Render Detail, the game will unlock all the individual rendering options (such as
Glow Detail, Texture Detail, etc) so that the user can customize each option individually to
his or her preference. Select from the four preset settings.
17
Screen Resolution:
Choose from 4 different screen resolutions (800x600, 1024x768,
1280x1024, 1600x1200).
GAME CONTROLS
Brightness:
Adjust the brightness.
CLASSIC COMMAND INTERFACE
Contrast:
Adjust the contrast.
Gamma:
Adjust the gamma.
Based on SWAT 3 controls, this interface uses hot keys to issue commands. Because all of
the commands are issued using the number keys in this mode, weapon and item selection
is moved to the function keys. All command prompts are shown in a small window at the
top left of the screen.
CUSTOM RENDER DETAIL SETTINGS
GRAPHIC COMMAND INTERFACE
Glow Detail:
This controls the quality of the "Glow" effect in the game. An
example of the Glow effect is the fuzzy glowing that you see
around the edges of neon signs in the game.
Issuing commands is very simple in SWAT 4. Simply use the right mouse button to bring
up the command interface and select the desired action. Styles 1-4 modify the way you
can open, select and close the GCI.
Bump Map Detail:
This controls how many objects in the game use bump mapping
(sometimes called normal mapping) and the amount of
detail in the bump mapping effect. Higher detail settings will
result in higher quality bump mapping, but will also slow down
rendering and increase load times.
Exit Menu Option:
This adds an exit option to the GCI, giving you an alternate way
to exit the command interface. This will take affect after you
restart the level.
Mouse Sensitivity:
Adjust the sensitivity of the mouse.
Texture Detail:
This controls the amount of detail in the in-game textures. Higher
detail settings will result in higher-quality visuals but will also
slow down rendering and increase load times.
Subtitling:
Enabling this option will turn on subtitles for spoken audio. This
will take affect after you restart the level.
Show Help Text:
World Detail:
This controls the visual complexity of the game environments. In
general, higher detail settings will result in more physical and
breakable objects being present in the world, as well as more
lighting effects and particle systems.
Move your mouse over a menu option. Text describing that
option will be shown in the bottom-left-hand corner of
the screen.
Invert Mouse Y-Axis:
Invert the up and down control of the mouse.
Always Run:
Change the default movement from walk to run. Faster movement
affects your aim.
Player Name:
Enter the name you want to be displayed for multiplayer and
cooperative games.
Voice Type:
Select the voice that is used for your officer in multiplayer and
cooperative games.
Connection Speed:
Select your type of Internet connection.
Keyboard Config.:
The Keyboard Config. menu allows you to customize your
in-game controls. Click on the function you want to change to
select it. Then click on the Change Key Binding button. Finish by
Allow PS2.0 Shaders:
18
On cards that support PS2.0, this option lets you disable that
capability and instead use the older Pixel Shader 1.1 rendering
model. In most cases, PS2.0 is faster and better looking, but
using PS1.1 on some video cards may result in faster rendering.
19
selecting the keyboard key or mouse button to which you would
like to assign the function. There are four separate keyboard
mapping screens: Movement, Interaction, Command and
Reserved. Note that keys listed under the Reserved tab cannot
be modified.
Reset to Defaults:
QUICK COMMAND
SWAT 4 uses context-sensitive commands that can be executed by pressing the spacebar.
The Quick Command is displayed in the lower-right portion of the screen. The color of the
square to the left of the text indicates whether the command will go to Red Team, Blue
Team or your entire element. As with the GCI, pressing Tab will cycle through your
available team options.
Use this to reset the default settings for that particular menu.
COMMAND LIST:
PLAYING THE GAME
COMMANDING YOUR TEAM
You are in charge of your squad, or element, in SWAT 4. A team will consist of the player
and a 4-man element made up of two teams of two, the Red Team and the Blue Team.
You can direct your commands to Red Team, Blue Team or the full element by
pressing the Tab key to cycle through each group. The color of the GCI will change to the
corresponding color.
TEAM VIEWPORTS
Members of your SWAT team are outfitted with a helmet-mounted camera. Pressing the
Insert key will access the viewport of Red Team. A small window will appear in the
upper-right-hand portion of the screen. The viewport will be labeled with the name of the
character whose you are viewing. The name will be written in the color of the team to
which the character belongs. Within this viewport, you will see what that character sees.
Pressing Insert again will toggle to the second member of that same team.
Press the Home key to access the Blue Team’s viewport, which works in the same way.
CONTROLLING TEAM MEMBERS THROUGH VIEWPORTS
You can issue commands through the viewports. Press the CAPS LOCK key to expand the
viewport. While expanded, you can use the mouse to look around from your officer’s
perspective and issue commands from that location. Press the CAPS LOCK key again to
return the viewport to its normal size and return control to the main screen.
While the cursor is in the viewport, players can use the mouse to move the cursor around
the view. Players can issue commands using this cursor in the same way they can in the
main viewport.
20
Fall In
Move To
Orders your squad to get in position around you.
Orders the selected squad to move to a specific location
determined by the position your targeting reticule when then
command is issued.
Cover
Commands the selected squad to provide cover for you while
you move.
Deploy
Opens the deploy menu to order the selected squad to deploy
grenades or tactical equipment.
Stack Up
Commands the selected squad to stack up on a corner or door
and hold the position until further orders are given. If the officers
stack up on a door, they will check to see if the door is locked
Pick Lock
Orders the officer to pick the lock on a locked door.
Move & Clear
Orders your selected squad to move through an area and clear
it of suspects.
Open & Make Entry Orders your selected squad to check the door and make entry if
the door is not locked. If the door is locked, your officers will
tell you so and will stop until you tell them to breach the door.
Open & Clear
Orders your selected squad to check the door and clear the
room of suspects if the door is not locked. If the door is locked,
your officers will stop and wait for you to order them to breach
the door.
Breach & Make Entry Orders your selected squad to breach the door and enter
the room.
Bang & Clear
Orders your selected squad to use a flashbang grenade before
entering the room to clear it.
Gas & Clear
Orders your selected squad to use a CS Gas Grenade before
entering the room.
Sting & Clear
Orders your selected squad to use a Sting Grenade before
entering the room.
Mirror Room
Orders your selected squad to use the Optiwand to scan for
suspects in a room. This is done on an open door.
Mirror Under Door
Orders your selected squad to use the Optiwand
underneath a closed door to scan for suspects.
Deploy Commands Orders your selected squad to deploy any of the following:
Pepper-ball gun, Taser, Flashbang, CS Gas Grenade, Sting
Grenade, Pepper Spray, C2 Explosive, Breaching Shotgun,
21
Less-Lethal Shotgun or the Door Wedge.
Restrain
Secure Evidence
Remove Wedge
Remove C2
Mirror Corner
Disable
Exit Mission
Orders your selected squad to restrain a suspect or hostage.
Orders your selected squad to secure evidence such as a
weapon.
Orders your selected squad to remove a Door Wedge from a
door.
Orders your selected squad to remove a C2 explosive charge
before it is detonated.
Orders your selected squad to deploy the Optiwand and scan
around a corner for suspects.
Orders your selected squad to disable an explosive device.
Use Key on Mission Exit door. This will end mission.
COOPERATIVE RESPONSES
Your teammates can respond with a positive or negative response once you have given
the command.
OTHER CONTEXT-SENSITIVE ACTIONS
When interacting with doors or blind corners, you may see an icon appear that
corresponds to one of the actions below.
Pointing at Locked Door with Toolkit
Pointing at Bomb with Toolkit
Pointing at Door with C2
Pointing at Door with Wedge
Pointing at Door with Breaching Shotgun
Pointing at Door with Optiwand
FIRE (Hold): Pick Lock
FIRE (Hold): Disable Bomb
FIRE (Hold): Set Charge
FIRE (Hold): Deploy Wedge
FIRE: Breach Door
FIRE (Hold) Mirror Under Door/
Around Corner
PAUSE MENU
Press Escape to bring up the Pause Menu. This screen brings up the Objectives and
Scores screen along with buttons for Settings, Resume and Abort.
On this screen, you will see your current objectives, procedures and team status as well as
a map of the area.
You can choose to abort your mission by clicking on the Abort button at the top of the
screen. This will take you directly to the debriefing screen which displays your score and
the status of any objectives during your mission.
22
PLAYING SWAT 4
It’s important to remember to follow SWAT procedure when on a mission. While SWAT 4
allows you to achieve the mission objectives using lethal force, some missions require
that hostages and suspects not be hurt. Following SWAT procedures can help to ensure
that innocent lives are not jeopardized while enforcing the law.
SWAT is a life-saving organization. Lethal force should be used only when the lives of
officers or innocent civilians are at stake, and Lethal firearms should be used only in
defense of life. The first course of action for any SWAT officer when encountering any
suspect in the field is to shout compliance (Default Key: Middle Mouse Button while
crosshairs are placed on target) to allow the suspect an opportunity to surrender
peacefully. Civilians must also be asked to comply at the scene of a crime in order to
ensure their safety as well as the safety of others. Once compliant, an individual may be
handcuffed by an officer. All suspects and hostages should be handcuffed by the officers
before the area is considered clear.
In order to satisfy the “Bring order to chaos” objective that is present on all career
missions, all suspects must be arrested or neutralized. If suspects are neutralized while
compliant or before given the chance to comply, a score penalty for violating SWAT protocol will be imposed at the end of the mission. To complete any civilian rescue
objectives (“Rescue all of the civilians” or the rescue of specific, named person), the
civilian(s) must be compliant and handcuffed. If any civilians are killed during a mission,
the mission will fail.
COMMANDING YOUR TEAM
As the Element Leader of your SWAT team, you are in command of your AI team
members. The aid of the AI officers in your element is crucial to your survival and
success. Your element is divided into the blue and red teams, each with two officers.
You may choose to give commands to the teams separately using the toggle command
targets key (Default Key: TAB) or to the element as a whole (known as “Gold”).
The quick command box in the lower right-hand corner is context-sensitive and will
change depending on what your crosshairs are targeting. The color of the square indicates
which team will receive your command. Pointing your crosshairs at a door will default to
the “Open and Clear” command appearing in this box and pressing the quick command
key (Default Key: SPACE BAR) will send the command to your teammates. Most general
orders can be given with the quick command key.
The graphical command interface can be used (Default Key: Right Mouse Button) to give
more specialized commands to your team members. Targeting a door and holding the
graphical command interface button will give you more options than are available to you
via the quick command box. You can order your team to open a door and deploy multiple
types of grenades before entering into a room, use their Optiwand to mirror under the
door for threats (if equipped in the pre-assault equipment loadout menu) and
23
much more.
SECURING EVIDENCE
During a mission, neutralized and compliant suspects will drop their weapons on the
ground. These weapons can be secured by walking up to them, targeting them and
pressing the Use key (Default Key: Middle Mouse Button). You can also order your team
members to secure weapons for you. There may also be objective items or weapons in a
mission that need to be secured before the objective can be completed.
USING TACTICAL EQUIPMENT
The use of tactical equipment is critical for successfully completing missions. Locked
doors can be breached by moving the door and targeting the lock. Targeting the lock high
will display a BREACH icon on the screen. Pressing and holding FIRE (Default Key: Left
Mouse Button) will result in your officer employing a noisy breaching item on the door
(such as a C2 Explosive). Targeting the lock low will display a PICKLOCK icon on the
screen. Pressing and holding FIRE will result in your officer picking the lock. Targeting the
foot of a door will display an OPTIWAND icon on the screen (if the Optiwand was selected
in during the loadout). Pressing and holding FIRE will result in your officer deploying the
Optiwand to mirror under the door. Your AI officers can also be ordered to use their
various tactical items during gameplay.
allow you to control the sniper with your mouse. Use the right mouse button to control
the zoom of the rifle.
You can also toggle viewports for each of your AI team members. Each officer has a
helmet camera through which you see from their point of view. You can toggle through the
helmet cams of the officers on both Red Team (Default Key: INSERT) and Blue Team
(Default Key: HOME). When controlling your officers through their viewports, you can give
commands remotely and employ more complex multi-team tactics (such as seizing control of a room that has multiple entrances).
PAUSE AND OBJECTIVE SCREEN
Pressing ESCAPE or the Display Objectives and Scores key (Default Keys: B, M, and O)
will bring up the objective screen. This screen will show the status of your mission
objectives, display the procedures totals, give the status of all officers in your element and
show the available map for the current mission. When using the ESCAPE key to access
this screen, you will have the options of changing your game settings and aborting the
current mission.
COMPLETING AND FAILING MISSIONS
TAKING DAMAGE
When you take damage during a mission, the image of your officer in your heads-up
display (HUD) will flash red in the area that sustained the damage. Taking damage to
different areas of the body will result in different negative effects. Taking damage to either
arm will lower your aiming accuracy and reduce the precision of the targeting reticule.
Taking damage in your legs will result in slower movement. If you take too much damage
during a mission, you will be killed, and the mission will fail.
Once all objectives are completed, a message will appear to notify you that the mission
can be finished. To end the mission, press the ESCAPE key and click the DEBRIEF button.
It is recommended that you secure all weapons and report all statuses to TOC before
debriefing to increase your final score. If you fail any mission objectives, you can end the
mission in the same way you can keep playing through the level. However, you cannot
successfully finish the mission until you restart the mission and complete all the
objectives. You can fail a mission by failing any mission objective, or by being killed.
REPORTING TO TOC
SCORING
Any time the status of any person during a mission changes, the new status should be
reported to TOC. Any civilians or suspects injured, dead or arrested must be reported by
targeting them and pressing the Use key (Default Key: Middle Mouse Button). If any of
your team members are incapacitated during a mission, not reporting them to TOC will
result in a score penalty at the end of the mission.
Your best score for every mission on each difficulty is saved and can be viewed from the
MISSION menu. You can get a better score by not injuring suspects or civilians, by
keeping yourself and your officers uninjured and by securing all weapons and reporting all
statuses to TOC.
TIPS AND TRICKS
SNIPERS AND VIEWPORTS
In any mission where snipers are present, the snipers will radio-in suspect sightings when
they occur. When this happens, you can press the toggle sniper viewport key (Default Key:
PAGE UP) to immediately bring up the viewport of the last-reported highground sighting.
You can bring up the sniper viewport at any time by using the same key. Some
missions have multiple snipers you can toggle through. When looking through a sniper
viewport, the control viewport key (Default Key: CAPS LOCK) will enlarge the viewport and
24
•
It is a good idea to have more than one AI officer is carry an Optiwand in case one is
incapacitated during a mission.
•
It is a good idea to Optiwand around blind corners. Your AI officers can be ordered to
Optiwand around most corners.
•
Any suspects caught behind a door that is being blown by C2 will either be killed or
momentarily stunned, depending on where they are standing in relation to the door.
25
•
Crouching, moving slowly and firing in short bursts keep the targeting reticule tight
and will make your shots more accurate.
•
Officers ordered to STACK UP against a door will also automatically check the lock and
report whether or not the door is open.
•
•
Grenades are best used for clearing rooms before entering. Make sure to select the
best grenade for the situation.
Most primary and secondary weapons are equipped with a flashlight. Use these to
illuminate dark areas that are difficult to see.
SWAT 4
CREDITS
IRRATIONAL GAMES,
LLC
Programming
John Abercrombie
Terrance Cohen
Carlos Cuello
Michael James
Dan Kaplan
Christopher Kline
Darren Lafreniere
Additional Programming
Henry Kaufman
Design
Bill Gardner
Paul Hellquist
Ian Vogel
Art
Steven Kimura
Joseph Kowalski
Sean Lattrell
Shawn Robertson
Mauricio Tejerina
Jed Wahl
Nathan Wells
Additional Art
Alexander Shoukas
Scott Sinclair
Liquid Development
Robb Waters
Music and Sound Design
Eric Brosius
Additional Audio By
Evan Buehler
26
Script
Sara Verrilli
Executive Producer
Kenneth S Rosman
Executive Producer
Ken Levine
Producers
Robert Irving
Paul Pawlicki
Rob Loftus
Senior Producer
Sara Verrilli
Associate Producer
Joseph Faulstick
Chief Technology Officer
Michael Heilemann
Marketing
Quality Assurance
Tim Franson
Keith Smith
Eric Kirchberg
S.W.A.T. Consultant
Kenneth A. Thatcher
Vengeance Engine
Programming:
Australia Team
Marc Atkin
David Beswick
Paul Dennison
Glenn Fiedler
Michael Johnston
Ryan Lancaster
Alex Luddy
Rowan Wyborn
SIERRA
ENTERTAINMENT
Production
Executive Vice President
of Worldwide Studios
Michael Pole
Vice President of
Production
Bret Berry
President of North America
Phil O' Neil
Vice President of Marketing
Koren Buckner
Senior Brand Manager
Lori Inman
Associate Brand Manager
John Choon
Marketing Coordinators
Keyur Shah
Kristin Bruno
Brand Manager, Europe
Antoine Molant
Senior Brand Manager,
Asia/Pacific
Chloe Rothwell
Public Relations
Director of Public Relations
Adam Kahn
Public Relations Manager
Sarita Churchill
27
Consumer Research
Research Manager
Linda Howard
Research Analyst
Eric Culqui
Creative Services
Kathy Carter-Humphreys
Kristy Cheng
Gretchen Clark
Elisabeth Miller
Nathan Gruppman
Hayley Sumner
Legal
Tracy Sargent
James Shaw
Rod Rigole
Kevin Crook
Pam Teller
Quality Assurance
Vice President of Studio Operations
Rich Robinson
QA Director
Gary Stevens
QA Senior Manager
James Galloway
QA Resources Senior Manager
Michael Gonzales
QA Supervisors
Chris Richardson
James Pasque
QA Managers
Wladia Summers
Igor Krinitskiy
QA Testers
Todd Allison
Abhishake Behl
Steven Baker
Kevin Boggs
Robert Bradbury
Bryan Bui
Brian Carr
Renny Chang
Gary Chen
Richard Cisneros
Channa De Silva
Minh Do
Brian Douglass
Jessica Eckstein
Russell-Roy Espinosa
Michael Fahrny
Duncan Field
Jim Gentle
Rick Gusa
Richard Hager
Jeff Hartmann
Brian Kang
Todd Langley
Kevin Lo
Sue Lowe
Chad Martin
Eduardo Mayor
Troy Mirmirani
Marc Nagel
James Ong
Sok Phuy
Ben Saurer
Robert Scott
Vinnie Shahzad
Alex Sharrigan
Dustin Thomas
Dwayne Zamora
Vivendi Universal
Publishing Certification
Glenn Dphrepaulezz
Cyra Talton
Brandon Valdez
Localization
Project Leads
Tharlie Richardson
Calvin Wong
28
Senior Project Managers
Fiachra Synnott
Catherine Walsh
Media Productions at VUG
Head of Talent Affairs
Tom Keegan
Casting and Voice Direction
Eric Weiss
Dialogue Supervisor
Andrea Toyias
Recording Engineer
Patrick McNulty
Dialogue Editor
Rich Seitz
Video Editor
Tonya Stumphauzer
T.O.C.
Nate Wells
Dispatch, 911 Operator,
TV Reporter, Female Hostage 2
Kari Walgren
Lawrence Fairfax, Male Suspect 2
Adam Arian
Hadeon Koshka, Gary Altman, Highground
Nick Guest
Alice Jenkins, Wendy Kline,
Female Hostage 3
Patricia Scanlon
Andrew Taroone, Male Suspect 4,
Allen Kruse
Fed Tatasciore
Voice Actors
SWAT Player
Justin Gross
SWAT Officer
Zack "Hollywood" Fields
Chris Edgerly
SWAT Officer
Tony "Subway" Girard
Nolan North
SWAT Officer
Steve "Gramps" Reynolds,
Theodore Sterling
Scott Bullock
SWAT Officer
Allen "Python" Jackson,
Jean Trouffant
Michael Ralph
SWAT Commander
David Pizzuto
Male Suspect 3, Alex Jimenez,
Carl Jennings
Armando Valdez-Kennedy
Hyun Jun Park
Keone Young
Female Hostage, Melinda Kline
Jenna Lamia
Male Hostage 3, Warren Rooney,
James Bettencourt Jr.
Andy Milder
Male Hostage 1, Phone Caller 1
Michael McMillian
Male Hostage 2, Louie Baccus,
Lawrence Adams
Mike Starr
Gladys Fairfax, Sharon Conway,
Female Hostage 4
Rhoda Gemignani
29
Male Suspect 1, Lian Niu, Simon Gowan
Ron Yuan
Special Thanks To
David O'Toole
Doug Rogers,
NVIDIA
Jeff Royle, ATI
Irrational Games Australia
Jonathan Zarge, ATI
10-David
(www.10-david.com)
Dan Lewis
Christopher Baker,
Metro S.W.A.T.
Jay Brenner,
Metro S.W.A.T.
Matthew Balint
Technical Support
Phone: (800) 630-0811
M–F, 6 a.m.–6 p.m., EST
GAMESPY
INDUSTRIES, INC.
Customer Service
Account Executive
Art Santos
Internet
Middleware SDK Engineer
Bill Dewey
Mail
Bryn Bennett
Jon Chey
David Eberly,
Magic Software
Stephen Ewart,
Havok Technical Support
Fred Fierst
and the staff of Fierst,
Pucci and Kinder
Epic Games
VIVENDI UNIVERSAL GAMES CUSTOMER SUPPORT CAN BE
REACHED IN THE FOLLOWING WAYS:
The BBE Squad
Benelli USA
http://www.benelliusa.com
Brian Benincasa and the
Microsoft Tech team
CUSTOMER SUPPORT
Developer Support Manager
Joost Schuur
Phone: (800) 757-7707
M–F, 6 a.m.–6 p.m., EST
http://support.vugames.com
VU Games
4247 South Minnewawa Avenue
Fresno, CA 93725
Client Services Manager
Kay Richey
QA Manager
Orlando Rojas
Project Manager
Tom Hitchcock
Keith Galocy,
NVIDIA
Dave Grenewetzki
Mikhail Islam
Kate Kellogg
Meredith Levine
Blaine Loder
Ross O'Dwyer,
Havok Technical Support
30
31
LICENSE AGREEMENT
YOU SHOULD CAREFULLY READ THE FOLLOWING END USER LICENSE AGREEMENT
BEFORE INSTALLING THIS SOFTWARE PROGRAM. BY INSTALLING, COPYING, OR
OTHERWISE USING THE SOFTWARE PROGRAM, YOU AGREE TO BE BOUND BY THE
TERMS OF THIS AGREEMENT. IF YOU DO NOT AGREE TO THE TERMS OF THIS
AGREEMENT, PROMPTLY RETURN THE UNUSED SOFTWARE PROGRAM TO THE
PLACE OF PURCHASE OR CONTACT VIVENDI UNIVERSAL GAMES CUSTOMER SERVICE AT (800) 757-7707 FOR A FULL REFUND OF THE PURCHASE PRICE WITHIN 30
DAYS OF THE ORIGINAL PURCHASE.
This software program and any files that are provided by Sierra Entertainment, Inc., to you by on-line transmission or
otherwise to ‘patch,’ ‘update,’ or modify the software program, as well as any printed materials, on-line or electronic
documentation, and any and all copies and derivative works of such software program and materials are the copyrighted work of Sierra Entertainment, Inc. and/or its wholly owned subsidiaries, or its suppliers (“Sierra”). All use of the
Program is governed by the terms of the End User License Agreement which is provided below ("License Agreement").
The Program is solely for use by end users according to the terms of the License Agreement. Any use, reproduction or
redistribution of the Program not in accordance with the terms of the License Agreement is expressly prohibited.
4.
END USER LICENSE AGREEMENT
5.
1. Limited Use License. Sierra hereby grants, and by installing the Program you thereby accept, a limited, non-exclusive license and right to install and use one (1) copy of the Program for your use on either a home or portable computer. The Program also contains a “Campaign Editor” (the "Editor") that allows you to create custom levels or other
materials for your personal use in connection with the Program ("New Materials"). All use of the Editor or any New
Materials is subject to this License Agreement. In addition, the Program has a multi-player capability that allows
users to utilize the Program over the Internet. Use of the Program over the Internet is subject to your acceptance of
a Terms of Use Agreement. Sierra reserves the right to update, modify or change the Terms of Use Agreement at
any time.
2. Ownership. All title, ownership rights and intellectual property rights in and to the Program and any and all copies
thereof (including but not limited to any titles, computer code, themes, objects, characters, character names, stories, dialog, catch phrases, locations, concepts, artwork, animations, sounds, musical compositions, audio-visual
effects, methods of operation, moral rights, any related documentation, and “applets” incorporated into the
Program) are owned by Sierra or its licensors. The Program is protected by the copyright laws of the United States,
international copyright treaties and conventions, and other laws. All rights are reserved. The Program contains certain licensed materials, and Sierra’s licensors may protect their rights in the event of any violation of this Agreement.
The Program may access websites owned, controlled by, or operated by licensed affiliates of Sierra, and receive
patches and/or updates to the Program from these websites. All patches, updates or other downloadable material
used by, or incorporated into, the Program are the copyrighted property of Sierra, who reserves all rights therein,
and shall be governed by the terms and conditions of this Agreement.
3. Responsibilities of End User.
A. Subject to the Grant of License hereinabove, you may not, in whole or in part, copy, photocopy, reproduce, translate, reverse engineer, derive source code from, modify, disassemble, decompile, create a source code equivalent
of, create derivative works based on, or remove any proprietary notices or labels from the Program without the
prior consent, in writing, of Sierra.
B. The Program is licensed to you as a single product. Its component parts may not be separated for use on more
than one computer.
C. You are entitled to use the Program for your own use, but you are not entitled to:
32
6.
7.
8.
9.
(i) sell, grant a security interest in or transfer reproductions of the Program to other parties in any way, nor to
rent, lease or license the Program to others without the prior written consent of Sierra;
(ii) exploit the Program or any of its parts for any commercial purpose, including, but not limited to, use at a
cyber café, computer gaming center or any other location-based site (Sierra may offer a separate Site License
Agreement to permit you to make the Program available for commercial use; contact Sierra for details);
(iii) use or allow third parties to use the Editor and the New Materials created thereby for commercial purposes,
including, but not limited to, distribution of New Materials on a stand-alone basis or packaged with other software or hardware through any and all distribution channels, including, but not limited to, retail sales and online electronic distribution, without the express written consent of Sierra;
(iv) host or provide matchmaking services for the Program or emulate or redirect the communication protocols
used by Sierra in the network feature of the Program, through protocol emulation, tunneling, modifying or
adding components to the Program, use of a utility program or any other techniques now known or hereafter developed, for any purpose, including, but not limited to, network play over the Internet, network play
utilizing commercial or non-commercial gaming networks, or as part of content aggregation networks, without the prior written consent of Sierra; and
(v) create or maintain, under any circumstance, more than one simultaneous connection to any hosting service
utilized for on-line play. All such connections, whether created by the Program or by other tools and utilities,
may only be made through methods and means expressly approved by Sierra. Under no circumstances may
you connect, or create tools that allow you to connect, to the hosting service’s private binary interface or interfaces other than those explicitly provided by Sierra for public use.
Program Transfer. You may permanently transfer all of your rights under this License Agreement, provided the
recipient agrees to the terms of this License Agreement and you agree to remove the Program and any New Materials
from your home or portable computer.
Termination. This License Agreement is effective until terminated. You may terminate the License Agreement at any
time by destroying the Program and any New Materials. Sierra may, at its discretion, terminate this License
Agreement in the event that you fail to comply with the terms and conditions contained herein. In such event, you
must immediately destroy the Program and any New Materials.
Export Controls. The Program may not be re-exported, downloaded or otherwise exported into (or to a national or
resident of) any country to which the U.S. has embargoed goods, or to anyone on the U.S. Treasury Department’s
list of Specially Designated Nationals or the U.S. Commerce Department’s Table of Denial Orders. By installing the
Program, you are agreeing to the foregoing and you are representing and warranting that you are not located in,
under the control of, or a national or resident of any such country or on any such list.
Customer Service/Technical Support. "Customer Service" as used herein may be provided to you by Sierra representatives by telephone and/or by electronic message (e-mail). "Technical Support" may be provided to you by Sierra
by telephone, by electronic message (e-mail), or by posting of information related to known technical support issues
on a website. Unless otherwise stated in the Program's packaging or in the Program's user manual, nothing herein
shall be construed so as to place a duty upon Sierra to provide Customer Service or Technical Support via a toll-free
telephone number for an unlimited period of time.
Duration of the “On-Line” Component of the Program. This Program contains an “on-line” component that allows
you to utilize the Product over the Internet utilizing servers and software maintained by Sierra and or its affiliates.
Sierra may, in its sole discretion, provide the servers and software technology necessary to utilize the “on-line” component of the Program, or Sierra may license to third parties the right to provide the servers and software technology necessary to utilize the “on-line” component of the Program. However, nothing contained herein shall be construed so as to place an obligation upon Sierra to provide the servers and software technology necessary to utilize
the “on-line” component beyond the time that the Program is Out of Publication. The term “Out of Publication” as
used herein shall mean that the Program is no longer being manufactured by Sierra.
Limited Warranty. Sierra expressly disclaims any warranty for the Program, Editor and Manual(s). The Program,
Editor and Manual(s) are provided "as is" without warranty of any kind, either express or implied, including, without
limitation, the implied warranties of merchantability, fitness for a particular purpose, or noninfringement. The entire
risk arising out of use or performance of the Program and Manual(s) remains with the User; however, Sierra warrants up to and including 90 days from the date of your purchase of the Program that the media containing the
Program shall be free from defects in material and workmanship. In the event that the media prove to be defective
33
during that time period, and upon presentation to Sierra of proof of purchase of the defective Program, Sierra will
at its option 1) correct any defect, 2) provide you with a product of equal or lesser value, or 3) refund your money.
Some states do not allow the exclusion or limitation of implied warranties or liability for incidental damages, so the
above limitations may not apply to you.
10. Limitation of Liability. NEITHER SIERRA ENTERTAINMENT, INC. NOR ITS PARENT, SUBSIDIARIES OR AFFILIATES
SHALL BE LIABLE IN ANY WAY FOR LOSS OR DAMAGE OF ANY KIND RESULTING FROM THE USE OF THE PROGRAM, THE EDITOR OR AN AUTHORIZED ON-LINE GAME NETWORK, INCLUDING, BUT NOT LIMITED TO, LOSS
OF GOODWILL, WORK STOPPAGE, COMPUTER FAILURE OR MALFUNCTION, OR ANY AND ALL OTHER COMMERCIAL DAMAGES OR LOSSES. ANY WARRANTY AGAINST INFRINGEMENT THAT MAY BE PROVIDED IN SECTION 2-312(3) OF THE UNIFORM COMMERCIAL CODE AND/OR IN ANY OTHER COMPARABLE STATE STATUTE IS
EXPRESSLY DISCLAIMED. FURTHER, SIERRA ENTERTAINMENT SHALL NOT BE LIABLE IN ANY WAY FOR THE
LOSS OR DAMAGE TO PLAYER CHARACTERS, ACCOUNTS, STATISTICS OR USER PROFILE INFORMATION
STORED ON AN AUTHORIZED ON-LINE GAME NETWORK. SIERRA ENTERTAINMENT SHALL NOT BE RESPONSIBLE FOR ANY INTERRUPTIONS OF SERVICE, INCLUDING, BUT NOT LIMITED TO, ISP DISRUPTIONS, SOFTWARE
OR HARDWARE FAILURES, OR ANY OTHER EVENT WHICH MAY RESULT IN A LOSS OF DATA OR DISRUPTION
OF SERVICE. Some states do not allow the exclusion or limitation of incidental or consequential damages, or allow
limitations on how long an implied warranty lasts, so the above limitations may not apply.
11. Equitable Remedies. You hereby agree that Sierra would be irreparably damaged if the terms of this License
Agreement were not specifically enforced, and therefore you agree that Sierra shall be entitled, without bond, other
security, or proof of damages, to appropriate equitable remedies with respect to breaches of this License Agreement,
in addition to such other remedies as Sierra may otherwise have available to it under applicable laws. In the event
any litigation is brought by either party in connection with this License Agreement, the prevailing party in such litigation shall be entitled to recover from the other party all the costs, attorneys’ fees and other expenses incurred by such
prevailing party in the litigation.
12. Limitations on License. Nothing in this License Agreement shall preclude you from making or authorizing the making of another copy or adaptation of the Program, provided, however, that (1) such new copy or adaptation is created as an essential step in your utilization of the Program in accordance with the terms of this License Agreement and
for NO OTHER PURPOSE; or (2) such new copy or adaptation is for archival purposes ONLY and all archival copies
are destroyed in the event of your Transfer of the Program, the Termination of this Agreement or other circumstances
under which your continued use of the Program ceases to be rightful.
13. Miscellaneous. This License Agreement shall be deemed to have been made and executed in the State of California,
and any dispute arising hereunder shall be resolved in accordance with the law of California. You agree that any claim
asserted in any legal proceeding by one of the parties against the other shall be commenced and maintained in any
state or federal court located in the State of California, County of Los Angeles, having subject matter jurisdiction with
respect to the dispute between the parties. This License Agreement may be amended, altered or modified only by an
instrument in writing, specifying such amendment, alteration or modification, executed by both parties. In the event
that any provision of this License Agreement shall be held by a court or other tribunal of competent jurisdiction to be
unenforceable, such provision will be enforced to the maximum extent permissible, and the remaining portions of
this License Agreement shall remain in full force and effect. This License Agreement constitutes and contains the
entire agreement between the parties with respect to the subject matter hereof and supersedes any prior oral or written agreements.
NOTES
You hereby acknowledge that you have read and understand the foregoing License Agreement and agree that the
action of installing the Program is an acknowledgment of your agreement to be bound by the terms and conditions
of the License Agreement contained herein. You also acknowledge and agree that this License Agreement is the
complete and exclusive statement of the agreement between Sierra and yourself and that the License Agreement
supersedes any prior or contemporaneous agreement, either oral or written, and any other communications
between you and Sierra.
34
35
NOTES
36
NOTES
37
NOTES
38
NOTES
39