1
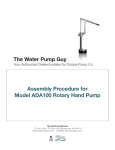
INSTALLATION PROCEDURE
FOR MODEL ADA100 ROTARY HAND PUMP
SIMPLE PUMP COMPANY
1140 Amarillo Drive, Gardner ville, Nevada 89460-7504
Phone: 877-492-8711 (toll free) or 775.265.4908
Mon-Fri: 8am-5pm PST (GMT/UTC -8hours)
Fax: 888.826.1444 (toll-free)
[email protected] • www.simplepump.com
TABLE OF CONTENTS
page 2
Introduction
3
Section 1: How We Shipped the ADA100
4
Section 2: Inspecting the Existing System / Removal of Old Pump
4
Section 3: Replacing The Existing Well Cover.
5
Section 4: Pump Cylinder, Drop Pipe Installation.
5
Section 5: Pump Head Installation.
7
Section 6: Pumping Water. Finishing Touches
9
© Simple Pump Company
INTRODUCTION
Thank you for purchasing a Simple Pump. We are extremely proud of the high quality
products that we manufacture. We have installed our pumps in a variety of well types
and sizes and our instructions are a result of installation experience and input from the
USDA-FS-MTDC. Please carefully read through these instructions. Your time will be
well spent. At any time, if you think you are overwhelmed, give us a call or get the
help of a professional pump installer.
The ADA100 Rotary Hand Pump was developed in concert with the USDA-FS-MTDC in
Missoula, Montana. The ADA100 is designed to deliver Safe Drinking Water Act (SDWA
- chemical-free) drinking water for the physically-challenged or anyone who cannot
operate a lever arm pump due to the high input force required with old-fashioned, cast
iron lever arm pumps. ADAAG (14.15.4) defines that an accessible hand pump must
be able to be operated with a maximum of 5 lbs. of force and the control height must
fall between 28”-40”. The axis of rotation of the 6” handle crank must fall 34” above
the ground. With the ADA100, the input force required to deliver drinking water in 4-8
ounce increments, from 100 feet, is less than 5 lbs. The access elevation can be adjusted to fall within 28”-40”. The design of the pump drive system is intended to be
robust allowing for long-term useful life in the outdoors.
We will be referring to parts by their part number and name. Use the attached parts
list to identify parts as you read through these instructions.
ASSEMBLY PARTS LIST
P1
P2
P3
P9
P10
P11
D1
D2
D3
D5
Pumping Cylinder Assembly (SIM040, SIM044, SIM047, SIM043-1, SIM043)
Pump Head (installed in cabinet, SIMA01)
Top Pump Rod (SIM020)
Well Cover (SIMA10–6” or SIM0A14-8”)
Taper Flange (SIMA11)
Safety Tool
Standard Drop Pipe
Sucker Rod with male and female fused ends
Sucker Rod Guide
Top Drop Pipe
REQUIRED TOOLS AND SUPPLIES
3” pocket mirror
Cutting torch or reciprocating saw (Sawzall)
Flat file or hand grinder
Bleach solution-50% bleach /50% water
One pipe wrench
One pair of channel locksTwo pair of vise grips
Hack saw & PVC cement (may be required)
One set of Allen wrenches
Safety tool (P11)
Teflon tape
Crescent wrench
SECTION 1: HOW WE SHIPPED THE ADA100
The ADA100 was shipped to you in two containers. The first is a spiral-wound paper
tube measuring 108” in length X 7” in diameter, weighing up to 52lbs, containing the
9’ drop pipe kits. The weight will vary depending on the number of drop pipe kits. The
ends of this tube have been taped and stretch-wrapped to survive the rigors of shipping. The second box is a corrugated shipper measuring 36” x 16” x 12”, weighing approximately 90lbs. This box contains the pump cylinder, piston, piston rod, well cap,
taper flange, PVC adapter and rotary pump drive system.
SECTION 2: INSPECTING THE EXISTING SYSTEM / REMOVAL OF
OLD PUMP
TOOLS / SUPPLIES NEEDED:
3” pocket mirror, cutting torch or reciprocating hack saw (Sawzall)
In this section you will remove your existing pump and well cover and inspect your
well for any obstacles that might obstruct the installation of the ADA100.
a)
Remove your existing well cover. There are so many styles, you will have to figure this
one out on your own. It may be necessary to use a cutting torch or reciprocating hack
saw to remove the old pump from the casing. When cutting the existing casing, be
sure to make your cut at approximately 16 inches from the ground as this will result
in a desired final elevation of crank arm drive shaft point of rotation between 32”-36”.
b)
Using a mirror reflecting the sun (don't laugh it's the best way), shine down the casing. If you have a straight well, you can see the water reflecting as deep as 200 feet.
Now that you have determined that you have a relatively unobstructed path to the
water, you can proceed.
c)
In our experience, the most efficient way to remove the existing pump is to contact a
local well drilling company. They will have a vehicle equipped with a hoist greatly facilitating the removal of the drop pipe string. The most difficult step in the installation of the ADA100 accessible hand pump is the removal of the existing hand pump.
Again, in traditional hand pumps, such as the Monitor pump, galvanized steel drop
pipe is used. Therefore, the drop pipe string is very heavy. If the well is relatively shallow, the drop pipe string can be removed by hand. Consult the user’s manual for the
existing pump for more specific directions on removal. The well driller will also be
able to extend or shorten the well casing (tell them your requirements before they get
to the site so they bring appropriate equipment). The top of the casing is 16 inches
above ground. They will also be able to make the top of the well casing level if asked.
This will ensure that the pump will be perpendicular to the ground upon installation.
Note: Due to some adjustability in the pump height, the top of the well casing could
fall in a range of 14-18 inches above ground and it will be possible to position the handle shaft at the proper height of 34” above ground level.
SECTION 3: REPLACING THE EXISTING WELL COVER.
TOOLS / SUPPLIES NEEDED
Flat file or hand grinder
a)
After cutting the casing in Section 2, inspect the outer rim of the well casing. The
ADA100 well cover is made to fit a standard 6" pipe. The casing should measure 6-5/
8" on the outside diameter. Your new cover has 1/16" clearance. Well drillers often
leave torch slag on the casing. This needs to be removed if it protrudes beyond the
outside diameter. A sharp flat file will remove it. A hand grinder will also remove the
slag very quickly. Make sure the cut is level.
b)
Install the ADA100 well cap to the casing using the four Allen head set screws. The ¾”
male PVC plug in the cover is for water testing access after the ADA100 is in place.
The ADA100 well cover incorporates a taper lock design to hold the ADA100 at the
proper elevation with approximately 10 inches of height adjustment. The taper lock
collar should be installed on the 2¼ ” O.D. riser tube about 2” up from the bottom of
the threads on the riser tube in anticipation of a later assembly step. It may be necessary to use a large flat head screwdriver to slightly pry open the gap in the taper lock
collar for easier installation past the male NPT threads.
SECTION 4: PUMP CYLINDER, DROP PIPE INSTALLATION.
In this section we will review the installation of the entire string of new drop pipe with
the pump cylinder at the bottom. Be extremely cautious during this sequence…dropping the entire string down the well is easy to do and once dropped they are almost
impossible to retrieve. Follow these directions!
TOOLS / SUPPLIES NEEDED
One pair of channel locks, one pipe wrench, two pairs of vise grips, safety tool (P11),
Allen wrench set, Teflon tape, one gallon bleach solution made up of 50% chlorine
bleach and 50% water.
Before starting, let's identify and organize the parts that we will need. On the ADA100,
the drop pipes are all identical except the one that will be used on the top (D5). This
one has male threads on both ends…1” threads on the bottom end, 1-¼” threads on
the top end. A 1/16” diameter weep hole has been drilled at a point three feet down
from the top fitting. The weep hole location is marked with magic marker.
a)
Lay out all of your pipes with the capped ends away from you.
b)
Take the pump cylinder (P1) with piston rod male threads protruding and thread on a
female sucker rod end. Tighten the sucker rod couplers with two pairs of vice grips.
Tighten to the point where the two fittings are shoulder–to-shoulder. Do not over
tighten.
c)
Apply Teflon tape and thread the drop pipe into the pump cylinder. Be careful not to
cross thread. Hand tighten the PVC drop pipe into the SS body of the pump while
holding the pump body with one channel lock or pipe wrench.
d)
Pour the bleach solution over the pump cylinder. (Watch your clothes.)
e)
(two persons) Now stand the assembly on end with the pump cylinder at the bottom,
and insert the assembly into the new well cover through the 2-3/4” hole. When the
pump passes through the port, slide the safety tool over the pipe and let it lay on the
well cover. As the pipe is lowered, the safety tool will stop the drop pipe at the coupling. You can now let go of the drop pipe.
f)
You should be looking at a female coupling with a male sucker rod end protruding
about 4". (The piston rod should be pushed to the bottom of the pump cylinder if it is
not already there). Now take a sucker rod guide (D3) and slide it over the protruding
rod and into the female coupling. Then take a sucker rod with female end and thread
this onto the protruding male sucker rod end. Tighten the sucker rod couplers (DO
NOT grip on the fiberglass rod) with two pairs of vice grips until the male and female
sucker rod couplers are shoulder-to-shoulder. Do not over tighten. Do not crush either the stainless steel fittings or the fiberglass rod.
g)
Take another section of standard drop pipe (D1) and stand on end with the blue plastic cap down. With one person holding the pipe upright over the female coupling in
the well cover held in place by the safety tool, the other person can remove the blue
plastic cap. Apply Teflon tape and then thread both pieces of drop pipe together making sure they are not cross threaded. Hand tighten the newly-added drop pipe while
holding the outside of the female fitting of the already-assembled drop pipe with one
pair of vise grips. DO NOT TIGHTEN TO MORE THAN 5/8” OF THREAD ENGAGEMENT
OR YOU WILL DISTORT THE ROD GUIDE. Do not let the coupling spin on the safety
tool, as it can work its way out. Lift the pipe string while the other person removes
the safety tool. As soon as the coupling passes through the port, re-position the
safety tool and hold it until the next coupling approaches. As the next coupling nears
the safety tool, the other person can grab the sucker rod and pull upward helping to
support the load and to keep the other person from pinching his fingers as the coupling comes into contact with the safety tool.
NOTE: This process is repeated for each section of standard drop pipe. When you suspect that you might be near your water level, pull up on the sucker rod at any time. If
you are not in the water yet, the rod will fall very quickly. When you are in water, the
rod will fall more slowly. Sometimes, as the pipe is lowered, a gurgling sound can be
heard when the pump is in water. You can also stroke the rod repeatedly and water
will be pumped up the string. If you are in water, it will become harder to stroke after
ten strokes or so. The pipe string is also much heavier with water in it.
DO NOT OVER TORQUE THE SECTIONS OF DROP PIPE AS THIS CAN DISTORT THE
ROD GUIDE AND CAUSE SEVERE BINDING. THE MALE NPT THREADS ARE TAPERED
AND EXCESSIVE TORQUE IS NOT NECESSARY TO PREVENT LEAKAGE. TIGHTEN TO A
MAXIMUM OF 5/8” OF THREAD ENGAGEMENT.
h)
When you are ready for the top drop pipe, install it just like the others. A rod guide is
required in the top fitting. Linear alignment of the top end of the top sucker rod will
be controlled by the ¾” shaft and the rod gland at the pump head and the last, top
rod guide. Lower this drop pipe down to the safety tool just like the others completed
so far.
SECTION 5: PUMP HEAD INSTALLATION.
In this section we will review the installation and assembly of the pump head and drive
system.
TOOLS / SUPPLIES NEEDED
One pair of channel locks, two pair of vise grips, crescent wrench, Allen Wrench set, (a
hack saw and PVC cement may be required in section c below)
a)
Find the 3/4" diameter top pump rod (P3) and thread it onto the sucker rod at the well
cover. Tighten with two pairs of vise grips. Grip the 3/4" rod only at the upper end
where flats have been milled for a crescent wrench.
b)
Apply Teflon tape to the male thread at the top of the drop pipe string. Thread the 11/4” female end of the 12-1/2” PVC adaptor onto the 1-1/4” male end of the drop
pipe string. The female/opposite end of the adaptor has been bushed to 2” to attach
to the male/bottom of the 2” riser tube. We have provided a 1-1/4” slip coupler that
can be used (if necessary) to shorten the PVC adaptor if for some reason the pump
piston is operating too close to the top of the pump cylinder. Two of these adaptors
and a short length of 1-1/4” PVC pipe can be used (if necessary) to lengthen the PVC
adaptor if for some reason the pump piston is operating too close to the bottom of
the pump cylinder.
c)
(two persons) Apply Teflon tape to the 2” male thread on the riser tube. Slide the
pump head / cabinet assembly over the 3/4" shaft being careful to guide the ¾” shaft
through the rod gland mounted inside the pump head which is mounted in the bottom of the cabinet. The cabinet weighs 50lbs…so be careful.
d)
Once the ¾” rod is inserted through the rod gland (3” is ideal), with a 3/16” Allen
wrench, loosely tighten the three Allen head bolts holding the taper flange to the well
cover. This is a snug fit. Rotate the assembly counterclockwise if needed to arrive at a
final elevation of approximately 34” as measured from the ground to the input crank
drive shaft centerline. Snug up the three Allen head bolts to hold the elevation until
the final function check.
e)
Install the pre-assembled crank handle, crank arm, drive shaft, bearing housing,
counter-weight assembly through the 2-1/8” hole in the cabinet (from the inside-out)
with the crank handle leading. Tighten the bearing housing to the cabinet wall using
four 5/16”-18 X ¾” Allen head bolts. Do not cross thread.
f)
After positioning the two cam rollers in the yoke tracks, install the yoke to the ¾” rod
by tightening the ¾” rod using a crescent wrench (gripping only on the flats of the top
end of the rod). A few early models had right-hand threads on the yoke and the ¾”
rod. Later models had left-hand threads on the yoke and the ¾” rod. Left-hand
threads, when tightened, will not tend to untighten sucker rod connections.
g)
Tighten all bolts and connections except for the three bolts in the taper lock on the
well cover that were left snug in an earlier step.
h)
Rotate the crank arm to bring water to the surface. The cam roller in the crank arm
has been installed at the maximum stoke / rotation position which is at the end of the
crank arm. This position describes or results in a cam roller rotation path of approximately six inches in diameter, resulting in a stoke of approximately six inches in
length. Ideally, this six inch stroke should be in the center of the sixteen inch available length of pump cylinder. If the crank arm does not rotate freely, it is likely that
the piston is not centered in the pump body and the piston is hitting either the bottom or top of the cylinder. There is one way to re-position the piston relative to the
pump cylinder…by increasing or decreasing the length of the 12-1/2” PVC adaptor
threaded into the bottom of the riser tube. (PVC slip coupling fitting included, but you
must use locally-sourced PVC cement). We have provided a 1-1/4” slip coupler that
can be used (if necessary) to shorten the PVC adaptor if for some reason the pump
piston is operating too close to the top of the pump cylinder. Two of these adaptors
and a short length of 1-1/4” PVC pipe can be used (if necessary) to lengthen the PVC
adaptor if for some reason the pump piston is operating too close to the bottom of
the pump cylinder.
SECTION 6: PUMPING WATER. FINISHING TOUCHES
It will require about three rotations for each foot of water depth to get the water up to
the pump head. 100 feet will require about 300 rotations. There is a very small
bleeder hole about 3 feet below the pump head, in the top drop pipe. This takes about
15 minutes to drain and protects the pump against freezing. Each time you go out to
pump after a period of pump inactivity, it will require about 10 to 12 rotations to get
the water back to the pump head. The check valves in the pump cylinder allow a very
small amount of leakage over time. Over several days or weeks, you may need to
pump a few extra rotations to get the water back to the top.
ADJUSTING AND SETTING UP THE PUMP
In this section we will be making adjustments to the force required to operate the
pump, as well as completing the final steps of pump assembly.
a) It is now time to adjust the force required to operate the pump. The counterbalance
has already been configured so that it takes five pounds of force (at a maximum) to
raise the weight to its elevated position. We will use this fact to help us position the
track roller bearing in the correct hole of the pin arm. Begin cranking the pump. After
ten to twenty revolutions, water should begin pouring from the spout. The 180 degrees corresponding to the upstroke of the piston should feel as “hard” to crank as the
180 degrees corresponding to the elevation of the counter weight.
‣
If the 180 degrees of the upstroke of the piston is more difficult – the track roller
bearing needs to be moved closer to the shaft
‣
If the 180 degrees of counterbalance elevation is more difficult – the track roller
needs to be moved further from the shaft
‣
If the full revolution feels consistent – the roller bearing is positioned correctly
With the correct roller bearing position determined tighten roller bearing using Allen
wrench.
Be sure that the roller bearing is fastened securely.
SIMPLE PUMP ADA100 PARTS LIST
5/13/2009
NUMBER
DESCRIPTION
PRICE
SEALS & O-RINGS
O23
023 O-ring (100 bottom seat)
$1.00
O29
029 O-ring (SS riser tube to pump head)
$1.00
121
121 O-ring (rod gland to pump head)
$1.00
626-212
100 U-cup seal for piston
$5.00
626-210
U-cup seal for 3/4" diameter stainless rod
$5.00
MODEL 100
SIM043 Piston
100 piston
$30.00
SIM043-1 Piston Seat 100 piston seat
$15.00
SIM047 Piston Rod
$30.00
3/8" diameter SS piston rod
3/4" diameter SS ball
$5.00
SIM040
100 SS pump cylinder
SIM044
100 SS bottom seat
$125.00
626-212
100 U-cup seal for piston
$5.00
835-010
1" female NPT X 1" slip, schedule 80
$7.00
436-010
1" male X 1" slip
$1.25
436-168
1 1/4" male NPT X 1" slip
$2.25
rod guides
$4.00
$40.00
PVC FITTINGS
DROP PIPE
D3-100RG
D5-109DPT
drop pipe - top
$15.00
D1-109DP
drop pipe
$15.00
D2
sucker rod
$20.00
PUMP HEAD
SIM020 / P3
3/4" diameter top pump rod - left hand threads
$85.00
SIM031
Rod Gland, nylon
$35.00
626-210
U-cup seal for 3/4" diameter stainless rod
$5.00
ADA100
ADA100:125.40
125.40 11/4" X 10" schedule 40 PVC
1.00
ADA100:435012
435012 PVC 1 1/4" FNPT X 1 1/4" slip
2.00
ADA100:435020
435020 2" slip X 2" female NPT adapter
2.00
ADA100:437250
437250 2" X 1 1/4" slip X slip bushing, PVC
2.50
ADA100:4464K39
4464K39 3/4" 90 degree Elbow - Male NPT X Female NPT,
304SS
18.00
ADA100:450007
450007 3/4"male PVC plug
2.00
ADA100:91015A033
91015A033 Jam Nut 1/2-13
1.25
ADA100:91475A027
10-32 Lock Washer, SS
0.10
ADA100:91841A195
10-32 Hex Nut, SS
0.15
ADA100:SIMA01
SIMA01 Pump Head
ADA100:SIMA01A
SIMA01A Pump Head Spacer
20.00
ADA100:SIMA02
SIMA02 Riser Tube
55.00
ADA100:SIMA03
SIMA03 Drive Shaft
25.00
ADA100:SIMA04
SIMA04 Hand Crank Arm
40.00
ADA100:SIMA06
SIMA06 Bearing Housing
50.00
ADA100:SIMA07
SIMA07 Counterweight
65.00
ADA100:SIMA07A
SIMA07A Counterweight Shaft Clamp
25.00
ADA100:SIMA08
SIMA08 Upper Roller Mount
ADA100:SIMA09
SIMA09 Yoke - left hand threads
150.00
ADA100:SIMA10
SIMA10 6" Well Cover
100.00
ADA100:SIMA11
SIMA11 Split Flange
40.00
ADA100:SIMA12
Fafnir YA012RR Bearing
40.00
ADA100:SIMA13
SIMA13 Yoke Crank Arm
ADA100:SIMA14
SIMA14 8" well cover
ADA100:SIMA15
SIMA15 3/16" spacer for cam roller
2.00
ADA100:SIMA16
4830K196 304SS 4" X 3/4" nipple
10.00
ADA100:SIMA18
Safety Tool
20.00
ADA100:SIMA48
6308K46 Phenolic Rotating Handle with 1/2-13 thread
25.00
ADA100:SIMA49
1/2-13 X 4 SS all thread
ADA100:SIMA50
SIMA50 Enclosure with Cover, 10ga, powder-coated
ADA100:92196A626
3/8-16 X 1 1/4 SS Allen Head
2.00
ADA100:92196A585
5/16-18X1-1/4 SS Socket Head Cap Screw
1.00
ADA100:92196A583
5/16-18X1 SS Socket Head Cap Screw
1.00
ADA100:92311A576
5/16-18X3/8 SS Cup Point Socket Set Screw
ADA100:nameplate
nameplate
200.00
20.00
30.00
100.00
6.00
350.00
.50
5.00
p a g e 12
© Simple Pump Company
p a g e 13
© Simple Pump Company