1
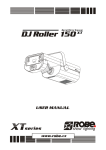
MOVING HEAD
TM
OBY-3
User manual
CAUTION!
contents
Features
1
Description of the appearance
2
Inspection.
3
Safety instructions
4
Lamp Installation
5
Rigging
6
Connection with the mains
7
Linking
7
Instruction for gobo replacement
8
DMX Channel Chart
9
Control Board
13
Maintenance
14
Replacing the Fuse
15
Appendix A
15
Product Specifications
16
Congratulations!
Thank you for purchasing OBY Series that elaborate manufactured
by Geni abundant experience of stage-lights. Hereafter you can get
high quality and low breakdown products on the market from Geni
Electronics Co., Ltd.; OBY Series concentrated unexpectedly
lighting effects for animating stages.
If any question or suggestion you have, please offer the precious
recommendation for improving our products and designs better;
and create perspective and expectancy about future lighting.
Features
Ideal & powerful effects
Smooth and silent revolving of a big range of 570-degree in X axis and
270-degree in Y axis, automatic electronic sensor to zero.
11 sharp dichroic colors + white.
6+1 easily replaceable rotating gobos.
Various kinds of glass gobos are available for clients' choices.
Rotating three facet prism.
1-7Hz fast flashing and 0-100% linear dimmer.
Remote-controlled focus.
Remote-controlled lamp switch ON/OFF.
Attractively smooth design
Stylish, high impact resistant polymer shell, which is lighter than any
one else of the same class in the market.
Solid square base is convenient set on the TRUSS, or directly stand on
the ground or stage for uses.
Systematic modular construction design has all inner function wheels
and PCBs modularized, which allows version update or customization
more convenient.
Sophisticated optical system makes light output more bright and sharp.
Simple and easy operation
Standard USITT DMX512 protocol, 13 or 11 DMX Channel.
High-torque stepper motors, smooth and precise micro-stepping
control.
LED screen controls DMX coding and built-in functions' election, as
well as also display lamp's time usage.
1
Description of the appearance
2
Inspection
Carefully unpack the carton, and make sure if any damage or loss
caused by transportation.
Contact your Geni dealer to assure your right by telephone or
facsimile immediately if damage has occurred or if something is
missing.
Packing List:
A. OBY-3 Moving Head
B.Operating Manual
C. Bracket
D.GOBO
E. Lamps ( Optional )
3
Safety instructions
This appliance must be earthed (grounded).
Disconnect power before removing covers or servicing.
Keep case closed while operating.
OBY-3 contains no user serviceable parts. Refer servicing to
qualified technicians only.
Lamp and components become hot during operation. Allow time to
cool before handling.
Keep flammable material at least one meter away from unit.
Do not operate in wet conditions or near liquids.
Keep air vents clear to avoid overheating.
Lamp produces hazardous UV light. Do not look directly at lamp
when lit.
Replace any blown or damaged fuses only with those of identical
values.
4
Lamp Installation
Warning
Remove the power cord before installing the lamp.
A
Remove the power cord and set the unit as to the
figure. Loosen the screws with appropriate tools and
extract A. (See the figure.)
Loosen the screws with appropriate tools then
extract B.
B
Please glove your hand to remove the lamp from
the package in order to keep the lamp life. Insert
the lamp in the lampholder securely and then put
back B and A for the complete installation.
If you want to change the lamp, please
extract the used lamp firstly, then execute
the above-mentioned processes.
5
Rigging:
Oby-3 can be set on the flat stage floor directly or use clamp to mount on
any kinds of trusses for fitting the mobility of various venues.
Mount two attached brackets(a) on the bottom (See Figure ), and
collocate the appropriate clamps(b) to rig with trusses. Must use the
safety ropes that can hold the ten times as heavy as the fixture through
the eye bolts(c) on the bottom of the base and trusses; then join the
safety ropes with screw-on carabines(d).
d
a
a
6
Connection with the mains
Connect the device to the mains with the power-plug.
The occupation of the connection-cables is as follows:
Cable
Pin
International
Brown
Live
L
Blue
Neutral
N
Yellow/Green
Earth
The earth has to be connected! In general, lighting effects should not
be connected to dimming-packs.
Linking
Use 3-pin XLR data cables to link the controller to DMX lighting
equipment.
3-pin XLR connectors are follows:
DMX-output
XLR mounting-socket:
2
1
3
DMX-input
XLR mounting-plug:
1:Ground
2:Signal(-)
3.Signal(+)
1
2
3
1:Ground
2:Signal(-)
3.Signal(+)
Building a serial DMX-chain:
Connect the DMX output of the first fixture with the DMX input of the
next fixture. And execute all the setups following the abovementioned instruction.
Flip the DIP SWITCH #3 of last fixture to ON position for terminal
confirmation.
7
Instructions for gobo replacement
!
DANGER!
Install the gobos with the device switched
off only. Unplug from mains before!
Please choose the suitable gobo dimensions of this fixture. (Appendix A)
Rotating GOBO wheel
1.Loosen the arrow-indicated screws in order with appropriate tools.
2.Open the top cover.
3.Push GOBO & the spring ring out with the
fingers carefully. (*Caution: Avoid falling
the spring ring into the fixture.)
4.Insert the new GOBO and the spring ring (*Press the spring ring
tight with the appropriate tools in order to keep GOBO compact),
screw up the top cover.
8
DMX Channel chart
Function of the control channels - 16 bit protocol
Channel 1 - Dimmer intensity
0-255
Gradual adjustment of the dimmer intensity from 0 to 100 %
Channel 2 - Shutter, Strobe
0-7
8-255
Shutter closed
Strobe-effect from slow to fast (max. 7 flashes/second)
Channel 3 - Color wheel 1
0
14
28
42
56
70
84
98
112
126
140
154
168
13
27
41
55
69
83
97
111
125
139
153
167
255
Open/white
Steel Blue
Orange
Green Blue
Bright Blue
Bright Pink
Red
Deep Blue
Yellow
Dark Pink
Moss Green
Light Blue
Color wheel rotation slow to fast
9
Channel 4 - Rotating gobo wheel
4
Channel 5 - indexing & Rotating gobo rotation
5
0
128
192
127
191
255
Rotating gobo angle adjustment from zero to 360 degrees.
Forwards gobo rotation from fast to slow
Backwards gobo rotation from slow to fast
Channel 6- Prism-wheel
6
0
2
8
133
254
1
7
132
253
255
Open position
Triple prism static
Triple prism f orwards rotation from fast to slow
Triple prism b ackwards rotation from slow to fast
Triple prism static
Channel 7- Focus
7
0
255
Focus adjustment from near to far
Channel 8- Pan reguration
8
CH-11 The head of the unit is allowed to turn horizontally from
zero to 570 degrees.
10
Channel 9 Tilt reguration
9
The head of the unit is allowed to turn vertically from
zero to 270 degrees
Channel 10 Pan fine-tune
10 While rotating horizontally the
head
fine tuned from zero to 2.2 degrees.
is allowed to be
Channel 11 Tilt fine-tune
11
While rotating vertically the head
fine tuned from zero to 1 degree.
is allowed to be
Channel 12- Reset
12
0
127
127
255
Normal state
Mechanical reset and re-start after 3 seconds
Channel 13- Lamp switch
13
0
48
96
160
208
47
95
159
207
255
Standby
Lamp "on" 3 seconds later
Standby
Lamp "off" 3 seconds later
Standby
11
Function of the control channels - 8 bit protocol
DMX
Channel
Function
1
DIMMER
2
SHUT
3
COLOR
4
GOBO
5
GOBO
6
PRISM AND ROTATE
7
FOCUS
8
PAN COARSE
9
TILT COARSE
10
AUTO RESET
11
LAMP ON/OFF
ROTATE
12
Control Board
13
Maintenance
Refer maintenance to qualified technicians. Please disconnect power
and signal wire before maintaining fixtures.
In order to preserve OBY-3 in good condition, keep the routine
maintenance by following date.
The Steps are as follows:
The dichroic colour-filters, the metal gobo-wheel, the internal lenses
and cooling fans should be cleaned with soft brush monthly.
The interior of the fixture should be cleaned at least half-yearly using
a vacuum-cleaner or an air-jet.
Caution: Be careful not to damage the interior mechanical structures
or circuits when using the air-jet.
To ensure a proper function and smooth rotation of the gobo-wheel,
we recommend lubrication in six-month intervals.
Caution: Avoid the damage of interior structures when fixtures
rotated, do not use excess lubrication.
Due to emit fog frequently, the optical lens and gobos would be oily;
thus luminosity would be weak. We recommend using moist cloth or a
trace of detergents to wipe them every two weeks. (Prohibit using the
detergents consisted of alcohol and solvents.)
14
Replacing the Fuse
If the fixture does not function, that may be the fuse was burned out. It
may be time to replace the fuse of same type and specification for
eliminating this fault.
Remove the electric power and flip the switch to " off " position before
replacing the fuse.
Replace the fuse as follows:
Step 1: Unscrew the screw of the fuse holder on the housing
counterclockwise with appropriate tools.
Step 2: Remove the broken fuse and then replace the new fuse.
Step 3: Reinsert and tighten the screw on the fuse-holder.
Step 4: Turn the power on for test.
Please contact with the dealer if the fixture still cannot work or the fuse
burns out again.
Appendix A
GOBO Size
24 mm
31 mm
15
Product Specifications
120V: 8A.
230V: 5A
350VA
16