Download Standard Components
Transcript
your
1
Dear customer,
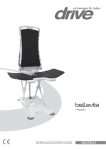
Thank you for purchasing your BUBBLY Bathlift.
Please read the operating instructions carefully before using your bathlift.
Please follow all instructions, particularly the safety instructions at all times.
The BUBBLY has been designed as a lightweight, battery-powered bathlift, to help the end-user
bathe in complete safety and comfort. The BUBBLY can be used in the home, in multi user
environments and by healthcare professionals.
The BUBBLY comes complete with a three-year warranty on the frame and charger and 1 year
on the battery hand control and accessories.
We hope the bathlift makes a difference to your life and that having a bath is now much easier
and safer for you.
CONTENTS
Standard components and unpacking
Separating the BUBBLY
Installation
Charging your Hand Control
Bathing
Removing the BUBBLY from the bath
Transporting and Storage
Cleaning and Maintenance
Disposal of Bathlift
Technical Data
Accessories and fitting
Page 3
Page 3
Page 4
Page 4
Page 5
Page 6
Page 6
Page 7
Page 7
Page 8
Page 9 / 10 / 11 / 12 / 13
Safety precautions
�
�
�
�
�
�
�
�
2
Ensure that you read and fully understand these instructions before operating the bathlift.
REMOVE TRANSIT CLIPS BEFORE USE.
Make sure the suction cups are firmly stuck to the bath before use.
Ensure that transfer flaps are clear of any obstructions as the seat section is raised.
Please use the Side Flap Diverters provided if your bath has handles on. Failure to do this
could damage the bathlift and will affect your warranty.
Before taking a bath, carry out a trial run to familiarise yourself with how the bathlift works.
The BUBBLY must only be used to assist one person getting in and out of the bath, do not
use it for any other means.
Always check there are no obstructions around or underneath the bathlift, including your
hands and legs.
NEVER recharge the battery in the bathroom or outdoors.
�������������������
��������
�������
(C)
1 x BUBBLY seat section (inc. two transfer flaps)
1 x BUBBLY base section
1 x Actuator (Attached to Seat Section – ONLY REMOVE
IF TO BE USED IN THREE SECTIONS)
1 x Hand control
1 x Charger
1 x User Manual.
2 x Transit Clip (REMOVE BEFORE USE!!!)
2 x Side flap diverters (in with user manual)
�
Unpacking – Simply remove the bathlift parts from the
packaging and check them to make sure that no
damage has been caused during transit.
�
Hand Control - This must be put on charge for 12
hours before using your BUBBLY Bathlift for the first
time.
�
Connect the hand control to the battery charger
and plug the charger into a mains power supply
OUTSIDE THE BATHROOM and allow the battery to
charge for a minimum of 12 hours. (See “Battery
Charging”)
��������
(A)
(B)
Seat and base sections - The BUBBLY can be
easily separated into two or three sections for
transportation and ease of back strain. �������������
��������������������������������������������������
����������������������������������
� Seat section including actuator (A)
� Base section (B)
� Actuator (C)
�������
Transit Clip
�������
�������
�������
To separate the seat and base section:
� REMOVE BOTH TRANSIT CLIPS (Fig 3)!!!
� Fully lower the seat and fold the transfer flaps onto the
seat.
� Lift the seat section clear of the base section.
� Reassemble in the reverse order, leaving the transit clip
off unless transporting the whole bathlift.
� Only reattach transit clips for transportation and remove
before using the bathlift again.
To remove the actuator from seat section:
� Release the Lower Actuator bracket (Fig 4).
� Pull the Actuator latch at the back of the
seat (Fig. 5) and lift the seat sufficiently to allow
the actuator to disengage itself from the bracket. The
actuator can now be removed from the seat section.
� Reassemble in the reverse order.
3
Installing your BUBBLY Bathlift
Please ensure your bath is clean and dry before
installing your bathlift.
Remove the seat section from the base.
Moisten the suction cups and place the base
section on the flat part towards the back of your
bath.
Push down on the base unit to ensure the suction
cups have a good hold (Fig 6).
WARNING: Very rarely, the suction cups may not
adhere properly on textured areas of a bath. If
this occurs, extra middle suction cups can be
added – ask your supplier for further details.
Diverte
Fold the side flaps onto the seat and slide the
seat section down onto the base section (to
remove the actuator see Page 3 “To remove
the actuator from the seat section”).
Please use the Side Flap Diverters provided if
your bath has handles on. They are designed to
prevent the side flaps from being caught under
any handles. Simply push the Diverters over the
handles on your bath (Fig 7).
Plug your charged hand control into the actuator
connector. The bathlift is now ready for use.
Charging your BUBBLY Hand Control.
ALWAYS CHARGE THE HAND CONTROL OUTSIDE
THE BATHROOM.
Match the hand control connector to the charger
connector together.(see fig 8)
Insert the charger plug into the mains.
Allow your hand control to charge for at least 12
hours before your first use.
The LED indicator on hand control will show an
AMBER light when charging is in progress (Fig
9).
We recommend that you charge your hand
control continuously when not in use, or at
least for a few hours after each use.
The hand control cannot be over charged.
If whilst using your hand control a RED light
flashes, this is an indication that it requires
immediate charge.
There is a safety mechanism on the hand control,
which prevents the lift from lowering if there is
insufficient charge to raise the lift.
Do not allow your hand control to go weeks
without charging (this may cause the batteries to lose
their charge completely).
4
Bathing with your BUBBLY
�
After installing your bathlift and connecting
the hand control, simply press and hold the
UP button to raise the seat (Fig 10).
�
Raise the seat until it is level with the top of
the bath, and then take your finger off the
UP button.
�
NOTE: Make sure that the bathlift side flap
is level with the edge of the bath (fig.10)
before transferring.
�
Sit on the bathlift flap and slide/shuffle over
to the middle of the seat and lift one leg at a
time over the side of the bath. Move / turn
your body facing forward so that you are
sitting in the correct position for comfortable
bathing.
�
Press and hold the DOWN button to lower
yourself to the required position. Taking your
finger off the button at any point will stop the
bathlift from moving (Fig 11)
�
When you have finished bathing simply
press and hold the UP button to raise the
bathlift back up to the top of the bath
(Fig.10)
�
You can now transfer off the lift using the
side flap for support.
��������
��������
NOTE: Taking your finger off the ‘Up’ or
‘Down’ buttons at any time will stop the
bathlift seat moving.
5
Removing the BUBBLY
from the Bath.
��������
�
Empty the water from the bath.
�
Press and hold the Down button to lower the
bathlift to its lowest position.
�
DISCONNECT THE HAND CONTROL!
�
Fold the side flaps onto the seat (Fig 12).
�
Lift the seat section up, continue to lift the
bathlift seat section until it is clear of the
bathlift base (to remove the actuator see
Page 3 “To separate the seat and base
section and to remove the actuator”)
(Fig 13)
�
To remove the base, lift the suction release
bar at the back of the bathlift base (A fig.14)
then tilt the base forward.
�
This will release the front suction cups and
the base section can be lifted from the bath.
��������
NOTE: DO NOT use the suction release handle
to lift the base. Once rear suction cups are
released use the base frame to tilt the base
forward.
��������
Transporting your Bathlift
�
If transporting the BUBBLY please reattach
the Transit Clips to ensure the bathlift
sections stay together (see page 3).
Storing your Bathlift
The BUBBLY should be stored as a full unit,
with the Transit clips attached. Store in a dry
area.
If storing or not in use for any length of time
please charge your Hand Control regularly
to prevent the battery going flat. (See
“charging your hand control” page 4).
6
Cleaning your Bathlift
�
�
We recommend that you clean your
bathlift on a regular basis.
The bathlift can be cleaned with any
normal nonabrasive cleaners, which
are used on your bath.
NOTE: If using emollients, aqueous
creams or oils in your bath, please ensure
that you thoroughly rinse/clean away any
residue from the base of the bathlift and
the suction cups.
Disposal of Bathlift
�
On expiry of service life, the bathlift, hand
control, charger, accessories and packaging
should be disposed of correctly. Individual
parts can be disposed of according to the
type of material. The BUBBLY does not
contain dangerous materials.
�
The battery hand control and the actuator
should not be disposed of via household
waste. They should be disposed of by
returning to your supplier, the manufacturer
or an authorised disposal point.
Regular cleaning will help to prolong the
life, look and efficiency of your Aquajoy
BUBBLY Bathlift.
Maintenance
The BUBBLY bathlift has been designed
to be maintenance free, however we
recommend that either your supplier or a
suitably qualified person inspect the
product annually.
Please check that everything is in good
working order at regular intervals and
clean the bathlift frequently.
7
Technical Data
Specifications for
������
Max.user weight:
154kg (24st/340lbs)
Total weight:
11.12kg
Seat section only:
4.88kg
Base section only:
3.12kg
Actuator:
3.12 kg
Seat height (Min/Max):
7.8cm/46.5cm
Actuator power input:
13.2V : 1300mAh
Environmental protection:
IP66
����������������������
Type:
Ni-MH
Output:
13.2V : 1300mAh
Internal protection:
Over Current
Environmental protection:
IP66
���������������
AC Input:
100~240V : 50-60Hz
DC Output:
20V : DC250mA : 5.0VA
Internal protection:
Self-resetting thermal cutout
Environmental protection:
IP50
Double insulated Class II Equipment
This product is suitable for transporting in aircraft.
���������������������������������������
8
����������
�������������������������
�����������������������
��������������
�����������������
���������������������������
������������������
�����������������
����������������
��������������
�����������������������
ACCESSORIES.
BUBBLY SEAT COVER (BL170)
The seat cover can be added to give extra comfort
to the user legs.
BUBBLY FULL COVER (BL175)
The Full cover provides extra comfort for the
user’s back and legs.
SWIVEL SLIDE UNIT (BL105)
The Swivel Slide transfer disk will help
you to get on and off your bathlift easily and safely.
It is ideal for people who have difficulties shuffling
into the centre of the bathlift and allows them to slide
and turn into the correct position to bathe.
HEADREST AND WING BACKS (BL120)
The Headrest provides extra support and
comfort whilst bathing.
The Wing Backs help stabilise the user by
adding extra support to the sides of the backrest
when bathing.
POMMEL AND LAP HARNESS (BL115)
The pommel can be fitted to support the user by
maintaining the correct sitting position and preventing
the user sliding forward.
The lap harness can be added to give extra support
to the users pelvic area and prevent sliding forward.
POMMEL AND CHEST HARNESS (BL110)
The pommel can be fitted to support the user by
maintaining the correct sitting position and preventing
the user from sliding forward.
The chest harness provides support and correct
upper body posture as well as preventing the user
pushing forward.
9
EXTRA SUCTION CUPS (BL155)
Middle suction cups can be added.
This is especially useful with textured baths.
FITTING OF ACCESSORIES
TO FIT & REMOVE THE COVERS
If you have cover mats for your Bathlift, please fit them now. To fit the one-piece
seat base and backrest cover stretch the two plastic corners (on the reverse of
your cover) over the two corners of your Bathlift backrest - just as you would with
a fitted bed sheet then slip the two side flaps of the seat into either side of the
seat cover. PLEASE ENSURE FITTING IS SECURE BEFORE BATHING!
`
To fit the seat cover, place the cover onto to the seat and slip the two side flaps
of the seat into either side of the cover – just as you would with a fitted sheet.
Press the side flaps down flat so that the cover is attached securely. PLEASE
ENSURE FITTING IS SECURE BEFORE BATHING!
10
TO FIT & REMOVE THE SWIVEL & SLIDE
Simply place the swivel & slide onto the seat base (see diagram)
TO FIT & REMOVE THE HEADREST
The Headrest provides extra support and comfort whilst bathing (see diagram).
TO FIT & REMOVE THE POMMEL
Place the pommel prongs into the seat (base) locating holes and push down.
The pommel will now sit in place
Simply lift upwards and the pommel will release
11
TO FIT & REMOVE THE WING SUPPORTS ON THE BACKREST
Simply locate the guides on the wings into the location points on either side of
the backrest.
Simply lift upwards from the location points and the wing supports will release.
TO FIT THE CHEST & LAP HARNESS
The chest harness fixing bracket should be attached to the back of the backrest
on the inside section of the backrest bracket. It is adjustable by sliding the
bracket up and down the backrest so that the belt can be positioned at the most
suitable height for the client. The harness is secured by screwing the knob into
the fixing bracket as shown in the attached diagram. (The short part of the twopiece chest harness should be attached to the side where the client is
transferring for easy, quick release). The chest harness size is adjustable from
the side by pulling the material through the buckle (as with a belt). To secure the
user, simply insert the chest harness clip into the buckle.
12
The lap harness should be attached to the rear underside of the seat base. (The
short part of the two-piece lap harness should be attached to the side where the
client is transferring for easy, quick release). The harness is secured by
screwing the knob into the boss insert as shown in the attached diagram. The
lap harness size is adjustable from the side by pulling the material through the
buckle (as with a belt). To secure the user, simply insert the lap harness clip into
the buckle.
Manufacturer’s Contact Information
Careline Corp.
286-1, Cheokeum-Ri, Naebuk-Myun,
Boeun-Kun, Chungbuk Province
Republic of Korea
Tel:+82 2 3487 4300
U.S. Customer Service
Harmar Access, LLC
2075 47th Street
Sarasota, FL 34234
Phone: (800) 833-0478
Fax: (866) 234-5680
[email protected]
13
your
14


