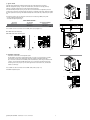
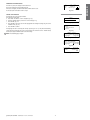
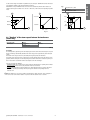
1
gaSteam 45/90/180
pHC control
User manual
We wish to save you time and money!
We can assure you that the thorough reading
of this manual will guarantee correct installation and safe use of the product described.
IMPORTANT WARNINGS
BEFORE INSTALLING OR HANDLING THE APPLIANCE PLEASE CAREFULLY READ AND FOLLOW THE
INSTRUCTIONS AND SAFETY STANDARDS DESCRIBED IN THIS MANUAL AND ILLUSTRATED BY THE
LABELS ON THE MACHINE.
This humidifier produces non-pressurised steam by means of a heat exchanger powered by a gas burner
immersed in the water contained in the boiler. The steam produced is used to humidify environments or
industrial processes, using special distributors.
The quality of the water used affects the process of evaporation, and as a result the appliance may be
supplied with untreated water, as long as this is drinkable, demineralised or treated with a softener
(see Characteristics of the supply water). The evaporated water is automatically replaced using a filling
valve.
This appliance has been designed exclusively to directly humidify rooms or ducts, using a distribution
system, as long as the installation, use and maintenance operations are carried out according to the
instructions contained in this manual and on the labels applied internally and externally.
The conditions of the environment, the fuel and the power supply voltage must comply with the specified values.
All other uses and modifications made to the device that are not authorised by the manufacturer are
considered incorrect.
Liability for injury or damage caused by the incorrect use of the device lies exclusively with the user.
Please note that the machine is connected to the gas mains, contains powered electrical devices and hot
surfaces.
All service and/or maintenance operations must be performed by specialist and qualified personnel who
are aware of the necessary precautions and are capable of performing the operations correctly and in
accordance with the safety standards and legislation in force, with specific reference to:
1. Italian law 1083/71: “Safety standards relating to the use of gaseous fuel”;
2. Italian Law no.46/90: “Safety standards relating to systems in buildings”;
3. Presidential Decree no. 447, December 6, 1991: “Regulations to law no. 46, dated March 5,
1990, on safety relating to systems in buildings”;
4. Italian Law 10/91: “Regulations to the national plan for energy savings and the development of
renewable sources of energy”.
Disconnect the machine from the mains power supply before accessing any internal parts.
The local safety standards in force must be applied in all cases.
Disposal of the parts of the humidifier: The humidifier is made up of metallic and plastic
parts.
In reference to European Community directive 2002/96/EC issued on 27 January 2003 and
the related national legislation, please note that:
1. WEEE cannot be disposed of as municipal waste and such waste must be collected and disposed of
separately;
2. the public or private waste collection systems defined by local legislation must be used. In addition,
the equipment can be returned to the distributor at the end of its working life when buying new
equipment.
3. the equipment may contain hazardous substances: the improper use or incorrect disposal of such
may have negative effects on human health and on the environment;
4. the symbol (crossed-out wheeled bin) shown on the product or on the packaging and on the instruction sheet indicates that the equipment has been introduced onto the market after 13 August 2005
and that it must be disposed of separately;
5. in the event of illegal disposal of electrical and electronic waste, the penalties are specified by local
waste disposal legislation.
Warranty on materials: 2 years (from the date of production, excluding the consumable parts, such as
the cylinder).
Certification: the quality and safety of CAREL products are guaranteed by CAREL’s ISO 9001 certified
and ETL marks.
design and production system, as well as the TÜV, CE
gaSteam pHC CONTROL +030220534 - rel. 1.0 - 17.11.2005
Content
1. General characteristics of the main control board - pHC 7
2. Control signals from the field
8
2.1 Humidity or temperature control........................................................................................................8
2.2 Pin strip position on the board for probe configuration...............................................................10
2.3 Using other brand probes .................................................................................................................10
3. Auxiliary contacts
11
3.1 Alarm contact..........................................................................................................................................11
3.2 Dehumidification contact . ..................................................................................................................11
3.3 Remote terminal/supervisor systems . .............................................................................................11
3.4 Checks.......................................................................................................................................................11
4. Starting, control and shutting down
12
4.1 Starting the appliance............................................................................................................................12
4.2 Manually draining the boiler...............................................................................................................14
4.3 The pGD0 graphic display (CAREL code: PGD0PH0F00)............................................................14
4.4 The main “menu”.................................................................................................................................15
5. “Main “menu” - auxiliary functions
18
“Service” (“maintenance”) submenu
18
5.1
5.2
5.3
5.4
“SERVICE” - information on the firmware.......................................................................................18
“SERVICE” - display the operating hours.........................................................................................18
Manually draining the cylinder
................................................................................................18
Procedure for testing the electrical parts.........................................................................................19
6. Reading and setting the parameters
20
6.1 Reading and setting the set point......................................................................................................20
6.2 Reading and setting the control parameters - reading the measurements.............................20
6.3 “Rotation” of the steam request between the two burners (UG180 only)..............................23
7. Configuration parameters
24
7.1 Reading and setting the configuration parameters - “USER” submenu....................................24
7.2 Configuring the control mode.............................................................................................................24
7.3 Humidity control with humidistat......................................................................................................24
7.4 Unit of measure.....................................................................................................................................24
7.5 Configuring the ambient humidity (or temperature) probe.......................................................24
7.6 Configuring the limit humidity probe...............................................................................................25
7.7 Initial auto-test.........................................................................................................................................25
7.8 Setting the pre-purge speed and calibrating the fan speed.........................................................25
7.9 Water supply with REVERSE OSMOSIS system..............................................................................26
7.10 Setting the maximum ratio between the water filled and the water drained for dilution...26
7.11 Preheating..............................................................................................................................................26
7.12 Antifreeze...............................................................................................................................................27
7.13 Reversing the logic of the alarm relay..............................................................................................27
7.14 Options - drain due to inactivity.......................................................................................................28
7.15 Setting the production ramp..............................................................................................................28
7.16 Setting the fan speed for minimum and rated production........................................................28
7.17 Setting the minimum production.....................................................................................................29
7.18 Options .................................................................................................................................................29
8. Alarms, troubleshooting
30
8.1 Alarms ....................................................................................................................................................30
8.2 Alarm management and signals........................................................................................................30
9. Operating principle, control and other functions
32
9.1 Operating principle...............................................................................................................................32
9.2 Control principles..................................................................................................................................32
gaSteam pHC CONTROL +030220534 - rel. 1.0 - 17.11.2005
10. Other functions
34
ENGLISH
10.1 Measuring the conductivity of the supply water..........................................................................34
10.2 Flue gas discharge temperature measurement...........................................................................34
10.3 Automatic draining.............................................................................................................................34
10.4 Antifoam procedure.............................................................................................................................34
10.5 Dehumidification request signal .....................................................................................................34
10.6 Automatically emptying the cylinder due to extended inactivity..............................................34
10.7 Automatic reset from no water.........................................................................................................34
10.8 Repeating the humidity request........................................................................................................35
10.9 Automatic procedure to unblock the floating level sensor.........................................................35
gaSteam pHC CONTROL +030220534 - rel. 1.0 - 17.11.2005
Terminal block
This is a microprocessor electronic controller based on the pGE technology developed by CAREL for the
management of all models of humidifier.
It is made up of two electronic boards, positioned one on top of the other and connected together by
pin strip.
• bottom board - “main control board”: connected to the pGE board with the microprocessor and the
clock card, as well as the serial card;
• top board, or “expansion board”.
The pHC is designed to run the control program, and is fitted with the set of terminals required for
connection to the controlled devices (for example: valves, power contactors) and to the field (probes,
external controller).
AL
D
L1L2GN
1U 2U 3U
The program and the parameters are saved in FLASH MEMORY, meaning the data is safe even in the
event of a power failure (without the need for a backup battery).
The pHC can be connected to pLAN (pCO Local Area Network) and tLAN networks.
The pLAN network is made up of a series of controllers and terminals that interact with one another.
Each controller in the pLAN network can exchange information at high speed. Up to 31 units, either pHC
controllers or terminals, can be connected, for the rapid exchange of information.
tLAN communication is available with I/O expansion modules or the PST display (3 or 4 digit).
Connection to the supervisor/telemaintenance serial line on the RS485 standard is ensured by fitting the
pHC with optional cards, using the CAREL, Modbus® or ECHELON®, RS232 and GSM communication
protocols.
gaSteam pHC CONTROL +030220534 - rel. 1.0 - 17.11.2005
ENGLISH
1. General characteristics of the main control board - pHC
1T 2T
1S 2S 3S
1Y
4U 5U 6U
3T 4T
5T
8T
6T 7T
4S 5S 6S
2Y
3Y
7U 8U 9U
9T
7S 8S 9S
U 14U
U
T
13T 14
T
U 12U 13
10U 11
T 12T
10T 11
S 14S
S 12S 13
10S 11
1O
4Y
5Y
6Y
7Y
8Y
9Y
4Z 5Z 6Z
7Z 8Z 9Z
Y
2O
3O
4O
5O
Z 12Z
10Z 11
S
Fig. 1.a
1Z 2Z 3Z
6O
7O
8O
9O
Z
O
ENGLISH
2. Control signals from the field
2.1 Humidity or temperature control
The humidifier with humidity control action can be connected to a remote supervisor using optional
cards. It can be controlled in the following four different ways (for further details, see chap. 9):
a) Type C control: ON/OFF
The humidifier is operated by a mechanical humidistat H, by a voltage-free remote contact CR, or by a
combination of the two, which must be connected to terminals 7U, 8U, 9U and 10U on terminal block U
in the electrical panel.
The diagrams in Fig. 2.b show the connections to be made in the case of:
a)operation controlled by a simple enabling contact (CR);
b)operation by external mechanical humidistat (H);
c) a combination of the two.
H
CR
Fig. 2.a
a
Remote
ON/OFF
Action
ON/OFF
7U 8U
9U 10U
b
Remote
ON/OFF
Action
ON/OFF
7U 8U
9U 10U
CR
c
H
Remote
ON/OFF
Action
ON/OFF
7U 8U
9U 10U
CR
H
Fig. 2.b
b) Type P control:
proportional control, with signal sent by an external controller.
The steam production is managed by an external controller R, which sends the controller a humidity
request signal; the controller can be programmed to receive one of the following proportional signals
(see par. 9.2.2):
• voltage: 0 to 1 Vdc; 0 to 10 Vdc; 2 to 10 Vdc;
• current: 0 to 20 mA, 4 to 20 mA.
R
CR
The reference (zero) of the external controller must be connected to the GND terminal (2U) and the
control signal to terminal B1 on terminal block U.
To avoid unstable control, the earth of the external controller must be connected to the earth of the
controller.
This type of control can also be used with an enabling contact (CR) connected to the “Remote ON/OFF”
terminal.
Fig. 2.c
External regulator
OUT
1U
REF
2U
3U
7U
CR
8U
Fig. 2.d
gaSteam pHC CONTROL +030220534 - rel. 1.0 - 17.11.2005
HT
CR
The diagrams shown in Fig. 2.g indicate the connection to be made using CAREL probes, with:
• just one relative humidity probe (a);
• an outlet humidity limit probe (b).
...for rooms
ASWH100000
CAREL PROBES AVAILABLE...
...for air ducts
ASDH100000
ASDH200000
Fig. 2.e
...for special applications
ASPC230000
ASPC110000
Table 2.a
The controller can also be connected to non-CAREL probes (see paragraph 2.3.)
HT
CH
HT: CAREL relative humidity probe;
CH: CAREL outlet relative humidity probe.
HT
out H
M
+ (G)
1U
HT
2U
3U
out H
M
+ (G)
1U
2U
3U
4U
4U
5U
CH
6U
7U
CR
8U
6U
7U
CR
a
CR
5U
out H
M
+ (G)
8U
b
Fig. 2.f
Fig. 2.g
d) Control for steam baths:
temperature control with room temperature probe
The humidifier is connected to a temperature probe TT (see Fig. 2.h), and performs a complete
control action according to the temperature measured inside the controlled environment.
Fig. 2.i shows the connection of the CAREL probe model ASET03001, with a range of measurement
-30T90°C. The recommended CAREL probes have a 0 to 1 volt output, and therefore the range
of reading must be set (see par. 7.5). The control signal must be connected to 1U, and the earth
reference is GND (2U).
TT
CR
The controller can also be connected to non-CAREL active probes (see par. 2.3).
TT: CAREL temperature probe.
Fig. 2.h
TT
out T
M
+ (G)
1U
2U
3U
4U
5U
7U
CR
Fig. 2.i
gaSteam pHC CONTROL +030220534 - rel. 1.0 - 17.11.2005
8U
ENGLISH
c) Type H control:
humidity control with ambient relative humidity probe (and outlet limit probe, if required).
With this configuration (see Fig. 2.e) the main control board, connected to a humidity probe HT, performs a complete control action according to the humidity measured.
An outlet humidity limit probe (see Fig. 2.f) can also be connected: with this configuration, the main control board, connected to a humidity probe HT, performs a complete control action, while also limiting
the steam production according to the relative humidity value in the outlet duct, measured by the probe
CH.
ENGLISH
2.2 Pin strip position on the board for probe configuration
1
2
3
4
5
6
room probe configuration
limit probe configuration
0 to 10 Vdc
all but 0 to 10Vdc
tachymetric 2
safety thermostat 2
1
2
Main board A in the
pHC controller
Expansion board B on
the pHC controller
JS4
JS3
3
2
1
3
2
1
5
6
3
4
Fig. 2.j
2.3 Using other brand probes
Different brand probes can also be used, with the output signals (see par. 7.3) selectable from the
following standards:
• voltage: 0 to 1 Vdc, 0 to 10 Vdc, 2 to 10 Vdc;
• current: 4 to 20/ 0 to 20 mA.
In addition, the minimum and maximum values of the signal must be set (see par. 7.5).
A 15 Vdc power supply is available for the probes.
The control signals must be connected:
• for the control probe HT (or TT) to terminal 1U, the earth reference for which is GND (2U);
• for the limit probe CH to terminal 5U, the earth reference for which is GND (6U);
• for the current probe to terminal 4U, the earth reference for which is GND (6U).
Important warnings:
• To avoid unstable control, the earth of the probes or the external controllers must be connected to the
earth on the appliance’s controller.
• For the operation of the humidifier, the terminals corresponding to the “remote ON-OFF” signal must
be connected to an enabling contact or jumpered (default solution). If these terminals are not connected, all the internal and external devices managed by the controller are disabled, with the exception
of the drain pump, limited to the drain cycle due to extended inactivity (see par. 10.5).
10
gaSteam pHC CONTROL +030220534 - rel. 1.0 - 17.11.2005
3.1 Alarm contact
The humidifier controller is fitted with a voltage free contact for the remote alarm signal (one or more
events).
The alarm contact is connected via terminals 70, 80 and 90, as shown in Fig. 3.a.
electrical specifications
250 Vac; Imax: 8A resistive 2A inductive
70
80
90
connection to the alarm contact
removable terminal block as per Fig. 5.13
Table 3.a
C
NO
NC
Fig. 3.a
3.2 Dehumidification contact
When the humidifier is used as in case c) in paragraph 2.1 (relative humidity control), a contact (NO,
voltage-free) can be used to activate an external dehumidification device; in this case, the humidifier can
provide complete control over the ambient relative humidity. The dehumidification contact is connected
via terminals 13U, 14U on terminal block U, as shown in Fig. 7.7. For further details, see chapter 7.14.
See table 3.a.
13U
14U
Fig. 3.b
3.3 Remote terminal/supervisor systems
The humidifier controller can be connected to up to three pGD user terminals, one of which fitted as
standard on board the unit, and 2 optional terminals that can be located up to 200m away.
The controller can also be connected to a supervisory system via RS485, RS232 serial lines or FTT10 LON
using the optional cards shown in the following table.
optional cards
PCO2004850
PCO200MDM0
PCO20000F0
characteristics supported
used for the direct interface of the controller to an
RS485 network
used for the direct interface of the controller to an
RS232 network with an external modem
used to interface of the controller to an FTT10 LON
network, when suitably programmed
protocols
CAREL, Modbus
CAREL for remote
connections
LON-Echelon
Table 3.b
Connection is also possible to TREND systems using a board sold directly by TREND.
3.4 Checks
The following conditions represent correct electrical connection:
• the rated voltage of the appliance corresponds to the mains voltage;
• the fuses installed are suitable for the line and the power supply voltage;
• mains disconnecting switch has been installed so as to be able to disconnect power to the humidifier;
• the electrical connections have been performed as shown in the diagrams;
• the power cable is secured to the tear-proof cable clamp;
• terminals 7U-8U are jumpered or connected to an enabling contact;
• the earth of any non-CAREL probes is connected to the earth on the controller;
• if the appliance is controlled by an external controller, the earth of the signal is connected to the earth
of the controller.
gaSteam pHC CONTROL +030220534 - rel. 1.0 - 17.11.2005
11
NC
C
ENGLISH
3. Auxiliary contacts
ENGLISH
4. Starting, control and shutting down
4.3 The pGD0 graphic display (CAREL code: PGD0PH0F00)
The pGD0 graphic display is an electronic device, compatible with the previous PCOI/PCOT terminals,
used for the complete management of the graphics, by displaying icons (defined at an application
software development level) and international fonts, in two dimensions: 5x7 and 11x15 pixels.
The application software only resides on the pHC board; the terminal does not need any additional
software during operation.
In addition, the terminal allows a wide range of operating temperatures (-20T60°C) and guarantees a
high index of protection (IP65).
The pGD0 graphic display (20 columns x 4 rows) is backlit.
1
2
3
4
rH
5
6
4.3.1 Front panel
7
1.
2.
3.
4.
5.
“PRG” button: programming button
Accesses the humidifier configuration maintenance and menu;
“Allarme” button: alarm button
Used to display and reset any alarms present;
“ESC” button: button to return to the “main screen”;
Graphic display, 4 rows x 20 columns: Displays the icons and texts for the user interface;
“UP arrow” button: scrolls the various screens on the pGD and changes the values of the configuration parameters;
6. “ENTER” button: used, where possible, to scroll the individual rows in the configuration screens and
to access the individual configuration parameters;
7. “DOWN arrow” button.
100.0%
50.0%rH
Off by Keyboard
Fig. 4.a
For convenience, the pages on the display are called “screens”.
The screens may contain text messages, small pictures, variable values (read and write).
In this case too, for convenience, the variable values (read or write) are called “fields”.
1
2
rH
Setp.
4.3.2 Main screen
3
Main screen” refers to the screen that appears during the normal operation of the humidifier.
This screen displays the main aspects relating to the operation of the humidifier.
For example, the screen shows the general humidifier operating status, the control mode selected, the
humidity value read by the probes, or an indication if any alarms are active.
100.0%
50.0%rH
Off by Keyboard
4
5
6
Fig. 4.b
The following table lists all the possible information shown on the main screen (Fig. 4.b).
Control mode field
mode
type H control
type T control
type P control
type C control
display
rH
rH
rH
display
Humidity value read by the ambient probe
Temperature value read by the ambient probe
Value as a % applied by the external controller to input “B1” on the pHC
Production value as a percentage of the target
Signal applied field
mode
type H control
type T control
type P control
type C control
display
%
°C (°F)
%
%
Unit of measure field
mode
type H control
type T control
type P control
type C control
Set point field
This row displays the set point. Only shown in H or T control mode
General operating status field
description
display
Off from the keypad
Off from Superv.
Disabled
No request
Pr. 000.0 kg/h
Unit off. Unit switched off from the keypad
Unit off. Unit switched off via supervisor
Unit on. Humidifier disabled via the keypad
Unit on. No steam request
Unit on. Total steam flow-rate currently produced in (kg/h or lb/h). Visible only when the unit is on, the
humidifier is enabled for operation and humidity is requested.
Unit on. Steam production stopped by the opening of the “Remote ON/OFF” contact
Unit on. The production in both cylinders has been stopped by a shutdown alarm. This is displayed for a few
moments, after which the message “No Request” is displayed, as, following a shutdown alarm, the humidity
request is forced to zero.
description
The alarm icon appears when an alarm or pre-alarm condition is present in one of the two cylinders.
Press the Alarm button to check and if necessary reset the alarm (see par. 8.1)
Table 4.a
Remote off
Alarms
display
12
gaSteam pHC CONTROL +030220534 - rel. 1.0 - 17.11.2005
4.4 The main “menu”
field
description
set
user
service
Enable operation. Set the control parameters.
Set the configuration parameters with access by password.
Access the operations reserved for the installer or service personnel.
Information on the firmware
System clock. Set
Set the time bands
Alarm log
Unit ON/OFF
clock
alarm log
unit on-off
ENGLISH
The main “menu“ offers the user or the installer the possibility to modify all the desired parameters. It is
accessed by pressing the “PRG” button, Fig. 4.e.p.
Use the UP and DOWN arrows to scroll the rows in the menu.
The description of the individual items are listed in the following table.
level of
accessibility
free
password
password
free
free
password
free
free
Table 4.b
As regards the description of the control and configuration parameters (“Set” and “User” items) refer to
par. 6.2.2.
The “Unit ON-OFF” item has already been analysed in par. 4.3.6 (“Start unit from keypad”).
clock
Time
Date
Day
4.4.1 “Clock” submenu
Entering the “clock” submenu, the user can access the clock (useful for the timed start-up of the humidifier) and the date, Fig. 4.c.
10:54
20/02/04
Friday
Fig. 4.c
Setting the clock
The clock can be set using the “UP” and “DOWN” buttons in the following screen, Fig. 4.d.
Clock update
Time
Date
To set the clock:
• press the “ENTER” button to move the cursor to the field to be changed;
• change the value using “UP” and “DOWN”;
• press the “ENTER” button to confirm.
10:54
20/02/04
Fig. 4.d
Clock
password
Setting the time bands
This important function is used to automatically set the operation of the humidifier during the days of
the week.
These settings are accessed after entering the password “0077”, Fig. 4.j, which opens the time band
activation screen, Fig. 4.f.
0000
Fig. 4.e
There are two possible settings:
• timed humidifier On/Off operation;
• timed humidity set point control.
In addition, both functions can be enabled to work at the same time.
Scheduler
Humidif. on-off
Set point
No
No
Fig. 4.f
4.4.3 Timed humidifier ON/OFF operation
This function can be used to set humidifier on and off times specifically and separately for each day of
the week. Once the humidifier is on, the production of humidity depends only on the control parameters
set (see par. 6.2.2) and the humidity measured.
Sequence:
• to activate this type of setting, go to the screen shown in Fig. 4.g and set the field on the right of “Onoff timezones” to “Yes”;
• press “ENTER” to confirm.
Scheduler
On-off timezones No
Humid.timezones Yes
Fig. 4.g
This then activates the following time band control screens. To display these, position the cursor (using
“ENTER”) at the top left and then press “UP” and “DOWN”.
Four different time bands can be selected:
ON-OFF bands
time band
F1
F1-1
ON
09:00
OFF
13:00
F1-2
14:00
21:00z
F2
14:00
21:00
F3
F4
Always ON
Always OFF
description
the humidifier remains on (the values in the table are the default
values. These can be modified by moving the cursor to the values and
using the “UP” or ”DOWN” button).
the humidifier remains on (the values in the table are the default
values, which can be modified.)
Humidifier always on
Humidifier always off
Table 4.c
Humid. on-off
Mon:F3 Tue:F3 Wed:F3
Thu:F3 Fri:F3 Sat:F3
Sun:F3
Once the time bands have been set, the bands then need to be enabled for each day. An example of the
screen is shown to the side.
Fig. 4.h
Sequence:
• use the “ENTER” button to move the cursor to the time band for the day in question;
• use the “UP” and “DOWN” buttons to choose one of the 4 time bands seen in Table 4.3;
• press “ENTER” to confirm and move to the next value.
Humid. on-off
Mon:F1 Tue:F1 Wed:F1
Thu:F1 Fri:F1 Sat:F2
Sun:F4
An example of a setting is shown to the side.
Fig. 4.i
gaSteam pHC CONTROL +030220534 - rel. 1.0 - 17.11.2005
13
ENGLISH
4.4.3 Timed set point control
With this type of control, the humidity H (or temperature T) set point can be varied during the day.
Up to 4 switching points can be set, with both the time and new set point. This setting is valid for every
day of the week.
Sequence:
• move to the screen shown to the side and set the field to the right of “Humid. timezones” to “Yes”;
• press “ENTER” to confirm.
Scheduler
On-off timezones No
Humid.timezones Yes
Fig. 4.j
Z1:
Z2:
This then activates the following control screens for the set point switching points (position the cursor
using “ENTER” at the top left and then press “UP” and “DOWN”).
To set the switching points, go to the following two screens.
Set point
ON
SET
00:00
000.0%
00:00
000.0%
Fig. 4.k
Z3:
Z4:
Set point
ON
SET
00:00
000.0%
00:00
000.0%
Fig. 4.l
Z1:
Z2:
Setting the switching points:
• press “ENTER” to move the cursor to the field to be changed;
• use the “UP” and “DOWN” buttons to set the desired time and the new humidity set point that will
take effect from that moment on;
• press “ENTER” to confirm and to go to the next field.
Set point
ON
SET
08:30
050.0%
12:30
040.0%
Fig. 4.m
Z3:
Z4:
For example, if the two screens are set as shown to the side, the trend of the set point during each day
of the week will be as shown in the example.
Set point
ON
SET
13:30
050.0%
18:00
030.0%
Fig. 4.n
Set %
00:00
08:30
12:30 13:30
Fig. 4.o
18:00
- Combined control
The activation of both control modes is used to set both the humidifier ON/OFF times and the set point
values during the day. To do this, both the values in the fields on the screen to the side must be set to
“Yes”.
Scheduler
Humidif. on-off
Set point
Yes
Yes
This will enable all the subsequent screens for setting the time bands and the set point.
Fig. 4.p
4.4.4 Alarm log
The humidifier memory can record the alarms that are activated during the life of the humidifier.
The memory saves up to 200 events, and information is available both on the type of alarm and on
the date and time it occurred. To access the alarm log, simply go to the “Alarm log” submenu (“History
Alarms”). Use the “UP” and “DOWN” buttons to scroll all the events that have been saved (the number
of the event is shown in the top right of the screen).
An example of a screen is shown to the side.
14
gaSteam pHC CONTROL +030220534 - rel. 1.0 - 17.11.2005
When shutting down the appliance at the end of the season or alternatively for maintenance on the
electrical parts and/or water circuit, the humidifier should be placed out of service.
NOTE: empty the cylinder before shutting down the humidifier to prevent fouling.
ENGLISH
4.4.5 Shutting down
OFF
Fig. 4.q
Sequence:
• open the mains disconnecting switch on the power line to the humidifier;
• move the rocker switch to 0 (see Fig. 4.z) and check that the display on the controller is off;
• close the shut-off tap on the water line to the humidifier.
To empty the cylinder when shutting down, refer to par. 5.3.
In the event of a malfunction with the pump, or a malfunction with the electrical parts, the boiler can be
emptied manually using the manual drain tap, see the figure to the side.
Fig. 4.q.a
4.1 Starting the appliance
Staring for the first time
When the humidifier is started for the first time, the AUTO-TEST procedure should be run (see par 7.7),
which automatically checks the main functions of the unit (fill, drain and control of the level sensor).
If enabled, the AUTO-TEST procedure starts whenever the electronic controller is switched on.
Nonetheless, the AUTO-TEST procedure can be disabled (see par. 7.7).
1
ON
0
Fig. 4.r
4.1.1 Start-up procedure and sequence
I – 0 switch: ON/OFF (Fig. 4.a).
After having closed the disconnecting switch in the power line to the humidifier, switch on the appliance
by moving the rocker switch to position “I”.
The start-up sequence then begins, which includes an initial phase followed by the operation of the
appliance.
Fig. 4.s
After the switch has been moved to the On position, the graphic display shows the screens in the
sequence described in the figures below.
1. Start power supply, system boot (around 10 seconds)
Nothing is displayed, Fig. 4.s.
2. Language setting (around 30 seconds)
In this phase, the user has 30 seconds to change the language (see par. 4.3.10), Fig. 4.t.
To pass directly to the next phase, press the “ESC” button.
3. Operating phase, main screen Fig. 4.u.
Language:
UP/DOWN
ENTER
ENGLISH
to change
saveexit
025
Fig. 4.t
rH
100.0%
Setp.
50.0%rH
Off by keyboard
Fig. 4.u
4.1.2 Main functions
STARTING THE UNIT FROM THE KEYPAD
Switch the unit on from the keypad. After the start-up sequence, the humidifier is not yet ready to operate, and the main screen appears as in Fig. 4.d.
Menu
. Unit On-Off
> Set
. User
Fig. 4.v.a
To start the unit, proceed as follows:
1. Select the MENU
a. press the “PRG” button. The “Menu” screen is displayed, Fig. 4.v.a;
b. scroll with the “DOWN” arrow until moving the cursor to the “UNIT ON-OFF” field, Fig. 4.e.b;
Menu
. Alarm History
> Unit On-Off
. Set
2. Enable
a. press the “Enter” button. The following screen is displayed, shown in Fig. 4.v.c;
b. press “Enter”. The following main screen is automatically displayed, as shown in Fig. 4.v.d.
Fig. 4.v.b
Unit status:
Off by Keyboard
- Press ENETR to
switch on
At this stage, the system is on and the operation of the humidifier can be started (see the next par.).
Fig. 4.v.c
rH
100.0%
Setp.
50.0%rH
Disabled
Fig. 4.v.d
gaSteam pHC CONTROL +030220534 - rel. 1.0 - 17.11.2005
15
-
ENGLISH
ENABLE OPERATION - START/STOP STEAM PRODUCTION
Once the unit is on, the “enable” function effectively starts the humidifier.
Subsequently, steam production is related solely to the humidity request or the presence of an alarm or
a remote OFF signal.
If the humidifier is not enabled for operation, the main screen appears as in Fig. 4.v.d.
Humidif.enabled: NO
Burners Sequence:
Parallel
Seq. hyster.:
5.0%
Fig. 4.v.e
- Enabling operation:
1. Select the MENU
a. Press “PRG”. The “Menu” screen is displayed, Fig. 4.v.b;
b. Scroll with the “DOWN” arrow until highlighting the “Set” row, Fig. 4.v.a;
c. Press “Enter”. The screen shown in Fig. 4.v.e is displayed;
2. Start the unit
a. Press the “Enter” button to move the cursor to the field to be modified, Fig. 4.v.f;
b. Press “UP” or “DOWN” to change the value. The screen shown in Fig. 4.v.g is displayed;
c. Press “ENTER” to confirm.
Note that in the main screen the term “Disabled” no longer appears, Fig. 4.v.g.
Humidif.enabled:
O
Burners Sequence:
PARALLEL
Seq. hyster.:
5.0%
Fig. 4.v.f
rH
100.0%
Setp.
50.0%rH
At this stage, the humidifier is ready to produce steam.
NOTE: the production of steam now depends only on the control parameters selected (see par. 6.2.3)
and the signal applied (humidity or temperature probe or signal from external controller).
Fig. 4.v.g
- Disabling operation
Similarly to as described in the previous paragraph, the operation of the humidifier can be stopped,
disabling the unit.
The sequence is the same, but rather set the “Humidif. enabled” variable to “NO”.
MODIFYING THE MAXIMUM PRODUCTION ALLOWED AND THE SET POINT
The maximum production allowed can be modified in all control modes.
The set point, on the other hand, can only be modified in the control modes where this is featured (see
par. 6.1).
Both the parameters are modified in the following sequence:
1. Select the MENU
a. Press “PRG”. The “Menu” screen is displayed, Fig. 4.v.b;
b. Scroll with the “DOWN” arrow until highlighting the “Set” row, Fig. 4.v.a
c. Press “Enter”. The screen shown in Fig. 4.v.e is displayed;
2. Access and modify the control parameters
a. Using the “UP” or “DOWN” buttons, move to the screen shown in Fig. 4.v.h;
b. Using the “ENTER” button, move to the field to be modified, Fig. 4.v.i;
c. Using the “UP” and “DOWN” buttons, change the value and press “ENTER” to confirm, Fig. 4.v.j.
Control Params
%rH Set P.
50.0%
Max.Prod.
70.0%
%rH Different. 5.0%
Fig. 4.v.h
Control Params.
%rH Set P.
50.0%
Max. Prod.
70.0%
%rH Different. 5.0%
Fig. 4.v.i
Control params.
%rH Set P.
60.0%
Max.Prod.
70.0%
%rH Different. 5.0%
NOTE: it can be seen that with this sequence, the humidity differential can also be changed, in the
modes where featured.
Fig. 4.v.j
Control Params.
Temp Set
Temp Diff.
If temperature control mode has been set, the screen shown in Fig. 4.v.k is displayed.
40.0 °C
5.0 °C
Fig. 4.v.k
QUICK ACCESS TO THE SET POINT PARAMETERS SCREEN
The previous screen can be accessed quickly, from the main screen, by pressing the PRG button:
• in C control mode: ON/OFF and P control mode: Ext. Controller, pressing PRG displays the screen
shown in Fig. 4.v.l;
• in H control mode: with or without limit probe, Fig. 4.v.m;
• in T control mode: the screen shown in Fig. 4.v.n is displayed.
Quick set
Humidifier
On
Max Prod.
70.0%
Fig. 4.v.l
Quick set
Humidifier
On
%rH Set P.
50.0%
Max Prod.
70.0%
Fig. 4.v.m
Quick set
Humidifier
On
Temp Set P.
40°C
Max Prod.
70.0%
Fig. 4.v.n
16
gaSteam pHC CONTROL +030220534 - rel. 1.0 - 17.11.2005
rH
Setp.
In the event of alarms, the alarm button lights up.
If the causes disappear, the alarm button flashes until the alarm is reset.
For the description of the alarms refer to chap. 8.
Pr.
40.0%
50.0%rH
130.0 kg/h
Fig. 4.z.o
SETTING THE LANGUAGE
The language can be set to English or Italian.
The sequence is listed below:
a. Press “PRG”. The “Menu” screen is displayed, Fig. 4.v.p;
b. Using the “DOWN” button, move to the “service” field, Fig. 4.v.q;
c. Press “ENTER”, Fig. 4.v.r.
d. Press “ENTER” to move the cursor to the language field and change the setting using the “UP” or
“DOWN” arrows, Fig. 4.v.s;
e. Press “ENTER” to confirm.
Menu
. Unit On-Off
> Set
. User
Fig. 4.z.p
Menu
. User
> Maintenance
. Clock
The language can also be set during the “start-up sequence” (par. 4.3.1): in fact, when the following
screen appears, the language can be set by simply pressing one of the two “UP” or “DOWN” arrows,
and then pressing the “ENTER” button to save the change.
NOTE: The default language is English.
Fig. 4.z.q
CAREL S.p.A.
Code :FLSTDmGST0
Vers.:1.0b10 06/09/04
Language:
English
Fig. 4.z.r
CAREL S.p.A.
Code :FLSTDmGST0
Vers.:1.0b10 06/09/04
Language:
taliano
Fig. 4.z.s
Language:
UP/DOWN
ENTER
English
to change
saveexit
025
Fig. 4.z.t
gaSteam pHC CONTROL +030220534 - rel. 1.0 - 17.11.2005
17
ENGLISH
INDICATING THE ALARM STATUS
If an alarm is present, the display shows the alarm icon.
ENGLISH
5. Reading and setting the parameters
The configuration and control parameters are grouped into two sets:
1. LEVEL 1 - set point and control parameters
2. LEVEL 2 - configuration parameters
Each parameter has the following attributes:
name
range
default
unit of measure
text identifying the parameter
limit values for the setting of the parameter
factory setting of the parameter value
symbol displayed for the unit of measure used for the parameter
Table 5.a
5.1 Reading and setting the set point
The set point can be read on the main screen, appearing in the field to the right of the text “Set P.”
control mode
Type H
Type T
display in the field to the right of “Set P.”
humidity set point
temperature set point
Table 5.b
5.1.1 Setting the ambient humidity set point
Sequence:
• go to the main screen and press “PRG”;
• enter the “SET” submenu;
• scroll the screens to reach the one shown on the left;
• press “ENTER” to move the cursor to the field to the right of “rH Set P”;
• press “UP” and “DOWN” to change the value;
• press “ENTER” to confirm.
Control Params
%rH Set P.
50.0%
Max.Prod.
70.0%
%rH Different. 5.0%
Fig. 5.a
Characteristics and range of the set point:
humidity setting (H control)
unit of
measure
% rH
default value min. limit
(1)
50.0
0.0
max. limit
100.0
Table 5.c
WARNING: the outlet humidity set point, relevant to the limit probe, is saved by the parameter “Limit
Set” (see par. 6.2.2).
5.1.2 Setting the temperature set point
Questa operazione è possibile solo se è stata attivata la modalità di regolazione T.
Sequence:
• go to the main screen and press “PRG”;
• press “ENTER” to move the cursor to the field to the right of “Temp Set.”;
• press “UP” and “DOWN” to change the value;
• press “ENTER” to confirm.
Control params.
Temp Set.
Temp Diff.
30.0 °C
5.0 °C
Fig. 5.b
5.1.3 Setting the outlet humidity set point
The outlet humidity set point can only be set if H control mode with outlet limit has been activated (see
the paragraph “Setting the control mode”, par. 7.2).
Sequence:
• go to the main screen and press “PRG”;
• enter the “SET” submenu;
• scroll the screens to reach the one shown on the left;
• press “ENTER” to move the cursor to the field to the right of “L set point”;
• press “UP” and “DOWN” to change the value;
• press “ENTER” to confirm.
Control Params
Limit Set 100.0 %rH
Limit Diff. 5.0 %rH
Fig. 5.c
5.2 Reading and setting the control parameters - reading the
measurements
5.2.1 Reading the measurements and the main parameters
The measurements and the main parameters can be displayed very simply by scrolling the screens that,
staring from the main screen (par. 4.3.3), are accessed by pressing the “UP” and “DOWN” buttons.
These screens contain the values listed in the table on the opposite page.
18
gaSteam pHC CONTROL +030220534 - rel. 1.0 - 17.11.2005
unit of measure
kg/h or lb/hr
%rH
%rH
°C (°F)
°C (°F)
%rH
%rH
kg/h or lb/hr
RPM
kg/h or lb/hr
RPM
°C (°F)
°C (°F)
μS/cm
°C (°F)
accessibility
in H control mode
in T control mode
in H control mode + limit
description
total steam flow-rate
humidity measured in the room
ambient humidity set point
room temperature
room temperature set point
set point at the outlet
relative humidity at the outlet
current production of burner 1
speed of fan 1
current production of burner 2 (UG180)
speed of fan 2 (UG180)
preheating set point (if preheating is not enabled, “N.A.” is displayed)
antifreeze set point (if not enabled, “N.A.” is displayed)
conductivity of the mains supply water
flue gas temperature
ENGLISH
display
steam:
Amb. Hum:
Set P.
Amb. T:
Set T.:
Set P. Lim.:
Humid. Limit:
Prod.Bur1:
Fan 1:
Prod.Bur2:
Fan 2:
Preheat Set:
Antifreeze Set:
Conductivity
Flue gas temperature
Burner 1:
Burner 2:
Table 5.d
Scroll the screens until reaching the “Menu password” request. Enter the password “77” to access a
series of screens that provide information normally reserved for the installer or service personnel. To
enter the password, simply:
• press “ENTER” to move the cursor to the “0000” field;
• press “UP” or “DOWN” to enter the number “0077”;
• press “ENTER” to confirm.
The information included on these screens is listed in the following table.
text
gaSteam status
Burner 1 (2)
option
see Table. 4.a
status
On
Off
Alarm
activity:
Off
Production
Preheat
Pre-purge
Antifreeze
Speed:
description
similar to the status that appears on the main screen
combustion active
combustion not active
alarm
burner not active
steam production in progress
preheating in progress
pre-purge in progress
antifreeze in progress
fan speed (rpm)
Table 5.e
5.2.2 Setting the control parameters
The control parameters are the values corresponding to the ambient humidity control (or temperature)
control process.
To access these parameters, scroll the screens present under the “SET” submenu.
Control parameters
display
Burner sequence,
UG180 only
Seq. hyster.: UG180
only
range
Parallel,
Series
0 to 20.0
default
Parallel
UOM
accessibility
always
5.0
%
always
Max. prod.
25.0 to 100.0
70.0
%
0 to 100.0
2.0 to 20.0
(%rH set point) to 100.0
2.0 to 20.0
0 to 50.0
32.0 to 122.0
2.0 to 19.9
35.6 to 68
0 to 100.0
0 to 100.0
0 to 100.0
50
5.0
80.0
5.0
30.0
86.0
5.0
41.0
10.0
90.0
100.0
%
%
%
%
°C
°F
°C
°F
%
%
%rH
0 to (high threshold)
32.0 to (high threshold)
(low threshold) to 60.0
(low threshold) to 140.0
0
32.0
60.0
140.0
°C
°F
°C
°F
12.5 to 100.0
%rH Set P.
%rH Differential
Limit Set
L. Diff.
Temp Set
Temp Diff.
Low
High
High
Low
High
UG045/90 UG180 if
sequence”= parallel and
rotation not enabled
only UG180 if “boiler
sequence”= series
gaSteam pHC CONTROL +030220534 - rel. 1.0 - 17.11.2005
description
Operating mode (see Chap. 9 Operating principles)
hysteresis for the shutdown/ignition of the burners
only in series or parallel burner sequence with
rotation (see “setting the operating sequence of the
two burners”) UG180
always
Maximum production of the humidifier as a
percentage
For the concept of rotation see par. 6.3 “Options”
Note: for the minimum limit for this parameter - see
par. 5.17 “setting the production”
in H control mode and H control Humidity set point
Humidity differential
mode with outlet limit
only in H control mode with
Outlet humidity set point
Outlet humidity differential
outlet limit
only in T control mode
Temperature set point
Temperature differential
in H control mode and H control
mode with outlet limit
only in H control mode with
outlet limit
only in T control mode
Low humidity alarm threshold
High humidity alarm threshold
High outlet humidity alarm threshold
Low temperature alarm threshold
High ambient temperature alarm threshold
19
5.2.3 Setting the “operating sequence of the two burners” (UG180 only)
ENGLISH
The gaSteam 180 manages the operation of the two burners so that in stable operation these produce
180 kg/h of steam.
Ideally, the gaSteam 180 can be considered as two separate humidifiers, each with its own burner, and
able to produce up to 90 kg/h.
The two systems are managed based on the setting of the “Burner Sequence” parameter, seen in the
table above.
• “PARALLEL” mode: the steam request is divided equally between the burners. In this case, therefore,
the steam production provided by the two burners is the same.
• “SERIES” mode: (also called “sequential”): if the steam request is less than 50% of the rated production, only one burner is operated. Only if the request exceeds the 50 % does the other burner
start.
As each burner must operate so that the corresponding “ideal” humidifier produces a minimum (25%
for natural gas; 33% for butane-propane) of the “ideal” flow-rate of 90 kg/h, “SERIES” mode naturally
offers a wider overall range of modulation of steam production.
• PARALLEL mode: the minimum possible production is 45 kg/h;
• SERIES mode: the minimum production is 22.5 kg/h
Key
1
2
3
4
5
production burner 1; total
total request
production burner 2; total
2% in P control; 0.1xP0 in H/T control
total production
Example of PARALLEL mode
3
1
5
100%; 50%
100%; 50%
100%
bD; bD/2
bD; bD/2
bD
2
100%
4
100%
“Min. Prod”
(bD)
2
100%
bD
2
Fig. 5.d
Example of SERIES mode
bD/2 ≤ 50% - hyst
1
3
4
hyst
100%; 50%
7
100%; 50%
100%
5
P**; P**/2
P*; p*/2
6
50%
bD; bD/2
bD; bD/2
1
100%; 50%
bD; bD/2
2
bD/2
H
bD
bD/2
50%
2
bD
100%
bD/2 ≥ 50% - hyst
50%
2
50%
100%
3
hyst
100%; 50%
Key
1
2
3
4
5
6
bD; bD/2
P*=P**
2
50%
bD/2 bD
100%
2
100%
50%
7
production burner 1; total
total request
production burner 2; total
total production
H= 2% in P control; 0.1xP0 in H/T control
hyst= “Seq.Hyster” parameter (def: 5.0%, range:
0-20.0%)
P*= 100% - 2*hyst - bD
P**= 100% - bD
100%
Fig. 5.e
It can be seen that an hysteresis is required in the intermediate burner On/Off zone, which is managed
by the “Seq. Hyster.” parameter seen in the previous table.
20
gaSteam pHC CONTROL +030220534 - rel. 1.0 - 17.11.2005
1
Key
1
2
3
production burner 1; total
total request
production burner 2; total
1
100%; 50%
ENGLISH
To offer a wider range of modulation in parallel mode, the concept of “ROTATION” has been introduced
(see OPTIONS - Rotation of the request between the burners).
If ROTATION is active, in PARALLEL mode too one burner is started first, while the other remains off
until the steam request is between 12.5% and 25%. Above 25%, both burners start operating in parallel
mode.
3
100%
100%; 50%
hyst
hyst
50%
2*bD; bD
bD; bD/2
bD
bD/2
bD; bD/2
bD/2
2
bD
100%
2
bD
50%
100%
Fig. 5.f
5.3 “Rotation” of the steam request between the two burners
(UG180 only)
parameter name
Burner rotation
options
NO ROTATION
AT START
IN PRODUCTION
default
No Rotation
Table 5.g
Description
In normal operation, depending on the humidity request and the control mode selected (series or parallel), the control logic automatically calculates how much energy must be generated by each burner/fan
system.
The rotation of the request consists in periodically reversing these production references.
The rotation of the request ensures, in the long term, similar operating hours for the two burners in the
gaSteam, with the consequence of not only having more uniform wear on the combustion systems, but
also a more uniform accumulation of lime-scale deposits on the two exchangers.
Two types of rotation are available:
• IN PRODUCTION: this is rotation by time, that is, whenever the difference in operating hours between
the two burners reaches 10 hours, the production references are reversed.
• AT START: whenever that the steam production ends, when following request is received, the burner
with the less operating hours always starts first, along as the difference in operating hours has exceeded 10 h.
Note: the difference of 10 h can be modified. The parameter is called “Time Diff.” and is displayed on
the same screen as the “Burner rotation” only if one of the two rotation modes is enabled.
gaSteam pHC CONTROL +030220534 - rel. 1.0 - 17.11.2005
21
bD/2
2
bD
50%
100%
ENGLISH
6. Configuration parameters
6.1 Reading and setting the configuration parameters - “USER”
submenu
The configuration parameters are used to set the operating modes of the controller, that is, assign the
essential functions of the humidifier.
These parameters are normally managed by the installer or the service personnel, and therefore a
password is required to access the screens that contain these parameters.
To access these screens, the sequence is:
• press “PRG”;
• enter the “user” submenu;
• when the “User Password” is requested, enter the number “77”.
To change the parameters in the same screen, proceed as follows:
• press “ENTER” to position the cursor on the desired parameter;
• press “UP” or “DOWN” to change the value;
• press “ENTER” to confirm and access the next parameter.
The type and meaning of these parameters are listed in the following paragraphs.
6.2 Configuring the control mode
This parameter can be used to choose between 5 different control modes, listed in the table below.
parameter name
Type of control
display
H: Probe %rH
H: Probe %rH + Limit
P: Ext. Control
T: Temp. Control
C: ON/OFF
H control (default)
H control
P control
T control
C control
description (for a detailed description see chap. 7)
Humidity control with probe in the room
Humidity control with room probe and limit probe
Proportional control with signal sent by an external controller
Temperature control with probe in the room
Humidity control with humidistat
Table 7.a
7.3 Humidity control with humidistat
Humidity control with humidistat.
parameter name
Probe type
(not accessible in C control mode: ON/OFF)
display
0 to 1V (default)
0 to 10V
2 to 10V
0 to 20mA
4 to 20mA
NTC
0 to 135 ohm
Table 7.b
7.4 Unit of measure
Select the unit of measure, between metric and imperial.
parameter name
Unit of measure
display
°C-kg/h (default)
°F - lb/hr
Tab. 7.c
7.5 Configuring the ambient humidity (or temperature) probe
This is used to set the minimum value, maximum value and the offset for the probe used in the room.
screen name
parameter name
range
default
Config. Amb. Probe (not accessible in C control
mode: ON/OFF)
Min.
Max.
Offset
0 to (Max. )
(Min) to 100
-10.0 to 10.0
0.0
100.0
0.0
accessibility
H control
%rH
%rH
%rH
UOM
T control
°C
°C
°C (or °F)
Table 7.d
NOTE for T control: the setting of the minimum and the maximum values for the probe is only in
degrees centigrade.
The offset, on the other hand, being linked to the difference between the reading made by the probe
and by a reference thermometer, depends on which unit of measure has been selected.
For example, if having selected imperial measurements: if based on the measurements made it is clear
that the value read by the probe is normally 2°F higher than the reading made by a reference thermometer, to correct the error set the offset to -2.0°F).
22
gaSteam pHC CONTROL +030220534 - rel. 1.0 - 17.11.2005
This is used to set the minimum value, maximum value and the offset for the limit probe.
screen name
Config. Limit Probe (accessible only in H control mode with
outlet limit)
parameter name
Type
Min.
Max.
Offset
range
0 to 1 V
0 to 10 V, 2 to 10 V, 0 to 20 mA, 4 to 20 mA, NTC
0 to (Max.)
(Min) to 255
-10.0 to 10.0
default
0 to 1 V
UOM
0.0
100.0
0.0
%rH
%rH
%rH
6.7 Initial auto-test
This is an automatic procedure used to check the correct status of the fill valve and the drain pump and
the correct operation of the float present in the level sensor.
• the boiler is filled until reaching the highest level of the level sensor;
• after which a drain cycle is performed until reaching the lowest level of the level sensor.
All this takes place without igniting the burners.
The auto-test must first be enabled.
Burners rotation:
NO ROTATION
To enable/disable the auto-test procedure, go to the “USER” submenu, enter the password “77” and go
to the screen shown in Fig. 7.a.
Move the cursor to “Auto-test” and use the UP/DOWN arrows to set “YES”.
Autotest: NO
Burners rotation:
NO ROTATION
NOTE: The auto-test is only performed if the humidifier is enabled for production, “Humid.
Enabled=Yes” and if the controller is enabled from the keypad This function is useful for service or when
first starting the appliance.
Autotest: YES
IMPORTANT: In these conditions, the auto-test occurs whenever the controller is switched off an on
again. To avoid the auto-test being performed whenever the controller is switched on, it is recommended to disable the function.
Fig. 6.a
6.7.1 End Autotest: softened water mode
At the end of the autotest the screen shown to the side is displayed, used to enable/disable operation
with softened water and set the number of evaporation cycles between two drain for dilution cycles.
• pressing “ALARM” confirms the settings displayed and exits the screen;
• pressing “ENTER” positions the cursor in the field that is used to enable or disable the mode, by
pressing the “UP” or “DOWN” buttons;
• pressing “ENTER” again moves to the field for setting the number of cycles, “UP” and “DOWN” change
the value.
• pressing “ENTER” again and then “ALARM” confirms the values set and exits the screen.
Softened water
NO (normal/demin.)
Forced drains 2
- Press ALARM Fig. 6.b
IMPORTANT: The value set by default for the number of evaporation cycles between two drain cycles
(Force drain cycles) is the value recommended by the manufacturer.
To change this setting without causing operating problems, contact qualified personnel.
6.7.2 End Autotest: setting the heat value of the supply gas
After exiting the “Softened water” screen, the screen shown to the side is displayed, (Fig. 7.c) which
prompts the user to set or confirm the HHV of the supply gas in Kj/m3. This option has been made
necessary for the American market, where the value varies considerably between the regions where the
humidifier may be installed.
• pressing “ALARM” confirms the value displayed and exits the screen;
• pressing “ENTER” allows the value to be set using the “UP” and “DOWN” buttons;
• pressing “ENTER” again confirms the value set and then pressing “ALARM” exits the screen.
Insert calorific
power:
37.9x1000 Kj/m3
- Press Alarm Fig. 6.c
IMPORTANT: The value set determines the correct operation of the humidifier. Contact qualified personnel before changing it.
6.8 Setting the pre-purge speed and calibrating the fan speed
NOTE: These operations must be carried out by qualified personnel.
The pre-purge speed is indicated in “RPM” and is normally set by the manufacturer based on the
characteristics of the combustion system and the gas.
To modify this parameter, go to the following screen and change the “Pre-purge” parameter.
Blower speed
Pre-purge
Manual
During service, it may also be useful to check if the fan speed measured with a stroboscope coincides
with the speed set via SW. The “Manual” parameter can be used to force a desired speed for performing
the test.
gaSteam pHC CONTROL +030220534 - rel. 1.0 - 17.11.2005
Fig. 6.d
23
3450RPM
3000RPM
Table 6.e
ENGLISH
6.6 Configuring the limit humidity probe
6.9 Water supply with REVERSE OSMOSIS system
ENGLISH
The gaSteam is a humidifier suitable for operation on demineralised water, which reduces the phenomena of saline deposits and fouling inside the boiler and on the walls of the exchangers.
In this regard, the water pipe can be connected to a reverse osmosis system for demineralising the water.
The rated water flow to the installation must be equal to the flow-rate of the solenoid valve fitted.
6.10 Setting the maximum ratio between the water filled and the
water drained for dilution
During normal operation, the gaSteam periodically performs drain cycles, called drain “for dilution”,
followed by refilling with supply water. These drain cycles have the fundamental task of reducing the
high conductivity of the water inside the boiler due to the continuous concentration of salts during the
repeated fill/evaporation cycles.
The control logic calculates how many fill/evaporation cycles must be completed before performing
the dilution, based on the conductivity of the supply water. Normally, if the supply water is not very
conductive, the drain cycles for dilution are performed less frequently. With this type of water, therefore,
the number of fills between two successive drain cycles for dilution can be very high.
This number therefore needs to be limited.
To do this, use the “Max ratio fill/drain” parameter, under the screen seen in the previous paragraph.
The default value is 10.
6.11 Preheating
The preheating function is used to keep the water above a temperature set by the user when no steam is
requested. Preheating thus speeds up the return to the steam production when next requested.
There are three options:
1. Preheating disabled;
2. Preheating enabled: operation by temperature + restriction on %rH
In the classic mode, preheating is controlled depending on the water temperature and is activated
according to the value read by the humidity (in H control) or temperature probes (in T control) or the
signal applied (in P control). This is enabled by setting “TEMP. + %rH” for the preheating options present
in the screen shown in Fig. 7.f.
Pre-heating:
DISABLED
Set PreHeat:
Preheating is activated depending on the humidity value measured by the probe and by the operating
mode set.
In C mode (ON/OFF), preheating is never activated.
In P mode (proportional), preheating is activated and deactivated depending on the signal applied to the
room probe input.
By default, preheating is activated when the signal applied exceeds 3%, while it is deactivated when it
falls below 1% (see Fig. 7.g).
80.0 °C
Fig. 7.e
Pre-heating:
TEMP. +%rH
Set PreHeat:
80.0 °C
In humidity control mode preheating is activated when the relative humidity falls below the “humidity
set point + preheating offset - hysteresis” and is deactivated when it rises above the “humidity set point
+ preheating offset” (see Fig. 7.g).
Fig. 6.f
The values of the preheating offset and hysteresis parameters can be changed from the default values.
These must be as follows:
Preheating offset:
Range= 2.0 - 20.0 [°C] ;
Default= 3.0 [°C]
Hysteresis:
Range= 2.0 - 5.0 [°C] ;
Default= 2.0 [°C]
Graph of Proportional Mode
Key
1
2
3
4
Graphic of Control Mode
1
production %
signal applied to probe 1 input
preheating
probe rH1
1
Max Prod
diff
hyst
Max Prod
hyst hyst
2
4
100%
2
100%
3
4
3
OFF
ON
OFF
ON
1
hy
3
Set Prerisc
Fig. 6.g
24
gaSteam pHC CONTROL +030220534 - rel. 1.0 - 17.11.2005
Once preheating is activated, the heating is modulated by the systems (burners + fans) depending on
the water temperature measured by the NTC probe and the “preheating set point” (see Fig. 7.h).
The preheating set point temperature is a parameter with a range 70T-90°C and a default equal to 80°C.
1
2
3
4
3
Hyst= 2,5 °C
100
Reference % for the burner
temperature
Fixed differential of 20°C
preheating temperature (def.: 80°C)
hyst
bD
2
4
Fig. 6.h
3) Preheating enabled: operation with temperature control only
In this case, preheating is always enabled, that is, it is not activated depending on the humidity value or
the temperature measured by the external probe.
The reference for the combustion systems only depends on the water temperature measured by the
NTC probe and by the preheating set point, as illustrated in the previous graph.
This option is enabled by choosing the “ONLY TEMPERATURE” option in the previous screen (Fig. 7.f).
6.11.1 Preheating on request
Setting preheating to “ON REQUEST”, that is, whenever a humidity request causes the burner to ignite,
means that the temperature of the water inside the boiler is checked, and if this is lower than the set value, the humidifier will heat the water to this value before actually responding to the request. In this
way, even with quite moderate requests and with cold water, steam production will start relatively
quickly.
6.12 Antifreeze
The antifreeze option can be very useful in applications that feature the installation of the gaSteam
outdoors, especially in colder countries where there is the real risk that, if no steam is requested, the
water inside the boiler might freeze.
For this reason, an option that can be enabled by the user has been added that starts heating the water if
the temperature measured by the NTC probe is too low.
1
diff. 3 °C
The humidifier must be activated and continuously connected to the power and gas supplies, excluding
any interruptions.
Max Prod
The antifreeze function acts as displayed in the following graph.
Key
1
2
hyst= 5 °C
reference % for the burner
NTC temperature
Min Prod
Fig. 6.i
6.13 Reversing the logic of the alarm relay
Normally, the alarms that stop the humidifier energise the coil in the alarm relay.
This logic can be reversed, so that the coil remains energised when no alarm is present, and is de-energised when an alarm is activated.
To do this, set the following parameter:
screen name
Options
parameter name
Al. Relay
range
ENERGISED
NOT ENERGISED
default
ENERGISED
Table 6.f
gaSteam pHC CONTROL +030220534 - rel. 1.0 - 17.11.2005
25
Set Nofrost
7 °C
2
ENGLISH
Key
1
6.14 Options
ENGLISH
Drain due to inactivity
The drain due to inactivity is used to completely empty the water from the humidifier if the cylinder does
not produce steam for a period set by parameter, which by default is 3 days.
By default, the drain due to inactivity is enabled.
It can be disabled by setting the parameter in the following table.
screen name
parameter name
range
default
Options
Drain for inactivity
Y,N
Y
Table 6.g
In addition, the value of the parameter relating to the period of inactivity can be changed, available by
scrolling the screens.
The parameter is:
screen name
parameter name range
default
UOM
Options
Days of inactivity
1 to 199
3
d (days)
Table 6.h
Warn when exceeding maintenance hour limit
The gaSteam features a limit to the number of operating hours of the humidifier, beyond which it is
recommended to perform maintenance (see the par. on MAINTENANCE).
In this case, a “maintenance request” alarm is sent.
Nonetheless, this alarm can be disabled, by setting the “Maint. warning” parameter to “N”.
screen name
Maint. warning
range
Y, N
default
Y
UOM
h (hours)
Table 6.i
Dehumidification
The dehumidification function is only possible if terminals 13U - 14U on terminal block U are connected
electrically to a dehumidifier (see par. 3.2).
By default, dehumidification is not enabled.
Dehumid
During normal operation, dehumidification may occur only if the following conditions are satisfied:
1. the dehumidification option is enabled;
2. the ambient humidity probe is connected;
3. the humidifier has not been disabled by “Remote ON/OFF”;
Dehumid Diff.
ON
OFF
If these conditions are satisfied, the dehumidification process is activated depending on the humidity
measured, based on the “dehumidification set point” and “dehumidification differential” parameters, as
shown in the graph to the side.
%rH
Dehum Set
Fig. 6.j
To activate the dehumidification function, the following parameter needs to be enabled:
screen name
parameter name
range
default
Options
Dehumidify
Y, N
N
Table 6.j
Once dehumidification has been enabled, the “set point” and “differential” parameters can be modified.
To do this, go to the following screen, under the “SET” submenu.
Control Params
DeHum. set
DeHum.diff.
100.0%
5.0%
The characteristics of these parameters are listed below:
screen name
parameter name
range
Fig. 6.k
Control Param
DeHumid. set
DeHumid.diff.
(humidity set point) to 100.0
2.0 to 19.9
default
100.0
5.0
UOM
%
%
Table 6.k
Manually set the conductivity of the supply water and set the conductivity alarm thresholds
The conductivity of the supply water, as well as normally being monitored to prevent excessively conductive water from entering (“High conductivity alarms” - see “Alarms”), is also useful for determining the
limit of fill/evaporation cycles between two drain cycles for dilution.
As the conductivity of the water is directly responsible for the accumulation of salts inside the boiler.
To change these two limits, set a parameter that, if not equal to zero, takes the place of the conductivity
read by the conductivity meter. The lower this parameter, the higher the limit values described above. By
default the parameter is set to zero.
The limit values for the high conductivity warning and alarm can also be set on the same screen.
The screen has the following characteristics:
screen name
parameter name range
Conductivity
Forced (B4)
Pre-Al (B5)
Alarm (B6)
0 to 2000 (*)
0 to (B6)
(B5) to 2000
default
0
1000
1250
UOM
uS/cm
uS/cm
uS/cm
Table 7.l
(*): supply water conductivity:
• b4= 0: the controller uses the conductivity measured automatically by the conductivity meter;
• b4= 1 to 4: the value set corresponds to the number of evaporation cycles between two drain for dilution
cycles: each “b4” evaporation cycles one drain to dilute cycle is performed;
• b4> 4: the controller uses the value of b4 as the conductivity and IGNORES the value measured by the
conductivity meter.
Note: to the side of the above parameters there may be the codes B4, B5 and B6, which indicate the
name of the parameter that was normally used with the gaSteam 40, 45 and 90.
26
gaSteam pHC CONTROL +030220534 - rel. 1.0 - 17.11.2005
6.15 Setting the production ramp
Time (b9)
Min.Pr.-100
0min
Fig. 6.l
6.16 Setting the fan speed for minimum and rated production
These values are set by default to ensure the correct air/gas mix with the natural gas.
These are found on the screen to the side.
Blower speed
for produuction:
Min.:
1800RPM
Nominal:
5150RPM
Fig. 6.m
6.17 Setting the minimum production
The minimum production as a % guaranteed by each burner depends on the type of gas used.
Normally, its value is 25% for natural gas, and 33% for butane and propane.
The reference screen is the following.
Burner minimum
production:
25%
Fig. 6.n
6.18 Disable the display of the change language screen on power-up
During the start-up sequence (see par. 4.3.4), the screen that is used to change the language normally
appears for 30 seconds. To deactivate this screen on power-up:
• go to the following screen;
• set the value to the right “Show language mask to unit start-up” to “N”;
• press “ENTER” to confirm.
Mostra masch.lingua
allo start-up?
Y
Abilita supervisore
on-off?
N
Fig. 6.o
6.19 Enable remote off via supervisor
In the same screen seen in the previous paragraph (par. 7.19), humidifier on/off via supervisor can also
be enabled.
To do this, simply set “Y” to the right of the question “Enable supervisory on-off?”.
6.20 Configure the communication protocols
By accessing the screen containing the parameters shown in Table 7.o, the controller can be configured
so as to be able to communicate correctly using different communication protocols.
The parameters in question are listed in the following table:
parameter name
ID number for BMS Network
Comm. speed
Protocol
range
0 to 200
1200, 2400, 4800, 9600, 19200
CAREL, Modbus, LON, RS232, GSM
default
1
19200
CAREL
UOM
Bps
Table 6.m
gaSteam pHC CONTROL +030220534 - rel. 1.0 - 17.11.2005
27
ENGLISH
Options
During operation, the steam request may change depending on the readings of the probes or the signal
from the external controller.
The speed at which the humidifier shifts to the new request can be slowed down by setting the parameter (formerly parameter b9 in the old gaSteam models 40, 45, 90) that is located in the screen shown to
the side.
• parameter set to zero: the control logic uses an internal ramp (30 s) to shift from one request to the
next;
• parameter set to a value other than 0: the logic recalculates the fan speed variation step, based on the
assumption that to change from 0 to 100% of production must take the time set for this parameter.
ENGLISH
7. “Main “menu” - auxiliary functions
“Service” (“maintenance”) submenu
By entering the “service” submenu, the installer or service personnel can access information and
perform any required operations.
7.1 “SERVICE” - information on the firmware
The first screen in this submenu indicates the code and the version of the application installed.
In addition, the language can be changed (see par. 4.3.10 Fig. 4.24).
System info
Bios 03.55
Boot 03.01
26/07/04
15/04/02
The second screen corresponds to “System information”, that is, the BIOS and BOOT versions installed,
see the figure to the side.
Fig. 7.a
7.2 “SERVICE” - display the operating hours
Hour counters
Humidifier
0h
Burner 1
0h
Burner 2
0h
The third screen indicates the total operating hours, and the operating hours of each individual burner,
Fig. 7.b.
Fig. 7.b
NOTE: The operating hours displayed are proportional to production.
For example, if burner 1 has operated for 100 hours at 100%, the value displayed will be 100 h, On the
other hand, if burner 1 has operated for 100 hours at 70 %, 70 h will be displayed.
Service
Password
Operations with password access
The following operations must only be carried out by installation or service personnel.
Access is only possible on entering the password “77” in the screen shown to the side.
0
To enter the password, simply:
• press “ENTER” to move the cursor to the field with the “0”;
• press “UP” or “DOWN” to enter the number “77”;
• press “ENTER” to confirm.
Fig. 7.c
- Reset the operating hours
Password access only.
The operating hours of the burner should be reset whenever the boiler is cleaned or the exchanger
replaced.
On the other hand, it is not recommended to reset the total operating hours of the humidifier, as it may
be useful to know how many hours the humidifier has been working for.
Resetting the total hour counter may be useful if completely replacing the combustion system (exchangers, burners).
The operating hours can be reset from inside the following screen.
Hours counters reset
Burner 1:
NO
Burner 2:
NO
GaSteam:
NO
To reset the hours:
• press the “ENTER” button to move the cursor to the field in question;
• press “UP” and “DOWN” to change the value;
• press “ENTER” to confirm and move to the next field.
Fig. 7.d
7.3 Manually draining the cylinder
The cylinder can be drained manually to complete empty the water contained inside.
This operation is particularly useful when maintenance needs to be performed on the boiler, the
exchangers or the burners, or alternatively when the humidifier needs to be shut down at the end of the
season.
The sequence to start the manual draining cycle is the following:
• press the UP and DOWN arrows together for 5 seconds until the drain cycle is activated.
Once the drain cycle is terminated, the humidifier returns to the same operating conditions as prior to
the drain cycle.
OFF
NOTE: the duration of the complete boiler drain cycle is preset. Nonetheless, the manual draining can
be stopped by pressing the UP and DOWN buttons again for 5 seconds.
Fig. 7.e
If the cylinder needs to be replaced, when the manual draining is complete the humidifier must be
switched off.
28
gaSteam pHC CONTROL +030220534 - rel. 1.0 - 17.11.2005
7.4 Procedure for testing the electrical parts
ENGLISH
Password access only.
This procedure allows the installer or the service personnel to check the correct operation of all the
electrical parts, i.e.:
• the activation of the fans/burners;
• the opening of the water fill valve;
• the activation of the drain pump;
• the activation of the dehumidification contact;
• the activation of the alarm relays.
To access the test screens, the humidifier must be disabled (Humid.enabled: NO) and then activated
from the keypad.
The sequence is the following:
1. press PRG;
2. enter the “service” submenu;
3. scroll the screens until the “Service Password” is requested;
4. enter the password “77” to access the subsequent screens;
5. scroll the screens until reaching the enable manual procedure screen;
6. enable the manual procedures, setting the “Manual” field to “Y”. Once the screen has been enabled,
the fields relating to the outputs will be active, Fig. 7.f;
7. to activate the outputs simply move to the desired output and change the value with the “UP” and
“DOWN” buttons, Fig. 7.g;
8. note that by enabling the manual procedures, the following screen can be accessed to activate the
burners/fans, Fig. 7.h;
9. to enable burner/fan 1, move to the “Burn.1” field and set it to “Y”. Once having done this, two other
fields will be displayed, which indicate the request as a % and the fan speed in RPM, Fig. 7.i;
10.to switch on burner 1, simply move to the “Req” field and set it to any value other than zero. In this
way, both the Honeywell board for burner 1 and fan 1 will be powered;
11. the same is true for burner/fan 2 (UG180 only), however to move to the “Burn.2” field, Fig. 7.j.
In Manuale: N
In Manuale: S
Carico: DeUmid.:-
Carico: N
DeUmid.:N
Scarico: Allarme: -
Scarico: N
Allarme: N
Fig. 5.f
Fig. 5.g
Procedura manuale
Bruc.1: S Bruc.2: N
Rich.: 0.0%
Vent.: 0000
Procedura manuale
Bruc.1: S Bruc.2: S
Rich.: 0.0%
0.0%
Vent.: 0000
0000
Fig. 5.i
Procedura manuale
Bruc.1: N Bruc.2: N
Fig. 5.h
Fig. 5.j
Once the outputs have been tested, exit the manual procedure by either setting the “Manual” variable to
“N” on the screen seen in point 5, or alternatively by simply switching the unit off using the keypad.
gaSteam pHC CONTROL +030220534 - rel. 1.0 - 17.11.2005
29
ENGLISH
8. Alarms, troubleshooting
8.1 Alarms
When an alarm is activated, the Alarm button starts flashing intermittently.
In these conditions, pressing the Alarm button once displays the type of alarm (and the code, in line with
the standard for CAREL humidifiers).
In the event of potentially dangerous alarms, the controller automatically stops the production of steam.
For some alarm events (see Table 8.a), as well as the signal, the alarm relay is activated, described in par.
3.1.
If the causes of the alarm are no longer present, the humidifier and alarm relay can be reset automatically or manually, depending on the type of fault, while the message displayed is cancelled
manually (see Table 8.b).
Even if no longer active, the alarm status continues to be indicated until the “reset display” button is
pressed.
The alarms that are still active cannot be reset.
In the event where more than one alarm is active, the display indicates all the codes in sequence, only if
after having pressed the Alarm button once, the “UP” or “DOWN” button is also pressed.
8.2 Alarm management and signals
Table of alarms
meaning
causes
Low production
alarm
• power not available;
• with the unit on, there is no
steam production;
• flue or air inlet blocked;
• gas tap closed;
• malfunction of the burner
and/or the controller.
No water
High conductivity
alarm
High conductivity
warning
High humidity
warning
Low humidity
warning
High temperature
warning
Low temperature
warning
High outlet humidity
alarm
Main probe
disconnected alarm
Outlet probe
disconnected alarm
solution
reset
• check the pressure of the gas and that the gas
tap is open;
• check that the air inlet is free;
• check the power connection to the fan;
• check the operation of the brushless fan, the
flue and the air inlet;
• burner flame malfunction;
• check the connections between the flame
control board and the burner and between the
electrical panel and the flame control board;
• check the connections between the control unit
and the terminal block inside the electrical panel.
no water supply
1. check that the supply pipe to the humidifier
and the internal tubing are not blocked or
choked and that there is enough pressure (0 to 1
to 0.8 MPa, 1 to 8 bar);
2. check the operation of the fill solenoid valve
and that the filter is clean;
3. check that there is not excessive back-pressure
in the steam outlet, causing the activation of the
overflow;
check that the steam outlet pipe is not choked or
that there are no pockets of condensate
high conductivity of the supply 1. check the threshold set;
water
2. switch the machine off and clean the
electrodes that measure the conductivity of the
water;
if the problem persists, change the origin of
the supply water or add a suitable treatment
system, (demineralisation, even partial). N.B.: the
problem is not resolved by softening the supply
water.
high water conductivity
1. check the conductivity of the supply water; if
pre-alarm
necessary, add a suitable water treatment system.
N.B.: the problem is not resolved by softening
the supply water
high humidity in the room
check the operation of the probe and the value
set for the upper limit parameter
low humidity in the room
check the operation of the probe and the value
set for the lower limit parameter
high temperature in the room check the operation of the probe and the value
set for the upper limit parameter
low temperature in the room check the operation of the probe and the value
set for the lower limit parameter
high outlet humidity
check the operation of the outlet probe
room probe not connected
outlet probe not connected
manual
alarm
relay
active
action
strop
production
automatic
Alarm: EF No Water (Burners Off) active
activate
automatic
procedure
manual
Alarm: EC High Conductivity
(Burners Off)
active
strop
production
automatic
Pre-alarm: Ec High Conductivity
not active
signal only
automatic
Pre-alarm: E- High Humidity
not active
signal only
automatic
Pre-alarm: E_ Low Humidity
not active
signal only
automatic
Pre-alarm: E> High Temperature
not active
signal only
automatic
Pre-alarm: E_ Low Temperature
not active
signal only
Automatic
Pre-alarm: E= Humidity Limit
Probe Alarm
Alarm: E3 Room Probe Not
Connected or Damaged
not active
signal only
active
stop
production
not active
signal only
check the connection of the probe, the parameter automatic
A2 for the room probe and the setting of
parameter A0 (see chap. 9)
check the connection of the probe, the outlet
automatic
humidity limit parameter and the setting of the
“type of control” parameter
30
alarm codes displayed
(2)= alarm relating to cylinder 2
Alarm: EP Low Production
(Burners Off)
Alarm: E4 Limit Probe Not
Connected or Damaged
segue
gaSteam pHC CONTROL +030220534 - rel. 1.0 - 17.11.2005
causes
Foam alarm
excessive foam in the cylinder the formation of foam is generally due to the
during the boiling phase
presence of surfactants in the water (lubricants,
solvents, detergents, water treatment or softening
agents) or an excessive concentration of
dissolved salts:
1. purge the water supply lines;
2. clean the cylinder; check for the presence of a
softener (in this case, use another type of water
or reduce the softening).
cylinder full signal with unit off with the machine off:
1. check for any leaks from the fill solenoid valve
or the return of condensate from the pipe;
check the cleaning of the level sensors
Auto-test failed;
Make sure that the unit receives water (1 to 8
probable problems in water
bar; 0 to 1-0.8 MPa; 14.5 to 116 PSI);
supply, level control or water Make sure that the unit drains the water;
drain cycle
Switch the machine off and clean the level
control and the fill valve, the pump and the drain
filter
Low level of the water in the Check the correct supply of water to the cylinder ;
cylinder or fault with the level Switch the machine off and clean: the cylinder ,
control
the level control and the fill solenoid valve
NTC water temperature not
Check the operation of the preheating function
connected
and the setting of the parameters;
check the connections on the terminal block on
the cover of the cylinder
fan error
Check the electrical connections between the
control board and the fan;
if necessary, remove the brushless fan and check
its operation
Cylinder full
Test alarm
Low level alarm
NTC probe
disconnected
System fan 1 (2)
alarm
solution
reset
alarm
relay
not active
action
automatic
alarm codes displayed
(2)= alarm relating to cylinder 2
Pre-alarm: EA Foam Present
automatic
Pre-alarm: EU Boiler Full
not active
signal only
manual;
turn the unit
off and on
again
Alarm: EE Test Alarm (burners off) active
Strop
production
manual
Alarm: EL Min. Water Level
(burners off)
active
stop
production
automatic
Alarm: E5 NTC Probe Not
Connected or Damaged
active
preheating
deactivated.
manual
Alarm: Ed Fan Alarm 1 (2)
(burner 1 (2) off)
active
Alarm: Et Klixon 1 (2) (burner 1
(2) off)
active
signal only
backup battery completely
discharged or general
problems with the clock
High flue gas
Flue gas temperature higher
temperature warning: than normal operation,
Maintenance
presence of lime scale
recommended
High flue gas
Flue gas temperature
temperature alarm
excessively high, boiler full of
lime scale
Replace the pHC controller
manual
Clock Card Alarm
not active
stop
production
of the
corresponding burner
stop
production
of the
corresponding burner
signal only
Carry out maintenance and/or clean the
exchanger
automatic
Pre-alarm: ER - High Flue Gas
Temp. (2) Boiler Maintenance
Not active
signal only
Switch the machine off, clean the exchanger,
check burner calibration
manual
Alarm: ER High Flue Gas Temp.
(2) (Burner off)
Active
Level sensor blocked Lime scale on the sensor
warning
Carry out maintenance on the level sensor
automatic
Pre alarm: EL - Level sensor
blocked
Not active
Level sensor blocked No more attempts to unblock
alarm
Carry out maintenance on the level sensor
manual
Alarm: EL Level sensor fault
Active
stop
production
of the
corresponding burner
activate
automatic
procedure
stop
production
Drain warning
Carry out maintenance
automatic
Pre-alarm: CL - Drain
maintenance
Not active
signal only
Carry out maintenance
manual
Alarm: CL - Drain maintenance
Active
stop
production
System thermostat 1
(2) alarm
safety thermostat activated due Stop the unit and perform complete maintenance Manual
to abnormal overheating of
on the cylinder
the cylinder sue to operation
without water
Clock error
Drain alarm
Filter blocked, level sensor
tube blocked, drain pump
malfunctioning
Drain pump broken, Filter
blocked, level sensor tube
blocked
Table 8.a
8.2.2 Resetting the alarms
The alarms are signalled by the flashing of the Alarm button and display of the alarm icon
.
The alarms are reset in the sequence shown in the following table:
sequence
Pressing once
effect
Display the Alarm code. (NOTE: in the event where more than one alarm is present, to display all the alarms, after pressing the Alarm button the first time, press the
“UP” or “DOWN” buttons)
if the causes of the alarm are no longer present, resets the alarm and the alarm relay (in the alarms where this is activated)
Pressed a second
time
Pressed a third time if the causes of the alarm are no longer present, resets the display of the alarm and cancels the following screen:
Nessun Allarme
Attivo
Pressed a fourth
time
return to main screen
gaSteam pHC CONTROL +030220534 - rel. 1.0 - 17.11.2005
Table 8.b
31
ENGLISH
meaning
ENGLISH
9. Operating principle, control and other functions
9.1 Operating principle
In a gas humidifier, the production of steam is obtained inside a boiler containing water that is heated to
and then held at boiling temperature.
The heat required to boil the water is provided by one or two burners that burn a mixture of air/gas.
The heat power of the flame created due to combustion is modulated by adjusting the speed of the
brushless fans equipped on the burners.
During the normal operation of the gaSteam, the level of the water is monitored using a three-float level
sensor. In stable operation, there are repeated periods in which the water is filled and the level rises,
and periods of evaporation in which the level descends. In these phases, the level remains between the
middle and top floats.
Due to these repeated fill/evaporation cycles, the conductivity inside the boiler increases due to the progressive accumulation of salts introduced with the water. The control logic therefore periodically
drains the water and replaces it with fresh mains water, so as to eliminate part of this excessive salinity.
9.2 Control principles
The range of humidifiers includes the following control options.
9.2.1 ON/OFF control
The action is all or nothing, activated by an external contact that determines the set point and the control
differential.
The external contact may be a humidistat:
• closed: the humidifier produces steam if the remote ON/OFF contact is also closed;
• open: the production of steam ends after the completion of the evaporation cycle in progress (max. 10
to 15 min from the opening of the contact).
Note that if the remote ON/OFF contact opens, the production of steam ceases immediately, irrespective
of the point that the current evaporation cycle has reached.
9.2.2 Proportional control
The production of steam (hourly quantity) is proportional to the value of a signal, Y, from an external
device; the type of signal can be selected between the following standards: 0 to 1Vdc, 0 to 10Vdc, 2 to
10Vdc, 0 to 20mA, 4 to 20mA. The entire range is indicated as BP (proportional band).
The maximum production of the humidifier, corresponding to the value maximum of the external signal,
can be programmed (by setting the Max.Product. parameter) from 25% to 100% of the rated output of
the humidifier.
1
Pmax
hy
hy
Pmin
OFF
ON
The minimum production, Min. Prod., has an activation hysteresis, hy, equal to 5% of the range BP of
the external signal Y.
Y
BP
1. Steam production.
Fig. 9.a
In the case of the UG180 humidifier, the following types of control sequence are available.
model
type of sequence
UG180
parallel
parallel with rotation
series
range
min. prod. %
25% - max prod.%
12.5% - max prod.%
12.5% - max prod.%
type of gas
natural gas
Table 9.a
9.2.3 Autonomous control with relative humidity transducer
The production of steam is related to the % rH reading made by the relative humidity transducer connected to the controller, and increases as the value read deviates from the set point St. The maximum
production, which is delivered when the relative humidity is less than the set point by a value at least
equal to the differential (“H differential”), can be programmed (by setting the Max.Product. parameter)
from 20% to 100% of the rated output of the humidifier, in operation with the parallel sequence (see
par. 7.2) and from 10% to 100% in operation with the series sequence (see par. 6.2.3).
The minimum production, Min. Prod. (10% or 20%, depending on the operating sequence selected),
has an activation hysteresis, hy, equal to 2% of the range.
The dehumidification function, if enabled (par. 7.14), overlaps the control diagram and is activated when
the relative humidity % rH, send by the transducer, is higher than St by a set amount (“dehum.offset”);
the hysteresis of the step, also programmable, is “dehum.diff.”.
To check that the relative humidity measured by the transducer is within certain preset values, two alarm
thresholds can be set in autonomous control:
• high relative humidity alarm threshold;
• low relative humidity alarm threshold.
When these thresholds are exceeded, an alarm is activated, after a delay of 60 seconds.
1
Pmax
hy
Pmin
ON
1
OFF
H differential
% rH
ST
Dehum. diff. Dehum. offs
2
3
OFF
ON
4
1
2
Fig. 9.b
32
steam production
activated
3
4
dehumidification
deactivated
gaSteam pHC CONTROL +030220534 - rel. 1.0 - 17.11.2005
In this case too the controller modulates steam production as a function of the % rH measurement
performed by the relative humidity transducer, however, in addition, the output is limited if the relative
humidity % rH2 measured by a second compensation transducer placed in the air duct downstream
from the humidifier exceeds the maximum desired value.
The compensation probe has its own set point (“L set point”) and differential (“L differential”), based on
which the limit in production is calculated (see Fig. 9.c).
1
L diff.
Pmax
The overall steam production is equal to the difference between the steam request from the main
transducer and the request from the compensation transducer.
2%
To prevent the relative humidity measured by the transducer in the air duct downstream from the
humidifier exceeding a value considered as excessive, in this control mode a high outlet relative humidity
alarm threshold can be set (also see chap. 8).
This threshold is equal to the sum between the limit set point (“L set point”) and an offset (“High
Offset”). When this threshold is exceeded, an alarm is activated, after a delay of 60 seconds.
Pmin
L set point
Fig. 9.c
9.2.5 Application for steam baths: autonomous control with temperature transducer
In applications for steam baths, in which the control probe measures the temperature rather than the
humidity, the same principles are true as in par. 9.2.3, with the temperature replacing the humidity. In
this operating mode, the dehumidification function is not available.
Recommended transducer: ASET030001.
High temperature limit 60°C.
gaSteam pHC CONTROL +030220534 - rel. 1.0 - 17.11.2005
33
ENGLISH
9.2.4 Autonomous control with relative humidity transducer and outlet humidity compensation transducer
ENGLISH
10. Other functions
10.1 Measuring the conductivity of the supply water
The controller measures the conductivity of the supply water. The measurement is made using the
conductivity meter by opening the fill solenoid valve.
The field of reading ranges from 0 to 1500 µS/cm. Two thresholds are available:
xx: pre-alarm threshold (signal only, without activating the alarm relay, and automatic reset when the
condition is no longer present);
xx: alarm threshold (production shuts down, activation of the alarm relay).
The alarm is activated when the reading exceeds one of the two thresholds continuously for 60 minutes,
or alternatively instantly if the value read is 3 times higher than the threshold.
To disable either of these thresholds, simply set the corresponding value to a number outside of the field
of reading the conductivity meter, that is, greater than 1500 µS/cm.
10.2 Flue gas discharge temperature measurement
The temperature of the flue gas discharge is constantly monitored so as to ensure correct operation. The
field of reading ranges from 0 to 200°C. Within these limits a number of operating thresholds are set:
• no production threshold: if the flue gas temperature falls below this value, it means that the burner is
not on and the no production alarm (Ep) is activated;
• pre-alarm threshold: first upper threshold, above this value the recommended maintenance warning
is activated. Also used to switch the burner to safety mode following abnormal operation with insufficient water in the boiler;
• alarm threshold: above this value production is stopped and the high temperature alarm (ER) is
activated.
The alarms or warnings are activated if the temperature reaches and then stays above these thresholds
for at least 20 seconds. In the case when the pre-alarm threshold is used to switch off the burner in
certain situations, such as drain cycles that last too long, activation is brought forward to 4 seconds.
10.3 Automatic draining
Automatic draining is managed by the controller: part of the water contained in the cylinder is drained
automatically, and replaced with fresh water to prevent an excessive concentration of salts following the
process of evaporation.
The drain pump is opened for a set time when the number of fill/evaporation cycles exceeds a limit
calculated automatically, based on the conductivity read by the conductivity meter.
10.4 Antifoam procedure
With certain types of supply water, foam may form during the production of steam just above the water;
this situation must be resolved, as it may cause water to be released together with the steam.
For this purpose, two electrodes are fitted on the ceiling of the cylinder. When these electrodes detect
the presence of foam, a draining procedure is started to resolve the problem. The procedure consists of
repeated drain cycles until the “foam present” pre-alarm disappears.
10.5 Dehumidification request signal
If activated, this function closes the contact of a relay when the relative humidity measured by the
transducer connected to the control module exceeds the set threshold. This signal can be used to start
an external.
10.6 Automatically emptying the cylinder due to extended inactivity
If the cylinder remains on but without steam production for a number of days equal to the value set
for the parameter described in par. 7.18 (default 3 days), the controller completely empties the water
contained inside the cylinder. This function prevents the corrosion of the electrodes due to saline water if
the humidifier is not operated for extended periods. The function can be disabled (see par. 7.18).
10.7 Automatic reset from no water
If the supply of water is interrupted (mains water stoppage, fault in the osmosis or softening system),
the controller stops normal operation and enters a special phase in which production is disabled so as
to avoid dry operation. In this situation, the return of the supply water is checked every 10 minutes, and
production is not resumed until water returns. During this phase the EF alarm is displayed.
34
gaSteam pHC CONTROL +030220534 - rel. 1.0 - 17.11.2005
10.8 Repeating the humidity request
Production reference
->
0%
Maximum production % (Max.Prod.) ->
ENGLISH
A variable voltage signal, between 0 and 10Vdc, is available between the two terminals on connector M8
on the pHC board.
This signal indicates the production of the humidifier as a percentage, as follows:
0 to 10V output
0V
10 V
10.9 Automatic procedure to unblock the floating level sensor
If for some reason (e.g. lime scale deposits) the level sensor sends incorrect information to the controller, an automatic procedure is activated to attempt to eliminate the causes of the error. This procedure
involves a drain cycle, followed by a fill cycle. In this way the sensor float is moved to attempt to remove
the cause of the blockage.
Steam production is not stopped, unless when, a following an excessive drain cycle, the temperature of
the flue gas increases excessively, thus indicating dry operation that may damage the unit. In this case,
production will resume at the end of the procedure. If this type of procedure occurs more than 10 times
over 10 days (default value), the controller will activate an alarm that shuts the unit down, signalling the
constant malfunction of the level sensor.
gaSteam pHC CONTROL +030220534 - rel. 1.0 - 17.11.2005
35
+030220534 rel. 1.0 - 17.11.2005